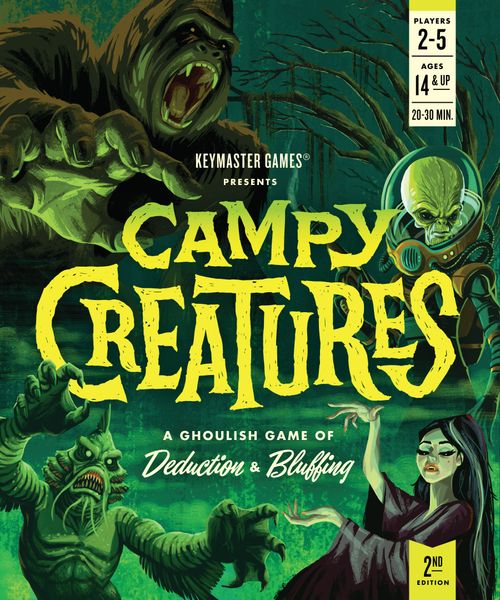
Campy Creatures
Campy Creatures Rulebook
Table of Contents
Table of Contents
Overview & Goal
Everyone begins a round with the same hand of creatures. Each turn, you will secretly send out a Creature from your hand to try and capture a Mortal. Once everyone has chosen a Creature, all players reveal their Creature card. Depending on Creature Strength and Abilities, players will capture Mortals in a certain order. Mortals help players score Points and win the Location. Your goal is to score the most Points by the end of the third round.
Components
- 1 board
- 5 Creature Decks • 10 Cards Each
- 37 Mortals
- 6 Locations
- 3 Final Acts
- 5 Clash Markers
- 5 Eye Tokens
Credit & Thanks • Game Design: Mattox Shuler × Graphic Design and Illustration: Josh Emrich × Published by Keymaster Games × 2nd Edition Development Support: Mario Radmilovic × Thank you to our families, Jen Graham-Macht, Rook & Pawn, our Kickstarter backers, and all others who have helped bring Campy Creatures to life
Game Setup
Place the board between players. Each player chooses a color and takes the corresponding Clash Marker, Eye Token, and hand of Campy Creatures. The player who most recently watched a creature feature places their Clash Marker at the top of the Clash-O-Meter. Moving clockwise each player places theirs below the others. All Eye Tokens begin at 0 Points on the board. For your first game, remove all Demogorgons from the Creature Decks.
Mortal Deck Setup
There are different Mortal types denoted by the icon on the top right of a Mortal card. When setting up, it's easiest to keep Mortals separated by their type. The color of an icon may be different, but as long as their shape matches, they should be considered as part of that set. To create the Mortal deck, first set aside all base mortals (bow-and-arrow icon). Depending on the player count, choose a Mortal set(s) below and shuffle in random cards from it to the base mortals:
- Teenagers (running-shoe icon), Classics (knife icon), Engineers (goggles icon)
- 2 players • 4 cards from 1 set + 2 assistants
- 3 players • 5 cards each from 2 sets + 2 assistants
- 4 players • 5 cards each from 3 sets + 3 assistants
- 5 players • All cards from 3 sets + 3 assistants
Place your shuffled Mortal deck face-down next to the board.
Assistants (lantern icon) are a special type of Mortal, always in the game. They should not be considered when choosing which sets to play with.
For example, in a 3 player game, you could choose to shuffle in 5 random Teenagers, 5 random Engineers, and 2 assistants to the base mortals to form the Mortal deck.
Location + Assistant Setup
Shuffle The Final Act Locations and deal one face-down on top of the Location slot on the board. Now deal a number of assistant Mortals face-down on top:
- 2 assistants for 2-3 Players
- 3 assistants for 4-5 Players
Shuffle the normal Locations and deal one face-down on top, then deal the same number of assistants on top of it. Finally, deal a Location Card face-up on top. This will be the Location for the first round.
Note: Camp Murkwood should only be used if Teenagers are in the game.
Place all unused Creature Decks, Clash Markers, Eye Tokens, Mortals, and Locations back in the box. You're ready to start!
Creature Card Anatomy
Creatures are the heart of the game. Each player begins with the same hand of Creatures 0–8, so guessing what an opponent might play in a certain situation is key. Let's take a look at the anatomy of a Creature card.
- Strength • Creature Strength ranges from 0–8 and helps determine capturing order on a turn. Weaker creatures usually have stronger abilities.
- Name & Ability • Creature abilities are explained in detail under Creature Ability Details, below.
- Activation Phase • This helps you know when the Creature Ability triggers. A single dot means the ability activates before capturing; two dots means it activates when capturing.
- Player Eye-Con • A reminder matching your Deck, Marker, & Token.
Mortal Card Details
Mortals can score Points individually or through collecting sets.
- Base Set & Classics • These Mortals are worth the Point value on the card which ranges from -3 to 6 Points. The more valuable a Mortal is, the more rare it is in the set.
- Teenagers • Teenagers are quite worthless on their own. But if you capture the most, you'll score 7 Points total. Second most scores 4 Points total. The amount of Teenagers on a card ranges from One to Three. The Clash-O-Meter breaks ties.
- Engineers • Purple cards like these Engineers can be good or bad. These score differently depending on how many you end up with. If you have an odd number of Engineers, each scores -2 Points—but if have an even number, each scores 3 Points.
- Assistants • Assistants are a special Mortal denoted by their black and white appearance. They score at the end of every round, and this is the only Mortal type that players will keep from round to round. The more you capture, the more powerful they grow. 1 Assistant scores 1 Point, 2 scores 3 Points, and so forth.
Note: Assistants are pretty sensitive about their work—if they're not captured they won't come back. This means if one is discarded for any reason, then it should be placed back in the box and does not return to the game.
Location Icons on Mortals • Location Icons appear in the top left on some Mortals. No matter their color, one icon counts as one, two icons count as two. The player who collects the most at the end of a round will conquer the Location and earn its reward.
How a Turn Works
- Reveal Mortals - To begin the round, reveal cards from the Mortal deck equal to the number of players. In this example, there are three players in the game, so three Mortals are revealed.
- Choose a Creature - Players choose a card simultaneously from their hand and place it face down in front of them.
- Reveal then Activate • Creatures - Once everyone has chosen, reveal all cards at once. Creatures with • in the bottom left instantly activate their ability from highest to lowest strength. In this situation, The Vampire's ability would activate first, which cancels The Blob's ability. The Blob's ability would now activate, but it was just drained of it by that sly Vampire!
- Capture Mortals and Activate •• Creatures - Now, the player with the highest strength Creature chooses a Mortal first. The player with the second highest chooses next, and so forth. Creature Abilities with •• activate when they capture a Mortal. In this example, The Vampire at 6 captures first and takes the Two Teenagers with a Location Icon from above. Next, the Werewolf at 5 captures The Cosmonaut and since it has ••, the ability activates—forcing the player to the right to discard a creature from their hand. Stuck at 0, The Blob is the last creature to capture and must take The Hunter.
Captured Mortals and Creature cards that have been played or discarded are kept face-up in front of each player in two separate piles. Face up cards are considered public knowledge. Begin a new turn by revealing the next set of Mortals equal to the number of players.
Memory-Focused Variant • All Creatures are placed face-down when discarded
End of a Round
- The Last One Always Escapes • When only one Mortal can be revealed, the round ends. Check to see who escaped! If it was a Assistant, remember to discard it back to the box.
- Score the Location • Players should total up the Location Icons on their captured Mortals. The player with the most conquers the Location by taking the card and its Reward. Ties are broken with the Clash-O-Meter.
- Score Mortals • Players should total up their Teenagers to see who scored the most and second most. Everyone can then tally up their points and move their Eye Token to their new score.
- Setup the New Round • Gather all the Mortals except for Assistants that players have captured. Shuffle the 2–3 Assistants from the Location area into the Mortal Deck and reveal the next Location card below them. Pick up your set of Campy Creatures cards and begin a new round.
End of the Game
Once The Final Act (the third round) concludes, the player with the most points wins! If there's a tie, the player higher on the Clash-O-Meter wins.
Round Scoring Variant • For lower player counts instead of keeping your score after a round, the player who scored highest wins the round. You can utilize any unused tokens to signify a win. First to two tokens—or three tokens for longer games—wins. Use and adjust the Clash-O-Meter to break round ties.
The Clash-O-Meter
Your handy-dandy tie-breaker.
When two or more players play the same creature or have same strength, A CLASH OCCURS! The order on the board dictates who goes first with abilities or capturing in a tie. For the players that clashed, the player higher on the Clash-O-Meter gets priority—meaning whenever their creature activates or captures, they does so before the other tied players. The next highest player would go second and so forth. In this case here, let's say the Pink, Green, and Purple player each played the 5 Werewolf and the Red player played the 8 Kaiju. The Red player with a Kaiju at 8 is not in a clash and because they have the highest strength, they capture first. Now there is a clash between these 3 other players who are all at 5. Because they are higher on the Clash-O-Meter, the Pink player would capture and activate their ability first, then the Green, then the Purple.
If a clash occurs then the Clash-O-Meter should be adjusted at the end of the turn. The player who clashed and was the first to capture among the clashed players moves to the bottom of the Clash-O-Meter. Even if two or more players clash or if there were two different clashes, only the one player who captured first across all clashed players moves to the bottom. In our example, Pink would move to the bottom while Red, Green, and Purple would slide upwards to fill the empty slot.
Only the player who clashed and captured first among the clashed players moves to the bottom at the end of a turn.
Resolving Other Ties • The Clash-O-Meter should also be used to resolve ties with Mortals and Locations, then moved afterwards. For example, if the Red and Green player are tied for the most Teenagers, the points are not shared. Because Red is higher on the Clash-O-Meter, they will win the most, and Green will win second most. The player who wins the tie—in this case Red—should move to the bottom.
Creature Ability Details
- 0 The Blob • The Creature you discard from your hand is absorbed by the Blob and only its Strength is added—not the Ability. A clash occurs when two or more Blobs are played—even if they end on different Strengths.
- 1 The Swamp Creature • You must give the Mortal to another player.
- 2 The Invisible Man • You may discard one of your captured Mortals—including the one you just captured with The Invisible Man.
- 3 The Mummy • The Mummy(s) captures immediately before all other creatures if a Kaiju is in play. A discarded Kaiju from The Blob's ability is not in play. Mummies do not capture a second time if they have already captured.
- 4 The Invader • If two or more Mortals are available, you must capture two. If one is available, only capture it.
- 5 The Werewolf • The player to your right chooses which Creature to discard from their hand face up.
- 6 The Vampire • The Ability of the Creature to your left is cancelled, but it still retains its Strength.
- 7 The Beast • If you still have The Beast in your hand at the end of a round, add 3 Points to your score.
- 8 The Kaiju - The King of Creatures needs no ability.
The Demogorgon
The Demogorgon works as a micro-expansion that slightly alters gameplay. Replace the 2 The Invisible Man with the 2 The Demogorgon in all Creature decks to bring some press-your-luck and hidden information into the mix. The Mortal captured by the Demogorgon must be returned to the bottom of the deck. The player then looks at the Mortal on top and captures it face down, so only they know what Mortal they received.
Location Rewards
Locations can help you score more Points or give you an advantage in future rounds.
- Camp Murkwood • The Mortal icon in the top right is a reminder that this should only be shuffled in if Teenagers are part of the Mortal deck. Whoever conquers this Location scores an additional Two Teenagers before totaling up who captured the most and second most.
- The Graveyard • Once conquered, The Graveyard can be discarded at any time to resurrect a random Creature back to your hand from your Creature discard pile.
- Lunar Base LZ-R • Once conquered, Lunar Base LZ-R may be discarded before Creatures are revealed on a turn to weaken a player's Creature by –2. The weakened player may rechoose their face-down card up til Creatures are revealed.
- The Metropolis • If you conquer the Metropolis rise to the top of the Clash-O-Meter and score 2 Points. Even if there was a Clash over the Location, the player who conquered the Metropolis rises to the top of the Clash-O-Meter.
- The Mystic Portal • You may exchange one of your captured Mortals with one in the discard pile. Use the Mystical Portal to help complete sets or capture that pesky Mortal that always escapes!
- The Secret Lab • Whoever conquers The Secret Lab should treat the card as a captured Assistant for the remainder of the game.
Location Cards with the Severed Hand mean that after conquering that Location, you may discard it in the future to activate its Reward. Once used, these can go back in the box.
Locations • Final Acts
Something crazy always happens in The Final Act! These Locations provide ways for a player to score big or for scoring to get flipped on its head.
- The Ancient Temple • Conquer the Temple to double the score of all your Archeologists for this last round.
- The Parallel World • Positive Point Mortals score normally—but any Mortal that scores negative Points, now scores its value as positive. So, a -3 Hunter becomes +3. Engineers are no longer as risky as each will score +2 if you capture an odd number, but remember you have to conquer the Location to get its Reward!
- The Uncharted Island • Whoever conquers The Uncharted Island will score Points based on the highest Strength Creature left in their hand. Creatures with Strengths 0-3 will score you 3 Points, 4-7 will score you 4 Points. 8 will score you 5 Points! Note: The Beast still scores Points from its Ability too. Will you be able to hold on to that Beast or Kaiju and conquer The Uncharted Island?
Sciency F.A.Q.
Can I rechoose my Creature card? At any time players may rechoose their face-down Creature card until Creatures are revealed.
Should I move Clash Markers during a turn? No. When a clash occurs, the Clash Markers should only get moved at the end of a turn and only one player's marker should move to the bottom.
Why are red Mortals good and blue bad? Well, you see we're the bad guys here—being mad scientists and all—so colors are reversed from what they usually mean.
Quick Start
Choose your color and creatures + setup the Clash-O-Meter.
Setup the Mortal Deck • Depending on the player count, add random cards from different sets to the base mortals (Teenagers, Classics, Engineers):
- 2 players • 4 cards from 1 set + 2 assistants
- 3 players • 5 cards each from 2 sets + 2 assistants
- 4 players • 5 cards each from 3 sets + 3 assistants
- 5 players • All cards from 3 sets + 3 assistants
Prepare the Location Deck • Add Locations and Assistants in this order starting with the Final Act face-down on the bottom: 2 assistants for 2-3 players, 3 assistants for 4-5 players. Deck order from bottom to top: Final Act, Location, Location.
Begin by revealing Mortals equal to the number of players. Everyone chooses a Creature then reveals at the same time.
- Activates before Capturing (one dot)
- Activates when Capturing (two dots)
Things to Remember
- The Clash-O-Meter breaks all ties
- Conquer a Location by having the most Location Icons
- Discarded Assistants return to box
A Campy Creatures production • presented in terrifying Monstervision — it will melt your eye!