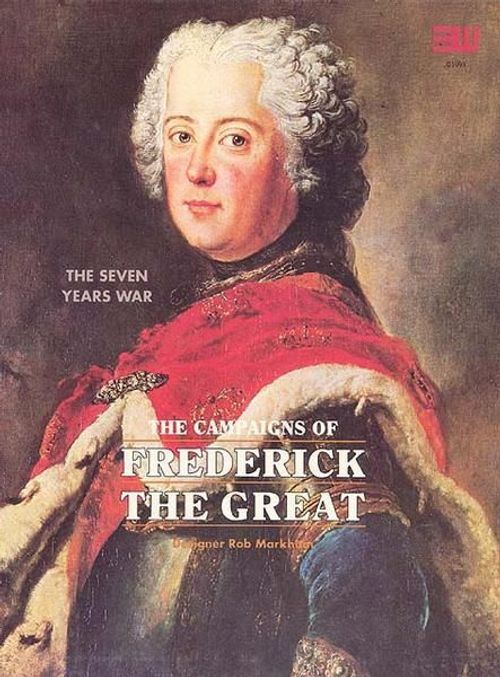
The Campaigns of Frederick the Great
The Campaigns of Frederick the Great Rulebook
Table of Contents
Table of Contents
- 1.0 Introduction
- 2.0 Game Components
- 3.0 Sequence of Play
- 4.0 Initial Phase
- 5.0 Command Markers
- 6.0 Leaders
- 7.0 Movement
- 7.5 Reaction Movement
- 8.0 Supply
- 9.0 Combat Phase
- 9.1 Combat Procedure
- 9.11 Participating Units
- 9.2 Supply in Combat
- 9.21 Tracing a Supply Line
- 9.22 Effects of Not Being Supplied
- 9.23 Supply Depletion
- 9.24 Intensifying the Battle
- 9.3 Engagement
- 9.4 Resolving Rounds
- 9.41 Modification of Combat Force
- 9.42 Combat Die Roll Modifiers
- 9.43 Excess Strength
- 10.0 Siege
- 11.0 Morale
- 12.0 Leader Losses
- 13.0 Victory Points
- 14.0 Scenarios
- 15.0 Strategic Campaign Rules
- 15.8 Victory Conditions
- 16.0 Designer's Notes
1.0 Introduction
Les campagnes de Frédéric le Grand is a game based on the campaigns in Central Europe from 1756 to 1762. The war pits the forces of Frederick the Great of Prussia and his allies against the combined forces of Austria, France, Russia, Sweden, the states of the Holy Roman Empire and Saxony.
2.0 Game Components
Each copy of Frederick contains the following elements:
- 1 map
- 400 die-cut counters
- 1 rulebook
- 1 scenario booklet
- aid sheets containing tables
- 2 six-sided dice
An opaque container, such as a coffee cup, is also required.
Two alternative methods of tracking game information are provided. Players may either photocopy the scenario information tables and use them to keep a written record, or they may use the strength points and other markers supplied with the game. Use whichever method suits you best. If markers are used, note that players may not examine the markers under an opposing leader or in leader tracking boxes (see 2.6).
The morale of a unit may be noted by writing it on the scenario tracking tables, or by the morale markers placed under the leader counters on the map (11.4) or in tracking boxes.
Note that the combat strength points used by leaders in their mobile forces and the strength points of the immobile garrisons located in various forts and fortresses are not interchangeable (but see the exception below). If you use the player record sheets there is no problem. If you use the markers on the map to keep track of the size of the various leaders' forces, and to note the strength of garrisons, take care not to confuse the two (the markers representing garrisons have a different orientation). The optimum method for players who prefer to use markers is to place the markers representing garrisons on the map, and the counters representing mobile forces in tracking boxes.
Each leader has a combat strength and a morale, recorded on the Player Record Sheet (2.5) or by the use of counters. Combat strength points and morale points cannot be transferred from one leader to another. If a leader loses all of his combat strength points, he is removed from the game.
Note: Strength point markers may be used to make change (5 strength points may consist of one 5-point marker, or of 1- and 4-point markers, or of 2- and 3-point markers, or of five 1-point markers).
Nationality
Leaders and point markers have a color code for simplified identification. The background colors are:
- Prussia: grey
- Hanover: purple
- France: pale blue
- Empire: dark blue
- Austria: white
- Russia: reddish-brown
- Saxony: green
- Sweden: yellow
Unit Types
Leader unit. The counter diagram labels: Leader (name), Nationality (background color), Rank, Command, Initiative and Combat Bonus. The diagonal bar on a counter means that the leader has already moved during the current movement phase.
Supply units. All wagons have combat, initiative and command values of 1-1-0. As far as possible, use the values printed on wagons that are independent of any leader; the others, for supply, are stacked with leaders or in the reserve. Counters with values greater than 2 should be used as spares.
2.1 Map
The map shows the area of Central Europe where the campaigns took place. The basic terrain types are: clear, mountains, passes, road, ocean and river edges.
2.2 Counters
The counters in the game include leaders, strength points, supply units and information markers.
Leaders. A leader is a marker with his name printed on it. If players use the Scenario tracking tables (see 2.5) to keep track of each leader's strength, the leader markers move on the map unaccompanied by strength point counters representing troops. Alternatively, players may use the strength point markers provided, placing the appropriate markers under their leaders, or in the tracking boxes for the forces provided (2.6). Note that the presence of a leader is required for movement; strength point markers can never move independently, nor can they leave a hex unless accompanied by a leader. (Exception: strength points may be left as a garrison in a fort or fortress in the leader's home country; once they become a garrison they may no longer move during the game.)
Information markers. The sheet's information markers (as printed) are: Demoralized, Leader Casualty, Morale, Game Turn, and Command Chit.
2.3 Scale of the Game
Each hex represents approximately 40 km. Each strength point represents about 1000 infantry men, modified by the addition of artillery and cavalry.
2.4 Tables
The tables are used to determine terrain costs, resolve combats, and determine losses due to attrition.
2.41 Percentage Table
The game procedures require players to calculate percentages of a leader's strength. The percentage table may be used for this. Locate the row corresponding to the original value, and cross it with the column corresponding to the percentage. If the exact value is not listed in the table, choose 2 rows whose values add up to the original value, find the percentages in those rows, and add the results.
Example: It is necessary to find 50% of a force that initially numbers 27 (27 is not listed, but 20 + 7 = 27). The player crosses row 20 with the 50% column, obtaining a result of 10. He then crosses row 7 with the 50% column, obtaining a result of 4. The desired percentage is therefore 10 + 4, or 14.
2.5 Player Record Sheets
Each player has a record sheet for each scenario. These sheets show when and where each leader enters the game. Players may also use these sheets to track the current strength and morale of the combat units (or they may use the counters provided, as explained above). If scenario tracking sheets are to be used, they must first be photocopied and cut in two (corresponding to the Allied and Coalition parts). The information on each player's sheet must be kept secret from the opponent. If you use strength and morale markers, note that players are not permitted to examine their opponent's stacks (this preserves the secrecy).
2.6 Tracking Boxes
When strength point markers are used instead of the player record sheet, players may find it simpler to use the reference boxes on the sheet rather than stacks of markers with the leaders on the map. Most leaders have a reference box on the sheet. Players should note that using the reference boxes on the sheet does not reveal any more information to the opponent than using player record sheets or using stacks. A further degree of privacy may be obtained by using money in strength point values (considering that the box contains more than one strength point), and always by placing a 1-point counter on top of the stack. Morale counters, however, will be visible to the opponent.
Leader reference cards are also provided with the game; their use preserves the element of secrecy, but of course you must be out of your opponents' sight to place them. Players must use their own judgment between the advantages and the secrecy.
2.7 Terminology
The term "leader" used in these rules should not always be understood as simply an individual, but sometimes as the individual himself and the force he commands. "Force" refers to an individual and his troops; in an appropriate context it may also refer to a garrison stationed in a fort or fortress. "Combined force" refers to a stack of more than one leader, together with their troops. "Units" refers to leaders as well as strength points. The words "Villages" and "Towns" are interchangeable in these rules.
3.0 Sequence of Play
I. Initial Phase
A. Reorganization. All leaders who are demoralized make a test to reorganize. Leaders who reorganize have their "demoralized" markers removed.
B. Replacements. Each player rolls a die for replacement points.
C. Reinforcements. Each player checks the scenario record sheet to see whether reinforcements arrive this turn.
D. Supply. Players decide whether or not they create supply units in friendly forts, fortresses or towns.
E. Placement of command markers. Players place their command markers in an opaque container.
II. Movement Phase
A. Starting with the Prussian player, command markers are drawn, and the player then decides whether to roll a die on the Movement Points Table for the leaders who may do so. Note that if a player does not wish to move units, he may simply pass, and another command marker is drawn.
B. Play continues until all command markers have been drawn, and all regular, reaction and forced movements have been completed.
III. Combat Phase
A. Combat takes place in hexes occupied by opposing forces. Results are applied, and retreats carried out.
B. Supply decrease. Leaders who are engaged in combat check their use of supply. If they use it, supply points are spent and the player record sheet or supply marker is adjusted accordingly.
IV. Siege Phase
A die is rolled for all sieges on the Siege Table, and the results are applied.
V. Time Phase (campaign game only)
At the start, and in the second turn of September of each year, the Prussian player rolls a die on the Time Table, using the column that corresponds to the next turn. If a "Yes" result occurs, the game ends at the end of the next turn. If a "No" occurs, the game continues and the Prussian rolls the die again on the next turn during the Time Phase.
VI. End Phase
A. All leaders are turned back to their movement side.
B. The game turn marker is advanced one space on the turn track.
4.0 Initial Phase
During this phase, both sides make tests for reorganization (11.3), the creation of supply (8.2), reinforcements (4.2), replacements (4.1) and the placement of command markers (5.0).
4.1 Replacement Points
Replacement points are combat strength points that can be added to a leader's force. Each player rolls a die. On a roll of 6, the player receives 2 combat strength points this turn; on a roll of 5, the player receives 1 combat strength point. On a roll of 1 to 4, the player receives no combat strength points.
Each player records the increase in strength on his player record sheet, or adjusts his strength point markers. Players may exceed the original strengths.
4.11 Restrictions on Replacement Points
- A demoralized force may not receive replacement points.
- A besieged force may not receive replacement points.
- To receive replacement points, a force must be supplied.
- A leader who has been eliminated may not be brought back into play by means of replacement points.
4.12 Reinforcements
Each player checks his scenario record sheet to see whether he receives reinforcements this turn. Reinforcements are placed on the entry hexes during this phase. If an entry hex is occupied by enemy units, the reinforcements may enter that hex or wait until a later turn, when the hex is no longer occupied.
5.0 Command Markers
Command markers indicate when players may move their units. Command markers are numbered 1 to 5 for the Prussians (Allied forces), and 1 to 4 for the Austrians (Coalition forces) only if a leader with a command value of 4 is present; otherwise they are numbered 1 to 3. The background color of a marker indicates which leaders it applies to: Allied leaders (grey) or Coalition leaders (white).
When a command marker is drawn, the appropriate player may move the leaders whose command value (6.0) is equal to or greater than the number on the marker. Stacking creates an exception to this rule (7.21). Leaders who are rolled for are turned to their moved side, regardless of whether they have already moved. Forces that have already moved may make a forced march. When all command markers have been drawn, the movement phase is over.
Example: The command marker drawn is an Austrian (Coalition) marker with the number 2. This means that all Austrian and Coalition leaders with a command value of 2 or more may roll a die for their movement on the Movement Points Table. Once rolled, the leaders are moved and turned to their moved side (Moved). Austrian (Coalition) leaders with a command value of 2 or more that have already moved during the turn may make a forced march. Note that if a leader has rolled on the Movement Points Table and receives too few movement points to carry out the intended move, the player may simply decide not to move him.
6.0 Leaders
Leaders are the heart of the system. To reflect the individual qualities of the officers portrayed, leaders have 4 different values (see the example of a unit).
- The command value determines when a leader moves, his movement points, his engagement in combat, and his ability to make a forced march.
- The initiative value affects reaction movement and the ability to leave hexes occupied by the enemy.
- The combat bonus affects combat. It is used to modify combat die rolls.
- The rank indicates experience. It determines which leader commands when several are stacked together. In each nation the rank-1 leaders are the most important, the next 2 are next in importance, and so on. Austrian and Prussian leaders always command when stacked together with their allies. The Hanoverians command the other Prussian allies. Otherwise, command is determined by a die roll if 2 leaders have the same rank.
7.0 Movement
During the movement phase, players choose which leaders to activate and move. To activate a leader, his command value must be greater than or equal to the number on the command marker drawn. Leaders may be moved only once by regular movement during each game turn. Once a player has rolled a die on the Movement Points Table for a leader, that leader is turned to his moved side (Moved), and he may be moved a maximum of the movement points just obtained on the Movement Points Table (for the movement of supply wagons, see 8.23). There are 2 other types of movement: reaction movement and forced march. These are explained later.
7.1 Regular Movement
When a leader is activated, the player rolls 2 dice, modifies the result by any applicable modifier, and consults the Movement Points Table, cross-referencing the leader's command value with the die roll. The result is the number of movement points that leader may use during the movement phase. The Terrain Effects Table lists the movement costs for each type of terrain. A leader may not enter a hex if he cannot pay the full cost to do so.
7.11 Stacks
If a stack containing more than one leader moves, the player rolls only once for that stack, using the highest-ranking leader. Stacks may not be divided during movement, nor may leaders be dropped off. If leaders move in a stack, they must finish their movement together.
7.12 Notes on Terrain
- Units entering a hex traversed by a road may use the road's movement value if they follow it. Otherwise, the unit pays the base terrain cost.
- If 2 road lines are parallel in a hex but do not touch, a unit may not, in a single movement, enter the hex by one road and leave by the other; it must pay the base cost of that terrain in the second hex. A unit that begins its movement in a road hex, however, may immediately begin using road movement and move along any road of that hex, regardless of the direction from which it entered the hex at the end of its previous movement.
7.13 Special Swedish Rules
The Swedish leader Hamilton may leave Swedish Pomerania (Swedish Pomerania) only if the player obtains a 6 on a die roll (d6). This roll is made before movement. Once a 6 has been obtained, Hamilton may leave Pomerania during the turn; but if he ends the turn in Swedish Pomerania, a 6 must again be obtained before he can leave.
7.2 Stacking and Combined Forces
Several leaders may move together as a stack. Two or more leaders moving together are called a "combined force" (Combined Force). A combined force moves using the movement points received on the Movement Points Table by the leader of highest command value. Stacking also affects movement capacity (7.21).
A combined force may not divide during its movement. If a player wishes leaders to finish their movements in different hexes, he must move them separately. When leaders move separately, each one rolls a die on the Movement Points Table.
7.21 Changes to Movement Capacity
Leaders' movement capacities are modified when they move together in a stack and when they leave the same hex separately. These modifications apply whether the movement is regular movement or reaction movement.
- When more than 3 leaders move together, the stack's movement capacity is reduced by 1 for each leader present above 3.
- If leaders that start the movement phase stacked together move separately, their movement capacities are affected: they lose 1 movement point for each leader moved, after the 1st. Thus the 2nd leader to move loses 1 point, the 3rd loses 2, and so on. Enemy leaders leaving the hex do not cause a movement penalty to friendly leaders. The movement capacity of a supply wagon is never reduced to 0 for stacking reasons; they may always keep 1 movement point. Leaders may have their movement capacities reduced to 0.
Example: Frederick with 10 strength points, Henry with 5, and Keith with 7, are stacked in the same hex. Frederick moves first and suffers no movement penalty. Henry moves 2nd and suffers a penalty of -1 movement point. Keith moves last and suffers -2 movement points.
7.3 Entering a Hex Occupied by the Enemy
Leaders may enter hexes occupied by the enemy (however, they must do so under an attack order).
- A leader must spend 1 extra movement point to enter a hex occupied by an enemy leader. There are no additional costs to enter a hex occupied only by an enemy supply wagon and/or an enemy garrison.
- A leader who enters a hex occupied by an enemy leader may no longer spend movement points in this phase; he must stop. Enemy wagons or enemy garrisons not accompanied by a leader do not cause this effect. A leader who enters a hex occupied by an enemy leader may not make a forced march during this phase; he may, however, attempt a reaction movement.
- If an enemy leader moves into a hex occupied by a friendly leader, the friendly leader may immediately try to leave the hex by reaction movement (7.5). If he fails to leave the hex, he may not attempt reaction movement again during this movement phase for as long as the enemy leader occupies the hex.
- If an enemy leader, using reaction movement, enters the hex of a friendly leader who is moving, neither of the two may spend movement points during this movement phase.
7.4 Leaving Hexes Occupied by the Enemy
A leader who starts any movement of any type in a hex occupied by an enemy leader must first roll a die to determine whether he can leave the hex. The player follows this procedure:
- The player rolls a d6.
- He compares the initiative values of the highest-ranking leader trying to leave the hex and of the highest-ranking enemy leader in the hex. He adds 1 to his roll if the enemy leader's initiative value exceeds that of the friendly leader; he subtracts 1 if the enemy leader's initiative value is lower than that of the friendly leader. If the initiative values are equal, there is no modifier to the die. The initiative of the highest-ranking enemy leader in the hex is used, even in a reaction movement triggered by a different enemy leader.
- The modified die roll is compared with the initiative value of the highest-ranking leader trying to move. If the result is equal to or less than that initiative value, the force may leave the hex, paying 1 extra movement point to do so. If the result exceeds the initiative value, the movement of the force ends immediately.
Before following this procedure, the player must declare exactly which leaders will try to leave the hex. If the attempt fails, these leaders may not move for the rest of the phase. The other leaders in the hex may always try to leave the hex, and they roll separately.
7.41 Supply Wagons
If a supply wagon is alone in a hex, enemy leaders may enter that hex without a movement cost for the wagon. The wagon is eliminated, and the enemy leader adds the wagon's supply points to his available supply column on the player record sheet, or adjusts his supply markers.
7.5 Reaction Movement
Leaders may attempt reaction movement during the enemy's movement. Each leader has a reaction zone, which extends in all directions to a distance equal to his initiative value. The leader's own hex is also part of his reaction zone. Reaction zones do not extend into or through mountain hexes. They extend across a hexside traversed by a river only if that hexside contains a bridge (if the river is traversed by a road).
When an enemy force (even a supply wagon) moves into a leader's reaction zone, the player may attempt a reaction movement. The attempt is made when the enemy enters the zone and before he spends movement points. Subsequent reaction attempts are subject to certain limitations, for each hex entered by the enemy in a leader's reaction zone (see below). The following procedure is used:
- The intercepting player announces which stack initiates the reaction movement attempt.
- The intercepting player rolls a die.
- If the die roll is equal to or less than the initiative value of the highest-ranking leader in the stack (whether or not he takes part in the reaction movement), the reaction is a success.
- If the reaction is a success, all or some of the leaders in the stack may immediately move up to a maximum of 5 movement points. If more than one leader takes part in this reaction movement, they must do so as a combined force, that is, they must be stacked together. Reaction movement is resolved immediately, before any movement of the enemy leader.
If an enemy leader (including the leader who is reacting) is in the same hex as the reacting stack and the attempt fails, neither may leave the hex, and neither may attempt reaction during the movement phase, for as long as the enemy leader occupies the hex.
7.51 Number of Attempts Allowed
A leader may attempt as many reaction movements as possible during a single movement phase. The total of these reaction movements may not exceed his regular movement capacity. However, a leader who enters a hex occupied by an enemy during a reaction movement may not move for the rest of the movement phase.
An unlimited number of enemy leaders in different hexes may react after each friendly move, but each stack may react only once per enemy hex entered. A player must declare all reaction attempts before resolving them. A player may attempt a reaction an unlimited number of times against the same enemy force.
Example: Henry has a reaction range of 2. The opposing player moves a force into a hex that is 2 hexes away from Henry. He rolls a die, obtaining a "3". This is greater than Henry's initiative, so the reaction attempt fails. The enemy now moves to a hex closer to Henry. A die is rolled again; with the result "2", Henry obtains a success for this roll, so he may move 5 movement points, assuming he succeeds in the roll to leave a hex occupied by the enemy (7.53).
Figure (Reaction Movement): Browne has an Initiative Rating of 2. His reaction zone is illustrated. Legend: RZ = Reaction Zone; NO = No Reaction Zone.
7.52 Stacks and Reactions
A player may attempt a reaction with a stack only if enemy units have entered the reaction zone of the leader with the highest initiative present.
Units that start a reaction movement in the same hex must move as a single stack. Some may remain behind while others move, but all units that move out of the hex must move as a single stack.
7.53 Reaction in Hexes Occupied by the Enemy
Leaders in a hex occupied by the enemy may attempt a reaction. If they succeed, they must always carry out the normal procedure to try to leave the hex (7.4). If they fail either in the reaction attempt or in the attempt to leave, they may not attempt another reaction movement in the same phase, for as long as one or more enemy leaders remain in the hex (supply wagons and garrisons do not cause this restriction).
If a leader undertakes a reaction movement while stacked with one or more enemy leaders who entered the hex during the same turn, he may not leave the hex by any hexside through which the enemy leaders entered.
7.54 Other Restrictions
- A reaction movement may not be used during the combat phase.
- A reaction movement may not be used during a friendly regular movement; it may only be used when enemy units are moving.
7.6 Forced March
Leaders who have already moved during the movement phase may make a forced march if the command marker drawn normally activates them (see 5.0). The player announces which units make a forced march, and rolls 2 dice, comparing the result with the forced march column of the Movement Point Table (Movement Point Table). On a roll of 9 or 10, the player loses 5% (rounded to the nearest whole number) of the force making the forced march. On a roll of 11 or 12, the player loses 10% (rounded to the nearest whole number). Halves are always rounded up. Forced marches may only be undertaken during a friendly movement.
- Each leader may make only one forced march during a movement phase.
Example: Frederick has already moved during the turn. A command marker of 4 is drawn. The Prussian player decides that Frederick makes a forced march. He rolls 2 dice and obtains 12. Because a 12 was obtained, Frederick suffers an attrition of 10% of his force, which numbers 16 points; this represents 2 strength points. The Prussian player reduces Frederick's force to 14 points and moves him 5 movement points.
8.0 Supply
Leaders must be supplied in order to act normally during combat. There are 2 types of supply sources: supply wagons and supply depots. For range, effects and exhaustion, see 9.2. Supply has an effect only on combat.
8.1 Supply Depots
Supply depots are friendly cities, garrisoned towns, forts and fortresses (see 10.3). "Friendly" in this context means any town, fort or fortress under the control of the player's nation or of its allies at the start of the scenario.
If an enemy leader occupies a supply depot, the units in the hex, whatever their side, may not use it to resupply themselves (translator's note: the French reads "les unités amies ou qu'elles soient ne peuvent l'utiliser pour se ravitailler", which is ambiguous as to which units are meant; transcribed literally). Friendly leaders in the hex may use the depot normally. It has no permanent effect on the depot, so it can function as a depot again only if it is captured and garrisoned.
8.2 Supply Wagons
Supply wagons carry a maximum of 2 supply points.
8.21 Creation of Supply Wagons
Each game turn, players may create a wagon in a supply depot. The player assigns a maximum of 2 supply points to the wagon by placing it on side 1 or side 2 (1 or 2 points). The wagon is placed on a supply depot and moves normally during the turn (see 8.23).
Supply wagons may only be created in a friendly supply depot that is not besieged. No wagon may be created if all available supply points have already been used, so that all supply wagons in the counter reserve are in play. Each scenario indicates the number of supply points available.
8.22 Exhausted Supply Wagons
When a supply wagon enters a hex occupied by friendly leaders, the supply points in the wagon may be given to a leader of the player's choice. The supply points are recorded in the leader's column of available supply on the player record sheet. The wagon, if it is then empty, is removed from the game. Players who prefer not to use the record sheet may simply place the wagon counter on top of the leader to whom the supply is given.
8.23 Movement of Wagons
Supply wagons have a command value of 1 and a movement capacity of 6 MP per turn. Supply wagons may move independently of leaders, when a command marker of 1 is selected. If they are stacked with a leader, they may simply be moved along with him; when they do so, they are not subject to the movement rules that affect the leader.
8.3 Russian Supply Line
Russian forces trace their supply line from the east edge of the map. When Russian supply wagons are created, they are placed on the east edge of the map.
9.0 Combat Phase
During the combat phase, a combat takes place in every hex that contains the 2 opposing camps. In each of these hexes, the players determine whether there will be combat and, if so, resolve it immediately. The Prussian player determines the order in which potential combats are resolved.
To determine whether there will be combat, use the following procedure:
- Compare the initiative values of the highest-ranking leaders in each camp.
- The player with the higher initiative value decides whether to attack first. If the initiative values are equal, the player who moved into the hex last decides whether to attack first.
- If the first player does not decide to attack, his opponent may decide to attack.
- If neither player decides to attack, there is no combat, and all units remain in the hex.
- If there is combat, the players use the combat procedure described in 9.1.
9.1 Combat Procedure
The following procedure is used to resolve a combat:
- Each player checks his supply.
- Each player then checks supply exhaustion (see 9.23).
- Each player determines the engagement of his troops (see 9.3).
- The rounds are resolved (see 9.4).
- At the end of each round, the defender first, and then the attacker, may choose to end the combat and retreat. If neither camp does so, the next combat round begins.
- Rounds continue until one of the camps retreats, either because it is forced to or by choice.
- The victor (the remaining camp) determines whether it has achieved a major victory (see 9.7).
9.11 Participating Units
If a player chooses to attack, he may use some or all of his leaders. (Exception: demoralized leaders may not attack.) Leaders who do not take part in an attack launched by others of the same camp are not affected by the battle (exception: excess losses, see 9.6). All enemy units (defending) in the hex always take part in the battle, unless they are not engaged (see 9.3).
9.2 Supply in Combat
A player must verify whether the forces engaged in a combat are supplied. A force is supplied if:
- the leader has supply points, or
- a supply wagon is in the same hex, or
- a supply depot is 2 movement points away.
A single wagon or depot may supply an unlimited number of different units, in an unlimited number of different combats, within the same combat phase.
9.21 Tracing a Supply Line
Trace a supply line from the leader toward the supply source, calculating movement costs using the Terrain Effects Table. A supply line may not contain a hex occupied by an enemy leader or garrison, other than the hex of the units being supplied. A supply line may be traced through:
- hexes that were occupied by the enemy earlier in the turn, but are no longer occupied;
- hexsides through which the enemy leader entered the battle.
Note that Russian supply is traced toward the east edge of the map. A combat unit that cannot trace a supply line of correct length is unsupplied.
9.22 Effects of Not Being Supplied
Leaders who are not supplied must retreat at the end of the first combat round, unless the enemy leaders have been forced to retreat because of demoralization.
9.23 Supply Depletion
Before a combat, each player rolls a die to check the depletion of supply.
- A die roll of 5 or 6 consumes 1 supply point for the entire force (Exception: campaign game, die roll of 6).
- On a roll of 1 to 4, no supply point is spent (Exception: campaign game, die roll of 1 to 5).
- A player may not voluntarily choose to be unsupplied. He must trace a supply line if possible, and risk the depletion.
9.24 Intensifying the Battle
Before the start of each combat round, the players may choose to intensify the battle. To do so, the player announces the intensification and spends 1 supply point. This is unrelated to the control of supply depletion. If a player intensifies a battle, he must spend 1 supply point (from any leader in the combat) for each round that is intensified. During each round in which he intensifies a combat, a player receives a +1 modifier to his die roll on the combat table.
9.3 Engagement
Immediately before the combat rounds begin, each player must determine engagement, using the following procedure:
- Select the highest-ranking friendly leader in the hex. Note that his command value is used, not his combat bonus value.
- On the Engagement Table (Table Commitment), select the column corresponding to the command value of the leader.
- Roll a die and modify the result by applying the appropriate modifiers listed at the foot of the table. Players may choose to spend a supply point to "concentrate their forces", that is, to increase the chances of a greater percentage of their forces being committed to the battle (see the bottom of the engagement table). This supply point may come from any leader in the stack.
- Cross the modified die roll with the column of the command value. The result is the percentage of the leader's force that may be used in combat.
- Check the percentage chart (percentage chart) to find the number of strength points that will take part in the combat. If the table indicates 0, take 1 strength point for the engaged force.
Engagement occurs only once, before the rounds begin. The second round is resolved with the initial engaged force minus the losses suffered in the 1st round, and so on.
9.4 Resolving Rounds
To resolve a round, each player carries out the following procedure:
- Total and modify the force of his engaged units (see Modification of Combat Force, 9.41).
- Locate the corresponding column in the Combat Results Table.
- Roll 2 dice, apply any appropriate modifier listed at the foot of the table, and cross the result with the column corresponding to the command value.
- The result is the number of enemy strength points eliminated. The enemy chooses which of the forces of his leader suffer the losses.
9.41 Modification of Combat Force
| Modifier | Condition |
|---|---|
| +2 | If the attacker and the leader have penetrated into a mountain pass hex during the turn. |
| +2 | If all leaders cross a river hexside adjacent to the combat hex during the turn. |
| x2 | If the defender is in a mountain pass hex. |
| x2 | If the defender is in a mountain hex. |
Modifications cumulate. Apply them in the order above to the total force of all leaders affected, then round up to the upper half. If some leaders are doubled or divided by 2 and the others are not, double or divide the proportion corresponding to the strength points engaged.
Example: Apraxin with 6 strength points (SP) and Fermor with 5 SP attack Maurice with 2 SP. Apraxin moves through a mountain pass hex during the turn, and his force is therefore divided by 2, becoming 3 (printed as "6 + 2 = 3"; the sense is 6 ÷ 2 = 3). Both he and Fermor advance into the combat hex via an adjacent river hexside; their combat strength (now totalling 3 + 5 = 8) is therefore divided, becoming 4. The combat takes place in a mountain hex, so the defender's force is doubled (2 x 2 = 4).
Translator's note: the example applies a division for the mountain pass and river crossings, while the modifier table above prints "+2" for those two conditions. The table is transcribed as printed; the example is transcribed as printed.
9.42 Combat Die Roll Modifiers
The combat bonus value of the player's highest-ranking leader is used as a modifier (depending on his combat bonus value in combat).
| Modifier | Condition |
|---|---|
| +1 | If the player chooses to intensify the battle. |
| -2 | If demoralized. |
| -2 | If the attacker is in a mountain hex. |
Note that each player uses only the combat bonus value of his highest-ranking leader taking part.
9.43 Excess Strength
If the engaged strength of a player exceeds 45, roll the dice once using the 41-45 column, and another time for the remaining engaged strength.
Example: The excess strength of a player is 56. He rolls once on the 41-45 column and once on the 11-15 column.
9.5 Demoralization and Retreat
At the end of a combat round in which a player's cumulative strength losses total 10% or more of the initial strength engaged, and at the end of each subsequent sub-round, the player must test morale. He tests morale with a single die roll for all the leaders who take part, not leader by leader.
Example: A player has 30 strength points, of which 60% (18 points) is engaged. 10% of 18 (rounded to the nearest whole number) gives 2. His force loses 1 point in the 1st round and another in the 2nd. He must therefore check morale at the end of the second round and at the end of each following round.
9.51 Morale Check Procedure
To check morale, a player rolls 2 dice and adds the following modifiers:
| Modifier | Condition |
|---|---|
| +1 | For each 10% of the initial force lost. |
| +1 | If the highest-ranking leader has a command value of 1. |
| -1 | If the highest-ranking leader has a command value of 4 or 5. |
| -1 | (Defender only) if the force is in a friendly fort or fortress hex. |
| +1 | If units begin the battle demoralized. |
The modified result is compared with the morale value of each leader. If the result is greater than a leader's morale value, that leader becomes demoralized. Note that although only one 2-dice roll is made, the modified result is applied separately to each leader in the stack; one leader may be demoralized while another is not.
9.52 Effects of Demoralization
- If a force fails a morale check during a battle, all leaders of the force participating in the battle must retreat immediately. If a force includes units that were demoralized at the start of the battle, it must retreat only if it fails a morale test during the battle; the simple presence of units already demoralized does not require a retreat.
- Demoralized leaders may not attack; i.e., the attacker may not count them in his force total.
- If either leader of the defending force is demoralized, the defender must subtract 1 from his engagement die roll.
- Demoralization does not affect reaction.
- No additional effect results if a demoralized leader becomes demoralized again.
9.53 Retreat
Leaders must retreat in the following cases:
- Immediately, if they are demoralized. (A force that begins a combat with demoralized units must retreat only if those units are demoralized again.)
- At the end of the 1st combat round, if they are not supplied, unless the enemy retreats because it is demoralized.
Leaders who are in the same hex but who do not take part in the combat do not need to retreat.
9.54 When to Retreat
A retreat resulting from demoralization occurs immediately. A retreat caused by absence of supply is carried out after the 1st round of combat. A retreat by choice of the player is carried out at the end of a round of combat. Retreats therefore occur in this order: combat, lack of supply, then the player's choice.
It is possible for both camps to retreat for the same reason. In that case, the player whose highest-ranking leader has the lower command value retreats first. If the command values are equal, the attacker retreats first.
9.55 Retreat Procedure
A player retreats his own units along routes of his choice, subject to the restrictions below. He may retreat different leaders to different hexes.
Leaders who retreat must spend 4 movement points, and each hex traversed must take them farther from the hex where the combat took place. If it is necessary to spend an extra movement point to enter the final hex of the retreat, it may be spent (i.e., if 3 MP have been spent, and the next hex costs 2 MP to enter).
A leader who must retreat but has no possible route to do so is removed from the game and is considered captured.
9.56 Effects of Enemy Units
Except as noted below, leaders who retreat may not enter hexes occupied by enemy leaders, nor may they leave the combat hex by any hexside through which enemy leaders entered the battle, unless those enemy leaders retreat first.
Exception: In both cases, enemy forces totalling less than 20% of the force that retreats do not block the retreat. On bridge hexsides or mountain pass hexsides, enemy units totalling 10% or more of the force that retreats block it. Round any fraction to the nearest whole number; round halves up.
Leaders may retreat through a hex occupied by the enemy only if there is no other alternative.
Example: A force of 20 points can retreat through a hex occupied by an enemy leader with 3 strength points, if there is no alternative. On a bridge hexside, however, the enemy force of 3 points would block the retreat (3 represents 15% of 20).
9.57 Other Restrictions on Retreat
- Leaders who retreat may not cross a river hexside without a bridge.
- A leader who retreats because he is demoralized must end his retreat, if possible, in a hex from which he can trace a supply line shorter than the one he had previously in the combat hex. If this is not possible (for example, if the leader is defending in a depot hex), he must retreat, if possible, toward a hex that is closer to another friendly force than the combat hex is.
- Leaders who retreat because they are unsupplied must retreat, if possible, toward a hex that is closer to another friendly force than the combat hex is.
- Forces that are defending may instead retreat through a friendly fort or fortress, in any hex they traverse during the retreat.
9.58 Supply Wagons
Supply wagons stacked with a force that retreats must accompany that force for the whole length of the retreat.
9.6 Excess Losses
If the strength losses of a player exceed the engaged force, some of the excess losses are removed from the strength of the force (not necessarily all of them). The enemy player rolls 1 d6, adds the number of excess losses to the die roll, and consults the Excess Losses Table (Excess Losses Table). The result is the number of engaged points that are removed.
9.7 Major and Minor Victories
If only one of the camps retreats after combat, the other camp has won a victory. Victories are classified as major or minor as follows:
- If the retreating camp loses 15 strength points or more, the battle is a major victory.
- If the retreating camp loses fewer than 15 strength points, the battle is a minor victory.
The winner scores 5 victory points for a major victory, and 1 victory point for a minor victory.
10.0 Siege
After all combats have been resolved, the 2 players check the results of sieges, starting with the sieges conducted by the Prussian player.
10.1 Prerequisites for a Siege
To conduct a siege, the besieging forces must have at least a 2-to-1 ratio, in strength points, of attacking forces to the strength points of the defending force (including the garrison and the mobile strength points of the defender). A siege may only be initiated if all defenders are inside a fort, fortress or town; there may be no defending force outside. (At the start of the combat phase, the player must establish whether the units subject to combat are inside or outside a fort, fortress or town.) Garrison troops never take part in a combat outside a fort, fortress or town.
10.2 Siege Procedure
To resolve a siege, the following procedure is used:
- Determine whether the attacker/defender ratio is at least 2 to 1.
- If it is at least 2 to 1 (as printed; step 1 asks the same question, and the text is transcribed as printed), use the column for the correct number of consecutive siege turns of the game on the Siege Table, and roll the die on the Breach Table (Breach Table).
- If a result of "B" is obtained, roll the die on the Honors of War Table (Honors of War Table). An "H" result means that all leaders who are defending, and their remaining strength points, are placed on the game turn track 4 turns further on. On the 4th turn, they are placed on any friendly fort or fortress as reinforcements. If the result is an "S", the defenders have surrendered and are removed from the game. Leaders who surrendered, and garrisons, give victory points (see 13.0).
10.3 Garrisons
Garrisons are strength points assigned to forts, fortresses or towns at the start of scenarios. They are intrinsically defensive in nature and, as such, they cannot be moved any more than they can be absorbed into the force of a leader. They are always considered to be inside a fort, fortress or town. They count as victory points when they surrender during a siege (see 13.0). Forts, fortresses or towns without garrisons are never besieged, but are controlled by any leader who enters the hex.
Garrisons that receive the honors of war are eliminated. They do not return to play 4 turns later, but they do not count for victory points.
11.0 Morale
Each leader has a morale value listed on the player record sheet. As the game progresses, morale values will increase and decrease. These values are used to control morale during combat, and for the possible recovery of a leader in the Initial Phase. Players may keep track of morale by noting changes on the player record sheet, or by placing (and turning over) morale markers under the leader counters on the map (see 11.4).
11.1 Morale Checks
In each battle, if a force ever loses 10% or more of its engaged strength in combat, a morale check is necessary at the end of each combat round of that combat. When the morale check results from combat losses, 2 dice are rolled, modified (see 9.51), and compared with the leader's morale value. If the result is greater than the morale value, the unit is demoralized.
Figure: a leader counter is illustrated, showing its morale value.
11.2 Increasing and Decreasing Morale Value
Each time a leader fails a morale test, his morale value is reduced by 1. Each time a leader participates in a combat that results in a major victory, his morale value is increased by 1. Morale values are recorded on the player record sheet, or by rotating the morale markers (see 11.4). Morale values may never be lower than 4, nor higher than 11.
11.3 Morale Recovery
During the Initial Phase of each turn, a demoralized leader who is not in a hex occupied by the enemy (unless he is in a fort or fortress) may attempt to recover his morale. To do so, 2 dice are rolled and compared with the leader's current morale value. If the dice roll is equal to or less than the morale value of the leader, the leader succeeds in his morale test and the "Demoralization" marker is removed. If the morale check fails, the leader remains demoralized.
11.4 Morale Markers
If a player uses morale markers to track morale, a single morale marker is placed under each leader. Orient the marker so that the side showing the current morale value is aligned with the top of the counter (see figure). When morale changes, simply rotate the marker (or, if necessary, turn it over) so that the new morale level is indicated by the number aligned with the top of the leader's counter.
12.0 Leader Losses
When a combat takes place, if a player rolls a natural 12 (i.e., before the application of any modifier), there is a chance that a leader may be lost. Use the following procedure:
- After all combats have been resolved, roll a die. The result is the number of leaders potentially killed. (If this number is greater than the number of leaders present, use the number of leaders present.)
- Mark the hex with the "Leader Casualty" marker and place all the leaders present in an opaque container. Then randomly select a number of leaders equal to the result of step 1.
- For each leader selected, roll 2 dice. On a result of 2, 3 or 12, the leader has been killed and is removed from the game. All other results have no effect.
- Replace dead leaders with replacement leaders. Leaders who are killed are simply replaced by another (or possibly the same!) replacement leader. Grey replacement leaders may be used to replace Prussian leaders or those of Prussia's allies; white replacement leaders may be used to replace Austrian leaders or those of Austria's allies.
- If Frederick dies, the game is considered over, and the Coalition forces are the winners.
13.0 Victory Points
At the end of each scenario, victory points are totalled, and the side with the highest score is declared the winner. Certain victory points are earned at the end of the game, and some are earned during the game, as follows.
Victory points: note at any time
| Points | Condition |
|---|---|
| 5 | Victory points for each major victory. |
| 1 | Victory point for each minor victory. |
| = | Victory points equal to the number of strength points of the enemy garrison that surrendered. |
| 1 | Victory point for each enemy leader killed (if the optional rule for leader loss is used). |
Victory points: note only at the end of each game
| Points | Condition |
|---|---|
| 5 | Victory points for each enemy fort controlled that began the game with a garrison. |
| 8 | Victory points for each enemy fortress controlled that began the game with an enemy garrison. |
To control a fort or fortress, a player must have captured it following a siege, and must currently occupy it, or be the last player who occupied it.
14.0 Scenarios
There are 8 scenarios in The Campaigns of Frederick the Great. The first 7 cover annual campaigns, while the last covers the entirety of the war. The last scenario, the Strategic Campaign, also uses additional rules and adds a strategic cycle to the sequence of play. The annual campaigns use only the sections of the rules from 1.0 to 14.0.
14.1 Annual Campaigns
Each annual campaign has a player record sheet which gives the length of the game, the initial forces, the setup in the hexes, the initial morale, the supply of the leaders, the garrison forces and the supply reserves available.
15.0 Strategic Campaign Rules
The strategic campaign scenario begins on turn 2 of August 1756, using the setup of 1756, and ends if an automatic victory is obtained, or at the end of the last turn of 1762. The strategic campaign adds a strategic cycle to the game. At the end of each annual campaign (i.e., when winter stops the annual campaign), the following strategic cycle is executed:
A. Resource determination phase. Each camp totals the value, in resource points, of the zones and cities it controls (see 15.1).
B. Troop acquisition phase. Each camp totals the troop points available in the zones and cities it controls (see 15.2).
C. Alliance determination phase. Control of neutral countries is checked to see whether they join a camp. For each neutral country, a die is rolled (see 15.3).
D. Leader phase. New leaders are selected and/or replaced (see 15.4).
E. Purchase phase. Each camp uses its available resource points to buy replacement points, and its troop points to create combat or garrison strength points (see 15.5).
F. Deployment phase. Each camp fills in a new Yearly Campaign Record Sheet (Yearly Campaign Record Sheet), assigning replacement points, combat points, garrison points and entry hexes (see 15.6). Rather than using additional sheets, players may choose to use the supplied markers to note strength, morale and supply.
G. Time phase. The Weather Table (Weather Table) is consulted to see at which moment the next annual campaign begins.
15.1 Resource Points
Each zone has 2 types of number that follow its name on the map: resource points and troop points (for example, Hanover has 10 resource points and 45 troop points). Most fortresses, forts and towns have a number after their names; this is their resource point value. Resource points are used to buy supply points.
Towns, forts and fortresses are controlled by the player who occupies them, or who was the last to occupy them. A zone is controlled by the player who controls all of the zone's towns. Note that to control a zone it is only necessary to control its towns, not its forts or fortresses.
15.11 Resource Determination Phase
During this phase, the number of resource points is calculated and noted by the players for future use in the strategic cycle. To total resource points, each player uses the following procedure:
- Total the resource points of all zones (Prussia, Bohemia, etc.) controlled by the player (see the control definition above).
- Total the points for all towns controlled by the player in zones that are not under his control.
- Total the resource points of steps 1 and 2. This is the number of resource points that may be used during the purchase phase.
Resource points are totalled separately for each country. Russia always receives 12 resource points and 70 troop points (this is resolved in this way because Russia is off the map).
15.2 Troop Acquisition
Troop points are totalled during the Troop Acquisition phase by adding together the troop points of all zones controlled by the player. The procedure is as follows:
- The second number after each zone name is the number of troop points available. Total the troop points of each zone the player controls.
- Subtract 3 points from this total for each fort in these zones that is under the control of enemy units, and 10 points for each fortress in these zones that is controlled by enemy units.
Troop points are totalled separately for each country.
15.3 Determination of Alliances
During the alliance determination phase, all neutral countries are tested to determine whether they join an ally: either Austria or Prussia. To do this, roll a die on the Alliance Determination Table for each neutral country, applying any appropriate modifier. If the result is "Prussia", the country is controlled by the Prussian player. If the result is "Austria", the country is controlled by the Austrian player. If the result is "Neutral", the country remains neutral and is tested again during the next strategic cycle.
15.31 Russia
During the Seven Years' War, the Russian Empire had a change at the head of state, which brought a change of alliance (from Austria to Prussia). At the beginning of the strategic cycle following the annual campaign of 1760, the Prussian player rolls a die. On a result of 1 to 3, Russia has a new leader and changes camp.
15.32 Great Britain
The camp allied with Hanover receives 8 additional resource points at each strategic cycle.
15.33 Conquest
When a country is conquered, i.e., all of its towns (forts and fortresses do not count) are controlled by the enemy, the country is no longer an ally. Its leaders are removed from the game and its strength points are eliminated. This state persists until all of its towns are recaptured by its original allies. If this happens, the country may once again receive leaders and combat strength points (see 15.34 for the procedure).
15.34 Leaders for New Allies
The following table indicates the number of leaders each country has when it is no longer neutral. When there are more leader counters than indicated, place the counters in an opaque container and draw the appropriate number. New leaders always start in their home country.
| Country | Leaders |
|---|---|
| France | 3 |
| Saxony | 1 |
| Russia | 3 |
| Sweden | 1 |
| Hanover | 2 |
| The Empire (L'Empire) | 1 |
15.35 Strength Points and Replacements for New Allies
The player totals the strength points, resource points and troop points in the home country of his new ally. He then creates strength points and supply (replacement) points, and assigns them to the new allied leaders.
15.4 Leader Replacement / Removal Phase
During this phase, the players place all unused leaders in an opaque container (this is done separately for each country). Each player then rolls 1 die per country and consults the following table:
| Die roll | Result |
|---|---|
| 1 | Replacement of one leader. |
| 2 | Replacement of two leaders. |
| 3 | No changes. |
| 4 | No changes. |
| 5 | Add a leader. |
| 6 | Add two leaders. |
If the result brings in the replacement of one or two leaders, the player chooses which of the active leaders of the previous annual campaign are to be replaced, and places them on an edge (these are then added to the replacement leaders that were in play during the previous annual campaign, and the number of leaders in the result is the number of leaders to draw). If the result was "No changes", only the replacement leaders in play during the previous annual campaign are removed, and an equivalent number of new leaders are drawn. If the result adds 1 or 2 leaders, the player adds this number to the number of replacement leaders of the previous annual campaign, and draws this total number of new leaders from an opaque container.
- Replacement leaders are never placed in an opaque container.
- This procedure is carried out separately for each country.
- Leaders eliminated in combat are permanently removed from the game.
- If a result would require drawing more leaders than are available, draw all the available leaders and ignore the rest.
Example: The Prussian player has 5 Prussian leaders who were not in play during the previous annual campaign. He has 1 replacement leader from the previous annual campaign, and rolls a 1 on the Leader table; the result reads "Remettre un Leader" (replace one leader). The Prussian player removes a leader with a command value of 1 who was active during the previous annual campaign. He then draws 2 leaders from an opaque container, and places them on the map in their home country.
15.5 Purchase Phase
The following procedure is followed:
- Players pay 1 troop point for the maintenance of each combat strength point that still exists from the previous annual campaign. If a player does not have enough troop points to pay the maintenance cost, all excess combat strength points are eliminated.
- Players pay 1 troop point for the maintenance of every 3 points of existing garrison strength from the previous annual campaign. If there are fewer than 3 garrison points, the cost is nonetheless 1 point to maintain them. (Example: Prussia has 32 garrison points. She must pay 11 troop points to maintain the garrisons.)
- If, after paying maintenance in steps 1 and 2, the players still have troop points, they may buy combat strength points or additional garrison strength points, at the rate of 1 combat strength point for 2 troop points, or 2 garrison points for 1 troop point spent.
- Players buy supply points at the cost of 1 resource point for each supply point bought. Each country is calculated separately. The supply points of the previous annual campaign are eliminated and may not be kept.
15.6 Deployment Phase
During this phase, each player fills in a new Yearly Campaign Record Sheet, beginning by listing the leaders available for the next annual campaign.
- Players then assign strength points for each of their leaders. The total is equal to the number of combat strength points bought or maintained during the purchase phase.
- Players then note the entry hexes for placement, which must be the towns, forts or fortresses, or the zones, controlled at the end of the previous year. Garrison points are assigned to fort or fortress hexes.
- Supply points are given to leaders. Leaders with a command value of 1, 2 or 3 may possess a maximum of 2 supply points, while leaders with a command value of 4 or 5 may possess a maximum of 3 supply points. Supply points in excess are returned to the reserve and are not noted as such.
- Morale points are assigned as follows: leaders with a command value of 5 start with a morale value of 11; leaders with a command value of 4 start with a morale value of 10; leaders with a command value of 3 start with a morale value of 9; leaders with a command value of 1 or 2 start with a morale value of 8. Leaders of the Empire start with a morale value of 7.
As usual, markers may be used in place of the record sheet. Whatever method is used, the players must simultaneously and secretly note the placement of each leader.
Figure: a photograph of a fortress is shown.
15.7 Time Phase
During the time phase of the strategic cycle, the Prussian player rolls a die on the Weather Table (Weather Table), using the column for the start of the annual campaign. The end of each campaign is controlled during the start of the bi-weekly turns, beginning during the time phase at turn II of September.
Figure: strategic map of Central Europe, showing the zones and the cities of the campaign.
15.8 Victory Conditions
At the end of each annual campaign, the 2 players check the victory conditions. A victory is obtained if a player has accumulated 10 victory points or more; the one with the highest total wins. Victory points are earned by the control of towns, forts and fortresses, as follows.
Allies (Prussia and its allies)
| Town | Victory points |
|---|---|
| Prague | 3 |
| Vienna | 5 |
| Dresden | 2 |
| Koniggratz | 1 |
| Metz | 2 |
| Torgau | 1 |
| Eger | 1 |
| Olmutz | 1 |
| Strassburg | 1 |
| Nuremberg | 1 |
| Brunn | 1 |
Coalition (Austria and its allies)
| Town | Victory points |
|---|---|
| Berlin | 4 |
| Magdeburg | 5 |
| Glogau | 2 |
| Hanover | 2 |
| Breslau | 1 |
| Stettin | 1 |
| Neisse | 1 |
| Glatz | 1 |
| Brieg | 1 |
| Dresden | 1 |
| Torgau | 1 |
| Kursten | 1 |
If, at the end of the annual campaign of 1762, neither camp has 10 victory points, the camp with the highest total of victory points wins. If the scores are equal, the game ends in a draw.
16.0 Designer's Notes
Designer's commentary (not rules). "If you like me, you will probably read these notes before playing a game. Unfortunately, I am not going to give you advice or tactics. …"
The bibliography in the source file consists only of an ellipsis; nothing is transcribed.