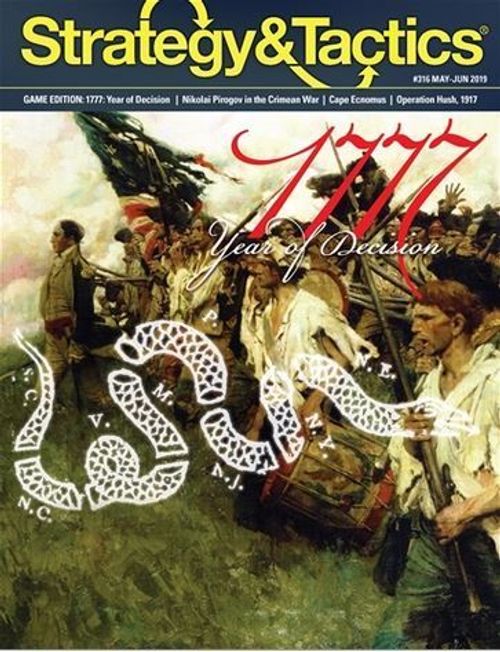
Campaigns of 1777
Campaigns of 1777 Rulebook
Table of Contents
Table of Contents
- 1.0 Introduction
- 2.0 Components
- 3.0 How to Win
- 4.0 Set Up
- 5.0 Sequence of Play
- 6.0 Rally
- 7.0 Action Phase
- 8.0 Stacking
- 9.0 March
- 10.0 Intercept
- 11.0 Avoid Battle
- 12.0 Reinforce Battle
- 13.0 Battle
- 14.0 Forts
- 15.0 Supply
- 16.0 Leaders
- 17.0 Sea Movement
- 18.0 Random Events
- 19.0 Special Rules
- 20.0 Short Scenarios
- 21.0 Optional Rules
1.0 Introduction
The objective of the British player is to control certain spaces to fulfill their victory conditions. The Patriot player's objective is simply to prevent the British victory.
1.1 Scale
One inch on the map represents about 20 miles. Each strength point (SP) represents an understrength regiment of roughly 300 to 500 men. Each game turn represents roughly two weeks.
2.0 Components
Campaigns of 1777 includes these rules, a 22 x 34 inch map representing the northern American Colonies, and one counter sheet with a total of 228 two-sided playing pieces, which will be referred to as units, counters and/or markers throughout these rules. Players will need to provide themselves at least two six-sided dice of any color.
The map and rules will designate how many six-sided dice to roll. When the rules refer to 1D6, they are instructing the player to roll one six-sided die. When they refer to 2D6 they are instructing the player to roll two six-sided dice.
2.1 Map
The map displays the American Colonies north of Pennsylvania and Maryland, including Quebec, as they were in 1777. The map is divided into spaces connected by lines to regulate movement.
Map Errata: Worchester should be spelled Worcester. Chad's Ford should be Chadd's Ford; Head of the Elk should be Head of Elk; the Sterling leader box should be Stirling.
Counter Errata: The Sterling counter should be spelled Stirling.
2.1.1 City Spaces
Circular spaces are cities which represent population centers. Units in cities automatically avoid battle (11.0). Cities may also be ports (2.1.5). Cities may contain magazines (15.1.1).
2.1.2 Countryside Spaces
Square spaces are countryside spaces that represent open areas with low population density.
2.1.3 Small Forts
Triangles are small forts that represent lesser fortifications (14.0).
2.1.4 Large Forts
Stars are large forts that represent larger fortifications (14.0).
2.1.5 Ports
Spaces marked with an anchor symbol are ports. These include:
- Boston
- Head of Elk
- Montreal
- New Haven
- New London
- New York
- Newport
- Wilmington
2.1.6 Connectors
Connectors are the lines connecting the spaces, that represent the march paths between each space. A player may march an activated leader and the associated army from one space to another via these connectors.
- Blue (water) connectors represent river transits or river crossings that inhibit march.
- Dashed (rough) connectors represent mountain passes and rough terrain, they also inhibit march.
- Solid (rural) connectors represent commonly traveled roads and trails.
- Parallel rural and river connectors (dual connectors) allow the use of either connector at the player's option.
2.1.7 Sea Movement Areas
If an army stacked with General Howe departs from a port for sea movement, they embark into the first box on the Sea Travel Track (labeled Turn 1 at sea). On the next turn, this group will progress into the second box (Turn 2 at sea). On the third turn, this group disembarks into the targeted landing port space (17.0).
2.1.8 Charts & Tables
All charts and tables are printed on the map.
2.1.9 Departments
The Patriots organized North America into departments. Spaces in each department may rally according to the rally numbers as shown in each department title box. There are four departments shown on the map.
2.1.10 Turn Record Track
The Turn Track lists turn by turn and denotes when rally takes place. The game is 10 turns in length, starting on the June I Turn and ending on the October II Turn.
2.1.11 Garrison Boxes
There are two Garrison Boxes on the map, New York and Montreal. Garrison Boxes are utilized to show the leaders and units required to stay in each city or fort space. That may change due to random events (18.0). These pieces are considered inside the city or fort for all purposes and are provided to make it easy to segregate pieces that must stay in those locations versus other pieces that may move out.
2.1.12 Available Box
Both the Patriots and the British have a holding box for counters that are not in use.
2.2 Pieces
The die-cut cardboard pieces are referred to as units, markers and leaders.
2.2.1 Leaders
Leaders are used to command units and other leaders. Leaders have values printed on the counters designating certain strengths and capabilities. Primary leaders show: Rank, Leadership, Range, Attack and Defense (with a Primary Leader Replacement Side on the back). Subordinate leaders show: Rank, Leadership (activation number), Range, Attack and Defense.
Important: Subordinate Leaders have a white box behind their activation number.
Leader Activation Marker: Each primary leader has a corresponding activation marker.
- Leadership: Primary leaders may expend leadership points to activate subordinate leaders or execute certain operations. All leaders must roll against the leadership rating to execute such things as intercept, avoid etc.
- Range: The distance in contiguous non-enemy controlled spaces inside which that primary leader may impact units.
- Activation Cost: The cost in leadership points (of a primary leader) to activate a subordinate leader.
- Attack: The benefit a leader will provide as the senior ranking leader in a battle when attacking or storming.
- Defense: The benefit a leader will provide as the senior ranking leader in a battle when defending or being stormed.
- Rank: The number of stars displayed on the leader counter. A leader with more stars than other leaders in that army is the senior ranking leader.
Important: Senior ranking leader is the most senior leader in an army that occupies a single space. Do not confuse this term with Primary Leader.
Important: Primary over subordinate. If there is a tie between two or more of a player's leaders for highest rank, the player may choose which is the senior ranking leader.
Note: Each leader has a holding box used to keep clutter down on the map. Inactive leaders in the same space may trade units back and forth at no cost.
2.2.2 Units
Units come in the following types:
- British: Regulars, Hessians, Tories, Indians, and Artillery
- Patriots: Continentals, Militia, and Artillery
Each of the unit types described above has a strength point (SP) number. SPs between units of the same type are interchangeable: players may make change when removing units or consolidate when adding units if they are of the same type. This game is component limited thus the units provided are an absolute limit. No more may be created for any purpose.
Other Units: Kosciuszko Engineer (19.5) and British River Ship (19.6)
2.2.3 Markers
Markers are included for supply depots/supply trains, control, casualties, destinations, activations, random events, game turn and game functions. Marker types shown: Casualties, Activation, Sea Travel Destination (front/back), British Control of Philadelphia (front/back).
2.2.4 Unit Colors
Units are printed in the following background colors to identify their nationality and the side on which they fight:
- Patriots: Dark Blue: Continentals; Light Blue: American Militia
- British: Dark Red: British Regulars; Tan: Hessians (Mercenaries); Green: Tories (pro-British Militia); Yellow: Indians
3.0 How to Win
3.1 Control of Spaces
A side controls a space if it occupies that space while there are no enemy SPs in that space. You may choose to mark control of spaces with a control marker if there is a magazine in the space.
3.2 Victory
The British player wins if:
a) At any time during the game the British have controlled Philadelphia (even if only at one point in time) and;
b) At the end of the game (at the end of the October II turn) the British player controls all the following spaces:
- Montreal
- Fort Ticonderoga
- Albany
- Fort Montgomery
- New York City
Once the British have controlled Philadelphia flip the "British have not controlled Philadelphia" marker to the "British have controlled Philadelphia" side where it will remain for the remainder of the game.
The Patriot player wins if the British player does not achieve either of his victory conditions.
4.0 Set Up
4.1 Activation Markers
Gather the primary leader activation markers (excluding the Clinton activation (19.2) and the Powell activation (19.1) markers), a supply check marker for each side and a random event marker for each side. Set them beside a large-mouth opaque cup.
Important: The number listed after the units in the set up information is the SP value.
4.2 British Set Up
- Montreal: Leaders: Burgoyne, von Riedesel, Phillips, Fraser. Regulars: 14. Hessian: 10. Tories: 1. Indians: 2. Artillery: 4. Supply Train: 2.
- Montreal Garrison (18.0 & 19.3): Leaders: Carleton. Regulars: 5.
- Ticonderoga Garrison (18.0 and 19.1): Leaders: Powell. Regulars: 5.
- Oswego: Leaders: St Leger, Johnson, Brant. Regulars: 5. Hessian: 2. Tories: 3. Indians: 5. Artillery: 1. Supply Train: 1.
- New York: Leaders: Howe, Cornwallis, von Knyphausen. Regulars: 25. Hessian: 12. Tories: 4. Artillery: 6. River Ship: 1. Supply Train: 2.
- New York Garrison (18.0 and 19.2): Leaders: Clinton. Regulars: 5. Tories: 2.
- New York Replacement Garrison: Regulars: 7 (set these units aside until the Reinforcements Event is conducted).
- Newport: Regulars: 4. Tories: 2.
- Available Box: Supply Depot/Train: 3. All remaining units.
4.3 Patriot Set Up
- Ticonderoga: Leaders: St Clair. Continentals: 3. Militia: 7. Supply Train: 1.
- Albany: Leaders: Schuyler. Continentals: 3.
- Fort Stanwix: Continentals: 3. Supply Train: 1.
- Schenectady: Leaders: Herkimer. Militia: 3.
- Morristown: Leaders: Washington, Stephens, Greene, Arnold. Continentals: 7. Militia: 4. Artillery: 4. Supply Train: 2.
- Peeskill: Leaders: Sterling. Continentals: 2. Militia: 3.
- Fort Montgomery: Leaders: Putnam. Continentals: 3. Militia: 3. Artillery: 2.
- Pompton: Leaders: Sullivan. Continentals: 3.
- Philadelphia: Continentals: 2. Militia: 3. Supply Train: 1.
- Boston: Leader: Heath. Militia: 6.
- Manchester: Militia: 2.
- Worchester: Militia: 2.
- Northampton: Militia: 2.
- Springfield: Militia: 2.
- Reading: Militia: 4.
- Available Boxes: Supply Depot/Train: 2. All remaining units.
- Patriot Control Markers: New London, New Haven, Head of Elk & Wilmington.
- Patriot Random Events: Kosciuszko, Smith & Militia: 5.
4.4 Markers
- Place the game turn marker on the June I Turn.
- Place the British and Patriot casualties markers on 0.
- Place the activation marker on Turn 1 with British side up near the Turn Track.
- Place the expert leader markers in the Expert Leaders Holding Boxes (see map).
- Place the "British have not controlled Philadelphia" marker in the box near Philadelphia.
- Place the "Sea Travel Destination" markers in the Sea Travel Destination Holding Box.
- Set the British "Jane McCrea" random event marker aside as it is not needed to conduct the McCrea event.
- Use Patriot and British random event markers by placing them on the appropriate Random Events Table to indicate the latest of the four events across the 2-5 or 2-6 result rows to occur.
5.0 Sequence of Play
Each game turn consists of the following sequence of play:
I. Beginning of the Turn Phase
a) Rally: The British player rolls to determine whether a primary leader will rally Tories and/or Indians. Place the rallied SPs on the map with their respective primary leaders according to the rally procedures (6.0). The Patriot player then rolls to determine whether a primary leader will rally militia. Place the rallied SPs on the map with their respective primary leaders.
Important: Clinton does not roll while in New York Garrison.
b) Sea Travel: The British player advances units on the Sea Travel Track one space (17.0). If units start this phase in the Turn 2 at Sea Box, expose their destination marker and place them in that space. They are available for use this turn. Resolve a battle immediately in that space if necessary (17.1).
c) Sortie Check: Any army under siege (regardless of the presence of a leader) may sortie from the fort and immediately resolve a battle (13.3) as the attacker. The British then the Patriots choose and execute any sorties. If the attacker loses the battle and has SPs remaining, the attacking army may retreat into the fort (14.8).
II. Initiative Phase
On Turn 1, the British automatically have the initiative (conduct step B only). On Turns 2 and later, follow this procedure:
a) Each player rolls 2D6 and adds the result to the number of casualties indicated for his opponent. The player with the higher modified total has the initiative (reroll ties).
b) The player with the initiative selects one primary leader (from either side) to act first and puts the remainder of the activation markers (from both sides) into a cup. Add the supply check marker and the random event marker for each side into the cup.
c) Reset the casualties markers to 0.
d) Place any leaders on the current game turn (13.4) of the Turn Track with a primary leader, British first.
III. Action Phase
The Action Phase consists of a series of action rounds driven by the markers, which the players draw from the cup. During each round, the player whose primary leader activation marker has been drawn activates that primary leader. A primary leader that has been activated may take the following actions:
a) March with an army; or,
b) Execute operations (including activating subordinate leaders); or,
c) March subordinate leaders and their armies.
The complete list of possible operations is provided in 7.3.
Important: Subordinate leaders may march with an army but may not execute operations.
Supply Check Marker is Drawn: The appropriate side executes a supply check and rolls for attrition if necessary (15.5).
Random Event Marker is Drawn: The appropriate side rolls on their Random Events Table (18.0) executing the event immediately as appropriate. Leave the random events marker near the Turn Track as a reminder that a random event was rolled.
Completion of Phase: The players continue to execute action rounds until the cup has been emptied. At this point, the Action Phase ends.
IV. End of Turn Phase
a) Check for victory (3.0).
b) Advance Turn: If it is not the last turn, move the game turn marker one space ahead and proceed to next turn.
6.0 Rally
6.1 Rallying Tories, Militia, & Indians
The players should refer to the Turn Track for an indication of whether to rally this turn.
- The British player will rally Tories and Indians first. For each primary leader not under siege, the British player must roll 1D6 for Tories and 1D6 for Indians.
- The Patriot player will then rally Militia. For each primary leader not under siege the Patriot player must roll 1D6 for Militia.
- For both players, if the roll is equal to or less than the relevant Tory, Militia or Indian rally number for the department the leader currently occupies, place the number rolled in SPs with that primary leader. If the roll is greater than the rally number, then no SPs are rallied.
6.2 Restrictions
The following restrictions apply to rallying Militia, Tories and Indians:
- Units may only be rallied with a primary leader not under siege.
- If a side has insufficient units in the Units Available Box, and it is not possible to add exactly the necessary number of SPs by flipping counters (making change) in the space alone, that side forfeits the additional rallied units for that primary leader for that turn.
- Rallied SPs never accumulate from turn to turn.
7.0 Action Phase
7.1 Process
Draw a marker from the cup.
Important: The player with the initiative selects (prior to putting all the markers in the cup) a primary leader activation marker (from either side) to play the first Initiative Phase (5.0). The player who owns the primary leader selected activates that primary leader in the first Action Phase of the turn.
- If a primary leader activation marker is drawn (or was initially designated by the player with initiative), the marker is placed in the corresponding side's Leader Holding Box on its designated space, and the owning player executes an Action Phase. That player activates that primary leader. Once all movement, battle and operations have been completed, another activation marker is drawn.
- If the supply check marker is drawn, it is placed in the corresponding side's Leader Holding Box and the designated side executes a supply check (15.0) concluding with any necessary roll for attrition (15.5).
- If a random event marker is drawn, it is placed in the corresponding side's Leader Holding Box and the designated side executes a random event roll immediately, resolving the event (18.0).
7.2 Next Marker
After the active player completes supply checks, random event or completes a primary leader activation, the next marker is drawn. This continues until the cup is empty.
7.3 Primary Leader Activation
When a primary leader marker is drawn, that primary leader is activated. That primary leader may perform operations by expending leadership points, up to a total of its own leadership rating. So long as there are leadership points remaining, multiple operations are allowed until all leadership points are expended.
7.3.1 Storm Fort
Perform a storm operation in the fort space containing the activated primary leader.
Cost: The activated primary leader's entire leadership rating.
7.3.2 Embark with Howe
Howe may embark for sea movement (17.0) with any subordinate leaders and units, with SPs up to each leader's rank limit (9.1).
Cost: Howe's entire leadership rating.
7.3.3 Activate Subordinate
An active primary leader may activate a subordinate leader within its leadership range.
Cost: Subordinate's activation number (2.2.1).
7.3.4 Forced March
Allow the active primary leader to march one additional space at the end of the march as if starting a new march. It may be across any connector including another water or rough connector.
Cost: 5 leadership points for an attempt: The activated leader must roll 2D6. If the result is less than or equal to his leadership rating he succeeds. If the activated primary leader is unsuccessful, the 5 leadership points are lost.
7.3.5 Rally Support
The activated primary leader rolls on the Rally Table for the appropriate department as if rallying (6.0).
Cost: 5 Leadership Points.
7.3.6 Indian Raid
An active British primary leader may conduct an Indian raid. To execute an Indian raid, designate any Indian SP within the active leader's leadership range. If there is a countryside space with any enemy SP within 2 spaces of the Indian SP, roll 1D6.
- If the result is 1, the Patriot player eliminates any one Patriot SP.
- If the result is an odd number, eliminate the Indian SP.
Important: A "1" result removes both the target and the Indian SP.
- If the result is an even number, there is no effect.
- There is no limit to how many times a given Indian SP may be used in this fashion during an activation.
- Track losses for each side as SPs are eliminated on the Casualties Track.
Cost: 3 Leadership Points.
7.3.7 Place Supply
An active leader may place a supply depot (15.1.2) or supply train (15.1.3) within supply restrictions and within the leadership range of an active leader expending leadership points. It may be placed from the Available Supply Box or picked up from anywhere on the map.
Cost: 4 Leadership Points.
7.3.8 Battle Planning
Add 1D6 to the active leader's battle roll. There is no limit to how many times this operation may be used in an activation. This occurs immediately before the battle is executed and is no longer applied after that primary leader's activation round.
Cost: 3 Leadership Points.
7.3.9 Coordination
An active primary leader may increase an activated subordinate's leadership rating by one before rolling against that leadership rating to reinforce a battle during that primary leader's activation round. There is no limit to how many times this operation may be used in an activation.
Cost: 2 Leadership Points.
7.3.10 Supply Raid
An active leader may choose any non-artillery SP within his leadership range. If there is a countryside space with one or more enemy supply units within two spaces of the SP, roll 1D6.
- A result of 1 or 2 removes one supply unit (trains before depots).
- A 3-6 result has no effect.
- If there is at least one enemy SP in the target space, a result of 3 removes the raiding SP (ambushed en-route).
- A given SP may only make one supply raid per leader activation. Track any SP losses on the Casualties This Turn Track.
Cost: 3 Leadership Points.
7.4 Limitations
A active primary leader may not spend more than its leadership rating. Any unused leadership points expire and may not be carried forward. Leadership points for operations may be used at any time during that primary leader's activation.
- Any subordinate leader that has been activated must execute all its march and resolve any battle before another subordinate leader may be activated (this does not preclude another leader from interception, avoid, reinforce or retreat nor does it preclude the active primary leader from moving or performing other operations).
- An activated primary leader has no such restrictions and may stop, activate another subordinate leader for march and battle and then resume march or operations as many times as his leadership points and the march rules allow.
- Only activated leaders may march.
- Only activated primary leaders may expend leadership points to activate subordinate leaders or perform operations.
- An SP or subordinate leader may only be marched once per turn.
8.0 Stacking
8.1 Armies
A group of friendly units (of any type) in the same space at the same time is called an army.
- You may have any number of units and or leaders in the same army in a space.
Important: There are limits to the composition of an army to be led by a leader that intends to march, intercept, avoid or reinforce (9.0, 10.0, 11.0, 12.0).
- Inactive leaders in the same space may trade units back and forth at no cost.
8.2 Activating an Army
In preparation for march, intercept, avoid or reinforce, an activated leader may act with unit SPs stacked in the space up to his rank limit (9.1), along with any other leaders (but no additional SPs) and supply trains.
8.3 Duration of an Army
Active primary and subordinate leaders and their army composition need only be defined for the duration of march, intercept, avoid or reinforce. Otherwise numerous leaders and units can coexist in a space. (This is in accordance with 8.1, which generally allows for unlimited stacking of units and leaders so long as they are not marching together.)
8.4 Fort Capacity
Each fort has a minimum and maximum capacity for SPs (14.2). No more than the maximum capacity of SPs may be inside a fort at any one time, while an unlimited number may be outside. Only one side may be inside a fort.
8.5 Stacking with the Enemy
The player may march your armies into spaces containing enemy units, but that may result in battle (Exception: 11.0).
8.6 Examining Stacks
Armies may be examined at any time during play by either player. Exception: Armies on the Sea Travel Track (17.0) may not be examined.
9.0 March
March is linked directly to activated leaders. Only units in an army led by an activated leader may march.
- An army will march along connections between spaces and the type of connection will determine how many spaces that army may march.
- March stops for an active leader once it can march no further or enters a space with an enemy unit (or is intercepted by an enemy unit (10.0)) and loses the resulting battle (13.0).
- Intercept, avoid, reinforce, and retreat have nothing to do with march limits.
9.1 Leaders & March
An activated leader may only march, intercept, avoid or reinforce with SPs up to the number allowed by rank as follows:
- 3 Star Leader: 11 SPs including up to 3 artillery SPs
- 2 Star Leader: 8 SPs including up to 2 artillery SPs
- 1 Star Leader: 5 SPs including up to 1 artillery SPs
Units cannot march without an activated leader.
- A leader, at no additional cost, may carry leaders, the Kosciuszko engineer unit, supply trains and river ships.
- Other leaders that accompany the activated leader may not bring additional SPs with them.
- Leaders and units are not required to march.
9.2 March Paths
Armies march from space to space via connections. Marching from space to space is not possible if no connection exists.
- Each activated army may march up to 2 spaces and must stop after it marches across its first water or rough connection.
- To march across a rough connection the army must start in a space adjacent to the rough connection.
- Armies always begin and end their marches in spaces; they may not hold position on a connection between spaces.
9.3 Expending Leadership Points
Once a leader has been activated, the owning player may march the leader's army. A primary leader may expend leadership points to perform operations and activate subordinate leaders within that leader's leadership range. For each activated leader and army, a player wishes to march, the player performs the following:
-
Designate the units within a single space with the activated leader that will constitute the army about to be marched. If there's more than one unit in a space, you may march them together (up to the activated leader's rank limit (9.1)) as one army or divide them up into a smaller army. SPs and leaders may be picked up and dropped off during a march. Once units are dropped off, they cannot march again this turn and activation. An army may only march if it is with an activated leader and the total SPs are equal to or less than that leader's rank limit (9.1).
-
A primary leader may interrupt a march at any point including when expending leadership points for operations (7.3). It may also pause its march while an activated subordinate leader conducts his march.
Important: Once an army enters an enemy occupied space, the players must conduct a battle (13.0). Other leaders may not be activated until the battle has been resolved.
- Keep track of the expenditure of leadership points by utilizing the leader activation marker.
Example of Play Routine: On Turn 1, St. Leger is chosen to go first. He takes 5 Regular SP (the maximum he can carry) and moves to Fort Stanwix, where 3 Patriot Continentals and a supply train await. The Patriots have no army in Fort Dayton, the only adjacent space, so cannot intercept. They cannot avoid away from the space, as they have no leader, but can and declare an avoid into the fort. The British declare reinforce by Johnson with 2 Hessians and 3 Tories and the supply train and Brant with 5 Indians. The avoid is automatic and occurs now. The British roll for Johnson as a reinforcement, getting a 7. Two is added for reinforcing across water, one subtracted for the British having the initiative, and one for reinforcing into a space with a friendly army (this last will always be true), for a total of 7, so he fails as his leadership rating is 6. Brant is similarly rolled for, and gets a 7, but since his leadership value is 7, he makes it. St. Leger now decides to spend some leadership points. He could spend all to storm the fort but chooses to spend 4 to activate Johnson and brings him to Fort Stanwix. If the Patriot army had chosen to battle, losing all its units, then St. Leger could have activated Brant at a cost of 3 and sent him forward two spaces.
9.4 Completion of March
The primary leader associated with the initiative marker may interrupt march. A subordinate leader's march must be completed once activated.
9.5 Per Turn Limits
No leader may march or activate more than once per Action Phase. Exception: Random events may cause a leader to activate more than once in an Action Phase.
9.6 Requirements
An army requires an activated leader to march. A moving army is not required to march two spaces before ending its march; it may march one space or none. No unit or army is ever required to march.
9.7 Drop-off Pick-up
An army may drop off or pick up SPs as the army marches; however, once a unit has been dropped off, it may not march again that turn.
9.8 Non-Activated Leaders
If the army has capacity, it may pick up SPs (subject to the rank limits) or leaders (they require no capacity) along the way but their marches are limited to the march with the activated leader.
9.9 Enemy units
You may march an army into a space containing an enemy army, but the moving army must stop in the occupied space and initiate battle (13.0).
9.10 Moving into an Enemy Occupied Space
An army entering a space occupied by enemy SPs (whether under siege or not) must stop and initiate the battle procedure (13.0).
- Leaders moving alone may not enter an enemy occupied space unless another friendly army is already present.
- If a leader is in a space occupied by enemy units and there are no friendly SPs in that space, the leader must roll on the Leader Escape Table (13.4).
- Enemy leaders alone in a space do not hinder the march of friendly armies (after the enemy leader rolls for leader escape, the friendly army may continue to move).
9.11 Intercepting Armies
Armies may not intercept or be intercepted if they have no SPs (10.1).
10.0 Intercept
Non-active leaders and armies may attempt to intercept enemy armies moving or debarking into spaces adjacent to them. Designate all leaders and their associated armies including at least one SP that will attempt to intercept. Resolve the resulting battle according to the Battle Sequence (13.1).
10.1 Qualifications
A friendly non-active leader with an army including at least one SP may attempt to intercept an enemy army of one or more SPs or at least one supply train, if it marches (or debarks) into an adjacent space.
- Your leader and army may attempt to intercept each time an enemy army marches into an adjacent space.
- A leader with an army in a space may make only one interception attempt for any one enemy army regardless of how many adjacent spaces it enters.
- Multiple leaders with separate armies may attempt to intercept from the same space.
- All interception attempts into an eligible space must be declared before any are resolved.
- There is no limit to the number of eligible leaders with armies that may intercept.
- An intercepting army need not include all units in a space.
- The intercepting army cannot exceed in size, the rank limit of the leader of that army.
10.2 Restrictions
- The intercepting army must be commanded by a leader.
- Armies conducting a siege may intercept but must leave enough SPs to exceed the number of SPs that they have under siege in the space.
- Armies that are under siege may not intercept.
- Interceptions can only be attempted against an enemy march.
- You cannot intercept an attempt to: Intercept; Avoid Battle; Reinforce; Retreat.
10.3 Procedure
To intercept, roll 2D6. If the modified die roll is less than or equal to the intercepting leader's leadership rating, the interception attempt is successful. Apply the following die roll modifiers:
- -1: Intercepting into a space containing a friendly army.
- +2: Intercepting across a water or rough connection.
- -1: If the intercepting player has the initiative.
All modifiers are cumulative and calculated before any rolls are made. Regardless of modifiers, an unmodified roll of 2 or 3 is an automatic success, and a roll of 11 or 12 is an automatic failure.
10.4 Result
If your interception succeeds, you must march the intercepting leader and associated army into the space. By moving into that space, you will force your opponent to stop his march and conduct battle (13.0).
- In battles caused by a successful interception, the intercepting player gets one additional die for each successful interception attempt to simulate the effects of surprise.
- If there were already friendly units to the intercepting army in the interception space, then the intercepting army simply joins in the normally resulting battle.
- If there were already friendly units to the intercepted army in the interception space, then those units join in the battle resulting from the interception.
10.5 Sequence
The sequence of actions is as follows:
- Declare and resolve all interceptions.
- Declare all avoid attempts.
- Declare all reinforce attempts.
- Resolve all reinforce attempts.
- Resolve all avoid attempts.
11.0 Avoid Battle
If an enemy army enters a space containing one of your armies (that did not intercept), the non-activating player may attempt to avoid and thus not have to fight the normally resulting battle. Designate all leader and their associated armies including at least one SP that will make the attempt. Resolve according to the Battle Sequence outlined in 13.1.
Important: Armies that intercept may not avoid.
11.1 Qualifications
A friendly leader with an army including at least 1 SP may attempt to avoid if an enemy army marches (or debarks) into its space.
- A leader and army may attempt to avoid each time an enemy army marches (or debarks) into its space.
- Multiple leaders with armies may attempt to avoid from the same space.
- All avoid attempts must be declared (along with any reinforce attempts) before any are resolved.
- There is no limit to the number of eligible leaders with armies that may avoid.
- An avoiding army need not include all units in a space and it may not exceed the rank limit (9.1) of the leader for that army.
- An army with or without a leader may automatically avoid into a fort.
11.2 Restrictions
- The avoiding army must be commanded by a leader. Exception: An army without a leader may automatically avoid into a fort.
- Armies under siege may not avoid.
- Avoid may only be attempted against an enemy march. You cannot avoid after an attempt to intercept or reinforce.
- Cannot enter a space containing an enemy unit unless a friendly unit is besieging the fort in the space.
- Cannot enter the space from which the enemy army is advancing, or any enemy armies are attempting to reinforce from.
- An army that enters the battle space with an interception is prohibited from attempting to avoid.
Important: Even if all enemy attempts at reinforce fail, if you declared an avoid, you must roll and resolve it.
11.3 Procedure
To avoid, roll 2D6. If the modified die roll is less than or equal to the avoiding leader's leadership rating of the ranking leader in the army, that army avoids.
Important: Avoid is automatic (no die roll required) if leaving a city space or avoiding into a fort.
The following modifiers apply:
- -1: Avoiding into a space containing a friendly army.
- +2: Avoiding across a water or rough connection.
- -1: If the avoiding player has the initiative.
- -1: If Washington is in the space with the avoiding army (Patriots only).
All modifiers are cumulative and are calculated before any rolls are made. An unmodified roll of 2 or 3 results in automatic success, and an unmodified die roll of 11 or 12 results in automatic failure.
11.4 Result
If the avoid attempt is successful, you must march the avoiding leader and associated army out of the battle space and into any one adjacent space that is not occupied by an enemy or into the original space that the enemy marching or intercepting/reinforcing armies came from.
11.5 Sequence
All interceptions are resolved before any avoid or reinforce attempts are declared and resolved. You must predesignate all avoid and reinforce attempts before any are resolved.
12.0 Reinforce Battle
If a friendly army enters a space containing an enemy army or an enemy army intercepts a friendly army, the activating player may attempt to reinforce the battle. Designate all leaders and their associated armies including at least one SP adjacent to that space that will make the attempt. Resolve according to the Battle Sequence outlined in 13.1.
12.1 Qualifications
A friendly leader with an army including at least 1 SP may attempt to reinforce if a friendly army marches (or debarks) into an adjacent space or is intercepted in an adjacent space occupied by an enemy army.
- A leader and army may attempt to reinforce a battle each time a friendly army marches (or debarks) into an adjacent space.
- Multiple leaders with armies may attempt to reinforce a battle from the same space.
- All reinforce attempts must be declared (along with any avoid attempts) before any are resolved. There is no limit to the number of eligible leaders with armies that may attempt to reinforce.
12.2 Restrictions
- The reinforcing army must be commanded by a leader.
- Armies that are under siege may not reinforce.
- Reinforce may only be attempted with a friendly march or against an enemy intercept.
- You may not reinforce, after an attempt to avoid.
- A reinforcing army that enters a space in which a battle takes place is prohibited from attempting to avoid.
Important: Even if an enemy army uses avoid and succeeds in removing all his units from the battle (and thus there will be no battle), if you declared a reinforce, you must roll and resolve it.
12.3 Procedure
To reinforce, roll 2D6. If the die roll is less than or equal to the leadership rating of the ranking leader in the army, that army successfully reinforces. Units without a leader may not attempt to reinforce. The following modifiers apply:
- +2: Reinforcing across a water or rough connection.
- -1: If the reinforcing player has initiative.
- -1: Into a space with a friendly army.
All modifiers are cumulative. An unmodified roll of 2 or 3 results in automatic success, and an unmodified die roll of 11 or 12 results in automatic failure.
12.4 Result
A successful reinforce attempt requires you to march the designated army into the battle space. If the die roll was greater than the leader's leadership rating, then the army remains in the original space and is not involved in the battle.
Exception: You may automatically reinforce from a friendly fort if it is currently under siege into the same space.
12.5 Sequence
All interceptions are resolved before any avoid or reinforce attempts are declared and resolved. You must predesignate all avoid and reinforce attempts before any are resolved.
13.0 Battle
13.1 When Battle Occurs
Battle is initiated when the active player marches an army into a space and after all intercept (10.0), avoid (11.0) and reinforce (12.0) attempts are executed leaving enemy SPs in the space.
- Both sides must be in the space and one side cannot be entirely in a fort (14.0).
- Battle is always mandatory.
- The active player is the attacker, while the other player is the defender.
- Battle only takes place in spaces, not on the connectors between them.
Battle Sequence
- Activated army marches into a space.
- Declare and resolve interceptions.
- Declare all avoid attempts.
- Declare all reinforce attempts.
- Resolve all avoid and reinforce attempts.
Note: These are resolved in any order desired, but after being declared all must be resolved, no matter the outcome of each.
- Both sides simultaneously execute battle die rolls.
- Both sides distribute casualties.
- The losing army must retreat, or it is eliminated.
- Continue the march if the attacker won and has any march capacity left.
13.2 Force Limitations
A maximum of 15 SPs from each side can participate in a battle. This does not limit the number of dice, only the number of SPs. Each player determines which units participate and all other rules for participation apply.
13.3 Resolving Battles
Battles are resolved by rolling dice. Regardless of the number of dice determined below, a minimum of one die will always be rolled. Each player rolls the number of dice equal to the sum of:
- +1: For every 2 Militia SPs.
- +1: For every 2 Tory SPs.
- +1: For every 2 Indian SPs.
- +1: For every Continental SP.
- +1: For every Hessian SP.
- +1: For every Regular SP.
- +2: For every attacking Artillery SP (up to the number of nonartillery SP).
- +3: For every defending Artillery SP (up to the number of nonartillery SP).
- +2: For every river ship SP (up to number of non-artillery SP).
- +1: Per failed enemy avoid attempts.
- +: The attack/defense rating of the senior ranking leader in the space (owner selects if tie).
In addition to the above, add the number of dice according to the specific conditions for the owning player:
- +1: For each additional leader in the space.
- +1: If at least 1 British Regular is present (limit 1).
- +1: If a British Regular and British leader is present (limit 1).
- +1: If at least 1 Hessian is present (limit 1).
- +1: If a Hessian and Hessian leader is present (limit 1).
Important: If the attacker entered the space from the sea, the number of dice are reduced by 50%, round down. (13.3.1).
13.3.1 Out of Supply
If any portion of an army in a space for battle is marked as being out of supply, keep them segregated from units and leaders that are not out of supply.
- Out of supply SPs count as one-half an SP. Total out of supply SP separately and divide the total by two, round down.
- Aside from the senior ranking leader, other leaders that are out of supply do not add to dice totals in any way.
13.3.2 Effect of Dice Rolls
Losses are simultaneous. Each "6" die roll eliminates an enemy SP.
Note: See alternative die roll resolution option in 21.5.
13.3.3 Loss Distribution
Each side applies losses to their own army. Each SP lost must be taken by reducing that number of SPs from units in the space. If a force consists of more than one type, no single type can take an additional loss until each type has taken an equal number of losses. Leaders cannot be used to fulfill losses. See 13.8 for surrender.
13.3.4 Tracking Losses
As SPs are eliminated, track losses for each side on the Casualties Track. This will impact the initiative roll in the next Initiative Phase (5.0).
13.4 Leader Escape Table
If one or more leaders occupy a space (including inside a fort) with enemy SPs and no friendly SPs, they must check to see if they escape. Roll 2D6 for each leader on the Leader Escape Table with the following result:
- 12; Leader Dead/Captured: The leader dies or is captured. Flip the affected leader to his replacement side permanently (even if the replacement dies). Place the replacement leader one turn ahead on the Turn Track. That leader can then be placed on the map with any friendly primary leader in the Initiative Phase.
- 11; Leader Escapes to a Friendly Fort: If there is a friendly fort space or a friendly occupied fort within two spaces, then the leader is placed there. The owning player chooses if more than one space qualifies. Otherwise treat this roll, as a 12.
- 10; Leader Escapes to a Friendly Controlled Space: If there is a friendly controlled space within two spaces, then the leader is placed there. The owning player chooses if more than one space qualifies. Otherwise treat the roll, as a 12.
- 2-9; Leader Returns as a Reinforcement: Place the leader one turn ahead on the Turn Track to return to a space occupied by a primary leader in the Initiative Phase of that turn.
Important: If using optional rule 21.2 and Washington is dead/captured, the British win the game.
Note: The Schuyler leader counter is turned over to the Gates side if dead or captured. Treat the Gates side as a replacement leader.
13.5 Winning a Battle
The side with the fewest SP losses is the winner of the battle, unless all of one side's units are eliminated, in which case the surviving side wins the battle. If both players lose the same number of SPs or are both eliminated, the defender wins the battle. The loser must retreat (13.6) unless only leaders remain, in which case use the Leader Escape Table (13.4).
13.6 Retreats
The winner remains in the battle space. The loser retreats to an adjacent space.
- The losing army must retreat to any space from which the losing army entered the battle space or an empty space that brings them closer to a friendly supply depot or magazine.
Note: Multiple armies may have entered the battle space from different spaces.
- A defending army or any portion of an army may retreat into a fort.
- Under certain conditions, a British army in a port space may retreat to sea (17.1).
13.6.1 No Retreat
Armies unable to retreat to the space a losing army came from, to an empty space that brings them closer to a friendly supply depot, or to a fort are eliminated. An army cannot retreat:
- To a space from which an enemy army entered the battle.
- To a space containing an enemy army.
13.7 Battle Effects
Retreats incur no additional lasting effects beyond the confines of the current battle.
13.8 Surrender
If one side loses 4 or more SPs, loses the battle and any SPs are out of supply, those SPs surrender. First allocate losses normally. Then, all SPs that are marked as being out of supply are eliminated and counted as casualties.
13.9 Continuation of March
If a marching army wins a battle, it may continue marching within the march restrictions with which it started the Action Phase. Thus, an army may fight two successive battles during one activation round, three if its leader successfully used forced march. Otherwise, its march is over.
14.0 Forts
If the combat units from only one side occupy a fort space, that side controls the fort space.
- If a fort is under siege, then neither side controls the fort space.
- The only way to take control of a fort occupied by the enemy is to storm the fort and win, or if it loses all SPs due to attrition while under siege.
- Forts do not affect battles, but do affect control, march, interception, avoiding, supply, retreat and reinforce.
14.1 Impact of Forts
If a space containing a fort is unoccupied or occupied by only one side, the fort is considered unoccupied.
- When an enemy army enters a friendly controlled space (by march, interception or reinforce) containing a fort, the originally occupying player must decide immediately whether some, all or none of the leaders and units present in the space will enter the fort.
- The defending units may automatically avoid into the fort (11.0).
- If any defending pieces in a space survive battle, they may retreat into the fort.
- To be deemed inside the fort, the number of SPs must be equal to or exceed the fort minimum capacity of 1 but not exceed the fort maximum capacity of 3 for a small fort or 5 for a large fort.
- Those deemed to be inside the fort, preclude enemy units from moving through or out of a fort space into any space that is not closer to the closest supply depot friendly to those enemy units.
- Those remaining outside will be required to fight a battle normally unless they are eligible to avoid (11.0).
Important: A fort is under siege if the only friendly SPs in a space occupy the fort and enemy SPs also occupy the space.
14.2 Pieces in Forts
Once a fort is under siege, units of the player under siege may not enter the space except to battle with the sieging army or to sortie during the beginning of the Turn Phase (5.0). Units besieged in a fort may not move to an adjacent space without first coming out of the fort and defeating the sieging army. If a fort is under siege and SPs in the fort drop to 0 the siege is over, and the besieging side controls the space.
14.3 Retreat into a Fort
A defending army defeated in battle may retreat into a fort (at or above minimum capacity and at or below maximum capacity).
- This is an exception to the normal retreat rules requiring the losing side to enter an adjacent space.
- Some units/leaders may retreat into the fort (depending on its minimum capacity and maximum capacity) and others into an adjacent space.
- If the units under siege attack their besieger and lose, they must retreat into the fort.
14.4 Storm
Storm is resolved during the activation of a primary leader and is the only way to actively eliminate units in a fort.
Note: Attrition (15.5) can cause losses within a fort, potentially emptying it of SPs thus giving control of the fort to the besieging side.
- Any leader inside a fort under siege without SPs rolls immediately for leader loss on the Leader Escape Table (13.4).
- An active primary leader may trigger a storm through the expenditure of leadership points (7.3.1). The storm, that occurs immediately, is resolved in a manner like any other battle.
14.5 Storm Resolution
An army being stormed calculates the number of dice rolled as follows:
- +1: For every non-artillery SP.
- +3: For every artillery SP.
- +: The defense rating of the senior ranking leader in the space.
- +1: For each additional leader in the space.
- +1: If a British Regular is present (limit 1).
- +1: If a British Regular and British leader is present (limit 1).
- +1: If a Hessian is present (limit 1).
- +1: If a Hessian and Hessian leader is present (limit 1).
- x2: An army being stormed doubles the total number of dice.
- 1/2: If the besieged army is out of supply reduced the total dice by 50% (13.3.1).
The above total is the number of dice the army under siege rolls as if it were in battle. Roll a minimum of one die. The army under siege totals the number of "6" results.
The army storming a fort calculates the number of dice rolled as follows (the effects are cumulative):
- +1: For every non-artillery, or non-Indian SP.
- +2: For every artillery SP up to the number of non-artillery or non-Indian SPs.
- +: The attack rating of the senior ranking leader in the space.
- +1: If there are any additional leaders in the space.
- +1: If a British Regular is present (limit 1).
- +1: If a British Regular and British leader is present (limit 1).
- +1: If a Hessian is present (limit 1).
- +1: If a Hessian and Hessian leader is present (limit one).
- +2: For every river ship SP.
- 1/2: A storming army halves his total dice.
- 1/2: If the storming army is out of supply the total dice are halved (13.3.1).
Note: A side could receive dice for the number of SPs and if they meet the nationality or leader requirement.
The above total is the number of dice the storming army rolls as if it were in battle. Roll a minimum of 1 die. The storming army totals the number of "6" results.
14.5.1 Impacts of Out of Supply
If any portion of either army in a space for storm is marked as being out of supply, keep the out of supply units separate from units and leaders that are not out of supply. Out of supply SPs are halved when calculating the number of dice once totaled, dropping fractions. Aside from the senior ranking leader, other leaders that are out of supply do not add to dice totals in any way.
14.5.2 Effect of Dice Rolls
Losses are simultaneous. Each "6" die roll eliminates an enemy SP.
14.5.3 Results of Storming the Fort
If all SPs under siege are eliminated and at least one attacking SP survives, the storming was successful.
- Remaining defending leaders roll on the Leader Escape Table (13.4).
- Storm results have no effect on the fort or subsequent storming operations.
- The storming army does not retreat.
- If all the SP of the storming side are eliminated, then storming leaders must roll on the Leader Escape Table (13.4).
- If all SP are eliminated on either side, that side moves supply trains and depots to the appropriate Available Supply Box.
- All other results leave both armies in place, though possibly reduced, at the end of this leader activation.
14.6 Tracking Losses
Track SP losses for each side on the Casualties Track.
14.7 Forts Effects on March
All forms of march, retreat, interception, reinforce and avoid from an enemy occupied fort space must be back to a space from which the army entered in the first place or is closer to a friendly supply depot.
14.8 Sortie Check
During the sortie check at the beginning of the Turn Phase (5.0), any army under siege (regardless of the presence of a leader) may exit the fort and immediately resolve a battle as the attacker (British then Patriot choose and resolve any sorties). If the attacker loses the battle and has SPs remaining, they may retreat into the fort.
15.0 Supply
Whenever a side's supply check marker is drawn, that side must determine the supply status of all SPs and leaders.
- Mark armies that are out of supply with a no supply marker.
- Armies that are out of supply, battle and storm at reduced effect, have their ability to march reduced to one space from two and cannot force march (7.3.4).
- Supply may either be traced to a chain of supply depots ending at a printed magazine or traced to a supply train (place the train in the appropriate Supply Available Box).
- Lastly, if any SPs are in a space and out of supply, they must roll for attrition.
Important: Supply status only changes if a supply check marker is drawn. The supply status of all units will remain as determined, until another supply check marker is drawn.
15.1 Sources of Supply
Pieces are in supply if:
- They are within two spaces (free of enemy armies) of a magazine.
- They are within two spaces of a supply depot that in turn is in supply (this may be a chain of supply depots 1 or 2 spaces apart) tracing back to a magazine; or,
- They are within one space of a supply train or depot and the supply train/depot is returned to the Supply Available Box (in this case the supply depot does not need to be in supply); or,
- Patriots, only if they occupy a fort (not under siege) that is within four spaces (free of enemy armies) of a magazine or supply depot that is in turn in supply.
15.1.1 Magazines
Certain spaces have magazines printed on the map in red (British) or blue (Patriot). If that side controls or was the last to occupy that space, then that magazine is a potential source of supply for that side. Use control markers to track which side was the last to occupy these spaces. Some spaces (those with both symbols) can be magazines for either side depending on control. A magazine may supply any number of supply depots in a chain and thus any number of leaders or SPs. It provides supply in its own fort (if besieged) or space (if outside) indefinitely if under friendly control.
15.1.2 Placed Supply Depots
Each side has a limited number of supply depot/supply train markers available. They may be placed on the map by an active leader expending leadership points (7.3.7) or placed as captured enemy supply trains/depots. These markers may be picked up during a friendly action and be placed elsewhere if needed as part of a leader supply action. This is at no cost in leadership points or activation.
- The depot must be built within 2 spaces of a friendly supply depot or magazine that is in supply and within the leadership range of the active primary leader.
- Active leaders may expend 4 leadership points to place a supply depot (7.3.7).
- Once placed these supply depots may not march but may be removed or relocated as part of a leader placing a supply depot (7.3.7).
- If an enemy unit controls a space with one of these supply depots, remove that depot back to the owning player's Supply Available Box. The capturing player may then replace it with one of their own supply depots or supply trains.
15.1.3 Placed Supply Trains
- A primary leader may spend 4 leadership points to place a supply train (7.3.7).
- The supply train must be built within 2 spaces of a friendly supply depot or magazine that is in supply and within the leadership range of the active primary leader.
- Once placed these supply trains may march in the same way as a unit.
- Supply trains do not contain SPs, nor may they be removed to satisfy combat losses.
- They may march with a leader or because of a retreat.
- They may be removed at any time during the friendly player's turn.
- If an enemy unit controls a space with one of these supply trains, remove that supply train back to the owning player. The capturing player may replace it with one of their own supply trains.
15.2 Impact of Forts on Supply
a) When an army shares a space with an enemy army and moves into a fort to be under siege, that side may place any friendly supply trains in the space in the fort plus one additional supply train if it is a magazine space for that side.
b) An army in a fort under siege cannot trace supply from outside the space. Supply trains and depots can supply units in a fort under siege but must be returned to their respective Supply Available Box when used to provide supply to units under siege. A supply train, depot or magazine in a fort under siege cannot supply armies outside of the fort.
15.3 Automatic Supply
The following pieces are always in supply:
- River Ships
- Indian SP
- Indian Leaders
- Militia SPs
- Militia Leaders
- Units at Sea
- Supply Trains
Exception: Militia and Indian SPs under siege do not qualify for automatic supply and undergo attrition like all other SPs in the fort if out of supply.
15.4 Out of Supply
Armies that are out of supply:
- Can only march one space and may not force march.
- Must cut the number of dice in battle or storm by half (13.3.1 & 14.5.1).
- Must roll for attrition (15.5).
- Leaders that are out of supply cannot spend leadership points on forced march nor may they create supply depots or trains.
- SPs that are out of supply may be forced to surrender (13.8).
- Out of supply subordinate leaders do not add any dice to a battle (13.3.1).
15.5 Attrition
After supply has been determined for all armies, any space with SPs from that side that are out of supply must roll for attrition.
- For each space roll 1D6 and apply the below results in each space with out of supply SPs. The owning player may choose the units that are eliminated. They do not count as casualties.
- 1-2: No effect.
- 3-4: Lose 1 SP.
- 5-6: Lose 2 SPs.
- Attrition can cause losses within a fort under siege, potentially emptying the fort of SPs thus giving control of the fort to the besieging side. Any leader inside a fort under siege without SPs rolls immediately for escape (13.4) and any supply trains/depots are captured (15.1.2 & 15.1.3).
16.0 Leaders
Leaders are a necessary component to armies that allow many functions in the game like march, intercept, avoid, and reinforce.
- Primary leaders are activated during the Action Phase when their activation markers have been drawn.
- Leaders may expend leadership points to perform operations.
- Subordinate leaders have a bracketed activation cost, may march, intercept, avoid, reinforce and do battle but may not conduct operations.
- Primary leaders are activated by activation marker draws and can activate leaders and expend leadership points to conduct certain operations.
16.1 Leader Values
Leaders possess the following values: Leadership, Range, Activation Cost, Attack, Defense, Rank. These values are defined at (2.2.1).
16.2 Leaders in Battle
Leaders may not be chosen to suffer elimination in battle.
16.3 Leader Survival
If one or more leaders occupy a space (including inside a fort) with enemy SPs and no friendly SPs, each must check to see if they survive (13.4).
16.4 Militia Leader
Militia leader Smith may only act as a leader if all units in the activating army are militia (19.8).
16.5 Indian Leader
Indian leader Joseph Brant may only act as a leader if all units in the activating army are indians.
16.6 Hessian Leaders
Hessian leaders (von Riedesel and von Knyphausen) are treated just like any other British leader. They may lead units of any type.
17.0 Sea Movement
At the cost of the entire activation, Howe may embark on ships from a port space with any subordinate leaders stacked with Howe. Each of these leaders may embark up to the number of SPs it can lead according to each leader's rank.
- All leaders and units must start the activation in the same port space.
- All embarked leaders and units are placed in the Embark with Howe Box on the Sea Travel Track on the map.
- A destination marker with the targeted landing space is placed face down under the army of units and leaders. The remaining destination markers are placed face down in the Sea Travel Destination Holding Box. These destination markers may only be viewed by the British player.
17.1 Sea Movement Execution
Leaders and units may embark if there were no units on the Sea Travel Track at the beginning of the activation.
- Any number of leaders may be embarked with Howe from one space but never more units than may be carried by those leaders.
Important: Howe must accompany any units and/or leaders using Sea Movement.
- This army is advanced one space during the sea travel portion of the Beginning of Turn Phase.
- If it is in the last space at the start of this phase, all leaders and units are placed in the destination space.
- This is not an activation but is treated like movement and thus enemy units may attempt to intercept and avoid.
- Afterward, friendly units may reinforce. A Battle (13.0) follows.
- If the British army does not win, then all units return to the originating spaces and those debarking return to the first box of the Sea Travel Box selecting a destination and placing its destination marker underneath.
- If the British win the battle they take the space but remain eligible for activation normally.
- Indians cannot be involved in sea movement.
- When Howe lands, place one supply depot in the space as if building a supply depot. This depot is always considered in supply (by sea) and returns to the Supply Box if captured by the Patriots.
17.2 Entering a Space Occupied by the Enemy
An army entering a space occupied by the enemy halve the available dice for battle. Continue with an immediate battle process as in 13.0 with the British attacking.
18.0 Random Events
Whenever a side's random event marker is drawn, that side must roll 2D6 and refer to the appropriate Random Events Tables on the map. Unless otherwise stated, the side owning the random event marker makes all choices. Losses are selected using the battle loss procedure (13.3.3). Losses due to random events are not included on the Casualties Track unless stated otherwise.
Important: Unless a random event's instructions state differently, random events can occur more than once per game.
Errata: The British event, Brandt is Finished, incorrectly states to remove his activation marker. Ignore that instruction. He does not have an activation marker.
19.0 Special Rules
19.1 Ticonderoga Garrison
At the start of the game Powell, his activation marker and 5 Regular SPs are designated the Ticonderoga Garrison, they must stay in the Ft Ticonderoga Garrison Recalled Box until the British control Fort Ticonderoga.
- The units in the Ticonderoga Garrison Box will contribute to a battle in Montreal.
- If Fort Ticonderoga is controlled by the British, add the Powell activation marker to the cup.
- Each time the Powell activation marker is selected, Henry Watson Powell and 5 Regular SPs (the Ticonderoga Garrison) must march as an army as close to Fort Ticonderoga as possible. Once they arrive remove the Powell activation marker and set it aside. It will not be used again this game.
- If the random event Carleton Won't Garrison Ticonderoga is pulled, pick up and place the Ticonderoga Garrison (Powell and 5 British regular SP) in the Ft Ti Garrison Recalled Box. Place the Fort Ti Garrison Recalled marker on the units.
19.2 New York Garrison
Units in the New York Garrison Box will contribute to any battle in the New York space. At the start of the game Clinton, 5 Regular SPs and 2 Tory SPs are designated the New York Garrison. They must stay in the New York Garrison Box until the British reinforcements random event occurs.
- When the British Reinforcements Random Event occurs, place 7 Regulars (see set up) in the New York Garrison Box for the remainder of the game. Clinton, 5 Regular and 2 Tory SPs stacked with him are released from the New York Garrison restrictions, are moved to the New York space.
- The Clinton activation marker is immediately added to the cup for the remainder of the game.
19.3 Montreal Garrison
Units in the Montreal Garrison Box will contribute to any battle in Montreal. At the start of the game 5 Regular SPs and Carleton are designated the Montreal Garrison and must stay in the Montreal Garrison Box for the remainder of the game (they cannot be activated). This is in addition to Powell and the Ticonderoga Garrison when present (19.1).
19.4 Mount Defiance at Fort Ticonderoga
Fort Ticonderoga was exposed to artillery fire from nearby Mount Defiance. Artillery storming Fort Ticonderoga provide 4 dice per SP rather than 2 dice per SP.
19.5 Kosciuszko Engineer Unit
Kosciuszko is treated just like any other Patriot unit with the following exceptions:
- It may only be marched with an activated leader and at no cost in SPs. In battles and storming, it adds 2 artillery SPs to the total.
- It may not retreat or avoid into a fort.
- It may not be removed to fulfill losses and if found in a space with enemy SPs and no friendly SPs, it is permanently removed from play.
19.6 British River Ship Unit
The river ship unit is treated just like any other British SP with the following exceptions:
- It may only be marched along water connections by an activated leader and at no cost in SPs.
- In battles and storming, it is treated as 2 artillery SPs.
- There is no change for the 2 SPs. It may be removed to fulfill losses for one SP total and is treated as an artillery unit for purposes of allocating casualties.
19.7 Staten Island/NY Connection
Due to British naval control of the sea around New York City, the Patriots cannot march between Staten Island and New York City in either direction. There is no limit to a British march between the spaces.
19.8 Smith & Militia Random Arrival
When the Patriot player rolls a 7 and it is the July I turn or later then Smith and 5 Militia SPs are placed in Castleton.
- If an enemy unit or units are in the space, they immediately execute a battle.
- The militia must always stay with Smith.
- It is possible for Militia to be added to this army up to the rank limit.
- Smith may not be activated by a primary leader. He may only be activated through this random event. He may intercept, avoid, reinforce and retreat normally.
20.0 Short Scenarios
Players may choose to play a scenario instead of the full campaign game to allow them to practice the concepts and rules included. If so, select a scenario and set up the map utilizing only units, leaders and markers placed on the map in areas outlined by the specific scenario instructions. The remainder of the map is not used and is not available for entry by any piece. Random events that impact the area of play are executed, otherwise they are ignored and have no impact unless specified per the scenario.
20.1 Burgoyne's Challenge
- Situation: Burgoyne goes it alone as Howe diverts to Philadelphia.
- Area of Play: The Northern Department plus Hudson.
- Victory Conditions: The British win if they occupy Albany at the end of the game.
- Leaders and Units: Only those leaders and units in the area of play are used in this scenario unless they enter by random event.
- Game Length: The scenario begins on the June I turn and is complete at the end of the September II turn.
- Random Events: The only active event is: Arnold assigned to defend Albany: Arnold is placed in Albany.
- Special Rules: No sea movement is allowed.
20.2 Howe's Prize
- Situation: Howe marches to take Philadelphia.
- Area of Play: The Middle Department plus the Fort Montgomery and Peekskill spaces.
- Victory Conditions: The British win if they hold Philadelphia and New York at the end of the game.
- Leaders and Units: Only those leaders and units in the area of play are used in this scenario unless they enter by random event. Treat the British Reinforcement Event as a No Event.
- Random Events: If an event has no impact on the area of play, no event occurs for that side that turn. Arnold assigned to defend Albany: Arnold is removed from the map permanently.
- Other Special Rules: None.
21.0 Optional Rules
21.1 Expert Leaders
Leaders may gain additional attributes if they make a qualifying achievement roll less than their leadership rating and the relevant expert marker is available.
- There is only one of each type of marker and it may only be carried by one leader at a time.
- If a leader carries a marker and achieves that condition again including making its leadership die roll, flip the marker to improve it once. No further improvements are allowed.
- A leader keeps that marker unless the leader dies or is captured in which case the marker is permanently removed from the game.
- A leader is only allowed one expert marker at a time.
- A leader holding a marker may earn another that has yet to be claimed but must return the one it holds.
- Markers may be awarded for the following:
- Battle Winner: +1/+2 dice if in a battle
- Storm Attacker: +1/+2 dice when storming.
- Storm Defender: +1/+2 dice when being stormed.
- Successful Intercept: +1/+2 to the leader's leadership rating when conducting an intercept attempt.
- Successful Reinforce: +1/+2 to the leader's leadership rating when conducting a reinforce attempt.
- Successful Avoid: +1/+2 to the leader's leadership rating when conducting an avoid attempt.
Dice are added after all other calculations are calculated.
21.2 Washington is Dead/Captured British Instant Victory
Play stops and the British win the game if George Washington is dead/captured or does not evade to a friendly army or fort (13.4). Players may choose to include this rule to make it harder for a skilled Patriot player. It may blunt the power of George Washington by increasing the risk of loss.
21.3 Alternate New England Victory
The British player must accomplish two of the following three victory conditions by the End of Turn Phase of the October II turn:
a) Control Philadelphia in the End of Turn Phase of any turn.
b) Control all the following in the End of Turn Phase of October II: New York City, Ft. Montgomery, Albany, Ft. Ticonderoga.
c) Control all four New England ports (Boston, Newport, New London and New Haven) in the End of Turn Phase of October II.
21.4 Sea Movement Early Warning
When Howe's army reaches the two-space on the Sea Travel Track, the British player must tell the Patriot player if the fleet is moving north or south.
21.5 Optional Die Roll Resolution
Players that would like to limit dice rolls to 2 dice may use this alternate system to resolve loss calculation.
- Calculate the total dice to be rolled normally as per 13.3.
- Then, use that number of dice to find the relevant column in the Optional Loss Calculation Table (see below) and roll 2 dice.
- These will cross reference at the number of losses.
Important: If only 1 or 2 dice are calculated per 13.3, roll them and count the sixes! Those are the losses. Then apply these losses as in 13.3.3.
If the number of dice is higher than the columns on the table, you will need to make multiple rolls. First select the highest column possible then select lesser columns so that the top number in the range for each column adds up to the number of dice or less. Then roll once on each column selected.
Optional Loss Calculation Table
Columns are the number of dice; rows are the 2D6 result. Cells give the number of losses.
| 2D6 | 3-7 | 8-12 | 13-17 | 18-22 | 23-27 | 28-32 | 33-37 | 38-42 | 43-47 | 48-52 | 53-57 | 58-61 |
|---|---|---|---|---|---|---|---|---|---|---|---|---|
| 2 | 0 | 0 | 1 | 0 | 2 | 1 | 1 | 2 | 2 | 3 | 4 | 5 |
| 3 | 0 | 0 | 0 | 1 | 1 |