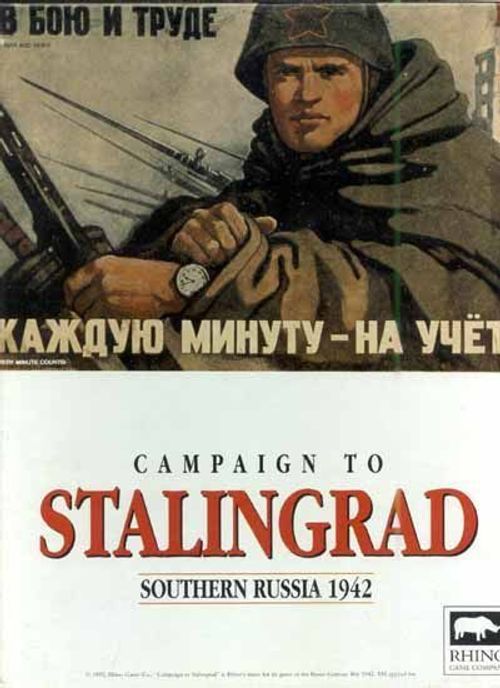
Campaign to Stalingrad: Southern Russia 1942
Campaign to Stalingrad: Southern Russia 1942 Rulebook
Table of Contents
Table of Contents
- SECTION I: Basic Game
- 1.0 Introduction
- 2.0 The Playing Pieces
- 3.0 Sequence of Play
- 4.0 Movement
- 5.0 Stacking
- 6.0 Zones of Control
- 7.0 Control of Hexes
- 8.0 Friendly Map Edge
- 9.0 Isolation and Line of Communication
- 10.0 Combat
- 11.0 Combat Modifiers
- 12.0 Retreats and Advances
- 13.0 Disruptions
- 14.0 Overruns
- 15.0 Railroads
- 16.0 Supply
- 17.0 Off Map Movement
- 18.0 Cadre Box and Cadre Elimination
- 19.0 Reinforcements
- 20.0 Withdrawals and Returns
- 21.0 Replacements
- 22.0 Organization Cards
- 23.0 The Air Game
- SECTION II: Operation Uranus
- 24.0 Major City Battles
- 25.0 Weather
- 26.0 Rivers in Winter
- 27.0 Isolated Pockets
- 28.0 Artillery Divisions
- 29.0 Combat Engineers
- 30.0 German Infantry Regiments
- SECTION III: The Campaign Game
- 31.0 The Rasputitsa
- 32.0 Soviet Guard Conversions
- 33.0 Off Map Boxes
- 34.0 The Caucasus Campaign
- SECTION IV: Scenarios
- 35.0 Fall Blau
- 36.0 Operation Uranus
- 37.0 Campaign Game
- SECTION V: Optional Rules
- 38.0 Abstracted Air Power
- 39.0 Rivers
- 40.0 Heavy Artillery Barrages
- 41.0 Army HQ Limitations
- 42.0 Fog of War
- 43.0 Off Map Supply
- 44.0 Soviet Armor
- 45.0 Command Control
- Designer's Notes
- Player Notes
- Errata
- Expanded Sequence of Play
SECTION I: Basic Game
1.0 Introduction
Campaign To Stalingrad is a game that simulates the situation in southern Russia during the second half of 1942. One Player controls the Axis Forces, the other the Soviet Forces. Each player attempts to take and hold vital territorial objectives and to destroy the opposing enemy forces.
Scale
Each turn of Campaign to Stalingrad represents 3 days. Each hex equals 16 kilometers. Most units are divisions, but there are also Soviet Tank, Cavalry, and Mechanized Corps, along with independent brigades, regiments and battalions.
Parts Inventory
A complete game of Campaign To Stalingrad contains:
- One full-size map and 1 half-size map
- Four sets of units and markers (total of 800 pieces)
- Two At Start/Scenario Displays (1 Axis and 1 Soviet)
- Two Turn Record Tracks
- One Caucasus Campaign Display
- One Combat Result Table
- One Terrain Effects Chart
- One Isolated Pocket Display
- One Major City Battle Display
- One Axis Organization Display
- One Soviet Organization Display
- One Replacement Table Card
- One Rules booklet
- Three dice
2.0 The Playing Pieces
The playing pieces (units) represent the military formations that took part in the historical campaign.
Sample Combat Unit
How To Read the Units
Color
The color indicates the nationality for the Axis, and for the Soviet side it differentiates regular army, Guard, NKVD, and Naval units.
Combat Factor
A numeric rating of the unit's attack and defense strength. When the unit possesses different values for attack and defense, the values are printed separately as Attack Factor and Defense Factor.
Movement Allowance
The number of Movement Points a unit may use when moving.
Steps
The number of step losses a unit can receive before it is eliminated. A unit that receives a step loss is flipped over to its reduced side. If a unit has more than two steps, an additional replacement counter is provided and will be used when a flipped counter takes an additional loss.
I.D.
Indicates the unit's historical identification.
Unit Size
Unit size is important for stacking purposes and identification.
-
II = battalion
-
III = regiment
-
X = brigade
-
XX = division
-
XXX = corps
-
XXXX = army
-
XXXXX = front or Army Group
2.4 Summary of Unit Types
(The unit-type chart is a graphic in the source document and is not reproduced here.)
Combat Units
- = These types are collectively called Infantry Type units. This definition is used in the Replacement rules.
** = ARMOR TYPE It is customary to call Axis armor units "Panzer," and Soviet armor units "tank." Collectively these will be called 'Armor" type units.
= = German motorized divisions were in a transitional period at this time. Not yet a Panzergrenadier division, but certainly more than just a motorized division. I have given them the mechanized symbol to distinguish them from the motorized units.
Markers/Non-Combat Units (chart graphic not reproduced)
Headquarters
Army HQ are used to provide Supply.
Army Group and Front HQ serve as an entry location for replacements and units returning from the Cadre Box. They are not a source of General Supply.
Air HQ are used to provide support for air operations.
3.0 Sequence of Play
Campaign To Stalingrad is played in Game Turns. A Game Turn is composed of an Administrative Phase and two Player turns, each of which is in turn subdivided into several "Phases."
Game Turn Sequence
Each Game Turn must be carried out in this specific order:
- I. ADMIN PHASE
- II. AXIS PLAYER TURN
- A. Movement Phase
-
- Air Segment
-
- B. Combat Phase
- C. Supply Phase
- A. Movement Phase
- III. SOVIET PLAYER TURN
- A. Movement Phase
-
- Air Segment
-
- B. Combat Phase
- C. Supply Phase
- A. Movement Phase
After the Soviet Supply Phase the Game Turn is completed. Move the Game Turn Marker to the next box in the Turn Record Track and start another Turn.
Please refer to the expanded sequence of play on the back page of the rule booklet for a handy reference to the sequence of play.
4.0 Movement
General
Players may only move their own pieces and only during the Movement Phase of their Player Turn. Each Movement Phase some, none, or all your units may move.
Procedure
Units must move from hex to adjoining hex. Each hex costs a certain number of Movement Points (MP's) to enter as determined on the Terrain Effects Chart TEC). Each unit has a Movement Allowance (MA) that is the maximum number of MPs it may expend for movement during a single Movement Phase. Every unit is guaranteed movement of at least one hex per turn, even if it has insufficient MPs to do so, as long as this movement does not violate the rules of zones of control (see 6.0) or cross a prohibited hexside.
A unit may not transfer unused MPs to other units or save MPs from one Player Turn to another - any unused MPs are forfeited.
Once a unit has completed its movement, it may not be moved again. A unit's movement is considered completed when the player begins to move another unit. However, a move may be redone if the opposing player consents.
A unit may freely pass over or stop in the same hex as a friendly unit. A unit may not enter a hex occupied by an enemy unit.
Motorized/Non-Motorized
The TEC often lists different MP costs for Non-Motorized and Motorized units. Motorized units are all non-Cavalry units with a MA of 5 or more. Every other Combat unit is considered Non-Motorized (including Cavalry).
Exception The flip side of an Army HQ (with a MA of 1) is still considered Motorized.
Terrain Effects On Units
A complete list of all terrain features and their effects on movement is contained on the TEC. The following cases require additional explanation.
Roads
A unit that follows the path of a road may use that reduced movement rate and may ignore the cost of the other terrain. The road rate may not be used when moving into a road hex from a non-road hex, or when moving into a road hex from another road hex which is not connected to it by a road.
Activated and unactivated HQ may use the road rate.
Cities
[Change] NKVD units may not leave a city hex once they enter one.
Note Kharkov is a three hex city. Only one of the hexes is considered a Major City hex.
Bridges
A bridge is considered to exist wherever a road crosses a river hexside. Units may ignore the extra MP cost to cross a river if using a bridge.
Note In most cases along the Major Rivers roads do not cross the rivers and therefore bridges do not exist.
Ferry Crossings
[Change] Any major river hexside where a road begins and ends but does not cross, is considered a ferry crossing site. The movement cost to cross these hexsides for all units is reduced to +1 MP instead of the normal +2/ +4. However, this reduced cost does not go into effect until the turn after the player controls both hexes on each side of the crossing.
Note One side could quickly turn a ferry crossing into a temporary bridge and this was often done.
Volga River
It cost all units their entire Movement Allowance to cross a Volga River hexside. They must start adjacent to the Volga and end movement after crossing the river.
Marsh
It costs non-motorized units 2 MP and motorized units 4 MP to enter a Marsh hex. There is also a MP penalty to leave a Marsh hex +2 for non-motorized units and +4 for motorized. This additional MP cost applies even when moving from one Marsh hex to another.
Note Major and Minor Rivers within a Marsh hex or along a Marsh hexside are ignored, their Movement cost is already figured into the Marsh MP rate.
Lakes
Treat lakes the same as you would a Volga River hexside.
Comment The lakes in this area were often shallow in the summer.
Exception see rule 31.0 (The Rasputitsa).
Strategic Movement
All non-HQ units may increase their Movement Allowance by (round fractions up) 1 1/2 times if they do not begin, or at any time enter a hex adjacent to an enemy unit during the entire length of their movement.
Exception Army, Front and Army Group HQ may not use Strategic Movement.
Exception HQ, Activated or unactivated, may not use Strategic Movement.
Motorized units may combine the road rate with Strategic Movement to move a maximum of 18 hexes.
Example An infantry unit with a printed Movement Allowance of three would have a Movement Allowance of five when using Strategic Movement.
Combat Zone
Entry into a hex adjacent to an enemy unit costs a moving unit an additional 1 MP above and beyond the normal cost to enter the hex. The +1 MP applies whether the enemy unit has a Zone Of Control or not (see 6.1)
Overruns During Movement
[Change] A special type of Overrun is allowed during the Movement Phase, but only if odds of 10-1 or greater can be achieved against the defending units in the hex. To conduct the overrun, move enough units adjacent to the hex to insure 10-1 odds. At that point, the enemy units in the hex may be ignored for the remainder of the Movement Phase (treat the hex as if it were vacant. The friendly units that made the 10-1 possible may move no further that Movement Phase, but other friendly units may enter or pass through the hex (enemy ZOC Bonds permitting) by simply paying the appropriate terrain cost.
In the combat phase, resolve the attack on the 7-1 odds column. Perform all retreats and advances after combat normally. If a friendly unit is stacked in the hex it has no effect on the retreat of the overrun unit(s).
To determine the odds for this special Movement Phase Overrun, the phasing player is allowed to use Armor Superiority (rule 11.2), Isolation in Combat (rule 11.3), Air, Artillery, and Maximum Effort to bring the odds up to 10-1 odds.
5.0 Stacking
Each side may have up to three divisions in a hex. Count Soviet Corps as Divisions. Count brigades, battalions and regiments as only 1/2 of a division. Headquarters, Replacements, Supply Depots, and all game markers have no stacking value and may freely stack in a hex without limit.
NOTE Reduced divisions and Remnants are still counted as a division for stacking purposes.
Stacking Restrictions
The stacking limit can never be voluntarily exceeded except during the course of movement. The stacking limit must be strictly observed at the completion of movement, after a Retreat, and during an Advance After Combat or Overrun. All stacking violations at these times must be corrected by the owning player by eliminating enough units from the hex to satisfy the three division limit.
Note, the rule is intended to prevent intentional violations; accidental oversights should be resolved in a friendly manner without the need to eliminate units.
Hungarian and Rumanian Units
Hungarian and Rumanian units may not stack together nor move through a hex occupied by the other nationality. See rule 6.8 and 11.4 for further restrictions.
Comment Due to prewar border disputes, these two nationalities would as soon have fought each other as the Soviet Army.
6.0 Zones of Control
Comment To help understand the following rules, imagine a Zone Of Control only wending out about half way into the surrounding six hexes. Singularly, these "half ZOCs have absolutely no effect. However, a ZOC that extends half way into a hex will "link" with a ZOC coming out half way from the opposite side. In this case, this link (called a ZOC Bond in this game) forms a full Zone Of Control with all the properties which experienced players have become accustomed.
Which Units Have ZOCs
Most Combat Units have a ZOC. The following units do not have a ZOC Remnants, brigades, battalions, regiments, and all divisions and Soviet Corps on their last step. Also all HQ and noncombat units (Replacements and Depots) have no ZOC. Combat units without a ZOC are indicated with a band across their counter for convenience.
Effects Of ZOCs
A ZOC by itself has absolutely no effect on movement (curtailment of movement is sufficiently covered already in rule 4.6 "Combat Zone"). A ZOC has no effect on the tracing of supply and communication lines, nor on retreats and combat. Their only effect is to provide the basis for creating a ZOC Bond (see below).
Other Points
Friendly ZOCs do not affect friendly units.
Enemy ZOCs are never negated by terrain. ZOCs do extend across Major and Volga River hexsides.
If at least three Combat Units without ZOCs stack together, the stack is considered to have a ZOC.
ZOC BONDs
When two friendly units that possess a ZOC are two hexes apart (with one intervening hex), they create a bond between them that no enemy unit may enter or cross. Due to the pattern of a hex grid, there can be two types of ZOC Bond a "Hex Bond" and a "Hexside Bond." The two types are illustrated below.
Effects of ZOC Bonds
ZOC bonds have the following effects
-
Enemy units may not enter a Hex Bond or cross over a Hexside Bond.
-
A Line Of Supply and a Line Of Communication (explained later) cannot be traced across a ZOC Hexside Bond or into a ZOC Hex Bond.
-
Units forced to retreat across an enemy ZOC Hexside Bond or into an enemy Hex Bond will suffer additional step losses (see rule 12.2 for complete details).
Canceling ZOC Bonds
A Hex Bond is cancelled when the intervening hex contains an enemy unit. A Hexside Bond is cancelled when enemy units are located on each side of the intervening hexside.
River Loops
A ZOC Bond is also negated if the intervening hex lies across a Major or Volga River hexside and all units involved in creating that Hex Bond are located on the opposite shore. In other words, you may enter loops of the river when the enemy is on the other side.
Joint ZOC Bonds
There are two situations where both players will have intersecting ZOC Bonds (see illustration on page 5). In those cases, neither player may cross the others ZOC Bond until it is negated under the rules of 6.5 above.
Intersecting ZOC Bonds
[Change] A unit may move into or cross an intersecting ZOC Bond if that intersecting bond was there at the start of the Movement Phase. Movement into such a hex cost the moving unit its entire Movement Allowance.
6.8 Hungarians and Rumanians Hungarians may not form ZOC Bonds with Rumanians and vice versa.
ZOC Bonds With the Map Edge
A unit with a ZOC can form a ZOC Bond hexside with a Friendly Map Edge (see rule 8.0). Assume there is a friendly unit just off the map edge.
7.0 Control of Hexes
A player has "control" of a hex if he is the sole occupant of the hex or was the last to pass through that hex. A friendly unit's ZOC is not by itself sufficient to take Control of a hex. This definition is used when determining control of railroads and those hexes necessary for Victory.
8.0 Friendly Map Edge
The Friendly Map Edge for the Axis Player is the Western edge and the hexes on the north edge of the map from 1046 to 1052. For the Soviet Player it is the Eastern, and Southern edge, plus all hexes on the North edge from 1045 eastward. This definition is important for Reinforcements, Off Map Movement and for tracing Lines Of Supply and Lines Of Communication.
Axis Garrison
If the Axis Player clears a portion of the north map edge of Soviet units, he must still garrison the map edge to prevent the Soviet Player from entering units through his Friendly Map Edge hexes. Since a player is not allowed to fight his way on to the map, one Axis unit with a ZOC in every other hex is sufficient to block Soviet units from entering.
8.2 Axis North Edge Control
[Change] The Axis Player's friendly north map edge hexes are extended eastward if an Axis unit is located on the north map edge at least ten hexes east of hex 1045. The Axis friendly map edge is moved eastward ten hexes short of the Axis unit furthest east on the north map edge that is in General Supply and can trace a LOC back to the west map edge. Indicate the new position of the friendly map edge with a control marker. Perform the adjustment during the Soviet Supply Phase.
Comment The 2nd Panzer Army located north of the map edge was in no condition to advance. However, a deep Axis penetration north of Voronezh would have pulled the Soviet line in front of 2nd Panzer Army back to avoid a dangerous salient.
Example An Axis unit ends its move in hex 1027. If the unit is still there at the end of the Soviet turn, then the Axis friendly map edge is extended to hex 1037. This would mean the Axis Player need only garrison hexes 1028 through 1036 to prevent Soviet units from entering behind his lines. It would also mean any Soviet units left west of 1037 will be eliminated if forced to retreat off the map edge.
9.0 Isolation and Line of Communication
Units unable to trace a Line Of Communication are considered Isolated.
Line Of Communication
A Line of Communication (LOC) is a path of hexes from one point to another that does not enter an enemy hex, cross over an impassable hexside, nor enter or cross over an enemy ZOC Bond.
Isolation
A unit that cannot trace a LOC to a friendly Map Edge is considered Isolated. For this purpose the LOC may be of any length, but it may not enter any enemy controlled rail hex.
Effects of Isolation
- Soviet non-Guard and non-NKVD units and Axis Minor Allies (see rule 11.3) have their defense strength halved if they are Isolated at the moment they are attacked.
[Change] Exception Isolated Soviet units (non-Guard and non-NKVD) and Axis Minor Allies are not halved in defense strength if they are in a Major City hex or can trace a Line of Supply to a friendly non-Disrupted Army HQ.
- Units that are Isolated at the moment they are eliminated suffer Cadre Elimination (see rule 18.2).
10.0 Combat
During the Combat Phase, the player whose Player Turn is in progress may initiate combat against adjacent enemy units.
Conditions/Restrictions
-
A unit is never required to attack, but always has the option of doing so.
-
Not all of the friendly units in a hex are required to attack. Some may attack while others in the same hex do nothing. Units which do not participate in the attack do not suffer any adverse effects from the attack.
-
Not all of the friendly units in a hex are required to attack the same defending hex. Units in the same hex may attack adjacent defenders in different hexes.
-
No enemy unit may be attacked more than once per turn and no friendly unit may attack more than once per turn Exception Overruns, see rule 14.0.
-
All defending units in a hex must be attacked as one combined defense strength.
-
If a unit or stack is adjacent to more than one defending hex, it may attack those hexes in one single Combat.
-
Attacking units may attack the same defending unit from as many different hexes as possible, provided all of the attackers are adjacent to the defender's hex.
-
No combat is allowed at worse than 1-4 odds. Attacks at odds greater than 7-1 are resolved on the 7-1 column.
-
Army HQ may use their one Attack Factor in an attack.
-
[Change] Soviet Tank Attacks No more than two Soviet “regular army" tank units may attack out of each hex, and no more than one may be a tank corps. In other words, the best the Soviet Player can achieve (with his non-Guard units) is a tank corps and a tank brigade attacking from a single hex. This restriction does not apply to Soviet Guards tank units; the two tank unit limit may be exceeded if all the tank units in the hex, except two, are Guards.
There is no restriction or penalty for Soviet tank units stacking or defending together. There is also no restriction on the number of regular tank units that may attack a single hex, as long as only two (one corps and one brigade) are attacking from each hex.
Note Historically the Soviets had a terrible time getting their numerous tank corps to work together. Without some kind of rule reflecting this, the Axis Player may be in for a shock when he has to confront seven tank corps on his northern flank by turn two.
Procedure
STEP ONE For each attack, compare the combined attack strength of the participating attacking units to the total defense strength of all defending units and express the comparison as a numerical odds ratio (attacker to defender). Round off this odds ratio downwards to conform to the simplified odds ratio categories found on the Combat Result Table (CRT). Example 53 vs. 18 strength points would be 2-1.
STEP TWO Next, take into account any column shifts (see Combat Modifiers, rule 11.0) due the defending or attacking units. Column Shifts are applied after the odds column is determined. Therefore a combat with odds of 8-1 and one shift to the left would use the 6-1 column.
Example A column shift favoring the attacker would bring a 1-1 to a 1 1/2-1.
STEP THREE The attacking player rolls the required number of dice (see Magnitude) and reads the results on the appropriate row under the odds. Roll the white die or dice for step losses, and roll the black die for Advance After Combat.
Example The combat is a 5-1. The attacker rolls a 4 with the white die and a 3 with the black die. The result is a A1/D2 with the attacker advancing 2 hexes.
STEP FOUR The results are implemented. Players immediately remove any step losses, and perform Retreats or Advances After Combat, if any. (see rule 12.0).
Magnitude
The Combat Result Table is essentially designed for battles where one side or the other has up to 1 1/2 divisions participating. When both sides have two or more divisions involved in the combat then two dice are rolled to determine step losses.
Count Soviet Corps as divisions; count all one step units (including Remnants, divisions and corps on their last step) as 1/2 of a division.
Example One division and a brigade attacks two divisions. The Magnitude would require one white die (remember, both sides need to have two divisions for two dice).
Example Nine divisions attack 3 divisions. The Magnitude would require two white dice.
Combat Results
The Combat Result Table (CRT) results express step losses.
Example A1/D2 means the Attacker loses one step and the Defender loses two steps.
When performing combat with two dice, simply add together the number of step losses from both results.
Also expressed on the CRT is Advance After Combat. In each battle (regardless of the Magnitude) the attacking player rolls one additional die - use the black die so you can roll simultaneously with the other dice. The result of this die determines whether the combat succeeds in forcing the defender to Retreat and how far the attacking force may Advance After Combat.
Even if the attrition die rolls results in no step losses, the player may still Advance After Combat if his black die roll allows him. The opposite is also true, you can completely eliminate a unit, and still not be able to advance if the black die resulted in no advance.
Example “Advance 3 " indicates that the defender retreats and the attacker may advance up to 3 hexes.
When no Advance is indicated, then the defender is not retreated and no Advance takes place.
Distributing Losses
The owning player, under the following restrictions, always chooses which units will receive the step losses.
-
No unit can take a second step loss in a single combat until all other friendly non-HQ units have taken their first.
-
If a player received a Column Shift due to Armor Superiority or one of his units prevented the opposing player from receiving Armor Superiority, then his first step loss must come from one of the units he used in determining Armor Superiority.
-
The owning player is not required to satisfy step losses with his HQ units until all other friendly units in the stack have been eliminated.
-
EXCESS LOSSES If one side cannot satisfy all its step losses, then the other side may reduce his losses by the excess number of steps remaining.
Example At 7-1 odds that the attacker will not suffer any step losses if the defender has only one step.
Remnants
All Soviet rifle divisions (including Guard and NKVD) possess three steps. Only the first two steps are represented on the counter. When a rifle division is reduced to its last step, the division counter is removed and is replaced with a Remnant unit. Place the rifle division counter in the Remnant Holding Display in the box corresponding to the ID of the Remnant. In this way, if the Remnant receives replacements it can be replaced with the correct rifle division. If the Remnant is eliminated, place it back into the Remnant Display and put the rifle division in the Deadpile.
11.0 Combat Modifiers
Terrain Effects on Combat
Certain terrain features are beneficial to the defender as listed below. All other features have no effect on combat.
CUMULATIVE EFFECTS The defensive benefits of river hexsides (all types) are not cumulative with the terrain in the defender's hex. The defending player uses whichever terrain benefit is most advantageous to his units.
MAJOR & MINOR CITIES All non-armored type units (see rule 2.4) have their Defense Strength Doubled. All Armor type units are not affected. See also Major City Battle Rules in Rule Section II.
MINOR RIVERS If all attacking units are attacking across a Minor River hexside, then the defending player receives a favorable shift of one column to the left on the CRT. If one or more attacking units are not attacking across a river hexside, then the defender does not receive this benefit.
MAJOR RIVERS If all attacking units are attacking across a Major River hexside, or a combination of Major and Minor River hexsides, then the defending units have their Defense Strength doubled.
THE VOLGA RIVER If all attacking units are attacking across a Volga River hexside, or a combination of Volga and other river hexsides, then the defending units have their Defense Strength Tripled.
MARSH All units attacking out of or into a Marsh hex or across a Marsh hexside are halved in Attack Strength.
A) Any major or minor river running through or along the hexside of a Marsh Hex is ignored for all combat purposes
B) The attacking player may not receive the Armor Superiority shift if all his armor units are attacking out of a Marsh hex. However, they may be used to prevent the defender from receiving the shift.
FOREST If the defender has one or more Infantry type units defending in a Forest hex then he receives a favorable shift of one column to the left on the CRT.
HILLS If the defender has one or more units defending in a hill hex then he receives a favorable shift of one column to the left on the CRT.
LAKES Attacking across lakes is prohibited.
Armor Superiority
[Change] Players achieve the Armor Superiority combat table shift by having a favorable ratio of armor steps involved in the combat than the enemy player. The Axis Player receives the shift (whether on the offense or defense) if he has the same number of armor steps (or more) than the Soviet Player. The Soviet Player receives the shift (offense/defense) if he has twice as many armor steps as the Axis Player. Anywhere in between, neither player receives the shift. If one side has armor steps involved in the combat and the other side doesn't, then the side that does receives the shift.
Each Hungarian and Rumanian panzer division, and all Mechanized steps are equal to one half (retain fractions) of a German or Soviet armor step.
Each Luftwaffe Flak division counts as three steps of Armor for defense only. In attack, they count as one armor step only if the defending units include armor units.
The Soviet FLAK division has no antitank value.
The first step loss must come from one of the units that made the shift possible. As an additional proviso, if there are more step losses to be distributed then non-HQ units, then once all non-HQ units have taken a step loss the first unit to receive a second step loss must be from one of the units that made the shift possible.
Some terrain types are not conducive to armor warfare and hence prohibit the attacker from receiving Armor Superiority. When defending units are in Woods, Marsh, Major and Minor Cities or when the attacker is attacking across any type of River or Marsh hexside, those attacking units are ineligible to receive Armor Superiority. However, they may be used to cancel any Armor Superiority shifts the defender would be entitled to.
[Change] The Axis Player receives a second Armor Superiority shift (on the offense or the defense), if all three of the following conditions apply 1) the Soviet force contains no armor steps; 2) the Axis force is composed entirely of German motorized units, at least one of which is an armored unit.
[Change] Soviet Heavy Tank Brigades
Soviet heavy tank brigades count as two steps of armor when determining Armor Superiority.
SUPPLY EFFECTS Units Out of Supply are ineligible to receive Armor Superiority and may not prevent the opposing player from receiving Armor Superiority (see rule 16.4).
Isolation In Combat
All Soviet non-Guard or non-NKVD units and all Axis Minor Allied units are halved in Defense if at the moment of combat they are Isolated.
[Change] Exception Isolated Soviet units (non-Guard and non-NKVD) and Axis Minor Allies are not halved in defense strength if they are in a Major City hex or can trace a Line of Supply to a friendly non-Disrupted Army HQ.
While an Isolated unit is not marked as Isolated until its Supply Phase, it is nonetheless immediately affected by Isolation for defense purposes.
Hungarian/Rumanian Rivalry
If units from these two nationalities participate in the same attack, then all units of those two nationalities in that attack have their Attack Strength halved.
German Tactical Advantage
The Axis Player may reroll any CRT die roll of 1 if he has more German units involved in the combat than Axis Allied units. In addition, the Soviet Player must reroll any CRT die roll of 6 if more German units are involved in the defense than Axis Allied units. Each die roll is applicable for reroll, that is if you used 3 dice to resolve the combat (two white dice and the black die) and all three resulted in a 1, then each may be rerolled. However, each reroll must be kept even if it results in another 1 or 6.
Maximum Effort
In each combat the attacking player has the option of declaring a Maximum Effort. Declaring a Maximum Effort is optional; it is never mandatory. If you do wish to declare it, it must be announced before the dice are rolled. There are two types of Maximum Efforts - One Shift and Two Shifts. The penalty for Maximum Efforts is an increase in the attacker's step losses.
ONE SHIFT. The attacking player receives a favorable shift of one column to the right on the CRT. Step losses against his units are doubled. Treat each zero step loss result as a step loss of one.
TWO SHIFTS The attacking player receives a favorable shift of two columns to the right on the CRT. Step losses against his units are tripled. Treat each zero step loss result as a step loss of two.
Example A player is attacking a hex at 2-1 odds, and the Magnitude requires two dice. He declares a One Shift Maximum Effort. He rolls on the 3-1 column a " - " (or zero) and a 'A1/D1." The zero increases to an A1 and the A1/D1 increases to a A2/D1.
Soviet Attack Penalty
[Change] All Soviet attacks conducted by units drawing no Attack Supply, or Attack Supply from a non-Guard Army HQ are penalized with one column shift to the left on the CRT.
Units drawing Attack Supply from a Guards Army HQ, are not affected by this penalty.
Comment It was found that the Soviet forces in CtS are much more powerful in the attack than they were historically. This rule amends this inaccuracy and reflects the improvement of the Soviet Army towards the end of 1942.
Rain And Snow Storms
[Change] All attacks made during rain and snow receive a penalty of one shift to the left on the CRT.
12.0 Retreats and Advances
Retreats After Combat
If the CRT indicates that the attacker may Advance, then the defending units must Retreat. Attacking units never Retreat after Combat.
LENGTH OF RETREATS It is always two hexes. A retreated unit that cannot end its retreat two hexes away from its original hex is eliminated.
RETREAT GUIDELINES The Retreat direction is always determined by the defender, but must follow, if possible, the guidelines below.
-
Avoid crossing or entering an enemy ZOC Bond.
-
Avoid moving adjacent to an enemy unit.
-
Keep stacks together.
-
Retreat towards the closest General Supply Source (rule 16.1).
-
End the retreat two hexes away from the original vacated hex.
ELIMINATION DUE TO A RETREAT Units may never Retreat into or through enemy units, off a non-friendly map edge or into hexes normally prohibited to them in movement; units that cannot retreat two hexes are eliminated.
Retreat Through Enemy ZOCs
Retreating into an enemy ZOC has no effect unless the retreating units cross over an enemy ZOC Hexside Bond or enter an enemy Hex Bond. A unit or stack that Retreats into or across an enemy ZOC Bond will suffer step losses. The number of step loses are determined by the number of enemy steps in one of the hexes forming the ZOC Bond. Use the side which has the least amount of enemy steps. The retreating stack loses one step for each enemy step in that hex.
Losses caused by retreating across or into enemy ZOC Bonds are chosen by the owning player.
Example The Axis Player must retreat his units across a ZOC Bond formed by two stacks of Soviet units. One stack has nine steps, the other has two steps. Therefore, the Axis Player losses two steps from the retreating units.
Comment Retreating across enemy ZOC Bonds incorporates a heavy penalty and will often result in the elimination of retreating units.
Combat Against Previously Retreated Units
If a unit or stack is Retreated into a friendly occupied hex and that hex then undergoes an attack in the same Combat Phase, the Retreated unit(s) do not add their strength or size (for Magnitude purposes) to the combat, and if required to retreat again they are eliminated.
Advance After Combat
Advance After Combat is allowed to the attacker whenever indicated by the CRT. Eliminating all defending units in a hex does not by itself earn Advance After Combat privileges. Defending units never advance.
LENGTH OF ADVANCE Determined by the Combat Result (i.e. "Advance 2", "Advance 3", etc.).
PROCEDURE The option to Advance After Combat must be exercised immediately, before any other combat resolution. Units are never required to Advance After Combat. Advances are measured in hexes advanced, not by Movement Points. Terrain cost, and the +1 MP for moving adjacent to enemy units are ignored. Units that advance must follow the guidelines below
Advance After Combat Guidelines
Non-motorized units may only advance a maximum of two hexes. Cavalry a maximum of three hexes. Motorized units may advance up to the full amount indicated by the result. Army HQ may Advance After Combat.
No unit may advance into a hex or across a hexside that is normally prohibited to it in normal movement.
The first hex of the Advance must be into the Defender's vacated hex.
A unit may never Advance After Combat across a unbridged Major River, Marsh hexside, or Volga River hexside unless it is the first hex of its advance. A unit that crosses such a hexside when advancing into its first hex may continue advancing.
All units must stop their advance if they enter a Marsh, [change] Forest, or Major City hex.
ZOC BOND No unit may cross over or enter an enemy ZOC Bond during an Advance After Combat except when entering the defender's vacated hex.
Motorized units that are Out Of Supply (rule 16.4) may only advance a maximum of one hex.
[Change] Any unit wishing to advance across a Minor River (after the first hex) must roll on the River Crossing Table. A Minor River crossed entering the first hex has no effect on an advance.
[Change] During Rain Turns all Advance After Combat values are halved (rounded up). Advance of 1 or 2 hexes would be 1 hex; an Advance of 3 or 4 would be 2 hexes; and an Advance of 5 would be 3 hexes.
[Change] NKVD NKVD units may reduce an enemy's advance into a city hex they currently occupy by taking step loses. For each step of NKVD units removed (above and beyond the steps removed for the CRT result), the Advance After Combat is reduced one hex. If the magnitude of the combat required two dice, then every two steps of NKVD units removed, reduces the Advance after combat one hex.
[Change] Advances Across Major Rivers Those units that attacked across a Major River or Volga River hexside, have their Advance After Combat result halved (rounding fractions down).
Example An “Advance 1" would round down to no advance, an advance of five hexes would round down to two hexes.
Determined Defense
The defender may reduce the number of hexes the attacker may Advance After Combat by declaring a Determined Defense after he sees the CRT roll. The penalty for this is increased step losses for the defender. The defender may not declare this unless he has the steps to absorb all his step losses. There are two types of Determined Defenses - One and Two Hexes
ONE HEX The defender may decrease the Advance After Combat by one hex by doubling the number of step losses his defending units absorb.
[Change] Doubling Axis step losses will decrease an Advance by two hexes instead of only one.
A result of " - " (or zero) would increase to 1 step loss. If decreasing the Advance After Combat by one hex still allows the attacker to advance, then the defending units are still retreated two hexes. If the original result was Advance 1 then decreasing by one would result in no Advance and his defending units are not Retreated.
TWO HEX The defender may decrease the Advance After Combat by two hexes by tripling the number of his step losses.
[Change] Tripling Axis step losses will decrease an Advance by 4 hexes. An advance cannot be reduced below zero.
A result of zero would increase to a 2 step loss. If the original result was Advance 2 then his defending units are not Retreated.
[Change] If a mixed stack of German and Axis allied units perform a Determined Defense, then all the extra step losses caused by the Determined Defense must come from German units or else the normal procedure applies.
Note A step from a German division actually represents more men then a step from a Soviet division (about 4,000 compared to about 3,000). Thus a German Determined Defense is handled differently than a Soviet Determined Defense.
A Determined Defense against an advance of three, four or five hexes, has no effect on the infantry's "two hex advance," unless the Determined Defense reduces the advance below two hexes. For example, a two hex Determined Defense against an “Advance 4” would still allow the infantry to advance two hexes.
Example The Magnitude requires two white dice and the attacker rolls results of "–“; “A1/D1" and “Advance 2." The defender declares a 2 Hex Determined Defense (triple casualties) and prevents the attacker from advancing. The attacker loses 1 step and the defender losses 5 steps - the "- " increases to a D2 and the A1/D1 increases to a A1/D3.
13.0 Disruptions
Defending units become Disrupted if they are forced to retreat. Attacking units never suffer Disruption. Place a Disrupted marker on top of disrupted units after. Disrupted units are penalized in the following ways:
Penalties
-
They may not Attack.
-
They lose their ZOC.
-
Disrupted Army HQ may not provide Attack Supply (see 16.6).
ABILITIES Disrupted units may move normally and retain their full Defense Strength. Units may enter or pass through friendly Disrupted units without becoming Disrupted. There is no additional effect of a Disrupted unit again becoming Disrupted.
Disrupted Army HQ may still provide General Supply.
REMOVAL Disruption markers are removed from all friendly units at the end of each friendly Player Turn (during the Supply Phase). Movement, Supply and enemy ZOCs have no effect on the removal of Disruption markers.
14.0 Overruns
Units Advancing After Combat may conduct one attack against units to which they move adjacent. This is called an Overrun.
[Change] Exception Non-motorized units may only perform Overruns if the original "Advance" result is "4" or “5."
Overruns cost attacking units 1 hex of their advance. For example, a unit that can advance three hexes, could advance two hexes and then perform an Overrun. Units that achieve only a 1 hex advance may not Overrun.
Procedure
Advance each unit individually. When an advancing unit wishes to Overrun, stop and resolve the Overrun as a normal combat. Each Overrun may only involve a single attacking unit. An Overrun may not be conducted from a hex containing another friendly unit. That is, you may not stack during an Overrun.
[Change] Exception Up to three German motorized units may combine their Attack Factors for each Overrun. The German motorized units must begin the Advance After Combat stacked together and must Advance as a stack. A stack of German motorized units that have made a successful Overrun may split apart. Some may advance and some may stay back. If the black die result of the Overrun allowed the Advance to continue, then the stack could split apart and go separate ways.
Advance after Overrun If the Overrun succeeds in eliminating or retreating the defending unit(s), the Overrunning unit must advance into the vacated hex and stop. It may not advance any further.
[Change] Exception Units which have performed an Overrun (any nationality) and receive an Advance result of "Advance 4” or “Advance 5" are not required to stop in the vacated hex. The units may continue to advance and complete the full number of hexes allowed to them by their first original combat.
Note that the Advance result from the Overrun does not give the attacker hexes to advance, it only determines whether the Overrun succeeds in retreating the defender and whether the Overrunning units can continue their original advance.
The units may even conduct another Overrun if they have sufficient hexes remaining.
Once the Overrun is completed, play continues where it left off. If the attacking player had not completed all the advances from the original combat, he may do so now.
Overruns Against Previously Attacked Units
Overruns can be conducted against any enemy unit, even if it has already been attacked in the same combat phase. Unlike rule 12.3, units that have been previously retreated are counted in an Overrun.
Retreat before Overrun
If all the units defending against an Overrun are HQ type units and/or Disrupted (they have been previously retreated), and the attacker has greater than 1-1 odds against the hex, then the defending units automatically retreat two hexes before the Overrun. There is no combat resolution. The Overrunning unit must advance into the hex, but may complete the full number of hexes of its original advance. An HQ that retreats before an Overrun becomes Disrupted if not already Disrupted.
NOTE This may result in some stacks retreating two or three times.
Ground Support
[Change] The Axis Player (only) may use Ground Support in an Overrun. The Air Unit does not have to be committed until the Overrun is declared.
15.0 Railroads
Railroads may be used for Rail Movement. Captured Rail Hexes must be repaired before they may be used.
Rail Movement
Each player may move units by rail during their Movement Phase.
PROCEDURE Units moving by rail may move an unlimited number of hexes.
Movement by rail must follow a path of repaired and friendly controlled rail hexes.
SOVIET ARTILLERY The artillery divisions must be on their mobile side to use rail movement.
Conditions and Restrictions
-
A unit wishing to move by Rail Movement, must start the Movement Phase on a railroad hex, or in an Off Map Box, or be a Reinforcement.
-
Movement by rail must follow the path of the railroad.
-
Rail movement into or out of a hex adjacent to an enemy unit is prohibited.
-
Rail Movement and normal ground movement may not be combined in the same Movement Phase.
-
Supply status (see 16.0) has no effect on Rail Movement.
Rail Capacity
For capacity purposes, count brigades, battalions, regiments, HQ, and Replacements as only 1/2 of a division. Count Corps as a full division. Count Cavalry and HQ as motorized.
SOVIET PLAYER The Soviet Player may move up to 4 divisional size units per turn by Rail Movement. No more than two may be motorized.
AXIS PLAYER The Axis Player may move up to 2 divisional size units per turn by Rail Movement. No more than one may be motorized.
Comment Due to a shortage of rail cars, locomotives and repair yards the Axis were never able to use the rail system as well as the Soviets.
Primary & Secondary Rail Lines
The Axis Player may not move more than 1 division per turn over each Secondary Rail Hex using Rail Movement.
The Soviet Player may not move more than 2 divisions per turn over each Secondary Rail Hex.
There is no limit placed on Primary Rail Lines.
Railheads & Connecting Rail Hexes
RAILHEADS On each rail line, the farthest friendly controlled and repaired rail hex from a player's Friendly Map Edge that is part of a continuous line of repaired rail hexes unblocked by enemy units or enemy ZOC bonds leading to the Friendly Map Edge, is called the Railhead.
Players should indicate their Railheads with Railhead Markers.
CONNECTING RAIL HEXES Any rail hex along the rail line from the Friendly Map Edge to a friendly Rail Head is considered a Connecting Rail Hex. This definition is used in the Supply Rules.
You can only block an enemy rail hex, you cannot destroy it.
Railroad Repair
All railhexes that initially start a scenario beyond a player's Railhead and through the course of play become friendly controlled, must be repaired before they may be used.
PROCEDURE During each friendly Supply Phase, the owning player may repair three hexes of railroads. Repairing a Rail hex is indicated by moving a Railhead Marker forward one hex. Each Railhead Marker may only Repair one hex, the three potential hexes must be divided between three Railheads.
Repaired Rail hexes may be used in the next friendly Movement Phase.
[Change] A player may automatically repair a section of rail hexes if he controls and has repaired both ends of that section. A "section of rail hexes" is defined as the length of rail hexes between a town, city or rail junction on the track and the next town, city or rail junction down the track.
Example The rail hexes between Kastornoye and Starry Oskol is considered a section of rail hexes; and so would the rail hexes between Kupyansk and hex 3141. Note, that the first section that the Axis will probably repair automatically are the hexes 2048, 2148, and 2248
Comment It is annoying to keep track of the repair of the minor off shoots and branches of all the rail lines. It is sufficient if players just concentrate on the main rail lines.
Railroad Security and Anti-Partisan Forces
The Axis Player must garrison each Major City along his rail net with at least two steps of units (any type or nationality). A Major City hex that is not garrisoned with at least two steps may not be used as a Connecting Rail Hex. Furthermore, any rail hexes between the Major City and the Railhead may not be used as Connecting Rail Hexes. That is, if the partisans control the city, no trains will get through.
16.0 Supply
All units require supply to operate at their full potential. There are two types of Supply: General Supply and Attack Supply. General Supply keeps units from becoming Out Of Supply in a player's own Supply Phase. Attack Supply is needed during the Combat Phase to allow units to use their full Combat or Attack Strength.
Supply Sources
GENERAL SUPPLY. General Supply originates at Army HQ, Connecting Rail Hexes (rule 15.5), or Supply Depots. Army Group and Front HQ are not a source of Supply.
ATTACK SUPPLY Attack Supply originates at Activated Army HQ or Supply Depots.
Both types of Supply are distributed to combat units via a Line Of Supply.
Line Of Supply
A Line Of Supply is a path of consecutive hexes from a Supply Source to a unit being supplied. The length of a Line of Supply depends on the source.
A Line Of Supply traced from a German Army HQ may be a maximum of eight hexes long.
A Line Of Supply traced from a Soviet, Hungarian, Rumanian or Italian Army HQ may be a maximum of five hexes long.
A Line Of Supply traced from a Supply Depot or a Connecting Rail Hex (of any nationality) can be a maximum of two hexes long.
Axis combat units may trace General Supply to any Axis Army HQ despite the nationality.
Restrictions
-
A Line Of Supply may not cross impassable hexsides.
-
A Line Of Supply cannot be traced across more than one unbridged Major River or Volga River hexside.
-
A Line of Supply may enter or pass through no more than one Marsh hex.
-
A Line Of Supply may not enter any enemy occupied hex, nor cross over or enter any enemy ZOC Bond.
General Supply
General Supply is checked once each turn during the owning player's Supply Phase. Those units that are not in General Supply at that time are considered "Out Of Supply" and are indicated with an Out Of Supply Marker. If the unit is already marked (from the previous Supply Phase) as Out Of Supply then it remains Out Of Supply - there is no further penalty. Units may remain Out Of Supply indefinitely.
Comment If a unit is not within effective range of its supply source it still is considered to be receiving a trickle of supplies.
Effects of Out Of Supply
MOVEMENT Non-motorized units may not use Strategic Movement (rule 4.5). Motorized units may move a maximum of one hex. Furthermore, if an Out of Supply unit is moved, it must move towards the closest General Supply Source or end its move in General Supply.
Supply is judged at the end of the player turn rather than the beginning. Therefore, a unit can starts its movement without a Line Of Supply and still move its full movement allowance.
Comment A unit usually carried enough supply for about three days.
DEFENSE STRENGTH No effect.
ADVANCE Motorized units may Advance After Combat a maximum of one hex. Non-motorized units are not affected.
ARMOR SUPERIORITY. Armor units cannot receive or prevent the opposing player from receiving Armor Superiority.
NOTE Being Out of Supply has no effect on a unit's Attack Strength; that is determined solely by the presence or absence of Attack Supply.
Removing Out Of Supply Markers
Out Of Supply Markers are removed from friendly units during the owning player's Supply Phase. All units that can trace a Line Of Supply to a General Supply Source are considered supplied and can remove their Out Of Supply Markers.
Attack Supply
To participate in combat at full strength an attacking unit must trace a Line Of Supply to an activated Army HQ or Depot at the moment of combat. Units that cannot do this have their Attack Strength halved (rounded down).
Each Supply Depot or Activated Army HQ may provide Attack Supply to an unlimited number of friendly units.
Only attacking units need Attack Supply, defending units are not required to trace a Line Of Supply during the Combat Phase.
An Activated Army HQ may move in the same turn it provides Attack Supply.
SUPPLY CONSUMPTION A Supply Depot used to provide Attack Supply to one or more units must be removed at the conclusion of the Combat Phase.
Activated Army HQ remain activated until flipped to their non-activated side at the end of the Player Turn (during the Supply Phase).
Overruns Overruns do not require additional supply consumption. Any motorized unit that was in Attack Supply for the original combat is considered in Attack Supply for an Overrun.
Players may elect to have their units attack at half strength (even if they can trace a Line Of Supply) so as to save a Supply Depot from consumption.
Army HQ
Army HQ are used to provide supply. They are a source of General Supply at all times if not Isolated. They are a source of Attack Supply if Activated. Army HQ are considered actual combat units. They have a Combat Strength and a step to lose in combat. They have no ZOC.
Army HQ units have two sides, an Activated side and a Non-Activated side. The Activated side is the side with the unit type box in yellow. When on their Activated side they have an increased Movement Allowance and may provide Attack Supply. On their non-Activated side they have a reduced Movement Allowance of 1 MP and may not provide Attack Supply.
ACTIVATING Army HQ may be activated at any time during the owning player's turn. They remain Activated until the Supply Phase of that same Player Turn, at which time they are all flipped back over to their non-Activated side.
Each Army HQ Activated costs one Supply Point or one Depot plus the Transport Cost (see below) to bring the Supply Point or Depot to the Army HQ's hex. There is no limit to the number of Army HQ that a player may Activate each turn, as long as he has the Supply Points/Depots and the Transport Points to do so.
Supply Points
Supply Points are used to Activate Army HQ and to create Supply Depots.
Each player receives 2 Supply Points per turn. Supply Points may be accumulated from turn to turn. No player may accumulate more than 18 Supply Points, any in excess of this are forfeited. Each player keeps track of his Supply Points on his Supply Track with his Supply Track Marker.
Imagine that all accumulated Supply Points are located somewhere on your rail net. Any Army HQ located on a Connecting Rail Hex can freely use those Supply Points. For a Supply Point to Activate an Army HQ off the rail net it must be transported to the Army HQ.
Transport Points
To deliver a Supply Point to an Army HQ for Activation cost Transport Points.
Each player has [change] three Transport Points to use each turn. These Transport Points may not be accumulated from turn to turn; those that are not used are forfeited. Players keep track of their available Transport Points using their Transport Marker on the Supply Track.
Activating an Army HQ located on a Connecting Rail Hex does not require any Transport Points.
The cost in Transport Points to Activate an Army HQ located off the rail net depends on the length from a Connecting Rail Hex to the Army HQ’s hex. The length is measured in multiples of 5 hexes. Each multiple or fraction of a multiple costs one Transport Point.
Example An Army HQ located 5 hexes from a Connecting Rail Hex would cost one Transport Point to Activate (plus 1 Supply Point). If it was located between 6 to 10 hexes from a Connecting Rail Hex it would cost 2 Transport Points (plus 1 Supply Point). If it was located from 11 to 15 hexes from a Connecting Rail Hex it would cost all three Transport Points.
Comment Both sides experienced extreme difficulty supplying armies located far from their rail lines.
TERRAIN EFFECTS When determining the length in hexes for Transport Cost the following rules apply
Roads Each hex that follows the path of a road costs only 1/2 a hex when determining length. For this purpose only, a road which ends and begins at each side of a Major or Volga River hexside is considered an uninterrupted road path
Comment Ferries were located at these places.
Rivers Each multiple of five hexes of the path may cross one unbridged River hexside (any type at no cost). At a second River hexside, any remaining hexes of the current multiple are forfeited and another multiple must be begun.
Comment What is reflected in Transport Points is not time but rather truck usage. That is why terrain cost is of little consequence except for the benefit of roads and the penalties of crossing a number of rivers. Crossing a river involves ferries and would not cause a strain on the truck pool. Crossing a number of rivers would cause an uneconomical use of trucks to relay from one river to the next.
Comment If your Army HQ are all located far from your railheads, the limitations of three Transport Points will restrict you to just a few activations each turn. If you wish to have a large offensive with many HQ you will need to build up supply at the front using your Supply Depots.
Supply Depots
Depots are used to store Supply Points near the front line. A Depot is equivalent to one Supply Point. Depots can be used to Activate Army HQ just like Supply Points. Depots may also provide General and Attack Supply.
ACTIVATING AN ARMY HQ A Depot may Activate an Army HQ. Each Depot used for Activation must be removed. If the Depot is stacked with the Army HQ no Transport Points are required. If the Depot is not stacked with the Army HQ then enough Transport Points (using the system described in 16.9) must be expended to deliver the Depot to the Army HQ.
CREATING DEPOTS Depots are created during the owning player's Supply Phase. Creating one Depot costs one Supply Point. If the Depot is created on a Connecting Rail Hex then no Transport Points are necessary. If the Depot is created off the rail net then sufficient Transport Points must be spent (see rule 16.9). There is no limit to the number of Depots a player may create as long as he has the Supply and Transport Points to do so.
MOVING DEPOTS Depots may be moved during the friendly Supply Phase. A Depot moved five hexes cost one Transport Point. A Depot moved ten hexes cost two Transport Points, and so on. The Terrain Effects of roads and rivers as described in 16.9 apply.
Supply Depots can be moved around the rail net freely; i.e. any distance and without counting against the Rail Capacity.
REMOVING DEPOTS Depots may remain in play until consumed by Activating an Army HQ, providing Attack Supply, destroyed by enemy units or voluntarily removed by the owning player during his Supply Phase.
A Supply Depot on a Connecting Rail Hex may be absorbed into the Supply Track during the Depot Creation step of the Supply Phase.
PROPERTIES Supply Depots are non-combat units. They have no step to lose in combat, and in no way can impede enemy movement. Supply Depots are destroyed if stacked with friendly units that are retreated during the combat phase or if an enemy unit enters the Depot's hex.
The Supply Phase
During the Supply Phase the phasing player performs the following activities
-
General Supply is checked for all friendly units.
-
All Activated Army HQ are flipped back to their non-Activated side.
-
Depots may be created and moved.
-
Replacements are absorbed (see 21.0).
-
Railroad repair (rule 15.6).
-
Remove all Disruption Markers from friendly units (rule 13.0).
17.0 Off Map Movement
Units may move off or be retreated off the map at any Friendly Map Edge hex. Units may reenter the map in the following friendly player turn.
Procedure
Movement off the map from a hex on the map edge may be done at the cost of 1 MP. A unit that exits the map may not reenter the map until the following turn.
Units reenter the map by paying the terrain cost of the first hex entered.
A unit may reenter the map anywhere along the same map edge as it exited. It may only reenter through a Friendly Map Edge hex. A unit cannot reenter the map through a different map edge than it exited. If all entry hexes are blocked by enemy units, it remains off the map until entry is no longer blocked.
Effects of Enemy Units
A unit off the map cannot fight its way back onto the map. Movement onto the map into an enemy ZOC is allowed. However, movement onto the map into or across an enemy ZOC Bond is prohibited.
Restrictions
A player may not move units off the opposing player's Friendly Map Edge (exception, see the Fall Blau Scenario Victory conditions). Units retreated off the opposing player's Friendly Map Edge are eliminated.
Note Off Map Boxes are used in the Campaign Game.
18.0 Cadre Box and Cadre Elimination
Cadre Box
All units that lose their last step are placed in the Cadre Box (exception see Cadre Elimination). Units remain in the box until replaced.
Cadre Elimination
A unit that is Isolated at the moment of its elimination is considered to have lost its cadre and it is not placed in the Cadre Box.
[Change] Exception A unit that is eliminated while Isolated does not have its Cadre Eliminated, if at the time of its elimination it was only one hex away from being in a non-Isolated hex. In a questionable situation use this procedure the owning player places the eliminated unit(s) in any vacant hex adjacent to the hex where it was eliminated. If from that hex it can trace a Line of Communication then its Cadre is not considered eliminated.
All non-HQ units suffering Cadre Elimination are permanently removed from the game. All HQ units eliminated while Isolated are set aside in any special location. To re-enter play, the owning player must expend one Mechanized Replacement unit (during his friendly Supply Phase) just to move it to the Cadre Box. The HQ is then eligible to be replaced per normal Replacement rules in a later turn.
19.0 Reinforcements
Both sides receive reinforcements as indicated by the Reinforcement Display located on the Turn Record Track.
Procedure
Reinforcements may move the turn they become available. Reinforcements entering the map pay the normal Movement Cost for the first hex entered and may continue to move normally. Reinforcements may use Rail Movement to enter the Map. Reinforcements using Rail Movement apply against the player's Rail Capacity.
All reinforcements are considered in General Supply during the first Player Turn they enter.
[Change] Army HQ Reinforcements
Army HQ arriving as a reinforcement may be placed in any friendly controlled hex which contains either a Connecting Rail Hex or another friendly HQ. Army HQ arriving as reinforcements arrive non-Activated, they may, however, be Activated on the turn of their arrival by normal procedures.
Reinforcements may not fight their way on to the map. Their first hex may be into an enemy ZOC, but their movement onto the map may not have been into or across an enemy ZOC Bond. If there are no hexes available for Reinforcements to enter, their entry is delayed until entry is possible.
Axis Entry
Axis Reinforcements may enter the map at any hex on the western map edge.
Soviet Entry
Soviet Reinforcements may enter the map at any Friendly Map Edge hex on the northern map edge.
Soviet Frozen Armies
There are five Soviet Armies that begin the game on the map "Frozen." The HQ and the units comprising the army may not move at all until "Released." The armies may be released by the proximity of enemy units or when indicated on the Turn Record Track.
A Frozen army is immediately released if an Axis unit moves within 8 hexes of any unit in the army.
Comment Four of the frozen armies are Reserve Armies. These armies were under the control of Stalin and hence were not available until he released them. The 51st Army was not a Reserve Army, but it was recovering from its defeat on the Kerch Peninsula and at the same time defending the Azov coast against invasion.
20.0 Withdrawals and Returns
Withdrawals
The Turn Track also indicates Withdrawals. On the turn that a Withdrawal is indicated, that unit is immediately removed from play. It may return to play later as a "Return" if indicated by the Turn Track.
Reduced Strength
The unit to be withdrawn must have at least the number of steps remaining as depicted in the "Withdraw" graphic on the Turn Record Track. If the unit has fewer steps, then a number of Replacements, equal to the deficiency, must be removed (returned to the Replacement Pool). If not enough accumulated Replacements are available, the Replacement units must be removed as they become available. Withdrawn units deficient in steps get absolute priority in Replacements.
Substitutes
If a unit that is required to Withdraw is Isolated, eliminated, or the player does not want to withdraw that specific unit, then a substitute may be Withdrawn in its place. The substitute must be of the same unit type and the substitute's current Combat Strength must be at least equal to the full Combat Strength of the unit to be withdrawn.
Returns
Some previously Withdrawn units will be returned to play as indicated on the Turn Track. The Returning unit is treated as a Reinforcement.
21.0 Replacements
Replacements are used to restore reduced or eliminated units. One Replacement of the proper type and nationality can add one step to a reduced combat unit or, if the unit is in the Cadre Box, bring it back into play at its lowest step value.
Receiving Replacements
At the start of his turn each player rolls on his respective Replacement Tables to receive new Replacement Units. Players use one die and use that one roll for each column of the Table.
Example The Axis Player's Replacement roll is a "4" - he receives one German Infantry, one German Armor and one Rumanian Replacement Unit.
Entering Replacements
Replacements enter play during the friendly Movement Phase at Front or Army Group HQ located on a Connecting Rail Hex. Each Front/Army Group HQ may be the starting location of only one Replacement Unit per turn. Replacements must be placed at the beginning of the friendly Movement Phase. They may move normally in that turn.
If there are not enough Front or Army Group HQ to bring on all Replacement units, then the excess arrive in the same manner as Reinforcements (rule 19.0).
Replacement Units
Replacement units are Non-Combat Units. They have no ZOC, no Defense Strength, no step to lose in combat, and in no way impede enemy movement. If caught alone by an enemy unit, they are immediately placed in the Replacement Pool; the enemy unit(s) may continue moving.
Replacements may not advance after Combat, however, they may retreat if stacked with friendly units that are retreating.
Replacement Procedure
For a unit on the map to receive a Replacement it must be stacked with the Replacement Unit. For a unit in the Cadre Box to receive a Replacement, the Replacement must be stacked on a Front or Army Group HQ.
Replacement actually occurs during the Supply Phase. A unit receives the replacement with which it is stacked. The unit that receives the Replacement is increased one step and the Replacement unit is returned to the Replacement Pool. If the unit is in the Cadre Box, place the unit in the hex where the Replacement was stacked with the Front or Army Group HQ and return the Replacement to the Replacement Pool.
Restrictions
-
A player can replace as many units each Turn as he has Replacements, but each unit can only receive a maximum of one Replacement per turn.
-
Units which participated in combat in the previous Combat Phase may not receive Replacements.
-
Replacement can occur in any hex in or out of supply or enemy ZOC.
-
The following is a list of what each type of replacement may be used for
GERMAN PANZER Any Axis armor or mechanized type unit, including the Rumanian and Hungarian panzer divisions.
GERMAN INFANTRY Any German non-motorized unit (including Luftwaffe infantry divisions), except the combat engineer unit.
GERMAN MECHANIZED Any German unit (including HQ), except armor type.
LUFTWAFFE Any Luftwaffe ground unit (including the Flak divisions).
ITALIAN, HUNGARIAN, RUMANIAN and SLOVAKIAN Any type of unit of their respective nationality (including their Army HQ) with the exception of the two panzer divisions.
SOVIET ARMOR Any Soviet armor or mechanized type unit.
SOVIET MECHANIZED Any Soviet unit (including HQ), except armor and artillery type.
SOVIET INFANTRY. Any Soviet non-motorized unit (including Guard rifle divisions), except Cavalry and NKVD units.
SOVIET CAVALRY. Any Soviet cavalry type unit.
SOVIET NAVAL Any Soviet naval brigade.
NKVD Any Soviet NKVD unit.
[Change] Naval and NKVD replacements may be used as regular infantry replacements or to replace their respective unit type. The reverse is not true, regular Soviet infantry replacements may not be used to build Naval or NKVD Units.
- Artillery and combat engineers may never be replaced.
Replacement Pool
After a Replacement unit is used to replace a step (or if the Replacement is eliminated), it is placed in the Replacement Pool. When a player is to receive a Replacement, that Replacement must come from a Replacement unit available in the Pool. If there are no Replacements of that type available, then the player receives none of that type that turn.
Merging Remnants
The Soviet Player may merge together two Remnant units to form a Rifle Division at its second step level. The merging is performed during the friendly Supply Phase if the two remnants are stacked together. Replace both of the Remnant Units with one of the corresponding Rifle divisions from the Remnant Holding Box. Move the other unused Rifle division from the Remnant Holding Box to the Cadre Box.
Soviet Rifle Divisions
Remnants are also used when a rifle division in the Cadre Box receives its first replacement. Place the rifle division on a Remnant Holding Box and place the corresponding Remnant on the map.
22.0 Organization Cards
Unit Boxes
Some units on both sides are represented by two counters. To avoid both counters accidentally entering play at the same time, it is recommended players use their organization cards. All units which have two counters have a box on the Organization card. The counter not currently being used should be placed in the box. There should at all times be one unit in all of the boxes. The other unit should be either in play, on the Reinforcement Track or in the Cadre Box. An empty box or a box containing two units is a warning flag that something is amiss.
Remnant Holding Box
Only the Soviet Player has a Remnant Holding Box. As with the boxes above, there should always be one unit in each of the Remnant boxes. Either the Remnant of the appropriate I.D. or the unit it is representing on the map.
Soviet Guard Pool
Used only in the Campaign game.
23.0 The Air Game
[Change]
Air Units can be used to assist ground units in the combat phase (Ground Support), bomb enemy units (Bombardment), interdict enemy movement (Interdiction), or attack the opposing player's air units (Air To Air Combat),
How To Read Air Units
AIR TO AIR FACTOR A numeric rating of the air unit's attack and defense strength when involved in Air To Air Combat. When the air unit possesses different values for attack and defense, the values are printed separately as Attack Factor and Defense Factor.
BOMBING FACTOR A numeric rating of the air unit's bombing strength when using the Bombing Table.
RANGE The distance in hexes an air unit can be from its Support (rule 23.6). Range can be traced over any type of terrain and/or enemy units.
TYPE There are four types of Air Units (B) Bomber, (GS) Ground Support, (F) Fighter, and (FB) Fighter Bomber.
The Air Segment
There is an Air Segment in each Player Turn, The Axis Air Segment is performed in the Axis Movement Phase before any Axis units have moved, the Soviet Air Segment is performed in the Soviet Movement Phase before any Soviet units have moved. The Phasing Player is the player whose Movement Phase is in progress.
Air Segment Sequence
-
DEFENSIVE AIR PLACEMENT The non-phasing player places his air units on the map (at half range).
-
OFFENSIVE AIR PLACEMENT The phasing player places his air units on the map (at full range).
-
AIR-TO-AIR COMBAT The Axis Player initiates all his Air-to-Air Combat first, followed by the Soviet Player. This is true whether it’s the Axis or Soviet Air Phase.
-
The phasing player resumes his normal turn. All air units still on the map are removed at the end of the Player Turn.
Defensive Air Placement
The non-phasing player may place his air units in any hex, regardless of terrain and enemy units. Air units placed by the non-phasing player may only use half their range (drop any fractions). There are three possible functions for Defensive Air
-
Interdiction.
-
Defensive Ground Support.
-
Air-to-Air Combat.
Offensive Air Placement
The phasing player may place his air units in any hex, regardless of terrain and enemy units. Air units placed by the phasing player may use their full range. There are three possible functions for Offensive Air
-
Offensive Ground Support.
-
Bombardment.
-
Air-to-Air Combat.
Support
All air units require Support. Support comes from Air HQ and Major City hexes. The distance in hexes from the air unit to its Support may not be greater than the air unit's Range.
Exception Air units placed during Defensive Air Placement must be within half their range.
Support is determined after air placement but before Air-to-Air Combat. All air units without Support are removed from the map. They are not eliminated, they simply cannot fly that player turn.
Air HQ
Air HQ move and function like normal ground units. They have a Defense Strength and a step to lose in Combat. They do not have a Zone of Control.
SUPPORT FACTOR The small number to the right of the Air HQ's Defense Strength is the Support Factor. The Support Factor is the maximum number of air units that may trace their Range to that Air HQ. Disrupted Air HQ may not support any air units.
REPLACING Eliminated Air HQ may be replaced like other HQ using one Mechanized Replacement unit.
STACKING Air HQ may not stack with other Air HQ.
MOBILITY STATUS Air HQ have two sides - a mobile side and a non-mobile side. On their mobile side they have a reduced Support Factor. On their non-mobile side they have their full Support Factor but may not move.
Mobility Status for Air HQ may only be changed during the friendly Air Segment. At this time the owning player may flip his Air HQ to either side. The Mobility Status chosen may not be voluntarily changed until the next friendly Air Segment.
If an Air HQ on its non-mobile side is attacked and forced to retreat, it is flipped to its mobile side.
SUPPLY Each Air HQ requires its own rail line for supply. An Air HQ without supply must always operate on its mobile side. To be in supply an Air HQ must be located on a Connecting Rail Hex that has a Dedicated Rail Link. A Dedicated Rail Link is defined as a path of friendly controlled and repaired rail hexes from the Air HQ to a friendly map edge which has no section (however small) used by another Air HQ.
An Air HQ without supply can operate in any hex, on or off a rail hex, or in or out of Isolation.
Major City Hexes
Each Major City hex may support one air unit. No Connecting Rail hex or Dedicated Rail Link is necessary. If an Air HQ is located in a Major City, then the total support factor for that hex is equal to the Air HQ's Support Factor plus one.
Air To Air Combat
Each player may use his F and FB type units to attack enemy air units. All Air-to-Air combat by the Axis Player is resolved first, followed by Air-to-Air Combat by the Soviet Player's surviving F and FB type units.
Air-to-Air Combat is performed one air unit at a time. The friendly F or FB unit attacks a single enemy air unit. If it survives it may attack another.
Restrictions
-
Only F and FB type air units may initiate Air To Air Combat.
-
The non-phasing player's F and FB type units may attack air units within three hexes of their location. The phasing player's air units may only attack enemy air units they are stacked with.
-
If the non-phasing player's F or FB type unit is stacked with enemy F/FB air units, it must first attack those air units before it can select a target outside the hex.
-
If the target is a stack of enemy air units, the attacking F or FB unit is not allowed to target enemy B or GS units in that stack unless it first attacks each enemy F and FB unit in the hex and survives.
-
Friendly B and GS air units located in the same hex as enemy B and GS units may not attack each other, they coexist in the same hex and have - no effect on one another.
-
Enemy air units may be attacked again and again by separate F/FB air units, but no air unit may be attacked more than once by the same air unit.
Procedure
-
Select the Air Unit that will attack.
-
Select the target.
-
Subtract the defender's Defense Strength from the attacker's Attack Strength to get the "Differential." This Differential determines which column to use on the Air to Air Combat Table.
-
Consult the Air To Air Combat Table, roll two dice, and implement the results.
If the attacking air unit was not eliminated or removed from the map, then it may target another enemy air unit using the same procedure. It may continue to attack until it is eliminated or removed from the map.
Interdiction
All the non-phasing air units that survived Air-to-Air Combat will hinder the movement of enemy ground units. Air units have no effect on the movement of friendly ground units.
The hex occupied by one or more enemy Air Units is called an Interdicted Hex. The six hexes surrounding the Interdicted hex is called the Secondary Interdiction Zone.
Interdiction Effects
-
Any Combat Unit attempting to leave an Interdicted Hex must pay one additional Movement Point (+1MP).
-
A unit moving by Rail Movement which leaves an Interdicted Hex must stop after moving five hexes past the Interdicted Hex. There is no additional penalty if it enters another Interdicted Hex in its last five hexes. Note that this will guarantee Rail Movement of at least five hexes each turn.
-
All units that Advance After Combat into an Interdicted Hex must stop in that hex.
-
All roads in an Interdicted hex or in the Secondary Interdiction Zone (see below) are ignored for movement purposes. All bridges on the hexside of an Interdicted hex are likewise ignored for movement purposes.
Ground Support
Ground Support provides a favorable column shift on the CRT when performing combat. Both the attacker and the defender may allocate Ground Support (GS). GS may be performed by any unit with a Ground Support Factor (GSF).
The Non-Phasing Player may allocate Defensive Ground Support from any of his air units within three hexes of the defender's hex. The Phasing Player may allocate Offensive Ground Support from only those friendly air units stacked in the defender's hex.
Each air unit may be used for Ground Support only once each Combat Phase.
GS and FB air units have a GSF equal to their Bombing Factor. B type air units have a GSF equal to one half of their Bombing Factor (round fractions up).
Every three GSFs allocated to this mission provides a favorable shift on the CRT of one column. Each ground combat may receive a maximum of two shifts for Ground Support.
If less than three GSFs are allocated to a combat, the owning player must roll a die to see if there is any effect. With one GSF a die roll of 5 or 6 is necessary to receive the shift. With two GSFs, a die roll between 3 and 6 is necessary to receive the shift. If the die roll is not successful in achieving the shift, then those air unit(s) have no effect on the combat. Use the same procedures to determine if a second shift is received if the number of GSFs is four or five.
If both players have Ground Support, the side with the fewer GSFs will cancel out a like number of GSFs from the opposing player.
Example The attacker has five GSFs, and the defender has only one GSF. The attacker subtracts one from five to get a final total of four. Four GSFs guarantees him one shift plus a 1/3 chance - for a second shift.
CITIES & FOREST If the defender is located in a Forest or Major City hex, then it takes six GSFs to give the player a favorable shift. Twelve GSFs to give the player two shifts.
Bombardment
Bombardment may Disrupt enemy units or eliminate enemy steps.
Conditions & Restrictions
-
The air unit must have a Bombing Factor.
-
The Bombardment may not occur adjacent to friendly ground units.
-
Units in Forest and Major Cities may not be Bombarded.
-
An air unit used for Ground Support may not perform Bombardment in the same Combat Phase.
-
Only the Phasing Player's air units may perform Bombardment.
Procedure
- Bombardment is resolved during the Combat Phase using the Bombardment Table. Tally the combined Bombing Factors of all bombarding air units in the hex. Find the column on the Bombardment Table that applies to that strength.
- Roll one die and find the result under the appropriate column on the Bombardment Table. The defender must remove any step losses immediately.
NOTE Because air units are either on a mission or off the map you may not bombard enemy air units on the ground. You may, however, bombard Air HQ.
Air Unit Replacement
Each side may replace one eliminated air unit each odd numbered turn (except the first turn of each scenario). Replaced air units arrive at the start of the turn and may be used normally in that turn.
Air Reinforcements
Each side receives air reinforcements according to the Air Reinforcement Schedule. Reinforcements, like replacements, arrive at the start of the turn and may be used normally that turn.
Air Placement Limits
The owning player may use all his air units on turns he Activates three or more Army HQ. He may use only seven air units on turns he Activates two Army HQ. He may use only four air units on turns he Activates only one Army HQ. He may use only one air unit on turns when he activates no Army HQ. The Limit applies separately to each player turn; that is, if you could use seven air units, you could use seven during your Air Segment and seven during the opposing player's Air Segment.
In addition to the free supply provided by Activated armies, the owning player may expend Supply Points to allow additional air units to fly. Every Supply Point expended allows an additional six air units to fly.
Since the Soviet Player Turn comes after Soviet Defensive Air Placement, the Soviet Player must make a note of the supply used by his air units which must be made good during his turn by either Activated armies or Supply Points.
Isolated Pockets
Add the following modifiers to the Air Transport Table -1 if the owning player has a F or FB type unit over the Isolated Pocket. +1 if the enemy player has an F or FB type unit over the Isolated Pocket. These two modifiers cancel out if both players have F/FB units over the pocket,
If more than ten divisions are presently Isolated, then no bombers may fly missions that turn. GS type units are not affected.
Comment The bombers are assumed to be assisting the transports in providing air supply.
Weather Effects
Air units may only fly during clear weather turns.
STOP! It is recommended you play
Scenario 1, “Fall Blau,” before proceeding to the next rule section.
SECTION II: Operation Uranus
24.0 Major City Battles
Capturing a Major City hex requires the attacker to achieve an Advance After Combat of four hexes. The hexes advanced may be completed incrementally through more than one turn. Each hex advanced is equivalent to having captured 1/4 of the city hex. Keep track of the fraction of the city captured by using a Control Marker on the City Control Track located on the Major City Battle Display. If both sides control a fraction of the city then their units are placed on a large hex on the Major City Battle Display. The large hex is divided into six sections to keep track of which hexsides each player is allowed to use for entering and exiting from the city hex.
Comment A defender forced out of one position in the city could simply retreat to the next. Success in city battles was often measured in yards rather than miles.
Procedure
As soon as the attacker achieves his first Advance result against a Major City hex, the involved units are transferred to a large hex on the Major City Battle Display. Place a Major City Battle marker on the city hex being contested.
The defender transfers all his surviving units onto the Display. The attacker transfers up to 3 participating attacking divisions to the Display.
The Major City Battle Display
There are two elements of the Display. A Control Track to record what fraction of the city hex one player controls (the other side controls the remaining fraction), and an enlarged city hex to keep track of which hexsides each player may use to enter and exit from the city hex.
Each player can control either two, three or four sections. If both players own half of the city hex then they each control three sections. If one player owns 3/4 of the city, then he controls four sections while his opponent controls only two. Indicate control of a section by placing one of the units in the city hex in that section. If the player does not have enough participating units to indicate control, he may either place a unit on the border of two sections to indicate control of both sections or use a Control Marker.
Choosing Sections
Players alternate picking sections to control. The attacking player has first choice. He must pick a section which has a common hexside with one of the hexes from which he attacked. After the attacker has chosen his section the defender picks any one of the remaining five sections. Then it is the attacker's pick again, and it alternates from player to player until all sections are picked.
Note Player's are restricted to picking only a section that is adjacent to a previously picked friendly section.
Gaining and Losing Sections
If either side achieves an Advance After Combat, thereby capturing more of the city hex, then that player takes control of the appropriate number of sections allowed to him by the fraction of the city he controls.
Example if the player initially controlled 1/4 of the city hex (giving him two sections), and then in the combat phase captured 1/2 of the city hex (achieved by an Advance After Combat of two hexes) then he is allowed to take control of two more sections. In total, he now controls 3/4 of the city hex and occupies four out of six sections.
The player gaining the extra sections may pick any section as long as it has a common side with a previously controlled friendly section. The enemy units formerly in the captured sections are moved into one of their remaining sections.
The defender does not have to retreat from a Major City Hex until the attacker has captured the entire city. Defending units in a city, however, are still Disrupted if the attacker achieves any type of Advance result.
Access Hexside
An exterior hexside (bold on the display) of any friendly section of the display hexes is called an Access Hexside.
Properties of the Display Hex
Keep in mind that the division of a Major City hex into six sections simply helps to keep track of Access Hexsides and does not reflect conquest.
-
The Stacking limit on the Display hex is still 3 divisional size units, but it applies separately to each player (therefore six divisional size units could be in the same city hex).
-
Zones of Control only extend out through Access Hexsides.
-
Entry and exit from the hex is allowed only through Access Hexsides.
-
A Line Of Supply and a Line Of Communication can be traced into and through a partially controlled city hex as long as entry and exit occurs through Access Hexsides.
-
Units inside the Display hex may attack adjacent enemy units outside the city hex without the need to attack those enemy units that co-occupy the city hex, however the units may only attack out through Access Hexsides.
-
Units adjacent to the Major City hex may combine their attack strength with friendly units within the city which are attacking the enemy co-occupants.
Complete Capture
Once one side or the other captures the entire city hex, the defending units must retreat from the hex. Normal retreat rules apply with the restriction that they may only retreat through Access Hexsides. If they cannot retreat through any Access Hexside then they are eliminated.
Units defending in a Major City hex may opt to retreat out of the city at any time. They are not required to contest each quarter fraction of the city.
25.0 Weather
At the start of each Game Turn, one player or the other determines the weather for the complete Turn.
Weather is determined by rolling one die and finding the result on the Weather Table under the appropriate month.
Effects
CLEAR No effect.
RAIN All units have their Movement Allowance reduced by half (rounded UP). Air units cannot be used.
[Change] All Advance After Combat values are halved (rounded up).
[Change] Each Transport Point has a length of three hexes (roads count as half a hex).
Rain has no effect on Roads.
The effects of both Rain and the Rasputitsa are cumulative.
SNOW STORM All units have their Movement Allowance reduced by half (rounded UP). Air units cannot be used.
OVERCAST Movement not affected. Air units cannot be used.
26.0 Rivers in Winter
On turn 52 all major and minor rivers become Frozen. A frozen Major River takes on the properties of a Minor River (+1/+2 MP and 1 defensive shift).
There is no effect due to Minor Rivers freezing.
Comment It still would be be a minor obstacle to movement and still provide a defensive benefit by the field of fire it offers.
The Volga River does not freeze over until Turn 58. When it does, it too takes on the properties of a Minor River.
Comment Marsh hexes are not affected by winter. Although the streams in rivers in those hexes would freeze over, the countless little water routes each with their snow drift banks would still be a great hindrance to movement.
27.0 Isolated Pockets
Units Isolated for a prolonged period of time will suffer penalties. Their combat and movement capabilities will slowly decline and they will eventually surrender. Isolated Army HQ and Supply Depots eventually lose their ability to provide General Supply. The condition of each Isolated Pocket is recorded on the Isolated Pocket Track.
Isolated Pockets
An Isolated unit or group of Isolated units, each of which can trace a mutual Line Of Communication to one another is called an Isolated Pocket.
Each player checks for Isolated Pockets during his own Supply Phase. Place an Isolated Pocket marker (one marker is sufficient for the entire group) on every Isolated Pocket found at this time. Place a matching marker on the Isolated Pocket Track.
The Isolated Pocket Track
The box where the Isolated Pocket marker starts is determined by certain factors
-
Start the marker in the "1" space if the Isolated Pocket contains a partially (see rule 24.0) or fully controlled friendly Major City and either an Army HQ or a Supply Depot.
-
Start the marker in the "3" space if the Isolated Pocket contains either an Army HQ and/or a Supply Depot but no friendly Major City.
-
Start the marker in the "6" space if the Isolated Pocket does not qualify for case 1 or 2 above.
Below each box on the Isolated Pocket Track is the condition of the Isolated Pocket. There are five conditions that the Isolated Pocket may be in
FULL SUPPLY. Army HQ and Depots retain their General Supply ability. No effect on movement or combat.
PARTIAL SUPPLY Same as above except motorized units tracing General Supply to the Army HQ or Depot may only move half of their Movement Allowance.
DEPOTS DEPLETED Army HQ and Depots lose their ability to provide General Supply. All units in the pocket are considered Out Of Supply and must follow the penalties of rule 16.4. Do not remove the Depot markers, it is assumed only that the fuel in the Depot has been depleted. It still may be used to provide Attack Supply (at which time it is then removed).
FOOD AND AMMO SHORTAGE (-1) Same as "DEPOTS DEPLETED" with the following additional penalties.
A) Non-motorized units have their Movement Allowance reduced by one.
B) If all defending units are at this position in the chart then the attacker receives a favorable shift of one column to the right on the CRT. If one or more attacking units are at this status, then the defender receives a favorable shift of one column to the left on the CRT.
CRITICAL FOOD AND AMMO SHORTAGE (-2) Same as "DEPOTS DEPLETED" with the following additional penalties.
A) All units may move a maximum of one hex per turn.
B) Same as in case B above except there is now a two column shift.
Supplying The Pocket
Every friendly Supply Phase (starting with the same Supply Phase the Pocket is formed) roll one die for each Isolated Pocket and consult the Air Transport Table. The result of the Air Transport Table indicates how the Isolated Pocket marker is moved (backwards, forwards or not at all).
Air Transport Table
To determine which column to use, count the number of hexes from a friendly controlled town or city outside the pocket to a unit within the pocket. That distance determines which column to use. If a town or city is located within the pocket then the distance must be measured to that hex.
Comment It is assumed that both sides will only commit the bare minimum of air transport to each Isolated Pocket (due to the needs for air transport on other fronts and for other uses). The number and size of Isolated Pockets has no bearing on the Air Transport Table.
Surrender Thresholds
Some boxes on the Track indicate that a particular type of unit will surrender. When a unit surrenders, it is considered immediately eliminated with its Cadre (see Cadre Elimination).
When an Isolated Pocket is composed of units with different Surrender Thresholds, the entire group assumes the best Surrender Threshold available in the group. In other words, all units within an Isolated pocket will surrender together at the same time.
Comment Those with high morale will inspire those with low morale.
Splitting Pockets
If an Isolated Pocket is split into separate parts due to friendly or enemy action, then each of the splinter groups becomes a separate pocket with its own markers. The Isolated Track marker for each newly formed group is placed in the appropriate box according to rule 27.2 or in the same box as its parent Isolated Pocket whichever is worse.
Example An Isolated Pocket has its track marker in box 13. If enemy units surrounded a portion of the pocket then that new isolated group of units would start their track marker in box 13.
Example An Isolated Pocket has its track marker in box 2. Enemy action causes a portion of the group to form their own separate pocket. If the new pocket formed has no Major City, Army HQ or Supply Depot, then its marker starts in box 6.
Combining Pockets
If two Isolated Pockets combine due to friendly or enemy action, then the combined pocket assumes the Supply state of the larger pocket. Larger is defined as the group with the greater number of steps. If two pockets are identical in size, the owning player may choose which supply state to use.
28.0 Artillery Divisions
Characteristics
Artillery divisions have two sides. A mobile side and a non-mobile side. On the mobile side they have a severely reduced Attack Factor. On their non-mobile side they have their full Attack Factor, but may not move.
Artillery Divisions have no Zones Of Control.
All Artillery Divisions have only one step.
Artillery Divisions may never be replaced.
An Artillery Division does not have to be adjacent to an enemy unit for it to attack (although it can be). An Artillery Division can add its Combat Factor to an Attack if it is adjacent to a friendly unit which is involved in the attack. An Artillery Division can not lend its Combat Factor to adjacent friendly units in defense.
Comment The Soviet army lost a lot of its artillery during 1941 and still had serious shortages in 1942. Most of its large caliber guns were grouped into Artillery Divisions and held under strict control by STAVKA. This powerful asset was only effective if time was taken to stockpile ammunition, and carefully reconnoiter the target area.
Mobility Status
Mobility Status for Artillery Divisions may only be changed during the Soviet Supply Phase. At this time the Soviet Player may flip his Artillery Divisions to either side without restrictions. The Mobility status chosen may not change until the next Soviet Supply Phase.
If an Artillery Division on its non-mobile side is attacked and forced to retreat, it is immediately flipped to its mobile side.
29.0 Combat Engineers
If the combat engineer unit is involved in an attack against a Major City hex, then the Axis Player receives a favorable shift of one column to the right on the CRT.
If the Axis player suffers any step losses, the first step must come from the combat engineer unit.
The combat engineer unit may not be replaced.
Comment During the battle for Stalingrad the Germans found the combat engineers very effective in street fighting. Consequently they drew in a number of combat engineer battalions from panzer divisions in the vicinity, plus additional battalions flown in from Berlin. The "Comp E" engineer unit represents those engineer battalions.
30.0 German Infantry Regiments
During the Axis Player's Movement Phase he may create one or more "infantry regiments." For each regiment formed one infantry division must be reduced one step. One infantry division can create all three regiments or it may be divided between different divisions. The infantry regiment is placed in the hex with the infantry division that removed the step. If the division has already moved in that Movement Phase, then the regiment may not move. If the division has not moved, then both may be moved normally.
Alternatively, the Axis Player may create a regiment with an Infantry Replacement. In this case, the regiment is created during the Supply Phase per normal replacement procedures. The replacement unit must be located on an Army Group HQ
Conditions and Restrictions
-
Supply, enemy ZOCs, weather, Disruption, or Isolation has no bearing on the creation of a regiment.
-
The Axis Player is limited to having a maximum of three regiments in play at one time.
-
A regiment may be used just like a infantry replacement to build up a German infantry division one step. Follow normal Replacement procedures and restrictions.
-
There is no need to keep track of which division created which regiment. Any regiment may recombine with any German infantry division.
STOP! It is recommended that you play Scenario 2, “Operation Uranus,” before proceeding to the next rules section.
SECTION III: The Campaign Game
31.0 The Rasputitsa
When it Occurs
The Rasputitsa can start at any time after Turn 26 by rolling a Rain result two turns in a row on the Weather Table. The Rasputitsa ends at any time after Turn 44 by rolling a Snow Storm or Overcast result two turns in a row on the Weather Table.
Effects
The Rasputitsa has the following affects
-
Motorized Movement Point cost is increased to 2 MPs for Clear Terrain and increased to 1 MP for the road movement. The Non-motorized Movement Point cost is not affected.
-
All units which achieve an Advance After Combat may only advance a maximum of one hex. Advance After Combat results for Major City Battles still equate to the same fraction of city capture.
-
Lake hexsides become impassable.
The effects of the Rasputitsa and Rain/Snow Storm are cumulative. Keep in mind that units may always move at least one hex.
[Change] Transport Points During turns of the Rasputitsa Transport Points are affected like combat units - road hexes count as one and off road hexes count as two hexes.
Comment The Rasputitsa was the muddy period when all motorized movement off paved roads became extremely difficult. The road network of Southern Russia at this time was quite primitive with very few paved roads.
32.0 Soviet Guard Conversions
Regular Soviet Army units may be converted into Guard units through the course of play. Conversion takes place in either the Axis or Soviet Combat Phase by one of two methods
-
In the Axis Combat Phase, if the Axis Player rerolls a "1" result (due to German Tactical Advantage, rule 11.5) and rolls another 1, then one of the participating Soviet units may be immediately converted to a Guard unit.
-
In the Soviet Combat Phase, if the Soviet Player rerolls a "6" result (rule 11.5) and rolls another 6, then one of his participating Soviet units may be immediately converted to a Guard unit.
Procedure
When a Guard conversion is called for, permanently remove the original unit from play. Replace it with a Guard unit from one available in the Soviet Guard Pool. The Guard Replacement must be of the same type, and it arrives at the same step level as the replaced unit.
Restrictions
-
Guard units formed in this fashion must come from the Soviet Guard Pool. If there are none of the correct type available then the conversion does not take place.
-
Only rifle divisions, tank corps, and cavalry corps may be converted. Artillery Divisions, Fortified Regions, Anti-aircraft, and Army HQ may not be converted.
-
Mountain Infantry and Motorized Infantry may be converted into Guards Rifle Divisions.
33.0 Off Map Boxes
Both players may move units off the map into Off Map Boxes. The Soviet Player may move units from one Off Map Box to another. There are seven Off Map Boxes: The Axis Off Map Box for the west edge; the Soviet Off Map Box for the north edge; the Trans-Volga, Astrakhan, and Caspian Boxes for the east edge; and the Caucasus and Black Sea Coast Boxes for the south edge. The three boxes for the east edge are collectively called the Caucasus Transit Boxes.
Movement
Movement into and out of an Off Map Box (OMB) is handled the same way as in the Basic Game (see rule 17.0).
Movement from one OMB directly into another OMB is allowed between "adjacent" (see below) Boxes. The movement cost to move between OMBs is the unit's entire Movement Allowance.
Restrictions
-
Only German units may enter the Axis OMB. Only Soviet units may enter the Soviet OMB and the three boxes of the Caucasus Transit Box. Both Axis and Soviet units may enter the Caucasus Box and Black Sea Coast boxes.
-
Only Soviet units may move between OMBs. Up to two Soviet divisional size units per turn may move between OMBs.
ADJACENT BOXES The Soviet OMB is adjacent to the Trans-Volga Box, the Trans-Volga is adjacent to Astrakhan, Astrakhan is adjacent to Caspian, Caspian is adjacent to the Caucasus, and the Caucasus is adjacent to the Black Sea Coast.
Characteristics
An unlimited number of units may occupy an OMB. Units in OMBs do not exert a ZOC onto the map edge. All units are automatically in General Supply while in an OMB. Combat is not allowed between units on the map and units in an OMB.
Entry & Exit Hexes
AXIS OFF MAP BOX Entry and exit via any hex on the west edge of either the north or south map.
SOVIET OFF MAP BOX Entry and Exit via any hex on the north map edge east of hex 1045.
TRANS-VOLGA Entry and exit via any hex on the east edge of the north map.
ASTRAKHAN Entry and exit via any hex on the east edge of the south map.
CASPIAN Entry and exit via Astrakhan or Caucasus Box only.
CAUCASUS For Soviet units, entry and exit via any hex on the south edge of the south map. For Axis units it is hexes 4737 through 4728.
BLACK SEA COAST Entry and exit via the Caucasus Box only.
34.0 The Caucasus Campaign
Both sides are allowed in the Caucasus and Black Sea Coast Off Map Boxes. Both sides may attack each other's units in the same box. Control of the Off Map Boxes is abstractly recorded by using the Control Tracks printed above the Off Map Boxes.
Comment Off the south edge of the map lie the Caucasus Mountains, with the oilfields of Maykop, Grozny and Baku. As German oil resources dwindled, the capture of these oil-producing areas grew in importance. Along the Black Sea coast could be found the last few ports left to the Soviet Black Sea Fleet. Without a port, the Soviet fleet would have to be scuttled and the Axis would enjoy unrestricted use of the Black Sea.
Combat Procedure
Each turn during the player's Combat Phase, he may attack enemy units in the Caucasus or Black Sea Coast Box with his own units in the same Box. Only one attack per Player Turn is allowed in each of the two boxes. That is, you can have two attacks total one for the Caucasus, and one for the Black Sea Coast. If an attack achieves any type of Advance After Combat, the attack is considered successful and the Control Track Marker is moved one space to the right (if it was the Axis Player attacking) or left (if it was the Soviet Player attacking).
To resolve the combat simply follow standard Combat procedures, with the following exceptions
-
Tally the defense strength of all enemy units in the box, and tally the attack strength of as many friendly units in the box as you wish to use. Units in the Black Sea Coast box may not assist units in the Caucasus, and vice versa.
-
The Magnitude can never be more than two despite the number of units involved.
-
All modifiers described in section 11.0 are applicable except Isolation in Combat (rule 11.3). The attacker may use Air Power, Armor Superiority, and Maximum Effort. The defender may use Determined Defense. If the defender reduces the Advance After Combat to zero by using Determined Defense, the Track Marker is not moved.
Supply
To attack at full strength, the units in the Off Map boxes require Attack Supply. Only one Depot or Activated Army HQ is necessary for each attack. The Soviet Player may always assume there is a friendly Connecting Rail Hex in each of his Off Map Boxes. The Axis Player must use Transport Points.
To deliver a Supply Point to an Axis Army HQ located in either the Caucasus or Black Sea Coast box or to deliver a Supply Point to create a Supply Depot in one of the two Off-Map boxes simply requires the Line Of Supply to be traced one hex off the south edge of the map through a legal entry hex (see 34.3). If the Axis Player repairs the rail line to the last hex on the south edge, he is still required to spend one Transport Point to carry the Supply Point off the map edge.
Example An Axis Railhead is at Rostov. The distance in hexes (using the road rate) from Rostov to one hex off the south map edge is six. Therefore to activate an Army HQ in the Black Sea Coast Box would cost two Transport Points plus one Supply Point.
Entering and Exiting Off-map Boxes
The Caucasus Box
For the Axis Player, entry into the Caucasus Box occurs from hexes 4737 through 4728.
For the Soviet Player, entry into the Caucasus Box occurs from any hex on the south edge of the map.
When Axis forces first enter the Caucasus Box an Axis Control Marker is placed on the Kuban Steppes box of the Caucasus Control Track. This box is free to the Axis Player without the need to achieve a "successful" attack against it from the map edge. All other boxes to the right on the Track must be fought for.
Once the Axis Player has units in the Caucasus Box, entry and exit for both sides are determined by the position of the Control Marker on the Caucasus Control Track. Axis entry and exit hexes are those printed on the Control Track, Soviet entry and exit hexes are all remaining hexes on the south edge.
Once the Axis Player controls the Pyatigorsk box, Soviet units may only enter and exit the Caucasus Box from the Caspian or Black Sea Coast Off Map Boxes.
Example The Axis Player Control Marker is in the Maykop space. His units may enter or exit the box through any hex from 4741 to 4725. Soviet units may exit from 4724 to 4701.
Black Sea Coast The Axis Player is prevented from entering the Black Sea Coast Box until he has captured the "Krasnodar" space on the Caucasus Track. Once he has done this, place another Axis Control Marker in the first box of the Black Sea Coast Track (marked "Taman Peninsula").
Axis Control of Krasnodar has special significance. As long as the Axis Player controls the Krasnodar space, Axis units may freely move into the Black Sea Coast Box from the Caucasus Box. Conversely, Axis units are forbidden to exit from the Black Sea Coast Box if the Krasnodar box is later recaptured by the Soviet Player (they are trapped in the Black Sea Coast Off -Map Box until the Axis Player can recapture the Krasnodar space.
Entry and Exit of the Black Sea Coast Box
Entry and exit of the Black Sea Coast is only allowed via the Caucasus Box. Movement of this type costs the unit its entire Movement Allowance.
Each turn both players may move only a limited number of non-motorized units between the Caucasus Box and the Black Sea Coast. The Soviet Player may move a maximum of six non-motorized divisional size units per turn. The Axis Player may move a maximum of two non-motorized divisional size units per turn.
Comment This reflects the limitations of rail transport and the shortage of trucks.
There is no limit to the number of motorized units that may move back and forth between the two boxes.
Complete Capture
Complete capture by the Axis Player of all spaces on the Caucasus or Black Sea Coast Track does not mean expulsion of the Soviet units from the
Off -Map Box. The Soviet units may remain in the box indefinitely. They may attack and be attacked. If attacked, only step losses are recorded since no further advance is possible. If they attack and are successful, the Axis Control Marker is pushed back one space and normal procedures can be resumed in the next combat phase.
Complete capture by the Soviet Player of all spaces on the Black Sea Coast Track will force the retreat of all Axis units in the Black Sea Box to the Caucasus Box. If the Krasnodar space is Soviet controlled then all Axis units are permanently removed from play. They are assumed to have retreated across the Kerch Straits. They are not considered eliminated, therefore the Soviet Player is not awarded victory points.
Complete capture by the Soviet Player of all spaces on the Caucasus Box will result in the expulsion of the Axis units from that Off Map Box. All Axis units in the Caucasus Box are retreated two hexes north onto the map through any hex from 4737 to 4728. Any Axis unit that was not in the off map box but located in hexes 4737 through 4728 must also be retreated two hexes north. The Soviet Player may now advance his units onto the map and occupy any of the hexes from 4737 to 4728 inclusive.
Axis units may reenter the Caucasus Box at any time through hexes 4737 through 4728. If they do, the Axis Player again places his Control Marker on the Kuban Steppes space and the just described procedures are resumed.
Soviet Replacements
The Soviet Player may enter one infantry type replacement per turn in the Caucasus Box. The Replacement is not free, it must come from those available from the Replacement roll. If the Replacement roll indicates a Naval replacement, he may enter that into the Black Sea Coast Box.
Soviet Caucasus Garrison
Some Soviet units start in the Caucasus Off Map Box, others arrive as reinforcements. These units were either guarding the Turkish border or the resources of the area. Therefore the following rules
-
Soviet units may exit the Caucasus Box at any time on or after turn 21.
-
No Soviet unit may ever leave these two Off Map Boxes before Turn 21, even if there are no Axis units in the Caucasus Box.
Soviet Control Markers
For purposes of receiving the benefits of terrain (the * and ** on the Control Tracks), always assume there is a Soviet Control marker just to the right of the Axis Control marker.
No Opposition
[Change] There is no provision to handle the possibility of no opposition on the Caucasus Off Map boxes. In other words, how many boxes per turn can a player take if all enemy units suddenly depart? Answer Four boxes per turn (the marker is moved during the Combat Phase).
SECTION IV: Scenarios
QUICK SET-UP It is not necessary to use the correct divisional designations when setting up play. Any division may be used which is the same type and has the same ratings for movement, combat and steps.
[Change] All "At Start" units (except HQ) must be set up within 3 hexes of the At Start Line if their Army's set-up hex focal point is within three hexes of the At Start Line.
Comment In other words, no setting up a thin screen on the front line, and placing all your other units far to the rear.
Victory Points for Isolated Units apply to both sides.
35.0 Fall Blau
Fall Blau was the codename for the German summer offensive. Its general aim was to destroy Soviet defensive strength and capture resources used in the Soviet war economy. The plan devised to accomplish this was a series of offensives aimed at pocketing as many Soviet units as possible. Long term objectives were to reach the Volga River (disrupting this vital transportation route for Caucasus oil) and capture of the oil fields itself.
Set Up Instructions
Players use the Fall Blau At Start Displays to determine their initial starting units. The Soviet Player sets up first, followed by the Axis Player. As long as the instructions on the setup card are followed the units may be placed in any hex as long as the following conditions are met
-
All Soviet units must start east of, and all Axis units west of the June 28th Start Line.
-
The Soviet Player must place enough units adjacent to the start line to prevent any Axis unit moving across the start line except by combat.
-
The Axis Player must do the same as in case 2, except on his side of the start line.
-
The Soviet Player must reduce his at start forces by five steps. No unit may take more than one step loss, and no more than three step losses may be taken from a single army.
[Change] The Soviet Player must distribute five steps losses to his units within the 38th Army. No unit may take more than one step loss. This is in addition to rule 35.1(4).
Supply
Each side starts with 12 Supply Points. Neither side receives any Depots at the start, but they may be created in the course of play.
[Change] Add two supply depots to the Axis At Start forces. These may start in any hex west of the June 28th start line.
Railheads
For the Axis Player, all rail hexes west of the June 28th start line are considered repaired with the exception of the line from 2946 to 3444, from 3447 to 3444, and from 3647 to 3845. The Axis Player should places Railheads in 2947, 3448, 3648 to indicate this. For the Soviet Player all rail hexes east of the June 28th Start Line are considered repaired.
Replacements
Neither side has accumulated Replacements at the start except the two in the German 6th Army. All other Replacement units are placed in the Replacement Pool.
NOTE Players count Victory Points at the end of turn 15. Any unit that was eliminated, but has returned to play via the replacement rules is not counted for Victory Points.
Weather
The weather is "Clear" on the first turn if playing with the weather rules.
Special Rules
There is no Movement Phase for Axis units on the first turn, the game begins in the Axis Combat Phase. Before resolving combat, the Axis Player may activate any number of his Army HQ as he wishes, as long as he pays the Supply and Transport cost.
[Change] Allow the two German infantry divisions at Kursk and the three Hungarian units at Oboyan (hex 2150) to move on the first turn. Note that the two units at Kursk are three hexes away and will not be able to take part in combat on the first turn. The Hungarian units can reach the front and attack on the first turn.
Comment These units were initially in Reserve and ready to be committed. The six motorized units near Stalino were in the process of replenishing and were not in any condition to attack.
[Change] SOVIET RESERVE ARMIES The three reserve armies arriving as reinforcements (the 3rd, 1st and 2nd), must enter the map east of hex 1032. These armies were located on the Voronezh -Moscow axis.
[Change] KUBAN GARRISON The four Soviet units that start within four hexes of 4336 (south map) may not move until an Axis unit on the south map moves adjacent to Rostov or a Don River/Marsh hex.
Comment These units were garrisoning the north western Kuban against a possible Axis invasion across the Sea of Azov.
[Change] The Axis may move in the first turn of Fall Blau if the units moved are exploiting a hole in the defender's line created by a Movement Phase Overrun.
Game Length
The game begins on Turn 1 and continues until game turn 15.
How to Win
Victory is determined at the conclusion of Turn 15. The player with the most Victory Points wins.
[Change] Exception To win, the Axis Player must have at least twenty more Victory Points than the Soviet Player.
Victory Points are counted at the conclusion of turn 15 and are awarded for the following reasons
Axis Victory Points
A. 1/2 Victory Point For each Soviet Division, Corps or HQ in the Cadre Box.
B. 1/4 Victory Point For each Soviet Brigade or Regiment in the Cadre Box.
C. Soviet units which have lost their Cadres are worth double their Victory Point value.
D. 1 Victory Point for each Axis division exited off the south edge of the map at a road hex.
Exception Count the Oil Brigade as 5 Victory Points (the only function for this unit is its victory point value if exited off the south edge), count panzer and mechanized units as 2 Victory Points. Count brigades and regiments as 1/2 a Victory Point. Only the first six Axis Allied divisions (Hungarian, Rumanian, or Italian) can count towards Victory Points, the rest are worth no Victory Points. At the end of turn 15 the Axis Player must be able to trace a Line Of Communication from his friendly map edge to at least one road hex on the south edge of the southern map; failure to do so results in no Victory Points awarded for exited units.
E) 12 Victory Points for having at least three Axis units (any type) adjacent to a Volga River hexside. The three units must be in Supply and able to trace a Line Of Communication back to the Axis Friendly Map edge.
Soviet Victory Points
A. 10 Victory Points for each Major City hex the Soviet Player controls with a Line Of Communication (LOC) to a Friendly Map Edge. If playing with the Major City Battle rules, the Soviet Player must control the entire city hex to receive any Victory Points,
B. 5 Victory Points for each Minor City hex the Soviet Player controls with a LOC to a Friendly Map Edge.
C. 1 Victory Point for each German division in the Cadre Box.
D. 1/2 Victory Point for each Axis Minor Allied division in the Cadre Box.
E. Brigades and Regiments are worth half the value of a division of that nationality for cases C and D.
F. Axis units which have lost their Cadres are worth double their Victory Point Value.
ISOLATED UNITS For Victory Point purposes, units Isolated at the end of the game are counted as eliminated units which have lost their Cadres.
36.0 Operation Uranus
Uranus was the codename for the Soviet winter offensive aimed at trapping the German 6th Army at Stalingrad. The offensive succeeded beyond their expectations. From the north, 5th Tank Army along with 21st and 65th Armies broke through the Third Rumanian Army and reached the Don River bridge at Kalach within 3 days. From the south, 57th and 51st Armies broke through the Rumanian divisions facing them and then completed the encirclement by linking up with 5th Tank Army near Kalach. From then on, it was a series of battles as the Soviets strove to tighten the encirclement and the Axis attempted to relieve it.
Set Up Instructions
Players use the Operation Uranus At Start Displays to determine their initial starting units. The Axis Player sets up first, followed by the Soviet Player. As long as the instruction on the setup card are followed the units may be placed in any hex with the following restrictions
-
All Soviet units must start east of, and all Axis units west of the November 19th Start Line.
-
The Soviet Player must place enough units adjacent to the start line to prevent any Axis unit being able to move across the start line unless by combat. This restriction does not apply on the south map.
-
The Axis Player must do the same as the Soviet Player in Case 2 above, except it applies to his side of the start line. Again, this restriction does not apply to the south map.
-
The Soviet Player must reduce his units by [Change] 30 steps before beginning play. No more than one step from each unit, and no more than [change] three steps from any single army.
STALINGRAD The Soviet Player has control of 1/4 of Major City hex 4209. His Access hexsides are those adjacent to the Volga River. The Soviet Player may start 3 divisions from his 62nd Army in this hex at the start of the game (place on the Major City Battle Display).
Supply
The Soviet Player starts with 12 Supply Points and the Axis Player starts with 6 Supply Points.
Railheads
For the Soviet Player all rail hexes east of the Nov. 19th Start Line are considered repaired. For the Axis Player, all rail hexes on the south map are repaired, and all rail hexes on the north map west of the June 28th Start Line are repaired. In addition, the Axis Player places railheads in the following hexes 1541, 3041, 4334, 4130,4535, 4515 and 4812. Note that the line from 1541 to Voroshilovgrad is repaired.
Replacements
All Replacement units start in the Replacement Pool.
Weather
If playing with the Weather rules, the first turn is Overcast.
Special Rules
The game starts on turn 49 with the Soviet Player's Combat Phase. There is no Axis Player Turn or Soviet Movement Phase in this Game Turn. The Soviet Player may Activate as many of his Army HQ as he wishes as long as he pays the Supply and Transport cost.
[Change] 5th TANK ARMY. The 5th Tank Army receives a free Artillery Barrage Shift plus 10 attack factors that may be applied to any one combat on turn one of Operation Uranus. The artillery shift does not expend any supply. This special artillery bonus applies only on turn one.
Comment The Soviet 5th Tank Army was loaded with supporting artillery at the beginning of Operation Uranus (more so than any other army). In the game it was not given an Artillery division because the numerous regiments were not organized into a division and most of the artillery was returned to STAVKA reserve after the initial barrage.
[Change] The Soviets may move on the first turn of Uranus if the units moved are exploiting a hole in the defender's line created by a Movement Phase Overrun.
Game Length
This scenario is 14 turns long. It begins on turn 49 and ends on turn 62.
How to Win
Victory is determined at the conclusion of Turn 62. The player with the most Victory Points wins.
[Change] Exception To win, the Soviet Player must earn at least ten more Victory Points than the Axis.
Victory Points are counted at the conclusion of turn 62 and are awarded for the following reasons
AXIS VICTORY POINTS The Axis player receives Victory Points for Soviet units that are eliminated or Isolated at the conclusion of turn 62. The Victory Point value of such Soviet units is the same as in the Fall Blau scenario.
SPECIAL Award the Axis Player 20 Victory Points if both hexes of Stalingrad are at least 1/4 friendly controlled, and a line of communication can be traced to the city from the Axis friendly map edge. Also award the Axis Player 20 Victory Points if he controls 100% of Rostov and has a LOC to his Friendly Map Edge. No Victory Points are awarded if the cities are controlled but have no Line Of Communication.
Comment Holding Stalingrad was psychologically very important to Hitler. Holding Rostov was critical for the escape of lst Panzer and 17th Army from the Caucasus.
SOVIET VICTORY POINTS The Soviet Player receives Victory Points for controlling cities and for Axis units that are eliminated or Isolated at the conclusion of turn 62. Victory Point values are the same (for units and cities) as in the Fall Blau scenario.
NOTE If Stalingrad is isolated at the end of the game with Axis units inside, the Soviet Player receives victory points for the Axis units but does not receive victory points for the city hexes. Also note that the Soviet Player starts this scenario holding 20 Victory Points worth of cities.
37.0 Campaign Game
This scenario links Fall Blau with Operation Uranus. Historically during September and October the German 6th Army slowly battled its way into Stalingrad, while the 1st Panzer Army and the 17th Army went south to the Caucasus. Little campaigning actually occurred along the rest of the front due to insufficient manpower and the muddy season that began in October.
Set Up Instructions
Players use the Fall Blau At Start Displays and the same rules governing that set-up.
Supply, Replacements, Weather, and Special Rules
Same as the Fall Blau scenario.
Game Length
The game begins on Turn 1 and continues until game turn 62.
How to Win
Victory is determined at the conclusion of Turn 62. The player with the most Victory Points wins. If players have the same amount of Victory Points, it is a tie. Victory Points are counted at the conclusion of turn 62 and are awarded for the following reasons
Axis Victory Points
A. The Caucasus Display Victory Points are awarded to the Axis Player for his gains in the Caucasus and Black Sea Coast Tracks. He receives all the Victory Points which are located in the box of his Control Marker and all boxes to the left of the Control Marker. The Axis Player must have a Line Of Communication to any road hex on the south edge of the map at the conclusion of turn 62 to receive these Victory Points. If the Oil Brigade is not in the Caucasus Box on turn 62, he receives only half (rounded down) the number of Victory Points he was to receive from the Caucasus Control Track (the only function for this unit is its victory point value if exited off the south edge.)
Example If the Axis Player's control markers were on the Mozdok space of the Caucasus Track and the Novorossiysk space on the Black Sea Coast Track, then he would receive five Victory Points.
B) 12 Victory Points for having at least three Axis units (any type) adjacent to a Volga River hexside. The three units must be in Supply and able to trace a Line Of Communication back to the Axis Friendly Map edge at the conclusion of Turn 62.
Soviet Victory Points
A. 10 Victory Points for each Major City hex the Soviet Player 100% controls with a LOC to a Friendly Map Edge.
B. 5 Victory Points for each Minor City hex the Soviet Player controls with a LOC to a Friendly Map Edge.
Automatic Victory
If either player controls all Major and Minor City hexes on the map, he is immediately declared the winner and the game is ended.
Eliminated Units
Victory Points are not awarded for eliminated units. Due to the length of this scenario, eliminating your opponent's units will be adequately rewarded by making your Victory Point objectives more attainable.
SECTION V: Optional Rules
38.0 Abstracted Air Power
Comment The values printed on the Air Units were for the Standard Air Game. Those values are ignored when using this abstracted version.
The Axis Player starts the Fall Blau scenario with two air units. On turn 3 he receives another as reinforcement. The Soviet Player has one Air Unit for the duration of the Fall Blau scenario.
Air Units may be used for Ground Support or Interception. Each Air Unit may perform one mission per turn.
GROUND SUPPORT. This mission allows Air Units to assist friendly ground units during the owning player's Combat Phase. Ground Support provides a favorable shift of one column to the right on the CRT. Ground Support may only be used by the attacker, there is no defensive Ground Support. Air Units performing Ground Support are placed at the start of the owning player's Combat Phase. Indicate an Air Unit on Ground Support by placing it in the hex to be attacked.
No more than one air unit may be allocated for Ground Support in a combat.
INTERCEPTION Axis Player only. This mission allows an Axis Air Unit to cancel a Soviet Air Unit on Ground Support. Interception occurs during the Soviet Combat Phase after the Soviet Player has placed his Air Units and before any combat is resolved. An Axis air unit used to provide a shift in the Axis Player's Combat Phase may not be used for interception. The intercepting unit and the intercepted unit return to play in the next turn.
Operation Uranus
Each player receives two Air Units.
39.0 Rivers
Comment The effects of rivers on combat was kept simple for the basic game. The following rule is probably a more accurate reflection of a river's defense value.
Units attacking across Minor Rivers have their attack strength halved. Units attacking across Major Rivers have their attack strength reduced to 1/3. Units attacking across Volga hexsides have their attack strength reduced to 1/4.
Total all attacking units, then round fractions DOWN.
As before, river benefits are not cumulative with any other type of terrain.
Comment Rivers are not cumulative with forest because there were almost always trees lining the rivers. They don't show up on the map because of the small area they covered in a hex. Rivers are not cumulative with cities because the combination of those two modifiers would be far too helpful for the defender. Sometimes the cities were located back from the river, and sometimes the river flowed through the middle of the city.
All units attacking into and out of a Marsh hex or across a Marsh hexside have their attack strength reduced to 1/3.
40.0 Heavy Artillery Barrages
A player may receive a favorable shift to the CRT of one column by declaring a Heavy Artillery Barrage. To declare a Heavy
Artillery Barrage the Soviet Player must have an Artillery Division (on its "0" movement side) stacked with a Supply Depot and adjacent to the target hex or adjacent to a friendly unit that is attacking the target hex. For the Axis Player to declare a Heavy Artillery Barrage he must have an Army HQ stacked with a Supply Depot and located within four hexes of the target hex, plus the Army HQ may not have moved in the preceding Movement Phase.
The cost for each Heavy Artillery Barrage is the Supply Depot the unit is stacked with.
41.0 Army HQ Limitations
Activated Army HQ may only provide Attack Supply to a limited number of divisions. Count brigades and regiments as 1/2 of a division. Count Soviet corps as divisions.
-
Activated German Army HQ may provide Attack Supply to only 12 divisions. Furthermore, Panzer Army HQ may provide Attack Supply to no more than 6 motorized divisions. Non-Panzer Army HQ may provide Attack Supply to no more than 3 Motorized divisions.
-
Activated Soviet Army HQ may only provide Attack Supply to 9 divisions. Furthermore, Tank Army HQ may only provide Attack Supply to 4 Motorized divisions. Non-Tank Army HQ may provide Attack Supply to no more than 2 Motorized divisions.
-
Activated Axis Allied Army HQ may provide Attack Supply to only 9 divisions, no more than two may be motorized.
-
NATIONALITY RESTRICTIONS
A) Each Axis Army HQ may provide Attack Supply to no more than two units of a different nationality.
B) Hungarian Army HQ may not provide Attack supply to Rumanians and vice versa.
-
There is no limit to the number, type or nationality of units for which one Army HQ may provide General Supply.
-
Depots may provide Attack Supply to no more than 6 divisions, two of which may be motorized.
42.0 Fog of War
A player may only look underneath the top unit of a stack of enemy units if that stack is adjacent to one or more of his units.
43.0 Off Map Supply
Players may assume that there are Connecting Rail Hexes off their Friendly Map Edges. This will allow them to Activate HQ and build Supply Depots without tracing to an on map rail hex. Assume that the distance (for Transport Point cost) is 5 hexes beyond the map edge for the north map, and 15 hexes for the south map.
44.0 Soviet Armor
When resolving combat in which both sides have armor units involved in the combat, the Axis Player does not receive an Armor Superiority shift if the Soviet Player has any number of Heavy Tank regiments or Guards armor units participating in the defense.
Comment The Soviets usually put their best tanks (T-34s) in their Guard formations. The heavy tank regiments were composed of heavy KV tanks which were more than a match for German armor.
45.0 Command Control
Note This represents an excessive penalty.
An Axis or Soviet unit that is attacked and cannot trace a Line of Supply to an Army HQ at the moment of combat suffers the following penalties
-
The attacking player receives a favorable shift of one column to the right on the CRT.
-
The defending units may not use Determined Defense.
Designer's Notes
ZOC BONDS This is a funny rule to grasp at first, but you'll find it allows the right amount of movement in salients and in tight pockets. It also prevents that irksome trick of surrounding a stack with just two units on each side. This rule was very popular with the playtesters.
DETERMINED DEFENSE This rule bothered some playtesters who felt it should be declared before combat like the Maximum Effort. Rather than think of it as a "hold at all cost" order issued before or during a battle, think of it as a hasty counterattack after the battle that either restores the line or holds up the enemy advance for a period of time.
The Soviet Player should make good use of this rule when he is defending in Major City hexes where he is doubled. In those cases the Axis Player will usually only get an advance of one or two hexes. A Determined Defense is usually not worthwhile when the attacker has an advance of three or more hexes.
MAXIMUM EFFORT. This is a costly tactic. It is probably best to use this only when time is critical or when you are forcing river lines.
STALINGRAD The combination of Determined Defense, Maximum Effort and Major City Battle rules can make for a long city fight. To make it even longer, have the army that is attacking the city be at the end of a long supply line and forced to compete for supply and transport points with two other armies. It could take months to take a double hex city, like... let's see ... that one on the Volga.
COMBAT ZONE Some playtesters wanted this rule in the Zone of Control section. It has nothing to do with Zones of Control! You pay that +1 MP whether or not the enemy unit has a ZOC. It is a small rule with a major impact. Notice that an infantry unit that starts adjacent to an enemy unit could move three hexes away and the enemy unit could not maintain contact. To pursue a unit in full retreat you will need either cavalry, motorized or German Jaeger units.
THE CAUCASUS CAMPAIGN I suppose it was silly to put out a game on the Axis 1942 offensive and cut off the map before the oilfields. I did so because a large map would not fit on most gaming tables. To make up for that deletion the off map campaign was given a lot of detail. I'm afraid I might have made the rules too long and deterred most Axis Players from even attempting the south edge exit. If you are the Axis Player, don't attempt this campaign unless you are going to do it in force. Historically, the Axis sent about 20 divisions down there and still only reached the Terek River and Novorossiysk.
THE CAUCASUS TRANSIT BOXES The Soviet Player will need to use these boxes to reinforce the Caucasus boxes once the Axis has entered there. And reinforce the Soviet Player should! Don't expect that garrison by itself to stop the Axis Player from getting to the oilfields.
GERMAN TACTICAL ADVANTAGE The German Army of 1942 was still a highly effective fighting force, while the Soviet Army was still experiencing difficulty coordinating a large attack. I went with the reroll system to reflect this, because the psychological impact is much more evident than a CRT column shift. The Soviet Player might feel his units have fumbled another attack when he rerolls a six and gets a one or two. The Axis Player might feel his German units have pulled off another decisive tactical victory when he rerolls a one and gets a five or six.
AIR RULES Do not think of the abstract air rules as a poor substitute. The game is nearly at the point where some may believe that complexity compromises playability. The optional simpler set of air rules may be used to redress this.
With the optional Air Rules, I do miss using those air HQ. Perhaps clever player's will submit an easy rule to incorporate them into the abstract air rules and the Air Transport Table.
Player Notes
Fall Blau
AXIS PLAYER The Axis Player has basically three strategies (1) Go for the Caucasus; (2) Go for the Volga; or (3) Take Voronezh and pocket a lot of Soviet divisions. Each strategy has its merits, and you can wait until about turn three or four to decide which to follow.
Keep your motorized units together so if you do get an Advance After Combat of four or five hexes it can be exploited by at least two or three motorized divisions. Take full advantage of the fact Soviet units are halved in defense when isolated.
Get your 1st Panzer Army started as soon as possible; don't wait to build it up to full strength.
There is a great potential to pocket a lot of Soviet units between the Donetz and the Don river. Be vigorous and even consider a Maximum Effort or two.
SOVIET PLAYER Be very careful about the middle of your line. It can be easily pocketed if you are not careful. It is probably best to set up your units in this area ready to run eastward as fast as they can. Don't expect to hold any sort of line between the Donetz and the Don, just retreat to the Don. Remember, your best help will come from an extended Axis Supply line.
Voronezh is an excellent place to entice the German player into a time consuming pitched battle. If he attacks the city, keep feeding units into it as long as the attrition rate is acceptable.
If his main spearhead is aimed across the Don at the Volga, don't be afraid to give up the Don river line; there are others.
Operation Uranus
AXIS PLAYER This scenario is very frustrating for the Axis Player. You'll have to keep at least some units in Stalingrad to prevent the Soviet Player from gaining the Victory Points for that city. just how much to keep in the pocket is a tough question. Don't forget to truck in a few Supply Depots before the pocket closes for possible counterattack purposes.
In the first couple of turns, it might be best to retreat and make the Soviet extend his supply line. Don't attempt to go back into Stalingrad until you have enough forces; wait until the panzer divisions arrive and shuttle some infantry divisions down from the 2nd Army. If it looks like the relief effort will fail, retreat back to the Donetz and hope to surprise the Soviets with a quick counterblow.
SOVIET PLAYER Your options are wide open. You should be able to pocket Stalingrad, but it probably will not happen as fast as it did historically (two turns). You may want to use plenty of Maximum Efforts so as to close the pocket as soon as you can. If you've destroyed a fair number of Rumanian divisions and pocketed the city, you'll probably have enough Victory Points to win the game. But you can't just hold tight, because the Axis Player will have the opportunity to strike back. Keep him off guard by starting another offensive around the Italian or Hungarian area in December.
Don't get too wild with your tank corps, they are very vulnerable against counterattacks. Maybe stack them in pairs (following Stalin's repeated advice to his generals) or keep them around plenty of rifle divisions.
The major prize is Rostov (a 30 point victory swing), but don't forget Voronezh; its worth ten Victory Points to you. If the German Player leaves it too lightly defended, go for it.
Campaign Game This scenario was purposely designed to give the players the widest range of options. Have a ball with it and let us know the results!.
Bibliography
Most printed sources available in this country were consulted, as well as microfilms of captured German documents. Our bibliography is available free upon request. Please include a self-addressed stamped envelope.
Note that we do not claim our order of battle is 100 % correct. Great effort was made to make it as complete as possible. Some units were deleted or substituted, however, when play balance or counter limitation dictated.
Note On Soviet Forces
It was a monumental task to determine where the Soviet units were and when, but it was an impossible task most of the time to determine their exact strengths. The units that start reduced on the At Start Displays reflect our research, while the required step losses the Soviet Player must distribute represent losses we know must have been accumulated, but could not pinpoint precisely.
Due to the large number of rifle and tank brigades in the Soviet Army, a good share of them have been left out of the order of battle.
A fair number were included in the counter mix and it was left up to the Replacement rules to reflect the remaining. Therefore, exact brigade designation was not followed in the scenarios.
Errata
-
CAUCASUS DISPLAY CARD Change "Turn 25" to "Turn 21 " in the sentence explaining the Caucasus Garrison. Delete the words "Axis Entry Space" above the Krymskaya box on the Black Sea Coast Control Track.
-
URANUS REINFORCEMENT CARD The first turn Soviet reinforcement may start the game on any friendly controlled rail hex that is not adjacent to an enemy unit.
-
TURN RECORD TRACK
A) The Soviet 6th Mech corps arrives on Turn 59, delete the withdraw graphic on Turn 44.
B) Delete the Soviet 4T Army HQ from Turn 26 -it arrives on Turn 11 as shown.
C) The temporary withdrawal of the 19th panzer division is missing. It should withdraw on Turn 22 and return on Turn 61.
D) The German 95th division's withdraw graphic is missing. It withdraws on Turn 29.
E) The withdraw graphic on Turn 25 applies to any Soviet Tank Corps.
-
132nd DIVISION The 132nd German infantry division was left on the counter sheet by mistake (it served in the 11th Army). Ignore it for all purposes.
-
DESIGNER'S GOOF There is only one Control Track on the Display, although there certainly could be more than one Major City battle going on at one time. This is an error that was caught after printing. Therefore, if two or more city battles are taking place at the same time, players must devise some method to distinguish which control marker goes to which Major City Hex. I apologize for this inconvenience.
Expanded Sequence of Play
I. Admin Phase
-
Remove Air Units
-
Roll for weather
-
Air unit Replacement (odd numbered turns after the first turn only)
II Axis Player Turn
A. Axis Movement Phase
-
Roll for Replacements and place them on Army Group HQ (maximum of one per HQ).
-
Remove units that must be Withdrawn
-
Check for Reinforcements and place them on the map at a friendly map edge.
-
Increase Supply Point Marker two points.
-
Move Transport Marker to the [change] "3" space.
-
Activate Army HQ (this may be done at any time during the player turn including during the Combat Phase).
-
Axis Air Segment
-
Axis Player may change mobility status of his Air HQ.
-
Defensive Air Placement
-
Offensive Air Placement
-
Check for Support and remove Air units without Support.
-
Resolve Air to Air Combat
-
Move some, none or all Axis units (including Reinforcements and Replacements). Remember +1 MP for moving adjacent to an enemy unit.
-
- Remove Depots if used to Activate an Army HQ.
B. Axis Combat Phase
-
Resolve Bombardments (Phasing Player only)
-
Place Air Units on Ground Support.
-
- Resolve Combats
-
- Conduct Overruns for each Advance After Combat before proceeding to the next combat.
-
5 Place Disrupted Markers on all units that retreated.
-
- Remove Depots if used for Attack Supply.
C. Axis Supply Phase
-
General Supply is checked for all friendly units. Place Out Of Supply and/or Isolated Pocket Markers on Axis units. If there are any Axis Isolated Pockets, roll for Air Supply.
-
All Activated Army HQ are flipped back to their non-Activated side whether or not they were used to provide Attack Supply.
-
Depots may be created and moved.
-
Replacements may be absorbed. German Infantry Regiments created.
-
Any three friendly Railheads may be moved forward one hex.
-
All Disrupted markers are removed from Axis units.
III Soviet Player Turn
-
The Soviet Phases are identical to the Axis Phases (switching the term Soviet for Axis) with the following addition to the Supply Phase:
-
- Soviet Artillery Divisions may be flipped to either side.