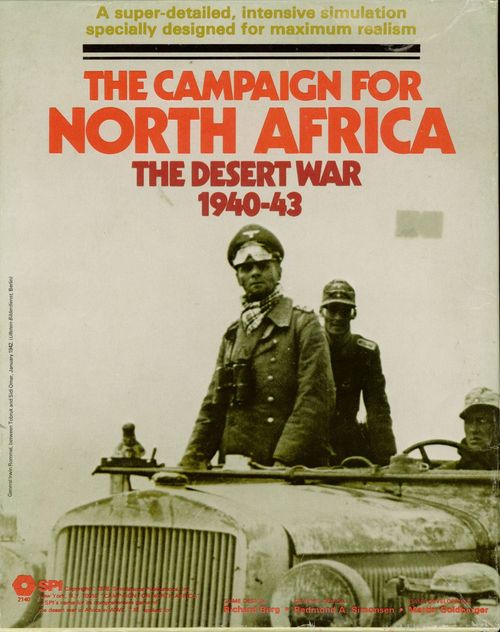
The Campaign for North Africa: The Desert War 1940-43
The Campaign for North Africa: The Desert War 1940-43 Rulebook
Table of Contents
Table of Contents
-
- Land Game Rules of Play
- [1.0] INTRODUCTION
- [2.0] HOW TO PLAY THE GAME
- [3.0] GLOSSARY AND UNIT DEFINITIONS
- [4.0] GAME EQUIPMENT
- THE LAND GAME
- [5.0] THE SEQUENCE OF PLAY (Land Game)
- [6.0] THE CAPABILITY POINT SYSTEM
- [7.0] INITIATIVE
- [8.0] LAND MOVEMENT
- [9.0] STACKING
- [10.0] ZONES OF CONTROL
- [11.0] THE COMBAT SYSTEM
- [12.0] BARRAGE (Artillery Combat)
- [13.0] RETREAT BEFORE ASSAULT
- [14.0] ANTI-ARMOR COMBAT
- [15.0] CLOSE ASSAULT
- [15.1] WHICH UNITS MAY PARTICIPATE IN CLOSE ASSAULT
- [15.2] HOW CLOSE ASSAULT OCCURS
- [15.3] TERRAIN EFFECTS ON CLOSE ASSAULT
- [15.4] COMBINED ARMS EFFECT ON ASSAULT
- [15.5] EFFECT OF ASSAULTING FORCE ORGANIZATIONAL SIZE ON CLOSE ASSAULT
- [15.6] EFFECTS OF MORALE ON CLOSE ASSAULT
- [15.7] HOW TO USE THE CLOSE ASSAULT COMBAT RESULTS TABLE
- [15.8] DETERMINING CASUALTIES
- [15.9] PROBES
- AN EXAMPLE OF COMBAT
- [16.0] PATROLS AND RECONNAISSANCE
- [17.0] MORALE
- [18.0] RESERVE STATUS
- [19.0] ORGANIZATION AND REORGANIZATION
- [19.1] DIFFERENCE BETWEEN
- [19.2] UNIT ASSIGNMENTS
- [19.3] FORMATION ORGANIZATION CHART
- [19.4] RESTRICTIONS ON ATTACHMENT AND DETACHMENT
- [19.5] MAXIMUM ATTACHMENT CHART
- [19.6] REBUILDING DEPLETED UNITS
- [19.7] AXIS BATTLE GROUPS
- [19.8] FORMING AD HOC AXIS ANTI-TANK BATTERIES
- [19.9] AUGMENTING COMMONWEALTH BATTALIONS WITH ANTI-TANK
- [20.0] REINFORCEMENTS, REPLACEMENTS AND COMMONWEALTH WITHDRAWALS
- [20.1] REINFORCEMENTS
- [20.2] REPLACEMENT POINTS
- [20.3] REPLACEMENT POINT CONVERSION CHART
- [20.4] HOW REPLACEMENT POINTS ARE USED
- [20.5] UPGRADING ARMORED CAR EFFECTIVENESS
- [20.6] AXIS PLANNED REPLACEMENTS
- [20.7] COMMONWEALTH PRODUCTION
- [20.8] COMMONWEALTH MANDATORY WITHDRAWALS
- [20.9] VOLUNTARY COMMONWEALTH WITHDRAWALS
- [21.0] BREAKDOWN
- [22.0] REPAIR
- [23.0] ENGINEERS
- [24.0] CONSTRUCTION
- [24.1] HOW CONSTRUCTION WORKS
- [24.2] ADVERSE EFFECTS ON CONSTRUCTION
- [24.3] CONSTRUCTING MINEFIELDS
- [24.4] CONSTRUCTING FORTIFICATIONS
- [24.5] ROAD CONSTRUCTION
- [24.6] BUILDING AND REPAIRING RAILROADS
- [24.7] CONSTRUCTING AIR FACILITIES (Air Game Only)
- [24.8] CONSTRUCTING REPAIR FACILITIES
- [24.9] CONSTRUCTING SUPPLY DUMPS AND DUMMY SUPPLY DUMPS
- [25.0] FORTIFICATIONS
- [26.0] MINEFIELDS
- [27.0] DESERT RAIDERS & COMMANDOS
- [28.0] PRISONERS : POW
- [29.0] WEATHER
- [30.0] THE MEDITERRANEAN FLEET (Commonwealth)
- [31.0] ROMMEL
- [32.0] ABSTRACT LOGISTICS AND AIR RULES
- [32.1] SUPPLY UNITS AND SUPPLY
- [32.2] SUPPLY EXPENDITURES
- [32.3] MOVEMENT OF SUPPLY UNITS
- [32.4] AVAILABLILITY OF SUPPLY UNITS
- [32.5] MOTORIZATION POINTS
- [32.6] SIMPLIFIED AXIS NAVAL CONVOYS
- [32.7] BOMBARDMENT OF THE COMMONWEALTH FLEET
- [32.8] ANTI-AIR UNIT MODIFICATIONS
- [32.9] ROAD AND TRACK STACKING MODIFICATION
- ADDENDA
- [33.0] SEQUENCE OF PLAY: Air Game
- [34.0] THE AIRCRAFT
- [35.0] SQUADRON GROUND SUPPORT UNITS
- [36.0] AIR FACILITIES
- [37.0] FLIGHT
- [38.0] AIRCRAFT MAINTENANCE
- [39.0] MISSIONS
- [40.0] FIGHTER COMBAT
- [41.0] BOMBING MISSIONS
- [42.0] NON-COMBAT MISSIONS
- [43.0] AXIS ITALIAN-AEGEAN AIR BASES
- [44.0] MALTA
- [45.0] AIR-TO-AIR COMBAT
- [46.0] ANTI-AIRCRAFT FIRE (FLAK)
- [47.0] ABSTRACT LOGISTICS RULES
- THE LOGISTICS GAME
- [48.0] SEQUENCE OF PLAY (Logistics Game)
- [49.0] FUEL
- [50.0] AMMUNITION
- [51.0] STORES
- [52.0] WATER
- [53.0] TRUCKS AND TRANSPORT
- [54.0] SUPPLY CO-ORDINATION
- [55.0] PORTS AND SUPPLY
- [56.0] THE AXIS NAVAL CONVOY SYSTEM
- [57.0] COMMONWEALTH SUPPLY BASE
- [58.0] ABSTRACT AIR RULES
- SCENARIOS
- [59.0] INTRODUCTION TO SCENARIOS
- [60.0] SCENARIO GROUP ONE: The Italians
- [61.0] SCENARIO GROUP TWO: THE DESERT FOX
- [62.0] SCENARIO GROUP THREE: OPERATION CRUSADER
- [63.0] SCENARIO GROUP FOUR: EL ALAMEIN
- [64.0] SCENARIO GROUP FIVE: THE CAMPAIGN FOR NORTH AFRICA
- [65.0] IN CONCLUSION
- DESIGNER'S NOTES In Brief
- Charts and Tables Common to Both Players
- [8.37] TERRAIN EFFECTS CHART
- [36.53] ALLIED OFF-MAP AIR FACILITIES CHART
- [8.89] OFF-MAP LAND UNIT MOVEMENT DISTANCE CHART
- [37.4] AIR DISTANCE CHART
- [56.26] ROAD DISTANCE TABLE
- [37.42] LAND DISTANCE CHART
- [56.18] AXIS NAVAL CONVOY AIR DISTANCE CHART
- SUMMARY OF IMPORTANT LOCATIONS
- [6.3] CAPABILITY POINT EXPENDITURE SUMMARY
- [15.53] ORGANIZATION SIZE CLOSE ASSAULT MODIFICATIONS CHART
- [16.6] PATROL SURVIVAL TABLE
- = Number of Battalion size-equivalent units in that hex about which the Patrolling Player receives Reconnaissance Information.
- = Number of Operations Stages needed to train that type of Replacement Point or raise any type of an untrained Commonwealth unit's Basic Morale one point. The Commando Replacement Point must be trained by its assigned unit. Note that the time required for training guns is more of an uncrating cost than training necessity.
Land Game Rules of Play
[1.0] INTRODUCTION
The Campaign for North Africa is a simulation of operations in Libya and Egypt from 1940 through early 1943. CNA was designed as a definitive simulation; it was intended for the sophisticated wargamer and the serious student of history. As such, CNA is the most logistically-oriented game ever designed and may be considered by some to be overly complex. Actually, the game system itself is quickly absorbed and most experienced Players will have little problem understanding how to play the game. At the same time, there is a ferocious amount of information for the Players to digest and use, and the assimilation and coordination of all this information is what makes CNA so formative, so challenging, and so (hopefully) enlightening. Very little has been abstracted; CNA contains more hard information on the subject than any other single source encountered by the SPI design staff.
The Campaign for North Africa is not a game for one, two, or even three players. This is a multiPlayer game in the true sense of the word. It is recommended, for maximum playability and efficiency, that, on each side, one person be assigned to Logistics, one person to Air Forces command, and at least three Players to Land Forces command (again per side). It is also firmly suggested that there be at least one calculator available.
It should be stated here that although the rules are quite long, CNA is quite an easy game to explain to somebody. By this, we mean that someone who is familiar with the rules can tell other Players how to play with remarkable ease.
Each hex represents approximately eight kilometers; each Game-Turn represents one week of "real" time. Units range in size from companies (approximately 100 men) to divisions (15,000).
[2.0] HOW TO PLAY THE GAME
COMMENTARY:
CNA is a game unlike any other that SPI has published in the past. This Section serves as an orientation for the prospective Player (or, at least, rules reader), to provide a basic overview of what is involved in the game and how it is organized.
CASES:
[2.1] ORGANIZATION OF THE RULES AND HOW THEY SHOULD BE READ
This Section of the rules (2.0) is divided into three parts. The second part discusses how the game is set-up. The third part explains what is involved in actually playing the game. Things are explained in very general terms; the intention of this Section is to give Players a broad overview of what the game is like and what sort of effort is required to learn and play it.
Section 3.0 is a glossary which is intended to both explain terms utilized in the play of the game and to explain their relationship to each other. The glossary should be perused before the rest of the.
rules, but some definitions will not be completely clear until the reader has absorbed pertinent Sections of the rules. The glossary is intended to serve both as an introduction and as a constant guide to Players in reference to specific Sections.
Section 4.0 describes the game equipment and details how the game should be set-up.
Section 5.0 includes the "Sequence of Play." This is basically an outline of a single Game-Turn. It should also be read before the rest of the rules, but will be most useful as a guide to the Players in their actual play of the game.
Sections 6.0 to 32.0 include all of the rules necessary to play the Land Game. The Land Game includes abstracted and relatively simple supply rules, and very simple air power rules. Sections 33.0 to 47.0 encompass the Air Game, which involves individual planes and pilots, and all of the effects of their presence. Sections 48.0 to 58.0 constitute the Logistics Game, which substitutes a highly realistic and intensive supply system to replace the abstract utilized if the Land Game alone is played. It is possible to play the Land Game on its own, or to combine the Land and Air Games, or to combine the Logistics Game with either the Land Game or with the Land and Air Games. Sections 59.0 to 65.0 are the five Scenario Groups. One Scenario is the entire 111 Game-Turn campaign from September 1940 (date of the Italian invasion of Egypt) on. Other Scenarios are smaller "slices" of the complete Campaign Game which can be played to a decision in considerably less time than the entire game.
[2.2] HOW THE GAME IS SET UP
There are two basic — and vital — prerequisites for playing CNA: time and people.
Preparing to play a game of CNA will take a great deal of effort. Indeed, this game cannot be played without considerable preparation, both in preparing the parts of the game for play and also in planning strategies and organizing a workable division of labor and logistics system.
Basically, there are very few counters representing units in play on the map at any one time. However, unlike many other SPI games, the counter on the map does not include all of the information about the unit it represents is necessary to play CNA. Au contraire!! In order to play CNA, the Players are required to keep track, on paper, of a myriad of details concerning the status of their units, including (but not limited to) the current strength of that unit, subsidiary units attached to that unit, the unit's current morale level and its supply status, and numerous concomitant factors. (For example, under the category "supply status," a current record of how many trucks one must keep carrying water, fuel, ammo and stores are attached to a given unit.)
Setting up the game involves compiling the information pertaining to each unit needed in the scenario. Provided with the game are three TOE Log Sheets; these forms are designed to store all such necessary information. Each of the three types of TOE Log Sheets is designed for a specific type or size of unit. In order to play CNA, it will be necessary for the Players to manufacture additional Log Sheets; they may wish to design their own or simply copy those provided. Most of the information that must be written on the Log Sheets will be found on the Organization/ Arrival Chart (4.45) and within the Scenario Rules Section itself. One Log Sheet will be required for each counter on the map.
Aside from getting all the components set up and all the TOE and supply sheets filled out, Players should be aware that they will need a goodly number of pencils (with erasers) and a hefty supply of scratch paper. A large supply of stamina might also come in handy.
In getting ready to play a Scenario, all the Players should have a fairly good working knowledge of the rules before they start. To do that, look through the charts and tables — and especially the TOE and OA Sheets — and familiarize yourself with them. The first few sections of the rules (1.0 through 5.0) are written to familiarize the Player with game terms and the system of play in general. Do not be fazed by the sheer weight of the game; play actually flows quite smoothly once the system is digested. Above all, get everyone organized; it is difficult to overstate the necessity for this. For those just wishing to see how the game works, it is suggested that they use the first Scenario, The Italian Offensive (60.0). Set it up, work out your TOE Log Sheets, and push the counters around to see what is supposed to happen. At the end of an hour or two you should be fairly fluent in the system.
[2.3] HOW TO RUN A GAME
OF CNA CNA is a logistically-oriented game, and its play requires not only a lot of attention to logistics, but, if you will, a logistically sound methodology. Two years' worth of playtesting experience has left us with the consensus that the optimum number of players for a game of CNA is between eight and ten — four to five per side. Fewer than four and there is too much work for somebody to do efficiently; more than five and it takes too long to reach a consensus whenever a decision requires everyone's input. How the Players divide the functions and responsibilities is critical. Playtesting proved conclusively that the team that communicated the best all the way up and down the line generally prevailed over a team of individuals technically proficient but poorly coordinated. Basically, here is the division of labor that became the norm in our playtesting: Commander-in-Chief: In charge of all intelligence gathering and cataloging and dissemination of all information about the Enemy. Includes responsibility for Raids on Rommel and other dirty tricks. Basic responsibility to make strategic decisions and settle any intra-team disputes.
Logistics Commander: In charge of all supplies. Responsible for getting required material from Italy/Britain to port in North Africa (easy for the Allied Logistics Commander) and hence to the Supply Dumps. Includes command of all Third Line Trucks, and some of the Second Line Trucks, as well as Naval Convoys (for the Axis Logistics Commander).
Rear Area Commander: In charge of getting supplies and reinforcements to the front, and of rear area (i.e., immediately behind the front line troops) security, and the deployment of reserves. Also responsible for prisoners and any construction. In charge of some Second Line Trucks.
Air Commander: In charge of all planes and pilots, and responsible for planning and execution of all air missions. Also responsible for deployment of air bases.
Front-Line Commander: Responsible for executing all attacks or coordinating defensive efforts. Also in charge of troop movement in the front line.
In order for a team to play well, everyone must take his task seriously and perform it competently. The Logistics Commander must plan to have Tank Replacements available when needed; the Rear Area Commander must warn the Air Commander of a Fuel shortage in time to avert disaster; the Commander-in-Chief must act decisively and forthrightly to resolve disputes among team members and devise and supervise the execution of a workable overall plan; et cetera.
[2.4] PLAYING TIME
To play the entire course of Campaign for North Africa will take at least twelve hundred hours (that's 1200)! Probably more, and that's just playing time. Each Game-Turn takes about 10 hours, perhaps less when there is little movement or combat (we have completed a full Game-Turn in under two hours, but that was because both sides were logistically exhausted). This is a long game. It takes a lot of involvement to play, but we feel that the involvement will be worthwhile because CNA allows the players to make all the operational and strategic decisions that the original commanders had to make.
[3.0] GLOSSARY AND UNIT DEFINITIONS
CASES:
[3.1] DEFINITIONS OF TERMS
Actual Combat Value: All resolution of combat involves the use of Actual Points. Certain calculations of combat strengths involve first determining Raw Points and then converting these to Actual Points.
Air Facility: An airplane base. There are four types. Airfields (large) and Air Landing Strips (small) are used by planes other than Flying Boats. Flying Boat Basins (large) and Flying Boat Alighting Areas (small) are used only by Flying Boats.
Armored Vehicle: Any fighting vehicle including tanks, tank destroyers, armored cars, and self-propelled artillery, but not half-tracks or motorcycles.
Assault: Ground combat in which the combatants are visible to each other (as opposed to Barrage). A Probe is an Assault in which the attacker uses minimal forces. An Assault consists of two parts:
Anti-Armor Combat (14.0), and then Close Assault Combat (15.0).
Assigned: A smaller unit is considered assigned to a larger (parent) unit if the smaller unit is in an organizational sense part of the parent unit. The number of smaller units which may be assigned to any one parent unit is limited; assignments of units (and their realignment) in CNA is more or less inflexible, depending upon the nationality in question. If a smaller unit is assigned to a parent unit, it is considered a constituent part of the parent unit, even if the parent unit is in one hex and the assigned unit is in another hex.
Attached: A smaller unit is considered attached to a larger (parent) unit if both are in the same hex and the smaller unit is represented on the game map by the parent unit's counter. Note: It is possible for a smaller unit to be either assigned or attached (not necessarily both) to a parent unit; it is possible for a smaller unit to be assigned to one parent unit and simultaneously attached to another.
Battle Group: A Brigade-equivalent headquarters capable of attaching a wide variety of compositions of unit types.
Breakdown: All types of vehicles, with minor exceptions, are subject to the possibility of being rendered unusable due to Breakdown (throwing a track, flat tire, busted axle, etc.). The probability of a vehicle breaking down is a function of its type and of the terrain and distance it is moved through.
Breaking Off: Units that are involved in combat become "locked together.' If the combat is relatively light, the units are considered In Contact; if the combat is heavy, they are considered Engaged. The act of disengaging from the enemy is termed Breaking Off.
Capability Point: A measure of the relative time needed to perform an action. Each unit possesses a Capability Point Allowance indicating how much a unit can do in one Operations Stage.
Cohesion Level: How combat effective the unit is at that point in time. The Cohesion Level is affected by acquiring Reorganization Points and Disorganization Points.
Combat Air Patrol (abbr. CAP): Offensive CAP involves sarching for intruder aircraft. Defensive CAP involves escorting other Friendly aircraft.
Combat Unit: Any unit capable of engaging other units and/or aircraft in combat. Headquarters, Engineers and Dummy Tank Formations are considered combat units in certain situations.
Combined Arms Attack: Tanks engaging in Close Assault must be supported by at least an equal number of infantry or the tank combat values are reduced. The tanks are considered performing a Combined Arms Attack.
Desert Raider: A company-size group of men in jeeps. It is a special "unit" capable of limited types of attacks and is normally permitted to be moved on the game-map unobserved by the opposing Player.
Efficiency Level: A port's ability to embark/disembark troops, equipment, and supplies and to withstand damage.
Engineering Capability; A measure of the capability of a Headquarters to be used to construct/demolish various game items.
Gun: Includes all types of Artillery, Anti-Tank and Anti-Aircraft units.
Headquarters (abbr. HQ): A unit which may be composed of independent subsidiary units (excluding Trucks) either represented by its counter or represented independently by separate counters.
Holding-Off Barrage: A Barrage directed against an Enemy unit which negates the requirement that adjacent Friendly units execute a Close Assault against it.
Initiative: The Player (Axis or Allies) with Initiative decides which Player is the first Player in each of the three Operations Stages of that Game-Turn.
Involuntary Movement: What a unit that incurs a "Retreat" result from a Close Assault has to do (i.e., retreat).
Log Sheet: Piece of paper designed to ease recording of a specific type of information and/or status. Players may alter the Log Sheets to suit their purpose. The TOE Log Sheets are sheets of paper used to record the information pertinent to the Players' various combat units.
Maneuver Element: Those forces within a division (or brigade) normally involved in carrying out offensive operations against the enemy; i.e., the main ground combat units (tank and infantry).
Morale: The ability and willingness of the men to fight. All combat units possess a Basic Morale Rating. Certain Commonwealth units begin with a lower Morale rating and may be Trained up to their Basic rating. Basic Morale may be exceeded by the unit being successful in battle.
Motorized Unit: A unit whose movement is produced by wheeled and/or tracked vehicles. Certain units are always considered motorized and certain units may be motorized if "on foot,' or vice versa.
Organization-Size: A measure of the unit's organizational complexity and physical number of men and equipment present. Units are considered Division-, Brigade-, Battalion-, or CompanyEquivalents (abbr. -Eq).
Organization at Arrival Chart (Abbr. OA Chart): A chart which lists the date of arrival, original composition and strength of each unit involved in the game at its time of arrival.
Parent Unit: A counter representing a unit comprised of subsidiary units that may be represented by independent counters that could be moved about separately. A Parent Unit may itself belong to a Parent Unit.
Pinned: A possible result of Air Bombardment or Barrage. A Pinned unit may not voluntarily move for the remainder of that sub-Phase of the Movement and Combat Phase and may not engage in combat (as opposed to having its combat ratings reduced to zero). In addition, a unit of Player A pinned by Air Bombardment is placed in Reserve 1, Note that a unit pinned by Air Bombardment is affected for the entire first sub-Phase of the first Movement and Combat Phase of the Operations Stage (see Case 41.9).
Reaction: The ability of a unit to evade combat. Directly related to the motorization/mechanization effectiveness of that unit.
Readying Aircraft: The acts of Arming, Fueling and Refitting aircraft in order that they may fly and perform Missions.
Reinforcement: A unit that does not start on the game-map but arrives and is placed in play at some later point in time.
Replacement: An unspecified number of unassigned combat personnel used to recreate destroyed units or increase the effectiveness of existing units.
Sequential Dice Roll: A result in which the dice are read in such a manner as to produce results ranging from 11 through 66. The larger die yields the 10's figure and the smaller die yields the 1's figure.
Shell Unit: A combat unit that possesses a below minimum number of TOE Strength Points (see definition) and/or subsidiary units.
Squadron Ground Support Unit (abbr. SGSU): The headquarters and support unit for airplanes.
Stacking Point: The amount of tactical volume of ground space a unit requires or the amount of Road or Track space filled by a unit being moved along a Road or Track.
Supplies: Four types of consumables: Ammo, Fuel, Stores, and Water
TOE Strength Point: The number of men and/or vehicles and/or guns needed to produce a minimum of fighting effectiveness in CNA. Equivalent to approximately 100 men, 5 to 8 armored vehicles, 4 to 8 guns.
Unit: A counter capable of expending Capability Points.
Upgrading: Increasing a combat unit's combat effectiveness.
Zone of Control (abbr. ZOC): The area of effect surrounding certain units, extending to at most the six immediately adjacent hexes. A ZOC requires opposing units to stop upon entering and attack Friendly adjacent units. (CNA uses a Rigid, Active ZOC system.)
[3.2] UNIT DIFFERENTIATION
[3.21] Units are differentiated into the following categories: Infantry-Type, Tank-Type, Recce-Type, Artillery-Type, Anti-Tank-Type, Anti-Aircraft-Type, Headquarters, Engineers, Tank Recovery Squadrons, Squadron Ground Support Units, Dummy Tank Formations, and Trucks. The counters comprising each type are indicated in the Counter Manifest (4.22) with the exception of Dummy Tank Formations, which do not possess a counter.
[3.22] For Barrage and aircraft attacks (Strafing and Bombardment) units are grouped into the following classes:
Infantry-class: All Infantry-Type, Engineers, Headquarters possessing a defensive Close Assault Rating but not possessing an Armor Protection Rating, SGSU, and Recce-Type that do not possess an Armor Protection Rating.
Armor-class: All Tank-Type, Dummy Tank Formations, Tank Recovery Squadrons, headquarters possessing an Armor Protection Rating, Recce-Type possessing an Armor Protection Rating, and those Artillery and Anti-tank-Type units possessing an Armor Protection Rating (SPA and Tank Destroyers).
Gun-class: All Artillery-Type, Anti-aircraft-Type and Anti-tank-Type units comprised of any TOE Strength Points not possessing an Armor Protection Rating, including HQs and infantry with Barrage capability.
Truck-class: All Trucks.
Note: Any Artillery or Anti-tank unit that is comprised of weapons (TOE Strength Points) with an Armor Protection Rating and of weapons without one are considered two units for target purposes.
[3.23] Combat units consist of all Infantry-Type, Tank-Type Recce-Type, Artillery-Type, Anti-tank-Type, and Anti-aircraft-Type units. For certain determinations, such as Zone of Control, Reconnaissance, Barrage and Bombardment, certain non-combat units may be considered combat units.
[3.3] HEADQUARTERS UNITS
HQ's serve two functions: They act as command coordination for the individual units under them, and they also represent, when on the game-map, all of the units attached to that HQ.
[3.31] HQ units represent all combat units, Trucks (and their Supplies), etc. attached to that counter. If any combat units are attached, the HQ counter itself is considered a combat unit, and fights with the combined strengths of all units in it.
[3.32] An HQ (and for that matter, all Parent Units) have a CPA equal to the CPA of the 'slowest' unit attached to the HQ.
[3.33] The Stacking Points printed on the HQ are those of a full complement of units. Thus a divisional HQ representing an entire division occupies 5 Stacking Points of space. The rules on unit Equivalents (see Case 9.2) discuss what happens if the division operates at less than full strength. If an HQ has no combat units attached it occupies zero Stacking Points and may use its parenthesized Ratings. It is no longer considered to be a combat unit and may not voluntarily attack.
[3.34] Certain HQ units, mostly with the Italian Army, have artillery assigned to regimental HQ's (guns directly under command of the HQ). These HQ's may use their combat strengths, and losses for the guns are taken as regular losses. However, when all gun TOE Strength Points are eliminated, the HQ is not destroyed: it reverts to the status of a non-combat HQ.
[3.35] Armored Division and Armored Brigade HQ units usually have a "platoon" of tanks assigned, as Players will note by the ratings of each such HQ. These tanks may not be used in combat unless the HQ has no combat units attached. Tanks assigned to HQ's may not be transferred to combat units, regardless of the situation. If such an HQ loses its tanks, they should be replaced by the first available Tank Replacement Points. HQ's with tanks attached are not subject to Breakdown.
[3.36] An HQ unit that has no combat values, either with or without parentheses, is captured instantly if it is in a hex without any combat units and an Enemy combat unit places the HQ in its Zone of Control. There is no Capability Point expenditure required for such a capture, and the HQ is treated as one Prisoner Point.
[3.4] COMBAT UNITS
CNA has a great variety of combat units — more than 25 different types, not including aircraft. Although the structure of the game is operational, there has been an attempt to inject a "tactical" flavor into the game by differentiating between the functions of the various units. However, players should keep in mind that this is an operational game, and that many purely tactical functions have been abstracted or ignored. Below is a brief resume of the various types of units, noting any exceptions. Some of the completely familiar units have been omitted.
Motorized Infantry: These are infantry units that are usually transported in Trucks. (The British often called their units Lorried infantry.) Motorized Infantry units must actually have Trucks in order to use their Motorized CPA (i.e., that of the Truck). Otherwise they are regular "foot" Infantry. Units that were usually motorized are so indicated on the units' Characteristics Charts.
Mechanized Infantry: Primarily, these units were not only motorized but also usually supplied with some Armored Cars, half-tracks, armored Personnel carriers, etc. Unless there is a terrible and total emergency, Mechanized Infantry should remain motorized at all times.
Motorcycle Infantry/Reconnaissance: These are mostly Italian Bersaglierei mitraglieri (motorcycle) units (plus two German battalions of Kradschutzen). The equipment is the popular two-man cycle, plus a few jeeps, Armored Cars, etc. Weaponry was pretty good, with a high percentage of machineguns; thus their relatively high firepower. Cycles may not enter hexes prohibited to Light Trucks. Moreover, even though motorcycles are vehicles, they do not use Fuel nor do they suffer Breakdown.
Heavy Weapons Units: There are several of these units, such as the German Schwerste-Infanteriegeschutz units. Equipment varied, but often included machineguns, mortars, some light artillery and anti-tank guns, perhaps a light AA battery. It varies from unit to unit.
Garrison Infantry: These units are virtually the sole property of the Italians — and they are usually welcome to them. Most Italian Garrison Infantry came from the GaF Settore di Coperture Regiments, comprised of over-age Italians living in Libya. Their training was minimal, their spirits low, their performance poor. However, units labeled as garrison units (with a G on the counter — and this includes all types of garrison units) stack free in the city or town which they were originally assigned to garrison. E.g., the 30th GaF infantry units have zero Stacking Points when in Bardia. There is one Commonwealth unit which is considered a Garrison: The Matruh Garrison. The OA Sheet gives specific instructions on this unit.
Airborne Infantry: These are treated as normal infantry, unless they are capable of being paradropped, which capability is listed on the Arrival Sheet for that unit. See Case 40.4.
Armored Recce and Armored Car units: Recce units usually comprise light armored cars (Bren Carriers, Autoblindas, etc.), while the Armored Car units have some tanks (Stuarts, PzII's, etc.) and heavier cars. The sole difference is the fact that Armored Car units are virtually light Tank Battalions. (The British considered Recce as infantry, but Armored Car as Armored units.) Recce and AC units have remarkable mobility and are best used to probe and freeze (Pin) small enemy formations.
Artillery: The Artillery units in the game comprise a wide variety of weapons, from 65mm Infantry guns up to 21cm German howitzers and British 5.5" howitzers. Some of the minor guns have been ignored or combined into one "piece" with similar ratings. Italian mortar companies have been melded into the regimental HQ's and ad hoc artillery units. Ratings for guns and howitzers were based on Range and Penetration effect, as well as rate of fire and type of shell. Unless stated otherwise on the Arrival Sheet, all Artillery has its own intrinsic (built-in) transport, transport which may never be stripped (unless you wish to abandon the guns). Artillery units use Fuel (when moving) as well as Water. However, they are not subject to Breakdown. Players will also note that certain Artillery units have more than one type of gun (e.g., the 221st Artillery Regt. of the German 90th Light Division). All guns belong to the same unit and they are treated as one unit.
Self-Propelled Artillery: These are guns mounted on Tank or quasi-tank chassis. They fire like guns and have Vulnerability Ratings, but they also may be destroyed by Anti-Tank Fire. Their advantage is in increased mobility and Assault value. SP Artillery consumes Fuel and Water and suffers Breakdown.
Coastal Defense Guns: These artillery units always have a CPA of 10 for combat purposes only, unless they have printed CPAs of greater than ten. They may not be moved unless Trucks are attached and assigned to that purpose. Guns with a '0' (not '0+') CPA are emplaced and may never be moved. Emplaced Guns do not possess a Vulnerability Rating and may be destroyed only by Barrage, Capture or Air Bombardment. Coast Defense Artillery that is motorized is subject to Breakdown.
Anti-Tank Units: These have "guns" with the ability to pierce armor, thus destroying tanks and other armored units. There are certain TOE Strength Points, not specifically anti-tank, that also have this ability: British 25-pdrs., the famous German 88mm Flak units, Italian 75mm and 90mm AA/Flak units, etc. British Heavy Anti-aircraft units, with 3.7" guns, theoretically had the capability to fire as anti-tank weapons. However, British doctrine was such that they were never (well, hardly ever) used in this role. ("If they were meant to be used as anti-tank guns they would have been called anti-tank guns." Apocryphal, but true.) Unless self-propelled, anti-tank units are not armored.
Anti-Aircraft/Flak Units: Of all the units in the game, AA/Flak units suffered the most liberties in terms of design. The myriad and voluminous AA/Flak batteries spread over Africa were often combined into larger regiments and battalions, making the historical battalions/regiments seem larger than they perhaps were. AA/Flak units comprise a fairly wide section of weapons: British 40mm, as well as the ill-used 3.7"s, German 20 and 88mm's, plus Italian 20mm's, 75's and 90mm's. Many of these guns had other tactical uses, apart from shooting down planes. Thus AA/Flak units are given a variety of ratings, most of them parenthesized. Some units, especially German 88's, can be used in many roles. These decisions were not based on innate capabilities, but rather on tactical doctrine and actual usage.
Units with Parenthesized Strengths: Certain combat units — and certain non-combat units — have parenthesized Combat Ratings. These ratings may be used only if such a unit is in a hex not occupied by Friendly combat units with appropriate non-parenthesized ratings is attacked by Enemy units.
[3.5] UNIT CHARACTERISTICS
Each counter comprises a number of TOE Strength Points. The unit's abilities are those of the TOE Strength Points comprising it (certain counters may exist if there are no TOE Strength Points in them; these possess only a Capability Point Allowance). The following is a brief explanation of the units' characteristics:
Capability Point Allowance (abbr. CPA): The unit's ability to execute movement and combat, stated numerically, Barrage Rating: A combat strength expressing the relative capability of that unit to inflict damage when firing as an artillery piece (i.e., indirect fire).
Vulnerability: A numerical expression of a gun's susceptibility to being destroyed or captured when in a Forward Position (see Case 12.1). It is based mostly on the gun's range and tactical usage doctrine.
Anti-armor Strength: A numerical expression of a unit's ability to destroy armored vehicles.
Armor Protection Rating: The ability of an armored vehicle to withstand enemy anti-armor fire.
This is based on the vehicle's armor thickness and excellence of construction.
Offensive Close Assault Rating: The ability, stated numerically, of a unit to engage enemy forces in "hand-to-hand" (i.e., Close Assault) combat.
Defensive Assault Rating: The ability, stated numerically, of a unit to defend against a Close Assault.
Anti-aircraft Rating: A numerical expression of a unit's ability to shoot down aircraft (this ability occurs, aside from anti-aircraft units, only in a few headquarters, tanks, and other units).
Maximum TOE Strength: This is, all things considered, the most important number on the sheet (see Case 4.46). It is the numerical expression of the manpower (for infantry), tank platoons (for armored units), or batteries (for guns) in that unit. The infantry manpower figures are based roughly on anywhere from 100 to 200 men, depending on the combat function of the individual and his use within the unit. The tank platoons are calculated in groups of five to eight vehicles. The gun batteries are calculated in groups of four guns.
Basic Morale Rating: A numerical (and somewhat subjective) expression of a unit's training, combat experience, and esprit d'corps, on a scale of +3 (excellent) to —3 (armed rabble with minimal interest in anything harmful). Certain Commonwealth units must be Trained in order to reach their listed Basic Morale.
Fuel Rate: A simplified reduction of the vehicle's miles per gallon efficiency.
Breakdown Adjustment Rating: An expression, stated numerically, of the general construction and ease of maintenance of a vehicle coupled with the level of mechanical competence of the unit performing the maintenance.
[4.0] GAME EQUIPMENT
CASES:
[4.1] THE GAME-MAPS
The game-map takes up a great deal of space (it is almost ten feet in length), and it is virtually impossible to play any scenario without all the maps. This is because of the logistical nature of the game and the emphasis on supply lines and transport. Players will also find that they will be using areas of the game-map for dropping counters, piling markers, etc. True, there are areas of the maps that will remain virtually untouched by combat units. Simply remember what's in play, and what is just being used. Playtesting of CNA, which usually took anywhere from six to 12 Players at any given time, revealed, among other things, that most action took place in one section of the game-maps. It can get pretty crowded in that area at times, so try to keep your displays and other information out of harm's way.
For those Players experiencing difficulties, the five Map Sections are labeled A through E and are laid long side by long side from west to east respectively (see diagram). The Map Sections should be laid so that the 01xx hexrow of a Map Section overlays the 39xx hexrow of the Map Section whose letter immediately preceeds it in the alphabet (that is, Map Section E partially overlays Map Section D which partially overlays Map Section C, etc.).
A B C
D E
[4.2] THE COUNTERS
There are actually few counters in play at any one given time. However, each division on the game-map is comprised of a large number of lesser-sized units. These battalions and brigades might be brought into use at any given time, so the players should sort their counters into divisions, and organize their divisions so that they know where the individual units of that division are. It may even be wise to have a separate table for placement of such units.
[4.21] Sample Units
(Counter illustrations are not reproduced; the labelled parts of each sample counter are listed.)
- HEADQUARTERS UNIT (sample: 31 GaF, Tobruk): Garrison Indicator; Engineering Capability; HQ Indicator and Stacking Point Value; Organization Size; Unit Type; Designation; Parent Formation (Garrison Location).
- COMBAT UNIT (sample: III/1 LbM, Maletti): Organization Size; Stacking Point Value; Unit Type; Designation; Parent Formation.
- AXIS COASTAL SHIPPING UNIT (sample: 1000 ton, B): Naval Transport Capacity; Designation.
- COMMONWEALTH WARSHIP (sample: BB 6/12, Qn Elizabeth): Warship Type; Barrage/Anti-air Strength; Designation.
- SQUADRON GROUND SUPPORT UNIT (sample: SGSU 2nd, 20): Designation; Capability Point Allowance.
- AIR FACILITY MARKER: Facility Type; Designation; Capacity Level (Squadrons).
- FORTIFICATION MARKER: Level of Fortification.
- AIRPLANE CLASS MARKER (sample: BOMBER): (Sub-) Class of Airplane.
[4.22] Unit Type Symbols
Infantry-Type: Mechanized Infantry; Motorized Infantry; Motorcycle Infantry; Motorized Machinegun; Motorized Heavy Weapons; Motorized Marines; Infantry; Commandos; Motorized Mountain Infantry; Airborne Infantry; Machinegun; Heavy Weapons; Marines.
Tank-Type: Tank.
Recce-Type: Camel Recon; Recon; Motorcycle Recon; Armored Recon; Armored Car.
Artillery-Type: Artillery; Airborne Artillery; Self-propelled Artillery; Coast Defense Artillery.
Anti-tank-Type: Anti-tank; Tank Destroyer; Anti-tank/Anti-aircraft.
Anti-air-Type: Anti-air; Heavy Anti-air.
Engineer-Type: Engineer; Railroad Engineer; Road Construction.
Organization Size. I = Coy, Bty; II = Bn; III = Regt; X = Bde; XX = Div; BG = Battlegroup.
Parent Formation Line. Italics indicate garrison; "-" indicates independent (no Parent Formation); "*" indicates that Parent Formation did not see service in North Africa; Maletti (e.g.) indicates Parent Formation; Tul/LTC (e.g.) indicates brigade/division Level Parent Formation; 288 SonIII (e.g.) indicates independent brigade-level Parent Formation.
[4.23] Counter Summary
Front / Back:
- Trucks in Convoy (unattached, 2nd/3rd line) / (blank)
- German Squadron Ground Support Unit / (blank)
- Commonwealth/Italian Squadron Ground Support Unit / (blank)
- Tank Delivery (CW)/Tank Recovery (Gm) Squadron / (blank)
- Axis POW's / CW POW's
- Axis Prisoner Guards / CW Prisoner Guards
- Desert Raider / (blank)
- Commonwealth Warship / (blank)
- Axis Coastal Shipping / (blank)
- Infantry Replacement Points / (blank)
- Gun Replacement Points / (blank)
- Tank Replacement Points / (blank)
[4.24] Informational Marker Summary
Front / Back:
- Game-Turn / (blank)
- Operations Stage / (blank)
- Initiative / (blank)
- Rain Storm / Sand Storm
- Construction Underway / (blank)
- Supply Dump / (blank)
- Airfield / (blank)
- Air Landing Strip / (blank)
- Flying Boat Basin / (blank)
- Flying Boat Alighting Area / (blank)
- Temporary Repair Facility / (blank)
- Minefield (status unknown) / Real Minefield
- Minefield (status unknown) / Dummy Minefield
- Fortification Level 1 / Fortification Level 0
- Fortification Level 1 / Fortification Level 2
- Pinned / Road Ends
- Construction Underway / Destroyed Road
- Railhead / (blank)
- Blocked Harbor / Destroyed Railroad
- Repair Facility Damaged / Destroyed Road
- Italian Fighter (single-wing) / (blank)
- CW/German Fighter / (blank)
- Italian Fighter (biplane) / (blank)
- Bomber / (blank)
- Flying Boat / (blank)
- Dive Bomber / (blank)
- Transport / (blank)
[4.25] Counter Deployment
A unit attached to another unit is not represented by a counter on the game map.
For example: The First Greek Infantry Brigade Group is comprised of the Ist Greek Brigade HQ counter, the Ist Greek Field Artillery Regiment counter and the Ist Greek Infantry, 2nd Greek Infantry and 3rd Greek Infantry Battalions counters. If the three infantry battalions and the artillery regiment were attached to the headquarters unit, the entire brigade would be represented on the game map by the headquarters counter. Unless specifically stated, all assigned units beginning a scenario in the same hex as their parent unit are attached to that parent unit. The counters representing said units are therefore not deployed on the game-map.
[4.26] Holding Boxes
Certain hexes on the game-map "attract" a large number of counters. These hexes are represented by Holding Boxes which are nothing more than large spaces for deploying all of the counters which are actually located in the hex the Holding Box is representing.
[4.3] CHARTS AND TABLES
There are an inordinate number of Charts and Tables in CNA. Most of them can be found in the Charts and Tables Booklet. However, some are located on separate loose sheets of paper or printed on the game-map or in the Rules booklets.
[4.4] ORGANIZATION AND ARRIVAL SYSTEM
In any given scenario, the Players receive units via the Initial Deployment (given in each scenario) and via the Reinforcement Schedules. In addition to these, Players may plan for Replacement Points to augment depleted units; the discussion of these can be found in Case 20.2. The Cases below give the Players a base for using and understanding the terminology and location of the terms and tables for acquiring and using units.
[4.41] There are three types of charts which the Player will refer to in order to gain information on his units. These are the Characteristics Charts, which show what capabilities and characteristics each unit or unit-type has (in terms of. ratings and numbers), the "OA" Sheets, which list the organization of units and arrival dates for each parent unit (usually division), and the Reinforcement Schedules, which list the names and dates of all newly arriving land units. Air units have separate reinforcement charts and tables which determine their arrival.
[4.42] The following procedure is used to determine which units arrive during a Game-Turn and the abilities of those arriving units. The Player consults the appropriate Reinforcement Schedule and determines the current Operations Stage of the Game-Turn in progress; noting the units arriving, he finds the OA (Organization at Arrival) Chart for each of those units. Parent Formations are easy to find (e.g., divisions and brigades); smaller detachments arriving piecemeal are usually given their parent formation for easy reference to the correct OA Sheet. Having located the correct OA Sheet for each unit, the Player notes the Characteristics Code for each individual unit (that has arrived) in that Parent, and refers to the Characteristics Charts to determine the capabilities of those units. Each Parent unit ar-: rives with all lesser units listed on the OA Chart, unless the unit has a later arrival date and/or is listed as excluded on the Reinforcement Track. Players should then draw up a TOE Sheet for each such Parent Formation (and its lesser units), To more clearly understand the above procedure, Players should at this time run through a sample turn of Reinforcements, using any turn on the Track. Such a brief examination will quickly show how this process operates.
Note: The Player is provided with an inter-locking series of charts and tables, each dependent on the other for information. Although there are a lot of tables and the profusion may seem confusing, just a brief scanning of these tables and tracks will be enough to show how they work. Remember, each different table or track provides a piece of information, and the tables and tracks often contain information found on the other such tracks or tables for purposes of cross-checking. Example: The Reinforcement Schedule shows the arrival of the 18th Australian Brigade. The Commonwealth Player, noting that, looks for the OA Sheet for the 18th Australian Brigade. The OA Sheet also gives the Arrival Date, which is a cross-check with the Reinforcement Schedule. The Player now notes the units within the brigade, their Characteristic Code Letters, and consults the Unit Characteristics Charts for those units to determine what their capabilities are. This information is then placed on the TOE Sheet for the 18th Brigade, along with any other information needed or desired.
[4.43] Reinforcement Schedules (see Charts and Tables)
[4.44] Aircraft Characteristics Charts
There are two identically organized Aircraft Characteristics Charts — one for each Player. Within each nationality the planes are grouped into those needing pilots and those not requiring pilots. Each plane is listed individually. Certain bear two or more rows of information. With these planes the owning Player may freely choose which line of characteristics and capabilities he will assign that plane every time he readies it. The explanation of the various ratings is discussed in Case 34.1 of the Air Game. *
[4.45] Organization At Arrival Charts (OA)
A great deal of time (perhaps too much time) was spent in arriving at the most accurate Order of Battle possible. As with any major campaign, sources differed, and the designers were forced, for a variety of reasons, to make several decisions which abstracted some units (especially anti-aircraft units). We feel that CNA has, by far, the most accurate Order of Battle ever done for the Campaign for North Africa. However, if you have information to the contrary about a specific unit, feel free to adjust the game to fit that information. If you feel like it, we would also like to hear about that information.
There are three identically organized OA Charts, one for Allied units, one for German units, and one for Italian units. Each chart is subdivided into sections hereafter termed sheets. Each sheet contains game and historical information on a major unit or grouping of units (e.g., all unassigned artillery units; 50th Infantry Division) of that Player's forces. The sheet is laid out as follows: the name of the major unit or regrouping is at the top. Below that is the Basic Morale Rating for all of the counters comprising that unit (untrained Commonwealth unit's morale at instant of arrival is indicated in parentheses where needed). This is followed by a list of the counters comprising the unit and any notes at the bottom of the sheet. The counters comprising the unit are arranged with the headquarters unit (if any) for that group at the top. Any units assigned directly to that HQ are indented, and any unit assigned to a subsidiary unit is further indented and listed in the rows directly below their brigade level parent unit. The explanation of the information contained under the column headings is as follows:
Unit Name: The historical name of that unit. Certain abbreviations have been made for each nationality and they are listed at the end of the Chart.
Counter Abbreviation: The type as it appears on the counter.
ID Code: One, two, or three letters which summarize the unit's characteristics. The unit's ratings for a particular ID Code are listed on the Unit Characteristics Chart for that nationality.
TOE and Weapons Systems: A unit comprised of a single type of weapons system (i.e., TOE Strength Points with identical characteristics) bears an N(ormal), U(nderstrength), or O(verstrength) indicator. If the unit is normal, it arrives (or begins deployed) at its maximum possible TOE Strength. If the unit arrives understrength or overstrength its TOE Strength at arrival will follow the U or O. If, on arrival, a unit comprises tank, artillery, or anti-tank TOE Strength Points, the number and then the type of the different TOE Strength Points will be listed."
Arrives: The Operation Stage/Game-Turn on which the unit arrives. If the unit beings the first scenario already deployed on the map, it is noted as a D. This column is a check on the Reinforcement Schedule.
The OA Sheets are needed for a purpose other than pure numerical information. The OA Sheets list the units originally assigned to a Parent unit. This is important, as units assigned to a Parent unit may stack and unstack, attach and detach themselves quite freely compared to other units being attached to that same Parent unit. The OA Sheets also, on occasion, list units that were historically attached to a Parent Formation at certain times during the Campaign.
There are numerous units that are not assigned to a division. These may be brigades (the Commonwealth Player has many of these) or simply solitary battalions, artillery regiments, etc. These units are grouped on OA Sheets according to their most important assignment characteristics (i.e., all of the British unassigned anti-air units are on a single OA Sheet).
The designers of CNA have chosen the division/brigade/battalion terminology system because it was (1) the basic system of a majority of the units in the campaign, and (2) the system with which they were most familiar. In many places it does not reflect the actual organizational levels of a unit. This is further exacerbated by the maddening British desire to call everything a regiment or a brigade when, in fact, it is a battalion. Thus, the 7th Rifle Brigade is, in game terms, a battalion (actually the 7th Battalion, the Rifle Brigade) and most of the "Tank Regiments" are battalion-size units. Most Players familiar with the campaign should have little trouble with items such as these (few people will think that the lst King's Royal Rifle Corps is, in fact, an actual Corps).
[4.46] Unit Characteristics Charts
There are three identically organized Unit Characteristics charts, one for Allied units, one for German units and one for Italian units. The Unit Characteristics Chart lists each ID Code's maximum TOE Strength Points and its values for the various Ratings. Unless otherwise indicated on the chart, all tank, artillery, anti-tank, and certain HQ units may comprise any combination of the variety of the weapons systems listed. These units take on the characteristics of the assigned TOE Strength Points (weapons systems). A unit comprising multiple weapons systems is a single unit for all purposes. However, all actions are undertaken using the ratings of the individual TOE Strength Points (e.g., an artillery unit comprising two TOE Strength Points of eighteen pounder guns and four TOE Strength Points of twenty-five pounder guns engaging in Barrage will fire at two times the eighteen pounder gun Barrage Rating plus four times the twenty-five pounder gun Barrage Rating). Note that a unit comprising different TOE Strength Points normally possess a CPA of that of the slowest TOE Strength Point. The characteristics of the individiual weapons systems are listed on the appropriate nationality's Tank and Gun Characteristics' Chart. Certain units possess parenthesized combat ratings. These units are discussed in Case 3.4. Certain headquarters units' maximum limit in assigned TOE Strength Points are enclosed in parentheses. Any weapons system TOE Strength Points assigned to such a unit operate with parenthesized combat values. Players should note that the maximum number of assigned TOE Strength Points for British Tank Regiments (battalion-equivalents) changes slightly in early 1942, with the influx of the first American tanks. Tank regiments with only American tanks (Grants and/or Shermans and/or Stuarts) now have a maximum of 9 TOE Strength Points, not ten. The reason for this decision is not clear; the allotment of tanks to a regiment, however, was dropped from 52 to 44 when the tanks were American. This was readjusted later on.
[4.47] Commonwealth Tank and Gun Characteristics Chart (see Charts and Tables)
This chart lists the values for TOE Strength Points of a specific type of tank or gun. The definitions of these characteristics are listed in Case 3.5.
[4.48] Italian Tank and Gun Characteristics Chart (see Charts and Tables)
[4.49] German Tank and Gun Characteristics Chart (see Charts and Tables)
[4.5] LOG SHEETS
Because of the enormous amount of information provided with CNA, and because of the game system devised for its use, there are a great number of Play-aids, in the form of Informational Sheets. The playing counters themselves have little combat information other than the unit designations and Stacking Points, and there are few "tracks" by which the Players can keep visual record of various supply levels. The reasons for this are many: the desire of the designer to include as much information as possible; the problem of keeping vital information secret from other Players; the fact that the game-map itself is so large that having a plethora of charts and tracks would make it necessary to rent The Hearst Estate at San Simeon to play it, etc. Therefore, players will keep track of virtually all the information they need — which is quite extensive — on the various sheets. The following sections describe these sheets, although we hope that they have been so designed that their utilization becomes self-evident. Players should feel free to devise any other sheets or methods they feel necessary to ease the flow of the game; most of the sheets in CNA were "designed" by the playtesters.
One copy of each type of Log Sheet is provided with CNA. Players should therefore produce as many copies of each form as they need, The designers suggest you use pencils and write lightly to make complete erasures easy.
[4.51] The Log Sheets have been divided into four groups on the basis of their 'owning' Player's usage. This is simply a presentation decision and has no effect on who actually uses what in a game.
[4.52] Field Commander's Group
These forms are used by the Players in charge of frontline fighting combat units.
Field Commander Control Sheet: This is designed to help the Field Commander coordinate his forces. Each row on the sheet is meant for each counter on the game-map under the Player's control. These counters will normally be Division-Eq, and a few Brigade-Eq's. Space is provided for keeping track of the unit's Capability Point expenditure(s) in that Operations Stage, its Capability Point Allowance (CPA), current Cohesion Level, Actual Points the unit could contribute to a Barrage and Offensive and Defensive Close Assault, and its reserves of Ammo and Fuel. There is space for your "weekly" Stores requirements for the units as a whole (Players rarely transport Stores on Attached Trucks, because the Stores are required only once per game-week). The bottom section of the sheet is for notes, normally detailing peculiarities of certain of the units attached to the counters listed above them on the sheet.
TOE Log Sheets: There are three of these in order to ease handling five basic division formation and organization structures and counters representing Brigade-Eq and smaller units. The TOE Log Sheets are the equivalent, for play purposes, of a giant combat unit counter. Each Parent Unit possesses its own TOE Log Sheet, and on it the Players keep track of the various strengths and ratings of the units within that formation, the changes to them and the supplies and trucks carried by and attached to that unit. The sheets can all be divided into the following sections or information areas:
A. Counter Identity: This is the area on the top of the sheet. The counter's historical name, its Basic Morale, its Current Morale (if 'Commonwealth), and any other useful information (such as its assigned Parent Unit, if any, Garrison location, engineering capability, etc.) should be written in this section.
E. Logistics: This is the area marked "1st Line Transport." The area is sub-divided into Trucks Available and Supplies. The first grouping consists of two paired rows of three boxes. They are for indicating the total attached Trucks and of those trucks, which are currently transporting nothing, by division into Heavy, Medium and Light trucks. The second grouping is for supplies and troops and/or guns being motorized by the attached trucks by the amount and the number of trucks and the type that are carrying them.
F. Combat Information: Boxes for recording (usually the maximum) number of actual Points that the unit is capable of in each of the categories.
D. Augmentation: This is for recording the formation's attachment of units over that formation's organization structure. (See Section on Unit Organization, 19.0). The method of filling out the boxes in this section is identical to that of Maneuver and Division Assets below. Any unit going i this section is attached to the counter the Log Sheet represents, although it may be assigned to some other unit.
G. Notes: Anything appropriate, ranging from which units are out of ammo or supplies to the amount of Water required by the elements comprising the counter every Operations Stage.
C. Divisional Assets/Support Units: Applies to those units attached directly to the division and not under a Brigade-Eq HQ (unless in a Commonwealth Armored Division). The boxes are filled in.
the same manner as Maneuver section.
B. Maneuver Elements: These boxes are the heart of the Log Sheet. They are where the information for the main combat forces comprising the counter is recorded. Basically, each box is used to record a single counter (i.e., attached unit). The information to be recorded consists of the unit's type, CPA, Fuel and Breakdown Rates (if any), current TOE Strength, name, and its ratings for barrage, anti-armor, vulnerability, armorprotection, offensive close assault, defensive close assault and anti-aircraft. Information concerning whether the unit is simply attached to the unit without being assigned, and/or is assigned to another parent unit or is a garrison unit, etc., is best recorded in the notes section. A tank or gun unit that is comprised of more than one weapons system (i.e., type of TOE Strength Point) will require more than one box to represent the unit (as many boxes as there are weapons systems). A unit assigned but not at present attached to the unit whose Log Sheet you are handling still occupies space within the formation's organization. This space may not be filled by attaching other units in its place. For ease of play, fill in "detached" in the box of such a unit.
The recorded information may be written in or adjacent to the unit's box in any manner the Player desires as long as he and the other Player's have no problems in reading it.
Brigade TOE Log Sheet: This is used for counters representing Brigade-Eq and smaller units. The formation's organization limits can be found by using the Formation Organization Chart and the Formation Attachment Chart. It is useful to put these limits in the Notes Section. As this is a multi-purpose form, the boxes in the Maneuver Elements and Augmentation sections are unadorned and can be divided in any manner necessary.
Infantry Division TOE Log Sheet: The boxes in the Maneuver Elements section are organized in a very restricted fashion. Some of the boxes in the Divisional Assets and all of the boxes in the Augmentation sections are unadorned to permit recording of multiple weapons systems occurring in the same unit. The division's organization and augmentation limits can be determined from the charts indicated above.
Allied and Italian Armored and German Division TOE Log Sheets This is free form with the boxes unstructured so as to permit the expected variations in both multiple weapons systems in a single unit and variations in division organization.
[4.53] Rear Area Commander's Group
This group belongs to the Player in charge of construction, demolition, mopping up operations, and other rear area jobs having nothing to do with supplies. (The Player will usually have a Trucks and Major End Items Control Sheet as he will normally be assigned some trucks in order to handle routine operations without bothering the Logistics Commander).
Vehicle Repair Control Sheet: Permits the Player to handle all broken down vehicle, destroyed tanks and abandoned vehicle counters.
Naval Convoy Log Sheet: While designed primarily for Axis strategic Naval convoys it is also used for either Player's tactical shipping. The sheet permits keeping track of naval transport, its location, destination, transit, what is being transported, etc.
POW Control Sheet: Designed to handle all POW's, their Capability Points expended, location and inhabitation of the POW Camps, and the TOE Strength and infantry-type of their Guards.
[4.54] Air Marshal's Group
The Player in charge of all the airplanes uses the following two forms and usually the Supply Dump Control Sheet to simplify required aircraft supply expenditures the aircraft require.
Squadron Ground Support Unit Sheet: The sheet contains space for controlling six squadrons of planes, the maximum number that can be berthed at an airfield. Each squadron section permits counter location, basic composition, aircraft characteristics recording, and the state and Mission of each plane in the squadron.
Air Mission Log Sheet: Permits the Player to co-ordinate all air missions assigned in that Operations Stage/Game-Turn, by hex and by squadron supplying the planes.
[4.55] Logistics Commander's Group
The Player in overall charge of supplies.
Trucks and Major End Items Control Sheet: Used for the Player's Truck Convoys. Organized to identify, within each counter, the number of each type of truck in the convoy, what supplies are being transported and by what trucks; which trucks are 'empty', any replacement points, repaired vehicles, returning Guards, etc., being returned or exchanged between units.
Supply Dumps Control Sheet: Enables the Player to keep track of the supplies and location of each of his supply dumps. It is strongly suggested that the Logistics Commander determine which of his dumps will be actively or constantly used and those which are not and separate them into different sheets, as the actual supply dump counter ID number has no effect.
General Supply Net Sheet: The Logistics Commander's chief headaches are how much supply does he have, how much is coming in, and how much of that supply is likely to be used in the near future. This sheet is set up to help prevent him from running out of a supply by accident, as it were, either locally or strategically.
Supply Requisition Form: The Logistics Commander is in charge of disbursing these to the various Field Commanders and Air Marshals. This may seem humorous at this point, but the form proved quite helpful in maintaining good supply organization, and it sure beats yelling at the top of your voice for 100 gallons of fuel.
[4.6] INVENTORY OF GAME PARTS
One Game-Map (five sections)
Nine sheets of 200 die-cut counters (1800 total) One Land Game Rules Booklet One Air & Logistics Game Rules Booklet Two Charts & Tables Booklets One 5/8" and one 3/8" plastic die One Game Box assembly One 22"? x 34'? log sheet |
One Historical Article Booklet
If any parts are missing or damaged, write, fill out the enclosed Complaint Card and return to SPI for replacement. Note: The process used to manufacture counters sometimes results in images being slightly off-center or in colors spilling along the edges of differently colored counters. Counters displaying such minor imperfections cannot be replaced by SPI. Only in cases where the counters are not legible can SPI supply replacement parts.
THE LAND GAME
In the Land Game, the Players deal with the fine distinctions of terrain and local and variable weather encountered by the actual combatants. The interlocking and detailed movement and combat systems permit the Players to recreate real time and space "continuous"? movement and combat. The organization and equipment rules create voluminous options, allowing the Players to deploy and maneuver company level and larger forces with equal ease while at the same time differentiating between raw, poorly motivated, or badly armed units and veteran, well motivated, well equipped forces as well as changes in the same unit from one state to the other.
[5.0] THE SEQUENCE OF PLAY (Land Game)
[5.1] THE GAME-TURN
In CNA each Game-Turn covers a period of approximately one week. However, to better handle combat operations, each Game-Turn is divided into three Operations Stages. Each Operation Stage is the equivalent of 2-3 days of activities and, within each such Stage, each Player performs a sequence of events covering all aspects of the game. Thus the Players complete their operations within one Operations Stage, proceed to the second, and then the third, thus finishing one full Game-Turn. Certain operations are performed only at the beginning of the actual Game-Turn. Most of the game operations — movement and land combat — are performed within the Operations Stage. The basic unit of time within the game is thus the Operations Stage.
[5.2] LAND GAME GAME-TURN SEQUENCE OUTLINE
This Sequence of Play applies when playing the Land Game without the Air and Logistics Games.
I. INITIATIVE DETERMINATION STAGE
The Players determine who will have the Initiative for the coming Game-Turn (Section 7.0). The Player going first within an Operations Stage (below) is known as Player "A"; the other as Player "B."
II. NAVAL CONVOY STAGE
A. Naval Convoy Schedule Phase
The Axis Player plans what specific cargoes the ships will carry and their routes. See Section 32.0 or Section 56.0. The Axis Player plans for the arrival of future Replacements from the Axis Replacement Points Pool. Likewise, the Commonwealth Player consults the Commonwealth Production Table and determines how many Replacement Points he will receive two turns hence and plans for their arrival.
B. Tactical Shipping Phase
Both Players plan the transport of cargo between African ports. Note: The Axis Coastal Ships are represented in the game by counters. Allied coastal shipping is not represented by counters and is limited only by the port capacities.
III. FIRST OPERATIONS STAGE
A. Initiative Declaration Phase
The Player who gained the Initiative in Stage I now states whether he will be Player "A" or Player "B" for this particular Operations Stage.
B. Weather Determination Phase
The Player with Initiative rolls for Weather (29.0).
C. Organization Phase
The following segments are undertaken in any order desired.
- Reorganization Segment: Attachment and/or assignment of Reinforcements, Replacements or any other non-assigned units including Trucks may be undertaken. Detachment of units may also be accomplished.
- Construction Segment:
- a. Construction Completion Step: Any work scheduled for completion is finished, removing and adding any markers necessary. Units that have finished construction are free to move.
- b. Construction Initiation/Continuation Step: any units beginning or continuing work on projects are noted. They may not voluntarily move in the remainder of the Operations Stage (Exception: Reaction).
- Training Segment:
- a. Training Completion Step: Units and Replacement Points completing a level of Training are noted and the effects in Morale applied.
- b. Any units beginning or continuing Training are noted. They may not move voluntarily in the remainder of the Operations Stage (Exception: Reaction).
D. Naval Convoy Arrival Phase
All Reinforcements, Replacement Points and Ammo Points scheduled for Arrival (and actually arriving) appear in their designated Ports of Arrival or Entrance hexes.
E. Commonwealth Fleet Phase
- Fleet Assignment Segment: The Commonwealth Player assigns his ships to any sea or coastal hexes.
- Fleet Repair Segment: Any Repair work on ships is undertaken at this time.
F. Reserve Designation Phase
Player "A" designates which of his units he is placing in Reserve Status, indicating such with a Reserve I marker (see Section 18.0).
G. The Movement and Combat Phase
The following four Segments comprise the Movement and Combat Phase. Player "A" may if he so wishes, repeat Segments 1 through 4 as many times as he desires within the restrictions of the Continual Movement Rules (8.2). Each repetition must include all four segments.
- Movement Segment: All units, except unattached Trucks and Tank Recovery Squadrons, not in Reserve and capable of being moved may be moved. Non-Phasing (Player "B") units may React if permitted and Player "B" wishes to do so.
- Breakdown Determination Segment: All vehicles and motorized units of both sides check for Breakdown (2.10). Broken down vehicles are indicated by a marker.
- Combat Segment: (Combat is resolved as follows see Sections 11.0 through 15.0).
- a. Position Determination Step: Both Players determine the "position" of all Gun-and Armor-class units.
- b. Barrage Step: Both Players secretly plot and then execute any Barrages.
- c. Retreat Before Assault Step: Player "B" may Retreat Before Assault any of his units permitted to do so.
- d. Force Assignment Step: Both Players secretly assign TOE Strength Points to Anti-Armor or Close Assault. Player "A" determines which Assaults will be Probes (although he need not reveal this decision) and which TOE Strength Points will be withheld from Assault.
- e. Anti-Armor Step: Both Players simultaneously resolve any Anti-Armor Fire, removing all casualties. Placement of Destroyed Tanks markers are made if necessary.
- f. Close Assault Step: Close Assaults are resolved in any order that Player "A" desires. He announces which Assaults are actually Probes after each is resolved.
- Reserve Release Segment: Player "A" may release any of his Reserves that he wishes.
H. Truck Convoy Movement Phase
Player "A" may move his Second and Third Line Trucks (unattached) and any POW's and Guards.
J. Commonwealth Rail Movement Phase
If Player "A" is the Commonwealth Player he may utilize Rail Movement (8.7) for units and/or Supplies.
K. Repair Phase
- Towing Segment: Player "A" may tow Broken down and Recovered vehicles.
- Maintenance Segment: Player "A" may attempt to Repair Broken down or destroyed vehicles which were not towed in this Phase.
L. Patrol Phase
If the Phasing Player has not engaged in Assault, he may use Patrols for reconnaissance purposes.
At this point Player "B" undertakes Phases F through L, replacing any references to "A" with "B" and "B" with "A".
IV. SECOND OPERATIONS STAGE
Both Players repeat all facets of the First Operations Stage.
V. THIRD OPERATIONS STAGE
Both Players repeat all facets of the First Operations Stage.
VI. END OF GAME-TURN
You have now completed one Game-Turn, a full week of the real campaign. Take a breather, have a beer and a sandwich, contact your loved ones to let them know you're still alive, and return for another Game-Turn.
[6.0] THE CAPABILITY POINT SYSTEM
GENERAL RULE:
CNA uses a Capability Point system to control all aspects of a given land unit's abilities. A unit's Capability Point Allowance (CPA) is a numerical representation of a unit's ability to undertake any and all functions: movement (including retreats and advances), combat, loading, transporting, construction, etc. There is not a function in the game that will not cost a unit some of its CPA (with some minor exceptions). CPA thus regulates each and every aspect of play. Under certain circumstances units may exceed their CPA. To do so will affect a unit's Cohesion, earning it Disorganization Points (which may affect Morale). Yet, the ability to exceed its CPA allows a unit to stretch itself to the limit, to perform feats it might not ordinarily perform — at a price. Players should thus keep close track of each unit's CP's expended and its Cohesion Level on the Sheets provided.
CASES:
[6.1] HOW THE CPA SYSTEM WORKS
[6.11] Each unit has a Capability Point Allowance (CPA). The CPA for each unit is given on the OA Sheets. Certain Gun units have a CPA of "0;" these units are considered to have a CPA of 10 for all purposes other than movement.
[6.12] Every function that a unit would need to perform costs that unit some portion of its CPA. The costs of each such function are listed on the Capability Point Cost Table, Section 6.3. Except where noted, everything a unit does costs CP's.
[6.13] The CPA for a given unit refers to the number of Capability Points that unit may use in a given Operations Stage without earning Disorganization Points (See 6.2). Thus, a Tank Battalion with a CPA of '25' could use 25 CP's in an Operations Stage without garnering any Disorganization Points.
[6.14] The allotment of CP's for an Operations Stage refers to both Players' portions of that Operations Stage. Thus, if the Axis Player goes "last" in a given Operations Stage any CP's used by his units in Retreating, Reacting, etc., during the Commonwealth portion of that Operations Stage are counted against those units' CPA's for that Operations Stage. As the Operations Stage progresses, Players should keep track of CP's expended by units on either the TOE Sheet for that unit or on the Field Commander Control Sheet. Example: At the beginning of the first Operations Stage of the September III, 1940 Game-Turn (Game-Turn 1), the First Royal Northumberland Fusiliers (a non-motorized Machinegun battalion at this point) has a CPA of eight. To start the game, the Italians move and attack the Ist RNF. They have no artillery and do not barrage. The Allied Player decides to Retreat Before Assault three hexes at a cost of six CP's. The 1st RNF did not use any CP's to defend, and the Italians did not expend any CP's to Close Assault, as the Allied unit retreated before any could be expended. Thus when the Commonwealth Player begins his portion of that Operations Stage the Ist RNF battalion will have only two CP's remaining before it exceeds its CPA and earns Disorganization Points.
[6.15] The CPA of a "Parent Formation" (e.g., division, brigade, etc.) is that of the lowest CPA of the units comprising that parent formation, regardless of the CPA of any higher-CPA units. If the British 7th Armored Division was to move as an entity (consult the OA Sheet for the 7th Arm. Div) it would move with a CPA of '10', or that of its lowest-CPA unit — the Ist KRRC (without trucks).
[6.16] A unit does not have to use all of its CP's in a single Operations Stage. However, CP's not used in one Operations Stage do not carry over into the next Operations Stage (unlike Cohesion Levels, which do). They are not transferrable from one unit to another (although an infantry unit may assume the CPA of a truck if it is motorized; see 6.17).
[6.17] Certain units may become "motorized" during the game: i.e., Infantry units (those units with a basic CPA of 10 or less) may use Truck units to transport them. Infantry units being thus transported by Truck units assume the CPA of the Truck unit carrying them. Thus, if the Ist RNF were to be motorized by Medium Trucks it would now have a CPA of '20', instead of '8'. (See also Section 8.9). Anti-air units with listed CPAs of 0+ may be motorized by assigning one Medium or one Heavy Truck Point per TOE Strength Point of Artillery.
[6.2] COHESION
Cohesion represents a unit's state of exhaustion and disintegration (Disorganization) or elation (Reorganization). A unit with a Cohesion Level of '0? is its normal self. A unit in Disorganization, with a minus Cohesion Level, has probably been exerting itself beyond the normal call of duty, while a unit with a plus Cohesion Level (Reorganization) has been winning battles. The Cohesion Level of a unit affects its Morale Level at the instant of combat, which in turn will affect its performance in that battle. (See Section 17.0).
[6.21] Whenever a unit exceeds its CPA within a given Operations Stage it earns Disorganization Points (DP's). For each Capability Point that a unit uses over its CPA it earns one Disorganization Point. Thus, a unit with a CPA of '15' that uses 18 CP's in an Operations Stage earns three DP's. [A unit may also earn DP's as a result of combat.] If a unit (Parent Formation as well as all units in that formation) suffers losses of 30% or greater in any one Close Assault it earns three DP's. (See also 15.29b).
[6.22] DP's are used to decrease the Cohesion Level of a unit. Thus a unit with a Cohesion Level of —1 that earns three DP's now has a Cohesion Level of —4. DP's accumulate from Segment to Segment; they may be negated only by certain actions on the part of the unit (See 6.23). Furthermore, DP's are credited immediately — not at the end of an Operations Stage. Example: the Ist RNF, with a CPA of '8' and a Cohesion Level of — 2 has expended five CP's in a Movement Segment. It then assaults an Italian unit, expending the five CP's necessary to do so. The Ist RNF has thus exceeded its CPA by two, earning 2 DP's and reducing its Cohesion Level by that fwo to —4. The decrease in the Cohesion Level takes place before the Close Assault is resolved and the Ist RNF uses its new Cohesion Level of —4 in computing any changes to Morale.
[6.23] A unit's Cohesion Level may be increased by earning Reorganization Points (RP's). Under no circumstances, however, may a units Cohesion Level ever go higher than plus ten (+10). RP's earned are added to a unit's Cohesion Level in such a way as to make it "better". Thus a unit with a Cohesion Level of — 3 that earns five RP's has a new Cohesion Level of +2. RP's, like DP's, are applied immediately.
[6.24] RP's are earned under the following cir- : cumstances:
-
For each Operations Stage in which a unit uses absolutely no CP's (except for a unit undergoing Training or conducting Training; see 18.3) that unit earns five RP's. However, no unit may ever increase his Cohesion Level above' '0' by this method. Thus, a unit with a Cohesion Level of —1 that uses no CP's for an entire Stage would have a Cohesion Level of '0' at the end of that Stage (not +4).
-
For each Close Assault in which a unit participates where the defending unit vacates its hex completely as a direct result of that Close Assault (not Reaction or Retreat Before Assault) that unit (victorious) earns three RP's.
[6.25] A unit with a positive Cohesion Level (e.g., +3) may have its Basic Morale increased in a given Close Assault, while a unit with a negative Cohesion Level (e.g., —12) may have its Morale lowered for a given combat (see Case 17.2).
[6.26] A unit with a Cohesion Level of —26 (or worse) may not move, attack, or defend. If an enemy combat unit moves adjacent to it it Surrenders, regardless of the size of the enemy unit. Such "disorganized" units may, however, refuel, and they do consume Stores and Water. (Note, that a unit may get a level of worse than — 26 if it performs a single action, such as an attack that would jump it past the — 26 level.)
[6.27] If a Player has more than one unit (or individual combat counter) in a given Close Assault, and those individual units have different Cohesion Levels, then the Cohesion Level of the largest (in terms of type: division, brigade, etc.) unit prevails. (Use the Stacking Points to determine the "largest'? unit.) When determining any adjustments to Morale through Cohesion Level, if there is more than one "largest unit", then the Cohesion Levels of all "largest units'? are added together and divided by the number of contributing counters.
Example: Three brigades are assaulting an enemy unit. The Cohesion Level of the Brigades is —4, —1 and +3, respectively. The Player adds the three together (—4 + (—)1 + 3 = —2, and then divides by three (—2 + 3 = —1, rounding to the nearest whole number). The Cohesion Level for that battle is thus — 1.
[6.28] If a Parent Formation has many units within it that have different Cohesion Levels the largest unit within the Parent Formation prevails, as per Case 6.27.
Example: An extreme example — and one not likely to occur — is one where a Parent Formation has three Brigades, all with different Cohesion Levels; in addition, one of the Brigades contains three battalions, each with a different Cohesion Level. The Cohesion Level for the latter Brigade would have to be determined before averaging the three Brigades to get the final Cohesion Level. Again, this will rarely — if ever — occur.
[6.29] Notwithstanding anything said in 6.27 or 6.28, each unit's Cohesion Level is kept track of individually. As most units in a Parent Formation will have the same level at all times, this will not prove to be too big a problem.
[6.3] CAPABILITY POINT COST SUMMARY
(see Charts and Tables)
[7.0] INITIATIVE
GENERAL RULE:
Initiative is an abstract, numerical rating representative of the strategic leadership capabilities of a given army. It is used, in the game, to determine who has the choice to act first within a given Operations Stage. The fact that a Player has the ability to choose when he will move is a great advantage, and the army with better initiative will often find that it has the upper hand operationally — if not materially.
[7.1] THE MECHANICS OF INITIATIVE
[7.11] The Player who has "Initiative" for a Game-Turn may choose whether he wishes to move first or last in a given Operations Stage.
[7.12] The Player who will have the Initiative is determined at the beginning of each Game-Turn (not Operation Stage). The Player who gains the Initiative keepts that Initiative for all three Operations Stages in that Game-Turn. Thus, the Player with Initiative may choose to move first in the first Operations Stage, last in the second stage and then first in the third Stage (which would give him, in effect, two "turns" in a row).
[7.13] Each side possesses an Initiative Rating (7.2), which is dependent on the date of the Game-Turn.
[7.14] To determine which Player has the Initiative for a given Game-Turn, each Player, in the Initiative Determinate Stage, rolls one die and adds his Initiative Rating to the result of the thrown die. The Player with the highest total (ties roll again) gains the Initiative. Thus, in October of 1940, if the Italian Player, with an Initiative Rating of '1', were to roll a '4' and the Commonwealth Player, with an Initiative Rating of '3', were to roll a '1', the Italian Player would gain the Initiative by virtue of having a total of five (1 + 4 = 5) to the Commonwealth total of '47 (3 + 1 = 4). The Italian Player would now be able to choose, in his Initiative Declaration Phase, whether he wants to move first or last in the Operations Stage for each of three Operations Stages in the Game-Turn.
[7.15] The Player with Initiative for the first Game-Turn of a given scenario is usually predetermined. Check the individual scenarios for who has the Initiative for the first Game-Turn.
[7.16] For purposes of the Sequence of Play, the Player who moves first in an Operations Stage is called "Player A"; the Player who moves last in an Operations Stage is called "Player B".
[7.2] INITIATIVE RATINGS CHART
This chart lists the Axis and CW initiative ratings for all units at any given point in the game. (See Separate Sheets)
[8.0] LAND MOVEMENT
GENERAL RULE:
In CNA, Land Movement is a function of the CPA of a unit. Most Movement occurs during the Movement Segment of the Movement/Combat Phase. During the Movement Segment, the Phasing Player (i.e., the Player who is in the process of moving) may move as many or as few of his units as he wishes. They may be moved in any direction or combination of directions, limited only by their CPA's, enemy Zones of Control, Terrain restrictions and, in the case of motorized units, Fuel consumption and Breakdown. Under certain conditions (Reaction and Retreat Before Assault) the non-Phasing Player may move his units.
PROCEDURE:
Units are moved one at a time, or in stacks, tracing a path of contiguous hexes through the hex grid. As a unit enters each hex it must expend a portion of its CPA for entering that hex or crossing a particular hexside. All terrain costs are listed on the Terrain Effects Chart (8.37). In addition to Movement costs, Players must pay attention to Breakdown costs for vehicles moving through certain hexes (see Section 21.0).
[8.1]. HOW TO MOVE UNITS
[8.11] Units may be moved voluntarily only during the Movement Segments or Retreat Before Assault Step. Voluntary movement may never take place out of the Sequence of Play. Players should note that while Player A may be the Phasing Player, Player B has several opportunities to move his units during A's Segment. All movement, of any type, expends CP's. Furthermore, if the unit moving is a vehicle (armored units, self-propelled artillery and trucks), the Player must check for possible Breakdown (see Section 21.0). Units may move freely through Friendly units, with the exception of movement along roads and tracks (see Case 8.34).
[8.12] Under certain conditions — usually combat — a unit may be forced to Retreat. This is considered involuntary movement, in that the retreat- ing Player does not move by his own choice but rather as a direct result of combat. However, involuntary movement also requires expenditure of CP's and checks for Breakdown.
[8.13] A unit may never enter a hex containing an enemy unit (see, however, Case 27.4). Furthermore, movement from hex to hex must be consecutive; units may not skip hexes. (There are, of course, different rules for aircraft.)
[8.14] If a unit moves into an enemy Zone of Control (10.0) it must stop immediately. It may move no further in that Movement Segment and will probably have to attack, in some form, the enemy unit exerting that Zone of Control.
[8.15] A unit that begins a Movement Segment in an enemy Zone of Control may move out of that hex and continue movement under the following conditions:
- It may not move directly into an enemy Zone of Control (however, see Case 10.24); and 2. It must pay a cost of two CP's if the units are in "Contact" (see Case 8.62); or 3. It must pay a cost of four CP's if the units are "Engaged" (see Case 8.63).
[8.16] Units may continue to move and fight as long as they wish, with certain restrictions (see Case 8.2). They may exceed their CPA in an Operations Stage; however this will affect their Cohesion Level.
[8.17] Non-motorized units — those units with CPA's of ten or less — may never voluntarily expend CP's greater than 50% of their base CPA during their portion of the Operations Stage (An '8' could not go higher than '12', a '10' no higher than '15'). Remember, Reaction and Retreat Before Assault are not voluntary movement in your own portion of an Operations Stage; they occur in the other player's portion of the Operations Stage. Furthermore, no unit with a Cohesion Level of —26 or worse may move.
[8.18] Second and Third Line Trucks (i.e., Truck Convoys; see Section 8.9) have their own Movement Phase: The Truck Convoy Movement Phase. Such trucks may not move (voluntarily) in the normal movement segments. Only trucks directly attached to, and part of, a combat unit or HQ may move in the normal Movement Segments. Trucks become attached and/or detached in the Organization Segment of the Sequence of Play.
[8.19] No Commonwealth Land unit may be moved west of Marble Arch (A2109) at any time, for any reason. (This solves a great number of playing problems, and also reflects Commonwealth operations considerations and strategy.)
[8.2] THE CONCEPT OF CONTINUAL MOVEMENT
CNA uses a concept called "Continual Movement". Under this concept a given unit does not possess a set Movement Allowance which it may never exceed, as in most wargames. Rather a unit has a Capability Point Allowance. If a Phasing Player wishes to push his units past their CPA he may do so, knowing that it will affect that unit's Cohesion. In Continual Movement a unit may continue to move after it has engaged in combat, moving and fighting as long as the Phasing Player wishes, within certain limits.
Continual Movement generates certain problems in terms of Time-and-Space Relationships. The rules attempt to account for the fact that time passes while one unit is moving; that other units are not standing still.
[8.21] Units are not limited as to the number of times they may move and engage in combat during a given Operations Stage except for Cases 6.26, 8.17, and 8.23. Thus, a unit may move adjacent to an Enemy unit, engage it in combat, move away (or stay), engage the same or another unit in combat, etc., as the Phasing Player wishes. The unit simply expends CP's for all actions it performs.
[8.22] Within a given Movement/Combat Phase there may be several segments of Movement and Combat. These are, to a certain extent, regimented. In essence, the Phasing Player moves his units. He then, after all such movement is completed, resolves any combat. He may then again move any of his units (within the exceptions mentioned in 8.21); after all movement at that time is completed any combat necessitated or desired is resolved. This cycle is repeated until the Phasing Player no longer wishes to move his units or have combat. Remember, no combat occurs until all movement has ceased within each Sequence of Movement and Combat.
[8.23] Only those Phasing units that have finished a Movement Segment within two hexes of an enemy unit are free to move again. A Phasing unit that finishes its movement more than two hexes from an enemy combat unit may not continue to move during that Movement Phase, regardless of - the number of CP's remaining, unless that is a unit that has been placed in Reserve Status (18.0). Players should note that Reserve Status is an exception to 8.22.
[8.24] A Phasing unit that begins any Movement/Combat Phase in the Zone of Control of an Enemy unit must expend two CP's to break "Contact'? — or four CP's, if such position was brought about by an "Engaged" result on the Assault CRT — if it wishes to move. (Note, that in the case of an Engaged result, the presence of an enemy ZOC does not matter.)
[8.25] A Friendly unit may attack a given Enemy unit more than once in a given Operations Stage, with neither unit ever moving! However, each combat occurs after all movement of other units cease. If there is no movement by any units, combat may still proceed for as long as the Phasing Player wishes, providing he has the necessary Ammunition and wishes to expend the required number of CP's.
[8.3] TERRAIN EFFECTS ON MOVEMENT
[8.31] Units expend a varying number of CP's to enter hexes or cross certain hexsides, depending upon the type of unit and/or what type of hex or hexside is involved. The costs range from % CP for roads (for motorized units) to + 8 for a vehicle to move down an escarpment via a track or an infantry-type unit to cross The Nile without a "bridge". See the Terrain Effects Chart for all effects (8.9).
[8.32] Certain types of hexes and/or hexsides are prohibited to certain types of units. E.g., certain vehicles may never enter a Salt Marsh hex, unless it is on a road or track.
[8.33] Roads and Tracks may be used to facilitate movement through terrain obstacles and speed movement over the entire game-map. For a unit to gain any benefit from movement on a Road or Track it must move from one Road/Track hex directly into an adjacent, connecting Road/Track hex through a Road/Track hexside. Units which are moving along Roads or Tracks ignore, for movement purposes, any other terrain in the hex or hexside, with the exception of vehicles crossing Escarpments (see 8.42).
[8.34] A unit comprised (at least in part) of vehicles (i.e., tanks, trucks, artillery, etc.) that is moving along a Road or Track is limited in its ability to move through other Friendly units on the Road or Track in that hex; see Case 9.33. Such moving units may always pass around Friendly units that are on a Road or Track by moving through the terrain in the hex, i.e., bypassing the units on the road by moving off the road and around them, going back on the road in the next hex.
[8.35] Most of the terrain in CNA is self-explanatory, especially when the Terrain Effects Chart is consulted. However, at this point it would help to be able to visualize the difference between slopes, ridges and escarpments. An idealized sideview of each of the above types of terrain is provided below so that players can see what is being abstracted:
Slope Ridge Escarpment Slopes and Escarpments always have an "up" side and a "down" side (see the Terrain Key). The splash contours of the respective terrain symbols are always on the "down" side of the slope or escarpment. Thus, when a unit is crossing a slope or escarpment hexside it is moving either up the slope/escarpment or down the slope/escarpment.
Ridges have no "direction"; crossing a Ridge hexside has the same effect regardless of which direction the unit is coming from. In essence, ridges are two-sided slopes.
[8.36] Certain types of terrain restrict combat or give the attacker or defender a combat benefit. These benefits are discussed throughout the sections on Combat, but they are all summarized on the Terrain Effects Chart.
[8.37] Terrain Effects Chart (see Charts and Tables)
[8.4] SPECIAL TERRAIN EFFECTS ON MOVEMENT
For those gamers used to Panzerarmee Afrika and Afrika Korps, the game-map of CNA will come as something of a shock and a revelation: there is terrain in all those empty spaces. And much of this terrain is unlike that of anywhere else on earth, bringing with it special problems for both designer and player. The most important of these are discussed below.
[8.41] Wadis. Wadis are, in essence, dried-out river beds. There are several major areas of wadis in North Africa. While the series of wadis that "guards'? the Libyan Sand Desert, south of Cyrenaica, is the largest group, perhaps the most important series of wadis are those extending like _ fingers from the Jebel Akhdar (game-map B).
Along with the other difficult terrain in the area, the wadis of the Jebel Akhdar greatly hinder rapid movement.
All units expend CP's to cross a Wadi hexside. (All wadis in CNA have been placed along hexsides, with the exception of the Wadi Natrun, just west of the Nile Delta, which is treated, for gamepurposes, as if it were Salt Marsh.) In addition, there is a Breakdown Factor of eight for vehicles crossing a wadi hexside. Roads negate wadis for movement purposes, while Tracks halve the cost to cross. Vehicles crossing a Wadi on a Road use the Road Breakdown Rate (4% BP), while vehicles crossing on Tracks garner four BP's, not eight.
Players should note that in an Operations Stage in which the Weather is Rainstorm wadis in affected map sections are impassable at all points, except where they are traversed by roads. The cost to cross a rain-swollen wadi by Road is +2 CP's;
there is no additional Breakdown cost (i.e., it is still 4% BP).
[8.42] Escarpments. The escarpments, which were such an integral part of the Desert Campaign, are at the edge of the Libyan Plateau, which rises from the edge of the strip of land that borders the Mediterranean. In some places the rise is gradual; in others it is sharp and severe, virtually uncrossable by vehicles. Movement costs for crossing escarpment hexsides are listed in the Terrain Effects Chart (8.37). However, other factors must be noted. No vehicle may ever move "up" an escarpment (i.e., cross an escarpment hexside by moving from the down side to the up side). If a Track crosses an escarpment hexside, vehicles may use the Track to move down the escarpment, but never up. The cost for moving down via Track would be +8 CP's and six Breakdown Points.
[8.43] Slopes and Ridges. These were discussed in 8.35. All units may cross these hexsides at a variety of Movement and Breakdown costs; see 8.37.
[8.44] Salt Marsh. Salt marshes are depressions consisting of very fine and treacherous salty sand —a veritable quicksand grave for vehicles, and no fun for infantry either. Vehicles, except for Light Trucks, Recce-type units, and motorcycle infantry may enter or leave a Salt Marsh hex only on a Road or Track. A prohibited vehicle that enters a Salt Marsh hex without using the Track, whatever the reason, is Abandoned (see 5.33). Because most vehicles are prohibited from entering Salt Marshes in a normal manner, no motorized unit or AFV (tank, armored car, etc.) may ever engage in Assault with units defending in a Salt Marsh hex. The one camel unit in the game (the Italian Meharisti Camel Cavalry) travels as infantry in non-track Salt Marsh hexes, as these hexes could not support loaded camels.
[8.45] Desert. Desert hexes, which comprise the area known as the Libyan Sand Desert, contain soft, shifting sand (as opposed to "Clear" hexes, which have a clay-like substance more supportive of vehicular traffic.) Desert hexes are forbidden to Light Trucks, Motorcycle infantry, and motorcycle Recce units whose weight was not sufficient enough to provide the traction necessary for moving vehicles through the soft surface. Such units may not enter any Desert hexes, whether traversed by Tracks or not. See 8.37 for all terrain costs.
[8.46] Tracks. The major communication network of the North African Plateau is the series of tracks that criss-cross the entire area. The tracks are useful not in that they are easier to walk or ride in (in some places they are no easier than the terrain in the hex); what they do provide is direction — i.e., which way to go. Sense of direction in the "desert" is almost non-existent; the tracks provide that. Movement along tracks is at 1 CP per hex and halves most hexside crossing CP costs. In addition, units using a track pay only one-half the normal Breakdown cost for that hex.
[8.47] Railroads and Roads. The use of these two are discussed quite succinctly in the body of the rules. However, Players should note that, on the game-map, there are large sections of railroad and some' roads that are not constructed as of September 1940 and must be constructed to exist. Specific later scenarios will list the hexes that have been constructed by that time. Unconstructed railroad hexes are ignored for all purposes. Unconstructed roads are treated as tracks.
[8.48] Oases do not affect movement, But it might be worthwhile to point out here that Oases are considered to be nondiminishing Supply Dumps for Water and Stores.
[8.49] All of these terrain types also affect combat. However, such effects are discussed in the various combat Sections, especially 15.3.
[8.5] REACTION
Reaction is the capability of a unit to "get out of the way" of an attacking unit or units before the enemy can launch an attack against the reacting unit. Reaction is movement conducted by the non-Phasing Player — as defender — in the opposing Player's Movement/Combat Phase. A unit's ability to react is limited to certain specific situations. Reaction expends CP's.
[8.51] Reaction is the process of movement by a Friendly, non-Phasing unit in response to an Enemy Combat unit moving adjacent to that Friendly, non-Phasing combat unit. Reaction follows all the standard rules of movement, except as stated below.
[8.52] A given unit may React as many times as the Player wishes during an Operations Stage. A unit "reacting"? expends CP's; however, it does not expend CP's for Breaking Contact/Engaged, as defined in 8.24.
[8.53] All units may react, with the following exceptions:
a. Non-motorized units, Squadron Ground Support Units, and Truck Convoys not stacked with Friendly combat units may never React.
b. No unit may React if the Enemy unit moving adjacent to it has a CPA six or more points greater than that of the non-Phasing unit and the owner of the Phasing unit announces there will be a Close Assault by his unit against the non-Phasing unit. Thus, a motorized infantry battalion may react when a tank battalion with a CPA of 25 moves adjacent to it, because a motorized unit will have a minimum CPA of 20 (from its trucks). However, if the same motorized battalion were to be moved adjacent to by an enemy Recce battalion, with a CPA of 45, the motorized battalion could not React. (It could still Retreat Before Assault, however; see Section 13.0). Furthermore, each units is treated individually; thus, Second Line Light Trucks stacked with (but not attached to) that motorized battalion could retreat (as they have an extended CPA of 40, only 5 less than 45). c. If a non-phasing unit is already in an enemy Zone of Control (usually as a result of (b) above) it may not React. In this way, faster units "pin" slower units.
d. A unit that is in combat or Engaged may not react.
[8.54] Notwithstanding anything said in 8.53, no battalion size unit may ever pin a division and no company-size unit may ever pin a brigade or larger unit. The terms used here refer to size, and not specifically the unit type/designation. Size of unit may be determined by Stacking Points as well as the TOE. Thus a division may be but a skeleton force, as may other units. The problem should rarely occur, as most units are fairly easy to determine as to size and type, but if there is a question use your Common Sense (or flip a coin if that commodity is in short supply). See Section 9.2.
[8.55] Reacting units may never enter an Enemy Zone of Control during their Reaction Movement. Otherwise, Reaction is undertaken like normal movement, with no limit as to how far a unit may React/Move.
[8.56] A unit may react, within the restrictions listed in 8.53 above, even if it is attached to a parent formation. In this case, the CP is expended for detachment and the unit may then react. A brigade HQ may not be detached from a division unless all of the units at present attached to the brigade HQ are also detached. In addition, the detachment of units may not be performed such that the parent unit is vow "pinned" as a result of its becoming a shell and having Case 8.54 now apply. Attached trucks may be freely divided amongst the parent unit and its detaching and reacting units. Note that this rule does not permit a parent unit to detach low CPA units in order for the parent unit to now be able to react.
[8.6] BREAKING OFF
[8.61] Breaking Off is a function of Movement that occurs when a unit beings a Friendly Movement Segment in Contact or Engaged with an Enemy Combat unit. Contact and Engaged markers are provided to indicate such status. (There has been some discussion of this in 8.24; see also Case 15.81).
[8.62] Units are in Contact if they are in an Enemy Zone of Control at the beginning of a Movement Segment.
[8.63] Units are Engaged directly as a result of Close Assault; Engaged is a combat result. Engaged units do not necessarily have to be in Enemy Zones of Control.
[8.64] A unit in Contact or Engaged with an Enemy combat unit at the beginning of a Movement Segment or a Retreat Before Assault (not Reaction) may not move until it has paid a cost in CP's to break off such contact. In addition, First Line Trucks wishing to detach from an Engaged or Contacted parent unit must expend the necessary CP's to so detach. Second/Third Line Trucks wishing to attach as First Line Trucks to Engaged or Contacted units do not expend additional CP's to so attach.
[8.65] A unit in Contact must expend two CP's to Break Off before moving.
[8.66] A unit that is Engaged must expend four CP's to Break Off before moving.
[8.67] When all of the Friendly units that were in Contact or Engaged with an Enemy combat unit Break Off that Enemy unit is no longer Engaged or in Contact.
[8.68] Contact and Engaged markers affect only the combat units in the hex at the time of their placement. Units moving into a hex with a Contact or Engaged marker are not affected by that marker.
[8.7] RAIL MOVEMENT OF LAND UNITS
[8.71] There are two rail lines in the game. The Alexandria-Mersa Matruh line is an active railroad. It may be extended by construction (see Case 24.6) and may be used only by the Commonwealth Player, regardless of the strategic situation. The Soluch-Benghazi-Barce rail line is on the game-map solely for historical purposes; it may not be used for anything and has no effect whatsoever on terrain or movement. (It was used by the Italians in 1940, but not in any way as to affect the game.)
[8.72] The Commonwealth Player may use Rail Movement once per Operations Stage, in the Commonwealth Rail Movement Phase. He may transport units and/or supplies, and he may move one "stack" of these any distance along the rail line in each direction. Thus, a unit may be moved west from Alexandria to any rail hex along a finished rail line as far as (eventually) Tobruk, and supplies in Tobruk may be moved east to Matruh.
[8.73] To use Rail Movement a unit must start the Operations Stage on a rail hex, it may not have expended any CP's for any other reason during that Operations Stage, and it may not be in an Enemy ZOC. The unit is then moved to the desired point along the line where it stops. It may not enter an Enemy ZOC or Enemy-occupied hex at any time while using Rail Movement.
[8.74] The Commonwealth Player may use his railroad lines once in each direction. I.e., he may carry one unit (or stack) as far as he wishes in an easterly direction and another stack (or perhaps supplies) as far as he wishes in a westerly direction.
[8.75] The maximum number of Stacking Points that may be carried by Rail Movement is two. (Thus large Brigades must be broken down for Rail Movement). For supply maximums, see Section 49,3.
[8.76] Rail hexes that have been destroyed by bombing, etc. may not be entered by Rail Movement until they are repaired. Likewise, the rail hexes not yet in existence (8.47) can not be used until they have been constructed (see Case 24.6).
[8.77] Units may be picked up and dropped off anywhere along a rail line, as long as the Stacking and directional restrictions are always observed and no unit using rail has expended CP's in that Operational Stage.
[8.78] No Rail hex west of any rail hex occupied by an Axis combat unit may be used by the Allied Player for Railroad Movement.
[8.8] TRIPOLI AND TUNISIA
[8.81] The area around Tripoli and Tunisia, both important entry ports for Axis troops and supplies, are represented by a series of four large boxes and a number of smaller boxes on the western edge of game-map section A. Each large box represents a specific region, centered around the geographical name in the box: Tripolitania, Tripoli, Gabes, and Tunis. References to these boxes as a group are indicated by the term "Tripoli/Tunisia boxes." The smaller boxes are used to represent the location of units in transit between the Tripoli/Tunisia boxes.
[8.82] Only Axis units and Commonwealth airplanes may enter the Tripoli/Tunisia region. No Commonwealth land or sea unit may ever enter any of the boxes.
[8.83] Air movement to/from the area is performed as per the standard Air Rules, with the distances listed in the Air Distance Chart. Land movement among the Tripoli/Tunisia boxes and the boxes and the North Africa proper of the game map has been abstracted. The distance traveled is measured by the number of Operation Stages in which a land unit must expend its Capability Point Allowance in movement. Motorized units are required to consume fuel but are not required to check for breakdown during movement in, to and from this off-map region. A unit must expend exactly its Capability Point Allowance in each Operations Stage of movement in, to, or from the off-map region.
[8.84] The number of Operation Stages of movement required by a specific unit in order to traverse the distance between the various Tripoli/Tunisia boxes and the map depends upon it Capability Point Allowance. The movement "rates" for units in the of f-map region is listed in the Off-Map Land Unit Movement Distance Chart (8.89). A unit being moved from one Tripoli/Tunisia box (or hex A 2802, see Case 8.85) to another that can traverse the distance in a single Operations Stage is simply placed in its new location and the required fuel is expended. If the unit cannot cover the distance in a single Operations Stage of movement, it is moved one In Transit box for each Operations State it is moved until the required number of Operations Stages of movement have been completed. Note that a unit In Transit is not required to be moved each Operation Stage and that such a unit may reverse its direction, returning to its original starting location.
[8.85] For a unit to be moved off the game map towards Tripolitania it must start that Operations Stage in hex A2802. A unit entering the game-map from the off-map region 1s simply placed in the © Road hex closest to the Tripolitania box. If there are more than five Stacking Points that are to be brought onto the map, they may be strung out on the Road in consecutive hexes (road) from the Tripolitania box; e.g., 5 points in hex 2802, 5. points in 2803, and 3 points in 2804.
[8.86] Reinforcements and replacements arriving in Tunis or Tripoli may not be moved from that box during the Operations Stage of their arrival.
[8.87] There are no stacking restrictions and unlimited Water in the Tripoli/Tunisia boxes and the In Transit boxes. In addition, the Tripoli/Tunisia boxes are considered to contain air facilities, mon-transferrable supplies and maintenance crews sufficient for every plane the Axis Player has.
[8.88] The Tripoli/Tunisia boxes are considered to be Supply Dumps of unlimited capacity. However, a truck or motorization point may not be moved in the Operations Stage in which it loads and/or unloads supplies.
[8.89] Off-Map Land Units Movement Distance Chart (see Charts and Tables)
[8.9] MOTORIZED UNITS/TRUCKS
[8.91] A motorized unit in CNA is one that always contains enough vehicles to transport the entire unit as a single entity. Motorized units include those comprised of mechanized (i.e., tracked) vehicles, trucks, and motorcycles. Motorized units are divided into those that are inherently motorized (whose transportation vehicles may not normally be removed) and those that are being transported by truck points assigned to that purpose.
[8.92] Non-motorized units (i.e., "leg" infantry and a few gun units, with the exception of the Meharisti Cavalry (camels), may be transformed into motorized units (and visa versa) by the addition/(subtraction) of sufficient Truck Points. When being transported by trucks, a non-motorized unit's CPA becomes that of the appropriate rating of the truck that is transporting it.
[8.93] Certain non-motorized infantry units are designated as being historically normally supplied with enough vehicles to motorize the entire unit. These infantry units are so indicated by a "+"' symbol after their CPA on the Unit Characteristics Chart. These units' characteristics differ only slightly with respect to their historically non-motorized brothers (see Cases 19.9 and 32.54).
[8.94] A motorized unit maintains its CPA even if it is performing an action which is impossible while actually in a vehicle. Examples: A towed (inherently) motorized artillery unit Barraging, an infantry unit receiving defensive benefits from fortifications, a motorized infantry unit assaulting into a salt marsh hex.
[8.95] Truck Points may be used to transport TOE Strength Points or supplies. Truck Points represented by a counter (for example: all of the Truck Points attached to an infantry division which is represented on the game map by its HQ counter) are assigned transportation duties individually,
Example: An infantry Battalion of six TOE Strength Points with 10 light, 10 Medium and 10 Heavy Truck Points attached might assign 4 light, two medium and one heavy Truck Points to the infantry in order to completely motorize the unit (this is inefficient, but variations on this theme will inevitably occur). Note that Truck Points are never required to transport anything, they may move around empty.
[8.96] Truck Points may be attached to any unit in CNA bearing a historical designation. When attached they are represented by the unit's counter. However, trucks are automatically under the control of the highest (largest) ranking Parent Formation to which they are currently attached. Example: A Truck Point attached to a battalion which is subsequently attached to a brigade become the property of that brigade. It is not necessary to subdivide the trucks among the brigade's component units.
[8.97] Trucks may be attached to a unit bearing a historical designation only during the Organization Phase of an Operations Stage (unless during the Operations State that unit is attached to a Parent Unit). Trucks may be detached from such a unit only during the Organization Phase of an Operations Stage unless that unit is a Parent Unit and detaches any of its attached subsidiary units during a Movement and Combat Phase. In such a case any portion of the total number of attached trucks to that newly detached unit. No unit with a Cohesion Level of minus five or worse may detach trucks completely from a unit bearing a historical designation.
[8.98] During the owning Player's Player-Turn, trucks that are attached to units move with those units in the Movement and Combat Phase, and trucks that are not attached to units are moved in the Truck Convoy Phase. In either case, trucks may be permitted to move during the opposing Player's Player-Turn (Reaction, etc.) Trucks that are moved in the Truck Convoy Phase may not exceed their CPA. If forced to through involuntary movement, they are captured instead. Truck Points being moved in the Truck Convoy Phase may be moved in any order, group sub-division, stops and starts. The only restriction being that Truck Points beginning and ending in the same hex and following the same path of travel must be moved as a group. Example: Fifty Truck Points begin in C2510. They are moved as a group (not required) to C2515 at which point 20 are moved to C2520 where they end their movement for that Truck Convoy Phase. The 30 Truck Points left in C2515 may now be moved (and sub-divided further if you wish). Note that this differentiates them from units detached from Parent Units (see Case 19.44)
[8.99] A Truck marker may represent any of the unattached Truck Points in that hex at that point in time, unless all of those Truck Points are being used to transport Infantry Replacement Points. The marker may be used to represent any Replacement Points or repaired vehicles in that hex (i.e., may not place the marker if just Tank Replacement Points in the hex). As many markers may be placed as there are unattached Truck Points in that hex.
[9.0] STACKING
GENERAL RULE:
Stacking refers to the process of placing more than one unit in a hex. Each unit is worth a certain number of Stacking Points, generally as printed on the counter, and each hex, according to the type of terrain it encompasses, has a maximum number of points that may be in that hex.
[9.1] THE STACKING POINT SYSTEM
[9.11] Each unit (or counter) in the game has a Stacking Point value printed on the face of the unit. (See Sample Units, 4.22). E.g., the 1/8 Panzer Battalion has 1 Stacking Point.
[9.12] HQ units, whether Division, Brigade, or Regiment, have parenthesized Stacking Point values. This means the Stacking Point value of that HQ is '0' when it has no combat units of any type attached; the printed number is its Stacking Point value when it represents the division or brigade as a combat unit. (See Unit Equivalents, 9.2).
[9.13] Stacking Points not only represent a given number of men but also, and more importantly, they represent organizational ability. Thus a full division has a Stacking Point value of '5', while, at the same time, it may include units whose total Stacking Point values are much greater than five. The divisional HQ supplies the necessary administrative and organizational functions that enables the division to exist — and fight — in a more cohesive state.
[9.14] Each hex, or rather each type of terrain, has a maximum number of Stacking Points which may be in that hex at the end of any Movement Segment. These limits are listed in Case 8.37.
[9.15] Informational markers and air units of all types do not have any Stacking Point value.
[9.16] There are three specific types of units that, on certain occasions, ignore Stacking restrictions:
a. Garrison units (those units with a "G" above their Stacking Point number) stack freely in the city/village to which they are assigned as a Garrison. E.g., the Italian Heavy Weapons battalion assigned as garrison to Fort Maddalenna would have '0' Stacking Points in that village but '1' point anywhere else.
b. Pure anti-aircraft units (those units with the identification symbol for AA/Flak) stack freely in Major Cities. In addition, one AA/Flak unit may stack freely with any air landing strip and three in any airfield.
a "0+"? CPA that are not at present motorized (have trucks attached that are being used to transport them) have zero Stacking Points.
[9.2] UNIT EQUIVALENTS
[9.21] A Division is considered to represent all units assigned and attached to (not simply stacked with) the HQ unit for that division. Units assigned (19.1) to a division (see the TOE Sheets for the units) may not necessarily be part of that division at a given time; they may have been detached for duty elsewhere. Only those units with the Parent unit/HQ at a given time are considered to be part of that parent unit for Stacking purposes.
[9.22] The next lowest level of unit organization in CNA is the Brigade Equivalent. Now, because of the peculiarities of the individual countries involved, not all units which are called "brigades" are brigade equivalents. The Italians used a Regimental designation as their next lowest organizational level (see any Italian infantry division). Such a Regiment is considered to be a Brigade equivalent for game purposes. Furthermore, the British had a propensity for using the terms "brigade" and "regiment" for a whole host of lesser-sized units, usually battalions. (E.g., the 7th Rifle Brigade is really a battalion-sized infantry unit while the 7th Motor Brigade is a Brigade). Players should be guided through this maze not by the unit designation on the counter or the unit's name but rather through the printed Stacking Point value. This number, cross-referenced with Section 9.4, will reveal the organizatioinal level of the unit (for game purposes).
[9.23] The basic combat unit in the game is the infantry and tank battalion ("battalion equivalent'). As noted, some battalion-sized units (actual battalion equivalents) may be called "regiments" or some such. Check the Stacking Point value when in doubt.
[9.24] Regardless of its organizational designation, every artillery unit in the game, with the exception of certain scattered batteries, has a Stacking Point value of "1". (The rare Artillery HQ unit may have a larger Stacking Point value).
[9.25] There are a number of companies and batteries in the game with a Stacking Point value of "Q", due to the miniscule number of men and combat impact those units had. Nevertheless, unless directly attached or assigned to a parent unit, no more than five such companies or batteries may ever be stacked in any one hex, in addition to whatever else is in that hex. Exception: there is no limit to the number of such units which may be placed in a Major City hex. Note: an HQ unit that has no combat units attached to it has a Stacking Point value of "0".
[9.26] A Division is considered a "shell" (see Case 3.1) when 50% or less of the total number of brigade-equivalents that may be assigned to it are attached to it. E.g., if a division which may have a maximum of two brigades assigned currently has only one brigade attached to it (ignore any independent battalions or whatever), the division is considered a shell. A brigade is considered to be a Shell if less than 2/3rds of the total number of battalions (combat units) that may be assigned to it are attached to it. Exception: a brigade to which a maximum of two battalions may be assigned is not considered a shell if two battalions are attached to it and at least one of them is not itself a shell. A battalion is considered to be a shell when less than 50% of its maximum TOE Strength Points are attached to it, unless it is an Artillery battalion (or regiment or whatever); an artillery unit must be less than 25% of TOE strength to be a shell.
[9.27] If a unit attached to a parent formation is a shell, it does not count as one of the pre-requisite lower level units necessary to allow the parent unit to qualify as a full-strength unit. For example, a division to which a maximum of three brigades may be assigned has three brigades attached to it, but two of the brigades are shells. The division itself is thus considered to be a shell.
[9.28] A unit that is a shell is reduced one level to the next lowest-level formation for purposes of Unit Differentiation on Close Assault (see Case 15.5) and for any rule where unit size is important. Thus, a division shell would be considered a brigade equivalent, a brigade shell a battalion equivalent, and a battalion shell a company equivalent.
[9.29] First line (attached) Trucks do not count in any way towards unit organizational size or for road space stacking limits. Furthermore, Truck Convoys (unattached, see Case 9.3) that are in a hex do not count against any stacking limits, except those concerning road space, for which they do count.
[9.3] THE EFFECTS OF STACKING
Stacking restrictions limit the number of units that can be in a hex at the end of a Friendly Movement Segment, as well as at the end of an Operations Stage. Stacking restrictions also affect the ability of motorized units to move through Friendly units on a Road or Track. Stacking restrictions also apply during involuntary retreats. The stacking limits for each type of terrain are listed on the Terrain Effects Chart (8.37).
[9.31] Units may never cease movement in a hex in violation of stacking restrictions (8.37).
[9.32] Units may always move through other friendly units, and stacking restrictions apply only at the instant all units have ceased movement. However, see 9.33 and 9.35.
[9.33] A motorized unit (tank, truck, artillery, motorcycle, etc.) using a Road or Track to facilitate movement may not exceed the five point Road or Track Stacking Limit by moving through a Friendly unit or units on that Track or Road. If a unit using a Road or Track would create such a situation it must "move around" the non-moving units, entering that hex without the Road or Track benefit. Note: some terrain is prohibited to motorized units and such units could not move off a road to "go around" in such terrain. A unit ending its movement in a hex that it entered along a Road or Track counts against the Road/Track Stacking limit for any other motorized unit(s) using that Road/Track. For this rule, Trucks in Convoy are treated separately. See Case 9.29. Note: Off-road markers are provided with the game. They may be used to indicate units moved into a road hex without using the Road Bonus, and therefore are not "on the road" for purposes of this Case.
[9.34] Players are not permitted to "break up' a unit in order to avoid exceeding the limits of 9.33; i.e, moving through an occupied Road/Track hex a sub-unit at a time and then recombining the subunits into the original unit. (Players should note that 9.33 and 9.34 operate to prohibit certain units from crossing escarpments by tracks if either side of that escarpment is occupied by Friendly units that would block passage as per Case 9.33).
[9.35] Stacking restrictions do apply during involuntary Retreats (those retreats mandated by the Close Assault CRT). A unit or stack of units may not retreat through a hex involuntarily in violation of Stacking Restrictions. However, in involuntary retreats, a stack of units (or parent formation) may be split up and retreated into different hexes (not through the same hex, though). Any portion of a unit forced to retreat that cannot so retreat because of Stacking Restrictions is required to "Stand" and receive additional losses (see Case 15.82).
[9.4] UNIT BASIC STACKING POINT VALUES
(see separate sheet)
[10.0] ZONES OF CONTROL
GENERAL RULE:
The six hexagons immediately surrounding a hex constitute the Zone of Control (ZOC) of any unit in that hex. However, only certain types and sizes of units exert ZOC's. Hexes upon which a unit exerts a ZOC are called controlled hexes, and these inhibit movement of Enemy units. All units must cease movement upon entering an Enemy-controlled hex.
[10.1] WHICH UNITS EXERT A ZONE OF CONTROL
[10.11] All combat units above battalion-equivalent (i.e. with more than one Stacking Point) exert a Zone of Control. In addition, if there is more than one Stacking Point in a hex even if no larger-than-battalion unit is present, the units in that hex also exert a ZOC. Truck Convoys never exert a ZOC, nor do HQ units that have no attached combat units.
[10.12] Aircraft, Squadron Ground Support units, and warships exert no ZOC.
[10.13] Informational markers, such as dumps, minefields, airfields, etc., do not exert a ZOC.
[10.14] Units with a Cohesion Level of —26 or worse do not exert a ZOC.
[10.15] Regardless of 10.11, any unit(s) in a hex that total less than ten Raw Defensive Close Assault Points do not exert a ZOC, whatever the organizational size of the unit. For this purpose, anti-tank units are always presumed to be Up Front (see Case 12.1).
[10.16] The non-Phasing Player must inform the Phasing Player whether or not a particular unit exerts a Zone of Control if that unit could exert a Zone into a hex and a unit belonging to the Phasing Player either begins a Movement Segment in that hex or is moved into that hex.
[10.2] EFFECTS OF ZONES OF CONTROL
[10.21] ZOC's extend into all hexes on the game-map, with the following exceptions:
a. ZOC's do not extend through All-Sea hexsides, Major River hexsides, or Lake hexsides; and b. ZOC's do not extend through Escarpment hexsides; and c. ZOC's do not extend into any adjacent hex into which the unit wishing to exert the ZOC could not enter from its present location. (Example: a Tank Battalion could not exert a ZOC into a Salt Marsh hex unless there was a Track or Road connecting the two hexes.)
[10.22] There is no cost in CP's to enter an Enemy ZOC. However, see Section 10.3.
[10.23] A unit must cease movement upon entering an Enemy-controlled hex. The moving unit may not exit that Enemy-controlled hex until the next Movement Segment (within that Operations Stage or in the next Operations Stage). If a unit begins a Movement Segment in an Enemy-controlled hex it may leave that ZOC, at a cost in CP's to Break Off (8.7). Units may not be retreated into a hex in an Enemy ZOC (exception: see Case 10.26).
[10.24] No units may be moved directly from one Enemy-controlled hex into another Enemy-controlled hex. However, terrain permitting, a unit may always "advance" into an adjacent hex vacated by an Enemy unit as a result of Combat, Retreat Before Assault, or Reaction. Such advance is taken as part of movement in the ensuing Movement Segment and costs CP's. (There is no literal Advance After Combat rule in CNA; this rule is simply an exception to the no-movementinto-Enemy-ZOC's rule).
[10.25] Friendly units may move through hexes adjacent to an Enemy combat unit that are not controlled by that Enemy unit's ZOC. (See Cases 10.1 and 10.21).
[10.26] For all movement purposes, the presence of a Friendly combat unit in a hex negates the effect of an Enemy ZOC. Friendly ZOC's never affect Friendly units.
[10.27] Opposing units exerting ZOC's on each other are considered to be in each other's ZOC. Furthermore, if opposing units exert a ZOC into the same hex that hex is considered to be controlled by both Players.
[10.28] There is no additional effect when more than one unit exerts a ZOC into a given hex.
[10.29] Truck Convoys may not enter an Enemy ZOC unless such hex is already occupied by a Friendly combat unit. Furthermore, no non-combat unit (i.e., bare HQ's, Engineers, Air Squadron Ground Support Units, etc.) may ever enter an unoccupied hex in an enemy ZOC voluntarily. If such a unit is alone in an Enemy ZOC at any time during the Enemy Movement/Combat Phase and it has no strength of any type, such Friendly non-combat unit is Captured.
[10.3] ZOC COMBAT REQUIREMENTS (HOLDING OFF)
[10.31] All hexes containing Enemy units exerting
Zones of Control on Friendly combat units must be attacked—either by Artillery Barrage or by Close Assault.
Note: A Probe (see Case 15.9) satisfies this requirement if the basic differential is — 4 or better.
[10.32] As an exception to 10.31, if the Friendly units in such Enemy ZOC consist solely of Artillery, anti-tank, or anti-aircraft (or non-combat) units, or there are other type units but they are pinned (12.42), these units do not have to attack as in Case 10.31.
[10.33] Players may use a special "Holding Off" Artillery Barrage to satisfy the requirements of 10.31. (For experienced gamers, this is a sophisticated version of "Soaking Off".) Thus a Friendly Division that is in the ZOC of Enemy units from two different hexes may choose to Hold Off one of those hexes and Close Assault the other.
[10.34] To perform a Holding Off Barrage, a Friendly Player must Barrage an Enemy hex with at least as many Actual Barrage Strength Points (i.e., Barrage Rating x TOE Strength + 10) as there are individual non-Gun (i.e., Artillery, Anti-Tank or AA units) Enemy battalion-equivalent combat units (units with less than 1 Stacking Point and Gun units do not count) in that hex. Remember, an Enemy Division may consist of, say, eleven battalion-equivalent units, so the Friendly Barraging Player would need 11 Actual Barrage Points to perform a Holding Off action against such a Division.
[10.35] If, according to the precepts of 10.34, a Friendly Phasing Player can not Hold Off Enemy units in a given hex he must Close Assault that hex. (Remember Case 10.32). There is no minimum point requirement for a Close Assault.
[10.36] If, for any reason, a unit can neither Assault nor Hold Off an Enemy unit, that Friendly unit must Retreat three hexes (playing all CP's for such movement) and earn three Disorganization Points, in addition to any garnered by the retreat. Such retreat must place the retreating unit three hexes distant from the Enemy unit (no doubling back, etc.) and may not be made through any hexes in Enemy Zones of Control. If forced to enter an Enemy ZOC the unit Surrenders in entirety.
[11.0] THE COMBAT SYSTEM
COMMENTARY:
CNA is an operational-level simulation, and it has been the history of operational games to have combat systems of a generally simple level (cf. Panzergruppe Guderian, Battle of the Bulge, even War in Europe). However, the combat system in CNA is a multi-layered sequence consisting of several steps, all of which have been designed to take into effect not only the characteristics of the individual types of weapons (small arms fire vis a vis indirect artillery fire, etc.) but also the uniqueness of desert warfare. This imparts a tactical flavor to combat without resort to actual play-outs of combat on a tactical level. Much has been abstracted (the major abstraction being artillery ranges), but there is still a wealth of information available as to relative strengths, compositions and capabilities of the different units. Above all, we have attempted to instill a "combined arms" imperative in the combat system, with the result that unit composition is as important as actual strength. The CNA combat system requires some mathematical dexterity, but most of all it requires a good sense of organization and planning. Most Players will enter combat "blind," knowing little about the Enemy. Knowing what to hold back and where to assign guns and tanks is all important.
The Combat System may appear complex, but it is simply a matter of following the sequence and making the necessary calculations as you progress. This section should be referred to when undergoing combat, at least until the mechanics of the sequence are well within the grasp of the Players.
GENERAL RULE:
During each Combat Segment, combat is mandatory between opposing units in adjacent controlled hexes. There are four basic types of combat activity: Barrage, Retreat Before Assault (non-Phasing units only), Anti-Armor, and Close Assault (offensive for the Phasing Player's units and defensive for the non-Phasing Player's units). Prior to the resolution of each type of combat, the Phasing and non-Phasing Players secretly allocate units to perform one or more of these activities, as they choose. The relative ability of a unit to perform a combat activity is a function of its basic rating for that activity modified by its current TOE Strength Level (excepting Retreat Before Combat, which any unpinned units may perform). Each activity necessitates the expenditure of Capability Points.
This Section discusses combat in general terms, as well as showing how the combat ratings are used. Combat resolution for each type of activity is discussed specifically in Sections 12.0 (Barrage), 13.0 (Retreat Before Combat), 14.0 (Anti-Armor Fire), and 15.0(Close Assault).
PROCEDURE:
Once all movement has ceased (i.e., the Phasing Player's movement and the non-Phasing Player's reactions), combat may occur. During a Combat Segment, the Phasing Player must attack all Enemy-occupied hexes which have units exerting Zones of Control upon Friendly units (see Case 10.3). Any other Enemy units in hexes adjacent to Friendly units may be attacked subject to terrain restrictions on combat. After determining which units are undergoing combat, each Player decides which Gun-class units in hexes adjacent to Enemy units will be placed in a Forward position and which will be considered in a Back position (see Case 12.1). This is done "secretly," each Player simply noting on either the TOE sheets or some other piece of paper the appropriate positions of his guns. Gun units remain in their specified positions throughout that Combat Segment. Players now engage in Barrage. Each Player decides which of his units will Barrage which Enemy hexes (see Case 12.2), noting the targets secretly on a piece of paper. Any adjacent hex containing Enemy units may be barraged. Both Players now Barrage individually, hex by hex, but casualties and Pinned results are taken after a// Barrages have been completed. Players should note here any Barrages undertaken as Holding Off actions to satisfy ZOC combat requirements (see Case 10.3).
The non-Phasing Player may now Retreat Before Assault with any of his units that were not Pinned during Barrage.
Both Players now (and secretly, again) assign their units (including forward Gun-class units) to Anti-Armor and/or Close Assault roles. Any unit with an Anti-Armor rating may be assigned to the former. An individual unit may be assigned to both Anti-Armor Assault and Close Assault. This is done by dividing the TOE Strength Points of that unit between both types of Assault. However, an individual TOE Strength Point may never be so divided. Players may also choose to withhold un- pinned Armor or Gun-class units out of combat (for whatever reason they so desire; usually ammunition costs). The strengths of these units is not considered; see Cases 15.29 and 15.8.
Both sides now engage in Anti-Armor Fire, each side firing at the other's "armor", All results from Anti-Armor Fire are taken before proceeding to Close Assault. All Armor units assigned to Anti-Armor or Close Assault are subject to Anti-Armor Fire. Withheld armor units are not subject to such fire. Thus, tanks assigned to Close Assault roles may be destroyed during Anti-Armor Fire.
After assessing losses from Anti-Armor Fire the Phasing Player engages in Close Assault against the non-Phasing Player. Only units assigned to Close Assault are used to determine the Assault Differential (however, see Case 14.26). Remember to adjust Close Assault Strengths for losses incurred from Anti-Armor Fire. Players now take casualties from Close Assault, place "Engaged" markers as needed and conduct any Retreats mandated by the Close Assault CRT. This concludes the Combat Segment, and the Phasing Player may now release any reserves he wishes and proceeds back to his Movement Segment (if he so desires).
The above sequence is general. For a complete description of all activities, consult Sections 12.0 through 15.0
CASES:
[11.1] UNIT COMBAT CHARACTERISTICS
There are seven Land Unit Combat characteristics: Barrage, Vulnerability, Anti-Armor, Armor Protection, Offensive Close Assault, Defensive Close Assault, and Anti-Aircraft. (The individual OA Sheets carry all the information for each unit in the game; the unit counters do not carry this information.) Every Land unit has been given a Rating (or a Factor used to multiply by TOE Strength) of its capabilities and relative strength in each of these areas. (See Designer's Notes for a discussion of how these ratings were arrived at). These are described in Case 3.5.
[11.11] The Barrage Rating is the measure of a unit's ability to engage in long-range indirect fire. Only Artillery units possess a Barrage rating.
[11.12] The Vulnerability Rating is an abstraction of a Gun unit's susceptibility to Close Assault, or how far back from the front it can operate without being affected by direct fire. All Guns — i.e., Artillery and Anti-Tank units — possess Vulnerability Ratings.
[11.13] The Anti-Armor Rating is a measure of a unit's ability to engage in direct fire with and destroy opposing Armored units.
[11.14] Armor Protection is a measure of a unit's armor, its strength and thickness vis a vis opposing Anti-Armor Ratings. Units that have Armor Protection Ratings are usually limited to Tanks, Recce and Armored Car units, and Self-Propelled Artillery.
[11.15] The two Close Assault Ratings are a measure of a unit's ability to perform (Offensive Assault) and defend against (Defensive Assault) Close Assault combat.
[11.16] The AA Rating of a unit is its ability to shoot down planes. For the most part, only AA/Flak units have this rating, but it can be found on other units. E.g., some Tanks have AA/Flak capability, as do some HQ units.
[11.2] CAPABILITY POINT EXPENDITURES FOR COMBAT
[11.21] A non-Phasing unit expends three CP's if it undergoes an attack. Exception: see Case 11.27. This will occur under the following circumstances:
a. If it Barrages an Enemy (Phasing) unit; or b. If it undergoes any form of Assault (Anti-Tank, Close) except Probe (2 CP's). This includes the situation where a unit Retreats Before Assault into a Friendly hex that is later assaulted.
c. If it undergoes a Holding Off Barrage (see Case 10.3).
[11.22] A Phasing unit expends five CP's to perform any form of attack, other than a Probe. It can never expend more than five CP's in a given Combat, although if it engages in a different (new) round of combat after completing the first round of combat it will (possibly) expend more CP's. The following is a list of circumstances under which a combat unit expends 5 CP's to attack:
- It Barrages an Enemy unit; or 2. It engages in Anti-Armor or Close Assault.
[11.23] A Phasing unit expends fewer than 5 CP's under the following circumstances:
- It Probes an Enemy unit (2 CP's), or 2. It undergoes Barrage (3 CP's).
[11.24] A non-Phasing unit never expends more than three CP's in combat in a given Combat Segment, regardless of what happens to it in that Segment. A Phasing unit never expends more than five CP's in a given Combat Segment. See Case 11.27.
[11.25] CP expenditures apply to all units in a hex, even if certain units did not participate in combat in any way. This applies to Phasing and non-Phasing units. Thus, if the Commonwealth Player Close Assaults with his entire 7th Armored Division, but chooses to withhold the Ist KRRC, the entire division expends five CP's, including the non-participating Ist KRRC. Concurrently, if the Artillery units of the 7th Armored Division had barraged Enemy units and then the 7th Armored did nothing else, the entire division (if it were all in the same hex) would still expend 5 CP's.
[11.26] Generally, Phasing units will expend 5 CP's and non-Phasing units 3 CP's in a given combat Segment, except where a Phasing unit chooses to Probe. However, remember, if units in the hex with the Probing units Barrage the Enemy units those units expend 5 CP's, regardless of the Probe attempt.
[11.27] A unit defending against a full (nonProbe) Close Assault in which the final Assault Differential is minus four or worse expends only one CP to defend.
[11.3] CALCULATION OF COMBAT STRENGTHS
The Combat Strengths of a unit for a given function (Assault, Anti-Tank, etc.) are stated in Actual Strength Points, which are arrived at by multiplying the TOE Strength by the Combat Rating for that particular function and then dividing this Raw Strength by fen (except for A.A). This does not apply to a unit's Armor Protection or Vulnerability Ratings, which remain constant and are applied and used differently.
[11.31] The relative strength value of units during combat (with some exceptions noted'below) is expressed in Actual Stength Points. These Actual Points are either applied directly to a hex or unit (as in Barrage or Anti-Armor) or compared with the Enemy forces (as in Close Assault or Probe). Case 12.54 is a minor exception to this rule.
[11.32] The formula for arriving at the Actual Strength of a unit is as follows: Combat Rating x TOE Strength used + 10 = Actual Strength Points. Players should round any decimals to the nearest whole number: 11.4 = 11,11.5 = 12.
[11.33] A unit that has less than .5 Actual Points (or, to state it differently, has only four or less Raw Points) has an Actual Strength of zero (0).
However, if both sides of a Close Assault or Probe have less than ten Raw Points Players should use the Raw Points as if they were Actual Points. See also Case 15.51. Raw Points are the numbers arrived at by multiplying the Combat Rating by the TOE Strength.
[11.34] All Raw Points are totaled before dividing by 10 for Actual Strength. This applies for units within a hex as well as units attacking from different hexes (against the same target).
[11.35] As an example, we will demonstrate how to determine a variety of combat strengths for an entire Division, using the German 90th Leichte Division as an example (see the OA Sheets for this unit). We will assume the unit is at full strength and that all units assigned are currently attached to the division and that there are no other units attached.
The Axis Player wishes to use the Artillery in the 90th to Barrage the enemy; it has the 361 Artillery Battalion and the 190th Artillery Rgt. to do this. The 361 has 3 TOE points of 9-rating Barrage, or 27 Raw Points. The 190 has 3 TOE of 18 Rating Barrage plus 3 TOE points of 9-Rating Barrage, for a total of 81 Raw points (27 + 54 = 81). Thus a combined total of 108 Raw Barrage Points is available, which equals 11 Actual Barrage Points (108 + 10 = 10.8, rounded up to 11). The 90th may now Barrage with those 11 Actual Points against the enemy. The Axis Player could also split up its TOE Strength if he wishes, using 2 TOE points of the 361st (or 2 Actual Points) against one unit and the other TOE point against a different unit. There are restrictions involved, and the Section on Barrage (12.0) covers them all.
Skipping to Close Assault — for demonstration purposes — we see that the 90th Leichte has seven Infantry Battalions: the entire 155th Schutzen Regt. (3 battalions), the two battalions of the 361st Afrika Regt plus the I[I/225 and the III/347 Battalions. The 155th provides 42 Raw Points, the 361st provides 9 Raw Points (it would provide 18 on defense) and the two odd battalions an additional 14, for a grand total of 65 Raw Offensive Close Assault Points (excluding any Artillery firing in Assault), or 7 Actual Points (6.5 rounded up). As above, these points could be split, by dividing the TOE points, or assigning different battalions to assault different hexes, etc. Each separate Close Assault is determined individually.
[11.36] It will behoove the Players to keep a running track of all Raw and Actual Point totals for his Parent organizations on his TOE Sheets, so he knows at a glance what is available and what his strengths are. These strengths are to be kept secret from opposing Players, revealed only upon attack.
[11.37] AA/Flak Actual Points are calculated the same as other strengths, with one major difference. As with anti-armor, close assault, and barrage calculations, multiply the TOE Strength by the AA Rating. But do not divide by ten; the raw AA Points are the Actual AA Points. Thus, an AA unit with a rating of 4 and a strength of 2 would have 8 AA Points.
[11.38] The only combat ratings that do not use the above formula (multiplying by TOE Strength, etc.) are the Vulnerability and Armor Protection ratings. These ratings are used to determine the number of gun and armor losses and are discussed in Cases 14.42 and 15.85.
[12.0] BARRAGE (Artillery Combat)
GENERAL RULE:
Barrage is the first "step" of the Combat Segment. Any combat or HQ unit with a Barrage Rating (and enough ammunition) may Barrage enemy units in adjacent hexes. Each Player simply determines how many Actual Barrage Points he has, selects his targets, and fires his guns at the selected targets, subtracting ammunition as used. At the beginning of the Combat Segment, all Artillery units are placed in either of two positions: Forward or Back. The position of a gun unit dictates whether it may coordinate fire with other artillery units and whether it may split its fire to Barrage more than one target.
PROCEDURE:
After all Targets have been designated and Barrage Points assigned to those Targets (see Case 12.23), Barrage is resolved. The effects of Barrage are simultaneous, in that all results are applied after all Barrages are completed, but each individual Target is barraged separately, in any order the Players desire. To resolve a Barrage, the Barraging Player states his Target (either by type or number, as explained in Case 12.24, or by specific unit 1.D., if he has that information), states the number of Actual Barrage Points (see Case 11.32) directed at that Target and then consults the Barrage Results Table (12.6), selecting the appropriate portion depending on the type of unit being fired at (Gun, Armor, or Infantry). He then rolls two dice, combining the results such that the larger die's result is stated first and the small die's second (e.g., a "2"/*5" is considered a "25"). The result is cross referenced with the Target type and the Actual Barrage Points expended. The Player then repeats the process to determine whether any trucks in the hex are affected. Results are noted, and applied at the end of the Barrage Step. The firing Player also subtracts ammunition expended as his guns are fired.
Note: "Holding-off" Barrages are resolved in the same fashion as normal Barrage (see Case 10.3).
[12.1] ARTILLERY POSITIONS
[12.11] Artillery units, when they are involved in combat, must be placed either Forward or Back. The entire unit, regardless of its size (or whether, as in some artillery units, it has more than one type of gun) must be placed in the same position.
[12.12] The position of an artillery unit may not be changed during a Combat Segment; it may be changed only at the beginning of a Combat Segment, when the Players must decide their gun positions.(See the Sequence of Play.) Positions of guns may be noted on the TOE Sheets or on any handy piece of paper.
[12.13] Artillery units in a Forward position may coordinate fire with other artillery units (in a Forward position) from the same or different hexes. i.e., they may combine its Barrage Strength with that of other units directed at a given target.
[12.14] Italian units in a Forward position may co-ordinate Barrage fire only with units within the same hex.
[12.15] Artillery units in a Forward position may split their TOE Strength and attack more than one target, directing a portion of its TOE Strength against one unit and another portion against a different unit (target).
[12.16] Artillery units in a Back position may not coordinate fire with any other artillery unit nor may they split fire. If a Heavy Weapons unit has Barrage capability and its guns are back, the entire unit is considered back and thus cannot participate in anti-armor or Close Assault combat.
[12.17] All non-Phasing Players' Guns in a Forward position are subject to losses from Close Assault, even if they do not participate in such an assault. See Section 15.8 for details on losses. All non-Phasing (Forward or Back) are subject to Close Assault losses if the Close Assault by the Phasing Player is conducted in the Overrun Columns of the Close Assault CRT (see Case 15.84).
[12.18] Artillery placed in a Forward position may participate in Anti-Tank or Close Assault in that same Combat Segment, providing they have the necessary Ratings and Ammunition. However, Artillery participating in an Offensive Close Assault has its Vulnerability rating reduced by 50% (%) rounded up. Thus a unit with a 7 Vulnerability Rating would have a 4 Vulnerability Rating if it chose to participate in Offensive Close Assault. Note: the higher a unit's Vulnerability Rating, the less vulnerable it is.
[12.19] Artillery units used in an Anti-Armor (14.0) role assume an automatic Vulnerability Rating of '2'.
[12.2] TARGET SELECTION
[12.21] Target Selection involves the principle that a Parent Formation is comprised of one or more battalion- (or company-) sized units. Thus, the 90th Leichte Division (German) is composed of thirteen battalion-sized combat units.
[12.22] For Barrage purposes, all (with the following exceptions) counters, whether attached or not, in a hex that bear a Stacking Point indicator are targets. This includes engineer units but excludes Trucks, SGSU's, etc. The exception is all HQ's without TOE Strength Points or with only points with parenthesized Close Assault Ratings. In addition, Dummy Tank formations (see Case 16.4) and Commonwealth warships may be considered targets.
[12.23] Barrage is directed at a specific target combat unit (as defined in 12.22). The Barraging Player states which hexes he wishes to Barrage from. The opposing Player then states how many targets (individual battalions/companies) are in each hex adjacent to a hex which is firing. He also states whether each Target is a Gun class, Armor Class, or Infantry Class unit—see Case 3.2. He does not have to state the strength, exact type or designation of any unit. However, if a Player knows that a specific unit is in a hex under Barrage (through Patrol or previous combat) he may designate that specific unit as a target.
[12.24] Except as stated in the last sentence of 12.23 the Barraging Player fires "blind", stating only that he is firing at a given type of unit as target. For purposes of resolving Barrage, Players should assign, for a Barrage Step, ID numbers to each type of unit. E.g., Infantry #1, Infantry #2, etc. Thus, the Barraging Player states he is directing "X" number of Actual Barrage Points against Target Infantry #2.
[12.3] EFFECTS OF TERRAIN AND OTHER RESTRICTIONS ON BARRAGE
[12.31] Artillery units may Barrage Enemy targets in any adjacent hex, regardless of terrain. Artillery units may not Barrage non-occupied hexes (however, see Case 12.5),
[12.32] No target may be barraged more than once in a Combat Segment from each adjacent enemy occupied hex. Of course, Artillery units in a Forward position may combine Barrage strengths in one Barrage against a given Target.
[12.33] Certain terrain affects artillery fire in that if a Target unit is in that terrain the Column (Barrage Points) used to resolve Barrage for that unit is shifted a specific number of rows "left,", benefitting the defender. Thus, if a towed artillery unit were being Barraged as a target in a Level Two Fortified position (Clear Terrain) by twelve Barrage Points (the 11-12 column on the Barrage CRT) the Barrage would be resolved on the 7-8 column, because a Level Two Fortification benefits the defender two column shifts.
[12.34] Column shifts — and terrain benefits — are not cumulative. The defender gets the benefit of only the best defensive position or terrain. See the Terrain Effects Chart for all terrain benefits and column shifts. Remember, column shifts always benefit the defender. Shifts worse than 1-2 column mean the Barrage had no effect.
[12.35] There are no Line of Sight restrictions in CNA regarding Artillery. Artillery units may Barrage any unit to which they are adjacent.
[12.4] EXPLANATION OF ARTILLERY BARRAGE RESULTS
[12.41] The Artillery Barrage Table (12.6) is a CRT that covers artillery fire against personnel, Armor, Artillery and concurrent effects on Trucks. Regardless of the target (see Case 12.5) the Player will use the Artillery Barrage Table for his results.
[12.42] The Artillery Barrage Table uses a two-dice sequential read-out; i.e., a '3' and a '4' are 34, reading the larget die first. These die rolls comprise the columns of the Table, while the total Barrage Points applied to the Target comprise the rows of the table. The "meat" of the table — the center portion — is the results, divided according to target type.
[12.43] The Player notes the number of Barrage Points being fired, adjusts the column left if necessary and rolls the two dice. He then cross-references those two numbers under the correct target type (personnel, tanks, or artillery) and obtains the result.
[12.44] If a result of "P" is obtained, the entire target unit is "Pinned", Pinned units may not move for the remainder of that Combat Segment, nor may they engage in Anti-Armor Fire or Close Assault. Pinned units are subject to casualties (see Case 15.12). Place a Pinned marker on all Pinned units; remove the marker at the end of the Combat Segment. "Pin" results from Barrage do not occur against Gun-class units or Artillery HQ units.
[12.45] A number as a result (e.g., 1 or 2) indicates the number of TOE Strength Points are destroyed by the Barrage. Casualties are taken after all Barrages are completed.
[12.46] Trucks may be affected by Artillery Fire. Every time a Player fires at a given target, be it Infantry, Armor or whatever, he must roll a second time to determine whether any Trucks attached to the Target unit and/or its parent unit (if any) are affected. Thus, if a Player has 10 Barrage Points firing at Infantry he rolls once for the effect on the target and if, and there are any Trucks in the same hex as the unit being barraged then the Barraging Player rolls again on the 10 point row under Trucks to see how many, if any Trucks were destroyed. The choice of Trucks to be removed is up to the Defender, but losses must be distributed as evenly as possible among types of trucks and types of cargo. Players should note that when barraging Infantry, if those TOE points are already in Trucks (motorized) those Trucks are also eliminated, in addition to any Trucks actually noted on the Artillery Barrage Table.
[12.5] BARRAGE AGAINST FACILITIES
[12.51] Artillery may be used to Barrage facilities, rather than actual units, in an effort to reduce their effectiveness. Such Barrage may be directed against Major Cities, Fortifications, Roads, Railroads, Supply Dumps, and Air Facilities.
[12.52] Barrage against Facilities follows all the rules of normal Barrage, with the exception that the Target designated is the specific facility.
[12.53] In barrages directed against any Facility other than a Supply Dump or Air Facility the Players use Air Bombardment Table (41.5), with the exception that they refer to the Artillery Barrage Points column in determining the effect of the Barrage. See Case 41.3.
[12.54] In Barrages directed against Supply Dumps or Air Facilities the Player uses Air Bombardment Table (41.5); however, he uses his Raw Barrage Points (not Actual) to correspond to the Bombload column. Thus 78 Raw Barrage Points would use the 41-80 column. Remember, do not use Actual Strength Barrage Points; use Raw Strength.
[12.55] Off-Shore Bombardment may be used to Barrage facilities; see Case 30.12.
[12.6] ARTILLERY BARRAGE TABLE
(See Charts and Tables)
[13.0] RETREAT BEFORE ASSAULT
GENERAL RULE:
Retreat Before Assault takes place after all Barrages have been completed. Any non-Phasing units that are not Pinned may Retreat Before Assault in the step designated for such movement. Retreat Before Assault is movement and consumes CP's; it should not be confused with Reaction (8.5).
[13.1] WHICH UNITS MAY RETREAT BEFORE ASSAULT
Any non-Phasing Unit that is not Pinned may Retreat Before Assault. Units with a Cohesion Level of —26 or worse may not Retreat Before Assault.
[13.2] HOW TO OF RETREAT BEFORE ASSAULT
[13.21] Retreat Before Assault is Voluntary Movement and is handled exactly as other types of Movement. It expends CP's (and Fuel, for vehicles), and vehicles are subject to Breakdown. In addition, there are certain other restrictions, as listed below.
[13.22] Non-Phasing units in the Zone of Control of an Enemy unit must pay the cost to Break Off (Contact or Engaged) as stated in Case 8.6.
[13.23] Non-Phasing units that begin a Retreat Before Assault Step adjacent to an Enemy combat unit may expend as many CP's in Retreating as desired.
[13.24] Non-Phasing units that do not begin a Retreat Before Assault Step adjacent to an Enemy combat unit may not expend more than four CP's (or move one hex, whichever is greater) in a Retreat Before Assault.
[13.25] During a Retreat Before Assault units may expend CP's only to move; they may not perform any other function except blowing supply dumps (see Cases 54.14 and 32.3).
[13.26] As in normal Movement, units must cease Retreat Before Assault when they enter an Enemy Zone of Control. They may not Retreat directly from one Enemy ZOC into another, and if they cannot avoid this restriction they may not Retreat Before Assault.
[13.27] Retreat Before Assault is voluntary; as such it is handled somewhat differently from retreats mandated by the Close Assault CRT (Case 15,82).
[13.28] Units that Retreat Before Assault into Friendly-occupied Enemy-controlled hexes, or into any hex that is attacked in the ensuing Anti-Armor and Close Assault sub-segments are affected by such combat. They will take — and are susceptible to — Anti-Armor Fire, but they may not direct Anti-Armor fire against Enemy units. They may not add their Offensive or Defensive Close Assault Ratings into the Assault combat in that hex, but their TOE Strength Points are included when taking percentage losses from that Assault.
[14.0] ANTI-ARMOR COMBAT
GENERAL RULE:
Anti-Armor Combat is fire by units with an Anti-Armor Rating directed against Enemy units with an Armor Protection Rating. Anti-Armor Combat occurs before Close Assault, and all losses from Anti-Armor are taken before proceeding to Close Assault, irrespective of what type of combat the armored unit has been assigned to. Units may be assigned to either Anti-Armor or Close Assault; or Players may split the TOE Strength Points within a unit and assign some to one and some to another — but never to both in the same Combat Segment. The Player then determines the Actual Anti-Armor Strength Points firing at a hex, he consults the Anti-Armor CRT and based on the number of Damage Points earned vis a vis the Armor Protection Rating of the Enemy units. Units specifically withheld from both Anti-Armor and Close Assault are not affected by Anti-Armor fire.
PROCEDURE:
During the Anti-Armor Combat Step, both Players engage in Anti-Armor fire, regardless of which Player is the Phasing Player. All Anti-Armor fire is simultaneous (i.e., all results are applied after all attacks have been resolved).
Anti-Armor fire is directed against a specific hex designated by the Phasing Player and affects only those units in that hex that have an Armor Protection Rating (see Case 14.23) which have not been withheld. Each Player totals his Actual Anti-Armor Strength Points firing in that hex (see Case 11.32), rolls two dice, and consults the Anti-Armor Combat Results Table (14.6) to see how many Damage Points he has inflicted. These points are then applied by the owning (fired upon, so to speak) Player to remove (eliminate) TOE Points with Armor Protection Ratings in that hex (see Case 14.4, Assessing Anti-Armor Damage), and a Destroyed Tank marker is placed in the hex.
Each Anti-Armor attack is performed separately in any order the Players wish, as all results are only applied after all fire is complete.
[14.1] WHICH UNITS MAY PARTICIPATE IN ANTI-ARMOR COMBAT
[14.11] Anti-Armor Combat pits units with Anti-Armor Ratings firing against targets that have Armor Protection Ratings. Only units assigned to the Anti-Armor Sub-Segment of the Combat Segment may fire their Anti-Armor Points, and only those units actually committed to Anti-Armor or Close Assault are affected by such fire (see Case 14.12). Units with Armor Protection Ratings withheld from combat are not affected by Anti-Armor fire.
[14.12] Anti-Armor fire by the Phasing Player is directed at an entire adjacent hex (not specific target units) occupied by Enemy units. Anti-armor fire by the non-Phasing Player is directed against any Phasing Armor Class units assaulting the hex. Units that are in a hex at which Anti-Armor fire is directed that have Retreated Before Assault are affected by Anti-Armor fire (although they may not use Anti-Armor fire against Enemy units) and they may not be withheld from the effects of Anti-Armor fire.
[14.13] Any artillery unit with an Anti-Armor Rating that is in a Back position (see Case 12.1) may not participate in (nor is it affected by) Anti-Armor fire. Anti-Armor guns are always Forward when firing.
[14.14] Artillery units used in an Anti-Armor role have an automatic Vulnerability Rating of 2.
[14.2] RESTRICTIONS ON ANTI-ARMOR COMBAT
[14.21] Units withheld from both Anti-Armor and Assault Combat are not affected by Anti-Armor fire (although defending units withheld may be affected by Close Assault).
[14.22] No hex may be attacked by Anti-Armor fire more than once in a Combat Segment, but units from different hexes may direct Anti-Armor fire into the same Target hex, combining their Anti-Armor Strength into one total strength.
[14.23] The Player directing the fire may not know whether the opposing Player actually has any armor in a hex; that is his problem to determine. If the "defending" Player has no units with Armor Protection Ratings in a hex being fired on by Anti-Armor the "attacking/firing" Player may reassign up to % (rounded down) of those Anti-Armor points to Close Assault for that Combat Segment. Only when there are no defending Armor units in a Target hex may this occur.
[14.24] Ammunition for Anti-Armor fire is removed as expended.
[14.25] Certain terrain influences the effectiveness of Anti-Armor fire, and these effects are noted on the Terrain Effects Chart (see Case 8.37) and in Case 14.3. All column adjustments are made before firing.
[14.26] Remember, a Player may divide a unit's TOE Strength Points between Anti-Armor or Assault, but he may not use a given TOE Strength Point for both in the same Segment.
[14.3] TERRAIN EFFECTS ON ANTI-ARMOR FIRE
[14.31] Certain types of terrain influence the effectiveness of Anti-Armor fire, while certain types of hexsides render Anti-Armor fire impossible.
[14.32] Where the defending armor is in a hex where there is a Terrain Effect, there is a Column Shift in favor of the Defender; i.e., it lessens the Anti-Armor firepower of the Attacker. All such effects are listed on the Terrain Effects Chart (Case 8.37). E.g., if units in a Rough Terrain hex are fired on by Anti-Armor Fire worth nine Actual Anti-Armor Strength Points the combat is resolved in the eight column of the Anti-Armor CRT because of the one column shift.
[14.33] The effects of terrain (including fortifications) are not cumulative; the defending Player must choose the best terrain. However, the effects of terrain across a hexside are in addition to those within the hex.
[14.34] No Anti-Armor fire may be directed from or against Phasing TOE Strength Points assaulting through Ridges that are not crossed by tracks or roads, or down a Slope hexside uncrossed by a Road or Track, or down an Escarpment uncrossed bya Track.
[14.35] If a terrain effect shifts the Anti-Armor Strength Point Row lower than '1', use the "0" row.
[14.4] ASSESSING ANTI-ARMOR DAMAGE
[14.41] All results on the Anti-Armor CRT (see Case 14.6) are in Damage Points. Damage Points are applied to the Armor Protection Ratings of any Armor TOE Strength Points in the hex being fired upon.
14.42] The Armor Protection Rating is the number of Damage Points that Point can absorb before it is destroyed. All units comprising Points with an Armor Protection Rating may be affected by anti-tank fire and thus take losses because of it.
[14.43] The Player undergoing Anti-Armor fire must remove af least as many TOE Strength Points as are affected by absorbing Damage Points. Thus, armor units with higher Armor Protection Ratings can absorb more Damage Points and are thus harder to destroy.
Example: The Commonwealth Player fires five Actual Anti-Armor Strength Points into a hex containing six TOE Points of Italian M/11's and three TOE Points of M/13's. The Commonwealth Player rolls a 35 on the dice and earns seven Damage Points. The Axis Player must remove enough TOE Strength Points to absorb at least seven Damage Points. He therefore destroys one TOE point of M/13 (3 Armor Protection Rating) and two M/11's, (2 Armor Protection times 2 = 4) to cover the necessary seven point absorbtion.
[14.44] Armor losses may be taken from any units with an Armor Protection Rating in the target hex, regardless of whether they were assigned to Anti-Armor or Close Assault. However, Armor units withheld from both types of combat are not affected by Anti-Armor Fire (see Case 13.28).
[14.45] Damage Points in excess of those necessary to destroy all armor units in a hex are ignored.
[14.46] Destroyed Tanks are noted with Destroyed Tank Markers, which cannot move but may be retrieved during the Repair Segment. Players should record precisely what each Destroyed Tank marker represents (see Case 14.5).
[14.47] Self-propelled guns may absorb anti-armor Damage Points at a rate equal to their Armor Protection Rating plus their Vulnerability Rating (modified if necessary if the point is engaging in anti-armor fire, etc.)
[14.48] If the owning Player's only TOE Strength Points in the hex (assaulting or defending against assault) that could be affected by anti-armor fire are halftracks (i.e., certain motorized axis leg infantry units), the halftracks double their Armor Protection Rating. Note that losses of halftracks involve not only the infantry TOE Strength Point but its transporting Truck Point(s) as well.
[14.5] CAPTURING ENEMY DESTROYED TANKS
[14.51] Friendly Players may capture (and repair)
Enemy Tank Units (only destroyed tanks may be captured; all other destroyed vehicles are removed immediately).
[14.52] If an Enemy Player enters a hex containing a Destroyed Tank Marker, and there are no other Friendly combat units in that hex, the Enemy must decide immediately whether to permanently eliminate the Points or thenceforth consider them captured.
[14.53] Captured Destroyed Tanks may be moved three hexes in any direction by the capturing Player at the instant of capture. The three hexes may not include Enemy units or Enemy ZOC's; nor may they include impassable terrain.
[14.54] Except for 14.53, Destroyed Tanks are treated like any other unit marked for possible Repair. In the Phasing Player's Repair Phase they may be towed to a Repair Facility for Maintenance.
[14.55] Players should note that there is a subtle difference between capturing Destroyed Tanks and capturing Broken down Vehicles. Consult Section 21.5 for a discussion of this.
[14.6] ANTI-ARMOR COMBAT RESULTS TABLE
(see Charts and Tables)
[15.0] CLOSE ASSAULT
GENERAL RULE:
Close Assault is the last step of the Combat procedure. In Close Assault, the Phasing Player is the attacker and the non-Phasing Player is the defender. The Phasing Player may assault any adjacent Enemy-occupied hex, within the terrain restrictions for Close Assault. Close Assault resolution involves an Assault Differential, in which the Close Assault Points of the Defender are subtracted from those of the Attacker; results are expressed in Casualties (either losses or prisoners) plus Engaged and Retreat results. The Assault Differential may be modified by terrain, morale, and the effects of Combined Arms. Close Assault expends ammunition for both sides. A form of modified Close Assault — the Probe — is discussed in Case 15.9. In Close Assault, the Phasing Player is always attacking (or assaulting), the non-Phasing Player is defending against the assault.
PROCEDURE:
Each Player totals his Actual Close Assault Points (either Offensive or Defensive, depending on whether he is Phasing or non-Phasing) involved in each separate Close Assault. The non-Phasing (defending) Player then subtracts his Actual Close Assault Points from the Offensive Actual Close Assault Points of the Phasing (attacking) Player, obtaining an Assault Differential (a positive or negative number, or a zero). This Diffrential is then modified by any terrain effects, morale considerations, and/or difference in unit organizational size between opposing forces. The Phasing Player then consults the Adjusted Assault Differential and rolls two dice, reading the dice sequentially: the large die is read first, then the small die so that a large die roll of 6 and a small die roll of 3 is 63. The non-Phasing Player does the same, and both consult the Close Assault Combat Results Table to determine what losses, if any, have occurred. Such losses, as well as any other results, are taken immediately before proceeding to the next hex's Close Assault.
CASES:
[15.1] WHICH UNITS MAY PARTICIPATE IN CLOSE ASSAULT
[15.11] All units which possess a Close Assault
Rating may use their ratings to aid in either Offensive Assault or Defense Against Assault. (Units without Ratings may also participate, even though they add nothing to the point total; see Case 15.17.)
[15.12] Pinned units and units retreated before assault into a hex under Close Assault attack may not add their Ratings to Defensive Close Assault. However, the TOE strengths of such defending units are considered for purposes of determining casualties vis a vis the number of TOE Strength Points in a hex, a percentage of which will be eliminated. This pertains only to non-Phasing defending units.
[15.13] Guns that are Back are not affected by Close Assault unless there is an Overrun situation (see Case 15.86). Guns that are Forward may participate in Offensive or Defensive Close Assault, but their Vulnerability Ratings may be affected (see Case 12.18).
[15.14] Only those units committed to Close Assault (either Offense or Defense) may add their Ratings to the total Assault Ratings. However, certain non-Phasing units may be affected by results even though they do not participate (see Cases 15.12, and 15.15).
[15.15] Units that are out of ammunition may not Close Assault, either offensively or defensively. However, as in Case 15.12, such units are considered when determining percentage losses if they are non-Phasing defending units. Phasing units that are out of ammunition are simply ignored. If all non-Phasing, defending units in a hex are out of ammunition for Close Assault purposes, and such units are Assaulted, they automatically Surrender en masse (i.e., every unit in the hex Surrenders).
[15.16] A given Phasing unit may split its TOE Strength Points and make one Close Assault with some Points and another with the rest, or simply withhold a portion from any Offensive Close Assault. A non-Phasing Player may withhold individual TOE Strength Points, too, but, unlike Phasing units, these Points are considered in determining percentage losses. Note: The same hex may never be Close Assaulted more than once per Combat Segment.
[15.17] Units with Close Assault Ratings in parentheses may use those ratings in combat only if they occupy a hex that is unoccupied by combat units. Such units do not include their TOE Strength for determining losses when they occupy a hex with combat units unless the "losing" Player so wishes. In such a case, units with parenthesized ratings may be used to absorb losses but may not absorb more than 25% of such losses. Note that if a Phasing unit Close Assaults two hexes in the same Close Assault at the same time, and one of the hexes contains solely a unit with parenthesized Defensive Close Assault Rating, that defending unit may use its parenthesized rating in that combat.
[15.18] In a Close Assault involving only non-Phasing units with only parenthesized Close Assault Ratings, if the attacking force has a Raw Offensive Close Assault strength at least three times the defending parenthesized units' Raw Defensive Close Assault strength the following two effects apply:
- The attacking (Enemy) force ignores the first 20% losses it receives from the Close Assault; and; If the defending parenthesized units receive a Close Assault result of Casualties of 20% or greater, any TOE Strength Points remaining after losses are assessed are captured (if the Enemy forces survive).
Thus, an AA/Flak unit, for example, may be able to hold off a small Enemy detachment, but it will most likely be overrun by anything larger.
[15.2] HOW CLOSE ASSAULT OCCURS
[15.21] Phasing units with Offensive Close Assault Ratings may Close Assault any Enemy units in adjacent hexes, unless Assault is prohibited by terrain (see Case 15.3). Units assigned to Anti-Armor may not participate in Close Assault (however, see Case 14.23).
[15.22] The Phasing Player announces which hexes he is assaulting, and both Players determine their respective total Points. The Phasing Player states whether his attack constitutes a Close Assault or a Probe (see Case 15.9), and then each individual assault is resolved sequentially, with results being taken as they occur.
[15.23] An Enemy-occupied hex may be Close Assaulted or Probed only once per Combat Segment, regardless of the number of units in that hex. The Phasing Player may not attack some of the units in that hex with one group and some others with another group.
[15.24] As many units from as many hexes as are adjacent to an Enemy-occupied hex may attack that hex, terrain permitting. Furthermore, a Phasing unit may Close Assault more than one hex at the same time, as long as the assaulted hexes are all adjacent to both the hex from which the assault initiates as well as adjacent to each other. The units that may participate are listed in Case 15.1.
[15.25] Any number of TOE Strength Points from a unit may be assigned to a given Close Assault (see Case 15.16); however, if the units making a given Close Assault have committed less than 50% of their available TOE Strength Points, that Close Assault is automatically considered a Probe and not a Close Assault. You must Close Assault with 50% or more of your available strength (although some of those Points may be directed elsewhere) to attack with a normal Close Assault (see Section 16.0).
Example: A unit with a TOE Strength of 7 uses 2 Points to assault Hex A and 1 Point to assault Hex B, withholding the other Point because of ammunition problems. Neither assault is a full Close Assault; both are Probes. If he used 3 Points against Hex A instead of 2, both would be considered Full Assaults, as he would have used at least 50% of his available strength somewhere.
[15.26] Each Player determines which of his units are participating in a given Close Assault. Each Player then determines his Actual Close Assault Strength Points, as stated in Case 15.4. The defending, non-Phasing Player now subtracts his total from that of the attacking, Phasing Player to achieve the Basic Assault Differential. Thus, if the Attacker has 6 points and the Defender eight, the Basic Assault Differential would be —2.
[15.27] The Basic Assault Differential is now adjusted, where necessary, for Terrain Effects (Case 15.3), Morale (Case 15.6), or Units Size Differential (Case 15.5). These effects result in an adjustment of the Differential Column (not the Differential number) either one way or the other, and the cumulative effect of all these upon the Assault Differential produces an Adjusted Assault Differential, which is then used to determine the results of the Assault. Consult the Procedure, Section 15.0. Remember, the two dice are read sequentially (6 and 2= 62) not mathematically (6 and 2 = 8) in Assault Combat.
[15.28] In Close Assault (and Probe) only, if one Player has fewer than 5 Raw Assault Points, he is considered to have zero Close Assault Points, and the Differential is determined from that figure. If each Player has fewer than 10 Raw Strength Points, the Raw Assault Strength Points are used as if they were Actual Assault Strength Points (see also Case 15.51).
[15.29] There is a possibility that one or both Players do not allocate any units to Assault. In such cases the following occurs:
-
If the Defender/Non-Phasing Player, for any reason, allocates no units to an Assault all his units in that hex automatically retreat three hexes and earn three Disorganization Points (as if it had taken 30% losses) in addition to any DP's earned by the move.
-
If the Attacker/Phasing Player does not allocate any units to Assault there is no Assault; it is ignored. This can occur only under Case 10.31 et seq;
[15.3] TERRAIN EFFECTS ON CLOSE ASSAULT
[15.31] The terrain which a defending unit occupies, or which an attacking unit has to cross, may increase or decrease the differential in favor of the attacker/Phasing Player. Players should consult the Terrain Effects Chart (Case 8.37) for a complete list of all effects on Assault combat.
[15.32] The terrain in a hex occupied by a unit is defending against full Close Assault or Probe either has no effect on the Differential (e.g., Clear Terrain or Sand/Gravel Terrain) or it will decrease the Differential vis a vis the Attacker by a specific number of columns on. the Assault Differential Combat Results Table. Thus a unit defending in a Mountain hex against a Close Assault in which the Basic Assault Differential is + 4 will be Assaulted in the + 1 column, because there is a three column shift in favor of the Defender. (Players should note that a unit defending in a Salt Marsh hex shifts the column one in favor of the Attacker.)
[15.33] Assaults across certain types of hexsides also decrease or increase the Differential vis a vis the Attacker/Phasing Player; e.g., a unit attacking through a Wadi hexside has its Attack Differential decreased by one, in addition to any changes for the hex the defender is in. If any units are attacking through a given hexside, the Differential is adjusted as if all units were attacking through that hexside.
[15.34] Certain terrain prohibits full Close Assaults or Probes by certain types of units. Motorized units may never assault up an Escarpment, even if it is crossed by a Track. (You may, of course, take your infantry out of the Trucks and then Assault.) Motorized units may not assault units defending in Salt Marshes. Any combat unit in the Zone of Control of an Enemy unit which it cannot attack must be retreated one hex, unless some other unit attacks that Enemy unit.
[15.35] Terrain effects on Close Assault are cumulative, with one exception. The defender may benefit from only one type of hexside (15.33) unless a unit is actually assaulting through a hexside which contains two types of terrain. The latter is quite rare, occurring mostly down in the southern areas of the game-map where some of the wadis run along. slope' hexsides. (See B5810-B5809).
Example: A unit in a Level Two Fortification in a Rough Terrain hex being assaulted through a Ridge hexside would shift the Assault Differential six columns in favor of the Defender: two for the Fortification, two for the Rough Terrain, and two for the Ridge hexside. (This is obviously a good position, one that should be assaulted only after being softened up by Barrage and Air Bombardment).
[15.36] Assaults down slopes or down escarpments benefit the attacker. (See Case 8.37, Terrain Effects Chart). If a unit is being attacked through both an up slope and a down slope hexside (this is quite possible in some areas of the game-map), the benefit to the attacker is offset by the benefit to the defender. Thus a unit defending in a hex that is assaulted through a down slope hex (+ 1) and an up-Escarpment hex (—3) would have an adjustment of —2 (—3 +1 = —2) in favor of the defender.
[15.4] COMBINED ARMS EFFECT ON ASSAULT
The term "Combined Arms"? is used to describe the mutual support of tanks and infantry. Tanks (and tanks only — not recce or self-propelled artillery, etc.) must be supported by an equal number of infantry to be completely effective. Thus, for each TOE Strength Point of tanks engaging in Close Assault, there must be an equal number of TOE Strength Point of infantry, machinegun, or heavy weapons units engaging in that Close Assault from the same hex. For every one to three TOE Strength Points of unsupported tanks, the Actual Close Assault Strength of the tanks is reduced by one. Thus, if two TOE Points of tanks, each with a Close Assault rating of 7 are assaulting unsupported, the Actual Close Assault Strength is reduced to zero. If there were four unsupported tank TOE Strength Points, their Actual Close Assault Strength would be reduced to two. In no case may the reduction be more than four Actual Assault Points. This applies both offensively and defensively.
[15.5] EFFECT OF ASSAULTING FORCE ORGANIZATIONAL SIZE ON CLOSE ASSAULT
Regardless of the Basic Assault Differential, the organizational size (battalion, division, etc.) has an effect on the relative strength in an assault. The greater disparity between the two opposing forces in terms of size of organization, the greater the benefit (in terms of a Column Shift on the Assault Differential Combat Results Table) to the larger unit. This is another rule that reflects the effects of organization and combined arms.
[15.51] If, regardless of the Basic Close Assault Differential, one side has at least twice the number of Raw Close Assault Strength Points as the other, the superior side adjusts the Assault Differential on the Combat Results Table two columns (not numbers) in its favor.
Example: 24 Raw Close Assault Strength Points (2 Actual) assaults 12 Raw Close Assault Strength Points (or 1 Actual). Normally, the differential (not taking into account any other effects) would be +1. However, because the attacker has twice the Raw strength of the defender, he would assault on the +3 Column. This adjustment always applies, regardless of any other adjustment to the differential (exception: Case 15.54).
[15.52] If the largest (regardless of number of units involved) unit in terms of organization of one side in an assault is bigger than the largest unit organization on the other side there will be a column shift benefitting the side with the larger unit. Unit equivalents apply here (see Case 9.2).
[15.53] The column adjustments for Organizational Size Difference, always in favor of the larger unit size, are as follows:
Largest Unit On:
| Larger Side | Smaller Side | Adjustment |
|---|---|---|
| Division | 3-point Brigade | 1 |
| Division | 2-point Brigade | 2 |
| Division | Battalion | 4 |
| Division | Company | 8 |
| Any Brigade | Battalion | 2 |
| Any Brigade | Company | 4 |
| Battalion | Company | 2 |
All of the above are equivalents (9.2).
[15.54] There are certain combat units that have no Defensive Close Assault Ratings (e.g., Commonwealth 5.5" howitzers, German 210mm Howitzers). If such a unit is alone in a hex and is Close Assaulted by an Enemy unit, such zero-rated unit is considered to have a Defensive Close Assault Rating of zero. In addition, two other adjustments are made: (1) The attacking unit takes no casualties; and (2) there is a three-column adjustment in favor of the Attacker, in addition to any adjustments for 15.53. Case 15.51 does not apply to this situation.
[15.55] For the purposes of this case a brigade is attached to a division only if the brigade HQ unit (counter) is attached to the division. For example, a Commonwealth infantry division with nine infantry battalions and no infantry brigade headquarters attached is a shell in Close Assault. Note that the two Italian infantry brigade counters (ID Code "m") represent the entire brigade.
[15.6] EFFECTS OF MORALE ON CLOSE ASSAULT
The Morale of each side involved in a given Close Assault'will affect the Close Assault Differential. A complete discussion of Morale is to be found in Section 17.0.
[15.61] Players first determine their individual Adjusted Morale Rating for that assault (Case 17.2). The Phasing/Assaulting Player then subtracts the Adjusted Morale Rating of the non-Phasing/ Defending units from that of the Phasing units. This Final Adjusted Morale number is the number by which the Assault Differential Column will be adjusted. (See Case 15.64).
[15.62] A positive (+) Final Adjusted Morale Rating adjusts the Assault Differential that number of columns to the right (in favor of the Phasing Player/Attacker). A negative (—) Final Adjusted Morale Rating adjusts the Assault Differential that number of columns to the left (in favor of the non-Phasing/ Defending Player).
[15.63] Players should use the "largest unit" rule, as espoused in Case 6.27, to determine Morale Ratings for units with different Morale in the same assault.
[15.64] Following is an extended example of how Morale would affect a given Close Assault:
a. The 15th Panzer Division (Morale of +3) and the Ariete Division (Morale of +1) are. Close Assaulting the b. 2nd New Zealand Division (Morale of +1) with the lst RNF battalion (Morale of +2) attached.
c. The Axis Divisions both have a Cohesion Level of, say, —4, which will be used to adjust their combined Morale Rating of +2 (both are divisions, so their Morale is combined and divided by the number of divisions, +3 +1 + 2 = 2), The Axis Player now uses his Cohesion Level to adjust his Morale Rating (see Case 17.2). Consulting the Morale Modification Table (17.4), he rolls a 43 at — 4 Cohesion Level, obtaining a — 2 adjustment to his Morale. Axis Adjusted Morale is now zero (+2 -—2=0).
d. The Commonwealth Morale for the assault depends on that of the 2 NZ Division, as that is the largest unit. The 2NZ has a + 1 Morale and, say, a Cohesion Level of +2. The Commonwealth Player rolls a 63 on the Morale Modification Table, so there is no adjustment to the Morale Rating of +1.
e. As the Axis Morale is zero and the Commonwealth Morale is +2, the Final Adjusted Morale Rating is —\ (Attacker minus Defender). Therefore, any assault will be modified (by Morale) one column in favor of the defender.
[15.7] HOW TO USE THE CLOSE ASSAULT COMBAT RESULTS TABLE
[15.71] The Close Assault Combat Results Table is a massive Combat Results Table that uses, for each Player, the roll of two dice added three different ways to determine a great number of results. It is important to remember that each Player throws the two dice only once per assault, with one minor exception (Case 15.73d). Players should consult the Assault Combat Results Table and become familiar with it before playing.
[15.72] The columns of the Assault Combat Results Table are the Assault Differentials (see Cases 15.26 and 15.27). The rows are percentage of losses possible. The numbers in the center of the Combat Results Table are the range of numbers needed to produce the losses (in the rows) under a particular differential (the column). There are additional results at the bottoms of each column: Engaged, Retreat (Defender only), and Captured Possibilities. These are determined from the same diceroll as determines the losses.
[15.73] The Close Assault Combat Results Table uses two dice. thrown once for each Player to determine all results as follows:
a. To determine his losses, each Player consults the Differential on Ais portion of the Combat Results Table (Attacker or Defender). He then throws two dice, reading the result sequentially, the larger die first. Thus a 2 on the large die anda 5 on the small die would be a 25. The Player would look under the Differential column to find where the 25 would fall, then look to his left to find his percentage of losses. Example: The Attacker is assaulting at +3. He throws a 34 to find his percentage of loss. Looking under the +3 Differential Column in the Attacker's portion of the Combat Results Table, we see that 34 falls in the 5% loss row. The Attacker would suffer losses of 5% (see Case 15.8).
b. The same diceroll used in (a) is now used to determine Engaged or Retreat results. However, here the dice are added together (3 + 4 = 7). Engaged results are always found on the Attacker's portion of the Combat Results Table; Retreats on the Defender's portion. Thus in the above example, the same 3 and 4 would now be added to produce a 7. As Engaged results (see Case 15.8) occur only on throws of 8, 9, 10 or 12 at that Differential, the units are not Engaged. However, if that 3 and 4 were the Defender's dice roll, the Defender would have to Retreat one hex (or lose an additional 10%) as one-hex Retreats occur on 4,5, 6, and 7 at that Differential.
c. Using the same procedure as in (b) above, adding the dice together, each Player checks (with his individual diceroll) to see if any of his percentage losses have been Captured. Still using the +3 column, there are no Attacking unit Captured possible in the column, but there are in the +3
Defender Column. However, the 7 would not result in a Defender Captured, as a diceroll of 2 or 3 is needed to produce Captured units.
d. If a Captured does result, this means that a percentage of the losses is captured. Thus if the Defending Player in the example we are using threw a 1 and a2 (12), he would suffer 20% losses, some of which would be Captured (the "3" of 1 + 2 = 3). When a Captured results, the Player throws one more die and consults the Prisoners Captured Results Table (15.89). In this case, if the Defender threw a 4, 50% of all his losses rounded up (the 20% of his force) would have been Captured by the Attacker.
[15.74] If, for some reason, both a Retreat and an Engaged result occurs in the same Close Assault, the Retreat takes priority, and the Engaged result is ignored.
[15.75] The Attacker and the Defender each roll two dice to determine their results. Both Players use the same Differential column, but they each use their own section of the Combat Results Table.
[15.76] If the diceroll produces a zero loss result, Engaged or Retreat results may still occur.
[15.77] The +J1 to +17 et seq columns of the Assault Combat Results Table comprise the Overrun section of the Combat Results Table. Overrun is not a voluntary action (as in most games). Overrun in CNA indicates that the Attacker has amassed such overwhelming strength that he has broken through the defensive line of the Defender, wreaking comparable losses and enabling him to reach and possibly destroy many of the defender's guns (see Cases 15.84 and 15.86). In addition, when Overrun, all Defender losses are rounded up.
[15.78] The Assault Combat Results Table is a large and seemingly unwieldy Table. However, it is not difficult to work with, and once the Players understand the mechanics of the different dicerolls and the method of determining losses, they will find that the Assault Combat Results Table produces an unusually wide variety of results.
[15.79] Close Assault Combat Results Table (see Charts and Tables)
[15.8] DETERMINING CASUALTIES
[15.81] An Engaged result means that all units involved in that assault are locked in combat. There are extended Capability Point penalties for an Engaged unit leaving an Enemy ZOC (see Case 8.6). Players should place an Engaged marker on all units affected to indicate their status. Engaged markers are removed at the end of the Operations Stage. (Players should note that all units that had assault and are still adjacent are in Contact, if they are not Engaged.)
[15.82] A Retreat of a specific number of hexes means that the affected units (including any units in that hex withheld from combat for any reason, such as Pinned or out of ammo) must move a minimum of that number of hexes away from the Enemy unit inflicting the Retreat. They must end the Retreat at least that number of hexes away and should follow the path of least resistance in the direction of their nearest Supply Dump or City. For each hex of mandated Retreat that units cannot or chooses not to Retreat those units suffer an additional 10% loss. Retreats cost Capability Points. Units in major cities (or retreated into a major city) may ignore retreat results (or the rest of any retreat result).
[15.83] Percentage Losses are determined in the following manner:
a. The Player affected determines the percentage
= loss from the Assault Combat Results Table then b. Totals all Raw Combat Assault strength Points involved in the assault. The Defending/non-Phasing Player would add to this total the Raw Assault Strength Points of any Pinned or previously retreated units in the hex. In an Overrun, all Defensive units withheld for any reason are added in.
c. Multiply the percentage of loss times the Total Raw Strength Points. The Attacker rounds up to the nearest whole number, while the Defender rounds down (but see Case 15.77), Thus a 35.1 would be 36 points for the Attacker but 35 for the Defender. In an overrun, 1.1 Defender Points would equal 2. Defenders should remember to add in any loss percentage they must take for hexes not retreated (see Case 15.82).
d. The affected Player must now remove enough TOE Strength Points to absorb the Raw Points lost. Thus one TOE Strength Point of 2 Defensive Close Assault Ratings infantry would absorb two Raw Points. Remember that some units have different Close Assault Ratings for Attack and Defense, and that the Attacking Player uses Offensive Close Assault Points, etc. (See Case 15.84). Only those units participating in the assault or, for the Defender, that were pinned or withheld may be used to absorb losses of Raw Points.
e. All losses must be applied to units in different hexes (if units in more than one hex are attacked or involved in an attack) proportionally. Example: If 50% of the Raw Strength Points used by the Phasing Player in a Close Assault are in one hex and 50% are in a second hex, any losses would be divided evenly between both hexes.
[15.84] Guns (i.e., Artillery, Anti-Tank units, etc.) take losses in Close Assault under the following circumstances:
a. If the Defending units are Overrun all defending guns, whether Forward or Back, add their Defensive Close Assault Points (if any) to the total for determination of percentage lost. Such units may be used to absorb losses as in Case 15.83.
b.. Guns that are Forward are subject to losses, based on their Vulnerability Rating. The affected Player must remove at least 50% as many Vulnerability Points of Forward Guns as he has lost Raw Strength Points in that Assault, with the provision that if at least one Raw Close Assault Point is lost then at least one Vulnerability Point must be removed (see Case 14.42; Vulnerability uses the same mechanics as Armor Protection). AA/Flak units are not affected by this rule.
c. In addition to (a), if there is an Overrun situation, all defending guns are subject to Vulnerability losses, as in (b). Vulnerability losses are taken after percentage losses (a).
[15.85] If, as a result of an Assault, a Player has some of his TOE Strength Points Captured (see Case 15.73) he takes that percentage of his losses as determined in Cases 15.83 and 15.84 and converts them to prisoners or captured equipment, which are then turned over to the Enemy Player. Captured percentages are always rounded upwards.
[15.86] Determine Captured TOE Strength Points as follows:
a. First determine what TOE Strength Points (and concurrently what units) have been eliminated by combat; then b. Take the Captured percentage of those TOE Strength Points (a); c. Players may use any type of TOE Strength Points to satisfy the Captured percentage, remembering that the percentage is taken of Raw Assault Points (either Offensive or Defensive, depending on the situation), not TOE Strength Points (see Case 15.83 for the mechanics of taking losses).
d. Captured infantry-type becomes Prisoner Points, one Prisoner Point for each TOE Strength Point. Captured Guns and/or Tanks may be taken and used by the Enemy as they see fit (see Section 28.0, on Prisoners).
[15.87] If any Player's losses amount to 30% or more of the TOE Strength Points committed to that assault (whether such losses came from committed units or not), all of that Player's units involved gain three Disorganization Points. It is faintly possible that both Players could be so affected, and this is allowed.
[15.88] A Player may always voluntarily Surrender his units, rather than have them slaughtered. Furthermore, units out of Ammunition or with a — 17 or worse Cohesion Level that are assaulted automatically Surrender (see also Case 17.25).
[15.89] Prisoners Captured Results Tables (See Charts and Tables)
[15.9] PROBES
[15.91] A Probe is any Close Assault conducted (by the Phasing Player) with less than 50% of his - available TOE Strength Points participating in that — or another — attack (see Case 10.31 and 15.25).
[15.92] A Probe may be conducted with any number of units, within the restrictions of Case 15.91,
[15.93] All combat results are the same for both sides, with the exception that all Engaged results are ignored, and the units in the Probe — both offense and defense — are not in Contact.
[15.94] The "Probing" Player does not have to announce that his assault is a Probe until after the assault is over. Remember, all units are assigned to Close Assault prior to Anti-Armor Combat.
[15.95] If all Probing units are Recce-type units, any losses from Close Assault to the Probing units are reduced by 10%.
[15.96] If, in a Probe, the Final Adjusted Differential is worse than —3, the units defending against the Probe do not use any Capability Points to defend against such Probe.
AN EXAMPLE OF COMBAT
The following is an extended example of a hypothetical combat. It should clarify much of the preceding sections, which rules, until actually applied, may seem somewhat convoluted and mystical.
The Commonwealth Player, in Hex "A", has an Armored Brigade Group containing one battalion of Stuarts (TOE Strength of 8), one battalion of Crusader II's (TOE Strength of 7), one motorized infantry battalion (TOE Strength of 5), an Anti-Tank Regiment of 2-pounders (TOE Strength of 6), and a regiment of 25-pounder Artillery (TOE Strength of 6). The brigade has a Basic Morale of +1 anda Cohesion Level of —3. The terrain in the hex is Rough.
The Axis Player has two forces, one in Hex "B" and one in Hex "C", In Hex "B" is a Kampfgruppe (Brigade) consisting of a battalion of 8 TOE Points of PzIII Specials (Tanks), two battalions of infantry (each with TOE Strength of 7), and a regiment of 105mm Guns (TOE Strength of 6). In the adjacent hex ("C") is a small force consisting of one infantry battalion (TOE Strength of 7) and a battery of 105mm Guns (TOE Strength of 4). The Axis Basic Morale is +2, with a Cohesion Level of —2. The Axis Player's units are all German, and he is the Phasing Player. He attacks. (Note that the given Cohesion Levels include the Capability Points expended for the attack/defense.) The Axis Player, wishing to get full use from his two Artillery units, places both of them in Forward position. The Commonwealth Player, having enough Anti-Tank strength with his two tank battalions and anti-tank regiment, decides not to use his 25-pounders in an Anti-Tank role and places them Back, for protection. Both Players now choose their targets for Barrage. The Axis Player, noting the Commonwealth anti-tank strength (he knows there are two tank battalions and two gun units) decides to direct his full Barrage against one of the Tank Battalions. He thus totals his Barrage Points which can be combined because his Guns are Forward, (ten 105's — Barrage Rating 9 — at a TOE Strength of 10 = 90 Raw Barrage Points) and finds he has 9 Actual Barrage Points. The Commonwealth Player, with six 25-pounders (Barrage Rating of 8) will use all 5 Actual Barrage Points (6 x 8 = 48, or 5) against one battalion of infantry (as he fears the Assault more than the Anti-Armor fire — a guess, really, as to the Axis intentions — and the Infantry unit is an easier target). Both Barrage simultaneously, adjusting for terrain (the Axis units are all in Clear Terrain.)
The Axis Player Barrages, using the "7,8" column on the Barrage Table (adjusting from "9,10" because of the Rough Terrain). He needs a roll of 36 or lower to pin the Tank battalion and he throws a 25. The result is that his target, which turns out to be the battalion of Stuarts, is Pinned and may not participate in any further combat. The Axis Player throws again rolling a "6". This results in two Truck Points destroyed although the infantry they are transporting is unharmed. The Commonwealth Barrage, on the "5,6" row results in No Effect when the Commonwealth Player rolls a 61. Note that no defending trucks are present so no second roll is necessary. Both Players now deduct any Ammunition expended.
The Commonwealth Player decides not to Retreat Before Assault with any of his units, and the Players now assign their units to either Anti-Armor or Close Assault (or nothing). The Axis Player assigns five points (of his 8 available) of his PzIII Specials to Anti-Armor and all three of his infantry battalions to Close Assault. He does not use his Artillery for Assault as he wishes to save ammunition. The Commonwealth Player assigns his Infantry battalion to Defend against the Assault and puts his Crusaders into that Assault. His Stuarts are pinned and cannot participate, but he does use his Anti-Tank guns for Anti-Armor Fire. His artillery is Back and may not participate in either Anti-Armor or Close Assault.
The Axis Player has 3 Anti-Armor Points (5 TOE Points of PzIIISpec. with an Anti-Tank rating of 5 x 6 = 30, or 3 Actual). The Commonwealth Player has only 2 (his 6 TOE Points of 2-pounder Anti-Tank, rating of 4 = 24, or 2 Actual). If his Stuarts had not been Pinned, they could have aided his Anti-Armor effort. Both Players now fire simultaneously. The Axis Player rolls a 51, and the, result on the Anti-Armor CRT is a "4". This means that the Commonwealth Player must remove enough Crusader TOE Points to absorb 4 Armor Protection Points. (He cannot use his Stuarts as they have been pinned and do not enter into Anti-Armor loss calculation). As Crusader I's have an Armor Protection Rating of 3, he must remove 2 TOE Points of Crusaders to absorb the loss. Likewise, the Commonwealth Player fire Anti-Armor, rolls a 55, resulting in a 3. Each PzilIl Special has an Armor Rating of 4, so the Axis Player removes 1 TOE of PzIII Specials (taking them from those tanks assigned to Anti-Armor, rather than upset his Assault power.)
Both Players now determine their Assault Differentials. The Attacking Axis has 42 Raw Points from Infantry (7 X 2 x 3 = 42) and 21 Raw from his tanks (7 x 3 = 21) for a total of 63 Raw Points, or 6 Actual. As he has 21 Infantry TOE Points and only 3 Tank TOE Points, he has no problems with Combined Arms effects on Assault. The Commonwealth Player has 10 Raw Infantry Points (5 x 2 = 10) plus 28 from his Crusaders (7 x 4 = 28) for a total of 38, for a 4 Actual. However, as he has two more Tank TOE Points than Infantry (7 to 5), he subtracts 1 Actual Point for Combined Arms Effects. The Basic Differential is thus 6 to 3, or +3 for the Axis.
Each Player now checks for his actual Morale at time of Assault. The Axis Player has a +2 Basic Morale with a Cohesion Level of — 2; he consults the Morale Modification Table, throws a 21, and gets a No Change to his Basic Morale. So his Adjusted Morale is +2. The Commonwealth Player has a Basic Morale of + | with a Cohesion Level of ~—3. Using his —3 Cohesion he also consults the Morale Modifier Table, throwing a 53. This results in a modification to his Morale of — 2, for an Adjusted Morale of —1. Comparing his Morale to that of the Axis Player shows a Final Adjusted Morale of +3 (+2 — [—1] = +3). This +3 means that the Axis Player will adjust the Assault Differential Column three in his favor. However, the Commonwealth units are in Rough Terrain, which is a two-column adjustment in their behalf, so the final column adjustment is +1 for the Axis. (There is no question of a unit Size/Organizational Difference here.) Thus, with a Basic Differential of +3, and a one-column adjustment for the Axis, the assault takes place on the +4 Column.
Each Player now throws two dice and consults his portions of the Assault Combat Results Table to determine his losses. The Axis Player throws a 32. That means he loses 5% of his Assaulting Force, and there are no other results for him (i.e., he is not Engaged). The Commonwealth Player throws a 21. He has several results from this: (1) He loses 15%; (2) He has 33% of these Captured (an additional die roll of 4); and he must Retreat all his units at least one hex (or take an additional 10% loss, which would further affect the Captureds).
The Axis Player Assaulted with 63 Raw Points, which he multiplies by his 5% Loss to get 3.15, or 4 Raw Points (the Attacker always rounds upwards). He removes two Infantry TOE Points (one from each of two battalions) to absorb the 4 Raw Points (each of his Infantry has an Assault Offensive Rating of 2, so 2 TOE of these equals 4 Raw Points). In addition, the Axis Player has his Artillery forward, so he must remove 50% of his Raw Points Lost in terms of Vulnerability Points. This means he has lost 2 Points (Vulnerability) of Artillery. As each 105mm Gun has a Vulnerability of 9, he would have to remove one of his Guns to absorb the 2 point loss. The Axis Player's losses are thus 2 TOE Points of Infantry (or about 200-300 men), 5 Panzers (1 TOE), and 1 TOE of 105mm guns (or 4 guns, for this type of gun).
The Commonwealth Player now determines his losses. He used 38 Raw Points; but he also has Pinned Stuarts, which must be included in the total. There are 8 TOE of these, with a Defensive Assault Rating of 4, for a total of 32 Raw, for a Grand Total of 70 Raw Assault Points. His losses are 15%, or 10.5 Raw Points, rounded down to 10. Of these, 33% are captured, or, rounding upwards, 4 Raw Points Captured. The Commonwealth Player has 2 Infantry TOE Points Captured (to absorb the 4), and eliminates 1 TOE of Stuart Tanks (4 Raw) and 1 more Infantry Point (2 Raw) to satisfy the 10 Points lost. He then Retreats his entire Force one hex, rather than incur additional losses. He has had about 150 men killed, about 300 men captured, and lost 5 Stuart and 10 Crusader Tanks. He has also lost his position.
The Commonwealth suffers no additional losses to his Cohesion Level, aside from those earned in moving the one hex (to Retreat). However, the Axis Player earns three Reorganization Points for pushing the Commonwealth Player out of the hex.
[16.0] PATROLS AND RECONNAISSANCE
GENERAL RULE:
Patrols may be conducted in order to determine the identification and strength of opposing units. In any Operations Stage in which no Anti-Armor or Close Assault combat has taken place a Phasing Player may "pull" men out of certain types of units to patrol in the Patrol Segment. To patrol, the Phasing Player announces how many Patrol Points are Reconnoitering a given hex. He consults the Patrol Survival Table, takes losses, if any, then refers to the Reconnaissance Table to see how effective his patrol has been. Depending on his success on the Reconnaissance Table, the non-Phasing Player must tell him information about a given number of units. No units actually move during patrol; patrolling is handled abstractly.
PROCEDURE:
To patrol, the Phasing Player announces the number of Patrol Points he wishes to allocate to a given patrol, expends the necessary fuel and ammunition, and states which hex is being patrolled. He consults the Patrol Survival Table (16.6) and rolls one die to determine any Patrol casualties (unless no combat units are present in the hex; see Case 16.32). If Patrol Points remain (that is, if the patrol is not wiped out), the Phasing Player rolls one die and cross-references the result with the number of remaining Patrol Points on the Reconnaissance Table (16.7) to determine what (if any) information his patrol garners. The non-Phasing Player must now reveal information as required by the results of the die roll. Finally, the Phasing Player rolls one die and consults the Objective Loss Table (16.8) to determine if there are any non-Phasing unit casualties and, if so, they are extracted.
CASES:
[16.1] WHICH UNITS MAY PATROL
[16.11] Only Recce-type, Light Tank (Italian CV/33's, British Mark VI Lights, or German Panzer I's), or Motorized Infantry may supply Patrol Points for Reconnaissance.
[16.12] The Phasing Player subtracts — or rather detaches — TOE Strength Points from the unit/TOE types allowable (Case 16.11) and designates them as Patrol Points. Example: a Phasing Player detaches two Recce TOE Strength Points from a Recce battalion in Hex A and assigns them as Patrol Points to Reconnoiter Enemy-occupied Hex B. The Player notes on his TOE Log sheets the assignment and any resultant casualties.
[16.13] No more than 2 TOE Strength Points may be assigned as Patrol Points from any one hex, regardless of the number of units in that hex..
[16.14] The maximum number of Patrol Points that may be sent to an Enemy-occupied hex is 3, with Patrol Points from different hexes having the capability of combining forces for a Reconnaissance operation.
[16.15] No unit with a Cohesion Level of — 8 or worse may assign TOE Strength Points to patrol duty.
[16.16] For each Patrol! Point sent out on Reconnaissance, the Phasing Player expends one Ammunition Point and 2 Fuel Points. These supplies must be present in the hex the Patrol Points originate from, and they are expended regardless of the result of the patrol.
[16.17] No Patrols may originate from or be directed into any hex affected by a Rainstorm or Sandstorm.
[16.2] RESTRICTIONS ON PATROLLING
[16.21] In any Operations Stage that a Phasing Player does not engage in Anti-Armor Combat or Close Assault against any Enemy units, he may patrol. In addition, although a Player may patrol if he has used Artillery Barrage during a given Operations Stage, he may not Reconnoiter any hex which has undergone any type of Barrage or Air Bombardment. A Phasing Player may launch as many patrols as he wishes.
[16.22] Patrol. Points may reconnoiter any Enemy-occupied hex within five hexes of the hex the Patrol Points originate from. The five-hex path may not include any terrain impassable to the units in the patrol (see Case 16.11), nor may they pass through an Enemy-controlled or occupied hex other than a hex in the Zone of Control of the unit being reconnoitered.
[16.3] PATROL LOSSES
[16.31] Both Players — the Patroller and the Patrollee — must check for any possible combat losses from Patrol action. However, each Player checks at a different time.
[16.32] The Phasing Player, after assigning his Patrol Points to Reconnoiter a specific hex, consults the Patrol Survival Table before reconnoitering, with one exception. The non-Phasing Player must inform him if there are no combat units in the hex which is being reconnoitered. If there are no combat units in that hex, the Phasing Player skips the Patrol Survival Table and suffers no losses. AA/Flak and Engineer units are not combat units for this purposes.
[16.33] The Phasing Player now rolls one die and consults the Patrol Survival Table. If all his Patrol Points are from Recce units he subtracts one from the die roll. Any losses — in TOE Strength/Patrol Points eliminated or captured by the non-Phasing Player (including trucks) — are deducted immediately (Phasing Player's choice as to unit type), Captured Points become Prisoner Points. If no Patrol Points survive, the Phasing Player goes no further; he gets no information.
[16.34] After the Phasing Player has gotten his information, or after having had all his units eliminated (whichever comes first) the Phasing Player rolls another die to see whether he has inflicted any losses on the non-Phasing Player, regardless of the losses he (the Phasing Player) has taken. There is one exception to this: if the Phasing Player's patrol is eliminated in entirety, the Captured result on the Objective Loss Table becomes an Eliminated. The choice of loss (in TOE Strength Points) is up to the non-Phasing Player, but it must come from a combat unit. If there are no combat units, the non-Phasing Player may eliminate either Truck Points, AA/Flak Points, Engineer Points, or HQ Points, in that order of priority.
[16.4] DUMMY TANK FORMATIONS
Dummy Tank Formations consisted of mock-ups of Tanks, usually made from wood or canvas covered cars (the Germans used Volkswagons), designed to fool Enemy intelligence into thinking there were Tank Brigades in places where they weren't.
[16.41] Each Player may use Dummy Tank Formations. These are the equivalent of Tank battalions in size, but they are worth nothing in combat. Their CPA is zero.
[16.42] To bring a Dummy Tank battalion into play, a Player must expend 10 Stores, which must be present in the hex in which the Dummy is "placed.'? Dummy Tank battalions are placed in the Construction Segment. There are no actual counters for Dummy Tanks.
[16.43] No Player may ever have more than three Dummies in existence at any one time. No more than one Dummy may be in any one hex. No Italian formations may ever make use of Dummies, even when mixed with German formations.
[16.44] Dummy Tank battalions may be assigned identifications actually used by other Tank battalions in play. Example: The Commonwealth Player may say Dummy Tank Battalion #1 is the 4th Royal Tank Regiment, even though the 4 RTR is in play elsewhere on the game-map.
[16.45] Dummies really have only one function: to confuse Enemy intelligence. Thus they are worthless alone in a hex. Whenever a Player conducts Reconnaissance against an Enemy hex, the Enemy Player, if he has a Dummy Tank unit in that hex, may tell him that he has the "X" Tank battalion of any TOE Strength desired, when revealing information. The patrolling Player has no way of knowing that this isa dummy or not (until he attacks).
[16.46] If a formation with a Dummy Tank battalion undergoes any type of Close Assault, the Dummy Tank Battalion is eliminated. If a formation undergoes Anti-Armor fire and has no armor — or loses all its armor — the Dummy Tank Battalion is eliminated. Anti-Armor fire committed against Dummy Tanks may not be switched to Assault if the only "armor" is Dummy Tanks!
[16.47] For the historians, The Household Cavalry Regiment, a Commonwealth Armored Car unit, was assigned to North Africa. However, it does not appear in the OA Sheets as it saw minimal action and was assigned mainly to handling the task of fitting out and overseeing the Commonwealth Dummy Tank Formations.
[16.5] RESULTS OF PATROLS
The Reconnaissance Table (16.7) results are expressed in terms of the number of battalion-size units about which the non-Phasing Player must reveal information. Thus, if the Phasing Player has two Patrol Points and obtains a die roll of 4, he will be told about two of the Enemy's units.
[16.51] The non-Phasing Player must reveal the following information about units: historical designation (e.g., 1/8 Panzer Battalion), type of unit (mechanized infantry, armored cars, etc.), whether the unit is motorized or not, and the exact TOE Strength within two of the actual strength at the time of the Patrol.
[16.52] The non-Phasing Player may choose the "units in a hex about which he will reveal the information listed in Case 16.51, if more of his units are in.the hex than he is required to give information about (exceptions: see Case 16.53, 16.54, and 16.55).
[16.53] Information must be revealed about battalion-sized units, unless only smaller (or larger) units are present.
[16.54] Information may not be revealed about HQ units or AA/Flak units unless there are no combat units in the hex. Information may be revealed about Engineer units.
[16.55] The Phasing Player may specifically list units about which he does not wish to receive information, and the non-Phasing Player may not choose such units to satisfy the requirements of Case 16.5. (Presumably, such units would be ones that the Phasing Player already had adequate information about, because of previous patrols or combats.)
[16.6] PATROL SURVIVAL TABLE
(see Charts and Tables)
[16.7] RECONNAISSANCE TABLE
(see Charts and Tables)
[16.8] OBJECTIVE LOSS TABLE
(see Charts and Tables)
[17.0] MORALE
GENERAL RULE:
The Morale Rule in CNA attempts to quantify a facet of combat that is so.subjective that it virtually defies all such attempts. The result: subjective opinion plays an important part in what is otherwise a highly objective game. In any case, the Morale rules combine the elements of a Basic Morale Rating (representing initial training, fitness, enthusiasm, secondary command capability, etc.), which is a fixed number (with one exception; see Case 17.3), with the effects of constant campaigning and victory or defeat. The Cohesion Level of a unit is used to raise or lower the Morale Rating of a unit at the instant of Close Assault. This adjusted Morale Rating is then compared with that of the opposing Player to adjust the Assault Differential one way or the other.
CASES:
[17.1] UNIT BASIC MORALE RATINGS
Each unit in the game has a Basic Morale Rating, listed on its OA Sheet, which, with the exception of Training (Case 17.3), never changes (although it may be adjusted by Cohesion for individual assaults). The Morale Ratings run from +3 to —3. The Basic Morale Rating of a battalion (or brigade) is always that of its assigned Parent Formation, unless the unit has been attached to another force or has been out onits own.
[17.2] ADJUSTMENTS TO BASIC MORALE RATINGS
[17.21] Every time a unit is involved in a Close Assault (or Probe) its Basic Morale Rating may be adjusted by its Cohesion Level at the instant of Assault. The effect of Morale on Assault has been discussed in Case 15.6.
[17.22] In order to determine the effect of a unit's Cohesion Level on its Basic Morale Rating, the Players use the Morale Modification Table (17.4). This is another table that uses a two-dice sequential read out (11-66), with the diceroll taking up the "center"? of the Table. In this case, the Cohesion Level of the unit is on the left, comprising the rows of the Table, while the Morale Modifier — the number the Player is rolling for — is on the top of the Table, comprising the columns. Example: A unit has a Basic Morale Rating of + 1. It goes into an Assault with a Cohesion Level of —4. The Player consults the Morale Modification Table and throws two dice, getting a 42. Locating the row for —4 Cohesion, the Player reads across until he finds the column in which a diceroll of 42 is located. That roll is in the —2 column, so the Morale Modifier is —2, and the Basic Morale is adjusted by that number (+i —2 = —1). The unit's Adjusted Morale Rating for that Assault is -1.
[17.23] The maximum Adjusted Morale Rating a unit can ever have is +3, and the minimum —3, regardless of what mathematical possibilities occur. Thus a unit with a +2 Basic Morale Rating that earns a + 4 modifier does not get an Adjusted Rating of +6, but just +3 (exception: see Case 17.28).
[17.24] All Cohesion Levels of — 17 or worse use the " —17 et seq" row. All Cohesion Levels of +8 or higher use the " + 8" row.
[17.25] The farthest column on the right is the Surrender column. If a combination of Cohesion Level and diceroll places the Modifier in that column, the affected units immediately Surrender (and become Prisoners, see Section 28.0; Exception: Case 17.26). If both units, for some strange reason, get a Surrender Modifier, the Surrenders are ignored, no assault occurs, and both sides are Engaged.
[17.26] If a unit or a Formation with a Basic Morale (individual or combined) of + 1 or better is involved in a Morale Adjustment computation, such unit follows the Morale Adjustment Table normally with one exception: it ignores all Surrenders (treating them as a —4 adjustment). However, it does not ignore the "Surrender" it one of the following is in effect:
a. The unit has a Cohesion Level of —11 or worse; or b. The Enemy unit(s) has at least 3 times the Strength (Enemy Raw Offensive Assault to Friendly Raw Defensive Strength).
[17.27] It is possible that a given Player has units of different Cohesion Levels in the same assault. The method of determining the applicable Cohesion Level is the Largest Unit Rule, discussed in Case 6.27.
[17.28] Axis units stacked with General Rommel at the instant of Assault have their Adjusted Morale Rating further adjusted by +1. Thus a unit with an Adjusted Morale Rating of 0 that is assaulting under the direct command of Rommel has an Adjusted Morale Rating of +1.
[17.3] TRAINING
Several of the Commonwealth units arrived in Egypt ill-prepared to fight a desert campaign. Therefore, their Morale Rating on arrival is lower than their assigned Basic Morale. In order to reach their assigned Basic Morale they must undergo Training.
To forestall questions on the subject, only Commonwealth units must undergo training for a variety of reasons. Most German units had already undergone considerable combat before arriving in Africa, and, although they were no more desert-acclimated than any other forces, this previous experience counted for much, in the designers' minds. As for the Italians, most of these units had served in Africa, had seen. combat, or are of too low a designated morale to bother with training. Those Commonwealth units designated for Training are based on unit descriptions and fitness reports in the various sources. :
[17.31] Units that are in need of Training have, on their OA Sheets, two Basic Morale Ratings. The rating in parentheses is the Untrained Rating; the other Rating is the maximum level of Training and Experience that that unit may reach, through Training.
[17.32] A Commonwealth unit undergoes Training in any one of three areas: Cairo (any one of the city hexes); Helwan (1430); or Alexandria (any city 2/ hex), or Amiriya, Abougir or Deghelia.
[17.33] To undergo Training a unit may not expend any Capability Points during an Operations Stage. If, for any reason whatsoever, a unit expends CP's during an Operations Stage, its Training has been interrupted.
[17.34] For every six Operations Stages that a unit undergoes Training, it raises its Untrained Basic Morale Rating one point. (Thus, a —1 would become a 0, a +1 a +2, etc.) It may never exceed its designated Basic Morale.
[17.35] In order for a unit to undergo Training, a combat battalion which has (or has reached) its designated Basic Morale must be present in the hex with the Training unit during each Operations Stage of Training. Infantry divisions or brigades may use an Infantry-type battalion; any unit with tanks must have a Tank battalion present to train. Such instruction battalions do not count against stacking limitations, and such battalions used for instructional purposes must be at least '4 of their assigned TOE Strength. Each instruction battalion may train as many units as may be stacked in that hex. :
[17.36] Units are not required to undergo Training; they may enter combat with their lesser Morale Rating and then be pulled back at a later time for Training. However, only Training can permanently raise the Basic Morale Rating, regardless of the amount of combat encountered.
[17.37] Commonwealth And Axis (see Case 20.43) Training Areas are indicated on the game maps.
[17.4] THE MORALE MODIFICATION TABLE
(see Charts and Tables)
[17.5] VOLUNTARY SURRENDER OF UNITS
A Player's units may be captured thru lack of combat ability or be forced to surrender as a result of morale determination during a Close Assault, lack of ammunition of possessing 26 or more Disorganization Points. A player may voluntarily Surrender his units under certain conditions.
[17.51] A Player may voluntarily surrender units. The surrendered units are treated as though they were captured or involuntarily surrendered (e.i., create prisoners for the infantry and turn the tanks, guns, and aircraft into replacements).
[17.52] In order to voluntarily Surrender the following conditions must be met:
A. The event is not occuring during Step "b" thru "f?? of a Combat Segment.
B. All of the units, Replacement Points, etc. in that hex at that instant are being surrendered.
C. The surrendering units must be adjacent to an Enemy combat unit and be able to be moved directly into that unit's hex.
[17.53] Units may be surrendered to an Enemy combat unit of any size or status (except 17.54).
[17.54] The enemy unit must accept the surrender, expending 2 CP's to do so. If the Enemy unit cannot expend 2 CP's the units may not voluntarily surrender.
[17.55] The owning Player may attempt to destroy part of the unit's material at the instant of voluntary surrender. This may only occur after he has declared that units in a hex are being voluntarily surrendered. The Player may not attempt to destroy anything that may not be moved or may only be moved in his Phasing Truck Convoy or Repair Phase.
[17.56] The Player may attempt to destroy any portion of his eligible material. Two determinations are made, one for tanks and guns and one for trucks/ Motorization Pointr The Player determines how his attempt at destroying tanks and guns has fared by rolling one die, subtracting one from the die roll and then multiplying by 10% (e.g., a roll of 4 results in the destruction of 30% of all designated tank and gun TOE Strength Points). Trucks/Motorization Point destruction is determined in a similar manner except that the modified die roll is multiplied by 20%. Round fractions down.
[17.6] TRAINING CHART
(see Charts and Tables)
[18.0] RESERVE STATUS
COMMENTARY:
The Reserve Rule was prompted by the unusual Time-in-Space problems encountered using the Capability Point Allowance System and Continual Movement. It protects the Defender from having the Phasing Player perform feats of incredible speed and agility far out of synch with the Laws of Motion, Time, and Inertia while, at the same time, enabling the Phasing Player to hold back certain units to exploit holes in the line. In essence, units in Reserve — not moving while the other units are — are still consuming "time" while they stand. Thus their capability to move and fight is reduced according to how long they spend in Reserve.
GENERAL RULE:
Reserve is a status which enables units to circumvent the rule that states a unit must be within two hexes of an Enemy unit to take advantage of the Continual Movement Concept. Units are placed in Reserve Status in the Friendly Reserve Designation Phase. At varying times during the Movement/Combat Phase the Player has the opportunity to pull a unit out of Reserve and use it, with varying degrees of restrictions, dependent on the length of stay in Reserve.
CASES:
[18.1] WHICH UNITS MAY BE PLACED IN RESERVE
[18.11] Any units belonging to the Phasing Player may be placed in Reserve. The non-Phasing Player may not place units in Reserve.
[18.12] Units assigned to Reserve Status must be so designated in the Reserve Designation Phase of the Operations Stage. Units are so designated by placing a Reserve I marker on top of them.
[18.13] Units still in Reserve during the first Reserve Release Segment of each Movement/Combat Phase, must either be released or have their Reserve I marker flipped over to its Reserve I side.
[18.14] Units in Reserve II Status remain in that status until either they are released in a subsequent Reserve Release Segment of that Operations Stage or the Operations Stage ends.
[18.15] Units may be placed in Reserve only in the Reserve Designation Phase. No unit may be placed in Reserve during the Movement/Combat Phase.
[18.2] EFFECTS OF RESERVE STATUS
[18.21] There are two states of Reserve: Reserve I and Reserve II. The Reserve marker on top of the units indicate their current Reserve Status.
[18.22] In a Movement Segment, units in Reserve I status may move one hex (regardless of Capability Point expenditure) as long as they do not enter an Enemy-controlled hex. Units in Reserve II status may never move.
[18.23] A unit in Reserve I status may be released from such status in the Reserve Release Segment in the first Reserve Release Segment in that Operations Stage; i.e., after other units have been moved once. Such a released unit may then move and fight in the ensuing Movement and Combat Segments with the following restrictions:
- It may not voluntarily exceed its Capability PointAllowance in that Operations Stage; and 2. lt may engage in only one offensive Close Assault in that Operation State.
[18.24] A unit in Reserve IT Status may be released in any Reserve Release Segment subsequent to the first Reserve Release Segment of a given Operations Stage. Such a unit may then move and fight with the following restrictions:
- It may' not voluntarily exceed one-half its Capability Point Allowance (rounded down) in that Operations Stage. Thus, a non-motorized infantry unit emerging from Reserve II Status would have a CPA of '5' that Operations Stage, which it could not voluntarily exceed; and 2. It may engage in only one offensive Close Assault (or Probe), within the restrictions of (1), above, in that Operation Stage; and 3. If it does voluntarily engage in any Close Assault, Anti-Armor or Barrage that Operations Stage it automatically earns one Disorganization Point, in addition to any others it might earn.
[18.25] Units released from Reserve may be moved (in the immediately subsequent Movement Segment only) even if they are not within two hexes of an Enemy unit, which is an exception to Case 8.23.
[18.26] Placing a unit in and releasing it from Reserve Status does not cost any Capability Points.
[19.0] ORGANIZATION AND REORGANIZATION
COMMENTARY:
As has been discussed previously in a variety of sections, the Organization of the various units — i.e., which battalions are part of which Brigade, which Brigades and support units form which Division, etc. — is important to the play of the game, particularly as pertains to Stacking. The basic Organizational heirarchy is pyramidical: 2-3 battalions form a brigade, and 2-3 brigades form a Division. This Section discusses which units are Assigned to a Parent Unit and which units may be Attached, how to Attach and Detach units, and when and how units may be built up to maximum strength.
Important: Players should be aware that this Section is one that could cause considerable problems unless certain basic tenets are understood. First of all, this Section is an attempt to formulize Organizational Doctrine; the Players are being forced to mold and use their armies in much the same way as the commanders did 30 plus years ago. And if it frustrates the Player not to be able to do things that are clearly beneficial, imagine how it was to those actually fighting this campaign. Furthermore, these Organizational rules are not, and should not be, considered as strict, rigid proscriptions. Rather, Players will find them easier to use if they attempt to understand the principles underneath them, and then use the accompanying charts and tables as guides. The charts and tables reflect the maximum Attachments and Assignments; anything within those limits can certainly be accomplished. Most of all, this Section should be played with attention to the flavor and meaning of the campaign which is being fought.
GENERAL RULE:
Each unit represented by a counter in the game is either independent or assigned and/or attached to a Parent Formation. Companies, battalions, and brigades may be assigned and/or attached; division HQ units are always independent. Divisions, brigades, and battalions may have subsidiary units attached or assigned to them (i.e., be Parent Formations). Historical assignments are listed on the Organization at Arrival Chart (O/A Chart, see Case 4.4); within limits, Players may alter these assignments. Players may more freely alter attachments. Limitations on such alterations are generally related to the capacity of the Parent Formation(s) to absorb subsidiary units. The historical TOE of battle (not the units themselves, but how many of each type there were) of every potential Parent Formation is listed on the Formation Organization Chart (19.3). Restrictions on additional attachments are listed for each Formation on the Maximum Unit Attachment Chart (19.5).
[19.1] DIFFERENCE BETWEEN
"ASSIGNED" AND "ATTACHED" UNITS
[19.11] A unit is assigned to a specific Parent Formation if that unit is considered a part of that Parent Formations organization (e.g., the 8th Panzer Regiment — a Brigade equivalent, see Case 9.2 — begins the game assigned to the 15th Panzer Division).
[19.12] A unit is attached to a specific Parent Formation if the counter representing the Parent Formation on the map represents the attached unit as well. (i.e., not only are both the attached unit and the Parent Formation in the same hex, but they are functionally combined into one unit).
[19.13] It is possible for the same unit to have two different Parent Formtaions simultaneously, one to which it is assigned, and one to which it is attached. A unit may never be attached to more than one Parent Formation at once; nor may a unit ever be assigned to more than one Parent Formation at once. Note: A unit must be in the same hex as a Parent Formation to which it is attached (indeed, it is represented on the game-map by the Parent Formation's counter); it need not be in the same hex as a Parent Formation to which it is assigned. Of course, a particular unit may be both assigned and attached to the same Parent Formation.
[19.14] It is possible for the same unit to be a Parent Formation and to simultaneously be, in turn, assigned and/or attached to another (higher level) Parent Formation. Note that the units attached to a particular Parent Formation may affect whether or not it can be attached in turn to another unit.
Example: If the lst Kings Royal Rifle Corps was detached from the 7th Armored Division (its assigned Parent Formation) and sent to support the 2nd New Zealand Division; the Ist KRRC, when absorbed by the 2nd NZ would become attached to one units and assigned to another.
[19.2] UNIT ASSIGNMENTS
Each Parent Formation (or potential Parent Formation) has an inherent set of limitations on the number and/or type of subsidiary units which may be assigned to it. These limitations are listed on the Formation Organization Chart (19.3). Example: An Italian armor Brigade may have assigned to it three armored battalions.
Units enter the game already assigned to a specific Parent Formation. Assignments are generally permanent, with excepetions for eliminated units for historical assignment shifts and assignment pattern shifts, and for British battalions, as detailed in the following Cases. Any new assignments or re-assignments are accomplished during the Player's Reorganization Segment and recorded on the appropriate Parent Formation's TOE Log Sheet.
[19.21] Any Parent Formation which has fewer units assigned to it than its maximum (see Case 19.3) may be assigned additional independent (non-assigned) units up to that limit (e.g., If only two armored battalions were attached to an Italian armor brigade, the Axis Player could, in his Reorganization Segment, assign any independent Italian armored battalion to that brigade). In order to be assigned to a Parent Formation, an independent unit must be currently attached to it.
[19.22] Should a unit's assigned Parent Formation be eliminated, (see Case 19.11), if that — presumably detached — unit survives, it is considered independent and eligible for re-assignment in accordance with Case 19.21 and 19.3.
[19.23] Should an assigned unit be eliminated, the assignment is considered terminated and another independent unit may be assigned to the Parent Formation in the eliminated unit's place. (i.e., eliminated units do not count towards the limitations listed in Case 19.3).
[19.24] The OA Chart (Case 4.45) contains notes concerning historical shifts in assignment relationships for several units. Players are free to either institute or ignore such assignment shifts at their option, within the restrictions of Case 19.21 (see also Case 19.25). Such re-assignments must be accomplished sometime during the month listed on the OA Chart note, or not at all.
Example: When the German 15th Panzer Division arrives it contains the 115th Panzergrenadier (motorized infantry) Regiment, albeit in a somewhat reduced state. At a later date, listed in the notes of the 15th Panzer and Sth/21st Panzer divisions, that the 115th Regiment, originally assigned to the 15th Panzer, becomes part of the 21st (nee' Sth Light) Panzer Division, taking on some additional units to flesh out its structure. If the Player wishes to switch the 115th to the 21st Panzer Division, the 115th would then be assigned to the 21st Panzer as per this case.
[19.25] As indicated on the Formation Organization Chart (19.3), the historical assignment limitations on Commonwealth armored divisions and brigades changed three times. The Commonwealth Player may, at his option, assign available independent units to such Parent Formations when these changes allow additional units to be assigned. The Commonwealth Player must "unassign" excess units whenever new, limitations require him to do so.
[19.26] A special rule applies to Commonwealth Brigades (both Infantry and Armor). Throughout the war, the Commonwealth made it a practice to shuffle individual battalions from one "assignment" to another. This was especially prevalent in the Indian units, where battalions like the 2/5 Mahratta Light Infantry appears virtually everywhere. Therefore, the Commonwealth Player is permitted to pull assigned battalions from a Brigade and replace them with others from another Brigade (or from the unassigned group). Such battalions are then considered assigned to their new Brigade. Battalions may only be reassigned or shuffled; they may not simply be "unassigned" and made independent. Example: The 2nd Armored Brigade (1st Armored Division) may pull the 10th Royal Hussars and 9th Lancers out, send them to Alexandria for refitting (with, perhaps, new tanks, etc.) and replace them with the 4th and 7th Royal Tank Regiment. The latter two units are now assigned to the 2nd Armored Brigade.
[19.27] Some units (designated with an asterisk on their counters) are assigned to Parent Formations that never made it to Africa. Except in accordance with Case 19.26, such units may not be reassigned.
[19.28] Only independent units may be assigned to a Parent Formation. No unit assigned to one Parent Formation may be assigned to another, except as noted in Case 19.26.
Remember: Assigned units take up "space" in a Parent Unit's TOE, regadless of where they are. Even if not attached, an assigned unit occupies its allotted space in the Parent Unit's TOE.
[19.3] FORMATION ORGANIZATION CHART
(see Charts and Tables)
The Formation Organization Chart lists the assignment limitations of "normal" units of divisional and brigade level. The maximum number of assigned units of each type that make up the units normal organizational structure are listed. A number of units have singular organizational structures, as noted on the OA Chart; such units are limited by those strictures, and not by any listed on the Formation Organization Chart.
[19.31] Allied Formation Organization Chart (see Charts and Tables)
[19.32] Italian Formation Organization Chart (see Charts and Tables)
[19.33] German Formation Organization Chart (see Charts and Tables)
[19.4] RESTRICTIONS ON ATTACHMENT AND DETACHMENT
Any units assigned to a particular Parent Formation may freely be attached to or detached from that Parent Formation. Most Parent Formations may have some number of additional non-assigned units of certain types, over and above their assignment limits, attached to them. These attachment limits are listed on the Maximum Attachments Chart (19.5). Non-assigned units may also be substituted for "missing" assigned units (Case 19.45).
[19.41] A unit assigned but not attached to a Parent Formation may become attached to that Parent Formation at any time so long as both units are in the same hex, at.a cost of one Capability Point each to both the subsidiary unit and the Parent Formation. The counter representing the attached unit is removed from the map. Note that moving such a unit into the hex with the Parent Formation (or vice versa) and immediately attaching it would have no effect upon the Stacking Point value of the Parent Formation (unless if it was a Shell; see Case 9.26).
[19.42] A unit not assigned to a Parent Formation in the same hex may be attached to that Parent Formation subject to the restrictions of Cases 19.4 and 19.5 (if applicable) at a cost of two Capability Points for both units during the owning Player's Reorganization Segment, only. Note that the unit would have to be moved into the hex containing the Parent Formation (or vice versa) during an earlier Movement Segment, subject to all stacking restrictions.
[19.43] A unit assigned and attached to a particular Parent Formation may be detached from that Parent Formation at any time at a cost of one Capability Point to both units.
[19.44] A unit attached but not assigned to a Parent Formation may be detached from that Parent Formation only during the owning Player's Reorganization Segment or Movement Segment at a cost of one Capability Point each to both units. However, note that units are moved individually or.as a stack, and once stopped, can be moved no further. Thus, jf a unit is detached from a Parent Formation during a Movement Segment, movement of either the detached unit or Parent Formation must cease (unless they are moved on as a stack).
[19.45] A unit(s) may be attached to a Parent Formation that has fewer units assigned to it than the maximum restrictions listed on the Formation Organization Chart (19.3) as a substitute for the "missing" (that is, not in the games, or reassigned as per Case 19.66) unit(s). Such a unit must not exceed, in its own organizational structure, the maximum limits that would apply to the missing assigned unit it is being substituted for. Example: If one infantry brigade assigned to a Commonwealth infantry division were eliminated, the Commonwealth Player could attach an independent infantry brigade to that division as a substitute. He could not, however, attach an infantry brigade to which more than three infantry battalions were assigned as a substitute, since that unit would exceed the applicable Formation Organization limits.
[19.46] A unit attached to a Parent Formation which is itself in turn attached to a larger Parent Formation is considered attached to the larger Parent Formation also, Note: This requirement may render it impossible (unless detachments are made) to attach a certain unit to a Parent Formation because other units attached to the first unit cannot be fitted into the Parent Formation's organizational structure. Exception: Units attached to a Parent Formation in turn attached to a larger Parent Formation in accordance with Case 19.45 do not count as being attached to the larger Parent Formation.
[19.47] Any units currently attached to a Parent Formation may be detached in such a way that they end up attached to one another at a cost of only the Capability Points required for detachment.
For example, the 132nd Regimente Corazzate and the Nizza Cavelleria Regiment are detached from the Ariete Division. The N.C. Rgt. may be attached to the 132nd R.C. at this point without any additional expenditures.
[19.5] MAXIMUM ATTACHMENT CHART
(see Charts and Tables)
The limits listed on this chart apply to all units of the indicated size and type, regardless of whether or not the unit's organization is "standard" (i.e., whether it appears on the Formation Organiztion Chart, 19.3) or not.
[19.6] REBUILDING DEPLETED UNITS
The method of replacing TOE Strength Points and/or Rebuilding units is covered in Replacements (Case 20.4). It should be pointed out here, however, that no unit may ever be rebuilt or augmented to the point that it exceeds its printed ID Code Maximum TOE Strength. Example: The Italian Light Tank battalions may never have more than nine TOE Strength Points of Tanks. (Whether these can be Light and/or Medium is covered in Case 19.64).
There are some cases, albeit rare, where the arriving TOE Strength is below the "paper" strength of the unit. This fact is usually listed in the TOE & Weapon System(s) section for that unit, and the Players may increase these units accordingly.
[19.61] Units that have been depleted (reduced) by combat, attrition, etc., may be augmented by Replacements (see Case 20.4). No unit may ever be increased above its stated maximum TOE Strength Level (listed in the OA Chart for that unit).
[19.62] Units that have been completely eliminated because of attrition on combat—not breakdown (i.e., no TOE Strength Points remaining) may not be rebuilt. However, HQ units that have lost all their assigned battalions may have new battalions assigned (up to the number listed on the OA Chart) as long as the HQ unit exists as a cadre.
[19.63] If a HQ unit (counter) is eliminated, it may not be rebuilt unless at least 50% of its assigned units still exist and are not attached to other units. In such case, two Infantry Replacement Points may be used to revive the HQ, Otherwise it is gone for good.
[19.64] The use of Replacement Points is covered in Case 20.4. However, the following principles apply in using Replacement Points to rebuild units:
a. Infantry Replacement Points may be used to rebuild a wide variety of Infantry-type units, as well as HQ and Engineer units;
b. Artillery units may be rebuilt with any type of artillery guns. (Commonwealth Players may want, for historical purposes to limit. their Medium Regiments to their Medium Guns and Field Regiments to their Field Guns, etc., but this is not a rule.), c. Tanks may be assigned to any Tank Battalion/ Regiment. (Historically, the Commonwealth used a system of I- or Infantry-tanks, Cruiser Tanks, and Light Tanks. Historians familiar with this might want to follow this system; it is really unimportant on an Operational Level. The Italians used a similar system that is easier to discern.)
d. Creation of Heavy Weapons Points requires the expenditure of Infantry Replacement Points and Gun Replacement Points.
[19.65] Armored Recce and Armored Car units use Recce points, usually, to rebuild. However, the Players may wish to use their Light Tanks to augment Recce units (see Case 20.6).
[19.66] In an instance where a battalion assigned to a Parent Formation has either been eliminated entirely or has, for any reason, been assigned to another Formation, the assigned "space" for that battalion may be taken by another, previously unassigned, battalion. The latter battalion is then considered assigned to the new Parent, although it was not previously so. Example: The 42nd RTR of the Ist Army Tank Brigade is destroyed completely. The Commonwealth Player may assign, say, the 7th RTR to fill its place, even though the 7th RTR would not normally be allowed to be assigned to the Ist Army Tank Brigade. (It would be allowed to "switch" under Case 19.26).
[19.67] The HQ unit for a Parent Formation is, for play purposes, its Cadre. As long as the HQ exists, that Parent Formation may be rebuilt by or Reassignments. If the HQ is eliminated, see Case 19.62 and 19.63.
[19.68] Rebuilding units takes place in the Organization Phase only; it may not take place at any other time. For every two Replacement TOE Strength Points added to a unit, that unit (and its parent, if such is the situation) uses one Capability Point. A unit may earn Disorganization Points by taking on a large number of Replacement Points in an Operations Stage. Severely depleted units a Player wishes to so refit should be first moved to rear areas.
[19.7] AXIS BATTLE GROUPS
[19.71] The Germans — and to some extent the Italians — have the ability to form Battle Groups (Kampfgruppen) out of ad hoc units or from units from other divisions and brigades. The Germans did this quite often, molding individual Battle Groups to fit an occasion. Therefore, at any time during an Organization Phase (and only then), the Axis Player may form Battle Groups with his units. All units must be in the same hex in the Organization Phase, and they must conform to Stacking Restrictions and the limits listed in the following Cases. Battle Group counters are pro- | vided to give HQ support. (These Battle Groups are given historical names, but can be used in any fashion.)
[19.72] A German Battle Group can carry a maximum of four battalion sized units of any type, but there may be no more than one tank battalion and/or two infantry battalions. Up to two additional companies may be attached over this limit.
[19.73] The Italians also formed Battle Groups, but on a limited basis. No actual counters are provided, but the Italian Player, if he wishes, may form Battle Groups using the list of Battle Groups on the Italian OA Sheet. Italian Battle Groups may have a maximum of three battalion-sized units, only two of which may be infantry and only one of which may be armor. One company-sized unit may be attached. No more than two Italian Battle Groups may be in existence at one time.
[19.8] FORMING AD HOC AXIS ANTI-TANK BATTERIES
The Axis Player may use his Anti-Tank Gun Replacement Points (his Marders will be especially useful) to form "ad hoc" units; i.e., new units not in the game. Essentially, he will be forming batteries of from 3 to 6 TOE Strength Points of any one AT gun. : .
[19.81] The Axis Player's Brigade-Level HQ units
(including Kampfgruppe) bearing an infantry-type symbol may contain up to six TOE Strength Points of anti-tank guns.
[19.82] The Axis Player may augment any Brigade-Level HQ at any point in the game with Anti-tank TOE Strength Points if, at that point in time, all of his anti-tank units on the map (which includes the Tripoli-Tunisia boxes for this purpose) are at at least 67% of their maximum permitted TOE Strength.
[19.83] The augmentation is performed by assigning anti-tank Replacement TOE Strength Points to the HQ as if the HQ is an anti-tank unit. The initial assignment must be at least three TOE Strength Points.
[19.84] The assigned Anti-Tank Replacement Points are trained at the Gun Replacement Point rate,
[19.85] An HQ that contains Anti-Tank TOE Strength Points possesses a CPA equal to that of those Anti-Tank Points.
[19.86] The Axis Player may only assign a single type of anti-tank guns to a particular HQ (if they are eliminated completely he may begin again with any type of anti-tank gun). Note that captured anti-tank guns cannot be used to augment.
[19.87] An augmented HQ retains a Stacking Point value of zero regardless of the number of AT points it currently contains.
[19.9] AUGMENTING COMMONWEALTH BATTALIONS WITH ANTI-TANK
[19.91] Starting with the 75th Game-Turn (April 1, 1942), the Commonwealth Player may increase the capabilities of certain of his infantry battalions by giving them TOE Strength Points of Anti-Tank guns.
[19.92] Only those infantry battalions possessing a CPA Rating of 10 (whether or not they were historically motorized; i.e., CPA Rating of 10+)
and Offensive/Defense Close Assault Ratings of either 1/2 or 2/2 may be so augmented.
[19.93] These infantry unit's characteristics change to now permit the unit to contain a second weapons system (i.e., Anti-Tank TOE Strength Points).
[19.94] Each historically motorized infantry battalion (CPA of 10+) may contain 2 TOE Strength Points of anti-tank guns. Each historically non-motorized infantry battalion (CPA of 10) may contain one TOE Strength Point of Anti-Tank guns.
[19.95] The Anti-Tank Points are assigned to the infantry unit as regular Gun Replacement Points. They undergo training at the Gun Replacement Point rate.
[19.96] No Anti-Tank TOE Strength Points may be so assigned if, at that point in time, any anti-tank regiment assigned to the infantry battalions parent unit(s) is not at maximum TOE Strength.
[19.97] Once the Anti-Tank Points have been absorbed by the infantry unit they possess the CPA of that infantry unit (i.e., a CPA of 10 if the infantry are walking or a CPA of 20 or 25 if the infantry are motorized).
[19.98] Anti-Tank TOE Strength Points do not affect any shell determinations of the infantry unit.
[20.0] REINFORCEMENTS, REPLACEMENTS AND COMMONWEALTH WITHDRAWALS
GENERAL RULE:
Both sides receive Reinforcements and Replacements. Reinforcements are entire units; Replacements are TOE Strength Points of particular Classes. Both Players receive Reinforcements according to the schedule listed on the Reinforcement Track. In addition, the Commonwealth Player receives Replacements according to Commonwealth Production, and the Axis Player receives Replacements more or less at his whim out of the Axis Replacement Pool.
Important: Any Replacement die rolls may be kept secret from the other Players (including other members of your own team).
CASES:
[20.1] REINFORCEMENTS
[20.11] Reinforcements are new, whole units that arrive as specified by the Reinforcement Track. Thus, in the September 3/2, Operations Stage, the Commonwealth Player receives the 6th New Zealand Brigade (and its three battalions) as well as the 6th NZ Field Artillery Regiment.
20.12] Reinforcements enter the game at the beginning of the Naval Convoy Arrival Phase of the Operations Stage. There is no Capability Point cost for debarking; arriving units may be moved in the first Operations Stage of arrival. (The arrival dates have been adjusted to account for the logistical problems of debarkation, etc.) Units do not pay a Capability Point cost for the first hex they are placed in.
[20.13] Reinforcements are treated as any other units as soon as they have arrived, and they may perform any and all game functions normally.
[20.14] Commonwealth reinforcements, unless noted below, arrive at Cairo. Layforce Commando unit (Game-Turn 19) and the Tiger Convoy (Game-Turn 32) of Tank Replacement Points (which are reinforcements) arrive in Alexandria. Returning withdrawn units arrive at Cairo or Alexandria at the Commonwealth Player's option (subject to stacking restrictions).
[20.15] All Axis reinforcements arrive in Tripoli, However, if there are no Commonwealth land combat units west of Mersa Matruh (inclusive) then the Axis Player may divert forces to Benghazi. The Axis Player may bring in one battalion-equivalent combat unit or two companyequivalent combat units and up to ten Truck (or Motorization) Points assigned to arrive with that unit (or its parent unit). The Axis Player may not divert units to Benghazi if this will exceed stacking restrictions or if Benghazi has worse than a Level three efficiency at that point in time. This use of Benghazi does affect its port capacity for that Operations Stage (see Case 55.1).
[20.2] REPLACEMENT POINTS
Replacement Points are designated by Class as follows: Infantry Points, Gun Points, Tank Points, and Recce Points. Replacement Points usually enter the game for Axis Replacement Points only — at the option of the Axis Player from the Axis Replacement Points Pool (see Case 20.6),-or — for the Commonwealth Player only — in accordance with the Commonwealth Production System (see Case 20.7). All Replacement Points, regardless of the method in which they enter the game, are covered by the same restrictions as listed in this Case.
[20.21] All Replacement Points "arrive" in the Naval Convoy Arrival Phase of an Operations Stage. Replacement Points mandated by the Reinforcement Track arrive in a particular Stage of a particular Game-Turn as designated. Replacement Points from the Axis Replacement Points Pool arrive in a particular Stage as determined by the Axis Player; however, he must plan such arrivals two full Game-Turns in advance (see Case 20.6). Replacement Points from Commonwealth Production also arrive in particular Stages as determined by the Commonwealth Player; these must be determined four Game-Turns in advance (see Case 20.7).
[20.22] Commonwealth Replacement Points may be—rarely—listed on the Reinforcement Track. They are designated by type (e.g., the Commonwealth Player will receive "27 points of Matildes," not merely "27 points of tanks").
[20.23] Replacement Points that are available in the Axis Replacement Pool are designated by type only. He is limited as to how many points of each type may be brought in during any one turn. See the Axis Replacement Pool.
[20.24] Similarly, Replacement Points available according to the Commonwealth Production System are designated by type and limited as to availability.
[20.3] REPLACEMENT POINT CONVERSION CHART
(see Charts and Tables)
[20.4] HOW REPLACEMENT POINTS ARE USED
[20.41] Trained Replacement Points may be assigned to (and absorbed by) a unit any place on the game-map (even in an Enemy Zone of Control). However, the Replacement Point and the receiving unit must be in the same hex. This means that "Mohammed usually goes to the Mountain," rather than the latter. Points must be assigned for eventual delivery to specific units immediately upon arrival. Should the designated unit be eliminated, or withdrawn, such points must be reassigned immediately.
[20.42] Counters are provided to represent the Replacement Points. Replacement Point counters have all the characteristics of an actual unit, with several major exceptions:
a. They may never voluntarily enter an Enemy Zone of Control unless the hex is occupied by a Friendly unit;
b. They may never be used in any type of combat other than defending against Close Assault, regardless of the strategic or tactical situation;
c. They all have a Basic Morale of — 3 (in their unabsorbed state);
d. They may never exceed their Capability Point Allowance (which is that of the unit they are being assigned to); if they ever exceed their CPA — for any reason — they are considered to have a Cohesion Level of — 26.
[20.43] Replacement Points (both Axis and Commonwealth) are required to undergo Training. They must train for a specific number of Operations Stages, which may include the Stage of arrival, Players should consult the rules on Training (17.3) for particulars, as the same rules that apply to Training Reinforcements apply to Replacements. Axis points train in Tripoli or any major city. Commonwealth units train in those locations listed in Case 17.32. When in doubt as to unit size, five Replacement Points equals one battalion. The schedule for Replacement Training is as follows:
| Type of Replacement Point | OpStages of Training |
|---|---|
| Gun Replacement | One (Actually, not Training; more uncrating) |
| Infantry Replacement | Three |
| Tank, AC, Recce Replacement | Six |
Note: This has nothing to do with Commonwealth training for Morale.
[20.44] In essence, within the parameters of Case 20.42, Trained Infantry Replacement Points are usually trucked (if available) to the Front Line after undergoing Training, where they are transferred to the unit of assignation. Trained Tank, Gun and Recce Replacement Points may move on their own, use Railroads (Commonwealth), etc.
[20.45] Like other normal units, Replacement Points require Stores and Fuel (if vehicles) when moving. Remember, five Replacement Points is the equivalent of a battalion for all purposes. They can be assigned ammunition, but this is pretty much a waste of supplies, given the maxims of Case 20.42.
[20.46] Replacement Points moving toward the Front for purposes of assignment are considered Truck Convoys and move only in the Truck Convoy Movement Phase.
[20.47] Players should use the Replacement Point Availability and Assignment Sheets for keeping track of what is happening with their Replacement Points.
[20.48] The cost in Capability Points to attach Replacement Points to units is listed on the Capability Point Cost Summary (6,3) Replacement Point units are considered as Assigned units for this purpose.
[20.49] Replacement Points may be absorbed only during the- Reorganization Segment. They then acquire the assigned unit's cohesion, breakdown and other levels.
[20.5] UPGRADING ARMORED CAR EFFECTIVENESS
At the beginning of the campaign, most Armored Car and Reconnaissance (Recce) units were "light" in nature, using lightly armored cars, carriers, and AP trucks mostly equipped with anti-personnel weapons. As the war progressed, this equipment was often upgraded with the addition of light tanks and better-armed cars and carriers. This rule reflects that increase in effectiveness.
[20.51] All armored reconnaissance and armored car (i.e., Italian ID Code "ww," German ID Code "go"? and Commonwealth ID Code "hh" thru "tt?? inclusive) units that arrive/deploy with an Anti-armor Rating of zero (even those also possessing an Offensive Close Assault Rating of "*3" — see Case 20.54) may be increased in effectiveness with the following exception. None of the Commonwealth Player's Recce units assigned to Infantry Divisions (for this purpose, the 18th Brigade of the 7th Australian Division is. considered a division) may be upgraded (i.e., the 51st Recce Regiment of the 5ist Highland division could not be upgraded).
[20.52] To upgrade an Armored Recce or A/C unit, the Player simply adds one TOE Strength Point of certain types of tanks (as listed in 20.53) to the Recce or A/C units, remembering that the unit may never exceed its stated TOE maximum. Thus, he may add the TOE to replace a lost TOE Point, or he may simply add the Tank TOE in and not increase the TOE Strength Points, if the Recce or A/C unit is already at maximum level.
[20.53] Commonwealth Players may use Stuarts to upgrade their Recce/AC units. German units may be upgraded by adding Pz IJ TOE points. Italian units may be upgraded by adding M/11 or L6/40 Tank Points, or armored recce/armored car Replacement Points.
[20.54] An "upgraded" Recce or A/C unit's TOE Strength Point has an Anti-Armor Rating of 1, instead of zero, and an Offensive Close Assault Rating of 3, instead of 2.
[20.55] No units may be upgraded untill/39, at the earliest.
[20.6] AXIS PLANNED REPLACEMENTS
Italian and German Replacement Points enter the game from the Axis Replacement Pool (20.66) as a result of direct planning by the Axis Player.
[20.61] In the Axis Replacement Pool, the Axis Player will find the maximum number of Replacemént Points for each type of point for the entire Campaign Game. (Each Scenario lists the maximum available for that Scenario, if any). The Axis Player may never use more Replacement Points than are provided. This is further limited by the maximum points available per turn, per type.
[20.62] The Axis Player may bring in any number of Replacement Points of any and all Classes during any one OpStage (see Case 20.23) limited of course by the pool restrictions. However, each Replacement Point is counted against the Shipping Tonnage allowance for that Game-Turn (see Case 51.5). The equivalent tonnage of each Point is given in the Pool Table. Thus, if the Axis Player wishes to bring in 10 Italian Infantry Replacement Points, he would need 350 Tons of Shipping availability.
[20.63] All Axis Replacement Points coming from the Axis Replacement Pool must be Planned for at least two turns in advance. In other words, Axis Planned Replacements for July, 1941 must be determined in the Naval Convoy Arrival Phase of the 1/I1IGame-Turn of June, 1941. Replacement planned in June II] may arrive in any OP Stage Naval Convoy Arrival Phase of July I.
[20.64] Replacement Points have priority in Shipping Space over any type of supplies. The Axis Logistics Commander thus has to keep a close watch (and tight rein) on what he is shipping at what time, as he rarely knows that far in advance exactly how much shipping he will have available (see Section 51.0). Remember, Axis Shipping is subject to Commonwealth air Raid, so keep an eye on Malta and the location of Commonwealth airfields.
[20.65] Replacement Points may not be absorbed by units that have no place for them, so remember to space your Replacements carefully.
[20.66] The Axis Replacement Pool Table (see Charts and Tables)
[20.67] Axis Replacement Point Type Limitations Chart (see Charts and Tables)
[20.7] COMMONWEALTH PRODUCTION
[20.71] Most Commonwealth units and some of their Replacements arrive via the Reinforcement Track. However, most -Replacements — mostly "drafts"? and transport — arrive somewhat randomly as mandated by the Commonwealth Production Tables (20.78).
[20.72] The Commonwealth Player must plan two months in advance (unless specified in a given Scenario) for the arrival of Replacement Points via Production. Thus, for Points required for August, 1942, the Commonwealth Player must plan — using the Production Systems — in the first Naval Convoy Schedule Phase of July, 1942. However, the Commonwealth Player always uses the Production Table for the month (one months in the future) in which he wishes his units to arrive — not the month in which he is consulting it.
[20.73] The Commonwealth Production System functions like the Axis Pools except for Infantry and Truck Points. The Player uses a random dice roll to determine what Infantry and Truck Points he receives per turn, depending upon the date of arrival.
[20.74] Replacement Points scheduled for any given turn must be divided among the OpStages as evenly as possible. This refers to the total Points for all types. Thus the Commonwealth Player may bring 10 Medium Trucks in one OpStage and 10 Infantry Points in the next.
[20.75] Replacement Points listed in the Reinforcement Schedule arrive in addition to any Production. The Commonwealth Player has no Shipping Problems; his Replacement Points simply arrive.
[20.76] All Planned Replacements arrive in any hex in Cairo or Alexandria. They, like other Replacements, must undergo Training (see Case 20.43).
[20.77] The Commonwealth Player may "upgrade"? his Infantry units in much the same fashion as his Recce/AC units. This applies only to infantry units with a 1/2 (Off/Def) Close Assault Rating. The Commonwealth Player simply uses one Infantry Replacement Point for each TOE Strength Point in the unit he wishes to upgrade. Furthermore, the Commonwealth Player must upgrade a// TOE Points in that unit at the same time. The Replacement Point used is absorbed to increase the Assault Rating to 2/2; it does not increase the TOE Strength itself. No upgrading may take place before the July 1/1, 1942 Game-Turn, which means they may be "planned" in June, 1942. Infantry Replacement Points scheduled for upgrading need not be Trained. Once upgraded additional replacements assigned to that unit only require 1 Infantry Replacement Point per TOE Point, not 2 (1&1) Infantry Replacement Points.
[20.78] Commonwealth Production System (see Charts and Tables)
[20.8] COMMONWEALTH MANDATORY WITHDRAWALS
During the Desert Campaign, Commonwealth units were often withdrawn and sent elsewhere (Crete, Greece, Syria, Iraq, Cyprus, Sudan, etc.). This is reflected in the Commonwealth Reinforcement Schedule, which tells the Commonwealth Player if, when, and how many units must be removed from the game.
[20.81] Withdrawals are listed in the Reinforcement Schedule. They are listed as either actual units or as types of units (e.g., " Withdraw any two Armor Brigades").
[20.82]. When a Withdrawal is listed by type, the unit chosen for Withdrawal must be at 75% maximum TOE Strength (at least), or, if no units are up to that level, the highest TOE Strength-level unit of its type available.
[20.83] Units to be Withdrawn must be moved to Cairo or Alexandria on or before the Game-Turn or Stage they are to be withdrawn. If they are not present or at required TOE Strength (20.75) by that time, they are eliminated. (This is a play mechanism to forestall procrastination.) Units so eliminated may not return (as many Withdrawls do, later in the game).
[20.84] Once the units have reached Cairo or Alexandria, they are simply removed from play.
[20.85] If a unit scheduled for Mandatory Withdrawal is less than 75% TOE Strength, it must be brought up to that level by Replacement Points before Withdrawal Date: (see Case 20.82) or an equivalent substitute unit of similar type that is at least at 75% TOE strength.
[20.9] VOLUNTARY COMMONWEALTH WITHDRAWALS
Throughout the Campaign, the Commonwealth was under great military and political pressure to support a wide variety of activities in such places as Cyprus, Sudan, Iraq, etc. Case 20.8 discusses large mandatory troop withdrawals. In addition, the Commonwealth, during lulls in action, would often send several ad hoc battalions to duty elsewhere; these units often shuffled back and forth in almost random fashion, dependent on the situation. It would be folly to list all such movements and even sillier to require a Player to follow them. (We are not too happy with Mandatory Withdrawals, but such unit absences on a large scale must be accounted for.) The Commonwealth Player therefore has the option to withdraw small forces at any time, thereby gaining Victory Points. Victory Points are given because these forces would aid campaigns elsewhere, put additional pressure on the enemy, etc. Returning voluntarily withdrawn units penalizes the Commonwealth Player. See the Campaign Game Victory Conditions,
[21.0] BREAKDOWN
COMMENTARY:
The great problem with the desert was not really the heat, which was bad enough. The major problem was the incredible wear and tear that vehicles incurred. The desert got into everything, and this deadly combination of heat, sand, and rocky ground wreaked havoc on all moving parts. Tanks used to going 1000 miles without an overhaul would collapse after one day's hard travel. The rules for Breakdown and Repair attempt to simulate this facet of the Desert Campaign. Like many other rules in CNA, Breakdown requires working with a lot of numbers. The rule itself is simple; it is the record-keeping that will tax the imagination (and patience). Sheets for Breakdown and Repairs are provided.
GENERAL RULE:
Essentially, all vehicles, except motorcycles and those vehicles assigned (abstractly) to gun units (Artillery, Anti-Tank, AA/Flak, etc.) are subject to Breakdown. Whether a given unit will break down depends on the distance traveled and the type of terrain encountered in a given Operations Stage. Furthermore, certain types of vehicles break down faster than others, and this is taken into account. In general, each type of terrain has a Breakdown Factor, and for each hex entered during movement the moving vehicle accumulates Breakdown Points. When the unit ceases movement, the Player totals the Breakdown Points accumulated, consults the Breakdown Table, adjusts the Breakdown Point Column for vehicle type, and rolls two dice, adding them together. The result is the percentage of vehicles (of a given type) in that unit that have Broken down. Broken down vehicles may not move, defend or attack, They are represented by Broken down Unit Counters. Broken down units may be captured (by the Enemy) or retrieved (by the owning Player). Either way, Broken down vehicles may be Towed back to a Repair Facility for Maintenance, or they may be Repaired in the Field (see Section 22.0 for Repairs).
CASES:
[21.1] WHICH UNITS BREAKDOWN
[21.11] Only the following vehicles are subject to Breakdown: Truck Points, tank, armored reconnaissance/armored car and self-propelled gun TOE Strength Points whether they comprise part of a unit or are Replacement Points.
[21.12] Each specific type of TOE Strength Point has its own Breakdown Adjustment Rating (BAR). BAR's are listed below and in the various Tank & Gun Characteristics Charts. For example, an Italian M 13/40 has a BAR of 2R while the Commonwealth Sherman has a BAR of zero.
[21.13] The Breakdown Adjustment Rating is used to adjust the Breakdown Points column to the left or right when rolling to determine Breakdown.
[21.14] Breakdown Adjustment Summary
| Type of Point | Breakdown Adjustment Rating |
|---|---|
| All Trucks | 2 Left |
| All Armored Car / ArmRecce | 1 Left |
| SP Guns | 1 Left, 2 Right* |
| Tanks | 1 Left, 2 Right* |
*Listed individually on the appropriate Tank & Gun Characteristics Chart.
[21.15] Vehicles are never required to check for Breakdown when moving to, from or amongst the Axis off-map Tripoli/Tunisia boxes.
[21.2] WHEN BREAKDOWN OCCURS
[21.21] Each hex (or rather the terrain in the hex) possesses a Breakdown Point Value, which is listed on the Terrain Effects Chart (8.37). In addition, certain types of hexsides (e.g., Wadis) also have a Breakdown Point Value. The Breakdown Point Value is the number of Breakdown Points a motorized unit or vehicle accumulates when moving into that type of terrain/hex and/or through that type of hexside. Breakdown Point Values for given terrain types may be modified by Weather (see Section 29.0).
[21.22] Combat does not cause Breakdown, although any movement (Retreat, Reaction, etc.) does accumulate Breakdown Points.
[21.23] As a vehicle or motorized unit (see Case 21.11) moves, it accumulates Breakdown Points. All of the vehicles/motorized units in a stack or Parent formation accumulate the Breakdown Points for given terrain. Example: (see bottom of this page)
[21.24] Whenever a vehicular or motorized unit ceases movement — whether it has finished its Movement for that Operations Stage or will be moving again under the Continual Movement Rule — the owning Player must check for possible Breakdown.
[21.25] All Breakdown Points garnered by a unit during a given Operations Stage are accumulated until the end of that Stage. Simply because a Player checks for Breakdown for a unit does not mean those Breakdown Points accumulated up to that point are discharged; they continue to accumulate up until the end of the Stage (see Case 21.26). In other words, Breakdown Points are cumulative within an Operations Stage — and they are cumulative and applicable during both Players' portions of the Operations Stage.
[21.26] If a unit has had a Breakdown check during an Operations Stage (regardless of whether or not it actually suffered any Breakdown), it is required to check for Breakdown again only if it has accumulated enough Breakdown Points to carry over into the next highest Breakdown Point Column on the Breakdown Table (21.38). Example: The LII (M) Battalion (in Case 21.23) had accumulated 15 Breakdown Points the first time it moved. During the same Operations Stage it moves again, but it moves only one hex, accumulating 2 more Breakdown Points for a total of 17. As it is still in the same column (21-30; because M/13's adjust +1 columns higher because of their Breakdown Adjustment Rating), it need not check for Breakdown when it stops. However, in the same Operations Stage, but in the opposing Player's movement, the LII retreats, accumulating 10 more Breakdown Points, for a total of 27. As it is now in a new (higher) column, the unit must check again for Breakdown. A unit does not check for each column; it checks only when it stops, if it is in a higher column. Note: the Breakdown Rate is virtually geometrically progressive — the further you move the worse it gets. The Player is penalized for moving, stopping, moving, stopping, etc.
[21.27] A unit does not check for Breakdown until it has accumulated more than threee Breakdown Points, regardless of that unit's Breakdown Adjustment Rating.
[21.28] Breakdown is determined separately for each type of unit: Trucks, Tanks (including S.P. Guns), or Armored Recce and A/C vehicles. Furthermore, if there are tanks and/or Guns within a stack/Parent formation with differing Breakdown Adjustment Ratings the Player checks separately for each group of tanks and Guns with a different Rating. A different Breakdown diceroll is used for each separate type.
(Illustration: a map diagram showing the movement of the Italian LII (M) Tank Battalion.)
In the above example, the Italian LII (M) Tank Battalion — containing, for example's sake, all M/13's — has accumulated 15 Breakdown Points for the illustrated movement: ½ Breakdown Point for each of the two Road hexes (it was using Road Movement), 8 for entering the Rough terrain hex, 2 for crossing the Ridge hexside and 4 for entering the Clear Terrain hex.
[21.29] Important: In addition to Case 21.28, Players must check separately for each type of unit in a stack that is in a different Breakdown Point column. Example: A Recce unit moves and accumulates 15 Breakdown Points, entering.a hex with a second Recce unit (which has not moved), Recce #1 continues to move along with Recce #2, both units picking up 23 more Breakdown Points. Recce #1 has accumulated 38 Breakdown Points, Recce #2, 23. Recce #1 and Recce #2 determine their Breakdown separately, because they are using different Breakdown Point columns.
[21.3] HOW BREAKDOWN / ISDETERMINED
[21.31] To determine Breakdown, the Breakdown Table (21.38) is used. Each column on the Breakdown Table corresponds to a Range of Breakdown Points accumulated. Thus 31-40 means anywhere from 31 to 40 Breakdown Points accumulated at the time of Breakdown check (all fractions are rounded up: 20.5 = 21). The Breakdown Table uses two dice, read sequentially. ;
[21.32] After the Player checking for Breakdown notes the Breakdown Points accumulated for a given unit, he takes into effect any Breakdown Adjustment Rating (21.13) as well as any adjustments to Breakdown Rates because of Weather (see Case 21.37). These two are cumulative: a 2 column left Breakdown Adjustment Rating plus a_ one-column-higher shift for Weather makes for a final adjustment of one column lower.
[21.33] Units accumulating more than 71 Breakdown Points use the 71+ column. You cannot adjust higher than that column, and that column is considered as one column for purposes of adjustment. Units that have their column adjusted lower than the 4-10 column do not suffer Breakdown. Remember the adjustments are in columns, not in points accumulated.
[21.34] Having determined the Breakdown Column, the Player throws two dice, reading sequentially, and cross-referencing that diceroll with the Breakdown Column. The result is the percentage of TOE Strength Points Broken down within the units for which the Player is rolling (remember Cases 21.28 and 21.29). Each Truck Point is equivalent to a TOE Strength Point for this purpose. (Remember that it is the TOE Strength Points that break down, not the units.) Example: A stack with 30 Truck Points and 20 TOE Strength Points of Crusader I's accumulates 35 Breakdown Points and stops. The Player checks for Breakdown. The Trucks have a Breakdown Adjustment
Rating of 2L, and the Weather is Hot, so the 31-40 column is adjusted one lower (—2 and +1 = —1). The Player rolls a 33, consults the 21-30 column and sees that 10% of his Truck Points (or 3 Truck Points) have Broken down. He then checks for his Crusaders: they have a Breakdown Adjustment Rating of 1R, plus 1 more for the Hot Weather, adjusting the 31-40 column up to the 51-60 column. The Player rolls a 61, and 33% (or 1/3) of his Crusader I's — or 7 TOE Strength Points — have Broken down.
[21.35] All Breakdown fractions are rounded up, (as the 6.7 Tank TOE Strength Points in Case 21.34 became 7). Exception: If the Player is checking for a unit that has only one TOE Strength Point, all percentage results of 10% are ignored.
[21.36] All breakdowns must be distributed as evenly as possible amongst types of vehicles as well as different units. Thus, if two German Panzer battalions, each with different types of tanks (all German tanks have a Breakdown Adjustment Rating of zero) suffers 25% Breakdown, the Breakdown must be distributed proportionally as to all types of tanks and between the different Panzer battalions. °
[21.37] Weather affects the Breakdown Rates/Columns as follows (consult also Section 29.0):
a. Normal Weather: No Effect.
b. Hot Weather: For each Breakdown check, adjust one column higher (1R).
c. Rainstorms: All Road Breakdown Point Values are treated as Track Breakdown Point Values.
d. Sandstorms: If at least 50% of a unit's Movement (calculated in Capability Points expended) in a particular Movement Phases, Retreat, Reaction, etc., is on a game-map with Sandstorms adjust the Breakdown column one higher (1R).
21.38] Breakdown Table
(see Charts and Tables)
[21.4] BROKEN DOWN VEHICLES
[21.41] Breakdown occurs (for the sake of simplicity) in the hex in which the units checking for Breakdown have ceased movement. However, if a unit checking for Breakdown started its movement within two hexes (with no Friendly units, Friendly ZOC's; or impassable intervening terrain) of an Enemy combat unit larger than a single battalion, then at least 50% of all TOE Strength Points that Break down must be placed in the hex in which that unit began movement.
[21.42] When Breakdown occurs, the Player places a Broken Down Vehicle marker in the hex in which the Breakdown has occurred and records the necessary information on his Broken Down Vehicles Sheet. Broken Down Vehicle Markers are numbered so that the Player may keep track of what is represented by each different marker.
[21.43] When a Truck Breaks down, its cargo stays with it, unless there are sufficient empty Trucks to pick up the slack. Players will note that a Motorized Infantry battalion that loses even one Truck Point that it cannot replace will become "un-motorized" because of the rule that the entire battalion (all TOE Strength Points) must be in trucks for the unit to be considered motorized.
[21.44] Broken down vehicles have no Capability Point Allowance, nor may they participate in combat of any type. Broken down vehicles may be captured (by the Enemy) — see Case 21.5 — or retrieved by the owning Player (see Towing, Case 21.6).
[21.45] Supplies on broken down Trucks may be transferred to working Trucks, in the same hex at the time of Breakdown at a cost of 2 Capability Points (the same as to load/unload). Infantry TOE Strength Points in broken down trucks may "dismount" (1 CP) from the trucks and start walking. Any Capability Points they have accumulated while in a Truck count against their non-motorized Allowance of 10 (or 8), with the exception that if they have used more than 10 (or 8) while motorized they are considered to have used only that 10 (or 8) — not more. If the men and/or supplies are to be picked up by Truck Points that were not attached to the unit which broke down at the time of Breakdown, there is a Capability Point cost for Loading.
[21.5] CAPTURING BROKEN DOWN VEHICLES
[21.51] Broken down vehicles may be captured by the Enemy. Players should differentiate between the capture of Broken down vehicles and (1) the capture of Destroyed Tanks (see Case 14.5); as well as (2) the Capture of abandoned vehicles.
[21.52] At any time during movement, if a Friendly combat unit of battalion-size or larger moves adjacent to a Broken Down Vehicle marker that vehicle (or vehicles) is captured.
[21.53] Broken down vehicles that are either stacked with Friendly combat units, HQs, or Engineers, or in a Friendly-controlled hex may not be Captured.
[21.54] The capturing unit and the broken down vehicle must be adjacent through passable terrain; i.e., a German Panzer battalion at the bottom of an Escarpment could not capture Enemy Broken down tanks at the top of the escarpment because the German tanks cannot move across and up an escarpment hexside.
[21.55] Captured Broken down vehicles may be placed (towed) a maximum of three hexes in any direction at the instant of capture. The path of this placement, which costs no Capability Points to any unit involved, may not be traced through Enemy units, Enemy Zones of Control or nonpassable terrain. (Units being towed are considered vehicles). Note: The capturing unit does not expend any Capability Points for this activity, and may indeed continue to be moved.
[21.6] TOWING
[21.61] All vehicles scheduled for repairs at a Repair Facility — including Broken down vehicles and destroyed tanks, whether retreived by the Friendly Player or captured by the Enemy Player — may be towed to a Repair Facility in order to undergo repairs.
[21.62] Only vehicles not undergoing Field Repair (or any other type of repair) may be towed. All towing occurs in the Repair Stage, except for instances such as Case 21.55.
[21.63] There are no towing vehicles (however, see 22.6 and 22.7). Rather, each Broken Down Vehicle marker or Destroyed Tank marker may move 10 Capability Points per Repair Phase. They may move only in the Repair Phase, and they may not React or Retreat Before Combat, etc. The marker is towed as though it is a Medium Truck.
[21.64] No vehicle may ever be towed if it is in an Enemy-controlled hex with the exception of towing at the instant of capture (see Cases 21.55 and 14,53). This restriction applies at all times during the Repair Phase. Friendly units negate Enemy Zones of Control.
[21.65] Towing incurs no costs for Fuel, Stores or Water. Towed vehicles do not undergo Breakdown.
[21.66] A Broken down vehicle that unsuccessfully undergoes Field Repairs may not be Towed in that Repair Phase.
[21.67] Broken down vehicles and destroyed tanks must be towed towards the nearest Temporary or Major Repair Facility, if they are being towed.
[22.0] REPAIR
GENERAL RULE:
Broken down vehicles and destroyed tanks may be Repaired and returned to action. Repairs may be undertaken in the field or at Temporary or Major Repair Facilities. Vehicle repair expends supplies.
PROCEDURE:
Vehicles may undergo Repair in the Repair Phase of the Operations Stage. The Phasing Player rolls one die for each type of vehicle he wishes to Repair and checks the variety of Repair Schedules, dependent upon the type of unit, the type of Repair (Breakdown or Destroyed Tanks) and the type of Facility. The dieroll results in the number of TOE Strength Points repaired (Field Repairs) or a percentage of the units which are successfully repaired (Facility Repairs). As Repairs are attempted, supplies are expended, whether the repairs are successful or not. Repaired vehicles are returned to play in the form of Truck Points or Replacement Points — for Tanks and Recce units — (see Case 20.2).
CASES:
[22.1] WHICH VEHICLES MAY BE REPAIRED
[22.11] A Player may attempt to repair all Broken down vehicles as well as any tanks destroyed in combat, whether they are his nationality or not. The only requirement is that he control the vehicles in question.
[22.12] All repairs are undertaken in the Repair Phase of each Operations Stage. Only the Phasing Player undertakes repairs.
[22.13] Repairs may not take place under the following circumstances:
a. If the vehicles to be Repaired are in an Enemy-controlled hex, regardless of the presence of Friendly units in the hex. The only exception to this is if the vehicles are in a Major Repair Facility, in which case the presence of an Enemy Zone of Control has no effect; or :
b. If there are no supplies available for Repairs (see Cases 22.2 and 22.3); or c. The vehicles have been towed during the Repair Phase; or d. The Weather is Rainstorm or Sandstorm for that hex. This does not apply to Major Repair Facilities.
[22.14] The Commonwealth Player may repair all his vehicles together (within the further restrictions below). However, the Axis Player must repair German vehicles separately from Italian vehicles. Captured vehicles are also repaired separately.
[22.2] FIELD REPAIRS
[22.21] Players may attempt to repair Broken down vehicles in the field. Destroyed tanks may not be repaired in the field; they must be towed to a Facility (exceptions: see Cases 22.6 and 22.7).
[22.22] Field Repairs may take place in any hex in which there is a Broken down vehicle stacked with a Friendly unit of any type, even a Squadron Ground Support Unit (see Case 22.13a). Field Repairs may not be made if the vehicle in question has been towed in that Repair Phase (see also Case 22.6).
[22.23] To repair trucks in the field, the Player rolls one die for Broken down trucks in the hex in question. If he rolls a 2 he may repair one Light or one Medium Truck Point. If he rolls a 1 he may repair two Light or two Medium Trucks (or any combination of Light and Medium equal to two) or one Heavy Truck. Field repair of Trucks requires no expenditure of supplies.
[22.24] To field repair armored cars and/or Recce TOE Strength Points, the Player rolls one die for all the A/C's and Recce points in the hex. If he rolls a i he may repair one such TOE Strength Point. No supply expenditure is required for field repair of Armored Recce or Armored car points.
[22.25] To field repair tanks or self-propelled artillery the Player consults the Broken Down Vehicle Repair Table (22.8) under the column for "Field Repair." He throws one die for each type of tank undergoing repairs. Thus, it the German Player has PzII's and PzIV Specials in the same hex, he rolls once for the PzII's and once for the PzIV Specials. The result is the percentage of tanks of that type in that hex that have been repaired. All fractions are rounded up, unless there is only one TOE point undergoing repair. In such case the Player ignores the 10% result.
[22.26] For each tank TOE Strength Point to undergo field repairs, the Player must have present in the hex and expend before rolling for repairs one Fuel Point. He may attempt to repair only those Tank TOE Strength Points he has expended Fuel for.
[22.27] Weather affects Field Repairs; see Case 22.13d.
[22.28] Players will note that field repairs are a risky proposition.
[22.3] FACILITY REPAIRS
[22.31] There are two types of Repair Facilities: Temporary Facilities and Major Facilities. Temporary Facilities may be constructed by the Players (see Case 24.8), and those in existence at the start of a scenario are designated in that scenario. Major Repair Facilities are found in Tripoli (the Tripoli Box), Tobruk (for whoever controls it), Alexandria and Cairo (all hexes). The effectiveness of Repair facilities may be reduced or neutralized by bombing (see Cases 22.35 and 39.37) and Artillery Barrage.
[22.32] If a Broken down Vehicle or Destroyed Tank beings a Maintenance Segment in a hex with a Repair Facility and that vehicle has not been Towed during that Operations Stage such vehicle(s) may undergo Repairs.
[22.33] Players Repair by type of vehicle: Truck Points, Recce/AC Points, Brokendown Tanks and Guns by Type, and/or Destroyed Tanks by Type.
[22.34] For each type of Brokendown vehicle the Player rolls one die and consults the Broken Down Vehicle Repair Table (22.8) under the correct column (Temporary or Major Facility). The dieroll may be modified by the effects of bombing on the Fortification Level of the city (see Case 22.35). The result of the dieroll is the percentage of that type of vehicle that may be Repaired (see Case 22.25 for details). See Case 22.4 for Destroyed Tanks., a. If the Repair Facility is in a Major City and the Enemy Player succeeds in reducing the Fortification Level of that City by one (see Air Bombardment Table) add one to the dieroll. If the level is reduced by two or three add two to the dieroll (whether reduced by Air Bombardment and/or Barrage).
b. If the Repair Facility is not in a Major City and the Enemy Player delivers enough Air Bombs or Artillery Barrage that, when/if using Air Bombardment Table, to reduce a Fortification one Level, that Repair Facility is neutralized for that OpStage. It may not repair any vehicles.
[22.35] For each Truck Point, Gun or Tank TOE Strength Point undergoing repair the Player must have present in that hex and expend (before rolling for Repairs) one Store Point:and one Fuel Point. He may attempt to repair only those points he has expended supplies for.
[22.36] Temporary Repair Facilities may be affected by Weather (see Case 22.13d). Major Facilities are never affected by Weather.
[22.37] If a Temporary Repair Facility is in the ZOC of an Enemy unit it may not be used for Repairs unless it is in a Major City. Major Repair Facilities may be used when in Enemy ZOC's.
[22.38] See Case 24.8 for how to construct a Temporary Facility.
[22.4] REPAIRING DESTROYED TANKS
Destroyed tanks — represented by Destroyed Tank markers — may be repaired and put back into service. Players may repair any destroyed tanks — theirs or the other player's — that they can get to a Repair Facility. See Case 14.5.
[22.41] Destroyed tanks may be repaired only in Repair Facilities. Destroyed tanks may not be repaired in the field. However, see Cases 22.6 and 22.7.
[22.42] For each and every destroyed tank TOE Strength Point a Player wishes to attempt to repair, he must expend two Stores and two Fuel Points (Logistics Game only). These supplies must be present in the hex and all such supplies must be expended before any repair attempts are resolved. le., before rolling the die for any repair attempts, the Player must decide how many attempts he will make and "pre-pay" for them. Supplies must be expended for all attempts regardless of whether they are successful or not. (Note that this is not the case with repairing aircraft.)
[22.43] In order to attempt to repair a Tank TOE Strength Point, the owning Player rolls one die and consults the Destroyed Tank Repair Table (see Case 22.44). The die must be rolled separately for each such tank TOE Strength Point. If the attempt is successful, the TOE Strength Point is considered repaired; if unsuccessful, it is either considered permanently eliminated ("junked") or nothing happens, in which case another repair attempt may be made.
[22.44] Destroyed Tank Repair Table (see Charts and Tables)
[22.5] REPAIRED VEHICLES
Repaired vehicles are treated as Replacement Points for that type of unit. See Case 20.2. They must have fuel to move again, and they follow all the rules laid down for Replacement Points, except that they do not have to undergo Training.
[22.6] THE DESERT TANK DELIVERY ORGANIZATION
The Commonwealth had special Tank Delivery Squadrons which were used to speed up the recovery, repair and training of Tank Units. In addition, they held any Reserves available.
[22.61] The Commonwealth Player receives, over the course of the game, three Tank Delivery Squadrons, which comprise the Desert Tank Delivery Organization (a name, not a HQ unit).
[22.62] Each Tank Delivery Squadron counter isa sort of "advanced" Field Repair Facility. If-a Brokendown Tank is in the same hex as a Tank Delivery Squadron the Commonwealth Player may subtract one from his dieroll for Field Repair (22.2). For Destroyed Commonwealth Tanks, TDS's repair on a die roll of "1". They do not "junk" and they may not repair Enemy tanks.
[22.63] Each Tank Delivery Squadron has no combat ratings of any type (see Case 22.64) and has no Stacking Points. They have a CPA of 25 as vehicles but may never voluntarily exceed that CPA or move into an Enemy Zone of Control. If alone in a hex and an Enemy combat unit places the TDS in its ZOC the TDS is eliminated. An eliminated TDS may be returned to play eight Game-Turns after its elimination.
[22.64] Each TDS may hold up to three TOE Strength Points of Tanks as Reserves and still maintain a Stacking Point value of "0". These Reserve TOE Tank Points are treated the same as any Tank Replacement Points.
[22.65] In addition to the above capabilities, DTS's may Tow Brokendown or Destroyed Tanks back to a Facility at a movement rate of 20 CP's'
(as opposed to the normal 10 for towing). DTS's may tow up to three TOB's of tanks (in addition to any Reserves); it still has a Stacking Point Value of "0". DTS's may not attempt Field Repair in a turn in which they tow.
[22.66] TDS's that have, for any reason, exceeded their CPA in a given OpStage may not attempt repairs in the ensuing OpStage. They may still tow.
[22.7] GERMAN MOBILE TANK REPAIR SQUAD
The German Mobile Tank Repair Squad is treated exactly the same as the Commonwealth Desert Tank Delivery Squadrpons, with the exception that they may repair only German Tanks (not Italian or captured Commonwealth). There is one German Mobile Tank Repair Squad counter.
[22.8] BROKEN DOWN VEHICLE REPAIR TABLE
(see Charts and Tables)
[23.0] ENGINEERS
GENERAL RULE:
In CNA Engineer units are used to aid in construction of a variety of items, as well as helping to repair facilities that have been destroyed. They are also useful in laying and removing minefields. Realistically, engineers had a great deal more usage than we have given them in this simulation. However, we have abstracted a goodly number of those uses, as the "thesis" of the simulation does not lie in the direction of Engineer capability. There are three types of Engineer units: Engineer Battalions, Engineer companies, and Headquarters Units with Engineer capability.
CASES:
[23.1] ENGINEER UNITS
[23.11] Engineer counters have no real combat value, nor do they exert Zones of Control. They are not combat units in any way, shape, or form. Engineer units may never enter Enemy-controlled hexes voluntarily, and they may use their parenthesized strength only if they are stacked with a Friendly combat unit.
[23.12] Engineer units may be replaced even if eliminated. Engineer units are rebuilt according to the schedule in Case 20.3.
[23.13] The Commonwealth has two units of the New Zealand RR Construction Battalion. These are used solely for the construction and repair of Railroads. The 1S.A. Road Construction unit is used solely for Road work.
[23.14] Headquarters units with a letter E next to their Stacking Points have Engineering capability (see Section 24.0) but otherwise they are treated like any other HQ unit.
[23.2] USES OF ENGINEERS
[23.21] The cost for a unit that is stacked with any Engineer unit (or HQ unit with Engineering capability) to enter an Enemy Minefield is reduced to six CP's for Motorized units and three CP's for non-motorized units (see Terrain Effects Chart, Case 8.37).
[23.22] If an. Engineer unit or a HQ with Engineer capability remains in an Enemy Minefield hex for an entire Operations Stage without expending any CP's, that Minefield is removed at the end of the Operations Stage.
[23.23] Engineer units and HQ's with Engineer capability may help to build fortifications, rebuild fortifications and bombed roads, build, rebuild and dismantle Temporary Repair Facilities, and build and rebuild Railroads and Air Facilities (see Section 24.0).
[23.24] If an unpinned Engineer Battalion or HQs with Engineer capability is attached to units mounting a Close Assault against units in a fortified hex (not a Major City hex), the Assault Differential column may be adjusted one in favor of the assaulting units.
[23.25] In addition to the above, Engineers and HQ's with Engineer capability have a variety of minor capabilities spread throughout the rules. Moreover, most of the above rules are covered in other Sections (e.g., Minefields).
[23.26] Engineer units may not build or destroy 'bridges' (i.e., River/wadi crossings) nor affect escarpments.
[24.0] CONSTRUCTION
GENERAL RULE:
Fortifications, minefields, air facilities, repair facilities, roads, railroads and supply dumps all come into existence (for the most part) through construction. Construction entails the use of manpower under the leadership of Engineers, along with the expenditure of time and supplies. Construction occurs in the Construction Segment of the Organization Phase (within the Operations Stage), and it may be affected by weather. Units involved in construction may not expend any Capability Points during an Operations Stage; otherwise that construction is halted.
CASES:
[24.1] HOW CONSTRUCTION WORKS
[24.11] All construction is initiated and undertaken in the Construction Segment of the Organization Phase within each Operations Stage. Construction is always completed at the beginning of the Construction Segment of a succeeding Operations Stage, depending on how long the construction takes. The number of Operations Stages required to complete construction are listed on the Construction Chart (24.17). These Operations Stages include the Operations Stage in which construction is started.
[24.12] If units involved in construction expend any Capability Points during the Operations Stage construction is halted and that Operations Stage does not count towards Construction. Units involved in construction do not affect Road/Track Stacking Limits.
[24.13] In order to complete construction of a given item the Player must have the necessary supplies on hand in the hex and actually expend them (listed on the Construction Table and described in the following Cases). Such supplies must begin the Construction Segment in the given hex; they are expended during the Construction Segment (even if the units involved in construction are later forced to move or fight).
[24.14] In addition to supplies expended for construction, units involved in construction expend all normal supplies as required (Stores, Fuel, etc.)
[24.15] No more than one project may be under construction by a given unit at any one time, and units involved in construction are subject to all stacking rules.
[24.16] A unit may always voluntarily cease construction without any penalty other than that construction is halted.
[24.17] Construction Chart (see Charts and Tables)
[24.18] Demolition Chart (see Charts and Tables)
[24.2] ADVERSE EFFECTS ON CONSTRUCTION
[24.21] During Hot Weather each construction site requires the expenditure of 10 Water Points in addition to any other requirements. ~
[24.22] No construction may occur in a hex affected by a sandstorm or a rainstorm. This does not stop construction entirely; it only prohibits that Operations Stage from counting towards construction time costs. However, if a unit involved in construction leaves a hex during a sandstorm or rainstorm, construction is considered to have stopped completely and must start over again from the beginning.
[24.23] Units pinned by artillery fire or air bombardment may not engage in construction. The effects, of this Case are similar to those of Case 24.22.
[24.24] The presence of Friendly units not engaged in construction has no effect on the process of Construction, Remember the stacking limits, however.
[24.3] CONSTRUCTING MINEFIELDS
[24.31] Minefields may be constructed by any Engineering unit (or Commonwealth' HQ Engineers). Engineers may construct regular minefields and/or dummy minefields. The minefield counters indicate whether the minefield is real or dummy on the reverse sides of the counter.
[24.32] A minefield requires one full Operations Stage to construct (lay), regardless of whether it is a dummy or an actual minefield. Thus, a minefield started at the beginning of one Operations Stage will be completed by the beginning of the Construction Segment of the next Operations Stage.
[24.33] In order to lay a regular minefield the Player must have an Engineering unit, 15 Store Points and 15 Ammunition Points in the hex. The supplies are expended at the start of construction. To indicate a minefield under construction, place an Under Construction marker in the hex.
[24.34] A dummy minefield is constructed in the same way as a regular minefield, except that the Player expends no Ammunition Points and only three Stores Points.
[24.35] Minefields may be constructed in clear, sand/gravel, or rough hexes. Only one Minefield (real or dummy) may be constructed in any one hex. Minefields may not be constructed in major cities.
[24.36] Minefields may not be constructed in Enemy-controlled hexes.
[24.37] See Section 26.0 for the effects of Minefields.
[24.38] If an Engineer unit or HQ unit with Engineering capability spends an entire Operations Stage in a hex with a real minefield (Enemy or Friendly), that Minefield is removed (see Case 23.22). Dummy minefields are removed upon revelation of their status.
[24.4] CONSTRUCTING FORTIFICATIONS
[24.41] Fortifications are strongly protected defensive emplacements requiring the laying of cement-work, etc. Fortifications are represented by counters as being either Level 1 or Level 2. In additions, major cities have built-in Fortification Levels which may be rebuilt by Engineer units when they are destroyed.
[24.42] In order to construct one Level of fortification, a Player needs one unit (of any size) with Engineering capability plus one Infantry battalion with three or more TOE Strength Points. These units must spend three complete Construction Segments in the hex under Construction (indicated by an Under Construction marker) without expending any Capability Points. At the beginning of the fourth Construction Segment, the Fortification Level is complete, and a Fortification Level counter (with the correct level indicated) is placed in the hex.
[24.43] In addition to Case 24.42, the Player must have present at the beginning of Construction 30 Stores Points. These Stores are then expended and Construction begins.
[24.44] Construction of new fortifications may take place in any hex except mountain, salt marsh, desert, major city, and delta. Fortifications may not be build from scratch in an Enemy Zone of Control.
[24.45] Fortification Levels — as well as Levels of major cities — that have been destroyed by air bombardment or artillery barrage may be rebuilt, using the same guidelines as in Cases 24.42 and 24.43. The major difference is that the rebuilding (or repairing) of fortifications may take place in an Enemy Zone of Control.
[24.46] No other construction — of any type — may take place in a hex which is undergoing fortification construction.
[24.47] Once emplaced, fortifications may not be voluntarily removed. They may be reduced only by air bombardment or artillery barrage. No other type of combat affects fortifications, although fortifications affect combat (see Section 25.0).
[24.48] Fortifications may be built or rebuilt one Level at a time. Levels of a major city may not be built or rebuilt above their original Level of two, with the exception of Alexandria and Cairo, which - are Level 3 cities.
[24.5] ROAD CONSTRUCTION
The Via Balbia is the major — actually the only — road that runs through North Africa. It provides the sole communications link and is of vital impor- tance to both Players. At the beginning of the war, several sections of the Via Balbia were incomplete or in such a state of disrepair as to be nonexistent. Such stretches are noted on the game-map as unfinished roads. In addition, there is a similar stretch on game-map B that avoids the coastal port of Derna. This is the Derna Bypass, built by the Axis to avoid Allied coastal shelling by off-shore bombardment. Finally, the track running between Mersa Matruh and Siwa was tarred over and converted to a road by the Ist SA Road Construction Battalion. All unfinished road sections may be built by construction; any road hexes bombed and destroyed may be rebuilt.
[24.51] Only those sections of road that appear as unfinished road hexes (see Terrain Key on map) may be built into actual road hexes, Neither Player may invent new stretches of road. Any road hex (actual) that has been destroyed by bombing may be rebuilt by construction.
[24.52] Unfinished road hexes and destroyed road hexes (noted by markers for destroyed roads) are treated as tracks for all purposes.
[24.53] There are several ways to Build or Rebuild Road hexes:
a. Any Infantry Battalion of 3 TOE Strength Points or more may build or rebuild one road hex per Construction Stage; or b. Any Engineer company or HQ with Engineer ing capability may build or rebuild one road hex per Construction Segment; or c. Any Engineer battalion alone, or any Engineer company/HQ plus 3 TOE Infantry unit may build or rebuild three road hexes per Construction Segment. The three hexes include the hex the units are in plus any two road hexes adjacent to that hex.
[24.54] For each road hex to be built or rebuilt the Player must expend at the beginning of the Construction Segment fwo Stores Points that are in the same hex as the constructing units.
[24.55] No Enemy-controlled road hex may be built or rebuilt.
[24.56] The Player may use an End of Road marker to indicate how far construction of new road has extended. When an entire stretch is finished, Players should simply note the fact somewhere.
[24.6] BUILDING AND REPAIRING RAILROADS
There are two railroad lines on the game-maps: the rail complex that crisscrosses the Nile Delta and extends towards Mersa Matruh (eventually to be completed at Tobruk) plus a defunct Benghazi-Barce line. The latter has been included for historical purposes only and may never be used for any reason.
[24.61] The only units that may build railroads (see Case 8.47) are the two New Zealand railroad construction companies (the 10th and the 13th). The NZRRC companies are considered engineer companies, but they may be used only for RR work. All engineer battalions and companies, including the NZRRC — and Commonwealth (only) HQ with Engineering capabilities — may repair destroyed track.
[24.62] One NZRRC company requires two OpStages to build one hex of new track. Two NZRRC companies in the same hex can build one hex of new track in one OpStage.
[24.63] Each Engineer Unit may rebuild three destroyed railroad hexes per Construction Segment. The unit may rebuild the hex it occupies plus any two hexes adjacent to the Engineer unit.
[24.64] For each Railroad hex to be built or rebuilt there must be present with the Engineer unit — and actually expended in the Construction Segment — one Store Point.
[24.65] No Enemy-controlled or Enemy-occupied railroad hex may be built or rebuilt.
[24.66] Railroad hexes may be destroyed by air bombardment or artillery barrage. They may also be destroyed by an Engineer unit, a HQ with Engineer capability, or an Infantry unit with three or more TOE Strength Points, if such a unit spends one complete OpStage in the hex to be destroyed without expending any Capability Points. Destroyed railroad hexes are indicated by placing a Destroyed RR Hex marker on the hex in question.
[24.67] The Alexandria-Mersa Matruh-Tobruk line may be constructed in only one specific direction. Construction must start from the last completed hex extending from Mersa Matruh and grow westward towards Tobruk. No hex may be skipped, and a Railhead marker is provided to indicate the extent of construction. Unbuilt railroad hexes simply do not exist; they serve no function until actually built.
[24.7] CONSTRUCTING AIR FACILITIES (Air Game Only)
[24.71] Air facilities include airfields, air landing strips, flying boat basins, and flying boat alighting areas. The use of these is covered in the Air Rules.
[24.72] Airfields and flying boat basins may be constructed only by Engineer battalions. Air landing strips and flying boat alighting areas may be constructed by Engineer battalions, Engineer companies, or Squadron Ground Support Units.
[24.73] Air fields or strips may be constructed in clear terrain, rough, major cities, desert or sand/gravel hexes. They may not be constructed in an Enemy-controlled hex. Flying boat facilities may be constructed only in coastal hexes, regardless of the terrain.
[24.74] Airfields and Flying Boat Basins require three Construction Segments to complete, while air landing strips and flying boat alighting areas require one Construction Segment to complete.
[24.75] The supply requirements for building new air facilities are listed on the Construction Chart (24.17).
[24.76] Air facilities may lose their effectiveness — or rather their capacity to maintain squadrons — or be destroyed entirely through bombing. Air landing strips, and flying boat facilities (both) must be built from scratch if destroyed. Airfields are rebuilt Capacity Level by Capacity Level (see Air Rules, Case 36.12). The cost and time to rebuilt one Capacity Level of an airfield is the same as it costs to build an air landing strip. Only one Level may be rebuilt at a time.
[24.77] Air facilities are represented by counters, each of which is lettered for identification purposes. When an air facility is constructed, the Player simply puts the corresponding counter on the game-map. There are no hexes in which air facilities are printed (except for Case 24.78); they must all be constructed, unless provided by the initial set-up for a scenario.
[24.78] A number of air facilities are, in essence, printed on the game-map. Such facilities do not need air facility counters. Each hex in Cairo is considered an airfield. In addition, air facilities for Malta are printed on the Malta map. There are also air facilities in the Tripoli-Tunis boxes, Commonwealth off-map bases (such as Deversoir; see map BE), Crete, Italy, and Sicily. The use of these facilities is covered in various sections of the Air Rules.
[24.8] CONSTRUCTING REPAIR FACILITIES
[24.81] Only temporary repair facilities may be constructed as new; all major repair facilities are already in existence (see Case 22.31). Both temporary and major repair facilities may have their effectiveness reduced or neutralized by air bombardment and/or artillery barrage. Temporary facilities may be destroyed by the presence of Enemy units; major facilities may not be so destroyed.
[24.82] All Engineer units — including HQ's — may build, rebuild or dismantle temporary repair facilities or rebuild major facilities.
[24.83] Construction of a new temporary repair facility entails the presence of one Engineer unit of any size for three Construction Segments, along with the expenditure of 250 Store Points and 150 Fuel Points (most of which represent machinery, lubricants, etc.). All supplies must be present at the start of construction and are expended immediately.
[24.84] Repair facilities in major cities that have had their City Levels reduced by bombardment (see Case 22.35) may be rebuilt by first rebuilding the Level of the city (see Case 24.4) and then expending 50 Stores Points and 30 Fuel Points, along with the presence of an Engineer unit spending one Construction Segment in the hex.
[24.85] A temporary repair facility may be built in any major city hex or in any village hex. However, no Player may ever have mre than two temporary repair facilities at any one time.
[24.86] Temporary repair facilities may be dismantled. It takes one unit with Engineering capability one Construction Segment to dismantle a temporary repair facility. When the facility is dismantled, the Player has 120 Store Points and 25 Fuel Points in that hex. The dismantled facility exists no more, and if a new one is to be built, it must _ be started from scratch.
[24.87] Temporary repair facilities may not be Constructed ine an Enemy-controlled hex. However, all Repair Facilities may be rebuilt or dismantled in an Enemy-controlled hex.
[24.88] A temporary repair facility that is in the process of being dismantled may not be used..
[24.9] CONSTRUCTING SUPPLY DUMPS AND DUMMY SUPPLY DUMPS
A supply dump is a place where supplies (in the Land Game, ammo and fuel only) are stored in a quasi-organized fashion (see Case 54.1). A supply dump may be constructed by having any one TOE Strength Point of any type expend three Capability Points and 20 Store Points (Logistics Game only) in a hex. A dummy supply dump may be constructed in a hex with an expenditure of three Capability Points only. That hex may then be designated a supply dump (dummy or not as appropriate).
Note: Supplies may be placed in a hex not containing a constructed supply dump. The only restriction on the use of such supplies is that trucks "in convoy'? may not load such supplies. Players should keep track (obviously) of the presence of supplies in a hex with no supply dump. However, there are restrictions on the maximum number of points that may be so deployed—see the Logistics Game.
[25.0] FORTIFICATIONS
GENERAL RULE:
All major cities in the game are considered fortifications. In addition, Players may construct fortifications (see Case 24.4). Fortifications are available in levels, reflective of the depth and strength of the fortifications. Most fortifications and cities have two possible levels, but Cairo and Alexandria have three possible levels. Fortifications give defensive benefits to units in that hex.
CASES:
[25.1] FORTIFICATION LEVELS
[25.11] Each level of Fortification gives an increasing defensive benefit to units in that hex (see T.E.C., Case 8.37).
[25.12] Each major city on the game-map is a Level 2 fortification. Cairo and. Alexandria are Level 3 fortifications. Villages are not fortifications.
[25.13] Constructed fortifications are either Level 1 or Level 2. Fortifications can never be constructed higher than Level 2, except in Cario or Alexandria. (Fortification counters have two sides, representing each level.)
[25.14] Fortifications may be reduced in Level strength by air bombardment (see Case 39.37) or artillery barrage (Case 12.5). No other type of combat affects fortifications. Reduced fortifications may be rebuilt.
[25.15] Reduced Fortification Levels may affect the rate of repair of a repair facility (see Case 22.35).
[25.16] Major cities and fortifications may be reduced to a Fortification Level of zero. (Note: The "zero" level has no effect in the Land Game, except to mean that the fortification can be more easily rebuilt. However, see the Strafing Table, Case 40.8).
[25.2] EFFECTS OF FORTIFICATIONS
[25.21] Fortifications have no effect on movement or breakdown for any units.
[25.22] The effects on various combat types for a unit defending in a fortified hex are summarized on the Terrain Effects Chart, Case 8.37.
[25.23] Air bombardment and strafing of land units (combat or otherwise), trucks, flak and supply dumps in fortifications is treated the same as artillery barrage in terms of column adjustments, with one exception: air bombardment does not affect any of the above items while in a Level 3 City. That city must be reduced to Level 2 for air bombardment to have any effect.
[25.24] A/l units in Level 3 cities ignore all pinned results from any type of combat.
[26.0] MINEFIELDS
GENERAL RULE:
in no place did the mine receive more notoriety than in the Libyan/Egyptian desert. Used sparingly in the early part of the war, minefields became a standard defensive feature by 1942. By El Alamein, they were ubiquitous. Minefields were more of a hindrance than a danger, at least on an operational level. (On tactical level it's a different question.) Therefore, in CNA minefields are obstacles; they rarely cause casualties. Units pay increased Capability Point costs to enter minefields.
CASES:
[26.1] TYPES OF MINEFIELDS
[26.11] There are two types of minefields: dummy and real, All minefield counters have the same front side; the reverse side of the counter reveals whether it is real or dummy.
[26.12] In moving units there is also a difference between Friendly minefields — paths through which are known (hopefully) —.and Enemy minefields.
[26.13] Real minefields may be removed by having an Engineer unit — or a unit with Engineer capability — spend one full Operations Stage in the hex (i.e., the Engineer must start the Operations Stage in the hex with the minefield). If it expends no Capability Points on movement and remains in the hex at the end of the Stage, the minefield is removed. This applies to both Friendly and Enemy minefields.
[26.14] Dummy Minefields are removed at the end of any Movement Segment in which an Enemy unit expends the Capability Points to move into that hex (see Case 26.23).
[26.15] A Friendly minefield is flipped over to reveal its type (real or dummy) immediately upon being entered by an Enemy unit.
[26.2] EFFECTS OF MINEFIELDS
[26.21] The movement costs to enter a minefield are in the Terrain Effects Chart, 8.37. It should be pointed out that a motorized unit or vehicle entering an Enemy minefield expends Capability Points proportional to its given Capability Point Allowance, Thus, an artillery unit would expend 15 Capability Points to enter an Enemy minefield.
[26.22] All movement costs are in addition to the terrain in the hex. Note: Units without Engineers will expend points far over their CPA. |
[26.23] The costs to enter a dummy minefield are the same as those for a real minefield. The only difference is that once a unit enters an Enemy dummy minefield, that minefield is revealed. However, it is not removed until the end of that Movement Phase of the Operations Stage. Thus, any units that move into that dummy minefield in that Phase of Movement still pay the cost to enter a minefield.
[26.24] Engineer units and combat units stacked with an Engineer battalion or Commonwealth HQs with Engineering capacity pay only four additional Capability Points to enter an Enemy minefield, rather than their listed cost. Engineer units and combat units stacked with an Engineer battalion pay no extra cost to enter a Friendly minefield.
[26.25] Whenever a vehicle (tank, truck, etc.) enters an Enemy minefield not accompanied by an Engineer battalion, or Commonwealth HQs with Engineering capacity, there is a possibility that the minefield will destroy some of the vehicles. The moving Player rolls one die for each battalion-sized (or less) combat unit and/or for all 2nd and 3rd line trucks. If the Player rolls a 5 or 6, the mines have destroyed one TOE Strength Point of tanks or motorized infantry, or one unattached Truck Point.
[26.26] On any anti-tank or close assault combat in which the attacking units are in an Enemy minefield or in which there is a Close Assault against an Enemy unit in an Enemy Minefield, the defending Player adjusts all columns one in his favor. This does not apply to artillery bombardment.
[27.0] DESERT RAIDERS & COMMANDOS
COMMENTARY:
On an operational level, Desert Raiders (The Long Range Desert Group and Die Sonderkommando Almasy) had little effect on the war. However, the designers felt that they would be missed in a simulation of this magnitude — and they do adda lot of fun to the game. Desert Raiders are useful for "annoyance" raids: blowing supply dumps, attacking convoys, etc. A bit of honesty is required for this rule.
CASES:
[27.1] THE LONG RANGE DESERT GROUP
[27.11] The Commonwealth desert raiders consist of two units of the Long Range Desert Group (LRDG). These are represented by two LRDG counters. There may never be more than two LRDG units in play at any one time.
[27.12] LRDG units must be formed from other units, already in play, that have reached their maximum Morale Level through training. Untrained units may never be used to form LRDG's.
[27.13] LRDG's are formed from Recce and Armored Car TOE Strength Points — and only from these type of units. To form an LRDG, the Player, in his Organization Phase, simply removes the TOE Strength Point from the Recce/AC unit and places an LRG unit on the game-map in its place. Once formed, an LRDG unit may zof return to Recce/AC status.
[27.14] LRDG's have a Capability Point Allowance of fifty (50). However, they have no combat ratings and may not engage in normal combat (see Case 27.3). They have no Stacking Points.
[27.15] There is no cost in Capability Points to form an LRDG unit.
[27.16] If an LRDG unit is eliminated, a new one may be formed (from that eliminated counter) four Game-Turns later. Thus, an LRDG unit eliminated in Operations Stage 2 of the July II Game-Turn would be formed in the Organization Phase of the 3rd Operations Stage of the August II Game-Turn.
[27.2] DIE SONDERKOMMANDO ALMASY
The Axis desert raiders were a small group under the command of Count Laslo von Almasy. DSA operates in the same way — and is formed in the same way — as LRDG units, with two exceptions: a. There may be only one DSA unit in play at any one time.
b. DSA may be formed only from. German (not Italian) Armored Recce/AC units.
[27.3] HOW DESERT RAIDERS ARE USED
[27.31] Desert raiders are represented by actual counters. However, for the most part, their movement is "hidden."
[27.32] At the time of initial formation, a desert raider unit is placed on the game-map. After that, its movement is secret: i.e., the owning Player records all movement and location of the unit(s) on a separate piece of paper (against a case of a "Matter of Disbelief Between Gentlemen"). The desert raiders follow all the normal rules of Movement (they are vehicle units, Recce type) except that they are usually not on the game-map.
[27.33] Desert raiders remain hidden until either of the following occurs:
a. They engage in a raid (Case 27.5); or b. They are spotted (Case 27.4)
When either one of the above occurs, the desert raider counter is placed on the game-map in the hex in which the event occurred.
[27.34] Desert raiders have no Zone of Control. Furthermore, they do not have to stop when entering an Enemy Zone of Control, although such movement risks being spotted (see Case 27.6). To enter an Enemy-occupied hex is to raid (Case 27.5).
[27.35] Desert raider units need supplies but not the same as normal units. Once a week — during a given Game-Turn (not Operations Stage) — they must pass through a Friendly supply dump, oasis or bir (well), As it passes through the supply dump, it picks up (and expends) from the supply dump one Ammunition Point and two Fuel Points. If such supply is not available, the desert raider unit must wait until it becomes available. It may not travel without those two Fuel Points per Game-Turn. Water is taken on in the same way, but can come from any oasis or bir. If a desert raider has not drawn water by the end of a given Game-Turn, it is eliminated. (Players will note that they can go 5 Operations Stages without resupplying, by getting supplies in Stage 1 of a Game-Turn, then resupplying in Stage 3 of the following Game-Turn,
[27.36] If necessary, desert raiders have Reaction capability (see Case 27.44).
[27.37] Raiders may never exceed their 50 point Capability Point Allowance. If for any reason they are forced to do so, they are eliminated.
[27.38] Desert Raiders do not consume fuel (except 27.35) nor do they breakdown.
[27.4] SPOTTING DESERT RAIDERS
[27.41] At any time a desert raider enters an Enemy-controlled hex, or at any time an Enemy combat unit enters a hex occupied by a Friendly desert raider, the desert raider may be spotted.
[27.42] Desert raiders may never enter Enemy-occupied hexes unless they are going to raid.
[27.43] If a Raider performs either action listed in Case 27.41, the raider Player must announce the fact and roll one die. If he rolls a 6, the raider has been spotted. If a raider unit is spotted, it is eliminated. Any other dieroll has no effect; the raider has not been spotted.
[27.44] If an Enemy unit is moving (and enters the raider hex) it must expend 1 Capability Point to try to spot the raider, even though the Enemy Player knows that the raider is there. In other words, the moving Enemy Player may choose not to go after the raider. A Phasing unit may. only try to spot a raider once per Operations Stage.
[27.5] RAIDS
[27.51] The type of raid a desert raider may perform usually depends on the objective. Most raids are "harassment" in nature, as they can cause little real damage (except for Case 27.6). They invariably take place behind Enemy lines.
[27.52] Desert raiders may be used to blow up a water pipeline. If a desert raider enters a hex with a water pipeline, and there are no Enemy combat units in that hex the raider may attempt to blow the pipeline. The Player announces the raid, places the raider on the game-map, and rolls one die. If he rolls a 1-4, the pipe is blown; a 5-6 the pipeline is safe. Such a raid may be attempted only once in an Operations Stage. It occurs during Movement and expends five Capability Points (the unit may, of course, move after the raid — away from harm).
[27.53] Desert Raiders may attempt to destroy ai?- fields. (Air landing strips are immune from raids; they are simply not the type of facility that can be rendered ineffective by desert raiders). If an Enemy airfield has no Enemy combat units in that hex, the desert raider may enter the airfield hex, reveal itself, and attempt to cripple the field. The Player rolls one die. If he rolls a 1 or 2, the capacity of the airfield is reduced by one level (see Case 36.00). On a dieroll of 3-6, nothing happens. The cost of the Raid is five Capability Points, and no casualties are suffered (as there are no Enemy combat units present). The raid may not take place if there are Enemy combat units present. (Squadron Ground Support Units of any type are not combat units for this purpose.) An airfield destruction raid may be attempted only once per airfield per Game-Turn. However, it may be combined with a plane destruction raid (see Case 27.54). Airfields in major cities may not be raided.
[27.54] Desert raiders may attempt to destroy Enemy airplanes that are on the ground. The planes may be in airfields or air landing strips. (Raiders can have no effect on flying boats or their facilities.) Planes in air facilities that have Enemy combat units in the hex or are in major cities may not be so raided. The raider unit enters the hex, reveals itself and expends five Capability Points. The Player rolls one die. If the result is a 1 or 2, 10% {at least) of all planes in the hex are destroyed, the choice of planes being up to the raiding player. If a 3-6 is rolled, the raid fails. However, if the Player rolls a 6, the raider unit is eliminated. This raid may be combined with attempted destruction of an airfield, as long as all Capability Point costs are paid.
[27.55] Raiders may attack Supply Dumps. Any dump may be a target, except for dumps in major cities. Unlike other raids, a desert raider may attack a guarded dump. The raider unit enters the hex with the dump, reveals itself and expends five Capability Points. Then one of two things can happen:
a. The Dump has no Enemy combat units: The Player rolls one die. If he rolls a 1 or 2, 10% of all supplies are destroyed. A 3-6 and the raid fails, and nothing happens.
b. The Dump is guarded by Enemy combat units: The raiding player rolls two dice, adding them together. If the total is higher than the Raw Defensive Assault Strength of the units guarding the dump, the raid is on, and the Player proceeds as in (a) above. However, unlike (a) above, if he rolls a 6, the unit is eliminated. If the total of both dice is not higher than the Raw Defensive Strength of the guards, the raider is simply eliminated.
[27.56] After any raiders-guards conflict is resolved, if any raiders survive, and the dump is a dummy that fact must be revealed immediately. The raid is then off, in terms of destroying supplies, but all other results (for guards and elimination) still apply.
[27.57] Desert raiders may attack unescorted truck convoys in order to destroy trucks and supplies. This may be ddne in one of two ways:
a. The Raider enters a hex that has a truck convoy; or b. The raider uses interception (see Case 27.59) during the opposing Player's Convoy Movement Phase.
[27.58] The mechanics of a truck convoy raid are the same regardless of the way it is initiated. The raider expends five Capability Points, enters the hex, and the Player rolls one die. If the dierollis a 1 or 2, one Truck TOE Point (plus cargo) is destroyed. The type of truck (heavy, medium, or light) is up to the "defender;" the type of cargo is then up to the raider. If the dieroll is 3-6, the raid fails. If any one of the trucks is carrying Replacement Points, the raider adds one to the dieroll, and a 6 will result in the elimination of the raider. If all the trucks are carrying Replacement Points, the Raider is automatically eliminated, and there are no Truck losses.
[27.59] Raiders may use interception to attack truck convoys. If, during a Truck Convoy Movement Phase, a truck convoy passes within four Movement Capability Points of a desert raider, the Player who has the raider may halt the convoy and attack it, using the above rules. In such a case the convoy uses five Capability-Points (but is not required to exceed its CPA) as does the raider. The raider may then expend up to five additional Capability Points.to leave the hex. (Remember, the Raider pays for all Capability Points he uses.)
[27.6] RAID ON ROMMEL
This rule has been included because we felt it would add a bit of fun, although it is based on solid historical events.
[27.61] Commonwealth LRDG units may attempt to Assassinate or Capture General Rommel by attempting a Raid on Rommel.
[27.62] To perform this raid, the LRDG simply enters the hex which the Rommel counter occupies.
[27.63] The Commonwealth Player rolls two dice and consults the Raid on Rommel TAble (27.64). The results of that table are self-explanatory. The cost for such a raid is 10 Capability Points, and if the LRDLG has no Capability Points remaining it is also eliminated.
[27.64] The Commonwealth Player may attempt no more than four Raids on Rommel during the course of a Campaign Game, and only one in any shorter Scenario.
[27.65] If the Commonwealth Player is related to Alistair McLean, Richard Burton, Franchot Tone, or Jack Higgins he adds one to his diceroll. If the Axis Player is an intimate friend of Erich von Stroheim or James Mason, well, that's nice.
[27.7] COMMANDOS: "Layforce"
[27.71] One of the Commando units in the game is: "A" Battalion of the Special Service Brigade (Commonwealth), also known as_ Layforce because of its Commander: Lt. Col. R.E. Laycock, of the Royal Horse Guards.
[27.72] Layforce "A" Battalion is the same as any other infantry unit with one exception: if Layforce starts an Operations Stage in Alexandria, it may be placed during that Operations Stage in any coastal hex on the game-map (see Case 27.77).
[27.73] Layforce "A" Battalion must spend one full Game-Turn in Alexandria before it can be landed. Such commando landing expends 5 Capability Points from the unit for every 50 hexes moved by the transporting ships in that OpStage, in addition to the cost of terrain in the hex.
[27.74] Layforce "A" Battalion needs no supplies for the first three Operations Stages after its landing, including the Stage in which it lands. After that, it must be supplied like any other unit.
[27.75] If Layforce "A" Battalion is being used for a Commando raid, trucks may not be loaded with it.
[27.76] Layforce "A" may take Replacement Points. To replace one lost point requires three Infantry Replacement Points trained for 12 Op-Stages with the Lay Force unit in Alexandria.
[27.77] Layforce may be transported by a unit from the Commonwealth Fleet. If such ship (or ships) remain in the coastal hex in which Layforce was landed, then the Layforce battalion may, if necessary, retreat into the ship. Such a retreat satisfies any and all mandated retreats. The Commonwealth Player may also freely embark the Layforce back onto a ship. Once Layforce has been moved into the ship, the ship immediately moves back to Alexandria.
[27.8] COMMANDOS: The Special Air Service Brigade
The Commonwealth Special Air Service Brigade (SAS) was a specially-trained unit whose primary function was the disruption and destruction of Axis air facilities and planes. It was trained to raid by land, sea or air, and in several raids it managed to destroy over 50 Axis planes. As such, the SAS operated closely with the LRDG, which often arranged for transportation of the SAS after its raids.
[27.81] The Special Air Service Brigade is a "battalion-size" infantry unit with a_ basic Capability Point Allowance of 15 (see the OA Sheets Section 04.46). It may be motorized; however, if being used on a raid where it is transported by air or sea it may not be motorized. The SAS Brigade may operate as a normal infantry unit (a waste) or as a Commando unit.
[27.82] The SAS Brigade raids Enemy airfields. It may raid guarded (with Axis troops) or unguarded facilities. It may complete its raid (and roll for plane destruction) only if there are no Axis combat units in the hex. Thus, if the SAS Brigade raids a facility with Axis combat units, it must either eliminate such units or force such units to retreat in some way. Any such combat is conducted normally.
[27.83] The SAS Brigade may move by land (see Case 27.81). If it does so it moves like any other land combat unit. It may also be transported by any one Commonwealth Ship counter and debarked in any coastal hex, at a cost of five Capability Points to the SAS for every 50 Movement Points or fraction thereofused by the ship. It may also be airdropped (see Case 42.4) at a cost of 5 Capability Points to the SAS unit.
[27.84] If the SAS Brigade travels by land, it uses normal supply restrictions and rules. If it is transported by sea or airdropped, it is in supply for three consecutive OpStages. This means that the unit has all the necessary ammunition, water, and stores it needs for those three OpStages (including the one of its transportation). After that, it is on its own.
[27.85] The SAS Brigade may attempt to destroy planes on any Axis Air Facility that has no Axis combat units present at the time the raid is attempted (see Case 27.82). The SAS unit may attempt its raid in any Movement/Combat Segment.
[27.86] To destroy Axis Planes by an SAS raid the Commonwealth Player consults the SAS Raid Table, rolls one die, and removes the resultant percentage of each type and make of plane present (see Case 27.9). The TOE Strength of the SAS Brigade at the time of such raid is irrelevant.
[27.87] Attempting a raid costs the SAS Brigade three Capability Points, in addition to any other Capability Points it may have expended during that OpStage. Only one such raid may be performed per month, and there must be at least six OpStages between raids.
[27.88] The SAS Brigade may move after a raid as far as it wishes, within the parameters of continual movement and cohesion. However, if the Commonwealth Player stacks that SAS Brigade unit with an LRDG unit at any time the SAS Brigade increases its Capability Point Allowance to 30, is removed from "physical sight" (in the fashion of an LRDG unit; see Case 00.00) and moves as an LRDG unit. The LRDG unit must escort the SAS unit to the point where it (the SAS Brigade) is placed on the game-map — i.e., it has returned home.
[27.89] The SAS Brigade may replace eliminated TOE Strength Points, three Infantry Replacement Points trained for a 12 OpStage period for every TOE point needing replacement. If the SAS Brigade is eliminated entirely, it may not be received or replaced in any way.
[27.9] DESERT RAIDER RAIDS TABLES
(see Charts and Tables)
[27.91] Desert Raider Raid Table (see Charts and Tables)
[27.92] Raid on Rommel Table (see Charts and Tables)
[27.93] Special Air Service Brigade Raid Table (see Charts and Tables)
[28.0] PRISONERS : POW
GENERAL RULE:
At any time that a unit surrenders, it becomes a prisoner. Every infantry TOE Strength Point becomes one Prisoner Point. Prisoners must be fed, kept in detention, and eventually herded to aDeparture Point for shipment elsewhere. For the latter purposes, guard units may be formed. Prisoners may not be massacred; historically, both sides in the African Campaign showed a sense of chivalry and common decency unknown in any other theatre.
CASES:
[28.1] THE CARE AND FEEDING OF PRISONERS
[28.11] Each Infantry TOE Strength Point that Surrenders — not tanks or guns — becomes a Prisoner Point. Prisoner Points are represented by counters, which may be used like "change." They are available as needed.
[28.12] Immediately upon surrendering, all Prisoner Points may be moved up to three hexes in any direction by the capturing Player. They may not enter an Enemy-controlled or Enemy-occupied hex or enter or pass through impassable terrain during that "free'? movement.
[28.13] Prisoner Points have a Capability Point Allowance of eight, which may be used for movement purposes only. They move in the captor's Convoy Movement Segment. They cannot, of course, engage in combat; their Capability Point Allowance is used for movement only. Prisoners may never exceed their Capability Point Allowance. If their guards are forced to retreat, they stand still.
[28.14] The maximum number of prisoners allowed in any one hex is 40 Points. If there are more than five points "standing" (not moving) in a given hex, the Player may put a POW Detention Camp marker in the hex to indicate that prisoners are being held there. Prisoner Point markers always remain on the game-map until they reach their Point of Departure.
[28.15] For every five Prisoner Points in a hex, the capturing Player must expend one Store Point per Operations Stage (not Game-Turn). These Stores are expended before any other stores may be allocated. They need not be present; they are subtracted from the nearest supply dump, etc.
[28.16] Prisoners can be dealt with by captors in any fashion they wish, as long as they are fed and kept alive. The best course, however, is to get them off the game-map. To do this they are marched to Departure Points. The Axis Departure Point is the Sirte box on game-map A; for the Commonwealth, the Departure Point for their prisoners is either Alexandria or Cairo. As soon as Prisoner Points enter their Point of Departure they are removed from the game — permanently. (They will not be used in factories to promote your war effort.)
[28.17] Each detention camp requires the presence of one Guard Point (see Case 28.2). When moving, one Guard Point is requried for each 1 Prisoner Points. Any prisoners without a guard "escape" (see Case 28.23).
[28.18] Prisoners may be transported by trucks, if you are feeling profligate with your transport.
[28.2] GUARDS AND ESCAPES
[28.21] Guards are needed to watch and escort prisoners.
[28.22] Guards may be formed from any infantry-type unit. Simply subtract a TOE Strength Point from the combat unit and replace it with a guard counter. Each Guard Point is an infantry unit worth one TOE Strength Point, with assault ratings of 0/1. Guards have a Capability Point Allowance of 10, but they are usually moving at a rate of 8, the same as their prisoners. Guards are capable of combat, reaction, etc. Players should note that if guards react or retreat before combat, their prisoners do not. Unused Guard Points may be returned to their unit of origin.
[28.23] If Guards abandon prisoners at any time, or there are prisoners in excess of the guard requirements (see Case 28.17), those prisoners escape. (There are no organized prison breaks here; this is Africa, not Colditz).
[28.24] If escaped prisoners are within eight Capability Points of a Friendly unit — not counting Enemy Zones of Control or units — they are placed with that Friendly unit. They are then removed from play and one month later are treated as Replacement Points, to be brought back for Training, etc. They may not be used to assign or attach to units. If the escapees are farther than eight Capability Points, they may start to move towards Friendly units. All they require is water. If they have water, they survive. For every Operations Stage without water, they lose 10% of their strength, rounded up. They stop moving when they reach a Friendly unit or Friendly major city, or if they are recaptured (an Enemy unit enters their hex). Escapees move in the Truck Convoy Phase. (Players may not escort Prisoners into the deep desert and then remove their guards in order that the escapees will die of thirst before reaching safety.)
[28.25] Escapees have no combat values at all. However, they may never be attacked in any way. Escaped prisoners are automatically recaptured if an Enemy unit is moved into a hex containing just them.
[28.26] The above rules for escapees should be taken cum grano salis. They are meant as fun; this is not a game of escape and evasion. Use the rule judiciously and with common sense.
[28.3] CAPTURED EQUIPMENT
Note that captured equipment, unlike prisoners, may be used against their former Player's units, as long as it has been repaired.
[29.0] WEATHER
GENERAL RULE:
"Whether there's weather or no, we must have weather, you know," In any case, weather is determined for each individual Operations Stage. There are four types of weather: normal, hot, sandstorms, and rainstorms. The probability of a given type of weather occuring depends on the season and the area of the game-map. Weather affects movement and breakdown.
CASES:
[29.1] WEATHER DETERMINATION
The Player with initiative rolls two dice and consults the Weather Table (29.6), using the proper row, in terms of season. The dice results are read sequentially. The Weather Table gives the weather for that Operations Stage (e.g., a diceroll of 53 during summer results in Hot Weather).
The Seasons are as follows:
| Season | Starts | Ends (inclusive) |
|---|---|---|
| Spring | March III | June I |
| Summer | June III | September II |
| Fall | September III | December II |
| Winter | December III | March II |
If a "sandstorm" or "rainstorm" result is obtained, the Player consults the Foul Weather Location Table (29.7) and rolls one die. This determines the map sections affected. Unaffected map sections have normal weather. Note: Weather never affects Malta, Italy, Sicily, Crete, or Tunesia-Tripoli. Weather effects on map E do affect Allied off-map airfields.
[29.2] NORMAL WEATHER
Normal weather in North Africa means hot during the day and cold at night. But, for game purposes, normal weather has no effect on the play of the game. The effects of such weather are already built into the system.
[29.3] HOT WEATHER
[29.31] When hot weather occurs, it occurs on all sections of all game-maps.
[29.32] When undergoing construction, the sites, exclusive of the requirements of units there, require water rations (see Case 24.21) in hot weather.
[29.33] When determining Breakdown during hot weather, adjust the. Breakdown Column one column higher (to the right), see Case 21.37.
[29.34] If the weather is hot, a// Fuel and Water- Levels (not including water in wells or oases) are reduced by five per-cent (5%). This includes water and fuel in dumps as well as in trucks. However, do not count the water/gas actually being consumed by a unit (in the radiators and gas tanks, as it were.) This is done during the Weather Determination Phase.
[29.35] During hot weather, water requirements for all units are doubled.
[29.4] SANDSTORMS
Sandstorms are whirling maelstroms of grit and dust, blinding personnel and clogging machinery for days. Visibility falls to zero, and all action comes to a virtual standstill. Most men preferred combat to the raging sandstorms.
[29.41] Sandstorms occur only on certain sections of the game-map, as per the Weather Table (29.6). Regardless of where a sandstorm occurs, it never occurs over delta hexes (Game-Map E). The Weather for game-maps on which there is no sandstorm is normal.
[29.42] No construction may occur in a hex in which there is a sandstorm (see Case 24.22).
[29.43] No aircraft may fly into or out of a hex with a sandstorm.
[29.44] A// movement costs for hexes with a sandstorm are doubled.
[29.45] If a unit expends 50% or more of its Capability Points for movement in sandstorm hexes during a given Movement Phase, the Player adjusts his Breakdown Point column one higher (to the right) when rolling for breakdown (see Case 21.37).
[29.46] Sandstorms do not extend out into the Mediterranean (they stop in the coastal hexes).
[29.47] Sandstorms may damage Grounded Aircraft (see Case 38.5)
[29.5] RAINSTORMS
Sudden downpours in the desert were a lot more common than is supposed. Aside from the blessing of having water, these rainstorms often wreaked havoc on movement, turning roads into morasses of mud and flooding heretofore empty wadis with swollen — and deep — rivers of rainwater.
[29.51] Rainstorms occur only on certain game-maps; see the Weather Table (29.6). Any game-map that does not have a rainstorm has normal weather.
[29.52] No aircraft may fly into or out of a rainstorm hex. Note: Rainstorms do extend to the northern edge of the map; i.e., into the Mediterranean.
[29.53] All depleted wells are filled during a rainstorm.
[29.54] No construction may occur during a rainstorm (see Case 24.22).
[29.55] All wadi hexsides are uncrossable during a rainstorm, except by Roads (see Case 29.56). Players may not use wadis to draw water.
[29.56] All road hexes have the same Movement Cost and Breakdown Rate as tracks during rainstorms. Tracks, themselves, remain as tracks, with the exception of Case 29.55.
[29.57] All river hexsides not crossed by roads or railroads are impassable.
[29.58] No vehicle or motorized unit may enter a delta hex, unless it is on a road or railroad. Units in a delta hex at the start of a rainstorm must remain there for that Operations Stage, unless they are on aroad or railroad.
[29.6] WEATHER TABLE
(see Charts and Tables)
[29.7] FOUR WEATHER LOCATION TABLE
(see Charts and Tables)
[30.0] THE MEDITERRANEAN FLEET (Commonwealth)
GENERAL RULE:
The Commonwealth Player is supplied with a number of battleships, cruisers and destroyers, which he may use for barrage and anti-aircraft purposes, They may not engage in naval combat (as there is none in the game). The ships — and their usage — are somewhat abstracted, as Naval movement by the British Fleet was extensive and erratic, and records of such are often inaccurate and misleading. Each ship has a Barrage Strength which is equivalent to Actual (not Raw) Barrage Points. They may be used to bombard. Ships may be subject to air attack as well as fire from land units. The Axis Player may try to cripple the British fleet with a daring Italian "Chariot" raid. The Italian Navy does not appear in this game; its actions are abstracted into the Axis Convoy Rules (see Section 51.0).
CASES:
[30.1] COMMONWEALTH NAVAL COUNTERS
[30.11] Commonwealth naval units are, in essence, abstracted battleships, cruisers and destroyers. They have been given names (of ships actually in the Med at the time) for identification purposes. However, the British Fleet was never a stable affair, in terms of position, and thus the Naval units represent types of ships available, rather than an actual ships.
[30.12] The naval counters have two strength numbers: their Gun Rating and their AA Rating. The Naval Gun Rating is equivalent to Actual Barrage Strength Points. The unit's AA/Flak rating is actual AA Points. Thus, the Queen Elizabeth, a battleship, has an (initial) Barrage Strength of 6 and an Anti-aircraft strength of 12 AA points.
[30.13] The Gun Rating of a unit/ship also represents its ability to withstand damage. (I said this was abstracted.) Thus, each point of Gun Rating is like a Strength Point. To completely sink a ship, all points of Gun Rating must be elimianted. AA points are reduced in ratio to loss of Gun Points.
[30.14] Naval units have no Stacking Points; they stack freely in any coastal or all-sea hex. They have no effect — in terms of their presence — on land movement, or air movement, or other Naval Movement, Enemy or friendly.
[30.15] Commonwealth Naval units have a Range of 100 sea hexes. This means they may reach any hex within 100 sea hexes of Alexandria (I.e., they may not be placed further West than hexrow xx29 on Map Section 'B'.). They do not actually move; they are simply placed in their hex of assignment at the beginning of a given OpStage.
[30.16] Naval units need no fuel, ammunition, or water within the requirement that they must spend two Operations Stages in Port for every one in action. In addition, no single ship may spend more than three consecutive Op-Stages at sea. (This, in turn, would require six Op-Stages in port.)
[30.17] The Italians do have a ship: The San Giorgio. Unfortunately, it has been partially sunk to block the harbor at Tobruk. It operates as if it were an artillery unit, until its removal or complete sinking by enemy engineers. The San Giorgio may not move. It may fire into adjacent hexes. It may fire at Commonwealth ships adjacent hexes through sea hexsides.
[30.18] Commonwealth ships may be moved to and from the port of Valetta (Malta). No more than five ships may be in Valetta at any one time. Valetta is a port (like Alexandria) for "recovery" purposes. Ships in Valletta may be moved only to Alexandria. Movement between these ports takes one Op-Stage; it is not considered a turn"at-sea" for purposes of refit.
[30.2] OFF-SHORE BOMBARDMENT
[30.21] Commonwealth ships may bombard any coastal hex they are in. In addition, battleships and heavy cruisers (4-pointers) may bombard any hex adjacent to the coastal hex they are in.
[30.22] Ship Gun Ratings are used as if they were Actual Artillery Strength Points, with the exception that they need no ammunition. The Commonwealth Player just considers them as if they were Artillery units in determining the effect of the naval guns, with one exception: battleships and heavy cruisers firing at 2 hexes distant (see Case 30.21) have their strength halved.
[30.23] To use ships for Off-Shore Bombardment, the Commonwealth Player simply moves the ship frem its home Port (which is usually Alexandria) to any hex within Movement Range it wishes to barrage from. Example: The British Player wishes to use the Valiant (a BB) and the AJax (Heavy Cruiser) to bombard Derna. He places both ships in the Derna hex (00000) in the Commonwealth Fleet Assignment Segment; in any one Barrage Step of that Operations Stage they may bombard Derna and any hexes ajdacent to it.
[30.24] Any one ship may use its Barrage Strength only once in an Operations Stage; it may not fire repeatedly, like an artillery unit (e.g., in the example in Case 30.23, the Commonwealth Player could fire twice, once with each ship). However, the Barrage Step that the ships fire in is up to the Commonwealth Player.
[30.25] If a Commonwealth ship engages in Off-Shore Bombardment, it must spend the next two Operations Stages in Alexandria. This requirement has nothing to do with a ship firing anti-aircraft guns at Enemy planes.
[30.3] ATTACKING SHIPS AND THEIR REPAIR
[30.31] Ships may be damaged by airbombardment (see Case 39.3), Coastal Guns (Case 30.36), or, in a special case, an Italian Chariot Raid (Case 30.4).
[30.32] Enemy bombers, fighter bombers, and torpedo-carrying planes may bomb a ship counter in an effort to damage the ship, reduce its Gun Rating, and put it out of action. Planes bomb ships when they are in the same hex.
[30.33] Bombing ships is a mission; a plane must be assigned to such mission in order to attack the ship. Even if it is in the same hex but is not assigned to bomb the ship it may not attack the ship. See Cases 41.3 and 41.7 for Ship Bombardment.
[30.34] Damage on ships is taken in Gun Rating Points. The Air Bombardment Table gives the number of Damage Points in Gun Rating Points lost as a result of that mission. The Gun Rating of such ship is reduced accordingly. Thus, if the Ajax (a 4) were to suffer two Damage points, it would now have a Gun Rating of two (and an AA Rating of 4). Players should keep track of the Gun Ratings and Damage Levels of ships on their Ship Assignment Sheet. Ships always fire with their reduced (if any) Gun and AA Ratings.
[30.35] Artillery units (with Vulnerability Ratings of 6 or more) and emplaced guns may be used against Enemy ships in the same hex as the artillery unit. The Player simply notes that the artillery is firing against the ships (separately from any Air Bombardment). Such artillery may not fire that Stage against land units. The Player takes the total Raw Artillery Points firing (not actual) and halves that total. He then uses the Air Bombardment Table, using the Artillery Points as if they were Bomb Points. Emplaced Guns (those Guns with a zero CPA) do not halve their Raw Points.
[30.36] If a ship's Gun Rating falls to less than 50% of its Face Value, it may not leave Port until it has been repaired to better than 50% of its value. If a ship's entire Gun Ratings have been eliminated, it is sunk (and unrepairable).
[30.37] To repair one Gun Rating level, a Ship must stay in Alexandria for six consecutive Operations Stages. No engineer is needed, and no supplies are expended. If the ship moves before the six Stages are finished, all work must start again.
[30.38] Ships may always fire as anti-aircraft guns regardless of where they are or what else they are doing — even repair.
[30.39] The San Giorgio may fire at Commonwealth ships using its gun rating as Bombardment Points. See Case 30.35.
[30.4] THE ITALIAN 10TH LIGHT FLOTILLA: Chariot Raids
In one of the most daring raids of the war, six men of the Italian 10th Light Flotilla, piloting slowspeed torpedoes called "Chariots" (or, affectionately, "Pigs"), slipped through the defense nets of Alexandria harbor on the night of 18 December, 1941 and extensively damaged the Valiant, the Queen Elizabeth and two other ships, thoroughly crippling the British Fleet in the Eastern Mediterranean. The following rule simulates this remarkable feat of, daring and courage.
[30.41] Starting in July of 1941, the Axis Player may attempt a "chariot" raid on Alexandria. His object: to damage Commonwealth shipping.
[30.42] The raid must be planned two weeks (six Operation Stages) in advance. The raid actually occurs on the seventh Operations Stage following the Stage in which it is planned. The Axis Player simply notes on a piece of paper the date of the plan of the raid and its execution.
[30.43] The raid takes place in the Air Mission Completion Segment of the Land Support Air Phase (after all ships have been sent out on any missions in the Ship Assignment Phase).
[30.44] The Axis Player announces the Frogman Raid and rolls one die, consulting the "Chariot" Table (30.46). The results on that table are self-explanatory.
[30.45] No supplies are needed or expended. However, the Chariot raid may be attempted only once in the game. It may be used only in a Campaign Game — not in an abbreviated scenario.
[30.46] The Chariot Table (see Charts and Tables)
[30.5] NAVAL TRANSPORT OF TROOPS
Only the Commonwealth has the ability to transport troops by sea; the Axis had little viable coastal shipping in North Africa. What they had was used for supplies. This section applies only to personnel; transporting of supplies by sea is covered-in Case 00.00.
[30.51] The Commonwealth may transfer units:
from one port to another, dependent on the personnel capacity of the port. Furthermore, ports may be incapacitated as a result of Enemy Air Bombardment (Case 39.3), in which event they are incapable of receiving or shipping out any personnel,
[30.52] The Commonwealth Player may make only one transfer of personnel per Operations Stage per port. Naval Transport and Transfer of troops takes place in the Truck Convoy Movement Phase. Thus, regardless of the ports used, or the direction of the transfer/transport (east-west), only one transfer/transport operation may occur per Operations Stage in any one port.
[30.53] All transfer of personnel from one port to another may affect any shipments of supplies received (see Case 30.57).
[30.54] The number of troops that may be debarked or embarked at a given port is dependent on the Port Personnel Capacity. The Port Personnel Capacity is the number of Stacking Points that that port can take in or send out in a given Operations Stage. Understandably, the capacity of the transfer will be limited by the port with the smallest capacity, be it the port of embarkation or debarkation.
[30.55] To be transferred, a unit or units must start the Operations Stage in the port of debarkation. It may expend no Capability Points during the Phases prior to the Truck Convoy Segment. In the Truck Convoy Segment, it is transferred to the port of embarkation, where it is landed at a cost in Capability Points equivalent to its Capability Point Allowance.
[30.56] Transfers may not take place between ports when one is incapacitated because of Enemy Air Bombardment (see Case 39.3). Transfer may take place between any Friendly-controlled Ports. (Control means the last Player to occupy the hex.)
[30.57] Whenever a Player transports troops by way of a port, the ability of that port to handle supplies is reduced by the percentage listed in Case 30.59. Thus, if Benghazi brought in any troops, its supply transport capacity (reduced or maximum level) is reduced by 25% for that Operations Stage.
[30.58] Ports may be blocked by mines, etc. (see Case 50.2). This does not affect a port's capacity to receive personnel (as above) until and unless that port is reduced to less than 2/3 (67%) capacity, rounded up. In such case, the port may not receive or send any personnel. Any port that is totally incapacitated by bombing may not, of course, receive or send personnel.
[30.59] Port Capacity Chart (see separate sheet)
[30.6] Commonwealth Fleet Reinforcement Schedule
[31.0] ROMMEL
GENERAL RULE:
The Axis Player receives a counter representing General Rommel. The Rommel counter aids the Axis Player in several ways (see also Raid on Rommel, Section 27.6):
-
Rommel has a Movement Capability Point Allowance of sixty (60); the Rommel counter is considered a vehicle (treat as 4-wheel drive medium truck with AM radio only and no ). He has no combat ratings.
-
Rommel may react and retreat before assault when approached by any unit except an LRDG. He may Retreat through an Enemy Zone of Control with impunity.
-
If Rommel is in the same hex as a unit involved in combat during the Combat Phase, all units in that stack have their Morale increased by one.
-
If Rommel starts an Operations Stage with a unit(s) and remains with that unit for the entire Operations Stage, such unit may increase its Capability Point Allowance by five points.
In addition to the above, there is a chance that Rommel has been called back to Berlin or has flown to Germany for health reasons. At the beginning of each Game-Turn that Rommel is present the Axis Player rolls two dice. If he rolls a 12 Rommel is in Germany, and the Axis Initiative falls to 3 for that Game-Turn. Rommel returns the next Game-Turn (unless the Player throws another 12).
A brief Designer's Note: The inclusion of Rommel as a counter (without using other specific commanders) was a pure design decision. While Rommel did have a great affect on tactical operations and decisions, including only him in the game is a Design Affectation, pure and simple. However, the effect of the Rommel counter is historical.
[32.0] ABSTRACT LOGISTICS AND AIR RULES
COMMENTARY:
The design thrust of CNA is logistics: the availability and proper use of supplies and trucks. As a simple experiment to test the efficacy of this, try motorizing all Italian divisions in 1940, doubling Italian initial supply outlay and arrival. Watch them winter in Cairo. However, both designer and developer, men of some mercy, felt that there were those who might want to try CNA from a purely military viewpoint. To this end, they have formulated the rules below, enabling players to work within a simpler logistics format. The game is not really simplified, it is just a lot less work; it should also cut playing time in half (from endless to simply horrendous).Moreover, because virtually all of the design effort went into the stardard game, using these rules will have some effect on game balance. How much is up to how well and how historically the players perform. (see Section 65.0).
GENERAL RULE:
This Section applies if the Players are playing the Land Game without the Air and Logistics Games. All supply expenditures in the Land and Air 'Games rules are ignored and are replaced by those Ammo and Fuel costs listed in this section. Players will not receive any trucks but rather receive Motorization Points which may be used to increase the CPA of non-motorized units or to transport "Supply Units." Supply Units contain Ammo and Fuel Points which must be expended in order for units to move and fight. Supply units are received in lieu of and, with some adjustments, in the same manner as standard supplies.
[32.1] SUPPLY UNITS AND SUPPLY
[32.11] The Players ignore all references to usage and expenditure of Ammo, Fuel, Stores and Water. (Thus, no unit will ever suffer attrition from lack of Stores, etc.). Only those rules for supply given below apply.
[32.12] The Players will be receiving Supply Units, which are abstract substitutes for all of the aforementioned points. A Supply Unit is represented by a Supply Dump counter.
[32.13] A Supply Unit has no combat capabilities. If any enemy combat unit enters a Supply Unit's hex, that unit is captured (and its supplies used immediately and freely).
[32.14] A Supply Unit possesses a stacking value of zero. However, only five such units may be placed in a Major City hex while only three units may be placed in any other type of hex off-map. The boxes of the Tripoli/Tunisia region may contain an unlimited number of Supply Units.
[32.15] A Supply Unit initially contains and may never contain more than 40 Ammo Points and 60 Fuel Points. Expenditures will reduce these numbers. When both Ammo and Fuel Points are at zero, the Supply Unit is removed. Supplies may be rearranged (at no cost) among Supply Units occupying the same hex during the Organization Phase. Movement and combat supply requirements may be satisfied by any Friendly Supply Unit within range.
[32.16] A Supply Unit may be drawn upon by any Friendly combat unit if it is within one-half (1/2) of that combat unit's CPA. Thus, a non-motorized infantry unit would have to be within 5 CP's of a Supply Unit, while a heavy weapons unit being transported by Motorization Points would have to be within 10 CP's and a typical recce unit unit within 23 CP's. The distance is calculated from the unit to the Supply Unit as though it is being traversed by a medium Truck unless the unit is a non-motorized infantry unit in which case it is traced as infantry movement. The supply line may not be traced thru impassable terrain or enemy ZOC's unoccupied by Friendly units.
[32.17] Players may attempt to destroy Supply Units they are with. To do.so the Player expends one-half of the CPA of all units in the hex (rounding upwards) and rolls one die for each Supply Unit in the hex. If he rolls a 1, 2 or 3 the Supply Unit is destroyed, any other result and it is unaffected. If the sum of the Stacking Points in the hex during the attempt is one or less, add one to the die roll. Attempting destruction of Supply Unit(s) occurs prior to any movement in a given sub-segment of a Movement/Combat Segment. Only one attempt may be made per Supply Unit per sub-Segment.
[32.18] Players may use dummy Supply Units to confuse their opponent(s). For every three Supply Units a Player receives and/or begins a scenario with, a Player may place one dummy Supply Unit on the map. It is moved int he same fashion as the real thing (although it requires less Motorization Points) and is removed upon discovery.
[32.2] SUPPLY EXPENDITURES
The Players will be required to keep track of the number of Ammo and Fuel Points in each supply unit. The Supply Dump, Truck Convoy and TOE Log Sheets may be used for this purpose. Note that for this Case's purposes, the Commonwealth Fleet and TOE Strength Points being used to Patrol do not require supplies.
[32.21] Ammo Points are expended by the number of individual battalion-equivalents supplied (that is, a five Stacking Point value division expends ammo by its component counters — not as a whole). A non-Phasing Bn-Eq requires one Ammo Point to participate in an Assault and two Ammo Points to participate in a Barrage. A Phasing unit requires twice the appropriate number of Ammo Points as a non-Phasing Unit.
[32.22] Ammo Points must be expended at the instant of combat.
[32.23] Fuel Points are expended per Operations State. Basically, each battalion-equivalent expends one Fuel Point in any Operations State in which it is moved by land (as opposed to rail or sea). In each Operations Stage, the first time a fuel requiring unit is moved, the required one (or two) Fuel Points are expended from a Supply Unit. This unit may now be moved up to its CPA in any combination of movements and halts within that Operations State. If the unit exceeds its CPA in that OpStage, additional Fuel Points must be expended at the instant the unit exceeds its CPA.
[32.24] Each tank battalion equivalent requires two fuel points for movement. Each tank Company-Eq requires one fuel point to move. All Gun-Class and Recce-type (excluding camel reconnaissance) battalion-equivalents require one Fuel Point to move. Any Motorization Points transporting infantry units (not Replacement Points) or gun unit battalion-equivalents or a real Supply Unit require one Fuel Point. (Companyequivalents or Motorization Points used for purposes other than listed above do not require Fuel Points).
[32.25] Patrolling does not require supply expenditure.
[32.3] MOVEMENT OF SUPPLY UNITS
[32.31] Supply Units may be moved by land, rail, sea, and air. A Supply Unit may be moved by land or rail during the OpStage in which it arrives.
[32.32] Supply Units may be transported by Motorization Points. Thirty Motorization Points are required to transport one real supply unit. Six Motorization Points are required to transport a dummy supply unit. Motorization Points may be attached/detached to supply units only during the Organization Phase of an OpStage. A supply unit not assigned the minimum necessary number of Motorization Points may not be moved.
[32.33] A supply unit being transported by Motorization Points may be moved in the owning Player's Movement/Combat Phase or Truck Convoy Phase but not both. It may be moved in the friendly Movement and Combat Phase only if it begins and remains stacked with a Friendly combat unit. Not that this restriction has no effect on the normal non-Phasing movement.
[32.34] The Commonwealth Player may transport any two supply units (real and/or dummy) by rail in any one direction as the total load for a given Operation Stage. Normal rail movement rules apply.
[32.35] The Axis Player may transport supply units by Axis Coastal Shipping. Each supply unit requires 2000 tons of coastal shipping (he may use two ships on one mission).
[32.36] The Commonwealth Player may transport a total of one supply unit per OpStage by sea to/from the ports of Alexandria, Benghazi, and Torbruk. The port of destination must currenly possess an efficiency level permitting the usage of at least 50% of the port's listed capacity. This sea transport occurs during the Naval Convoy Arrival Phase andis in lieu of any combat unit transport from the port of origin and into the port of destination.
[32.37] Only supply units may be transported by air. Each Player may air transport one supply unit per Game-Turn. The air transport occurs during the Organization Phase of an OpStage (Motorization Points may be detached in order for the supply unit to be air transported). The supply unit is simply picked up and placed in a new hex. The hex of origin and destination must be a major city, village, or Tripoli/Tunisia box. The owning Player must expend 12 Fuel Points before transport from any supply unit in the hex or origin. The supply unit may not be transported from a hex if there are any Enemy combat units within five hexes of that hex. The supply unit may not be transported further east (if Axis), or west (if Commonwealth) than the easternmost/westernmot hexrow (respectively) occupied by a Friendly division (shell or full). In addition, the destination hex must be occupied by a Friendly division or brigade (not battle-group) headquarters counter. An air-transported supply unit (and its supplies) may not be moved at all by the owning Player that OpStage, although it may be drawn upon (see Case 32.16).
[32.4] AVAILABLILITY OF SUPPLY UNITS
[32.41] At the start of each scenario the Players receive a specified number of Supply Units (see the Simplified Supply case in each scenario). In addition, the Players receive Supply Units from the Simplified Supply Unit Availability Tables (see case 32.46 and 32.47).
[32.42] Supply Units for the Axis Player arrive as per convoy, see 32.6 Commonwealth Supply Units are placed in Cairo unless more than three are received in a single Game-Turn. In such a case, one Supply Unit for every three received may be placed in Alexandria.
[32.43] At the beginning of each Game-Turn, the Players plan for the arrival of their supply units. The Axis Player plans two Game-Turns in advance, the Commonwealth four Game Turns in advance. Players may do as much planning as is necessary to that, with the exception of the starting Game-Turn of a scenario, Supply Units arrive on all Game-Turns (if permitted by the planning die rolls).
[32.44] The Axis Player plans his supply using the following procedure. He consults the Axis Naval Convoy (00.00) and determines the appropriate Availability Chart Tonnage Availability Letter for the month in which he is planning (not the month in which it is arriving). He then consults the Axis Simplified Supply Availability Table. He rolls one die and cross indixes the roll with the column matching the letter. The result is the number 'of Real Supply Units he may bring in on Axis Naval Convoys two Game-Turns from then.
[32.45] The Commonwealth Player plans his supply using the following procedure. He consults the Commonwealth Simplified Supply Availability Table and determines the time period involved. This time period is that of the arrival of the Supply Units, not the one in which they are being planned. He then rolls one die, cross indexing it with the proper column. The result is the number of Real Supply Units he receives four Game-Turns hence.
[32.46] Axis Simplified Supply Availability Table (see Charts and Tables)
[32.47] Commonwealth Simplified Supply Availability Table (see charts and tables)
[32.5] MOTORIZATION POINTS
[32.51] Motorization Points are used in place of Truck Points. They are used to transport (motorize)units and may also be assigned to transport Supply Units. Motorization Points are treated in all aspects as Medium Truck Points except as modified in this Major Case.
[32.52] Each scenario lists the number of Motorization Points initially available to the Players. Additional Motorization Points are received as reinforcements as per scenario instructions. In addition, Players may bring in Motorization Points as Replacements at a rate equal to their ability to bring in Medium Truck Replacement Points.
[32.53] Motorization Points may be used to transport units and all Guns with a CPA of 0+. All normal units are considered to possess their own 'built-in' transport, as in the standard game.
[32.54] All 'leg' infantry units may be motorized. However, a Player must assign Motorization Points sufficient to transport all historically motorized infantry units (i.e., those with CPA's of 8+ and 10+) before assigning them to any other infantry-type units.
[32.55] Motorization points are not subject to Breakdown. All other Breakdown rules apply.
[32.56] Motorization Points are normally subject to loss only if the unit they are assigned to is eliminated. If their assigned unit is captured, the Motorization Points are also captured and may be used by the Enemy. Note that a Barrage Combat Result against Trucks never occurs.
[32.57] Motorization Points are subject to (abstract) loss from various factors (mostly Enemy aircraft). During the first Naval Convoy Stage of each month, Motorization Points losses for the previous month are determined. The Players consult the Abstract Motorization Point Loss Chart and read the result for the appropriate month. The number to the left of the stroke is the percentage of Motorization Points lost by the Commonwealth Player; the number to the right of the stroke the percentage lost by the Axis Player. The percentage is that of the total Motorization Points belonging to the Player on the map (which includes Tripolitania-Tunis boxes) at that point in time. The points lost may be removed from anywhere on map Section E for the Commonwealth Player or anywhere on Section A (including the off-map region) for the Axis Player.
[32.58] Motorization Points transporting a supply unit have the following attributes:
A. They possess a CPA of 15.
B. If forced to exceed their CPA for any reason, they must be returned to the last hex in which they had not exceeded their CPA.
C. Are not required to expend CP's if stacked with combat units participating in combat.
D. May react unless the unit moving adjacent possesses a CPA of 35 or more.
[32.59] Abstract Truck/Motorization Loss Chart.
(see Charts and Tables)
[32.6] SIMPLIFIED AXIS NAVAL CONVOYS
[32.61] In the abstract Logistics game system, Axis Naval Convoys consist of all Supply Units, Motorization Points and Replacement Points for that Game-Turn. These items may be divided and assigned to any Convoy Lane available, as per rules for such assignment (56.0). These are no tonnage limitation.
[32.62] The Axis Player may never assign more than three Supply Units and twenty Motorization Points to any one Convoy Lane in any one Naval Convoy Stage. Note that the Axis Player is limited by the Replacement Pool's charts as to the maximum number of each type item that may be assigned to Axis Naval Convoys (total) for arrival during a particular Game-Turn.
[32.63] The Commonwealth Player may attempt to destroy whatever is being shipped by a particular convoy. He may attack all convoys regardless of the weather on the map. The attack(s) occur in the Naval Convoy Phase of the OpStage. The Axis Player announces which convoy lanes are being used. The Commonwealth Player then attacks each arriving convoy separately.
[32.64] Each attack is carried out as follows: The Commonwealth Player consults the Simple Axis Naval Convoy Bombing Chart (32.66) and reads down the proper Convoy Lane column until reaching the westernmost location of a qualifying Commonwealth division. He then reads across that row to determine the number of Bomb Points to be used in the attack. The Commonwealth Player then consults the Air Bombardment Combat Results Table, rolls two dice reading them sequentially and refers to the previously determined Bomb Points column to yield the result. The result is expressed in percentage of supply units, Motorization Points and Replacement Points assigned to that convoy lane that are destroyed.
[32.65] The result obtained above on the Axis Naval 'Convoy is modified as follows:
A. A result of 10% applies only to Motorization Points and Replacement Points, rounding fractions down for the former and rounding fractiongs up for the latter.
B. A result of 20% or greater applies to all items being conveyed, rounding fractions down. However, at least one point of each and Supply Unit is always eliminated.
Losses of tanks and guns, within each nationality, are in percentages of the total, not the individual types. For example, a convoy carrying one point of CV 33's, two points of PzII's, two points of PzIIIJ's and two points of PzIVH's that suffers a 10% loss only has the CV 33 and one German tank point eliminated (the Axis Player's choice).
[32.66] Simple Axis Naval Convoy Bombing Chart (see Charts and Tables)
[32.7] BOMBARDMENT OF THE COMMONWEALTH FLEET
[32.71] The Axis Player may perform a limited number of Bombardment attacks on the Commonwealth Fleet in Alexandria Harbor.
[32.72] The Axis Player determines the number of such attacks he is permitted to make in the scenario as follows: He rolls one die secretly, adding two to the number if playing a Campaign Game. The result is the number of attacks the Axis Player may perform against Commonwealth ships using the Air Bombardment and Secondary Barrage Targets Combat Results Table in that Scenario.
[32.73] The Axis Player may only perform one such attack per Operations Stage. Each attack must be plotted secretly during the' Commonwealth Fleet Assignment Segment of an Operations Stage. Once planned, it occurs in the Tactical Naval Movement Segment of that Operations Stage.
[32.74] The attack is performed as follows:
a. The Axis Player determines the strength of the attack by consulting the Air Bombardment and Secondary Barrage Target Combat Results Table and rolling one die, adding two to the die roll if playing the Campaign Game. The attack is determined on that number of columns in from the left hand side of the table (that is, a roll of 1 would result in the attack being performed on the Bomb Points: 1-20 column, etc.)
b. The Axis Player rolls two dice, reading them sequentially. He cross-indexes the dice roll with the proper column to determine the result. The result is the number of damage points (see the Chariot Raid Table, 30.46) inflicted upon the ships in Alexandria Harbor (only). The Axis Player may distribute these Damage Points in any manner he wishes.
[32.75] No Bombardment attack may be made if Game-map section "E"'s weather is either rain storm or sand storm.
[32.8] ANTI-AIR UNIT MODIFICATIONS
[32.81] The Commonwealth Player removes all Anti-air units and all Light and Heavy Anti-air TOE Strength Points (regardless of where assigned) from play. This includes anti-air Replacement Points. Captured Axis anti-air TOE Strength Points are immediately removed from play.
[32.82] The Axis Player removes all German anti-air units with ID Codes of "z," and "bb" from play. All assigned light anti-air TOE Strength Points and Replacement Points are removed from play. Heavy anti-air TOE Strength Points and Replacement Points are unaffected.
[32.83] The Axis Player's Italian forces are affected as follows:
-
All anti-air units (i.e., those with ID Codes of "ss," "tt" and "uu") are removed from play.
-
All anti-air TOE Strength Points assigned to emplaced gun units (ID Code "pp") are removed from play (just the AA points);
-
Artillery units that may be assigned anti-air points (ID Code "kk") lose all assigned Heavy anti-air TOE Strength Points.
-
All Heavy anti-air (i.e., 75mm and 90mm) Replacement Points are lost.
-
Light anti-air Replacement Points may only be brought in at a rate of one per month (effectively halving the number of available points).
[32.84] All of the above modifications and restrictions apply to anti-air TOE Strength Points and Replacement Points. They do not affect non-anti-air TOE Strength Points/Replacement Points that possess an anti-air rating.
[32.9] ROAD AND TRACK STACKING MODIFICATION
The Players ignore all Road and Track (only) Stacking Point restrictions listed in Section 9.0.
ADDENDA
The following addenda to the rules and counters of Campaign for North Africa are the result of continuing testing and fine tuning by the design/development team. In a game the size of CNA, it is a virtual certainty that some points will be in need of clarification — or even correction, despite the most elaborate precautions. The following addenda are included as the game goes to press in order to provide the most up-to-date game possible.
[3.1] (clarification) Parent Unit. The terms Parent Unit and Parent Formation have been used interchangeably. It was intended that they express the following distinction: a Parent Unit has counters attached while a Parent Formation has counters assigned.
[3.4] (clarification) Coast Defense Guns. There are three types of coast defense guns in CNA:
A. Inname only: A number of units possess the title of Coastal Defense Artillery that are nothing of the sort. These may be distinguished by the fact that their guns possess CPA's of 15. They were simply artillery units (theoretically) assigned to a coastal defense role. They may contain any type of artillery.
B. Sited Guns: These units and/or TOE Strength Points possess a CPA of '0+." This indicates that while the guns did not possess organic transport, had transport been available, the guns could have been moved with little trouble.
C. Emplaced Guns: The units and/or TOE Strength Points possess a CPA of "0.'? This indicates that the guns have been "fixed" in revetments and may never be moved. Note that there were emplaced guns at Benghazi that are not represented in CNA due to their inability to fire at shoreward targets coupled with the game restriction as to how far west Commonwealth warships may operate.
[3.6] LIMITED INTELLIGENCE
(addition) CNA relies heavily on the Players' willingness to trust one another. Virtually all of the information in the game is kept hidden from your opponent. Even in land combat, only the totals are revealed, not the units producing them.
[3.61] Players are not entitled to any knowledge of the status, composition, or any other attributes of any opposing counter in CNA except as expressly indicated in the rules.
[3.62] The following is a partial listing of the information available to opposing Players:
Map. A Player may examine any stack of counters on the game map. What is in those counters is another story.
Anti-armor Fire. The types of tanks and self-propelled guns, presence of armored recce-type and/or halftracks actively participating in Assault in a hex but not the numbers, hex(es) of origin or which TOE Strength Points absorbed the Damage Points.
Close Assault. The unit types actively participating in Close Assault (or forced into it via Overrun) but not the numbers, weapon systems, what took losses, etc.
Prisoners. Nothing. All you get is the prisoners and captured equipment; they may not be quizzed.
Patrol. No mention of the state of supplies or attached trucks (other than whether the unit is motorized).
Broken down vehicles/destroyed tanks/abandoned vehicles. The contents of the marker is secret.
POW's/POW Camps/Guards. The numbers (and nationality, if Axis) are secret.
Construction. The item undergoing construction/demolition is secret.
Trucks & Replacement Points. The numbers, types, etc., are secret.
Air reconnaissance. Even less detail than Patrol.
Planes. The Players are entitled to know the exact makes of opposing planes engaged in air-air combat but the pilot ratings are secret up to the instant of combat. Land units without any Anti-air TOE Strength Points or an SGSU in a hex in which a bombing or strafing mission occurs are not entitled to know the numbers or types of planes engaged in the mission(s), only the type of mission being performed.
[12.0] (clarification) For the purposes of this Section, all references to artillery units apply to any unit comprised of TOE Strength Points with a Barrage Rating.
[12.23] (addition) Commonwealth warships are always considered to be historically identified targets.
[12.46] (clarification) Trucks do not receive terrain benefits.
[14.0] (clarification) Anti-armor fire occurs within a hex occupied by the non-Phasing Player's units. However, either Player may be the attacker and/or the defender.
[14.15] (addition) A parenthesized anti-armor rating may only be used if there are no units comprising TOE Strength Points possessing non-parenthesized anti-armor ratings. Note that replacement points do not affect this ability.
[14.27] (clarification) The Phasing Player may send TOE Strength Points from a unit into different hexes, regardless of whether all are engaging in anti-armor or all in close assault.
[16.51] (clarification) Note that the Patrolling Player does not identify the types of TOE Strength Points comprising the unit. Example: A tank battalion comprising four Shermans, two Stuarts, and two Mark VI Lights (8 TOE Points) can be simply reported as a tank battalion of six points (8 + 2 points).
[19.62] (addition) Any eliminated unit whose maximum TOE Limit is one or two TOE Strength Points. If the unit's assigned spot has been taken by the time it is recreated, it is treated as an independent unit.
[20.63] The Axis Player is required to schedule at least two weeks in advance, those Replacement Points (from his Axis Replacement Pool) he is sending to NorthAfrica via the Axis naval convoys. Replacement Points may be scheduled to arrive during any OpStage of a Game-Turn, as per the naval convoy rules. For example, Replacement Points arriving during the third week of August, 1941 must be scheduled for Axis naval convoys in the first week of August's Naval Convoy Schedule Phase. (Players should note that the maximum tonnage that the Axis naval convoys of the third week of August is determined during the second week of August!)
[21.11] (addition) TOE Strength Points comprising a headquarters unit are not subject to breakdown, regardless of type.
[21.63] (clarification) Any portion of the broken down vehicles in a hex may be towed. However, if only some are towed, the owning Player will have to place an additional marker in the new location and adjust his information on the control sheet (see Case 21.67).
[21.67] (addition) Players should avoid proliferating masses of broken down vehicles and destroyed tank markers over the game map.
[23.15] (addition) The Commonwealth Player receives, via the Reinforcement Track, two tank battalions completely refitted (re-equipped) with Scorpion tanks (historically the 42nd and 44th Royal Tank Regiments). These two battalions are engineer units but possess only anti-minefield capabilities. Each battalion is considered to possess engineer unit status while it contains at least six Scorpion TOE Strength Points. Note that the points may not be transferred to other units for any reason, including the elimination of the "tank" battalion.
[24.79] (addition) A maximum of one flying boat facility and one non-flying boat facility may be built in any hex. Air landing strips and flying boat alighting areas may be upgraded to airfield and flying boat basin status respectively. However, the facility may not be used while the upgrading is underway and no benefit in reduction of construction is applied.
[27.52] (clarification) This includes pipeline in railroad hexes (although the railroad itself may not be harmed by a raid).
[30.36] (addition) If the warship is eliminated while transporting a commando unit, the commando unit is also eliminated.
COUNTER ADDENDA
Counter Section Nr. 1
A. The following headquarters units are missing their identifying stripe: 63 Cir, 157 (63), 158 (63), 64 Cat, 141 (64), 142 (64), 101 Tst, 65 (101), 66 (101), 9 Brs (101), 102 Trn, 61 (102), 62 (102), 7 Brs (102), Ariete, 132 RC (Ariete), 8 Brs (Ariete), Littorio, 133 RC (Littorio), 12 Brs (Littorio), and the 136 GGFF.
B. The 101st Trieste Division's divisional and regimental headquarters counters (i.e., 102 Tst, 65, and 66) should show a motorized infantry instead of mechanized infantry symbols. -
C. The 2/8Brs (Ariete) Anti-tank Battalion is assigned directly to the Ariete's divisional headquarters and should bear a counter abbreviation and parent formation indicator of "2 (Ariete)." It is correctly listed on the Ariete's OA Sheet.
D. 141st Regiment of the 64th Catanzaro Division is missing its organization size indicator of "III." E. The IV/66 (101st Trieste) Company should show Heavy Weapons and not an Anti-tank symbol.
46
Counter Section Nr. 2
A. The following units are missing the headquarters stripe: 30 GaF (Bardia), i0 Brs, Libyan, 54 Ter (Derna), and 4/10 Army. Note that the Stacking Points indicators of the 54 Ter and 4/10 Army are correct in not possessing parentheses. B. The headquarters counter for the 10th Bersaglieri Regiment (10 Brs) should show a mechanized infantry instead of a motorized infantry symbol.
C. The 5th and 23rd Desert Patrol (5 DPtl and 23 DPtl) units should show recon instead of motorized infantry symbols.
D. The Sth, 6th, and 7th Artillery Regiments of the Tobruk Garrison should show counter abbreviations and Parent Unit indicators of, respectively, V/31 (Tobruk), VI/31 (Tobruk), and VII/31 (Tobruk). The counter abbreviations on the Tobruk Garrison's OA Sheet are also incorrect.
Counter Section Nr. 3 A. The 138th Infantry Battalion of the 2nd CCNN Division — 138 (238/2CN) — should not show a headquarters stripe.
Counter Section Nr. 4
A. The ArKo 104 artillery counter is missing its headquarters stripe.
B. The 368 Heavy Flak Battalion should show a Heavy AA instead of an AA symbol.
C. The 200th Regiment of the 15th Panzer Division should show a motorized infantry instead of a mechanized infantry symbol.
D. The 5th Light Panzer Division's Stacking Point indicator is missing its closing parenthesis.
Counter Section Nr. 5
A. The 2nd New Zealand Cavalry (2NZ Cav) should show an Armored Recon instead of a Tank symbol.
Counter Section Nr. 6 No errata.
Counter Section Nr. 7
A. The 65th Anti-tank Regiment should show an Anti-tank instead of an Artillery symbol.
B. The 14 (14/70) Anti-tank Company should show an Anti-tank instead of an Artillery symbol.
C. The 61st Heavy AA counter is missing its '1°' Stacking Point indicator.
Counter Section Nr. 8
A. The 13th DCL Armored Car Regiment is attached and not assigned to the 18th Indian Brigade and should show a dash (—) instead of "18 In X" as its Parent Formation indicator.
B. The 9th Australian Division's headquarters counter should not show an Engineering Capability (E) indicator.
Counter Section Nr, 9 (back and front)
A. The Minefield, POW, Guard, and POW Camp counters should be labelled as "Commonwealth" and not "Allies." j THE AL GAME
The following rules Sections cover the air war in CNA. In essence, all planes are represented individually, and fighters have pilots. Each type of plane has differing characteristics and mission capabilities. All of these are listed in the Aircraft Characteristics Charts for each nationality. Yet, in keeping with the tone of the land game, the feel of the game is operational. While there is plane-toplane combat, it is not resolved tactically, and all strengths have been considered operationally.
Ideally, the air portion of the game requires a separate Player for each side. There is a large amount of paperwork involved, and, even though there were relatively few planes in Africa, a Player may have to juggle operations for 500 to 1000 aircraft during a given OpStage. The rules for the Air Game are a lot simpler than those for the land game. Air Commanders should simply keep their Characteristics Charts handy and be prepared to do a lot of planning.
[33.0] SEQUENCE OF PLAY: Air Game
Note: It is possible to use the Land Game and Air Game Rules while omitting the Logistics Game Tules.
LAND/AIR GAME-TURN SEQUENCE OF PLAY
Play of the game should proceed in accordance with the following outline.
I. INITIATIVE DETERMINATION STAGE
The Players determine who will have the initiative for the coming Game-Turn (see Section 7.0). The Player going first within the Operations Stage (see below) is known as "Player A"; the other is "Player B".
II. STRATEGIC AIR PLANNING STAGE
A. Designation Phase: The Players assign their airplanes to fly Land Support or Strategic missions.
B. Axis Malta Availability Determination Phase The Axis Player determines the amount of support he' will receive from his abstracted N. African Theatre airforce for Raids on Malta.
C. Strategic Mission Assignment Phase
Planes designated as flying. Strategic missions are assigned. The Axis Player assigns his planes to Raids on Malta or naval convoy protection. The Commonwealth Player assigns his planes to naval Recon missions or Bombing Reserve.
D. Malta Raid Phase
The Axis Player resolves flak suppression, anti-aircraft fire and bombing missions against Maltese air facilities (Note that Commonwealth warships stationed at Valetta may only be attacked by Land Support Missions).
III. NAVAL CONVOY STAGE
A. Naval Convoy Schedule Phase
The Axis Player refers to the Axis Naval Convoy Level Chart and then to the Axis Convoy Capacity Table and rolls one die to determine the total tonnage available for the next Game-Turn. He then plans what specific cargoes the convoys will carry and their routes.
B. Convoy Resolution Phase
-
Naval Convoy Reconnaissance Segment: The Allied Player resolves Strategic Convoy Reconnaissance missions.
-
Convoy Lane Assignment Segment: Axis convoy protection aircraft are assigned CAP missions in specific Convoy Lanes. Commonwealth Bombing Reserve aircraft are assigned CAP, Flak Suppression or Convoy Bombing missions in specific convoy lanes.
-
Convoy Bombing Segment: All air-to-air combat, Flak Suppression, anti-aircraft, and convoy bombing is carried out.
IV. FIRST OPERATIONS STAGE
A. Initiative Declaration Phase
The Player who gained the initiative in Stage I now states whether he will be "Player A" or "Player B" for this particular Operations Stage.
B. Weather Determination Phase
The Player with initiative rolls for weather (see Section 29.0). All adjustments for unusual weather are made at this time, including any additional evaporation of Fuel/Water from "Hot Weather."
C. Organization Phase (The following Segments are undertaken in any order desired).
-
Reorganization Segment: Attachment and/or assignment of reinforcements, replacements, or any other non-assigned units including Trucks may be undertaken. Detachment of attached units may also be done.
-
Construction Segment:
a. Construction Completion Step: Any work scheduled for completion is finished, markers being removed or added as required. Units that have completed construction may freely be moved.
b. Construction Initiation/Continuation Step: Any continuing (or ensuing) work on projects is noted. Any units involved in such work may not be moved (voluntarily) during the remainder of the current Operations Stage.
- Training Segment:
a. Training Completion Step: Units and Replacement Points completing a level of training are noted and the effects in Morale Applied.
b. Training Initiation/Continuation Step: Any units beginning or continuing training are noted. They may not be moved (voluntarily) in the remainder of the Operations Stage (exception: Reaction).
-
Supply Distribution Segment: Supplies in the same.hex as land units may be redistributed at this time, subject to the maximum innate capacity of the unit(s) and the hex. Trucks may be loaded/unloaded:
-
Tactical Shipping Strength: Both Players execute the transport of cargo between African ports. Note: Axis coastal ships are represented in the game by counters. Allied coastal shipping is not represented by counters, and is limited only by the port capacities.
D. Naval Convoy Arrival Phase
All land and air reinforcements, Replacement Points, and Supplies scheduled for arrival (and actually arriving) appear in their designated ports of arrival or entrance hexes. Check Reinforcement Tables and Convoy Rules. The Axis Player plans for the arrival of future Replacement Points from the Axis Replacement Points Pool, if he is the phasing Player. In his first Naval Convoy Arrival Phase of each month, the Commonwealth Player consults the Commonwealth Production Table and determines how many Replacement Points he will receive one month hence and plans for their arrival.
E. Commonwealth Fleet Phase
-
Fleet Assignment Segment: The Commonwealth Player assigns his Ships to any Sea or Coastal hexes for Bombardment purposes.
-
Fleet Repair Segment: Any Repair work on ships is undertaken at this time.
F. Land Support Air Phase
(Only those planes assigned to Land Support Missions may be used in this Phase.)
-
Mission Assignment Segment: All planes that are fueled may be assigned Missions by the Player.
-
Mission Deployment Segment: Counters representing each type of plane assigned a Mission are placed in their hex of assignment.
-
Air-to-Air Combat Resolution Segment: Combat between opposing aircraft, including any caused by Scramble and Interception, is resolved. Mission aborts may take place before combat resolution.
-
Flak Resolution Segment: Aircraft in the same hex as enemy anti-aircraft units undergo Flak fire.
-
Mission Completion Segment: All missions that can be completed (e.g., bombing, strafing, etc.) are completed. Aborts may take place here, too.
-
Return to Base Segment: All surviving aircraft are returned to their base of origin (excepting those on transfer missions and some other rare occasions).
-
Tactical Maintenance Segment: Both Players may attempt to ready all planes eligible to fly land support missions for the next OpStage.
G. Reserve Designation Phase
Player "A" designates which of his units he is placing in Reserve Status, indicating that with a Reserve marker (see Section 18.0).
H. Movement and Combat Phase The following four Segments comprise the Movement and Combat Phase. Player "A" may, if he so wishes, repeat Segments 1 through 4 as many times as he desires within the restrictions of the Continual Movement rules (8.2). Each repetition must include all four Segments.
-
Movement Segment: All units except unattached trucks and tank recovery squadrons not in reserve and eligible to be moved may be moved. Non-Phasing Player ("B") may move units in accordance with the Reaction movement rules (see Case 8.6).
-
Breakdown Determination Segment: All vehicles and Motorized units of both sides are checked for Breakdown (Section 21.0). Broken down vehicles are indicated with an appropriate marker.
-
Combat Segment:
a. Position Determination Step: Both Players determine the "position" (Front or Back) of all Gun and Armor class units.
b. Barrage Step: Players secretly plot and then execute any barrages.
c. Retreat Before Assault Step: Player "B" may retreat before assault any of his units eligible to be so moved (see Section 13.0).
d. Force Assignment Step: Both Players secretly assign TOE Strength Points to anti-armor or close assault. Player "A" determines which assaults will be probes (although he need not reveal this decision) and which TOE Strength Points will be withheld from assault.
e. Anti-Armor Step: Both of the Players simultaneously resolve any anti-armor fire, extracting any casualties. Destroyed tank markers are deployed as required.
f. Close Assault Step: Close Assaults are resolved in any order as determined by Player "A." He announces which of them are actually probes after each is resolved.
- Reserve Release Segment: Player "A" may release any of his reserves that he wishes to.
J. Truck Convoy Movement Phase Player "A". may move his Second and Third Line (unattached) Trucks, replacement points and any POW's and Guards.
K. Commonwealth Rail Movement Phase If Player "A" is the Commonwealth Player, he may utilize rail movement (see Case 8.7) to move land units or supplies. Otherwise this Phase is omitted.
L. Repair Phase
-
Towing Segment: Player "A" may tow broken down and recovered vehicles.
-
Maintenance Segment: Player "A" may attempt to repair broken down, or destroyed vehicles which were not towed in this Phase.
M. Patrol Phase
If the Phasing Player has not engaged in Assault, he may use patrols for reconnaissance purposes.
At this point, Phases G, H, J, K, L, and M are repeated, except that for "Player 'A" read 'Player 'B",
V. SECOND OPERATIONS STAGE
Both Players repeat all facets of the First Operations Stage.
VI. THIRD OPERATIONS STAGE
Both Players repeat all facets of the First Operations Stage.
VII. STRATEGIC AIR RECOVERY STAGE
A. Return to Base Phase All surviving planes from missions flown in Stage IL are returned to their base or origin if possible.
B. Aircraft Maintenance Phase
Both Players may attempt to ready planes that have flown missions during the Strategic Air Stage.
VIII. END OF GAME-TURN
You have now completed one full Game-Turn, replete with airplanes and sandstorms and the lot! Congratulations. You may put in for a transfer, but before doing so, keep in mind that the Russian Front is the only other active Theatre.
[34.0] THE AIRCRAFT
GENERAL RULE:
Players will be handling individual aircraft in CNA, each type of plane having its own characteristics. There are, basically, seven different types of planes: fighters, fighter-bombers, bombers (also classified as to night bombing capabilities), dive-bombers, transports, pure reconnaissance (some planes with additional capabilities may also fly recon), and flying boats. These planes can perform a variety of missions, all of which fit into one of the following roles: patrol (support of other planes), combat (bombing or strafing), recon, or transport.
Each plane is assigned to a specific squadron, whose Squadrons Ground Support Unit (base) is placed on the game-map — usually in an air facility (airfield, air landing strip, flying boat basin or flying boat alighting area). The Squadron Ground Support Unit (SGSU) services the planes for that squadron. The planes themselves are rated as to range, tactical air combat, bomb load and/or transport capacity, maneuver capability, fuel consumption and mission capability. Fighters are also assigned individual Pilots. Planes are useful only if they have been fueled and refitted after a mission.
CASES:
[34.1] AIRCRAFT CAPABILITIES
[34.11] Range
A Plane's range is the maximum distance, in hexes, that it may be flown fo a hex to perform a mission. It is also the maximum distance from which it may return to a base from a mission. There is one exception to this: planes flying a transfer mission (simply moving from one air facility to the next) may be flown a distance equal to twice that of their listed range. Example: An Mel09E based on a Landing Strip in hex C3101 may fly to hex C3133 for a strafing mission — a distance of 32 hexes, within its Range of 41 — and then fly back to its squadron base at C3101. The Mel09E could not be flown from the mission hex to an Axis airfield in A0915 for two reasons: it is too far away and, generally, all planes must return to their Base of origin. Planes may not save hexes not flown (within a plane's Range) going out and use them coming back (e.g., the Me109E flies only 10 hexes to a Mission; it still has a Range of 41 on its Return, not 41 + 31 — the hexes not used flying fo the Mission hex.
[34.12] Certain aircraft have more than one listed Range, usually as a result of an increased fuel capacity or bombload. Players are free to choose whichever range load they wish.
[34.13] Tactical Air Combat (TacAir)
This is the aircraft's combat rating vis a vis other aircraft, based on the number and type of armament carried by the plane. A unit with a parenthesized TacAir Rating (3) may not initiate air-to-air combat.
[34.14] Bombload Capacity
This is the number of Bomb Points, called tonnage (but not actually in tons), that a Plane can carry. If a Plane can carry torpedoes that fact is listed along with the bombload capacity.
[34.15] Transport Capacity
This is the capacity of the plane, given in TOE Strength Points (infantry) and/or tons of supplies (see Case 54.5 for tonnage equivalents).
[34.16] Maneuver
This is a somewhat abstract rating that simulates the ability of a plane to fly faster, higher, and with greater agility than other planes. Maneuver ratings are always considered in relation to other planes. Maneuver ratings are used to modify Basic TacAir Differentials.
[34.17] Fuel Consumption
This is the number of Fuel Points a plane requires to perform any mission or emergency flight (see Case 37.3). All Fuel Points are consumed during a mission, regardless of the type or distance of the mission.
[34.18] Mission Capability
These are the types of missions that the plane can undertake. Planes may only undertake missions for which they have capability. For a more complete description, consult the Section on missions, 39.0.
[34.19] All aircraft Ratings are listed on the Aircraft Characteristics Chart, 34.6. No aircraft counter contains any numbers; players keep track of all ratings on their various sheets.
[34.2] FIGHTERS
[34.21] Fighters, as a class of plane, include fighters (F) as well as fighter-bombers (FB). Fighter-bombers may fly either as a fighter or bomber, but not both at the same time. Thus a fighter-bomber on a bombing mission may not break off to initiate air-to-air combat, although it may defend against such normally.
[34.22] Fighters and fighter-bombers usually fly Combat Air Patrol (CAP) missions; i.e., support and protection for bombers or a ground facility. Certain fighters may also strafe Enemy units/facilities. See the individual missions for details.
[34.23] Every fighter and fighter-bomber is assigned a pilot (see Case 40.1). Pilots affect the plane's air-to-air combat capability.
[34.24] Certain fighters/fighter-bombers may fly reconnaissance missions. Fighters and fighter-bombers flying recon may not initiate air-to-air and may not bomb.
[34.3] BOMBERS
[34.31] Bombers, as a class of plane, includes bombers, dive-bombers and fighter-bombers.
[34.32] Most Bombing Missions are concerned with dropping bombs (air bombardment) on targets in order to destroy, reduce or otherwise incapacitate them. Different bombers have varied capabilities ds regards this.
[34.33] Bombers, in and of themselves, are usually considered as one or sometimes more of the following: Bombers, Night Bombers (NB), Dive Bombers (DB), Torpedo Bombers (TB).
[34.34] Dive-bombers are the same as regular bombers, with one difference: they can perform two Missions at once. Dive-bombers may both bomb and strafe the same target.
[34.35] Bombers may never initiate air-to-air combat; they may only defend if attacked. However, bombers may increase their TacAir Ratings if they fly in large formations (see Case 45,36).
[34.36] Certain bombers are capable of transporting (TT) personnel or supplies.
[34.4] FLYING-BOATS (SEAPLANES)
Several planes in the game are flying boats, or seaplanes (FlyBt). These aircraft have all the normal range of capabilities that other planes have, with one exception: they may not be based in, take off from, or land in airfields or air landing strips. They must use flying boat basins or flying boat alighting areas.
[34.5] TRANSPORTS
[34.51] Both sides are given planes of minimal combat value that are used for transporting (TT) personnel and/or supplies.
[34.52] Transports are given a Transport Capacity, expressed in TOE strength points or Supply tons they can carry. Thus, a Ju52 can carry up to 2% tons (or 20 Points) of Fuel or 1 TOE point of infantry. Transports can never transport vehicles or motorized units of any type (except motorcycle units),
[34.53] Transports may never initiate air-to-air combat. They receive no benefit from formation flying, as do bombers. Transports are relatively helpless in the air and must have heavy CAP to insure their arrival.
[34.6] AIRCRAFT CHARACTERISTICS CHARTS
(see Charts and Tables)
[34.7] AIRCRAFT COUNTERS
[34.71] The aircraft counters do not represent individual planes in the game; they are used to note the location of planes and facilitate air-to-air combat.
[34.72] Planes on the ground are not represented by the Squadron Ground Support Unit counter (see Section 35.0). The actual types and numbers of plane in that squadron are kept on the Squadron Composition Sheet. No aircraft counters are needed.
[34.73] When placing a squadron or squadrons (or part of a squadron) of planes in a target hex (the hex in which the mission will occur) the Player simply places one aircraft counter for each class of planes (fighter, bomber, transport) in the target hex to denote that planes of that class are in the hex. The counters are lettered so that the Players can note which planes/squadrons are represented by what counters.
[34.74] If any planes are eliminated, the Player simply reflects those losses by adjusting that total on his sheet, not by changing counters. The counter representing the planes remains in place.
[34.75] When resolving air-to-air combat, Players may want to use aircraft counters to represent individual fighters, bombers, etc., so that they may better visualize what is happening. Players may therefore take any aircraft counters not on the game-map and use them as they see fit in representing the individual planes.
[34.8] AIRFORCE REINFORCEMENTS AND WITHDRAWLS
The Players receive airforce reinforcements in the forms of individual pilots, individual planes and Squadron Ground Support Units (SGSU's). Low ranked pilots arrive as needed while higher ranked pilots arrive randomly. SGSU's arrive as needed. Airplane reinforcements follow a fixed schedule: in addition, the Commonwealth Player is required to remove various squadrons during the course of the game.
[34.81] The Commonwealth Player's airforce reinforcements may be placed in any air facility in Malta, Cairo, Alexandria, or Off-map except Ethiopia. The reinforcements may be divided amongst the recieving air facilities in any distribution the Commonwealth Player chooses except as follows:
A/No more than 10% of a month's airplane reinforcements may be sent to Malta.
B/No airplane reinforcements may be sent to a Malta/N African Off-map air facility in excess of the facility's current squadron capacity.
The Axis Player's airforce reinforcements may be divided amongst the bases in the Tripoli/Tunisia boxes and Italy/Sicily/Crete as he chooses within the requirements concerning basing German bombers in the Mediterranean (see Case 43.1).
[34.82] SGSU's arrive in the Naval Convoy Arrival Phase of the Operations Stage. Axis SGSU's may arrive in any Tripoli/Tunisia box. Commonwealth SGSU's may arrive in any Alexandria/Cairo hex. SGSU reinforcements may be brought in as the Players desire subject to the following restrictions:
Both Players: An SGSU lost through enemy action may not be replaced for one complete Game-Turn. This is in adddition to any restrictions below.
Commonwealth Player: A/U.S. Army Airforce
SGSU's (i.e., those with "USAAF" historical designations and CPA's of 30) may not be brought in until August, 1942 (1/91 Game-Turn). B/The Commonwealth Player may never have more SGSU's in play than the total number of his planes at on-mapfacilties divided by twelve, plus two. E.g., if the Commonwealth Player has 438 planes at on-map facilities he may have 39 GSU's 438 + 12=36% +2 =39 (rounded up). C/ The Commonwealth Player may, because of a counter shortage, find that he is somewhat short of SGSU's (there are enough commonwealth counters to hold approximately 1,200 planes). The Commonwealth Player may create additional SGSU counters only if he has the maximum number of planes possibly based at Commonwealth N. Africa off map air facilities (i.e., calculate the number from the base's printed rather than current capacity). In such a case, he may create SGSU counters but is still bound by "B" above. These counters may not be U.S. SGSU's.
Axis Player:
A/ The Axis Player may never have more German SGSU's in play than the total number of his German planes based at on-map facilties divided by ten. E.G., if the Axis player has 286 planes based on-map he may have 29 German SGSU's.
B/ The restrictions on Italian SGSU's in play are the same as those for German SGSU's.
C/ Captured Commonwealth planes may count as part of the on-map planes for the Axis nation to whose SGSU they are assigned.
D/ The Axis Player may run short of Italian and/or German SGSU counters. He may only create more SGSU's for a nation if at least 30% of that nation's total airforce is based at off-map (N. African and/or Meditteranean) air facilities. This percentage is of total planes, not by types.
[34.83] One-to Six-Rated Pilot reinforcements arrive during the Naval Convoy Arrival Phase of the First Op Stage of each month. The Players always possess as many zero-rated pilots as needed for any situation (including emergency flight).
The Players determine the number and rating of pilot reinforcements once a month, at the instant of their arrival. The owning player consults the ap- .
propriate Pilot Arrival Table (Case 34.88 or 34.89) and if pilots are available, makes a single roll of two dice (although separate rolls for the German and Italian pilots). The Player adds the dice together and cross indexes the result underall of the columns to determine the number of pilots of that nationality of each rating that he receives for that month (note that Hauptmann Hans-Joachim Marseille arrives automatically.)
[34.84] Airplane reinforcements arrive. in the Naval Convoy Arrival Phase. The reinforcements are listed as to the total of each type of plane arriving during that month (the beginning of the campaign has arrivals during certain specific game-turns instead of months). The planes must be divided amongst the weeks as evenly as possible and all of the planes arriving during a game-turn may arrive in the First Op Stage of that game-turn at the owning Player's choice (i.e., the Players need only divide the total by four, not twelve). The individual planes arriving are determined freely by the owning Player. E.g., in January of 1941 the Commonwealth Player receives a total of 59 planes (44 Hurricanes, 12 Blenheims, 2 Wellingtons and 1 Maryland). The Commonwealth Player could have 15 Hurricanes arrive the first game-turn; 10 Hurricanes, 2 Blenheims, the Maryland and both Wellingtons arrive the second game-turn; 15 Hurricanes arrive the third game-turn and 10 Blenheims and 4 Hurricanes arrive the fourth game-turn.
[34.85] The Commonwealth Player is required to withdraw certain squadrons during the course of the game. The dates, squadron types and plane requirements are listed in the Commonwealth Airplane Reinforcement and Squadron Withdrawl Schedule (Case 34.86). Squadron withdrawls are performed at the beginning of the month indicated. Squadrons may be withdrawn from any air facility on Malta or game map section "E". The Commonwealth Player simply removes from play all of the planes and pilots assigned to that squadron. .
SGSU's are not removed unless they now exceed the limit determined in Case 34.82.
[34.86] Commonwealth Airplane Reinforcement and Squadron Withdrawal Schedule (see Charts and Tables)
[34.87] Axis Airplane Reinforcement Schedule (see Charts and Tables)
[34.88] Commonwealth Pilot Arrival Table. (see Charts and Tables)
[34.89] Axis Pilot Arrival Tables. (see Charts and Tables)
[35.0] SQUADRON GROUND SUPPORT UNITS
COMMENTARY:
All planes are attached to a specific squadron, and each squadron is represented by a Squadron Ground Support Unit (SGSU), which is the base for that squadron. Each squadron has its own Squadron Composition Sheet, and the planes and pilots — as well as supplies — attached and available to that squadron are listed on it. The squadron is the basic unit for the Air Game, and finds its counterpart in the German "Staffel" and Italian "Squadriglia.'? Actually, the Squadron was next-to-lowest in air hierarchy (above the Flight); squadrons were part of wings, which were, in turn, part of groups (and their Axis counterparts). However, most of this was for purely administrative purposes. Therefore, the only organizational level CNA covers is the Squadron.
GENERAL RULE:
Squadrons — specifically the SGSU's — are used to maintain and supply the aircraft assigned to them. Each SGSU may contain only one class of airplane, and it is limited as to the number of planes it may handle effectively. The SGSU counters are considered vehicles (medium trucks) and have their own Capability Point Allowance printed on the counter. They have no combat values.
[35.1] SGSU CHARACTERISTICS
[35.11] An SGSU counter acts as base for all planes assigned to that squadron. Each SGSU counter is placed on the game-map to indicate where that squadron is located. They are usually placed at air facilities. SGSU counters do not include the airplanes attached to the squadron;
SGSU's are the mechanics, trucks, equipment, etc., that are part of that squadron. They are not "air"? units.
[35.12] SGSU's have their Capability Point Allowance printed on the counter; they are vehicles. SGSU's move in the Truck Convoy Phase. They have no Stacking Point Value and may stack freely with other units. (Their capability to handle the planes in their squadron is limited by the Capacity Level of the air facility they are based at.) SGSU's have no combat strength of any type; if an Enemy combat unit moves adjacent to an SGSU that has no Friendly combat unit stacked with it, that SGSU may react (if possible). If it cannot react, it is eliminated.
[35.13] SGSU's arrive according to the orders of the player (See Case 34.8). Each SGSU has a unit designation (squadron ID number). These numbers are historical, but they are not used historically. If an SGSU counter is eliminated, it may be returned to play, as per 34.8, one Game-Turn later.
[35.14] SGSU's require a certain amount of supplies themselves to function. Each SGSU must expend one Stores Point per Game-Turn. In addition, each SGSU requires one Fuel Point and one Water Point per Operations Stage. SGSUs without the required supplies (for themselves) may not repair their planes. (Maintaining the planes will, of course, require additional supplies of Fuel and Ammunition).
[35.15] Truck units may be attached to an SGSU as First Line Transport. They are used to carry the supplies that the SGSU needs to keep its planes fit and readied.
[35.16] SGSUs may be used to construct air landing facilities or flying boat alighting areas (see Case 24.7).
[35.17] SGSUs are necessary to refuel and refit airplanes; only SGSUs can perform such tasks. Aircraft may refuel at any SGSU: their own squadron or another squadron base. However, refitting must be performed at their assigned squadron base (SGSU) for maximum efficiency. If a plane attempts to refit at an SGSU other than its assigned squadron, the Player adds one to his dieroll for refit. In addition, Players should remember that planes may not be refueled or refitted beyond the capacity of the air facility (see Case 36.12, 36.2, 36.3 and 36.4).
[35.18] The United States Army Air Force (USAF on the counters) SGSU's may not be used prior to Aug. 1, 1942.
[35.2] SQUADRON COMPOSITION
[35.21] Each Squadron must contain the same class of aircraft: i.e., bomber, fighter or transport (recon planes may be assigned anywhere). Fighter-bombers may go into either. Furthermore, it is recommended (but nota rule) that only one type of plane (e.g., Hurricane IIC or Ju87D, etc.) be assigned to a squadron. The latter is for ease in handling and supervision. The composition of each squadron is noted on the squadron's Composition Sheet.
[35.22] Planes may not change squadron assignments, with two exceptions:
a. The squadron's SGSU has been eliminated. In such case the aircraft are free to transfer to any other squadron, or they may be placed in reserve. b. A squadron falls below 50% ready Capacity. Planes may then be transferred from other squadrons to bring that squadron back to a more than 50% capacity.
Planes reassigned to a new squadron are given a transfer mission (to fly to their new base), unless the new SGSU is in the same hex as the plane.
[35.23] The number of planes that may be assigned to a squadron is limited and dependent on the nationality of the squadron. Each squadron's limit is the maximum number of ready planes it can handle; a squadron can always keep 4 more in reserve (whether ready or not). Thus, a squadron with a capacity of 12 may contain 16 planes: 12 ready to fly, and 4 (4 of 12) in reserve (and incapable of performing a mission). The capacities are as follows:
| Nationality | Ready Capacity | Reserve Capacity |
|---|---|---|
| Italian Squadriglia | 9 | 3 (12 total) |
| German Staffel | 12 | 4 (16 total) |
| Commonwealth Squadron (1940-June '41) | 15 | 5 (20 total) |
| Commonwealth Squadron (July '41-'43) | 18 | 6 (24 total) |
Players will note that starting with July 1941 Commonwealth Squadrons increase their capacity.
[35.24] Pilots (see Case 40.1) for fighter and fighter bombers are assigned to squadrons, not to specific planes. A record of pilots in a squadron is kept on the Squadron Composition Sheet, and pilots are given specific planes when they fly missions.
[35.25] Assignment and transfer of planes, where flying is unnecessary, is done in the Organization Phase. Otherwise, assignment and transfer are done in the Mission Deployment Segment (as a transfer mission).
[35.26] As noted, each squadron may keep a certain number of planes in reserve. These planes may be readied and armed (or not, as the Player sees fit), but they cannot fly if the ready capacity of that squadron is flying. Reserves are used to supplement aircraft that were not readied. Reserves may not scramable. They amy use emergency flight (see Case 37.3).
[35.27] If an SGSU is eliminated (see Case 35.12) and there are planes on the ground with the SGSU, the plaries are captured. They may be used by the opposing Player one Game-Turn later or destroyed as he sees fit.
[35.28] Italian and German planes may not coexist in the same squadron. They require separate maintenance. However, Italian squadrons may consist entirely of German planes (but not vice versa).
[35.29] A historical note: Although the Commonwealth and Italian SGSU's are indistinguishable as to type of aircraft handled (at least on the face of the counter), the German SGSU's are not. Each SGSU represents a specific type of plane. The Players need not follow this representation, as the SGSU's do not represent strict squadron OB. However, for those so inclined, JG Squadrons are Fighters, St.G. Squadrons are for Dive Bombers, KG for Bombers, ZG for Fighter-Bombers, and H and F Squadrons for Recon. (All, of course, with a few exceptions.)
[36.0] AIR FACILITIES
GENERAL RULE:
Air facilities include airfields, air landing strips, flying boat basins and flying boat alighting areas. These facilities are differentiated by the type and number of planes they can handle in terms of flight and maintenance. Air facilities are constructed (see Case 24.7), and counters are provided for that purpose for each type of air facility. Some air facilities exist at the start of each Scenario; these are noted in the instructions for that Scenario. Air facilities may be damaged and/or destroyed by Enemy bombardment. The number of SGSU's and airplaines which can use an air facility is dependent upon its current capacity level. Thus take-off, recovery, and maintenance are limited.
CASES:
[36.1] AIRFIELDS
[36.11] Airfields are fully-equipped and engineered air facilities, with repair shops, full maintenance facilities and runway capacity for a large number of squadrons. Airfield construction is covered in Case 24.7. Each airfield is noted by an airfield counter in the hex in which the airfield has been constructed.
[36.12] Each Airfield has a capacity level of six (maximum). This means that it may handle a maximum of six squadrons (regardless of squadron size) at any one time. There may never be more than six SGSU's in a given airfield hex. However, see Case 36.5.
[36.13] If an airfield is landing six squadrons planes in a given Operations Stage, it may not receive any more airplanes, even in an emergency. Such excess planes must seek other fields or strips at which to land. Likewise, no more than six squadron's worth of planes may be readied at a given airfield (see Aircraft Maintenance Section 38.0).
[36.14] The capacity of an airfield (its levels) may be reduced by enemy bombardment (air or artillery). Players should keep track of the capacity level of an airfield. Thus, if bombing has reduced the capacity of an airfield from six to three, that airfield may handle only three squadrons at a time, until it is built back up to six. Note that, regardless of the capacity of an airfield, each airfield may still have six SGSU's with it, even though some may not be able to function because of a reduced capacity level. If an airfield is reduced to zero capacity, it is considered destroyed for all purposes.
[36.15] Airfields may also be damaged by desert raiders. However, normal land units never damage airfields (except by barrage; see Cases 36.14 and 12.5). Land combat units may capture or destroy (entirely) an airfield by occupying its hex. Airfields are, in essence, non-denominational; they may be used by anyone.
[36.16] Players should keep in mind that, while it is the airfield that has the capacity for maintenance, it is the SGSU that actually performs that maintenance (see Case 35.17).
[36.17] An airfield is a supply dump for supplies to be used by the SGSU's on that airfield. Fuel, ammunition, stores, etc., may be stored at an airfield as if it were a dump. Land units may not use airfield supply dumps unless it is an emergency. (Exactly what constitutes an emergency is left to the Player.) Any SGSU at an airfield may make use of the supplies there to maintain and ready its planes.
[36.18] Airfields have an intrinsic anti-aircraft Strength Point of one (in addition to any other anti-aircraft units present). The Strength Point may only be used against planes on strafing and/or dive-bombing combat missions.
[36.2] AIR LANDING STRIPS
Air landing strips are simply locations cleared and leveled for take-offs and landings, with only minimal maintenance facilities. They are represented by air landing strip counters, and they are treated exactly as airfields except that each air landing strip has a maximum squadron capacity of one. If that capacity level is destroyed, the strip is eliminated and removed from the game-map (see Case 24.7 for construction details, and Case 36.1 for capacity details).
[36.3] FLYING BOAT BASINS
Flying boat basins are "airfields" for flying boat seaplanes. All flying boats must use a flying boat basin (or alighting area) for landing and maintenance. They may not use airfields or landing strips. Basins have the same features as an airfield, with the exception that their Capacity is three Squadrons. Construction details are in Case 24.7. Players should note that they can bring supplies to a flying boat basin simply by bringing trucks into the hex; they need no other transport. Flying boat basins are placed in any coastal hex. As with airfields, flying boat basins have one intrinsic Strength Point of anti-air (see Case 36.18). Flying boat basins may not be used for normal aircraft.
[36.4] FLYING BOAT ALIGHTING AREAS
Alighting Areas are the same as flying boat basins, except that they have a capacity of one Squadron and they are immune to artillery barrage. They are still susceptible to Air Bombardment (see Cases 24.7 and 41.36).
[36.5] OFF-MAP AIR FACILITIES
There are several off-map air facilities: e.g., the Tunisia boxes, the Commonwealth facilities such as Deversoir, on map E, et cetera. These are treated the same as other, on-map facilities with three exceptions:
a) There are unlimited supplies for airplane maintenance and repair;
b) They may exceed the SGSU limit up to the limit listed on the field;
- They may never be destroyed by bombing (although they may be reduced to zero), and may be rebuilt using the Malta AirFacility Construction Table (one roll gives total levels for all CW air facilities each game-turn).
Axis Mediterranean bases are also different in one other way: they may not be bombed.
[37.0] FLIGHT
GENERAL RULE:
Flight is movement of aircraft. Flight is handled operationally: planes are simply assigned to fly to a given hex from a given hex. The path of flight in hexes may not exceed the plane's range. When the plane is to be moved, it is simply placed in its target hex, noting the path of flight (hexes it flies through) for purposes of CAP interception. Planes must be refueled to fly, and all planes except those flying transfer missions must be refitted to fly again (after they have flown any other mission). Flight is never affected by the presence of ground units, with the exception of flak fire.
CASES:
[37.1] THE MECHANICS OF FLIGHT
[37.11] All planes have a range (see Case 34.11). This determines how far a plane may fly in any one direction (unless the plane is flying a transfer mission, in which case it may double its range for the one-way flight).
[37.12] To move a plane, the Player notes the location of the target hex for that mission and counts the distance in hexes, using any path he wishes, from the base/air facility to the target hex. If the number of hexes falls within the range of the plane, the plane may be flown to that hex (see Cases 37.4 and 56.18).
[37.13] Having determined the path of flight, the Player takes an aircraft counter to represent each class of plane that is assigned to a mission in that hex and places that counter (or counters) in the target hex. The Player will have a record of what missions each squadron is undertaking. Flight takes place in the Mission Deployment Segment of the Land Support Air Phase, or in the Malta and Convoy Bombing Segments of the Strategic Air Stage.
[37.14] There is a form of flight called scramble, wherein planes on the ground may take off to counterattack a nearby air threat (see Case 40.3).
[37.15] No plane may fly unless it has been fueled. Furthermore, other than units flying transfer missions, no plane may fly unless it has been refitted (see Case 37.32).
[37.16] If a plane that has been fueled flies any distance it uses all its Fuel and must be refueled to fly again.
[37.17] Planes may be flown without Ammunition, although this could be a dangerous practice.
[37.2] RESTRICTIONS ON FLIGHT
[37.21] Planes may never exceed their range in any one direction, unless they are flying transfer missions. Planes flying transfer may double their range for the one-way transfer trip.
[37.22] No plane may fly into or out of a sandstorm or rainstorm hex.
[37.23] Planes must return to their base of origin; i.e., where the Flight started from. If, for some reason, that air facility had been so reduced that it cannot hold the returning planes then — and only then — may planes attempt to land elsewhere. If such a plane cannot land at any air facility it must crash land as close to an air facility as it can get. The Player then rolls one die. If he rolls a 1, 2, or 3 the plane — and pilot — survive the landing. The plane and the pilot are recovered during the next OpStage, and both may be ready to fly (pending refitting, etc.) in the following OpStage. If the plane does not survive (a roll of 4, 5, or 6), roll the die again. If the Player rolls a 1 or 2 the second time, the pilot survives the crash and escapes serious injury and may return to play one Game-Turn following his crash.
[37.24] No planes may fly in excess of the air facility's capability level. Moreover, no planes may fly in excess of an SGSU's ready capacity (see Case 33.23). Thus, if there are five SGSU's on an airfield, but the capacity level of that airfield has been reduced to two, only two of those SGSU's may refit and ready their planes (thus enabling them to fly). The other three squadrons are forced to remain inactive because of the reduced field capacity. Likewise, an Italian squadron (for example) could send no more than nine planes on a mission, regardless of how many planes it has ready (as reserves).
[37.3] EMERGENCY FLIGHT
[37.31] Ifan Enemy land combat unit moves adjacent to a Friendly air facility that has readied planes on the ground, and those planes are in danger of being destroyed or captured by that Enemy unit, the readied planes may attempt an emergency flight to escape such danger. Emergency flight is a transfer mission
[37.32] Only fueled planes — including reserves — may make an emergency flight.
[37.33] The Player assigns pilots and then rolls once for each plane attempting to escape. Using one die, if the plane is a fighter or fighter bomber and he rolls a 1, 2, or 3, or if the plane is a bomber, recon, or transport and the Player rolls a 1 or 2, then the plane escapes. On any other die roll, the plane must remain on the ground.
[37.34] Emergency flight follows all normal rules of flight, except that it occurs out of sequence. Planes performing emergency flight may be flown up to double their range.
[37.35] The Player must exercise this option immediately. If an Enemy unit moves adjacent and the Friendly Player does not roll for emergency flight prior to the movement of another Enemy unit, all planes are stuck on the ground.
[37.4] DISTANCE CHARTS
(see Charts and Tables)
The Air Distance Table is provided as a handy reference to determining distances in hexes between major points. Considering the size of the game-map, counting hexes can be a chore,
[38.0] AIRCRAFT MAINTENANCE
GENERAL RULE:
In order to fly, planes must by ready. A readied plane is one that is refitted and fueled (being armed is optional, although it is a major contributor to plane survival). SGSU's have the capability of readying (i.e., performing maintenance on) planes. Aircraft maintenance is limited to each air facility's current squadron capacity. Planes may be refueled and rearmed by an SGSU without penalty, although refitting is performed with maximum efficiency by the squadron's own SGSU.
CASES:
[38.1] READYING AIRCRAFT
An airplane that is readied is one capable of performing a mission. Readying aircraft is performing maintenance so that the planes may be capable of flight and combat. There are three different types of maintenance. The different types of maintenance are:
a. Fuel. A plane must have fuel to fly; no plane may fly without being refueled up to its capacity.
b. Refit. Refitting is repairing wear and tear from the previous mission. Desert flying proved extremely tough on planes, and keeping them flying was even tougher.
c. Arming. In order to engage in air-to-air a plane must have ammunition. In order to engage in bombing missions, a bomber.must have bombs.
[38.2] REFUELING AIRCRAFT
[38.21] Planes must have fuel to fly. The amount of fuel needed to refuel a plane is its Fuel Consumption Rating, listed on the Aircraft Characteristics Chart. That is the number of Fuel Points required to enable one plane of that type to fly any one mission.
[38.22] Planes are refueled at air facilities by SGSU's. The SGSU does the actual refueling; the airfield or air strip simply limits the number of SGSU's that may operate there.
[38.23] An SGSU may refuel planes from any squadron. However, it may never refuel more planes than the maximum capacity of that SGSU
(readied plus reserve). Therefore, an Italian SGSU can handle refueling chores for a total of 12 planes, regardless of squadron assignment, in a given Operations Stage or 12 planes in a given Strategic Maintenance Phase.
[38.24] To refuel a plane the necessary fuel must be in the hex containing the air facility (which usually acts as a supply dump for its planes). The fuel is subtracted from the total supply in the air facility, and the plane is marked as refueled on the Squadron Composition Sheet. This is done. for each plane that a Player wishes to refuel. Refueling takes place in the Tactical Maintenance Segment or the Strategic Maintenance Phase, depending on the class of mission assigned.
[38.25] Planes do not have to be refueled (if the Player does not wish to use them), nor do refueled planes have to fly. Planes in reserve for a squadron may be refueled. Planes may sit refueled without flying for the entire game; fuel never gets stale.
[38.26] Players will note that certain aircraft have the capability of adding to their range by carrying extra fuel (or, to be exact, extra fuel tanks). This decreases their maneuverability but adds greatly to their range. Such tangs may be jettisoned if the planes become involved in air-to-air combat, in order to increase their maneuverability. In such case the Maneuver Rating reverts to its highest (normal) value, but the range of the plane also reverts to its lower range. This could cause problems in terms of getting back to base.
[38.3] REFITTING AIRCRAFT
Refitting aircraft is repairing and maintaining them so that they can fly another mission. In order to fly any mission other than a transfer, a plane must be refitted.
[38.31] At the start of a Scenario, all planes are considered refitted, unless otherwise indicated. As soon as a plane flies any mission other than transfer, it must be refitted again. A plane that is not refitted may fly no mission other than transfer, even if it is refueled.
[38.32] Refitting takes place in the Tactical
Maintenance Segment, for planes assigned tactical missions, and in the Strategic Maintenance Phase, for planes assigned strategic missions.
[38.33] Planes are refitted at air facilities by their SGSUs. It is the capacity of the SGSU that counts; the air facility only limits the number of SGSUs allowed. Each SGSU can refit up to the maximum planes the SGSU can contain (Ready plus Reserve). An SGSU can Refit planes from other squadrons; however, when doing so, the Player must add one to his refit dieroll if the plane being refitted is not assigned to the SGSU doing the work. SGSU 274RAF 25
[38.34] Refitting is not a guaranteed process, like refueling. Players must roll for each squadron undergoing refit. If planes not belonging to that squadron undergo. a refit attempt, they are rolled for separately from the rest of the squadron. The Player simply determines the number of aircraft in the squadron undergoing refit and throws one die, making any adjustments (see Case 38.35) and consulting the Aircraft Refit Table (38.38). The table gives him the percentage of planes successfully refitted. (Round all fractions up.)
[38.35] When rolling for refit, the Player adds one to his die roll if the planes do not belong to the squadron attempting the refit. If the planes attempting refit are Italian, the Player (be he Axis or Commonwealth) adds fwo to the dieroll. If the planes are German, add one to the dieroll. The affects may be cumulative.
[38.36] For every squadron undergoing an attempted refit — whether successful or not — the Player must have present and actually expend one Stores Point. A Player is not required to try to refit any plane; the choice to refit or not is up to him.
[38.37] Twenty percent (rounded up) of all refitted planes in a hex on the ground in which there js a sandstorm must be refitted again before they can be flown. Players should distribute this effect as equally as possible.
[38.38] Aircraft Refit Table (see Charts and Tables)
[38.39] Players wishing to use a more painstaking if (slightly) more accurate, method of refitting planes may roll for each plane individually. The Player, in this case, rolls two dice. The Commonwealth Player refits a plane on a roll of 2 through 8; the Axis Player refits German planes on a roll of 2-7, the Italian planes on 2-6. The effects of Case" 38.35 are increased to adding two to the diceroll to account for the "wrong" squadron. (This was, with some minor variations, the method used by the Playtesters. I can't truthfully say they lovedit...).
[38.4] ARMING AIRCRAFT
[38.41] Aircraft are armed to provide them with ammunition for combat and bombing. Arming is not necessary for flight; it is necessary to fly a bombing mission — and for safety.
[38.42] Planes are rearmed by SGSU's with the same limits and restrictions as applied to refueling. Ammunition comes from the air facility (supply dump).
[38.43] Each squadron requires one Ammunition Point to allow its planes to use their TacAir Rating. If that point is not supplied, each plane has a TacAir Rating of zero and may not fire at any Enemy planes (see Case 46.21).
[38.44] For bomb tonnage, one Ammunition Point is required for all bombs loaded onto a plane. Thus a bomber with a tonnage capacity of 15 would need and expend only one Ammunition Point to carry its maximum bomb load (see Case 41.22).
[38.45] A plane's bombload, whether used or not, is expended during a mission including Emergency Flight. (It was dangerous to land with bombs, so if unused after an abort they were often dropped in the sea or into the desert).
[38.46] The armament status of a plane may be noted on the Squadron Composition Sheet.
[38.47] The cost in Ammo Points to load a bomber with mines (see Case 41.39) or torpedoes (see Case 41.7) is one Point.
[39.0] MISSIONS
GENERAL RULE:
No plane may fly without being given a specific mission. A mission is a one or two word description of the undertaking, the reason the plane is flying and what it is supposed to do. Generally, no plane may perform more than one mission at any one time. There are a large variety of missions, and they are all dependent on the class of plane and the target. The various missions and their descriptions are covered in a series of Cases following 39.1, which is general in nature. Missions may be aborted, or discontinued before completion.
Note: Often players may not know precisely what is in a hex, but will have to assign missions "blindly," and only find out what target are present when the planes arrive.
PROCEDURE:
Most missions involve different planes going after different types of targets. However, virtually all missions (except transfer) follow the same pattern. The sequence below should be followed for all missions, with exceptions taken as specifically noted in a mission description.
a. All Planes are placed in their mission target hex.
b. Resolve all interception and scramble.
c. Any air-to-air combat between fighters is resolved.
d. Fighters on CAP that sutvive air-to-air may, under certain circumstances, attack Enemy non-fighter planes.
e. Any planes remaining in hex after air-to-air undergo flak fire if there are Enemy AA/Flak units in that hex.
f. Each mission is run in any order the Player wishes, the opposing Player noting and taking any damage inflicted.
g. All surviving planes return to base.
CASES:
[39.1] MISSIONS IN GENERAL
[39.11] Unless a plane is attempting emergency flight (see Case 37.3), no plane may fly unless it has been assigned a specific mission. Nor may any plane be flown if an Enemy land combat unit is adjacent (see 37.3).
[39.12] Each Player may use any shorthand he wishes to note which mission is which. Each Squadron Composition Sheet has a section for listing the mission that a specific plane is undertaking in a given Operations Stage or Strategic Air Phase. The Player simply writes the mission next to the plane, and that plane will attempt that mission.
[39.13] There are two major areas of missions: strategic air missions and Tactical Land Support. The former refers to any Commonwealth Missions flown against Axis Naval Convoys as well as any Axis Missions flown against Malta. Both of these Missions are flown only in the Strategic Air Phase of the Sequence of Play; moreover, they are flown only once per Game-Turn.
[39.14] Tactical land support missions are missions flown during an Operations Stage of the Game-Turn, affecting the movements and usage of land (or naval) units. Tactical land support missions are numerous in type and they are flown a possible three times a Game-Turn (or once an Operations Stage).
[39.15] There is no limit to the number of planes that may be assigned to a given mission to a given hex. There is a restriction to the type and class of plane that can undertake a given mission, as no plane may perform a mission for which it does not have the Capability. Plane Capabilities are listed on the Aircraft Characteristics Chart (34.6).
[39.16] Planes from different squadrons may be assigned to the same mission (or even target), and planes from the same squadron may be assigned to different missions. However planes from the same squadron may not be divided between strategic and land support missions.
[39.17] There is no limit to the number of the type of missions that may occur in (or rather over) a given hex (limited, of course, by what is in that hex worth going after). Players should keep the planes assigned to each specific mission separate, so as to avoid confusion.
[39.18] There are basically five "types" of missions: fighter, bomber, transport recon and transfers. The later mission is the only mission that may be undertaken by any plane (see Case 42.1)
[39.19] Generally, a plane may fly only one mission per Operations Stage or Strategic Phase (with the exception of certain fighters and dive bombers; Case 39.2). A plane flying a mission in an Operations Stage may not fly in the Strategic Phase of that Game-Turn and Vice versa.
[39.2] COMBINED MISSIONS
Planes can generally fly only one mission per flight. However, certain fighter aircraft had the ability to carry small bombloads, dropping them as they strafed a target. The Stukas, as dive bombers, also had this capability, although their armament placement prohibited them from performing in a fighter capacity. Thus, any plane with a capability notation of D("dual") may strafe and bomb the same target as a combined mission.
[39.3] VOLUNTARILY ABORTED MISSIONS
[39.31] An aborted mission is one that is cancelled before any action is taken to complete that mission. No mission may be voluntarily aborted once some action, be it bombing, strafing, or even air-to-air combat, has taken place.
[39.32] To voluntarily abort a mission a Player simply states that he wishes to abort; he then sends his planes back to base — if they qualify (see Cases 39.36 and 39,37).
[39.33] Aborted missions consume fuel, and bombers must expend their bombload, even though they do not use it.
[39.34] A Player is not required to abort all his planes on a given mission. He may choose to continue with some and send some back. The choice, when available, is up to him, within the restrictions below.
[39.35] Any fighter (any plane with a pilot, including fighter-bombers) may voluntarily abort if its Maneuver Rating is no lower than 10 Points the highest maneuver-rated Enemy Fighter on CAP in the Target hex. To determine this, subtract the "aborting" fighter's Maneuver Rating from that of the Enemy CAP fighter. If the result is — 10 or better (—8, —2, +3, etc.) the plane may abort. Of course, if there is no Enemy CAP, the fighters may always abort (exception: see Case 40.26).
[39.36] Non-fighters flying with a sufficient fighter Screen (Friendly fighters flying CAP for that hex; see Case 39.37) may abort if they wish. If there is not sufficient fighter Screen, they may not abort, unless the planes' Maneuver Rating is higher than the best Enemy fighter (a highly unlikely occurrance).
[39.37] A sufficient fighter screen is defined as a number of Friendly fighters (simply counting numbers of planes, not ratings) equivalent to at least 25% of the number of Enemy Fighters flying CAP in that hex. Thus a bomber raid with 12 fighters as escort encountering 40 Enemy fighters on CAP could be aborted; if there were 50 Enemy planes flying CAP, the bomber mission could not be aborted. Fighters acting as such a screen may not abort if they act as a screen. Fighters cannot screen fighters.
[39.38] Aircraft may also abort involuntarily; e.g., as a result of AA/flak fire (see Case 46.3 and 45.14).
[39.4] NIGHT MISSION
[39.41] Night Missions are essentially a Phase within the Land SupportAir Phase. All Night Scramble, air-to-air combat, anti-aircraft fire and land support bombing are conducted separately from other Land Support Missions.
[39.42] Only certain missions may be flown at night and only planes with night missions capability may participate in any night missions actions (exceptions see Case 39.43).
[39.43] Planes, with the exception of planes assigned Offensive CAP or Scramble missions, may only perform a mission at night if specifically assigned a night mission. In all other situations a plane, even if it possesses night mission capability, is considered to be performing a regular Land Support Mission.
[39.44] Planes flying at night benefit from the decrease in the ability of enemy aircraft to find them (e.g., planes on night missions may not be Intercepted), may not engage enemy aircraft in air-to-air combat, and benefit from a decrease in the effectiveness of anti-aircraft fire. Conversely, non-fighters may not benefit from Formation Flying while performing a night mission.
[39.5] AIR MISSION SUMMARY
(see Charts and Tables)
[40.0] FIGHTER COMBAT
GENERAL RULE:
Fighters may fly a variety of missions. The most common fighter mission is combat air patrol (or CAP). Fighters may also fly strafing missions and flak suppression missions. Fighters are also capable of scramble, a form of interception CAP. A number of fighters are capable of carrying bombloads (especially fighter-bombers); these fighters are so noted and they may participate in bombing missions (see Section 41.0). Each fighter is flown by a pilot, whose Pilot Rating will affect the plane's air-to-air combat ability. Fighters may be assigned to only one mission in an Operations Stage (three in one Game-Turn) or Strategic Air Stage (one in one entire Game-Turn; see Case 39.2).
PROCEDURE:
Players assign each fighter/fighter-bomber or squadron a mission in a specific hex. Once the planes reach the target hex, the Player must then assign each plane or squadron to a particular target of the type previously selected (e.g., fighters assigned to offensive CAP would be assigned particular Enemy aircraft to atack only after they were in their target hex; fighters assigned to a strafing mission against "first-line Trucks" would be assigned trucks attached to a specific parent formation only after the planes had reached the hex (and any air-to-air combat and flak fire had been resolved).
[40.1] PILOTS
[40.11] Pilots are not represented by counters. Rather, pilots enter the game through the Reinforcement Track as "numbers," the number referring to the pilot's Rating. Each Player notes the pilots he is receiving and assigns them to his squadrons as they arrive. Consult the various Pilot Arrival Tables to see how this works.
[40.12] Pilots are assigned to squadrons. They are assigned to a particular squadron — and become available for use by that squadron — in the first Operations Stage of the turn of their Arrival. As each squadron usually contains only one type of plane, that is the type of plane the pilot is trained to fly. Thus a pilot assigned to a squadron of Hurricanes is trained to fly Hurricanes.
[40.13] Pilots may be reassigned to different squadrons at any time. A pilot is reassigned simply by switching him from one Squadron's Composition List to another. A pilot that is being reassigned may not fly in the Operations Stage (or Strategic Air Phase) of his reassignment.
[40.14] If a pilot is reassigned to a squadron that contains planes of a different type than for which he was trained, the pilot must be trained to fly those new planes. It requires one full Game-Turn (or three Operations Stages) to train a pilot. Thus a pilot switching from a squadron of Hurricanes to a squadron of Beaufighters may not fly for three Operations Stages.
[40.15] The Pilot Rating is his capability. Pilot Rating's are either 1,2,3,4, or 6. (The 6 pilot) represents the infamous Hans-Joachim Marsielles, the German Desert Ace). The Pilot Ratings are added to the plane's TacAir Rating when that plane is involved in any air-to-air combat. Thus an ME Bf109F with Marseilles would have a TacAir Rating of 14.
[40.16] As Pilots are assigned to squadrons, the Player may have them fly any plane within that squadron (remember Case 40.14). Any plane that does not have a pilot assigned for a mission is considered to have a zero-rated pilot. There is an unlimited supply of zero-rated pilots.
[40.17] If a fighter is shot down, there is a chance that the pilot bailed out and can be recovered (see 45.65). If the pilot has been recovered, he may fly again three Operations Stages after his Recovery. He is returned to his squadron of assignment.
[40.18] There is an Optional Rule available for Players who are attempting a full campaign game and wish to create their own Aces. In such a case, all pilots start the game with a zero Rating; there is no need to bring in Reinforcement Pilots (ignore any Reinforcement Pilots). However, for each five "kills" a pilot gets, he increases his Rating by one. A kill is any Enemy plane destroyed in air-to-air combat. There is no limit how high a rating a pilot may get. This should not be used for the shorter Scenarios.
[40.2] COMBAT AIR PATROL (CAP)
[40.21] Any plane that has F (fighter) capability (see the individual capabilities on the Aircraft Characteristics Charts) may fly Combat Air Patrol. Usually, fighters fly CAP. To denote that a fighter is flying a CAP mission, write CAP and the target hex in his mission column on the Squadron Composition Sheet. He should also denote whether this is offensive CAP (CAP-O) or defensive CAP (CAP-D).
[40.22] Offensive CAP concerns flying to a hex with the intention to shoot down Enemy planes. Defensive CAP is undertaken by fighters wishing to protect Friendly bombers or transport (flying as escort/screen for them) or to protect an installation or facility. The distinctions can sometimes become a bit blurred. .
[40.23] If three or more fighters are assigned to offensive CAP in a given hex, the fighters possess the equivalent of an air Zone of Control (i.e., they are flying CAP over the hex they are in as well as all six hexes surrounding that hex). They may thus engage any Enemy planes that enter any one of those seven hexes.
[40.24] Fighters (or any plane with F capability) may fly CAP over any hex on the game-map that is within range. However, no plane based in Africa (on the game-map) may fly CAP of any type for or against Axis Naval Convoys. Commonwealth planes based on Malta may fly CAP against Axis Naval Convoys only. Axis planes based in Italy, Sicily, and Crete may fly CAP for Axis convoys. Remember, a plane flying CAP may not fly any other mission in that Stage.
[40.25] Example of CAP Missions
The Axis Player wishes to bomb Tobruk. He sends two squadrons of Ju88's to accomplish this. He also sends to the same target hex (Tobruk) as escort/screen two squadrons of ME Bf109B's and a squadron of Italian CR. 42's. (They could have come from any air facility within range.) The Commonwealth Player has placed on defensive CAP above Tobruk two squadrons of Hurricanes. The Commonwealth Hurricanes and Axis ME's and CR 42's engage in air-to-air to see whether the bombers can get through to complete their mission.
[40.26] Using the example in Case 40.25 we can best illustrate the differences between offensive and defensive CAP. If the Commonwealth planes were flying defensive CAP they would, first off, have no air Zone of Control (40.23). They would also not automatically initiate air-to-air combat. However, the Axis Squadrons would have to get through the defensive CAP to perform their Mission. If the Hurricanes were flying offensive CAP, they would have an air Zone of Control and they could initiate combat against the Axis planes. There is one additional — and important — difference. If fighters are flying offensive CAP, they would have fo attack any Enemy planes entering their hex or any hex in their Zone of Control to perform a mission in that hex; they could not decide to not have combat. Exception: only Enemy planes in one such hex must be attacked. Defensive CAP planes may decline combat and abort; offensive CAP planes may not.
[40.27] Fighters flying Offensive CAP may intercept Enemy planes whose paths of flight enter the hex they are in or their air ZOC. After all plane counters have been placed to indicate their mission target hex, but before revealing the numbers of planes involved, a Player with fighters on offensive CAP may ask to see a path of flight. If that path coincides with his fighters, the Player with the offensive CAP may choose to intercept the Enemy mission right there. If so, air-to-air combat will take place, and any surviving planes may continue their mission. Fighters on offensive CAP may intercept only one mission per Operations Stage.
[40.3] SCRAMBLE
There may be a time when a Player wishes to either conserve fuel or, perhaps, retain some flexibility with his fighter force. Scramble gives him the ability to do that. Planes assigned to scramble missions are planes that stay on the ground until Enemy aircraft come within range. They may then, under certain circumstances, take-off and engage the Enemy in air-to-air combat.
[40.31] Only planes with scramble capability may be assigned a scramble mission. Planes assigned a scramble mission are noted with an SC in the Mission column. No hex is assigned. Scramble mission may be assigned only in the Land Support Air Phases.
[40.32] Scramble occurs at the end of the Mission Deployment Segment. After all planes have been placed in their assigned mission hexes, any fighters assigned to scramble may take off and engage Enemy planes within scramble interception range. The farther the range, the lesser the chance of successful interception. A Player is not required to scramble his planes even if they are assigned to a scramble mission, but only planes assigned a scramble mission may scramble.
[40.33] If a Player decides to scramble his fighters so assigned he notes the hex which he wants them to fly to and consults the Scramble Table (40.4), determining the distance in hexes from the base of the scrambling planes to the target hex. The path of flight may not include a hex (other than the target hex) containing other enemy fighters. The Player then rolls one die and checks the table to see if the scramble has succeeded. If it has, the planes have made contact with the Enemy. They are considered to be on offensive CAP now and will attack those enemy planes. If the Scramble is unsuccessful, the planes have flown and they still must refuel and refit. The choice of whether to Scramble is up to the Player, but all decisions are made in secret and revealed at the same iime (at the end of the Mission Deployment Segment).
[40.34] The Player wishing to scramble rolls for each squadron separately, even if more than one squadron is heading for the same target. Squadrons may not be split between different hexes for scramble purposes.
[40.4] SCRAMBLE TABLE
(see Charts and Tables)
[40.5] STRAFING
[40.51] Any plane with strafing capability (STR) may strafe ground forces asnd other selected targets. Mostly, fighters have strafing capabilities. Dive-bombers have the capability to both Strafe and Bomb a given target. Strafing is a mission, and precludes the undertaking of any other mission (with the exception of planes with STR/B capability).
[40.52] Planes on a strafing mission are assigned a target hex and a specific type of. target (Case 40.54). This would be listed as, say, STR/C1234/dump. Strafing missions follow the general course of all missions (39.0).
[40.53] Each individual plane may strafe only one target in a hex, regardless of how many different types or number of target of a single type there are in that hex. Furthermore, strafing is resolved as a single attack against a target; it is not a repeated series of attacks against, say, each truck in a convoy. Note: a group of fighters assigned to strafe, for example, "infantry-type units'? may attack each of two battalions attached to a Brigade in a target hex, so long as no one plane attacks more than one battalion.
[40.54] The following types of targets may be Strafed:
a. Infantry-type types of units b. Trucks in Convoy c. First Line Trucks (attached) d. Supply Dumps e. Grounded Aircraft f. Tanks (only Hurricane II D's) g. Ports h. Water Pipeline
[40.55] Strafing may not occur in major city hexes.
[40.6] STRAFING PROCEDURES
[40.61] Infantry Units. The strafing Player totals his TacAir Points (Remember, do not add Pilot Ratings in here; they apply only to Air-to-Air) and consults the Strafing Table. The Player may strafe as many infantry-type battalions or companies as he wishes, but each plane may strafe only one target (battalion) per mission. The Player then rolls two dice and checks that diceroll under the column for the number of TacAir points applied to that battalion/company. The result is the number of TOE Strength Points eliminated. If such infantry toe Strength Points were actually being transported by trucks, such trucks are also eliminated.
[40.62] Truck Convoys. This is treated in the same fashion as Case 40.61, with losses being in Truck Points. The Player being strafed determines which trucks are eliminated, except that the losses must be distributed as evenly as possible between the various types of "cargo" (i.e., water, fuel, Replacement Points, etc.) A strafing Player may choose to go after first line attached trucks in the same fashion. In such a case he would strafe the parent unit, designating its attached trucks as the target. Again, losses are distributed as evenly as possible.
[40.63] Grounded Aircraft Treated similarly to Case 40.61, with the target being planes on the ground. The result on the Strafing Table however, is not the number of planes but rather the number of dice that the strafing Player must roll to see how many planes are shot up. Thus, if he gets a 1 on the Strafing Table, that Player then rolls one die; the result of that dieroll is the number of planes strafed and destroyed on the ground. Strafed Planes may be Recovered (45.6).
[40.64] Supply Dumps: The mechanics are the same as 40.62, the results are in the percentage of all supplies in that dump destroyed. Thus a result of 1 equals 10%, 2 equals 20%, etc.
[40.65] Tanks: Strafing of enemy tanks by planes was done only towards the end of the campaign, and only by certain planes equipped with heavyenough cannon to pierce the tank's armour. The commonwealth Hurricane Mark IID's were the only planes so equipped (with Vickers 40mm cannon). Strafing Tanks is accomplished much the same as strafing planes, with the second die or dice-roll producing the minimum number of Armour Protection Points that must be removed. Anything with an armour protection rating may be strafed. Any dummy tank counter strafed is automatically removed from play.
[40.66] Ports. Strafing of ports is combined — and is considered part of — a bombing raid on the port. The Player adds his Strafing TacAir Points then halves them, rounding down. He adds this to the total bombload delivered on the target (the port), and consults the Air Bombardment Table (See 41.5)
[40.67] Water Pipeline. Planes may strafe an Enemy pipeline in order to render it useless. The Player assigns the fighters a mission to strafe the pipeline in a given hex, uses-the Strafing Table, and rolls the dice. If he obtains any result of 2 or more, the pipeline is destroyed. (This is not a "cost efficient'? way of destroying a pipeline.)
[40.7] FIGHTER FLAK SUPPRESSION
[40.71] Fighters may use their TacAir Strength to "suppress" enemy anti-aircraft fire before it is used against Friendly planes.
[40.72] Fighter flack suppression does not produce any losses on either side. Rather the fighters divert the flak fire and cover for the other planes. However, any unsuppressed flak may fire at any planes in the hex, including any fighters on a flak suppression mission. Flak suppression is a mission.
[40.73] Fighter flak suppression is flown after air-to-air is resolved but before any flak fire against planes is undertaken.
[40.74] For every three fighters (individual planes) that fly flak suppression, one point of anti-aircraft/flak fire is neutralized and may not be used that Operations Stage. Only light AA points and ship AA points may be suppressed by fighters. Heavy AA points may not be suppressed by fighters.
[40.75] Fighters flying flak suppression expend ammunition. The flak units neutralized also expend ammunition, as they are firing at the fighters!
[40.76] Anti-aircraft units may only be destroyed by bombing; see Case 41.3
[40.77] Planes may strafe ships to suppress flak, as a regular flak suppression run. They may not damage a ship by strafing. Ships may be damaged by bombing and torpedoes (41.34). Remember 39.2 (Combined missions).
[40.8] STRAFING TABLE
(see Charts and Tables)
[40.9] NIGHT FIGHTERS
[40.91] Night fighters (so indicated on the Aircraft Characteristics Chart) have all the characteristics or regular fighters, with one exception: night fighters may scramble against a night bombing mission, but when they do, the Player rolling for scramble adds two to the die roll.
[40.92] The following night fighters have their Maneuver Ratings lowered by 4 points when used during the day: Blenheim IVF, Bf 110, and Ju88c.
[40.93] Planes on offensive CAP have no 20C at night.
[40.94] Any CAP must be designated as being flown at night, and such CAP/Escort has no effect on other missions.
[41.0] BOMBING MISSIONS
GENERAL RULE:
Any plane with a Bombload Capacity greater than "zero"? may engage in a bombing mission. There are many varieties of bombing missions, delineated by the target type. In addition, certain planes have the capability of engaging in night bombing missions, which decrease the chances of getting attacked by enemy CAP, while lessening the likelihood of damage to a target. Certain planes can engage in bombing missions while strafing. See 39.2. To determine the effect of a bombing mission the Player simply totals the Bombload Points (Tons) delivered to the target and consults the Air Bombardment CRT corresponding to the target type to see what damage, if any, has resulted.
PROCEDURE:
During the Strategic Air Planning Stage of each Game-Turn, the Players must assign any bombers that they wish to use in that Game-Turn either to land support missions, (not specifying what missions each plane or squadron will perform, but just assigning them to general land support missions for that Game-Turn), or to strategic convoy reconnaissance and/or bombing missions (commonwealth player only). All such assignments should be in writing. Any Malta bombing missions are resolved immediately, in the Strategic Air Planning Stage, and any bombers assigned to such a mission may not be reassigned or used again until the next Game-Turn. Any convoy missions are resolved during the appropriate Segments of the Convoy Resolution Phase of the Naval Convoy Stage of each Game-Turn; any bombers assigned a convoy mission may not be reassigned or used until the following Game-Turn. During each Land Support Air Phase (there are three in each Game-Turn, one in each Operations Stage), both Players may assign any eligible bombers assigned to "land support missions" to specific missions and after air-to-air combat and flak fire are resolved, the missions themselves are resolved.
[41.1] RESTRICTIONS ON BOMBERS
Note: The term "bombers" generally refers to planes that do not require pilot points.
[41.11] Bombers may not scramble, nor do bombers have an air zone of control.
[41.12] Bombers may bomb only one target per mission, and that target must be selected prior to actual flight. (Sorry, you can't drop your excess bombs on Tobruk on the way back.)
[41.13] Bombers may abort before dropping their bombs on their selected target. (See Case 41.3.) However, whether the bombers abort or not, they are considered to have dropped their bombs somewhere, and thus expend their ammunition.
[41.14] In order to fly any mission (excepting Transfer), a bomber must be refueled and refitted (as well as armed).
[41.15] Players will note that bombers have parenthesized TacAir Ratings. This means that they may not be used except to fire back at Enemy fighters that attack them. See the Section on Air-to-Air combat. (45.0).
[41.16] Certain planes may undertake two missions simultaneously (see Case 39.2) dive bombers may strafe and bomb the same target and fighters with bombload capacities may both strafe and bomb a target, if they have a "D" capability. However, fighter-bombers may either bomb or undertake a fighter mission; they do not have the capacity to undertake both types of missions at once. If a fighter-bomber is flying a bombing mission, it is considered to have a parenthesized TacAir Rating (unless it jettisons bombload).
[41.17] Torpedoes may be used only against ships and ports.
[41.2] LAND SUPPORT MISSION PROCEDURE
[41.21] Land support missions are concerned with bombing land installations, ports, personnel and equipment in furtherance of operations on land. Bombers assigned to land support missions for a Game-Turn are assigned a specific mission in a specific hex during the Mission Assignment Segment of a Land Support Air Phase. Thus, to assign a squadron of Wellingtons to bomb the port facilities at Tobruk, the Commonwealth Player would write "B-PF/Tobruk" (or any other reasonable representation of that intent). A counter representing all of the bombers of each type assigned to a particular mission in a hex is placed in that target hex (players will have to keep track on paper of which bombers are represented by each counter), unless they are intercepted en route by Enemy CAP (see Case 40.27). (That is why it is important for a Player to be aware of the path of flight; if it passes through an enemy offensive CAP Air ZOC, the Enemy fighters may attack the bombers). Bombers may also be intercepted by Enemy fighters assigned to scramble missions.
[41.22] Once a bomber has reached the target hex, any air-to-air combat is resolved. Then any flak fire is resolved. Then, after any losses are subtracted, any remaining bombers may drop their bombload, and the opposing Player determines the effects of same. He does this by totaling the number of bomb tons delivered against the particular target and referencing the proper portion of the Air Bombardment and Secondary Barrage Target Combat Results Table (41.5). He then rolls two dice reading sequentially and applies any results. Any surviving planes are then returned to base (subject to Enemy CAP interception on the way).
[41.3] LAND SUPPORT BOMBING MISSIONS
All Land Support bombing missions except "mining harbors" are resolved using the Air Bombardment and Secondary Barrage Target Combat Results Table (41.5). Mining harbor attempts are resolved using the Mining Harbors by Plane Table (41.9).
[41.31] Bombing Personnel (B-CU): The effect of the anti-personnel bombing mission is to Pin a number of units (battalion-equivalent) in the target hex; see Case 41.9 for the explanation of Air bombardment pins. The Player totals his bomb total and consults the Air Bombardment CRT. He rolls two dice, reads the results sequentially, and cross-references that diceroll with the bombload tonnage. The result is the number of battalion-equivalent units Pinned. However, for this purpose, each tank or gun (artillery/anti-tank) unit is worth two units (AA/Flak units may be pinned in the way). The choice of units to be Pinned is determined the same as an artillery barrage (See 12.2). There is one exception to this section: Units in MaJor Cities may not be bombed unless and until the fortification level of the city is reduced to one (1) or less.
[41.32] Bombing Truck Convoys (B-TC): The results are given in the number of truck units destroyed. The defending Player must divide the losses as evenly as possible amongst type of trucks and types of cargo. Trucks in major cities may not be bombed by air until the city is reduced to zero ('O'). In addition, first line trucks (attached) may be bombed in similar fashion, except that first line trucks may be bombed only by planes with a "D" capability. The method and results are the same, however.
[41.33] Flak Destruction (B-FS): The results are in terms of the number of TOE strength points with an Anti-Air rating that are destroyed. Flak/AA may also be pinned; see B-CU above. Flak destruction bombing takes place after flak fire, unlike fighter flak suppression.
[41.34] Bombing Ships (B-CF): The result is the number of Damage Points inflicted on the ships in the hex (See 30.34). Bombing of the Commonwealth Fleet may not be undertaken at night. Torpedoes may be used against ships (See 41.7). See also 41.6. Axis coastal shipping may not be bombed.
[41.35] Bombing Supply Dumps (B-SD): The result is the percentage of each type of supply in that dump that is destroyed. In addition, if there are any unattached trucks in the hex, for every 10% of supplies destroyed, one Truck Point is lost, choice of defender, dividing losses as evenly as possible.
[41.36] Bombing Air Facilities (B-AF): The result is the number of capacity levels. That that facility is reduced. In addition, for every level destroyed,.
remove 10% of the planes on the ground (e.g., 2 levels, 20% planes), rounded down.
[41.37] Bombing Major Cities/Fortifications (B-F/C): Any major city or hex with fortifications may be bombed. If the target is a major city, the mission may be flown at night (41 -4). Only one level of fortification may be destroyed in any Operations Stage. See also 22.35. Players may use this mission to neutralize a temporary repair facility that is not in a major city hex. If the Player obtains a result that would reduce the fortification level by one, the temporary facility is neturalized (and may not be used) for one Operations Stage.
[41.38] Bombing Roads or Railroads (B-R or B-RR): This is done in the same fashion as Bombing Cities, using the same table (but a different row, according to the target). Roads may be bombed at night if the Road is in a Coastal Hex.
The results are simply having the road or railroad hex destroyed. (Railroads are very easy to repair; whether they are worth the effort to destroy is the player's problem.)
[41.39] A. Mining Harbors (B-MH): Players use the Harbor Mining Table, with the Player rolling for each six bombers attempting to successfully lay the mines. Rolling one die, if the Player succeeds, place one mine counter in the port hex. The result of a mine is the same as blocking harbors: Note: The capacity column refers to the average bombload for all six planes (Not this total of six). B. Bombing Ports (B-P): The Purpose of this mission is to reduce the efficiency level (55.1) of the port. Players total, bombload and strafing delivered to the hex and consult the Air Bombardment Table. The number result is the loss in efficiency rating for that port. (See Case 41.8 for bombing Tripoli, etc.) Torpedoes may be used against ports.
[41.4] NIGHT BOMBING MISSIONS
[41.41] Certain bombers may fly night missions. Bombers capable of flying and bombing at night have a capability code of "N" or "O" in their capability column.
[41.42] In night bombing, accuracy is sacrificed for the sake of safety. Only fighters with night fighting capacity may escort bombers on night missions.
[41.43] The Player must designate that a given bombing mission is a night mission as such: B-P(N). See the Air Mission Summary (Case 39.5) for a list of which missions may be flown at night.
[41.44] All regular missions are resolved before night missions, and the "defending" Player must be informed if a given mission is a night mission prior to all resolving of missions, scramble, etc.
[41.45] Bombers flying night missions have their bombload tonnage halved, rounded down. Torpedoes may not be used at night.
[41.46] Only Night Fighters may Scramble against a Night Bombing Mission (see Case 40.9). Fighters without NF capability may be given an offensive CAP versus night raid mission, but have no ZOC, and may only search for (and thus attack) Enemy planes with a mission in the same hex (see Case 41.96). Night Fighters also go through the search procedure in 41.96
[41.47] Fighters of CAP as well as Enemy night fighters scrambling against night bombers must go through a search procedure in order to find the bombers. The Player rolls one die for each Squadron; if he rolls a '1' the fighters have found the bombers (and any NF escort). Subtract '2' from any search die roll involving squadrons of night fighters (at night). If the die roll is not good, search is unsuccessful and the fighters go home. Any air-to-air combat proceeds normally.
[41.48] Flak/AA fire against night missions is adjusted one column to the left. If already in the lowest column, the flak fire is considered ineffective.
[41.49] Night bombers do not get any benefits from formation flying (45.36).
[41.5] AIR BOMBARDMENT TABLES
(see Charts and Tables)
[41.51] Air Bombardment & Secondary Barrage Table
[41.52] Mining Harbors by Plane Table
[41.6] STRATEGIC PHASE BOMBING MISSIONS: AXIS NAVAL CONVOYS
[41.61] The Axis Player uses the convoy shipping lanes to place his arriving convoys of supplies and personnel (see 55.1). Each of these convoy shipping lanes has distances in hexes from certain key cities listed in the lane. This is the airflight distance from that city (see 56.18).
[41.62] Commonwealth bombers assigned to the Strategic Air Phase may fly bombing missions against Axis naval convoys. This includes Africa-based bombers as well as those based on Malta. The only requirement is that the distance flown is within that plane's range. In tracing the range from Africa-based air facilities, the planes must fly to one of the cities listed in the lane and then fly to the lane from that point. The two distances are added to obtain the full distance.
[41.63] Axis fighters based in North Africa may not fly CAP for Axis Naval Convoys. Axis fighters based in the Mediteranean may fly CAP for any Convoy Lane within range. Commonwealth fighters may fly CAP or Flak Suppression missions to any Convoy Lane within range. The distances to the Convoy Lanes are given in the Axis Naval Convoy Air Distance Chart (Case 56.18). Note that planes flying from North Africa must be able to fly to one of the cities listed plus the additional distance from that city to the Convoy Lane.
[41.64] The Commonwealth Player may only attack Axis Convoys that he has located. Axis Convoys may only be located as a result of a Strategic Convoy Reconnaissance Mission.
[41.65] The procedure for resolving attacks against Axis Naval Convoys is as follows:
A. The Players divide their planes between those assigned to Land Support and those assigned to Strategic Missions. The Axis Player subdivides his planes to those performing Air Raids on Malta and those flying convoy protection.
B. The Commonwealth Player performs his naval recon missions. Note that the planes may not be attracted by air-to-air combat or anti-aircraft fire.
C. The Axi Player assigns his cénvoy protection aircraft CAP missions in specific Convoy Lanes. The Commonwealth Player assigns his planes to a CAP, flak suppression, or bombing mission in any convoy lane in which a convoy has been located (remember range restrictions). If no convoys have been located, the planes never take off and therefore do not have to undergo readying.
D. Air-to-air combat is resolved in the individual convoy lanes.
E. Flak Suppression of the convoy is performed.
F. Anti-aircraft fire attacks from the convoy are resolved.
G. Commonwealth bombing of the convoy is resolved. The Axis Naval Convoy Missions are now completed. All of the surviving planes will return in base during the Strategic Air Recovery Stage.
[41.66] Convoy bombing is resolved on the Air Bombardment and Secondary Barrage Target Results Table. The Commonwealth Player totals his attacking bomb points, modifying for torpedos if necessary (see Case 41.7), and rolls two dice. The cross-indexed result is in tens of percent of the cargo in that convoy lost.
[41.67] All losses are evenly divided percentagewise among the various cargo types, rounding fractions up. All truck replacement points are considered to be one cargo type. All Italian tanks are considered to be one cargo type. All German tanks are considered to be one cargo type. All Italian guns are considered to be one cargo type. All German guns are considered to be one cargo type.
[41.68] Bombing of Axis Naval convoys never affects the arrival of listed reinforcements.
[41.7] TORPEDOES
[41.71] Certain planes have the capability of carrying torpedoes, which are effective against ships and port facilities (See Case 38.47 for arming Bombers with Torpedoes.)
[41.72] When Axis planes are carrying torpedoes against Enemy ships (this refers to Axis plane vs. Commonwealth Fleet) the Axis Player uses the torpedo line, not the normal bombload line. Thus, if he has a mixture of planes (some carrying bombs and some carrying torpedoes) he rolls twice for that mission: once for the bomb-carrying planes and once for the torpedo-carrying planes.
[41.73] When Commonwealth planes fly against Axis convoys and at least 50% of the planes are carrying torpedoes, in determining the level (Case 41.66), increase the bombing tonnage by 25%, rounding upward. Thus, if 160 tons of bombs were delivered to convoy route Nr. 3 via 30 planes, 17 of which were armed with torpedoes, the tonnage would be increased to 200 tons (effective).
[41.74] Torpedoes may be used against port facilities, but as such count as normal bombs.
[41.75] Only planes with "T" capability can carry torpedoes.
[41.8] BOMBING TRIPOLI
[41.81] Commonwealth bombers may bomb the Tripoli/Tunisia boxes in order to reduce the port capacity level and destroy any planes on the ground. These are the only two types of missions that may be flown against Tripoli, etc.
[41.82] Distances from game-map hexes to Tripoli, etc., are printed on the Air Distance Chart Add that distance to any actually flown on the Game-Map to get the actual flight distance for the raid.
[41.83] Bombing missions against Tripoli (the port) or Bizerta (Tunis) are conducted as any other similar mission, and the results are the same as any such mission. (See Case 41.39)
[41.84] Bombing missions against grounded Axis planes in Tripoli/Tunisia air facilities are conducted as a Bombing Air Facilities Mission, although the results against the facility are ignored (see Case 41.36).
[41.85] The AA/Flak capacity for Tripoli, et al, is constant, non-destructable, and printed in the respective boxes. CAP coverage depends on the Axis Player, but any CAP coverage is for all targets in that box.
[41.86] Night missions may be flown against the port of Tripoli.
[41.9] PINNED BY BOMBING
The effect of a Pinned result inflicted on a unit by Air Bombardment is different from an artillery barrage pinned. (This rules Section supercedes the somewhat incorrect definition of Pinned given in Case 3.1; in essence this case is an early errata.) The Pinned by Bombing result depends on whether the "pinned" unit belongs to the "A" Player or the "B" Player.
[41.91] Pinned Unit: "A" Player
The following results occur from a Pin to a unit belonging to the A Player for that OpStage:
- The unit may voluntarily use only % (roundeddown) of its CPA; and 2. Such unit may not voluntarily enter an Enemy ZOC; and 3. If such unit is in an enemy ZOC when Pinned such unit may not leave that ZOC; and 4. Such unit may not voluntarily engage in combat; i.e., it may not barrage or use Offensive Close Assault or Anti-Armour.
As soon as the OpStage switches to the B Player these results are no longer in effect.
[41.92] Pinned Unit: "B" Player
The following results occur from'a Pin to a unit belonging to the B Player for that OpStage: such unit may not move voluntarily or engage in combat voluntarily during A OpStage. As soon as it is B's turn, the effects of Section 41.91 apply. The unit becomes unpinned at the end of that OpStage.
[42.0] NON-COMBAT MISSIONS
[42.1] TRANSFER MISSIONS
[42.11] A transfer mission is flying a plane from one air facility to another.
[42.12] Transfer missions should be flown before undertaking any other missions, so as not to forget them in the heat of battle. Unless they run into Enemy CAP (see 40.27) they should not run into any problems.
[42.13] Planes flying transfer missions may double their range. Transfer is a one-way flight; transfer planes do not (cannot) return to their base of origin.
[42.14] Planes flying transfer need not be refitted to fly. However, a plane completing a transfer mission must be refitted to fly another mission in the next Stage or Turn. Transfer missions consume fuel; whether planes conducting them are armed is a question of choice.
[42.15] To assign a plane a transfer mission, write "Transfer to'? and the hex of destination in the mission box of the Squadron Control Sheet. The plane is then placed in the new hex. Transfers are flown only in Tactical Land Support Phases of the Operations Stage.
[42.2] RECONNAISSANCE MISSIONS
[42.21] Reconnaissance (Recon) missions may be flown by any plane with a Recon Capability ("R").
[42.22] The object of a Recon mission is to find out what units—in general terms—the Enemy has in a given hex. Therefore, Recon missions are flown over a specific hex with an Enemy unit in it. Recon missions may be flown over any hex except for major cities.
[42.23] The Player assigns a number of planes to fly Recon to a specific hex. After all air-to-air and flak, the Player totals the number of planes on Recon in that hex and consults the Air Reconnaissance Table (42.27), rolling one die. The result is the number of units in hex the Player has learned information about (42.24).
[42.24] For each battalion-sized unit the player flying Recon can learn about, the opposing Player must reveal the type of unit and its TOE strength under the following conditions:
a. All tank units (including dummy tank units, which are considered to have a TOE Strength of "three" for this purpose) revealed first, then infantry, then artillery.
b. The opposing player must give the TOE strength, but may "lie" in either direction to a deviation of '2'. Thus, for a unit with a TOE of '3' he could say it had '1' or '5' or any number in between.
[42.25] No Recon mission may be flown in a hex that is undergoing air bombardment.
[42.26] Land Recon missions are flown in the Tactical Land Support Air Phase of the OpStage. Planes flying Recon require refit. Recon missions against Axis Naval convoys are flown during the Strategic Air Phase.
[42.27] Air Reconnaissance of Land Units Table (see Charts and Tables)
[42.3] TRANSPORT MISSIONS
[42.31] Certain planes with transport capability may transport personnel or supplies by air. The cargo capacity of each transport is listed on the Aircraft Characteristics Chart in terms of TOE Strength Points or tons of supplies.
[42.32] For a Transport to carry a TOE Strength Point or supplies to a given hex, that "cargo" must start the Operations Stage in the hex with the transport. The transport may then fly one type of transport mission: a. The Transport flies to the target hex, lands the cargo, and flies back; or b. The transport flies to the target hex and lands, remaining in that hex. In this case, the transport may use its transfer range (double its normal range).
[42.33] Transport missions must be flown to Friendly air facilities, as the planes have to land. Supplies and personnel may be airdropped under special circumstances (See 42.4)
[42.34] Personnel transported by air may not voluntarily move in the Operations Stage they are transported in, having used their allotted CPA. 'Personnel may be flown into a hex in an Enemy Zone of Control; however, such units may not be used for any attacks. That is, they may not voluntarily expend CP's on combat. They may defend. Personnel air-transported may never voluntarily exceed their basic CPA, through reaction or retreat before assault.
[42.35] Supplies air-transported may be used as soon as they can be assigned to a dump or specific units. They cannot be used directly "off the plane." They must be distributed in the Organization Phase first.
[42.36] Transport missions may be flown only in Operations Stages. Planes require refitting, even when flying Transport Missions.
[42.37] Only infantry (without trucks), motorcycle infantry/recce units, and airborne units may be transported by air. Exception: dead camels may be transported by air. Live camels may not be transported by air.
[42.4] AIRDROP MISSIONS (PARATROOPS)
Although there were several airborne units in the desert campaign (The Ramcke Brigade and the Folgore Division), there were no major airborne missions. The following rules are, in. essence, hypothetical.
[42.41] Units capable of being airdropped are so noted on the OA Sheets. Such units may be airdropped by transport planes during a tactical land support Air Phase, under certain circumstances.
[42.42] An airborne mission is the same as a transport mission (42.32a). The only difference is that the units are dropped into the hex, not landed, so an air facility is not needed for the transports. However, they must start from a Friendly air facility.
[42.43] Units may be airdropped into any clear, gravel or desert hex. They may not be airdropped into major cities and they may not be airdropped into hexes occupied by Enemy units or hexes in an Enemy Zone of Control. Units may be airdropped into a Friendly occupied hex, within stacking restrictions, as long as such hex is not in an Enemy ZOC. In addition, the drop-zone hex may not be more than two hexes from a recognizable land feature (42.44).
[42.44] A recognizable land feature is a major city, a road (unfinished, destroyed or not) or railroad hex, a village, air facility, or oasis.
[42.45] Airdrops may not occur in sandstorms or rainstorms. However, there is no drift; units always drop in the target hex. There are no casualties in an airdrop.
[42.46] Airdropped units require and use supplies the same as any unit: they are not commandos. Thus, only certain types of supplies may be airdropped: ammunition and stores may be airdropped (using the precepts of 42.42 and 42.43). Supplies may be airdropped into a Friendly-occupied hex even if it is in an Enemy Zone of Control. In the latter case, there is no need to use the recognizable land feature provision of the airdrop rule. Airdropped supplies may be used as soon as they arrive, unlike transported supplies (42.35).
[42.47] Airdropped combat units may move and fight normally, with one exception: they may not voluntarily exceed their CPA in the Operations Stage in which they are dropped.
[42.48] There is no limit to the number of TOE Strength Points that may be dropped (within the limits of how many transport planes you can muster). However, no unit may be airdropped more than once a month (every 12 Operations Stages).
[42.5] NAVAL CONVOY RECONNAISSANCE MISSIONS
[42.51] The Commonwealth Player may fly reconnaissance missions in Convoy Lanes to determine the existence and size of the Axis Naval Convoy assigned to that Lane.
[42.52] The Commonwealth Player must assign each reconnoitering plane to a specific Convoy Lane. A plane may only be assigned to a naval recon mission if it posses Recon capability (R). A plane may be assigned to any Lane within its range. The distances to the convoy lanes are listed in the Axis Naval Convoy Air Distance Chart (Case 56.18). A plane flying a recon mission from North Africa must possess a range.at least equal to the distance from its air facility to one of the key cities listed on the chart plus the distance from that city to the Lane.
[42.53] Naval recon missions are resolved on the Air Reconnaissance of Axis Naval Convoys Table. If a successful reconnaissance of the convoy lane has been made the Axis Player must indicate whether or not a convoy is assigned to that lane this game-turn; and if so, its approximate tonnage.
[42.54] Planes flying naval recon missions may not be attacked in air-to-air combat or by anti-aircraft fire.
[42.55] Naval recon missions are Strategic missions that are flown in the Naval Convoy Stage
[42.56] Naval convoy recon missions are assigned in the Strategic Mission Assignment Phase of the Strategic Air Planning Stage. An unlimited number of planes may be assigned recon missions in the same convoy lane. Naval recon missions are resolved in the Naval Convoy Reconnaissance Segment of the Convoy Resolution Phase.
[43.0] AXIS ITALIAN-AEGEAN AIR BASES
GENERAL RULE:
The Northern "shore" of the Mediterranean was almost exclusively controlled by the Axis, especially after the fall of Greece and Crete in early 1941. The Axis often used Italy, Sicily, Greece and Crete to base its bombers, so that they could be used for multi-purpose duty. The German Player is, Bo therefore, required to base a certain percentage of his Bombers in either Italy, Sicily or Crete. Boxes for these are provided on the game-maps, as are their flight distances. There are also certain restrictions pertaining to missions based in the Mediterranean, in terms of fighter support.
[43.1] AXIS MEDITERRANEAN BOMBER BASE REQUIREMENTS
[43.11] At least 75% of all German He 111's, Ju88D's and FW220's must be based in Mediterranean Bases.
[43.12] Until 1/35 Game-Turn 1941, 75% of all German bombers must be based in Italy/Sicily.
[43.13] From June 1/35 Game-Turn 1941 to the end of the game at least 50% of all Helll's, Ju88's, and FW220's must be based in Crete; the remaining 25% may be based in Sicily/Italy or in Crete.
[43.14] It takes one OpStage to transfer from Italy to Sicily and/or to Crete, and vice-versa.
[43.2] MEDITERRANEAN BASE RESTRICTIONS AND CAPABILITIES
[43.21] German Bombers based in Italy/Sicily and Crete do not need SGSU's. All their requirments are met by the specific "Box" they are in, including fuel and ammunition. The Axis Player does not expend fuel or ammo for these planes. However, all planes must be refitted (38.3)
[43.22] When refitting planes as per 38.37 (per Squadron), the Axis Player should divide all bombers in a given area into groups of 6 to 12, considering each such group a squadron.
[43.23] Bombers based in Crete must be used to attempt to raid the Suez Canal area (not on the game-maps) each month. This is handled abstractly in that during four OpStages within a given month there may be no bombing missions flown from Crete . There is no effect on the game of such missions (as they had little effect operationally on the Commonwealth, other than harrassment and extended work hours). There are also no losses.
[43.24] Bombers flying from Crete may not receive any protective CAP from planes in Africa. They fly "naked".
[43.25] Bombers based in Italy/Sicily may co-ordinate with African-based fighters for CAP. They may also be used in raids on Malta (see 44.0).
[44.0] MALTA
COMMENTARY:
The importance of the tiny island of Malta to the campaign in North Africa cannot be understated. Lying, as it does, astride the Axis Shipping Lanes, it provided the Commonwealth with an excellent position from which to hinder the transport of Axis supplies and reinforcement.
GENERAL RULE:
The Commonwealth has several air facilities on Malta on which he may base planes for strikes at Axis convoys and bases. In retaliation, the Axis may attempt to reduce the effectiveness of Malta by bombing the island. The Axis Malta reduction effort is controlled by external policies which have been abstracted into several charts proscribing the extent of such effort. Likewise, the Axis may not invade Malta — at least not in this game. Planes performing missions over Malta must be assigned a specific hex.
[44.1] THE MALTESE AIR BASES
[44.11] The map of Malta represented on Game-Map "A" is not in the samé scale as the African portions of the game-maps, nor is it in scale in terms of geographic location vis-a-vis the African coast. The air distances to key points in Africa are listed in the Malta Box. The map-of Malta itself shows different terrain and cities, mostly for historical purposes. The only items of importance on the Malta map are the air facilities and the port of Valetta.
[44.12] Maltese air facilities are printed directly on the game-map (unlike most others). They are permanent and may never be moved. No further air facilities may be built on Malta. Although they may not be destroyed, Maltese air facilities may be reduced (by Axis bombing) to zero effectiveness.
[44.13] The initial capacity of Maltese air bases is given in each scenario. It may be increased—up to the standard levels—by using the Maltese Air Facility Construction Table (44.5) The Commonwealth Player may use the table once each Game-Turn for each air facility on Malta, the table informing the Commonwealth Player how many "levels" he may construct for each facility. No supplies need be expended.
[44.14] The Commonwealth Player does not need—nor does he use—SGSU's on Malta. Each "level" of air facility can handle up to 18 planes of any type. Thus an airfield operating at maximum capacity (6 levels) could handle 108 planes. However, for the sake of play ease, the Commonwealth Player should group his planes as if they were squadrons.
[44.15] Planes on Malta may be moved from one field to another without flying. Such a movement is not considered a mission and happens "outside" the play sequence, In essence, the Commonwealth Player simply moves his squadrons or planes from one field to the other at the beginning of the OpStage, noting such movement on his squadron sheets, prior to any missions being flown. The Axis Player need not be informed of such moves.
[44.16] Planes based on Malta do not need fuel or ammo; they are automatically refueled and rearmed each Stage. However, they must be refit like all other planes, using the same method as all other planes.
[44.17] Commonwealth planes may transfer to and from Malta and the African fields, provided they have the range.
[44.18] The Commonwealth Player may divert AA/Flak points (Replacements) to Malta. For each light AA Flak point he diverts to Malta he receives one AA Point on Malta; for each heavy AA point he diverts he receives four AA points on Malta. These points: come from the Commonwealth Replacement Pool for AA points. No more than one AA Replacement Point (Light or Heavy) may be diverted to Malta per Month, and the maximum AA point capacity of Malta is 48 AA points.
No flak counters are placed on the Malta map; the Commonwealth Player simply notes which bases have how many Flak Points. Any losses from bombing are noted as they occur. Flak points may move between airfields/strips as planes do in 44.15 but flak/AA units may not be moved between Malta and the mainland.
[44.2] AXIS AIR RAIDS ON MALTA
[44.21] Axis bombers based in Italy/Sicily as well as any African-based Axis planes that can reach the island can raid Malta, bombing the Maltese air facilities to reduce their capability to refit planes.
[44.22] In addition, to 44.21 the Axis may draw on Italian and German aircraft based permanently in Italy and Sicily (and otherwise not available to the Axis Player). These planes are reflected by the Axis Malta Availability Levels. (See 44.41.)
[44.23] There are four Axis Malta Availability Levels, representing the levels of Axis commitment to Malta. Each level gives the number of Game-Turns during the Campaign Game that that portion may be used. Each shorter scenario has separate listings. No Availability Level may ever be used more Game-Turns than it is listed as available. It is up to the Axis Player to plan his raids according to what he wants to accomplish and when he want to doit.
[44.24] Axis Raids on Malta take place in the Strategic Air Phase of the Game-Turn, and thus occur only once per Game-Turn. (This is, admittedly, somewhat abstract—and the various Malta tables reflect this abstraction.) The Axis Player chooses the planes in the game he wishes to bomb Malta with by consulting the portion of the Malta Availability Table of his choice (44.23). He assigns each squadron to a specific airfield in Malta and conducts each bombing and/or strafing raid normally—including air-to-air and AA/flak.
[44.25] To compute how many — and what types — of planes he may use, the Axis Player uses the Axis Malta Table (44.42). In addition to the planes he receives from this Table he may then add in — up to the maximums he gets from the Table — any planes he wishes from Africa. In essence, the Table shows the Axis Player how many of his planes in the game, but in Italy/Sicily he may use plus how many planes not in the game (for normal use) but available nonetheless that may be added to this total. The two are combined to provide the number of Planes Available, to which are added any Africa-based planes. If, at any time, the Axis Player does not wish to bomb Malta he is considered to have used Level I (which is unlimited).
[44.26] In using the Axis Malta Availability Tables, the Axis Player always assigns his map-based planes after determining how many planes he will get from the tables.
[44.27] In no case may the Axis Player assign more planes of any one type from map bases than are assigned from the Availability Tables. That is, if the table says 6 S.M. 81's may be used, the Axis Player may add in no more than 6 map-based SM 81's. Furthermore, if a plane is not assigned from the table it may not be assigned from the map.
Example: The Axis Player decides to launch a Level III raid on Malta. He has, based in Italy and Sicily, 12 SM 79's, 6 BR 20's, 16 CR 42's, and 4 CR 32's. He consults the table and rolls a "6". As per the number ot the left of the slash he may assign 50% of these available planes to the mission. He may add to this, as per the percentage to the right of the slash, a number of planes equal to (100%) what he has based in Italy/Sicily. These planes are not actually in the game but have been provided by the Axis in Europe. In essence, the Axis player now has available 150% of the total planes he has based in Italy/Sicily. He may also add to this the same number of planes (or less) — by type — as he has available from the above from bases in Africa.
[44.28] To determine what losses are are absorbed by planes actually in play — as opposed to those taken by planes that are used only for Malta bombing as per 44.4 — the player must obtain a ratio between the planes he uses that come from (1) Africa, plus (2) the percentage to the left of the slash on the Table, and compare that total to the planes he uses from the percentage to the right of the slash on the table (i.e., those planes not really in the game but available for bombing Malta). This ratio is used to obtain an Actual Loss Percentage, which is then applied to any total losses (from the CRTf's), rounding up. The Axis Player applies this revised (and usually lower) loss number to those planes he actually has in the game. Planes not actually in play never take losses; they are an applied constant.
Example: The Axis Player has one squadron of Ju88A's from Benina and two squadrons of Ju88A's from the Malta Availability Table. All squadrons have 12 planes, for a total of 33% of the total comes from Benina. The three squadrons attempt to bomb Lugqa airfield. The squadrons lose 6 planes to air-to-air and 2 to flak. In addition, 2 are forced to abort, a factor not considered—simply noted—when determining who takes losses. 33%, rounded up, of 8 means 3 bombers from Benina have been shot down. The number of bombers lost in Italy/Sicily from the Availability Table is not considered.
[44.29] The Axis Player may, after rolling on the Table, decide not to raid. The raid is cancelled, but he still has used the table he rolled for once—regardless of whether he cancels or not (see Case 44.23.) In such a case, the Axis Player may not, of course, use map-based planes.
[44.3] INVASION OF MALTA
Realizing the importance of Malta to the Axis supply effort, the German High Command contemplated invading Malta on several occasions, even going so far as to set a definite date. However, that plan was aborted when Rommel borrowed the air cover assigned to such invasion for his thrust to take Tobruk—and then never returned them. In any case, the German High Command had deep reservations about an invasion of the strongly-defended island, and given the fearsome losses taken by German paratroopers on Crete it is more than likely that the Germans never would have carried their planned invasion through to the end. They certainly would have received little valuable support from the Italians who, despite several professed "airborne" divisions (like the Folgore) had little practice in this sort of thing. It is mainly for these reasons that—at least in this game—the Axis Player may not invade Malta. Sorry.
[44.4] STRATEGIC AIR RAIDS ON MALTA
(see Charts & Tables)
[44.41] Axis Strategic Airforce Commitment Chart (see Charts & Tables)
[44.42] Axis Malta Availability Table (see Charts & Tables)
[44.5] MALTA AIR FACILITY CONSTRUCTION TABLE
(see Charts & Tables)
[45.0] AIR-TO-AIR COMBAT
GENERAL RULE:
Although CNA uses individual planes, the resolution of air-to-air combat is done on an operational level, with much abstracted (in terms of plane ability, etc.). Air-to-air combat occurs before flak/AA fire and before completing any missions. Essentially, only fighters with non-parenthesized tacair ratings my initiate air-to-air combat, and fighters on offensive CAP must initiate Air-to-air combat. Air-to-air combat is resolved by comparing tacair ratings, augmented by the pilot ratings, and further adjusted by any difference in maneuver ratings. Bombers' tacair ratings may be augmented if they are formation flying. Planes resolve air-to-air in pairs, one plane against another, and all combat takes place within the hex.
PROCEDURE:
The Players first determine which planes in the hex will be engaging in air-to-air. This means all scrambles must be performed first. Each Player then declares whether or not he wishes to initiate air-to-air, with any player having planes on offensive CAP forced to initiate. Fighter vs fighter (or screen) combat takes'place before fighters may attack any Enemy bombers/transports, etc. (unless they are unescorted).
Having determined the planes involved, the Players now decide who will be the Attacker (see Case 45.16). (Remember, all Missions are flown simultaneous). The defender places all his planes being attacked down on a flat surface, using available aircraft counters (see 34.75). The attacker now allocates his attacking fighters against the defending planes. Each individual air-to-air combat is now resolved, using the Air-to-Air Combat Tables. After attacking fighters have attacked escorts/screens they may, if possible, now attack the bombers/transports. After all air-to-air is resolved, players complete their missions (after, of course, undergoing flak/AA fire.)
All opposing planes involved in air-to-air combat are individually "matched up", (see Case 45.2). The Players now determine each airplane's tacair differential. In order to do this, the Players first adjust the tacair rating of their aircraft in one of two possible ways:
a) For each fighter, the owning Player adds the rating of the pilot to that of his plane.
b) For each bomber, add to the tacair rating any applicable formation flying bonus: if 6-17 bombers are on the mission, add one to each bomber's tacair rating; if 18 or more bombers are on the mission, add two to each plane's tacair rating. (Note: Dive bombers are not eligible for formation flying bonuses.)
Each Player now subtracts the adjusted tacair rating of the Enemy plane from his own plane's adjusted rating. This is the tacair differential. The tacair differential is now adjusted for each plane to account for the relative difference in manueverability of the planes. The manueverability rating of the less manueverable plane (the lower rating) is subtracted from that of the higher, and the Maneuver Adjustment Chart is consulted to obtain the appropriate maneuver adjustmenr. This Maneuver Adjustment number is added to the tacair differential of the plane with the higher maneuverability rating and subtracted from the tacair rating of the plane with the lower maneuverability rating. (Note: If the maneuver ratings are equal, no such adjustment is possible.) Thus, if prior to the adjustment for maneuver ratings one plane had a tacair differential of -3 and the other +3, but the plane with the lower tacair differential had a maneuver rating 16 points higher than the second plane, then the tacair differentials would be adjusted, respectively, from -3 to +1 and from +3 to -1, since the Manuever Adjustment Chart calls for an adjustment of "4" in favor of the plane with the higher manuever rating.
In fighter vs. fighter match-ups, the fire of the plane with the "minus" tacair differential is resolved first. (For "0" differentials, the plane with the highest rated pilot is considered to fire first, or if that is a tie, the attacking Player's plane.) If there is more than one fighter attacking one Enemy Fighter, the lone fighter fires first. In fighter vs. non-fighter, the non-fighter plane's attack is always resolved first.
Using the final adjusted tacair differentials, the Players refer to the tacair Kill Table (45.5), and the Player firing first rolls two dice and combines the results sequentially to obtain a result (e.g., "2", "4"? equals "24"). If the result falls within the kill range given on the table corresponding to the ap propriate tac air differential, the opposing plane has been shot down. Otherwise, the opposing Player with the aircraft with the positive tacair dif ferential gets to fire. If his dice roll result falls within the kill range as delineated on the TacAir Kill Table, the first plane is shot down; if not, then there is no result. (Note: Non-fighters fire in dividually at each Enemy fighter that is matched against them; fighters may never fire at more than one plane, even if attacked by more than one.)
Figure A: PLAYER A
| Plane Nr./Type | Pilot | TacAir | Maneuver |
|---|---|---|---|
| 1 Gladiator MkII | 1 | 2 | 27 |
| 2 Gladiator MkII | 0 | 2 | 27 |
| 3 Tomahawk | 0 | 2 | 32 |
| 4 Tomahawk | 0 | 2 | 32 |
| 5 Hurricane MkI | 0 | 4 | 32 |
| 6 Hurricane MkI | 3 | 4 | 32 |
| 7 Hurricane MkI | 1 |
Figure B: PLAYER B
| Plane Nr./Type | Pilot | TacAir | Maneuver |
|---|---|---|---|
| A Fiat C. R. 42 Falco | 1 | 3 | 28 |
| B Fiat C. R. 42 Falco | 0 | 3 | 28 |
| C Messerschmitt Bf. 100 | 2 | 5 | 32 |
| D Me Bf 110 | 1 | 5 | 32 |
| E MeBf 110 | 0 | 5 | 32 |
| J Me Bf 109 E | 2 | 6 | 34 |
| K Me Bf 109 E |
Figure C
| Player A's planes | 1 | 2 | 3 | 4 | 5 | 6 | 7 | 8 | 9 |
|---|---|---|---|---|---|---|---|---|---|
| Player B's planes | D, A | E, C, F | G | H | I | J | K, M | L | B |
The preceding is an illustration of determining the plane match-ups in the following example of planes about to engage in air-to-air combat. Player A (Commonwealth) possesses nine planes while Player B (Axis) possesses thirteen planes, making the former the defender and the latter the attacker for this particular group of air-air combats.
Figure: The Commonwealth Player has two Gladiator MkII's, one piloted by a 1 pilot; two Tomahawks; four Hurricane MkI's, one piloted by a 3 pilot and one by a 1 pilot; and one Beaufighter Mk IF. The Commonwealth Player numbers his planes (for convenience) in ascending order by combat worth. Within the numbers assigned to each type of plane he randomly determines the rank of the pilot handling the aircraft.
Figure B: While the Commonwealth Player is listing his planes the Axis Player is performing the same actions. His job is slightly easier as he is not troubled by having to jumble his pilot ratings.
Note that if either or both Players possess identical aircraft with identically rated pilots that arrived in this particular hex from different squadrons the owning Player would have to indicate the parent squadron for each of those planes.
Figure C: The Commonwealth Player announces the type number and ID numbers for each of his planes without stating the pilot's rank. The Axis Player then matches up his planes in any pattern and order against the Commonwealth Player's aircraft, making sure that each Commonwealth aircraft is opposed by at least one Axis aircraft. In the case of a plane being attacked by a number of planes and only able to shoot back at a single one of the attackers (this particular type of example), he names the order in which the multiple attacks on the opposing aircraft are to be performed (as the defender may only shoot at one of the attacking planes). The Players then proceed to resolve the individual air-to-air combats.
Note that in this example the Axis Player has apparently decided to take the long view, with the worst plane (Italian C. R. 42) being sacrificed to the Beaufighter and ganging up on the two worst (pilot distribution being equal) Commonwealth planes.
CASES:
[45.1] HOW AND WHEN AIR-TO-AIR COMBAT OCCURS
[45.11] Air-to-air combat takes place within a hex. Only planes in a given hex may engage in air-to-air combat with each other, regardless of air Zones of Control. (Remember, fighters with air ZOC's may move into an adjacent hex to engage in air-to-air; if they are on offensive CAP in a hex without opposing aircraft they must move into an adjacent controlled hex to engage.)
[45.12] All planes in a given hex are subject to air-to-air combat. However, there are priorities as to who attacks whom, and when. The primary rule is that only fighters or fighter-bombers on a fighter combat mission may initiate air to air combat.
[45.13] Air-to-air combat occurs before flack/AA fire and before any missions in that hex may be completed. Remember, fighters may scramble or intercept into a hex, and that must be done before attempting to resolve air-to-air.
[45.14] If there are fighters in a hex on offensive CAP, those fighters must attack all Enemy planes in that hex. Thus, fighters on offensive CAP automatically intiate air-to-air combat. If there are no fighters on offensive CAP, both Players must decide (secretly; to be revealed simultaneously) whether they want to initiate combat. If either Player decides to initiate combat, combat is joined.
However, if neither Player desires air-to-air, both Players send their aircraft home, and all missions in that hex are cancelled. (This is sort of a free abort; planes may always try to abort even if the other Player desires combat, but this is not automatic. See 39.3.)
[45.15] Once air-to-air has been initiated, the Players determine which planes, if any, are being screened by Friendly fighter escort (planes flying defensive CAP for the bombers, etc.). Only planes flying a mission other than CAP may be screened. Furthermore, planes flying a mission other than CAP are automatically screened, unless they have no escort. Planes without Friendly defensive CAP are mot screened. The Players now set the screened units aside, and engage in air-to-air with their fighters on CAP.
[45.16] The Players must now decide who is the attacker. The Player with the most fighters (pure numbers) is the Attacker in all situations. In the instance where both Players have the same number of fighters, the Player with initiative for that Game-Turn (7.0) is the attacker. At this point, Players attempt to abort any missions they desire to abort. See 39.3.
[45.17] A plane without ammo (bombs aside) may not fire in Air-to-Air combat. However, its normal ratings are still used to resolve the effects of opposing fire.
[45.18] Players now resolve the first wave of air-to-air combat (45.2). Once this is completed, the screened planes may be attacked. (See 45.3). This is resolved in the same way, with certain restrictions and changes.
[45.19] A plane assigned to a particular match-up may never be switched to another match-up, even if the plane it was matched-up against is shot down before it has a chance to fire,
[45.2] FIGHTER VS FIGHTER
[45.21] In resolving air-to-air combat between fighters (planes with nonparenthesized tacair ratings), the Player follows the general outline of the Procedure augmented as below.
[45.22] The Defender places his fighters down on a flat surface, using the aircraft counters. He then states what type of plane (e.g. Mel09F, CR42, etc.) each fighter counter represents. He does not reveal the rating of his pilot at this time.
[45.23] The attacker must now assign at least one fighter to every fighter the defender has placed down. Once every defending fighter is "covered", the attacker may assign more than one fighter to a defending fighter. There is no limit to the number of attacking fighters that may engage a solitary defending fighter, as long as all the defending fighters are attacked.
[45.24] Each individual air-to-air match-up is now resolved (45.5). A defending fighter may fire at only (any) one attacking fighter, while, if there is more than one fighter attacking a defending fighter they all may fire at the defending plane. However, all air-to-air combat is resolved individually. No planes ever add their strengths together. The Players may resolve the individual match-ups in any order they wish.
[45.25] After fighter vs fighter has been resolved, there is a possibility that some of the fighters may fire, again, against enemy bombers and other screened planes (See 45.3).
[45.3] FIGHTER VS NON-FIGHTER (SCREENED PLANES)
[45.31] When all fighter vs fighter combat has been finished, Friendly fighters remaining may, if possible (see Case 45.32) attack any Enemy screened planes. They do not have to do so, even if they are on offensive CAP—unless only non-fighter planes were in the hex to start with (and so there was no fighter vs. fighter combat). In such case, offensive CAP fighters must initiate air-to-air with such unscreened planes.
[45.32] If the Player wishing to attack screened planes has more fighters remaining (after fighter vs. fighter combat) in the hex than does the Enemy Player, he may attack the screened planes with the excess number of fighters; e.g., the Axis Player sends a squadron of Helll's escorted by 6 Me Bfl09F's to a Target. The Commonwealth Player scrambles two squadrons of Hurricane IIC's. The Hurricanes attack the Messerschmitts, and, after fighter vs fighter combat, there are 19 Hurricanes remaining along with 5 Messerschmitts. The Commonwealth Player may now take any of his 14 excess Hurricanes (19-5=14) and attack the Heinkels. The 14 Hurricanes are now engaging in a second round of air-to-air.
[45.33] The Defender is automatically the Player with the screened planes. He places his planes down as in 45.22. The attacker may now assign his fighters in amy way he sees fit; he does not have to cover all the defender's planes, as in 45.23. He may take, using the above example, all 14 Hurricanes and attack one of the Henkels, or he may divide them amongst the 12 Henkels. The choice is the attacker's.
[45.34] Air-to-air fighter vs non-fighter is resolved in the same way as fighter vs fighter (see 45.2) with one exception: defending, screening planes may shoot at each and every fighter attacking that plane — not just one, as in 45.24. (A dive bomber may shoot at one attacking fighter.)
[45.35] Any screened planes that survive may now proceed to the flak/AA fire portion of the mission run.
[45.36] Bombers flying in formation receive a bonus: if 6-17 bombers are on the mission, add one to each plane's tacair rating; if 18 or more bombers are on the mission add two to each plane's tacair rating.
Examples of Air-to-Air Combat Resolution:
a. ACR 42anda Hurricane I engage in air-to-air. The CR 42 has a '3' pilot for a total tacair of '6' (3+3=6), while the Hurricane has a '2' pilot for a total of '6' (4+2=6). But the Maneuver Rating of the Hurricane is four better than that of the CR 42 (32 to 28), so this gives an adjustment of 2 tacair points in favor of the Hurricane. The final tacair differential is +2 for the Hurricane, — 2 for the CR 42. The CR 42 fires first at —2, needing an 11 or 12 for a kill. He rolls a 25 and misses. (Had he rolled a '12' the combat would have been over.) Now the Hurricane rolls, needing an 11-22 to get a kill. If both miss, there is no more rolling.
b. Three Hurricane IB's attack a Junker Ju88D, flying in a formation of 12. Each Hurricane has a '2' pilot. The Hurricane has a tacair of '6', plus '2' for the pilot. The Ju88 has a tacair of '5', plus one more for formation flying. That gives the Hurricane a differential of +2. However, the Hurricanes have an 11 point maneuver advantage, for a further adjustment of 3 points, making the final differential for each Hurricane + 5. The Junker 88 fires first at each Hurricane. If he rolls an 11 he scores a kill. Then each Hurricane fires at the Ju88, needing an 11-26 fora kill.
[45.4] MANUEVER ADJUSTMENT CHART
(See Charts & Tables)
[45.5] TACAIR KILL TABLE
(see Charts & Tables)
[45.6] PLANE AND PILOT RECOVERY
(see Charts and Tables)
[45.61] In certain cases fighters shot down during air-to-air, as well as planes strafed on the ground (40.63), may be recovered.
[45.62] For planes strafed on the ground, the Player expends 1 Stores Point and 1 Fuel Point for every plane he wishes to attempt to repair. He then throws one die; if die roll is "1" or "2", the plane is repaired. Any other number and the plane is permanently destroyed. In this case supplies are expended only if the repairs are succesful! For the plane to be repaired, the supplies must be expended. Any strafed plane may be repaired in this fashion, and once repaired that plane may fly one full Game-Turn later.
[45.63] For fighters (only) shot down (by either Enemy planes or flak) the Player rolls only one die. In this case, a roll of '1' means the fighter actually was not shot down and has managed to limp back to base. (This roll is the same used for recovery of the pilot (45.66); thus if a '1' is thrown, both the pilot and fighter return. On a 2, only the pilot makes it back.)
[45.64] Once the fighter has returned (from 45.63), the Player must attempt to repair it. He uses the same system as in 45.62, but in this instance no die roll is needed to repair the plane; simply expending the supplies will do.
[45.65] Fighters recovered and repaired in this fashion are not "kills" for the purposes of 40.18.
[45.66] If a plane is shot down, the pilot may bail out and survive. For each fighter that is shot down, the owning Player rolls one die. If a "1" or "92> is obtained, the pilot survives and is recovered, regardless of where the plane was shot down. He is ready for action three Operations Stages later. Otherwise, the pilot is killed.
[45.7] EXTENDED RANGE
Certain aircraft have more than one maneuver rating. Such an aircraft must utilize the lower maneuverability rating if on a mission at extended range, unless the Player makes a decision to jettison the extended range fuel tank. In that case, the higher maneuverability rating may be used in air-to-air combat, but the plane cannot return to any air facility that is beyond its normal range. If out of range of any Friendly air facility, the plane must be crash landed (see Case 37.23)—if it survives the combat, that is. Fighter-bombers attacked by Enemy planes while on bombing missions may jettison their bombs to increase their Maneuver Rating for Air-to-Air. The jettisoned bombs have no effect.
[46.0] ANTI-AIRCRAFT FIRE (FLAK)
GENERAL RULE:
Planes flying missions in a given hex must undergo anti-aircraft fire, if there are Enemy units capable of such in that hex. Generally, AA fire is conducted before a mission is undertaken and any casualties taken before determining the effects of that mission. AA fire is given in points, based on capabilities of light or heavy AA (or flak) guns. The number of AA points for each unit is determined by multiplying the TOE strength by the AA rating. All AA units have Flak Points, and some other HQ, artillery and heavy weapons units also have flak/AA capability. A unit's flak/AA rating is listed in that unit's Characteristics Chart Table under the AA column. AA/flak fire consumes ammunition.
PROCEDURE:
Anti-aircraft Fire occurs after all Air-To-Air combat and Flak Suppression Missions have been completed. The Enemy Player divides the opposing planes into Target Groups (46.26) and indicates the number and type, but not Mission, of the planes in each Target Group. The Friendly Player may then attack the Target Groups in any order he wishes. Each attack is performed separately and all planes destroyed, aborted and Ammo expended requirements are completed before the next attack is performed. All anti-aircraft attacks are performed using the Anti-Aircraft Combat Results Table. The Friendly Player determines AA Points of Air Facilities and which TOE Strength Points of units with anti-aircraft Ratings are attacking a particular Target Group. The total Anti-Air points are then determined (do not divide by ten!)
All anti-aircraft attacks are performed using the Anti-Aircraft Combat Results Table (46.3).
All attacks on planes flying Fighter-type Missions are performed as follows: Roll two dice, reading them sequentially. Read down the rows of results in the Planes On Fighter-Type Missions section of the CRT until one is found that contains that dice roll. Read along the row to the right to determine the number of planes in that Target Group destroyed by anti-aircraft fire. The actual planes in that Target Group that are destroyed should be determined at random. The players may use any method they wish as long as it is consistent and mutually agreeable.
Example: The players alternate picking which planes are destroyed. Example: Number the planes in the Target Group from 11 to 66 and roll the dice until enough different numbers are thrown to match the number of planes to be eliminated and then eliminate those planes whose number has come up.
All attacks on planes not flying Fighter-Type Missions (46.2.6a and 46.2.6b) are performed using the Planes on Other Missions section of the anit-aircraft CRT as follows:
Prior to determining the results of AA fire the firing Player may have to adjust his AA Point column to account for the density of enemy planes overhead. He consults the AA Density Adjustment Chart, noting the total number of enemy planes (other than fighters) in that hex. He then adjusts the column — in his favor — if warranted. Remember, Night Missions are done separately from others.
The firing Player rolls two dice twice using the same column, once to determine the number of planes destroyed (using the rows of the same name) and once to determine the number of planes that Abort involuntarily (using the rows of the same name). Determination of which planes are destroyed and Aborted should be made by the same method used for determining losses on Fighter Missions. Aborted planes are determined after all losses from destroyed planes are completed.
[46.1] FLAK/AA UNITS
[46.11] A large number of units have AA/Flak capability; that is, they may fire at enemy planes. A unit that has an AA Rating may so fire (however, see Case 46.22). Most of these units are called AA or Flak units, and are so delineated by their unit symbol on the counter. However, many other types of units have AA Ratings. These AA Ratings are multiplied by the TOE Strength of the unit to determine the Actual AA. Points that can fire. (There is no dividing by 10, as with other strengths.) Any unit with an AA symbol on its counter is called a Pure Flak unit (See 46.17.).
[46.12] A flak unit having a (parenthesized) defense assault rating, defends against an assault only if alone in the hex. Players should note that the German 88's and Italian 90mms have a defensive assault rating and are treated as artillery units with assault ratings when attacked.
[46.13] Unless specifically stated otherwise, flak units are treated as artillery in terms of having their own transport. There are some flak units without transport, and to "motorize" these units requires trucks. Each Point of AA may be towed by a medium truck point or a Heavy Truck Point.
[46.14] Flak/AA units require supplies like any other unit. (They are treated as artillery). They will, of course, use ammunition when firing.
[46.15] Certain combat units—in addition to regular flak units—have AA/Flak Points. Certain tanks and recce units have AA/Flak Points, and these are points per TOE Strength Point (Thus, 5 TOE points of Sherman tanks would have 5 AA/Flak Points).
[46.16] Tanks may use their AA/Flak Points only against fighters strafing units in that hex or against dive bombers. They may not use their AA Points against any other planes/missions.
[46.17] Pure AA/flak units (i.e., units that have only AA Points) may stack freely in major cities; they do not count against the stacking limits. In addition, one pure AA/flak unit may stack freely in an air landing strip hex, and three may stack freely in an airfield.
[46.2] RESTRICTIONS ON ANTI-AIRCRAFT FIRE
[46.21] Anti-aircraft fire may only be directed at planes flying missions in the same hex as the units and air facilities possessing an anti-aircraft ability.
[46.22] Infantry, recce, and tank units may fire AA only at planes in the fighter mission, strafing and/or dive bombing target group (see Case 46.26).
[46.23] Anti-aircraft fire occurs after all air-to-air combat and flak suppression missions have been performed.
[46.24] The planes fighters flying flak suppression missions and those flying naval convoy reconnaissance missions may not be attacked by anti-aircraft fire.
[46.25] Opposing planes flying missions in a hex must be grouped into target groups for anti-aircraft fire purposes.
[46.26] The target groups are as follows: a) All Enemy planes not assigned to fighter-type missions and flying (normal) daytime missions by each mission. b) All Enemy planes not assigned to fighter-type missions and flying night missions by each mission, c) All Enemy planes assigned the fighter-type missions of combat air patrol. Scramble and interception flying daytime. d) All Enemy planes assigned night fighter-type missions of combat air patrol, scramble and interception. e) All planes flying fighter-type missions of strafing and/or dive bombing.
[46.27] AA may be fired at as many target groups as the owning Player wishes.
[46.28] Replacement Points may not use AA ratings until absorbed by a unit.
[46.3] ANTI-AIRCRAFT COMBAT RESULTS TABLE
(see Charts and Tables)
[46.4] FLAK ADJUSTMENT CHART
(see Charts and Tables)
[47.0] ABSTRACT LOGISTICS RULES
The Players use the Abstract Logistics and Air Rules (Section 32.0) except as modified below.
[47.1] SUPPLY UNITS AND SUPPLY
[47.11] All off-map (N. African and Mediterranean) air facilities possess unlimited supplies for aircraft maintenance.
[47.12] Cairo and Alexandria have unlimited supplies for Commonwealth aircraft maintenance for any SGSU occupying a Cairo/Alexandria hex or within supply range (see Case 47.13).
[47.13] An SGSU may draw supplies from any friendly supply unit per Case 32.16 (or Cairo/ Alexandria) that is within 15 Capability Points.
[47.14] The Players receive regular (i.e., those described in Section 32.0) and Depot supply units. A Depot initially contains 180 Fuel and 40 Ammo Points. It retains its Depot status until it contains no more than 60 Fuel Points, at which time it is treated as a regular supply unit. Depots may never absorb fuel or ammo points. Supplies may be withdrawn from a depot only for use by SGSU's and motorization points engaged in transporting that depot (i.e., supplies may not be redistributed to other supply units nor used by combat units or motorization points not actively engaged in moving that depot).
[47.2] SUPPLY EXPENDITURES
[47.21] Only Gun-class units are required to expend ammo in order to fire at enemy aircraft. A gun-class unit must expend 1 Ammo Point in order to perform anti-aircraft fire against a target group.
[47.22] Fighter and fighter-bomber squadrons do not require ammo expenditures to enable their planes to use their TacAir and Bombload ratings. Non-fighter squadrons are entirely rearmed with the expenditure of one Ammo Point.
[47.23] Fighter/Fighter-bomber squadrons require the expenditure of one Fuel Point to refuel the entire sqaudron. Axis non-fighter squadrons require the expenditure of two Fuel Points in order to refuel the squadron. Commonwealth non-fighter squadrons require the expenditure of three Fuel Points in order to refuel the squadron.
[47.3] MOVEMENT OF SUPPLY UNITS
[47.31] Fifty motorization points are required to transport a depot.
[47.32] A depot may only be transported in the Truck Convoy Movement Phase (i.e., it may not be attached to a combat unit).
[47.33] A depot counts as two supply units if being transported by rail. The Commonwealth Player'may not transport a depot by sea.
[47.34] The Axis Player may transport a depot by Axis Coastal Shipping. Each depot requires 3,000 tons of coastal shipping.
[47.35] Regular supply units may be transported by air. The Axis Player may air transport regular supply units as follows: Any thirty planes with air transport capability may transport a supply unit containing up to 8 Ammo Points and up to 20 Fuel Points, any sixty planes with transport capability may transport a regular supply unit with any level of supplies. The Commonwealth Player may air transport regular supply units as follows: Any twenty planes with transport capability may air transport a supply unit containing up to 10 Ammo and up to 25 Fuel Points. Any fifty planes with transport capability may transport a regular supply unit with any level of supplies. Either player may transport a dummy supply unit with any ten planes with transport capability. Note that the supply unit counter must be physically transferred from one location to another.
[47.4] AVAILABILITY OF SUPPLY UNITS
[47.41] The Axis Player receives Depot supply units as an addition to the regular supply units produced by the Axis Simplified Supply Availability Table. He receives one Depot for each regular supply unit produced.
[47.42] The Commonwealth Player receives Depot supply units as an addition to the regular supply units produced by the Commonwealth Simple Supply Availability Table. During time period I he receives one Depot per game turn. During time period II he receives two Depots per game-turn. During time period III he receives three Depots per game-turn.
[47.5] MOTORIZATION POINTS
[47.51] Cases 32.57 and 32.59 are ignored and Case 32.56 is modified as follows: Motorization Points may be attacked (and destroyed) as though they are trucks as per the Strafing (Cases 40.5 and 40.6) and Land Support Bombing (Cases 41.2, 41.3 and 41.5) rules in the Air Game.
[47.52] The initial motorization points available to the Players are calculated in the same manner as listed in 32.5 except that Second/Third Line trucks listed as available at air facilities are included in the calculations.
[47.53] Motorization points may be received as though they are truck replacements. The Players' ability to bring in motorization points is equal to their ability to bring in Medium plus Heavy Truck Points (i.e., each medium/heavy truck point is equal to one motorization point) as per the Axis Truck Production Chart of the Axis Replacement Pool and the Commonwealth Truck Production Table of the Commonwealth Production System.
[47.6] SIMPLIFIED AXIS NAVAL CONVOYS
These rules replace those listed in Case 32.6.
[47.61] In the abstract Logistics game system, Axis Naval Convoys consist of all Supply Units, Motorization Points and Replacement Points for that Game-Turn. These items may be divided and assigned to any Convoy Lane available, as per rules for such assignment. There are no tonnage limitations.
[47.62] The Axis Player may never assign more than three regular and three depot supply units and twenty-five motorization points to any one Convoy Lane in any one Naval Convoy Stage. Note that the Axis Player is limited by the Replacement Pool as to the maximum number of replacement points of each type of item that may be assigned to Axis Naval Convoys (total) for arrival during a particular Game-Turn.
[47.63] If the Commonwealth Player successfully performs a Axis Naval Convoy reconnaissance mission, he is informed as to the composition of the convoy in total number of: Regular supply units, depot supply units, motorization points, tank replacement points, infantry replacement points, gun replacement points and armored recce/armored car replacement points.
[47.64] Attacks against a convoy are carried out as per the Axis Naval Convoy Bombing rules.
[47.65] The result of an attack on an Axis Naval Convoy is modified as follows:
A/A result of 10% applies only to motorization points and replacement points, rounding fractions down for the former and rounding fractions up for the latter.
B/A result of 20% applies to all items except Depot supply units, rounding fractions down. However, at least one regular supply unit at one point of each class of replacement point is always eliminated.
C/A result of 30% or greater is applied as "B" above with the modification that at least one supply unit of any type must be eliminated (supply units are considered as a total for loss determination).
[47.7] BOMBARDMENT OF THE COMMONWEALTH FLEET
Ignore Case 32.7 Bombardment of the Commonwealth Fleet is carried out as per the Air Game
Rules. :
[47.8] STACKING MODIFICATIONS
[47.81] The Players ignore all Road and Track (only) Stacking Point limits as listed in Section 9.0.
[47.82] The Players may stack one Depot supply unit in addition to the regular supply unit stacking limits listed in Case 32.14.
THE LOGISTICS GAME
The Logistics Game allows the players to realistically experience the constraints that actually applied to the armies which fought in North Africa. Basically, there are four distinct "flavors" of supply in CNA: water, fuel, stores, and ammo. The Logistics Game requires that players keep track of the amount of each of these that each unit possesses and consumes. Also included are detailed naval convoy rules that cover the movement of the supply types to Africa for the Axis and rules covering the use of truck transport to move the supplies.
The Logistics Game constitutes the heart and soul of Campaign for North Africa. The entire design emphasis is on recreating the difficulties of supply in desert warfare. Overall commanders will soon find out that their most important weapon is not their tanks or their 88's or their long-range bombers; it is their Trucks.
Over a year of intensive testing has proven at least one thing: no one can do well in this game if he does not have a definitive grasp of the logistical situation and, moreover, a far-sighted plan on how to handle it. This goes double for the Axis Player, who is often so far away from his base of supply that it will seem to take forever just to "feed" his troops. Players should learn to'use the three-tiered "Line" system for their trucks, and they must set up a system whereby trucks and the shipment of supplies is handled with a maximum of efficiency and speed. Any Stage in which supplies are not constantly being moved forward is a wasted three days (game-time). The thoughtful use of Supply Dumps is an absolute must.
The general feeling that players will get throughout the game, vis a vis the logistics, is frustration (albeit more so on the part of the Axis Player. than the Allied Player). The Axis Player will have countless opportunities to smash weakly held Allied positions, only to find he has neither the fuel the ammunition to carry out his plans; they are somewhere on trucks 200-300 miles to his rear. The player who best minimizes this problem will most often be the winner.
Much research was done on the logistics portion of the game. Statistics are available, but not in a form that is easily translatable to game terms. The supply needs, in terms of the points consumed and needed, are based on basic computations using weights and consumption figures (where available). These figures were then extrapolated to cover usage over the time scale in the game. This was especially important when determining ratios for fuel and ammunition for aircraft. Furthermore, complete information on fuel consumption was not available on a goodly number of the bigger planes. Another problem area was ammunition usage. But the biggest prou.cm area, and the area that is most abstracted for game purposes, is the correlation between supplies used and weight of supplies convoyed (by the Axis). Exact figures here are rare, and much testing was spent on seeing whether the numbers we came up with were satisfactory.
All of the above is by way of giving the players a little background on the logistics game. The supply problem in CNA is extensive, and the work needed to run it—in terms of the game—is just as extensive. It is highly recommended that one player from each side be assigned to this area, and this area alone. Testing proved that rare was the player who could handle military matters, strategy, tactics, etc., and also coordinate supply for his troops.
[48.0] SEQUENCE OF PLAY (Logistics Game)
COMMENTARY:
It is possible to use the Logistics rules in concert with the Land Game and omit the Air Game rules. If that is the desire of the players, they should ignore all part of the following Sequence marked "Air Game Only."
GENERAL RULE:
Play of the game should proceed in accordance with the following outline.
I. INITIATIVE DETERMINATION PHASE
The Players determine who will have the initiative for the coming Game Turn. (See 7.0) The Player going first within the Operations Stage (see below) is known as "Player A" and the other is "Player B."
II. STRATEGIC AIR PLANNING STAGE (Air Game Only)
A. Designation Phase: The Players assign their airplanes to fly Land Support or Strategic missions.
B. Axis Malta Availability Determination Phase The Axis Player determines the amount of support he will receive from his abstracted N. African Theatre airforce for Raids on Malta.
C. Strategic Mission Assignment Phase
Planes designated as flying Strategic missions are assigned. The Axis Player assigns his planes to Raids on Malta or naval convoy protection. The Commonwealth Player assigns his planes to naval missions or Bombing Reserve.
D. Malta Raid Phase
The Axis Player resolves flak suppression, anti-aircraft fire and bombing missions against Maltese air facilities (Note that Commonwealth warships stationed at Valetta may only be attacked by Land Support Missions.)
III. NAVAL CONVOY STAGE
A. Naval Convoy Schedule Phase
The Axis Player refers to the Axis Naval Convoy Level Chart and then to the Axis Convoy Capacity Table and rolls one die to determine the total tonnage available for the next Game-Turn. He then plans what specific cargoes the convoys will carry and their routes.
B. Convoy Resolution Phase (Segments 1 & 2: Air Game Only)
-
Naval Convoy Reconaissance Segment: The Allied Player resolves Strategic Convoy Reconaissance missions.
-
Convoy Lane Assignment Segment: Axis convoy protection aircraft are assigned CAP missions in specific Convoy Lanes. Commonwealth Bombing Reserve aircraft are assigned CAP, Flak Suppression or Convoy Bombing missions in specific convoy lanes.
-
Convoy Bombing Segment: All air-to-air combat, Flak Suppression, anti-aircraft, and convoy bombing is carried out.
IV. STORES EXPENDITURE STAGE
Both Players distribute and expend stores (Section 51.0) to eligible units requiring them. Units not receiving required stores are noted. Players also adjust fuel and water storage levels for any losses as aresult of spillage or evaporation.
V. FIRST OPERATIONS STAGE
A. Initiative Declaration Phase
The Player who gained the initiative in Stage I now states whether he will be "Player A" or "Player B" for this particular Operations Stage.
B. Weather Determination Phase The player with initiative rolls for weather (Section 29.0), Ail adjustments for unusual weather are made at this time, including any additional evaporation of fuel or water from hot weather.
C. Organization Phase The following Segments are undertaken in any order desired.
-
Water Distribution Segment: Players distribute water to eligible units requiring such.
-
Reorganization Segment: Attachment and/or assignment of reinforcement, replacements, or any other non-assigned units including trucks may be undertaken. Detachment of attached units may also be done.
-
Attrition Segment: Reductions of any units that have not been adequately supplied with water or stores is undertaken.
-
Construction Segment:
a. Construction Completion Step: Any work scheduled for completion is finished, markers being removed or added as required. Units that have completed construction may be freely moved.
b. Construction Initiation/Continuation Step: Any continuing or ensuing work on projects is noted. Any units involved in such work may not be moved (voluntarily) during the remainder of the current Operations Stage.
- Training Segment:
a. Training Completion Step: Units and replacement points completing a level of training are noted and the effects applied.
b. Training Initiation/Continuation Step: Any units beginning or continuing trainingare noted. They may not be moved (voluntarily) in the remainder of the Operations stage.
-
Supply Distribution Segment: Supplies in the same hex as land units may be redistributed at this time, subject to the maximum innate capacity of the unit(s) and the hex. Trucks may be loaded/unloaded.
-
Tactical Shipping Segment: Both players execute the transport of cargo between African points. Note: Axis coastal ships are represented in the game by counters. Allied coastal shipping is not represented by counters, and is limited only by the port capacities.
D. Naval Convoy Arrival Phase: All reinforcements, Replacement Points, and supplies scheduled for arrival (and actually arriving) appear in their designated ports of arrival or entrance hexes. Check Reinforcement Tables and convoy rules. The Axis Player plans for the arrival of future Replacement from the Axis Replacement. In his first Naval Convoy Arrival Phase of each month, the Commonwealth Player consults the Commonwealth Production System and determines how many Replacement Points he will receive two months hence and plans for their arrival.
E. Commonwealth Fleet Phase
-
Fleet Assignemts Segment: The Commonwealth Player assigns his ships to any sea or coastal hexes for bombardment purposes.
-
Fleet Repair Segment: Any repair work on ships is undertaken at this time.
F. Land Support Air Phase (Air Game only):
Only those planes assigned to land support missions may be used in this Phase.
-
Mission Assignment Segment: All planes that are fueled may be assigned missions by the Player.
-
Mission Deployment Segment: Counters representing each type of plane assigned a mission are placed in their hex of assignment.
-
Air-to-air Combat Resolution Segment: Combat between opposing aircraft, including any caused by scramble and interception, is resolved. Mission aborts may take place before combat resolution.
-
Flak Resolution Segment: Aircraft in the same hex as Enemy anti-aircraft units undergo flak fire.
-
Mission Completion Segment: All missions that can be completed (e.g., bombing, strafing, etc.) are completed. Aborts may take place here, too.
-
Return to Base Segment: All surviving aircraft are returned to their base of origin (excepting those on transfer missions and some other rare exceptions).
-
Tactical Maintenance Segment: Both Players may attempt to ready all planes eligible to fly land support missions.
Reserve
G. Reserve Designation Phase: Player "A" designates which of his units he is placing in reserve status, indicating that with a :reserve marker. (See Section 18.0.)
H. Movement And Combat Phase
The following four Segments comprise the Movement and Combat Phase. Player "A" may, if he so wishes, repeat Segments 1 through 4 as many times as he desires within the restrictions of the continual movement rules (8.2). Each repetition must include all four segment.
-
Movement Segment: All units, except trucks and tank recovery squadrons not in reserve and eligible to be moved may be moved. Non-Phasing Player ("A") may move units in accordance with the reaction movement rules (Case 8.6).
-
Breakdown Determination Segment: All vehicles and motorized units of both sides are checked for breakdown. Broken down vehicles are indicated with the appropriate marker.
-
Combat Segment:
a. Position Determintion Step: Both Players determine the "position" (front or back) of all gun and armor class units.
b. Barrage Step: Both Players secretly plot and then execute any barrages.
c. Retreat Before Assault Step: Player "B" may retreat before assault any of his units eligible to be so moved,
d. Force Assignment Step: Both Players secretly assign TOE Strength Points to anti-armor or close assault. Player "A" determines which assaults will be probes (although he need not reveal this decision) and which TOE Strength Points will be withheld from assault.
e. Anti-Armor Step: Both Players simultaneously resolve any anti-armor fire, extracting any casualties. Destroyed tank markers are deployed as required.
f. Close Assault Step: Close assaults are resolved in any order determined by Player "A". He announces which of them are actually probes, after each is resolved.
- Reserve Release. Segment: Player "A" may release any of his reserves that he wishes to.
J. Truck Convoy Movement Phase: Player "A" may move his Second and Third Line (unattached) Trucks, and any POW's and Guards.
K. Commonwealth Movement Phase: If Player "*A" is the Commonwealth Player, he may utilize rail movement (Case 8.9) to move landunits or supplies. Otherwise this Phase is omitted.
L. Repair Phase
-
Towing Segment: Player "A" may tow brokendown and recovered vehicles.
-
Maintenance Segment: Player "A" may attempt to repair brokendown or destroyed vehicles which were not towed in this Phase.
M. Patrol Phase: If there has been no combat in the current Operations Stage, the Phasing Player may use patrols for reconnaissance purpose.
VI. Second Operations Stage
Both Players repeat all facets of the First Operations Stage.
VII. Third Operations Stage: Both players repeat all facets of the First Operations Stage.
VIII. Strategic Air Recovery Stage (Air Game Only)
A. Return to Base Phase: All surviving planes from missions flown in Stage II are returned to their base of origin if possible.
B. Aircraft Maintenance Phase: Both Players attempt to ready planes that have flown missions during the Strategic Air Stage.
IX. End of Game-Turn
You have now completed one full game-turn, replete with airplanes fuel sandstorms and the lot! Congratulations. You may put in for a transfer, but before doing so, keep in mind that the Russian Front is the only other active theatre.
[49.0] FUEL
GENERAL RULE:
Almost every vehicle in the game consumes fuel when moving. Players will consider a vehicle to consume fuel unless it specifically states somewhere in the rules that it does not. Fuel is consumed at a consumption rate dependent on the vehicle and on the distance travelled. Fuel may also be consumed in certain types of construction. Players should consult the Section on Construction for the rates.
Players must keep track of the amount of fuel they have available. This may be done on the Supply Dump Sheets as well as the unit TOE Sheets. Fuel being transported by truck convoys will be noted on the Truck Convoy Sheet. As fuel is consumed (by usage or evaporation and spillage) or increased (by arriving convoys) the Player should record the changes in levels immediately.
[49.1] FUEL CONSUMPTION RATES
[49.11] All Fuel is considered in terms of Fuel Points. The Fuel Point is the basic unit of consumption. A Fuel Point is roughly equivalent to 250 pounds or 35 gallons of gasoline and auxiliary petroleum products. (This rate does not apply to the Air Game, where fuel usage has been abstracted because of the decrease in the true number of sorties flown.)
[49.12] Every vehicle in the game consumes fuel when it moves, except where specifically noted. (e.g. desert raiders and patrols among others, have slightly different rules.) Fuel users include HQ's with non-parenthesized TOE Strength Points and all gun class units. They do not include motorcycles or the towing of tanks and trucks back to repair facilities.
[49.13] Every TOE Strength Point of vehicles has a fuel consumption rate and a fuel capability rating. The fuel consumption factor is the number of Fuel Points consumed for every five Capability Points (or fraction thereof) expended by the TOE Strength Point for movement (or any type). Note: Fuel is not consumed when CP's are expended for combat or any other action that does not involve actual movement from one hex to another. Example: One TOE Strength Point of tanks with a fuel consumption rate of "4" that moved in such a way that expends 12 Capability Points would consume 12 Fuel Points—"4", the fuel consumption rate multiplied by ''3", the number of groups of 5 CP's expended.
[49.14] The fuel capacity rating is the number of Fuel Points a TOE Strength Point may have, so to speak, in its gas tanks. All vehicles' fuel capacity ratings are determined according to the following formula:
Fuel capacity rating = CPA x 1/5 x fuel consumption rate
Players will note that a TOE Strength Point always has a fuel capacity rating exactly sufficient to allow all its CPA to be expended on movement.
[49.15] For fuel to be consumed, it must be present in the same hex with the consuming unit/TOE Strength Point. Generally, movement of a unit will be "counted against'? its fuel capacity rating—i.e., the fuel in the unit's gas tanks, which by definition is in the same hex at all times—and players will have to record how far each land unit has been moved since the last time its fuel supply was replenished. See also Case 49.16.
[49.16] In essence, a unit consumes fuel in the hex in which it begins Movement for any Movement Segment in the OpStage. It may draw fuel from any source in that hex, except for second-third line trucks. (Such fuel from convoying trucks must be off-loaded first). There is no cost in CP's to "gas up". The Player simply notes how far he is going to go in that Movement Segment and then subtracts the necessary fuel points from whatever source is available in the hex. He then moves the unit. If such unit were to move again in that OpStage, it would have to draw fuel from the new hex or from its own Fuel Capacity (49.14).
[49.17] In an emergency, Players may "siphon gas." That is, if two units are in a hex, one has fuel and the other doesn't, and there is no other fuel supply available, the Player may transfer some—or all—of the fuel from one unit to the other, up to the maximum Fuel Capacity of the receiving unit. Such transfer costs 3 CP's to both units. Siphoning may occur in any Movement segment. The definition of "emergency" is left to the Players. (Note that fuel may be siphoned from abandoned or Brokendown enemy vehicles; it may not be siphoned from a destroyed vehicle. The enemy player should supply the siphoning player with the number of fuel points so available—when requested.)
[49.18] Trucks carrying fuel will also consume fuel themselves while they are moving. They may consider the fuel they are transporting as a source of fuel. It is possible for a truck to consume half of its cargo getting from a port to a forward area.
[49.19] Fuel is non-denominational. It can be used by either player, making a supply dump a worthwhile objective.
[49.2] TRANSPORTATION OF FUEL
Fuel may be transported from one place to another by trucks, trains and, in some cases, planes. Fuel may never be "transported" by tanks or other such vehicles. Walking infantry may never transport fuel. (How would you like to cross the desert carrying a 20 pound jerry-can filled with gasoline?) See the Truck Characteristics Chart for the amount of Fuel Points that can be carried on a truck and Aircraft Characteristics Chart for the transport tonnage capacity of planes.
[49.3] EVAPORATION AND SPILLAGE
Fuel is subject to loss through evaporation and spillage, regardless of where it is kept. During the Stores Expenditure Stage of each game-turn, each Player reduces all fuel levels on the game-map (not in convoys at sea) by six percent (6%), rounded down. In addition, if the weather for an operations stage is "hot weather", an additional reduction of five per-cent (5%) is taken as soon as the hot weather is determined. There is one exception to these rates: from Sept., 1940 until the last Game-Turn (inclusive) in August, 1941, the Commonwealth spillage and evaporation rate is mine percent (9%) per Game-turn. This is due to the poorly constructed containers used by the British; it wasn't until the British copied that German "jerry can" that their rate was reduced (This rule also applies to certain sources of water, see 52.44.)
[50.0] AMMUNITION
GENERAL RULE:
Land units that use their TOE Strength Points in combat expend ammunition, as do planes that carry bombs and/or engage in air-to-air combat. Ammunition is consumed in terms of Ammunition Points at rates of consumption dependent on the weapon-type firing. A unit without ammunition is useless in terms of combat. Players must keep track of the ammo supply of each TOE Strength Point. Each TOE Strength Point may carry (i.e., transport by itself without trucks) only enough ammo to fire once. However, units may always use ammo present in the hex (either in attached trucks or in a supply dump).
CASES:
[50.1] CONSUMPTION OF AMMUNTION
[50.11] All ammunition is considered in terms of Ammunition Points. Each Ammunition Point is (very) roughly the equivalent of four tons. Ammunition consumption rates are given in 50.2
[50.12] Whenever a land unit uses its barrage strength, its anti-armour strength, its AA points, or any of its assault strengths it consumes ammunition. A unit without ammunition of any type is useless in combat; it may not even defend against assault if it finds itself in an Enemy Zone, of Control and/or it is fired upon by an Enemy unit, it surrenders and is captured. (Units without ammunition have NO ZOC.) A unit without ammunition may not enter an Enemy ZOC unless stacked with (or entering a hex occupied by) a Friendly unit with ammunition or a supply dump.
[$0.13] Each combat function has an ammunition consumption rate, listed in 50.2. Units, such as tanks, that have several types of strengths (anti-armour as well as assault) use the ammunition consumption rate of on the combat function chosen.
[50.14] The ammunition consumption rate is the number of Ammunition Points expended for each' TOE Strength Point being used in combat. Ammunition is expended by guns barraging (or firing flak), anti-armour fire, or offensive and defensive assault: Thus, four TOE Strength Points of German 150mm guns would expend 16 Ammunition Points (4 TOE times the artillery consumption rate of 4 = 16), regardless of how many Actual Barrage Points are being applied. Thus, a Player may choose to conserve ammunition by only firing, say, 3 out of 6 available TOE Strength Points.
[50.15] Ammunition is consumed only if present in the hex. However, ammunition on truck convoys (2nd or 3rd line trucks) may not be used until it is off-loaded. Ammunition is expended the instant it is used, and the ammunition level for that hex/unit/dump must be reduced accordingly.
[50.16] Ammunition is specialized for both players. Only one-third of all captured Ammo Points (rounded up) may be used by the opposing Player. The rest are lost. If a supply dump is recaptured, only one-third of all remaining Ammo Points may be used by the re-capturing Player.
[50.17] Ammunition may be transported by trucks or aircraft; it may be airdropped. It is available for use when in first line trucks or supply dumps. Ammunition with truck convoys may not be used until off-loaded. Combat units may carry enough ammo to fire once.
[50.2] AMMUNITION CONSUMPTION RATES CHART
(see Charts and Tables)
[51.0] STORES
GENERAL RULE:
The term "stores'? encompasses everything that isn't fuel, ammunition or water. This includes food (which is what most playtesters ended up calling stores), paper, uniforms, and whatever else was used and needed to keep going. Stores are different from other types of supply in that they are distributed at the beginning of the Game-Turn, rather than during each Operation Stage, and that units may get along without them, albeit with limited effectiveness and with the possibility of attrition.
CASES:
[51.1] USAGE OF STORES
[51.11] Every TOE Strength Point in play requires four Stores Points per Game-Turn, except as noted below.
[51.12] Prisoners use stores, at a rate of one Stores Point per five Prisoner Points per Operations Stage. (See 28.15). Prisoners must be supplied with Stores before any other units. For this purpose only, if there are no Stores in the hex, Stores may be deducted from the nearest supply dump, regardless of how far away it is.
[51.13] HQ and engineer units require only one Stores Point per Game-Turn.
[51.14] Stores may have to be expended during construction. See 24.0.
[$1.15] Each Stores Point weighs one ton. Stores may be transported by trucks or planes, and they may be airdropped. Stores must be present in the hex to be used. Stores on truck convoys cannot be used until off-loaded.
[51.16] Fifty per cent of any captured Stores Points may be used by the opposing Player; the rest are lost. ;
[51.17] Guard points require two Stores points per Game-Turn each. Guards may also draw from the nearest dump as per 51.12.
[51.2] EFFECTS OF LACK OF STORES
[51.21] If any TOE Strength Point of a unit (including parent formation-size) does not receive required stores, that unit earns one Disorganization Point, per Game-Turn of lack of stores.
[51.22] For every two consecutive Game-Turns units in a hex are without stores, they lose 2% of their TOE Strength Points, rounded to the nearest whole number. This loss is progressive and cumulative (as long as it is consecutive). Thus, at the end of the fourth consecutive Game-Turn, the rate rises to 4%, and at the end of six turns, 6% and so on. TOE Strength Points may be eliminated only if they are infantry-type TOE Strength Points. Guns and tanks are not affected by this.
[51.23] A Player in desperate straits may place units on half rations. He cuts his stores requirements from four to two for units, with the following effects: 1. No half-ration unit may voluntarily exceed its CPA; 2. A half-ration unit may not voluntarily enter an Enemy Zone of Control.
Players may not use this case to "save" Stores.
This is used only if there are not enough to go around.
[52.0] WATER
GENERAL RULE:
A somewhat ironic fact of the Desert Campaign was that, although water is the single most important item in the desert, it was never really a decisive factor, operationally. Players should find that they rarely run out of water, but that it is a nuisance as it is absolutely necessary. Water comes from wells (called "birs" in North Africa; hence, the expression "Hey, Cold Bir Heah" was first heard at an inter-divisional Soccer Match.) Most wells are located close to the coast, and thus most of the water supply is away from the inland areas. Wells may be "poisoned" or depleted through usage. Depleted wells are replenished by rains, and poisoned wells may be ''sweetened." Players may construct water pipelines from major sources to facilitate water usage and availability.
CASES:
[52.1] WELLS
[52.11] Water is found in wells—and only wells. (It may be extended from wells through the use of water pipelines.) Wells are located in major cities, villages, and birs. Water is also found in oases (See 52.3). Each of the above automatically contains a well; no other locations or hexes have wells. (The Tripoli/Tunisia boxes each have unlimited wells.)
[52.12] The amount of water available from a given source is given in the Water Availability Table, (52.7). The Table also gives the depletion possibilities for each source.
[52.13] To obtain water, a unit moves into a hex with a well. The Player then expends one CP and throws a die to draw water (the die roll is unnecessary in Major Cities and oases.). He consults the Water Availability Table under the correct column (village or bir) and cross-references the dieroll with the source. The result is the number of Water Points drawn, as well as whether the source is depleted or not. Players should note that wells in major cities and oases have unlimited water; they may not be depleted and they may not be poisoned.
[52.14] When a well becomes depleted, the Player who drew the water notes this on a piece of paper. He does not have to tell the opposing Player that the well is depleted. However, if an opposing Player's units enter a hex with a depleted well, and attempts to draw water the Player then tells him that it is depleted (after he has expended the one CP!). When a depleted well is revealed, a depleted marker is placed in that hex.
[52.15] Depleted wells remain depleted until a rainstorm occurs. All depleted wells on a game-map section with a rainstorm are automatically replenished at the instant the rainstorm occurs.
[52.16] Wells in villages and birs (not in major cities or oases) may be "poisoned". Actually, poisoning is a fanciful term. No one actually dropped fifty pounds of arsenic down a well; the folks in Geneva looked askance at that sort of thing. Rather, the wells could be salted, as there was plenty of salt around. To poison a well, therefore, any unit in a hex (village/bir) with a well may expend one CP and roll one die. If the dieroll is a '1', the well is poisoned. If the dieroll is 2-6 the attempt fails (for any number of reasons) and no further attempt on that well may be made that Operations Stage. Poisoned wells may be kept secret as in $2.14.
[52.17] Poisoned wells may be sweetened (unpoisoned) by having any land unit expend 5 CP's and roll a die. If the result is a 1, 2, or 3 the well is OK. Any number of attempts—at 5 CP's a shot—may be undertaken, except that a unit may not exceed its CPA trying to sweeten wells.
[52.2] WATER PIPELINES
[52.21] Players may try to extend their access to fresh water by constructing water pipelines. Pipelines extend from a specific source of water—only wells in major cities.
[52.22] Water pipelines may extend from any well in a major city any length the Player desires. The Commonwealth Player may consider any operating Railroad hex to be a pipeline for water, and he may construct pipelines from any railroad hex. The Axis Player may rot use the defunct Barce-Benghzai railroad for this purpose.
[52.23] Any water pipeline (or RR hex) is considered as a source of water similar to a major city. It may not be poisoned or depleted, and it is unlimited. It may be destroyed.
[52.24] Pipelines are built by engineer battalions or CW HQ units in the engineering capability. It takes one Construction Phase, plus the expenditure of 10 stores, to build a hex of pipeline. Only one pipeline hex may be built in any given Operations Stage.
[52.25] Water Pipelines are susceptible to enemy attacks. Pipelines—except for railroads acting as pipelines—may be destroyed by desert raiders, the presence of an Enemy unit in the hex, or strafing. Railroad pipelines are destroyed if the railroad is destroyed. If a pipeline is destroyed, water may be drawn only from the farthest connected hex. Pipelines are repaired in the same fashion and cost as they are built. Pipeline and destroyed pipeline counters are provided,
[52.3] OASES
Oases are treated the same as the terrain of the hex they are in, with one major exception: oases are "natural" supply dumps for water and stores (in terms of food). Oases wells are never depleted and have an endless supply; they may not be poisoned. Furthermore, oases provide as many stores as needed to supply units with non-construction stores (or stores to maintain normal levels; 51.1) Units sitting in Oases have all the stores and water they need to last them the entire game. Pipelines cannot be built from Oases.
[52.4] WATER USAGE RATES
[52.41] Each infantry battalion or company regardless of its TOE Strength, requires one Water Point per Operations Stage. See also 52.6.
[52.42] Each TOE Strength Point of Vehicle (Tank, Recce, Artillery, etc.) or Truck Point requires one Water Point each Operations Stage, if it uses any of its CPA.
[52.43] Hot weather (29.3) requires additional water usage.
[52.44] Water—except for water in wells and pipelines—is subject to evaporation and spillage (See 49.3).
[52.45] Water may be transported by trucks at the rates given in the Truck Capacity Tables (40.2).
[52.5] EFFECTS OF LACK OF WATER
[52.51] Vehicles without water may not move or close assault offensively. Vehicles without water defending against close assault halve their total raw strength before determining actual strength.
[52.52] Infantry units (all units moving without benefit of vehicles) may not voluntarily exceed their CPA for the Operations Stage they are deprived of water. Furthermore, they may not engage in offensive close assault; they defend at half strength.
[52.53] For every consecutive operations Stage after the first Operations Stage without water, each infantry unit loses one TOE Point.
[52.6] THE ITALIAN PASTA RULE
One of the biggest mistakes the Italians made during the entire Desert Campaign was to provide their troops with a diet which was composed, in large part, of spaghetti and macaroni. Aside from providing insufficient protein (this wasn't Buitoni Brand), pasta has one serious drawback in the desert: you need water to cook it! Therefore, each Italian battalion, when it receives its Stores, must receive an additional 1 Point of Water when Stores are distributed. Any battalion-sized unit that does not receive their Pasta Point (one Water point) may not voluntarily exceed their CPA that Turn. Furthermore, Italian battalions not receiving their Pasta Point that have a Cohesion Level of -10 or worse immediately become Disorganized, as if they had reached -26. As soon as such units get their Pasta Point, they regain the original Cohesion Level (i.e., the level they had before they disintegrated).
[52.7] WATER AVAILABILITY TABLE
(see Charts and Tables)
[52.8] POISONING AND SWEETENING WELLS TABLE
(see Charts and Tables)
[53.0] TRUCKS AND TRANSPORT
COMMENTARY:
Transport is the lifeline of the Player. The Player who fails to grasp the overriding importance of transport (or, as it is called throughout the rules, trucks) to his military effort will be a losing Player. Trucks are the game; without a well-organized and efficient truck convoy system your entire military effort will fall apart.
GENERAL RULE:
Trucks are used for one of two purposes: carrying supplies or transporting men (motorizing infantry-type units). Each one "point'? of trucks is equivalent to ten actual trucks. Heavy Trucks are those of the (approximately) three ton or heavier variety, including heavy-duty lorries and partiallytracked vehicles. Medium trucks are the equivalent of all transport vehicles of around 30 cw. Light trucks are all transport lighter than the 30 cw limit. Trucks consume fuel and water when they move, and they suffer breakdown.
CASES:
[53.1] FIRST, SECOND, AND THIRD-LINE TRUCKS
There are three truck formations: First, Second, and Third Line Trucks. These formations (or rather definitions) delineate what the Trucks in that formation are doing and where they belong. These definitions are provided not so much in the form of rigid rules but rather as a system—based on one actually used in the campaign—so that the player may better visualize what he can accomplish and what he has to do it with.
[53.11] First Line Trucks
These are trucks attached directly to the parent combat unit (division, brigade, battalion, etc.). They are used to carry men and/or supplies of that parent combat unit. First line trucks are not represented by counters; the Player notes on his TOE Sheet for a parent combat unit the number and type of truck attached as first line and assigns men or supplies to each truck unit. First line trucks may be detached (in the Organization Phase), in which case they will be represented by a counter and are no longer considered to be first line trucks.
[53.12] Second Line Trucks These truck units essentially operate between combat units and the forward supply dumps from which they are retrieving supplies. These trucks are not limited to carrying supplies; they may, like all trucks, carry anything not specifically forbidden. Second line trucks are represented by counters. Players keep track of all second line trucks on their truck and Major End Items sheets. They move during the Truck Convoy Movement Segment of the Operations Stage, as they are not attached to a regular unit.
[53.13] Third Line Trucks
These trucks operate between the major ports of entry (e.g., Alexandria, Tripoli, Cairo, Tobruk, etc.) where supplies and reinforcements originate, and the forward supply dumps. Third line trucks rarely transport directly to combat units, although there is no rule restricting such transport. Third line trucks are similar in all ways to second line trucks, with the sole exception of the name, which distinguishes them in any supply network you may devise.
[53.14] Three Tier Organization: The most efficient system for hauling supplies and reinforcements is a three-tiered effort: third line trucks pick up supplies from the port of entry and transport them to forward dump areas; second line trucks pick up supplies at those forward dump areas and drive them directly to the combat units, where the supplies are then loaded on to that unit's first line trucks. They are now available for instant use by the unit. This system is recommended by the designers and the playtesters; it is not, however, a rule.
[53.2] RESTRICTIONS ON THE USE OF TRUCKS
[53.21] Trucks acting as convoys may move only in the Truck Convoy Movement Segment (See 8.18). This applies only to trucks not attached to a combat unit or HQ. Thus, truck counters on the game maps are, by definition, convoys and will move only in the Truck Convoy Movement Segment.
[53.22] Trucks moving in a Convoy Movement Segment have an extended CPA: heavy and medium trucks have a CPA of thirty (30), and light trucks have a CPA of forty (40). However, Trucks moving in a Truck Convoy Movement Segment may never, under any circumstances, exceed their extended CPA. If, for some reason, they are forced to exceed their extended CPA they are considered to have suffered breakdown (21.0) at the instant they exceed their extended CPA. First line trucks use their basic CPA (20 or 25) and may exceed their CPA as their parent unit does (See 6.1).
[53.23] Any combat unit with a cohesion level of minus five (-5) or worse may not voluntarily detach its first line trucks. Conversely, second and third line trucks attached as first line trucks assume the cohesion level of the parent unit.
[53.24] There is a Capability Point cost to load and/or off-load supplies and men. (See 6.3). Supplies for one truck unit must have been off-loaded by that truck before another truck unit may load and carry them. This applies even if both truck units are attached to the same parent combat unit or convoy. Furthermore, supplies and/or men carried by second and third line trucks that have reached their full extended CPA's may not be off-loaded (and picked up by another truck) if such action will cause that truck unit to exceed its extended CPA. Exceptions: During the Supply Distribution Segment, trucks may freely be loaded and unloaded; during the Combat and Movement Segment, ammunition and fuel loaded in trucks that hex may be expanded with no unloading cost.
[53.25] "Leapfrogging" is not permitted. Leapfrogging is defined as having truck "A" carrying supplies to a hex, then having truck "B" pick up the same supplies in the same Movement Segment and move them on to another truck, which then picks them up, and so on. If this were allowed, a given cache of supplies could be moved from one end of the game-map to the other in one Segment! Thus, for this purpose, supplies and men being transported by trucks are considered to have and to have used the same number of CP's that the trucks carrying them expended, and they may never exceed the CPA of the first truck they started with in the Operations Stage.
[53.3] ABANDONED VEHICLES
[53.31] Trucks, or any prohibited vehicles, that are in a salt marsh hex and not on a road or track are automatically abandoned (see 8.44). If the abandoned vehicle was carrying infantry-type units or is an artillery unit and there is an Enemy combat unit within three traversable hexes (counted from Enemy unit to salt marsh hex) and there are no Friendly combat units (at the end of the Movement Stage) within those same three hexes, those infantry units surrender and the guns are captured. If there is no Enemy around, the infantry is now on foot and walking (starting next Movement Stage) and the guns are abandoned.
[53.32] Abandoned vehicles and guns may be recovered by any unit in an adjacent non-salt marsh hex with engineering capability (23.1). The cost to recover such vehicles (or guns) is 10 CP's to both units. (Note: The abandoned vehicle is considered to have its full CPA.) Recovery may not be performed if either the recovering unit or the abandoned unit is adjacent to an Enemy combat unit. Recovered vehicles become attached to the recovering unit.
[54.0] SUPPLY CO-ORDINATION
COMMENTARY:
Many of the rules in this Section are covered elsewhere, but they are spread throughout the rules booklet. This Section is provided to consolidate an important facet of the game: coordinating your supply effort and logistics system. This involves the rules needed for setting up a supply network of dumps and trucks and maintaining the network so that whatever supplies you do have flow smoothly.
CASES:
[54.1] SUPPLY DUMPS
[54.11] Supply dumps are used to hold large amounts of supplies — ammunition, fuel, stores, and water — in places that can be easily reached and used by combat units. Any hex can be used as a supply dump, and all major cities are natural supply dumps.
[54.12]. Dummy supply dumps hold no supplies. They are revealed only when an Enemy unit enters the hex or bombs/strafes it. The Dummy supply counter is removed upon revelation.
[54.13] Supply Dump Capacity Chart (see Charts and Tables)
[54.14] Players may attempt to "blow" supply dumps and their supplies. Only non-gun units may attempt to blow dumps. Only one Phasing unit per [continued on page 23]
hex may attempt to blow a particular dump per Player-Turn. To blow a dump, the attempting Player must expend Capability Points equal to one-third (rounded up)of the attempting unit's basic CPA. The attempting Player may never expend more than the unit's basic CPA attempting to blow a dump moreover, a unit may not exceed its CPA to blow adump.
To blow a dump, the Player expends the necessary CPAs and rolls one die and modifies the die roll if necessary for unit size, dump ownership, location, etc. The Player may adjust the die roll by announcing, before rolling the die, that he is expending an additional one-third or two-thirds of the attempting unit's basic CPA. Cross index the modified die roll with the percentage of supplies row on the Supply Dump Demolition Table (54.17) to determine the percentage of each type of supply in the dump that is destroyed. In addition, a unit occupying the same hex as a supply dump may attempt to blow that dump as part of a retreat before combat. The Player may only expend one-third of the unit's basic CPA and must vacate the hex regardless of the result. Supply Dumps may be blown in any segment of an OpStage.
[54.15] Dumps may be used by any Player as supply sources. The supply dump counters have ID numbers on them so that the Player may facilitate record-keeping, including which dumps are Dummies.
[54.16] It is suggested that Players set up their dumps so that each is within a one-OpStage truck ride (including loading and unloading time) from the next. Otherwise you are asking for trouble. Establishing a viable dump network should be top priority for logistics commanders.
[54.17] Supply Dump Demolition Table (see Charts and Tables)
[54.2] TRUCK CHARACTERISTICS CHART
(see Charts and Tables) The use and mechanics of trucks is discussed in many places. Let it suffice to repeat that it is of primary importance that the Player set up a system whereby his trucks are constantly in use, ferrying supplies forward as fast as they can. The carrying capacities of one Truck Point for each type of truck are listed on the Chart; see Charts and Tables. *It requires two light trucks to carry one TOE Point of infantry; it is suggested that light trucks not be used for this task.
[54.3] THE COMMONWEALTH RAILROAD: Supplies
[54.31] As stated previously, the Commonwealth railroad may be used to move personnel in any direction. It may also be used to move supplies. It may move either supplies or personnel — it cannot move both at the same time.
[54.32] The Commonwealth supply capacity of the railroad is 1500 tons per Operations Stage in either direction. The RR may move personnel in one direction and supplies in another. Players should check the various Sections on supplies to see the equivalent weight in tons for each type of supply.
[54.33] The railroad may transport only one type of supply at a given time. It may move fuel, ammunition, or stores — not any combination of the three. (Water need not be transported by RR — the railroad hexes are pipelines in and of themselves.)
[54.34] For the duration of one Operations Stage per month (calendar month), the railroad may not be used for anything. It is transporting water forward for railroad use. Players must state each month which Operations Stage they are not using the railroad.
[54.35] Like personnel, supplies may be moved from any one spot and dumped in another spot. Supplies are considered unloaded when they reach a specific hex. They may not be moved that Operations Stage.
[54.4] AXIS USE OF THE COMMONWEALTH RAILROAD
Under certain conditions the Axis Player may make use of the coastal railline extending from Egypt to Libya (the Commonwealth railroad system). In essence, he must control the rail hexes and he must import rolling stock. Remember, the Barce railroad east of Benghazi is not usable under any conditions.
[54.41] At any time the Axis player controls five or more continguous rail hexes he may use such rail hexes to transport equipment and personnel. To control a rail hex the Axis player must be the last player to have a land combat unit of any type pass through that hex.
[54.42] The Axis Player may never build new rail line. However, he may repair rail hexes he controls at the same rate as the Commonwealth Player.
[54.43] To make use of controlled Commonwealth Raillines the Axis Player must convoy Rolling Stock (locomotives, tenders, stock cars, flat cars, etc.) from Europe to Africa. For each 250 Stores and 100 Fuel Points that the Axis Player imports to Africa and brings to any controlled and operative rail hex he may activate all such hexes under his control (as long as they are contiguous) to the extent of hauling 300 Tons of Supplies in any one direction during an Operations Stage. (Rail movement occurs in the Convoy Stage).
[54.44] In order to transport one Stacking Point of any-type of unit the Axis Player must have active enough Rolling Stock to transport thé equivalent of 900 Tons of Supplies in any one direction.
[54.45] Once Stores and Fuel is applied as Rolling Stock the points are used up; they may not be recovered. If at any time the Axis Player loses control of enough rail hexes so that he does not have the necessary five contiguous hexes the Rolling Stock is considered to have been destroyed. The Axis may not use Commonwealth Stock, nor vice versa.
[54.46] All rules concerning the movement of troops/supplies and the use of the railroad that apply to the Commonwealth apply equally to the Axis.
[54.5] EQUIVALENT WEIGHTS CHART
(see Charts and Tables).
[55.0] PORTS AND SUPPLY
[55.1] PORT CAPACITY AND USE
[55.11] There are two types of ports: major ports and minor ports. Major ports may receive both men and supplies; minor ports may receive only supplies. Both types of ports may ship out men and supplies.
[55.12] Every port in the game has an Efficiency Level, which is an abstract number assigned to that port. For example, Tobruk has an Efficiency Level of 5. This Efficiency Level indicates the level of efficiency at which the port is operating. The Efficiency Level of the port may be reduced by various Enemy activities, all discussed previously.
[55.13] In addition to its Efficiency Level, each port has a specific limit (capacity) as to the number of TOE Strength Points and/or tons of supplies that may enter and leave that port; this is called the port capacity. (See the Port Capacity and Efficiency Level Chart, 55.3.)
[55.14] The amount of troops and supplies that can be brought into or out of a port depends on its current Efficiency Level and its capacity. A port operating at peak efficiency (its level is at maximum assigned) uses its listed capacity. A port that has been reduced by bombing or mines operates at a lower efficiency directly proportionate to its reduced Level. Thus, a port with an assigned Efficiency Level of 5 that has had its Level reduced to 3 operates at 3/5 (or 60%) or its assigned capacity. Therefore, all incoming and outgoing shipments are reduced to 60% of original level. Example: Benghazi has a supply tonnage capacity of 2500 tons per OpStage. It has a maximum Efficiency Level of 3. If this Level has been reduced to 1, its supply receiving capacity is reduced to 1/3 of 2500 (or 834 tons). Round all reductions upward to the nearest ton.
[55.15] In addition to any reductions brought about by Enemy action, the fact that troops are being debarked at a port — as opposed to supplies (fuel, ammo, etc.) — may reduce its Efficiency Level vis a vis supplies for the OpStage or Game-Turn in which the troops arrive. The arrival of scheduled reinforcements (those that arrive mandatorily, via the Reinforcement Schedule), as opposed to those which the Players plan, etc., do not affect a port's capacity or Efficiency Level.
[55.16] Some ports may receive shipments only in a Strategic Phase, while others may be used each OpStage. Players should be careful to adjust all capacities and Efficiency Levels to cover both uses. A port's capacity applies to al/ shipments received in a Game-Turn (including OpStages), except as stated in Case 55.15.
[55.17] The port of Bizerta (Tunis Box) is an unusual case. Although nominally open to the Axis via Vichy France, on Hitler's request it was never used (for various convoluted reasons). To add to that, it is quite a long way to the front — even if it is out of range of most Commonwealth planes. In any case, Bizerta is non-operable until the start of the June 1, 1941 Game-Turn. Starting with that Game-Turn, the Axis Player throws two dice each Game-Turn. If he throws a 12, he may use Bizerta from that turn on. It remains inoperative until the Game-Turn that he does throw a12.
[55.18] For every OpStage that a port does not lose any Efficiency Levels to Enemy bombs, it regains one point. Exception: Cases 55.26 and 55,27. It can never go above its maximum assigned level (see Case 55.3).
[55.2] BLOCKING HARBORS
Either Player may reduce the effectiveness of a port he actually occupies by scuttling ships in the harbor to block other ships from entering. This was done notably at Benghazi by the Axis,.thereby reducing the effectiveness of Benghazi (as a port) to almost zero during the entire war. Enemy Players may also mine opposing ports.
[55.21] A Player who controls a port may desire — for whatever reason occurs to him — to block up the harbor. Each harbor being different, the ability to do this varies with the port. The ports at Bizerta, Tripoli, Alexandria, Aboukir (E3815) and Rosetta (E4019) may not be so blocked.
[55.22] In order to block a port harbor, the Player must have an engineer battalion or CW HQ with engineer capacity present in the port hex. He then expends 25 Ammunition Points and 10 Stores Points, which must be actually present in the hex, in the Construction Phase. The Efficiency Level of the port is reduced by one (see Case 50.14).
[55.23] All ports are reduced at the same rate, with one exception: it requires the expenditure of 50 Ammunition Points and 25 Stores Points to reduce Tobruk port one Level.
[55.24] A port may be reduced one Level per Operations Stage; it may never be reduced more, regardless of the expenditure of supplies.
[55.25] Players will note that at the start of the game, the Italian cruiser San Giorgio is partially blocking the harbor of Tobruk. The San Giorgio reduces the efficiency level of Tobruk by three levels.
[$5.26] The effect of blocking harbors may be undone only by Friendly engineer battalions or CW HQ with engineering capability. Engineers reverse the process of 55.22. However, for each port, it costs 50 Ammunition Points and 25 Stores Points to undo the damage, at one level capacity per Operations Stage. There are two exceptions to this: Tobruk requires only 25 Ammunition Points and 10 Stores Points to remove one level of blocking effect; Benghazi requires the expenditure of 100 Ammunition Points and 50 Stores Points plus the presence of two engineer units to remove one level of blocking effect.
[55.27] Harbors may also be blocked by Enemy bombers laying mines by air (see Case 41.3 for the mechanics). Each successfully laid mine lowers the 'Efficiency one level. Mines may be removed by engineer battalions. If there are mines in a harbor, and the Player controlling the harbor has an engineer unit (as in Case 55.26) in that harbor, he rolls a die for each mine in the harbor. A roll of 1-3 removes the mine; a roll of 4-6 and the mine remains. Mine removal is done in the Construction Stage, and the engineer unit may not move or voluntarily expend CPA's in that Stage. The engineers cannot be involved in any other construction or removal work.
[55.28] CW ships in an Axis port hex have no effect on Convoy arrivals. (This is somewhat of an abstraction; attempts to block the ports during the day would not have worked due to Axis air power:)
[55.3] PORT CAPACITY AND EFFICIENCY LEVEL CHART
(see Charts and Tables)
[56.0] THE AXIS NAVAL CONVOY SYSTEM
GENERAL RULE:
Almost everything the Axis needs for its desert campaign must be shipped in from Italy and the Aegean. Supplies and personnel are sent in convoys. Convoys are planned one Game-Turns in advance and the route of the convoy (the shipping lane it will use) is also chosen at that time. Each convoy is given in tonnage, and the Axis allowable tonnage depends on the month, year, and roll of the die. It may be further depleted by Commonwealth bombers. In addition, the capacity of each port is limited as to the tonnage it may receive, and that facet will also limit the Axis planning. The Axis Player has a limited amount of coastal shipping which he may use to transfer small amounts of supplies from one coastal port to another.
CASES:
[56.1] THE SHIPPING LANES
[56.11] There are six Shipping Lanes in CNA, representing the various routes taken by Axis convoys. The Shipping Lanes are not printed on the game map but rather are identified by their ports of origin and destination (see the Axis Naval Convoy Air Distance Chart).
[56.12] An Axis convoy is defined as the total tonnage assigned to a Shipping Lane during a Game-Turn. The Axis Player may have as many as six convoys or as few as one during any Game-Turn. The Axis Player is restricted to the listed ports of origin and destination combinations (i.e., he may not create additional shipping lanes).
[56.13] Axis Naval Convoys may be attacked by Commonwealth bombers (see Axis Naval Convoy Strategic Bombing, 41.6). The Axis Player must therefore balance the risks in having a convoy arrive close to the front, thereby placing it within range of a greater number of Commonwealth N. African based planes or having it arrive far in the rear, trading time and supply expenditures for safety.
[56.14] Shipping lanes 4 and 5 (the routes originating from Greece) may not be used until the second Game-Turn of May, 1941. See also Case 55.17.
[56.15] All Axis convoys are assigned to a specific shipping lane in the Axis Convoy Planning Phase. The lane assignment may not be changed, regardless of any changes in the positions of the land units, with one exception: a convoy scheduled to arrive at a port that is captured by the Commonwealth is cancelled. It never sails.
[56.16] The Axis Player notes on his Convoy Control Sheet what he is shipping and through which lane. If that shipping lane is not attacked by Commonwealth planes, all items arrive at their designated port (which is stated as part of the lane). If the lane is under bombardment, the Axis Player totals the tonnage in that lane and divides by 1000 to obtain his Flak/AA Points for that convoy. Thus 15,000 tons of shipping would amount to 15 Flak/AA Points with which to fire at Commonwealth planes. Any losses are taken as per the strategic bombardment rules.
[56.17] There is no limit to the tonnage that can be carried by a convoy in a given lane, except as noted in Case 56.2.
[56.2] SHIPPING BY CONVOY
Many different methods of determining arrival rates and times of Axis convoys were considered in designing this game. Each one had several merits — all had drawbacks. We chose this method (using the actual tonnage figures for a given month) over the other less easy to determine methods. No one was completely satisfied with any of the methods. (The drawback with the chosen method is that the arrival rates may not coincide with Axis needs.) But both designer and developer were loathe to tackle the problem of Italian ship-building, availability of supplies in Italy, and a whole host of other problems. Thus the rules below reflect the arrival of Axis supplies as they actually occurred (within the parameters of the rules).
[$6.21] Axis shipping of supplies by naval convoy uses several charts, under the heading of the Axis Naval Convoy Level Chart. The Axis Convoy Capacity Table refers the Axis Player, by month and year, to the Tonnage Capacity Table for that particular month. The figures given on the Tonnage Determination Table are the tonnage of supplies that the Axis may ship in that Game-Turn (for which he is planning).
Example: The Axis Player, at the beginning of Game-Turn 54 (October IV, 1941), makes his plans for his shipping and convoys for Game-Turn 55 (November I, 1941). (Remember, while Axis replacements are planned two turns in advance, the Axis Player always plans his convoys one Game-Turn prior to actually sending them out.) The Axis Monthly Shipping Table tells the Axis Player to use row E on the Tonnage Capacity Table for November 1941. The Player refers to that Table and column and rolls a die; he rolls a 4. That means he may ship 21,000 tons of supplies and Replacement Points (see 20.00) on Game-Turn 55. The choice of shipping lane and destination is up to him.
[56.22] Having determined the allowable tonnage for a given Game-Turn, the Axis Player may now plan to ship any amounts (within the limits of allowable tonnage) of. fuel, ammunition, and stores that he wishes. They are available (for game purposes) in unlimited quantities in Europe. For example, with those 21,000 tons available on Game-Turn 55 (November I, 1941), the Axis Player may decide to ship out 10,000 tons of fuel, 10,000 tons of ammunition, and 1000 tons of stores.
[56.23] The tonnage equivalencies of supplies are listed on the Equivalent Weight Chart (54.5)
[56.24] The Axis Player may also have planned previously (see Case 20.6) to ship replacements from Italy/Greece. These take up space and weight, and their tonnage equivalencies are given in the Equivalent Weight Chart (54.5). Only Replacement Points not arriving via the Reinforcement Schedule affect shipping tonnage; reinforcements and scheduled replacements do not use convoys and do not affect shipping tonnage. Thus if the Axis Player had planned to send 10 Infantry Points in the Game-Turn 55 convoys, this would subtract 300 tons from the available tonnage for that Game-Turn.
[56.25] After determining what tonnage he has available and what he wishes to ship, the Axis Player then, at the same time, allocates his available tonnage to the lanes — and ports — he wants them to use. He cannnot change lanes and destinations once chosen (see Case 56.1).
[56.26] Axis convoys — and their cargoes — may undergo Commonwealth bombardment.
[$6.27] The Axis Player should remember that ports have maximum capacities; they may not receive supplies over that capacity (see Case 55.3).
[56.28] Supplies and personnel are unloaded the instant of their arrival, (if possible) and they may be used immediately. All ports of arrival (e.g., Tripoli, Bizerta, Tobruk) are considered to have supply dumps built in, as it were.
[56.3] AXIS COASTAL SHIPPING
The Axis had a small fleet of boats that they used for coastal transfer of small amounts of supplies. These were old shipping boats and aging tramp steamers that could ill afford to venture too far from land. They have a limited capacity.
[56.31] Axis coastal shipping is represented by several ship counters. Each ship counter has its tonnage capacity printed on it. Each ship has a CPA — for movement only — of 50. Each sea hex costs one point.
[56.32] Axis coastal shipping moves in the Truck Convoy Phase, and on/y in that Phase.
[56.33] Axis coastal ships cannot be attacked from air or land. They may not enter a port that has been neutralized (Capacity Level of zero). They may also never enter an Enemy-occupied port.
[56.34] To use coastal shipping, the Axis Player loads supplies (no personnel) on his boats at the beginning of the Truck Convoy Phase (at a cost of 5 CPs) and then moves the boat. Unloading supplies costs 5 CPs. Only one type of cargo may be carried at any one time by any one ship. Tanks, guns, etc., may not be shipped via coastal shipping
[56.35] Coastal ships may stop and unload in one port and then continue on to another port, etc., as long as they do not exceed their CPA. Coastal ships do not require fuel.
[56.4] AXIS NAVAL CONVOY LEVEL CHART
(see Charts and Tables)
[56.5] AXIS CONVOY CAPACITY TABLE
(see Charts and Tables)
[57.0] COMMONWEALTH SUPPLY BASE
GENERAL RULE:
The Commonwealth Player has an unlimited amount of supplies of all types — fuel, ammunition, water, and stores — in Cairo at al/ times during the game. His problem is solely to get it to where he wants it. He does not ship supplies in; if he wants something, it is in Cairo. Remember, Commonwealth ships need no supplies. For reinforcements and replacements for personnel and equipment, the Commonwealth Player should consult his Reinforcement Schedule and CW Replacement System (see Section 20.0)
[58.0] ABSTRACT AIR RULES
COMMENTARY:
This Section covers the rules required for the Players to play the Land and Logistics Games without utilizing the Air Game rules. CNA's play is relatively unaffected by the lack of an Air Game, the adjustments required being made in the Player's "trucking" ability.
CASES:
[58.1] EFFECT ON AXIS NAVAL UNITS
Attacks on Axis naval convoys are conducted using the same procedure listed in the Basic Logistics and Air Rules of the Land Game (see Section 32.0). The only difference is that the convoy being attacked is now more detailed as to what it is transporting. Note that the Axis coastal shipping and both Players' tactical shipping may not be attacked.
[58.2] COMMONWEALTH FLEET BOMBARDMENT
The Axis Player is entitled to make attacks on the Commonwealth fleet. Such attacks utilize the same procedure as that in the Basic Logistics and Air Rules described in the Land Game (see Section 32.0).
[58.3] EFFECT ON SUPPLIES
There is only one restriction — the Axis Player loses three-quarters of all fuel actually brought into a port on the instant of its unloading (considered to be used for airplanes). This loss is incurred before any loss for evaporation is calculated.
[58.4] EFFECT ON TRUCKS
[58.41] The Players' initial set-ups will be reduced by a certain number of Truck Points (those assigned or that would be assigned the task of supplying the air facilities).
[58.42] Both Players are subject to truck losses in addition to those caused by land combat. These losses represent the abstracted effects of strafing and bombing the opposing Player's trucks. The losses are determined in the same manner as those for motorization points (see Case 32.57) using the percentage loss figures in the Abstract Motorization Point Loss Chart (32.59) but applying them to the Players' trucks.
The owning Player may remove the lost Truck Points from any place he wishes. However, losses must be distributed in proportion by truck type and by proportion of trucks in convoy and those attached. Example: A Player possesses 50 Light, 100 Medium, and 50 Heavy Truck Points distributed as 40 Light and 10 Medium in convoy and the remainder attached. If he is required to lose 10% of the total Truck Points, he must lose 4 Light and 1 Medium Truck Points from those in convoy and 1 Light, 9 Medium, and 5 Heavy Truck Points from those attached.
[58.43] Both Players are subject to a reduction in their total available truck force in order to account for the trucks that would be carrying supplies to their air facilities. Both Players lose 10% (rounding fractions up) of all truck points that arrive in N. Africa (the instant they arrive) via the Commonwealth Truck Production Table and the Axis Replacement Pool. Trucks listed on the reinforcement track are not affected.
[58.44] Abstract Truck Loss Chart (see Charts and Tables)
SCENARIOS
[59.0] INTRODUCTION TO SCENARIOS
COMMENTARY:
There are five scenario groups in Campaign for North Africa. Each scenario group contains at least one separate game. Of course, one is for the playing of a campaign game. The groups cover what the designer felt were the most important — and most accessible, in terms of information — areas of the campaign. Specific battles, such as Gazala, were avoided as they did not fit within the concept of the game (operational). Each scenario is a self-contained game and each highlights certain problems.
Those wishing to get the most out of CNA without becoming enmeshed in a lifetime occupation are advised to try the Rommel's Arrival scenario — it is fast-moving and a lot of fun. It is also not too long or difficult (the small number of units involved keeps paperwork to a minimum). For those interested in seeing why trucks are so important and want to keep all their work in a small area, try the Italian scenario. For those interested in seeing a lot of units sit around doing nothing, try El Alamein —aremarkably boring situation (in game terms, if not historically).
Players should take great care in setting up each scenario, as a great deal of information is provided. The bigger scenarios could take 10 to 15 hours to prepare. A further word to the Africa buffs: given all the information in the game, it should be fairly easy to concoct your own situations and scenarios. Your major problem would be logistical information.
On the subject of Victory Conditions, it is the designer's feeling that, in a game of this size and scope, few Players will patiently battle through 100-200 hours of playing time and feel they have actually lost (or won). Finishing is an event in itself. The Victory Conditions have been thought out carefully, in light of not only what was actually accomplished, but also what had to be accomplished. Yet the conditions are somewhat general, especially the campaign game objectives. This is because outside considerations that could not possibly have been simulated had to be taken into effect. Any Player worth his salt will know whether he has accomplished what he set out to do without checking what we' ve told him he must do.
CASES:
[59.1] SCENARIO ORGANIZATION
[59.11] The scenarios in CNA are divided into five groups. The first four of these groups deal with individual battles or offensives, and the fifth covers the campaign game.
[59.12] Each of the first four scenario groups contains the following information:
a. Length of the scenarios in the group.
b. Victory Conditions of the scenarios in the group.
c. Initial location and strength of all land and air forces.
d. Initial location and amount of all supplies.
e. Initial location and number of all trucks.
f. Forces available on Malta & Crete/Italy/Sicily. g. Abstractions necessary to play the scenarios without the Air and/or Logistics Games.
h. Special rules for the individual scenarios.
[59.2] HOW TO READ THE SCENARIO SET-UPS
Basically, all air and land units, supplies, and trucks available at the start of a scenario are listed by hex location. Generally, the parent unit will be listed, and Players must refer to the appropriate OA Chart to determine which subordinate units are assigned to that parent unit. Whenever a given unit has a composition different from the one listed on the OA Chart, that is noted in parentheses.
Hex Location. If more than one hex is listed for a given group of units, the Player may divide the listed units between the hexes in any way he chooses, so long as stacking limitations are not exceeded.
Unit Type. If not apparent from the name, this is noted with an abbreviation. Where noted, it is always the first item enclosed in parentheses. I = infantry; R = reconnaissance (recce); T = tank; Ar = artillery; AT = anti-tank; AA = anti-air; HQ = headquarters (the headquarters counter only).
Parent of Listed Unit. If the listed unit has been assigned to a parent unit (whether or not it still is), that parent unit's designation is listed, in bold type, as it appears on the listed unit's counter. This is to facilitate identification of the listed unit.
Listed Unit Lacks Subordinate Units Originally Assigned. All such subtractions from what is listed on the OA Chart are noted after the indicator "Less."
Listed Unit Includes Subordinate Units Not Originally Assigned. All such additional units (which may be detached) are listed after the indicator "Assg."
Assigned Subordinate Units Are Detached. These are listed under the parent unit after the indicator "Det." Of course, they are listed separately in the hex(es) they themselves are in.
Listed Unit Has Entirely New/Different Roster of Assigned Units from Those Listed on OA Chart. All subordinate units listed after indicator "Consists of." Note. Whenever a unit inside parentheses requires expanded explanation, that explanation is enclosed inside double parentheses: e.g., ((....)).
Listed Unit Exceeds Formation Organization Limits. Such units may operate normally, including being themselves assigned and/or attached, with the exception that no new subordinate units may be assigned or attached to them, and should any units be detached, no new ones may be attached in violation of the limits.
Listed Unit Includes Subordinate Units Attached But Not Assigned. All such units are listed after the abbreviation "Att."
Disposition of the Units in a Hex. All units listed to begin in the same hex may be organized as the owning Player chooses, within the limits of the Formation Organization rules and stacking limitations. In other words, units in the same hex may be freely detached or attached to each other at the start of the scenario, in any fashion deemed desirable.
Trucks. All listed trucks are first line trucks and must be assigned to the units in the hex, in any manner deemed desirable.
Abbreviations Used in Scenario Set-Ups.
Div = division; Bde = brigade; Regt = regiment; Bn = battalion; Coy = company; In = Indian; Gds = Guards; RTR = Royal Tank Regiment; RHA = Royal Horse Artillery; Hus = Hussars; SA = South African; NZ = New Zealand;Cp = Conps; CLY = County of London Yeomanry; Gaf = Garrison troops; CCNN = Blackshirts; * = no parent organization.
[59.3] INITIAL AIR STRENGTHS
[59.31] Each scenario lists the starting Axis and Allied plane types, numbers, pilots, air facilities, and squadron ground support units. This listing is divided into forces available in North Africa and Malta for the Allied Player and to forces available in North Africa and Sicily/Italy/Crete for the Axis Player.
[59.32] Planes are listed by type, with the ready planes indicated as a portion of the total available. All planes (refitted or not) are considered to begin a scenario fueled and armed (at no cost to the supplies available).
[59.33] Planes may be distributed among the squadron ground support units as the owning Player desires within the restrictions on squadron composition listed in Case 35.2.
[59.34] Pilots may be assigned to planes and squadrons as the owning Player desires.
[59.35] Squadron ground support units may be placed on any of the air facilities owned by the Player. However the number of SGSU's may not exceed an air facility's readying capability.
[59.36] Maintenance may not be performed onplanes during the first OpStage of a Scenario.
[59.4] INITIAL TRUCK STRENGTHS
[59.41] Trucks initially available to each Player are divided into Ist line, 2nd-3rd line available for supplies, and 2nd-3rd line available for air facilities.
[59.42] First line trucks are listed by hex in the land forces initial deployment section of the scenario. These trucks must be assigned to units in their listed hex. The trucks may be divided among the units in that hex in any manner the Player desires.
[59.43] Second-third line (in convoy) trucks available for air facilities must be placed on an air facility.
[59.44] Second-third line trucks available to transport supplies must be placed (if the Axis Player is not starting them off-map) on a hex occupied by a Friendly combat unit, a supply dump, or a major city/town/oasis. These trucks may be distributed as the owning Player desires.
[59.45] Trucks may start a scenario transporting supplies or motorizing troops or anti-aircraft units at no cost or penalty. Any trucks starting with supplies may load any type of supply. These supplies are in addition to those listed in the supply section of the scenario.
[59.5] INITIAL SUPPLY
[59.51] Each scenario lists the location and amounts of a Player's initial supplies.
[59.52] The supplies are divided into those available at air facilities and those available at supply dumps. Air facilities automatically possess a supply dump. If a Player places supplies available at a supply dump in the same location as those available at an air facility, the totals are combined and it becomes one dump (see Case 36.17). Some scenarios separately list an aggregate number of supplies available at a player's air facilities.: These may never be allocated to off-map facilities.
[59.53] Certain scenarios list a Player as receiving active and non-active supply dumps. Non-active dumps are dummy dumps and cannot, therefore, be placed in the same hex as an air facility.
[59.54] Axis coastal shipping begins all scenarios unloaded (i.e., empty).
[59.6] ABSTRACT LOGISTICS AND AIR
[59.61] If only the Air Game is abstracted, the Players simply ignore all Trucks and supplies available at/for Air facilities in the initial set-ups. Play is then governed by the rules in Section 58.0.
[59.62] If the Logistics Game is abstracted, whether or not the Air Game is also abstracted, Players will be using Motorization Points and Supply Units. The initial set-ups for the Supply Units and Motorization Points are given in the following cases.
[59.63] Initial Motorization Point Strengths: The initial motorization points available to each Player are calculated from the trucks listed in the scenario set-up.
A. Attached Motorization Points: These are calculated, hex by hex, from the Ist Line trucks available to the Player unless specifically modified by a scenario's instructions. Each Medium Truck and each Heavy Truck is equal to one Motorization Point. Example: In the first Scenario Group, the 4th CCNN is listed as beginning the scenario with 10 Light, 25 Medium and 10 Heavy Trucks. It possesses 35 Motorization Points.
B. Unattached Motorization Points: These are calculated from the second-third Line trucks available to each Player in the same manner as in "A." If the Air Game is being abstracted, ignore all trucks available atair facilities. Note that the initial distribution/placement of these trucks will affect their ability to start a scenario loaded with supplies in addition to those listed as available in supply dumps (see Case 59.66).
[59.64] Initial Motorization Point distributions may be, with one exception (see Case 59.66 "B"), freely altered once the game starts as per the Land Game rules on attachment and detachment.
[59.65] Supply Units: The Player's initial supply levels are listed as to the number, location, and contents of regular and depot supply units available. Regular supply units are described in Section 32.0. Depot supply units — used only if the Air Game is being played and the Logistics Game is being abstracted — are described in Section 47.0. Initial supply unit placement may exceed stacking limitations only if unavoidable due to scenario distribution instructions. There is no penalty in such situations; however, no additional supply unit may be stacked in that hex. Once the supply unit distribution meets stacking restrictions all normal stacking restrictions for that hex must be met from that point on. (Remember that motorization points transporting supply units do not count against hex stacking limits.)
[59.66] Additional Supplies:
A. Motorization Points may begin a scenario loaded with supplies. These do not count against supplies listed in the scenarios supply dumps.
B. Each attached Motorization Point (see Case 59.63 "A") not initially transporting men or guns may start loaded with 1 Ammo Point or 3 Fuel Points. the unit must consume these supplies first (i.e., it may not draw on a supply unit) in order to meet any supply expenditure requirement. These supplies may not be transferred to a supply unit. The Motorization Points transporting these supplies may be detached from the unit only if remaining attached to a subsidiary combat unit of that parent unit (Note that the Motorization Point is under this réstriction only while it is transporting these initial supplies).
C. Unattached Motorization Points (see Case 59.63 "B") are divided into those that are listed as initially available at air facilities (these appear only if playing the Air Game) and all other unattached Motorization Points. Air facility Motorization Points may begin by transporting additional supply units as follows: Each 50 Motorization Points in a hex may start with a depot supply unit; each 30 Motorization Points in a hex may start with a regular supply unit. Each 30 other unattached Motorization Points in a hex may start with a regular supply unit. Example: 80 air facility and 100 other Motorization Points may begin with the air facility points transporting one depot and one regular supply unit while the other points may begin with three regular supply units. Note that for these Motorization Points to begin with a supply unit they must be in groups of 30 (and/or 50 if air facility) points (i.e., 20 Motorization Points may not begin with a supply unit). The Tripoli/Tunisia boxes are hexes for the purposes of this Case.
[60.0] SCENARIO GROUP ONE: The Italians
CASES:
[60.1] GENERAL DESCRIPTION
The first scenario group covers the initial months of the desert fighting, from 15 September 1940 through the middle of February 1941. Although there was an actual state of war existing between the British and the Italians vis a vis Libya/Egypt, the months of June through early September 1940 have been ignored as there was little done other than aggressive patrolling. The actual campaign starts with the first Italian offensive and subsequent British counter-attack.
[60.2] SCENARIO LENGTH
[60.21] There are two separate scenarios in the Italian scenario group; each may be played separately to a specific conclusion.
[60.22] Graziani's Offensive
This scenario starts with Game-Turn 1, OpStage 1; it ends with the conclusion of Game-Turn 6, OpStage 3. The estimated time of play is anywhere from 25 to 50 hours. Victory Conditions are listed in Case 60.71.
[60.23]. The Italian Campaign
This scenario starts with Game-Turn 1, OpStage 1, and proceeds through the end of Game-Turn 20, OpStage 3. It includes Operation Compass (O'Conner's counteroffensive). The estimated time of play is 90 to 150 hours. Victory Conditions are listed in Case 60.72.
[60.3] AXIS FORCES
[60.31] Italian Initial Deployment (Hex: Units)
C4218: 1 CCNN Div (I; Att: I(M) [T; Ar/LTC] Trucks: 10 light, 25 medium, 10 heavy.
C4120: 63 Cirene Div (I; Att: LXIII (L) [T; Ar/LTC]; Trucks: 45 medium, 5 heavy.
C4020: 1 Libyan Div (I); Trucks: 10 light, 15 medium.
C3920: 2 Libyan Div (I; Att: [IX(L) [T; Tvl/LTC]; Trucks: 15 light, 15 medium.
C3919: Aresca Regt (T; LTC, Det: all except XX); Trucks: 5 medium, 5 heavy.
C3918: 62 Marmarcia Div (I; Att: LXII(L) [T; Ar/LTC]; Trucks: 40 medium, 5 heavy.
C3617: Maletti Div (I; Att: I(M) [T, Tvl/LTC]; Trucks: 5 light, 30 medium, 5 heavy.
C4707: 64 Catanzaro Div (I); Trucks: 30 medium, 5 heavy.
C4507: 4 CCNN Div (1); Trucks: 10 light, 25 medium, 10 heavy.
Bardia (C4321): Trivoli Regt (T; LTC; Det: IIQM) and IX(L)); Bardia Garrison; Trucks: 20 medium.
Tobruk (C4807): HQ: Libyan Tank Command; Tobruk Garrison; Trucks: 5 medium.
Benghazi (B4827): Benghazi Garrison.
Barce (B5504): Libyan Parachute Regt (I); Trucks: 5 medium.
Derna (B5925): Derna Garrison.
Mechili (B4921): Mechili Garrison.
Giaribub (C1014): Giaribub Garrison.
Bir Scheferzen (C3419): Scheferzen Garrison.
Fort Maddelena (C3019): Fort Maddelena Garrison.
el Grein (C1715): el Grein Garrison.
Benina (A4829): Benina Garrison.
Soluch (A4130): Soluch Garrison; X Cp (Ar).
Anywhere in Libya: 1/1AR; 2/1AR; 3/1AR; 4/1AR; XXI Cp; XXVI Cp 4/1AR; XXI Cp (Ar).
Within 3 Hexes of C0716: Saharan Det (1); Trucks: 5 light.
Anywhere on Map A or B: XVIIILib (I; *); XXXIILib (I; *); and (all Ar) 147; 131; 2/24; 5/1; 6 GaF; 16 GaF; 22 GaF; 42 GaF; 350 GaF.
Tripoli: 2 CCNN Div (I); 3 CCNN Div (I); XXII Cp (Ar); XXIII Cp (Ar).
Tripolitania: 4/10 Army (I).
In addition, two TOE strength Points of Autoblinda 40's (recce, 1D Code "WW") may be attached, each point to any unit (but not both to the same) ignoring all regular unit composition restrictions. Or they may be deployed in Tobruk as regular (i.e., trained and fueled) replacement points.
[60.32] Italian Air Strengths
The following planes may be placed at any Italian airfields, landing strips, flying boat basins, etc., within the capacities of those facilities. However, no planes start the game in Italy/Scily. Crete is unavailable (it is still British).
| Plane | Total Available | Total Refitted |
|---|---|---|
| CR 42 | 65 | 25 |
| CR 32 | 70 | 28 |
| Ba 65 | 10 | 2 |
| Ba 88 | 24 | 6 |
| SM 79 | 133 | 35 |
| SM 81 | 17 | 4 |
| Ca 309 | 56 | 12 |
| Ro37Bis | 10 | 6 |
| 2S01 | 9 |
The Italian Player may not attempt to refit planes until Game-Turn 1, OpStage 2.
Italian Pilots Available:
Three's: 3
Two's: 10
One's: 15
Italian SGSU Available: 39.
[60.33] Italian Second-Third Line Trucks
The Italian Player receives the following trucks (Points). He may assign them and place them as he wishes; within the restrictions listed. (Original assignments may, of course, be changed as the game progresses).
| Location | Trucks Available (in points) |
|---|---|
| Tripoli | 25 Light, 140 Medium, 40 Heavy |
| Anywhere in Libya | 30 Light, 100 Medium, 25 Heavy |
| Any Air Facility | 10 Light, 50 Medium |
The Italians have a major repair facility at Tripoli, and a temporary facility at Tobruk and Benghazi.
[60.34] Axis Initial Supply Status: The Axis Player receives Dumps with the following supplies at the following locations:
Supply (in points)
| Location | Ammo | Fuel | Stores | Water |
|---|---|---|---|---|
| Tobruk (C 4807) | 200 | 2000 | 500 | - |
| Bardia (C 4321) | 100 | 1000 | 200 | - |
| Benghazi | 100 | 250 | 100 | - |
| Derna (B 5925) | - | 250 | 50 | - |
| Tripoli (box) | 250 | 5000 | 250 | - |
*These and two Dummy supply dumps may be placed in any hex on map section C in Libya that is not within four hexes of a Commonwealth unit.
In addition the Axis Player receives a total of 1200 Ammo, 850 Fuel, 100 Stores and 100 Water Points which may be freely distributed among his airfields.
[60.35] The Italian Player may use all Axis coastal shipping counters. They start the game in Tripoli.
[60.36] The Axis Player's Strategic attacks on Malta are restricted to forces called for by Availability Level I (see the Axis strategic Commitment Chart, case 44.41).
[60.37] The Italian Player must plan convoy runs for the remainder of September, 1940, prior to starting the game. He may only use lanes 2,3 and 6.
Consult the Convoy Availability Charts to see what shipping the Italian Player has. He receives all reinforcements as per the Reinforcement Track.
[60.4] COMMONWEALTH FORCES
[60.41] Commonwealth Initial Deployment (Hex: Units)
C4131: 2nd Scots Guards (I); 31st Field Arty Regt (4 In); Trucks: 10 medium.
C3926: 1st Coy French Motor Marines; Trucks: 2 medium.
C3922: 3rd Coldstream Gds/(I); Ist Kings Royal Rifle Corps (I; 7Spt/7); 4th RHA (7 Spt/7); 7th Medium Arty Regt; Trucks: 15 Medium, 5 Heavy.
C3721: 1st Royal Northumberland Fusiliers (I); 3rd RHA (AT; 7Spt/7); Trucks: 5 medium, 5 light.
C3520: Ist RTR (7/7); Trucks: 5 medium.
C3320: 2nd Rifle Bde (I; 7Spt/7); Trucks: 10 medium. ;
C3020: 11th Hus (R; 7Spt/7); Trucks: 3 Medium.
D3714: Matruh Garrison (I; Att: 1 Essex 23/70; Ist Durham Lt Inf 23/70; 1st South Stafforshires; Trucks: 5 light, 15 medium, 5 heavy.
D3612: 7th Armored Division (Det: all 7 Arm Div. units listed above); Trucks: 5 light, 5 medium, 5 heavy.
D3615: 4th Indian Division (Det: 31st Field Arty and 7th In Bde); Trucks: 5 light, 20 medium, 2 heavy.
E1829: 16th Inf Bde (70); Trucks: 20 medium.
Alexandria (E3613 &/or 3714): HQ: 2nd New Zealand Division; 4th NZ Bde (2 NZ); 27th NZ MG Bn (2 NZ); 2nd NZ Cavalry (2 NZ); 4th NZ Field Arty Regt (2 NZ); Trucks: 10 light, 15 medium, 5 heavy.
Cairo and/or Helwan (E 1430): In Training: 6th Australian Division (Less: 19 Aus Bdg; 2/1AFld Arty; 2/2AFld Arty).
Cairo: 8th Field Arty Regt; Ist Welch (1); Ist Cheshire MG Bn; 2nd King's Own Ry] Regt (I).
Anywhere on Map D or E: 8th Medium Arty Regt; 65th Anti-tank Regt; 149th Anti-Tank Regt; 9th Heavy AA; 15th Light AA; 57th Light AA.
Note: lst Welsh counter bears the same coloration as Indian Units.
Broken Down Vehicles
Alexandria: 2 TOE of A9 Cruiser Tanks; 1 TOE of A10 Cruiser tanks.
[60.42] Commonwealth North African Air Force The following planes, SGSU's and pilots may be placed at any Commonwealth N. African air facility, within the capacity of that facility.
| Plane | Total Available | Total Refitted |
|---|---|---|
| Lysanders | 12 | 8 |
| Bombays | 15 | 12 |
| Sunderlands | 18 | 11 |
| Blenheim Mk. I's | 26 | 18 |
| Blenheim Mk. IV's | 12 | 12 |
| Blenheim Mk. IVF's | 9 | 5 |
| Gladiators | 36 | 30 |
| Hurricane Mk. I's | 6 | 4 |
| Morane 406's* |
*May be in the same squadron (Free French).
Pilots Available: 1 Three, 5 Two's and 8 One's.
SGSU Available: 14.
[60.43] Commonwealth Second-Third Line Trucks The Commonwealth Player receives the following Truck Points; He may assign them and place them as he wishes, within the restrictions listed. (These will change).
| Location | Truck Points Available |
|---|---|
| Any hex in Cairo | 40 Medium, 10 Heavy |
| Alexandria | 10 Light, 20 Medium |
| Anywhere, maps | 15 Light, 40 Medium, 5 Heavy |
| Any Air Facility | 5 Light, 30 Medium, 20 Heavy |
[60.44] INITIAL SUPPLY STATUS
(Factors
| Location | Ammo | Fuel | Stores |
|---|---|---|---|
| Mersa Matruh (D3714) | 1000 | 3000 | 4000 |
| Sidi Baranni (C4131) | 250 | 500 | 100 |
| Dump I | 500 | 750 | 500 |
The Dump I dump and one dummy dump may be placed anywhere in Egypt on map C or D. Remember that unlimited supply points are available in Cairo and Alexandria.
Air Supply (Distribute amongst Air Facilities as desired)
- Ammo: 200
- Fuel: 250
- Stores: 50
Unlimited Supplies in Cairo/Alexandria (as per rules)
The Commonwealth Player has his Major Repair Facility in Alexandria. He has one Temporary Facility in Mersa Matruh.
[60.45] Commonwealth Fleet: The Commonwealth Player has a total of one battleship, three cruisers and seven destroyers available at the beginning of the campaign. These are deployed according to the Commonwealth Fleet Schedule (see Section 30.0). The warships may not be moved until the first OpStage of the second Game-Turn. Their combat ratings are unaffected (i.e., they do not need repair and may fire).
The following units are available and in Port at Alexandria:
| Number | Type |
|---|---|
| 2 | Battleships |
| 2 | Cruisers |
| 4 | A. A. Cruisers |
| 6 | Destroyers |
The following units are in Valetta, in Malta:
| Number | Type |
|---|---|
| 1 | Cruiser |
| 1 | A. A. Cruiser |
| 2 | Destroyer |
No Fleet units may be moved until the September 1/IV Stage/Turn. All ships may use their AA Ratings.
[60.46] Malta Planes:
| Planes | SGSU's | Ready |
|---|---|---|
| 15 Hurricane MkI's | (2 SGSU's) | (12 Ready) |
| 12 Swordfish | (1 SGSU) | (9 ready) |
| 3 Gladiators | (1 SGSU) | (all ready) |
| 1 Sea Gladiator | (1 SGSU) | (all ready) |
Pilots: 4 Two's, 6 One's
AA: 17 AA Points distributed as player sees fit
State of Air facilities: The Malta bases have an initial capacity of five SGSU's. These may be spread amongst the Malta facilities as the player wishes. Construction on increasing the capacity of Malta Air Facilities may begin in October, 1940.
[60.47] The Commonwealth Player uses his Reinforcement Track as printed, bringing in units where and when listed (Remember that some units need Training, which means that other units have to be assigned as Training Units!) No Replacement Points may arrive before November 1940.
[60.5] AIR FACILITIES
The following Air Facilities are in existence. Players will note that Air facilities may be used by anyone Who controls them. All facilities in Egypt belong to the Commonwealth; all those in Libya belong to the Italians. at the start of the game.
Airfields
| City/Village | Hex |
|---|---|
| Abbassia | E2132 |
| Aboukir | E3815 |
| Abu Seier | Off-Map E(3433) |
| Alexandria | Both hexes, (E3613, 3714) |
| Almaza | E2133 |
| Amiriya | E2212 |
| Barce | B5504 |
| Benina | A4829 |
| Dekheila | E3512 |
| Deversoir | Off-Map E(1833) |
| El Adem | C4507 |
| El Berca | A4728 |
The four Tripoli/Tunisia boxes (off-map).
Air Landing Strips
| City/Village | Hex |
|---|---|
| Augila | B0707 |
| Bardia | C4321 |
| Bir el Gubi | C4108 |
| Burg el Arab | E3109 |
| Buq Buq | C3926 |
| El Agheila | A1816 |
| El Hamman | E3007 |
| Ft. Capuzzo | C4020 |
| Fuka | D3323 |
| Gambut | C4414 |
| Gazala | B4933 |
| Giarabub | C1014 |
Note: Insufficient Air Landing Strip counters are provided. Use blanks.
Flying Boat Basins
| City/Village | Hex |
|---|---|
| Alexandria | E3614 |
| Bomba | B5331 |
Port Said (off-map E4033).
Flying Boat Alighting Areas
| City/Village | Hex |
|---|---|
| Derna | B5925 |
[60.6] INITIATIVE
For this Scenario Group, the Italian Player has the Initiative for the entire first Game-Turn. Starting with the second Game-Turn, players determine Initiative as per the rules for such.
[60.7] CONSTRUCTION ON THE MAP AT THE START OF THE GAME
There are no minefields, fortifications, or pipeline (other than those provided by the RR). The RR runs to Mersa Matruh (D3714) and ends there. All ports are at listed Efficiency with the exception of Tobruk, which is at Efficiency Level 7 (the San Giorgio is partially sunk, blocking the harbor).
[60.8] FIRST SCENARIO GROUP VICTORY CONDITIONS
[60.81] Graziani's Offensive
Italian Strategic Victory: The Italian Player must take and hold either Alexandria or Cairo (any hex) with a combat unit that can be supplied (by convoy) from any hex on Game-Map D.
Italian Decisive Victory: The Italian must take and hold (occupy) both Mersa Matruh and Siwa with any combat unit that can be supplied by convoy from Tobruk.
Italian Tactical Victory: The Italian must take and hold (occupy) Sidi Birani and retain possession of Sollum (C4021) and Fort Maddalena and Giarabub in supply (as above, to Tobruk)
Commonwealth Tactical Victory: Must take and hold Sollum and Halfaya Pass (C3922) as well as Siwa (C0127) tracing supply by truck convoy back to Alexandria or Cairo.
Commonwealth Decisive Victory: Must take and hold Bardia, Fort Maddalena, Sidi Omar, Sollum and Siwa, supply as above.
Commonwealth Strategic Victory: Must take and hold Tobruk; supply as above.
[60.82] The Italian Campaign
Players are awarded points for holding (occupying) the following locations. Units holding such places must be combat units (i.e., units with non-parenthesized Close Assault Ratings) and they must be able to trace supply of not more than one Game-Turn's duration back to a Supply Dump or City which can eventually be traced back either to Cairo (Commonwealth) or Tripoli (Italian).
Victory Points
| City/Village | Italians Hold | Commonwealth Holds |
|---|---|---|
| Mersa Matruh | 100 | 0 |
| Tobruk | 50 | 25 |
| Derna | 20 | 30 |
| Giarabub | 10 | 10 |
| Siwa (C0127) | 10 | 10 |
| Benghazi | 10 | 50 |
| Agadabia (A2629) | 10 | 50 |
| Mersa Brega (A2021) | 0 | 50 |
If there are no Italian combat units that can trace a Supply Line on the game-map the Commonwealth Player wins a Strategic Victory. All other conditions produce a simple "Victory". Most points wins. These conditions are based on what actually happened, and less on actual objectives.
[60.9] AIR & LOGISTICS GAMES ABSTRACTIONS
This Case lists the adjustments needed in addition to those given in Case 59.6 in order to play this scenario without the Air and/or Logistics Game(s).
[60.91] Air Abstracted
(Land & Logistics Games): None.
[60.92] Air & Logistics Abstracted (Land Game Only):
A. The Players' ability to bring in Motorization Points is equal to their respective abilities to bring in Medium Truck Points (i.e., each Medium Truck Point equal one Motorization Point).
B. Axis Initial Supply Status: Case 60.34 is replaced by the following:
| Location | Regular Supply Units | Each with Ammo | Each with Fuel |
|---|---|---|---|
| Tobruk (C 4807) | 3 | 15 | 50 |
| Bardia (C 4321) | 2 | 10 | 40 |
| Benghazi (B 4827) | 1 | 10 | 10 |
| Derna (B 5925) | 1 | - | 10 |
| Tripoli (box) | 8 | 5 | 60 |
| Dump 1* | 3 | 40 | 50 |
| Dump 2* |
*In any one hex on map-section "C" in Libya, not within four hexes of a Commonwealth unit.
In addition, the Axis Player receives two groups of three dummy supply unit counters which may be placed according to the rules for Dumps 1 and 2.
C. Commonwealth Initial Supply Status: Case 60.44 is replaced by the following:
| Location | Regular Supply Units | Each with Ammo | Each with Fuel |
|---|---|---|---|
| Mersa Matruh (D 3714) | 5 | 40 | 60 |
| Sidi Baranni (C 4131) | 1 | 40 | 60 |
| Dump 1* | 3 | 40 | 30 |
*All three in any one hex on map-section "D" west of Mersa Matruh.
In addition, the Commonwealth Player receives one group of three dummy supply units which may be placed according to the rule for Dump 1.
In addition, Alexandria and Cairo each possess three regular supply units, each supply unit containing 40 Ammo & 60 Fuel.
[60.93] Logistics Abstracted (Land & Air Games): A. The Players' ability to bring in motorization points is equal to their respective abilitys to bring in Medium plus Heavy Trucks (i.e., each Medium and each Heavy Truck is equal to one motorization point).
B. Axis Initial Supplies: As in 60.82 "B" above and in addition a total of 5 regular supply units, each with 40 Ammo and 15 Fuel Points, to be distributed among and placed on any Axis airfields(s).
C. Commonwealth Initial Supply Status: As in 60.82 "C'? above and in addition a total of 2 regular supply units each with 20 Ammo and 12 Fuel Points to be distributed among and placed on any Commonwealth air facilities.
[61.0] SCENARIO GROUP TWO: THE DESERT FOX
[61.1] GENERAL DESCRIPTION
The Desert Fox scenario covers the arrival of the Germany Africa Korps and General Rommel. There are two scenarios that may be played from this set-up. The first is the initial arrival of Rommel and the race for Tobruk. The second is a complete campaign, starting from the same point.
[61.2] SCENARIO LENGTH AND DURATION
The race for Tobruk scenario begins with the 3rd
OpStage of Game-Turn 26 and ends at the conclusion of the 3rd OpStage of Game-Turn 38. It should take from 75 to 125 hours to play.
[61.3] COMMONWEALTH FORCES
[61.31] Commonwealth Land Forces Initial Deployment (Hex: Units)
A2022: 3rd Armored Bde (2 Arm); ( Assg: 6th RTR [4/7]; 3rd Hus); HQ: 2nd Armored Division; Trucks: 20 Medium.
A2021: 2nd Support Group (2 Arm); Trucks: 25 Medium, 5 Heavy.
C4507: 3rd In Motor Bde; Trucks: 5 Light, 25 Medium.
Msus (B4004): 1st Coy French Motor Marines Trucks: 3 Medium.
Any hex within the triangle formed by Tocra (B5501), Er Regima (A4830) and Benghazi: 24 Aus Bde (9 Aus; Less: 2/32 Bn); 20th Aus Bde (9 Aus Bde); 2/3 Aus AT Regt (9 Aus); 51st Field Arty Regt; Trucks: 5 Light, 35 Medium.
Jalo (B0513): One unit of the LRDG
Tobruk (C4807): HQ: 9 Aus Division; 26th Aus Bde (9 Aus); Ist RHA; 8th Field Arty Regt; 104th RHA; 65th AT Regt; 2nd Heavy AA Regt; 9th Heavy AA Regt; 15th Light AA Regt; 57th Light AA Regt Trucks: 5 light, 5 Medium.
Anywhere within one hex of:
Alexandria: 7th Armored Division (see 61.38); HQ: 70th Infantry Division; 22nd Gds Bde (I; ATT: Ist Buffs; 2nd Scots Gds; 3rd Coldstream Gds); 107th RHA; 149th AT Regt; 13th Light AA Regt; "Layforce"(I).
Mersa Matruh (D3714): ist Royal Northumberland Fusiliers MG Bn; 7th Medium Arty Regt.
Any hex in Cairo: Polish Bde; 11 Czech Bn; Ist Chesire MG Bn; Ist South Staffordshires (I); 2nd Kings Own Royal Regt. (I); 8th Medium Field Arty; 64th Medium Field Arty; 106th AT Regt; 74th Heavy AA Regt, 52nd Light AA Regt; Ist Essex (23/70)
Note: Several units in Egypt at this time have not been listed as they did not see action and were eventually shipped to Crete or Syria; e.g. 7th RTR, 1st Hampshires, 1st Welch; 1st Durham Light, infantry and the entire 16th Bde of the 70th Infantry division, among others.
[61.32] Tank
The following tanks (in TOE Points) are assigned to the given units (which start this scenario assigned to the 3rd Armored Bde):
| Unit | Tanks |
|---|---|
| 3rd Hussars | 3 Points MkVI Light |
| 5 RTR/3d Arm X | 1 TOE Points A/9's; 4 TOE Points A/13's |
| 6RTR/3rd Amr X | 5 TOE Points of M13/40s (Captured) |
Tanks of the 7th Armored Division are at maximum TOE, but all are broken down (see Case 61.38).
[61.33] Commonwealth North African Air Force
Planes & SGSU's: The following squadrons of planes, each being represented by one SGSU, are available with all planes refitted:
| Location | Type | Plane Available |
|---|---|---|
| Benina (A 4829) | Hurricane I | 15 |
| Agedabia (A 2629) | Lysanders | 3 |
| Maraua (B 5410) | Blenheim IV | 15 |
| Barce (B 5504) | Lysanders | 9 |
| Tobruk (C 4907) | Hurricane I | 16 |
Pilots: 1 TWO pilot and 4 ONE Pilots.
Air Facilities:
Flying Boat Basins @ Alexandria (E 3614) and Port Said (off-map, E 4033).
Flying Boat Alighting Areas = none.
Airfields @ Benina (A 4829), Barce (B 5504), Derna (B 5925), Martuba (B 5526), El Adem (C 4507), Mersa Matruh (D 3714), Amiriya (E 3212), Dekheila (E 3512), Alexandria (E 3613 & 3714), Abbassia (E 2132), Aboukir (E 3815), Almaza (E 2133) plus the four off-map fields to the east (i.e., all except Ethiopia in the south).
Landing Strips @ Agadabia (A 2629), Antelat (A 3233), Msus (B 4004), El Abiar (B 4901), Maraua (B 5410), Gazala (B 4933), Tobruk (C 4807), Gambut (C 4414), Sidi Barrani (C 4131), Gerawla (D 3516), Sidi Haneish (D 3418), Maaten Baggush (D 3520), and Fuka (D 3323). In addition the Commonwealth Player may place three Landing Strips anywhere on the game map.
[61.34] Malta: The Commonwealth Player has an initial total air facility capacity of 8 which he may divide amongst the facilities. He has 26AA Points which he may divide amongst the facilities:
Pilots: 2 TWO's and 4 One pilots.
Planes (all are refitted): 24 Hurricane I, 12 Wellington I, 10 Swordfish, 5 Sunderlands, 4 Marylands.
He may not begin construction/repair of air facilities until the second game-turn of this scenario,
[61.35] COMMONWEALTH TRUCKS
The Commonwealth Player receives the following Second-Third Line Trucks for distribution to any location on game-maps A through D. (Not E). This includes trucks for Dumps and Air Facilities.
| Type | Number |
|---|---|
| Light | 45 |
| Medium | 100 |
| Heavy | 25 |
The Commonwealth Player places the following Trucks in Alexandria or Cairo:
| Type | Number |
|---|---|
| Light | 25 |
| Medium | 175 |
| Heavy | 35 |
[61.36] Supply
The Commonwealth Player receives nine Dumps and three Dummy Dumps. In addition, both Benghazi and Tobruk are supply dumps.
The Dumps may be placed at any of the following locations: Msus (B 4004), Tecnis (B 5407), Martuba (B 5526), Mechili (B 4921), Timimi (B 5229), E] Magrun (A 3729), Barce (B 5504), Mersa Brega' (A 2021), Derna (B 5925), Agadabia (A 2629), Tocra (B 5501) and Sceledima (A3933). All Dumps must be placed. (Historically, the first nine were actual dumps, with Msus and Tecnis being the major dumping areas.)
Benghazi holds 100 Fuel Points, 50 Ammunition Points, and 150 Stores. Benghazi also has 10 Points of Italian Prisoners, a POW Camp, and one Commonwealth Guard.
Tobruk has 500 points of Fuel, 1500 Ammunition Points, and 1000 Stores.
The Commonwealth Player has for distribution to his Dumps the following: 2550 Fuel Points, 1700 Ammunition Points and 1600 Stores. These may be distributed as the Commonwealth Player sees fit, with one limitation: no more than 25% of the total of each item may be placed in a single dump. Furthermore, all actual dumps must have at least 50 points of each item. All First Line Trucks not carrying men/equipment may be loaded with Fuel/Ammo/Stores and Water as the Players see fit. This is in addition to what is supplied above. Unlimited supplies in Cairo/Alexandria as per the rules.
The Commonwealth Player has a Temporary Repair Facility in Tobruk and one in Mersa Matruh. Alexandria (either hex) and Cairo have Major Repair Facilities.
Air Supply
The Commonwealth Player has 180 Fuel Points, 250 Ammo Points, and 50 Stores for distribution amongst Air Facilities.
[61.37] COMMONWEALTH FLEET
The Commonwealth Player receives all his fleet counters in Alexandria. They may not move out of Alexandria before the first OpStage of Game-Turn 27. All are armed and undamaged.
[61.38] REINFORCEMENTS/ REPLACEMENTS
Except as listed below, the Commonwealth Player takes his Reinforcements as they arrive, via The Reinforcement Track. Replacement Points arrive in the normal manner; the Commonwealth Player may not plan any such Replacements and must start any such planning in the normal course of events. There are no replacements allowed for March 1941.
There are several Commonwealth units being refitted, returned from assignments elsewhere, etc. These units had been either on the way to Greece/Syria, or in the shops. Plans had to be changed hastily, yet the scenario must adjust for the time in which that can be done. In essence, no units in Cairo or Alexandria may move during the third OpStage of Game-Turn 26. After that, only one battalion may be released per OpStage. (Thus it would take several stages to release the entire Polish Brigade; you would have to wait the required time to release all the battalions.) Remember, also, that battalions will be needed for Training purposes! In addition to the above, the 18th Australian Brigade appears in Alexandria on the first OpStage of April, 1941. It may move (by rail, sea or land) on the succeeding OpStages of April, 1941 (in addition to any of the above units.
The 7th Armored Division presents a special case. It had been chewed up pretty badly in the previous six months' action; its tank battalions were a mess and its infantry and support units worn to the bone. The unit was in Alexandria for a complete refit. At the start of the scenario, all 7th Armored tanks are considered Brokendown. The 7th's Tank battalions may not be released until they are at least 75% repaired, and then they may be released only one per OpStage. In addition, one more nontank battalion may be released and sent westward per OpStage, all starting with the first OpStage in April. HQ units may be released at any time the player wishes. At the time of this scenario the 7th Armoured contained the following units: 4th Armrd Brigade (6 RTR reassigned, ARTR assigned); 7th Armrd Brig; 7th Support Grp.
For the purposes of the above Release Schedule, the 22nd Guards Brigade counts as one battalion.
[61.4] AXIS FORCES
[61.41] Axis Land Forces
All German land units that are scheduled to arrive before the third OpStage of Game-Turn 26 (See Reinforcements Schedule) may be placed within one hex of El Agheila (A1816) but not east of that village. The Axis Player may place them in any formations he wishes (using Battle Groups, if he so desires). The Italian Player has six Divisions on the game-map: the Ariete Division may be placed within two hexes of El Agheila, but not east of that village. The Pavia, Bologna, Brescia and Savonna divisions may be placed anywhere between Ras el Ali (A 2010) and Nofilia (A2703) with no divison less than two hexes from another. The Trento Division is in Tripoli. Also in Tripoli are the XXI Corps Artillery, the 350th GaF Artillery Regiment, the 2nd Artillery Ragruppament, and the Sabratha Division. The Sabratha Division has lost its 6 infantry battalions (although the 85th and 86th Regimental Headquarters still exist). Its MG Bn, and Arty Regiment have been reduced to 1 TOE Strength Point each. NOTE that the six infantry battalions and two "support" units may be rebuilt by Replacements.
All units (except the Sabratha) are as listed on the OA Sheets (including Tanks).
One Oasis Company (German) is at Maaten Groter (A 1318) and one at Magadah (A 0817).
[61.42] Axis Airforce
Planes: The Axis Player receives all of the German planes listed in the Axis Airplane Reinforcement Chart as shceduled to arrive prior to the 3rd OpStage of Game-Turn 26. All of these planes are considered refitted. The Axis Player receives the following Italian planes:
| Type | Total Available | Refitted |
|---|---|---|
| C.R. 42's | 61 | 27 |
| G. 50's | 62 | 33 |
| B.R. 20's | 1 | 0 |
| SM 79 | 30 | 14 |
| Z 1007bis | 1 | 1 |
Pilots: Italian = 3 THREE, 11 TWO's and 12 ONE pilots. German=The Axis Player rolls once to determine the number of ONE thru FOUR rated pilots he receives (i.e., the March, 1941 die roll).
SGSU's: 13 Italian. German SGSU's are available as per the Air Game rules (because of Air Facilities, below).
Air Facilities: The Axis Player may base any portion of his airforce at Italy/Sicily within the minimum German plane restrictions of Case 43.1 (Crete is still British). The Axis Player may place one airfield and one air landing strip in any hex west of El Agheila (A 1816).
[61.43] Axis Trucks
All German first line Trucks (which are indicated on the Reinforcement Schedule as being attached to arrived German units) may be distributed among those units freely.
The Italian Player receives the following First-Line Trucks, which may be assigned as he sees fit to his units:
| Type | Number |
|---|---|
| Light | 45 |
| Medium | 220 |
| Heavy | 50 |
The following Second/Third Line Trucks are available (for any and all purposes):
| Type | Number |
|---|---|
| Light | 95 |
| Medium | 280 |
| Heavy | 50 |
It is firmly suggested that the Axis Player use these as Second/Third Line Trucks, otherwise he will have a hard time moving his Supply around.
Additional second/third line trucks: 10 Medium Trucks at air facilities.
[61.44] Supply
The Axis Player receives five Dumps, two of which are Dummies. These dumps may be placed at any hex between El Agheila and Nofilia.
For division between the three active dumps the Axis Player has 9600 Fuel Points, 2500 Ammo Points, 950 Stores, and 1100 Water Points. No more than 50% of each may be located at any one dump.
In addition, Tripoli holds 3000 Fuel Points, 1500 Ammunition Points, and 500 Stores.
For distribution to Air Facilities (remember, Tripoli/Tunisia air facilities have unlimited Fuel and Ammo) there are 50 Fuel Points and 50 Ammo Points. The Axis player does not receive a Convoy during the first game-turn. He must plan his convoys for the second and third game-turns.
[61.45] All Axis Reinforcements are taken normally, as they appear on the track.
[61.5] INITIATIVE
The Axis Player has the Initiative through the end of Game-turn 27. Players roll for Initiative starting with Game-Turn 28.
[61.6] CONSTRUCTION ON THE MAP AT THE START OF SCENARIO
The railroad runs to Mersa Matruh (D3714) and ends there. There are no minefields or pipeline (other than provided by the RR). All ports are of full (listed) Efficiency Level except Benghazi (at zero) and Tobruk (at seven—and San Giorgio is still there). The Commonwealth Player may place a total of four Level 1 Fortifications within two hexes of Tobruk. The unfinished roads connecting Sollum (C4021) and Sidi Barrini (C4131) and the entire network around Tobruk have been built.
[61.7] AIR & LOGISTICS GAMES. ABSTRACTIONS
This Case covers the adjustments needed in addition to those given in Case 59.6 in order to play this scenario without the Air and/or Logistics Game(s).
[61.71] Air Abstracted (Land & Logistics Games): The 2nd-3rd Line Trucks available to the Players are modified as follows:
A. Axis Player: 2nd-3rd Line are now a total of 90 Light; 270 Medium and 40 Heavy.
B. Commonwealth Player: 2nd/3rd Line Trucks in Alexandria/Cairo are now a total of 25 Light, 150 Medium and 25 Heavy. Other 2nd/3rd Line Trucks are now a total of 40 Light, 90 Medium and 20 Heavy.
[61.72] Air & Logistics Abstracted (Land Game Only):
A. The Players' ability to bring in motorization points is equal to their respective abilities to bring in Medium Truck Points (i.e., each Medium Truck Point equal one Motorization Point).
B. Initial unattached motorization points: The Axis Player has 290; the Commonwealth Player has 150 in Alexandria/Cairo and 90 at other locations.
C. Axis Initial Supply Status: Case 61.43 is replaced by the following: The Axis receives 10 regular supply units, each with 40 Ammo and 60 Fuel Points and 3 Dummy supply units which may be distributed freely (within stacking restrictions) in any of the road hexes between El Agheila (A 1816) and Nofilia (A 2703) inclusive. This does not include the road from E 1716 the Maatan Groter (A 1318). In addition, the Axis Player receives 8 regular supply units, each with 40 Ammo and 25 Fuel Points, in the Tripoli box.
D. Commonwealth Initial Supply Status: Case 61.35 is replaced by the following:
The Commonwealth Player receives one regular supply unit with 20 Ammo and 30 Fuel Points in Benghazi (A 4827) and 5 regular supply units, each with 40 Ammo and 15 Fuel Points, in Tobruk (C 4807). In addition, he receives 9 regular supply units, each with 40 Ammo and 25 Fuel Points, and 4 Dummy supply units to be divided among the following locations with the restriction that no more than 2 regular supply units may be placed at any location: Mersa Brega (A 2021), Agadabia (A 2629), Sceledima (A 3933), El Magrun (A 3729), Msus (B 4004), Tecnis (B 5407), Barce (B 5504), Tocra (B 5501), Martuba (B 5526), Mechili (B 4921), Timimi (B 5229) and Derna (B 5925)
In addition, Cairo and Alexandria each contain two regular supply units: each supply unit contains 40 Ammo and 60 Fuel Points.
[61.73] Logistics Abstracted (Land & Air Games):
A. The Players' ability to bring in motorization points is equal to their respective abilities to bring in Medium plus Heavy Truck Points (i.e., each Medium and each Heavy Truck Point is equal to one Motorization Point).
B. Axis Initial Supply Status: As in 61.62 "C" above and in addition 1 regular supply unit with 20 Ammo and 30 Fuel Points may be placed at any one Axis air facility.
C. Commonwealth Initial Supply Status:. As in 61.72 "D" above plus 1 regular supply unit with 40 Ammo and 60 Fuel Points which may be placed at any one Commonwealth air facility.
[61.8] VICTORY CONDITIONS
Victory Conditions for The Race for Tobruk Scenario are fairly simple. The Player who holds Tobruk at the end of the scenario wins. If the Axis Player also holds Bardia (C 4321) he wins a Decisive Victory. If he holds Benghazi-TobrukBardia plus any two villages/cities in Egypt he wins a Strategic Victory. If he holds anything less than the above, it is a Commonwealth Victory. Furthermore, if the Commonwealth holds all the above (including Benghazi) it is a Smashing Victory.
[62.0] SCENARIO GROUP THREE: OPERATION CRUSADER
[62.1] GENERAL DESCRIPTION
Operation Crusader covers the events of the Winter of 1941-2, in which the Commonwealth forces attempted to relieve Tobruk (under siege by the Axis) while, at the same time, Rommel had planned to strike eastward at the Allied forces in Egypt. The result was an extended series of battles in the area between Sollum and Tobruk.
[62.2] SCENARIO LENGTH AND DURATION
The scenario starts with the 3rd OpStage of the 57th Game-Turn. The scenario ends with the conclusion of the 1st OpStage of the 65th Game-Turn. The estimated playing time for this scenario is between 200 and 250 hours.
[62.3] COMMONWEALTH FORCES
[62.31] Commonwealth Forces Initial Deployment (Hex: Units)
Within 1 hex of C4807: 32 Army Tank Bde (2; Assg: Ist RTR [7/7]; 4th RTR and 7th RTR); Polish Bde; 70th Infantry Division (Less: 1 Argyll & Sutherland; Assg: 2nd Kings Own Rifles [in place of the 1 A&S], Ist Royal Northumberland Fusiliers MG Bn, Ist RHA; 104th RHA, 107th RHA; ATT: 144th Field Arty, 2/13 Aus Inf Bn [20/9]; 12/15 Aus In Bn [TOE strength of 4; 0/9]; 13th Light AA; 14 Light AA; 2nd Light AA and 89th Heavy AA. Trucks: 20 Light, 135 Medium, 53 Heavy.
C4111: 7th Armored Bde 7; Assg: 7th Hus [4/7], 6th RTR [4/7], 2nd RTR; Less its own 1 RTR and 8 Hus; Att: 4th RHA [7Spt/7]; Trucks: 30 Medium, 15 Heavy.
C4131: Kings Dragoon Gds (R; 2Spt/2); 67th Medium Arty; 16th Light AA; Trucks: 6 Light, 10 Medium, 3 Heavy.
C 3814: 4th South African Armored Car Bn Trucks: 2 Light, 3 Medium, 1 Heavy. 4th Armored Brigade (7; Independent Bde: no longer considered assignedassigned to the 7th Armored Div; Less: its 6 RTR and 7 Hus; Assg: 8th Hus [7/7]; 3rd RTR [1/2]; 5th RTR [3/2]; Att: 102nd AT Regt; 2nd RHA [2Spt/2]); Trucks: 45 Medium, 15 Heavy.
C3823: 11 In Bde (4 In; Less: 4/7 Rajp; Assg: 2/5 Mahratta Light Inf [in it place]); Trucks: 5 Light, 20 Medium, 5 Heavy.
C3721: Central India Horse Regt (R; TOE Strength of 3; 4 In); Trucks: 3 Light, 3 Medium.
C3714: 1st South African Division (Det: the three Inf Bdes and 4th SA Field Arty); Trucks: 5 Light, 22 Medium, 6 Heavy.
C3614: 7th Support Group (7; Det: 11 Hus [R] and 4th RHA; Assg: Ist Light AA and 60th Field Arty) Trucks: 30 Medium, 15 Heavy.
C3621: 4th In Division (Det: All three Inf Bdes and the Recce Regt); 8th Field Arty; 65th AT Regt; 57th Light AA; Trucks: 5 Light, 20 Medium, 8 Heavy
C3532: 2nd South Africa Div (Det: 7 SA Armored Car, 2nd SA Field Arty and 2nd SA AT Regt); Trucks: 12 Light, 70 Medium, 14 Heavy.
C3521: 1st Army Tank Bde Trucks: 30 Medium, 17 Heavy.
C3530: 73rd AT Regt; 7th Medium Arty; 64th Medium Arty; 68th Medium Arty; Trucks: 3 Light, 25 Medium, 5 Heavy.
C3419: 7th In Bde (4 In); Trucks: 5 Light, 22 Medium, 5 Heavy.
C3426: 5th In Bde (4 In; Less: 1 Royal Fusilier; Assg: 1 Buffs [in its place]); 2nd South Africa AT Regt (2 SA); Trucks: 5 Light, 20 Medium, 5 Heavy.
C3410: 11th Hus (7Spt/7); Trucks: 10 Medium, 3 Heavy.
C3414: HQ: 7th Armored Division Trucks: 2 Light, 2 Medium
C 3318: 2nd New Zealand Div Trucks: 15 Light, 75 Medium, 21 Heavy.
C 3212: 22 Armored Bde (now Assg to the 7th Armored Div) Trucks: 15 Medium, 10 Heavy.
C3111: 1st South African Bde (1SA) Trucks: 5 Light, 20 Medium, 3 Heavy.
C 3015: 22 Gds Bde (I; Assg: 1st Tower Hamlet Rifles Spt/2, 3rd Coldstream Gds; Att: 51st Field Arty) Trucks: 20 Medium, 10 Heavy.
C2712: 5th South Africa Bde (1SA); Trucks: 5 Light, 20 Medium, 3 Heavy.
C 1014: 6th South African Armored Car Bn; 7th SA Recce Bn (2 SA); 29th In Bde (5 In; Less: 6/13 FFR; Assg: 1st Royal Fusiliers [5/4 In; in its place]; Att: 2 South African Field Arty Regt [2 SA]) Trucks: 7 Light, 25 Medium, 6 Heavy.
D 3714: 2nd South African Bde (1 SA); 4th SA Field Arty (1 SA) Trucks: 5 Light, 22 Medium, 6 Heavy.
D2001: 1st South African Road Construction Bn. Trucks: 3 Light.
[62.32] Tanks
The units listed below have the following TOE of tanks (Unit: Tanks).
- 1 RTR (32nd Army, Bde 12): 4 Mk VI Light
- 4 RTR (32nd Army, Bde 12): 10 Matildas
- 7 RTR (32nd Army, Bde 12): 4 Matildas
- 8 RTR (1st Army, Tank Bde): 10 Valentines
- 42nd RTR (1st Army, Tank Bde): 3 Matildas (the following OpStage, the first of game-turn 58, the unit receives 7 more TOE of Matildas if it does not move. If it does, it receives them the second OpStage of game-turn 58.)
- 8 Hussars (4/7): 10 Stuarts
- 3 RTR (4/7): 10 Stuarts
- 5 RTR (4/7): 10 Stuarts
- 7 Hussars (7/7): 4 Crusader I's, 3 A/13's, 4 A/10's
- 6 RTR (7/7): 10 Crusader I's
- 2 Hussars (22nd Armor Bde): 9 Crusader I's, 1 A/10
- 4 CLY (22nd Armor Bde): 9 Crusader I's, 1 A/10
In addition to the above tanks, the following tanks (in terms of TOE Points) are considered to be broken down in Repair Shops in Alexandria.
3 x Crusader I; 15 x Crusader II; 18 x Stuart; 7 x Matilda; 8 x Valentine.
Repair on these tanks may not start until the scenario's second OpStage.
[62.33] Commonwealth North African Air Force
Planes: These may be distributed freely amongst the available air facilities:
| Plane | Total Available | Refitted |
|---|---|---|
| Hurricane I's | 82 | 64 |
| Hurricane IIA's | 66 | 60 |
| Hurricane IIB's | 42 | 36 |
| Blenheim IVF's | 24 | 16 |
| Tomahawks | 88 | 64 |
| Beaufighters | 22 | 16 |
| Blenheim IV F's | 142 | 100 |
| Wellington IC's | 110 | 80 |
| Bostons |
Pilots: 1 FOUR pilot, 5 THREE pilots, 15 TWO pilots and 20 ONE pilots.
Air Facilities: 1 Flying Boat Basin anywhere on map-section D or E, and Port Said (off-map).
No Flying Boat Alighting Areas.
Airfields at Maaten Baggush (D 3520), Fuka (D 3323), Amirya (E 3212), Kabrit (off-map) and Tobruk (C 4807).
Air Landing Strips at any two hexes in the Giarabub Oasis (C 1014) complex, Gerawla (D 3516), Sidi Haneish (D 3418), El Daba (D 3329), Qotafiya (D 3227), Abu Seier and Fayid (off-map, i.e., both have been reduced to the ability to perform maintenance on a single squadron).
SGSU's: As per Air Game rules.
[62.34] Commonwealth Trucks
The Commonwealth Player receives the following Second/Third Line (Convoy) Trucks for distribution to any location on game map-sections C thru E. However, no more than 10 Light, and/or 20 Medium and/or 10 Heavy Trucks may be placed within five hexes of Tobruk.
| Type | Number |
|---|---|
| Light | 150 |
| Medium | 400 |
| Heavy | 150 |
The Commonwealth Player receives the following Trucks for distribution to any Air Facility (except that in Tobruk): 80 Medium and 20 Heavy.
[62.35] Commonwealth Supply
The Commonwealth Player possesses dumps at the following locations containing the listed amounts of Supplies:
| Location | Ammo | Fuel | Stores | Water |
|---|---|---|---|---|
| Tobruk | 800 | 1,500 | 550 | — |
| Sidi Barrani | 500 | 1,000 | 300 | 700 |
| Giarabub Oasis | 200 | 400 | 300 | — |
| Mersa Matruh | 1,000 | 2,000 | 400 | 800 |
| Bir Khamsa (C 3029) | 200 | 600 | 50 | 300 |
In addition, the Allied Player receives dumps at Oxford Circus (C 3532), Bir al Sheferzen (C 3419), Sidi Suleiman (C 3721) and any two locations on game map section D and any one location on game map section C. Only four of these six dumps are active. A minimum of 20% the total of each type of the following total available Supplies must be placed in each active dump: 400 Ammo, 400 Fuel, 200 Stores, and 700 Water Points.
In additon, the Commonwealth Player receives 150 Ammo, 350 Fuel, 25 Stores, 50 Water Points at each Airfield and 10 Ammo 150 Fuel, 10 Stores and 20 Water Points at each Air Landing Strip, Flying Boat Basin, or Flying Boat Alighting Area. (This does not include off-map facilities.)
[62.36] Malta
The following Planes are Available on Malta:
| Type | Total Avail | Total Refitted |
|---|---|---|
| Swordfish | 3 | 3 |
| Hurricane IIB's | 28 | 24 |
| Beaufighter IC's | 8 | 6 |
| Hurricane I | 10 | 9 |
| Hurricane IIA | 12 | 11 |
| Wellington IC | 13 | 13 |
The Malta air facilities have an initial capacity of 14 Squadrons. There are 24 AA Points to place where desired. Malta receives 1 Three Pilot, 4 Two Pilots, 5 One Pilots.
[62.37] Commonwealth Fleet
The Commonwealth Player may place all his warship counters in Alexandria. In addition, note that the Italian 10th Light Flotilla is active this scenario (See 30.4). However, the 10th Light may not raid Alexandria until December.
[62.38] Reinforcements/Replacements
These are taken as normal, from the tracks and production.
[62.4] AXIS FORCES
[62.41] Axis Forces Initial Deployment (Hex: Units)
C 4014: 33rd Aufklarungs Bn (R, 15); Trucks: 2 Light, 5 Medium.
C 4015: 3rd Aufklarungs Bn (R; 5 Le); Trucks: 2 Light, 5 Medium.
C 4108: 32 Ariete Div Trucks: 20 Light, 42 Medium, 11 Heavy.
C 4216: 21st Panzer Div (consists of: 5th Panzer Regt 5 Le; 104th Rifle Regt 15; which consists of: 2nd Bn of the 104th Inf Regt (15), 8th MG Inf Bn (5 Le) and the 708th Heavy Weapons Coy; 39th Panzerjager Bn AT; 5 Le; 155th Arty Regt; and the 200th Pioneer Bn 5 13) Trucks: 12 Light, 45 Medium, 12 Heavy.
C4306: 26th Arty Regt (12 Pav); 57th Arty Regt (27 Bre) Trucks: 4 Light, 4 Medium, 4 Heavy.
C 4406: RECAM (Italian Armored Car Regt) Trucks: 5 Light, 15 Medium.
C 4407: 17th Pavia Div (Det: 26th Arty Regt) Trucks: 8 Light, 30 Medium, 4 Heavy.
C 4408: 155th Rifle Regt (90 Le) Trucks: 5 Light, 18 Medium, 5 Heavy.
C 4411: 361 Afrika Regt (90 Le) Trucks: 5 Light, 6 Medium, 3 Heavy.
C 4507: XXI Corps Arty; 1/2AR; 2/2AR; 3/2AR; 4/2AR; 1st and 2nd Articelere Regts (all are Arty) Trucks: 5 Light, 20 Medium, 6 Heavy.
C4606 and/or C4706: 102nd Trento Div (I) Trucks: 25 Light, 55 Medium, 15 Heavy.
C4608: 25 Bologna Div (I) Trucks: 8 Lights, 25 Medium, 7 Heavy.
C 4610: 90th Light Div (Det: 361 Afrika and 155 Regts, 3rd Bn of the 255 Regt and 3rd Bn of 347th Regt; Less: 190th Arty, 580th Recce, and 190th AT. Ergo, the counter consists of the HQ and the 613th Flak Bn); 200th Rifle Regt (15; consists of the 2nd MG Bn 5 Le and the 15/200 Kradschutzen Bn 15); Trucks: 5 Light, 21 Medium, 1 Heavy.
C 4613: 15th Panzer Div (Det: 33rd Recce; Less: 200th Rifle Regt, 104th Rifle Regt and 140th Arty Regt; 33rd Arty Regt has a TOE Strength of 6). Trucks: 15 Light, 50 Medium, 16 Heavy.
C 4804: 27th Brescia Div (Italian Inf; Det: 57th Arty). Trucks: 8 Light, 30 Medium, 4 Heavy.
Divided approximately equally amongst B 4432, C 4303 and C 4102: 101st Trieste Div (I); Trucks: 20 Light, 50 Medium, 15 Heavy.
Anywhere within the triangle formed by C 3916—Sidi Omar (C 3618)—C 3922: 55th Savona Div (Det: II/15 and III/16 Inf Bns); 1/104 Rifle Bn (15 Panzer); Trucks: 10 Light, 25 Medium, 5 Heavy.
Within one hex of C 4321: 2,5,6,12, and 13th Coys of the Oasis Bn; III/255 Rifle Bn (90 Le); III/347 Rifle Bn (90 Le); IV Genova MG Bn (Italian); 350 GaF Arty Regt; II/15 and III/16 Inf Bns (55 Sav); Trucks: 5 Light, 7 Medium, 10 Heavy.
Attached to any Italian Inf Div(s): III(M) and LII(M) tank Bns; Trucks (each tank battalion): 2 Light, 6 Medium.
[62.42] Axis Tanks
The Axis Player assigns German tank TOE Strength Points as follows:
| Unit | Tanks |
|---|---|
| I/8 | 4 PzII, 2 PzIII(E), 5 PzIII(H), 2 PzIV(D) |
| II/8 | 4 PzII, 3 PzIII(E), 5 PzIII(H), 4 PzIV(E) |
| I/5 | 3 PzII, 7 PzIII(H), 1 PzIV(D) |
| II/5 | 3 PzII, 6 PzIII(H), 2 PzIV(E) |
The Axis Player assigns Italian tank TOE Strength Points as follows:
| Unit | Tanks |
|---|---|
| VII(M) | 6 M13/40's |
| VIII(M) | 6 M13/40's |
| IX(M) | 6 M13/40's |
| LII(M) | 6 M13/40's |
| III(M) | 5 M13/40's |
| I(L) | 5 CV33's |
| II(L) | 5 CV33's |
(Note: Over 100 additional Light Tanks—usually CV 33's and their ilk—were spread around other Italian units, assigned to Recce units, Bersagliere regiments, HQ's, etc. This information is "factored" into the strengths/TOE of those units.)
[62.43] Axis Air Strength
The Axis Player receives the following planes. The Axis Player receives 23 SGSU's.
| Aircraft | Available | Refitted |
|---|---|---|
| MC 200 | 35 | 20 |
| Cr 42 | 23 | 8 |
| G50 | 28 | 20 |
| BR 20 | 29 | 15 |
| Ju87D | 9 | 5 |
| SM79 | 21 | 10 |
The Axis Player receives the following Italian Pilots:
| Rating | Number |
|---|---|
| Two | 5 |
| One | 11 |
The Axis Player receives 33 German SGSU's and the following planes:
| Aircraft | Available | Refitted |
|---|---|---|
| Ju88D | 83 | 45 |
| He111 | 27 | 15 |
| Ju87D | 94 | 90 |
| Bf109E | 19 | 13 |
| Bf109F | 40 | 27 |
| BF110C | 23 | 13 |
The German Player receives the following pilots:
| Rating | Number |
|---|---|
| Six | 1 |
| Four | 2 |
| Three | 3 |
| Two | 6 |
| One | 12 |
The Axis Player has Airfields at Benina (A4829), Derna (B5925), Timimi (B5229), Gazala (B4933), Gambut (C4414), Martuba (B5526), Benghazi (A4827), Barce (B5504) and Maraua (B5410). The Axis Player has 3 Air Landing Strips anywhere on maps A thru C. The Axis Player has one Flying Boat Basin anywhere on Map A or B. In addition, he may base planes in Crete/Italy/ Sicily within the restrictions of Case 43.1
[62.44] Axis Trucks
The Axis Player receives the following Second/Third Line (In Convoy) Trucks:
| Location | Light | Medium | Heavy |
|---|---|---|---|
| Anywhere on game maps A & B | 45 | 120 | 20 |
| Tripoli | 20 | 35 | 10 |
| Nofilia | 20 | 25 | 10 |
| Derna | 15 | 20 | 10 |
The Axis Player receives 30 Light and 60 Medium trucks for distribution among his air facilities.
[62.45] Axis Supply
The Axis Player possesses dumps at the following locations containing the listed amounts of Supplies:
| Location | Ammo | Fuel | Stores | Water |
|---|---|---|---|---|
| Tripoli | 200 | 1,300 | 350 | — |
| Nofilia | 500 | 800 | 500 | 250 |
| el Agheila | 150 | 450 | 350 | 400 |
| Benghazi | 650 | 2,200 | 700 | — |
| Mechili | 500 | 1,700 | 150 | 600 |
In addition the Axis Player receives dumps at Gazala (B4933) Rotunda Segnali (B 4432) and any three locations on game map section B. Only three of these five dumps may be active. A minimum of 20% of the following total available Supplies of 700 Ammo, 1,350 Fuel, 150 Stores and 400 Water Points must be placed in each active dump.
In addition, the Axis Player receives 150 Ammo, 350 Fuel, 25 Stores and 50 Water Points at each Airfield (excepting Tripoli/Tunesia).
[62.46] All Axis Coastal Shipping units are available, and may be distributed among the parts of Maps A, BandC.
[62.47] Axis Player must plan Replacements for all November OpStages in advance of starting the game. After that, he plans normally.
[62.5] CONSTRUCTION AT THE START OF THE SCENARIO
There are no minefields. All ports are at full (listed) Efficiency. All hexes adjacent to Bardia contain Level 1 Fortifications. All hexes adjacent to Tobruk contain Level 2 Fortifications.
The railroad extends past Mersa Matruh.and ends in hex C 3430. From that point, the pipeline extends in a straight line as far as Birkhamsa (C 3029). All unfinished roads are built with the exception of the Siwa Track, which is completed to only twenty hexes from Mersa Matruh (i.e., the hex the Ist South African Road Construction Battalion occupies, D2001).
There is a Temporary Repair Facility in Tobruk. The Commonwealth Player may also place an additional Temporary facility in any village/city he wishes. As usual, Alexandria and Cairo contain Major Repair facilities.
There is a Temporary Repair facility in Derna, plus one in any other village or city. There is a Major Repair facility in Benghazi.
[62.6] AIR & LOGISTICS GAMES ABSTRACTIONS
This case covers the adjustments needed in addito those given in Case 59.6 in order to play this scenario without the Air and/or Logistics Game(s).
[62.61] Air Abstracted
(Land & Logistics Games): None.
[62.62] Air & Logistics Abstracted (Land Game Only):
A. The Players' ability to bring in Motorization Points is equal to their respective ability's to bring in Medium Truck Points (i.e., each Medium Truck Point equals one Motorization Point).
B. Axis Initial Supply Status: Case 62.45 is replaced by the following:
| Location | Regular Supply Units | Each with Ammo | Each with Fuel |
|---|---|---|---|
| Tripoli (box) | 2 | 20 | 60 |
| Nofilia (A2703) | 3 | 30 | 25 |
| el Agheila (A1816) | 1 | 30 | 50 |
| Benghazi (A4827) | 4 | 30 | 60 |
| Mechili (B4921) | 3 | 30 | 60 |
| Derna (B5925) | 4 | 15 | 60 |
| Group 1* |
*These, and in addition 2 dummy supply units, are to be placed in any of the following locations in any distribution at the Axis Player's choice: Gazala (B4933), Rotunda Segnali (B4432) and any location(s) on game map-section "B".
C. Commonwealth Initial Supply Status: Case 62.35 is replaced by the following:
| Location | Regular Supply Units | Each with Ammo | Each with Fuel |
|---|---|---|---|
| Tobruk (C4807) | 4 | 40 | 40 |
| Sidi Baranni (C4131) | 3 | 30 | 50 |
| Mersa Matruh (D3714) | 5 | 40 | 30 |
| Giarabub Oasis (C1014) | 1 | 40 | 50 |
| Bar Khamsa (C3029) | 1 | 30 | 60 |
| Group 1* | 4 | 20 | 15 |
*These, and in addition 2 dummy supply units, may be distributed among the following locations at the Commonwealth Player's choice with the restriction that no more than one regular supply unit may be placed in any hex: Oxford Circus (C3532), Bir al Scheferzen (C3419), Sidi Suleiman (C3721) and. any two hexes (other than Mersa Matruh) on game-map-section "D". In addition, Cairo and Alexandria each contain two regular supply units, each with 40 Ammo and 60 Fuel Points.
[62.63] Logistics Abstracted (Land & Air Games):
A. The Players' ability to bring in Motorization Points is equal to their respective abilities to bring in Medium plus Heavy Trucks (i.e., each Medium and each Heavy Truck is equal to one Motorization Point).
B. Axis Initial Supplies: As in 62.62 "B" above plus 1 regular supply unit at each Axis airfield (except those off-map) with 30 Ammo and 40 Fuel Points.
C. Commonwealth Initial Supplies: As in 62.62 "C" above plus 1 regular supply unit at each airfield (except Kabrit) with 30 Ammo and 40 Fuel Points and 1 regular supply unit at each remaining air facility (except off-map) each with 5 Ammo and 15 Fuel Points.
[62.7] INITIATIVE
Historically, the Commonwealth Player should have the Initiative for the first OpStage. However, the Players may roll in the normal manner to determine who has initiative in that OpStage if they prefer. In each OpStage after the first, the Players roll the die as per normal procedure.
[62.8] VICTORY CONDITIONS
Players amass points for controlling geographical locations. The Player with the most points subtracts the other player's points from his and then determines the level of victory, if any.
The Players receive Victory Points for controlling certain cities/villages. The number of points depends on the location and the player controlling. Control of a city/village means occupying that city/village with a combat unit of any strength. That unit must have sufficient supplies to exist for one month and Ammo for one week (one round each OpStage).
| City/Village | Points for Axis Control | Points for CW Control |
|---|---|---|
| Tobruk | 6 | 4 |
| Bardia | 2 | 3 |
| Sollum | 2 | 2 |
| Halfaya Pass (both hexes) | 1 | 1 |
| Ft. Maddelenna | 1 | 2 |
| Sidi Biranni | 3 | 0 |
| Giarabub | 1 | 1 |
| Siwa | 2 | 1 |
| Ft. Capuzzo |
| Point Differential | Level of Victory |
|---|---|
| 10+ | Strategic |
| 6-9 | Decisive |
| 1-5 | Tactical |
| 0 | Draw/Standoff |
Players may wish to compare losses in men and tanks (as well as air, although that is not that revealing) to see how well they did, in comparison to each other, in gaining or not gaining their objectives. Players may wish to subjectively raise or lower their victory level as per this. However, losses can be misleading, so this type of condition is "officially" left out of the conditions here.
[63.0] SCENARIO GROUP FOUR: EL ALAMEIN
[63.1] GENERAL DESCRIPTION
There are two scenarios which can be played from this scenario Group. The first is a short scenario in which the Axis Player has one week (one game-Turn) to try to break through the Commonwealth lines and reach Alexandria (a relatively impossible task). The second scenario is one of survival: can the Axis army survive the end of the campaign intact? For those familiar with El Alamein they will realize that both scenarios are, militarily (and in terms of game-playing) quite stultifying. They are included for historical reference, mostly. Playtesting proved them to be as equally dull as their gaming predecessors. The first scenario has the advantage of being remarkably short; the other scenario is for those who like to retreat or chase fleeing troops.
[63.2] SCENARIO LENGTH AND DURATION
Both scenarios begin with the Ist OpStage of Game-Turn 10Z. "The Last Chance" Scenario ends with the completion of the 3rd OpStage of Game Turn 102 lst OpStage of Game-Turn 111. "The Long Retreat" ends at the completion of the December 3/IV, 1942 Game-Turn. "The Last Chance" should take about ten hours to play, excluding set-up; "The Long Retreat" should take from 50 to 100 hours.
[63.3] COMMONWEALTH FORCES
[63.31] Commonwealth Land Forces Initial Deployment (Hex: Units)
E 3101: 9th Aus Div (Det: 24 Aus Bde; Att: 40 RTR 23/8)
Trucks: 30 Light, 55 Medium, 15 Heavy.
E 3001: 24th Aus Bde (9 Aus)
Trucks: 5 Light, 25 Medium, 6 Heavy.
D 3033: 51st Inf Div (Att: 50 RTR 23/8). Trucks: 40 Light, 70 Medium, 21 Heavy.
E 2901: 2nd New Zealand Div (2nd NZ Cav is now TOE Strength of 5 Recce Points and 6 Stuart tank Points; Less: 4 NZ Bde; Att: 9th Armored Bde 10; Att: 3 Hus, 14th Sherwood Forresters I)
Trucks: 30 Light, 90 Medium, 20 Heavy.
E 2801: Ist South African Div (Less: 5th SA Bde; Assg: 3 SA Bde #SA; in its place#; ATt: 8th RTR #1 Army#, 1st SA Field Arty #2 SA#, Die Middelandse MG Regt # SA#, and 2nd Botha #5/1SA ) Trucks: 35 Light, 85 Medium, 25 Heavy.
E 2701: 5 In Bde (4 In; Less: 1 Royal Fusilier and 4/6 Rajp Rifles; Assg: 1/4 Essex* and 3/10 Baluchies in their places); 6th Rajput Rifles MG Bn; Ist Field Arty Regt (4 Jn); 149th AT Regt; 11th Field Arty Regt; 32nd Field Arty Regt; 57th Light AA Regt HQ: 4th In Div (Less: 11 In Bde, 31st Field Arty, and Central In HOrse R; Det: 5th and 7th In Bdes and ist Field Arty). Trucks: 10 Light, 25 Medium, 10 Heavy.
E 2601: 7th In Bde (4 In; Less: 4/11 Sikh; Assg: 1/2 Gurkha Rifles in its place) and 161st In Motor Bde (consists of: 1st Argyll & Sutherland 16/17, 1/1 Punjab Regt, 4/7 Rajputanis 11/4 In). Trucks: 5 Light, 25 Medium, 5 Heavy.
2501: 50th Inf Div (Less: 150 Bde, 2nd Chesire MG Bn and 72 Field Arty; Assg: Greek Bde and 111th Field Arty Regt in place of the Inf Bde and Arty Regt respectively; Att: 154th Field Arty Regt, 102nd AT Regt 2Spt/2 and 34th Light AA Regt). Trucks: 35 Light, 65 Medium, 21 Heavy.
E 2302: 7th Armored Div (Consists of: 4th Armored Bde #consists of 4/8 Hus**, Royal Scots Grays (8/10) and 1KRRC (7 Spt/7); 22nd Armored Bde consists of 1 RTR (7/7), 5 RTR 3/2), 4 CLY (22 Amr Bde), and 1 Rifle Bde (2/1); 11th Hus r; 7; TOE Strength of 83 RHA Which now is considered a regular artillery unit, Possesses 6 TOE Strength Points of 25lbrs; 4th Field Arty Regt; 97th Field Arty Regt20/10 In; 65th AT Regt; 15th Light AA Regt; AH: 2nd Derby Yeomanry R, 8; Strength of 6; 44th Recce Regt 44. Trucks: 75 Medium, 40 Heavy.
E 3005: lst Armored Div (Consists of: 2 Armored Bde Less: 1st RflBde, 7th Motor Bde 7; Which consists of: 2nd Rifle Bde (7Spt/7), 7th Rifle Bde (23/8) and 2nd KRRC (1Spt/1), 2nd RHA #Spt/2, 4th RHA 7Spt/7, 11th RHA self-propelled counter, 78th Field Arty, 76 AT Regt 1Spt/1, 1st Royal Northumberland Fusiliers MG Bn, 42nd Light AA, and 12 Lancers R; 1Spt/1; Att: An ad hoc Bde—level formation known as "Hammerforce"; consisting of: 4/6 SA Armored Car Regt*** with a TOE Strength of 7, 146th Field Arty, 73rd AT Regt and 56th Light AA Regt). Trucks: 10 Light, 90 Medium, 30 Heavy.
E 3007: 8th Armored Div (Det: 40 RTR and 50 RTR of the 23rd Armored Bde, 2nd DerYoe R; Less: 24th Armored Bde, 7th Rifle Bde of the 23rd Armored Bde); 121st Field Arty. Trucks: 5 Medium.
E 2805: 10th Armored Div (consists of: 8 Amr Bde 10; Less: SctsGray; Assg: 3rd RTR (1/2; in its place) and Ist Buffs (1), 24th Armored Bde [8], 133rd Inf. Bde [44]. lst Royal Dragoons R, 1 RHA, 104 RHA, 98sth Field Arty, Sth RHA self-propelled counter, 84th AT, and 53rd Light AA). Trucks: 75 Medium, 40 Heavy.
E 2904: 1st Army Tank Bde (Det: 8 RTR) Trucks: 5 Medium.
E 2401: 44th Inf Div (Det: 44th Recce; Less: 133Inf Bde; Att: 53rd Field Arty). Trucks: 20 Light, 55 Medium, 6 Heavy.
Within one hex of E 2403: Ist Free French Bde Trucks: 10 Light, 35 Medium, 5 Heavy.
2nd Free French Bde. Trucks: 5 Light, 12 Medium, 1 Heavy.
Within two hexes of el Alamein (E 3002): 14th Light AA; 16th Light AA; 27th Light AA; 88th Heavy AA; 94th Heavy AA. Trucks: 5 Medium.
21st In Bde (10 In; consists of:: 1/6 Rajput Rifles 11/4 In, 3/7 Rajputana Regt 61 In Mtr Bde and 2/8 Gurkha Rifles); 7th Medium Arty Regt; 64th Medium Arty; 69th Medium Arty Trucks: 10 Light, 25 Medium, 7 Heavy. *This is a British unit whose counter bears the Indian units' coloration.
**Formation created by combining the 4th and 8th Hussars. Use the counter for the 8th Hus (7/7). The unit's max TOE Strength is still 10. ***Formation created by combining the 4th and 6th SA Armored Car Battalions. Use either counter. The unit's max TOE Strength is now 8. Certain of the above units may have their equipment and TOE upgraded, using the rules sections for such as references.
A. Each non-motorized infantry battalion (CPA of 10) may add 1 TOE of 6-pounder AT guns; B. Each motorized battalion of infantry (10+ CPA) may add 2 TOE of 6-pdr AT guns.
C. 40% (rounded up) of all AT units may replace their 2-pdr AT guns with 6-pdr AT guns.
D. Armored car (not armored recce) units may be upgraded as per the rules for such. (It is not necessary to use Replacement points; simply upgrade them as if they had used Replacement Points)
E. Any artillery units with 18-pounders or 18/25 pounders may replace them with 25 pounders.
[63.32] Commonwealth Tank Battalion Composition
The following tank battalions are listed as to their assigned parent formatin(s) for this scenario and their starting compositions, in TOE Strength Points, if they differ from their listing on the OA Sheet.
| Tank Battalion | Parent Formation(s) | Composition |
|---|---|---|
| 40 RTR | 23/8 | 8 Valentines |
| 46 RTR | 23/8 | 10 Valentines |
| 50 RTR | 23/8 | 9 Valentines |
| 8 RTR | 1 Army* | 10 Valentines |
| 3rd Hussars | -† | 2 Grants, 2 Shermans, 3 Crusader I's |
| Ryl Wi Yeomanry | 9/-‡ | 3 Grants, 2 Shermans, 3 Crusader I's |
| Warwick Yeo | 3 Grants, 3 Shermans, 3 Crusader II's | |
| 9th Aus Div Cav | 9 Aust‡ | 3 Crusader II's, 1 Stuart 6 ID Code "11" |
*Starts attached to the 1st SA Div.
†Starts attached to the 2nd NZ Division.
‡This armored unit is a tank battalion for these scenarios.
[63.33] Commonwealth Air Strength
| Location | SGSU's | Planes (Type and #'s Available) |
|---|---|---|
| Burg el Arab (E 3109) | 3 | Spitfire VB (18); Hurricane IIA (12); Tomahawks (6); Marylands (4); Baltimores (4) |
| Wadi Natrun (E 2418) | 1 | Marylands (12) |
| Deversoir | * | Mitchell II (39) |
| Amiriya Air Complex (see Air Facilities below) | 28 | Boston III (48); Baltimore II (24); Baltimore III (24); Tomahawk (16); Kittyhawk I (56); Kittyhawk II (91); Kittyhawk III (39); Hurricane IIB (48); Hurricane IIC (64); Hurricane IID (32); Hurricane IIE (16); Spitfire VB (48) |
| Idku (E 3817) | 2 | Beaufighter IC (16); Beaufighter VIF (16) |
| Abu Seier | * | Wellington IC (32) |
| Jebel Hamzi (E 2024) | 2 | Wellington IC (32) |
*=SGSU's not needed; off-map base. All Commonwealth Planes are Refitted!
Pilots Available
| Rating | Number Available |
|---|---|
| Four | 1 |
| Three | 5 |
| Two | 22 |
| One | 31 |
Air Facilities
Air Facilities
The Commonwealth Player places six Airfields within one hex of Amiriya (The Amiriya complex). He has an Airfield at Burg el Arab (E 3109), Alexandria, and Cairo. He has a Landing Strip at Wadi Natrun (E 2418). The Commonwealth Player may also place 1 additional Airfield and 3 Landing Strips, 1 Flying Boat Basin and 1 Flying Boat Alighting Area anywhere on Map E, but not within five hexes of an enemy unit, or in the Qatarra Depression. The Commonwealth Player's seven off-map facilities are all undamaged.
[63.34] Commonwealth Trucks
Second-Third Line Trucks (In Convoy):
Anywhere on game maps D & E: 200 Light, 725 Medium, 225 Heavy
The Commonwealth Player receives 100 Medium and 60 Heavy trucks for distribution among his Air Facilities.
[63.35] Commonwealth Supply
The Commonwealth Player receives 10 Supply Dumps plus 3 Dummies, for a total of 13 Dumps. As many as five of these dumps may be placed within one hex of the Front Line (i.e., any hex east of and adjacent to an Axis unit.) One dump each must be placed at el Alamein, E2805, and E2403. The remaining dumps may be placed anywhere on Map BE, but not within one hex of the front.
Front Line Dumps receive (amongst them) 2500 Ammo points, 2000 Fuel Points, 1500 Stores, and 1500 Water Points. The other dumps split (in any way the Player wishes) the following: 1000 Ammo Points, 3000 Fuel Points, 500 Stores, 2000 Water Points.
Remember, there is unlimited supply available in Alexandria and Cairo. All Trucks not carrying men may be loaded with supplies as the Player wishes. The Commonwealth has no temporary repair facility. Alexandria and Cairo are Major Repair Facilities.
[63.36] Commonwealth Fleet
The Commonwealth Player receives the following warship counters in Alexandria: 2 Heavy Cruisers, 3 Light Cruisers, 4 Destroyers.
[63.37] Malta
All Air Facilities are operating at full capacity. The following planes are available in Malta:
| Type | Number | Refitted |
|---|---|---|
| Wellington V | 5 | 5 |
| Baltimore I | 4 | 4 |
| Baltimore II | 3 | 3 |
| Beaufighter IC | 12 | 5 |
| Beaufighter VIF | 8 | 6 |
| Spitfire VB | 54 | 33 |
| Spitfire VC | 18 | 10 |
| Hurricane IIC | 8 | 8 |
| Albacore | 3 |
48 AA Points are Available for placement as desired. The Following Pilots are available:
| Rating | Number |
|---|---|
| Three | 1 |
| Two | 5 |
| One | 5 |
[63.38] Reinforcements and Replacements
All Reinforcements are taken as per the Reinforcement Schedules. All Replacements are taken normally, except that all available points are reduced to 10%, rounded up, of their listed maximum. However, the Infantry and Truck Production Tables' output are unaffected. In any case, no Replacement points may arrive before the first OpStage of Game-Turn 105, and these may be planned before the scenarios starts. Replacements for the 106th Game-Turn may also be planned at the start of the scenario. There are no Replacements or Reinforcements for the "Last Chance" scenario.
[63.4] AXIS FORCES
[63.41] Axis Land Forces Initial Deployment (Hex: Units)
D3328: 90th Light Div (Det: 580 Aufklarungs Bn [R]); Trucks: 10 Light, 40 Medium, 7 Heavy
D3132: 15th Panzer Div (Less: 200th and 104th Regts; Det: 33 Recce; Assg: 2 MG Bn [5 Le]); Trucks: 15 Light, 40 Medium, 10 Heavy.
D3032: 164th Light Div; Trucks: 5 Light, 45 Medium, 5 Heavy.
D2931: 3 Aufklarungs Bn (R; 21); Trucks: 2 Light.
D2831: 21st Panzer Div (Less: 2nd MG Bn; Assg: 200th Rifle Regt [15]; which begins the scenario detached); Trucks: 7 Light, 20 Medium, 10 Heavy.
D2733: Ramcke Bde; Trucks: None.
D2630: 104th Rifle Regt (Now assigned to the 21 Panzer); Trucks: 5 Light, 25 Medium.
D2532: 33 Aufklarungs Bn (R; 15).
D2431: 580th Aufklarungs Bn (R; 90 Le); Trucks: 5 Light.
D 3327: 136th GGFF Div (I); Trucks: 25 Light, 15 Medium.
D 3326: 101st Trieste Div (I; Det: 21 Arty Regt; ATT:III(M); Trucks: 5 Light, 55 Medium, 5 Heavy.
D 3325: 16th Pistoia Div (I); Trucks: 30 Light, 30 Medium.
D 3232: 133rd Littorio Div (T; Det: 12th Bersaglieri Regt; Less: X(M) and XII(M) tank Bns and V and VI Arty Bns self-propelled: Assg: in their places, respectively IV(M) and LI(M) tank Bns and DLIV and DLVI Arty Bns self-propelled) Trucks: 25 Light, 25 Medium, 6 Heavy.
E 3133: 12th Bersaglieri Regt (I; Littorio( Trucks: 6 Light, 20 Medium.
D 2933: 102nd Trento Div (I; Det: 7th Berg Regt) Trucks: 68 Medium, 7 Heavy.
D 2932: 7th Bersaglieri Regt (102 Trn) Trucks: 20 Medium.
D 2833: 25th Bologna Div (I); 21st Arty Regt (101 Tst); Trucks: 12 Light, 60 Medium, 10 Heavy.
D 2732: 27th Brescia Div (I) Trucks: 10 Light, 65 Medium, 7 Heavy.
D 2632: 132 Ariete Div (T; Less: VII(M) tank Bn; Assg: LII(M) tank Bn in its place, V and VI Arty Bns self-propelled; Littorio; Att: XIII(M) tank Bn; The 132 Arty Regt now contains 3 TOE Strength Points of 105/28 guns and 2 TOE Strength Points of 90mm Flak guns heavy AA Trucks: 25 Light, 45 Medium, 10 Heavy.
D 2533: 185th Folgore Div (I) Trucks: 30 Light, 30 Medium.
D 2432: 17th Pavia Div (I) Trucks: 10 Light, 65 Medium, 7 Heavy.
Anywhere on Map D: Italian XXIV Cp Arty; XXVI Cp Arty; 1/2AR Arty Bn; 2/2AR Arty Bn; 3/2AR Arty Bn; 4/2 AR Arty Bn; RECAM (R); III/133 Fanterie Inf Bn I(L) and II(L) tank Bns. German: Sonderverband 288 Regt (I); 707th and 708th Heavy Weapons Coys; 13th Coy of the Bandenburg Regt (I).
Anywhere on Map A thru D: Any four Oasis Coys and the 778th Naval Engineers. All remaining unassigned German independent (i.e., no parent unit) artillery and anti-aircraft units. This includes the 1st and 2nd African Arty HQ's and the 155th and Arko 104 Arty Hq's and their subsidiary units.
Modifications to units strength: A// Axis Infantry-type units are reduced to 2/3 (round fractions up) of their maximum TOE Strength.
[63.42] Tank Deployment
The following are exceptions to the OA Chart
Listing.
| Unit | Strength |
|---|---|
| I/5 Panzer | 2 PzII: 4 PzIIIH; 1 PzIIIE; 4 PzIIIJ Specials |
| II/5 Panzer | 2 PzII; 2 PzIIIE; 4 PzIIIH; 4 PzIIIJ Specials; 1 PzIVE |
| I/8 Panzer | 1 PzII; 4 PzIIIH; 5 PzIIIJ Specials; 3 PzIVF² Specials |
| II/8 Panzer | 1 PzII, 3 PzIIIH, 1 PzIII6, 5 PzIIIJ Special, 1 PzIV6, 3 PzIVF² |
| LII/(M) | 6 M/13/40's |
| VIII/M | 6 M/13/40's |
| I/(L) | 6 L6's |
| II/(L) | 4 L6's |
Broken down in Tobruk's Repair Facility: 3 PzIIH's; 1 PzIVD.
[63.43] Axis Air Strength
German Planes
The following planes may be located at any air facility in Africa. Planes not refitted may not be readied until the second OpStage of the scenario (they are not ready for the first OpStage).
| Type of Plane | Total Avail | Refitted |
|---|---|---|
| Ju87D | 70 | 44 |
| Me Bf109F | 83 | 40 |
| Me Bf109G | 90 | 50 |
| Me Bf109E | 16 | 6 |
| Me Bf110C | 16 | 10 |
SGSU's available: 21
Pilots Available:
| Rating | Available |
|---|---|
| Four | 4 |
| Three | 4 |
| Two | 11 |
| One | 16 |
The Axis Player has available in Crete the following planes: 75 Ju88's (60 refitted) and 15 Hel11's (10 refitted). No SGSU's or pilots are needed.
Italian Planes
| Type of Plane | Total Avail | Total Ready |
|---|---|---|
| Cant.Z.1007 | 14 | 14 |
| Fiat CR42 | 125 | 75 |
| Fiat G.50 | 12 | 0 |
| Macchi C.200 | 58 | 40 |
| Macchi C.202 | 139 | 84 |
| S.M.79 | 34 | 24 |
SGSU's Available: 27
Pilots Available:
| Rating | Available |
|---|---|
| Four | 1 |
| Three | 3 |
| Two | 20 |
| One | 18 |
Air Facilities
The Axis Player has nine Airfields, eight one Flying Boat Basin and One Flying Boat Alighting Area. He may place these wherever he wishes, on Maps A-D.
[63.44] Axis Trucks
Second-Third Line Trucks (In Convoy):
May be placed anywhere on game maps A thru D: 115 Light, 350 Medium, 75 Heavy.
The Axis Player receives 50 Light and 100 Medium trucks for distribution among his Air Facilities.
[63.45] Axis Supply
The Axis Player receives ten Supply Dumps, three of which are Dummies. At least five of those dumps must be placed on Game-Maps A, B or C. The other five may be placed on game-map D (or A-C, if desired). In addition, the Axis Plyaer receives supplies at several cities/villages, as listed below. He may use Supply Dumps for those villages listed, in addition to those given to him.
| Location | Ammo | Fuel | Stores | Water |
|---|---|---|---|---|
| Map D Dumps* | 2700 | 4000 | 1500 | 800 |
| Other Dumps* | 500 | 500 | 500 | 500 |
| Ghazal (D3328) | 200 | 500 | 0 | 500 |
| Mersa Matruh | 500 | 1500 | 250 | 500 |
| Sidi Barrani | 200 | 500 | 0 | 500 |
*No one dump may contain more than 33% of the total supplies of each type listed.
Each Airfield has 150 Ammo points, 350 Fuel points, 25 Stores and 50 Water except Tripoli/Tunisia.
Each Strip, Flying Boat Basin/Alighting Area has 20 Ammo points, 25 Fuel points, 10 Stores and 10 Water Points.
Trucks may be assigned to the dumps, cities as needed fromthe 2nd-3rd Line Trucks available.
The Axis has a Major Repair Facility in Tobruk, and Temporary Repair Facilities in Bardia and Mersa Matruh.
Axis Coastal Shipping (all units/tonnage) is available. Ships may be placed at any port between Tobruk and Tripoli.
[63.46] Axis Mediterranean Air Force Deployment
The Axis Player may transfer 10% of his available force to Italy or Sicily but no more. He may not have more than 10% of his air power in Italy or Sicily. Strategic air attacks against Malta may be made only in the Long Retreat scenario (see 44.41).
[63.47] Replacements and Reinforcements
For the "Last Chance" Scenario, ignore all Reinforcements and Replacements.
For the "Long Retreat" scenario, Reinforcements as normal. As for Replacements, Axis Player must reduce all his Points Available to 5% (rounded down) of what is listed in the Axis Replacement Pool. Moreover, any Replacement Points sent must be sent to Tripoli and must stay there, unless the following occurs: If the Axis Player still holds Tobruk, Bardia, or Mersa Matruh by the third OpStage of Game-Turn 105, then 25% of Replacement Points in Tripoli may be released the following OpStage. After that, 25% of all available Replacement Points (by type, and rounded up) may be released in the first OpStage of Game-Turn 108.
This rule takes into effect the Allied Landings (feared and actual) to the West, and the historical fact that almost all manpower at this time was being diverted to Tunisia.
[63.48] Upgraded Axis Equipment
A. All eligible Axis armored car and armored recce units may be upgraded as per rules for such. It is not necessary to use Replacement Points; simply upgrade the units as if they had used Replacement Points.
B. Any two of the four following Italian infantry divisions may have their assigned artillery units' OA Sheet listing of two or three 75mm heavy anti-air TOE Strength Points replaced with two 90mm heavy anti-air TOE Strength Points: 16 Pistoia, 17i Pavia, 25 Bologna and 27 Brescia.
C. The following German anti-tank units have their weaponry upgraded replacing their OA Sheet listing: The 605th SP of the 21st Panzer has 6 TOE Strength Points of Marder SP anti-tank guns. The 3.7mm anti-tank guns in the 15th and 21st Panzers are replaced by the same number of 5cm guns. The Scm guns in the 15th and 21st Panzers and 90th Light are replaced by the same number of 7.62 Pak(R) guns.
D. Any four eligible Italian brigade-level HQ's are ad hoc anti-tank batteries each with 4 TOE Strength Points of Italian AT guns. Any two eligible German brigade-level HQ's are ad hoc anti-tank batteries, each with 4 TOE Strength Points of 2.8cm anti-tank guns.
E. All Italian artillery units originally assigned to a division (i.e., as listed in the OA Chart) have their 75/18 Gun-Howitzer TOE Strength Points replaced by an equal number of 75/27 guns. The two self-propelled artillery units in the Littorio and the two in the Ariete each possess 4 TOE Strength Points of Semovente 75/18 SP guns.
F. The following German artillery units are upgraded: The III/220 and III/220 artillery battalions of the 164th Division each consist of 3 TOE Strength Points of 1ScmK18 guns and 3 TOE Strength Points of 15cm sFH18 guns (replacing their OA Sheet artillery). The 149, 526 and 533 Coastal Defense artillery battalions replace their artillery with, respectively, 3 TOE Strength Points of 15cm sIG33 guns, 3 TOE Strength Points of 17cm K18 guns and 3 TOE Strength Points of 21cm Mrs18 guns.
[63.5] SPECIAL RULES
The following rules may not be used: A. 10th Italian Light Flotilla B. Raid on Rommel
[63.6] INITATIVE
Historically, the Germans had the initiative during the first OpStage of this scenario. However, the Players may at their discretion roll the die to determine who has the iniative on the first OpStage. (If the Commonwealth Player gains the initiative for the fist week, it will be even more depressing than usual for the Axis Player, of course.)
[63.7] CONSTRUCTION
[63.71] All unfinished Roads have been built.
[63.72] The entire unfinished railroad complex has been built. However, the RR in the three hexes immediately west of el Alamein are destroyed.
[63.73] The only pipeline available is that in railroad hexes. The Axis Player may draw water through it from Tobruk while the Commonwealth Player may draw water through it from Alexandria.
[63.74] All ports are at full (listed) Efficiency except Benghazi, at Efficiency Level One, and Tobruk at Efficiency Level Five.
[63.75] Level One Fortifications are placed in the four hexes adjacent to Tobruk. In addition, the Axis Player may place a total of three Level One Fortifications among the four hexes adjacent to Bardia.
[63.76] Commonwealth Player places minefields in the following hexes: D3033, and on map-section E3101, 2901, 2801, 2701, 2702, 2601, 2501, 2401, 2302 and other five hexes (on map-section E). Of the fifteen, ten are Real and five are Dummy; the distribution is at the Commonwealth Player's choice. All start the scenario at unknown status (i.e., face-up).
[63.77] The Axis Player places minefields in the following hexes of map-section D: 3233, 3133, 3032, 2933, 2833, 2733, 2632, 2633, 2533, 2429, 2433, 2831, 2832, and 2731. Of the fourteen, eleven are Real and three are Dummy; the distribution is at the Axis Player's choice. In addition the Axis Player may place up to five Real and two Dummy minefields in any eligible hexes within three hexes of Tobruk and a maximum of two Real and two Dummy minefields in any eligible hexes on game map-section A thru C that are not within five hexes of Tobruk. ("Eligible" refers to the ability of the Players' to construct a minefield in that hex under the normal game restrictions.) All start the scenario at unknown status (i.e., face-up).
[63.8] AIR & LOGISTICS GAMES ABSTRACTIONS
This case covers the adiustments needed in addition to those given in Case 59.6 in order to play these scenarios without the Air and/or Logistics Game(s).
[63.81] Air Abstracted (Land & Logistics Games): The Commonwealth initial supplies are reduced as follows: The Front Line Dumps now total 2250
Ammo, 1750 Fuel, 1500 Stores and 1250 Water Points. The other dumps now total 500 Ammo, 2000 Fuel, 400 Stores and 1600 Water Points (see Case 63.35).
[63.82] Air & Logistics Abstracted
(Land Game only)
A. The Players' ability to bring in Motorization Points is equal to their respective abilities to bring in Medium Trucks (i.e., each Medium Truck equals one Motorization Point).
B. Axis Initial Supply Status: Case 63.45 is replaced by the following:
| Location | Regular Supply Units | Each with Ammo | Each with Fuel |
|---|---|---|---|
| "Other Dumps" Supply units* | 14 | 40 | 20 |
| "Map D Dumps" Supply units† | 2 | 40 | 25 |
| Ghaza (D 3328) | 1 | 40 | 60 |
| Mersa Matruh (D 3714) | 1 | 40 | 60 |
| Sidi Baranni (C 4131) | 1 | 40 | 60 |
| Bardia (C 4321) | 2 | 20 | 60 |
| Tobruk (C 4807) |
*These plus 2 dummy supply units may be placed in any hexes on maps A thru D at the Axis Player's discretion except that no more than a total of four supply units (i.e., regular plus dummy) may be placed on maps A through C.
{These, and in addition 1 dummy supply unit, may be placed in any hexes on Maps A through C.
C. Commonwealth Initial Supply Status: Case 63.35 is replaced by the following: The Commonwealth Player receives 13 regular supply units, each with 40 Ammo and 20 Fuel Points, to be placed at his Front Line in any fashion with the restriction that at least one regular supply unit must be placed in each of the following hexes: el Alamein (E 3002), E 2805 and E 2403. The Front Line is defined as hexes E 3002, E 2805, E 2403 and any hex that is east of and adjacent to an Axis unit. In addition, the Commonwealth Player receives 2 regular supply units, each with 40 Ammo and 60 Fuel Points, which may be placed anywhere on map E except that neither may be placed within two hexes of the Front Line (this includes Front Line hexes not occupied by supply units).
[63.83] Logistics Abstracted (Land & Air Games):
A. The Players' ability to bring in motorization points is equal to their respective abilities to bring in Medium plus Heavy Trucks (i.e., each Medium and each Heavy Truck is equal to one. Motorization Point).
B. Axis Initial Supplies: As in 63.72 "B" above plus 2 depot supply units, each with 180 Fuel and 40 Ammo Points, one at Mersa Matruh and one at Tobruk. In addition, a total of 9 regular supply dumps, each with 30 Ammo and 50 Fuel Points, to be distributed among and placed on any Axis air facilities other than Mersa Matruh and Tobruk.
C. Commonwealth Initial Supplies: As in 63.72 "C"? above plus a total of 2 depots, each with 40 Ammo and 180 Fuel Points, one each at any Commonwealth air facility not within three hexes of a Front Line hex.
[63.9] VICTORY CONDITIONS
[63.91] "The Last Chance" Scenario A. The Axis Player wins a Strategic Victory if he can occupy at least one hex of Alexandria with at least a Brigade-equivalent unit. Supply doesn't matter.
B. Failing the above, the Axis Player totals the number of TOE Strength Points (any type) on Game-Map E, the Commonwealth Player totals those TOE points he has on Game-Map D (exclusive of Layforce and SAS units). The Player with the most TOE points (in comparison to the other) is the winner of a tactical victory.
[63.92] "The Long Retreat" Scenario
The name of the game is survival here. How good is the Axis Player at delaying, at giving territory grudgingly. He cannot win in a military sense (the Allies are landing, Africa is lost—at least in retrospect). However, the better he fights, the more attention the Allies will have to pay to Africa. Here the Axis Player is playing against actual history. Can he do better than Rommel on this retreat? Rommel didn't do badly; see if you can best his record (if you don't fall asleep first). In essence, the Axis Player gains points for occupying certain locations. Occupying means that all combat units in that City/Village must have at least one Game-Turn's worth of Stores, be able to fire all weapons twice, and have enough fuel for all units to move 20 CP's.
| Location | Axis Pts for Occupying |
|---|---|
| Mersa Matruh | 1 |
| Bardia | 3 |
| Tobruk | 5 |
| Derna | 2 |
| Benghazi | 3 |
| El Agheila | 1 |
| Marble Arch | 1 |
If the Axis Player can get 10 or more points he wins a Strategic Victory.
If he can get 4-9 points, he wins a Substantive Victory.
If he gets 1-3 points, he wins a Marginal Victory.
If he get no points, the Commonwealth Player wins.
[64.0] SCENARIO GROUP FIVE: THE CAMPAIGN FOR NORTH AFRICA
[64.1] INTRODUCTION
If you have gotten this far you will by now have surmised that the full campaign game of CNA is, far and away, the most ambitious undertaking a gamer could ever want to get involved with. The campaign game requires not so much a commitment in time (which is always relative), but more so a commitment to planning and foresight. A campaign game will need at least ten players, perhaps more. Ideally, each land division should have a commander, plus an Air Commander anda Logistics Commander. On top of this should be one Player as Supreme Commander. This means a lot of players, and, again, this is the ideal situation. The fewest number of players would be three to a side. Lastly, it would be hard to underestimate the amount of paperwork and planning that are involved in a campaign game. Keeping on top of the situation is half the battle . . . and more than half the fun. And speaking of fun, the campaign game can be a lot of fun. If you are interested in a challenge, interested in wrestling with the problems of organizing and running a campaign, and if you simply want to experience the complexities of. modern warfare at all levels, you will get much satisfaction from CNA.
[64.2] SCENARIO LENGTH
There are two campaign game scenarios in CNA. The first covers the entire war in Northeast Africa and begins in the third week of September, 1940 (i.e., the Italian Offensive, Ist OpStage of Game-Turn 1). The "shorter" campaign begins with the arrival of General Erwin Rommel and the Deutsches Afrika Korps during the fourth week of March, 1941 (i.e., the Desert Fox, 3rd OpStage of Game-Turn 26). Both campaign games end with the completion of the third OpStage of Game-Turn 111.
[64.3] INITIAL DEPLOYMENTS
If the entire campaign is being played, the Players use the information provided in Section 60.0 for the initial placement and distribution of their land, sea, and air forces, supplies and construction. If the Players are starting the campaign with the arrival of Rommel, the information in Section 61.0 is used.
[64.4] INITIATIVE
The Players determine Initiative using the information provided in Section 60.0 or 61.0 depending upon where they are starting their campaign. Iniative is determined normally once the restrictions in the appropriate section expire.
[64.5] SPECIAL RULES/ADJUSTMENTS
[64.51] There are no restrictions on normal game actions (i.e., Raids on Rommel, the Commonwealth Fleet, etc. may be performed as per the appropriate rules).
[64.52] The Axis Player's Malta Air Availability is determined using the appropriate campaign game row on the Axis Strategic Airforce Commitment Chart.
[64.53] If the shorter campaign game is being played the Axis Replacement Pool must be adjusted as follows:
A. German Production Chart: No change.
B. Axis Truck Production Chart: The total trucks the Axis Player may bring in are reduced to 800 Light, 2400 Medium and 500 Heavy.
C. Italian Production Chart: One-half of all replacement points (rounding fractions up) that could be planned up thru (i.e., including) Game-Turn 24 are no longer available with the following exception: the Axis Player still has 60 CV L.3 & CV 33/35 tank replacement points available.
[64.54] If the shorter campaign game is being played the Commonwealth Production System must be adjusted as follows:
A. Commonwealth Truck Production Table: No change.
B. Commonwealth Infantry Proudction Table: No change.
C. Commonwealth Production Chart: The replacement points listed below are reduced to (not by) those numbers, all other replacement points are unaffected:
| Item | Number |
|---|---|
| Armored Car/Armored Recce | 75 |
| Light Anti-air | 70 |
| 25-pounder artillery | 230 |
| 2-pounder AT guns | 50 |
| Mk VI Light tanks | 5 |
| A9 crusiers | 3 |
| A10 crusiers | 3 |
| A13 crusiers | 5 |
| Matildas | 20 |
[64.6] AIR & LOGISTICS GAMES' ABSTRACTIONS
Why anyone would play a campaign game without the Air and/or Logistics Game(s) is beyond me. However, the Players should pick their start point (Italian Offensive or Desert Fox) and use the rules in the appropriate section(s) (32.0, 47.0, 58.0) and the abstracted set-up for that scenario group and the replacement point adjustments in Case 64.5.
[64.7] VICTORY CONDITIONS
It would be hard to imagine anything more exasperating than playing a game for five years, getting to the end, and finding out that you have lost by one point or two hexes, or something of that ilk Victory conditions for a game of this size and scope are almost meaningless: survival itself is a victory. However, you have to have some sort of objective, and the Designer has to make some sort of decision. Our decision here is to use Victory Conditions that compare to what actually happened, not what each side needed to do. The reason for this is that the Axis situation was a foregone conclusion by 1942, what with the pending Allied invasion of Africa from the West. Thus, the Axis had to take Alexandria (and the Delta) or else be caught in the desert between two armies. And Alexandria is thus the Axis objective, historically. As for gaming, it becomes a matter of points, or who can hold onto what.
[64.71] If the Axis Player occupies all hexes of Alexandria and Cairo for one full Game-Turn, and such occupying units can trace a line of supply (i.e., convoy route) back to a Supply Dump which in turn can be supplied from Tobruk or Tripoli in any way, and that line is 90 movement points by truck or less, the Axis wins the game—regardless of the turn or date. Failing that, we count points, as below.
[64.72] Starting with the first OpStage of Game-Turn 35, if there are no Axis Combat units that can trace a line of supply of 60 Movement Points (Truck) to a Supply Dump and thence to Tobruk or Tripoli as per case 64.71, game-map, the Commonwealth wins the game automatically. This does not include air or coastal shipping units.
[64.73] Failing the above two cases, players receive points for doing (or not doing) certain things. The first of these points are Geographical Occupation Points. The Player occupying the given cities/villages gains the points listed. Occupation for these purposes means having a combat unit of at least 1 TOE Strength in the hex. That combat unit, at the end of the game, must have enough Stores and Water for one Week, and enough Fuel and Ammunition to fire its weapons three times and move 20 CP's. Any units failing these "tests" do not occupy for victory conditons.
| City/Village | Axis V.P.'s | C'wlth V.P.'s |
|---|---|---|
| Mersa Matruh | 100 | 10 |
| Sidi Barrani | 50 | 10 |
| Siwa | 20 | 10 |
| Jalo | 10 | 20 |
| Giarabub | 15 | 10 |
| Bardia | 100 | 50 |
| Sollum | 25 | 10 |
| Tobruk | 200 | 100 |
| Derna | 25 |
[64.74] The next series of points are replacement Victory Points. Each Player receives one point for each unused Replacement Point allotted to him in his Production Charts, not including planes and/or Trucks and, for the Commonwealth Player only, Infantry. Thus, if the Commonwealth Player had a total of 35 Crusader I Tank Replacement Points available for the game, but he uses only 18, he gains 17 points.
[64.75] The final type of Victory Points apply solely to the Commonwealth Player: Withdrawal Points. (Unit, not Drug). These apply to battalions withdrawn from the game, other than those Withdrawn via The Reinforcement Track. These are voluntary withdrawals, not mandatory withdrawals. They are earned as follows:
A. For every combat battalion (not company) or battalion-equivalent of infantry, armour, artillery or anti-tank guns (not AA) that is at least 75% TOE Strength that is Withdrawn from the game the Player receives ½ point for each week that unit is gone, to a maximum of three points per unit. To be Withdrawn a unit must start the Stage in Alexandria or Cairo.
B. Every time that a battalion withdrawn under A. above is returned to the game, the Commonwealth Player loses two points. A unit voluntarily Withdrawn and then returned to the game may not be Withdrawn until six months from the date of return. (This may not be entirely accurate, but it will stop players from doing the One-Point Two Step, shuffling a single unit in and out to get one point).
[64.76] The levels of Victory are as follows. Again, anyone who actually finishes this game can consider himself a winner (much as the soldier who fights two-three years does when he survives.) Questions about the balance of the campaign scenario received before 1981 will be considered with the seriousness which they deserve. The following schedule is consulted after both sides total their points, comparing the totals as a ratio of most to least.
| Ratio | Result |
|---|---|
| Even (1 to 1) | Draw (My God, what a waste of time!) |
| Better than 1-1, up to 1½-1 | Marginal Victory |
| Better than 1½-1, up to 2½-1 | Decisive Victory |
| Better than 2½-1 | A Smashing Victory |
[65.0] IN CONCLUSION
We have attempted, in Campaign for North Africa, to provide the hobby with the most accurate and most stimulating simulation yet undertaken. Very little is abstracted (mostly the naval game), and the Players are given as much to do as we considered humanly feasible. CNA is a difficult and complex game; it is not for the novice, to be sure. It is our (both designer and developer) opinion that we have, in the main, succeeded in our endeavor. CNA was playtested for nearly two years an extensive list of "veteran" testers, most of whom were chosen for their insight and gaming acumen. Many researchers were used—including the inimitable Richard Garcyznski—more than on any other project. The amount of work put into the game was enormous; the amount of information available is almost mind-boggling. We hope that the amount of fun is just as great.
DESIGNER'S NOTES In Brief
A game such as CNA certainly could use — nay, demands — extensive background information as to where and why. Unfortunately, to do this subject justice would require a veritable book. And you already have enough to read with this game. I'll simply try to cover a few subjects generally.
The general research was done mostly by me; the specifics were done by a host of others. The task was divided into areas — Italian OB, German air, logistics, etc. It was done over a period of two years, and provided many hours of confusion and some laughter. (We felt that being provided with a complete OB for German bakery companies was a bit much...although the temptation to use them was great.)
The scale of the game was decided by its scope and size — and the map configuration. The sources are listed in the bibliography, and suffice to say the game-maps are borrowed from several conficting sources. Often the designer had to make difficult decisions as to which tracks existed and which simply filled in the blank spaces on an Italian map. The tracks proved most difficult — I don't think there are two maps that agree — but defining things such as sand-gravel, rough, and salt marsh was equally taxing. The map of the game is as accurate as we could get it on the scale presented. The greatest liberties, or shall we say, abstractions, are with ridges, slopes, and escarpments. Again the effort was, at the scale given, to present effect rather than strict geographical accuracy.
The system itself was developed rather quickly. The first problem tackled was the theory and application of mobile desert warfare. Several approaches were tried, most were unsatisfactory. What I wanted was a system that would enable units to move as far as the player wanted them to, but within the limits of fuel and fatigue. And I found the germ for such an idea in an unlikely place: Mick Uhl's Gettysburg '77. From that gamé came the general idea for the Continual Movement System. Actually, the system did not take full effect until I came up with the idea for Cohesion Points — and, of course, a workable set of numbers for such. Both of these provided the game the one thing I wanted to prove — that mobile units were more powerful not because they had more "combat points" but because they were more mobile.
After the movement system fell into place it took several weeks to come up with a combat system. The idea was to provide a tactical feel with an operational game. (The system for CNA is remarkably similar to Frank Chadwick's Operation: Crusader.) Of course, the backbone for the combat system is the OB work — and especially the values given to each unit. Lord knows where some of these came from, but I do know that I have a mountain of yellow sheets in my basement with a lot of mathematical computations. Tanks and guns were done strictly on relative strengths — using the Italians as a base for the lowest. The same with infantry. I'm sure questions will arise as to why some infantry is 2/2, some 1/2, some 1/1, etc. A lot has to do with weaponry, some with background and training, and some is fairly subjective. The strengths themselves are not the balancing factor, the Morale Level is. And Morale Level was based on performance, training and general esprit de corps. (The morale system was taken from my own Veracruz, another unusual source.)
Combat, however, is not what this game is about. Logistics is the subject, and trucks are the thesis. And from the very beginning that is what I concentrated on. Most of the design work went into making the logistics system work. Hundreds of computations on breakdown rates, fuel consumption, tonnage capacities, etc., were done using available statistics and charts. One of the hardest jobs was the Replacement Charts. It is one thing to determine how much a man weighs, and thus a battalion; it is another to determine how much ship space he takes up. The same can be said for guns and other equipment. We had a fairly accurate picture of Axis shipping tonnage, but there was little information available as to what was shipped on what and how. The real problem was not coming up with all this information, it was integrating it so that everything meshed. Luckily, the logistics system proved to be relatively trouble-free.
Not so for the air system. That was hell. We were working with individual planes — a conceit of the designer, admittedly — and thus the combat system had to be tactical. However, this was an operational game and I had no desire to get involved in an African version of Air War. It took a long evening of fiddling with a calculator to come up with the complicated series of computations that we used to arrive at our air strengths. This was possible only when I came up with a combat system. If you ask me, the whole thing is a bit much — but then you could say that of the entire game. I would have scrapped the whole shebang had not the playtesters enjoyed it so much. As it is, the air system is a game within itself, with all its logistical problems and planning. Oh, yes — having the air commander roll for refit for each plane individually is a good way of passing time while the land gameis on.
The main question with CNA is, "Why?" The answer, superficially, is because that's what the feedback said you wanted. But that's a cop-out. I did CNA as a definitive and informationally overpowering simulation because I wanted to see how far I could take simulation gaming and still survive. CNA is virtually unplayable — as a game. It is, for the most part, a source of information. Yet, if it is approached from the point of view of an experience, a lesson in history, then CNA can provide remarkable insights into a fascinating campaign. One does not "play" CNA, one immerses himself in it. Some of you will, no doubt, drown; most will just tread water. But a few of you will find the swim refreshing.
A word as to the accuracy of all this information. Let's face it, I am not the definitive scholar on North Africa — it's not even my main area of interest. There are bound to be some mistakes, some all-too-subjective assumptions, and some pure baloney. But all of it is based on hard research. As I have said elsewhere, if you have better information, use it. (And let me know, too....) This is a system for your enjoyment; it is not an ironclad contract between gamer and designer. One thing I do know, from all the research we did, this — CNA —is the first commerically available source to publish a complete battalion-level Order of Battle for all sides at all times during Africa. Just think how many games you can devise from that alone!
Charts and Tables Common to Both Players
(Transcribed from the Land Game booklet chart pages and the common Charts & Tables sheets.)
[8.37] TERRAIN EFFECTS CHART
| Terrain Type | CP Cost to Enter or Cross: non-Mot | CP Cost: Mot | Breakdown Value | Combat Adjustment: Barrage | Anti Armor | Close Assault | Stacking¹ Limit |
|---|---|---|---|---|---|---|---|
| Clear | 2 | 2 | 4 | – | – | – | 6 |
| Gravel | 2 | 2 | 6 | – | – | – | 6 |
| Salt Marsh² | 3 | 2 | 6 | – | – | R1 |
CP = Capability Point; Mot = Motorized; non-Mot = non-Motorized; P = Prohibited; L or R = Column Shift(s) to left or right, respectively.
Notes
- A garrison unit in its assigned hex occupies zero stacking space. In addition, an unlimited number of anit-aircraft units may occupy a Major City hex at zero stacking space; three anti-aircraft units may occupy an Airfield hex at zero stacking space while one anit-aircraft unit may occupy an Air Landing Strip hex at zero stacking space.
- Vehicles other than Light Trucks, Recce-type units, and motorcycle infantry may only enter/leave the hex on a track. Motorized units may not engage in combat into/out of a Salt Marsh (Case 8.44).
- Light Trucks, motorcycle reconnaissance units, and motorcycle infantry units may not enter, even via a track.
- Alexandria and Cairo hexes are Level Three Fortifications, all others are Level Two.
- Commonwealth units may be able to use Rail Movement (Case 8.7).
- Negates all hexside terrain feature entry costs and Breakdown Point Values.
- Applies only to the units/truck points in that hex at that time.
- Halves all terrain feature entry costs and all hex/hexside Breakdown Point values except the Capability Points expended and the Breakdown acquired by moving a vehicle down an escarpment.
- Motorized units and trucks may only cross on a track.
- May only be crossed during a Rainstorm if the hexside is crossed by a road or railroad (which is treated as a road for this purpose) at a cost of two additional Capability Points.
- May only be crossed if the hexside is crossed by a road or railroad. A motorized unit may so cross at no additional cost in Capability or Breakdown Points.
- Armor targets receive the defensive benefit only if the hex is a Major City hex.
- Engineer units reduce cost to enter (Case 26.2). If assaulting forces are in an Enemy minefield, the non-Phasing forces receive L1 shifts for Anti-Armor and Close Assault if not already receiving them for occupying a Friendly minefield.
[36.53] ALLIED OFF-MAP AIR FACILITIES CHART
| Entry/Exit Hex | Air Facility | Distance to Entry/Exit Hex | Maximum Squadrons |
|---|---|---|---|
| E4033 | Port Said* | 12 | 3 |
| E3433 | Abu Seier | 7 | 9 |
| E3433 | Ismailia | 9 | 9 |
| E1833 | Fayid | 11 | 9 |
| E1833 | Deversoir | 12 | 9 |
| E1833 | Kabrit | 13 | 9 |
| E0127 |
*Flying Boat Basin. †No planes may be based here until the first OpStage of Game-Turn 35.
[8.89] OFF-MAP LAND UNIT MOVEMENT DISTANCE CHART
| Tunis | Gabes | Tripoli | Tripolitania | |
|---|---|---|---|---|
| Tunis | – | |||
| Gabes | 1/2/5 | – | ||
| Tripoli | 2/3/8 | 1/1/3 | – | |
| Tripolitania | 3/4/11 | 2/2/6 | 1/1/3 | – |
| Nofilia | 4/5/14 | 3/3/9 | 2/2/6 | 1/1/3 |
Numbers represent number of Operations Stages of continuous movement required for a unit to complete its movement between indicated places. Number refer respectively to units with a CPA of 25 or more/15 to 20/less than 15. Note that a unit may not exceed its Basic CPA during off-map movement.
[37.4] AIR DISTANCE CHART
A. Axis Off-Map N. African Areas
| Tripolitania | Tripoli | Gabes | Tunis | |
|---|---|---|---|---|
| Tripolitania | – | |||
| Tripoli | 32 | |||
| Gabes | 68 | 40 | ||
| Tunis | 91 | 60 | 40 | |
| Malta | 60 | 42 | 58 | 52 |
| Nofilia |
B. N. Mediterranean Off-Map Areas
| Crete | Malta | Sicily | Italy | |
|---|---|---|---|---|
| Malta | 105 | – | 24 | 72 |
| el Nofilia | P | 80 | P | P |
| Benghazi | 62 | 84 | 96 | 138 |
| Derna | 27 | 108 | 105 | 147 |
| Tobruk | 48 | 126 | P | P |
| Bardia |
All distances are in hexes. P = Prohibited; not possible to traverse air distance directly between indicated points.
[56.26] ROAD DISTANCE TABLE
| Nofilia | Marble Arch | El Agheila | Benghazi | Derna | Tobruk | Bardia | Mersa Matruh | Alexandria | |
|---|---|---|---|---|---|---|---|---|---|
| Nofilia | – | ||||||||
| Marble Arch | 9 | – | |||||||
| El Agheila |
Determining Shortest Distance
The shortest distance (not the actual flight path) in hexes between any two map locations is determined as follows: Choose one hex to be the origin hex and the other to be the destination hex. Trace a path of hexes through the origin hex along any of the three 60° hex axes (i.e., east-west, northeast-southwest, or northwest-southeast) and trace a similar path using a different hex axis through the destination hex. At some point, these two paths will converge at a 60° not 120° angle. Count the number of hexes from the hex of origin to the hex in which the convergence occurs to determine the shortest distance. Example 1: Tobruk to Ben Gania. Either 31 hexes west to hex B4809 or 31 hexes southwest to hex B1725 as Ben Gania lies along the northwest-southeast axis that intersects both paths. Example 2: Agedabia to Ismailia (Allied off-map airfield). East 33 hexes to B2629 + 33 hexes to C2629 + 33 hexes to D 2629 + 33 hexes to E2629 + zero hexes northwest to E3425 + 8 hexes to E3433 + 9 hexes east to Ismailia. Total distance is 149 hexes.
[37.42] LAND DISTANCE CHART
| Nofilia (A2703) | El Agheila (A1816) | Benghazi (A4827) | Agedabia (A2629) | Soluch (A4130) | Barce (B5504) | Ben Gania (B3715) | Mechili (B4921) | Derna (B5925) | C2803 | Tobruk (C4807) | Giarabub (C1014) | Ft. Maddalena (C3019) | Bardia (C4321) | Bir-el-Qatrani (D2903) | Mersa Matruh (D3714) | Gerawla (D3516) | Alexandria (E3613)* | Wadi Natrun (E2418) | |
|---|---|---|---|---|---|---|---|---|---|---|---|---|---|---|---|---|---|---|---|
| Nofilia (A2703) | – |
*One major city hex. Number represents the shortest distance in hexes from one location (exclusive) to the other (inclusive). Note that this includes cutting across the Mediterranean (assuming an all-sea hex grid) where necessary. A specific hex on a map section is always 33 hexes from a hex on an adjacent map section bearing the same hex number (e.g., D4102 is 33 hexes from C4102 and E4102). See Determining Shortest Distance above.
[56.18] AXIS NAVAL CONVOY AIR DISTANCE CHART
| Nr. | Shipping Lane | Sicily | Italy | Crete | Malta | Rally Point: Benghazi | Rally Point: Derna | Rally Point: Tobruk |
|---|---|---|---|---|---|---|---|---|
| 1 | West Sicily to Bizerta | 20 | 56 | – | 42 | 126 | 145 | 165 |
| 2 | West Sicily to Tripoli | 45 | 82 | 134 | 35 | 100 | 135 | 160 |
| 3 | Italy to Benghazi | 41 | 79 |
Nr. = The Axis Convoy Lane's description number. Sicily, Italy, Crete = Airplanes flying from any of those boxes. Malta = Airplanes flying from any hex on Malta. Values represent distance in hexes from that location to the Shipping Lane. Note that in order for a plane to fly a Mission to a Shipping Lane from North Africa it must possess a Range at least equal to the number of hexes from its Air Facility to a Rally Point and from that Rally Point to the Shipping Lane.
SUMMARY OF IMPORTANT LOCATIONS
| Place | Location | Major City | Port | Assigned Garrison | Victory Condition |
|---|---|---|---|---|---|
| Aboukir | E3815 | – | X | – | – |
| Agadabia | A2629 | – | – | – | X |
| Alexandria | E3613/3714 | X | X | – | X |
| Bardia | C4321 | X | X | X | X |
| Benghazi |
[6.3] CAPABILITY POINT EXPENDITURE SUMMARY
| Action | Capability Point Expenditure |
|---|---|
| Detach a unit (Parent Formation and detaching unit) | 1 |
| Attach an assigned unit (Parent Formation and attaching unit) | 1 |
| Attach an unassigned unit (Parent Formation and attaching unit) | 2 |
| Absorb 2 TOE Replacement Strength Points (PF + absorbing unit) | 1 |
| Enter a non-minefield hex | TEC |
| Enter a friendly minefield hex: | |
| Any unit with an Eng unit | 0 + TEC |
| Non-motorized unit, no Eng unit | 1 + TEC |
| Motorized unit, no Eng unit | 4 + TEC |
| Enter an enemy minefield hex: | |
| Non-motorized unit with an Eng unit |
TEC = Expenditure listed on the Terrain Effects Chart for the hex's terrain type. CPA = The unit's Capability Point Allowance. *If the final adjusted differential is –4 or worse, the defending units 'reacquire' two of the capability points they originally expended in order to defend if the units were not barraged nor engaged in barrage. Note that certain actions, while not requiring the expenditure of capability points, restrict a unit's ability to expend Capability Points.
[15.53] ORGANIZATION SIZE CLOSE ASSAULT MODIFICATIONS CHART
Largest Unit On:
| Larger Side Is | Smaller Side Is | Adjustment |
|---|---|---|
| 5 SP's | 3 SP's | 1 |
| 5 SP's | 2 SP's | 2 |
| 5 SP's | 1 SP | 4 |
| 5 SP's | 0 SP | 8 |
| 3 SP's | 2 SP's | 0 |
| 2 or 3 SP's | 1 SP | 2 |
| 2 or 3 SP's | 0 SP | 4 |
| 1 SP | 0 SP | 2 |
Largest Unit On = Each Player's largest unit, in size-equivalents, actually taking part in the combat in the hex. Note that only those TOE Strength Points actually partaking of combat (although not necessarily Close Assault) in that hex contribute toward determining size-equivalency. If, for example, a battalion did not contribute at least 50% of its maximum TOE Strength Point Limit (due to being understrength, engaging in a Probe, contributing to attacks in other hexes, whatever), that battalion is considered a shell, and may therefore affect the size-equivalent of any brigade or division it is currently attached to. Larger Side Is/Smaller Size Is = Either Player may possess the largest unit in that combat. Note that the numbers of the various size-equivalent units engaging in this Close Assault do not matter. Only the size of the largest unit. 5,3,2,1,0 SP's = The largest unit's size in Stacking Points. Adjustment = The number of columns to be shifted in the Larger Size Player's favor in that Close Assault.
[16.6] PATROL SURVIVAL TABLE
| DIE* | TOE Strength Point of Patrolling Force Killed / Captured |
|---|---|
| 0...3 | 0 / 0 |
| 4 | 0 / 1 |
| 5 | 1 / 0 |
| 6 | 1 / 1 |
*If all Patrolling TOE Strength Points are from Recce units, subtract one from the die roll.
[7.2] INITIATIVE RATINGS CHART
| Player | Situation | Initiative Rating |
|---|---|---|
| Commonwealth | Game-Turns 1 thru 42 incl. | 3 |
| Commonwealth | Game-Turns 43 thru 90 incl. | 4 |
| Commonwealth | Game-Turns 91 thru 111 incl. | 5 |
| Axis | Rommel counter on the Game-Maps* | 6 |
| Axis | German land combat units but no Rommel counter on the Game-Maps* | 3 |
| Axis | No German combat units or Rommel counter on the Game-Maps* | 1 |
*The Holding Boxes on Game-Map A for Tripoli/Tunisia region are not part of the Game-Maps for this purpose.
[9.4] STACKING POINT VALUES
| Unit Equivalent: Full | Shell | Stacking Point Value |
|---|---|---|
| Division | – | 5 |
| Super* Brigade | Division | 3 |
| (Standard) Brigade, Battle Group | – | 2 |
| Battalion | Any Brigade, Battle-Group | 1 |
| Company | Battalion, HQ, any attached units | 0 |
| Truck Points in Convoy | – | ½ for ea. 5 or fraction thereof† |
| Replacement Points | – | 1 for ea. 5 or fraction thereof |
*Term coined in order to distinguish those brigades which were in effect, infantry-light divisions from 'standard' brigades. †Only comes into play when determining Road/Track CP movement cost applicability.
[11.4] LAND COMBAT CALCULATIONS SUMMARY
Barrage:
Raw Barrage Points = Sum of the various Ratings × the respective assigned TOE Strength Points
Actual Barrage Points = Raw Points ÷ 10
Ability to combine to attack a single target is affected by whether the barraging unit is Forward or Back and/or Italian.
Terrain may benefit the target.
Anti-armor:
Raw Anti-armor Points = Sum of the various Ratings × the respective assigned TOE Strength Points
Actual Anti-armor Point = Raw Points ÷ 10
Terrain may benefit either Player.
Minefields benefit the non-Phasing Player.
Non-phasing Player is benefitted by the Phasing Player's forces having to enter the Non-Phasing Player's hex.
Close Assault
Raw Close Assault Points = Sum of the Various respective Offensive or Defensive Ratings × the respective assigned TOE Strength Points
Phasing Player may be restricted because he is performing a Probe
Either Player's Ratings may be reduced because their tank TOE Strength Points are not involved in a Combined Arms attack.
Actual Close Assault Points = Raw Points ÷ 10
Terrain may benefit either Player.
Morale may benefit either Player.
Organizational size of the units involved may benefit either Player.
2:1 superiority in Raw Close Assault Points may benefit either Player.
Minefields may benefit the non-Phasing Player.
Engineer Units may benefit the Phasing Player.
[12.6] BARRAGE AGAINST LAND UNITS COMBAT RESULTS TABLE
Barrage Points (dice-roll ranges, read sequentially):
| Target Class | Result | 1,2 | 3,4 | 5,6 | 7,8 | 9,10 | 11,12 | 13,14 | 15,16 | 17+ |
|---|---|---|---|---|---|---|---|---|---|---|
| Infantry | No effect | 11...53 | 11...44 | 11...41 | 11...34 | 11...24 | 11...16 | – | – | – |
| Infantry | Pinned | 54...66 | 45...66 | 42...65 | 35...64 | 25...61 | 21...44 | 11...35 |
Pinned = The unit may not Retreat Before Assault, may not participate in Assault. 1 = Infantry* or Armor: Lose one TOE Strength Point and Pinned. Guns or Trucks: Lose one TOE Strength Point. 2 = As above, except lose two points. *If the Infantry is in Trucks, eliminate one Truck Point.
[14.6] ANTI-ARMOR FIRE COMBAT RESULTS TABLE
Anti-Armor Points:
| DICE | 0* | 1 | 2 | 3 | 4 | 5 | 6 | 7 | 8 | 9 | 10 | 11 | 12 | 13 | 14 | 15 | 16+ |
|---|---|---|---|---|---|---|---|---|---|---|---|---|---|---|---|---|---|
| 11,12 | – | – | – | 1 | 2 | 3 | 4 | 6 | 8 | 10 | 11 | 12 | 14 |
*Only if 1...4 Raw Anti-Armor Points (before any terrain effects). Nr = Number of Armor Protection Points that must be lost.
Modifiers: Phasing Player decreases his dice roll by one row (an 11 or 12 is unaffected).
Terrain: Shift left one column if the non-Phasing Player's units are in Level 1 Fortification, Rough or Heavy Vegetation. Shift left two columns if the non-Phasing Player's units are in a Level two or three Fortification or Mountain hex. In addition, shift left one column if all of the attacking forces are attacking through a slope hexside, or Shift left two columns if all of the attacking forces are attacking through a ridge hexside, or the attacker only shifts two columns left if attacking down an escarpment hexside (his forces may not be harmed). A shift to less than zero is treated as zero Anti-Armor Points.
[15.89] PRISONERS CAPTURED RESULTS TABLE
| DIE | 1 | 2 | 3 | 4 | 5 | 6 |
|---|---|---|---|---|---|---|
| % Prisoners | 10 | 25 | 33 | 50 | 50 | 75 |
% Prisoners = Percentage of Casualties of Infantry, Armor, and Gun losses that are taken as Prisoners by the opposing Player.
[16.7] PATROL RECONNAISSANCE TABLE
Net Patrol Points:
| DIE | 1 | 2 | 3 |
|---|---|---|---|
| 1 | 0 | 0 | 1 |
| 2 | 0 | 1 | 1 |
| 3 | 1 | 1 | 2 |
| 4 | 1 | 2 | 3 |
| 5 | 2 | 3 | 4 |
| 6 | 3 | 4 | All |
= Number of Battalion size-equivalent units in that hex about which the Patrolling Player receives Reconnaissance Information.
[16.8] OBJECTIVE LOSS TABLE
Objective Losses in TOE Strength Points:
| DIE | Killed / Captured |
|---|---|
| 1...4 | 0 / 0 |
| 5 | 0 / 1* |
| 6 | 1 / 0 |
*Results are losses suffered by units in the hex under Reconnaissance by the Patrolling Force. If the Patrolling Force was completely eliminated, treat as 1 TOE Strength Point Killed.
[27.93] SPECIAL AIR SERVICE BRIGADE RAID TABLE
| DIE | 1 | 2 | 3 | 4 | 5 | 6 |
|---|---|---|---|---|---|---|
| % Planes: | 0 | 10 | 25 | 25 | 33 | 50 |
% Planes = Percentage of the planes on the ground in that hex that are destroyed.
[15.79] THE CLOSE ASSAULT COMBAT RESULTS TABLE
Final Close Assault Differential. Attacker's section (Attkr. Losses):
| Attkr. Losses | –11, ET Seq | –8, –9, –10 | –6, –7 | –4, –5 | –3 | –2 | –1 | 0 | +1 | +2 | +3 | +4 | +5, +6 | +7, +8 | +9, +10 | Overrun +11, +12, +13 | Overrun +14, +15, +16 | Overrun +17, ET Seq |
|---|---|---|---|---|---|---|---|---|---|---|---|---|---|---|---|---|---|---|
| 50% | 11-15 | 11-12 | 11 | – | – | – | – | – | – | – |
Defender's section (Dfndr. Losses):
| Dfndr. Losses | –11, ET Seq | –8, –9, –10 | –6, –7 | –4, –5 | –3 | –2 | –1 | 0 | +1 | +2 | +3 | +4 | +5, +6 | +7, +8 | +9, +10 | Overrun +11, +12, +13 | Overrun +14, +15, +16 | Overrun +17, ET Seq |
|---|---|---|---|---|---|---|---|---|---|---|---|---|---|---|---|---|---|---|
| 50% | – | – | – | – | – | – | – | – | – | – |
CAPT = If the Player's dice sum lies within the range of numbers listed, proceed to the Prisoners Captured Results Table (15.7). RETREAT = If the defending Player's dice sum lies within the range of numbers listed, his forces occupying the attacked hex(es) must retreat at least that number of hexes or suffer additional casualties. ENG = If the defending Player retreats after combat this result has no effect. If the defending Player does not retreat after combat and the dice sum lies within the ragne of numbers listed the result is an Engaged.
If the dice sum does not lie within the range of numbers listed the result is In Contact. Note: The attacking forces are never required to perform an Involuntary Retreat.
[17.4] MORALE MODIFIER TABLE
| Disorganization Level | +4 | +3 | +2 | +1 | NO | –1 | –2 | –3 | –4 | SURR |
|---|---|---|---|---|---|---|---|---|---|---|
| +8+ | 11...26 | 31...46 | 51...65 | 66 | – | – | – | – | – | – |
| +7 | 11...16 | 21...36 | 41...56 | 61...66 | – | – | – | – | – |
Column headings are the Morale Modifier. NO = No change to the unit's Basic Morale. SURR = All of the units Surrender. (exception: See case 17.26). Number = Add (or subtract) that number to the unit's Basic Morale for that combat. Note limitations on maximum and minimum adjusted Basic Morale.
[17.6] TRAINING CHART
| Type of Replacement Point | Number of OpStages |
|---|---|
| Infantry (except Commando) | 3 |
| Tank or Recce | 6 |
| Gun | 1 |
| Commando | 12 |
| Commonwealth Unit | 6 |
= Number of Operations Stages needed to train that type of Replacement Point or raise any type of an untrained Commonwealth unit's Basic Morale one point. The Commando Replacement Point must be trained by its assigned unit. Note that the time required for training guns is more of an uncrating cost than training necessity.
[52.8] POISONING AND SWEETENING WELLS TABLE
Attempt: Poison Well
- Die 1: Well poisoned.
- Die 2...6: No effect.
Attempt: Sweeten (Unpoison) Well
- Die 1...3: Well sweetened, water points may be drawn as normal.
- Die 4...6: No effect (well still poisoned).
[40.8] STRAFING TABLE
TacAir Points:
| Result | 1...5 | 6...10 | 11...15 | 16...20 | 21...25 | 26...30 | 31...35 | 36...40 | 41...45 | 46+ |
|---|---|---|---|---|---|---|---|---|---|---|
| 0 | 11...63 | 11...56 | 11...53 | 11...46 | 11...42 | 11...34 | 11...25 | 11...16 | – | – |
| 1 | 64...66 | 61...66 | 54...65 | 51...64 | 43...63 | 35...62 | 26...61 | 21...56 |
Shift one column to the right if Strafing Trucks in Convoy. Shift one column to the right if Strafing a Supply Dump. Infantry: Shift one column left if in a Fortification Level zero or one hex, two columns left if in a Fortification Level two hex. Armor: Shift one column left if in a Fortification Level two hex.
RESULTS: Trucks = That number of Truck Points and their cargo eliminated. Infantry = That number of TOE Strength Points, and their transporting Truck Points, if any, that are eliminated. Supply Dump = Multiply by 10% to determine the percentage of all types of Supplies in that Dump that are eliminated. Pipeline = A result of '2' or '3' destroys the pipeline. Grounded Airplanes = The number of dice to be rolled. The sum of the numbers of the dice roll is the number of planes destroyed. Armor = The number of dice to be rolled. The sum of the numbers of the dice roll is the minimum number of Armor Protection Points eliminated. Notes: Strafing of Ports is considered, in determining results only, to be part of any Bombardment Mission attacking that Port.
[19.5] MAXIMUM ATTACHMENT CHART
| Allied Unit Type | Maximum Attachment(s) |
|---|---|
| Armor Division (GT-1-67) | 2 units. 1 Infantry; no Tank. |
| Armor Division (GT 68+) | 3 units. 1 Infantry and/or 1 Tank. |
| Infantry Division | 2 units. 1 Infantry; no Tank. |
| Tank Brigade (GT 1-67) | 2 units. 1 Infantry; no Tank. |
| Tank Brigade (GT 68+) | 1 unit. No Tank. |
| other Brigade | 1 unit. |
| any Battalion | 1 Company. |
| Matruh Garrison (GT 1-12) | 6 units, no tank, 1 gun class |
| Selby Force (GT 13+) | 5 units, no tank, no recce, 3 infantry |
| German Unit Type | Maximum Attachment(s) |
|---|---|
| Armor Division | 1 Brigade and 1 unit or 4 units. No Tank. |
| Infantry Division | 1 Brigade or 3 units. No Tank. |
| Infantry or Armor Regiment | 1 unit. |
| Battle Group | 4 units. |
| Artillery Brigade HQ | 1 Artillery unit. |
| any Battalion | 1 Company. |
| Italian Unit Type | Maximum Attachment(s) |
|---|---|
| Armor Division/Tank Group | 2 units. |
| Infantry Division | 2 units. 1 Infantry or 1 Tank. |
| Brigade/Regiment | 1 unit. |
| Battle Group | 3 units. |
| any Battalion | No units. |
Unit = Refers to a counter which is at full strength, a Battalion—or Company-Equivalent. Tank = Specifically Bn-Eq units composed of tank TOE Strength Points. Infantry = All Infantry-type units with the exception of Machinegun and Heavy Weapons units (whether or not they are motorized).
Modifications: Any nation's Division- and Brigade-equivalent units may attach two non-Shell company-Equivalent units at no cost to the maximum attachments. Note that three company-eq are equal to one Bn-eq unit and that the company-equivalents must comply with any restrictions as to the type of units which may be attached to that Division or Brigade.
[39.5] AIRCRAFT MISSION SUMMARY
STRATEGIC MISSIONS:
Commonwealth
- Reconnaissance of Axis Naval Convoys (Case 42.5)
- Bombing Axis Naval Convoys (Case 41.6)
- Defensive CAP over Axis Naval Convoys (Case 41.63)
- Flak Suppression of Axis Naval Convoys (Case 41.63)
- CAP over Malta
Axis
- Bombing Maltese air facilities (Case 44.2)
- CAP over Malta
- Flak suppression of Maltese air facilities (Case 44.2)
- Offensive CAP over Axis Naval Convoys (Case 41.63)
LAND SUPPORT MISSIONS:
Fighter
- Scramble* (Case 40.3)
- Combat Air Patrol* (CAP), Offensive/Defensive (Case 40.2)
- Strafing (Cases 40.5 and 40.6)
- 1st Line (attached) Trucks
- Flak Suppresion
- Grounded Aircraft
- Infantry-type units
- Ports†
- Tanks‡
- Trucks in Convoy (2nd-3rd Line)
- Water Pipeline
Bombing (Section 41.0)
- Air facilities
- Fortifications/Major Cities*
- Flak Destruction
- Mining Harbors
- Personnel
- Ports*
- Railroad/Road*
- Commonwealth Ships
- Supply Dumps
Non-Combat
- Airdrop (Case 42.4)
- Reconnaissance of land units (Case 42.2)
- Transfer (Case 42.1)
- Transport (Case 42.3)
*May be performed at Night. †Performed on the Air Bombardment CRT. ‡Only Commonwealth Player owned (i.e., non-captured) Hurricane IID's. Note that certain planes may be assigned two Land Support Missions in the same OpStage (See Combined Missions, Case 39.2 and the Aircraft Characteristics Charts 4.6)
[29.61] WEATHER TABLE
| Season | Game-Turn | Normal | Hot | Sand storm* | Rain storm* | ||
|---|---|---|---|---|---|---|---|
| Spring | 1...12 | 49...60 | 97...108 | 11...42 | 43...55 | 56...64 | 65...66 |
| Summer | 13...24 | 61...72 | 109...110 | 11...23 | 24...55 | 56...66 | – |
| Fall | 25...36 | 73...84 | – | 11...35 | 36...54 | 55...61 |
*Proceed to Table 29.62, Foul Weather Location Table
[20.3] REPLACEMENT POINT CONVERSION CHART
| One Replacement TOE Strength Point of | Requires Replacement Points |
|---|---|
| Any Headquarters Unit | 2 Inf |
| Commando^a | 3 Inf |
| Paratroop Infantry^b | 2 Inf |
| Italian Bersaglieri Infantry | 2 Inf |
| Machinegun^c | 2 Inf |
| Heavy Weapons^d | 1 Inf & any 1 Gun |
| Any other Infantry | 1 Inf |
| Engineer Battalion^e | 2 Inf |
| Engineer Company | 1 Inf |
| Road Construction or Railroad Construction^f | none |
| Motorcycle Reconnaissance, Camel Cavalry or Reconniassance | 2 Inf |
Key: a = Specifically the Layforce or Special Air Service Brigade. b = Specifically units of the Italian 185th Folgore or German Ramcke Brigade. c = Whether or not it bears a motorized symbol. d = All units except those of the Ramcke Brigade. e = Including the Australian Pioneer unit. f = Specifically the Commonwealth Player's one South African Road Construction Battalion and two New Zealand Railroad Construction Battalions. If eliminated, the unit is returned to play as a reinforcement during the sixth Operations Stage after the Operations Stage in which the unit was eliminated. g = Only applies if assigning anti-tank TOE Strength Points to headquarters of the 185th Folgore Division and/or the headquarters of the Ramcke Brigade. Inf = Infantry. Gun = Artillery, anti-tank or anti-air, whatever its ratings. ArmR = Armored Reconnaissance/Armored Car. Italian ArmR replacement points are always treated as Autobelinda 41's (ID Code 'vv'), even if not able to upgrade the unit under the listed Upgrading Armored Car Effectiveness rules (Case 20.5). Lt Tank = Light Tank of the type specified in Case 20.5. This only applies if upgrading the unit. Lt At = Only Italian 47/32 or German 2.8cm or 28/20 Pak anti-tank guns.
[21.38] BREAKDOWN TABLE
Accumulated Breakdown Points:
| % Breakdown | 0...3 | 4...10 | 11...20 | 21...30 | 31...40 | 41...50 | 51...60 | 61...70 | 71+ |
|---|---|---|---|---|---|---|---|---|---|
| 0 | 11...66 | 11...42 | 11...32 | 11...26 | 11...23 | 11...16 | 11...14 | – | – |
| 10 | – | 43...64 | 33...62 | 31...55 | 24...53 | 21...46 | 15...42 | 11...33 | 11...25 |
| 25 |
%Breakdown = The percentage of that type of vehicle that breaks down. BAR (Breakdown Adjustment Rating) of a particular type of vehicle is found by indicating the number of columns shifted (right or left) before rolling to determine Breakdown. Hot Weather: shift one column to the right. Sandstorms: If at least 50% of the accumulated Breakdown Points were acquired in map sections containing Sandstorms, shift the Breakdown Points one column to the right. BAR for vehicles and Weather are cumulative. Note that certain vehicles (e.g., motorcycles, artillery with inherent transport) never Breakdown.
[22.15] VEHICLE REPAIR SUPPLY COSTS CHART
| Location | State | Type of Vehicle | Supplies Expended Before Attempt |
|---|---|---|---|
| Field | Bd | Truck, AC, Recce | None |
| Field | Bd | Tank, SPA, TD | 1 Fuel |
| Facility | Bd | All | 1 Fuel and 1 Stores |
| Field | De | Tank* | 2 Stores and 2 Fuel |
| Facility | De | Tank | 2 Stores and 2 Fuel |
Supplies = Amount of that number of points of that type of supply. Facility = Major or Minor Repair Facility. Bd = Broken down vehicle. De = Destroyed tank (no other destroyed vehicle points may be repaired). AC = Armored Car. SPA = Self-propelled artillery. TD = Tank Destroyer. *Only destroyed Commonwealth tanks by a Tank Delivery Squadron. Only German tanks by the Mobile Tank Repair Squad. Note: If not indicated on the chart, the repair may not be performed.
[22.44] DESTROYED TANKS REPAIR TABLE
| DIE | Field | Axis Repair Facility: German | Axis: Italian | Axis: Commonwealth | CW Repair Facility: All Nationalities |
|---|---|---|---|---|---|
| 1 | R | R | R | R | R |
| 2 | – | R | R | R | R |
| 3 | – | R | – | – | – |
| 4 | – | – | – | – | – |
| 5 |
Add one to the die roll if attempting repair through use of a Minor Repair Facility. Field: Repair in the Field. May only be attempted by a Tank Delivery Squadron on Commonwealth tanks and the Mobile Tank Recovery Squadron on German tanks. R = The tank TOE Strength Point is repaired. J = The tank TOE Strength Point is Junked (lost). – = No effect (may attempt repair again on another Op. Stage.).
[22.8] BROKEN DOWN VEHICLE REPAIR TABLE
| DIE | Field: Truck | Field: AC/R | Field: Tank/SPA/TD | Repair Facility: Temporary | Repair Facility: Major |
|---|---|---|---|---|---|
| 0,1 | 2 | 1 | 25% | 50% | 75% |
| 2 | 1 | 0 | 10%* | 33% | 50% |
| 3 | 0 | 0 | 10%* | 25% | 50% |
| 4 | 0 | 0 | 10%* | 25% | 50% |
| 5 |
Field, Repair Facility = The place in which the repair attempt is being made; AC/R = Armored Car/Recce; SPA = Self-propelled Artillery; TD = Tank Destroyer. 1 = One Light or Medium Truck Point is repaired; 2 = One Heavy Truck Point (or any combination of Medium and Light Truck Points equal to two) is repaired.
AC/R: 1 TOE Strength Point of either armored cars or recce is repaired. %: That percentage of that type of vehicle is repaired, rounding fractions up. 10%* = If only attempting to repair a single TOE Strength Point, treat as a 0% (zero) result. Die Roll Modifications: Subtract one from the die roll if attempting to repair a broken down tank in the same hex as Tank Delivery Squadron or Mobile Tank Repair Squad. Add one to the die roll if the Facility is in a Major City hex whose Fortification Level is at present two. Add two to the die roll if attempting repairs at a repair facility in a Major City hex whose Fortification Level is at present one or zero.
[29.7] FOUR WEATHER LOCATION TABLE
| DIE | 1 | 2 | 3 | 4 | 5 | 6 |
|---|---|---|---|---|---|---|
| Map Sections | A,B | C,D | D,E* | B,C | B,D | B,C,D |
Map Sections = The map sections on which the Sandstorm or Rainstorm appear. Normal Weather occurs on the unaffected map sections. * = A Sandstorm occurring on a (Nile) Delta hex is treated as Normal Weather. Note: Sandstorms do not extend north of the coastal hexes.
[27.91] DESERT RAIDER RAIDS TABLE
Target: Water Pipeline
- Die 1...4: Target destroyed
- Die 5,6: No effect
Notes: Each Desert Raider is limited to one attempt per OpStage.
Target: Airfield
- Die 1,2: Reduce one level of effectiveness
- Die 3...6: No effect
Notes: May not be raided if any combat units are present. An airfield may not be raided more than once per Game-Turn.*
Target: Airplanes on the ground
- Die 1,2: 10% of the planes are destroyed, the planes being determined by the raiding Player
- Die 3...5: No effect
- Die 6: Planes unaffected, desert raider eliminated.
Notes: May not be raided if combat units are present. Flying boats are never affected by raid results.*
Target: Rommel
Notes: Only by Commonwealth Long Range Desert Groups. See Raid on Rommel Table.
Target: Supply dump with combat units in hex
Notes: Roll two dice. If the dice sum is equal to or greater than the total Raw Close Assault Defense Points (ignore parentheses when calculating strength) of the combat units in the hex the desert raider survives and attacks as below. If the dice sum is less than the total Raw Defensive Close Assault Points, the desert raider is eliminated.
Target: Supply dump with no combat units in hex or one in which the desert raider survived
- Die 1,2: 10% of supplies in the dump destroyed
- Die 3...5: No effect
- Die 6: Supplies unaffected. If there are combat units present, the desert raider is eliminated.
Notes: If the desert raider completes the raid without being eliminated, the opposing Player must inform the raiding Player if the supply dump is real, a non-dump, or a dummy.
Target: Trucks in convoy
- Die 1,2: 1 Truck Point eliminated. The raided Player determines the type of Truck Point eliminated, the raiding Player then determines the cargo carried eliminated, with Replacement Points named only if unavoidable.
- Die 3...5: No effect
- Die 6: Trucks unaffected. If any of the trucks in that convoy are transporting infantry Replacement Points, roll one die again. If a 5 or 6 is rolled, the desert raider is eliminated.
Notes: If all of the trucks in the convoy are transporting infantry Replacement Points, the desert raider is eliminated without the raiding Player determining if the trucks are affected.
GENERAL NOTES: All raids require the expenditure of 5 CP's by the desert raider. No target in a Major City hex may be raided. *The raiding Player may combine attacks on an airfield and the planes on the ground in that hex into a single raid. The desert raider must expend 10 CP's. The results of "both" raids are determined separately with the airfield attacked first. No desert raider may perform the same raid in the same hex or attack the same truck convoy more than once per OpStage.
[24.17] CONSTRUCTION CHART
| Item | Situation | Unit(s) Required | Supplies Required* | Nr. Op Stages | Restrictions† |
|---|---|---|---|---|---|
| 1 Level of Fortification | Build/Rebuild‡ | AnyE + Inf Bn with 3+ TOE | 30 Stores | 3 | May not be built in a Salt Marsh, Delta or Major City hex. May be rebuilt in a Major City hex in an enemy ZOC. No construction other than construction/demolition of ports and/or flying boat facilities may simultaneously occur in same hex. |
| Real Minefield | Build | EBn, ECoy or CHQ^E | 15 Ammo + 15 Stores | 1 | May only be built in Clear, Sand/Gravel and Salt Marsh hexes. |
| Fake Minefield | Build | EBn, ECoy or CHQ^E | 3 Stores | 1 | As above. |
| Railroad | Build |
Key: Nr. Op Stages = Number of Operations Stages of constructions required. AnyE = Any engineer battalion, engineer company or headquarters unit with engineering capability. EBn = Engineer battalion. ECoy = Engineer company. HQ^E = Any headquarters with engineering capability. CHQ^E = Allied headquarters with engineering capability. SGSU = Any Squadron Ground Support Unit. CSGSU = Allied Squadron Ground Support Unit. Inf Bn with 3+ TOE = Any infantry-type battalion possessing at least three TOE Strength Points. CP's = Capability Points.
Notes: †= Unless otherwise stated, an item may not be constructed in an enemy ZOC. *= If the hex is affected by Hot Weather, an additional 10 Water Points are required for each item, other than a Supply Dump, under construction. ‡= Only one may be built, rebuilt or blocked at a time
[24.18] DEMOLITION CHART
| Item | Situation | Unit Required | Nr. Op Stages | Restrictions/Commentary |
|---|---|---|---|---|
| Fortification | Reduce 1 Level | Not allowed | May be reduced by air bombardment or barrage. | |
| Fake Minefield | Clear | Any unit | 1 | Cleared at the end of the Movement Segment in which it is entered. |
| Real Minefield | Clear | Any E or tank bn with 6+ TOE of Scorpions | 1 | |
| Railroad | Destroy | Any E or inf bn with 3+ TOE | 1 | May also be destroyed by air bombardment or barrage. |
| Road | Destroy | Not allowed |
Nr. OpStages = Number of Operations Stages required to demolish the item. Any E = Any engineer battalion, engineer company, or headquarters with engineering capability. E bn = Engineer battalion. HQ E = Headquarters with engineering capability. CHQ E = Allied headquarters with engineering capability. Inf bn with 3+ TOE = Any infantry-type unit with at least 3 TOE Strength Points.
[35.23] SQUADRON CAPACITY CHART
| Nationality | Ready | Reserve | Total |
|---|---|---|---|
| Italian Squadriglia | 9 | 3 | 12 |
| German Staffel | 12 | 4 | 16 |
| Commonwealth Squadron (1940-41) | 12 | 4 | 16 |
| Commonwealth Squadron (1942-43) | 18 | 6 | 24 |
[38.37] AIRCRAFT REFIT TABLE
A. By Plane:
| Commonwealth | German | Italian | |
|---|---|---|---|
| Dice Roll to Refit | 2...8 | 2...7 | 2...6 |
#...# = Plane refitted. Modifier: Add two to the dice roll if the plane is not assigned to the Squadron Ground Support Unit attempting the refit.
B. By Squadron:
| Dice Roll | 1 | 2 | 3 | 4 | 5 | 6,7 | 8,9 |
|---|---|---|---|---|---|---|---|
| % of Planes Refitted | 100 | 80 | 70 | 60 | 50 | 40 | 33 |
Modifiers: German Squadron Ground Support Unit add 1. Italian Ground Support Unit add 2. Planes attempting refit not assigned to Squadron Ground Suport Unit attempting refit add 1.
[45.6] PILOT AND PLANE RECOVERY TABLE
| DIE | 1 | 2 | 3...6 |
|---|---|---|---|
| Strafed: | R | R | L |
| Flak/Air-Air | R&A | L&A | L&K |
Strafed = Any plane lost thru a destroyed result on the Strafing CRT may be rolled for. Flak/Air-Air = Only fighter/fighter-bombers and their pilots lost in plane-plane combat or from Flak Fire may be rolled for. R = The plane is repairable. L = The plane is permenently eliminated. A = The pilot survives. K = The pilot is eliminated. Note that plane and pilot recovery may only be attempted, and 1 Fuel and 1 Stores Point expended for each reparable plane, during the first eligible Maintenance Segment/Phase after the plane was lost. A repaired plane is considered unfueled, unarmed and unfit and normal maintenance may not be performed on it until one Game-Turn has elapsed from this saving die roll. A surviving pilot may not be returned to his squadron until one Game-Turn after this saving die roll.
[40.4] SCRAMBLE TABLE
| Distance | 0...2 | 3,4 | 5,6 | 7,8 | 9,10 | 11...15 |
|---|---|---|---|---|---|---|
| Scramble | 6 | 5 | 4 | 3 | 2 | 1 |
Distance = Distance in hexes to the Target Hex. Scramble = A die roll equal to or less than the number listed successfully Scrambles that Squadron's planes.
[42.27] AIR RECONNAISSANCE OF LAND UNITS TABLE
| DIE | 1,2 | 3,4 | 5,6 | 7 | 8 | 9 | 10 | 11 | 12 | 13+ |
|---|---|---|---|---|---|---|---|---|---|---|
| Reveal: | 0 | 1 | 2 | 3 | 4 | 5 | 6 | 7 | 8 | All |
Add one to the die roll for every four planes completing the Reconnaissance Missions (ignore fractions). Reveal = Number of battalion-equivalents revealed. All = Reveal all units in the hex, regardless of size-equivalency.
[49.19] FUEL CONSUMPTION CHART
| CP's Expended in Movement | Rate 1 | 2 | 3 | 4 | 5 | 6 | 7 |
|---|---|---|---|---|---|---|---|
| 1 | 0.2 | 0.4 | 0.6 | 0.8 | 1.0 | 1.2 | 1.4 |
| 2 | 0.4 | 0.8 | 1.2 | 1.6 | 2.0 | 2.4 | 2.8 |
| 3 | 0.6 | 1.2 | 1.8 | 2.4 | 3.0 | 3.6 | 4.2 |
Columns 1-7 = the vehicle's Fuel Consumption Rate. # = The number of Fuel Points consumed by each vehicle.
[41.39] MINING HARBOR BY PLANE TABLE
| Bombload Capacity: | 0...5 | 6...10 | 11...15 | 16...20 | 21...25 | 26...30 | 31+ |
|---|---|---|---|---|---|---|---|
| Harbor Mined: | 0 | 1 | 2 | 3 | 4 | 5 | 6 |
Bombload Capacity: The average Bombload of the six planes attempting to Mine the Harbor. Harbor Mined: If the die roll is equal to or less than this number, the Harbor is Mined.
[46.4] FLAK ADJUSTMENT CHART
| Nr. non-Fighter Planes | Columns Adjusted in Favor of Player Firing AA |
|---|---|
| 1 to 23 | 0 |
| 24 to 47 | 1 |
| 48 to 71 | 2 |
| 72 or more | 3 |
[45.4] AIR-AIR COMBAT MANEUVER ADJUSTMENT CHART
| Maneuver Differential: | 0 | 1...3 | 4...7 | 8...14 | 15...20 | 21+ |
|---|---|---|---|---|---|---|
| Adjustment: | 0 | 1 | 2 | 3 | 4 | 5 |
Maneuver Differential: The absolute difference between the Maneuver Ratings of the two planes. Adjustment: The amount added to (subtracted from) the TacAir Rating of the plane with the higher (lower) Maneuver Rating in the Air-Air combat.
[45.5] TACAIR KILL TABLE
| Adj TacAir Diff | –13 or less | –5...–12 | –2...–4 | –1 | 0 | +1 | +2 | +3 | +4 | +5 | +6 | +7 | +8 | +9 | +10 | +11 | +12 or more |
|---|---|---|---|---|---|---|---|---|---|---|---|---|---|---|---|---|---|
| Kill: | na | 11 | 12 | 13 | 14 | 15 | 16 | 22 | 24 | 26 | 32 | 34 |
Adj TacAir Diff: The result of subtracting the defender's (modified) TacAir Rating from the total of the attacker's (modified) TacAir Rating plus the Maneuver Adjustment (which may be a negative number) for those two planes. Kill: A dice roll, read sequentially, equal to or less than that number results in the elimination of the defending plane. na = The defending plane may never be eliminated.
[41.5] AIR BOMBARDMENT AND SECONDARY BARRAGE TARGETS TABLE
Column headings, by weapons type: Bomb Points and Torpedo Points^a (the two rows below give the corresponding column headings), and Barrage Points^b. The table is read by dice roll (two dice read sequentially); each cell lists the dice-roll range giving that Result.
| Weapons Type | Col 1 | Col 2 | Col 3 | Col 4 | Col 5 | Col 6 | Col 7 | Col 8 | Col 9 | Col 10 | Col 11 |
|---|---|---|---|---|---|---|---|---|---|---|---|
| Bomb Points | 1…20 | 21…40 | 41…80 | 81…120 | 121…160 | 161…200 | 201…260 | 261…320 | 321…390 | 391…470 | 471+ |
| Torpedo Points^a | 1…5 | 6…12 | 13…24 | 25…50 | 51…80 | 81…120 |
Airfields / Air Landing Strips / Ports
| Result | Col 1 | Col 2 | Col 3 | Col 4 | Col 5 | Col 6 | Col 7 | Col 8 | Col 9 | Col 10 | Col 11 |
|---|---|---|---|---|---|---|---|---|---|---|---|
| 0 | 11…62 | 11…55 | 11…51 | 11…42 | 11…36 | 11…31 | 11…15 | 11…12 | – | – | – |
| 1 | 63…66 | 56…66 | 52…66 | 43…66 | 41…62 | 32…56 |
Supply Dump
| Result | Col 1 | Col 2 | Col 3 | Col 4 | Col 5 | Col 6 | Col 7 | Col 8 | Col 9 | Col 10 | Col 11 |
|---|---|---|---|---|---|---|---|---|---|---|---|
| 0% | 11…62 | 11…56 | 11…46 | 11…34 | 11…16 | – | – | – | – | – | – |
| 10% | 63…66 | 61…66 | 51…66 | 35…64 | 21…56 | 11…46 |
Fortification
| Result | Col 1 | Col 2 | Col 3 | Col 4 | Col 5 | Col 6 | Col 7 | Col 8 | Col 9 | Col 10 | Col 11 |
|---|---|---|---|---|---|---|---|---|---|---|---|
| No Effect | 11…65 | 11…63 | 11…56 | 11…52 | 11…43 | 11…33 | 11…24 | 11…16 | 11…13 | 11 | – |
| Reduced | 66 | 64…66 | 61…66 | 53…66 | 44…66 | 34…66 |
Railroad
| Result | Col 1 | Col 2 | Col 3 | Col 4 | Col 5 | Col 6 | Col 7 | Col 8 | Col 9 | Col 10 | Col 11 |
|---|---|---|---|---|---|---|---|---|---|---|---|
| No Effect | 11…63 | 11…61 | 11…53 | 11…43 | 11…32 | 11…22 | 11…14 | – | – | – | – |
| Destroyed | 64…66 | 62…66 | 54…66 | 44…66 | 33…66 | 23…66 |
Road
| Result | Col 1 | Col 2 | Col 3 | Col 4 | Col 5 | Col 6 | Col 7 | Col 8 | Col 9 | Col 10 | Col 11 |
|---|---|---|---|---|---|---|---|---|---|---|---|
| No Effect | 11…65 | 11…63 | 11…56 | 11…51 | 11…36 | 11…25 | 11…16 | 11…13 | – | – | – |
| Destroyed | 66 | 64…66 | 61…66 | 52…66 | 41…66 | 26…66 |
Trucks, Flak Suppression, Combat Units, Commonwealth Fleet
| Result | Col 1 | Col 2 | Col 3 | Col 4 | Col 5 | Col 6 | Col 7 | Col 8 | Col 9 | Col 10 | Col 11 |
|---|---|---|---|---|---|---|---|---|---|---|---|
| 0 | 11…62 | 11…46 | 11…16 | 11…12 | – | – | – | – | – | – | – |
| 1 | 63…66 | 51…66 | 21…66 | 13…42 | 11…24 | – |
Axis Naval Convoy
| Result | Col 1 | Col 2 | Col 3 | Col 4 | Col 5 | Col 6 | Col 7 | Col 8 | Col 9 | Col 10 | Col 11 |
|---|---|---|---|---|---|---|---|---|---|---|---|
| 0% | 11…66 | 11…54 | 11…33 | 11…22 | – | – | – | – | – | – | – |
| 5% | – | 55…64 | 34…64 | 23…54 | 11…45 | 11…32 |
(Note: the printed Barrage Points header for the last Torpedo column (341+) reads "1+" in the scan; it is reproduced here as printed.)
Key to Air Bombardment and Secondary Barrage Targets Table
Key: a = Use only when attacking ships of the Commonwealth Fleet. Attacks consisting of Bomb and Torpedo Points are performed as two attacks. Attacks by planes armed with Torpedos against Ports or Axis Naval Convoys are carried out using the Bomb Points row (see Case 41.7). b = Calculated in the same manner as for the Master Barrage Against Units CRT. Results: An Airlanding Strip receiving a result of 1 or greater is eliminated. Airfield: That number of Squadron Ground Support Units may no longer use the Airfield's Readying Capacity. Ports: Reduce the Port by that number of Efficiency Levels. Supply Dump: Eliminate that percentage of all Supplies in that Dump. In addition, lose 1 Truck Point for each 10%, if possible, defender's choice. Trucks: That number of Truck Points and their cargo destroyed. Flak Suppression: That number of TOE Strength Points eliminated. Combat Units: That number of Battalion-equivalents (and then Company-equivalents) Pinned (see Case 41.9). Commonwealth Fleet: That number of Damage Points. Axis Naval Convoys: That percentage of the Shipping that is eliminated. Fortification: Reduced one Level or not affected. Railroad: Destroyed or not affected. Road: Reduced to a Track or not affected. Modifications: If at least 50% of the planes attacking an Axis Naval Convoy are armed with Torpedos, increase the total Bomb Points by 25%. Subtract one from the results of Land Support Bombing against armor units.
[46.3] ANTI-AIRCRAFT COMBAT RESULTS TABLE
Number of Flak Points:
Planes on other missions: No. Planes Destroyed
No. Planes Destroyed
| Result | 1...4 | 5...8 | 9...12 | 13...16 | 17...20 | 21...24 | 25...28 | 29...32 | 33...36 | 37+ |
|---|---|---|---|---|---|---|---|---|---|---|
| 0 | 11…55 | 11…45 | 11…36 | 11…32 | 11…21 | 11…12 | – | – | – | – |
| 1 | 56…66 | 46…65 | 41…62 | 33…56 | 22…55 | 13…53 | 11…45 | 11…36 |
No. Planes Aborted
| Result | 1...4 | 5...8 | 9...12 | 13...16 | 17...20 | 21...24 | 25...28 | 29...32 | 33...36 | 37+ |
|---|---|---|---|---|---|---|---|---|---|---|
| 0 | 11…53 | 11…42 | 11…31 | 11…22 | 11…13 | – | – | – | – | – |
| 1 | 54…66 | 43…64 | 32…62 | 23…55 | 14…52 | 11…44 | 11…31 | 11…21 |
Planes on fighter missions
Nr. Planes Destroyed
| Result | 1...4 | 5...8 | 9...12 | 13...16 | 17...20 | 21...24 | 25...28 | 29...32 | 33...36 | 37+ |
|---|---|---|---|---|---|---|---|---|---|---|
| 0 | 11…64 | 11…56 | 11…52 | 11…42 | 11…31 | 11…16 | – | – | – | – |
| 1 | 65…66 | 61…66 | 53…66 | 43…66 | 32…65 | 21…62 | 11…56 | 11…46 |
Notes: Each Target Group is attacked separately. Attacks against a Target Group comprised of Planes on Other Missions containing a multiple of twelve Bomber-Class or Transport-Class aircraft or any combination shift the Nr. of Flak Points one column to the right for each twelve aircraft exceeding twelve aircraft (i.e., 24 aircraft shift one column to the right).
[50.2] AMMUNITION CONSUMPTION RATES TABLE
Logistics Game Played
| Action | Ammo |
|---|---|
| Barrage | 4 |
| Anti-armor | 3 |
| Close Assault: Armor-class, Gun-class, MG-inf, HvyWpn-inf | 2 |
| Anti-air at single target group | 2 |
| Rearm any portion of a squadron's planes' tacair rating | 1 |
| Rearm one plane with bombs, torpedoes, or mines | 1 |
| Engage in air-to-air combat and/or strafe | TacAir / Bombload |
Logistics Game Abstracted
| Action | Ammo |
|---|---|
| Barrage: Phasing Battalion-Eq | 4 |
| Barrage: non-Phasing Battalion-Eq | 2 |
| Assault: Phasing Battalion-Eq | 1 |
| Assault: non-Phasing Battalion-Eq | 1 |
| Anti-air Fire: Gun-class unit at a single target group | 1 |
| Rearm any portion of a non-fighter squadron's tacair ratings and bombload | 1 |
| Flight by a non-fighter plane | Bombload |
Ammo = If the logistics game is being played, the number of Ammo Points that must be expended in order for one TOE Strength Point to perform the action. If the Logistics Game is being abstracted, the number of Ammo Points that must be expended for the unit to perform the action.
[58.5] ABSTRACT TRUCK LOSS CHART
| Year | Jan | Feb | Mar | Apr | May | June | July | Aug | Sept | Oct | Nov | Dec |
|---|---|---|---|---|---|---|---|---|---|---|---|---|
| 1940 | – | – | – | – | – | – | – | – | – | 6/2 | 5/3 | 4/4 |
| 1941 | 2/3 | 2/3 | 10/1 | 9/2 | 7/3 |
Nr/ = Percentage of Commonwealth Motorization Points in N. Africa that are destroyed. /Nr = Percentage of Axis Motorization Points in N. Africa (Tripoli/Tunis/etc are part of N. Africa) that are destroyed.
[52.7] WATER AVAILABILITY TABLE
| DIE | 1 | 2 | 3 | 4 | 5 | 6 |
|---|---|---|---|---|---|---|
| Town: | 100 | 150 | 200 | 300 | 350* | 500* |
| Bir: | 50 | 100 | 150 | 200* | 300* | 400* |
Number = Number of Water Points drawn. *Roll one die again, secretly. If the die roll is a '1', the Town or Bir in that hex is Depleted. Note that a Player may draw an unlimited number of Water Points from an Oasis or Major City, which never deplete.
[54.12] SUPPLY DUMP CAPACITY CHART
| Location | Ammo | Fuel | Stores | Water |
|---|---|---|---|---|
| Tunis/Tripoli | U | U | U | U |
| Major City | U | U | U | U |
| Village | 2,500 | 8,000 | 3,000 | 1,000 |
| Other Terrain | 1,500 | 5,000 | 1,000 | 1,000 |
| Non-Dump | 50 | 0 | 50 | 0 |
Tunis/Tripoli = Each of the four Axis Off-map boxes for the Tripoli through Tunis region. Location = The hex in which the dump is located or the type of dump. Nr = The number of points of that type of supply that may be stored in a dump in that location. U = An unlimited number of points may be stored. Note that water may be drawn as well as stored in a village, major city hex or Tunis/Tripoli box. Note that the Tunis/Tripoli/In Transit boxes may not be used as supply dumps.
[54.17] SUPPLY DUMP DEMOLITION TABLE
| DIE | –2 | –1 | 0 | 1 | 2 | 3 | 4 | 5 | 6 | 7 | 8 or more |
|---|---|---|---|---|---|---|---|---|---|---|---|
| % Supplies | 0 | 33 | 0 | 10 | 20 | 33 | 50 | 75 | 100 | 33 | 100 |
Die = The die roll, modified as listed below. % Supplies = Percentage of all supplies in that dump that are destroyed.
Modifications (cumulative):
- +1...for each additional 1/3 or the unit's Basic CPA expended and
- +1...if the attempting unit is a full (non-shell) division, or
- –1...if the attempting unit(s) total one Stacking Point or less, and
- –2...if the attempt is being made in a Major City hex. If not, then
- +1...if the total of the dump's supplies is 500 or less points, or
- –1...if the total of the dump's supplies is 4000 or more points, and
- +1...if the attempting unit(s) "just" captured the dump, or
- –1...if the dump has not just been captured and the nearest enemy unit is at least 20 CP's (via a medium truck) away.
[54.2] TRUCK CHARACTERISTICS CHART
MAXIMUM TRANSPORT CAPACITY
| Truck Type | CPA: Inf | CPA: Guns | CPA: Supplies* | TOE Strength Points: Inf | Arty | AA | Supply Points: Ammo | Fuel | Stores | Water | Fuel Capacity | Fuel Consumption Factor | BAR |
|---|---|---|---|---|---|---|---|---|---|---|---|---|---|
| Light | 25 | na | 40 | ½† | na | 1 | 2 | 50 | 6 | 40 | 8 | 1 | 2L‡ |
| Medium | 20 |
Inf = Infantry. Arty = Artillery. AA = Anti-aircraft. BAR = Breakdown Adjustment Rating, in column shifts to the left. CPA = The Capability Point Allowance of the Truck Point when transporting (motorizing) the item listed. na = Not allowed. *Applies only to Trucks in Convoy carrying Supplies. †Requires two Light Truck Points to motorize one Infantry TOE Strength Point. ‡Light Trucks, if not being moved along a Road, garner one break down point in addition to those acquired by entering the hex or crossing the hexside. e.g., moving along a track one hex across a wadi into a rough hex accumulates 18 BP's (½ × 8 for the wadi + ½ × 8 for the rough + 1 each for the wadi hexside and the rough hex).
[54.5] EQUIVALENT WEIGHTS CHART
In Tonnage — Supplies by Naval Convoy, Interport Transfer, Railroad or Air Transport:
| One Point Of | Equivalent Tonnage |
|---|---|
| Ammo | 4 |
| Fuel | 1/8 |
| Stores | 1 |
| Water | 1/6 |
| One Replacement Point By | Equivalent Tonnage |
|---|---|
| Axis Naval Convoy | Varies, see Axis Replacement Pool |
| Interport or Railroad | na (See below) |
| Air | 2* |
| Truck/Motorization Point by | Equivalent Tonnage |
|---|---|
| Axis Naval Convoy | Varies, see Axis Replacement Pool |
| Railroad | n/a (see below) |
| Interport | 50† |
| Air | P |
In Stacking Points (Railroad/Interport):
| Item | Stacking Point Equivalent |
|---|---|
| Truck/Motorization Point‡ | 1/10 |
| Replacement Point | 1/5 |
| Squadron Ground Support Unit | 1/2 |
| Unit of Stacking Points | 1/2 |
Key: n/a = Not applicable. P = Prohibited. * = Note that only infantry-class replacement points may be transported by air. † = Only applies to unattached points or those attached points in excess of the sum total of the TOE Strength Points comprising the Parent unit to which they are attached. ‡ = Only applies to points being transported by rail that are unattached or those attached points in excess of the sum total of TOE Strength Points comprising the Parent unit to which they are attached.
[55.3] PORT CAPACITY AND EFFICIENCY LEVEL CHART
| Port | Efficiency Level | Stacking Points In | Stacking Points Out | Maximum Tonnage |
|---|---|---|---|---|
| Tripoli | 10 | 10 | 15 | 15,000 |
| Bizerta* | 10 | 10 | 15 | 3,333 |
| Alexandria | 10 | 5 | 10 | 15,000 |
| Tobruk† | 5 | 1 | 3 | 1,700 |
| Benghazi | 3 | 2 | 5 | 2,500 |
Stacking Points: The number of stacking points of items that may be shipped in and may be shipped out in one Operations Stage. Maximum Tonnage: The total tonnage of supplies that may be shipped in and/or out in one Operations Stage. Efficiency Level: A rating expressing a port's ability to absorb damage without being affected. A loss of one level of efficiency decreases the port's capacity by a fraction equal to one over the listed efficiency level. Note that reinforcements are never affected by a port's capacity or current efficiency; that the stacking points handled and tonnage handled by a port have no effect upon each other; and that replacement points shipped by an Axis Naval Convoy are off-loaded by the Stacking Point schedule, not the maximum tonnage schedule. *May not be used by the Axis Player before Game-Turn 35, at which point he may roll for activation. †Begins the campaign with an efficiency below the listed five due to the San Girogio partially blocking the harbor. ‡Any one unit of zero Stacking Points may be shipped in.