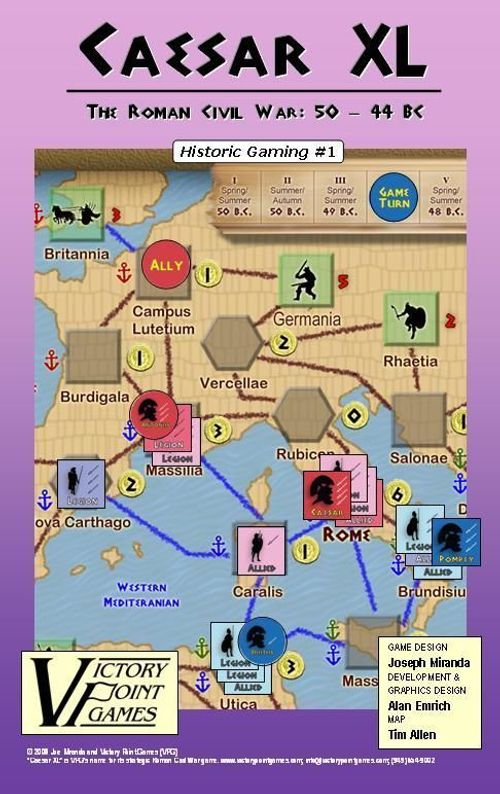
Caesar XL: The Roman Civil War 50 - 44 BC
Caesar XL: The Roman Civil War 50 - 44 BC Rulebook
Table of Contents
Table of Contents
- BRONZE RULES
- SILVER RULES
- GOLD RULES
BRONZE RULES
[0.0] Using These Rules
New gaming terms, when they are initially defined, appear in dark red lettering for quick referencing.
The instructions for this game are organized into major "Rules" sections as shown in large green CAPS font, and represented by the number to the left of the decimal point (e.g., rule 4.0 is the fourth rule). These rules generally explain the game's subject, its components, play procedures, its core systems and mechanics, how to set it up, and how to win.
With each Rule, there can be "Cases" that further explain a rule's general concept or basic procedure. Cases might also restrict the application of a rule by denoting exceptions to it. Cases (and Subcases) are an extension of a Rule shown in the way that they are numbered. For example, Rule 4.1 is the first Case of the fourth Rule; and Rule 4.1.2 is the second Subcase of the first Case of the fourth Rule.
Important information is in red text. References to examples of a Rule or Case are in blue text. Text in shaded boxes provides the voice of the game's designer, who is addressing you to explain an idea or concept that is not, itself, a Rule or a Case.
[1.0] Introduction
Caesar XL ("XL" being the Roman numeral for "40," which is roughly how many pieces will be on the map during play) is a two player strategy game where players assume the roles of Julius Caesar and Pompey the Great during the first Roman Civil War of 50-44 BC.
Each player is trying to control the Roman world (which means eliminating the other player) using their Leaders, Legions, and Allies to engage the opponent's forces. The control of cities is important, as they allow a player to collect Gold that is used to build armies and seize opportunities.
This game includes two levels of play: the Bronze Rules, which provide a quick and easy (i.e., introductory) game experience, and the Silver Rules, which provide more realism and complexity. New players should read the Bronze Rules and play a game or two before trying the Silver Rules.
[2.0] Game Equipment
Parts Inventory
- 1 11" x 17" game map with tables
- 1 sheet of 40 square game pieces
- 1 sheet of 28 round game pieces
- 40 SPQR + 2 Commander cards
- 1 'Bronze Rules' booklet
- 1 'Silver Rules' sheet
- 1 Designer's Notes sheet
Alea iacta est ("the die is cast"): Not included are some 6-sided dice that you will need to provide.
[2.1] The Game Map and Scale
Each Game Turn represents half a year of real time. Each unit represents perhaps 5-10,000 troops plus auxiliaries, supply trains, camp followers, and so forth. The game map shows the Roman world as it was at the time of the late Republic and depicts the following:
Roman Cities. These are shown in brown, usually squares. These represent major urban centers (or other regions). Each city has a Gold Value representing the number of Gold a player collects if he controls that city. Some cities are hexagon shaped, representing Legionary Colonies. Other cities are round shaped, representing Allied Client states.
Barbarian Settlements: These Areas are shown as green squares. These have a Strength value, represented by the red number next to it printed on the map.
Routes: These are the lines connecting cities. A player may move his legions from one city to another via routes. Some routes go overland (roads) while others go over sea (sea lanes). Both are treated the same in the game.
Ports: Are shown as anchor symbols in different colors by Sea Zone (Atlantic = Red; W. Med. = Blue; E. Med. = Green); note that some locations with two anchors are on both Sea Zones. (See Fleet cards.)
[2.2] Game Charts & Tables
Various game aids are provided on the map for certain game functions, such as the Sequence of Play, Map Legend, Build Chart, Turn Record Track, etc.
[2.2] The Playing Pieces
The cardboard pieces that move and fight are called "units." There are the following types of units in the game:
Supreme Leader: This is Gaius Julius Caesar for the Caesarian side, and Pompey the Great for the Pompeian side. Note that a Successor Leader, if in play, functions as a player's Supreme Leader for all purposes.
Leaders: Other important Leaders are represented by cards and round unit counters. These are shown in both players' colors as they might align with either faction.
Legions: these units represent a Roman legion.
Allied: These represent the forces provided by Rome's client states. They function in the same way as Legions, except that they are weaker and are more vulnerable to certain SPQR card events.
Units have printed on them a number of swords. This is the unit's combat strength, used when resolving battles. Legions and Allied units are two-sided. The lighter (weaker) side is usually used. The darker (stronger) side is established under special circumstances.
Gold: Players collect income in the form of "Gold." The round 'coin' counters indicate their denominations (see 8.0). Gold represents not simply money but also political pull, logistical support, etc.
SPQR Cards: Each of these has some event or action printed on them. How many hand cards and how much Gold you possess are not secrets!
[3.0] Setting Up the Game
See the game's inside-front cover.
[4.0] Sequence of Play
During a Game Turn, each player conducts his own Player Turn (as is hereafter referred to as the "Phasing Player") strictly according to the following Sequence of Play:
Caesarian Player Turn
- Forum / Victory Phase: The Caesarian Player may attempt to gain a single Forum card and / or declare victory.
- Draw Cards Phase: The Caesarian Player draws one free SPQR card.
- Purchase Phase: The Caesarian Player spends his Gold to make purchases.
- Tax Phase: The Caesarian Player taxes his controlled cities and collects Gold.
- March Phase: The Caesarian Player may move his pieces.
- Combat Phase: The Caesarian Player must attack enemy forces at the same location as his friendly forces.
- Turn Marker: Flip (Caesarian) or advance the Game Turn marker ahead one space on the Turn Track and flip it (Pompeian).
Pompeian Player Turn
Repeat Steps 1 through 6, but reverse the player roles. That is, the Pompeians get to claim a Forum card, draw an SPQR card, tax, spend, move, and fight.
End Turn: Continue until victory is achieved (5.0) or the last Game Turn (Autumn 44 BC) has been played.
[5.0] Forum / Victory Phase
General Rule
First, the Phasing Player may claim one (1) Forum card and / or declare victory and win the game.
Claiming a Forum Card
A player may only attempt to claim one Forum card per friendly Forum Phase. If he has fulfilled its claim condition on the card at that time, he may claim that card and place it, face up, in front of him. Once claimed, a player keeps that Forum card for the remainder of the game.
Unclaimed Forum cards: These remain in The Forum area indefinitely until claimed.
Bidding: Only certain Forum cards require 'bidding' (all the others are simply claimed if their condition is met). The player attempting to claim a 'bid' card must have, and declare a bid of, at least 1 Gold. His opponent may either raise that bid by at least 1 Gold or 'pass.' Players cannot bid more Gold than they currently possess. Bidding alternates thus until one player desires to (or must) pass.
The winning bidder claims the Forum card and must immediately pay to the Stock the Gold he bid. Important: The losing bidder forfeits half the value of his bid (bribe), rounding fractions up, to the Stock.
Forum Card Effects
The Effects listed on a claimed Forum card function as a permanent 'special ability' for its owner and may be used each turn in the Phase indicated.
Forum cards also provide Victory Points as explained below.
Declaring Victory (How to Win)
A player can declare victory and wins the game only during his own Forum Phase and only in one of these two ways:
Military Victory: A Military Victory can be declared if all of the following conditions exist for that player during his Forum Phase after claiming a Forum card:
- His Supreme Leader is in Rome,
- The enemy's Supreme Leader is not on the map, and
- He controls locations whose total Gold (Roman cities) and Strength values (Barbarian Areas) equals or exceeds 25.
Political Victory: A Political Victory can be declared if that player has a net total of seven (7) Victory Points. Victory points come in two types based upon the leading political factions of the day, the Optimates (the "best of men") and the Populares (those "favored of the people").
Players check their own Leader and Forum cards and total the number of symbols (i.e., 'Victory Points') that they have for both factions, subtracting their smaller total from their larger one. If that net total is a difference of seven (7) or more points, that player declares victory for that faction and wins the game.
If a card states "Optimates or Populares," then its owner can decide which he wants whenever he computes his Victory Points.
For example, a player has a total of 6 Populares and 1 Optimates symbols in front of him. He has a net difference of 5 Victory Points.
Player note: It makes long-term sense to concentrate your Victory Point acquisition on one faction. However, there are two compelling reasons to play off of both sides to gain the benefits of a particular Leader or Event card: one is to gain the effects of that card, sacrificing the long term Victory Point advantage for short term gain on the board; the other is to deny your opponent control of certain cards!
Defeat: If, at the end of the last Game Turn (44 BC), neither player has declared victory, the game ends in a draw. The Roman world collapses into chaos and history blames you for the end of Western Civilization. Sic transit gloria mundi.
[6.0] Draw Cards Phase
SPQR: Abbreviation for senatus populusque romanus (the Roman Senate and People).
General Procedures
During his Draw Cards Phase, the Phasing Player draws the top SPQR card from the facedown draw pile. When multiple cards are drawn during a single Draw Cards Phase, they are drawn individually and acted upon (if needed) before the next one is drawn.
Played and discarded cards are placed faceup in a discard pile next to the draw pile. If the draw pile becomes exhausted, reshuffle the discards together to form a new draw pile.
Card Types
Event: This card must be played immediately (i.e., its event performed), then discarded, when drawn.
Forum: This card is immediately placed, face-up, beside the map in a common area that both players can easily see. This area is called "The Forum" (see Rule 5.0).
Action: This card is kept secret in the player's 'hand' and may be played during the Friendly Phase (unless otherwise noted) and under the circumstances indicated on the card itself, after which it is discarded.
Tactics: This card is kept secret in the player's 'hand' and may be played during the Combat Phase (see Rule 10), after which it is discarded.
Leader: This card is kept secret in the player's 'hand' and may be played, face-up in front of the player, during his Purchase Phase. When played, place its corresponding Leader unit (in its owner's color) on any city that contains at least one other friendly unit (even another Leader).
Hand Size Limits
Each Supreme Leader permits a maximum card hand size limit as shown below:
- Caesar: 4 cards
- Pompey: 3 cards
Players with no Supreme Leader (or their Successor) on the map play with a hand size that is one card fewer.
Forum and Leader cards face-up in front of a player do not count against this limit. Cards can be received beyond this limit, but then enough cards must be immediately discarded to bring that player's hand size back within its limit. Note that certain Forum cards allow you to increase your hand size limit.
Certain cards allow a player to pick cards from the discard pile. In this case, he can sort through the discards and choose which card from among them he desires.
[7.0] Purchase Phase
Procedure
Players may expend Gold to 'recruit' units (that is, take them from their stock of unused Legions and Allied units and put them into play on the map). A player's 'stock' includes those square pieces that were not setup and those eliminated in battle; i.e., eliminated units can be purchased and brought back into play.
Costs
A player can recruit one or more Legions at a cost of 9 Gold each.
A player can recruit one or more Allied units at a cost of 6 Gold each.
Leaders are free by playing their card.
[7.1] Recruitment Limitations: A player's available stock of units is a strict limit. A player may not recruit more units than are currently available in his stock.
[7.2] Placement Locations: Newly recruited units are placed in friendly cities. A "friendly city" is one that is currently occupied solely by one or more of that player's pieces (e.g., a Legion, Allied unit, Leader, or Ally marker).
[7.3] Placement Restrictions: A player may place either a single Legion or up to two Allied units in a friendly city, per friendly Phase.
Within these restrictions, a player may recruit any number of units in a single turn provided they are available in his stock and he has the Gold to pay for them.
Special Cities
Legionary Colonies (hexagon cities): Certain SPQR cards (e.g., Legions Grumble and Veterans Settlement) allow you to recruit additional Legion units at these cities.
Allied Clients (round cities): Certain SPQR cards (e.g., Allies Mobilize and Allied Settlement) allow you to recruit additional Allied units at these cities.
[8.0] Tax Phase
Procedure
During his Tax Phase, that player collects Gold from friendly cities (see 7.2). Each friendly city provides its indicated amount of Gold, which is added to that player's treasury (i.e., his available Gold or 'cash-on-hand').
Gold in the game is represented by round tokens ('specie' or 'coins') with Roman numerals on them in denominations of 1 (I), 5 (V), 10 (X), and 25 (XXV). You can think of them as pennies, nickels, dimes and quarters, if that will help. Players are free to 'make change' whenever necessary.
With proper money management, this should not be necessary, but if more Gold is required than is available in the bank, use some spare change from your pocket to help out. The 'bank' can never 'go broke.'
[9.0] March Phase
Procedure
During his March Phase, a player may (unlike Chess) move some, none or all of his units as he desires.
Friendly pieces can be moved together or separately (it doesn't matter). They may freely leave or enter a location containing enemy units (although the latter case will result in a battle).
Tip: Move units from several different adjacent locations into a single city to concentrate your forces for battle.
After a piece is moved and its owner's hand withdrawn from it, it cannot be moved again in the same March Phase.
[9.1] Distance: Each piece may move a maximum of one 'space' (by land or sea) per March Phase to a connected city.
[9.2] Stacking: Both players may have any number of units in the same location.
[10.0] Combat Phase
General Rule
Combat occurs only during a Player's Combat Phase. A player must complete his Movement Phase before initiating his Combat Phase and conducting combat.
A battle (i.e., an exchange of die rolls thrown in an effort to inflict casualties on opposing forces) must take place when enemy forces are located at the same city.
Nomenclature: The Phasing Player is always called the 'attacker' and his opponent the 'defender' at a battle. So if it is Caesar's turn and he marches 3 Legions into Rome where a force of Pompeian units awaits, Caesar is the 'attacker' in the ensuing battle.
Battle Procedure
If more than one battle must take place during a single Combat Phase, the attacking player determines the order in which they will be resolved. Each battle must be concluded before the next is begun.
Each battle must be conducted in the following sequence:
-
Remove all units from the contested location and line them up opposite each other off to one side of the map. Place the Battle marker in that contested location to remind you where this battle is occurring.
-
The attacker may commit one Tactics card by placing it face-down in front of him. After seeing whether or not the attacker makes this commitment, the defender then has the option to commit one Tactics card. Both Tactics cards are then revealed and their effects noted; discard them at the end of that battle.
-
Each side determines its Leadership Value by adding the sword strength of all its Leader units present at that battle (modified for Tactic cards). The side with the higher Leadership Value is the "Lead Player" in that battle and gets to commit units and roll first. If the Leadership Values are tied, then the defender is the Lead Player.
-
The First Battle Round: Players alternate committing a unit and rolling the die.
- A. The Lead Player 'commits' one ('Light') Allied unit (only; Legions and Leaders have to wait their turn) at that battle, if he has any (if not, he must 'pass'). This is shown by moving it apart from the rest of the units in his battle line. He then rolls a die and compares it to its sword strength (modified by Tactic cards). If the result is less than or equal to (<=) that unit's sword strength, a 'hit' is scored; any other result is no effect. For each hit scored, one enemy unit of the enemy player's choice is immediately eliminated (i.e., removed and placed in the stock; if a Leader unit, his card is also discarded). Note that a player may select his losses from units that have already been committed this round or those that have not; in this latter case, those units won't get a chance to roll during the current Battle Round.
- B. Now the other player repeats Step A, above, committing one Allied unit (only), if he has any available. Players alternate thus until each Allied unit on their side has been committed (meaning the side with more Allied units will be rolling for them consecutively), eliminated, or passes.
- C. Repeat Steps A and B (above), but this time for ('Heavy') Legion units until they have all been committed or eliminated.
- D. Then repeat Steps A and B again, but this time for Leader units. At this juncture, the Battle Round ends.
Battle Example
Caesar moves himself (XXXX), a XXX Veteran Legion and two XX Legions into Pharsalus where the Pompeians have Cato (X), one Allied unit (X) and four XX Legions.
Caesar declines to play a Tactic card, but the Pompeians do, revealing a Double Line which adds 1 sword to his Leader and 2 swords to his Legions (during the first round of battle only). Caesar has a higher Leadership Value at 4 to 2 (Cato's 1 is enhanced to 2 by the Tactic card) and becomes the Lead Player.
The Round begins with Allied units, but the Caesarians have none to commit, so the Pompeians commit their lone Allied unit. It rolls a 2 and 'just' misses.
Since all Allied units have been committed (or eliminated), the Legions take their turn. Caesar, as the Lead Player, goes first and commits his Veteran Legion; and hits with a roll of 3. The Pompeians opt to lose their Allied unit, as it has already rolled this round and is their weakest. The Pompeians put forth a Legion whose sword strength is increased from 2 to 4 due to the Tactic card, and rolls a 5 for no effect. Then the players alternate, committing one Legion at a time, with the end result being one hit to each side, and each eliminating a Regular Legion.
Finally, the leaders are committed, Caesar first, who scores a hit while Cato misses; another Pompeian Legion is eliminated.
Caesar opts to stay and fight another round, but with his Tactic exhausted and down to only two Legions, the Pompeian Player decides to cut his losses and retreat.
Cato commits suicide; his unit is returned to the stock and his card discarded. Caesar rolls three dice (one for each of his surviving units) and scores another hit. Only one Pompeian Legion hobbles away in retreat and Caesar is the master of Pharsalus. Caesar then promotes one of his surviving Legions to its Veteran side.
[11.0] Leaders
Leaders, including a player's Supreme Leader (Caesar or Pompey), are treated like other units with regard to movement and combat, with the following notes:
Leadership Value: Each has a Leadership Value equal to its sword strength. This is used for determining who has the advantage of committing the first units during a Battle Round.
Supreme Loss: When a Supreme Leader is eliminated, that player immediately loses half of his Gold (round up fractions). He also loses all of the SPQR cards in his hand. Afterward, he may accumulate Gold and cards normally.
Replacement: If eliminated, a player's Supreme Leader cannot be replaced unless he plays the Successor card. Use that side of his Supreme Leader card to denote this. A Successor functions as that side's new Supreme Leader, although with reduced capabilities (-1 hand size; -1 sword value).
[12.0] Barbarian Areas
General Rule
In the Bronze Game, units cannot enter Barbarian Areas for any reason. Units can only enter Roman cities (square, hexagon, or round).
If the SPQR Event card Barbarian Invasion occurs in the Bronze Game, the Barbarians go 'looting.' Each player rolls one die and loses that amount of Gold. If he has insufficient Gold to cover this loss, he must eliminate the balance in sword strength from among his units on the map (his choice of which units to lose).
Consto ("Stop")
You have learned the rules to the Bronze Game of Caesar XL. You should gain experience with these rules before moving on to the Silver Rules.
SILVER RULES
These Silver Rules supplement / supersede the Bronze Rules as indicated.
[6.0] Draw Cards Phase
Buying Additional SPQR Cards
[6.1] After receiving your Free SPQR card(s) for that turn and examining / acting upon them, you may spend Gold to purchase up to two additional cards. Each additional SPQR card purchased costs 5 Gold.
[7.0] Purchase Phase
Diplomacy
[7.4] At any empty or friendly controlled city or Barbarian Area, you may attempt to purchase an Ally marker to place there with your side's color showing. Each location may have only one Ally marker.
Function: An Ally marker's only function is to maintain control of that location for that side even when it has no other units there. Beware, however! It is a weak type of control and subject to political intrigues.
[7.41] Method: Players attempt to place / remove an Ally marker by purchasing a Diplomacy Roll (DR).
- Procedure: The purchasing player designates a target location and rolls a die. He succeeds if the modified result is greater than (>) its Gold value. Other results are 'No Effect.'
- Diplomacy Roll Modifiers: These die roll modifiers are cumulative:
- +1 if the target location is a friendly controlled city
- -1 if the enemy's total Sword value in all connected locations exceeds the target location's Gold value
- -1 if the target location is a Barbarian Area
- Limitations: Only one DR can be purchased per friendly Purchase Phase.
- Costs: It costs 3 Gold to attempt to place an Ally marker from the stock, or move a friendly Ally marker on the map to another location. It costs 5 Gold to attempt to remove an opponent's Ally marker from the map and return it to the stock. This can only be attempted if there are no enemy units stacked with it.
[7.42] Recruiting: A player may recruit new units at cities that have just 'joined their side' during that Purchase Phase.
[7.43] Occupation: Ally markers are lost (returned to the stock) whenever an enemy unit is in its city at the end of the Enemy Combat Phase.
[8.0] Tax Phase
Include Roman cities with only a friendly Ally marker. Friendly controlled, subdued Barbarian Areas are handled as per 12.3.
[9.0] March Phase
Forced March
[9.3] A player can move a unit two spaces during a single March Phase by paying for a Forced March.
All forced marching occurs during a single Movement Segment. A player must finish all movement, including Forced Marches, prior to engaging in any combat.
[9.3.1] The Cost of Sandals: The player must pay 1 Gold for each Legion and Allied unit as it makes a Forced March.
Leaders may 'ride for free' with a friendly Legion or Allied unit that has paid to Force March, or they can Force March separately for 1 Gold each (and see 11.2 for using your Supreme Leader in a Forced March).
[9.3.2] Pick Me: Forced Marches are conducted by individual units, not stacks. Units that begin stacked together need not be Forced Marched together. That could get expensive, folks.
[9.3.3] Non-Stop Marching: Units that Force March may freely move through enemy units. That is, movement is never blocked by enemy forces. A player cannot conduct a battle against enemy units that were moved 'through;' only when your units end in the same city as enemy units is there a battle.
[10.0] Combat Phase
Veteran Unit Durability
[10.1] Veteran units are not eliminated when they suffer a 'hit' in combat. Instead they can 'absorb' a hit by being reduced from veteran to regular units (i.e., flipping the counter over from its darker / veteran side to its lighter / regular side).
Looting
[10.2] When units are eliminated in combat, do not return them to the stock right away. Set them aside until after the battle ends.
The victor of a battle receives 1 Gold from the bank for every Heavy (e.g., Legion) and Light (e.g., Allied) unit on the loser's side eliminated in that battle (from scavenging the enemy's baggage trains and such).
Stacking and Supply
[10.3] Procedure: At the end of his Combat Phase (after all battles and looting; see 10.2), that player must check each location on the map where he has forces. If the number of his Legions plus Allied units there exceeds the city's Gold value, then he must pay the difference to keep those units supplied.
[10.3.1] Supply Costs: It costs 1 Gold per Legion and / or Allied unit above that city's Gold value to keep it in supply and remaining in place at that city. If this Gold cost is not paid, that unit is immediately eliminated. (Such eliminated units are chosen by the owning player.)
[10.3.2] 0 Value Cities: This means that players will have to pay for every Legion and Allied unit in a city whose Gold value is 0 (e.g., Rubicon).
[10.3.3] Leaders: Leaders are 'stack free' and do not count against a city's supply capacity nor require supply themselves.
Supply Example: Utica has a Gold value of 3. If Pompey was there with three Legions, no supply cost need be paid. If Pompey's force were 2 Allied units and 5 Legions, he would have to pay 4 Gold to keep them in supply, or eliminate one Legion or Allied unit (of his choice) for each Gold not paid to maintain his forces there.
[11.0] Leaders
Supreme Leader Feats
A player's Supreme Leader has some additional special abilities:
[11.1] When in Rome: If your Supreme Leader is in Rome during your Draw Cards Phase, you may draw one additional (+1) free SPQR card that turn.
[11.2] Onward: The Supreme Leader may always Force March (9.3) for free. In addition, units beginning a Friendly March Phase in the same location as that player's Supreme Leader may Force March with him as a group for half the normal cost (round fractions up).
- These units must remain with the Supreme Leader for the entire move.
- These units may not be dropped off along the way or moved to different locations.
- The Supreme Leader may not 'pick up' additional units as he Force Marches. That is, he can't add forces to his stack in the location that he moves through.
[12.0] Barbarian Areas
General Rule
In the Silver Rules, the Barbarian Areas are much more interesting.
Barbarian Invasion
[12.1] When the SPQR Event card Barbarian Invasion is drawn, a particular Barbarian Area causes trouble.
[12.1.1] Quo Vadis?: The player who drew this card rolls two dice and uses their sum to consult the Barbarian Invasion Table (see map) to determine which Barbarians are 'acting up.'
Note: Barbarian Areas controlled by a player are considered 'subdued' and will not generate invasions. Treat these outcomes as 'No Effect.'
[12.1.2] Invasion Procedure: Total the sword strength of both players' units in Roman cities (square, hexagon, and round) that are adjacent to that Barbarian Area.
If the players' sword strength total is equal to or greater than (=>) the (red) Strength value of that Barbarian Area, then the Barbarians are kept in check and nothing happens.
If the players' sword strength total is less than (<) the Strength value of that Barbarian Area, then Roman cities are 'looted' and each player rolls one die and loses that number of Gold. If he has insufficient Gold to cover this loss, he must eliminate the balance in sword strength from among his units (globally) on the map (his choice of which units to lose); i.e., just as in the Bronze Rules.
Subduing Barbarian Areas
[12.2] Although Barbarian Areas are not part of the Roman world, players' units may enter them. They are treated like other cities with the following exceptions:
[12.2.1] Independence: Players can never recruit units in a Barbarian Area.
[12.2.2] Self-Defense: Every Barbarian Area contains its own 'self-defense force' of notional (i.e., 'pretend' or invisible) units equal to its Strength value.
Each of these Barbarian self-defense units is a Regular (i.e., not a Veteran) Light (i.e., Allied-type) unit with a two sword value (i.e., XX). That is, they are all committed in battles before Legions, will hit on die rolls of 1 or 2, and require only 1 hit each to eliminate.
[12.2.3] Battling Barbarians in their Home Areas: A player whose forces enter an active Barbarian Area must attack its self-defense forces during his Combat Phase. His opponent rolls the dice for the notional Barbarian units. Unlike Romans, Barbarians cannot benefit in battle from any SPQR card, nor ever retreat or profit from looting (10.2). A Roman player can enjoy all of these things when fighting Barbarians.
If the Barbarians win the battle, they retain control of their area. If their territory is violated again, their self-defense forces become fully replenished and they will fight again at full strength.
If the Romans win the battle by eliminating all of the Barbarian's notional self-defense units, then that Barbarian Area becomes 'subdued.'
Taxing Barbarian Areas
[12.3] When a player controls a subdued Barbarian Area during his Tax Phase, he must designate it at that time and roll a die. If the result is less than or equal to (<=) his sword strength (+1 for an Ally marker) in that Barbarian Area, he collects that amount of Gold.
If the result is greater than (>) his sword strength in that Barbarian Area, he collects no Gold. Worse, if the die roll was a 6, that Barbarian Area 'revolts:' any Ally marker and all Roman units there are slaughtered (eliminated and returned to the stock, with any killed Leader's cards discarded) and that Barbarian Area is once again uncontrolled.
Maintaining Control of Barbarian Areas
[12.4] One player may move into and attack the other's forces in a subdued Barbarian Area. The Barbarians do not participate in any way during such Roman vs. Roman battles in their areas.
If the invading player is victorious, he then gains control of those subdued Barbarians.
If, at the end of any Phase, there are no Roman units in a subdued Barbarian Area, it immediately reverts back to Barbarian control and its self-defense forces become fully replenished.
GOLD RULES
(English translation of the official French Gold Rules v1.0.)
These Gold Rules replace or supplement the Bronze and Silver Rules.
[2.0] Game Equipment
New SPQR Cards
Several new SPQR cards are included in this expansion. Simply add them to the rest of the SPQR cards and shuffle, if you are playing with the Gold Rules. There is a gold circle at the top right of the card, which makes it easy to sort out and remove the cards of this expansion if you want to play the Bronze or Silver versions.
Barbarian Units
20 new Barbarian counters are provided in the Gold version of Caesar XL. They are square and two-sided and are either:
- brown (powerful intrinsic forces that are only used when a Barbarian Area is invaded and then removed after the battle), or
- green (weaker mobile forces that are placed on the map and remain until they are eliminated).
(The counter diagram shows, for each of Self-Defense (brown) and Mobile (green), the Veteran and Regular sides of the 'Light' and 'Heavy' types, plus Leaders.)
Barbarian units are always placed on the map on their dark (stronger) side. If they are hit in combat, they are flipped to their weaker side (lighter color) if they have one; otherwise they are eliminated. Note that if the Barbarian Leader of strength 2 takes a hit, it is not flipped, but eliminated like the other Leaders.
[6.0] Draw Cards Phase
Trading SPQR Cards
[6.2] A player may offer to trade any Action or Forum card that he has with the other player if they manage to agree. Action and Forum cards, plus Gold, may change hands. Although promises may be made, players are not obliged to keep them (it is all a matter of trust).
[7.0] Purchase Phase
Recruiting Veterans
[7.5] Newly recruited units may be placed on their veteran (darker) side if:
[7.5.1] Corresponding City: Veteran Legions can only be bought in Legionary Colony cities (hexagon). Veteran Allied units can only be bought in Allied Client cities (round).
[7.5.2] Gold Cost: There is an additional cost of 6 Gold (+6 Gold) to buy a veteran unit at its corresponding city (that makes 15 Gold for a Legion and 12 Gold for an Allied unit).
[9.0] March Phase
Training Your Units
[9.4] In addition to promoting a Legion or Allied unit after certain victorious battles or recruiting veteran units (7.5), players may also flip the counters of these units to their veteran (darker) side (+1 sword) by paying for 'training.'
[9.4.1] Leaders and Training: Units that are in the same area (thus 'stacked') with a Leader may be trained. One unit per Leader may be trained per March Phase.
[9.4.2] No Movement: Training is done during the March Phase in place of the movement of the unit and of the Leader that turn. These two units must stay in place during that friendly March Phase.
[9.4.3] Gold Cost: The cost of training a unit (and thus of flipping it to its veteran side) is 6 Gold.
[10.0] Combat Phase
[10.4] 'Breakthroughs': In each battle round, add one (+1) to the sword strength of each unit if the opponent has no unit of the same type opposite [Light infantry, Heavy infantry or Leader].
For example, if your opponent has no (or no more) Light infantry units (Allied units) during the battle, all your Light units have the advantage of having no direct opponent and instantly receive +1 to their sword strength.
[10.5] Optional Rule - A Wheelbarrow of Dice: For more fun and to stress the importance of Leaders' leadership during a battle, use this rule:
[10.51] The 'to hit' procedure: In a battle, each unit rolls a number of dice equal to its (modified) sword strength. For each unit (Heavy or Light), if one or more 1s are rolled among those dice, a single hit is inflicted on the enemy. Important: No more than one hit can be inflicted per friendly unit (Light or Heavy), regardless of the number of 1s rolled.
[10.51] Leaders: Unlike Light and Heavy units, Leader units inflict a hit on enemy units for each 1 they roll. Thus, they can inflict several hits per round.
Leaders such as Antony, Pompey and Caesar can be decisive in a battle, especially if their strength is increased with a Tactic card and if luck is with them!
[12.0] Barbarian Areas
General Rule
In the Gold Rules, the Barbarians make their own decisions.
Barbarian Invasions
[12.1] This rule is unchanged from the Silver Rules, but if the Barbarians are not kept in check by a Roman force (12.1.2), they will launch an invasion with their own units!
[12.1.2] Barbarian Invasion Procedure: Add up the total sword strength of the two players in the Roman cities (square, hexagon and round) adjacent to the Barbarian Areas.
If the players' total sword strength is equal to or greater than (=>) the (red) strength of that Barbarian Area, then the Barbarians are kept in check and nothing happens.
If the players' total sword strength is less than (<) the (red) strength value of that area, an Invasion Force is created. To create an invasion force, take the green (mobile) Barbarian units from the stock and set aside the unit types not allowed in that type of area, as shown on the "Barbarian Self-Defense Forces" chart (example: Sarmatia has no Leader allowed). Then, at random, draw from the stock (among the allowed units) a number of units equal to the strength of the area and place them in that area. If there are not enough allowed units available, take what remains, respecting the permissions.
[12.1.3] Moving Barbarian Invasion Forces: The newly placed Barbarian forces will then make an incursion (that is, move one area). To determine into which area the force will move, calculate the target value for each connected Roman or Allied city. To do this, take the Gold value of the city and subtract from it the number of Roman or Allied units present (Legions, Allied units and Leaders). The city with the highest target value (this number may be negative) is the one the Barbarian invasion force will go to. In case of a tie, roll a die to break the tie between the cities with equal target values.
Example: There is not enough sword strength adjacent to Parthia when it is activated. This creates an invasion force. The invasion force consists of 5 randomly chosen mobile (green) units (5 being the value of the Parthia area). These 5 units are chosen from 3 unit types (because Parthia's defense forces consist of these three types). One of the players draws at random from the available mobile Barbarian units: 1x Light, 3x Heavy and 1x Leader, and all are placed in Parthia and ready to move.
Quo vadis (or where are you going?). One of the adjacent areas, Armenia, has a Gold value of 2 (and has no garrison); Pontus is worth 3, -1 for an Allied unit; and Antioch is worth 4, -1 for a Roman Legion present. The area with the highest target value is therefore Antioch (with 4 - 1 = 3), and so the Parthian invasion force immediately moves there and fights the Roman Legion stationed at Antioch (see below).
[12.1.4] The Barbarians Fight: If there are Roman units in that city, the battle is immediate. The Barbarians benefit from no SPQR card, nor do they retreat, nor do they gain Gold by looting (10.2). They can exploit the benefit of a breakthrough (10.4) if applicable.
When a Barbarian invasion force gains control of a Roman city, that city is looted and each player immediately rolls a die and loses the equivalent in Gold of the result of that die (exactly as in Bronze Rules 12.12).
If that city already has an Ally marker, it is returned to the stock.
Barbarian Units in Battle Rounds
- 'Light units' fight in the 1st segment at the same time as Allied units.
- 'Heavy units' fight in the 2nd segment at the same time as Legions.
- 'Barbarian Leaders' fight in the 3rd segment with the other Leaders.
Subduing Barbarian Areas
[12.2] Players may enter Barbarian Areas, as in the Silver Rules, but in the Gold Rules, the Barbarians defend their territory with physical (= real) brown units (listed in the chart under: Barbarian Self-Defense Forces) instead of the intrinsic (notional) units. These units return to the stock after a battle.
Note that the rules for Taxing a Barbarian Area and Maintaining Control of Barbarian Areas remain the same as in the Silver Rules.