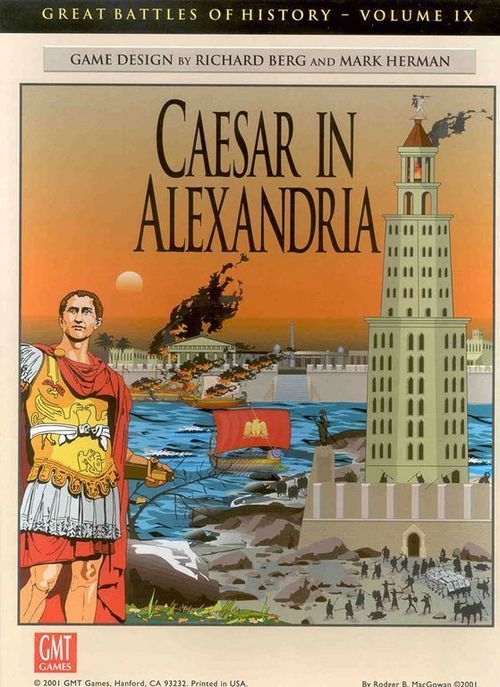
Caesar in Alexandria
Caesar in Alexandria Rulebook
Table of Contents
Table of Contents
- 1. Introduction
- 2. Game Components, Terminology and General Information
- 3. The Sequence of Play
- 4. Leaders and Activation
- 5. Movement
- 6. Facing and ZOCs
- 7. Missile Combat
- 8. Shock Combat
- 9. Galley Combat
- 10. The Effects of Combat
- 11. The Battle
- 12. The Scenarios
- Map Addendum
- (5.36) Terrain Effects and Movement Costs Chart
- Errata and Clarifications (GMT, November 2005)
1. Introduction
Caesar in Alexandria simulates the efforts of Arsinoë, sister of Cleopatra, to retake Alexandria from the Romans and Julius Caesar. The two main features of this extended battle/siege were street-fighting and a naval engagement.
Important Note to GBoH Gamers: Many of the rules and mechanics which are part and parcel of all previous GBoH series, land and sea, have either been changed or are not around anymore. Much of this has to do with the differences between street-fighting and the linear warfare of the era. Do not assume that any previous GBoH rules apply to Alexandria.
2. Game Components, Terminology and General Information
The game includes:
- 1 22x33" game-map
- 1 Sheet of 280 counters
- 1 Rule Book
- 1 Charts and Tables Folio
- 2 Galley Holding Box Cards
- 1 10 sided die
- 2 6 sided dice
2.1 The Map
The map of Caesar in Alexandria contains both hexes and, to represent the city, point-to-point movement along streets, which surround "Blocks". As such, its terrain is far different from other GBoH games. That terrain is discussed below.
Hexes use their printed number for identification. In Alexandria proper, Roads, which run generally east-west, are numbered; Streets, which run generally north-south, are lettered. A "Block" (or built-up area) is identified by the four surrounding roads/streets. Example: 2/3-K/L is the Block that contains the Palace.
The eastern end of Alexandria, as well as the clear and marshy land south of the city, has been excluded, as they did not see, nor would they in a game, any action.
2.2 The Playing Pieces
There are four types of playing pieces, or counters: Land Combat Units, representing the various types of fighting troops; Galleys, the ships of the respective Fleets; Leaders, the individuals who command the troops; and Information Markers used to note certain types of information necessary for play.
(2.21) Each land combat unit is a specific type—and (possibly) class (as illustrated below)—depending on its weaponry, body armor/protection and level of experience. All land combat units are rated numerically for Troop Quality (TQ) and Movement capability. Units (other than artillery) that are capable of firing missiles also have a Missile Indicator, indicating the type of missile used (A = arrow or J = javelin). The Land Unit Missile Table gives the Ranges over which these missiles may fire.
Design/Play Note: There is no Size Rating as in most other GBoH games. For informational purposes, each infantry unit contains about 200 men, archers about half. Thus, Caesar's defending force numbers around 5,200 legionnaires; Ganymedes' army numbers around 9,000, not including archers.
Major change from previous GBoH games: the reverse side of the counters does not show "Moved" status. In Caesar in Alexandria, the reverse side shows that the unit is Reduced (10.2).
(2.22) Each unit is of a certain Type, such as CO (cohorts), MI (Medium Infantry), etc. Cohorts (CO) are further subdivided into Class: either VET (Veterans) or REC (Recruits). These descriptions are used to determine the effectiveness of one type/class when fighting another.
(2.23) Examples of Land Combat Units (counter illustrations):
- Legion Cohort (Veteran). Front shows: Unit I.D. (6th Legion, 1st Cohort), Class (Vet), Unit Type (Legion Cohort), Movement Allowance, Troop Quality (TQ). The back is the Reduced side.
- Medium Infantry (Egyptian). Front shows: Unit I.D. (Egypt #1), Unit Type (Medium Infantry), Movement Allowance, Troop Quality (TQ). The back is the Reduced side.
- Archers. Front shows: Unit I.D., Missile Type (Archer), Unit Type (SK), Movement Allowance, Troop Quality (TQ).
(2.24) Galleys. Unlike the ships of our War Galley game, the galleys are the same size counter as the land units. Galleys are combat units. Galleys are rated numerically for Crew Quality, Ramming ability, transport capacity, and Movement. Each ship counter represents 3 ships. Because of the scale, we are not using the double-sized counters for galleys, as we did in War Galley. For those interested in background and detail, that game contains a lot of peripheral/historical information about ships, etc.
Galley counter: the front (Cruise Speed) shows Crew rating, Unit I.D., Ram Attack/Defense, Transport Capacity and Movement Allowance; the back is the Attack Speed side.
(2.25) Leaders have a somewhat different, and less detailed, set of ratings than in previous GBoH games. These are discussed in section 4.1. This is a major change from previous GBoH games.
(2.26) Informational Markers, such as "#'s" (representing Hits taken), "Rammed", "Captured", etc., are used to record certain game functions, as discussed below.
(2.27) Abbreviations
| Abbreviation | Meaning |
|---|---|
| Pysymmat. | Pysymmaticus |
| Bi | Bireme |
| Tri | Trireme |
| Quad | Quadrireme |
| Quin | Quinquereme |
| L.Bi | Liburnian Bireme |
| C.Tri | Cataphracted Trireme |
| T | Transport |
2.3 Charts, Tables and the Die
The use of each chart and table is explained in the rules. Many of the detailed Charts and Tables from previous GBoH games are not used.
The game uses a 10-sided die for all land-oriented die rolls; the '0' is treated as a '0' (not a '10'), and is less than '1'.
One or Two six-sided dice are used for naval combat and other naval activity. Each table notes which dice are used. If two dice are used (abbreviated 2d12 in the rules), the values of the individual die's are totaled to produce a sum between 2 and 12.
2.4 Terminology
Knowledge of the following game terms will be useful for play.
- Activated Leader: The leader who has been selected to undertake the Player Turn. Only one leader may be active at any one time.
- Block: the sections of the map, inside Alexandria, that represent closely-built urban areas, with narrow streets. Very confining.
- Boarding: hand-to-hand combat between troops on mutually grappled galleys. The core of Roman naval tactics.
- Class: Sub-category within the Cohort type, used to differentiate between levels of training and experience. Cohorts are either Veterans or Recruits.
- Cohesion: A unit's ability to remain in an organized, fighting formation. In the game this is measured in the form of Cohesion "hits".
- Crew Rating: A measure of a galley crew's ability to perform naval activities. This is the single most important galley rating.
- DR/DRM: Die roll, and Die roll Modifier.
- Fatigue: The adverse affect on a galley of repeated naval combat or high speed maneuvering.
- MA: Acronym for a unit's basic Movement Allowance. It also represents a unit's maneuverability vis a vis other units in the game.
- Missile Volley: Friendly units throwing javelins, shooting arrows, or firing artillery at enemy units.
- MP: Movement Points.
2.5 Game Scale
Each hex is approximately 125 yards from side to side. The distance between points varies, but it's around that number. The various events of Alexandria took place over several days, maybe weeks. We have compressed them into one, continuous event.
2.6 Game Length
Those familiar with the rules, and the tactical problems the game presents, should finish this in one long sitting. The smaller scenarios can be finished in about 3 hours.
3. The Sequence of Play
The game consists of an indeterminate number of Player Turns, as below. The players alternate turns, subject to a successful Turn Seizure (4.5), until one player achieves his victory conditions or until both armies reach their Exhaustion Level. The player currently conducting the Player Turn is the active player. When he is finished, the Player Turn passes to the opposing player.
The Player Turn
A. Activation Phase. The active player may do one of the following:
- Activate one of his Subordinate Leaders and any eligible combat units (see 4.2) that are within his Command Range; OR
- Activate his Fleet. This activates all the player's Galleys and any/all units transported by them; OR
- Activate all his Auxiliaries (see 4.2); OR
- Move his Overall Commander. No other units are activated. Steps C-F are skipped if the player chooses to move his Overall Commander.
B. Movement and/or Missile Fire Phase: Activated units may Move and/or conduct Missile Fire. Galleys may Ram, Rake, Grapple, etc.
C. Shock Combat Phase: Activated land combat units conduct Shock or Boarding Combat.
D. Fleet Status Phase (Fleet activation only): The active player performs the following actions, in the order listed, for all of his affected Galleys at the end of a Fleet activation.
- The player may attempt to Disengage any of his Galleys that are Fouled (see 10.42).
- The player must make a Firefighting Check for each of his Galleys that are On Fire (see 7.32). If any of his Galleys remain On Fire, the player must check to see if the Fire spreads to any galley Grappled/Fouled to it (7.33).
- The player must check to see if any of his Rammed Galleys sink (see 9.42).
E. Exhaustion Level Check: See 11.3. Exhaustion is not used in the two short scenarios.
F. Victory Determination: See 11.0 and 12.0.
(Transcriber note: the cross-references in this section are shown as corrected by the official errata: 2.25 to 4.1; Player Turn to 4.2; Turn Seizure to 4.5; the two references to 4.12 to 4.2; Fleet Status #3 to 10.42; Exhaustion to 11.3.)
4. Leaders and Activation
4.1 Leader Counters
Overall Commander (counter: Name, Seizure Rating, Movement Allowance, Rank, Initiative, Charisma (Heroic)). Example: J. Caesar.
Overall Commanders have the following Ratings:
- Seizure: The number of times that leader may attempt Seizure during the game. Use a Strength marker to indicate the number of attempts used.
- Initiative: This rating is used to determine the success of an attempt to Seize the Initiative from the opposing player, cancel his activation and substitute yours.
- Charisma: Denotes his ability to spur his troops on to greater efforts. The rating is used to adjust the die roll on the Shock Combat Results Table in his favor for combat units with which he is stacked. Heroic Charisma is the same as Charisma, with the addition that it applies to all units in an adjacent land hex or point of the leader. The additional effects of Heroic Charisma do not apply if the leader is in a Block or on a Galley.
- Movement Allowance: The number of Movement Points available for the turn.
Subordinate Leader (counter front: Name, Rank, Command Range, Movement Allowance; with a Replacement side).
- Command Range: Denotes his overall presence as well as the effectiveness of his abilities: the distance over which that leader may exert his abilities. Unlike other GBoH games, the range is measured in Movement Points (see 5.11).
Play Note: It costs one additional Movement Point to trace Command Range into a friendly occupied hex/Point.
Design Note: We are tracing command differently to account for the various types of terrain and the very restrictive nature of city fighting.
4.2 Command Eligibility
(4.21) Roman Subordinate Leaders (Legates) may activate cohorts of their own legion, Artillery, or any Gallic MI (actually, dismounted cavalry). They may not activate Archers, Light Infantry, or cohorts from another legion. Archers, Light Infantry, Artillery, and the Gallic MI may be activated as Auxiliaries.
(4.22) Egyptian Subordinate Leaders may activate any land combat unit. Archers and Artillery may also be activated as Auxiliaries.
(4.23) The Overall Commanders, Caesar and Ganymedes, may not activate combat units.
(4.24) Command Eligibility Chart. See Charts and tables.
4.3 Leaders and Combat
This section covers general rules relating to leaders and enemy combat units. For specific rules for leader casualties from Missile Fire and during Shock, see 7.18 and 8.4.
(4.31) Leaders may not move adjacent to an enemy unit in a hex or point, or into an enemy occupied Block unless stacked with, or moving onto, a friendly combat unit.
(4.32) Leaders stacked with combat units threatened by Shock may, if the player wishes, Retreat one hex/point … but never into a Block. The instant any enemy combat unit moves adjacent to a leader alone in a hex/point/Block that leader may immediately retreat up to two hexes/points (no Blocks). The leader may not retreat through enemy units or impassable terrain. If the leader can't retreat, he is killed. Leaders aboard Galleys don't retreat.
(4.33) All leaders, other than Caesar and Ganymedes, may be Replaced when killed. At the end of the Activation in question, place the leader, replacement side up, on any friendly unit that the leader is eligible to command.
Play Note: "All leaders" includes those already on their Replacement side.
(4.34) If Caesar is killed, the Egyptians automatically win.
4.4 Leaders and Unit Activation
Combat units may not move or missile fire unless they are activated.
(4.41) When a Subordinate Leader is activated, eligible units (see 4.2) within his Command Range may be activated. The range is measured in Movement Points, whether they are Points or Hexes. Moreover, while a Command Range may be traced into a Block (and only from an adjacent Point); it may not be traced through a Block. A path is obstructed by hexes/Points occupied by enemy units, an unoccupied hex in an enemy Zone of Control (ZOC), or terrain a leader could not cross or enter. Friendly units negate enemy ZOCs for purposes of tracing Command Range. All other paths are considered unobstructed. Command Range may be traced from/to leaders/units aboard galleys that are Beached, Aground, in Slips, or grappled to the Heptastadium Causeway. It costs 3 MP to trace Command into/from a Galley that meets these conditions.
(Errata: the second sentence is changed to: "The range is measured and traced in Movement Points using land unit movement costs (see 5.31, 5.36, and 5.74).")
Example: Sosius is in Point 4-K. He could activate any Egyptian unit in any/all of the three adjacent Blocks plus all units in Points within 6 MP of his position. Note that it costs an additional MP to trace Command into an occupied Point. So if the Points on road 4 were occupied from Streets H through N (inclusive), only those units from Streets I through M could be activated.
(4.42) When a player activates his Fleet or Auxiliaries, all units of that type, regardless of location are activated. A Fleet activation also activates all land units that are on board the Galleys. These land units may missile fire, conduct Boarding combat, disembark and conduct Shock combat, etc.
(4.43) If the player decides to move his Overall Commander (per 3.0 Phase A, 4th bullet), no other units are activated. However, an Overall Commander may move (debark, use his Charisma) during a Fleet activation if he started the Player Turn aboard a Galley, or if stacked with an activated land combat that moves. In this instance, the OC must remain stacked with the combat unit.
(4.44) There is no prohibition as to which Leader (or Auxiliaries/Fleet) may be selected in a given Player Turn. Leaders aboard galleys that are Beached, Aground, in Slips, or grappled to the Heptastadium Causeway may activate themselves and any eligible units that meet the conditions in 4.41. Note that this is not a Fleet activation.
Play Note: This means that if the Roman player activates X Legion, followed by the Egyptian player activating his galleys, when the turn flips back to the Roman player, he may, again, activate X Legion.
4.5 Turn Seizure
(4.51) When it is a Player's Turn, and before that player designates which units he will activate, his opponent may attempt to Seize the Turn. To do so the seizing player rolls the die:
- If the DR is the same as or lower than the Overall Commander's Initiative Rating the first player's Turn is canceled and it is now the turn of the Seizing Player
- If the DR is higher than the Overall Commander's Initiative Rating, the attempt fails.
Play Note: And the penalty for failure is that the seizing player wasted one of his opportunities.
(4.52) A Player may attempt Turn Seizure as many times during the game as his Seizure Rating allows. Use a Strength marker under the leader to keep track of the number of Seizure attempts. A player may not make a Seizure attempt twice in succession, nor may he make an attempt on the first Player Turn of the game.
Example: The Egyptian Player, as Ganymedes, can attempt Seizure five times, success coming on a DR of 0-3 for each attempt.
(4.53) The opposing player may not attempt to Seize back the turn after a successful Seizure attempt.
Example: The Roman player has just completed his turn. It is now the Egyptian player's turn. The Roman player decides to make a seizure attempt with Caesar and succeeds. The Roman player now has a player turn instead. After the Romans take their turn, play now passes to the Egyptians. The Roman player cannot again make a seizure attempt per 4.52, so the Egyptian player will be able to complete his turn.
5. Movement
5.1 Movement Allowances
(5.11) A unit's printed Movement Allowance is the basic allowance for a single Player-Turn. An activated combat unit may move up to its printed MA. Units may always move less than the printed MA (but see 5.43).
Play Note: There are no Cohesion Hits for any movement (as in previous GBoH games), as sieges rarely require use of formations.
(5.12) Activated Subordinate leaders may move when activated, but only after all combat units have moved.
5.2 Terrain
The Alexandria map contains two different types of base terrain: Inside and Outside of the City. The area Outside of the city has a hex grid overlay as used in other games in the series. The Inside part of the City is divided into Blocks separated by the streets/roads of the city which connect a series of Points. Units Inside the City are positioned in either the Blocks or Points—they are analogous to the hexes Outside of the City.
(5.21) When moving Outside the city, units move from hex to adjacent hex paying the appropriate Movement Point cost to enter the hex, or cross a hex side.
(5.22) A unit may move from Outside the City to/from Inside the City by moving from a hex to an adjacent Point. Hexes adjacent to a Point are marked with a small arrow. A unit may move to/from a hex to a Point only if they are connected by an arrow. A unit in a hex may not move directly into a Block nor may a unit move from a Block to hex; it must first move into a Point. Furthermore, a unit may not move from a Block to another Block without first entering a Point.
Example: Point 4-D is adjacent to hexes 2023 and 2024.
(5.23) When moving Inside the city (including the town on Pharos), units move from Point to Point along the streets/roads, changing directions as they wish. A unit may move into a Block from any adjacent Point. It costs a unit its entire printed Movement Allowance—and, thereby, a full Activation—to move into a Block. A unit in a Block may move into any adjacent Point by expending the appropriate MP cost (see 5.36).
Example: 2/3-K/L is the Block that contains the Palace. A unit may enter the Palace Block from the three Points between 2/3-K inclusive and the three points between 2/3-L inclusive.
(5.24) Canal: Units moving from Point to Point ignore the canal. Units moving from a Point into a Block (and vice versa) may not cross the Canal. Units may cross a canal to/from a Point to a hex or from a hex to another hex at the cost of one additional MP. The canal separates Block 2/3 - N/O into two separate blocks. Units may not enter Block 2-M (bordering hex area) through a canal hex side nor may they move from one Block to the other across the Canal.
Example: A unit in Point 3-O cannot move into Block 3/4-N/O.
(5.25) Heptastadium Causeway: Though portrayed as hexes on the map, Causeway terrain is treated as if it were a Point for all purposes unless otherwise stated in the rules. These "hexes" are treated as land; they may not be entered by Galleys with one exception: Galleys may move through the two "Overpasses" at each end, as if they were sea hexes. Galleys may not end movement in these hexes, nor may these hexes be entered if occupied by an enemy land unit, or if both egress hexes are occupied by other galleys.
(5.26) The Lighthouse: This feature is treated as a hex for movement and combat. The player who has any combat unit in the Lighthouse may deny entry of any galley into 3931-2 and/or 4032. Furthermore, units in the Lighthouse benefit from favorable combat modifiers and have special stacking restrictions.
(5.27) Slips: Galleys that move into a Slip hex—representing the docks and sheds that housed the fleets—must cease movement for that player turn, though they may then be turned around to face in whatever direction the player wishes. A galley may not move from one Slip hex directly into another Slip hex. Galleys in Slips may not be Rammed or Raked; they may be Grappled (and Boarded) and fired at. In addition Slips may be set afire by Missiles, if no galleys are in the Slip. If there are galleys present, they must be the target.
(5.28) Shoals: Galleys pay a higher Movement cost to enter a Shoal hex. In addition, for each Shoals hex entered, the player rolls a 1d6. If the DR is 6 or higher, the galley has run aground and is stuck for the rest of the game. Galleys at Attack Speed Level add (+1) to this die roll.
(5.29) Beach: Galleys that end their turn in an eligible coastal hex may Beach in order to debark land units. Galleys may beach on Pharos only on the northern side of the island (from 3204 through 4130, inclusive), or on the coastal hexes west of the city (from 1005 through 1814 inclusive). See 5.48.
(Errata: the reference to hex 3204 should read hex 3304.)
5.3 Movement Restrictions
(5.31) A unit expends Movement Points for each Hex, Point, or Block it enters, as per 5.36. As a unit moves it traces a path of contiguous Hexes/Points through the hex grid, paying the cost of each Hex/Point entered. One unit's movement must be completed before another can begin, even if they start stacked together.
(5.32) A unit may be moved in any direction or combination of directions. However, a combat unit may only enter a Hex or a Point which is to its Front (6.11, 6.15, and 6.2). In order for a unit to change direction to its Flank/Rear it must first change facing (6.12 and 6.2) by pivoting in the Hex/Point it occupies. Exception: Galleys may Backwater (see 5.47).
Important Play Note: The above applies to Hexes and Points, not Blocks. A unit may enter a Block from an adjacent Point regardless of facing.
(5.33) Units may not cross Walls, except at the Main Gate. Land units may not cross an all-sea hex side unless transported by a Galley, while Galleys may not move across an all land hex side. All unit types may enter Coastal hexes.
Play Note: The thin stretch of land at the eastern end of Pharos (hexes 4020-4027) is an example of a land hex side that a Galley could not cross.
(5.34) A moving unit must have enough MP's to pay the terrain cost of entering a Hex/Point/Block; if it doesn't, it cannot enter that Hex/Point/Block. Units also may have to pay movement point costs to change facing; see 6.1 and 6.2.
(5.35) Galleys may move into and through sea hexes that also contain a city wall with no penalty. However, the player may not debark units in those hexes (see 5.63). Galleys may not move through the mole guarding the King's Harbor.
(Illustrated on the page: galley movement costs of 1 MP for a normal sea hex and 2 MPs for a Shoal hex, where a 6 on 1d6 means Run Aground; Turn Around costs 2 MPs; Change Facing does not cost extra MPs during movement; Backwater movement costs 2 MPs per hex plus Half Speed (10.44).)
(5.36) Terrain Effects and Movement Cost Chart: This chart gives the Movement costs for each type of unit moving (or changing facing in) into/across a specific type of terrain.
5.4 Galley Movement
The Movement Ratings for the galleys in this game are used rather differently than in War Galley. There is no Wind used in this game.
(5.41) Each Galley is always at one of two Speed Levels: Cruise (the front of the counter) or Attack (the reverse). The Speed Level determines which types of actions (Ram, Beach, etc.) a Galley may use during the activation. The Movement Allowance represents the maximum number of Movement Points (5.31) that galley may expend during its turn.
(5.42) The Speed Level for each ship—which side of the counter to use that turn—is determined at the start of each Activation. Speed Levels are determined for each galley individually, prior to any movement. Galleys that are immobile, Crippled, have a Fatigue Level of 4 or more, or have had their Movement Allowances reduced to half through Collision or Capture must be placed at Cruise Speed. For all other galleys, the player may choose either Attack Speed or Cruise Speed.
(5.43) The actual number of Movement Points that a Galley will use that turn is chosen—and announced—prior to actually moving the ship, and the Galley must then use all of those announced MP, unless it either Rams, or collides with, another ship, or runs aground. Galleys at Attack Speed must declare at least two Movement Points of movement.
Example: A Liburnian Bireme is at Cruise speed, which means the player may expend from 0 to 8 MP when moving the ship. The player decides to row at a speed of 5 MP, which he announces prior to moving the unit. The Bireme must now expend all 5 MP … unless something stops it from moving (such as beaching).
(5.44) Galleys that are Rammed, Fouled, Grappled, Beached, have Run Aground, or who have 0 Movement Points available (due to Fatigue, etc.) are immobile. Rammed and Run Aground galleys may not move or change facing for the remainder of the game; the others may move once the condition has been removed (through Recovery, Disengage, or un-Beaching).
(5.45) Crippled (Raked) galleys may move one hex. However, they may never move straight ahead; they must always move into the bow/flank hex in the direction indicated by the Crippled marker. Crippled galleys never earn Fatigue nor are they affected by Fatigue.
Play Note: A Galley may use Missile Fire, attempt to Grapple, and use Boarding Combat, since these activities do not cost any Movement Points.
(5.46) Galleys at Attack Speed that receive adverse combat or Fatigue results that cause them to fail to meet the conditions outlined in 5.42, are immediately placed at Cruise Speed. If active, the player checks for Fatigue per 5.5.
(5.47) Backwater. A Galley at Cruise Speed may move into an all sea hex (only) directly to its Stern or Stern/Flank. The Galley may not use any type of forward movement that turn and may not change facing within a hex but it can change direction by backwatering into a stern/flank hex.
(5.48) A player may beach a Galley that is at Cruise Speed by stopping in an eligible Coastal hex, per 5.29. The galley may not change facing when it beaches. Place a Beach marker on the galley. A beached galley may un-Beach by using Backwater (only) to leave the hex (see 5.47). A galley is considered at Half Speed on the turn it un-beaches (see 10.44). In order to un-beach, the galley must have sufficient movement points to leave the hex.
(5.49) Galley Speed Level Effects Table. See Charts and Tables.
5.5 Galley Crew Fatigue
(5.51) At the end of each Fleet activation, the Active Player checks for Fatigue on any galley that is at Attack Speed, or any galley at Cruise Speed that used all its allowable Movement Points, or one less. (Thus a galley with an MA of '8' would be checked if it used '7' or '8' MP.)
Play Note: The "allowable" Movement Points are adjusted for Fatigue, Half Speed, etc. so a Galley with a Cruise Speed of 8 and two levels of Fatigue would have to roll for Fatigue if it uses 5 or 6 Movement Points. Crippled galleys do not earn Fatigue.
(5.52) To check for Fatigue roll a 1d6 and compare it to the Crew Rating.
- If the DR is higher than the Crew Rating, the ship incurs one Fatigue Level. Place a strength marker on/under the unit (or on the appropriate Galley Holding Box) indicating its current level.
- If the DR is equal to or lower than the Crew Rating, nothing happens.
(5.53) A galley that attempts Avoidance earns an automatic Fatigue level, as per 5.92.
(5.54) The Fatigue Level of a galley lowers the number of Movement Points available to a Galley by the amount indicated. Thus, a galley with a printed Movement Allowance of '8' that has a Fatigue Level of 2 may move only 6 MPs that activation. Galleys with a Fatigue Level of 4 or more must use Cruise Speed.
(5.55) No Galley may incur more Fatigue than its Movement Allowance. Crippled galleys do not earn Fatigue.
(5.56) Recovery. If an activated galley does not expend Movement Points during the player turn when the fleet is activated, it reduces its Fatigue Level by one. Replace the strength marker accordingly.
5.6 Galley Transport
(5.61) Galleys can transport land units. While on board, land combat units act as Marines (see 8.6). The ability to carry units is one of a ship's ratings; the rating being the number of land units (including artillery) that the ship may carry. Leaders do not count against the limit. Land units on galleys move during a Fleet activation. Galleys may transport any land unit except Light Cavalry.
Play Note: Units embarked on Galleys should be placed beneath the Galley counter (or on the appropriate Galley Holding Box).
(5.62) Only units that start a Fleet activation embarked on ships may be transported. To embark for transportation, a land unit must move onto the Galley paying the embarkation cost during that land unit's activation (see 5.36).
(5.63) Land units may debark from—leave—a Galley in an eligible land hex during a Fleet activation, or during a leader activation if the Command Range/Command eligibility rules conditions are met. The debarking units are placed in any adjacent land hex or point free of enemy units (it can be in an enemy ZOC) and faced in any direction. Stacking limits must be observed. The Player may only debark units from Galleys that are Beached, in Slips, or Grappled to the Heptastadium Causeway. Units may not debark onto an Overpass space (5.25). Land units may embark/debark from/to the land hex for that Slip (see map), even if it would apparently move through a Wall. Land units that debark may/must Shock attack per the Shock combat rules (see 8.11 and 8.2).
Example: Two Egyptian galleys move into slips and debark the two units they are each carrying. The units may be placed in any adjacent hex or point in any facing desired. They may move no further that turn.
(5.64) Land units may move from a Galley to any (one) adjacent friendly galley—Grappling is not required—as long as Transport Capacity limits are met. The galleys in question must begin the activation in each others flank hexes and must both be at Cruise Speed. Land units may perform this transfer only once per activation. The galleys may move after the transfer, but all involved are considered at Half-Speed (see 10.44).
5.7 Stacking
Stacking refers to having more than one unit in a Hex/Point/Block at the completion of movement.
(5.71) Stacking for land units is determined by location.
- Land Hexes: Two combat units of the same type (CO, HI, etc.) may end movement in the same hex. In addition, one artillery unit may stack for free. For Roman cohorts to stack together, they must be from the same Legion. Any friendly unit may move through a friendly occupied hex.
- Causeway: Only one land unit, of any type, may occupy a Causeway space at any time. A combat unit cannot move through a Causeway space occupied by another combat unit.
- Points: One combat unit and one artillery unit may end movement in a Point. A unit may move through a friendly unit in a Point.
- Block: Up to four combat units of any type may sit in a Block. Both sides may occupy the same Block (up to 4 units each).
- The Lighthouse: One Archer and one other non-Artillery unit of any Type.
- Galley: Land combat units up to its Transport Capacity.
(5.72) Only one Galley counter is allowed per hex at any time. Exception: two galleys may occupy the same Slip. They still move separately.
(5.73) Leaders and informational markers do not count for stacking purposes. A Hex/Point/Block may contain any number of leaders/markers.
(5.74) It costs a land combat unit one additional MP (+1 MP) to enter a friendly occupied Hex/Point. The unit may remain there if the stacking restrictions are met. If the player decides (or is required to) continue to move the unit, the moving unit undergoes a TQ Check. The player rolls the die. If it is higher than the unit's TQ, it takes a Cohesion Hit. There is no TQ check for the stationary unit.
- Exception #1: There is no additional MP cost nor is there a TQ check when any unit moves through an artillery unit alone in a Hex/Point.
- Exception #2: There is no TQ check when any unit moves through units occupying a Redoubt hex, though the moving unit still pays the additional MP cost.
- Exception #3: Galleys do not pay any additional movement points to enter a Coastal hex containing friendly land units, nor do friendly land units pay any extra MP to enter such a hex with a Galley (they would pay an embarkation cost if that was the intent).
(5.75) A friendly unit may never move into a hex or Point containing an enemy combat unit or into an occupied Causeway space. This prohibition applies to galleys entering a coastal hex with enemy combat units and vice versa. A unit may enter a Block containing enemy units.
Exception: A Galley may enter a hex with enemy Galley to conduct a Rake attack (see 9.2).
(5.76) An activated unit may change its position in a stack by expending all of its Movement Points to do so. If the player desires to move only one unit from a stack, only the top unit may move. A unit moving into a hex/Point/Block to stack is always placed on the bottom.
Play Note: Stacking order applies to units on Galleys and in Blocks.
(5.77) Stacking has the following effects on combat:
- For Missile Fire, see 7.12
- For Shock Combat, see 8.11
- For all TQ die rolls for Stacked units, add one (+1).
- If 10.12 does not take precedence, Shock hits are distributed equally, with the "odd" hit going to the top unit. If attack is from the rear, it goes to the bottom unit.
(5.78) Stacking Chart. See charts and Tables.
5.8 Orderly Withdrawal
Orderly Withdrawal is a form of voluntary retreat carried out by non-active units during an enemy Player Turn, in the face of an approaching enemy.
(5.81) During enemy movement, any friendly land combat unit (see 5.9 for Galleys) may avoid contact with an enemy non-Cavalry unit the instant it moves either within two hexes, or into an adjacent Point, of the friendly, "defending" unit. Units that start Movement within two hexes, or in an adjacent Point, do not trigger Withdrawal. Units entering Blocks do not trigger Withdrawal, nor may units in Blocks withdraw. A unit that is in an enemy ZOC may not withdraw.
Play Note: Unlike other GBoH games, any unit may use Orderly Withdrawal. There are no Movement Allowance restrictions.
(5.82) A player decides whether or not to Withdraw a unit the instant 5.81 is met. He then moves that unit one or two Movement Points, his choice, in any direction that will move it farther away from the approaching unit. The unit must maintain its current facing.
(5.83) At the completion of withdrawal, the unit may change facing if it is in a hex. If the Withdrawing unit was approached from a rear or flank hex (i.e., the hex into which the enemy, moving unit could have entered next) it suffers one Cohesion Hit before withdrawing. If such penalty would cause the unit to be eliminated, it may not Withdraw.
Play Note: The above case (5.83) applies to hexes, not to Points.
(5.84) A unit may withdraw an unlimited number of times during a game turn. No movement points are expended nor do the units need to be in range of a leader.
(5.85) Orderly Withdrawal takes place during the opposing player's Movement—a unit may not Withdraw in the Shock Combat phase. The attacking/moving unit may continue to complete its movement in the face of such withdrawal.
(5.86) A Leader stacked with a combat unit may Withdraw with the combat unit. They may withdraw to separate hexes/points or the same hex/point.
5.9 Avoidance
Avoidance is the naval version of Orderly Withdrawal.
(5.91) During enemy movement, any friendly Galley that is threatened—or thinks it is threatened—by an active Galley may use Avoidance the instant the active Galley moves into an adjacent hex. The active player does not have to indicate anything of what he is going to do.
(5.92) To attempt Avoidance, the owning player rolls the die (1d6).
- If the DR is equal to or lower than the Crew rating, the galley may move one hex directly backward or forward. The galley incurs one additional Fatigue level.
- If the DR is higher, the galley may not Avoid, and there is no Fatigue effect
(5.93) Galleys that are immobile, Crippled, have a Fatigue Level of 4 or more, at Half Speed, or have been Captured, may not use Avoidance. Galleys with a Fatigue Level of 3 or less may attempt Avoidance, but their Fatigue Level is added to the attempt die roll.
(5.94) An individual galley may attempt Avoidance an unlimited number of times within the restrictions of 5.93.
6. Facing and ZOCs
How a unit is faced depends on whether the unit is a land combat unit or a Galley, and in the former the type of terrain the unit occupies. Only land combat units in hexes exert ZOCs and then only into a hex.
6.1 Land Combat Unit Facing
(6.11) Hexes: When in a Hex, a unit must be faced so that the top of the unit (the side with its name) faces into the vertex of the hex (between two hex sides, as in the diagram). The two hexes to the front are called the Front Hexes; those to the side, the Flanks, and those behind, the Rear. A unit may only move into a hex to its Front.
(6.12) In order for a unit to change its facing it must pivot within its hex. All units pay a cost of 1 MP to change facing in any direction, regardless of the number of vertices shifted. The exceptions to this are:
- Archers, who never pay any MP cost to change facing
- Cavalry, which pay a cost of 1 MP for each vertex shifted
- Orderly Withdrawal, see 5.82
(6.13) A unit may not change facing while entering an enemy ZOC. Exceptions: Debarking units (5.63) and those advancing after combat (see 8.53). An activated unit that begins its player turn in an enemy ZOC may change facing in any direction, however, if it does so, the unit may not conduct Missile Fire or Shock Combat in that turn.
(6.14) Units stacked in a hex may each adopt any facing, even if one differs from the other. This will extend its ZOC and reduce the non-Frontal hexes showing to the enemy.
Play Note: This is a significant change from prior games in the series.
(6.15) Points: When in a Point, a unit must be faced so that the top of the unit (the side with its name) faces in one of the directions the street/road runs. The direction opposite the facing of the unit is its Rear; all other directions are considered Front. However, a unit in a Point may only move into a Point directly to its Front. A unit must first change facing per 6.12 to move to a Point to its side or Rear.
Play Note: Thus, a unit at a cross-road will face Frontal down the street and to its sides and present Rear to the street behind it. However, to move down the side road it would first have to change facing (and pay the +1 MP).
(6.16) Points and Hexes: If a Point is adjacent to hexes, the player may orient the unit as in 6.15, or orient the unit facing the hexes. If faced toward a street/road, the adjacent hexes are considered to be in the unit's Flank, if faced toward the hexes, the adjacent hexes are considered Front and any adjacent Points are considered Flank.
Example: A unit in Point 4-D is faced toward Point 5-D. Hexes 2023 and 2024 are in the unit's Flank. If the unit were faced toward 2003/4, these hexes would be Front while all adjacent Points would be in the unit's Flank.
(6.17) Units inside Blocks, in the Lighthouse, on a Causeway space, and aboard Galleys have no specific facing; all directions are considered Front for all game purposes. Units entering a hex or Point from these locations may position themselves in any allowable direction at no additional cost in MP.
Design Note: Facing in streets/blocks and other special terrain is much more liberal, as the units do not require/use as much linearity as in the open.
6.2 Galley Facing
Galleys must always face—pointed, as in the diagram—to one of the hex sides of the hex it is in. The direction in which it is pointed determines what is its Bow, what is its Flank (Bow and Stern), and what is its Stern. (Diagram: the hex side the galley points to is the Bow (Front); the two hex sides adjacent to it are the Bow Flanks; the two hex sides adjacent to the opposite side are the Stern Flanks; the opposite side is the Stern (Rear).)
(6.21) Galleys may change facing without leaving the hex by paying 1 MP per hex side changed. However, a galley that changes facing in this manner must be using Cruise Speed for that turn.
(6.22) Galleys may change facing one hex side, without cost, to move into a Bow/Flank hex side. Galleys that change their facing by moving forward may do so at any speed level. A Galley may not move into a Bow/Flank hex without first altering its facing to point its Bow at that hex.
Example: A Galley is in hex 3032 with its Bow pointed toward hex 3131. The Galley may move into its Bow/Flank hexes 3031 or 3132 by first facing the Galley (at no cost) toward either of the hexes.
(6.23) Turn Around. Galleys may turn around 180 degrees at a cost of 2 MP, simply by flipping the galley around, front-to-back. It may not do this if any enemy Galley is in an adjacent hex or if the Galley is at Attack Speed.
Play Note: Be aware of the difference between a Facing Change (6.21), which does not involve leaving the hex (just pivoting and/or repositioning the ship within the hex, at an additional MP cost) and Changing Direction (6.22), which involves movement into a Bow/Flank hex - and no additional MP cost for the change.
6.3 Zones of Control (ZOC)
The Zone of Control rules apply only to land combat units that occupy land hexes. Land combat units occupying Points or Blocks do not have a Zone of Control. Galleys and the Land units transported by them never exert a ZOC.
(6.31) All land combat units other than artillery exert a Zone of Control (ZOC) into their Front hexes. Archers exert a ZOC into both their Front and Flank hexes.
(6.32) ZOCs do not extend into a hex into which movement is prohibited. In addition, they do NOT extend across Wall hex sides, nor into or out of Points or Blocks.
(6.33) A land unit must cease expending Movement Points (thus the unit may not change facing) the instant it enters an enemy ZOC. A unit that begins movement in an enemy ZOC can move out of the enemy ZOC. A unit leaving an enemy ZOC may immediately enter another enemy ZOC, but it would then cease movement for the remainder of that Activation.
(6.34) If opposing units extend a ZOC into the same hex they are both considered to "control" that hex.
7. Missile Combat
Missile combat occurs during the Movement/Missile Fire phase of the Player Turn as part of—or instead of—movement at any point during the phase.
7.1 Land Combat Unit Missile Fire
(7.11) Land combat units with Missile Capability (see 2.23) may Missile Fire. There are three types of missile units in this game: Archers (A), Javelinists (J), and several types of ancient artillery. When activated, individual missile units can move, fire, or fire during movement. A unit may fire during movement only if it moved "forward" (towards the target) immediately preceding actually firing. Firing during movement does not cost any movement points; however, see 7.17[4].
Play Note: We have eliminated the ability of Roman CO to use pila, for a variety of reasons, including the mandates of street fighting and its narrow frontage, et al.
(7.12) Land combat units may Missile Fire once when activated, and when inactive, as many times as Reaction Missile Fire (see 7.4) is triggered. Only the top unit in a Stack may Missile Fire. Exception: Artillery may fire regardless of its position in the stack. Enemy Missile Fire affects only the top unit in the stack, unless the fire is through the Rear facing of the topmost unit, in which case it affects only the bottom unit.
Play Note: Stacking order does apply to units in Blocks and transported on galleys. In these cases, only the topmost unit may fire and be fired on since facing is irrelevant.
(7.13) A Missile unit may fire at any single target unit (the top unit if target is stacked) which is within its Missile Range—which extends from its Frontal and/or Flank hexes, or, from a Point, in the direction the street/road runs, or into an adjacent Block—and to which it can trace a Line of Sight (7.15). If a Point is adjacent to a hex, units may fire into/through those hexes. Missile Range is counted in hexes and/or points. For non-artillery units, each Point is treated as one hex away from the closest Point. For artillery units, see 7.4. Missile units must each fire individually; they may not combine fire.
Example: An archer in the Point 4-J may fire at a target in the Point 3-J at what would be a distance of '2' in terms of the chart. If there was a unit in the Point between those two, LOS would be blocked.
Play Note: Inside the city, Missiles fire along the street lines. No turning corners.
Design Note: In spatial terms, most of the Points are really two hexes distant. However, the restrictions of the streets defines the target a lot easier, and those same restrictions also serve to make targets much "denser" than in the open. Thus the trade-off.
(7.14) Missile units in Blocks may fire at units within their Block, or into Points adjacent to that Block, and then only if there are no enemy units in their Block. They may not fire into an adjacent Block.
(7.15) A missile unit may only fire at an enemy target unit to which it has an unobstructed Line Of Sight (LOS). If either the target or firing unit is in a hex, the LOS is calculated by tracing a path of hexes between the center of the hex (or Point) the missile unit is in and the same for the target unit, through the firing unit's frontal or flank hex sides. LOS is blocked by walls and/or Blocks and combat units. If the LOS path divides two hexes along their common hex side, then the LOS is blocked only if both hexes contain blocking terrain. If the LOS is blocked, missiles may not be fired.
Exception: Missile Units may always fire into adjacent hexes. If both units are in Points, the LOS is traced in the direction the street/road runs and is blocked by intervening combat units.
(7.16) A missile unit may fire at Galleys transporting land units. Only the transported units are affected by the results. Conversely, missile combat units being transported on Galleys may fire at combat units on land. For Galleys firing at other Galleys see 7.22.
(7.17) The Land Missile Fire Table is used to determine the effect of Missile volleys by land combat units. For each volley, a die is rolled. If the die roll is equal to or less than the hit chance of the missile unit at that range then the target unit takes one cohesion hit. If the die roll was greater than the missile units volley strength then it misses. The following die roll adjustments are made … and they are cumulative:
- +2 if the target is in a Block.
- +1 if fire is directed through a redoubt hex side (each end of the Heptastadium Causeway).
- +1 if an archer fires on a Cohort or Heavy Infantry target.
- +1 if the firing unit is an archer or cavalry that moved or will move. This modifier does not apply to foot javelins.
- +1 if the firing unit is Reduced.
- +2 if the target is an Archer.
Design Note: The lighter shafts of archers were usually most effective against the formidable shield-wall and body armor of the heavy infantry when firing "from above" (arced trajectory) into the body of troops. However, it appears that most units were in testudo mode, which negated that advantage.
Play Note: There is no Ammunition Supply rule.
All combat effects from missile combat are immediate and occur before any other unit is moved/fires.
(7.18) If there is a leader in the hex fired at and the Missile Die roll is a "0", there is a possibility that the leader has been hit. Roll the die again and consult the Leader Casualty table (8.41). Players may, if they wish, fire at a hex (in range) in which there is only a leader counter.
(7.19) Terrain Effects on Land Unit Missile Combat and Land Unit Missile Results Table. See charts and tables.
7.2 Galley vs. Galley Missile Fire
This section applies only to Missile Fire between Galleys. Rule 7.1 is used to resolve Missile Fire between units on land and those on Galleys. Galley vs. Galley Missile Fire is resolved with different procedure and uses its own Missile Fire Table.
(7.21) A Galley and its passengers may use Missile Fire:
- once at any time during its own Movement Phase, and
- once during an opponent's Movement Phase as Reaction Fire
Units on Galleys may not Missile Fire at units on land and those on Galleys in the same Player Turn.
(7.22) A galley may use Missile Fire against any/all adjacent Galleys. Its Missile Fire Strength is the sum of the following:
- '2' for each Archer unit on board
- '1' for each other non-Archer (including artillery) land combat unit on board.
Galleys with a Missile Strength of '0' may not Fire.
Example: A Quadrireme with a cohort and an Archer on board has a Missile Fire Strength of 3 (1+2 = 3)
(7.23) A galley may divide its Missile Strength between several targets. Thus, a galley with a Missile Rating of '2' may fire at each of two enemy targets with strength of '1'.
(7.24) To resolve Missile Fire by a Galley, the player notes his Missile Fire Strength and rolls one (1d6) die. If the die roll is equal to or less than the hit chance for its Missile Strength, one combat unit on board the target Galley suffers one cohesion hit. If there is more than one unit aboard, the top unit is hit. If the firing unit has Flame Missile capability (see 7.31), the target must check to see if it catches fire if the die roll is less than the hit chance. If the die roll is greater, the missile fire misses.
The following die roll adjustments are made … and they are cumulative:
- –1 if the target is immobile (5.44), or
- –1 if the firing Galley is Quadrireme, Quinquereme, or any other galley type transporting a Ballistae
Design Note: Quadriremes and Quinqueremes have "built-in" Ballistae on board.
7.3 Flame
(7.31) Quadriremes, Quinqueremes, and Galleys transporting Ballistae are considered Flame Missile capable. A target fired on by a Flame Missile capable Galley must check to see if it has caught fire when indicated by the Galley Missile results chart. Roll a 1d6. If the player rolls a 4–6, the target is On Fire; 1–3 means No Effect.
(7.32) A galley on Fire can do anything it could do without the Fire. However, during the Fleet Status Phase, the active player determines the effect of the Fire. Roll the die (1d6) and consult the Firefighting section of the Naval Conditions Chart.
(7.33) If a galley is grappled to, or fouled with, a burning ship, it too may catch fire. During the Fleet Status Phase, the active player, after all Firefighting rolls have been conducted, rolls one die (1d6) for each non-burning ship "attached" to one of his galleys still On Fire:
- If the DR is a 1-4, Nothing Happens
- If the DR is a 5-6, the ship has caught fire.
Play Note: Galleys that catch fire because of the above two mechanics are not eligible to roll on the Firefighting Table until their next activation.
(7.34) Flame capable Galleys may Missile Fire at unoccupied Slips to attempt to set them on Fire. If successful, the Slips are destroyed and the hex is considered impassable for the remainder of the game.
(7.35) Naval Missile Fire Table. See Charts and Tables.
7.4 Reaction Fire
The inactive Player's missile-capable units (including Galleys) may fire in reaction to certain enemy movements or actions. Land combat units may fire as many times as Reaction conditions allow. Galleys, when firing at other Galleys, may only fire once per opposing Player Turn.
(7.41) Retire Reaction: Whenever a unit leaves the ZOC of an enemy Archer, or leaves a hex adjacent to an artillery unit, that unit may fire at the moving unit. Any results are applied before the unit moves. Units in Points/Blocks may not use Retire Reaction Fire. All Retire Reaction Fire at units moving away from the firing unit is at a Range of two (2) hexes.
(7.42) Entry Reaction: Whenever an active unit enters the ZOC of an enemy missile unit or moves adjacent to an artillery unit—and this includes entry as a result of Advance after Combat—that enemy missile unit may fire a volley at the entering unit (range: one hex) before any further movement or friendly fire occurs. All effects from this missile combat occur immediately. Units in Points/Blocks may not use Entry Reaction Fire.
(Errata clarification: a unit entering a friendly occupied hex does not trigger entry reaction fire.)
Play Note: 7.41 and 7.42 only apply if the reacting unit is in a hex.
(7.43) Street-Shock Reaction (Points and Blocks Only): Units in Points and Blocks that are the object of a Shock attack, may fire at the attacking units. Any results are applied before the Shock attack is resolved.
(7.44) Return Fire: An inactive Player's Missile unit may Return Fire against an active enemy unit that fires at it, if the inactive unit has a LOS. Note that rule 7.12 applies even if the unit triggering the Return Fire is not the top unit on a stack. Such Return Fire is simultaneous with the active unit's fire.
(7.45) Galleys may use Reaction Fire once per enemy Player Turn against other Galleys that fire at it (per 7.44), or against adjacent enemy galleys that are attempting to Grapple, Ram, or Rake. Units on Galleys may use Return Fire against units firing from land hexes as many times as they are fired on per 7.44.
7.5 Harassment and Dispersal
This rule covers the tactic land based missile-armed units used to be effective without closing with the enemy. This rule applies only when the target unit is in a land hex; this rule does not apply to defending units in Points or Blocks.
(7.51) Harassment & Dispersal (H&D) capability applies to:
- Missile-armed LC (all targets)
- Missile-armed Light Infantry (against non-Cavalry)
Play Note: The only mounted cavalry in the game—there are a bunch of cavalry fighting dismounted— is some Egyptian LC used to keep the Romans from effecting a landing west of the city.
(7.52) Units wishing to use H&D must start:
- [LC] within 3 hexes—but not adjacent to—the "target" unit
- [LI] within 2 hexes—but not adjacent to—the "target" unit
They may not start in an enemy ZOC, and they must be able to trace a path of hexes clear of other enemy units to their intended target. The H&D path may be traced only through land hexes.
(Errata clarification: 7.13 applies to Harassment and Dispersal Fire.)
(7.53) If the unit satisfies the above, it may fire its missiles against the enemy target without moving (on the game map, that is). The procedure is:
- A. Note which unit is using H&D
- B. Note the target, as per above
- C. Fire the missiles as if they were being fired at one hex range
- D. Take return fire, if any (at a one hex range)
… all of this without moving the firing unit.
Design Note: Well, it is moving … to the target and then back to whence it came. We just eliminated the micromanagement of same. Think of it is an early form of the caracole.
(7.54) LI—but not cavalry—may be stopped during H&D by quick moving defenders. Anytime an LI undertakes H&D, instead of the defender using Return Fire, he may opt for trying to gain contact with the LI. To do this, he rolls the die. If the defending unit has a higher TQ than the attacker, add one (+1) to the DR.
- If the adjusted DR is higher than the LI's Movement Allowance, the LI must (move the unit to and) stop in the hex adjacent to the Defender … after throwing its missile. It may move no further, nor may it change facing.
- If the adjusted DR is the same as or lower, the LI completes its H&D
Example: The Egyptian LI makes an H&D attack on the Roman cohort. The range is one hex (the LI essentially moves forward one hex and then returns). The Roman player may try to gain contact with the LI—successful on a die roll greater than the LI's MA. The cohort has a higher TQ so the Roman player must modify the gain contact die roll by +1.
(7.55) A unit may use H&D through a friendly combat unit. However, doing so costs both the moving and stationery unit 1 cohesion hit each.
(7.56) H&D Stoppage Table. See Charts and Tables.
7.6 Field Artillery
Artillery, here, refers to small, shaft-propelling units (such as Scorpios) for field use. And larger ones (stone throwers, such as Ballistae, etc.) for firing at galleys.
(7.61) Artillery units have the following ratings (counter: Scorpio; Unit I.D., Unit Type (Light Infantry), Movement Allowance, Range, Troop Quality (TQ)):
- Range: How many hexes and/or Points the unit may fire through to reach a target. Count the target hex/Point, but not the firing hex/Point. Important: The nearest Point is considered to be one hex, but each Point past that is treated as two hexes (in terms of Range). So, a Point two points away would be a Missile Range of '3'.
- Type: If shock attacked, artillery is treated as LI.
- TQ: Same as other units
- Movement Allowance: Same as other units, except that they may not move into Blocks.
(7.62) Artillery, when activated, may Fire if it does not move; it may move if it does not fire. They may Fire any time during an opponent's activation that they are eligible for Reaction Fire.
(7.63) Artillery has no facing; they may fire in any direction (but only one direction per fire attempt), regardless of which direction the actual counter is pointed. They may not fire through Walls or Blocks, nor may they fire into Blocks. They may stack with other units in Hexes or Points and may fire from any position in the stack.
(7.64) Scorpios are anti-personnel artillery; they have effect only on land combat units and have no Flame Capability.
Design Note: Scorpios were "low trajectory" guns, with almost no ability to raise/depress the angle of fire. They are primarily defensive weapons.
(7.65) Ballistae (combat units not the ones' built into a Galley) have effect on both personnel and on galleys that come into range. Ballistae effect only targets in hexes, not in Points or Blocks. Ballistae firing at galleys are considered to have Flame capability (see 7.31).
(7.66) Artillery stacked with a non-artillery combat unit that must, or wishes to, Retreat may do so along with that unit. Artillery alone in a hex that wishes to Retreat (Withdrawal) may do so. However, artillery alone in a Hex or Point that suffers a Retreat result from Shock is, instead, eliminated.
8. Shock Combat
Design Note: Because of the nature of street fighting, as well as the fact that both "armies" were using (mostly) the same weapons systems, we have simplified the usual GBoH shock system somewhat.
Procedure: Shock Combat occurs in the Shock Combat Phase of the Sequence of Play after all activated units have moved and or conducted Missile Fire. Shock Combat is resolved somewhat differently based on the terrain the defender unit occupies: Hex, Point, Block, or aboard a Galley. Each shock combat is conducted as a series of steps performed in order for all units participating in shock combat—before the next step of shock combat is conducted. The Shock Resolution steps are:
- A. Shock Designation [8.2]
- B. "Shock-Must Check" marked units and their defenders Check TQ [8.3]
- C. Conduct Street-Shock Reaction Fire (Points and Blocks only) [7.43]
- D. Check for any Leader casualties [8.4];
- E. Determine results using Shock Results Table [8.5]
8.1 Shock Eligibility
Only activated units may engage in Shock Combat. An active unit may attack only once per Shock Combat Phase and a defending unit may be shock attacked only once. Who may/must Shock is determined by the terrain the defender is in. Moreover, an attacker may only conduct Shock into one terrain type (hex, point or block) per phase. Archers and artillery units may not Shock attack.
(8.11) Land Hex: If the defending units are in land hexes, the attacking player determines which units may/must Shock per 8.2. Units that do Shock, must Shock all units in their ZOCs, except those units being attacked by another, friendly unit in that Shock Combat Phase. If the attacker is in a Point, all units in adjacent hexes (as indicated by the arrows on the map) to that Point must be attacked as above. The attacker determines which units will be involved in each, individual combat resolution, within the restrictions that follow:
- A friendly unit may attack more than one unit, as long as the targeted defenders are all in the attacking unit's ZOC (or adjacent to the Point).
- An attacking unit may not split its attack capabilities, although two (or more) units may combine to attack one defender.
- Stacked units faced in the same direction must attack the same unit(s); they cannot split attacks into different hexes. Furthermore, the bottom unit may not be used for determining the Weapons/Armor Difference modifier. Note: This does not apply to Boarding type attacks.
Other than the above restrictions, the attacking player may divide his attacks among his units as he sees fit.
(8.12) Units in Points adjacent to enemy occupied hexes are not required to Shock attack. If they do, all such adjacent units must be attacked. Units in Blocks may not Shock attack enemy occupied hexes.
(8.13) Points: Units in Points may be attacked from a Point adjacent, an adjacent hex, or an adjacent Block. Only one unit can attack into a Point. All such attacks are voluntary, regardless of where the attack originates. Units in a Block may not attack an enemy occupied Point if there are enemy units in the same Block, or if it did not begin the player turn in the Block. Units attacking out of a Block never gain Position Superiority.
(8.14) Blocks: Units in Blocks may only be attacked by enemy units in that same Block; they may never be attacked from an adjacent Point or Hex. Units in Blocks are not required to attack, but if they do all attacking and defending units must participate.
(8.15) Galleys (Boarding): Units aboard Galleys may attack and be attacked if they are Grappled to another Galley or to a Causeway space (except for the Overpass hexes). See 8.6 for the details. Units on Galleys may not attack units on other land hexes without first debarking (see 5.63). Similarly, units on Galleys can't be Shock attacked by units in other land hexes.
8.2 Shock Designation
This segment is conducted for all active land combat units. Some units must Shock Attack, while others may choose to. All attacks must be designated before any are resolved.
A. All Cohorts (CO) and Heavy Infantry (HI) that moved during the current activation (this includes debarking from a Galley) and are in a hex with an enemy occupied hex in their ZOC must undertake a Shock Attack against all enemy units in their ZOC.
- These Attacking units do not undertake a TQ check.
- The Defending units must undergo a TQ Check
B. All other units (MI, LI, and LC) that moved during the current activation (this includes debarking from a Galley) and are attacking from a hex into another hex may choose to undertake Shock against all enemy units in their ZOC.
- These Attacking units must undertake a TQ Check unless the defender is an Archer and/or artillery unit.
- The Defending units do not undertake a TQ check.
In case of multi-unit attacks which cover more than one possibility, undertaking a TQ check overrules not taking one (if applicable). Use the appropriate Shock-Check markers to denote which units must make a TQ check [8.3]
C. In all other situations, Shock attacks are voluntary. Neither Attacker nor Defender undertakes a TQ check.
Example #1: An Egyptian HI begins the activation in a Point on Pharos facing 3720-3721. There is a Roman Cohort in 3720. Case C applies in this situation even if the Egyptian HI moved into the Point.
8.3 TQ Check
All units with a "SHOCK-Must Check TQ" marker (as per 8.2) must undergo a Troop Quality check by rolling the die for each unit, all such checks being simultaneous. If the die roll is higher than a unit's TQ:
- If the Attacker, it does not attack
- If the Defender it must Retreat one hex. If it cannot, it stands and defends, but with a +1 to attacker's Shock die roll.
Play Note: Given the significant amount of street fighting in the game, cases A and B and the TQ checks will be relatively rare. However, this segment insures that the attacking player designates all his Shock attacks before any are resolved.
8.4 Leader Casualties
Casualties to Leaders are determined prior to resolving the actual Shock attack. If either or both sides has a leader stacked with one of the units that will be involved in combat, the owning player rolls a d10 for each such leader. If the die roll is a 1-9, nothing has happened; if it is a '0', the leader has suffered a possible "casualty". The affected player now rolls a d10 and consults the Leader Casualty Table.
Killed leaders are immediately removed from play. See 4.33 for replacement.
(8.41) Leader Casualty Table. See Charts and Tables.
8.5 Shock Resolution
The active player now resolves each Shock attack in any order. He rolls one die for each attack, adding any/all applicable modifiers [8.51] and applies the result indicated on the Shock Combat Result Table to both the attacking and defending units. If either the attacker and/or the defender have more than one unit involved in the Shock attack, the owning player may choose which unit to use to determine the Weapons Systems modifier. However, this unit also must be used to determine the Training and Experience modifier and the Position Superiority modifier. Furthermore, that unit must take any Hits not evenly dividable among the units. If both players have more than one unit involved in the Shock, the defender declares his choice first.
(8.51) The following situations could provide Die roll Modifiers for the Attacker when rolling on the Shock Resolution Table.
- Position Superiority: The attacking units receive a +2 DRM if attacking through the defending units Flank or Rear. Units attacking out of Blocks do not get any Position Superiority, nor does Position Superiority apply to Shock combat within a Block, on Galleys, or in a Causeway space. If more than one attacker and/or defender are involved, the attacker gains this modifier only if all non-artillery defenders are attacked through the Flank/Rear.
- Weapons/Armor Difference: The Weapon Systems Matrix provides a DRM depending on what type of unit is attacking what type. Example: Egyptian Heavy Infantry attacking a Roman LI would give the Attacker a +3 DRM, but if that HI attacked a Roman Cohort, it would garner a –1 DRM (plus whatever other DRM applied).
- Training and Experience: Roman legionnaires ran the gamut from hardened veterans to This is a New Experience. The Roman Cohort Training Matrix provides a DRM. Example: When attacking with a Veteran (VET) unit, the Romans receive a +1 DRM.
- Charisma: Add the Charisma rating of any involved attacking leader, and subtract the Charisma of any defending leader.
- Unit Numbers: If either the attacker or defender has more units than the opponent that are involved in a single shock resolution, the player with more units uses the difference as a DRM ('+' if the Attacker; '–' if Defender). Artillery units are ignored when determining Unit Numbers. This modifier does not apply if the defender is in a Point or Causeway space (and this includes Boarding attacks against a Causeway space). Example: Two units shocking one would give the attacker a +1.
- Reduced Units: If any of the attacking units are Reduced, subtract one (–1) to the die roll. If any of the defending units are Reduced, add one (+1) to the die roll.
- Stands: If the unit can't retreat from a failed Pre-Shock Check, add one (+1) to the die roll.
- If any of the attacking units Debarked this turn, subtract one (–1) from the die roll (see 5.63).
(8.52) Shock Results: The results are expressed as a number of Hits taken, by both attacker and defender. If more than one unit (of the same player) was involved in that combat, cohesion hits are distributed as per 10.12. Units that have Cohesion Hits equal to or greater than their TQ are flipped to their Reduced side (plus any overage in Hits, which remain). Units without a Reduced side, or Reduced units that exceed their TQ, are eliminated. Defending units in Points that receive an "R" result must Retreat to the next available Point (see 10.3). Defending units on Galleys that receive a Retreat result are eliminated.
Example: An Egyptian HI (TQ 7) in Point 4-K decides to attack a Recruit Cohort of XXXVII Legion (TQ 5) stacked with a Scorpio in the Point between 4-K and 3-K. All units are at full strength and none have hits. There are no Leaders present. The Romans have their Scorpio conduct Reaction Fire and score a hit on the Egyptian HI. Steps 8.33 and 8.34 are skipped—this is a street fight and no leaders are around. The Weapons System DRM is -1. No other DRM's apply. The Egyptian player rolls a 9. The Romans take 3 hits and must retreat (here to 3-K which is vacant). The Cohort takes 2 hits per 10.12, while the Scorpio receives one. If either or both of the units are unable to stack in 3-K, they could retreat to into one of Points connected to 3-K, stacking limits permitting. The Egyptian HI takes one hit and advances into the Point vacated by the Romans units.
(Errata: the reference to steps 8.33 and 8.34 should be to sections 8.3 and 8.4.)
(8.53) Advance After Combat. Attacking units must advance into any Hex, Point, or Galley vacated by enemy units as a result of Shock (only). Units advancing into a hex may change their facing one (1) vertex upon finishing the advance, even if they are in an enemy ZOC. Units advancing into a Point may face in any direction. If there was more than one attacking unit, the unit that generated a DRM (either by providing the Weapons Matrix, Position, or Training modifier) must advance. If no such unit, the one with the highest TQ must advance. Tie? Player chooses.
(Errata clarification: only one unit advances after Shock whether it is a hex, Point, or Galley.)
8.6 Boarding Combat
(8.61) Galleys have no intrinsic manpower—(no "M" Rating, as they do in War Galley). They only have boarding capability equal to the number of land units they carry. Any non-cavalry land unit (including artillery) may be placed on board.
(8.62) A player may have his transported land combat units board a grappled enemy ship to capture it. Boarding takes place during the Shock Combat Phase of the Player Turn.
Play Note: Remember, land units on galleys are activated when their Fleet is activated.
(8.63) All galleys that are grappled to the same target may take part in the Boarding attempt. If one galley is grappled to two or more enemy galleys, the player may Board more than one galley. To do so he distributes his units among the galleys he has designated.
Example: An activated galley with three combat units is grappled to two enemy ships. The player decides to Board both enemy ships and divides his units, one against one enemy, and two against the other. He could have, instead, boarded only one using all three units.
(8.64) To resolve a Boarding attempt, the active player uses the Shock Resolution Tables (all of them), as per 8.5. In addition (to incurring Hits), the attacker has Captured the target if the defender suffers an "R" result. All defending units (including artillery) and leaders are eliminated. Place a "Captured by Rome/Egypt" marker atop the vessel.
Example: Two Roman galleys, each with two combat units (2 Veteran Cohorts and 2 Recruit Cohorts) board a galley that has one Egyptian MI unit. The activated player sends all four of his units onto the target. The Roman gets +2 for Weapons System, and opts to use the +1 for Veteran-level Training. With a +3 for Unit numbers, the total DRM is +6. He rolls a '2', adjusted to '8'. The attacker sustains 1 Hit (to one of his Veteran units), but has Captured the galley (and eliminated the defending units.)
(8.65) If a galley has no land combat units on board, it is automatically captured.
(8.66) Once a galley has been Captured it is always treated as a Captured Ship (see 10.41). If it is retaken, flip the marker to its "Re-Captured" side.
(8.67) Units on galleys Grappled to the Heptastadium Causeway may Shock attack (and be Shock attacked by) one adjacent enemy occupied space. The Shock attack is resolved as a Boarding attempt per 8.64 with the exception that an R result means that the defender in a Causeway space must Retreat into an adjacent vacant space, including a friendly galley grappled to the Causeway. If no such space is available, the defending unit is eliminated. In the reverse situation, the unit on land attempts to Board the Galley, the "R" result means the Galley is captured and all defending units are eliminated.
8.7 The Shock Combat Tables
(8.71) Weapons System Matrix. This gives a DRM that represents the relative military value of the units involved.
(8.72) Roman Cohort Training Matrix. This chart is used to determine whether or not the Class of Roman cohort (Veteran or Recruit) will have an effect on Shock.
(8.73) Terrain Effects on Shock Combat. This chart summarizes the Terrain effects on Shock Combat.
(8.74) Shock Combat Results Table. This Table is used to resolve shock combat in terms of Cohesion "hits" to both attacker and defender. See 10.11 and 10.12.
(8.75) Cohesion Hit and TQ Check Chart. Use this as a summary of when Cohesion Hits are applied and when TQ checks take place.
9. Galley Combat
The following section details the rules on combat unique to Galleys: Ram, Rake, Grapple, and Disengage.
9.1 Ramming
(9.11) Ramming is part of Movement and is resolved during the active player's Movement Phase. A galley must be at Attack Speed to attempt a Ram. An inactive galley may be the subject of an unlimited number of Ram attempts, usually until one succeeds.
(9.12) A galley may attempt to Ram any opponent's galley by starting in, or moving into an adjacent, Flank hex—never a pure Bow or Stern hex—with the bow of the moving Galley pointing directly at the target galley.
(9.13) To resolve the Ram attempt, the active Player consults the Ramming Table, cross-referencing the moving ship's Ram Attack Rating with the Ram Defense of the Target. The result is the dice roll (2d12) range needed to successfully Ram.
Example: A ship with a Ram Attack of '5' that has targeted a galley with a Ram Defense of '6' will need a dice roll of 10–12. The attacking Galley has a higher rated crew providing a +1 DRM to the ramming galley. The player could roll a '9' and still be successful, as the DRM would make the '9' a '10'.
(9.14) The Ram Attempt DR may be adjusted by the following:
Positive Die Roll Modifiers (help the Attacker)
- +1 if target ship is Crippled or immobile (5.45)
- +1 if attacking ship has a higher-rated Crew
Negative Die Roll Modifiers (help the Defender)
- –1 if target ship has a higher-rated Crew
(9.15) The possible results from a Ram Attack are:
Collision: The result is a "No/C", or the player's die roll does not produce a successful Ram, meaning the ram attempt was unsuccessful and the galleys have collided.
- The ramming galley may move no further that activation.
- Both attacker and defender incur one Fatigue
- Place a Half Speed marker on the ramming galley (but not the target). See 10.44 for the effect.
- The moving galley may not attempt to Grapple in the turn in which the Collision takes place; the Galley may use Missile Fire.
Rammed: If the Ram Attempt is Successful, place a "Rammed" marker on the target. See 10.42 for the effects of being Rammed.
Retract (after Ram): After successfully ramming, the attacking ship invariably tried to disengage itself from its wounded (and possibly sinking) target. To determine whether a successfully ramming galley has retracted, the player uses the original adjusted DR he used to determine the success of the Ram. He adjusts that die roll by subtracting the Crew Rating of the ramming ship. There is no "new" die roll.
- If the previous Ram DR for a successful Ram (adjusted by Crew) is within a 7-12 Range—the Fouled Range— the galley has failed to Retract and is Fouled. Place a Fouled marker astride the two affected ships.
- If it is lower than the Foul Range, the galley has Retracted. The galley may Backwater one hex … if such hex is available (see 5.44). If not, it stays in place, but is free of the rammed ship (i.e. it's not Fouled).
Example: Using the example, above, the ramming ship succeeded with a DR of '9'. That is within the Foul Range (natural 7-12). However, that ship had a '3' Crew which, subtracted from the original '9', produces a '6', which is outside the Foul Range.
Play Note: Retracting ships that have not used Backwater are still adjacent to the target ship, and, as adjacency is the only requirement for such, may be subject to grappling, boarding, missiles, etc. See the rules for those.
Fouled: If the ram attempt succeeds, but the ramming ship does not successfully Retract, the two ships are Fouled (and the target is still Rammed). Neither galley may move. See 9.44 for disengaging from Foul.
(9.16) Ram Results Table. See charts and tables.
(Errata: in 9.15 Retract, the second sentence should read "… the player uses the original unadjusted die roll …". A galley that successfully Retracts may move no further that activation. See the Errata section at the end.)
9.2 Raking Oars
(9.21) A moving galley may attempt to cripple an enemy galley by Raking the galley to shear off its oars. To do so, the moving galley must enter any flank hex from an adjacent flank hex. When using Diekplus; see 9.24.
(9.22) A Rake may be attempted only when the galley is using Attack Speed.
(9.23) Whether the Rake attempt is successful or not, the active galley completes its move, using all its designated Speed. The Rake attempt does not cost any MP. It may attempt another Rake (if possible), attempt to Ram, or Grapple (if eligible). And it may fire.
(9.24) The Diekplus Maneuver. Diekplus is a mechanic by which an active galley moves through an enemy galley that has its flank hexes occupied by other galleys or impassable terrain, solely for the purpose of attempting to Rake. To attempt a Diekplus, the raking galley must start in, or move into, the Bow or Stern hex (not Bow/Flank or Stern/Flank) of the galley that will be the target of the rake. The movement into those hexes must be straight ahead; a galley may not use Diekplus if it has to move to port or starboard to enter the enemy Bow or Stern hex.
(Errata: the last sentence should read "… a galley may not use Diekplus if it has to move to port or starboard to enter the enemy Bow or Stern hex, nor may it make such a turn within that hex.")
Play Note: The Diekplus Maneuver is used only against a Galley whose flanks are covered by other galleys or impassable terrain.
(9.25) To resolve the Diekplus, the following movement costs and requirements must be met … not including the MP cost to reach its position adjacent to, and pointing at, the target galleys' bow/stern hex:
- The moving galley expends two MP to move dead ahead, through that enemy galley, during which it attempts a Rake on either that galley or either adjacent galley.
- It must then have sufficient MP remaining so that it reaches a sea hex location not occupied by any other vessels, usually the hex beyond the stationary galleys.
After the Diekplus movement is complete, the active player rolls to resolve the Rake Attempt, as per 9.26.
(9.26) To resolve a Rake attempt, the player cross-references his Attacking ship's Crew Rating with that of the target. The result is the 2d12 dice range needed for success:
- If the Rake is successful, the sheared ship is now Crippled. Place a "Crippled" marker on top pointing to the hex the attack came from. For Diekplus, the raking player may point the marker in either direction. Otherwise,
- If the attempt was unsuccessful there is no other effect, other than that the moving galley must finish its allotted movement.
(9.27) Rake Die Roll Modifiers. These DRM take into account the differences in mobility and agility between ships. They refer to the current maximum Movement Allowance (not what the galley used during the turn).
- –1 if target ship has a higher adjusted (for Fatigue, etc) Movement Allowance than the raking ship.
- +1 if raking ship has a higher adjusted (for Fatigue, etc.) Movement Allowance than the target ship.
- +1 if target galley is immobile or is at Half Speed (see 10.44).
The above are all cumulative.
Example: A Roman Quadrireme (Crew 3) begins its activation in 2924 facing west. There are three Egyptian Triremes (all Crew 2) in hexes 3023, 2923, and 2824. All galleys are at Attack Speed and have no Fatigue. The Roman player decides to use all 8 of his Quadrireme's MA and declares a Diekplus against the galley in 2923. It moves through its target to hex 2922 expending 3 of its 8 MP. The Roman player resolves the Rake attempt modifying the DR by –1 (the Trireme has a higher Movement Allowance). The Roman player rolls an 8, modified to a 7 which is still in the successful range. The target is Crippled; place a crippled marker pointing to either of the adjacent galleys. The Quadrireme must continue to move expending all five remaining MP.
(9.28) A raked galley is Crippled. When that happens, place a "Crippled" marker atop the ship, with the arrow pointing to the flank side on which it was raked. See 10.43 the effects.
(9.29) Rake Results Table. See charts and tables.
9.3 Grappling
Grappling is the prerequisite for Boarding and then Capturing an enemy galley. As such it puts a premium on crew capability, with the subsequent Boarding attempt relying on land units on board the ships.
(9.31) Any active galley that ends its Movement sharing a common flank hex side with an eligible enemy galley (see 9.32) may attempt to Grapple that galley so that it may be Boarded. Grappling is undertaken in the Movement Segment; Boarding may take place only between (mutually) grappled ships; See 8.64.
(9.32) An active Galley at Attack Speed may attempt to Grapple any enemy galley that meets the common flank hex side requirement. An active Galley at Cruise Speed may attempt to Grapple an enemy Galley that is also at Cruise Speed or one that is Crippled or immobile. An active Galley that is Crippled or immobile may attempt to Grapple an enemy Galley that is also Crippled or Immobile. For Rammed Galleys see 10.42.
(9.33) The player attempting to Grapple, rolls the die (1d6).
- If the adjusted DR is equal to or lower than that player's Crew rating, the galleys are now grappled. Place a Grappled marker astride the affected units.
- If the adjusted DR is higher, the Grapple attempt has failed with no further effect.
The player making the attempt adjusts the die roll (all cumulative) as follows:
- –1 if the target galley is Crippled or immobile (see 5.45).
- –2 if the object of the Grapple attempt is an unoccupied causeway hex.
- +1 if the target galley is faced in the opposite direction to the galley attempting to grapple, and the target's speed is not reduced to half or less.
(9.34) A Galley may make only one Grapple attempt per activation, regardless of how many enemy galleys are adjacent. However, a non-activated galley may be grappled by more than one active galley in a given activation.
(9.35) Neither Fouled, Collided or successfully Retracted ships are considered grappled. To attempt to Board, they must still make a successful grapple attempt.
9.4 Disengage
Disengage covers a ship's ability to detach itself from a ship with which it has become Fouled or Grappled.
(9.41) The two types of Disengage each take place at different times.
- Grapple Disengage: This is part of Movement and costs all available or 2 Movement points (whichever is less) and is conducted prior to moving the galley. Movement can occur only if the attempt is successful.
- Foul Disengage: This occurs in the Fleet Status Phase of the Player Turn.
(9.42) Grapple Disengage. The player, rolls a 1d6 for each galley to which his galley is Grappled, and compares the result with his galleys' Crew Rating. The following DRM may apply
- –2 All Grapple Disengage Attempts.
- –1 The active Galley successfully repulsed a boarding attack in the opposing player's last Fleet activation.
- –1 ** The active Galley has a better Crew than the one to which it is grappled. This DRM is not usable if the player is attempting to disengage from more than one vessel during an activation.
- +1 The active Galley is Crippled or Fouled.
- –2 ** If the player controls both grappled Galleys in question—which usually happens when he has captured an enemy galley by boarding.
** = Player cannot combine these.
If the adjusted die roll is less than or equal to the galley's Crew Rating, the attempt succeeds. Remove the Grapple marker; the ship is free to move (if not still immobile, and it has already used 2 MP to disengage). If greater than the Crew rating, the galley remains Grappled.
Play Note: Galleys whose speed has been reduced below 2 MP may still Grapple Disengage though they will be unable to move.
(9.43) A Galley that is grappled to two or more enemy vessels may attempt to Disengage from all of these in the same Phase, all at the one, above, cost in MP. However, the Superior Crew bonus may not be used in any of the attempts.
(9.44) Foul Disengage. During the Fleet Status Phase, the active player rolls one die for each Fouled ship he has in play, comparing it with the ship's Crew Rating. Two (–2) is subtracted from the die roll.
If the adjusted die roll is less than or equal to the galley's Crew Rating, the attempt succeeds. Replace the Fouled marker with a Half Speed Marker. It may not return to "normal" until it has undergone on turn of movement at Half Speed. If greater than the Crew rating, the galley remains Fouled.
10. The Effects of Combat
Land combat units suffer cohesion penalties (called "hits") from combat. Too many cohesion hits reduce a unit's effectiveness and may destroy it. There are no Hits suffered due to Movement (as in other GBoH games).
10.1 Cohesion
Cohesion is a measure of how organized and effective a unit is at any point during the battle. The loss of cohesion is measured in Hits, which are applied against a unit's Troop Quality … sometimes automatically, sometimes after a die roll. The Cohesion Hit and TQ Check Chart summarizes when these occur.
(10.11) Each time that a unit suffers a cohesion hit place a Cohesion Marker—representing the total number of hits taken—on (or under) the unit.
(10.12) If there are multiple units involved in a single combat resolution, hits must be divided as equally as possible amongst these units, with any extra hits being given to the unit that was:
- 1st: Unit used to determine Position, Weapons System, or Cohort Training DRM;
- 2nd: 5.77, if applicable.
- 3rd: Player's choice
This rule applies even if it means that a unit will be eliminated.
(10.13) When a unit has absorbed cohesion hits greater than or equal to its Troop Quality Rating it is flipped to its Reduced side. Any Hits in excess of its original TQ are retained. If already Reduced or if it has no Reduced side, it is eliminated.
(10.14) Cohesion hits do not affect a unit's combat strength or capabilities in any way, other than to show how close it is getting to falling apart. Thus, a unit with a TQ of 6 and 4 hits has the same combat effect as one with no hits.
(10.16) The Cohesion Hit and TQ Check Chart lists the times during the game when a unit must undergo a TQ Check. These instances have also been noted throughout the rules, above. A TQ Check consists of rolling the die and comparing it to the unit's printed TQ rating. The Cohesion Hit and TQ Check Chart gives the results, usually one or more Cohesion hits when/if the die exceeds the rating.
Play Note: There is no Rally or Recovery, as in other GBoH games.
10.2 Reduction
Reduction reflects the loss of men in combat to the point that it affects the unit's performance. Reduced units have lower TQ than "Full Strength" units.
(10.21) Any time a Full Strength unit (other than one listed in 10.23) incurs Hits equal to or exceeding its TQ, it automatically becomes Reduced. Flip the unit to its Reduced side, keeping Hits that exceed those that Reduced the unit. Units that are already Reduced and reach their reduced TQ level are eliminated.
(10.22) Reduction affects combat as follows:
- If any Reduced unit participates in a Shock attack, there is a –1 DRM on the Shock Results Table.
- If any Reduced unit is defending against a shock attack, there is a +1 DRM on the Shock Table.
- Add one (+1) to all Missile die rolls by a Reduced missile-capable unit.
(10.23) Many units have no reduced side. If they reach their TQ, they're eliminated.
- The cohorts in the Roman VI and XXVII Legion
- All Light Infantry (LI), Archers, and Artillery.
10.3 Retreat
Units defending in a Point must Retreat when called for by the result of a Shock attack. The unit is immediately moved to an adjacent Point. If such Retreat would cause it to stack with a friendly unit, the unit may Retreat one more Point (through the stationary friendly unit), and the stationary unit undergoes a TQ Check. If a unit cannot finish its mandated Retreat it is, instead, eliminated. Units in hexes, Blocks, and on board Galleys never retreat. A unit may not retreat into a friendly occupied Causeway space, though it may retreat from a Causeway space onto a friendly Galley that is grappled to the Causeway.
10.4 Effects on Galleys
Galleys are affected in a number of ways due to combat.
(10.41) CAPTURE. Captured Galleys are treated like others of the newly owning player's for all purposes, except that they:
- have Crew Ratings of "0";
- have their Movement Allowance permanently reduced by half, rounded up. Note: This prevents the galley from using Attack Speed and thus limits its offensive capabilities.
A Captured galley retains all its status markers. If the current Fatigue Level is greater than its new Movement Allowance, set the Fatigue Level to the new Movement Allowance.
(10.42) RAMMED. A Rammed galley is permanently immobile. A Rammed Galley may still Missile Fire, may Grapple if Fouled with its target, and any land units may Board (8.64) if Grappled, or the land units may transfer to another adjacent Galley. During the Fleet Status Phase of the Turn, the active player rolls one die (1d6) for each of his galleys that has a "Rammed" marker.
- If he rolls a 1-5, it remains afloat (but still Rammed);
- If he rolls a '6', the ship sinks. So do any ships grappled or fouled with that ship. All land combat units and leaders on board are eliminated.
Play Note: The last sentence means that if "A" is grappled with "B" and "B" is fouled with "C", and "A" sinks, so do B and C.
(10.43) CRIPPLED. A Crippled galley may move a maximum of one hex per turn; however, it may move, or change facing without moving, only in the direction of the arrow (and not straight ahead). It may not use Attack Speed or use Avoidance. Its Ram Defense rating remains the same and it may Grapple and Board under certain conditions, and use Missile Fire. A Crippled galley never earns Fatigue or is effected by Fatigue (remove all Fatigue markers).
(10.44) HALF SPEED. Galleys receive a Half Speed status as a result of a Collision (9.15), un-beaching (5.48), or transferring units (5.64). A Galley at Half Speed may move (in its next activation), at (most) one half (rounded up) of its speed level. At the end of the next time that ship moves, remove the marker. Fatigue effects are applied after accounting for the Half Speed. If the Fatigue Level exceeds the Half Speed allowance, the Galley may not move, but the marker is removed and the player may reduce his Fatigue level by one for not moving. The marker may not be removed if the galley is Fouled or Grappled.
11. The Battle
11.1 Roman Deployment
The Roman Player has the following units available at the start of the game:
Land Combat Units and Leaders
- J. Caesar (OC)
- 8 Cohorts from Legion VI; Legion VI Legate
- 8 Cohorts from Legion XXVI; Legion XXVI Legate
- 10 Cohorts from Legion XXXVII; Legion XXXVII Legate
- 4 Gallic Medium Infantry
- 4 Cretan Archers
- 4 Numidian Light Infantry
- 4 Scorpio
- 2 Ballistae
Galleys
- 3 Biremes
- 1 Liburnian Bireme
- 2 Triremes
- 1 Cataphracted Trireme
- 2 Quadriremes
- 2 Quinqueremes
- 2 Transports
The Roman Player sets up first, as follows:
- One Cretan Archer and one Gallic Medium Infantry in The Lighthouse
- All Galleys in Slips in either the King's Harbor and/or the Great Harbor
- All remaining units inside Alexandria in the Roman-held section. Land units may be deployed on Galleys at the start.
The Roman-held Section consists of the colored blocks around and including the Palace (see Map Legend), the Points bordering these Blocks, plus all hexes North and NW of Street "O" and Road "2", plus all Points adjacent to those hexes.
If the Roman player wishes, he may deploy the Cleopatra counter in the Palace. Cleopatra has no effect on play (other than to boost the spirits of the Roman player).
11.2 Egyptian Deployment
The Egyptian Player has the following units available at the start of the game:
Land Combat Units and Leaders
- Ganymedes (OC)
- Sosius, Ptolemais, Achillas, and Pysymmaticus (Subordinate Leaders)
- 24 Light Infantry
- 5 Medium Infantry
- 20 Heavy Infantry
- 3 Archers
- 4 Light Cavalry
- 3 Scorpio
- 1 Ballista
Galleys
- 2 Biremes
- 5 Triremes
- 7 Quadriremes
- 2 Quinqueremes
The Egyptian Player deploys after the Romans, as follows:
- 1 Heavy Infantry, plus 1 Artillery unit, each, in each Redoubt Hex at the ends of the Causeway
- Light Cavalry in any land hex west of the city (but not on Pharos) [a]
- Any 10 combat units, plus one Subordinate Leader, but no Artillery, in any Point on Pharos, or in any hex adjacent to a Point
- All Galleys in Slips in the Harbor of Eunostus
- All remaining combat units, Ganymedes, and the other three Leaders, anywhere inside Alexandria at least two (2) MP from the Roman-held section and not in a Block adjacent to this section.
- No Egyptian land units may start on galleys.
a = These are pretty useless, but they were there. So we included them.
(Errata: in the Light Cavalry bullet, add "These units may not enter the city of Alexandria or the Heptastadium Causeway.")
The Egyptian Player goes first (and this initial turn may not be "seized").
Egyptian land units that initially deploy on Pharos may not end a player turn in a hex on Pharos west of the city that is not adjacent to a Point until an Egyptian player turn after the Roman player has landed units on the island (the units that deploy in the Lighthouse don't count). These units are free to leave the island (via the Causeway) if they wish.
11.3 Exhaustion
Each army has an Exhaustion Level listed below. When an army exceeds its Exhaustion Level, it may no longer Shock Attack on land. It defends normally, may use Missile Fire, and conduct Boarding attacks, including Boarding (only) attacks against the Heptastadium Causeway. During the Exhaustion Level Check phase of the player turn, the active player determines whether he has exceeded his level by counting the number of Exhaustion Points he has incurred and comparing them to his Exhaustion Level.
Exhaustion Points are determined as follows:
- All Light Cavalry, Cohorts, Heavy Infantry, and Medium Infantry = their full strength TQ
- All Light Infantry = 2 Points (regardless of TQ)
- All Archers and Artillery = 1 point (regardless of TQ)
- Galleys and Leaders = 0 points
If both armies have exceeded their Exhaustion Level and neither side as fulfilled the victory conditions given below, the game is over—and no one has "won".
- Roman Exhaustion Level = 55
- Egyptian Exhaustion Level = 50
Play Note: Once a player has reached his Exhaustion Level, it is highly unlikely that that player will win the game. He can, though, hang on and fight for a draw by forcing his opponent over his Exhaustion Level. If both players agree, they may instead use the optional method for ending the game described below.
(Errata clarification: Exhaustion Points are earned for eliminated units. A unit that leaves the map (voluntarily or otherwise) is considered eliminated.)
11.4 Victory
Either Player wins if he controls The Heptastadium (by occupying the Redoubt hexes 2124 and 3119) and The Palace (there are no enemy units in The Palace Block or its bordering Points between 2/3K and 2/3-L inclusive). At the start of the game, the Romans control The Palace and the Egyptians control The Heptastadium.
If Caesar is killed, the Egyptian player wins.
Optional: If both players agree prior to the start of the game, they may use this alternative method for ending the game. Once either player exceeds his Exhaustion Level, the game ends immediately. If neither player has achieved the above conditions (control of the Heptastadium and Palace), the player who has not exceeded his Exhaustion Level is the winner. If both players have exceeded their Exhaustion Level, the game is a draw.
12. The Scenarios
12.1 The Battle for the Heptastadium
This scenario is a sort of microcosm of the siege, the battle for the causeway including both land and naval forces, as well as being the final "event" in the siege.
Caesar had executed a coup de main and seized the town of Pharos after a heated battle. He then decided that, to assure his control of the situation, it would be necessary to hold the Heptastadium causeway. To that end he landed three cohorts close to the southern, Alexandrian redoubt and quickly grabbed it.
The Egyptians, however, were quick to react. They counter-attacked the Romans in that redoubt and pushed them back onto the causeway. In the meantime, both fleets set out for the area. Before the Romans in Pharos could react, the Egyptians landed some men on the causeway just as the Romans did the same. Both fleets lined up alongside the causeway, supplying missile fire and troops as the battle for control raged back and forth.
In the midst of all this, with Roman cohorts retreating onto the overloaded galleys, Caesar took the opportunity to go for a swim, falling over into the drink. This did little for Roman morale. Caesar was fished out before any more harm could be done and the Romans retreated back to their original positions, a bit worse for wear.
Roman Deployment
- Any Pharos Point + 3119: Legate VI; 7 Veteran Cohorts (VI Legion); 2 Archers [a]
- 2424 and 2324: Legate XXVII; 2 Quadriremes, carrying 3 Veteran Cohorts (XXVII Legion) and 1 Archer
- In any Great Harbor Sea hex east of XX30 hexes: Caesar; Remainder of Roman Fleet; 4 Cohorts (XXVII Legion), 4 LI, 1 Archer, 1 Scorpio
Romans deploy and move first.
a = Caesar's Pharos invasion force originally consisted of 10 cohorts, some LI and those dismounted Gallic cavalry. This represents what was left after the battle for Pharos, and what was available to act (not posted elsewhere).
Egyptian Deployment
- All Eunostus Harbor slips: All Egyptian galleys (minus 1 Bireme, 1 Quinquereme [a])
- 2124: 1 HI (7 TQ)
- In any Alexandria City Points in Streets A thru I: Ganymedes, Sosius; 8 HI (3-7TQ, 3-6TQ, 2-5TQ); 2 MI (1-7TQ, 1-6TQ); 2 LI (2-6 TQ); 2 Archers; 1 Scorpio
a = these account for losses in the Naval battle.
Map Movement Restrictions: No units may move into any Point in streets J—Q.
Seizure Ratings: Both Caesar and Ganymedes have Seizure ratings of '2' for this scenario.
Game Length: The game ends when one Player has undertaken, and completed, 25 player turns.
Victory: The Roman Player wins by occupying both redoubts—2124 and 3119—at game's end. Otherwise, it's an Egyptian victory.
12.2 The Naval Battle
This scenario covers the full-scale naval battle resulting from Caesar's desire to cripple the Egyptian fleet so that it could not harass his supply lines and threaten his troop movements. It's a good way to learn the naval rules, as there is no land fighting.
In the actual battle, the Rhodians slipped through the narrow passage between Pharos and the shoals and engaged the Egyptian right wing, enabling the rest of the Roman fleet to clear the shoals and attack. Roman marine superiority appears to have won the day, as they did manage to sink 2 of the better Egyptian galleys without any losses to their own. The end result achieved Caesar's original aims.
Roman Deployment
The Roman player receives all 11 galleys (except Transports), plus 11 Veteran Cohorts (TQ as desired!) and 2 Archers. The combat units are deployed on the galleys as the player sees fit. The Romans deploy first, as desired, in following hexes, facing east: 3002-3, 2902, 2802-3, 2403-4, 2303-4, and 2203-4. The Romans have the Initiative and move first.
Egyptian Deployment
All 16 galleys, plus the following land units:
- 5 HI (2 7TQ, 3 6TQ)
- 5 MI (1 7TQ, 3 6TQ, 1 5TQ)
- 4 LI (2 6 TQ, 2 5TQ)
- 3 Archers
Deploy (after the Romans), as desired, in the following hexes, facing west: 3108, 3009, 2909, 2611, 2511, 2412, 2312, 3210, 3110, 3011, 2911, 2812, 2712, 2613, 2513, and 2414.
(Errata: the TQ distribution for the Egyptian MI should be: 2 TQ 7, 2 TQ 6, and 2 TQ 5.)
Activation: Players alternate moving their fleets in time-honored Igo-Hugo fashion. There is no Seizure and no leaders.
Victory: Players receive Victory Points as follows:
- VP equal to the Ram defense of each enemy ship he has rammed (even if it does not sink) or that has Run Aground
- VP equal to the Ram Defense plus one (+1) for each enemy ship captured. This does not apply to 're-captured' ships.
In addition, the Roman player receives 5 VP for each Egyptian Slip he sets afire, as per 7.34.
- The Roman Player wins when he has accumulated 35 VP
- The Egyptian Player wins when he has accumulated 28 VP
Victory is determined after every Egyptian Turn. If both players have exceeded their totals, the game ends, and victory is awarded to the player with the higher VP total.
Design Note: Although we do know that the Rhodian admiral, Euphanor, was probably in charge of Caesar's fleet, we have not used any "leader" rules, because of the small size of the battle.
Historical Note: This was a Roman victory, with 5 Egyptian galleys sunk/captured and the remainder hustling back to the safety of their slips.
(Errata: add to the first Victory bullet "…or has sunk by other means such as Fire." Add to the second bullet: "If a player regains an enemy-captured galley, the opposing player loses those VP. If a Captured ship is subsequently Rammed, Sunk, or Runs Aground the Capture Bonus (+1 VP) is lost.")
Map Addendum
The following slip hexes are prohibited to land units unless a galley is present: 2319-2321, 2836, 2938, 3139, and 3239.
The following coastal hexes contain a sliver of sea but may not be entered by a galley: 1915, 2123, 2331, 2633, 2839, 3140, 3240, 3339-3340 and 3440; Pharos: 3222.
(5.36) Terrain Effects and Movement Costs Chart
| Terrain | Land Units | Galleys | Restrictions |
|---|---|---|---|
| All Land | 1 | N/A | May not be entered from a Block |
| All Sea | N/A | 1 | Land units may enter if Transported |
| Coastal | 1 | 1 | |
| Partial Sea/Wall | N/A | 1 | |
| Partial Land/Wall | 1 | N/A | |
| Shoals | N/A | 2 | Roll for Running Aground; land units may enter if Transported. |
Errata and Clarifications (GMT, November 2005)
Appended from the separate GMT errata sheet "Caesar in Alexandria Errata & Clarifications, November, 2005"; the Questions & Answers were compiled by Mike Lang.
Rules
-
2.25 The reference should be to section 4.1
-
2.4 Player Turn: Reference should be to 4.2
-
3.0 Sequence of Play: Intro reference on Turn Seizure should be to 4.5. A. Activation Phase: The two references to 4.12 should be to 4.2. D. Fleet Status Phase #3 - Reference should be to 10.42. E. Exhaustion Level - Reference should to 11.3.
-
4.41 Change the second sentence to: "The range is measured and traced in Movement Points using land unit movement costs (see 5.31, 5.36, and 5.74)."
-
5.29 The reference to hex 3204 should read hex 3304.
-
7.42 Clarification: A unit entering a friendly occupied hex does not trigger entry reaction fire.
-
7.52 Clarification: 7.13 applies to Harassment and Dispersal Fire.
-
8.52 Example: Reference to steps 8.33 and 8.34 should be to sections 8.3 and 8.4.
-
8.53 Clarification: Only one unit advances after Shock whether it's a hex, Point, or Galley.
-
9.15 Retract (after Ram): Second sentence should read: "… the player uses the original unadjusted die roll …" A galley that successfully Retracts may move no further that activation.
-
9.24 Last sentence should read: "… a galley may not use Diekplus if it has to move to port or starboard to enter the enemy Bow or Stern hex, nor may it make such a turn within that hex."
-
11.2 Egyptian Deployment, second bullet [Light Cavalry]: Add "These units may not enter the city of Alexandria or the Heptastadium Causeway."
Counters
-
Legion XXVII, Cohort 6 should have a TQ of 7.
-
Roman Cataphracted Trireme #1 Attack side Ram Defense should be 7
Questions and Answers
Note: Some questions are duplicated in different sections for convenience.
(A) SHOCK COMBAT
Q1. If artillery is stacked with units that suffer hits in shock, does it receive its fair share? Even if the stack with the artillery is attacking?
A1. Yes and no. In the latter, the artillery can't Shock so isn't involved in the combat.
Q2. Can a unit in a Point retreat into a connected hex?
A2. No -- see 10.3
Q3. If a unit in a Point wants to Shock an enemy in an adjacent Point, does the attacker have to attack through the top edge of the counter (ie the traditional 'front')?
A3. Any front point will do, remember Shock is voluntary in Points.
Q4. If a defending unit in a Point suffers an R result in Shock, can it retreat into a block under any circumstances?
A4. No
Q5. Toward which attacking unit can the defending one use Street Shock Reaction fire if one of the attackers is coming from behind, for example from a point in the rear?
A5. The attacker chooses the unit that will attack. Street Shock Reaction fire does require a LOS so the defending unit cannot fire at a unit attacking its rear.
Q6. Am I correct in assuming that a unit in a point, adjacent to 2 hexes and a block (containing each 2 enemy units), can be attacked only by the top-most unit of each stack in the same turn? (as per 8.13)
A6. No
Q7. Or the intent of the rule is to let just one, and only one, enemy unit attack a unit in a point? No matter how many of them are surrounding the point?
A7. Yes
Q8. Assuming 2 enemy galleys are involved in a boarding, but the shock attack doesn't produce any definitive result (the defender stands). If in the next activation the transported troops decide to renew the attack (or boarding), can they use missile fire?
A8. Yes.
Q9. Aren't they already mixed with the opposite side's troops?
A9. Perhaps, but in reality missile fire probably would be occurring at the same time as the melee. Gamers do need some order, hence the simplification.
Q10. If defender must retreat due to failing the TQ-check, can it retreat into an enemy ZOC?
A10. No. It stands
Q11. When a stack must TQ-check for shock, do both units check or just the top one? what if the top unit fails the check when attacking? Does only the bottom attack?
A11. Per 8.3, all check.
Q12. What if all attacker and defender units are eliminated as a shock result? Does one attacking unit survives with a CH=TQ-1 (as per GBoH)?
A12. No.
Q13. If a unit is attacking through an enemy unit's flank, while having another enemy unit pointing toward its own flank, does it get position superiority?
A13. Yes. We don't have this restriction due to the scale and style of combat represented here.
Q14. Two HI attack two CO in a block. During a subsequent Egyptian turn, two MI are activated and enter that block. During Shock Combat, the two active MI attack; are the two HI included in the combat resolution even though they were not activated during that turn?
A14. Only the activated units attack -- all units defend
Q15. The rules state that successful boarding units advance after combat and presumably board the captured galley. Assuming that all of the attacking land units attacked the unlucky defender, do they ALL advance after combat?
A15. No, just one
(B) MISSILE COMBAT
Q16. If missile units on galleys fire at units on the Causeway, is it resolved on the land-based missile table or the galley-missile table?
A16. As land units -- see 7.2 and 7.1
Q17. If artillery is stacked with units that suffer hits in shock, does it receive its fair share? Even if the stack with the artillery is attacking?
A17. Yes and no. In the latter, the artillery can't Shock so isn't involved in the combat.
Q18. Can artillery fire in reaction as many times in one enemy activation as the artillery itself is targeted by missiles?
A18. Yes, as is true for all missile units
Q19. Because artillery can fire in any direction regardless of facing, does it pay normal cost for facing changes (+1) when it moves?
A19. They can fire in any direction, but still must be faced for movement and pay the +1 MP to change facing.
Q20. A unit moving through artillery alone pays no extra MP - is it the same the other way ie does artillery pay extra to enter an occupied hex?
A20. Artillery pay +1 MP to enter an occupied hex.
Q21. In order to roll to check if your missile-firing galley has set an enemy on fire, do you just have to score an ordinary hit first, to qualify for the fire check roll? Is that the intent of the rule?
A21. Yes.
Q22. If a galley is already on fire, do further fire hits have any additional effect?
A22. No
Q23. If a friendly galley enters a hex adjacent to an enemy galley and the friendly wants to use missile fire, but the enemy wants to use Avoidance, which takes precedence?
A23. Avoidance
Q24. Can units on different galleys combine fire against an enemy?
A24. No
Q25. Can an enemy galley be the target of repeated (uncombined) missile attacks in the same friendly turn?
A25. Yes
Q26. Do galleys block LOS to archers or scorpions that want to fire at troops on board of another galley?
A26. Galley vs. galley fire is limited to a range of 1 hex. In all other fire situations galleys are treated as units, so they block LOS.
Q27. No negative drm when trying to fire at artillery?
A27. No.
Q28. If an Arty. is sitting on the causeway can it shoot into hexes?
A28. Yes, artillery may shoot out (and others in with a +1 DRM) at other hexes.
Q29. Assuming 2 enemy galleys are involved in a boarding, but the shock attack doesn't produce any definitive result (the defender stands). If in the next activation the transported troops decide to renew the attack (or boarding), can they use missile fire?
A29. Yes.
Q30. Aren't they already mixed with the opposite side's troops?
A30. Perhaps, but in reality missile fire probably would be occurring at the same time as the melee. Gamers do need some order, hence the simplification.
(C) NAVAL OPERATIONS
Q31 If the fleet is activated, and a galley moves adjacent to a causeway hex and successfully grapples, can a unit "board" the causeway hex from the grappled galley even if it is unoccupied by enemy units?
A31. Yes, debarking is allowed onto grappled causeway spaces.
Q32. 9.15 Collision states that both attempting rammer and rammee incur a single fatigue point. 5.5 states that fatigue is checked after each activation. Is the latter fatigue check IN ADDITION to any fatigue earned as a result of the collision?
A32. Yes.
Q33. If a unit is fouled and then grappled (to the same unit), does it have to disengage once or twice?
A33. The two disengagements are separate events. See 9.4.
Q34. Rammed galleys can't really do much but they can try to grapple with units they are fouled with. Since fouling involves a ram attempt (no other way to get fouled is there?) this means that the two galleys are not flank to flank and that they are flank to bow in alignment. So this is a special case for grappling correct?
A34. Yes
Q35. Can rammed and fouled galleys grapple with their attackers? And what sort of modifiers would they get for this attempt?
A35. Yes, and the immobile modifier applies.
Q36. If a galley is grappled to the Heptastadium and an enemy galley attempts to ram it but fail, does the target galley earn one fatigue point due to collision?
A36. Yes -- think of the collision as shaking up the rowers on board.
Q37. Can a coastal hex contain 2 land combat units AND a friendly galley?
A37. Yes. Two land units of the same type and a galley can coexist in the same hex regardless of the galley's status.
Q38. If a galley has the movement points, can it diekplus more than one enemy galley in the same move?
A38. If it meets the conditions of 9.24, yes.
Q39. If an enemy galley is attempting to rake a friendly, by moving into its bow flank hex and the friendly then successfully rolls Avoidance, moves into its bow hex and puts the enemy in its stern flank, does this negate the intended Rake?
A39. Yes
Q40. Given the situation in the question above, if the enemy attempting Rake does find itself in the friendly stern flank, and turns around in the hex to have another bash, would this turnaround trigger an Avoidance attempt by the friendly?
A40. Yes, if necessary, although bear in mind 6.23 (Turn Around) ie you can’t spin 180 degrees in a hex if you are at Attack Speed or if there is an enemy in an adjacent hex.
Q41. Does a diekplus actually cost 2+1 MP ie 2 for the enemy-occupied hex and 1 for the clear hex beyond?
A41. Yes
Q42. 5.53 says a galley which ATTEMPTS Avoidance earns 1 Fatigue, but 5.92 says only a galley which SUCCEEDS at Avoidance earns 1 Fatigue. Which is correct?
A42. 5.92
Q43. Is diekplus still allowed against an enemy which has open flanks and could thus be raked in ordinary fashion?
A43. No
Q44. In order to roll to check if your missile-firing galley has set an enemy on fire, do you just have to score an ordinary hit first, to qualify for the fire check roll? Is that the intent of the rule?
A44. Yes.
Q45. If a galley is already on fire, do further fire hits have any additional effect?
A45. No
Q46. If a friendly galley enters a hex adjacent to an enemy galley and the friendly wants to use missile fire, but the enemy wants to use Avoidance, which takes precedence?
A46. Avoidance
Q47. Can units on different galleys combine fire against an enemy?
A47. No
Q48. Can an enemy galley be the target of repeated (uncombined) missile attacks in the same friendly turn?
A48. Yes
Q49. Do galleys block LOS to archers or scorpions that want to fire at troops on board of another galley?
A49. Galley vs. galley fire is limited to a range of 1 hex. In all other fire situations galleys are treated as units, so they block LOS.
Q50. Assuming 2 enemy galleys are involved in a boarding, but the shock attack doesn't produce any definitive result (the defender stands). If in the next activation the transported troops decide to renew the attack (or boarding), can they use missile fire?
A50. Yes.
Q51. Aren't they already mixed with the opposite side's troops?
A51. Perhaps, but in reality missile fire probably would be occurring at the same time as the melee. Gamers do need some order, hence the simplification.
(D) MISCELLANEOUS
Q52. Can a unit change facing while in a ZOC?
A52. In general, yes, but see 6.33 for an exception.
Q53. If friendly and enemy units both start in the same block, can a friendly unit exit that block into any empty adjacent point regardless of the enemy units in the block?
A53. Yes
Q54. The 5 Points along "O" and "2" East of the canal that meet the criteria are not colour coded as Roman Held. They are part of the Roman Held portion of the City correct?
A54. Correct.
Q55. Are Redoubts considered Walls? The Redoubts are never classified as such and it would seem they would block LOS through them.
A55. No, Redoubts are not walls. The "redoubts" are nothing more than hastily erected barricades.
Q56. Is there a wall on the Heptastadium?
A56. No.
Q57. In order to win the battle, does a side need to control both objectives at the end of turn 55? Or at the end of whatever turn the targets are sized?
A57. For the Battle for the Heptastadium, the game must go 25 turns.
Q58. The rules say that the first player turn cannot be seized - since the Egyptians go first (in the full battle), does this just mean that the Romans cannot grab the first turn, or does it mean that the Egyptians cannot seize the first Roman turn, so as to give themselves two turns running?
A58. The former