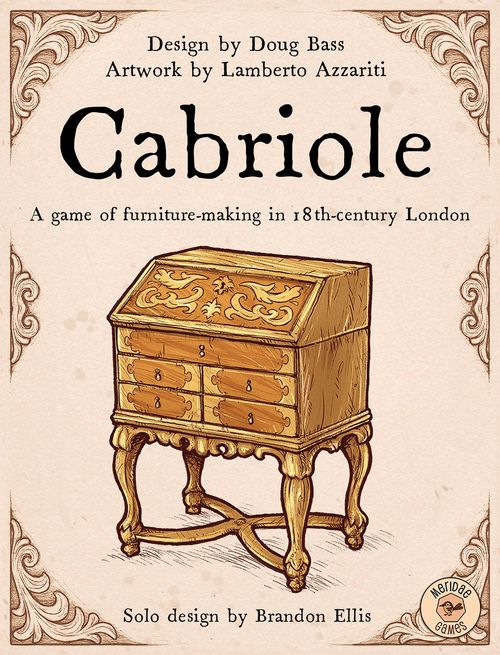
Cabriole
Cabriole Rulebook
Table of Contents
Table of Contents
Components
- 1 game board
- 1 round marker (black cylinder)
- 1 "off-limits" marker
- 1 start player marker
- 114 poker-sized playing cards:
- 72 project cards
- 36 special cards
- 6 starter / scoring aid cards
- 100 resource discs (25 of each type)
- 88 cardboard currency tokens:
- 52 one-pound coins
- 20 five-pound notes
- 16 ten-pound notes
- Four sets of player components:
- 1 player board
- 5 "Assistant" pawns
- 4 small wooden cubes
- 1 wooden prestige tracking disc
- Solo components (see the Solo Rules section)
Setup
-
Place the game board towards the right end of the table, leaving room along the left edge for the card display, and place the black round marker on the first space of the round track. Place the resource discs and money tokens within easy reach of all the players, to the right of the main board.
-
Shuffle together the furniture project cards and special cards marked with "Deck A" on the back side, removing any cards marked with "3+" on the back for a two-player game. Do the same with the project cards and special cards marked with "Deck B". Place the cards in two separate stacks. Deck A will be used during rounds 1 through 3, while Deck B will be used during rounds 4 through 6.
-
Deal cards from Deck A to the left of the main board as follows:
- For two players, deal three rows of four cards each (shown on next page).
- For three players, deal four rows of four cards each.
- For four players, deal four rows of five cards each.
-
Each player should take the following:
- One player board of their chosen color.
- Five Assistant pawns of that color.
- Four small cubes of that color, placed to the side of their player board.
- One disc of that color, placing it on the zero space of the prestige track.
-
Choose a starting player and randomly deal one of the six starter cards to each player. Each of these cards shows the two Apprentice-level craftsmen a player begins with, to be marked in the corresponding spots on their player boards using wooden cubes of their color. Each player should also take the amount of money shown on their starter card from the supply. Finally, each player should take one unique resource, in counter-clockwise order beginning with the player to the right of the start player. The starter cards may then be flipped over to remind the players of end-game scoring conditions.
The game is now ready to begin, with play always proceeding clockwise.
Game Round
A game of Cabriole is played over a series of rounds, with each round being divided into four phases: Placement, Resolution, Production, and Reset. At the end of the sixth round, final scoring takes place and the winner is declared.
Placement Phase
During this phase, players take turns assigning one Assistant to any queue on the board, filling in the spaces from left to right, until each player has placed all five of their Assistants. Only one Assistant may be placed on each space of any given queue, but the same player may place multiple Assistants in the same queue as separate actions, if spots remain available.
Important: Player count restrictions shown in the upper right corner of the queue spaces must be observed. For example, 3+ means the space may be occupied only in games with three or four players.
Example: In the queue above, blue has placed first, followed by yellow, and finally green. As it is a three-player game, the last space (marked with a 4 in the upper right corner) is unavailable.
Card Display
Each Assistant placed in queue beside a row of cards will allow the player to take a card from that row during the Resolution Phase, in the order of placement. The first Assistant placed beside a row will confer the best choice of the cards, while the second Assistant gives the next best choice, and so on. When placing the Assistant, the player should not announce which card he or she intends to take. After three Assistants have been placed beside a row (four in a four-player game), no additional Assistants may be assigned to that row.
Important: During every round except the last, when at least one Assistant has been placed beside all the card rows except one, the remaining row immediately becomes "off-limits" for the rest of the round. This should be indicated by placing the "off-limits" marker over the queue spaces beside the remaining row. Cards in the off-limits row can be accessed only by placing an Assistant in the Extra Projects space (see below).
Extra Projects
Assistants placed in this queue will be able to take up to two cards from the display during the Resolution Phase, after the card display queues are resolved. In 3- and 4-player games, there are two Extra Projects spaces, but the same player may not place Assistants in both spaces.
Guildhall Queue
Each Assistant placed in the craftsmen's guild queue will allow the player to hire or train a craftsman during the Resolution Phase, in the order of placement.
Market Queues
Each Assistant placed in one of the silk or wood market queues will later have the opportunity to purchase the corresponding resource type during the Resolution Phase, in the order of placement.
Resolution Phase
After every player has placed all five of their Assistants, the Resolution Phase begins. During this phase, the areas are resolved in the order listed below.
Important: For any queue on the board, a player may opt not to resolve their Assistant's action and instead take 2 pounds from the supply.
Resolving the Card Display
Starting with the top row of cards, players take cards in the order their Assistants were placed in queue beside the row. For example, the player who was first to place an Assistant in queue beside a row retrieves that Assistant and takes their choice of the cards in the row, along with any money present on the card. The same or other players with Assistants beside the same row of cards do the same, in queue order. The process is repeated for all the card rows, working from the top of the card display to the bottom. Assistants should be returned to the players as the cards are taken. When taking a project card, the player may take the card even if their craftsmen have not yet advanced to the required level or they do not yet possess the required resources. When a project card is taken, it should be placed to the left of the player board, along with other project cards that have not yet been completed.
Important: A player may take at most six unfinished project cards at a time and may not discard a project they already have to take a different one.
When taking a special card allowing a craftsman to be hired or trained, the player should place a wooden cube in the Apprentice space of the corresponding craftsman type (when hiring that type for the first time) or shift the corresponding cube on their player board one slot up (when promoting the craftsman from Apprentice to Journeyman or from Journeyman to Master). For a special card granting resources or money, the rewards should be taken from the general supply, and the card should be discarded.
Resolving the Extra Projects Space
Assistants placed in this queue may take up to two cards from those remaining in the display. For cards taken from the off-limits row, the player must pay two pounds for one card or five pounds for two (before taking them). Special cards may also be taken when resolving this action.
Resolving the Guildhall Queue
For this queue, players should move their Assistants to the first available space beside the type of craftsman they wish to hire or train, if space is available. The player should then pay the cost printed below the space to the bank. After paying the cost, the player should either place a wooden cube into the Apprentice spot for the corresponding craftsman type (when hiring a new craftsman) or move the cube on their player board one slot up (when advancing from Apprentice to Journeyman or from Journeyman to Master).
Example: Mitchell, playing red, hires an Apprentice Carver, costing him 2 pounds. Rob, playing blue, trains his Apprentice Turner to become Journeyman, costing him 3 pounds. Gabriela (green), wanting to hire an Apprentice Turner, is forced to pay 5 pounds. Lastly, Rob opts to also train his Journeyman Upholder to become a Master, costing him 4 pounds. The yellow player did not place in this queue.
A player may not choose to train a craftsman who is already a Master. After all Assistants in the Guildhall queue have been assigned to guild spaces and the costs paid, the Assistants should be returned to the players.
Resolving the Resource Market Queues
Players who placed Assistants in a Resource Market queue may now buy resources, starting with Oak and proceeding to Walnut, Silk, and Mahogany, in that order. Each Resource Market is resolved independently, with resources being bought in the order Assistants were placed in queue. To buy a specific number of resources, the player whose Assistant is next in queue should move it to an open space showing the number of resources they wish to purchase. Only one Assistant can be placed on each such space. After moving the Assistant, the player should pay the specified price to the bank and take the indicated number of resources from the supply. The purchased resources may be placed in the warehouse space of the player board or directly onto the project cards.
Example: Beth, playing green, has chosen to buy three Walnut for 9 pounds, after which Mike (blue) pays 5 pounds for two Walnut. Luke, playing yellow, is left with the option of buying only one Walnut for 2 pounds or four Walnut for 14 pounds.
After all the Assistants in a particular resource market queue have made their purchases, the Assistants are returned to the players.
Important: At no time may a player possess more than eight resources of a single type. If the player's purchase would put them over this limit, they must take fewer resources, so as not to exceed it. Resources in the supply are not intended to be limited. In the unlikely event sufficient resource discs do not remain in the supply for a player to take the indicated quantity, a suitable substitute may be used.
Production Phase
During the production phase, the players decide which project(s) they will create that round, beginning with the start player. To craft the furniture shown on a project card, the player must allocate the exact type and quantity of resources depicted on the cards and must have the required type(s) of craftsmen in their studio.
Using colored shield icons, the project cards also specify the minimum required level of the craftsmen required for that card: Apprentice, Journeyman, or Master. A craftsman's skill level also determines the total number of projects that craftsman can be assigned to work on in a round. Apprentices may work on only one project per round, whereas Journeyman or Master craftsmen may work on a maximum of two or four projects in a single round, respectively.
Example: Bradley, who has an Apprentice Carver and an Apprentice Joiner, can craft the Chest on the left using two Walnut and one Mahogany, earning either 19 pounds or 13 prestige points. Brittany, who has a Journeyman Joiner and an Apprentice Upholder, but no Carver, is able to produce the Chair in the middle using one Walnut and two Silk, taking either 23 pounds or 15 prestige points. With an additional two oak, she can also complete the table on the right, choosing whether to receive pounds or points for each project individually. On the other hand, even if she did have an Apprentice Carver and the additional resources, she could not complete all three, as Journeyman can work on two projects at most per round. Sowjanya, with all three types of craftsmen and the necessary resources, is able to complete all three projects, since her Joiner is a Master. Even if she had a Journeyman Joiner, she would not be able to complete all three in one round.
Included with the game are sets of square tokens that can make it easier for players to keep track of how many projects each craftsman is working on. As players advance their craftsmen's levels during the game, they should take tokens of the appropriate type: one token for apprentices, two for journeymen, and four for masters. Players can assign these tokens to projects to help them visualize how many projects each craftsman is working on.
For each project card completed, the player may choose to take their reward either as pounds from the supply, or as prestige points by moving their scoring disc on the track around the outside edge of the board.
Once completed, the players should discard the resources that were used, placing their completed project cards face up to the right of their player boards, where they remain until final scoring.
Reset Phase
If the round just completed was the sixth round, proceed to final scoring. If not, set the off-limits marker to the side, advance the black round marker one space on the round track, pass the start player token to the next player in clockwise order, and perform the following steps:
-
Discard any cards with three pounds on them.
-
Add one pound to each card remaining in play from the round just completed.
-
Deal cards to fill all empty card slots to begin the new round, using Deck A for rounds 2 and 3 and switching to Deck B for rounds 4, 5, and 6:
- For two players, fill in three rows of four cards each.
- For three players, fill in four rows of four cards each.
- For four players, fill in four rows of five cards each.
Final Scoring
Final scoring takes place at the end of the sixth round, when bonus points are awarded for sets of cards called Vignettes, for having advanced your craftsmen to Journeymen or Master level, and for leftover resources and money.
A Vignette is composed of a Chair, a Chest, and a Table, with each vignette being worth 10 prestige points. A partial Vignette, worth 5 prestige points, consists of two different cards: a Chair and a Chest, a Chair and a Table, or a Chest and a Table. These bonuses are added to the players' scores on the prestige point track. Each project card may be part of one vignette only and single cards are not worth additional prestige points.
Example: A completed Vignette on the left and a partial Vignette on the right. (The example diagram is not reproduced here.)
The players then score bonus prestige points based on the number of craftsmen they have advanced to Journeyman level (3 points each) and Master level (7 points each).
Example: Krystal, who has three Journeymen and one Master at the end of the game, would receive 16 bonus points. Keith, who has two of each, would receive 20 bonus points, whereas Heidi with four Master-level craftsmen would receive 28 bonus points.
Next, players should exchange resources for money at base cost (e.g. 2 pounds for each Oak and Walnut, 3 pounds for each Silk, and 4 pounds for each Mahogany). Players then receive one prestige point for every five leftover pounds.
Finally, players deduct five prestige points for each unfinished project. After all bonuses and penalties have been tallied, the winner is the player with the most total prestige points. In the case of a tie, the tied player with the most completed project cards wins. If the players are still tied, they share the victory.
Solo Rules
In this solo mode, you face the petty sabotage of a rival furniture company. Your job is to overcome their meddling to become London's finest furniture maker.
The solo rules section of the printed rulebook reuses the headings of the main rules. Headings here are prefixed with "Solo" to tell them apart; the wording is unchanged.
Solo Components
- 6 rival action cards
- 6 die face tokens, numbered 1-6
- 1 six-sided die (d6)
- 1 four-sided die (d4)
Solo Game Setup
Set up the game according to the two-player rules, removing the project and special cards with a 3+ on the back from both decks. Place the six numbered die face tokens on or beside the board areas, as follows:
- 1 = Extra Projects
- 2 = Guildhall
- 3 = Walnut
- 4 = Silk
- 5 = Mahogany
- 6 = Extra Projects
Gather all the player pieces in your chosen color and select a second color for the rival company. Deal yourself a starter card and mark your starting Apprentices accordingly, and take your starting money and a resource.
Solo Round Structure
At the start of each round, after preparing the card display, shuffle the six rival action cards and deal five across the top of the board, either face down for a standard game or face up for an easier game. Place one of the rival company's Assistants on each of the five cards. The rival plays first every round.
Solo Placement Phase
During the Placement Phase, when it is the rival player's turn, take the Assistant from the next rival action card, flipping the card face up if necessary.
Solo Card Display
If the rival action card reads "Card Display", roll the d6 and place the rival's Assistant in queue beside the row indicated by the table below, observing the same queue limits as a 2-player game:
- 1 - 2 = Top Row
- 3 - 4 = Middle Row
- 5 - 6 = Bottom Row
Solo Game Board
If the rival action card reads "Game Board", roll the d6 and place the rival's Assistant on the first open queue space on the board area with the matching die token, observing the same limits as a 2-player game.
Important: When a six is rolled and the Extra Projects space is occupied, the rival company will place in the Guildhall queue instead, if space is available.
If the play is not legal because the row is off-limits or because the queue is full, re-roll until a legal play is found. In the unlikely event all the board or card queues are full, roll instead to place in a card or board queue. The rival's Assistant must be placed!
Solo Resolution Phase
When an Assistant belonging to the rival player is next in queue during the Resolution Phase, perform one of the procedures below.
Solo Card Display Resolution
When resolving an Assistant beside a card row, roll the d4 and discard one of the four cards according to the number rolled on the four-sided die:
- 1 = Leftmost card
- 2 = Second card
- 3 = Third card
- 4 = Rightmost card
Solo Game Board Resolution
When resolving an Assistant in a queue on the game board, roll the d4 and resolve it as described below.
- Extra Projects: Remove one card from the off-limits row according to the die roll (1 = leftmost, 4 = rightmost). If there is no off-limits row, do nothing.
- Guildhall: Place the Assistant in the first available space beside one of the four craftsmen (1 = Carver, 2 = Joiner, 3 = Turner, and 4 = Upholder).
- Market Queues: Move the Assistant to the space matching the rolled number.
If the play is not legal because the card has already been taken or the space is occupied, re-roll the die. The rival's Assistant must take an action!
Solo Scoring
At the end of the sixth round, determine your score according to the normal rules, and earn your artisan rank:
- Less than 100: Time to close up shop!
- 100 - 129: Live to make another pound!
- 130 - 149: You're getting noticed!
- 150 - 169: You're the talk around London!
- 170 or more: You've made it into the history books!
Frequently Overlooked Rules
- Players may place more than one Assistant in a queue, if space is available.
- Players may take a project card even if the requirements have not yet been met.
- Players may not have more than six incomplete projects, and may not discard a project once taken.
- Players may not take resources beyond the eight resource per type limit.
- During the Resolution Phase, players may not block a Guildhall space if their corresponding craftsman is already a Master.
- For any queue, a player may opt to retrieve their Assistant to take two pounds instead of resolving an action.
Changes for Two Players
- All cards with "3+" on the back are removed from both decks.
- The Oak market is not used.
- Queue spaces with "3+" or "4" in the upper right corner are unavailable.