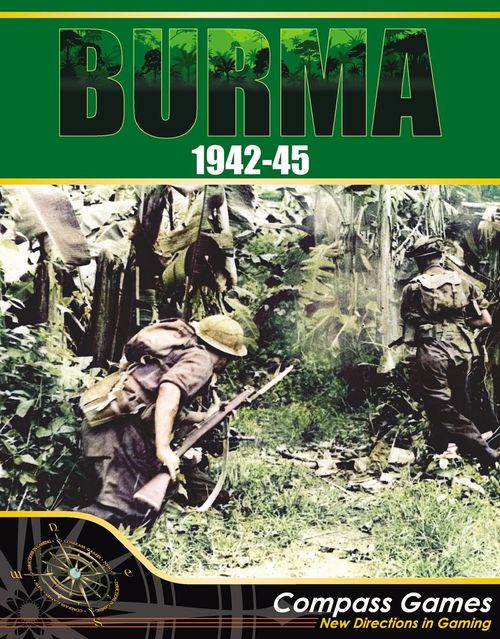
Burma 1942-45
Burma 1942-45 Rulebook
Table of Contents
Table of Contents
- 1.0 Introduction
- 2.0 Game Components
- 3.0 Sequence of Play
- 4.0 Game Length and Victory Conditions
- 5.0 Ground Movement
- 6.0 Stacking
- 7.0 Zones of Control
- 8.0 Air Movement
- 9.0 Sea Movement
- 10.0 Ground Combat
- 11.0 Supply
- 12.0 Road Construction
- 13.0 Airfields and Airheads
- 14.0 Special Combat Forces
- 15.0 The Burma Road
- 16.0 Beachheads
- 17.0 Replacements and Reinforcements
- 18.0 Island Occupation
- 19.0 Port Garrisons
- 20.0 Setting Up the Game
- 21.0 Optional Rules
- 22.0 Designer's Notes
- Editor's Notes
1.0 Introduction
1.1 Background
A. In the conduct of the Pacific War, most actions and battles were small, hard fought island conquests taking weeks, months at most before the conclusion was obvious and the fight ended. In Burma, the campaign was different. Burma marked the solid land link between the staunch Allied stronghold in India and the newly conquered Japanese outlands of China, Indo-China, and Malaya. Through Burma, Japan struck, and actually invaded India. Through Burma, the Allies struck back, to finally wrest from the Japanese their conquered lands.
B. Burma is a detailed campaign simulation of the military conflict between the United Nations and Japan along the only active land front of the Pacific War.
1.2 Abbreviations
| Abbr | Explanation | Abbr | Explanation |
|---|---|---|---|
| AAP | Amphibious Assault Point | NTP | Naval Transport Point |
| ATP | Air Transport Point | SOP | Sequence of Play |
| CRT | Combat Results Table | SP | Stacking Point |
| DRM | Die Roll Modifier | TEC | Terrain Effects Chart |
| HQ | Headquarters | TRC | Turn Record Chart |
| LRP | Long Range Penetration (Force) | VP | Victory Point |
1.3 Rounding Fractions
A. Round fractions down, except for Victory Points.
B. Where there are multiple units in a stack, and each unit is halved, add each unit's halved strength together, and then round any remaining fraction down.
2.0 Game Components
The contents of Burma include a map, a rules set, a charts set, and one sheet of die-cut unit counters.
2.1 Map
2.1.1 In General
A. The map, measuring 22 by 28 inches, portrays the terrain and geography of Burma and neighboring countries using a hexagonal grid to break up and define individual locations, thus assisting in movement and combat definition. The concept is similar to that of the squares on a checkerboard.
B. The various symbols printed on the map affect the use of the units during the game, and are defined on the Terrain Effects Chart (TEC).
2.1.2 Map Errata and Clarifications
A. Ramree Island does not extend into hex 3629. Ramree port is in 3630.
B. Hexside 3630/3629 is a prohibited hexside across which Zones of Control do not extend. Combat may not occur across this hexside except by the use of amphibious assault, or by Japanese Base units. Movement is prohibited across the hexside except by sea transport or amphibious assault.
C. The following hexsides are prohibited hexsides across which movement, Zones of Control, and Combat are not allowed, except by amphibious assault, transport by sea, or Japanese Base units: 4826/4926, 4927/4926, 5024/5023, 4820/4920, 4921/4920, 4921/5020, 5121/5120, 1213/1113, and all blue lake hexsides.
2.2 Rules
These rules provide complete rules regulating play of the game. The charts enhance the rules and display a variety of frequently used information.
2.3 Counters
A. The counter sheet includes 240 square unit counters and markers which represent the military forces which are fighting the campaign. Counters are generally marked with a unit symbol, a combat strength, and a movement factor, plus additional information as necessary.
B. The Unit Identification Chart indicates the nature and location of the information coded onto the counters.
C. Additionally, the counters are coded by color to indicate nationality.
| Color | Nationality | Color | Nationality |
|---|---|---|---|
| Mustard w/black | Japanese | Blue | Airmobile troops |
| Mustard w/brown | INA | Green w/black | American |
| Brown w/black | Indian | Green w/yellow | Chinese |
| Brown w/white | African | Yellow w/black | Yunnan Chinese |
| Light Brown w/black | British |
3.0 Sequence of Play
A. Burma is played in game-turns, each representing approximately one month of real time. During monsoon periods this equivalent period is increased to two months.
B. The first turn is December, 1942; the last is May, 1945.
C. Each turn is divided into a Japanese player-turn and an Allied player-turn. Player-turns are further subdivided into phases to allow proper regulation and execution of game activity.
D. When these rules use the word "turn," it means game-turn.
E. The phasing player (or side) is the player (or side) whose turn it is.
F. The sequence of play (SOP) is as follows:
3.1 Japanese Player-Turn
3.1.1 Supply Determination Phase
A. Both sides determine the supply status of all of their units.
B. Isolated units are identified.
C. Supply Markers may be expended during this phase to avoid isolated status.
3.1.2 Reinforcement Phase
Japan enters reinforcements and replacements called for by the Order of Battle/Appearance and the Turn Record Chart (TRC).
3.1.3 Land and Naval Movement Phase
Japan may move its units overland and by naval transport, as desired.
3.1.4 Combat Phase
Japan resolves any desired attacks and performs any post-combat movement.
3.2 Allied Player-Turn
3.2.1 Supply Determination Phase
A. Both sides determine the supply status of all of their units.
B. Isolated units are identified.
C. Air drop Supply Markers placed during the previous Allied player-turn are removed, and do not count toward supply determination in this phase.
D. Expend Supply Markers to avoid isolated status.
3.2.2 Reinforcement Phase
The Allies enter reinforcements and replacements called for by the Order of Battle/Appearance and the TRC.
3.2.3 Land and Naval Movement Phase
The Allies may move their units overland and by naval transport, as desired.
3.2.4 Air Power Phase
The following air related operations are performed:
A. Parachute assault movement is made, and any resulting combat is announced and resolved.
B. Air transport of units and placement of Air Drop Markers occurs.
C. Exploitation movement, over land only, may be made by units transported by air.
3.2.5 Combat Phase
The Allies resolve any desired attacks and perform any post-combat movement.
4.0 Game Length and Victory Conditions
A. Burma consists of 26 turns, some of which do not allow movement and combat due to the Monsoon Season.
B. At the end of 26 turns, both sides compare victory points (VPs) to determine the winner. Each side can win a tactical or a decisive victory, based on the number of VPs acquired through the course of the game.
C. VPs are awarded according to the following schedule:
| VPs | Side | Condition |
|---|---|---|
| ½ | Japan | per turn a Japanese unit is in India |
| 1 | Japan | per turn it occupies Jorhat (0117) |
| 1 | Japan | per turn it occupies Dinjan (0114) |
| 5 | Allies | per turn Rangoon is Allied-occupied |
| 5 | Allies | for completing the Burma Road |
| 1 | Allies | per turn the Burma Road is open* |
* Free of enemy units or their ZOCs, though friendly-occupied hexes negate enemy ZOCs for this purpose.
D. At the end of Turn 26, subtract the Japanese VPs from the Allied VPs, and find the result in the chart below to determine the winner and level of victory.
| Differential | Victory Level |
|---|---|
| <0 | Japanese Decisive |
| ½-4 | Japanese Tactical |
| 4½-8½ | Allied Tactical |
| 9+ | Allied Decisive |
Editor's note: as printed, the differential chart has no band between 0 and ½; it is transcribed as printed.
5.0 Ground Movement
5.1 In General
A. During the Land and Naval Movement Phase, the phasing side may move all or any of its units as desired.
B. Each unit has a movement factor that details the unit's number of movement points (MPs). MPs are expended each turn as the unit pays the terrain and Zone of Control (ZOC) costs to enter and leave hexes on the map. The movement factor of a unit is automatically renewed each turn, but unused MPs from previous turns may not be accumulated for use in later turns.
C. The TEC specifies the costs to enter each specific terrain hex. In situations where a unit has insufficient MPs to enter a specific hex, the unit is prohibited from making that movement.
D. Allied units may not enter Siam.
E. In general, movement by road, track or railway negates other terrain costs.
F. When a unit crosses a major river at a point where a road or railway also crosses no river-crossing cost is incurred if the hex being entered is friendly. A friendly hex is one which another friendly unit occupies or was the last to pass through.
G. At the start all hexes in Burma and all hexes in China west of the Salween River are considered friendly to Japan. All hexes in India at the start are considered friendly to the Allies.
H. When a unit moves from a minor river hex to any adjoining non-river hex through a hexside crossed by a road, track, or railway, no additional movement cost is incurred.
5.2 Strategic Movement
Any unit, except a Supply Marker, may use strategic movement if it is not in an enemy ZOC at any time during the Movement Phase. The MP cost for roads and tracks (but not railroads) is halved.
5.3 Railroad Movement
A. Allied units may only use railroad movement in India.
B. Japanese units may only use railroad movement in Burma.
C. Units expend 1 MP per 10 or fraction hexes travelled. Thus moving 10 hexes by rail costs 1 MP, while travelling 11 hexes by rail costs 2 MPs.
5.4 Exploitation Movement
The Allies may move units during the Air Power Phase using MPs not expended prior to air movement (8.0).
6.0 Stacking
6.1 In General
A. More than one unit may be present in a hex, provided they do not exceed the stacking limit.
B. Stacking is based on stacking points (SPs): each unit has a specific value, based on its nationality and unit type, and expressed in stacking points. The total SPs in a hex at one time may not exceed 10.
C. The stacking limit applies at all times, including during the Movement Phases and during the Combat Phase.
D. Markers and air units do not count toward the stacking limit.
6.2 Enemy-Occupied Hexes
A. Allied units may never move into a hex containing Japanese units. (Exception: Optional Rule 21.2.7.)
B. Japanese units using infiltration movement may enter hexes containing Allied units, but may not end the Movement Phase in such a hex.
C. The stacking limit applies to all units in a hex; thus it prohibits Japanese infiltration movement into a hex containing 10 SPs of Allied units.
6.3 Stacking Point Values
The following tables indicate stacking point values:
6.3.1 Japanese Units
| SPs | Unit Type | SPs | Unit Type |
|---|---|---|---|
| 2 | Butai | 1 | Antitank Battalion |
| 1 | Tank | 0 | Engineer Regiment |
| 0 | Base Unit | 0 | Supply Marker |
| 0 | Artillery Regiment | 3 | INA Regiment |
6.3.2 Allied Units
| SPs | Unit Type | SPs | Unit Type |
|---|---|---|---|
| 3 | Infantry Regiment or Brigade | 3 | Any other Chinese Unit |
| 1 | Tank, including Chinese | 0 | Supply Marker, including Chinese |
| 2 | LRP Unit | 0 | Artillery Regiment |
| 1 | Parachute Battalion | 1 | Engineer Brigade |
7.0 Zones of Control
7.1 In General
A. Each Infantry, LRP, and Artillery unit exerts a ZOC, extending into the hex the unit occupies and the six hexes adjacent to the unit.
B. An enemy ZOC may only be entered by enemy units upon payment of a 1 MP cost, and may only be exited upon paying a 1 MP cost. Because controlled hexes may be adjacent, a unit may be forced to pay both costs to move to another hex. ZOC costs are in addition to other movement (terrain) costs.
C. Air units are unaffected by ZOCs. Supply units are unaffected if moving through a controlled hex which is also occupied by a friendly unit.
D. LRP units (including US units such as 5307, Mars-1, and Mars-2) pay a universal cost, in all situations, of 1 MP to enter a controlled hex, but pay no cost to leave a controlled hex.
E. The ZOC of a unit on a coastal hex extends into full sea hexes. Naval transport may not be made through such controlled hexes.
F. ZOCs do not extend into hexes separated from the owning unit by a major river hexside.
G. ZOCs are negated by friendly units only for supply purposes (and for VPs for the Burma Road).
H. Japanese base units have ZOCs into all adjacent hexes, including all-sea hexes.
7.2 Infiltration Movement
A. Allied units are always prohibited from entering a hex containing a Japanese unit.
B. Japanese units may, however, enter a hex containing Allied units by using infiltration. The hex containing the Allied unit is treated as another ZOC hex; normal and ZOC movement costs are paid, plus 1 MP per Allied unit in the hex.
C. No unit may end a phase in a hex already occupied by an enemy unit.
8.0 Air Movement
During the Allied Air Power Phase, the Allies may move parachute units and regular units by air, and conduct parachute assaults.
8.1 Air Transport Points
A. The Allies are provided with Air Transport Points (ATPs) in the form of counters marked with airplane silhouettes. Each silhouette represents 1 ATP. Counters serve bookkeeping purposes, and may be freely interchanged providing the total number of ATPs is not altered.
B. ATPs are based at airfields, each with a capacity of 3 ATPs. Each airfield is a base hex, and ATPs must return to their particular base hex at the end of the Air Power Phase, after carrying out their missions.
8.2 Parachute Assault
A. Parachute Assault is a special combination of movement and combat executed in the Air Power Phase. Only parachute battalions may perform this mission. At the beginning of the phase, the parachute unit must be in an airfield hex, and have not moved during the player-turn. The unit is then moved up to 17 hexes, ignoring all terrain, and placed in a drop-zone hex. The hex may be any clear terrain hex except one containing a Japanese unit. (Clear terrain hexes containing town, airfield, road, track, rail, or river symbols are still considered clear for this purpose.)
B. Immediately upon placement of all parachute units in their drop-zone hexes, all units which occupy enemy ZOCs must attack all units exerting those ZOCs, using normal combat rules. The victor may advance after combat.
C. No aircraft are required to perform parachute assault.
8.3 Air Transport
Following Parachute Assault, ATPs may perform missions, subject to various restrictions and ranges. These missions are:
8.3.1 Transfer
An ATP may move to any other friendly airfield on the map, regardless of range. ATPs appearing from the Order of Battle/Appearance must perform this mission to be placed on the map.
8.3.2 Troop Transport
A. One ATP may transport 3 SPs of infantry. 6 ATPs together may carry one Supply Marker. The unit(s) being transported are carried from an airfield/airhead (called the origination hex) within 17 hexes of the ATPs' base hex, to any airfield/airhead within 17 hexes of both.
B. Units being transported must move to the origination hex during the Allied Land and Naval Movement Phase, and have at least 2 MPs remaining. Air Transport costs each unit 2 MPs. Any remaining unexpended MPs may then be expended by exploitation movement during the Air Power Phase.
8.3.3 Supply Drop
A. 6 ATPs may create a special supply line. One Supply Marker at a friendly airfield or airhead (origination hex) within 17 hexes of the ATPs' base hex is used to supply any one hex within 17 hexes of both the origination and base hexes. The Supply Marker is expended, and an Air Drop Marker (marked with a parachute) is placed on the units in the hex being supplied. This marker serves to place all units in the hex in attack supply for the player-turn, and in general supply for the next player-turn.
B. A maximum of three Air Drop Markers may be in play at one time.
8.3.4 Airhead/Airfield Supply
A. 6 ATPs may create an Assisted Distance for the purpose of supply. 6 ATPs are committed to the mission, and may form an air route between an airfield, which is itself in supply to a geographic source, and an airfield or airhead hex. Both ends of this air route must be within 17 hexes of each other, and of the ATPs' base hex.
B. An Assisted Distance created by air is in existence until the beginning of the next game turn's Air Power Phase.
8.3.5 Glider Assault
A. One ATP may carry one LRP unit to glider assault any hex within range. LRP units must move to an airfield (origination hex) within 17 hexes of the ATP's base hex, and have at least 2 MPs remaining. The LRP unit is then transported to any hex not in an enemy ZOC, and not containing a mountain hexside, within 17 hexes of both the base and the origination hexes. The unit may expend any unused MPs in exploitation movement.
B. In any six month period, up to three LRP units may make Glider Assaults. Use the numbered counters (1, 2, 3) to mark each Glider Assault landing as it occurs.
9.0 Sea Movement
9.1 Naval Transport
A. During the Land and Naval Movement Phase, the owner may move units by naval transport, providing the capability is available that turn. The TRC indicates the availability of Naval Transport Points (NTPs).
B. NTPs allow the movement of units along sea lanes. Such movement must begin and end in friendly ports or beachheads, and may not pass through enemy ZOCs. Such movement must follow the marked sea lanes to ports. Any route may be traced to beachheads.
C. One NTP allows the movement of one Supply Marker, or of up to 3 SPs of ground units (of a type having a non-zero SP value), or one unit with a zero SP value. Units using NTPs may each move up to 30 hexes by sea, at an MP cost (similar to the rail cost) of 1 MP per 10 or fraction hexes.
D. NTPs may not be saved.
E. A port is friendly to the last side to move through it. At the start, all ports in Burma are friendly to Japan, and all ports in India are friendly to the Allies.
9.2 Amphibious Assault
A. Beginning in 1945, the Allies may mount amphibious assaults, landing units by sea at non-port hexes, and then creating beachheads for further supply and movement advantage.
B. The TRC indicates the availability of Amphibious Assault Points (AAP). One AAP allows the movement of 3 SPs of infantry, tank or LRP.
C. AAPs may not be saved.
D. An amphibious assault must begin in a friendly port; units may move up to 30 hexes at a cost of 1 MP per 5 hexes or fraction. Sea lanes need not be followed, and enemy ZOCs do not hinder or affect movement, and do not impose ZOC movement costs.
E. During the assault turn only, units are treated for supply purposes as if they are in the port of embarkation. Enemy ZOCs do not affect supply on that turn. On succeeding turns, supply is calculated normally.
F. When making an amphibious assault, place a Beachhead Marker in the landing hex.
10.0 Ground Combat
10.1 In General
A. Combat occurs between opposing adjacent units, during the Combat Phase, at the option of the phasing side. Attacks are voluntary in the Combat Phase; units are never compelled to attack, and not every friendly unit capable of attacking an enemy unit need participate in an attack if one is made.
B. Units must be in attack supply before an attack may be made (11.0).
C. Only one hex may be attacked per combat (no multi-defender hexes). All units in the hex defend together.
D. No defending hex may be attacked more than once in a player-turn.
E. Attacking units may be in different hexes if they attack the same hex together. However, units making an amphibious assault, or attacking across a major river hexside may not attack the same hex together with other units from different hexes. Units performing operations may participate in attacks with other units (which are not amphibious assaulting, or attacking across a major river) provided no more than one stack from the restricted operation is involved.
10.2 Combat Procedure
Adjacent units undergo combat in the following manner:
A. The phasing side declares which of its units are attacking, and designates the hex containing enemy units which will defend.
B. Total the combat factors of the attacking units (which may be in separate hexes). Adjust for terrain effects. This forms the attack strength for combat.
C. Total the combat factors of all defending units in the hex being attacked. Adjust for supply and terrain effects. This forms the defense strength for combat.
D. Calculate the ratio of attack strength to defense strength, reducing it to the closest odds given in the Combat Results Table (CRT), rounding in favor of the defender, if necessary.
E. Roll one die, cross-referencing the result with the CRT to obtain a combat result and implement it immediately. Apply a -1 die roll modifier (DRM) when any Allied tank units are attacking and any Japanese antitank units are defending.
10.3 Combat Results
The results apply only to the units which participated in the combat.
A. ½AE: Attacker eliminates at least half of its combat factors.
B. AR: Attacker retreats all of its units.
C. NE: No effect.
D. ½EX: Defender eliminates at least half of its combat factors (before any terrain effects). Attacker loses at least half of the defender's combat factors as modified by terrain.
E. EX: Defender is eliminated. Attacker loses combat factors at least equal to the defender as modified by terrain effects. Attacking combat factors are taken at face value.
F. DR: Defender retreats all of its units.
G. DE: Defender is eliminated.
10.4 Retreats
A. Attacking units retreat toward the supply unit providing attack supply.
B. Defending units retreat in the direction of their nearest supply route.
C. Units may not retreat into a hex in an enemy ZOC unless the hex is occupied by a friendly unit.
D. Units may not retreat across a major river hexside unless into a hex occupied by a friendly unit.
E. The stacking limit may be exceeded during a retreat, but the situation must be corrected during the next friendly Movement Phase.
F. If a hex overstacked due to retreat is attacked, it may only be defended by units totaling 10 SPs.
G. When a result of AR or DR is obtained, any supply units stacked with the affected combat units do not retreat but remain in the hex.
H. No units other than base units may retreat into all-sea hexes.
10.5 Advance After Combat
A. If combat results in the defender retreating or being eliminated, the attacker may advance after combat, moving any units which participated in combat into the vacated hex.
B. Parachute assault is the only situation in which the defender may advance.
10.6 Combat Example
Three Japanese Butais and one artillery regiment (strengths: 4-10, 4-10, 3-10, and 1-10, respectively) attack two LRP units (each 2-11), in general supply in rough terrain. The total Japanese strength attacking is 12. No terrain modifications apply to the Japanese units. Each LRP is increased by one combat factor (for rough terrain), giving a sum of defending factors of 6. The attack strength and the defense strength yield a ratio of 12 to 6, which reduces to 2 to 1. Roll one die is rolled. If the roll were a 5, the defending units would retreat from their hex. If the result were a 2, the result would be no effect.
11.0 Supply
A. Supply affects the ability of units to attack and defend. Movement is not affected by supply.
B. Lack of supply for four consecutive turns results in a unit's elimination.
11.1 Supply States
A. Specific points in the SOP are designated for the determination of supply status. The supply status determined then applies until the next point it is determined.
B. Three different supply states are possible for all units, which must be in one of those states at all times.
11.1.1 Isolated
A. Isolated units are unable to trace a supply line during the Supply Determination Phase. Isolated units may not attack, and their combat strength is halved while defending.
B. A unit is eliminated in the fourth consecutive Supply Determination Phase when it is judged to be isolated, and immediately removed from the map.
11.1.2 General Supply
A. Units in general supply have either traced a supply line during the Supply Determination Phase, or were established as being in general supply by the expenditure of a Supply Marker during the phase, or were established as being in general supply by the presence of an Air Drop Marker.
B. Units in general supply defend normally but may not attack.
C. Supply lines are traced during the appropriate Supply Determination Phase for the purpose of general supply.
D. A unit in general supply remains so until the next Supply Determination Phase.
E. Supply units must be expended to maintain units in supply if expending them would be the only way a unit could be in general supply. The owner does not have the option to withhold use of supply units.
11.1.3 Attack Supply
A. Units are established in attack supply only during the Combat Phase, by the expenditure of a Supply Marker or the presence of an Air Drop Marker.
B. Units in attack supply may attack enemy units.
11.2 Supply Lines
A. Several forms of supply line are possible. Successful tracing of any one form of supply line is sufficient to establish a unit as being in general supply.
B. Supply lines are always traced from the unit to the source. Each line has four possible components, some of which may be omitted. These four components are:
- The Initial Distance
- The Assisted Distance
- The Road/Rail Distance, and
- The Source.
11.2.1 The Initial Distance
A. The Initial Distance is traced by the unit overland through any hexes and hexsides through which it may move, to:
- A maximum of two hexes to the end hex of another component of the supply line, or
- Two hexes overland to a Supply Marker which itself is adjacent to the end hex of another component of the supply line.
B. Thus, one empty hex (whose terrain is traversable by the units receiving supply) may separate a unit from the next component (or a Supply Marker).
11.2.2 The Assisted Distance
A. The Assisted Distance may exist to connect the Initial Distance with the Road/Rail Distance, or it may connect directly with the Supply Source.
B. Assisted Distances are traced by air or sea.
C. ATPs may create an Assisted Distance of up to 17 hexes, providing both ends of the Assisted Distance are airfields or airheads.
D. During amphibious assault, an Assisted Distance exists between the port of embarkation and the beachhead of the assault.
E. The Assisted Distance (Air or Amphibious) may not be contained within Road/Rail Distance.
11.2.3 The Road/Rail Distance
A. The Road/Rail Distance connects the assisted or the initial distance to the supply source.
B. The Road/Rail Distance may be of any length, and must be traced by road, track, or railroad.
C. It may be traced by marked sea-lanes connecting friendly ports as part of the total distance.
D. The Allies may not use railroads in Burma as part of the distance, and Japan may not use railroads in India.
11.2.4 The Source
The Source is any form of supply available to the units. This may be Supply Markers, Air Drop Markers, or the appropriate geographic location.
11.3 Attack Supply
A. Notwithstanding the determination of general supply, a unit must be in attack supply before it may attack. Attack supply requires the expenditure of a Supply Marker. When a Supply Marker is expended, it supplies all attacks within two hexes of it.
B. Creation of attack supply interrupts the counting of consecutive player-turns of isolation.
C. If ATPs have been used to create an Assisted Distance as part of the supply line of the units attacking, and a Supply Marker is present in an airfield marking one end of the Assisted Distance, it may be expended during the Combat Phase to create a state of attack supply.
D. Similarly, a Supply Marker in the port of embarkation of amphibious assault troops may be expended to create a state of attack supply for those units.
E. The Air Drop Marker creates a state of attack supply when it is placed for units in that hex.
11.4 Supply Sources
Supply may be traced to any of three sources, geographic locations, Supply Markers, or Air Drop Markers.
11.4.1 Geographic Locations
A. Geographic locations are land hexes that serve as permanent sources. They provide only general supply.
B. Japanese geographic locations are Rangoon and hexes on the south edge of the map.
C. Allied geographic sources are any hex on the west edge of the map.
D. Yunnan Chinese geographic locations are any hex on the east edge of the map in the area bounded by the Salween River serves. (As printed; the sentence is incomplete in the source.)
11.4.2 Supply Markers
A. Supply Markers are provided in the Order of Battle/Appearance. Each has a movement factor and moves as units do.
B. They may be transported by sea using NTPs.
C. Allied Supply Markers may be transported by air, using the troop transport mission. A commitment of 6 ATPs is required to move one Supply Marker.
D. The Yunnan Chinese may be supplied only by their own Supply Markers (in Yunnan Chinese colors).
E. When supply is traced to a Supply Marker which is not adjacent to a supply line, the counter is expended in the process of creating the state of general supply.
F. When a state of attack supply is created, or when an Air Drop Marker is created, a Supply Marker is expended.
11.4.3 Air Drop Markers
Air Drop Markers are specially created by the Air Drop Air Mission; they serve as supply sources.
11.5 Supply Markers
A. Supply Markers appear per the Order of Battle/Appearance. When a Supply Marker is expended, it is placed on the map edge which that side uses as a supply source.
B. On the next turn, during the Reinforcement Phase, the counter is returned to play. Thus, once a counter appears per the Order of Battle/Appearance, it is capable of being recirculated after use.
11.6 Destruction and Capture of Supply Markers
A. Supply Markers may be destroyed to prevent capture, or to allow rapid redeployment to other areas of the map. At least one friendly unit must be present in the hex containing the Marker(s), and expend 3 MPs. The desired counters are destroyed and returned to the map edge for reuse.
B. Supply Markers are not eliminated when the units they are stacked with are eliminated in combat. In such cases, they are capable of being captured by enemy units advancing after combat. The marker is replaced by a Captured counter, and the original is returned to the map edge for reuse.
C. Captured counters remain in play until used to create a state of attack supply, after which they are removed from play, and do not become available for reuse.
D. Supply Markers in a hex without friendly troops or defense strength may also be captured by simply entering the hex.
11.7 Moving Out of Supply Intentionally
A. Allied units may not move out of supply during their Movement Phase, except for LRP units.
B. Allied LRP units and all Japanese units may move out of supply during their Movement Phase, but cannot move such that they are out of supply and isolated at the end of their player-turn.
C. No unit may advance after combat to become out of supply.
D. A Japanese or Allied LRP unit beginning its turn out of supply may hold its position, move towards supply using its full movement, or move a supply unit so as to recreate a supply route.
E. Allied combat units, other than LRPs, may not hold their position when isolated, but must if possible move towards supply using its full movement, or move a supply unit to recreate a supply route.
F. A state of isolation must be avoided by both sides by expanding any available supply unit to create general supply.
G. The rules in this section are meant to specify that a state of isolation cannot be voluntarily created by either side. If isolation is created by the enemy, Japanese units and Allied LRP units cannot move to make it worse, but, if they move at all, must act to eliminate isolation as soon as possible.
11.8 Sample Supply Routes
A. A unit could trace the following supply lines:
- Two hexes overland (Initial Distance) to a road, and then any distance by road (Road/Rail Distance) to the correct map edge (Source). No Assisted Distance is used.
- One hex overland (Initial Distance) to a road, and then by road to a friendly port, via sea lanes to another friendly port, then by road (all forming the Road/Rail Distance) to the correct map edge (Source). There is no Assisted Distance.
- Two hexes overland (Initial Distance) to an airhead, then by air 13 hexes to an airfield (Assisted Distance), then by road (Road/Rail Distance) to the correct map edge (Source).
- Two hexes overland (Initial Distance) to an airfield, then six hexes by air (Assisted Distance) to an airfield containing a Supply Marker (Source). The counter would be expended in the process of providing supply.
- Two hexes overland (Initial Distance) to a beachhead, then by sea (for units making amphibious assault) to the port of embarkation (Assisted Distance), then by sea lanes to a friendly port and by road (thus all forming the Road/Rail Distance) to the correct map edge (Source).
- Two hexes overland to a Supply Marker adjacent (Initial Distance) to an airfield, then by air 17 hexes to an airfield (Assisted Distance), and then by road (Road/Rail Distance) to the correct map edge (Source).
- Two hexes overland to an airfield (Initial Distance), then by air 15 hexes (Assisted Distance) to an airfield which contains a Supply Marker (Source). The Supply Marker would be expended in the process of providing this supply.
B. Other routes are also possible.
12.0 Road Construction
During the Land and Naval Movement Phase, engineer units may undertake the construction of roads.
12.1 Allied Roadbuilding
A. Each Allied engineer can construct roads in any type of terrain.
B. In clear terrain, or in terrain containing a track, one engineer unit may build two hexes of adjacent road.
C. In rough, non-track terrain, one engineer unit may construct one hex of road in two turns. Invert the unit on the turn it begins construction, and right it on the following turn, at which time the road marker is placed on the map.
D. If the road is being built to cross a mountain hex with no track crossing it, one extra turn is required.
12.2 Japanese Roadbuilding
A. A stack of two Japanese engineer units may construct roads in some types of terrain.
B. In any non-rough terrain containing a track, except across mountain hexsides, a road may be built to upgrade the track. Two engineers may construct one hex of road in one turn.
C. In any other non-rough terrain, two engineers may build one hex of track in one turn.
D. In rough terrain containing a track, except across a mountain hexside, two engineers may construct one hex of road to upgrade the road in two turns.
E. In any other rough terrain, two engineers may construct one hex of track in two turns.
12.3 Restrictions
A. An increased number of engineers does not shorten the construction time for roads and tracks.
B. Engineers involved in construction may only move one hex in the turn. In the case of the Allies, this may be used to move to the hex of the second allowed road construction, or it may be used to move to the site of the next turn's construction.
C. Construction rates may not be mixed. If the Allies wish to construct one hex of road in clear terrain and one hex of road in rough terrain, using one engineer unit, it would take two turns.
D. Roads and tracks, once constructed, may not be destroyed, and may be used by either side.
E. Constructed tracks may not be the basis for later construction of roads.
F. Road counters are provided. It is not necessary to mark each hex containing a road or track, only those necessary to clarify the situation. The Japanese side must be careful to distinguish which of its markers note roads and which note tracks.
G. Roads and tracks may not be used in the turn they are placed. If a road (but not a track) forms a path crossing a river, a bridge is assumed present. No extra cost is incurred in constructing roads or tracks over rivers.
13.0 Airfields and Airheads
Airfields and airheads serve as points for interaction between air and ground units.
13.1 Airfields
A. Airfields initially exist at printed locations on the map. More airfields may be constructed during the game.
B. One Allied engineer unit may construct an airfield, at the cost of 1 MP in any hex which it passes through, provided the engineer is not engaged in road construction during the turn.
C. Japanese engineers may not build airfields.
D. Airfields serve as bases for ATPs. Each airfield has a capacity of 3 ATPs.
E. No more than one airfield may be in any one hex.
F. All airfields have an intrinsic defense factor of 1 combat point, which may be used alone or added to the sum of units if they are present in the hex.
G. ATPs do not possess a ZOC.
H. Enemy airfields may be captured by entering such a field when no enemy ground units are present. If ATPs are present, each point separately rolls for escape:
- On a 1-4, the ATP escapes. Escaping ATPs fly to any friendly airfield.
- On a 5-6, the ATP does not, and it is destroyed.
I. When all airfield counters are in play, unused counters in the Allied rear area may be removed from play to allow more building towards the front.
J. Airfields may not be destroyed by troop action.
K. An airfield can operate when in an enemy ZOC if it is occupied by a friendly combat unit.
13.2 Airheads
A. Airheads act as destination or origination hexes for supply and movement.
B. An Airhead may be placed at any time in the Land and Naval Movement Phase or the Air Power Phase by a LRP unit at a cost of 3 MPs.
C. An Airhead may be used immediately upon placement. Transport missions and supply missions may be made in the phase of placement, if otherwise possible.
D. An Assisted Distance component of a supply line may be traced from an Airhead, and air transport missions may be flown to an Airhead.
E. Airheads act as fortification counters, adding one combat factor to the defense of each LRP unit present in the Airhead hex.
F. An airhead can operate when in an enemy ZOC if it is occupied by a friendly combat unit.
14.0 Special Combat Forces
Special units are available to both sides.
14.1 Japanese Base Units
A. Base units can move into all-sea or coastal hexes at the cost of 1 MP per hex of movement.
B. Base units in a coastal box can be attacked from land as if they were land units.
C. Base units can attack into any hex adjacent, even including all-land hexes.
D. Base units cannot end their movement away from a friendly port for more than one turn, else the unit is eliminated.
14.2 Long Range Penetration Forces
The Allies are provided with various US Long Range Penetration (LRP) units, including Merrill's Marauders (5307) and their later replacements (Mars-1 and Mars-2).
14.2.1 LRP Special Abilities
A. LRP units may purposely move out of supply if the owner so elects.
B. Only LRP units may use the Glider Assault Air Mission.
C. LRP units are automatically eliminated after eight consecutive player-turns in which they are supplied through an Airhead and/or with Air Drop Markers. Creating supply by other means for even one player-turn is sufficient to break the cycle.
14.2.2 Training Other Units
A. The Allies have the option of converting British and Indian units into equivalent forces. Any pair of British or Indian infantry brigades may exit from the west edge of the map into India for training. The units are placed in Box 1 of the Training Chart. Each turn, as the Turn Marker is moved on the TRC, the units are advanced one box. When the units are moved out of Box 4 of the Training Chart, the pair of brigades is replaced by 3 LRP units, and they are brought into play in the next Reinforcement Phase.
B. The brigades used to create these special forces should be kept separate to preclude their use as replacements. The brigades are not destroyed, simply converted.
C. Units in training may be returned to play, without conversion, simply by so stating, and transferring to the map edge for appearance in the next Reinforcement Phase.
D. A maximum of six brigades may be converted to provide a maximum of nine additional LRP units.
14.3 Parachute Troops
A. The Allies may also convert infantry brigades into parachute battalions in a fashion similar to that of converting LRP units. One Indian or British brigade moves to the Training Chart, and upon its leaving, it is converted into two parachute battalions. The converted brigades should be kept separate to preclude their use as replacements.
B. Parachute battalions are automatically in supply for combat when conducting a Parachute Assault, in that portion of the Air Power Phase. No Supply Marker is needed.
14.4 Chinese Troops
A. Chinese units (in green with yellow) appear per the Order of Battle/Appearance.
B. Yunnan Chinese units (in yellow with black) appear per the Order of Battle/Appearance, but are restricted geographically to the area of China east of the Salween River until they are successful on the Chinese Appearance Table. Beginning on Turn 12, the Allies roll on the table until success is achieved.
Chinese Appearance Table
| Roll | Result | Roll | Result | Roll | Result |
|---|---|---|---|---|---|
| 1 | 2+ | 3 | 15+ | 5 | 16+ |
| 2 | 14+ | 4 | 15+ | 6 | 17 |
C. If the result achieved on the table is equal to or less than the current turn, the Yunnan Chinese may cross the Salween River. Once success is achieved, it need not be rolled again. The Yunnan Chinese may cross the Salween River on Turn 17 if success has not occurred before that turn.
D. All Chinese Troops (not just Yunnan) are, to a great extent, politically unreliable. At the start of each turn in which any Chinese troops are to be used, roll on the Chinese Reliability Table. It indicates the restrictions, if any, on the use of Chinese units.
Chinese Reliability Table
| Roll | Result |
|---|---|
| 1-3 | Normal Combat and Movement |
| 4-5 | Half Attack, Normal Movement |
| 6 | May not Attack or Move |
E. Defense strength is always normal for Chinese Troops.
F. Chinese units may not move south of Lashio (row 23).
14.5 The Indian National Army
The three Japanese units marked INA are regiments of the Japanese-formed force of dissident Indian nationals. This force used Indians in the war against India, ostensibly in an effort to free their own nation from British rule. Their strength and stacking point ratio reflect their worth in the war effort.
15.0 The Burma Road
A. A major victory condition for the Allies is the construction of the Burma Road. Normal road construction methods are used (12.0).
B. The actual Burma Road is any line of rail hexes (in India only) and road hexes connecting the Allied geographic supply source at the west map edge (in India) and the geographic source at the east edge (in China) beyond the Salween River.
C. The road must be free of Japanese units and their ZOCs, unless occupied by Allied units.
D. Both printed roads and constructed roads may be used to trace the route.
E. VPs are awarded for completion and opening of the road, and for each turn in which the road is open for the entire turn.
16.0 Beachheads
A. Place a Beachhead Marker when an amphibious assault is made into a hex. It serves to mark the location of the assault. Once placed, it remains in place as a focus of supply, allowing one end of an Assisted Distance to be traced to it.
B. A Beachhead Marker has an intrinsic combat defense strength of one if at least one combat unit is present in the hex.
C. A beachhead is destroyed if an enemy unit is present in its hex and no friendly units are present.
17.0 Replacements and Reinforcements
During the Reinforcement Phase, the phasing side notes the units designated to appear, and brings them into play. These units are of two types: reinforcements and replacements.
17.1 Reinforcements
A. Reinforcements are units specified by unit size, type, strength, designation, or other criteria. The Order of Battle/Appearance indicates reinforcements.
B. ATPs may appear at any friendly airfield.
C. Troop reinforcements appear at a geographic supply source.
17.2 Replacements
A. Replacements are units previously eliminated in combat, brought back into play in terms of factors. The total number of factors allowed as replacements is noted on the TRC.
B. Eligible units equal to or less than the number of factors allowed, in terms of combat strength points, may appear.
C. Replacements must be taken from eliminated units. Any type of unit may be taken, except for those which require training (paratroops and LRPs).
D. For the Allies, Chinese replacements are specified separately and must be taken separately. Unused replacement factors may be accumulated if the owner desires, to be taken in later turns instead.
E. Replacements appear at a geographic supply source at the map edge.
F. If tanks are taken as replacements, they are replaced at twice their combat strength. Thus, a 2-strength tank unit would require four replacement points.
18.0 Island Occupation
Allied units may occupy islands (i.e., land on the first hex) only by amphibious assault, parachute drop, or LRP glider landing.
19.0 Port Garrisons
Japan must garrison every port in its possession with at least one combat unit, provided no Allied unit is within five hexes. A port's garrison requirement is lifted as soon as any Allied unit comes within five hexes of it.
20.0 Setting Up the Game
After laying out the map, each side separates its counters in preparation for play. The Allies selects the units specified on the Order of Battle, placing them on the map per those instructions. Japan then sets up its units, and moves first.
21.0 Optional Rules
21.1 Monsoon Weather (from Phoenix Magazine #24)
During monsoon weather:
A. Ground movement is allowable only by road, track, or rail, but only to the extent that a normal, one-month turn permits.
B. Opposing forces in contact are considered to be disengaged; no combat may be initiated.
C. Opposing forces may not move into contact. D. Air transport is allowed in 1944 but not in 1943.
E. Naval transport is allowed.
F. In calculating the effects of isolation (11.1.1), monsoon months count as two turns.
G. LRP assaults may be made in 1944, but must observe all restrictions of this section.
H. LRP training in monsoon turns count for two boxes.
21.2 From Consimworld
21.2.1 Armor Bonus
A. When armor units attack, the owner applies a +1 DRM to the combat die roll. Only a +1 DRM applies, regardless of how many armor units are participating in the combat.
B. Armor do not get this modifier if attacking across a mountain hexside, by amphibious assault, or through a major river hexside.
21.2.2 Stand and Defend
If a force of either side suffers a DR result, it may elect to suffer a ½EX result instead. In such case, the attacker does not suffer any adverse effects.
21.2.3 Japanese Airfields
A. Airfields controlled by the Japanese at game start have garrisons as Allied airfields do.
B. If a Japanese airfield is captured by the Allies, then left unoccupied, and Japan can trace a line of supply to the airfield, then the Japanese garrison returns to the airfields. This may occur at any time during either player-turn.
21.2.4 Monsoon
During monsoon turns:
A. All units may move by rail.
B. All units may move one hex, including after rail movement.
C. Units may not cross mountain and major river hexsides except by rail.
D. Supply may not be traced across major rivers except across bridges.
21.2.5 Limited Amphibious Assault
A. Both sides may attack or seize control of islands from the mainland. Attacks may be launched from any coastal hex adjacent to the island.
B. If the island hex is undefended, the attacker may advance from the coastal hex. The attacker in this case does not need to expend a supply unit.
C. If the hex is occupied, combat takes place normally using the rules for attacking across a major river.
21.2.6 Rangoon Air Cover
If the British do not control 2932, all Allied attacks against Rangoon suffer a one-column shift to the left.
21.2.7 Long Range Penetration Groups
21.2.7.1 In General
A. The Allies may not use brigades of 4 or 5 combat factors to train for LRPs.
B. LRPs may infiltrate as the Japanese do.
21.2.7.2 Retreat Before Combat
A. If attacked, LRPs may attempt to evade combat. To do so, roll a die. On a 1-3, the LRP may retreat before combat. If more than one LRP is in a hex, each unit must roll separately.
B. If retreating into an Allied-occupied hex which is subsequently attacked, they add their combat strength to the defense unless overstacking occurs.
C. If retreating into an empty hex, and Japan announces an attack against that hex, the same procedure can take place. The Allies can roll for disengagement and retreat, or can remain and defend.
21.2.7.3 Rail Sabotage
A. LRPs may sabotage rail hexes and bridges during the Allied Movement Phase. To destroy these targets, an LRP must expend an additional MP in the hex. Use a blank counter to mark the blown hex.
B. The damage is automatically repaired at the end of the next Japanese player turn.
C. Supply lines may not be traced along a blown rail hex or bridge.
D. Units may not move by rail using damaged rail hexes.
21.2.8 British and Indian Combat Performance
Until at least the middle of 1943, British and Indian infantry (Exception: LRPs and paratroops) combat performance was sub-standard and the high command recognized the lack of fighting spirit against the Japanese. All attacks made by British and Indian infantry units suffer a one-column shift to the left on the CRT through Turn 7.
21.2.9 Mutaguchi's Offensive
In March, 1944, Japanese General Reyna Mutaguchi launched an offensive into India to first capture Imphal, and then move deeper into India in the hope of inciting rebellion against the British. It was a desperate throw of the dice with divisions that were weaker than their opponents and not enough supplies to sustain the offensive. Mutaguchi hoped to repeat the Japanese success in 1942 in causing the British to flee once their road supply lines were cut, and assumed they would repeat the old patterns of withdrawal leaving behind supplies for the Japanese to capture. Unfortunately for him, the British of 1944 were different from 1942. It would be the worst disaster of the war for the Japanese army.
21.2.9.1 Creation of Offensive
A. Beginning on or after Turn 14, Japan may declare that Mutaguchi's Offensive is in effect. The rules for this offensive last until the end of Turn 19.
B. Three divisions, with any artillery/tank/engineer units with them at the time the offensive is declared, plus one or more INA units, may move out of supply during the offensive.
C. While out of supply, they may attack with half their strength and still advance towards India.
D. They may survive out of supply six complete player-turns, rather than four.
E. These units must move toward India.
21.2.9.2 Mutaguchi Headquarters
A. Create a headquarters (HQ) counter representing Mutaguchi. The HQ unit begins in a hex with one of the divisions taking part in the offensive. (The real Mutaguchi was safe far away, but this is merely a device to force some cohesion on the player.)
B. The HQ may move four hexes per turn. All units taking part in the offensive must be within six hexes of the HQ at the end of the Japanese player-turn.
C. The HQ may not be destroyed; if alone in a hex entered by an Allied unit, place the HQ with the nearest Japanese unit.
21.2.9.3 Specify Assault Units
A. Record any three Japanese divisions as being the assault divisions. (Historically they were the 15th, 31st, and 33rd.) If the Japanese divisions are mixed up on board, and the three chosen have some components that were eliminated, exchange in exactly equal strength counters that are on board for those division units in the dead pile to build up three divisions for the attack.
B. Division units that have become spread out across the map may also be exchanged for the correct divisions taking part in the offensive.
C. No more than three divisions (plus artillery, INA, engineer, and tank units) may participate. Other units in the area must obey normal rules.
21.2.9.4 Combat Effects
A. The first two turns of the offensive, Japan receives a one-column shift to the right on the CRT when attacking.
B. The third turn, Japan gains a +1 DRM when attacking.
C. After the third turn, Japan gains no further attack advantages. These apply only to the chosen units.
21.2.10 Indian National Army Political Effect
A. If Japan is able to move an INA unit into Dimapur (0420), Imphal (0921), or Silchar (0925), Japan may roll a die immediately to try to cause unrest in India. (The idea of political unrest was considered possible by General Slim.)
B. Unrest occurs on a:
- 1 if Imphal is occupied.
- 1-2 if Dimapur is occupied.
- 1-3 if Silchar is occupied.
C. Unrest means British replacements for each turn are lost while INA units are in these towns. Only half of the British reinforcements scheduled arrive until the INA units are driven out of these cities.
D. Unrest rolls may occur each time Japan captures these towns and moves an INA unit into them, or after being driven out, returns to them.
E. This rule is limited to the Mutaguchi Offensive, and INA units have no political effect during other turns.
21.2.11 Additional Victory Points
Award VPs per the chart below for control at the end of the game (Turn 26).
| VPs | Side | Hex |
|---|---|---|
| 1 | Both | 2516 |
| 1 | Both | 2516 |
| 1 | Both | 2932 |
| 1 | Allies | 1006 |
| 1 | Allies | 2309 |
| 1 | Japan | 4924 |
| 1 | Japan | 4925 |
22.0 Designer's Notes
The Long and Winding Road
With the publication of Burma by GDW, I finally realized a goal I had been working towards for quite some time. These notes will describe how the game came to be and the decisions made in the design process.
Burma, as a country, had always evoked exotic pictures in my mind. I imagined the sound of tinkling bells in a Buddhist pagoda or I could see a steamboat churning through the waters of a broad sluggish river and of course there were the steaming jungles in which all motion is slowed due to the heat. To these images were added the massive armies that General Slim wrote of in his book Defeat Into Victory (1959). I was amazed by the size of the forces involved and the complexity of the strategies attempted.
In 1969, shortly after my introduction into wargaming, I read the book Kohima and I was captured by the descriptions of the heroic efforts of the individuals on both sides. This was the 'spark' which led to BURMA.
I felt that the best level of operations by which to simulate this conflict was by showing the entire campaign. But having never designed a game I was put off somewhat by the complexities of the actual campaign. I felt that I should first design a less ambitious game in order to get some actual design experience. I decided to do the battles of Kohima and Imphal. I began on this project in 1970, working whenever I felt inspired or when I was in the mood. Months actually went by without my even looking at the design. Then there were periods when I'd spend four to eight weeks on just solid design work – no breaks, not even weekends. In spreading my time like this, things that at first seemed difficult to design became easy, or flaws that I might have missed were caught and corrected.
I very much wanted the game to be published. Most of the publishers I contacted were most unresponsive, but the now defunct ALBION published the game in its original form and following this, JagdPanther Publications decided to publish the game. This led me to modify the game and it was published by JP in early 1976.
After this experience I felt I was ready for the 'real' game – BURMA. I approached the design very analytically. SPI had talked about their 'systems approach' to game design and having been a systems analyst I felt I'd give it a try. I decided to layout what I thought they meant based on my experiences in the design of the Imphal battle game. I would establish a logical method to ensure that the BURMA design would be as thorough as possible.
This approach resulted in a written Methodology of Wargame Design. This included a written design specification system and a schedule of sequential steps that I would follow. Briefly, these were:
- Write a specification for the game design (including scale, number of turns, number of units, etc.).
- Research and determine the complete order of battle.
- Select the scale of the map and sketch it out on paper.
- Sketch the scale of the map on a standard hex sheet.
- Prepare 'turn' sheets, with each sheet approximating in real time what would occur in one turn.
- Final specifications (tactics to be represented, scale, number of turns, etc.).
- Prepare worksheet files on each subject (i.e., design topics such as supply, movement etc. from historical references).
- Draft the rules.
- Complete unit counters.
- Complete map.
- Solitaire playtest a complete game by using 'turn' sheets.
- Make rules revisions.
- Have game playtested by independent playtesters.
- Make all final revisions necessary.
I followed the above schedule quite closely and found it worked well. It might be too thorough and detailed, but the design for me was a hobby – I enjoyed spending the time.
The main goal of the design was to give priority to playability. The hardest section in which to achieve this was in the supply rules. Supply considerations were so significant in the actual campaign it was simply impossible to omit them in the game. Omitting them was considered at one point, but the game would have been distorted beyond all reason. With the air rules, the decision (based on playability) was the opposite – the axe fell.
Some liberty was taken with the rules to achieve playability. For example, a normal turn is about one month except during the monsoon season when one turn represents an entire season. The order of appearance is not exact, although it could have been designed as in ANZIO or PANZERARMEE AFRIKA with units arriving or withdrawing at exact times. Instead, the most significant units are made to arrive, but not leave the board so that the number of combat factors available is always correct. On the map, there is no railway from India to Chittagong, although there was one in reality. This is done to create the effect of the supply bottleneck that actually occurred on this railway which had very limited capacity.
The game as published by GDW has adhered well to the design principles, although they have added substantially to rule concepts. I feel that all involved have done their best to produce an interesting and enjoyable game.
What is the best strategy in the game? I don't feel that being a designer really qualifies me to answer this question well. However, I can comment based on what happened historically.
The Japanese must push as deep into India as possible on all fronts. They must capture Imphal and perhaps base his line on the central front at Kohima. In the north, he must push as far as his supply will allow him towards Ledo. On the coast, probably they can reach the Feni River. A conservative player can await the Allied counteroffensive. An aggressive player will probably build a road for supply and use this to push far into India, ideally attacking from Imphal to reach the north edge of the mapboard, cutting off Ledo. The Japanese must be wary of the coast at all times since it is so remote as to be difficult to reinforce, and a significant Allied offensive here can spell disaster when the Allies get their amphibious capability. In the end, the Japanese must be prepared to fight a slow withdrawal, timing this so they have enough strength left to defend south of Mandalay in 1945.
The Allies must decide where to start the Burma Road soon, and once committed cannot start again. However, they can keep the Japanese guessing as long as possible by attacking from both Ledo and Dimapur. They must start in the meantime a slow and steady push along the coast, to capture Akyab by at least the end of 1944 and to threaten the whole of the coast by amphibious assault. Once they get Ramree Island they, in fact, threaten Rangoon.
The Allies will have a hard time at the start of their counteroffensive – they must be prepared for a war of attrition to wear down the Japanese. The key to get moving is to convert as soon as possible at least four brigades into LRP units and another brigade into paratroops – more if they can afford it. Throttling the Japanese supply line is the objective. Paratroops can attempt to seize airfields near supply routes into which infantry can be flown to establish a stronghold; or LRP units can be glider-landed into rough terrain next to supply routes. If you don't succeed at first, withdraw before being hurt too badly and try again. In any case, once the Allies start building the road, they must keep up the pressure and never let the Japanese rest.
The final phase should see the Chinese and British/Indian forces join near Mandalay, or at least Bhamo, to cut off the north, and be prepared to drive south onto Rangoon; another strong force should be poised on the coast to threaten Rangoon by amphibious assault. The Japanese, if weakened enough, cannot watch both directions.
Editor's Notes
Omitted from this transcription: the credits block (section 23.0) and the designer and reviser attribution lines. Minor typographical errors in the source were corrected ("Suring" to "During", "apply unit" to "supply unit", "the units the are" to "the units they are", "Road counter are" to "Road counters are", "patters" to "patterns", "a least" to "at least", "threated" to "threaten", "affect" to "effect" in 21.2.10 E). Two rules sentences are garbled in the source and are transcribed as printed: 11.4.1 D and 10.6 ("Roll one die is rolled").