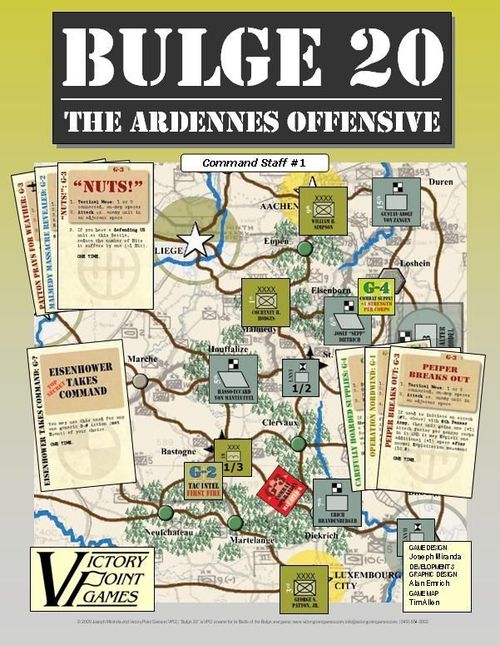
Bulge 20: The Ardennes Offensive
Bulge 20: The Ardennes Offensive Rulebook
Table of Contents
Table of Contents
- 0.0 Using These Rules
- 1.0 Introduction
- 2.0 Game Equipment
- 3.0 Defining Key Terms
- 4.0 Setting Up the Game
- 5.0 Sequence of Play
- 6.0 Staff Cards
- 7.0 G-1 Administration
- 8.0 G-2 Intelligence
- 9.0 G-3 Operations
- 10.0 Battles
- 11.0 Air Missions
- 12.0 G-4 Logistics
- 13.0 Planning Phase
- 14.0 Weather
- 15.0 Housekeeping
- 16.0 How to Win
- Errata (v1.0 Errata Sheet)
0.0 Using These Rules
New gaming terms, when they are initially defined, appear in dark red lettering for quick referencing.
The instructions for this game are organized into major "Rules" sections, represented by the number to the left of the decimal point (e.g., rule 4.0 is the fourth rule). These rules generally explain the game's components, procedures for play, the game's core systems and mechanics, how to set it up, and how to win.
With each Rule, there can be "Cases" that further explain a rule's general concept or basic procedure. Cases can also restrict the application of a rule with exceptions to it. Cases (and Subcases) are an extension of a Rule shown in the way that they are numbered. For example, Rule 4.1 is the first Case of the fourth Rule; and Rule 4.1.2 is the second Subcase of the first Case of the fourth Rule.
Important information is in red text. References to examples of a Rule or Case are in blue text. Text in shaded boxes provides the voice of the game's designer or developer, who is addressing you to explain an idea or concept that is not, itself, a Rule or Case.
1.0 Introduction
BULGE 20 is a strategic level wargame of the German Ardennes Offensive from December 1944 to January 1945. Players are put in the position of German and Allied Army Group commanders on the northern part of the Western Front.
Player's decisions reflect actual Army Group level command via a Military Staff System. Each turn, players allocate capabilities, represented by their Staff cards. The map shows the theater of operations with major Axes (plural of "axis") of Advance delineated. Units move and conduct combat along these axes. How well a player conducts his staff work often determines the outcome of these battles.
The German Player has three major strategic objectives. The Allied player attempts to prevent German success while, at the same time, conserving strength for the long-awaited invasion of Germany.
2.0 Game Equipment
Parts Inventory
- 1 11" x 17" map
- 1 11" x 4 1/4" Battle mat
- 1 set of 12 3/4" square game pieces
- 1 set of 40 5/8" square game pieces
- 1 set of 11 5/8" round game pieces
- 20 German and 24 Allied Staff cards
- 3 German Objective cards
- 1 Weather card
- 2 Order of Battle (OOB) mats
- 2 OOB screens (with player data)
- 1 Rules booklet
- 1 ea. Setup & Sample Turn (inside covers)
- 1 Designer's Notes sheet
Not included is at least one 6-sided die needed for resolving battles.
2.1 The Game Map
The game map shows the Theater of Operations stretching from Luxembourg to the English Channel, and the Westwall to Antwerp. It is divided into spaces which are the points with names (e.g., Bastogne) where players deploy their units.
The map also shows vital routes, called Axes of Advance and rivers between some of these spaces - a unit that attacks across a river gives the defender certain benefits.
2.2 The Playing Pieces
The playing pieces represent the actual military units that fought in this campaign. The numbers and symbols on the playing pieces represent the strength and type of unit represented by that playing piece. A sample unit shows: Size, Type, Formation ID, Commander (army units), Attack Factor / Defense Factor.
The German player controls the German (gray and black) units. The Allied player controls the other (green and brown) units.
2.2.1 Units: Armies, corps and garrisons are known collectively as "units" representing military forces.
Unit type symbols (Allied / German):
- Armored infantry: a mix of armored and heavily motorized divisions
- Armor / Panzer: composed of primarily armored divisions
- Infantry: primarily infantry divisions
- Airborne: parachute divisions
- Garrison: immobile scratch formation
There are no airborne drops in this game.
Unit size symbols: Corps (XXX), Army (XXXX), Army Group (XXXXX).
2.2.2 Armies: The basic unit of maneuver in the game is the army. These are represented by the large counters.
- The Allies are divided into the US Army and British Army. There are restrictions on how they cooperate.
- Each army has its commander's name (which is included for historical flavor only) and a corresponding Holding box on the OOB mat into which the corps that comprise it are placed.
2.2.3 Corps: These are the smaller square counters. Corps are generally placed in the Holding box for each army, thus providing that army's combat strength and resilience. Corps can also be placed on the map.
Corps have two numbers on them: their Attack Factor and Defense Factor (i.e., how many dice they throw in Battle when attacking or defending).
Corps are two-sided units. Their front (organized) side shows them at full strength, while their reverse (disorganized side) side has a stripe highlighting their reduced strength.
Abbreviations: Two Allied corps have abbreviations as follows:
- CR = Corps Reserve
- TR = Allied Theater Reserve (an ad hoc group of divisions)
2.2.4 Garrison units: These are found on the reverse of the square Captured Depot markers. See Case 10.8 for their details.
2.2.5 Markers: Markers are provided to help players remember information:
- The round Control markers denote which side controls a specific space if it is not obvious. The square Control markers are used by the Germans to denote their control of key (LOC; see 3.5) spaces.
- The square Combat Support markers are provided to remind players which armies are attacking where, and with what additional support in that Battle.
- The Game Turn marker keeps track of time as the game is played.
Staff Cards: A Staff card shows its Card Title and Type, the Basic Staff Work Actions (file folder), Event text (if any), and a Limited Reuse notation (if any). Each side has its own set of Staff cards (the Allies have more) that make things work in the game. These cards are not shuffled! Rather, each side begins with all of their Staff cards available from the start.
Other Cards: The German player selects one of the three German Objective cards at the start of play. This selection will generate his secret victory condition for the game. The Weather card indicates the current weather condition, its gameplay effects, and the chance of the weather changing.
3.0 Defining Key Terms
Some key terms should be understood before continuing with the rules:
3.1 OOB: This stands for "Order of Battle" and refers to the off-map player mats with their Holding boxes. In these Holding boxes, corps are assigned to armies (and are placed in the appropriate Holding box) while the army unit itself, representing those corps, is placed on the map. Friendly corps and armies can be placed in (their on-map, printed) Army Group HQ space and are immediately moved off map to that AGHQ Holding box.
3.2 Armies: Note that an army, regardless of how many corps it contains (up to four, see 7.5), is still considered only one unit. When activated (using a single card) to move or attack, all of that army's corps participate as well (i.e., you don't have to spend a card for each corps in it to move or attack with that army).
Thus, armies containing multiple corps are much more efficient to operate than individual detached corps.
3.3 Army Group HQs: Army Group HQs ("HQs") are represented by a permanent location printed on the map. Friendly units only (no enemy units allowed) can be moved into and out of their HQ along axes of advance via Tactical (9.1) and Strategic (12.1) Movement like any other space.
- 3.3.1 No On-Map Placement: Units are not placed on the map at an HQ's location! Instead, any units there are immediately transferred to (i.e., hidden in) that Army Group's HQ Holding box.
- 3.3.2 One-Way Ticket: Units may not both enter and exit an Army Group HQ in the same Player Turn.
- 3.3.3 No Attacking Into: Attacks cannot be initiated into an HQ location. One unit per turn may attack out of an HQ location along each Axis of Advance extending from it.
3.4 Control: A player controls a space if:
- He has a unit occupying it.
- One of his units was the last to pass through it (i.e., it moved away, but the enemy has not re-entered it).
- That player had initial control and no enemy unit has occupied it.
Initial Control: At the start of the game, the Germans control all of the spaces on the east side of the starting line; the Allies control all of the spaces on the west side.
Once a player controls a space, he retains control until the enemy captures it.
The assumption is that rear echelon forces which are not shown in a game at this scale are maintaining control.
Use the round (normal) and square (special space) Control markers on the map to indicate who controls what space should there be any question or ambiguity.
3.5 Supply & Lines of Communication: Certain Staff cards require their player to trace a Line of Communications (LOC). A LOC is a path of friendly-controlled spaces traced from the unit in question along Axes of Advance to a friendly Army Group Headquarters (HQ) or depot (collectively referred to as "supply sources") of their nationality along axes of advance.
-
3.5.1 LOC Length: The maximum distance that can be traced from a unit back to its supply source is:
- Germans: two spaces
- Allies: three spaces
as indicated on their respective OOB screens, but these can be extended via Strategic Crossroads and captured enemy depots as explained below.
-
3.5.2 Friendly Depots: Friendly depots are printed on the map with a star symbol in that nationality's color. Note also that friendly Army Group HQs are also friendly depots.
Ultimately, units may only trace a LOC to a friendly supply source of their own nationality, as listed below, in order to be "in supply:" Also see Air Supply: 12.4.1.
- German: Army Group B, Trier. This reflects the actual German logistical situation; they built up their depots behind the Rhine to fool Allied intelligence about the offensive.
- US: 12th Army Group, Liege, Namur.
- British: 21st Army Group, Antwerp.
-
3.5.3 Capturing Allied Depots: The German player (only) may capture Allied depots printed on the map (i.e., Antwerp, Namur and Liege; see 10.8).
-
3.5.4 Extending LOC: A player can trace a LOC to a friendly-controlled Strategic Crossroads space provided that space, itself, can then trace a LOC to a friendly depot.
If the Germans control an Allied depot, they can similarly use it to extend their LOC a further two spaces.
Strategic Crossroads and captured Allied depots are not, themselves, supply sources. They are merely 'extenders' for units to trace back to a supply source.
4.0 Setting Up the Game
Follow these steps to set up the game:
- Choose sides and give each player their respective Staff cards and units. Set aside the German Objective cards for now.
- Place the markers in their respective on-map Holding Boxes, and the Weather card in the Weather Conditions on-map box on its "Bad Weather" side.
- Allied armies, corps and garrison units are deployed first, as shown on the Setup sheet (inside front cover). The Allied player then selects four (4) Allied Staff cards plus his Friction of War card for his starting hand and sets aside the others, face-down, forming his Available Pile.
- The German player then carefully selects one German Objective card of his choice and sets it to one side, face-down (unseen by the Allied Player). Place the German Objective chit on top of it to denote that card's selected status and place the other two (unselected) German Objective cards, face-down, next to it.
- German units are deployed second. Their on-map pieces are placed as per the Setup sheet, however the German Player may freely divide his thirteen German corps among the Holding boxes on his OOB as he desires, no more than three (3) to a box. The German player then selects seven (7) German Staff cards plus his Friction of War card for his starting hand and sets aside the others, face-down, forming his Available Pile.
Note: The German OOB mat corps deployment shown on the Setup sheet is the historical one, for those interested, but the German player has absolutely "free deployment" of his corps assets during setup.
Setup Sheet (printed text)
The Setup sheet is a diagram showing the map, the Allied and German OOB mats, and the card piles; unit identities and counter positions are shown only graphically. Its printed text is:
- Allies Set Up First. Labelled Allied placements on the map: Antwerp, Brussels, Aachen, Liege area, Elsenborn, St. Vith, and Clervaux or Diekirch. Allied Available Pile and Allied Starting Hand are shown beside the map. (Note that the cards shown as the Allied Starting Hand are those historically used. However, the Allied Player may freely choose his four starting cards.)
- Rotate the three corps units in the US 3rd Army box to signify that they are unavailable for transfer until Patton's 3rd Army arrives as Reinforcement.
- Germans Set Up Second. Each in its own Westwall space (the diagram shows German army units placed at Duren and other Westwall spaces). German Available Pile and German Starting Hand are shown beside the map. (Note that the cards shown as the German Starting Hand and units on the German OOB mat are those historically used. However, the German Player may freely arrange his corps units and choose his seven starting cards; see 4.0.)
5.0 Sequence of Play
Each game turn consists of the following Phases that must be conducted in order:
German Player Turn
- Action Phase: The German Player removes any Reconstituted corps units from the Game Turn Track and places them in the HQ box on his OOB mat. He then plays his Staff cards in any order. The Allied player can play certain of his Staff cards in response.
- Planning Phase: The German player selects a number of his Available Staff cards until his Hand Size reaches its size listed for on the current Game Turn as shown on the Game Turn Record Track (plus the 'free' Friction of War card).
Allied Player Turn The Allied Player then conducts his Action and Planning Phases in the same manner as above, but with the player roles reversed.
Weather Determination/Housekeeping Check to see if the weather and/or forecast changes. Advance the Game Turn marker.
Play continues thus until one side concedes the game, the end of the eighth Game Turn or, if the Germans have Wacht Am Rhein as their objective, the moment that they attain their victory condition.
Note that there are no separate movement, combat, etc., Phases as in most wargames. Rather, all such activity is generated solely by the play of Staff cards. (German and Allied Hand Sizes are listed on the Game Turn Record Track.)
6.0 Staff Cards
These are named after the four US military staff sections: G-1 Administration (assignment and organization of forces); G-2 Intelligence (about enemy strengths and intentions); G-3 Operations (tactical moves and combat); and G-4 Logistics (strategic moves, supply, maintenance, etc.).
6.1 Selecting Staff Cards: Each Player selects his hand of Staff cards from those in his Available Pile during his Planning Phase at the end of his Player Turn. Cards remain in your hand until played or your ensuing Planning Phase, at which time you keep or discard any cards in your hand and then draw back up to your Hand Size as indicated on the Game Turn Record Track.
Good Weather: On Good Weather turns, both player's Hand Sizes are increased by one (+1) Staff card when selecting them at the end of their turn (13.2).
6.2 Playing Staff Cards: Each Staff card can perform its generic G-1, G-2, G-3 (ground or air), or G-4 Actions shown on its file folder. Some Staff cards also have an Event on them; these Events are usually performed instead of the usual generic (file folder) Action when playing that card.
- 6.2.1 Timing: Generally, operations cards are played one at a time during a player's Action Phase in any order he desires. That card's Action or Event is performed, and then the next card is played, and so forth. During combat, however, several cards can be played concurrently by both sides in support of a Battle (see 10.2).
- 6.2.2 Prerequisites: Some Events can only be played if certain prerequisite conditions are met as stated on the cards.
6.3 Discarding Staff Cards: After playing or discarding a "generic Staff card" (i.e., one with a large G-# on its file folder graphic), it is returned to your Available Pile. Other ("Event") Staff Cards may not be, as indicated below:
- 6.3.1 One Time: If you played (not discarded) a card with the words "ONE TIME" after its Event text (whether you played it for its Event or used it to conduct a generic Action), it is permanently removed from play. Place it under the Removed Cards marker to indicate its removed status.
- 6.3.2 May Reuse: Although these G-3 Air cards are not generic, they are always discarded to your Available Pile and are available for reuse each turn.
Key Concept: Since you assign Staff Cards during your Planning Phase, the enemy has an entire turn to perform Actions and Events, thereby possibly rendering your picks moot - reflecting very real staff planning issues at the Army Group level.
6.4 The Friction of War card: Each player has this "Dummy" Staff card in their starting hand and, if it is ever discarded (see the discard rule on the card itself), is reselected "for free" at the end of that Player's Turn and returned to his hand. These cards are useful during a Battle to disguise each player's Staff card selection (10.2).
7.0 G-1 Administration
Armies have no "strength" per se; they are composed of corps which provide that army's strength and durability. G-1 cards allow you to reorganize the disposition of your corps units.
G-1 Administration Actions
By playing a G-1 card, you can do one of the following Actions:
7.1 Assign a Corps to an Army: The corps being assigned must be in your Army Group HQ. Move it from that box on your OOB mat to the Holding box of the Army you desire, provided that Army unit is in supply (as per 3.5).
7.2 Transfer a Corps to Army Group HQ: The transferred corps must be in an Army Holding box on your OOB mat or detached on the map. Move it from that Army Holding box or map space to the Army Group HQ box, provided that unit is in supply (3.5).
Important: You cannot transfer corps directly from one army to another. They must go through Army Group HQs.
There is no limit to how many armies or corps can be located at Army Group HQ. An HQ's OOB Holding box can be "overstacked" without penalty.
7.3 Detach a Corps from an Army: Simply place the corps unit on the map in an empty, friendly-controlled space adjacent to that army unit.
- 7.3.1 One at a Time: Each G-1 card can detach only one corps.
- 7.3.2 Army Group HQs: Corps cannot be detached from an Army Group HQ location onto the map. They can be detached from an Army in that location directly to the HQ Holding box (and from there later assigned to an army).
- 7.3.3 Re-attachment: To be reattached is a two-step (i.e., two-card) procedure: a corps has to be transferred to its Army Group HQ (7.2) and then reassigned to an army (7.3)!
7.4 Reorganize a Disorganized Corps: One disorganized (i.e., flipped to its lower-valued side) corps unit that is in supply (3.5) is flipped back over to its (full-strength) organized side.
Other Administrative Cases
7.5 Army Unit Contents: Each army must have at least one corps in its OOB Holding box in order to exist on the map. When the last corps in an army is eliminated, that army unit is removed from the map and placed in its Army Group HQ Holding box on the OOB mat (see 10.5.2).
Army Size Limit: An Army can have no more than four corps units in it.
7.6 Frontage (Stacking Limits): There can never be more than one unit (i.e., one army or one detached corps, not counting friendly Garrisons) per space. This is true at all times, so you cannot move an army or corps into or through a space with another army or corps (enemy or friendly).
At this scale, units getting their axes of advances crossed (i.e., they stack or move through one another) are a staff nightmare. The exceptions would be one's own Army Group HQ spaces, which have an infinite stacking limit, and Garrison units (which are "stack free;" see 10.8).
- 7.6.1 One Unit: Note that an army may be composed of more than one corps - off-map corps in army's OOB Holding box do not affect frontages.
- 7.6.2 Enemy Units: Friendly units may never enter or move through a space containing an enemy unit under any circumstances.
7.7 Detached Corps Actions: Detached corps conduct Actions just as an armies do. That is, for example, it takes one card to move a unit, whether it is a single detached corps or an army (itself full of corps units).
Thus it is more efficient to have corps conduct their activities together in armies.
7.8 Nationality Restrictions: US corps can not be part of British armies. British corps can not be part of US Armies.
G-1 Reinforcements Entry
7.9 Reinforcements: Certain units commence play as Reinforcements and automatically enter the game as instructed when their corresponding G-1 card is played. Specifically, they include:
- 7.9.1 Patton's 3rd US Army: When its G-1 commitment card is played the Allied player moves the US 3rd Army unit from the Reinforcement box to the 12th Army Group HQ box on his OOB mat. The three corps in the US 3rd Army box, which set up rotated, are turned to face normally.
- 7.9.2 Commit Strategic Reserves: When its G-1 commitment card is played, the Allied player moves the two listed corps as indicated.
8.0 G-2 Intelligence
Players must place their armies and corps visibly, face-up on the map, and the other player is allowed to know the quantity of cards in your hand. He does not get to know exactly which cards they are nor the content and position of units of your OOB mat (which should be hidden from his view by your OOB screen). That secret information can be garnered by playing G-2 cards.
G-2 Intelligence Actions
By playing a G-2 card, you can do one of the following:
8.1 Tactical Intelligence: Each player in Battle may play one G-2 card to gain/protect the Tactical Advantage (see 10.2.1).
8.2 Operational Intelligence: Your opponent lifts his OOB screen and you may take a moment to examine the position of his units there, after which his OOB screen is replaced to once again hide that information.
8.3 Strategic Intelligence: You may examine the enemy's card hand and then return it.
8.4 Theater Intelligence: The Allied player (only) may reveal one of the unselected German Objective cards; it is left face-up for the remainder of the game. When the last unselected German Objective card is revealed in this manner, the selected German Objective card is as well.
8.5 Counter-intelligence: Outside of a battle (10.2.1) you may play one G-2 card from your hand to immediately cancel the opponent's just-revealed G-2 card used for Operational, Strategic or Theater Intelligence only (a G-2 Event cannot be cancelled in this manner). The opponent's card has no effect and both cards are discarded.
Security: Again, outside of a Battle (10.2.1), "Counter Counter-intelligence" is allowed. Thus, a G-2 card can be used to cancel an opponent's just-played from his hand Counter-intelligence G-2 card (and that Counter Counter-intelligence card can then be canceled with another, and so on).
9.0 G-3 Operations
This is what makes the troops press forward and engage in battle.
G-3 Operations Actions
By playing a G-3 card, you may either move or attack as follows:
9.1 Tactical Movement: One friendly unit on the map (i.e., an army or detached corps), regardless of its supply situation, may be activated for Tactical Movement per G-3 card. It moves along axes of advance 1 or 2 spaces according to the data on each player's OOB screen.
- 9.1.1 Speed: Army units move at the rate of the slowest corps unit in them.
- 9.1.2 Restrictions: Units may not enter or move through a space occupied by another unit (enemy or friendly, except for friendly Garrison units as per 10.8).
- 9.1.3 Rivers: German units (only) must cease their movement for that G-3 Staff card immediately upon crossing a river.
- 9.1.3 Sequencing: You must complete the movement of one unit before commencing the movement of another.
Important: Although similar, G-3 Tactical Movement is not the same as G-4 Strategic Movement (12.1).
9.2 Attack: A friendly unit conducts an attack against an enemy unit in an adjacent space and initiates a "Battle" between them as per Rule 10.0.
- 9.2.1 One Target: Only a single space may be the target of a given attack.
- 9.2.2 Many Attackers: More than one unit can attack a single target space (i.e., you may attack that single target space from different directions concurrently), but each additional attacking unit requires its own G-3 card to activate it.
- 9.2.3 Persistence: A unit can attack more than once (and can even attack the same enemy unit multiple times) per Friendly Player Turn, simply by playing additional G-3 cards.
10.0 Battles
When one or more units have G-3 cards used to initiate an attack (as per 9.2), a Battle ensues. The player whose turn it is becomes "the attacker" and his opponent is "the defender," regardless of the overall situation on the map.
- Each attack is resolved individually and a Battle must be completed before the next attack can commence.
- A Battle consists of the following Steps:
The Battle Sequence
- Attack Declaration: The attacker spends one G-3 card per space attacked from (9.2) and places one red G-3 Attacking marker along each contested axis of advance to indicate the attack direction. Housekeeping: Place the Battle Location marker at the target space, noting any terrain effects at this time.
- Commitment: Both players secretly and simultaneously commit, and then reveal (and negate, as appropriate), any "Battle Support" G-2, G-3, G-4 and / or Friction of War cards that they wish to play.
- Placement: Reveal all committed units and place all engaged units on the Battle mat, including any G-# Support markers (from Step 2) present at that Battle to remind players of their effects.
- Engaged Tactical Advantage Player corps conduct "First Fire:" The opponent applies one "Hit" at this time for each Hit rolled and notes the total number of "Retreats" rolled.
- Engaged Tactical Disadvantage Player corps then conduct "Return Fire:" Surviving (from Step 4, above) engaged corps (which may now be on their disorganized side) return fire. Note the total number of Hits and Retreats rolled.
- Tactical Disadvantage Player Applies Retreats: Each Retreat rolled by the opponent must be accounted for as either a single Hit - OR - a space of retreat for each of that player's units in the Battle.
- Tactical Advantage Player then Applies Hits and Retreats to his units at the Battle (from Step 5) in the same manner.
- Housekeeping: Return surviving armies' corps units to each Army's Holding box on the OOB mat; also return all of the Battle markers to their Holding box.
- Attacker Advance: Attacking units (only) might be able to conduct Advance after combat, if allowed and desired (10.7). [Errata: the printed v1.1 text read "Attacker Advance / Exploitation ... Advance and Exploitation after combat ... (10.7, 8)"; exploitation was removed by the errata.]
Important: There is only one "Round of Fire" exchanged per Battle (but see 9.2.3).
10.1 Attacking Terrain Restrictions: An army attacking from OR into a Rough / Forest space, or across a River, can only engage (i.e., place forward on the Battle mat) a maximum of two of its corps in that Battle. Note that any additional corps in those armies that are not engaged are still committed to that Battle (this is an important distinction when apply Hits) and are revealed to the other player.
A defending army always uses all of its corps to defend.
This is very important and players need to organize their armies accordingly.
10.2 Committing Staff Cards to a Battle: Both players secretly choose Staff cards that they wish to play from their hands and commit to that Battle. After both players have secretly committed their desired cards, they are revealed and their effects implemented.
-
10.2.1 G-2 Intelligence: To gain / protect the Tactical Advantage at a Battle. Having the Tactical Advantage means that your units in that Battle have First Fire (i.e., they can prevent enemy corps from shooting back in that Battle) and you choose how to apply your losses after seeing the opponent's choices.
The Defender begins a Battle with the Tactical Advantage by default.
- The Attacker can commit one G-2 card to a Battle for its Tactical Intelligence Action to gain "First Fire."
- The Defender can commit one G-2 card for Counter-intelligence to negate the Attacker's possible play of a G-2 card (see 8.5). If the Defender plays a G-2 card and the Attacker didn't, the Defender's G-2 card is discarded without effect (i.e., it is "wasted").
This single G-2 card commitment at a Battle by both sides is the maximum number allowed for Tactical Intelligence or Counter-Intelligence.
-
10.2.2 G-3 Support: Some G-3 cards can be used to affect Battles (e.g., an Air Force card or "Nuts!"). Each player may commit a maximum of one Air Support (providing its Close Air Support Action) and one non-Air Support (providing its Combat Support Event) G-3 card to a Battle. Note that a revealed Air Support card can also be negated at a Battle (as per Case 11.3).
-
10.2.3 G-4 Logistics: Each side may commit a maximum of one G-4 card to a Battle for Combat Support if it can trace supply (3.5) from the target space.
10.3 Placement: Remove both side's corps units engaged in that Battle and place them in their respective Battle Group boxes on the Battle mat. The defender's corps are placed in his Main Battle Group box, and the Attacker's corps are divided between his Main Battle Group and Additional Attacking Group boxes (to keep them separate if attacking from multiple directions) as appropriate.
After noting corps engagement restrictions due to terrain (10.1), place engaged corps forward toward the defender's Main Battle Group box and the unengaged corps in the rear of their box, clearly away from the defender's units.
Battle markers are also placed from their Holding box on the map to the Battle mat at this time. These serve to remind players of their garnered support from Step 2.
For Example: An attacking German army with two regular panzer corps, one v panzer corps, and one infantry corps (all organized and at full-strength) attacks out of a Rough / Forest space. While all four of these corps are committed to the Battle, the German player elects to engage with the maximum allowed two units (due to terrain restrictions). He goes all-out, selecting one regular and the v panzer corps to place forward on the Battle mat in his Main Battle Group box. The committed, unengaged regular panzer corps and infantry corps are revealed to the Allied player and placed distinctively at the back of their Group box on the Battle mat.
10.4 Conduct First Fire: The player with the Tactical Advantage (10.2.1) fires first. If that player is the attacker, he rolls a number of dice equal to the total of his Attack Factors engaged in that Battle, as modified for any support garnered from Step 2. If that player is the defender, he would similarly roll a number of dice equal to his total modified Defense Factors.
- 10.4.1 Hits: Each Hit symbol (^ on the die as printed) rolled is a "Hit." When conducting First Fire, the other player must apply all of the Hits that his forces suffered immediately (i.e., before firing back). See Rule 10.5.2 to apply Hits.
- 10.4.2 Retreats: Each Retreat symbol (% on the die as printed) rolled is a "Retreat" (think of it as a "soft Hit"). Retreats are merely counted and their total noted at this time. They will be applied later.
- 10.4.3 Misses: All other die roll results are "Misses" and have no effect.
10.4 Conduct Second Fire (numbered 10.4 a second time in the printed rules): The player with the Tactical Disadvantage fires second, but only noting all Retreats and Hits rolled (i.e., how many of each).
Example Continued: Among the Allied Player's First Fire rolls were a single Retreat and a single Hit. The German Player notes the Retreat result (he'll have to take care of that later), but must immediately suffer a Hit as per 10.5.2.
10.5 Applying Hits and Retreats: Beginning with the Tactical Disadvantaged player (during Step 6 of the Battle Sequence), each player in turn applies all of the remaining Hits and Retreats to their units in that Battle.
-
10.5.1 Effect Reductions: Certain circumstances allow for a reduction of ill effects suffered in a Battle. These reductions are cumulative where applicable.
- When the defender's unit is located in a city space, it may reduce the number of Hits OR Retreats it suffers by one.
- Similarly, when a German unit is defending in a Westwall space, it may reduce the number of Hits OR Retreats it suffers by one.
- If that side has an army unit in the Battle, it may reduce the number of Retreats (only, not Hits) it suffers by one.
-
10.5.2 Applying Hits: Each Hit flips one organized unit to its disorganized side or eliminates one disorganized unit of the suffering player's choice from among those corps at that Battle.
Although a player decides exactly how to apply any Hits suffered to those units present at that Battle, all engaged units at that Battle must suffer 1 Hit before any unengaged (i.e., merely committed) units can suffer any Hits.
Example Continued: The one Hit suffered by the German player must be applied to one of his engaged panzer corps. He chooses the regular one, flipping it over to its disordered side.
Placing Lost Units: Eliminated corps are placed in their owner's Replacement Pool if they were in supply as per Case 3.5 (i.e., they can be brought back into play through a G-4 Reconstitute Action; see 12.3). If they were not in supply when lost, they are removed from play and placed in the Permanently Removed Units Box on the map instead.
Similarly, when the last corps in an army is lost (or detached; 7.3), that army unit is also removed from the map and is placed back in its HQ Holding box if it was in supply (i.e., it can return to the map once again if you assign it corps). If that army was not in supply when its last corps was lost, it is placed in the Permanently Removed Units Box.
-
10.5.3 Applying Retreats: Each Retreat suffered must also be dealt with by the receiving player, but he has more options in applying them:
10.6 Housekeeping: Clear the Battle mat by returning all surviving corps units from armies to their respective Army's Holding box on the OOB mat and detached corps to their respective spaces on the map. Return any Battle markers back to their Holding box on the map.
10.7 Advance After Combat: [Errata applied.] Only if the defender's space is Open / Town or Crossroad and not across a river, may the attacker conduct "advance after combat." Advance after combat cannot be conducted across a river or into a Rough / Forest, City, or Westwall space.
That is, if the defender's space is Open / Town or Crossroad and not across a river, and it is vacated (by eliminating or retreating all the defenders in that space), and there is at least one surviving attacking unit, and the attacker's forces did not retreat, then the attacker may conduct "advance after combat." One victorious attacking unit on the map (you may not detach a corps at this time; 7.3) may immediately move into the vacated defender's Open / Town or Crossroad space (not across a river). No card is required to conduct advance after combat; this is an entirely optional "free move."
[Errata] The former Rule 10.8 (Exploitation) has been removed and rule 10.9 (Capturing Allied Depots) renumbered to 10.8. Designer's errata note (Joseph Miranda): When I originally wrote the Exploitation rule, I was thinking in terms of lower echelon units. Simply put, it makes sense for a division or corps to exploit after a humongous battle (a la the old SPI double impulse system). But in Bulge 20 we are talking about entire armies with their huge logistical tails, heavy artillery and, in the case of the Germans, a lot of heavy armor. Moreover, given the conditions in which these units are operating, a two-space exploitation would require some serious staff planning - again for an army echelon to exploit a breakthrough. This would mean establishing new boundaries and such for sub-units within the space (a G-3 function). Thus, in game terms, another G-3 card is required to pull off this kind of exploitation after a battle.
Consider Patton's blitz through France in the summer of 1944: it required a heck of a lot of logistical and planning support (example below). When this advance ran out (the cards were given to Montgomery for Market-Garden, so to speak), it all came to a halt. And don't forget, this was Patton operating in summer against a largely shattered German army.
Example: For the "Pursuit" phase of the "Breakout & Pursuit" operations of 1944, Third Army had to plan for things like maps, road routes for mobile columns [remember the famous traffic jam scene in the movie Patton?], assigning bridging engineers to the correct columns, and so forth. Indeed, the topic of whether bridging engineer companies should be division or corps level assets was a major issue of debate in the US Army in WWII. Compare that to, say, Army Group South operating in Ukraine circa 1942: in that situation, the Germans had a very large hand size (maybe ten cards every turn owing to their high level of planning and good weather), so they could play extra G-3 cards without concern, while the Soviet hand size would have been quite minimal - perhaps only two or three cards (and then reduced even lower by German aerial interdiction!). So, upon further reflection, there should just be one space of advance after combat, and then only into open terrain types.
10.8 Capturing Allied Depots: One Allied Garrison unit sets up in each of the Allied Depot spaces printed on the map. Garrison units:
- Can never be moved or transferred
- Do not affect the movement of other Allied units (they are just ignored as "stack free" pieces)
- Can never participate in an attack (but defend if their Depot space is attacked)
- Can be eliminated (only, never retreated) to fulfill a combat result (10.5.2; 10.5.3)
- Cannot be returned to play (Reconstituted; 12.3) once eliminated (see below)
- Their loss does not count toward the Casualty Objective (see Rule 16.0)
After its elimination, an Allied Garrison unit is flipped to its Control marker side and placed in the Control Markers Holding box. That depot space is still Allied-controlled until a German unit actually enters it.
If the Germans then capture that Allied depot space by moving into it (requiring the Germans to play an additional G-3 card to move into the enemy-controlled space), place that Control marker back in the Allied depot space. If the Allies later recapture it, return that Control marker back in the Control Markers Holding box.
Example: The German army adjacent to Liege attacks and overwhelms the lone Garrison unit defending it. The attacking army can't advance after combat, as this Allied depot space is both a city and across a river! Although the Garrison unit has been defeated and the way cleared, Liege is still an Allied-controlled space until a German unit actually enters and captures it. The German player commits the last G-3 card in his hand, moving his army into the now-vacant city of Liege, and stopping there (because it crossed a river). He wishes he had a G-1 card remaining to detach a corps from that army to secure a neighboring space, but his hand is played out, thus ending his Action Phase.
11.0 Air Missions
G-3 "Air Support" cards are identified by their airplane symbols. Most have the words "May Reuse" at the end of their text to denote that they are discarded to your Available Pile and can be reused like generic G-# cards.
G-3 Air Support Actions
11.1 Close Air Support: During Good Weather turns only, these cards can be committed to a Battle by both sides during Step 2 of the Battle Sequence. They add their Close Air Support Attack Factor to their side (as additional dice rolled) in the ensuing ground battle.
- Nationality Restrictions: US Close Air Support can not be committed to a Battle where only British units are fighting on the Allied side and vice-versa.
11.2 Interdiction: Interdiction Attacks are not a function of ground Battles but are instead performed separately against the enemy in general (i.e., vs. his card hand).
Procedure: Regardless of the weather, roll a die for each Interdiction Attack Factor. For every $, % or ^ rolled (die-face symbols as printed), one Staff card, picked at random from your opponent's hand (up to as many as he has, including his Friction of War card) is discarded and placed (face-down) in his Available Pile (unseen by the Interdicting Player, but the losing player can freely examine them). Other die roll results have no effect.
11.3 Air Cover: During Good Weather turns only, you can play this card from your hand to immediately cancel the opponent's just-played/revealed Air card used for an Action only (i.e., an Air card's Event cannot be canceled in this manner, only a generic Action). The opponent's card has no effect and both cards are discarded as usual.
Interception: Note that "Interception" (i.e., cancelling an enemy Air Cover Action) is allowed. Thus, a G-3 Air Support card can be used to cancel an opponent's just-played Air Cover (and that Air Cover card can then be canceled with another, and so on).
Note that in Battle, negating enemy support via Air Cover is performed differently than via Counter-intelligence (see 10.2). Air Cover is far more flexible (from a staff planning perspective) and thus can always be played directly from a player's hand. Counter-intelligence, conversely, requires considerably more pre-planning and thus can only be played as a pre-selected card during Step 2 of the Battle Sequence.
12.0 G-4 Logistics
Logistics increase the efficiency of your forces in Battle, as well as allowing you to return eliminated units to duty.
G-4 Logistical Actions
12.1 Strategic Movement: This Action is performed in the same way as a G-3 Tactical Move (9.1) with these exceptions:
- That unit must be in supply (3.5) to use a Strategic Movement Action.
- That unit can move further (Germans +1 space; Allies +2 spaces - as indicated on each side's respective OOB screen).
- That unit can only move through friendly-controlled spaces.
Strategic Movement has nothing to do with Battles or advance after combat, nor does it 'supplement' a G-3 Tactical Move card. Strategic Movement is its own Action. [Errata: the printed text read "Battles or exploitation (10.8)".]
12.2 Combat Support: Each side may commit a maximum of one G-4 card to a Battle during Step 2 of the Battle Sequence if it can trace supply (as per 3.5) from the defender's space. When it receives Combat Support thus, that side adds one (+1) to the Combat Factor of every friendly corps engaged in that Battle.
12.3 Reconstitution: Lost corps in a player's Replacement Pool (e.g., sent there via 10.5.2) can be replaced and returned to duty by playing a G-4 card.
- 12.3.1 Procedure: Select a corps in the Replacement Pool and place it (on its organized, full-strength side) on top of the Game Turn marker on the Game Turn Record Track on the map; then roll a die (known as a "delay roll").
- 12.3.2 Result: The result is the number of turns ahead on the Turn Track that corps is placed. If a Hit symbol (^) is rolled, or if the result would place that unit beyond the last Game Turn on the Track, place that corps instead in the Other Reconstituted Units Box instead. It won't return to duty, but at least it won't count as a casualty when assessing victory (16.0). At the beginning of its turn of arrival, it is placed in its Army Group HQ box.
Note that units in the Permanently Removed Units Box cannot be Reconstituted.
Example: The last corps in an army with a LOC is removed as a casualty. That corps is placed in the Replacement Pool and the army is placed in its HQ Holding box (10.5.2). It is an arduous process to redress this situation over the time span of the game. First, you must use a G-4 card to Reconstitute the corps. Then, when it returns from the Turn Track, you must use a G-1 card to assign it back to its army. Next, you'd probably want to use another G-4 card and use Strategic Movement to get it back to the front lines as quickly as possible. And this, dear player, is what life is like on the staff at Army Group Headquarters!
12.4 Air Supply: The Allied Player has an additional type of Air card - the IX Troop Carrier Command. It performs two logistical support Actions in Good weather only (both of which can be cancelled by enemy Air Cover, 11.3):
- 12.4.1 Establish Air Supply: place the Air Supply marker (on either side) at, or move it to, a friendly space. Its presence indicates that "Air Supply" is established there.
- 12.4.2 Combat Support Airdrop: You may perform a Combat Support Action (as per Rule 12.2) at or from a space with Air Supply (to an adjacent space only).
- 12.4.3 Benefits of Air Supply: At its space, Air Supply allows Combat Support Airdrops (12.4.2) and G-1 Reorganize (7.4) Actions to be performed, and prevents the permanent elimination of Allied units there (10.5.2).
- 12.4.4 Automatic Removal: Immediately remove the Air Supply marker from the map and place it in the Unused Marker Holding box if and when weather reverts from Good to Bad.
13.0 Planning Phase
During a player's Planning Phase, he selects the number of Staff cards indicated for the current Game Turn on the Turn Record Track (see 6.1). He may select any cards of his choice from his Available Pile. Note that planning ahead is rewarded here. You're choosing cards to react to your opponent's next Player Turn, as well as to set up your own!
13.1 The "Friction of War" card: In addition to your other card selections, your Friction of War card is always returned to your hand "for free" at this time.
13.2 Good Weather: If there is Good weather this game turn, you may select one additional (+1) Staff card at this time.
14.0 Weather
During the Weather Determination - Housekeeping Phase, perform the following Weather Steps in order:
- Change the Weather: if the Change Weather marker is on top of the Weather card, flip the Weather card over to its other side.
- New Weather Forecast: consult the current side of the Weather card and roll a die to determine if the Change Weather marker is placed on it. This indicates the status of the weather for the next turn.
14.1 Bad Weather: Players cannot conduct regular Close Air Support, Air Cover and Air Supply Actions. Remove the Air Supply marker if it is currently on the map as per Case 12.4.4.
14.2 Good Weather: Air Support cards have free reign and both players may select one additional (+1) Staff card during their respective Planning Phases on these turns.
15.0 Housekeeping
Advance the Game Turn marker by one box. If Game Turn 8 was just completed, see below to determine the winner.
16.0 How to Win
Bulge 20 tells the story of The Ardennes Offensive - Hitler's last gamble. It was a large-scale counteroffensive committing most of Germany's strategic reserves, which Hitler chose to thrust at the Western Allied nations in mid-December of 1944. Consequently, victory is measured by the German Player's ability to meet his (pregame setup) selected objectives as defined by Victory Levels (VLs).
Victory Levels
Victory Levels are earned by the German player and added together.
- 3+ VLs: German Crushing Victory
- 2 VLs: German Major Victory
- 1 VL: German Victory
- 0 VLs: Draw
- -1 or fewer VLs: Allied Victory
Casualty Objective
In addition to the Objective-specific VLs, disproportionate losses are also evaluated. When VLs are determined, also count the total number of corps units in both side's Replacement Pools and the Permanently Removed Units box.
- +1 VL: if the Allied total count is three or more higher than the German count.
- -1 VL: if the German total count is three or more higher than the Allied count.
Grand Slam Objective
If the German Player selected the Wacht Am Rhein Objective (the historical German plan), the game is played until the German Player either declares victory (see below) or fails to do so by the game's end.
The German Player declares victory if, at the end of any German Player Turn, a supplied (3.5) German army unit (a detached corps unit is insufficient) occupies each of Antwerp or Brussels and Liege or Namur. Victory Levels are awarded as follows:
- +1 VL: for each of Antwerp, Brussels (these two only if the Germans declared victory), Liege and/or Namur (these two only count at the end of the game if the Germans did not declare victory) if the Germans occupy it with a supplied German army unit.
- -1 VL: for failing to declare victory.
A proper "tail" of firm control and support would be required to give a German spearhead's capture of Antwerp or Brussels sufficient consequence to win a "Grand Slam" victory.
Small Slam Objectives
If the German Player selected one of the limited Objectives (Operation Aachen or Case Martin), the winner is determined at the end of the game only (i.e., at the completion of Game Turn 8).
These Small Slam Objectives, while easier to achieve, require the German Player to hold them at the end of the full eight turns, giving the Allies additional time to regroup and counterattack.
Operation Aachen was an attempt to envelop the Allied salient around Aachen and possibly retake the city. Victory Levels are awarded as follows:
- +1 VL: if supplied German army units (detached corps units are insufficient) occupy both Aachen and at least one Allied depot.
- +1 VL: if the Allied Player plays his Commit US 3rd Army Event.*
Case Martin was a plan developed by von Rundstedt and Model as a limited spoiling attack in Belgium/Luxembourg. Victory Levels are awarded as follows:
- +1 VL: for each if a supplied German army unit (a detached corps unit is insufficient) occupies Luxembourg City and up to one Allied depot.
- +1 VL: if the Allied Player plays his Commit Strategic Reserve Event.*
*The idea being that if the Germans chose a Small Slam and the Allies committed too many forces to stopping it, then they have undermined their own future operations for 1945. Thus, the Allied player should be circumspect and use his G-2 cards to reveal the German Player's Objective.
Errata (v1.0 Errata Sheet)
The following corrections apply to the v1.0 version of Bulge 20 (already reflected in the rules above, except where noted):
- Advance After Combat / Exploitation: Only if the defender's space is Open / Town or Crossroad and not across a river, may the attacker conduct "advance after combat." Advance after combat (10.7) cannot be conducted across a river or into a Rough / Forest, City, or Westwall space.
- Rule 10.8 (Exploitation) has been removed and rule 10.9 (Capturing Allied Depots) renumbered to 10.8.
- German victory for Wacht am Rhein requires the occupation by a supplied (3.5) German army unit (a detached corps unit is insufficient) of each of Antwerp or Brussels and Liege or Namur.
- The German Peiper Breaks Out and 2nd Pz / Pz Lehr Breaks Out cards' special events apply only to engaged corps in their respective armies. Their special abilities are changed to allow that card's attack to be followed up by advance after combat (but not exploitation) into an otherwise qualifying Forest / Rough or City space. (Card text itself is not reproduced in the rulebook; this errata overrides the printed card.)
- The Allied Engineers Blow Bridges now stops any German regular G-3 or G-4 action as it occurs (not just movement actions). (Card text itself is not reproduced in the rulebook; this errata overrides the printed card.)