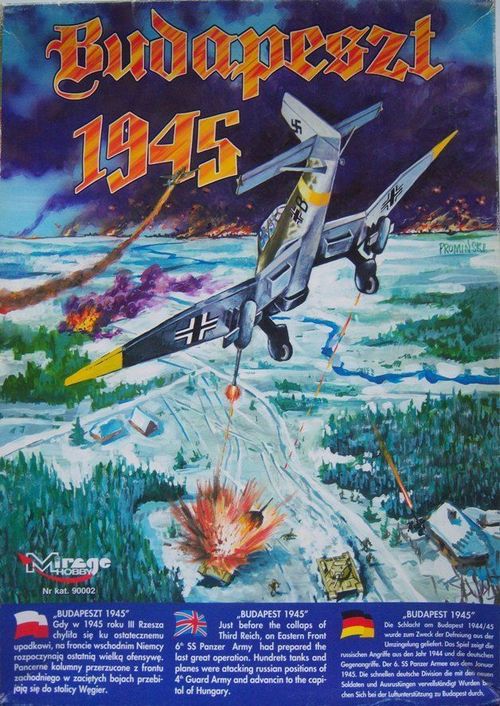
Budapeszt 1945
Budapeszt 1945 Rulebook
Table of Contents
Table of Contents
- Part One: WB-95 Rules
- 1.0 Basic Information
- 2.0 Phases and Turns
- 3.0 Movement
- 4.0 Zone of Control
- 5.0 Combat
- 6.0 Artillery
- 7.0 Fortifications
- 8.0 Air Units
- 9.0 Headquarter
- 10.0 Supply
- 11.0 Reinforcements
- 12.0 Strategic Movement
- 13.0 Tactical Concentration
- 14.0 Bridges
- 15.0 Special Units
- 16.0 Unit Masking
- 17.0 Air Units
- Tables of the WB-95 System
- Part Two: Budapest 1945 Scenarios
Part One: WB-95 Rules
1.0 Basic Information
[1.2] Counters
Game provides three types of counters:
- units
- field fortifications
- auxiliary counters.
Some scenarios may contain different types of counters which are described in the scenario's notes.
Each unit counter shows all its characteristics relevant for the game play. At the top there is unit name/number (on the left) and unit's alignment (division, corps or army) name/number (on the right). In the middle there is unit size and icon representing unit's type. At the bottom there are Strength Points (in case of artillery units there are two values) and Movement Points values.
Most counters in the game are printed on two sides. If unit has full strength printed on the top side of a counter and weaker strength on the reverse then it has 2 Combat Efficiency Levels (CEL – see 1.4 Definitions). Unit counter that is printed just on top side has 1 CEL.
Artillery units (except mechanized artillery) has only one CEL even though there often is a reverse for their counter. This is due to the fact that artillery counters reflect transport and combat setup of the unit (see 6.2.2).
Mechanized artillery unit, due to its maneuverability, has characteristics of regular units and usually has 2 CELs.
Reducing a unit (loosing 1 CEL) is flipping a full strength unit's counter onto weaker side. Unit that loses all its CELs is eliminated from the game.
Unit size symbol allows for easy counter identification:
- XX – division
- X – brigade
- III – regiment
- II – battalion
- I – company
In scenario setup units are described by their type and size (e.g. INF-R, ARM-BR). In obvious cases (complete infantry division or complete Soviet corps) size appendix is omitted (e.g. INF for all division units or CAV for all Soviet cavalry corps units).
[1.3] Types of Units
For movement purposes units are divided into:
- Motorized Units:
- Mechanized (units equipped with tracked or half-tracked vehicles)
- Trucked (units equipped with wheeled vehicles)
- Non-Motorized Units
Note that each non-mechanized artillery unit is treated as motorized (trucked) unit even if there is no truck symbol on the counter.
[1.4] Combat Modifier
Combat Modifier (CM) is column shift applied on initial CR in order to obtain its final value. Both attacking and defending units can gain CMs through various factors like terrain, fortifications, unit's special abilities and tactical concentration.
Defender's CMs lower initial Combat Ratio (shift initial CR column in COMBAT table to the left) while attacker's CMs increase initial Combat Ratio (shift initial CR column in COMBAT table to the right).
Maximum and minimum Combat Ratio from COMBAT table can never be exceeded.
Example: a) Attacker units' total strength is 8 and they have 3 combat modifiers. Defending units' total strength is 3 and they have 1 combat modifier. Initial combat ratio is 8:3 => 2.67:1 => 3:1. After attacker's CMs are applied combat ratio increases to 6:1. After defender's CMs are applied, final combat ratio is set to 5:1.
b) Attacker units' total strength is 18 and they have 7 combat modifiers. Defending unit strength is 4 and it has 2 combat modifiers. Initial combat ration is 5:1. After attacker CMs are applied combat ratio is 13:1. Combat Ratio cannot exceed maximum from COMBAT table (10:1) therefore it is reduced to 10:1. After defender's CMs are applied, combat ratio is set to 8:1.
Players must use all combat modifiers gained from terrain, fortifications and tactical concentration. Use of unit's special abilities (see 15.1 and 15.4) is voluntary.
[1.4] Definitions
Strength Point (SP) Reflects unit's strength/morale/training/experience and other factors influencing unit's combat power.
Movement Point (MP) Reflects unit's maneuverability. It limits unit's movement range.
Zone of Control (ZOC) Marks unit's ability to influence its neighborhood.
Combat Efficiency Level (CEL) Marks unit's hardiness – ability to fight and sustain loses.
Out of Supply (OoS) Marks unit's supply level and its influence on unit's morale. The higher OoS level the bigger chance for unit's surrender.
[1.4] Combat Ratio
Combat Ratio (CR) is column in COMBAT table where combat result is to be looked up after 2 dice (2K6) roll.
CR is calculated as follows:
- Attacking Player units' SPs are divided by defending Player units' SPs which, after rounding (see [1.7]), yields initial combat ratio.
- Initial combat ratio is modified by both Players' Combat Modifiers (see [1.6]) in order to calculate final combat ratio.
Example: Two infantry units, having 4 SPs each, attack enemy infantry unit with 5 SPs. Total attacker's strength is 8. Total defender's strength is 5. Combat ratio is 1.6:1 and after rounding 2:1.
[1.7] Rounding
Any integer number division is rounded up.
Example: a) If unit with strength of 1 SP should have it halved, its strength is still counted as 1. b) 5 divided by 2 is 2.5. After rounding it is 3.
For combat ratio calculations any initial CR below .5 is to be rounded down and any result above or equal to .5 is to be rounded up.
Example: a) Attacker has 3 SPs while defender has 2 SPs. Combat Ratio is 3:2 => 1.5:1 => 2:1. b) Combat Ratio 6.49:1 is to be rounded to 6:1.
[1.7] Dice rolls
Game has standardized way of naming dice rolls. In the system Players use 6-sided dice and throughout game play may be required to roll it.
Player may be required to roll dice several times and sum up the results (instead of rolling just one dice Player(s) may have two or more and roll them at once).
Example: a) One 6-sided dice roll is described as 1K6 b) Two 6-sided dices roll (with summing up the results) is described as 2K6 c) And so on…
2.0 Phases and Turns
[2.1] General rules
2.1.1 Game play in WB95 system is divided into turns. Every turn allows or obliges players to make certain actions (movement, attack, supply check etc.).
2.1.2 All actions in a turn are grouped into phases. Every phase allows for given set of actions only. Performing an action outside correct phase is prohibited.
2.1.3 Each turn is finished after all Phases have been completed.
2.1.4 Players cannot change order of phases. A phase can be omitted if there are no mandatory actions and both players choose not to perform voluntary ones.
2.1.5 After turn has been completed, players move TURNS (ETAPY) counter by one position and start over a new turn.
2.1.6 One turn represents 1 day of a battle.
Note: The intention of the rule is that unit is always able to move by at least 1 hex.
[2.2] Phases
Player with initiative (moves first) – player A. Player without initiative (moves second) – player B.
Phase 1 – Air Phase During this phase both Players can assign air missions for their air units (see 8.0). Players should choose location of air counters secretly to reduce the chance of enemy counter actions (see 8.1.8).
Phase 2 – Artillery Barrage of Player A (see [6.5]) If scenario allows, Player A can conduct artillery barrage on enemy units.
Phase 3 – Movement of Player A (see [3.0]) Player A can move his units or build field fortifications. His reinforcements can enter the map. Instead of movement units can be selected for Strategic Movement (by covering them with 'Strategic Movement' marker)
Phase 4 – Attack of Player A (see [5.0]) Player A carries obligatory (see 5.1.3 and 5.1.4) and voluntary attacks. Order of combat is chosen by Player A, but Phase can end only when all mandatory attacks are made.
Phase 5 – Strategic Movement of Player A (see [12.0]) All Player's A units that are covered with 'Strategic Movement' marker can move. Player A can also enter reinforcements on the map.
Phase 6 – Supply Phase of Player A (see [10.0]) – following actions are made:
- Player A must trace line of supply to all his units. Unit that cannot be supplied must be covered with marker reflecting their out of supply (OoS) level.
- Unit that is out of supply must undergo surrender test (see 10.2.6).
- Supplied units span control over hexes within their Zone of Control (see 4.3).
- HQ may start bridge building.
Phase 7 – Air Phase Analogous to Phase 1.
Phase 8 – Artillery Barrage of Player B Analogous to Phase 2.
Phase 9 – Movement of Player B Analogous to Phase 3.
Phase 10 – Attack of Player B Analogous to Phase 4.
Phase 11 – Strategic Movement of Player B Analogous to Phase 5.
Phase 12 – Supply Phase of Player B Analogous to Phase 6.
3.0 Movement
[3.1] Basic rules
3.1.1 Players can move their units during Movement Phases (regular movement – Phases 3 and 9, strategic movement – Phases 5 and 11), and Combat Phases (pursuit and retreat – Phases 4 and 10).
3.1.2 Retreat and Pursuit has additional limitations – see [5.3] and [5.4].
3.1.3 Order of units to be moved during any Movement Phase is Player's choice.
3.1.4 Unit cannot "overleap" a hex during movement. There must be continuous path of hexes between unit's start hex and unit's target hex.
3.1.5 Players units' movement and/or maneuvers during Movement Phases are limited by each unit's MPs.
3.1.6 Unit does not need to use all its MPs, but any "saved" MPs do not carry over to next turn.
3.1.7 Unit cannot pass its MPs to other units.
3.1.8 Unit cannot enter hex occupied by enemy units.
3.1.9 Any number of units can move through a hex.
3.1.10 Unit can move through a hex occupied by friendly units regardless of stacking limits.
3.1.11 Cost of entering a hex for a unit depends on unit type and terrain on the hex. All modifications are listed in TERRAIN INFLUENCE table.
3.1.12 Terrain costs are cumulated.
Example: If, for mechanized unit, cost of entering forest is +1, cost of crossing a stream is +2 and base cost of clear terrain entry is 2 MPs then such unit will pay 5 MPs for entering a hex with forest through a stream.
3.1.13 Maximum cost of entering a hex cannot be higher than unit's initial MPs (number of MPs unit has at the beginning of Movement Phase).
Example: a) Mechanized units starts movement phase with 7 MPs. Unit can always enter adjacent hex, even if cumulated cost is higher than 7. If cost of entering adjacent hex was 9 MPs unit can enter the hex. b) Infantry unit out of supply (normally having 4 MPs) starts Movement Phase with 2 MPs. If cost of entering adjacent hex is 3 MPs the unit can still enter the hex without increasing its OoS level.
[3.2] Stacking
3.2.1 After the end of any phase there cannot be more than 8 CELs on one hex.
3.2.2 Each Headquarter is counted as 1 CEL for stacking limit.
4.0 Zone of Control
Zone of Control reflects unit's ability to influence its surroundings which denies enemy to move freely through such area.
[4.1] Basic rules
4.1.1 ZoC spans onto unit's all adjacent hexes.
4.1.2 All regular units have ZoC.
4.1.3 ZoC does not extend through big rivers.
4.1.4 ZoC does not extend on terrain impassable for unit of given type.
Example: Motorized units do not influence adjacent swamp hexes. They don't have ZoC on such hexes.
4.1.5 There can be any number of ZoCs on one hex (both friendly and enemy). Many ZoCs on one hex means only that this hex is influenced by many units.
4.1.6 ZoC allows hex control.
[4.2] Movement Influence
4.2.1 Unit that entered enemy ZoC must stop (cannot use its MPs in this Movement Phase any more).
4.2.2 Entering enemy ZoC does not cost additional MPs.
4.2.3 Moving in ZoC of single unit is possible only during pursuit.
4.2.4 During Movement Phase a unit can leave enemy ZoC and enter other (or reenter the same) enemy ZoC.
4.2.5 Unit can move directly from one enemy ZoC into different enemy's ZoC.
4.2.6 Leaving enemy ZoC cost 1 MP.
[4.3] Hex Control
Hex control allows capturing game scenario objectives like towns or other important hexes.
4.3.1 At the beginning of the game Players control all hexes within their territory (behind frontline).
4.3.2 Player gains control of enemy hex when his unit is on the hex at the end of Player's Supply Phase. OR 4.3.3 Player gains control of a hex if his unit's ZoC is influencing the hex and there are no enemy ZoCs influencing this hex at the end of Player's Supply Phase.
4.3.4 Unit that surrendered during given Supply Phase does not provide control for any hexes.
4.3.5 Only supplied units can control adjacent hexes (in their ZoC).
4.3.6 Enemy ZoC (even of OoS units – see 10.2) denies control of an unoccupied hex (so if hex is unoccupied but in ZoCs of opposing units, neither Player controls it).
5.0 Combat
Direct combat between units is resolved during Combat Phase. In this phase unit can be attacked by regular units supported by aircrafts and artillery. Air attacks can be carried in Air Phase (by aircrafts only).
5.1.1 Unit can fight only once during Combat Phase.
5.1.2 Regular unit can attack enemy unit on adjacent hex only.
5.1.3 Unit in enemy ZoC must attack unless it is in fortifications (see 7.1.11 and 7.2.5).
5.1.4 Enemy unit having attacking Player's units in its ZoC must be attacked.
5.1.5 For single combat either attacker or defender must be on one hex.
Example: a) American armored regiment unit enters ZoC of German infantry unit. In nearest Combat Phase American unit must attack (but not necessarily above mentioned German infantry) and German unit must be attacked (but not necessarily by American armor). b) Soviet mechanized brigade enters hex adjacent to Romanian cavalry which is on swamps. Soviet ZoC does not extend onto swamps but since Soviets are in Romanian ZoC the cavalry must be attacked. Alternately – Romanian cavalry would not need to attack Soviets as its ZoC does not reach them. c) Unit A has 3 enemy units (1, 2 and 3) on 3 adjacent hexes in its ZoC. Units 2 and 3 are entrenched, while unit 1 is not. Unit 1 is in ZoC of another unit B. In this case unit 1 must attack (5.1.3) which means that both units A and B must be attacked (5.1.4). Following scenarios are possible: Unit 1 attacks both units A and B. Then units 2 and 3 cannot participate in attack (because either side of a combat must be on one hex). Unit 1 attacks unit B only – then there must be an attack made on unit A made by either unit 2 or 3 (or both) even though they are entrenched.
5.1.6 Attacking Player chooses order of the attacks.
5.1.7 Attacking Player chooses when Combat Phase finishes (decides on voluntary attacks), but not sooner than 5.1.3 and 5.1.4 are satisfied.
5.1.8 Player owning the units decides which of his units take losses inflicted during combat.
5.1.9 Attack on HQ alone on hex is always resolved at maximum Combat Ratio (right-most column) in COMBAT TABLE. HQ cannot retreat in such combat and sustain loses according to 5.3.7.
5.1.10 Towed units (towed artillery, anti-tank (AT), anti-aircraft (AA) guns etc.) cannot attack in direct combat.
[5.2] Combat Procedure
5.2.1 Combat procedure is as follows: a) Attacker selects attacking unit(s) and their target(s). b) Both sides total SPs and combat modifiers are counted. c) Combat ratio is calculated (see [1.5]). d) Combat modifiers are applied (see [1.6]). e) Two dice (2K6) are rolled. f) Intersection of final combat ratio column with row respective to dice roll provides combat result. It should be applied before g) in following order: first loss of SPs, than retreats and pursuits if any. g) Any rolls for disorganization are made.
Example: German armored division attacks 2 Soviet cavalry brigades that are in the woods (not fortified). German total strength is 17 SPs. Soviet total strength is 8 SPs. Germans have 1 CM for Tactical Concentration and 1 CM for black star modifier (2 in total). Soviets have 1 CM for woods. For this combat initial combat ratio is 17:8 => 2:1. Final combat ration must include both Players' CMs which makes it 3:1. If combat result is B2/-1 then Germans must lose 1 CEL (in unit(s) that used black star modifier) and Soviet must:
- lose 2 CEL and does not retreat.
- lose 1 CEL and retreat by 1 hex.
- retreat by 2 hexes (1 disorganization test must be made). Note: Combat results are explained below COMBAT table.
[5.3] Retreat
5.3.1 Unit retreat when a combat result is Dx or Ax (x marks number of hexes unit to retreat).
5.3.2 Unit retreat by given number of hexes from hex they fought.
5.3.3 During retreat unit cannot enter enemy ZoC, impassable terrain or leave the map.
5.3.4 Unit can retreat through hexes in enemy ZoC if they are occupied by friendly unit(s). For each hex of such retreat unit loses additional 1 CEL.
Example: Below picture shows retreat hexes available for Soviet infantry after successful attack by German armored battalion.
5.3.5 During retreat unit can cross big river only through bridge.
5.3.6 Unit cannot finish retreat on hex where it would cause exceeding stacking limit. Unit can retreat through such hexes but it cannot enter enemy ZoC, impassable terrain or leave the map.
5.3.7 Unit can choose not to retreat – each hex of such sustained retreat cost 1 CEL reduced from units that do not retreat by required number of hexes.
Example: Combat result is D3. Player has 4 options:
- withdraw by 3 hexes
- withdraw by 2 hexes and carry additional loss of 1 CEL
- withdraw by 1 hex and carry additional loss of 2 CELs
- keep position and lose 3 CELs
5.3.8 Additional losses due to sustained retreat are taken regardless on number of hexes units occupied before the combat.
Example: Soviet guard division is attacked by 3 German armored battalions (from 3 different hexes). If attacking Germans receive combat result A1 and German Player wants to keep positions he must carry loss of 1 CEL from any of 3 units that took part in the attack. If German Player does not want to lose 1 CEL he must withdraw all 3 units by 1 hex. German Player may also leave some units (e.g. 2 of 3 attacking) and withdraw the rest. In this case he must carry loss of 1 CEL from unit(s) that remained on the position(s).
5.3.9 Retreat obliges Player to conduct disorganization test(s) (see 5.6.2). Player must make test for each (except the first one) hex of his retreat path.
Example: a) Attacker received combat result A2 and retreated by 2 hexes. It must make 1 disorganization test. b) Defender received combat result D4 and retreated by 3 hexes. 2 disorganization tests must be made. c) Result D3 result and retreat by 1 hex does not require making disorganization test.
5.3.10 After retreat, in next Movement Phase, unit cannot build Field Fortifications.
[5.4] Pursuit
5.4.1 If enemy units retreated as a result of a combat, then opposing units can pursuit.
Note: Defender can also pursuit – if attacker retreats after unsuccessful assault (result Ax).
If Soviet Player decides to retreat on friendly armored unit then retreating unit must additionally lose 1 CEL.
5.4.2 Pursuit must be made through retreat path and allows leaving it by 1 hex.
5.4.3 If several units retreated through different paths then pursuing Player can choose any one of them.
5.4.4 First hex of any pursuit must be the hex emptied by retreating unit(s).
5.4.5 Enemy ZoCs are ignored during pursuit.
5.4.6 Pursuing units can move number of hexes not greater than length of retreat path.
Example: Defending German 167 Regiment received combat result D4. It retreated by 3 hexes. In this situation pursuit can be made by up to 3 hexes and first hex must be the one emptied by defender.
5.4.7 Pursuit is not limited by MPs unit has but it cannot enter impassable terrain or leave the map.
5.4.8 Pursuing unit must stop after it crosses big river.
5.4.9 Towed units cannot pursuit.
5.4.10 If enemy unit was eliminated in combat then victorious units can enter emptied hex and move on any adjacent hex (all movement limitations, especially influence of enemy ZoCs, apply in this case).
[5.5] Terrain Influence
5.5.1 Terrain effect on combat is described in TERRAIN EFFECT table.
5.5.2 Terrain influence on combat is cumulated.
Example: If defender is in woods (+1 CM) and is attacked through river (+1 CM) then defending Player gains +2 CMs for this fight.
5.5.3 If defender fights on multiple hexes the one with most SPs is counted for any CMs gained by defender.
5.5.4 Rivers and/or streams influence combat only when more than half of SPs of attacking units assault through this obstacle.
[5.6] Disorganization
5.6.1 Unit becomes disorganized during combat (direct combat, artillery attack or air attack) in three cases:
- combat result marks disorganization (e.g. result D3D means that defender retreats by 3 hexes and becomes disorganized)
- attacking Player fails disorganization test (marked by black dot in given combat result table).
- Defender fails disorganization test after retreat.
5.6.2 Disorganization test requires Player to throw 2 dices (2K6). If result is higher or equal than unit morale limit, then it become(s) disorganized.
Morale limits by nation (DISORGANIZATION table):
- Germans: SS units 12; Wehrmacht 11; Volkssturm 9.
- Allies: Americans, British, Poles 11; French, Romanians, Hungarians 9; Belgians, Dutch 8; Italians 7.
- Soviets: Guards 11; other 9.
5.6.3 Artillery can be disorganized only if it fights on hex adjacent to the enemy.
Example: Artillery unit supported infantry attack from distance of 2 hexes. If attacking units becomes disorganized as a result of the attack, supporting artillery does not. If artillery supporting the attack were on hex adjacent to enemy units being attacked than it would disorganize together with regular units.
5.6.4 Disorganized unit has its strength (both in attack and defense) halved.
5.6.5 In order to organize unit must remain inactive during full turn.
Example: a) Unit became disorganized during combat. If unit remains inactive until end of its next Combat Phase than it regains full strength (after its next Combat Phase). In order to do this unit cannot move, attack or be attacked. b) Unit became disorganized as a result of air attack (phase 7). If unit does not move, attack or be attacked than it regains full strength at the end of phase 7 next turn.
5.6.6 Disorganized units are covered with disorganization marker.
6.0 Artillery
Artillery (as well as air units) can fight indirectly by supporting friendly regular units' attacks or defenses from remote hex(es).
[6.1] Basic Rules
6.1.1 Artillery is divided into 2 types: towed and self-propelled.
6.1.2 Artillery range is 3 hexes.
6.1.3 Artillery can use ranged fire only when in combat setup (see 6.2).
6.1.4 Artillery can fire twice during the turn – once in each Combat Phase.
6.1.5 Artillery units do not have ZoC; except situation described in 10.1.11.
6.1.6 Towed artillery has always 1 CEL.
6.1.7 Towed artillery can be eliminated by enemy regular unit entering its hex. During Movement Phase such action cost 1 MP – if artillery unit is in fortifications then cost increases by 1 MP.
Example: 3 artillery units alone on hex can be eliminated if enemy regular unit enters the hex and spends 3 MPs. If artillery units were fortified then cost for such action would be 4 MPs.
[6.2] Movement
6.2.1 Towed artillery is always treated as trucked units.
6.2.2 Towed artillery has icon of a gun at the front (combat setup) and icon of a truck on the reverse (transport setup).
Note: Some (older) games' counters do not have combat/transport setup printed. They have icon of a gun on the front and empty reverse side. For those, empty reverse should be treated as transport setup with MPs printed on the front of the counter. Those towed artillery units should be still treated as trucked units.
6.2.3 Towed artillery can move only when in transport setup.
6.2.4 Change of setup is possible only during Movement Phase and cost 1 MP.
Note: Above two points make it unable for the artillery in combat setup to withdraw after direct attack. In such situation artillery units must suffer loses and/or is eliminated by enemy units entering the hex during pursuit.
Example: An infantry unit (2 CELs) and towed artillery unit (in combat setup) on one hex are attacked by the enemy. If combat result is D2 then following scenarios are possible: a) Infantry retreats by 2 hexes and enemy eliminates the artillery during pursuit. b) Artillery is eliminated (loss of 1 CEL) allowing infantry to retreat by 1 hex only. c) Both artillery and infantry suffers loss of 1 CEL. Artillery is eliminated but that allows the infantry unit to keep position. Elimination of infantry unit (by losing 2 CELs) would not save the remaining artillery – attacking Player can enter its hex in pursuit and eliminate artillery unit. If artillery was in transport setup it couldn't fight but would be able to retreat without taking loses.
[6.3] Support Fire
6.3.1 Artillery (only in combat setup) can support friendly regular units in combat adding its attack/defense strength to SPs of the fighting units.
6.3.2 For attack any of the attacking hexes must be within artillery's range.
6.3.3 For defense any of the defending hexes must be within artillery's range.
6.3.4 Artillery providing support fire does not suffer combat results (cannot pursuit or retreat, cannot disorganize etc.)
6.3.5 Support fire can be made on adjacent hex. In such situation artillery units suffer all combat effect.
[6.4] Ranged Attacks
6.4.1 Artillery (only in combat setup) can fire directly to enemy units on remote hexes – in this case offensive SPs are used.
6.4.2 Procedure of a ranged attack is as follows: a) Player declares number of units carrying the attack and selects target (one hex) that must be within range of all attacking units. b) Player sums total SPs of attacking artillery units and subtracts doubled terrain modifier of the defender. c) Player rolls 2 dice (2K6). d) Result is looked up in ARTILLERY FIRE table.
6.4.3 Ranged attack cannot be made on adjacent hexes.
6.4.4 Ranged attacks can be supported by air units.
6.4.5 Unit that is target of a ranged attack cannot be attacked directly in given Combat Phase. If they must be attacked (e.g. due to 5.1.3) then ranged attack cannot be made.
6.4.6 Artillery that was target of a ranged attack, after applying its result, can in the same phase support defense of friendly regular units.
Example: Artillery unit was attacked by enemy artillery ranged fire. As a result artillery unit was disorganized. The unit can support defense of friendly units in the same Combat Phase using half of its defensive SPs.
6.4.7 Artillery can target objects (in this case also on adjacent hexes). Attack procedure is analogous to that in 6.4.2 (but no terrain modifiers are accounted for) and result is looked up in ATTACKS ON OBJECTS table.
[6.5] Barrage
6.5.1 Some scenarios allow making artillery barrage – Players can execute it only when it is explicitly described in game scenario description.
6.5.2 Barrage is executed in Barrage Phase.
6.5.3 Barrage is carried analogous to 6.4 with firing artillery units strength doubled.
6.5.4 Barrage fire on one hex must be made by at least 2 artillery units.
6.5.5 Artillery units firing barrage cannot move in the same Movement Phase.
6.5.6 Artillery unit firing barrage cannot support friendly units during next 2 Combat Phases (Player's attack and defense).
6.5.7 Barrage is limited by Ammo Units (AU) – every artillery firing in the barrage must use 1 AU. Number of AUs available is described in the scenario.
Example: If scenario allows for barrage during first 2 turns and provides 8 AUs for that it means that Player can (for example):
- Use available AUs in the first turn (if he has enough artillery units).
- Fire e.g. with 3 artillery units (using 3 AUs) during first turn and firing with 5 artillery units (using remaining 5 AUs) in the second turn.
6.5.8 Player does not have to execute the barrage nor use all AUs available.
[6.6] Direct Combat
6.6.1 Artillery attacked directly can support defense according to 6.3 only when stacked with at least one regular unit.
6.6.2 Artillery can support attack on adjacent hex according to 6.3 even without being stacked with regular unit.
Note: This means that artillery practically always can support attack using its offensive SPs. Although support from hex adjacent to enemy may result in artillery disorganization.
6.6.3 Towed artillery in combat setup, alone on hex, defends always with 1 SP when attacked directly. Defense of such hex is always 1 SP regardless of number of artillery units attacked.
Example: Enemy attack 2 hexes: 1 hex is occupied by cavalry unit (regular unit) with 5 SPs and the second hex is occupied by 2 artillery units (in combat setup) having 5/3 SPs each.
- In such case defending units have 6 SPs
- If the units were attacking they could use 15 SPs.
- If there were another regular unit with artillery on hex they could use their 6 defensive SPs.
6.6.4 Towed artillery in transport setup, alone on hex, defends analogous to 5.1.9.
6.6.5 Self-propelled artillery always fights using its offensive/defensive SPs.
7.0 Fortifications
[7.1] Field Fortifications
7.1.1 Field Fortifications (FF) are marked by putting respective auxiliary counter under the unit on the hex.
7.1.2 FF are built in Movement Phase by a regular unit that: a) will not be moved AND b) didn't retreat in last Combat Phase (it is allowed to sustain retreat and take loses).
7.1.3 Unit that retreated and is unable to leave enemy ZoC can build FF (7.1.2 b) can be ignored).
7.1.4 Building FF cost all MPs unit had at the beginning of Movement Phase.
7.1.5 FF is removed from the map if there is no unit on the hex at the end of the phase.
Note: This means that all units that were on the hex with Field Fortifications can leave and if other friendly unit enters the hex by the end of the phase it can still use the same FF.
7.1.6 FF is removed when enemy unit enters the hex. The same FF cannot be used by opposite Players.
7.1.7 FF can be rebuilt on the same hex by both sides.
7.1.8 FF can be built on any terrain except swamps.
7.1.9 FF cannot be built on hexes with Fixed Positions.
7.1.10 FF provides 2 CMs for defending unit(s).
7.1.11 Units on hex with FF do not need to attack (see 5.1.3).
7.1.12 FF does not add any cost for movement.
Example: Infantry division is defending on Fixed Positions Line. It is attacked by 3 units: A, B and C. Attack by unit A is through FP line while attack by units B and C is not. Strength of attacking units on hex A is 15 SPs, strength of units on hex B is 5 SPs and strength of units on hex C is 10 SPs. In this case defender receives all bonuses provided by Fixed Position line (as enemy units attacking from the rear are not stronger than those attacking frontally). Nominal attack SPs of unit A will be smaller than those of units B and C due to the fact that its SPs will be halved. If attacker regrouped and put additional SPs on hex B or C than defender didn't receive FP bonuses and would be treated as if he was in Field Fortifications. Note that unit's A SPs are always halved (same as artillery and air support) even if no FP bonus is gained by defending unit due to stronger units attacking from the rear. What changes is CMs received by defender.
[7.2] Fixed Positions
7.2.1 Fixed Positions (FP) are marked on the map in the form of black-red lines or areas ('Zigfrid Line in Ardennes or Normandy beaches fortifications).
7.2.2 FP halves total SPs (including artillery and air support) of attacking units and provide additional 3 CMs for defender.
7.2.3 Some hexes may create independent FP group that provides different CMs bonus for defender.
7.2.4 FP is accounted for if no less than half of attacker's SPs assault through FP hex edge. If more attacker SPs are used for attack from the rear side of FP then defender loses all bonuses of FF (is treated as if defended in FF).
7.2.5 Units in FP do not need to attack (see 5.1.3).
7.2.6 Loses due to sustained retreat for units in FP are reduced by 1.
Example: Above rule means that for combat result D1, if defender wants to keep position he does not carry additional loses, for D2 would need to carry loss of 1 CEL, for D3 would need to carry loss of 2 CELs etc.
8.0 Air Units
For simplicity reasons game reflects only air operations that influenced main ground forces. Therefore game reflects only regular bombers and offensive air support and omits aspects connected with fighters' combats. Air units are assumed to have fighters cover which provides very simple reflection of air combat if opposite Players happen to choose operation on the same or adjacent hex.
[8.1] General Rules
8.1.1 In the game air units are artificially grouped and represented by air counters with strength provided on them.
Note:
- Some scenarios provide only number of air SPs available for Player. In such situation Player can freely divide them into air missions.
- Some (older) games provide only number of air counters available (without strength printed). In such case Players should assume each counter is equivalent of 5 SPs (4 SPs for Soviet counters).
8.1.2 Air counters allow carrying air missions during Air Phases.
8.1.3 Air counter can be used for one air mission only.
8.1.4 Players can carry missions during any Air Phase.
8.1.5 Each counter can be used only once during a turn.
8.1.6 There can be unlimited number of air counters on a hex.
8.1.7 Air missions should be chosen secretly by each Player during each Air Phase.
8.1.8 If enemy air units carry missions on same or adjacent hexes then air combat takes place.
Air combat procedure: Each Player sums SPs used on a hex and adds result of one dice (1K6) roll. Player with lower result loses the combat and removes his counters from the map. Ties are rerolled until winning side is chosen.
8.1.9 Air units that were forced to retreat during air combat cannot be reused in the same turn.
[8.2] Air Missions
8.2.1 There are following missions:
- offensive support
- defensive support
- air attack
- objects destruction
- Soviet movement disorganization
- rivers crossing disorganization
- supply mission
[offensive support]
8.2.2 Air units supporting assault of regular units add their strength to SPs of attacking friendly units.
8.2.3 Air units can support artillery ranged attack – SPs of aircraft units is added to SPs of firing artillery.
[defensive support]
8.2.4 Air units supporting defense of ground units add half of their strength to SPs of defending units.
Example: Player chooses 3 units (having 13 SPs in total) to support defense of friendly infantry regiment. Strength added to this defense is 7 SPs.
8.2.5 Soviet air units cannot be used for defensive support.
[air attack]
8.2.6 Air units can attack enemy ground units. Effect of the attack is set according to AIR ATTACK table.
8.2.7 During air attack doubled defender's terrain modifiers are subtracted from total SPs of attacking air units.
Example: Player chooses 20 SPs of air units to attack German armored battalion on hills (2 CMs). From initial SPs of attacking air units, 4 SPs (2 x 2 CMs) is subtracted. As a result attack is carried with 16 SPs.
[object destruction]
Currently the only object that air unit can target is bridge.
8.2.8 Results of air attack on an object are in ATTACKS ON OBJECTS table.
8.2.9 Terrain modifiers are not counted for attack on objects.
8.2.10 Minimum of 4 SPs must be used to air attack objects.
[Soviet movement disorganization]
8.2.11 Air units can disorganize movement of Soviet (only) ground units.
8.2.12 Minimum of 7 SPs must be used for each mission targeted to disorganize Soviet movement.
8.2.13 Movement disorganization mission adds movement cost of +1 MP to target hex and to all adjacent hexes.
8.2.14 Unit starting its movement under movement disorganization mission loses 1 MP (per each mission).
8.2.15 Impact of air counters in movement disorganization missions is cumulated.
Example: German Player executes one disorganization mission. If Soviet Player moved 57th armored brigade along the road then he needs to pay additional 1 MP per each hex influenced by German air counter. 294th infantry division that starts movement on hex influenced by German air mission has its MPs reduced by 1. It still needs to pay additional 1 MP (2 MPs in total) for movement within influenced area. If German Player carried 2 missions then Soviet units would have to spend +2 MPs per hex influenced by those missions and/or lose 2 MPs if they start movement on such hexes.
[river crossing attack]
8.2.16 Air units can attack enemy units crossing big rivers in Movement and Strategic Movement Phase.
8.2.17 During river crossing attack missions Player receives number of air attacks equal to doubled value of air SPs used.
8.2.18 Player assigns any number of the attacks to given hex(es). If more than 1 hex is chosen than they must be connected with each other.
8.2.19 Each enemy unit crossing river must roll 1 dice (1K6) for each such air attack assigned to the hex:
- result 1-5 means no losses
- result of 6 means loss of 1 CEL.
Note: River crossing attack targets hex that unit enters after it crossed big river.
Example: Unit must roll twice if 2 air attacks are assigned to hex of its river crossing.
8.2.20 Unlimited number of units can be attacked during one turn.
8.2.21 Ground units crossing rivers through bridge are not influenced by river crossing disorganization missions.
[supply mission]
8.2.22 Allied air units (American and British) can supply friendly ground units.
8.2.23 Player must spend at least 7 SPs of air units to carry out supply mission.
8.2.24 Player must roll 1 dice (1K6) for each air unit carrying supply mission – on result of 6, the mission is unsuccessful.
8.2.25 Each successful supply mission lowers OoS level of units on given hex by 1.
Example: Player carries 3 air supply missions in order to supply infantry division (3 counters with OoS level = 4 each). Player places his air units on hex with infantry division positions. Player rolls 3 dice with result of 1, 4 and 6. This means that only 2 missions were successful. All division's regiments on the hex have their OoS reduced by 2.
9.0 Headquarter
[9.1] Basic Rules
9.1.1 HQ counter does not have ZoC.
9.1.2 HQ counter has 10 MPs and is moves like trucked units.
9.1.3 HQ counter can enter hexes inaccessible for trucked units (swamps, mountains) for cost of 5 MPs.
9.1.4 HQ has 1 CEL.
Note: As a result Player can eliminate HQ instead of regular unit when combat results obliges him to carry loses.
9.1.5 HQ is eliminated if enemy regular unit enters hex with it (if HQ is alone on hex).
9.1.6 Elimination of HQ gives the opposing Player 5 CMs to be used in next 2 Combat Phases.
Example: Player loses HQ during a combat (Phase 4, Turn 5). Opposing Player gains 5 CMs he can use during Phase 10 on Turn 5 and Phase 4 on Turn 6. He can use all 5 CMs in one combat or can divide them and use in multiple combats.
9.1.7 CMs gained due to HQ elimination can be used for combats within 8 hexes from elimination field.
9.1.8 See 5.1.9.
[9.2] Combat Influence
9.2.1 If all units in given combat are within friendly HQ range, then Player can add (if defending) or subtract (if attacking) 1 from dice roll for combat result (see 5.2.1 pt. e)).
9.2.2 HQ range is as follows:
- American, British, German: 4
- Soviet and other nations: 3
9.2.3 HQ influence is not cumulated – Players cannot add/subtract more than 1 from dice roll.
9.2.4 Both attacking and defending player can gain HQ combat modifier (in this case influence equals out).
10.0 Supply
[10.1] Basic Rules
10.1.1 Line of Supply (LoS) is a path of hexes connecting a unit with Supply Base.
10.1.2 LoS for unit is checked in Player's Supply Phase.
10.1.3 Each unit traces its LoS independently from other units. LoS of a unit is not limited in any way by LoSes of other friendly units.
10.1.4 Supply Bases are defined for each scenario (they are usually map edge, a town or given HQ unit).
10.1.5 LoS can be traced through roads without range limits.
10.1.6 LoS can be traced through off-road hexes for distance allowed by supply MPs limit.
10.1.7 Number of off-road supply MPs is specific for each nation.
- Americans, British: 12 MPs
- Germans: 10 MPs
- Soviets (and their allies, e.g. Polish People's Army): 8 MPs
- German allies (Romanians, Italians etc.): 7 MPs
10.1.8 In order to provide supplies LoS must "reach" unit's hex (starting from a road hex). It is done by spending supply MPs – they are spent analogously to trucked unit's movement rules (e.g. LoS cannot be traced through swamps or mountains).
10.1.9 Supply MPs are not spent for tracing off-road LoS between friendly units on adjacent hexes.
10.1.10 LoS cannot be traced through enemy units and/or their ZoCs unless the hex is occupied by friendly regular unit.
10.1.11 For LoS tracing it is assumed that all enemy units and all enemy towns have ZoC (excluding artillery in transport setup and HQs).
Example: Line of Supply is traced from western edge of the map to units of "GrossDeutchland" division. Due to presence of enemy units blocking the roads Germans must trace supply line through off-road hexes. The limit of 10 MPs German Player can use allows him to reach 2 armored battalions but only because 2 motorized infantry units extend the line by 1 hex. Even then assault guns brigade (on hex 4106) and Tiger tanks company (on hex 4404) are out of supply. To supply assault guns brigade there must have been a unit between it and supplied armored battalions since after reaching a road on hex 4206 Germans have no more supply MPs to spend and cannot supply further off-road units. To supply Tiger company German Player could move additional unit on hex 4303 and allow to trace supply line through ZoC of Soviet 18th infantry division or could move a unit on hex 4406 to allow tracing LoS on road through ZoC of Soviet 50th cavalry division.
[10.2] Out of Supply
10.2.1 Unit's that are unable to trace LoS during Player's Supply Phase are considered Out of Supply (OoS) and covered with counter marking OoS level equal to 1.
10.2.2 OoS units have their movement and attack strength halved (they still have full strength in defense).
10.2.3 Player, by increasing OoS level of unit by 1, can:
- move unit using its full MPs limit
- attack using unit's full strength
Example: If Player moves unit out of supply using its full Movement Points limit and then attack using units full strength that OoS level of this unit is increased by 2.
10.2.4 Unit's OoS level is increased by 1 when:
- unit is successfully attacked by enemy (result Dx)
- unit's attack fails (defender does not obtain Dx result)
Example: If OoS unit moves with full Movement Points limit, and then unsuccessfully attacks using its full strength then its OoS level increases by 3. If in subsequent Combat Phase unit is successfully attacked by enemy than its OoS level increases additionally by 1.
10.2.5 OoS modifications are made just after the action (movement or combat) which changes it.
10.2.6 Each OoS unit undergoes surrender procedure during Supply Phase.
Surrender Procedure: Player rolls two dices (2K6) and then subtracts the result from current OoS level. If OoS level modified this way is greater than 0 then unit surrender and its counter is eliminated from the game.
10.2.7 If OoS unit regains supply (Player can trace LoS to the unit at the beginning of Supply Phase) then its OoS level is reduced by 4.
Example: It will take 2 Turns with full supply for unit with OoS equal to 5 to regain full combat abilities.
10.2.8 Unit which OoS level is 0 or less regains all its base combat statistics (SPs and MPs).
11.0 Reinforcements
[11.1] Basic Rules
11.1.1 Reinforcements for each Player are provided in game scenarios.
11.1.2 Reinforcements can enter map in entry zones (hexes) described in game scenarios.
11.1.3 Reinforcements can enter map during Movement Phases and Strategic Movement Phases.
11.1.4 Reinforcements cannot enter the map from entry zones controlled by enemy.
11.1.5 If reinforcement units cannot enter the map stacked on one hex then Player should divide them into stacks and add entry hex MPs cost for movement of each next stack. This effect is cumulated for subsequent reinforcement stacks.
Example: Player has 10 full infantry units (2 CELs each) and decides they enter the map from one hex. This number of units must be grouped into no less than 3 stacks. Assuming that entry hex is woods and infantry pays 2 MPs to enter it, the cost of entry is as follows:
- first stack (selected by the Player pays) 2 MPs to enter this hex
- second stack pays 4 MPs to enter this hex
- third stack would need to pay 6 MPs to enter this hex (but since infantry units are not likely to have 6 MPs this unit will have to wait until next Movement Phase to enter the map or Player would have to change entry zone – see below) If unit enters the map through hex with road and infantry movement cost on the road is e.g. 0.5 MP than:
- first stack would pay 0.5 MP to enter the hex
- second stack would pay 1 MP to enter the hex
- third stack would pay 1.5 MPs to enter the hex
[11.2] Entry Zone Changing
Player may want to or be forced to (by enemy controlling entry zone) to change entry hexes for his units.
11.2.1 Player can change entry zone and enter adjacent entry zone in the same Movement Phase at cost of half of unit's MPs for entering the map and subsequent movement.
Example: Second armored division (7 MPs) was to enter the map from entry (hex) zone C. In the same Movement Phase Player can switch entry zone and enter the map from zone B or D with his division having 3.5 MPs.
11.2.2 Player can delay unit's entry and 'move' by 3 entry zones instead of entering the map. On next Movement Phase such unit(s) can enter the map from new entry zone using all theirs MPs.
Example: There are 10 entry zones: A, B, C, D, E, F, G, H, I and J. According to scenario Player can enter his reinforcements in zone C. During current Movement Phase Player can enter zone C with unit's all MPs, zones B or D with half units' MPs or enter zones A, B, C, D, E and F in next Movement Phase using unit's all MPs. To enter from zones G, H and I Player would need to delay entry of his units by 2 turns. To enter from zone J Player would need to delay entry of his units by 3 turns.
11.2.3 Unit can leave map through entry zone during Movement Phase or Strategic Movement Phase. On next Movement Phase unit is treated as reinforcement unit that can enter the map in the same entry zone (or delay its entry and move to different entry zone).
11.2.4 If there are no entry zones printed on map (and scenario enters units from edge of the map) Player should treat each road that leaves the edge of the map as separate entry zone.
12.0 Strategic Movement
Strategic movement allows Player to relocate his units after all attacks were made therefore he can exploit any gaps that was created as a result of combats.
12.1.1 Strategic Movement Phase (Phases 5 and 11) allows Player to move his units after Combat Phase.
12.1.2 Strategic Movement (SM) can be made by units that were not activated during their Movement Phase and did not fight during their Combat Phase.
12.1.3 All movement rules (see [3.0]) apply to Strategic Movement.
12.1.4 Units to be moved in Strategic Movement are to be marked with 'Strategic Movement' counter.
[12.2] Detailed Rules
12.2.1 Units that are in enemy ZoC cannot make SM.
12.2.2 Units cannot enter enemy ZoC during SM.
12.2.3 For SM units MPs are reduced by 2.
Example: Motorized infantry regiment normally has 7 MPs. During Strategic Movement unit's MPs are reduced to 5 MPs.
13.0 Tactical Concentration
[13.1] Basic Rules
13.1.1 Tactical Concentration (TC) applies to German and Allied divisions or Soviet armored/mechanized corps.
13.1.2 If 3 units of the same division/corps take part in a combat than commanding Player gains 1 CM.
13.1.3 It is not required that units are on the same hex.
13.1.4 TC effect is cumulated.
Example: If 9 units of 3 different divisions (3 of each) take part in a combat then Player gains 3 CMs. If 6 units of single division take part in a combat then Player gains 2 CMs.
13.1.5 Unit's organic artillery (e.g. artillery of armored or motorized divisions) count for TC even if artillery uses ranged fire to support regular units.
14.0 Bridges
[14.1] General Rules
14.1.1 All bridges are objects (hence can be e.g. destroyed by artillery and/or aircrafts).
14.1.2 Destroyed bridges can be marked by "bridge destroyed" counter or by removal of "bridge" counter.
14.1.3 Bridges are controlled analogous to other objectives, but if opposing units are on each sides of the bridge then Player whose unit was first at the bridge controls it.
Example: Bridge connects hexes A and B and there is German garrison on hex B. The bridge is owned by Germans. Allied unit(s) moved to hex A, attacked Germans and forced them to retreat from hex B. Now the bridge is controlled by Allies. Even if Germans reenter hex B the bridge will still be controlled by Allies (and only they will be able to destroy it) until they decide (or are forced) to empty hex A and Germans stay on the other side.
14.1.4 Bridge can be destroyed only by Player who controls it.
[16.2] Rivers and Streams
14.2.1 Bridges on river or stream can be destroyed by any regular or HQ unit at cost of 1 MP (unit must be on any side of the bridge).
14.2.2 Bridge on river or stream can be rebuild by any non-artillery unit within HQ range (HQ itself can also rebuild bridge) at cost of 3 MPs.
14.2.3 Bridges on rivers or streams can only be rebuilt. Player cannot build a bridge if there is no bridge printed on the map.
[14.2] Big Rivers
14.3.1 Bridges on big river can be destroyed by any regular or HQ unit at cost of 3 MP (unit must be on any side of the bridge).
14.3.2 Bridge on big river can be built or rebuilt by a HQ unit according to following procedure:
- HQ unit must be at one of the river's sides at the end of its Supply Phase.
- In his next Movement Phase Player declares bridge building and secretly notes hexes connected (HQ uses all its MPs for bridge building).
- If other hex of the river (that bridge is going to connect) is controlled (not in enemy ZoC or friendly regular unit on both hexes) by the Player till next Turn's Movement Phase then bridge is built and can be used in this Movement Phase (HQ uses all its MPs for bridge building).
Example: In Turn 5 HQ unit takes part in pursuit that ends at the bank of big river (hex A). In Turn 6, during Movement Phase, Player can declare bridge building (to connect hex A with hex B). If Player manages to control hex B till Movement Phase on Turn 7 then it is built and can be used from this phase.
14.3.3 One bridge can be built/rebuilt by one HQ only.
14.3.4 During bridge building HQ unit cannot move (it can be attacked but must stay on the hex).
15.0 Special Units
Some units during combat had special abilities that could not be included in Strength Point factor. Such units' positive or negative influence during combat is described in this chapter.
[15.1] Basic Rules
[15.11] Starred Units
15.1.1 Units that had considerable advantage during a fight are marked by colored stars which reference unit's special abilities that can be used in combat.
15.1.2 Special abilities are described in below table.
15.1.3 Each star provides +1 CM during combat.
15.1.4 Star influence is cumulated. At the one hex, player may use no more than 3 star CM.
15.1.5 Towed units (e.g. towed anti-tank guns) can use their abilities only in defense.
15.1.6 Player can decide if he wants to use unit's special ability (see 15.1.7).
15.1.7 If Player uses special ability during combat and suffers any loses than at least 1 CEL must be reduced from units using their abilities during the combat.
15.1.8 Unit's special abilities cannot be used (the printed emblems are the German, Soviet and Allied nationality symbols) in assault through big river.
Star table (printed on the same page as 15.1.8):
| Counter | Color | Influence | Attack | Defense |
|---|---|---|---|---|
| Counter with black star | black star | Influence combat against unfortified units. Disabled if enemy uses white star. Disables yellow stars. | YES (if enemy is not fortified) | YES |
| Counter with white star (GB/VII) | white star | Influence combat against enemy mechanized units (and armored cars). Disables black and yellow stars. | YES (see 15.1.5) | YES |
| Counter with yellow star | yellow star | Influences any attack. Disabled if enemy uses black or white star. | YES | NO |
| Counter with blue star (150 BPanc.) | blue star | Influences any combat. Cannot be disabled by enemy stars. | YES | YES |
16.0 Unit Masking
16.1.1 During game Players cannot look what's in enemy stacks (effectively only top counter is visible in this case).
16.1.2 Player can cover his units with masking auxiliary counters which disallows to see top unit on the stack.
16.1.3 Players can look up enemy stacks that took part in combat – during and after it – until end of current Combat phase.
16.1.4 When enemy units are on adjacent hex then following information must be provided by opponent:
- enemy units are fortified: unit type of each counter
- enemy units are not fortified: unit type and number of CELs of each counter.
17.0 Air Units
[17.1] Basic Rules
21.1.1 Out of 6 air counters in the system, 2 have white stars. They are treated similarly to white stars for regular ground units (they provide column shift for ground attack support and row shift for air attack – see [15.1]).
21.1.2 Only 2 air counters can carry air mission on one hex.
Tables of the WB-95 System
TERRAIN INFLUENCE
| Terrain | Movement: motorized (track or half-track) | Movement: non-motorized | Combat effect |
|---|---|---|---|
| clear | 2(1) | 1 | - |
| hills | 3(2) | 1 | +1 |
| forest | 4(3) | +1 | +1 |
| city | 3 | +1 | +2 |
| town | 2 | - | +1 |
| main route | 1/3 (1/2) | 1/2 | - |
| secondary route |
- if all movement is made on secondary route unit can move one additional hex on this road
Bomber Attack
Rows: SPs used. Columns: 2 dice (2D6) roll.
| SPs used | 2 | 3 | 4 | 5 | 6 | 7 | 8 | 9 | 10 | 11 | 12 |
|---|---|---|---|---|---|---|---|---|---|---|---|
| 1-2 | -1 | -1 | - | - | - | - | - | - | - | D | -1 |
| 3-5 | -1 | -1 | D | - | - | - | - |
-1 - Player loses 1 CEL D - units on hex are disorganized Doubled defender's terrain modifiers must be subtracted from air SPs used
Air Attack
| SPs used | 2 | 3 | 4 | 5 | 6 | 7 | 8 | 9 | 10 | 11 | 12 |
|---|---|---|---|---|---|---|---|---|---|---|---|
| 1-2 | - | - | - | - | - | - | - | - | - | - | -1 |
| 3-5 | -1 | - | - | - | - | - | - |
-1 - Player loses 1 CEL D - units on hex are disorganized Doubled defender's terrain modifiers must be subtracted from air SPs used
Artillery Fire
| SPs used | 2 | 3 | 4 | 5 | 6 | 7 | 8 | 9 | 10 | 11 | 12 |
|---|---|---|---|---|---|---|---|---|---|---|---|
| 1-2 | -1 | - | - | - | - | - | - | - | - | - | ● |
| 3-5 | -1 | D | ● | - | - | - | - |
-1 - Player loses 1 CEL D - units on hex disorganized ● - disorganization test Doubled defender's terrain modifiers must be subtracted from air SPs used
Attack on Objects
Printed as "rzut 2 x K6" (Polish for "roll"): roll 2 x K6.
| SPs used | 2 | 3 | 4 | 5 | 6 | 7 | 8 | 9 | 10 | 11 | 12 |
|---|---|---|---|---|---|---|---|---|---|---|---|
| 1-2 | Z | - | - | - | - | - | - | - | - | - | - |
| 3-5 | Z | Z | - | - | - | - | - |
Z – object destroyed
COMBAT TABLE
Columns are the final combat ratio (CR); rows are the 2 x D6 roll. Each cell gives the combat result. "●" is the printed "Roll for D" mark (see the legend below the table).
| 2 x D6 | 1:4 | 1:3 | 1:2 | 1:1 | 2:1 | 3:1 | 4:1 | 5:1 | 6:1 | 7:1 | 8:1 | 9:1 | 10:1 |
|---|---|---|---|---|---|---|---|---|---|---|---|---|---|
| 2 | -1/-1D | -1/B1D | -1/B1D | -1/B2D | -1/B3D | -1/B3D | -1/B3D | -1/B4D | -1/B4D | -1/B4D | -1/B4D | -1/B5D | -1/B5D |
| 3 | -1/- | -1/B1 |
Modifications: terrain, HQ, tactical concentration, units' abilities
Examples:
- -1 / -1 => both Players lose 1 SP
- D2 -1 => defender must retreat by 2 hexes and loses 1 SP
- -1 / D2 -1 => attacker loses 1 SP, defender retreats by 2 hexes and loses 1 SP
- -1 / D4D => attacker loses 1 SP, defender retreats by 4 hexes and disorganize
- A1D => attacker retreats by 1 hex and disorganize
- ● Roll for D
DISORGANIZATION
| 2 x D6 | Nationality | Side |
|---|---|---|
| 12 | SS | Germans |
| 11,12 | other | Germans |
| 9-12 | volksgrenadiers. Volksturm | |
| 11-12 | Alies, Russians (guards) | |
| 10-12 | other Russians | |
| 9-12 | French, Romanians, Hungarians | |
| 8-12 | Belgians, Netherland | |
| 7-12 | Italians |
The "Germans" label in the printed table spans the SS and "other" rows. "Alies" and "Netherland" are printed as shown.
Part Two: Budapest 1945 Scenarios
The scenario booklet is reproduced below in its order: Encirclement, Konrad 1, Konrad 2, the reinforcement calendar, Konrad 3, and Tavaszi Ebredes, followed by the scenario terrain table. Each set-up is given as printed, with each entry as "unit | hex". Where the printed set-up is set out in columns without a side heading, the entries are grouped under the side they belong to by unit type. Hex numbers, SL reductions and the "U" (improved fortifications) and "u" (field fortifications) marks are kept as printed.
Scenario 1: Encirclement
Notes
- Game starts at 20 and ends at 31 of December.
- Initiative: Soviets.
- Supply: Germans: W, N. Soviets: E.
- U – unit in the improved fortifications (red counter).
- u – unit in the field fortifications.
- Player with bigger number of the victory points wins the scenario.
- At the end of each day Soviet player removes 3 SL of any units of the 6 Armored Army and Plijev's Group.
- At the end of each day German player removes 1 SL of any units of the 24 Armored Division or 18 Armored Division.
- Bridges: Estergom-Sturowo (as printed; the booklet gives no further bridge hexes for this scenario).
Victory conditions
- Red Army: Instant victory if Budapest is captured or completely surrounded by Soviets. 1 VP for each of the following hexes: 812, 713, 3319, 3420, 2217, 2821, 1611, 2008, 2609.
- Germans and Hungarians: 1 VP for each of the following hexes: 812, 713, 3319, 3420, 2217, 2821, 1611, 2008, 2609.
Set-up: Soviets
| Formation | Unit | Hex |
|---|---|---|
| 6 Armored Guards Army | VI CavCorp Grd, HQ Plijew | 101 |
| 6 Armored Guards Army | IV CavCorp Grd | 201 |
| 6 Armored Guards Army | IV MechCorp Grd (-1 SL) | 400 |
| 6 Armored Guards Army | V ArmCorp Grd (-1 SL), HQ | 300 |
| 6 Armored Guards Army | IX MechCorp Grd (-1 SL) | 500 |
| 7 Guards Army | HQ, 51 ArmBrig/6 | 399 |
| 7 Guards Army | 141, 303 RifDiv | 702 |
| 7 Guards Army | 36 GrdDiv, 2 AT | 901 |
Set-up: Germans (fortified column)
| Unit | Hex |
|---|---|
| 24 ArmDiv (-3 SL) | 103 |
| 18 ArmDiv GD SS (-3 SL) | 304 |
| 2 ArmDiv (w) | 503 |
| 357 InfDiv | 903, 1203 |
| 4/1 CavDiv (hung) | 1604 |
| 1 ArmDiv (hung) | 1604 |
| 12 InfDiv (hung) | 1803 |
| Billnitzer (hung) | 1803 |
| 10 InfDiv (hung) | 2002 |
| Koranyi (hung) | 1904 |
| Berendt (hung) | 2006 |
| HQ I Corps (hung), Art. Buda | 2105 |
Set-up: Germans and Hungarians (second German column, no separate heading in the booklet)
| Unit | Hex |
|---|---|
| ArmDiv GD SS FH | 2203, 2303 |
| Art, HQ IX Corps SS | 2205 |
| 12 Flak | 2106 |
| KG A/13 ArmDiv | 2206 |
| 271 InfDiv (-1 SL) | 2305, 2609, 2610 |
| 52/22 CavDiv SS | 2507 U |
| 239 StuG | 2609 |
| KG B/13 ArmDiv | 2610 U |
| 211 InfDiv | 2711, 2912 |
| 8 SS MotDiv | 2912 |
| Solt | 3014 U |
| 23 InfDiv (hung) (-2 SL) | 3014, 3214 |
Scenario 2: Konrad 1
Notes
- Game starts at 1 and ends at 7 of January.
- Initiative: Germans.
- Supply: Germans: W, N. Soviets: E.
- U – unit in the improved fortifications (red counter).
- u – unit in the field fortifications.
- Soviet units can't cross the Danube between Komarno and Esztergom.
- Bridges: 2704-2705, 2707-2708.
Victory conditions
- Germans: Instant victory if there is a road connection, free of the enemy ZOCs, between Tata and Budapest and at least 7 hexes of Budapest are controlled by the German and Hungarian units.
- Soviets: Victory if Germans won't accomplish their victory goal.
Set-up: Soviets (fortified)
| Unit | Hex |
|---|---|
| 180 RifDiv | 2208 |
| 297 RifDiv | 2401 |
| V CavCorp Grd | 2721 |
| II MechCorp Grd (-3 SL) | 1606 |
| XVIII ArmCorp (-2 SL) | 2217 |
| VII MechCorp (-3 SL) | 3318 (1) |
| I MechCorp Grd | 4110 (1) |
| 207 ArmBrig | 4110 (1) |
| 3 Art./3 FU | 2803 |
| 2 Art./3 FU | 2805 |
| 1 Art./3 FU | 2608 |
| 317 RifDiv | 2302 |
Set-up: Germans (fortified)
| Unit | Hex |
|---|---|
| 357 InfDiv | 114 |
| 28, 98/8 ArmDiv | 314 |
| 111/6 ArmDiv | 515 |
| 394/3 ArmDiv | 715 |
| InfDiv SL (hung) | 813 |
| 283/96 InfDiv | 125 |
| 284/96 InfDiv | 915 |
| 287/96 InfDiv | 1118 |
| HQ, Art. LVII ArmCorp | 619 |
| 662 Jagd | 619 |
| 721 AT | 1127 |
| HQ, Art. LXXII ArmCorp | 1228 |
Set-up: Germans and Hungarians (other units)
| Unit | Hex |
|---|---|
| 325 StuG | 1228 |
| 208 ArmBat | 1224 |
| 1 SS | 1222 |
| 3 ArmDiv SS | 1322 |
| 977, 978/271 InfDiv | 1423 |
| HQ IV ArmCorp SS | 1424 |
| 5, 10/5 ArmDiv SS | 1522 |
| Art. 6 A | 1523 |
| 9/5 ArmDiv SS | 1629 |
| 4, 11/6 ArmDiv | 1822 |
| 3, 6/3 ArmDiv | 2023 |
| 10/8 ArmDiv | 1822 |
Budapest
- 979/271 InfDiv, KG A/13 ArmDiv, 12 Flak, ArmDiv FH, HQ, Art. IX Corp SS, 8 CavDiv SS, 17, 53/22 CavDiv SS, HQ I Corp (hung), Art./Buda, 1 ArmDiv (hung), 4/1 CavDiv (hung), 10 InfDiv (hung), 12 InfDiv (hung), Billnitzer, Berndt, Koranyi.
Scenario 3: Konrad 2
Notes
- Game starts at 7 and ends at 17 of January, but players may decide to make it longer if they want to.
- Initiative: Germans.
- Supply: Germans: W, N. Soviets: E.
- u – unit in the field fortifications.
- Soviet units can't cross the Danube between Komarno and Esztergom.
- Bridges: 2704-2705, 2707-2708.
- Since the 14 of January, at the end of each turn German player has to remove 1 SL of the German and Hungarian units in Budapest.
Victory conditions: same as in the "Konrad 1" scenario.
Set-up: Soviets (fortified)
The printed set-up is in columns with formation headers. The entries are listed here in printed order, with the header kept as a row where it appears.
| Unit | Hex |
|---|---|
| 99 RifDiv | 2307 |
| 316 RifDiv | 2407 |
| Art., HQ | 2309 |
| 4 Guards Army (header) | |
| 4 GrdDiv (-1 SL) | 1709 |
| 41 GrdDiv, 9 AT | 2118 |
| 34 GrdDiv | 1920 |
| 40 GrdDiv | 2121 |
| 223 RifDiv | 2223 |
| 52 RifDiv | 2523 |
| 7 GrdDiv | 2823 |
| 5 GrdDiv, 42 AT | 3023 |
Set-up: Germans (fortified)
| Unit | Hex |
|---|---|
| HQ, Art LXXII Corp | 425 |
| 357 InfDiv | 116, 216, 318 |
| 211 InfDiv | 419, 520, 621 |
| 325 StuG | 520 |
| HQ, Art LVII ArmCorp | 421 |
| 28, 98/8 ArmDiv | 723, 725 |
| 10/8 ArmDiv | 1228 |
| 20 ArmDiv | 126 |
| 208 ArmBat, 662 Jagd | 927 |
| 721 AT, SL (hung) (-3 SL) | 1127 |
| 711 InfDiv | 911, 1111, 1211 |
| 96 InfDiv | 1412, 1512, 1613 |
Budapest (save to the hexes 2204 and 2304):
- 979/271 InfDiv, KG A/13 ArmDiv, 12 Flak, ArmDiv FH, HQ, Art. IX Corp SS, 8 CavDiv SS, 17, 53/22 CavDiv SS, HQ I Corp (hung), Art./Buda, 1 ArmDiv (hung), 4/1 CavDiv (hung), 10 InfDiv (hung), 12 InfDiv (hung), Billnitzer, Berndt, Koranyi.
Reinforcement calendar (printed "Callendar")
The booklet prints this calendar on its own page, between the Konrad 2 and Konrad 3 scenarios. The booklet does not name this calendar's scenario. It is taken to be the "reinforcements table" that the Konrad 3 notes refer to, from its placement in the booklet. Turns run 1 I to 31 I (January). Each row lists the units that enter or are reduced on that turn, with the printed hex letter. Entries are in the printed order.
| Turn | Germans and Hungarians | Soviets |
|---|---|---|
| 1 I | – | 6 Grd Armored Army (- 8 SL), A |
| 2 I | 17 Nbf, D | A (as printed on this row) |
| 3 I | 1, 2/509, D; 211 InfDiv., B | 113 RifDiv, N |
| 4 I | – | – |
| 5 I | 711 InfDiv., D | – |
| 6 I | 20 ArmDiv., B | – |
| 7 I | 2 ArmDiv. (h), D; 403 VAK, HQ, Art. VIII C (h), D | – |
| 8 I | 239 StuG, D; 153 InfDiv., B | – |
Notes on this calendar as printed: the column of hex letters ("A", "B", "D", "E", "F", "G", "M", "N", "P", "C") is the entry-zone letter used by the scenario. The "-2 SL" lines are printed as reductions and are applied by the player as the table shows. The "A" printed on the 2 I row is kept as printed; it follows the 6 Grd Armored Army entry on the 1 I row.
Scenario 4: Konrad 3
Notes
- Game starts at 17 and ends at 31 of January, but players may decide to make it longer if they want to.
- Initiative: Germans.
- Supply: Germans: W, N. Soviets: E.
- u – unit in the field fortifications.
- Soviet units can't cross the Danube between Komarno and Esztergom.
- Bridges: 2704-2705, 2707-2708, 1805-1806.
- Since the 18 of January, at the beginning of each turn players have to remove SLs mentioned in the reinforcements table.
- Since the 18 of January, at the beginning of each turn German player has to remove 1 SL of the units in Budapest.
Victory conditions
- Germans: Instant victory if there is a road connection, free of the enemy ZOCs, between Tata and Budapest and at least 4 hexes of Budapest are controlled by the German and Hungarian units.
- Soviets: Instant victory if Germans won't accomplish their victory goal.
Set-up: Soviets (fortified)
The printed set-up is in columns with formation headers. "G" in a unit name is printed for Guards ("I G", "II G").
| Unit | Hex |
|---|---|
| VII Corps (rom) | 2104 |
| 74 RifDiv | 3706 |
| 1 RU | 4126 |
| 63 MechBrig/VII | 3926 |
| 64 MechBrig/VII | 3518 |
| 16 MechBrig/VII | 3618 |
| 41 ArmBrig/VII (-1 SL) | 3621 |
| 122 RifDiv | 4014 |
| 21 RifDiv | 3814 |
| 104 RifDiv | 3614 |
| 4 Guards Army (header) | |
| 69 GrdDiv, 42 AT | 3725 |
Set-up: Germans (fortified)
| Unit | Hex |
|---|---|
| 357 InfDiv | 116, 216, 318 |
| 211 InfDiv | 419, 521, 523 |
| 325 StuG | 523 |
| HQ, Art LVII ArmCorp | 323 |
| 153 InfDiv | 126, 926 |
| 20 ArmDiv | 225, 526, 1125 |
| 8 ArmDiv | 725, 726, 1125 |
| 208 ArmBat | 725 |
| HQ, Art LXXII Corp | 726 |
Set-up: Germans and Hungarians (other units)
| Unit | Hex |
|---|---|
| 721 AT, 203 StuG | 825 |
| InfDiv SL (hung) (-3 SL) | 1127 |
| 711 InfDiv | 910, 1110, 1310 |
| KG B/13 ArmDiv | 1310 |
| 96 InfDiv | 1412, 1613, 1814 |
| 3 CavDiv | 1915, 2016 |
| HQ I CavCorp | 1515 |
| 23 InfDiv (hung) | 2017, 1922, 2024 |
| HQ, Art. VIII Corp (hung) | 1629 |
| 6 ArmDiv (-1 SL) | 2019, 1920 |
| 2 ArmDiv (hung) | 2225, 2525 |
| 662 Jagd |
Budapest:
- KG A/13 ArmDiv, 12 Flak, Pz, Gren./ArmDiv FH, HQ, Art IX Corp SS, Stug, 16/8 CavDiv SS, 17/22 CavDiv SS, HQ I K(hung), Art./Buda, 1 ArmDiv (hung), 4/1 CavDiv (hung), 10 InfDiv (hung), 12 InfDiv (hung), Billnitzer, Berndt (hexes 2105, 2205, 2006, 2106, 2206 only).
Reinforcements: see the reinforcement calendar printed between Konrad 2 and Konrad 3 above.
Scenario 5: Tavaszi Ebredes (Winter Awakening)
Notes
- Game starts at 4 and ends at 20 of March.
- Initiative: Germans.
- Supply: Germans: W, N. Soviets: E.
- u – unit in the field fortifications.
- Player with a higher number of VP wins.
- Bridges: 2704-2705, 2707-2708.
- Only hexes south of Danube and south of hexrow 8xx are in play.
- Air force: Soviets: 2 and 3 SP (these two cannot be used together to defend one hex). Germans: 3 SP.
Victory conditions
GERMANS:
- Instant victory if there is a road connection, free of the enemy ZOC, between Komarom and Budapest.
- For hex 4209: 12 VP
- For hex 4908: 20 VP
- For hex 5710: 15 VP
- For each city hex (save to Budapest): 3 VP
- For each town hex: 2 VP
- 2 PZ (as printed)
SOVIETS:
- For making German instant victory impossible: 16 VP
- For hex 4209: 8 VP
- For hex 4908: 3 VP
- For hex 5710: 6 VP
Set-up: Soviets
The printed set-up is in columns with formation headers. "G" is printed for Guards and "Art./7 A" and similar are printed as shown.
| Formation | Unit | Hex |
|---|---|---|
| (no formation printed) | 1 Art./7 A | 4727 |
| 46 Army | 86 GrdDiv | 1110 |
| 46 Army | 109 GrdDiv | 1411 |
| 46 Army | 180 RifDiv | 1612 |
| 46 Army | 49 GrdDiv | 1913 |
| 46 Army | 59 GrdDiv | 2114 |
| 46 Army | Art., HQ | 2213 |
| 46 Army | 99 RifDiv | 2217 |
| 4 Guards Army |
Set-up: Germans
The booklet heads the German column "GERMANS: (fortifited)". Units are listed as printed.
| Unit | Hex |
|---|---|
| HQ, Art. VIII Corp (hung) | 1920 |
| 1 CavDiv (hung) | 2222, 2423, 2723 |
| 3 ArmDiv SS (-3 SL) | 2922 |
| 6 ArmDiv (-1 SL) | 2924 |
| HQ IV ArmCorp SS | 3122 |
| 2 ArmDiv (hung) (-2 SL) | 3121 |
| 5 ArmDiv SS (-3 SL) | 3220 |
| 3 ArmDiv (-1 SL) | 3319 |
| 1 ArmDiv (-1 SL) | 3419 |
| 1, 2/509 ArmBat | 3420 |
| Art. 6 A, 228 StuG | 3320 |
| HQ, Art. III ArmCorp |
Set-up abbreviations and SL note (printed on the Tavaszi Ebredes page)
- Corp – Corps, Div – Division, Brig – Brigade, Bat – Battalion, Inf – Infantry, Rif – Rifles, Grd – Guards, Arm – Armored, Mech – Mechanized, Mot – Motorized, Cav – Cavalry, Art – Artillery, AT – Anti-Tank, Hung. – Hungarian, Rom. – Romanian, SL – Strength Level.
- "-1 SL" – unit starts the game with 1 Strength Level lost (from the entire stack).
Terrain influence for the scenarios
The booklet prints the TERRAIN INFLUENCE table after Konrad 1. Its values are the same as the TERRAIN INFLUENCE table in Part One above.
TERRAIN TABLE FOR THE TAVASZI EBREDES (WINTER AWAKING) SCENARIO
| Terrain | Movement: motorized (track or half-track) | Movement: others | Combat effect |
|---|---|---|---|
| clear | 3 | 2 | - |
| hills | 3 | 2 | +1 |
| forest | 3 | 2 | +1 |
| city | 3 | 2 | +2 |
| town | 2 | 2 | +1 |
| main route | 1/2 | 1/2 | - |
| secondary route | 1 |
The booklet prints the scenario table with the heading "city" as "citi" in the source; it is given in full here.