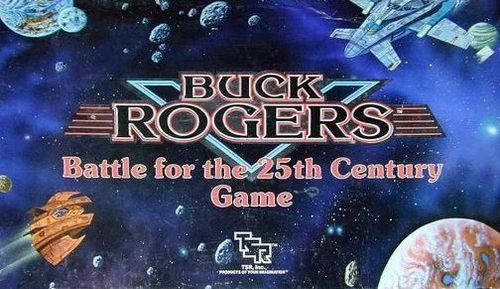
Buck Rogers: Battle for the 25th Century Game
Buck Rogers: Battle for the 25th Century Game Rulebook
Table of Contents
Table of Contents
How to Use These Rules
The Basic Game is designed to familiarize players with the BUCK ROGERS, BATTLE FOR THE 25th CENTURY game. If you're a new player, skim these rules to get a feel for the game. Then, turn to the Sample Turn (beginning on page 13 of the Advanced/Optional & Sample Turn booklet). Play through the sample, referring back to the rules if you run into something you don't understand. By the time you finish the sample turn, you'll know how to play the game.
In addition to the Basic Game rules in this booklet, you'll also find an Advanced/Optional & Sample Turn book in the game box. The advanced and optional rules offer different challenges than the Basic Game, allowing you to pick your own complexity level, playing time, and so on. But we strongly encourage you to play the Basic version of the BUCK ROGERS, BATTLE FOR THE 25th CENTURY game a few times before moving on to the advanced and optional rules.
The Sample Turn appears at the end of the Advanced/Optional rulebook. Note, however, that the Sample applies only to the Basic Rules. It is included in the second booklet so you can have the rules and the Sample Turn available at the same time, without a lot of page flipping.
Winning the Basic Game
To win the battle for the Inner Planets, you must accomplish one of the following goals:
- Control 15 Territorial Zones at the end of any turn.
- Control the last Leader Character on the board.
- Convince all of the other players to surrender by pointing out the futility of their positions.
- Control the highest number of Territorial Zones at the end of the turn in which Earth returns to its starting Zone, completing one revolution around the Sun. If there's a tie at the end of Earth's first revolution, go into sudden death overtime — the player with the most Zones at the end of the next turn wins. Continue until there's a clear winner.
The game ends whenever any one of these victory conditions is met.
Strategy
As one of the factions vying for control of the Solar System, you conquer territories while preventing enemies from conquering yours. This means you must balance a pitiless offense with an unyielding defense. Your marauding Troopers must invade foreign zones while safeguarding your Factories, your territories, and your Leader from destruction.
You are represented on the board by a Leader Character. This character is your most important piece. If your Leader is killed, your forces are "rendered inert," and you miss a turn. Therefore, you must protect your Leader, either by surrounding him with his own troops or by placing him far from enemy units.
Diplomacy plays a critical role in this game. While all other players are your enemies in the long term, you will often find it necessary to establish temporary alliances to stop another player from becoming too powerful. But beware these alliances, lest they make you vulnerable to surprise attacks.
One last piece of advice — pay careful attention to the movement of the planets and asteroids around the sun. The shifting positions provide opportunities for devastating, unexpected attacks.
Components
Before beginning the game, scan the component list below and the illustrations on pages 5, 6, 7, and 8 and make sure you have all the pieces listed. Following the list, you'll find a more complete description of each playing piece. (Don't worry if you don't understand everything in the descriptions — you will by the time you finish reading these rules.)
- Game Board (1)
- Leader Characters (6)
- Control Markers (138 — 23 of each color)
- Troopers (120 — 20 of each color)
- Gennies (48 — 8 of each color)
- Transports (24 — 4 of each color)
- Transport Markers (48 — 8 of each color)
- Fighters (90 — 15 of each color)
- Battlers (36 — 6 of each color)
- Killer Satellites (14)
- Factories (24)
- White Chips (45)
- Red Chips (5)
- Planet Markers (13)
- 10-Sided Dice (5)
- Playing Cards (54)
- Territorial Zone Cards (42)
- Turn Cards (6)
- Leader Cards (6)
- Basic Rulebook (1)
- Advanced/Optional & Sample Turn Booklet (1)
Game Board
The game board is divided into two main "displays":
The Solar System Display in the center of the board represents an overhead view of the planets and asteroids as they revolve around the sun. The planets and asteroids are color coded: yellow for Mercury, green for Venus, blue for Earth, red for Mars, and grey for the Asteroids. The orbits of the planets are shown on the Solar System Display in matching colors. The orbits are connected to one another by white lines. Spaceships travel between the planets along these lines. The dots on the Solar System Display are used to measure how far a planet or spaceship moves. These dots are called "Space Zones."
The Planetary Displays around the edges of the board represent the planets and asteroids themselves. The surface of each planet is divided into several smaller areas called Territorial Zones. Some of the planets have moons and man-made satellites (Earth's L-4 and L-5 colonies, Mercury's Hielo and Mariposas, Mars' Deimos). These are considered Territorial Zones. The space around each planet is divided into a Near Orbit Zone and a Far Orbit Zone. (Note that the borders of each planet's Far and Near Orbit Zone are color-coded to match the orbits on the Solar System Display.) Asteroids have only one Orbit Zone (which sometimes works like a Near Orbit Zone and, at other times, works like a Far Orbit Zone — this is explained further later in these rules).
Leader Characters
Each player has a Leader — Buck Rogers, Wilma Deering, Killer Kane, Ardala, Black Barney, or Doc Huer. Leaders move up to four Territorial Zones, Orbit Zones, or Space Zones. The presence of a Leader bolsters troop morale, adding two to the combat die rolls of any friendly playing pieces sharing the Zone with him. If all friendly units in the Zone are killed and enemy units remain, the Leader is considered killed. If your Leader dies you miss one entire turn. After that, your forces continue normally, but your Leader is out of the game.
Troopers
Troopers, full-blooded humans, are the workhorses of your army. While not as powerful as Gennies, they can be loaded on Transports and moved from planet to planet. By themselves, Troopers move one Territorial Zone per turn.
Gennies
This is a colloquial term for "genetically engineered human." The Gennies in this game are specially manufactured for combat, making them more effective fighters than Troopers. However, Gennies are designed to fight only on a particular planet, and can't leave that planet, even on Transports. This makes Gennies primarily defensive fighters.
Transports
Transports move four Zones per turn in any combination of Territorial Zones, Orbit Zones, and/or Space Zones. They can carry up to five Troopers or one Factory. Factories inside Transports can't produce new units.
Transports have minimal fighting capabilities, so it's a good idea to escort them with Fighters and/or Battlers. In combat, a Transport can't be attacked until all other friendly units in its Zone are destroyed. If a Transport is destroyed, any units inside it are destroyed, too.
Transport Markers
Each faction has eight Transport Markers, two marked "Transport 1," two marked "Transport 2," two marked "Transport 3," and two marked "Transport 4." When a Transport is placed on the board, put a Transport Marker under it. Then place the matching marker off the board within easy reach. When a unit is loaded aboard a Transport, place it off the board with the second marker. This makes it easy to tell which units are aboard which Transport; it makes movement of fully loaded Transports easier; and it makes it more difficult for opposing players to know exactly what's loaded aboard a particular Transport.
Fighters
These are the most versatile pieces you've got. They are relatively easy and cheap to build, and can move up to four Space, Orbit, or Territorial Zones. This versatility has its price, however — in Territorial Zone combat, Fighters are no match for Gennies, and in Space or Orbit they are outclassed by Battlers.
Battlers
The Battler is a 25th century battleship. Battlers are superior in combat to Fighters and have the unique ability to bomb planetary surfaces from adjacent Orbit Zones. Battlers, like all spaceships in the Basic Game, move up to four Orbit or Space Zones per turn. Unlike Fighters and Transports, they can never land on Territorial Zones or Asteroids.
Once per turn, Battlers get a special bombing attack, allowing them to destroy units in a Territorial Zone while they remain safe in Near Orbit. In order to bomb, a Battler must be in the Near Orbit Zone of a Planetary Display. The player declares his target (any Trooper, Fighter, Transport, or Factory in one of that Planetary Display's Territorial Zones). He then rolls a die and, on a "7" or higher, the target is immediately removed from the board without getting a counterattack. If the roll is a "6" or less, the bombing attempt fails, and the Battler can't bomb again until the next turn (though it can still fight conventionally).
Killer Satellites
Though difficult to build (you must control all of a planet and tie up a Factory for two turns), Killer Satellites provide strong planetary defenses and can inflict terrible damage on attackers. Killer Satellites can only be deployed in the Near Orbit Zones of Planetary Displays or in the Orbit Zones of Asteroids. Killer Satellites can be deployed even if enemy ships are present in the Near Orbit Zone.
Note that you don't have to control the entire asteroid belt in order to deploy a Killer Satellite in orbit near a single asteroid — you just have to control the asteroid you want to defend with a Satellite.
Once deployed, Killer Satellites can't move, but enemy ships entering the Near Orbit Zone are frozen in place until the Combat Phase. Before any other combat takes place, the Killer Satellite gets one free shot at every enemy ship in its Near Orbit Zone. Any ships killed at this time are removed from the board without getting a counterattack. During subsequent rounds of the Combat Phase, the Killer Satellite fights like other units — one attack per round against one opponent — and can be attacked by enemy units normally. No more than one Killer Satellite can be built in any Planetary Display except Earth/Moon — both the Earth and its Moon can support a Killer Satellite.
Factories
These are the engines of each player's war machine, used to produce new playing pieces as the game goes on. Factories are capable of producing the unit types described above, according to the following schedule: two Troopers per turn; two Gennies per turn; one Fighter per turn; one Transport per turn; one Killer Satellite every two turns; one Battler every two turns; one Factory every two turns.
Factories can only be placed on Territorial Zones. Once placed, Factories can only be moved aboard Transports. They have no combat ability at all.
Control Markers
The presence of a Control Marker signifies ownership of a Territorial Zone (Space and Orbit Zones can't be owned). Control Markers are placed on a Zone at the end of the Combat Phase in which you take control of a Zone with any piece. The Control Marker remains on that Zone until another player captures the Zone.
Control Markers have no fighting abilities in the Basic Game and, once placed, don't move. Any enemy unit moving into a Zone containing nothing but a Control Marker automatically takes over that Zone — no combat is necessary.
If at the end of a battle, a Marker is the only unit remaining, the Marker stays — the last player who controlled the Zone retains control.
Each faction has 23 Control Markers of its own color, with the faction symbol on one side and the words "In Production" on the other. The "In Production" side of the Marker is used to show that a Factory has spent one turn producing a unit that takes two turns to manufacture.
White and Red Chips
These represent multiple units. A White chip represents one unit, a red chip, five. If you have 14 fighters in a Space Zone, it's far easier to stack two red chips (10 units), three white chips (3 units) and one Fighter playing piece together than to try to squeeze all 14 Fighters on the board.
Planet Markers
There is one Planet Marker for each planet and asteroid on the Solar System Display. Each Planet Marker has a sun-side and a crescent moon side — this is so players can keep track of planetary movement. Note that each Marker also has a letter (or letters) which matches a code on one of the Space Zones on the Solar System Display. This is so you can match each planet with the appropriate orbit during Set-Up.
10-Sided Dice
These are used to resolve combat and determine turn order.
Territorial Zone Cards
These are used to determine which Territorial Zones you control at the beginning of the game. Each card shows the game board with a single Territorial Zone highlighted. Before the game begins, each player is dealt six Territorial Zone Cards, and places one of his Control Markers in each Territorial Zone highlighted on his cards.
Turn Cards
These are not used in the Basic Game. In the Advanced Game, they are used to determine the order in which players move each turn. A copy of the Combat Results Table is printed on the back of each Turn Card. (Ignore the Control Marker numbers — they're for the Advanced Game.)
Leader Cards
These are not used in the Basic Game. In the Advanced Game, each Leader has a special ability instead of a +2 combat bonus. These abilities are described on the Leader Cards.
Beginning the Game
-
If this is your first time playing the BUCK ROGERS, BATTLE FOR THE 25th CENTURY game, carefully separate the seven styrofoam trays in the box along the heavy, scored lines. There's one tray for each Faction's playing pieces. The seventh tray, called the Bank Tray, holds Factories, Killer Satellites, dice, and Planet Markers. Separate the playing pieces and markers by color and place each color in its own tray. Put the rest of the pieces in the Bank Tray.
-
Place each Planet Marker, sun-side up, on the Solar System Display on the Space Zone matching the abbreviation of the planet's name.
-
Pick which color units you want and take the appropriate tray of pieces and markers. Select a Leader Character as well.
-
Separate the different types of cards, placing the Leader and Turn cards aside. Deal six Territorial Zone Cards to each player.
-
Place one of your Control Markers on the Zones indicated on the cards you were dealt. This signifies that you control these Zones at the beginning of the game and can place pieces there.
-
Remove the following pieces from your tray:
- 1 Leader Character
- 8 Troopers
- 4 Fighters
- 2 Factories
- 2 Gennies
- 1 Transport
This will be your army on the first turn.
-
Each player rolls one die. The player who rolls highest places three pieces of his choice on any Zone he controls. All three pieces must be placed in the same Zone. The player to his left goes second, and so on, until all pieces removed from the trays have been placed.
There are two placement restrictions: You can't place a piece in a Zone that piece couldn't normally enter (no Troopers in Orbit or Battlers in Territorial Zones, for example), and you can't begin the game with more than six pieces in any one Zone. (There is no limit to the number of pieces players can have in a Zone after initial Set-Up.)
(If this is your first time playing, you may want to use the Set-Up in the Sample Turn.)
You are now ready to begin the first turn. Turns in the BUCK ROGERS, BATTLE FOR THE 25th CENTURY game are divided into four steps, called "Phases." These are: Turn Set-Up, Movement, Combat, and Building. Each phase must be completed in order before you move on to the next phase.
Turn Set-Up
Planetary Movement
Move the planets on the Solar System Display — slide each Planet Marker one Space Zone counterclockwise in its color-coded orbit and then flip the Marker over. Since the initial Set-Up began with each Planet Marker sun-side up, the first move results in all Markers being flipped so their moon-sides are up. If some of the Planet Markers are sun-side up and some are moon-side up, you probably forgot to move a few of the planets. Correct this before moving on.
Note that there may be times when playing pieces are in the same Space Zone as a Planet Marker when that Marker is moved. In that case, the playing piece remains where it is, while the Planet Marker moves ahead without it.
Order of Movement
The order in which players move changes every turn, depending upon the roll of a die. Each player rolls one die, with the high roller moving first. In case of ties, re-roll until there is a clear winner.
If the high roll is even, play proceeds clockwise (the high roller is followed by the player to his left, and so on).
If the high roll is odd, play proceeds counter-clockwise (the high roller is followed by the player to his right).
Movement
Each player moves in the order previously determined. You can move as many or as few of your pieces as you want, any distance up to each piece's movement limits. There are no limits on the number of pieces you can move into a Zone.
Ground Units: Troopers and Gennies move one Territorial Zone per turn. In other words, they can move from the Zone they're in to any adjacent one.
Leader Characters: Leaders move up to four Space, Orbit, or Territorial Zones per turn. They can never end movement alone in a Zone containing enemy units.
Spaceships: All spaceships move up to four Zones. All ships can move on the Solar System Display. Fighters and Transports can also move on Territorial Zones. Battlers can never enter Territorial Zones.
Fighters and Transports can move from one Territorial Zone to an adjacent one or from any Territorial Zone to the Near Orbit Zone of that Planetary Display (and vice versa). All ships can move from Near Orbit to Far Orbit and from Far Orbit onto the Solar System Display (and vice versa).
When a ship moves from Far Orbit to the Solar System Display, place the ship playing piece atop the Planet Marker which represents the planet whose Far Orbit Zone the ship left. (This means Planet Markers are always adjacent to the Far Orbit Zone of the planet they represent.)
Since asteroids contain only one Orbit Zone (the circle next to the asteroid), players move directly from the asteroid to orbit and then onto the Planet Marker representing that asteroid on the Solar System Display.
Transports
Transports are used to move Factories and Troopers from one Zone or Planet to another. No other types of units — Gennies, Fighters, Battlers, Killer Satellites, or Leaders — can be transported. (Fighters, Battlers, and Leaders can move through space by themselves.)
A Transport can move four Zones, just like a Fighter. It can move through Space Zones, Orbit Zones, and Territorial Zones.
A Transport can carry one Factory or up to five Troopers. If it is already loaded with a Factory it cannot carry any Troopers, and vice versa.
Loading and unloading are free and can be done at any time during a Transport's move. The Transport can load and unload units as often as the player wants as long as the load limit is never exceeded and the Transport doesn't move more than four Zones.
A Trooper can move before loading onto a Transport but not after unloading. Since Factories don't move, a Transport must begin in a Zone with a Factory or move to the Factory in order to load it.
No piece can be Transported more than once per turn (so you can't move a piece from one Transport to another and whisk it across the solar system in a single turn).
Unloaded Troopers can fight and unloaded Factories can produce immediately. Units are considered unloaded as soon as a Transport lands on a Territorial Zone.
If a loaded Transport is destroyed in combat, everything it is carrying is destroyed.
A Factory cannot be Transported if it is halfway finished producing a unit requiring two turns to build unless the In Production unit is voluntarily destroyed first. Return the half-finished unit to your tray or the Bank Tray and the Factory can be transported normally.
Enemy Units and Movement
All pieces must stop upon entering a Territorial Zone containing enemy units. Ships moving through Orbit or Space Zones containing enemy ships can always continue moving whether permission is granted or not. (Ships belonging to two or more players can even share Orbit and Space Zones.) Territorial Zones can never be occupied by units belonging to more than one player at the end of a turn.
If your units begin a Movement Phase in a Territorial, Orbit, or Space Zone occupied by another player's units you can move them out when it is your turn. (In other words, if the first player to move enters a Territorial Zone occupied by units of player 2, Player 2 has the option of moving out before the Combat Phase.)
The Space Elevator
This Mars Territorial Zone is unique in that it is adjacent to three different types of Zones: the Pavonis Territorial Zone, the Mars Near Orbit Zone, and the Mars Far Orbit Zone.
Diagram 2. Example of Ground Unit Movement
Ground forces can move into any adjacent area (unshaded areas in diagram). Ground forces can't move into non-adjacent (shaded) areas in a single turn.
Diagram 4. Example of Transport Use
- A) Load Factory on Transport (full load)
- B) Move loaded Transport into Near Earth Orbit (1)
- C) Land in Independent Arcologies (2)
- D) Unload Factory
- E) Load 5 Troopers on Transport (full load)
- F) Move loaded Transport into Near Earth Orbit (3)
- G) Move into Far Earth/Moon Orbit (4)
- H) On next turn, Transport could land and unload on L-5 Colony or move onto Solar System Display (SSD). It could even land on L-5, unload some of the Troopers on board, and carry the rest onto the SSD.
Combat
Whenever opposing units end the Movement Phase in the same Zone, combat may result. Combat is mandatory in Territorial Zones, but optional in Space and Orbit Zones.
Combat is resolved from the center of the Solar System toward the outer edge. Beginning with the planet Mercury, follow the steps outlined below:
- Killer Satellites get all of their free attacks.
- Battlers in orbit bomb the surface.
- Resolve any battles on Territorial Zones.
- Resolve any battles in Near and Far Orbit Zones.
- Resolve any battles taking place in Space Zones along the planet's orbital path.
When all battles on and around Mercury are finished, continue with battles on Venus, then Earth, Mars, and the Asteroids.
A battle is fought in rounds. Each round, each piece in the battle (except Leaders) gets to attack once. To attack, follow these steps, beginning with the player who moved first:
- Announce which of your pieces is attacking and which of your opponent's pieces is being attacked. You can attack any enemy piece (except an escorted Transport), including a piece that was attacked already but missed.
- Check the Combat Results Table for your Hit number. Find the type of piece that is attacking (the Attacker) on the left side of the table and the type of piece that is being attacked (the Target) along the top of the table. The number where the attacker's row and the target's column meet is the Hit number.
- Roll one die. If the number rolled is equal to or higher than your Hit number, the target is hit and destroyed. If the number rolled is less than the Hit number, the attack missed and has no effect. If you have a Leader present in the battle, add two to all of your die rolls.
- If the target was hit, set it behind the battle line or tip it over to indicate that it must be removed at the end of the round.
- Select another of your pieces that hasn't attacked yet and repeat steps 1 through 4.
- When all of your pieces have attacked (or all of the enemy pieces have been hit), your part of the combat round is over. Now your opponent gets to repeat the process for all of his pieces in the battle, including those that were hit.
- When both sides have finished attacking, remove all pieces that were hit and return them to the appropriate trays.
- If both sides still have pieces in the Zone, another combat round may begin. Combat is mandatory in Territorial Zones: you have to keep fighting until only one player (or neither player) has units in the Zone. In Orbit and Space Zones, the battle can be called off at the end of any combat round if both players agree. If either player wants to continue fighting, the battle goes on.
- If combat took place in a Territorial Zone, the victor places one of his Control Markers in the Zone to indicate it is now his. If neither side has units left in a Territorial Zone (both sides were wiped out) and only a Control Marker remains, the marker stays — the last player who controlled the Zone retains control.
Combat Results Table
Attacker (left) vs. Target (top):
| Attacker | Troopers | Gennies | Fighters | Battlers | Transports | Killer Satellites | Control Markers |
|---|---|---|---|---|---|---|---|
| Troopers | 6 | 8 | 7 | X | 6 | X | 3 |
| Gennies | 5 | 6 | 6 | X | 5 | X | 2 |
| Fighters | 7 | 7 | 6 | 8 | 3 | 7 | 3 |
The Control Markers row and column are for Advanced Combat only.
"Bomb" = Hit on 7 or higher "X" = Attack not possible
Declaring Attacks
You only have to declare one attack at a time. If that attack misses, your next attack can be against the same enemy piece. You can continue attacking the same piece until you hit it or you have used up all of your attacks. Sometimes, though, you can save time by declaring several attacks at once (for example, "My three Fighters are attacking your three Gennies"). Leaders never attack. If you have a Leader in battle, however, add two to all of your die rolls. If both sides have Leaders, both players add two to their die rolls. If you have more than one Leader in the battle, you still get to add only two to your die rolls.
Leaders
A Leader can never be attacked. If you hit all of your opponent's pieces, however, leaving his Leader alone in the Zone with at least one of your combat units, the Leader is removed from play (see "Rendering Forces Inert," below). If, through some strange twist of fate, two Leaders are left alone in an area after a battle (both sides were wiped out), the Leaders are removed from the board, both side's forces are rendered inert and the battle is over.
Transports
You can't attack a Transport while your opponent has any other pieces in the battle. You can only attack a Transport when your opponent has no Troopers, Gennies, Fighters, Battlers, or Killer Satellites left in the battle that haven't been hit.
Big Battles
When you are fighting a big battle, it helps to take the pieces off the board (remember where they came from!) and line them up alongside. This makes it easier to see what pieces are involved, which pieces have attacked, and which pieces have been hit.
Multiple Combat
There may be situations where three or more players want to fight over the same Zone. Combat proceeds pretty much as described above, but any player can attack any other player in the Zone. Attacks are still resolved in move order, and a unit never gets more than one attack in a combat round, regardless of the number of players in the battle.
Rendering Forces Inert
If at any time your Leader is your sole remaining unit in a Zone containing enemy units, your forces are immediately rendered inert. Your Leader is removed from the board, and you lose the rest of the current turn and your next turn. You can't move, initiate combat, or build new units until you've missed a turn. You can fight if attacked, however. After you miss a turn, your forces return to normal, but your Leader is out of the game for good.
Factory Sabotage
If all of your pieces are eliminated from a Territorial Zone containing a Factory, the Factory falls into the hands of the opposing player. To prevent this, you can roll one die to sabotage your own Factory. If the roll is a 7 or higher, the Factory is removed from the board. Any units in production are destroyed. If the roll is less than 7, the Factory is occupied by the other player, and can produce units for the new owner in the Building Phase immediately following. Units in production become part of the new owner's forces.
If all units of both sides in a conflict are eliminated from a Territorial Zone containing a Factory, the Factory remains the property of the player whose Control Marker is in the Zone.
Building Costs
In a single turn, a Factory can build one of the following:
- 2 Troopers
- 2 Gennies
- 1 Fighter, or
- 1 Transport
It takes two turns to produce:
- 1 Killer Satellite
- 1 Battler, or
- 1 Factory
Building
When the last battle is completed, the Building Phase begins. During this phase, players with Factories can build new units. In Turn Order, players declare what type of unit each of their Factories will build, and place all units produced on the board.
In a single turn, a Factory can build:
- 2 Troopers
- 2 Gennies
- 1 Fighter, or
- 1 Transport
It takes two turns to produce:
- 1 Killer Satellite
- 1 Battler, or
- 1 Factory
Troopers, Gennies, Fighters, and Transports are immediately placed on the board in the same Territorial Zone as the Factory that built them. Units requiring more than one turn to build work a little differently.
New Factories are placed in any Territorial Zone you control that is adjacent to the Factory producing it. If no such Zone exists, or you intend to Transport the Factory somewhere else, two Factories can occupy the same Zone, but only one can produce new units; the other must be transported to another Zone before it can produce. A Factory cannot produce anything on the turn it is completed.
Battlers and Killer Satellites can't occupy Territorial Zones, so they are always placed in the Near Orbit Zone nearest the Factory that produced them.
Remember that Factories, Killer Satellites, and Battlers take two turns to produce. On the first Building Phase, place the Factory, Killer Satellite, or Battler with a Control Marker ("In Production" side up) in the Zone where you want the unit. During the next Building Phase, simply remove the "In Production" Marker to indicate that the unit is complete. Units "In Production" can't be attacked.
If a Factory changes hands, any "In Production" units become the property of the new owner — substitute the new owner's playing pieces and counters for the old. If a Factory is destroyed, sabotaged, or dismantled, "In Production" units are destroyed as well, and returned to the owning player's tray.
Planetary Control and Killer Satellite Production
One Killer Satellite can be built in any Near Orbit Zone (including that of the Moon) if two conditions are met: First, the Zone must be free of enemy units when construction begins (you can deploy the satellite even if enemy units are present); second, the player building the Killer Satellite must control all of the Territorial Zones on the planet adjacent to the Near Orbit. This is a relatively simple matter for one-zone asteroids. It's tougher to put a Killer Satellite up near Earth. Note that moons, satellites, and colonies don't count here — players just have to control the surface of the planet.
Earth's Moon is the only non-planet or asteroid capable of supporting a Killer Satellite. The player must control every Territorial Zone on the Moon — the Earth and L-colonies don't count.
If a player loses control of a planet's surface, Killer Satellites in production or already deployed become uncontrolled — they remain in orbit, but no player can use them in combat. The first player to control every Zone on the planet's surface regains control of the satellite.
The Black Market
A thriving Black Market exists in the 25th century. This allows a player with no Factories to acquire a single Trooper or Fighter in the Building Phase. A Factory can be acquired through the Black Market by waiting two turns. Only Troopers, Fighters, and Factories can be acquired through the Black Market, and only players with no Factories can get units in this way.
Dismantling Factories
If a player feels he is faced with imminent invasion, he can dismantle Factories to keep them out of enemy hands. This can only be done at the beginning of the Building Phase, at which time the Factory is simply removed from the board and returned to the Bank Tray. A dismantled Factory, of course, doesn't produce any new units.
Playing With Fewer Than Six Players
No changes are necessary when playing the BUCK ROGERS, BATTLE FOR THE 25th CENTURY game with four or five players. For two- and three-player games, make the changes below.
Three Player Game
- Each player selects two Leader Characters — one player gets Buck Rogers and Wilma Deering, one gets Killer Kane and Ardala, and one gets Black Barney and Doc Huer. You never get more than one +2 Leader bonus in combat, even if you have two Leaders in a Zone.
- Deal nine Territorial Zone cards to each player, rather than six.
- Each player chooses two trays of playing pieces, and can build, move, and fight at will using both colors. Take a standard starting set-up for each color (eight Troopers, four Fighters, two Gennies, two Factories, one Transport). The limit of six units in an area during set-up doesn't apply in the three player game. The only limitation on piece placement during set-up is that pieces of different colors can't coexist in a single Zone. In later turns, friendly units of different colors can coexist in a single Zone.
- To win, you must control 20 Territorial Zones, rather than 15. All other victory conditions are unchanged.
Two Player Game
- Each player begins with three Leader Characters — one side with Buck, Wilma, and Black Barney, the other with Kane, Ardala, and Huer. You never get more than one +2 Leader bonus in combat, even if you have more than one Leader in a Zone.
- Deal 12 Territorial Zone cards to each player.
- Each player chooses three trays of playing pieces, and can build, move, and fight at will using both colors. Take a standard starting set-up for each color (eight Troopers, four Fighters, two Gennies, two Factories, one Transport). The limit of six units in an area during set-up doesn't apply in the two player game. The only limitation on piece placement during set-up is that pieces of different colors can't coexist in a single Zone. In later turns, friendly units of different colors can coexist in a single Zone.
- To win, you must control 25 Territorial Zones. All other victory conditions are unchanged.
Final Notes
Every attempt has been made in the design of this game to cover all play situations, but there will doubtless be circumstances in which you have to interpret the rules yourself. As there are likely to be several opinions, the players at the table should engage in a reasonable amount of discussion followed by a vote. The majority carries the day. If there is no majority, flip a coin. Feel free to modify the game for your own enjoyment, changing, adding, or ignoring rules as desired.
Advanced Game Rules
Now that you've played the Basic Game a few times, you're ready to move on to the Advanced Game. If you haven't played the Basic Game yet, you probably should — all Basic Game rules remain in effect in the Advanced Game except those specifically discussed or altered in this booklet.
Winning the Advanced Game
The victory conditions are unchanged from the Basic Game. However, winning by eliminating Leaders is more difficult.
In the Advanced Game, Leaders are never permanently eliminated, as they are in the Basic Game; instead, when a Leader is the last piece in a Zone containing enemy units, the Leader is removed from play for two full turns, after which time the player who owns the Leader can return him or her to the game anywhere on the board.
To win the Advanced Game by eliminating Leaders, a player must get rid of every Leader on the board within two turns — no easy task.
Advanced Components
In the Advanced Game, some of the playing pieces have different capabilities and/or restrictions.
LEADER CHARACTERS: In place of the +2 bonus Basic Game Leaders gave to all friendly units in their Zone, Advanced Game Leaders have unique abilities. Each of these abilities, described below, can be used only once per turn (not once per Combat Round, but once per turn).
Buck Rogers: Buck is the best rocket jockey in the solar system and a born leader. During combat, retreat, or pass-through fire, all Fighters in the Zone with Buck destroy any enemy unit on a roll of four or higher.
Wilma Deering: Wilma is a rebel, a freedom fighter, skilled in the art of blockade running. Fighters, Battlers, and Transports travelling with Wilma are immune to pass-through fire, retreat fire, and Killer Satellite fire. (Immunity to Killer Satellite fire applies only to the multiple attacks satellites get before combat actually begins. Wilma's ships can be targeted normally by Killer Satellites during any Combat Round.)
Killer Kane: Kane opposes everything Buck and Wilma stand for, and will use any means to defeat them and their allies. Kane gets to make a sneak attack. Units with Kane get one free attack before combat begins. Opponents get no counterattack. This ability is used even before Killer Satellite attacks!
Ardala: Ardala is a wicked and beautiful temptress with two powers (but she can only use one power per turn). First, she can use her seductive talents to steal two units from other players. She can take two unloaded Transports, two Troopers, two Fighters, or any combination. She can take both units from one player or one apiece from two different players. Stolen units are taken before the Ardala player moves. They can be taken from anywhere on the board, but are always placed with the Ardala playing piece.
If Ardala chooses, however, she can forego this power and, instead, take control of another player's Leader, using its powers, for one turn. She can't move the Leader more than four Zones, and if he or she dies while under Ardala's control, she suffers the consequences: The other player's Leader is returned to the original owner (who can place it anywhere he has friendly units) and Ardala is removed from play.
Doc Huer: Huer is a holographic mad scientist and mechanical genius. His technical and navigational skills allow him to speed through the universe. Any Battlers, Transports, and Fighters with Huer can move two extra Zones per turn.
If Huer has to get somewhere in a real hurry, however, he can roll a die for movement. He never has to roll and, if he does, he doesn't get the two extra Zones per turn described above. When he rolls, the number rolled is the distance he, and all ships in the Zone with him, can move that turn. If he rolls a one, that's too bad; if he rolls a 10, watch out!
Black Barney: Barney is the leader of the space pirates. Instead of destroying ships in combat, he captures them, replacing the original crew with hand-picked men of his own. Once per turn, Barney can steal ships defeated in battle. He must be in the combat Zone and he must win the battle in order to use his power. If these conditions are met, he can replace all defeated ship pieces in that Zone with identical units of his own color. This playing piece exchange takes place after all combat in the Zone is completed.
Turn Order and Set-Up
In the Basic Game, you rolled dice to determine the order in which players moved and resolved attacks. In the Advanced Game, each player selects one of the six turn cards at random, right before the Movement Phase. The number on the card determines when each player goes. That means you no longer go clockwise or counter-clockwise around the board — there's no telling who will go before whom.
Keep your turn card hidden until it's your turn to move. As each player finishes, he asks who's next, and so on, until all players have moved.
Advanced Movement
SPACESHIP MOVEMENT: In the Basic Game, all ships moved 4 Zones per turn. In the Advanced Game, ships move at varying rates of speed:
- Fighters — 5 Zones per turn
- Battlers — 4 Zones per turn
- Transports — 3 Zones per turn
There are no other changes in ship movement — Battlers are still unable to enter Territorial Zones, and so on.
Advanced Combat
PASS-THROUGH FIRE: This is a special kind of attack which takes place during the Movement Phase of the turn. It takes two forms.
The first form of Pass-Through Fire occurs only in Orbit and Space Zones (but like all space combat, it is never mandatory). This form of Pass-Through Fire happens when a player moves ships through a Zone occupied by another player's units. All units belonging to the player who already occupied the Zone get a free shot at the moving units as they leave the Zone. The moving player doesn't get to return fire — eliminated units are immediately removed from the board. Surviving ships can continue to move normally if they choose.
The second form of Pass-Through Fire can occur anywhere on the board. It happens when a player with a low Turn Card number moves into and stops in a Zone already occupied by units belonging to a player with a higher Turn Card number. Since movement takes place in Turn Card order, the player with the higher number has the opportunity to move out before the Combat Phase begins. In the Basic Game, the second player could just move out; there was nothing the first player could do about it. That meant moving second was a big advantage. (If you've played the Basic Game, you've probably figured this out already!)
In the Advanced Game, the second player can still move out, but there's a risk: Each unit the first player moved into the Zone gets a shot at each unit the second player moves out. The second player doesn't get a counterattack, and eliminated units are immediately removed from the board. Surviving units can continue to move normally.
(This rule makes a nice addition to the Basic Game, even if you choose not to use any of the other advanced rules.)
Diagram 1. Pass Through Fire
- Two friendly Fighters in Far Venus Orbit want to land on Venus.
- The two Fighters enter Near Venus Orbit, already occupied by a defending Fighter. The defender gets a shot at one of the enemy Fighters, in this case, destroying it.
- The remaining Fighter lands on Elysium, where it can take part in combat this turn.
CONTROL MARKERS IN COMBAT: In the Advanced Game, Control Markers take part in combat, just like regular units. (Imagine that they're the indigenous population of a Zone, fighting with guns, knives, even pitchforks, if necessary.) All friendly units in a Zone must be committed to combat before a Control Marker can fight. Similarly, all units belonging to the player who controls the Zone must be targeted before an enemy can attack a Control Marker.
Control Markers must be destroyed in order to take control of a Zone away from another player. And even then, you must have at least one Trooper, Gennie, Fighter, or Transport in the Zone in order to take control.
When playing the Advanced Game, use the Combat Results Table below. It includes the combat values for Control Markers.
Advanced Combat Results Table
| Attacker | Troopers | Gennies | Fighters | Battlers | Transports | Killer Satellites | Control Markers |
|---|---|---|---|---|---|---|---|
| Troopers | 6 | 8 | 7 | X | 6 | X | 3 |
| Gennies | 5 | 6 | 6 | X | 5 | X | 2 |
| Fighters | 7 | 7 | 6 | 8 | 3 | 7 | 3 |
RENDERING FORCES INERT: In the Basic Game, the death of a Leader Character rendered all of a player's forces inert. In the Advanced Game, Leaders are never eliminated from the game; they are removed from play for two turns if they're left alone in a Zone with enemy units. After missing two turns, the Leader playing piece is returned to the board anywhere the player wants. The rest of a player's forces are still out for just one turn, however, as in the Basic Game, regardless of the Leader's status.
COMMANDO OPERATIONS: This is a specialized form of combat allowing players to launch commando-style raids against enemy Factories. A successful commando raid destroys the Factory.
To mount such a raid against an enemy Factory, you must have Troopers or Gennies in the Factory's Territorial Zone. Before the first round of combat begins in that Display, you, as the player raiding the Factory, announce that you're mounting a commando operation and set aside as many Troopers and Gennies as you want to allocate to the raid. All of the Troopers and/or Gennies in a Zone can be set aside or as few as one. These units can attempt to destroy the Factory round after round, until they succeed or are destroyed by enemy forces in the Zone. No new units can be added to this commando force once the first round of combat begins.
After commandos have been assigned, combat is conducted normally except commandos can't fight other units; they can only attack the Factory or retreat, using the Retreat rules, below. The commandos can (and almost certainly will) be targeted by enemy units in the Zone, but they can't counterattack.
Commandos are pretty much sitting ducks unless accompanied by friendly units. Units in the Factory Zone, but not assigned to the commando operation fight normally. During the Combat Round, the player who owns the Factory can attack either the commandos or the units defending them. After this normal combat is complete, any commandos who survived can try to destroy the Factory. The player who controls the commandos rolls one die for each survivor. On a roll of six or higher, the Factory is removed from the board.
Units assigned to commando operations can't do anything else in a turn — if you send six Troopers in as commandos, and the first one blows up the Factory, the remaining five are useless until the next turn. All they can do is attack the Factory or retreat.
ESCAPE: In the Advanced Game, combat need not be fought to the bitter end. A player who faces overwhelming odds can choose to surrender or retreat if things go badly.
Surrender: You can always surrender to a foe at the start of any Combat Round. If the opposing player accepts, your forces are removed from the board, replaced by identical units belonging to the other player. Surrender works best in combination with diplomacy — when both players have something to gain ("I'll surrender to you here if you'll surrender to me there"), or when a stronger third player threatens everyone.
Retreat: If you find yourself in trouble during combat, but you don't want to just give up units, you can retreat. At the end of any Combat Round, after all losses have been removed from the board, you can try to leave the Zone. The player with the lowest Turn Card number gets to retreat first.
Retreating units can move one Zone away from the combat Zone. They can only enter a Zone they could move into normally. The retreat Zone must be free of enemy units.
All units in combat don't have to retreat to the same Zone, and some units can retreat while others continue fighting. Units which don't move (Factories, Control Markers, and Killer Satellites) or can't move (e.g., Troopers and Gennies on an asteroid) can't retreat.
Retreating units are subject to Pass-Through Fire from enemy units in the Combat Zone. The opponent gets one free shot at the fleeing units; the fleeing units don't get a counterattack. Retreat fire happens "between" Combat Rounds — units firing on fleeing enemies can attack normally in the next Combat Round.
Advanced Building
FACTORY LIMITATIONS: In the Basic Game, you could build as many Factories as you wanted, as long as you had Territorial Zones in which to build them and there were Factory pieces left in the Bank Tray.
In the Advanced Game, there is a limit to the resources available in each Planetary Display, which limits the number of Factories each Display can support. The Factory limits are:
- Mercury: Four Factories, total. No more than two on the planet's surface.
- Venus: Four Factories.
- Earth/Moon: Nine Factories, total. No more than five on Earth. No more than two on the Moon.
- Mars: Five Factories, total.
- Asteroids: One Factory per asteroid.
COMBINING FACTORY PRODUCTION: In the Basic Game, each Factory produced on its own, meaning that some units took two turns to produce. In the Advanced Game, two Factories in adjacent Territorial Zones can combine their output, producing a Battler, a Killer Satellite, or another Factory in a single turn. (Asteroids are considered adjacent, for production purposes only, if they are next to each other on the Planetary Display.)
New units can be placed in either Factory Zone or, in the case of Battlers and Satellites, in the nearest adjacent Orbit Zone. As always, units can't be placed in a Zone they couldn't enter during Movement.
Advanced Game: Playing With Fewer Than Six Players
The Basic Rules for playing with two or three players are changed in just one way under the advanced rules: Turn Cards determine the order of movement.
A separate Turn Card is selected for each color you control. Keep each card you draw with one of your piece trays so you'll know which card goes with which color. Rather than moving as one, unified faction, your pieces are moved one color at a time. They can still share Zones (even Territorial Zones) and fight as allies, but their movement is staggered.
This lessens the likelihood that one player will suffer the disadvantage of going first all the time.
(This rule — and the Turn Cards — are easily adapted to the Basic Game, whether you're playing with two, three, four, five, or six players.)
Optional Game Rules
The BUCK ROGERS, BATTLE FOR THE 25th CENTURY Basic and Advanced Games provide enough fun and excitement for many play sessions. But if you want a slightly different challenge, try some of these optional rules.
Some of them make the game shorter; others make it longer. Some add complexity; some make the game simpler. Use one optional rule or several, in any combination. Try them with the basic rules or with the advanced rules. These optional rules have been provided so you can customize the game, making it truly your own, if you want to. If you don't feel the need to experiment with these rules, ignore them — you never have to use the optional rules.
The only rule you have to use is this: Make sure all players know which rules — Basic, Advanced, and Optional — you're using before the game begins.
Optional Rules: Winning
A. ALTERNATE CONTROL RULES: Control of individual Territorial Zones is unchanged. Control of a Planetary Display (for purposes of producing Killer Satellites, for example) is a matter of controlling a simple majority of the Zones in it.
- Mercury: Control 4 of 6 Zones to control Display
- Venus: Control 4 of 7 Zones to control Display
- Earth/Moon: Control 7 of 13 Zones to control Display
- Mars: Control 4 of 7 Zones to control Display
- Asteroids: Control 5 of 9 Zones to control Display
Using this rule, you can put up a Killer Satellite when you have control over a Display — you don't have to control every Zone on the planet's surface.
This rule also makes possible a variety of alternate scenarios, like B1 and B2, below. Others, like number 3, are enhanced by the use of this rule, though its use isn't necessary.
B. ALTERNATE SCENARIOS: In addition to the standard victory conditions described in the Basic and Advanced Games, the BUCK ROGERS, BATTLE FOR THE 25th CENTURY Game lends itself to all sorts of variants. These include:
B1. Gross Displays of Power: In this scenario, you win by controlling three Planetary Displays. (This scenario requires use of the alternate Control rules, above.)
B2. The Battle for Earth and Mars: No one can place pieces on the Earth/Moon or Mars Planetary Displays. Remove those cards from the Territorial Zone card deck before set-up. The first player to control both the Earth/Moon and Mars Planetary Displays wins the game.
B3. Someplace to Call Home: At random, take one Territorial Zone card for each Planetary Display (if you have 6 players, take one for Earth and a separate one for the Moon). Deal each player one card. That player then controls all of the Zones in that Planetary Display.
The player with Mercury gets the yellow playing pieces and Doc Huer; Venus gets the green pieces and Ardala; Earth gets the blue pieces and Buck Rogers; Earth's Moon gets the brown pieces and Wilma Deering; Mars gets the red pieces and Killer Kane; the Asteroids get the black pieces and Black Barney.
During initial set-up, players must place all of their units in their "home" Displays. The first player to take control of two more Displays wins.
B4. All In a Day's Work: In this scenario, the planets don't move around the sun, but remain throughout the game right where they started. Victory conditions are unchanged from the Basic Game.
B5. Leader, Leader, Who's Got the Leader?: Set-up is unchanged for this scenario, but there's only one victory condition — you win by controlling a majority of the Leader Characters in the game when Earth returns to its starting space Zone. That might be four Leaders out of the six; or you might want to kill off all the others so you control the one and only Leader left; or you could kill off three of them and leave another player with one, so the two you control constitute a majority. Obviously, this scenario plays well with the optional rule about Subverting Leaders.
B6. Pick a Unit, Any Unit: Victory conditions are unchanged in this scenario, but starting forces are entirely up to you. Take a Leader Character, two Factories, and 17 other units in any combination of Troopers, Fighters, Transports, and Gennies. The units you select can be placed in any Zone you control — the initial set-up limitation of six units per Zone is off in this scenario.
Optional Rules: Components
C. PLACING PIECES: Instead of placing pieces three at a time in initial set-up, try placing them one at a time. This takes longer, but enhances suspense, and makes negotiations among players even more crucial.
D. LEADERLESS FACTIONS: Start the game without any Leaders. You acquire a Leader by controlling the planet associated with a particular Leader:*
- Buck Rogers — Earth
- Wilma Deering — Moon
- Killer Kane — Mars
- Ardala — Venus
- Black Barney — Asteroids
- Doc Huer — Mercury
*Control can mean every Zone on the planet's surface or, if you're using the optional control rule, a majority of Zones in a Planetary Display. If you're using the latter, however, note that the Moon has its own Leader — Wilma Deering. To control her, you must still take every Zone on the Moon.
E. GENNIE ABILITIES: Twenty-fifth century genetic engineering has led to the creation of races which, while humanoid, are only marginally human. Each planet in the solar system poses unique survival problems, and the humanoid life forms created to exist and work on each planet differ. This can be reflected in the BUCK ROGERS, BATTLE FOR THE 25th CENTURY Game by giving Gennies differing powers, depending upon where they were created.
Mercurian Gennies: Mercury is the energy-supplier of the solar system, and the Mercurians are expert in the management and use of energy. Their Gennies are highly energy-efficient and quite powerful. They add one to all combat die rolls. For example, if an ordinary Gennie needs a seven to hit, Mercurian Gennies only need a six.
Venusian Gennies: The corrosive atmosphere of Venus poses one of the most extreme survival tests in the solar system. For that reason, Venusian Gennies have to be incredibly tough and durable. Anybody attacking a Venusian Gennie adds one to his hit numbers.
For example, a Fighter attacking your average Gennie hits on a roll of seven. To hit a Venusian Gennie, the Fighter must roll an eight (7+1=8). A Transport fighting Gennies usually hits on a ten; against a Venusian Gennie, the Transport would have to roll an 11! Obviously, this isn't possible, so a roll of ten always hits, regardless of what the Combat Results Table and modifiers like the one described here seem to call for.
Earth Gennies: Earth is the industrial heart of the Solar System. Its Factories run non-stop, around the clock, always at maximum capacity. On Earth, Gennies can be produced at an alarming rate — three per turn, rather than the ordinary Gennie rate of two per turn.
Lunar Gennies: Mass-driver technology was perfected many years ago on Earth's Moon, and Lunar Gennies are designed to take advantage of that technology. This allows Lunar Gennies to attack units in space — a die roll of eight or higher hits any type of unit in the Near Lunar Orbit Zone.
Martian Gennies: The Martians are among the most cunning people in the solar system. Their armies train in the ways of speed and stealth. Martian Gennies are sneaky, moving up to two Territorial Zones per turn (but only through friendly or uncontrolled Zones).
Asteroid Gennies: Like the grizzled Asteroid miners they serve (when not engaged in combat), these Gennies can travel short distances through space. They can move from the surface of the asteroid upon which they were produced to the Orbit Zone of that asteroid.
Optional Rules: Movement
F. SPACE AND FAR ORBIT ZONES: Under the Basic and Advanced rules of the game, the Far Orbit Zone of a Planetary Display is adjacent to the Planet Marker's Space Zone on the Solar System Display. One interesting variant is to consider the Planet Marker and the Far Orbit Zone the same Zone, rather than adjacent Zones.
A playing piece sitting on a Planet Marker is considered to be in the Far Orbit Zone of that planet's Display. But (and it's a crucial "but"), when the planets move on the Solar System Display at the beginning of each turn, ships in the Far Orbit Zone of a Planetary Display move with the planet, while those on the Solar System Display are left behind.
This is because ships on the Solar System Display are considered to be under power, fighting the pull of a planet's gravitational field. Ships in the Far Orbit Zone of a Planetary Display are not under power and are, therefore, subject to the planet's gravity.
Despite this difference, ships in Far Orbit and on the Solar System Display are considered to be in the same Zone for purposes of combat. Make sure to check both Zones before conducting combat.
This optional rule changes the game more than you might expect — keep a sharp eye out for surprise attacks. Ships you don't think can reach you can. Also be wary of forces which appear weaker than they actually are: Once units on the Solar System Display join those in Far Orbit, mighty armadas can appear out of nowhere!
Diagram 2. Space Zones = Far Orbit Zones. Far Orbit Zones and Planet Markers are considered the same space, for purposes of movement and combat. A Fighter in Earth's Far Orbit can move from Far Orbit (1), to the Earth Planet Marker (1b) and then move four Zones.
G. VARYING MOVEMENT SPEED FOR GROUND UNITS: In the Advanced Game, ships move at varying rates of speed. Try varying ground unit movement speeds: Troopers can move up to two Zones per turn. Gennies never move more than one.
H. UNIT CONVERSION: Before moving any of your pieces, you can convert some units into other types of units. There is no limit to the number of conversions you can make in a turn, but all conversions must be made before a single one of your pieces moves.
Conversions are not magic, or even super-science — they reflect the ability of a faction to strip a single large, modular ship to make several smaller ones (or vice versa), and to retrain ground units to fly Fighters and Battlers. (Picture two Troopers, for example, dashing for a grounded Fighter, hopping into the cockpit, and flying off to do battle . . .)
The following conversions are possible:
- 2 Troopers = 1 Fighter
- 2 Fighters = 1 Battler
When converting, simply replace the units on the left side of the "equals" sign with the unit on the right side. A Battler can be converted into two Fighters, and a Fighter can convert into two Troopers.
If you want to play really fast and loose, allow the following conversions as well:
- 2 Gennies = 1 Fighter
- 1 Trooper & 1 Gennie = 1 Fighter
When reversing the direction of the conversion, however, Gennies simply become Troopers. No, it isn't realistic, but the bookkeeping involved in remembering which Fighters had Gennies in them and which didn't would be a nightmare. If you use this optional rule, live with the illogic of Gennies becoming Troopers.
I. TRANSPORT HOPPING: Troopers and Factories can jump from one Transport to another in a single turn. If a Transport ends its movement in the same Zone as a second Transport which hasn't moved in that turn, units aboard the first can jump to the second. The second Transport can then carry those units up to four Zones. If it ends in a Zone with another Transport, units can be transferred again, and so on. This allows lightning strikes across the solar system.
Diagram 4. Transport Hopping
- Transport A moves from Earth's Eurasian Regency to the Independent Arcologies, where it loads 2 Troopers. 2-4. Loaded Transport A moves from Near Earth Orbit to Far Earth/Moon Orbit and lands on L-4, where it picks up a third Trooper and transfers all three to Transport B. 5-6. Transport B moves into Far Earth/Moon orbit and onto the SSD, where it transfers the three Troopers to Transport C. 7-10. Transport C moves to Deimos, on Mars Planetary Display, where it unloads the three Troopers.
J. MOVEMENT AFTER UNLOADING: Troopers aboard a Transport can move one Zone after it lands. Movement prior to loading is irrelevant, as is Transport movement — all units aboard a Transport can move one Zone. All other movement restrictions still apply (no Troopers in Orbit, etc.!).
K. THE SLINGSHOT EFFECT: Spaceships on the Solar System Display can try the difficult (and risky) Slingshot maneuver to increase their speed.
To slingshot, a ship must maneuver very close to a planet or to the Sun, using the energy gained by flying deep into the gravity well to shoot the ship further along its course. Only Mercury, Venus, Earth, Mars, and the Sun can be used for slingshot moves. The unit attempting this maneuver can't begin the turn on the Planet Marker or Sun Zone it hopes to use in the slingshot attempt.
To slingshot, a ship or group of ships moves onto the Space Zone occupied by a Planet Marker or the Sun Zone in the center of the Solar System Display. The ship must be able to reach this Zone in its normal move.
When the ship reaches a Planet Marker, the player rolls one die. On a roll of one through nine, the slingshot attempt succeeds, and the ship or group of ships moves two extra Zones. On a roll of 10, the angle of approach was wrong and the ship crashes into the planet's surface and is destroyed.
A slingshot around the Sun offers even greater speed, but at correspondingly greater risk. When the ship or group of ships reaches the Sun Zone in the center of the Solar System Display, the player rolls one die. On a roll of one through seven, the attempt succeeds, and the ship or group of ships moves four extra Zones. On a roll of eight, nine, or 10, ships attempting to slingshot are destroyed.
If a group of ships attempts a slingshot, you can check each ship's attempt separately or make one roll for the entire group. The decision must be made before any dice are rolled.
It is possible to make multiple slingshots, as long as separate rolls are made for each planet you use. A player starting near Mercury can slingshot around the sun, use the energy gained from that move to slingshot past Venus, and thereby reach Earth on the far side of the Solar System.
Diagram 5. Slingshot Maneuvers
1-3. A Fighter moves from Earth/Moon orbit on the SSD to Mercury's orbital path. 4. The Fighter uses its last Zone of movement to slingshot around the Sun. A die roll of 7 barely succeeds — the Fighter can move 4 extra Zones. 5-7. The Fighter moves its extra Zones. 8. The Fighter slingshots around Earth, rolling a 2. This allows an extra 2 Zones of movement. 9-10. The Fighter moves to Mars orbit on the SSD.
Optional Rules: Combat
L. SUBVERTING LEADERS: When a Leader Character is the last unit of its Faction in a Zone, an opposing player can try to brainwash him or her. The opposing player must roll a 15 or higher on one 10-sided die. Obviously, this is impossible, but the brainwashing player subtracts one from that 15 for every ordinary unit he has in the Zone with the Leader and five if his Leader is in the Zone.
If the subversion attempt succeeds, the Leader comes over to the opposing player's side. That player now benefits from the Leader's special ability. In addition, the player isn't rendered inert until both (or all) Leaders under his control are defeated by other players.
However, there's a chance the brainwashing will wear off each time the Leader uses his or her special ability (or, in the Basic Game, each time the Leader takes part in combat): Before a subverted Leader's ability is used, the Leader's original owner rolls one die. On a seven or higher, the Leader returns immediately to the original player, who can place him in any Zone he controls.
The original owner immediately regains his lost Leader if the Leader is left alone in a Zone containing enemy units — enemies of the player who currently controls the subverted Leader, of course! When this happens, the original owner gets the Leader back, and can place him or her in any Zone he controls.
Note that you can win the game by controlling all Leaders remaining in the game — you don't have to kill them all. If no other player controls a Leader, you win.
M. DEFENSIVE BONUS IN FACTORIES: Surface units defending Factories are considered to be in hardened structures and are, therefore, harder to kill than the same units in open terrain.
All attacks against Troopers and Gennies in Zones containing Factories require a number one greater than that listed on the Combat Results Table. (If an attacking unit normally needs a seven to hit, the enemy player must roll an eight.) A roll of ten always hits, however.
Optional Rules: Building
N. UNIT PLACEMENT: During opening set-up, you place units in any Zone you control. This optional rule allows you to place units produced by your Factories in the same way — you don't have to place new units in the same Zone as a Factory, or in adjacent Zones, but can place them in any Zone you control.
In addition, any two Factories on the board can combine their production capacity, allowing you to produce two turn units (Battlers, Killer Satellites, and other Factories) in a single turn.
O. FACTORIES IN SPACE: Ordinarily, Factories on board Transports can't produce new units. This optional rule allows them to produce one Fighter per turn. This Fighter is placed in the Zone containing the Transport during the Building Phase. Under no circumstances can Factories on Transports build anything but one Fighter, nor can they combine their output with other Factories.
P. FREE FACTORIES: The first player to take control of a Planetary Display gets a free Factory. This Factory is placed during the Building Phase on the turn during which the player took control of the Display and can begin producing units on the next turn following. The free Factory must be placed somewhere on that Planetary Display in an area the player controls in which he doesn't already have a Factory. If no such area exists, the Factory is returned to the Bank Tray.
Only the first player to control each Display gets this free Factory. Taking control of the Display away from that player doesn't win another free Factory.
Sample First Turn
This section of the BUCK ROGERS, BATTLE FOR THE 25th CENTURY rules illustrates movement and combat, and gives some hints about the tactics and strategy employed in the game. Set the game up and follow the first turn before players select which color they want to play. When you reach the end of this sample turn, deal each player a Turn Card — this determines the order in which players select their colors. The sample turn is set up for six players. If you have fewer, simply remove any extra colors after each player has made his selection.
Set-Up
Normally, units are placed three at a time. To get you into this sample quickly, however, we've merged all the placements. For now, don't worry about how each unit got where it is; simply place the following units on the Zones listed below.
Blue Player
- American Regency (Earth/Moon): Buck Rogers (Leader), 2 Troopers, 2 Gennies, 1 Factory, Control Marker
- L-5 Colony (Earth/Moon): 4 Troopers, 1 Fighter, 1 Factory, Control Marker
- Hielo (Mercury): 3 Fighters, Control Marker
- Aerostates (Venus): 2 Troopers, 1 Transport, Control Marker
- Vesta (Asteroids): Control Marker
- Pallas (Asteroids): Control Marker
Burgundy Player
- Coprates Chasm (Mars): Killer Kane (Leader), 2 Troopers, 2 Gennies, 1 Factory, Control Marker
- Ram H.Q. (Mars): 5 Troopers, 1 Transport, Control Marker
- L-4 Colony (Earth/Moon): Control Marker
- Thule (Asteroids): 1 Trooper, 4 Fighters, 1 Factory, Control Marker
- Beta Regio (Venus): Control Marker
- Psyche (Asteroids): Control Marker
Yellow Player
- Tranquility (Moon): 1 Trooper, 4 Fighters, 1 Factory, Control Marker
- Tycho (Moon): Wilma Deering (Leader), 2 Troopers, 2 Gennies, 1 Factory, Control Marker
- Elysium (Venus): 5 Troopers, 1 Transport, Control Marker
- Hygeia (Asteroids): Control Marker
- Boreal Sea (Mars): Control Marker
- The Warrens (Mercury): Control Marker
Green Player
- Lowlands (Venus): 4 Troopers, 1 Fighter, 1 Factory, Control Marker
- Aphrodite (Venus): Ardala (Leader), 2 Troopers, 2 Gennies, 1 Factory, Control Marker
- Ceres (Asteroids): Control Marker
- Antarctic Testing Zone (Earth): 2 Troopers, 1 Transport, Control Marker
- Arcadia (Mars): Control Marker
- Tolstoi (Mercury): 3 Fighters, Control Marker
Purple Player
- Pavonis (Mars): 4 Troopers, 2 Gennies, Control Marker
- Space Elevator (Mars): Black Barney (Leader), 4 Fighters, 1 Factory, Control Marker
- Deimos (Mars): 4 Troopers, 1 Transport, 1 Factory, Control Marker
- Mt. Maxwell (Venus): Control Marker
- Urban Reservations (Earth): Control Marker
- Aurora (Asteroids): Control Marker
Brown Player
- Sobkou Plains (Mercury): 3 Troopers, 1 Gennies, 1 Factory, Control Marker
- Mariposas (Mercury): Doc Huer (Leader), 1 Trooper, 4 Fighters
- Juno (Asteroids): Control Marker
- Fortuna (Asteroids): 4 Troopers, 1 Transport, 1 Factory
- Moscoviense (Moon): Control Marker
- African Regency (Earth): Control Marker
Movement Phase
Once set-up is complete move the Planet Markers one Space Zone counter-clockwise. Then roll a die to determine the order of movement (in this case, blue, burgundy, yellow, green, purple, and brown).
In playing through this sample turn, refer to the diagram on page 4 frequently. This will help you keep track of the movement of units on the Solar System Display. On the diagram, each Space Zone on the board is given a coded letter/number combination. This allows you to chart unit movement precisely and easily.
The following shorthand is used on the diagram and in the description of the sample turn:
SSD: Solar System Display
TM: Trans-Mars. The ring of Space Zones between Mars orbit and the Asteroids' orbit on the SSD is called the Trans-Mars orbit. Space Zones in this area are abbreviated "TM#" (see below).
TE: Trans-Earth. The ring of Space Zones between Earth/Moon orbit and Mars orbit is called the Trans-Earth orbit. Space Zones in this area are abbreviated "TE#" (see below).
SSD followed by planet abbreviation and number: Solar System Display in the named planet's orbit on the number Space Zone. For example, "Transport SSD A4 to SSD TM7" means "Move the Transport on Space Zone Asteroids 4 on the Solar System Display to Space Zone Trans-Mars 7."
Transport/# Unit Name: Transport loaded with the number and type of units after the slash. For example, "Transport/5 Troopers" means "The Transport is loaded with 5 Troopers." If the Transport moves, the units loaded aboard it move, too.
Each color's position is analyzed in an opening paragraph, followed by the player's move in table form. The columns on the table describe the Display in which the moving units can be found; the specific Pieces moving; the Territorial Zone From which the pieces are moving; the Zone To which they're moving; and the distance in Zones they move. Following the table, you'll find an explanation of the move, so you know why each piece did what it did.
Blue Player Analysis and Move
Blue is in a good position to take Earth. To do this, however, he will have to prevent yellow from expanding his natural hold on the Moon and moving to Earth. If yellow won't negotiate or pay attention to threats, blue may need an ally to help break him. Blue and green may be able to reach an acceptable arrangement regarding the use of green's Transport and 2 Troopers on Earth and blue's similar (though stronger) force on Venus. Despite what looks like a good position on Earth, blue must play cautiously because he moves first. Vacate weak Venus and Mercury Zones and head for Earth. Offer to leave Aerostates (Venus) in return for green's military aid on Earth.
| Display | Pieces | From | To | Zones |
|---|---|---|---|---|
| Mercury | 3 Fighters | Hielo | SSD Me1 | 4 |
| Venus | Transport/2 Troopers | Aerostates | SSD Me1 | 4 |
| Earth | 1 Trooper | American Regency | Eurasian Regency | 1 |
| 1 Trooper | American Regency | Independent Arcologies | 1 | |
| 1 Fighter | L-5 Colony | Urban Reservations | 3 |
The Fighters on Hielo leave because the position is indefensible. They also provide defense for the Transport blue moved from Venus (which would have to move even if green refused a deal for military aid!). The three moves on Earth are attempts to force yellow to divide his forces if he chooses to attack Earth. That blue gains ground on Earth is a side-benefit.
Burgundy Player Analysis and Move
You got unlucky — moving before purple puts you at a disadvantage on Mars. Not much you can do this turn but circle the wagons. If you move before purple on the next turn, you may even have to evacuate Mars! You're on the defensive this turn.
| Display | Pieces | From | To | Zones |
|---|---|---|---|---|
| Asteroids | 4 Fighters | Thule | M2 | 4 |
| Mars | Transport/5 Troopers | Ram HQ | Coprates Chasm | 3 |
The Fighters on the move from Thule are moving to reinforce Mars (which needs all the help it can get) or to cover a rapid retreat next turn, if necessary. Consolidating all forces in a single Zone on Mars forces purple to come to burgundy. That's the best burgundy can do for now.
Yellow Player Analysis and Move
Blue made a mistake and you can exploit it! He left his Leader and a Factory weakly defended on Earth. You can take him out with some good die rolls. That will put you on the road to control of the Earth/Moon system.
| Display | Pieces | From | To | Zones |
|---|---|---|---|---|
| Moon | Leader | Tycho | American Regency | 3 |
| 1 Gennie | Tycho | Tranquility | 1 | |
| 4 Fighters | Tranquility | American Regency | 3 | |
| Venus | Transport/5 Troopers | Elysium | Ve3 | 4 |
Yellow's Leader and 4 Fighters move to American Regency to eliminate blue's Leader and take control of the Factory there. The Gennie move into Tranquility is a defensive measure — the chances that green will be leaving Earth are high, and you want to dissuade him from attacking you, and maybe stealing one of your Factories, as he leaves.
Green Player Analysis and Move
Venus is yours! No one can reach you, so you can spread yourself thin and control the entire planet. Mercury and Earth are lost causes. Evacuate now. There's no reason to antagonize people on the first turn; there'll be plenty of time for that later. Decide if you want to help blue on Earth. Probably not — you have no natural enemies, so there's little to be gained from an alliance. On the other hand, yellow's Transport at Ve3 is an awfully tempting target. . . .
| Display | Pieces | From | To | Zones |
|---|---|---|---|---|
| Venus | 1 Fighter | Lowlanders | Ve3 | 4 |
| 1 Trooper | Aphrodite | Wreckers | 1 | |
| 1 Trooper | Aphrodite | Elysium | 1 | |
| 1 Gennie | Aphrodite | Beta Regio | 1 | |
| 1 Trooper | Aerostates | Mt. Maxwell | 1 |
The Fighter launched from the Lowlanders of Venus is going after yellow's completely undefended Transport. If the yellow player balks at this, point out that you could have really hurt him on Earth, but you moved your Transport and Troopers out of his system. If this approach gets blue upset, point out that you're putting the hurt on yellow elsewhere. Overall, your moves get you out of two bad situations (Earth and Mercury), you control a planet, and the other players have too much on their minds to give you a hard time.
Purple Player Analysis and Move
Going first forced burgundy to play it safe. You can afford to play a little more aggressively, but you don't want to go crazy — burgundy's got a strong force in Coprates Chasm and reinforcements are on the way. Spread out on Mars. Show burgundy you mean business but leave him alone for the moment. You'll out-produce him two Factories to one. Eventually you'll take him, but right now, he's got you outgunned. Settle in for an extended battle.
| Display | Pieces | From | To | Zones |
|---|---|---|---|---|
| Mars | 2 Gennies | Pavonis | Space Elevator | 1 |
| 1 Trooper | Pavonis | Arcadia | 1 | |
| 2 Fighters | Space Elevator | Boreal Sea | 2 | |
| 2 Fighters | Space Elevator | Ram HQ | 3 |
All you're doing is taking control of Territorial Zones and putting your units where, next turn, they can put the hurt on burgundy or, if necessary, retreat to safety. You want burgundy to feel hemmed in. You want him thinking he'd better get the heck out of Dodge (or, in this case, Coprates).
Brown Analysis and Move
Mercury is yours. Also, you should be able to roam the Asteroids without much competition. Burgundy's meager force on Thule looks ripe for the plucking but his Factory will produce defensive forces before you can get there, and his Fighters near Mars could respond quickly to an attack. Better to head for Vesta.
| Display | Pieces | From | To | Zones |
|---|---|---|---|---|
| Mercury | 2 Troopers | Sobkou Plains | Bach | 1 |
| 1 Fighter | Mariposas | The Warrens | 2 | |
| 1 Fighter | Mariposas | Tolstoi | 2 | |
| 1 Fighter | Mariposas | Hielo | 2 | |
| Leader | Mariposas | Sobkou Plains | 2 |
All of your moves within the Mercury system are designed to take control of Territorial Zones. You want complete control of that Planetary System this turn. Wait, and someone will try to stop you. The Leader move to the Sobkou Plains serves the secondary purpose of protecting your Factory. In the Asteroids, you want to steer clear of burgundy, but, with slow, careful development, you should be able to take control of several asteroids, establishing a second base of operations far removed from your primary base on Mercury. Putting you out of the game will be very, very tough.
Combat
With movement complete, examine the board to see if there's any combat to resolve. Begin with Mercury and work your way out to the Asteroids. Don't forget to check the SSD.
In the example below, combat is described in table form. The columns on the table describe the Zone in which combat takes place; the Attacker; the Defender; the hit number the attacker Needs to roll to kill the foe; what the attacker actually Rolled in the example; and the Result of the roll.
Mercury Combat
No combat. Remove blue, green, and yellow Control Markers and replace them with brown ones.
Venus Combat
No combat. Remove blue, green, yellow, and burgundy Control Markers and replace with green ones.
Earth Combat
| Zone | Attacker | Defender | Needs | Rolled | Result |
|---|---|---|---|---|---|
| American Regency | Blue Gennie | Yellow Fighter | 6 | 2+2=4* | No kill |
| American Regency | Blue Gennie | Yellow Fighter | 6 | 3+2=5 | No kill |
| American Regency | Yellow Fighter | Blue Gennie | 7 | 5+2=7 | Kill |
| American Regency | Yellow Fighter | Blue Gennie | 7 | 8+2=10 | Kill** |
* Both players have a Leader in the Zone, so the first number represents the roll, the second, the +2 morale bonus conferred by the Leader.
** Both blue Gennies are killed, so the last two yellow Fighters don't need to roll. This leaves the Leader alone in the Zone with enemy units. He dies and the blue forces are rendered inert for the rest of this turn and all of the next.
Replace the blue Control Marker in American Regency with a yellow one. Yellow now controls the Factory there and can build with it this turn. Replace the purple Control Marker in Urban Reservations with a blue one and place blue markers in Independent Arcologies and European Regency.
Mars Combat
No combat (yet!) Replace yellow, green, and burgundy Control Markers with purple ones.
Asteroids Combat
No combat.
Solar System Display Combat
| Zone | Attacker | Defender | Needs | Rolled | Result |
|---|---|---|---|---|---|
| Ve3 | Yellow Transport | Green Fighter | 8 | 2 | No kill |
| Ve3 | Green Fighter | Yellow Transport | 3 | 5 | Kill |
The Transport and the five Troopers on board are destroyed and removed from play.
Building Phase
The last part of the turn is the Building Phase. Below, you'll find an analysis of each player's position at the end of turn one and recommended builds. At this point, however, you may want to pick your colors and begin play, making your own decisions about what units to build. Ours are just suggestions.
Each build is described in table form, with columns describing the Display in which you'll find the Factory; the Zone where it's located; and the Units the Factory produces.
Blue Analysis and Builds
Things look bad. Blue wasn't cautious and paid the price. He gets no builds this turn because his Leader died. Still, things could be worse. Blue will probably lose Earth, but his space fleet should be okay and his Factory may survive. Blue is hurt, but can now take the role of wildcard, striking terror into the hearts of other players (especially yellow). It might be worthwhile to try and talk green into coming back to Earth to cause trouble for yellow this turn, until you get back on your feet.
Burgundy Analysis and Builds
If burgundy moves before purple, his best bet is to build a Transport, leave Mars, and head for the Asteroids (Fortuna, if he wants to make enemies; Psyche, if he wants to be friendly). If burgundy feels lucky, and thinks he'll be moving after purple next turn, he should build Gennies and settle in for a long war. At the same time, he wants to build up Thule, so he has someplace to go if he does get kicked off Mars.
| Display | Zone | Units |
|---|---|---|
| Asteroids | Thule | 2 Troopers |
| Mars | Coprates Chasm | 2 Gennies or a Transport |
Yellow Analysis and Builds
Despite the loss of a Transport full of Troopers, yellow's in great shape — he's got three Factories and his primary foe, blue, doesn't move this turn. He has to keep an eye on green, however (look at the SSD), and make sure his Factories are well-defended, so green isn't tempted to strike. Next turn, yellow should take the Moon, so he can put up a Killer Satellite there as soon as possible. At the same time, he should crush blue on Earth, leaving L-5 for later.
| Display | Zone | Units |
|---|---|---|
| Moon | Tycho | 2 Gennies |
| Tranquility | 2 Gennies | |
| Earth | American Regency | 2 Gennies |
Green Analysis and Builds
Green's job is to fortify Venus while continuing to develop his space armada. He should start building a Killer Satellite right away. Green might want to consider sending his Fighters and loaded Transport on the SSD against Earth or Mercury, but he better think long and hard: His space fleet can attack Venus, or Mars, or it can defend Venus; it can't do all three. In making this decision, green should think about who he wants to tick off, if anyone. He should also pay attention to blue's potentially threatening force on the SSD. Blue may be down, but he's not out yet.
| Display | Zone | Units |
|---|---|---|
| Venus | Aphrodite | 1 Fighter |
| Lowlanders | 1/2 Killer Satellite |
Purple Analysis and Builds
Purple is in fine position and has lots of options. Now is the time to hit burgundy hard. Just in case purple moves before burgundy, protect the Factory on Deimos, but be ready to move everything available against burgundy if burgundy moves first. Building Troopers on Deimos helps protect the Factory. Building a Transport on the Space Elevator allows purple to pick up Troopers all over Mars and bring them to bear against Coprates Chasm.
| Display | Zone | Units |
|---|---|---|
| Mars | Space Elevator | 1 Transport |
| Deimos | 2 Troopers |
Brown Analysis and Builds
This is a good position. Green is a possible threat, but he can only get three Fighters to Mercury this turn. Try to arrange a non-aggression pact with green and begin building a Killer Satellite, just in case. If green won't go for a truce, build Gennies to ward off a potential green Fighter raid, then spread Mercury's ground forces out so three Fighters can't do much damage. In the Asteroids, brown wants to build assault forces — Troopers and Transports, in that order — to prevent other players from moving in there. Later, brown can begin building Factories in the Asteroids to solidify his control.
| Display | Zone | Units |
|---|---|---|
| Mercury | Sobkou Plains | 1/2 Killer Satellite or 2 Gennies |
Conclusions
This battle for the 25th century has barely begun. Blue looks bad right now, and probably has little chance to win, but he could determine who does win. Yellow will be quite strong if someone doesn't step in to prevent his early takeover of the Earth/Moon system. Burgundy and purple are locked in combat, and may want to arrange a truce. That may be their best chance of preventing a yellow build-up or an easy brown or green victory.
Now, start your own game or select colors so you can finish this one. The future of the solar system is in your hands.