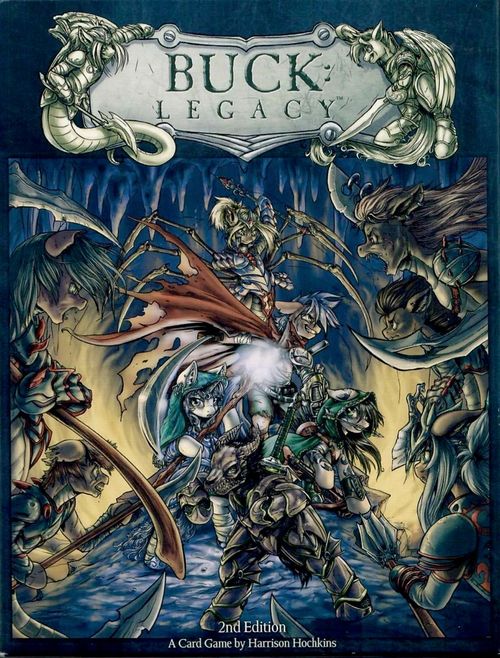
Buck: Legacy (2nd Edition)
Buck: Legacy (2nd Edition) Rulebook
Table of Contents
Table of Contents
- Game Overview
- Object of the Game
- Golden Rules
- In Play
- Card Anatomy
- Component Description
- Setup
- Start of the Game
- Market Part Background
- Market Part
- Adventure Part
- Exploration Phase
- Exploration Phase Sequence
- Combat Phase
- Dungeon Boss
- Zone and Dungeon Boss Cards
- Dungeon Boss Overview
- End of the Adventure Turn
- End of the Game
- Dungeon Boss Attack Card
- Examples of Play
- Choose vs Target
- Rule vs Ability
- Attachment
- Maximum Values
- Rule of Six
- Using Spells
- Glossary
- Spells
- Treasure Table
- Single-use Items
- Transmutation
- Treasure Cards
- Flight
Game Overview
Buck: Legacy is a game for 2-6 players set in the fantasy world of Loria. Each player takes on the role of an Adventurer: a brave mercenary fighting for what he believes in. Some fight for money and glory, some for duty and honour, and others are born for exploration and Adventure; that is their calling.
Whatever the motives of each Adventurer, they fight to defend the Kingdom of Loria from the Nagapon invaders, and from any other monsters or demons that cross their path.
The players fight against the Dungeon Deck, from which random events and monsters emerge. On each turn, the players take turns drawing and playing 1 Dungeon card.
The game is divided into 2 clearly defined parts, which repeat until the game ends:
Market Part. During this part the Adventurers may restock their supplies and jointly prepare for the coming journey.
Adventure Part. During this part the Adventurers explore the dungeons and fight their way through hordes of bloodthirsty enemies toward the final objective, the Dungeon Boss.
Object of the Game
The goal for all players is to collect as many Medals as possible before the game ends.
Players receive Medals at the end of each Adventure Phase for successfully completed quests, defeated monsters, and simply for surviving.
The game ends when a pre-agreed number of Dungeon Bosses have been defeated (the standard game ends when 2 Bosses have been defeated).
Before the game begins, the players must decide which game they are playing:
Standard Game - 60-90 min. Objective: Defeat two Dungeon Bosses.
- 2 players: Defeat one Dungeon Boss from the Starting Zone and one from the Mid-Level Zone.
- 3 or more players: Defeat one Dungeon Boss from the Mid-Level Zone and one from the Advanced Zone.
Quick Game - 30-45 min. Objective: Defeat one Dungeon Boss. At the start of a quick game each player takes a Treasure card (see page 20) and begins the game with 60 Gold instead of 20 Gold.
- 2 players: Defeat one Dungeon Boss from the Starting Zone.
- 3 or more players: Defeat one Dungeon Boss from the Mid-Level Zone.
Golden Rules
The rules in this book are the most complete version of the rules of the Buck: Legacy card game and are designed for a game lasting 60 to 90 minutes.
Several golden rules should be remembered during play:
The Game Owner has the last word. If players dispute a contradiction in the rules, and that contradiction is not addressed in the FAQ, the outcome of the dispute is decided by the game owner.
Cards outrank rules. If the text of a card contradicts the rules presented in this book, the text of the card takes priority. This rule does not extend to the Quick Reference cards (see page 3).
House Rules. The game owner may introduce their own rules, but all players must agree to introduce these rules into the game.
We strongly recommend that players devise House Rules only after they have played the game several times.
Please note that House Rules do not let you experience Buck: Legacy the way its designers intended.
Rerolls and modifier rolls. When you roll a die, players may change the result of the roll after it has been made. A die may be rerolled an unlimited number of times through the effects of cards, rules and spells.
Trading, blackmail and bribery. In Buck: Legacy, players are allowed to trade Items, Treasures and Gold, but are forbidden to trade Medals, Mana, Tesla, Gifts or Curses (unless the card's ability says otherwise).
Using in-game gold and items, players may exchange with or bribe one another, and may also form alliances or oppose one another.
"My word is my bond" (Change). Note: in the current version (2.1) of the rules, the rule "My word is my bond" has been removed entirely.
In Play
When a card is "In Play", it means that it is placed face down on the table and its effect is active.
Cards that are "In Play" include:
- Cards drawn from the Dungeon Deck.
- Active Equipment, Class and Race cards.
- The active Arena or Dungeon Boss card.
Cards that are NOT considered "In Play" are:
- Cards in an Adventurer's backpack (in hand).
- Cards in all decks.
- Cards in all discard piles.
- Cards in the Distance / Trophy decks.
Card Anatomy
Card Name. The name of the Item or Monster.
Sale / Purchase Cost. Determines the cost to buy and sell the card. Lavender Dungeon cards show Level / Escape values in place of this value.
Light / Large. Equipment cards carry a "Light" or "Large" indicator. An Adventurer may carry at most one "Large" item.
Dungeon cards show a "Loot" value in place of this indicator.
Card Illustration. A visual representation of what the item or monster looks like.
Type. Defines the type of the card. For example, an Item card may be a "Weapon" or a "Headgear".
Subtype. Gives a fuller definition of the type. For example, a card of the "Weapon" type may be "Cutting", "Fire" or "Staff".
Icon. Item icons are shown here. Trophy and Distance icons are also shown here.
Special Ability Name. The name of a special ability explains the cause under which the ability of the item or monster activates. It has no effect on play.
Special Ability Description. Describes how the card affects the game. When a card enters play, follow the instructions in its description.
If a card says "You", it means the player who took or played that card.
Illustrator Credit. The name or alias of the artist who drew the card's illustration.
Feature. Shows the Protection, combat strength modifiers and vulnerabilities.
Card ID. A unique card ID. It is not important for play.
Note. Dungeon Bosses and Zones are the only cards in the game with a different appearance (see page 13).
Reference Cards. These cards contain only text and are included in the Character Creation deck. They hold brief extracts from the rulebook to simplify play.
Component Description
Player Stat Card
This card is used to record the characteristics of your character. Stat cards can be found in the Character Creation deck.
Place the Stat Card in the clear sleeve included in the box. During play, use the dry-erase markers included in the box to write on the sleeves.
To avoid damaging your Buck: Legacy deck, make sure the sleeves are wiped clean of marker ink before packing the game back into the box.
Combat Strength. This is the base strength of your character. It is used in battles with monsters.
Combat Roll Modifier. Equipment and other effects of your cards can increase the value of any of your combat rolls. Use this field to record modifiers to your rolls.
Mana. Magical energy used for spells.
Tesla. Electrical energy used for steampunk devices.
Medals. The goal of the game is to collect as many Medals as possible through combat and survival.
Gold. Also called "Zol". This is the in-game currency. Active Adventurers may trade, bribe and blackmail one another with gold at any time. Stunned Adventurers may not trade gold or cards.
Monster Stat Card
When fighting large monsters or the Dungeon Boss, you will need to track certain modifiers.
Use this card just as you would a normal Stat Card. This will simplify your game.
Total Distance. Each time a Distance card is added to the player's Distance deck, note it in this field.
Loot Modifier. Some card abilities increase or decrease the amount of loot dropped by a monster. Make notes in this field for reference.
Monster Level. Some card abilities can lower or raise the level of a monster. Make notes in this field for reference.
Black Die Modifier. Also known as the "Monster Combat Roll". The value of the black die shows the ferocity of the monster's attack.
Escape Roll. Some card abilities can lower or raise the roll required to escape from a monster. Use this field to track this value.
Monster HP. Large monsters must be wounded several times in order to be defeated. The number of wounds inflicted is shown by the "Monster HP" value. When Monster HP reaches 0, the Monster is considered defeated.
Buck Token. Performs the same function as the dealer chip in poker. The Buck token determines the order in which players play cards.
The player who holds the Buck token is called the Buck Dealer.
Setup
1. Prepare the decks. Separate them into five different decks:
- Character Creation (Brown)
- Items (Blue)
- Dungeon (Lavender)
- Dungeon Boss / Arena (Purple)
- Treasure (Red)
Items, Dungeon and Treasure cards must be shuffled and placed face down. Players must not look at the contents of a deck.
Each player may look through the Character Creation deck, the Arena / Dungeon deck and all discard piles at any time.
2. Deal the components. Gather the Stat Cards and deal one to each player.
In a standard game, each player starts with 20 Gold.
In a quick game, each player starts with 60 Gold and 1 Treasure card (see page 20).
If a player starts the game at Magic Level 1 or higher, that player starts with maximum Mana (10).
3. Determine the Buck Dealer. Each player rolls a die. The player who rolls the highest value becomes the Buck Dealer and receives the Buck Token.
4. Prepare the characters. Starting with the Buck Dealer and proceeding clockwise, each player chooses from the Character Creation deck:
- 1 Race card
- 1 Class card
- 1 Starting Weapon card
All three cards are placed on the table. The Race and Class together are the player's character, and the Starting Weapon is the character's equipment.
Now the players are ready to begin the game.
The setup of each player in a standard game should look like this: [layout diagram omitted from this text transcription]
Start of the Game
From this point on, the players and their characters are regarded as one, and are called Adventurers.
The game is divided into 2 alternating parts: the Market Part and the Adventure Part.
The game always begins with the Market Part.
Market Part Background
Before the Adventurers set out on an adventure, they must buy equipment and supplies for the journey, and discuss the details with their client.
The team of Adventurers is almost always hired by a client who sponsors their small expedition. A client may be anyone in Loria's society: members of the University who crave samples of Changeling eggs, Gauss technology or Magical Artifacts; other clients may be the high military command, or the city guard who need to neutralise a local threat. To reflect this situation, the Buck Dealer decides which mission to choose, and selects a Dungeon Boss, then shows it to the Adventurers so that they can prepare properly.
The Market Part is a collection of small tasks performed by the Adventurers, such as planning their route, carrying out simple errands for a small fee, and searching the market for quality goods, since the market is so large that it will take several hours before you find something worthwhile.
In addition, you may visit the workshops of the Steam Mechanics scattered around the city, which for a fee will repair and recharge equipment that uses Tesla. An Adventurer with the Steam Mechanic class usually owns his own workshop.
Finally, Adventurers who have studied at a school of magic can restore their Mana and rest before battle, since frequent use of spells can cause migraines and loss of consciousness.
Ways of restoring Mana may vary. Clerics often pray in the city temple to receive the blessing of their deity. Necromancers may meditate or take part in bloody rituals.
All the Adventurers meet at an agreed place and leave the city together, heading for adventure and their cherished goal.
Market Part
Ingenuity
Adventurers may use "Ingenuity" an unlimited number of times. Ingenuity does not count as an action, and its use does not spend Market Actions.
Ingenuity: Sell Items. Sell an item or treasure from your backpack or from your equipped gear.
The sold card is placed in the corresponding discard pile, and the Adventurer who sold it receives Gold equal to the card's sale value.
Ingenuity: Recharge Tesla. Adventurers may buy Tesla at a price of 5 Gold per unit of Tesla.
At the start of the game a player may hold a maximum of 8 Tesla (this may be increased).
End of the Market Part
When all the Adventurers have taken all their actions and Ingenuity uses, the Market turn ends.
At the end of the Market turn, discard all item cards from the shop into the corresponding discard pile, then begin the Adventure Turn.
Market Part Sequence
1. Open the Shop. At the start of the Market turn, the Buck Dealer opens the "Shop": takes cards from the Items deck (blue) and places them face down on the table.
- In a 2-3 player game, take 4 cards.
- In a 4 or more player game, take 6 cards.
2. Adventurers take Market Actions. Each Adventurer may take up to 3 Market Actions.
Any Adventurer may declare which action they are taking at any time.
There is no turn order during this phase. Adventurers may declare their actions in any order.
One action may be taken more than once.
Adventurers may also trade equipment with one another and equip new items.
3. The Buck Dealer selects the Arena. The player holding the Buck Token reviews the Arena / Boss deck (purple) and, after choosing, places one Arena card on the table. The Arena card remains on the table until the end of the following Adventure Phase.
Market Actions
Action: Restore Mana. Allows you to fully restore your Mana. (At the start of the game the maximum Mana is 10, but equipment and card abilities may increase this maximum.)
Action: Side Job. Receive 20 Gold.
Action: Buy an Item. Spend your Gold to buy an item from the "Shop" for its purchase cost.
Purchases from the shop may be "interrupted" by an Adventurer with a higher Buck Priority (see page 7).
When an item is bought, take a card from the blue deck and place it face down in the position of the bought card.
Purchased items are placed in the "backpack".
Examples of a Market turn and more information on Buck Priority can be found on page 7.
Equipment
An Adventurer may wear one item with each of the symbols below:
Armour - Weapon - Glasses - Headgear - Other
An Adventurer may carry only one "Large" piece of equipment.
The Starting Weapon is removed from the game if it is unequipped for any reason.
You may change your equipped gear at any time during the Market turn and during the "Preparation" step of the Exploration Phase. Unequipped gear returns to the backpack.
Backpack
The backpack consists of the cards held in an Adventurer's hand.
Unused equipment and single-use items are kept here. Players do not have to say which items they have in their backpack.
A backpack may hold a maximum of 5 cards.
If you exceed the maximum, you must immediately get rid of the excess cards by using single-use items or by discarding cards.
Buck Priority
The Adventurer holding the Buck Token has the highest priority. The Adventurer to the left of that Adventurer is second. The Adventurer to the left of the second is third, and so on.
In the example above there are 4 players: Adventurers A, B, C and D.
The Buck Token is held by Adventurer C, so Adventurer C has the highest priority for interrupting other Adventurers' actions.
The player sitting to his left (Adventurer D) is second.
The player to the left of Adventurer D (Adventurer A) is third, and Adventurer B has the lowest priority.
Priority matters in three cases:
- "Interrupts" during the Market Turn.
- The order in which card abilities act during the Exploration Phase.
- The order of combat with monsters during the Combat Phase.
More detailed information about the Exploration and Combat Phases can be found on page 10.
Market Interrupts
During the Market Turn there is no turn order; any Adventurer may declare an action at any time.
If 2 Adventurers want to buy the same item from the shop, Buck Priority determines who may buy that item.
When an Adventurer declares the purchase of an item, another Adventurer with higher priority may "interrupt" the purchase, which allows that Adventurer to buy the item instead of the player who originally wanted it.
More than one interrupt may occur on a single purchase. In that case the item goes to the interrupting player with the highest priority.
Only the Adventurer who actually completes the purchase spends the action. All other players who were interrupted do not spend an action on the purchase.
Adventurers may interrupt others even if they do not have enough money for the purchase; in that case they must immediately spend actions selling items or earning money in order to afford the purchase of that item.
[Diagram omitted: the example seating of Adventurers A, B, C and D around the shop.]
Market Turn Example
Adventurer B has 20 Gold and 3 actions.
As his first action, Adventurer B chooses "Side Job" and earns 20 Gold, so that he now has 40 Gold.
As his second action, Adventurer B declares that he is buying an item from the shop.
Adventurers A, C and D have higher priority, but none of them needs this item, so they do not interrupt.
Adventurer B takes the item and places it in his backpack, then deducts from his Gold the purchase cost shown on the card.
As his last action, Adventurer B wants to restore his Mana. He equips a new item that raises his maximum Mana from 10 to 12. He then declares that he is using an action to restore Mana, and records the Mana value of 12 in the corresponding field on his Stat Card.
If he wants to sell something or recharge Tesla, Adventurer B must wait for the other Adventurers before moving on to the Adventure Part.
Adventure Part
Adventure Part Background
When the Adventurers reached the Zone where their objective lay, they began to explore the Zone carefully. Rangers searched for tracks while Scouts reconnoitred in search of danger.
Their explorations led them underground, through gorges and along the edges of perilous cliffs. Rogues traversed such difficult terrain with ease.
Monsters of every kind lived in those lands, and most were hostile to any Adventurers who strayed into their territory.
They were fought by Berserkers, Alchemists and Warriors, who bravely threw themselves into the thick of battle with support from the mages.
Sometimes our heroes needed days to cross the Zone and its dark and gloomy dungeons, with haunted tombs and the ruins of ancient cities. On the way, some of the Adventurers were lost or maimed.
But in the end, when they reached their cherished goal, they had to face the hardest trial: the Dungeon Boss, who fiercely guards its treasure.
Overview of the Adventure Turn
The Adventure Turn is divided into two alternating phases: the Exploration Phase and the Combat Phase.
The Exploration Phase represents the Adventurers' progress toward their goal, as they inspect secret rooms and search for possible traps.
The Combat Phase represents the Adventurers' battles with any Monsters that stand in their way.
The Adventure Part always begins with an Exploration Phase, then moves to a Combat Phase. When all battles are over, the Adventurers continue exploring until they reach the Dungeon Boss.
If all the Adventurers are stunned or the Dungeon Boss is defeated, the Adventure Part ends and the next Market Part begins.
Active vs Stunned
Adventurers can be in one of two states:
- Active: The Adventurer fights and trades as normal.
- Stunned: The Adventurer is unconscious and temporarily unable to continue the Adventure.
Adventurers begin the game in the "Active" state and may often be stunned during the game. More complete information is on page 12.
To remove stunned status, see the rule "Recovery" on page 12.
Exploration Phase
Overview of the Exploration Phase
During this phase the Adventurers may encounter the following cards:
Gifts. These cards are added to your character as equipment. They give a temporary boost to your character and are discarded at the end of each Adventure.
Using some of them requires passing a Charisma check.
Curses. These cards are added to your character as equipment. They temporarily affect your combat abilities and are discarded at the end of each Adventure.
Events. These cards represent non-combat situations which may be either dangerous or helpful. Some of them require passing checks.
Dungeon Card Icons
Dungeon cards carry several icons. A description of each kind of icon is given below.
Check Rolls
To activate the effects of some cards, a check must be passed. There are 4 types of check: Escape, Charisma, Fear and Trap.
All checks are resolved the same way: roll the die and add modifiers.
To pass a check you must roll a value equal to or greater than the value shown on the card (the number with a "+" sign). For example, to pass a check of 4+ you must roll a 4 or higher on the die. Penalties for failing Charisma, Fear and Trap checks are written in the card abilities. An Escape check is always made when attempting to flee from a Monster. If a check is failed, the player is considered stunned. More information on stunning is on page 12.
After a check roll, the value shown on the die may be changed. Moreover, through card abilities or spells, a failed check may even be rerolled.
A die may be rerolled through card abilities, rules or spells an unlimited number of times.
Fear
Loria is home to many terrible monsters, and not every Adventurer is able to keep their nerve.
When an Adventurer Encounters (see page 11, "Encounter") a Monster that frightens him, he must pass a Fear Check of 4+.
If the check is passed:
- The Adventurer fights the Monster as normal.
If the check is failed:
- The Adventurer has lost the battle and must carry out the conditions described under "Adventurer loses combat against a Monster / Dungeon Boss".
Distance Counter
When you have finished playing a card with a distance counter, place it beside your character in the Distance Deck.
The Distance Deck is the pile of cards placed beside the Adventurer's Stat Card / Race / Class.
Defeated monsters are placed in the Distance Deck vertically.
Monsters that the Adventurer fled from, or that stunned the Adventurer, as well as events, are placed in the Distance Deck horizontally.
Distance and Trophy counters lying in a player's Distance Deck are not considered discarded and are not returned to the common deck through the card ability "Light of the Campfire".
Distance counters allow players to determine when the Dungeon Boss appears (see page 14) and who receives Medals at the end of the Adventure Turn (see page 15).
Trophy Counter
If an Adventurer defeats a monster with a Trophy counter, the monster is placed vertically in the player's Distance Deck.
If the Monster defeats the Adventurer, or the Adventurer successfully escapes from it, the card is discarded.
Cards with a Trophy counter may be lost through "Stun Penalties", described in detail on page 12.
Trophy counters determine who receives Medals at the end of the Adventure Turn (see page 15).
Exploration Phase Sequence
1. Does a Dungeon Boss appear? If, at the start of the Exploration Phase, the total number of Distance counters across all players (including stunned players) is greater than or equal to the distance value shown on the active Zone card, a Dungeon Boss appears. In that case, instead of the usual Exploration Phase, the Dungeon Boss Exploration Phase is played. More on this on page 14.
Otherwise, proceed to step 2.
2. Reveal Dungeon cards. Each Adventurer, starting with the Buck Dealer and then the following players clockwise, takes a Dungeon card and places it in front of their character.
All abilities of Dungeon cards activate immediately and continue to work until the Dungeon cards leave play.
3. Preparation. Players may exchange Gold and cards, and may swap equipped gear for items in their backpack. Unequipped gear returns to the backpack.
4. Play cards. When a card is being played, Adventurers may not exchange cards with one another or change their equipment.
Each Adventurer, starting with the Buck Dealer and then the following players clockwise, plays their Gifts, Curses and Events one at a time.
When all Gifts, Curses and Events have been played, the Combat Phase begins.
Combat Phase
Combat Phase Sequence
1. Play the combat. Each Adventurer, starting with the Buck Dealer and then the following players clockwise, plays their Monster cards one at a time.
2. Continue? When all Monsters have been played, the next Exploration Phase begins.
There are 2 exceptions to this rule:
- If all the Adventurers are stunned, the Adventure ends according to the rule "End of the Adventure" (see page 15).
- If the Adventurers are fighting a Dungeon Boss, instead of an Exploration Phase the next Combat Phase begins (more complete information on battles with a Boss is on page 14).
Combat Terminology
Monster Level. Shown on each Monster card at the top left. Determines the strength of the Monster's attack.
Combat Strength. Usually located in the stats of the cards, determines the strength of the Adventurer's attack.
Monster Combat Roll. Requires the black die. Determines how successful the Monster's attack was. Combat rolls may be modified after they have been rolled, but their value cannot be less than 1 or greater than 6 (since the die has only 6 faces, this rule is called the "Rule of Six"; see page 18).
Adventurer Combat Roll. Requires the white die. Determines how successful the Adventurer's attack was. Combat rolls may be modified after they have been rolled, but their value cannot be less than 1 or greater than 6 (since the die has only 6 faces, this rule is called the "Rule of Six"; see page 18).
Resistance
Some monsters are more resistant to certain types of damage. For example, a weapon dealing "Cutting" damage is designed to slash and pierce, which makes it ineffective against opponents in Armour.
If a weapon with a particular type of special damage is used against a monster resistant to that type of damage, the weapon's Combat Strength value does not count (+0). Even if the card has modifiers, this characteristic is still treated as +0.
If a weapon with two or more types of special damage is used against a Monster that is resistant to one of them and vulnerable to a second, the weapon's strength counts as +0, but the player will always parry successfully.
Example. An Adventurer armed with "Dragon's Tongue", which deals fire damage and has a Combat Strength of +1, fights an "Enraged Fire Elemental", which is resistant to fire. Therefore the +1 Combat Strength of the weapon does not count.
Vulnerability
Some monsters are more vulnerable to certain types of damage.
If a weapon with a particular type of special damage is used against a Monster that is vulnerable to that type of damage, the weapon's Combat Strength value (see page 4) increases by +1. Moreover, the Adventurer automatically parries the Monster's attacks.
Vulnerability does not stack: if a weapon with two or more special damage types is used against a Monster vulnerable to two types of damage, the weapon still receives only +1 to its Combat Strength.
Playing a Monster Card
Each Monster is fought in order of Buck Priority.
A battle against a Monster proceeds as follows:
1) Encounter the Monster. You "encounter" the Monster you drew when it is your turn to fight. Some card abilities activate at this point.
2) Make the combat rolls. The Adventurer fighting the Monster rolls 2 dice: one white (the player's attack) and one black (the Monster's attack).
3) Count the Combat Points. The value of the black die is added to the Monster Level. The total is the Monster's Combat Points.
The value of the white die is added to the Adventurer's Combat Strength. The total is the player's Combat Points.
4) Compare the results. The player's Combat Points and the Monster's Combat Points are compared. During this step the player may ask other players for help.
Also during this step, any of the roll results may be modified, including by properties that allow dice to be rerolled.
Combat Points may be changed any number of times.
During this step, players may declare "Support", inflict instant damage, use spells, play single-use items from the backpack, apply resistance and vulnerability modifiers, and other modifiers, activate special properties of equipment, and so on.
When you have finished all changes, act according to the result of the comparison of Combat Points:
- If the player's Combat Points are equal to the Monster's Combat Points, the player parries the blow.
- If the player's Combat Points are higher than the Monster's Combat Points, the player wins the battle.
- If the player's Combat Points are lower than the Monster's Combat Points, the player loses the battle.
Examples of the Exploration and Combat Phases can be found on page 17.
Battle Outcome: Parry
In this case the player and the Monster deal blows of equal strength to each other, step back a few paces, and then raise their weapons for the next blow.
Any "instant damage" dealt during the battle does not count, and the Monster's and the player's dice are rerolled.
Any declared "Support" remains in effect.
The player and the Monster may parry an unlimited number of times during a battle, until one of them wins the battle.
Battle Outcome: The Adventurer Wins
This means the player has killed the Monster. The Adventurer receives Loot equal to the Loot value on the Monster card (after adding the Loot modifier from the Zone card).
The Monster is placed in the player's Distance Deck (see page 9).
If the Monster has HP, see below.
Battle Outcome: The Adventurer Loses
This means the Monster has proven too strong for the player, and nothing remains for him but to flee. The Adventurer must pass an Escape check (more information on checks can be found on page 9). The roll required to escape is shown on the Monster card.
If the player fails the check, he is considered Stunned, and suffers additional penalties.
If the player successfully passes the check, he places the Monster in his Distance Deck horizontally or discards the Monster, depending on which counter is shown on the Monster card (distance or trophy).
If the Monster has HP, see below.
Monsters with HP
If a Monster has HP (Hit Points), this means the Monster is so strong that it must receive several wounds before it falls.
When the player defeats a Monster that has HP in a battle outcome, 1 hit point is removed from the Monster. After this the battle begins again from step 2: combat rolls are made, and all instant damage dealt earlier is ignored (however, any previously declared Supports remain in effect).
Use the Monster Stat Card to track a Monster's HP.
If a Monster recovers HP, its HP value cannot be higher than its starting value.
Dungeon Boss
Dungeon Boss Background
Our Adventurers, exhausted after gruelling battles with waves of enemies, have at last reached the lair of the Dungeon Boss, and once they engage it in battle there will be no turning back.
Dungeon Bosses are most often large and powerful, and able to survive wounds that would fell an ordinary monster. This combination of size and strength is represented by their HP value.
The Adventurers surround the Dungeon Boss and fight it together, following group tactics; each strikes in order of Buck Priority. If the player's blow does not wound the Boss, the player must dodge the monster's counterattack.
Thanks to its imposing size, strength or abilities, a Dungeon Boss can show incredible skill in battle. It may hurl huge boulders or split the earth with a single blow. This is shown by the Dungeon Boss Attack value on the corresponding card.
If the Adventurers manage to overcome the Boss, they will receive treasure and be generously rewarded for their courage. If they fall, they will limp back to Urbem Sanctem to try again later.
Support
If an Adventurer did not draw a Monster during the Exploration Phase, he may declare "Support" once during the Combat Phase that follows.
A player may be supported an unlimited number of times.
The player receiving the Support does not need permission to receive it.
When a player declares Support, he chooses the player who is currently fighting the Monster. That player immediately receives Combat Strength equal to the Combat Strength value of the supporting player's weapon (resistance and vulnerability to damage from this weapon are not counted).
The effect of a declared Support lasts until the end of the Combat Phase.
Stun
This state means the Adventurer is unconscious, wounded, or simply lost in the dungeon.
When an Adventurer becomes Stunned, as a penalty the player must discard all cards with a Trophy counter.
An Adventurer who is stunned by a Monster may avoid this penalty if he has Protection.
While he is Stunned, the Adventurer is temporarily out of the game. He may not trade cards or gold, use special effects or Class / Race abilities, cast spells, take part in battle, and so on.
He does not draw a card during the Exploration Phase. There are two ways to remove the Stunned status:
- Be Revived.
- Wait for the end of the Adventure Part.
If all Adventurers are stunned, the Adventure Turn ends; see page 15.
Revival
Revival removes Stun and makes the Adventurer Active again.
If an Adventurer is revived during the Exploration Phase, he takes a Dungeon card and plays it as normal.
If an Adventurer is revived during the Combat Phase, he does not fight the Monster. Otherwise play proceeds as normal.
If a revived Adventurer did not draw a Monster card during the previous Exploration Phase, he still has the right to declare one "Support".
Instant Damage
Many cards and spells can deal Instant Damage (for example any kinetic weapon, usually bows, crossbows and magical spells).
You may deal Instant Damage during the "Compare the results" step of a battle.
For each point of Instant Damage dealt, the Monster's Combat Points are reduced by one.
Instant Damage is temporary, and its effect is removed after any battle outcome.
Some monsters are immune to Instant Damage.
Protection
Some equipment and spells grant "Protection". Protection saves an Adventurer from attacks by the Dungeon Boss and from Stun penalties.
If an Adventurer who could not escape is stunned by a Monster whose unmodified level is less than or equal to the Adventurer's Protection, the Adventurer does not discard cards with a Trophy counter.
Protection values are cumulative.
Example. If an Adventurer wears a Headgear with Protection 3, Armour with Protection 4, and Glasses with Protection 3, the player's total Protection is 10.
Zone and Dungeon Boss Cards
These cards carry additional fields containing special information.
These cards also have 2 sides. The side that is currently face down is not in play.
Only one Zone / Dungeon Boss card may be active at any given time.
Zone Cards
Special Rule. The properties described here work only during the Adventure Part.
Distance. The number of Distance counters required for the Dungeon Boss to appear.
Loot. During the Adventure Part, the Loot value from a Monster is changed by the amount shown.
Level. During the Adventure Part, the Monster Level value is changed by the amount shown.
Use the Monster Card to track changes to these values.
Difficulty Indicator (Starting / Mid-Level / Advanced). Used to set the difficulty of the game:
- Starting: a weak Boss.
- Mid-Level: a medium Boss.
- Advanced: a hard Boss.
Dungeon Boss Cards
Type. All Dungeon Bosses count as "Monsters". Secondary types, Water or Undead, are shown here.
Resistance. This Monster is resistant to the following types of damage.
Vulnerability. This Monster is vulnerable to the following types of damage.
Special Ability. If a 6 is rolled on the red die when rolling the Dungeon Boss Attack (red die), the Monster's Special Ability activates. More information is on page 16.
Level. The Monster's base Level.
Hit Points. The Monster's starting number of Hit Points.
Dungeon Boss Overview
Dungeon Bosses are the most powerful Monsters in the game. Each of them is capable, on its own, of defeating an entire party of Adventurers without taking a scratch.
Once a Dungeon Boss has appeared, the Adventurers cannot flee from the battle. They are forced to fight until the entire party is Stunned, or until they defeat the Monster.
Victory over a Dungeon Boss may take several attempts. Each time, your team will come closer to victory, because you will have all the best equipment.
Appearance of the Dungeon Boss
A battle with a Boss looks somewhat different from an ordinary battle, but it also has Exploration and Combat Phases.
A Dungeon Boss can appear only when the total number of Distance counters held in the players' hands is greater than or equal to the value shown on the corresponding Zone card.
Before the Dungeon Boss appears, the last Exploration Phase is played. Once the battle with the Dungeon Boss has begun, a new Combat Phase starts at the end of each Combat Phase, and the cycle continues until all the Adventurers or the Boss have been defeated.
Dungeon Boss: Exploration Phase
1. The Boss appears. Turn over the Zone card. The Zone card's properties are deactivated.
Fill in the Monster Card with the corresponding characteristics of the Boss.
When a Dungeon Boss appears, Dungeon cards are no longer drawn.
2. Preparation. The Adventurers have a final opportunity to prepare before they come face to face with the Dungeon Boss. For a player, this is the last chance to change equipment and exchange cards.
3. Start of battle. When all the Adventurers are ready, the Combat Phase begins.
Dungeon Boss: Combat Phase
Each player, starting with the player with the highest Buck Priority, fights the Dungeon Boss.
During this battle, Support may not be declared, because all the Adventurers are fighting one opponent at the same time.
When the player with the lowest Buck Priority finishes the battle, if at least one Adventurer is still Active, a new Combat Phase begins (the Exploration Phase is skipped).
When the Boss's HP reaches 0, it is defeated, and the Adventure Turn ends (see page 15).
If the Adventurers' party is defeated, the Boss recovers all its HP.
Playing the Battle with a Dungeon Boss
Each player fights the Boss in order of Buck Priority. Follow these steps:
1. Encounter the Monster. When it is your turn to fight the Dungeon Boss, you encounter it. During this step the red die is rolled, and according to the result the effects shown on the Boss Attack card are applied. The effects work only on the player who is currently fighting the Boss.
2. Combat rolls. Make the combat rolls as normal, taking into account the result of the Boss Attack.
3. Count the Combat Points. Count the Combat Points as normal, but taking into account the Boss's Resistance and Vulnerability to types of damage.
4. Compare the results. Compare the results as normal. Support may not be declared. Parrying works as normal, but the effects of Success and Failure work somewhat differently.
"Our Weapons Are Useless!"
Weaker Adventurers cannot even scratch the Boss. During a battle with a Boss, Adventurers may voluntarily fail Escape checks if their Combat Strength +6 is less than or equal to the Monster Level +1.
Outcome: The Adventurer Wins the Battle Against the Dungeon Boss
This means the Adventurer has wounded the Dungeon Boss. Wounding it once is often not enough to defeat the Boss completely.
The Adventurer does not receive Loot.
The Monster loses 1 HP.
The battle ends, and the next player by priority begins to fight the Boss.
Outcome: The Adventurer Loses the Battle Against the Dungeon Boss
This means the Dungeon Boss has overcome the Adventurer and forced him to leave the battle.
The Adventurer must pass an Escape check (more information on checks is on page 9). The roll required to escape is shown on the Boss card.
If the Adventurer fails the check, he becomes Stunned and receives the corresponding penalties.
If the Adventurer successfully passes the check, he leaves the battle with the Boss and joins the battle in his turn in the next Combat Phase.
This does not count as an "Escape" from a Monster, so the Rogue's ability "receive 10 Gold" does not work when leaving a battle with a Dungeon Boss.
End of the Adventure Turn
Our brave Adventurers have completed their expedition and limped back to Urbem Sanctem to rest and restock their supplies. They receive Medals for their service.
Stunned Adventurers may also be rewarded with Medals.
If, when distributing Medals, two or more Adventurers have the same number of Distance counters, Trophy counters, Curses or defeated Monsters, each of those Adventurers receives one Medal.
Dungeon Bosses do not count as having Distance or Trophy counters, nor as a defeated Monster, when distributing Medals.
Choose the section that applies to your end of the Adventure Turn and follow the steps described in it.
All Adventurers Are Stunned
If all the Adventurers are stunned, carry out the following steps:
Distribution of Medals
- The Adventurer with the most Distance counters receives 1 Medal.
- The Adventurer with the most Trophy counters receives 1 Medal.
Distribution of Treasure
- Nobody receives Treasure.
Final Actions
- Return the Zone / Dungeon Boss card to the deck.
- Discard all Dungeon cards that are in play and in all players' Distance Decks.
Revive all Adventurers Remove the "Stunned" status from all Adventurers, and they return to the Active state. The Adventure Turn is complete. A new Market Part begins.
The Dungeon Boss Was Defeated
If the Dungeon Boss was defeated, carry out the following steps:
Distribution of Medals
- The Adventurer with the most Distance counters receives 1 Medal.
- The Adventurer with the most Trophy counters receives 1 Medal.
- The player with the most Curses on his character receives 1 Medal.
- The Adventurer with the most defeated Monsters (lying vertically in the Distance Deck) receives 1 Medal.
- All Active Adventurers each receive 1 Medal.
Distribution of Treasure
- Each Adventurer, starting with the one holding the Buck Token, takes 1 Treasure card.
Final Actions
- Remove the defeated Boss card from the game.
- Discard all Dungeon cards that are in play and in the players' Distance Decks.
Revive all Adventurers Remove the "Stunned" status from all Adventurers, and they return to the Active state. The Adventure Part is complete.
- When the players have defeated a predetermined number of Bosses, the game ends. The player who has collected the most Medals wins.
- If the players defeated a Boss but it was not the last one, they continue playing and advance to a Zone of higher difficulty.
Cooperation or Competition
The team of Adventurers will most likely be stunned several times before it manages to defeat a Dungeon Boss.
If the Adventurers work together, they can make the game easier for one another, but this allows other Adventurers to earn more Medals and Gold, which makes them harder to overtake in the future.
It may be in a player's interest to hinder the leading Adventurers and cooperate with a player who has fewer Medals.
Be noble or underhanded; the choice is yours.
End of the Game
The game ends at the end of the Adventure Part in which the final Boss was defeated.
The player with the most Medals is declared the winner. Games may end in a tie.
It is not recommended to continue playing after the defeat of the final Boss.
Dungeon Boss Attack Card
At the start of each battle with a new player, the red die is rolled. It determines which attack the Boss will make in this round. The attack's effect lasts until the end of the round.
When a parry occurs, the red die is not rerolled.
Values:
1. Stumble. The Dungeon Boss's blow hits a wall, the ceiling, or something equally dramatic happens that prevents the Monster from completing its attack. The Monster receives -1 to its combat rolls in this round.
2. Regular Strike. The Dungeon Boss does not exert itself. Perhaps it is tired, or it is saving its strength for a powerful blow. No effects.
3. Furious Attack. The Dungeon Boss lunges at the Adventurer with lightning speed. The Monster receives +1 to its combat rolls in this round.
4. Volley. The Dungeon Boss hurls the nearest boulder at the player, casts a spell, or spits corrosive acid at him to drive him away. If the Armour Level of the Adventurer fighting in this round is less than the Monster Level, this Adventurer receives Stun. (The rulebook prints this as "Armour Level", the same value as the Protection described above.)
5. Ground Slam. The Boss breaks the ground with its blow. From the shockwave, all Adventurers standing on the ground stumble. If the Adventurer fighting in this round does not have the "Flight" ability, he receives -2 to his combat rolls for this round.
6. Special Ability. Each Dungeon Boss has its own special attack. Its use may have devastating consequences. The Dungeon Boss uses its special ability.
Examples of Play
Example of the Exploration Phase
Adventurers E and F begin the Exploration Phase. The Buck Token is with Adventurer F, and Adventurer E sits to her right.
Adventurer F takes a Dungeon card and places it in front of her character.
Player E comes next in priority. He takes a Dungeon card and places it in front of his character.
Player F drew a Nagapon Soldier. Player E drew a Bat Companion.
Starting with the Buck Token holder, the players play their Gifts, Curses or Events.
Player F did not draw a Gift, Curse or Event, so she waits for the start of the Combat Phase.
Player E sits to her left, so he is next in turn. He plays his Gift and makes a Charisma check. For this he rolls one die. He rolls a 4 and fails the check. The Gift goes to the discard pile.
Since the players have no more Gifts, Curses or Events to play, the Combat Phase begins.
(Transcriber's note: the printed example places Adventurer E to F's right in its opening line and to her left in the next paragraph. The priority order makes E the next player after F, which matches the "left" placement.)
Examples of the Combat Phase and of battle with a Dungeon Boss can be found on page 17.
Example of the Combat Phase
Adventurers E and F enter the Combat Phase. Adventurer F is the Buck Dealer and Adventurer E sits to her left.
(The equipment, classes and races of both Adventurers are not shown, but they are taken into account in play.)
Adventurer F drew a "Nagapon Soldier" in the previous Exploration Phase and awaits its resolution.
The next in line is Adventurer E, who drew a Gift in the previous Exploration Phase and played it.
Example of Battle with a Dungeon Boss
Adventurers E and F begin the Exploration Phase. The Buck Token lies with player F, and player E sits to her left.
Between the two of them they have 8 Distance cards in total, so Ebony Bloody Rose appears (Level 8, 4 HP, Escape 4+).
(The equipment, classes and races of both Adventurers are not shown, but they are taken into account in play.)
Both Adventurers move to the Combat Phase.
Player F fights the Boss first and rolls the combat dice and the red die.
The red die shows that the Boss's attack is a Stumble, so the value of the black die is reduced by 1.
Player F's Combat Points: 4 + 3 = 7. The Boss's Combat Points: 8 + 5 = 13.
Player F has lost the battle and is forced to flee. She rolls a 4 and successfully evades the Boss's attack. She leaves the battle and will fight again in the next Combat Phase.
The turn of the next player by Buck Priority comes. This is player E. He rolls the dice.
According to the red die, the Boss's attack is "Volley". Player E does not have enough Armour Level to block this attack. He asks for help. He could be helped with the spells "Protection" and "Power Shunt", or by using a Communicator. No help comes, and player E is stunned.
All the Adventurers have finished their rounds of battle with the Dungeon Boss, so a new Combat Phase begins, in which only player F is active. Player F begins the Combat Phase and joins the battle with the Boss, rolling the combat dice and the red die.
The red die shows that the Boss's attack is a "Regular Strike", which has no additional effects.
Player F's Combat Points: 4 + 6 = 10. The Boss's Combat Points: 8 + 1 = 9.
The Adventurer wins this round of combat. Ebony Bloody Rose's HP is reduced from 4 to 3 (as shown on the Monster card).
The battle continues until either the players or the Dungeon Boss are defeated. With any outcome of the battle, the Adventure Turn ends. For the steps to end the Adventure Turn, see page 15.
Since Adventurer E did not draw a Monster card in the previous Exploration Phase, he may "Support" in this Combat Phase.
Starting with the Buck Dealer, each Adventurer, if able, plays his Monster card.
Adventurer F plays her Monster card first. Her Combat Strength is 4, and she fights a Monster whose Level is 6.
The battle begins: F against the Monster. She rolls the white and black dice.
Adventurer F's combat score: 4 + 4 = 8. The Monster's combat score: 6 + 3 = 9.
At this point the Monster is winning, so F asks for help.
Adventurer E decides to help her. Since the Nagapon Soldier is immune to Instant Damage, he can help only with a "Support".
Adventurer E declares Support, and the Combat Strength of Adventurer F's weapon increases by the Combat Strength of Adventurer E's weapon, adding another +1 of Combat Strength (the score is now 4 + 4 + 1 = 9).
Since the scores are now equal, the outcome of the battle is a Parry, and the white and black dice are rerolled.
Adventurer F's Combat Strength is now 4 + 6 + 1 = 11. (4 Combat Strength + 6 Combat roll + 1 from Support.) The Monster's combat score: 6 + 3 = 9.
Adventurer F has won the battle. She places the defeated Monster vertically in her Distance Deck and receives the Loot shown on the card (20 Gold).
All Adventurers have played their cards; a new Exploration Phase begins.
Choose vs Target
Targeting an Adventurer or a Monster precisely in the heat of battle can sometimes be difficult; in some cases, an accurate shot is impossible.
The only difference between "Choose" and "Target" is the effect that prevents them.
Rule vs Ability
Abilities are the result of the unhindered use of an item or equipment: conditions under which the Monster is more comfortable fighting.
The only difference between "Special Rules" and "Special Abilities" is which abilities are able to block them.
For example, the Treasure "Golden Eye" cannot block the use of special rules or special abilities.
Attachment
When two cards are "Attached", they are placed on top of one another, which forms a temporary contact between these two (or more) cards. If any of these cards is discarded or returned to its deck, the attached cards are separated and are also discarded or returned to their deck.
If one of these cards is a Single-use Item, it is discarded immediately after separation.
Maximum Values
Adventurers begin the game with certain maximum values. The use of special abilities may allow these values to be increased for the Adventurer using them.
The starting maximum values for Adventurers are:
- Backpack capacity: 5 cards
- Tesla: 8 units of Tesla
- Mana: 10 Mana
- Number of "Large" items that may be carried at one time: 1
Rule of Six
A die roll is limited by the number of faces on the die. A modified roll value can never be less than 1 or greater than 6.
Example. If a special ability that gives +2 to your combat rolls applies to you, and you roll a 5, then since the die has only 6 faces, the final value of your roll is 6. The Berserker class ability and the Treasure card "Unlimited Drill" are exceptions to this rule.
Using Spells
To use spells you need two things: a "Magic Rank", which represents the magical abilities and the level of spell mastery of your character, and "Mana", the magical energy needed to cast spells.
To restore Mana, you may either spend 1 action on it during the Market Turn, or make use of the abilities of cards.
To use a spell, choose a spell from the list on page 20, subtract from your Mana the amount the spell costs to use, and apply its effect.
If you do not have enough Mana or Magic Rank, you cannot use that spell.
Magic Levels
Any Adventurer may use spells if they have the corresponding Magic Rank.
Each player starts the game with a Magic Rank of zero, but Class, Race and equipment cards may increase it.
The Magic Rank that can be reached is not limited, but all the strongest spells are unlocked at Rank 3.
- Rank 1: may use Rank 1 spells.
- Rank 2: may use Rank 1 and Rank 2 spells.
- Rank 3: may use Rank 1, Rank 2 and Rank 3 spells.
Mana
The starting maximum Mana is 10, but it can be increased through special abilities of equipment.
If you are wearing equipment that increases maximum Mana, then when it is removed the maximum value decreases and all excess Mana is destroyed.
Example. An Adventurer has 12 Mana, since he uses the Starting Weapon "Apprentice's Staff" (which gives +2 to maximum Mana). He replaces it with "Dragon's Tongue", which gives no Mana increase. The Adventurer's maximum Mana immediately decreases to 10.
However, if an Adventurer swaps one piece of equipment for another that increases maximum Mana, for example "Apprentice's Staff" for "Lightning Rod", he does not lose Mana (provided the new equipment gives an equal or greater amount of Mana).
Using Tesla
Tesla is the general term for a form of elemental energy. Tesla may take the form of electrical impulses or gas, and may even be turned into a liquid and used as fuel.
Adventurers may pay 5 Gold for 1 Tesla at any time during the Market Turn. This counts as "Ingenuity" (see page 6).
Glossary
(Entries are kept in the order printed in the source. Page references are to the printed page numbers of the source rulebook.)
Adventurer: A player (see page 5).
Active: One of the two possible states of an Adventurer: fights and trades as normal. The other state is Incapacitated (see pages 8, 12).
Arena: A double-sided purple card; the reverse side of a Dungeon Boss (see page 13).
Buck Dealer: The Adventurer holding the Buck Token (see page 4).
Buck Token: A round chip used to determine turn order (see page 4).
White die: The Adventurer's Combat Roll (see page 10).
Combat Points: The sum of the Adventurer's Combat Strength and Combat Roll; or the Monster Level plus the Monster's Combat Roll.
Dungeon Boss: A double-sided purple card; the reverse side of an Arena (see page 13).
Revival: Restoring a stunned Adventurer to Active (see pages 8, 12).
Headgear: A type of Item or Treasure that is worn as Equipment (see page 6).
Preparation: The step before cards are played during the Exploration Phase (see page 10).
Gift: A special type of Dungeon card played during the Exploration Phase (see page 10).
Action: Used during the Market Turn to gain gold or mana, and to buy items (see page 6).
Item Card: A blue card that contains either Equipment or a Single-use Item.
Treasure Card: A red card, more powerful than an Item Card (see page 20).
Red die: The die used to determine the Dungeon Boss's attack (see page 16).
Trap: A secondary characteristic of an Event card.
Magic Level: The required condition for casting a spell. Adventurers start with a Magic Level of 0 (see page 18).
Mana: The consumable resource for casting spells (see page 18).
Instant Damage: Temporary damage dealt to a Monster (see page 12).
Medal: The reward for combat. The Adventurer with the most Medals wins (see page 15).
Monster: A type of Dungeon card or Dungeon Boss played during the Combat Phase (see page 11).
Companion: A secondary characteristic of a Gift card; requires a Charisma check.
Starting Weapon: A type of Character Creation card that is removed from the game when unequipped.
Armour: A type of Item or Treasure that is worn as Equipment (see page 6).
Crushing: A secondary characteristic of a Weapon; a special damage type.
Radiance: A secondary characteristic of a Weapon; a special damage type.
Protection: Protects against Stun penalties and against attacks by Dungeon Bosses (see page 12).
Gold / Zol: A consumable used for bartering, bribing and blackmailing other Adventurers, and for buying items (see page 4).
Electric: A secondary characteristic of a Weapon; a special damage type.
Dungeon card: A lavender card that may contain a Monster, Event, Gift or Curse (see page 10).
Stunned: One of the two states of an Adventurer, the opposite of Active (see pages 8, 12).
Fire: A secondary characteristic of a Weapon; a special damage type.
Single-use Items: A type of Item or Treasure discarded after use (see page 20).
HP / Hit Points: The number of wins in battle against a Monster required for an Adventurer to achieve victory (see page 11).
Description: The in-game narrative description.
Weapon: A type of Item or Treasure that is worn as Equipment (see page 6).
Glasses: A kind of Item or Treasure in the equipment slots (see page 6).
Parry: A battle outcome (see page 11).
Support: Temporary help given to an Adventurer (see page 12).
Flight: An Adventurer with the Flight ability is protected from some card effects (see page 20).
Staff: A secondary characteristic of a Weapon; a special damage type.
Rule of Six: The rule under which a die value cannot be higher than 6 or lower than 1 (see page 18).
Priority: The order of turns, beginning with the Buck Dealer and continuing to the left of him or her (see page 7).
Curse: A special type of Dungeon card played during the Exploration Phase (see page 10).
Other: A type of equipment (see page 6).
Distance: The symbol showing when a Dungeon Boss will appear. The symbol is also used to distribute Medals (see pages 9, 15).
Cutting: A secondary characteristic of a Weapon; a special damage type.
Backpack: The Adventurer's hand: holds at most 5 cards (see page 6).
Discard: Placing a card face up beside its corresponding deck.
Holy: A secondary characteristic of a Weapon; a special damage type.
Ingenuity: A free action during the Market Turn.
Equipment: Items and Treasures that may be attached to an Adventurer (see page 6).
Event: A special type of Dungeon card played during the Exploration Phase (see page 10).
Fear: A type of check (see page 9).
Skirmish: The first step in fighting a Monster (see page 11).
Tesla: A consumable used to power energy devices (see pages 6, 18).
Transmutation: An Alchemist Adventurer's ability (see page 20).
Trophy: A symbol denoting a Medal reward (see pages 9, 15).
Resistance: A characteristic of a Monster (see page 10).
Vulnerability: A characteristic of a Monster (see page 10).
Chaos: A secondary characteristic of a Weapon; a special damage type.
Charisma: A type of check (see page 9).
Black die: The Monster's Combat Roll (see page 10).
Spells
Level 1 Spells
Spark: Cost 1 Mana. Target: an Adventurer's weapon. This weapon deals Electric damage until the end of the Combat Phase.
Ember: Cost 1 Mana. Target: an Adventurer's weapon. This weapon deals Fire damage until the end of the Combat Phase.
Retribution: Cost 1 Mana (Clerics only). Target: an Adventurer's weapon. This weapon deals Holy damage until the end of the Combat Phase.
Protection: Cost 2 Mana. During the Combat Phase, choose an Adventurer: this Adventurer receives Protection up to level 4 (inclusive) until the end of the Combat Phase.
Magic Missile: Cost 3 Mana. Used once per Combat Phase. Target: a Monster; deals 1 Instant Damage to it.
Level 2 Spells
Power Shunt: Cost 3 Mana. Used once per Combat Phase: choose a rolled die and reroll it.
Crystal Wings: Cost 2 Mana. Choose an Adventurer: this Adventurer gains "Flight" until the start of the next Exploration Phase.
Flash: Cost 2 Mana. Activates when an Adventurer has failed an escape attempt: reroll the Escape die.
Healing: Cost 2 Mana (Clerics only). Choose a Stunned Adventurer and "Revive" them.
Magic Arrow: Cost 3 Mana. Used once per Combat Phase: choose a Monster and deal it 1 Instant Damage.
Level 3 Spells
Voltage Surge: Cost 3 Mana. Increases any roll by 1.
Dispel: Cost 2 Mana. Choose an Adventurer's Curse: cancel the effect of the Curse and discard it.
Null Zone: Cost 4 Mana. Activates during the Combat Phase: until the end of the Combat Phase, all special abilities of Monsters are ignored. (Cannot be applied to Monsters with "Mana Drain".)
Fortitude: Cost 3 Mana. Used once per Combat Phase. Choose a Monster: it receives -1 to its combat rolls until the end of the Combat Phase.
Acid Storm: Cost 4 Mana. Used once per Combat Phase. All Monsters receive -1 to their Level until the end of the Combat Phase.
(Transcriber's note: the spell "Power Shunt" is printed as "Силовой Сдвиг" in the spell list and as "Силовой Шунт" in the example on page 18; both refer to the same spell.)
Treasure Table
When you make a roll on a Treasure card, roll one die (all modifiers apply after the roll), then receive the reward according to the result.
- Receive 40 Gold.
- Receive 20 Gold and one Item card.
- Receive 40 Gold and one Item card.
- Receive 20 Gold and 2 Item cards.
- Receive one Treasure card.
- Receive 20 Gold and one Treasure card.
Single-use Items
Single-use Items are kept in the backpack. Unless stated otherwise, all Active Adventurers may use Single-use Items at any time.
After the effect of a Single-use Item has ended, the card is placed in the corresponding discard pile.
Transmutation
Only the Alchemist class is able to carry out Transmutation, and it may have only one transmuted item.
Transmutation may only be carried out during the "Preparation" step or at any time during the Market Turn.
To carry out Transmutation, follow these steps:
- Choose two blue equipment cards from your backpack or from your worn equipment (cards on the table).
- "Attach" them, placing one on top of the other.
- The top card receives the special ability of the card below it.
This works only for special abilities. The purchase / sale cost, the weight (light / heavy) and the characteristics (see page 3) are ignored.
A transmuted item cannot be transmuted again.
If a transmuted item is removed, its components are immediately separated.
Treasure Cards
Treasures are rare and powerful artifacts.
When you receive a Treasure card: take 2 cards from the Treasure deck, choose one and keep it, and shuffle the other back into the Treasure deck.
Flight
Having "Flight" gives no bonuses by itself. In some cases Flight provides advantages, and immunity to some card abilities.