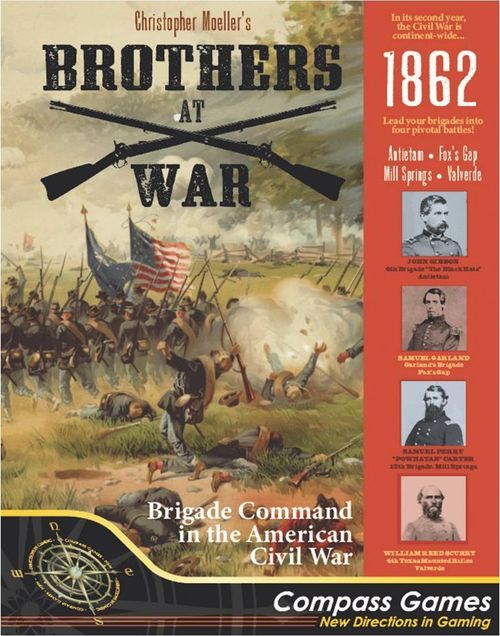
Brothers at War: 1862
Brothers at War: 1862 Rulebook
Table of Contents
Table of Contents
- 1.0 Introduction
- 2.0 Sequence of Play
- 3.0 Activation Phase
- 4.0 Command
- 5.0 Movement
- 6.0 Fire Combat
- 6.1 Types of Fire
- 6.2 Range
- 6.3 Line of Sight (LOS)
- 6.4 Pass-Through Fire
- 6.321 Example of Hexsides and Line of Sight
- 6.341 Example of Elevation and Hindrances
- 6.351 Example of LOS Shadows
- 6.363 Example of Skirmish Zone
- 6.431 Example of Pass-Through Fire
- 6.5 Combat Results
- 6.6 Save Rolls
- 6.7 Retreats
- 7.0 Assault
- 8.0 Brigade Display
- 9.0 Special Units
- 10.0 Reinforcements
- 11.0 Battle Cards
- Clarifications/Errata (Christopher Moeller, 11/14/2022)
1.0 Introduction
1.1 Scale
1.11 BRIGADES: Brothers at War's focus is the civil war infantry brigade: how it maneuvered, how it fought and how long it could hold out in a cauldron of fire like the cornfield at Antietam. Small battles such as Valverde have one brigade per player, while larger battles feature a dozen or more. Units and commanders are members of a brigade. When a brigade activates, its component units move and fight together. Brigades track their reserves and casualties on a brigade display. When a brigade breaks (takes a certain number of casualties), its commander and units are removed from play.
1.12 UNIT SIZE: Each infantry and cavalry firepower point represents 100 men. Each artillery firepower point represents 2 field pieces. Each skirmisher unit represents a company or battalion. Large regiments are represented by two units. Small regiments (those with fewer than 100 men) appear either as skirmishers (58th Virginia), or have their manpower folded into other regiments (Coppen's Zouaves).
1.13 DISTANCE: A hex is 100 yards across.
1.14 TIME: A turn represents 20 minutes.
1.15 LIST OF COMPONENTS
- 520 - 3/4" counters
- 114 - 9/16" counters
- Four 22"x34" maps
- One deck of 52 battle cards
- Two save roll reference cards
- Six off-board artillery cards
- Nine cardstock player aids
- Rulebook & scenario book
- Six 6-sided dice
1.2 Units
Units are infantry regiments, cavalry regiments, artillery sections or batteries and skirmishers (8.4). Units have a firepower rating and a movement rating. Artillery units also have a range rating. Units are double-sided, each side representing a different formation. Infantry units have a formed side and an unformed side. Cavalry units have a mounted side and a dismounted side. Artillery units have a limbered side and a deployed side.
1.21 FIREPOWER RATING: Units attack by rolling dice equal to their firepower rating. Each result of 5-6 is a success, inflicting a hit (6.51).
1.22 MOVEMENT RATING: A unit's movement rating governs how many movement points it may spend when activated. In addition to moving, movement points are spent on actions such as firing and changing formation (5.2).
1.23 RANGE: Artillery units can attack targets up to three times their range rating away in hexes. Other units can attack units up to 3 hexes away.
1.3 Skirmishers
Skirmishers screen friendly forces and harass the enemy (9.1).
1.4 Commanders
Brigade commanders (4.1) help the units in their brigade move and rally.
1.5 Markers
The primary markers used in the game are Finished and Disrupted markers. A hex will never contain more than one of these markers. They affect all units in a hex. If a unit starts or ends its turn in a hex containing one of these markers, it is affected by the marker.
1.51 FINISHED: When a unit completes its activation, fires, retreats or participates in an assault it is Finished. A Finished unit may not move or fire (it defends normally during assault). Finished markers are removed during recovery. Units which are not Finished are ready.
1.52 DISRUPTED: Units may become Disrupted (6.53) by enemy attacks, overstacking or as the result of a battle card. Disrupted markers are removed when a unit rallies (3.211). Units which are not Disrupted are Undisrupted.
1.53 OUT OF COMMAND: When a unit fails a command check (4.31) it is out of command, indicating that if it performs a move action it will become Disrupted. Out of command markers are removed during the Move Commander step. Units which are not out of command are in command.
1.54 OTHER MARKERS: There is a turn marker to track the passage of time, countdown markers (3.13), which determine when a turn ends, control markers to show which player controls a hex, free action markers (2.321) and reserve, exhausted and casualty markers used to track units on the brigade display (8.0).
1.6 Maps
Brothers at War: 1862 contains four maps. Terrain features are described in detail on the Terrain Effects Chart (TEC). If a symbol on a map does not appear on the terrain effects chart, it has no bearing on play.
1.61 FENCES AND WALLS: These are not drawn directly along hexsides (see examples for how to interpret them).
1.611 EXAMPLE: Fences and Stone Walls do not follow hexsides directly. The fences and walls in the rulebook's examples affect movement and line of sight across the hexsides highlighted in orange.
1.62 FOREST PATHS: If a hex's dominant feature is the woods symbol, the hex is a woods hex. What appear to be winding paths through the woods and thickets are aesthetic, and do not change the nature of the hex.
1.7 Dice
Brothers at War uses 6-sided dice (1d6), where a roll of 1-4 is a failure, and a 5-6 is a success. Rolls may be modified in one of two ways:
1.71 NUMBER OF DICE: The number of dice rolled may be increased or decreased (for example, artillery firing at close range gains +1 Firepower, meaning it rolls one additional dice).
1.72 TO HIT NUMBER: The number required to hit may be modified (for example, Disrupted units in an assault have -1 to hit, meaning a roll of a 5 (normally a success), becomes a 4 (a failure).
1.73 CHECKS: Units will make checks during play, such as rally and command checks. To perform a check, one dice is rolled. If it is a success, the check succeeds, otherwise the check fails.
1.8 Displays
During the game, one Brigade display (8.0) is used by each player. One Activation display (3.11) is placed between the players, used by both of them.
1.9 Opaque Container (The Cup)
An opaque container, referred to in these rules as "the cup", must be provided by the players.
2.0 Sequence of Play
Each turn in Brothers at War contains a set of phases as outlined below.
2.1 Preparation Phase
Activation markers not committed to boxes on the activation display are placed in the cup. One countdown marker is placed in the cup.
2.11 BOXES: The activation display contains a number of boxes: the Countdown Markers box contains countdown markers that have not been added to the cup; the Broken Brigades box contains activation markers of broken brigades; the Exhausted Brigades box contains activation markers of exhausted brigades; the Uncommitted Brigades box contains activation markers of uncommitted brigades.
2.12 REMNANTS RECOVER: If there are remnant units (9.2) on the map, they recover now (3.21).
2.13 FREE ACTIVATIONS: Resolve free activations (2.321).
2.2 Activation Phase
2.21 SELECTION STEP: Draw a marker from the cup and place it on the activation track. The first marker goes in the space marked "start". Subsequent pulls are placed in the spaces that follow. If a space contains a symbol (3.14), its effect triggers when a marker is placed on it.
2.22 ACTIVATION STEP: When a brigade's activation marker is pulled in the selection step, its owner conducts the following series of steps:
- RECOVER (3.21)
- ACTIVATE UNITS or PASS (3.22)
- MOVE COMMANDER (4.11)
When the player Finishes these steps, return to the selection step.
2.23 FINAL COUNTDOWN: Once two countdown markers are on the activation track, the phase ends.
2.3 End Phase
Players prepare for the next turn.
2.31 DISCARD AND DRAW STEP: Both players discard all battle cards in excess of their starting hand size (players may discard additional cards if desired), then draw to their starting hand size. If there are no special rules, players have a hand size of 3 cards. (11.1).
2.32 CLEAN UP STEP: All remaining activation markers are removed from the cup.
- a) Countdown Markers (3.13): All countdown markers except one are returned to the countdown marker box.
- b) Exhausted Brigades (8.111): Each exhausted brigade places one of its activation markers in the exhausted brigades box. Each brigade which is no longer exhausted, removes its marker from the box.
- c) Inactive Brigades: Each brigade that ended the turn without one of its activation markers on either the activation track or in the exhausted box, regains one spent reserve and recovers. This includes divisional artillery.
- d) Hex Control: Determine if the control of any hexes changes (2.41).
2.321 FREE ACTIVATIONS: Occasionally, a brigade will have only one Activation Marker in play, as opposed to the usual two. When such a brigade is inactive, its owner gains a Free Activation during the next preparation phase (2.1). To conduct a free activation, a free activation marker is placed in the start space of the activation track, and the brigade resolves one complete brigade activation, as outlined in the rules for the Activation Phase.
If more than one brigade is eligible for a free activation, players alternate placing free activation markers. The player holding the most free activation markers activates first*. Free activation markers placed on spaces with symbols (3.14) trigger them. Once all free activations are complete, proceed to the Activation Phase. A brigade cannot gain a free activation marker two turns in a row.
* If players hold an equal number of free activation markers, each rolls 1 dice, with the high roll activating first.
2.33 FATE CHECK STEP: Each brigade with an activation marker in the exhausted brigades box makes a fate check (rolls 1d6 and consults the following table). The USA player resolves fate checks for his or her brigades first.
- a) Break: on a roll of 1-3 the brigade breaks. Remove its units and brigade commander from play and place its activation markers in the broken brigades box. Place a generic remnant unit (9.2) on the map in any one hex previously occupied by a unit of the broken brigade.
- b) Exhausted: on a roll of 4-5 the brigade remains exhausted. It may:
- Recover (3.21)
- -or-
- Disrupt all of its Undisrupted units and perform an immediate movement action with any or all of them, including the brigade commander. This movement may provoke point blank fire (6.15).
- c) Regroup: on a roll of 6 or higher, the brigade is no longer exhausted. It gains one reserve (8.1) and recovers 3.21. If the brigade has an activation marker in the exhausted box, remove it.
FATE CHECK MODIFIER: when making a Fate Check, add +1 to the die roll if all units in the brigade are 7 or more hexes away from all enemy units in line of sight (6.3).
2.34 ADVANCE TURN MARKER: Move the turn marker to the next space on the turn track. If this was the final turn of the game, check victory conditions (2.4).
2.35 REINFORCEMENT STEP: Reinforcements due to arrive this turn are placed near their entry hex(es) and their activation markers are added to those already in play.
2.4 Determining Victory
Each scenario has its own victory conditions (see the scenario booklet). There are two types of victory conditions: instant victory, in which the game ends the moment the condition is met, and victory conditions that are resolved at the end of the scenario.
2.41 HEX CONTROL: Control of key hexes may be used to determine victory. Unless scenario rules state otherwise, all such hexes begin play in neither player's control. A hex becomes controlled by a player when it is occupied during a clean-up step (2.32) by one of that player's units (mark the hex with a control marker). A hex remains in a player's control until an enemy unit gains control of it. Infantry, cavalry and artillery units may gain control of hexes, skirmishers and brigade commanders may not.
3.0 Activation Phase
3.1 Activation Markers
Each brigade in the game has one or two activation markers. Divisional Artillery (9.3) has its own activation markers (labeled USA Artillery and CSA Artillery).
When a brigade enters the game, its activation markers enter play as well. In certain scenarios, a brigade's activation markers may enter play at different times.
3.11 THE ACTIVATION DISPLAY: This display contains the activation track, plus boxes for countdown markers, exhausted brigades (8.111) and uncommitted brigades. All activation markers and countdown markers in play are either on this display or in the cup.
3.12 THE CUP: During the preparation phase, activation and countdown markers are placed in the cup. During the activation phase, they are drawn out randomly, and placed on the activation track, beginning with the space marked START.
3.13 COUNTDOWN MARKERS: Countdown markers determine when the activation phase ends. When two of these markers have been placed on the activation track, the activation phase is over. One countdown marker is placed in the cup during the preparation step. The others begin in the countdown markers box.
3.14 ACTIVATION TRACK SYMBOLS: Some spaces on the activation track contain symbols. When a marker is placed in one of these spaces, it triggers one of two events:
- a) A countdown marker is added to the cup from the countdown markers box.
- b) Both players draw a battle card.
3.15 UNCOMMITTED BRIGADES: Scenarios may have instructions for uncommitted brigades. The activation markers of these brigades begin play in the uncommitted brigades box. During the preparation phase, an uncommitted brigade's owner may move its activation markers from the uncommitted brigade box to the turn track. On the following turn, that brigade becomes committed.
Once a brigade commits, it cannot become uncommitted. An uncommitted brigade may support divisional artillery (8.12). Doing so does not cause it to commit.
3.151 AUTOMATIC COMMITMENT: If an enemy unit fires upon or moves within 3 hexes of a unit from an uncommitted brigade, immediately move the brigade's activation markers from the uncommitted brigade box to the turn track. On the following turn, the brigade becomes committed. An uncommitted brigade will commit automatically if it conducts opportunity fire or defends against an assault. It will not commit automatically if one of its units retreats, or it spends reserves, including support for divisional artillery (8.12).
3.2 Activating Brigades
When a brigade's activation marker is placed on the activation track, its units and brigade commander recover, then activate for movement and combat following the sequence below:
3.21 RECOVERY: When a brigade's activation marker is drawn, units in the brigade which are Finished become ready (1.51), units which are Disrupted (6.53) and not adjacent to enemy units make rally checks, and then ready units not in command range make command checks (4.2).
3.211 RALLY CHECKS: When required to make a rally check (1.73), a unit or stack rolls 1d6, and modifies its die roll as follows:
- +1 if it is stacked with or adjacent to its brigade commander.*
- +1 if it is 7 or more hexes from all enemy units in its LOS.
If the check succeeds, the unit becomes Undisrupted. If the check fails, the unit's owner either flips the disrupted marker to its Finished side or leaves it in place.
* A divisional artillery unit gains this modifier if adjacent to any friendly commander.
3.212 UNITS UNABLE TO RALLY: A unit adjacent to an enemy unit may not make a rally check (it remains Disrupted).
3.22 ACTIVATE: Once recovery is complete, the brigade activates its units one at a time. Activated units may move, fire and perform other actions (5.0). A player may activate none, some, or all of a brigade's units.
3.221 PASS: If a brigade passes (activates none of its units), its owner may draw a battle card (11.23) and must, if subsequently holding cards in excess of his or her hand size, discard a card.
3.23 MOVE COMMANDER: After a player has finished activating a brigade's units, the brigade's commander may be moved (4.11) and all out of command markers are removed from the brigade's units. Draw another activation marker from the cup.
3.3 Ending the Activation Phase
When the first countdown marker in a turn is drawn, it is placed on the activation track (triggering an event if appropriate), and another marker is drawn. When the second countdown marker in a turn is drawn, it is placed on the activation track (triggering a card draw if appropriate), and the Activation Phase ends.
4.0 Command
4.1 Brigade Commanders
Brigade commanders place units from their brigade in command and help units in their brigade rally from Disruption. Brigade commanders move during the move commander step. Commanders cannot be eliminated and are unaffected by markers.
Divisional artillery units (9.3) do not have a dedicated brigade commander.
4.11 MOVING COMMANDERS: Unlike units, brigade commanders do not have firepower or movement ratings and do not perform actions. During the move commanders step, they may be moved to any valid hex on the map (they may not be placed in enemy occupied hexes or hexes prohibited to movement, such as unfordable river hexes).
4.12 DISPLACEMENT: Brigade commanders cannot be attacked. If an enemy unit occupies a hex adjacent to a lone brigade commander, the commander is displaced (moved to any legal hex on the map). When a unit stacked with a brigade commander retreats, the commander may accompany it.
4.2 Command Range
A unit within 4 hexes of its brigade commander is in command and activates normally. This 4 hex radius is a commander's command range. Command range may not be traced through enemy occupied hexes or hexes prohibited to movement (such as unfordable river hexes).
4.21 DIVISIONAL ARTILLERY AND COMMAND: Divisional artillery units are in command if within the command range of any friendly brigade commander. A divisional artillery unit that's stacked with or adjacent to a friendly brigade commander gains +1 modifier to rally checks (3.211).
4.3 Out of Command
Ready units outside the command range of their brigade commander must make a command check during recovery (3.21). If the check succeeds, the unit may move normally. If it fails, it is marked out of command. An out of command unit disrupts prior to performing a move action, and may not deploy skirmishers. It may perform any other action: change formation, fire or assault. Out of command markers are removed during the Move Commander step.
4.31 COMMAND CHECKS: A unit making a command check modifies its die roll as follows:
- +1 if it is 7 or more hexes from all enemy units in its line of sight.
- +1 if it has the cavalry symbol (including cavalry units, horse artillery units and cavalry skirmishers).
4.32 REINFORCEMENTS: During the activation in which they enter the map, reinforcements are automatically in command.
5.0 Movement
5.1 Movement in Overview
Units move individually, or as stacks (5.32) when their brigade's activation marker is drawn. When a unit begins spending movement points it becomes active. When it Finishes spending movement points, it is Finished (1.51) and another unit in its brigade may become active.
5.2 Actions
Movement is just one of a number of actions a unit may conduct while active, each action costing the unit movement points. Active units spend movement points (MP's) up to and not exceeding their movement rating, both to move across the map, and to perform actions. Possible actions are:
- Move
- Change Formation
- Assault
- Fire
- Hold Fire
- Deploy Skirmisher
- Disband Skirmisher
5.21 MOVE: Moving into an adjacent hex costs a unit 1 movement point, plus any additional costs for terrain; see the Terrain Effects Chart (TEC). Costs are listed for each terrain type under "Move".
Example: entering a Woods hex costs 2 movement points for unformed infantry (1+1 for the Woods move penalty).
5.211 ROADS AND TRAILS: Units never spend more than 1 movement point when entering a road or trail hex, if they are entering that hex from a hex containing a connecting road or trail.
5.212 ROAD MARCH: Any unit which begins its activation on a road hex, gains +1 to its movement rating. The unit must spend its entire activation on connected road hexes in order to gain the bonus. A unit using road march may not enter a hex adjacent to a non-skirmisher enemy unit.
An infantry unit which begins its activation formed may not gain the road march benefit.
5.213 RIVERS: River hexes may not be entered by any unit except across ford hexsides. If crossing multiple river hexes, all hexsides crossed must be ford hexsides.
5.214 EXITING THE MAP: Units may not exit the map by moving off a map edge unless scenario instructions allow them to.
5.22 CHANGE FORMATION: Changing formation (flipping a unit over to reflect its new formation) costs 2 Movement Points.
5.221 FORMATION AND MOVEMENT: When a unit changes formation, its remaining movement points are limited by its new facing. For example, if a dismounted cavalry unit (movement rating 4) moves two hexes (2 MP) and changes formation (2 MP) flipping to its mounted side (movement rating 8), it will have 4 unspent movement points remaining. Conversely, if a mounted cavalry unit (movement rating 8) moves 3 hexes (3 MP) and then changes formation (2 MP) flipping to its dismounted side (movement rating 4), it is marked with a Finished marker because the 5 movement points it spent while mounted exceeds the movement rating 4 it has when dismounted.
5.222 DEPLOYING AND LIMBERING ARTILLERY: As its first action when activated, a deployed artillery unit may spend 2 movement points to flip to its limbered side (gaining the movement rate printed on that side of the counter, minus 2). A limbered artillery unit may spend 2 movement points to flip to its deployed side, at which point it becomes finished (its deployed movement rating being 0).
5.23 ASSAULT (7.0): If a unit enters an enemy occupied hex, an assault occurs. After resolving the assault, the unit is Finished.
5.24 FIRE (6.0): Firing costs 2 movement points. After resolving the fire attack, the unit is Finished. Artillery units which begin their activation deployed may fire at no cost in MP's.
5.25 HOLD FIRE: A unit may spend 3 movement points to end its activation without a Finished marker. This may not be combined with an assault or fire action.
5.26 DEPLOY SKIRMISHERS (9.13): A unit may use its activation to deploy one of its brigade's skirmishers.
5.27 DISBAND SKIRMISHERS (9.14): A deployed skirmisher may disband instead of activating.
5.3 Stacking
A maximum of two units may occupy the same hex (called stacking). Brigade commanders and markers do not count toward stacking limits.
5.31 STACKING DURING MOVEMENT: If the 2-unit-per-hex limit is exceeded during movement or retreat, any Undisrupted non-moving units in the hex are Disrupted (formed infantry becomes unformed). Skirmishers are ignored for stacking purposes during movement.
5.32 FORMING A STACK: A stack is formed when two units end their activation in the same hex. Only units from the same brigade may form a stack. Divisional Artillery (9.3) counts as its own brigade for stacking purposes. Skirmishers may not end an activation stacked.
5.33 ACTIVATING AS STACKS: Two units may activate together if they begin their activation stacked. Stacks have the movement rating of the slowest unit in the stack. A unit may be dropped off as a stack moves, but the dropped unit is Finished. While active, units spend movement points as a stack rather than individually.
5.34 MIXED STACKS: Different unit types/formations may stack and activate together, as long as they are from the same brigade. Mixed stacks only gain a formation save roll if all units in the hex are unformed infantry or dismounted cavalry. When a formed infantry unit ends its activation in a hex with a disrupted marker, it becomes unformed. When a mixed stack containing infantry takes a hit, formed infantry becomes unformed before the hit is assessed. When assaulting with a mixed stack, make assault rolls for units individually. When moving as a stack, costs are paid by both units, using the highest movement cost of the two when entering a hex. Movement points are spent as a stack rather than individually, meaning if one unit spends points to perform an action that the other unit does not, the stack's movement point as a whole is reduced.
Example: a hex contains an unformed and a formed infantry unit (each with 4 movement points). The unformed infantry changes formation (2 MP) so that both units are now formed. The stack fires using combined fire (2MP). The stack ends its activation.
5.35 REGIMENTAL STACKS: When two units with the same regimental or battery name stack, they count as a single unit for purposes of rule 5.31 (only). Units capable of regimental stacking have an "a" or "b" notation beside their unit symbol.
Example: The two 28th Pennsylvania units at Antietam can form a regimental stack. McRae and Mishler's artillery units from 2nd & 3rd Cavalry at Valverde can form a regimental stack as well. Normally, if a stack moves through a hex occupied by a single unit, the inactive unit will become Disrupted, but because a regimental stack counts as 1 unit while moving, the unit moved through remains unaffected.
5.36 STACKS AND COMBINED FIRE: Formed infantry units may combine fire when activated as a stack (6.14), as may artillery units. Artillery may not combine fire with formed infantry. All other units/formations may only fire a single unit when activating as a stack.
5.37 HITS, MARKERS AND CHECKS: Stacks making a command check (4.31) or rally check (3.211) roll once, affecting both units in the stack.
When one unit in a stack is Disrupted, both units are Disrupted. If an Undisrupted unit and a Disrupted unit form a stack, both become Disrupted (5.31). If the stack splits up, the Disrupted status goes with each unit. If a stack containing both formed and unformed infantry units takes a hit, the formed unit unforms, and the stack is Disrupted.
When a unit or stack fires, it's marked with a Finished marker. Once a Finished marker is present in a hex, no additional fire can come out of that hex until the Finished marker is removed.
Example: an infantry unit moves to hex A and fires. Later, another infantry unit from the same brigade ends its move in hex A, forming a stack. The second unit may not fire (because the hex already contains a Finished marker).
5.38 ELIMINATION: If a Disrupted stack takes a hit (6.51), one unit will be eliminated. If the stack takes two hits, both units will be eliminated.
5.39 RETREAT: Stacks cannot split up when retreating (6.7). Stacking limits apply during retreats.
5.4 List of Formations and Their Effects
Units have different capabilities and limitations depending on their formation:
5.41 INFANTRY
a) FORMED (front)
- May not enter a woods hex except along a road or trail
- May conduct combined fire
- Gains +1 to hit when making assault rolls
- Becomes unformed when hit (instead of Disrupted)
b) UNFORMED (back)
- Gains 1 save roll when targeted by enemy fire
5.42 ARTILLERY
a) DEPLOYED (front)
- A unit which begins its activation deployed may fire once at no cost in MP's.
- May spend 2 movement points to limber
- May conduct combined fire
- Fires at close range (3 hexes or less) with +1 firepower (including doing assault if Undisrupted).
- Fires at long range (2x printed range or more), with -1 to hit penalty.
- Fires at extreme range (3x printed range), inflicting a maximum of 1 hit.
- Target does not gain save rolls due to range.
- May not fire at skirmishers.
b) LIMBERED (back)
- May move
- May not assault
- Horse artillery (artillery unit with the cavalry symbol) may retreat up to 4 hexes (6.72).
5.43 CAVALRY
a) DISMOUNTED (front)
- Gains 1 save roll when fired upon
- Gains +1 modifier when rolling command checks (4.31)
- May retreat up to 4 hexes (6.72)
b) MOUNTED (back)
- May retreat up to 4 hexes (6.72)
- Gains +1 modifier when rolling command checks (4.31).
5.44 SKIRMISHERS
a) Infantry / Dismounted Cavalry (front)
- May not end its move stacked
- May not move adjacent to enemy units (including other skirmishers)
- Pays no terrain costs when moving
- Disbands when:
- Disrupted
- An enemy unit enters an adjacent hex
- Gains 1 save roll when fired upon
- May not be the target of artillery fire
- May be eliminated from its brigade's display to regain one spent reserve
- Exerts a skirmish zone (6.36)
- A skirmisher with the sharpshooter symbol can fire at targets 4 hexes away
- Conducts point-blank fire (6.15) any time a unit enters an adjacent hex
- May not retreat
- Cavalry gains +1 modifier when rolling command checks (4.31)
b) Mounted (back) identical to dismounted skirmishers except:
- Pays terrain costs as mounted cavalry when moving
- Gains +1 modifier when rolling command checks (4.31)
- Does not exert a skirmish zone.
5.45 REMNANTS
- Cannot activate, move, retreat or spend reserves
- Recover during the preparation phase
6.0 Fire Combat
Most combat in Brothers at War is resolved using the fire combat rules. When conducting a fire action (5.24), the firing unit targets one enemy occupied hex within range (1.23), to which it can trace an unblocked line of sight (6.3). It rolls dice equal to its firepower, with every success scoring one hit. The opposing player rolls dice to generate saves (6.6), with every success negating one of the hits scored by the firing player. If more hits than saves are scored, the difference will affect the target.
6.1 Types of Fire
Fire is conducted by ready, Undisrupted units while active (standing or moving fire), or when an opponent's unit is active (opportunity fire). Conditions may allow standing or moving fire to be conducted as pass-through fire. Finished and Disrupted units may conduct point blank fire. Pairs of formed infantry and artillery units may conduct combined fire.
6.11 STANDING AND MOVING FIRE: An active unit spends 2 MP to fire. After firing, the unit is marked with a Finished marker, even if it has unspent movement points remaining. A unit which conducted a move action prior to firing conducts Moving Fire. A unit which did not conduct a move action before firing conducts Standing Fire (changing formation does not count as movement).
6.12 OPPORTUNITY FIRE: Opportunity fire is conducted by inactive units, targeting enemy units as they move. A ready, Undisrupted unit may conduct opportunity fire when an active unit performs a Move action (5.21) within its range and line of sight. The unit conducting opportunity fire interrupts the active player's turn, resolves fire, and becomes Finished. If the targeted unit has movement points remaining, it may continue to act; if Disrupted, its movement must conform to those rules (6.53); if it retreats (6.7) it becomes Finished.
- a) A unit may be the target of one opportunity attack per move action. If there are multiple units eligible to fire, the owner chooses which to use.
- b) Units may combine fire (6.14) when conducting opportunity fire.
- c) Opportunity fire cannot be conducted as pass-through fire (6.4).
- d) Artillery units cannot conduct opportunity fire attacks at targets more than 9 hexes away.
- e) Opportunity fire is not allowed into a hex that contains friendly units.
- f) Ignore non-moving units and/or markers when conducting opportunity fire. Only the moving unit/stack is affected.
6.13 SKIRMISHERS: Skirmishers (8.47) may conducted standing, moving or opportunity fire, with the following modifications:
6.131 ONE HIT MAXIMUM: Skirmishers never inflict more than one hit per fire attack (6.5).
6.132 LIMITED SAVES: The only save rolls that a unit targeted by skirmishers may make are those generated by moving fire (6.11) and retreats (6.7).
6.133 NO PASS-THROUGH FIRE: Skirmisher fire is not pass-through fire, nor does the presence of a skirmisher trigger enemy pass-through fire (6.4).
6.134 SHARPSHOOTERS: Skirmisher units with the sharpshooter ability may target units up to 4 hexes away.
6.135 VERSUS ARTILLERY: Skirmishers may not be the target of artillery fire.
6.14 COMBINED FIRE: Two formed infantry units from the same brigade may conduct combined fire, totaling their firepower and making one attack. Two artillery units may do the same. Units combining fire must be stacked, or in adjacent hexes. Units may combine fire using standing, moving, opportunity or point blank fire. When combining the fire of adjacent units, both must have a clear LOS to the target. If ranges to the target are different, use the longer of the two. The firing player may choose either firing hex from which to determine pass-through fire (6.4).
6.141 EXAMPLE OF COMBINED FIRE
- A. The 6th Wisconsin is unformed, so may not combine fire with the 2nd Wisconsin. Only formed infantry units may combine fire.*
- B. The 2nd Wisconsin and 19th Indiana may combine fire. The range is 3 (the longer of the two ranges).
- C. The 19th Indiana and 30th New York are from different brigades. Units must be from the same brigade to combine fire.*
- D. The 30th New York and one of the units in 0707 may combine fire (not both, a maximum of two units may combine fire). Both units in 0707 are finished after the fire is resolved.
- E. The 22nd and 84th New York may combine fire as a stack.
* Artillery may combine fire like formed infantry. All friendly divisional artillery units are considered members of the same brigade.
6.15 POINT BLANK FIRE: If a unit enters a hex adjacent to an enemy unit, and, in the same activation attempts to leave that hex using a move action, the enemy unit is eligible to make an opportunity fire attack, regardless of its status (Disrupted or Finished). This is the only way such a unit can fire. Units may conduct point blank fire any number of times.
6.151 SKIRMISHERS AND POINT BLANK FIRE: A Finished skirmisher may conduct point blank fire any time an enemy unit enters a hex adjacent to it. After resolving fire, the skirmisher disbands.
6.16 ARTILLERY FIRE: Artillery is the only unit type with a printed range. Artillery which fires at close range (0-3 hexes) gains a +1 firepower rating. Artillery which fires at long range (up to twice printed range), has a -1 to hit penalty. In addition to the long range penalty, artillery which fires at extreme range (up to three times printed range) will do a maximum of 1 hit to the target (6.5).
Ordinarily, an artillery unit's line of sight is not blocked by friendly and enemy units at lower elevations (6.34), however friendly units cast LOS shadows which do block such fire (6.35).
Artillery fire is unaffected by skirmish zones (6.36).
Artillery may not fire at skirmisher units.
Targets of artillery fire do not gain save rolls due to range (6.62).
Artillery may conduct combined fire.
6.161 OFF-BOARD ARTILLERY FIRE: Scenarios may have artillery units firing from outside of the play area (9.4).
6.2 Range
Artillery units may target units up to 3 times their range rating away in hexes (6.14). Skirmishers with the sharpshooter symbol may target units up to 4 hexes away. All other units may fire at targets up to 3 hexes away.
6.3 Line of Sight (LOS)
Units making a fire attack must trace a clear line of sight (LOS) to their target. A line of sight is an imaginary line, traced from the center of a firing hex to the center of a target hex. Line of sight is blocked if any hex the sight line crosses contains a LOS obstacle (a unit, an elevation change or certain terrain features). Note that there are also terrain features called hindrances (6.33) which hinder but do not block line of sight.
6.31 TERRAIN FEATURES: The Terrain Effects Chart (TEC) indicates which types of terrain affect LOS, and in what way (as obstacles or hindrances). Artwork on the game map identifies a hex or hexside's terrain type. The artwork itself does not interact with line of sight.
Example: A line of sight, traced through a woods hex, is blocked even if it does not touch any part of the woods symbol in the hex. Conversely, a line of sight, traced through a level 1 hex, is not blocked even if it passes through part of a level 2 elevation symbol that extends into that hex.
6.32 HEXSIDES AND LINE OF SIGHT: When tracing a sight line precisely along one or more hexsides, the presence of blocking hexes on both sides of the line will block the LOS. If hexes on only one side of the line block LOS, the LOS is open (line of sight is effectively traced through the open hexes). The firing player may choose which side of the sight line to use to trace LOS (i.e. if one hex contains hindering terrain and the other does not, the player can choose to ignore the hindering terrain).
6.321 See EXAMPLE OF HEXSIDES AND LINE OF SIGHT below.
6.33 HINDRANCES: Terrain classified as a hindrance is not an obstacle and does not block LOS. If a firing unit traces its line of sight through (not just into) a hex containing a hindrance, the target gains one save roll for each different type of hindrance the line of sight crosses. IMPORTANT: multiple incidences of the same type of hindrance do not give the target additional save rolls. Hindrances other than those casting LOS shadows (6.35) are ignored when attacker and target are at different elevations.
6.34 ELEVATION: Maps in Brothers at War contain multiple elevation levels, where level 2 is higher than level 1, level 3 is higher than level 2, and so forth. When the firing unit and target are at different levels, there are three rules to remember:
- Elevation rule 1: Line of sight is blocked by hexes between the units that are higher than both.
- Elevation rule 2: Line of sight is blocked by hexes between the units that are at the same level as the higher unit.
- Elevation rule 3: Line of sight is not blocked by hexes between the units that are lower than the higher unit (exception LOS shadows (6.35))
Example: a LOS exists between observers at level 2 and level 1 regardless of obstacles at level 1.
6.341 See EXAMPLE OF ELEVATION AND HINDRANCES below.
6.35 LOS SHADOWS: While LOS between units at different elevations is not affected by terrain lower than the higher unit (Elevation Rule 3), there is an exception. Any hex containing a terrain feature or friendly unit affects LOS into the hex directly behind it. It casts a "shadow" into that hex, but only if the shadowed hex is not higher than the hex with the terrain feature or friendly unit (i.e. shadows do not go "up"). If the lower unit is in the "shadow" hex, LOS is affected by the terrain casting the shadow (i.e. if it is an obstacle, the LOS is blocked, and if it is a hindrance the defending unit gains save rolls).
Terrain features (woods, cornfields, etc...) cast LOS shadows. Elevation changes (slopes) do not.
6.351 See EXAMPLE OF LOS SHADOWS below.
6.36 THE SKIRMISH ZONE: Skirmishers do not block line of sight, but they generate a skirmish zone that may. All hexes in and adjacent to a skirmisher comprise its skirmish zone.
6.361 EFFECTS: If a firing unit traces its line of sight through (not just into) an enemy skirmish zone hex, the LOS is blocked if:
- The target of the attack and the skirmisher generating the zone are from the same brigade, or
- The target of the attack is an artillery unit.
When LOS is blocked in this way, the skirmisher itself becomes the target of the attack. The attacker must be able to trace line of sight and range to the skirmisher generating the zone in order to conduct the attack. If the skirmisher cannot be targeted, neither it nor the unit its zone is protecting may be fired upon. Opportunity fire is permitted against units protected by a skirmish zone, however the fire targets the skirmisher generating the zone, not the moving unit.
6.362 EXCEPTIONS: Artillery fire ignores skirmish zones, and mounted cavalry skirmishers do not generate skirmish zones.
6.363 See EXAMPLE OF SKIRMISH ZONE below.
6.37 FRIENDLY UNITS: Friendly units block LOS through a hex, regardless of elevation, with two exceptions:
- a) Skirmisher units do not block LOS (but their skirmish zone may).
- b) LOS for artillery fire is not blocked if either the firing unit or target hex is higher than the intervening unit's hex. Recall however that friendly units cast LOS "shadows" which can block this type of fire (6.35).
6.4 Pass-Through Fire
When conducting standing or moving fire, if the LOS traced from the firing unit's hex through the target hex would enter an enemy occupied hex directly behind the target hex, the fire is conducted as pass-through fire and the firing unit gains +1 firepower. Range to the second hex is not a limiting factor when determining pass-through fire. If the LOS through a target hex lies precisely along a hexside, use rule 6.32 to determine if pass-through fire occurs.
6.41 MASSED TARGET: If both hexes in a pass-through fire calculation contain stacks, the attacker gains an additional +1 firepower.
6.42 EXCEPTIONS FOR ARTILLERY AND SKIRMISHERS: Artillery and skirmisher units are ignored when calculating pass-through fire.
6.43 EXCEPTIONS FOR TERRAIN AND ELEVATION: Pass-through fire is negated if the LOS to the second hex is blocked by an obstacle other than the target unit (if both hexes were woods hexes for example) or if the hexes are at different elevations.
6.431 See EXAMPLE OF PASS-THROUGH FIRE below.
6.321 Example of Hexsides and Line of Sight
When a line of sight is traced precisely along one or more hexsides, the firing player decides which side of the sight line to trace the LOS through.
- Patterson's battery is firing precisely along a series of hexsides at the 19th Indiana. It can trace along the hexes on the left side of the sight line (A), or the right side (B). Option A (0613-0712-0813-0912-1013) is blocked by the 84th NY in 0912. Option B (0613-0713-0813-0913-1013) is open. The 19th Indiana gains 1 save roll for the fence hexside between 0913 and 1013.
- Here, Patterson's battery is firing precisely along a series of hexsides at the 19th Indiana. Tracing along the right side of the sight line (Option C: 0709-0809-0808-0907-0906), the 84th New York in 0809 blocks LOS. Tracing along the left side of the sight line (Option D: 0709-0708-0808-0807-0906), the 22nd New York in 0807 blocks LOS. Patterson cannot fire at the 19th Indiana, because both sides of the sight line are blocked.
- Here, Patterson's battery is firing along a series of hexsides at the 30th New York. It could trace along the hexes to the left side of the line (Option F: 0511-0411-0410-0309-0308), but that is blocked by a higher elevation hex in 0309. Tracing along the right side of the line (Option E: 0511-0510-0410-0409-0308) there are no obstructions. Patterson's fire is unblocked.
- Finally, the 11th Mississippi is firing precisely along a hexside at the 2nd Wisconsin. There is nothing to block line of sight, so the fire may take place. Tracing along the left side of the line (Option G: 0313-0413-0513) gives the 2nd Wisconsin one save for the fence between 0413 and 0513. Tracing along the right side of the line (Option H: 0313-0414-0513) ignores the fence. The CSA player chooses to trace its LOS through the hexes on the right.
6.341 Example of Elevation and Hindrances
Figure 1 shows lines of sight from Patterson (level 4) to a variety of targets. Lines of sight B and D are both blocked because of Elevation Rule 2 (Line of sight is blocked by hexes between the units that are at the same level as the higher unit.) If Patterson were at level 3, LOS C would be blocked in the same way, but because Patterson is at level 4, the elevated hexes at level 3 don't affect its LOS.
Figure 2 shows the effects of multiple hindrance terrain types on a fire attack. Patterson rolls 3 dice. If any of them hit, the 19th Indiana will make save rolls. These will be (a) 1 from the cornfield hexes (hindrance), (b) 1 from the D.R. Miller Farm (hindrance), (c) 1 from the orchard hexes (hindrance) and (d) 1 for the wooden fence that the 19th is directly behind (cover), for a total of 4 save dice. Note that each type of hindrance gives the defender one save roll, not each incidence of such a hex. Also note that the only fence that grants a save roll is the one that the 19th Indiana is directly behind.
6.351 Example of LOS Shadows
Patterson's Georgia battery is on a level 4 elevation at Antietam. All of its potential targets are at level 2.
- A) Blocked LOS: the 30th New York is in the shadow of the 11th Mississippi (a friendly unit).
- B) Open LOS: elevation changes do not cast LOS shadows.
- C) Blocked LOS: the 84th New York is in the shadow of the woods hex in 0406.
- D) Open LOS: the 22nd New York would be in the shadow of the 84th New York if it were a CSA unit (only units friendly to the firing unit cast LOS shadows).
- E) Open LOS: the 6th Wisconsin is in the shadow of the Dunker Church which doesn't block, but will affect Patterson's fire (the building is a Hindrance).
6.363 Example of Skirmish Zone
The 2nd U.S. Sharpshooter skirmisher exerts a skirmish zone into all of the shaded hexes. These affect fire as follows:
- A) Blocked LOS: a skirmish zone protects units from the skirmisher's brigade (the 11th Mississippi must target the skirmisher if it fires).
- B) Blocked LOS: a skirmish zone protects friendly artillery (the 11th Mississippi must target the skirmisher if it fires).
- C) Open LOS: the skirmisher is from Phelps' brigade, the 6th Wisconsin is from Gibbon's brigade. Skirmishers only protect units from the same brigade.
- D) Open LOS: Artillery fire ignores skirmish zones.
6.431 Example of Pass-Through Fire
- A) Patterson's Georgia battery (0408) fires at the New York regiments in 0607. Its firepower is 3, increased to 4 because the target is at close range (0-3 hexes). The Wisconsin regiments in 0706 trigger pass-through fire, bringing Patterson's firepower to 5. Because both hexes contain stacks, this is increased to 6.
- B) Patterson fires at the 84th New York in 0506. Base firepower is 4 (close range). Because the line of sight is being traced exactly along a hexside, the firing player chooses which hexes to use when determining pass-through fire. Both sides have open lines of sight: the right side through hexes 0507 & 0606, and the left side through hexes 0407 & 0505. Patterson selects the right side, triggering pass-through fire to the 19th Indiana in 0606, and increasing its firepower to 5.
- C) The 11th Mississippi fires on the 84th New York. Its line of sight, traced from the center of its hex to the center of 0506 continues into 0606, which contains the 19th Indiana. Its base firepower of 2 becomes a 3.
6.5 Combat Results
Regardless of the number of successes rolled, an attack will never score more hits than the maximum allowed. An assault will inflict a maximum of 4 hits, a fire attack 3 hits, skirmish fire (6.131) and extreme range artillery fire (6.16) 1 hit.
| Attack | Maximum |
|---|---|
| Assault | 4 Hits |
| Fire | 3 Hits |
| Skirmish Fire | 1 Hit |
| Extreme Range Artillery Fire | 1 Hit |
Example: Two 5 Firepower Union regiments conduct combined fire, rolling six successes. This results in 3 hits (the maximum for a fire attack).
6.51 HITS: Each hit inflicted on a target causes the following:
| Target Type | Effect |
|---|---|
| Formed infantry unit | unit is Unformed |
| Undisrupted unit | unit is Disrupted |
| Disrupted unit | unit is Eliminated |
| Skirmisher | unit is Disbanded |
Multiple hits cause multiple effects. Example: three hits on a formed infantry unit will cause it to unform, then Disrupt, then be eliminated.
6.52 HITS ON FORMED INFANTRY: If a hex contains formed infantry, the first hit causes it to flip to its unformed side. In a mixed stack of formed and unformed infantry, a hit causes the formed unit to flip, and Disrupts both units. A second hit would eliminate one of the infantry units.
6.53 DISRUPTION: Place a Disrupted marker on a unit or stack when it becomes Disrupted (if marked with a Finished marker, flip the marker over to its Disrupted side). A Disrupted unit is eliminated if Disrupted again.
6.531 EFFECTS: A Disrupted unit suffers the following penalties:
- May not perform actions other than Move (5.21)
- In assault, suffers -1 to hit
- Eliminated if hit
- May not close distance to an enemy unit that is 7 or fewer hexes away, and in its line of sight (except when retreating)
- May not move into a hex adjacent to an enemy unit (except when retreating).
6.54 ELIMINATION: When a Disrupted unit receives a hit, its owner must either eliminate it or spend reserves to cancel the hit (8.11). When a unit is eliminated, it is removed from play and a casualty marker is placed on the left-most space of its brigade's reserve track (8.1). When a Disrupted stack receives a hit, it eliminates one unit, not both units.
6.541 ELIMINATING SKIRMISHERS: A skirmisher which receives a hit is disbanded rather than eliminated (disbanded skirmishers are placed on the brigade display (8.0)).
6.6 Save Rolls
When a target of enemy fire receives hits, its owner has an opportunity to cancel them by making save rolls (6.6) and/or spending reserves (8.11).
A save roll is the roll of one dice, which, if successful, cancels one hit (a "save"). The target gains save rolls depending on the following factors:
- Did the Attacker Move?
- Moving fire grants the target 1 save roll. This is the only save roll granted when hit by skirmisher fire.
- Is the Attacker Far Away?
- Each hex between the attacker's hex and target hex grants the target 1 save roll. For example, a target 2 hexes away from the attacker gains 1 save roll. No save rolls for intervening hexes are granted to a target of artillery fire.
- What is the Target's Formation?
- 1 save roll is gained if any of the following is true: the target of the fire is unformed infantry, dismounted cavalry, a skirmisher, or Disrupted.
- Is Terrain Involved?
- Each different hindrance (6.33) the attack's line of sight traverses grants the target 1 save roll.
- Each type of cover in the target hex (fence, woods) grants the target 1 save roll.
- Each type of heavy cover in the target hex (wall, depression slope) grants the target 2 save rolls.
- A hexside feature only grants save rolls if the LOS both crosses that hexside, and is part of the target hex. Hexside cover is ignored when attacker and target are in adjacent hexes (including heavy cover).
- If the firing unit and target are at different elevations, the target gains 1 save roll.
- This save roll is ignored if the firing unit is artillery firing at a lower elevation target.
- If the target is a skirmisher in a building hex, it gains 1 save roll.
- Does the defending unit retreat?
See 6.341, Figure 2 for an example of how saves are calculated.
6.7 Retreats
When making save rolls, the defending player may choose to retreat to gain one roll (after the unit rolls for saves, it conducts its retreat). A Unit may also be forced to retreat by card play, or by losing an assault. Stacks retreat together (they may not split up).
6.71 RETREAT DISTANCE: A unit must retreat exactly 2 hexes if possible. A retreating unit may not enter prohibited or enemy-occupied hexes, and may not end the retreat illegally stacked. Formed infantry may retreat into woods, but unforms at the end of the retreat. If it is impossible for a unit to retreat the required 2 hexes, it retreats 1 hex, and becomes Disrupted at the end of the retreat if not Disrupted already (formed infantry becomes unformed). A unit may not opt to retreat, or be forced to retreat by a battle card, if it cannot retreat legally. If a unit loses an assault and cannot retreat, it is eliminated.
6.72 CAVALRY RETREAT: Cavalry units and horse artillery units (artillery with the cavalry symbol) may choose to retreat exactly 4 hexes instead of 2, gaining 2 save rolls instead of the usual 1. If it is impossible for a unit to retreat the required 4 hexes, it may retreat 3 hexes, but becomes Disrupted at the end of the retreat if not Disrupted already. A dismounted cavalry unit that retreats more than 2 hexes becomes mounted.
6.73 RETREAT DIRECTION: Each hex moved during a retreat must close the distance to one of the owning player's rally points, marked on the map, by one hex. Where more than one rally point is present, the closest rally point has priority (retreating player's choice if rally points are equidistant). If it is impossible to move closer to the nearest rally point during a retreat, movement that closes the distance to any friendly rally point is legal. A retreating unit may move through friendly-occupied hexes, possibly inflicting overstacking penalties (5.31). For each hex a retreating unit enters that is adjacent to an enemy unit or skirmisher, one additional hit is inflicted (skirmishers disband after inflicting such an extra hit).
6.731 EXAMPLE OF RETREAT: The 19th Indiana has been hit by fire from the 11th Mississippi and wants to retreat to gain a save roll. The green hexes in the example are the only hexes available for retreat (each bringing the 19th closer to the USA rally point in 1903). If the 19th retreats into 1703 or 1804 it will receive an additional hit for retreating adjacent to an enemy unit (6.73). The optimal move leaves the 19th in 1803. If the 19th were a cavalry unit, it could choose to retreat 4 hexes to gain 2 saves. In this case, the most it could retreat would be 3 hexes (to 1903), so after making its save rolls, it would end its retreat mounted and Disrupted in hex 1903 (6.72).
6.732 PROHIBITIONS: Units may not:
- a) retreat voluntarily if enemy fire inflicts no hits,
- b) retreat off the map,
- c) retreat out of a rally point hex,
- d) end a retreat overstacked,
- e) retreat into or through prohibited terrain or enemy units,
- f) retreat into a hex that does not close distance to a rally point.
6.74 RETREATING ARTILLERY: After retreating, surviving artillery becomes limbered.
6.75 BRIGADE COMMANDERS: A brigade commander stacked with a retreating unit will accompany that unit.
6.76 SKIRMISHERS AND REMNANTS: A retreating unit may choose to end its retreat in a hex containing a friendly skirmisher (the skirmisher disbands). Skirmishers and Remnants (9.2) may not retreat. If a Remnant loses an assault, it is eliminated.
6.77 READINESS: Ready units that retreat become Finished.
6.8 Unsaved Hits
All hits not negated by saves affect the defending unit(s). If the hits inflicted do not eliminate any units, defending units are Disrupted or un-formed as appropriate and play proceeds. If the hits threaten to eliminate one or more units, those "killing" hits may be negated by spending reserves. Rules for spending reserves are detailed in 8.11.
7.0 Assault
7.1 Initiating Assault
When a unit enters an enemy occupied hex, it initiates an assault. During an assault, both players' units roll dice equal to their firepower, with the effects applied simultaneously. Each success results in one hit on the opposing unit/stack (no save rolls are made). Artillery units and skirmishers may not initiate assaults.
7.11 ASSAULT MODIFIERS: Assault combat has its own set of modifiers, distinct from fire combat.
- Formed units: +1 to hit
- Disrupted units: -1 to hit
- Attacker moved upslope immediately prior to entering the assault hex: attacker -1 to hit
Note: Undisrupted artillery gains its Close Range bonus to Firepower during assaults.
7.12 MANDATORY RETREAT: The side that scores the most hits wins the assault and remains in the contested hex. If both sides score the same number of hits, the defender wins. The side that loses the assault retreats. Retreat from an assault does not generate a save roll. Eligible units may opt to retreat 4 hexes (6.72). All participants in the assault are Finished.
7.13 SAVES IN ASSAULT: There are no save rolls in assaults. After the loser retreats, both players may spend reserves (8.11) to cancel hits.
7.2 Terrain Effects on Assault
Formed units may not assault into woods hexes. If an attacking unit moves upslope immediately prior to initiating an assault, it suffers -1 to hit.
7.3 Retreat Before an Assault
When a unit enters an enemy occupied hex, the inactive unit(s) may be able to retreat before the assault is resolved (6.7). Eligible units may opt to retreat 4 hexes (6.72). If the target of an assault retreats, the assaulting unit wins the assault and occupies the vacated hex. It may continue to perform actions if it has movement points remaining.
7.31 READY UNITS: After retreating before an assault, ready units become Finished.
7.32 FINISHED UNITS: After retreating before an assault, Finished units become Disrupted, and formed infantry units become unformed.
7.33 DISRUPTED UNITS: Disrupted units that retreat before an assault suffer one Hit.
8.0 Brigade Display
Each player has a brigade display, used to track reserves, casualties and skirmishers. Skirmishers deploy from the brigade display and return to it when they disband.
8.1 Reserves
Reserves are tracked by brigade. Each brigade has its own reserve track on the brigade display. A reserves marker is placed in the space marked START for each brigade in play.
8.11 SPENDING RESERVES: Whenever a unit takes a hit that would eliminate it, the hit may be canceled by spending a reserve on its reserve track (move the reserve marker one space towards the end of the track marked EXHAUSTED). Important: Reserves may only be spent to negate hits that would eliminate a unit.
8.111 EXHAUSTION: When a reserve marker enters the space marked exhausted, flip it and the brigade's commander to their exhausted sides. An exhausted brigade has one of its activation markers placed in the exhausted brigades box on the activation display during the cleanup step, and rolls a fate check (2.33) during each fate check step to see if it breaks, remains exhausted, or returns to normal. If a brigade becomes unexhausted during the Activation Phase, its activation marker remains in the exhausted box until the clean up step (2.32b).
8.112 BRIGADES WITH ONE ACTIVATION MARKER: If a brigade with one activation marker becomes exhausted, flip its brigade commander to its exhausted side, but do not place its activation marker in the exhausted brigades box (the brigade does make a fate check at the end of every turn as if it had a marker in the exhausted brigades box). Also see Free Activations (2.321).
8.12 ARTILLERY SUPPORT: Divisional artillery does not have a reserve track on the brigade display, but it can gain support from nearby brigades. If a divisional artillery unit is threatened with elimination, any friendly brigade with a unit 1-2 hexes from the threatened unit may spend reserves to prevent its elimination (when a unit retreats, use its location prior to the retreat to determine which brigades may offer support). Off-board artillery units have a limited form of artillery support (9.44).
8.13 RECOVERING SPENT RESERVES: Brigades may be able to recover spent reserves during the game. When this happens, the reserve marker is moved one space back towards the end of the track marked START. If the marker is already on the START space, or if the space it would move to contains a casualty marker, the brigade cannot recover the reserve. There are three ways that a brigade can recover a reserve:
8.131 INACTIVE: If a brigade does not have an activation marker on either the activation track or the exhausted box at the end of a turn, it recovers one spent reserve during the cleanup step (2.32).
8.132 FATE CHECK: If a brigade rolls the regroup result when making a fate check (2.33), it recovers one spent reserve.
8.133 ELIMINATE SKIRMISHER: A disbanded skirmisher on a brigade's display may be eliminated at any time to recover one reserve for that brigade.
8.2 Casualties
When a unit is eliminated, place a casualty marker in the left-most space of its reserve track, beginning with the space marked START. If there is a reserve marker in the space, move it one space to the right.
When a skirmisher is eliminated, flip it over to its casualty side. Cavalry skirmishers do not have a casualty side. When eliminated, they are removed from the display and replaced with a casualty marker.
Eliminated artillery units do not create casualty markers.
8.3 Broken Brigades
When all of the dark gray spaces on a brigade's display are filled with casualty markers, the brigade breaks. Remove its units, skirmishers and commander from the game and place its activation markers in the broken brigades box.
8.31 DIVISIONAL ARTILLERY: If all of a player's divisional artillery units have been eliminated, place both artillery markers in the broken brigades box until reinforcing artillery units arrive or the game ends.
Design Note: exhaustion represents total commitment of a brigade's manpower, limiting its ability to respond to unforeseen events and emergencies. Breaking represents the brigade's collapse as a fighting unit.
9.0 Special Units
Skirmishers in the civil war were detached units that fanned out in front of a brigade to protect it from enemy fire, to fix the location and strength of opposing brigades, and to drive in their skirmishers. Skirmish companies, often formed from the best shots in the regiment, were dangerous to enemy officers, and to unprotected artillery crews. They tended to be most important as brigades moved to contact. Once the battle lines were engaged, they would be recalled to bolster the brigade's firing line.
9.1 Skirmishers
Skirmishers in play are either on the brigade display or on the map. Each brigade in the game can deploy one or more skirmishers. There are two types: cavalry skirmishers and infantry skirmishers. Skirmishers may be deployed (placed on the map), disbanded (placed on the brigade display), or eliminated (removed from the game).
9.11 MOVEMENT: Cavalry skirmishers have a mounted side and a dismounted (infantry) side. They flip between their mounted and dismounted sides by paying the formation change cost (2 MP). Infantry and dismounted cavalry skirmishers pay 1 MP per hex entered, regardless of terrain or elevation. Mounted skirmishers pay cavalry movement costs for terrain entered. Skirmishers may not move adjacent to enemy units or skirmishers and may not end their activation stacked.
9.12 DISRUPTION: A skirmisher that becomes Disrupted disbands.
9.13 DEPLOYING SKIRMISHERS: An infantry or cavalry unit may deploy one of its brigade's skirmishers by performing the deploy skirmishers action (5.26). The skirmisher is moved from the brigade display to the active unit's hex (the skirmisher may not end its activation stacked). The deployed skirmisher is activated and the unit that deployed it is Finished. Infantry skirmishers must be deployed by infantry units, and cavalry skirmishers by cavalry units. Cavalry skirmishers may enter the map mounted or dismounted.
9.14 DISBANDING: A skirmisher that receives a Disruption, is adjacent to an enemy unit, or ends an activation stacked with another unit is disbanded. Skirmishers may disband voluntarily instead of activating. Disbanded skirmishers are removed from the map and placed on their brigade's display. A skirmisher may not re-deploy during the same activation in which it was disbanded.
Design Note: This rule means that a unit which is adjacent to an enemy unit cannot perform the deploy skirmishers action (because the skirmishers would disband upon entry).
9.15 SKIRMISH ZONES AND POINT BLANK FIRE: Skirmishers that aren't mounted generate skirmish zones that block line of sight under certain conditions (6.36). A skirmisher may conduct point blank fire at any enemy unit that enters a hex adjacent to it (6.151).
9.16 STACKING: A unit may move freely through a hex containing a friendly skirmisher (and vice versa). If a unit ends its activation in a hex with a skirmisher, the skirmisher disbands.
9.17 ELIMINATION: A disbanded skirmisher may be eliminated at any time to recover one of its brigade's spent reserves (8.13).
9.18 VERSUS ARTILLERY: Skirmishers may not be the target of artillery fire.
9.19 INDEPENDENT SKIRMISHERS: Some scenarios include independent skirmishers. When these units enter play, they are placed on the owner's brigade display. They interact with the brigade like a regular skirmisher, with the following exceptions:
- a) They may not be eliminated to recover a spent reserve.
- b) One independent skirmisher per activation may deploy when its brigade recovers, by being moved from the brigade display to a hex adjacent to the brigade's commander (it is ready when deployed).
- c) When disbanded, an independent skirmisher is placed on the turn track, 2 turns from the current one. It returns to its brigade display during the reinforcement step of that turn.
- d) Deployed and Disbanded independent skirmishers are permanently eliminated when the brigade to which they're attached becomes exhausted (not just when it breaks).
9.2 Remnants
Remnants are unformed infantry units that do not belong to any brigade. They may be set up at the start of a scenario, or created during play as the result of a fate check (2.33). Remnants do not activate and cannot retreat or spend reserves. They recover during the preparation phase. They may conduct point blank fire, opportunity fire, and defend normally during assaults. The owner of a remnant may remove it from play at any time.
9.21 COMMAND AND STACKING: Remnants do not have a brigade commander. Units may not end their activation stacked with a remnant.
9.22 GENERIC VS. NAMED REMNANTS: Named remnants (such as the 5th Texas), are used when placed at the beginning of a scenario. Fate checks (2.33) create generic (un-named) remnants. These are placed in any hex previously occupied by a regiment of the broken brigade. The counters provided in the game are not a limit on how many remnants may be created. If a player runs out of generic remnants, named remnants may be used.
9.3 Divisional Artillery
Most artillery units in the game are not part of a brigade. They are termed divisional artillery units (identified by their lack of a colored brigade stripe and brigade commander). All of a player's divisional artillery forms an ad hoc brigade for game purposes, with its own activation markers but without a brigade commander or reserve track. Divisional artillery units are in command if they are within 4 hexes of a friendly brigade commander (4.21) and may be supported by a friendly brigade's reserves (8.12).
9.4 Off-Board Artillery (OBA)
Certain scenarios include off-board artillery cards on which off-board artillery units are placed. OBA cards indicate where units on the card can fire, how many save rolls they receive when targeted by enemy fire, and what their elevation level is. Off-board artillery units are treated like on-board artillery units, but are permanently deployed, are considered unstacked and cannot move or retreat. Any two units on the same OBA card may combine fire (6.14). OBA units may be Disrupted or eliminated by fire from opposing on-board or off-board artillery fire. OBA units are divisional artillery. They are always in command (4.2).
9.41 DETERMINING RANGE: Range to on-board targets is governed by fire points, printed on the map. The range of an OBA attack equals the number of hexes between the fire point (exclusive) and the target hex (inclusive), plus the range number beside the fire point.
Example: if an OBA target is 5 hexes away from a fire point with a value of 10, range to that target is 15 hexes.
9.42 DETERMINING LINE OF SIGHT (6.3): Line of sight is measured from the edge of the map where the unit's fire point is located, not the fire point. LOS is blocked by terrain features along that LOS. The Off-board artillery box will contain information about the elevation level of the firing artillery. Only on-board LOS obstacles will interfere with LOS to and from off-board units.
9.421 See EXAMPLE OF OFF-BOARD ARTILLERY below.
9.43 TARGETING OBA UNITS: Off-board artillery units may be targeted by units on the map. Such fire is resolved normally with the following modifications:
9.431 ON-BOARD ARTILLERY: Off-board artillery units may be targeted by units on the board by reversing the process in 9.41 and 9.42 (the firing unit traces LOS to the map edge, and counts range to the target's fire point).
9.432 COUNTER-BATTERY FIRE: Off-board artillery units may only target other off-board artillery units if text on the firing unit's card allows it.
9.433 SAVE ROLLS: Off-board Artillery units targeted by enemy fire gain one save roll if disrupted and one if their elevation is higher than that of their attacker. They may gain additional save rolls as indicated on their OBA card. This represents prepared positions, local hindrances, etc...
9.421 EXAMPLE OF OFF-BOARD ARTILLERY
Example 1: Langner's Off-Board artillery battery fires at Brockenbrough's Maryland battery. The range is 24 hexes to the Pry House fire point plus 4 hexes from the fire point to Brockenbrough (total of 28 hexes range). The line of sight is measured from 0714 (the map edge containing the Pry House fire point) to 0712. It is unblocked (Pry House is Level 4, 0712 is level 3). Brockenbrough gains 1 save dice for the fence. Langner will fire with 3 dice, It's range of 10 means that it is firing at more than double its printed range (extreme). That means it will have -1 to hit, and cannot inflict more than one hit after saves (6.61). The Union player could conduct combined fire with both batteries (6 dice), or fire once with each unit.
Example 2: Brockenbrough wants to fire at Langner's battery. The same determination is made: 28 hexes of range, with line of sight traced from 0712 to 0714. Unfortunately, Brockenbrough's printed range is 9, which means that the Pry House is beyond its maximum range of 27. If Brockenbrough was in hex 0613, the range would be 27 hexes and it could fire: Langner would gain 1 save for being at a higher elevation than Brockenbrough, and fire would be 2 dice at -1 to hit, inflicting a maximum of 1 hit on the Union battery.
9.44 ARTILLERY SUPPORT FOR OBA: Off board units have a limited form of artillery support (8.12). When an off-board unit takes a hit that would eliminate it, flip it to its reverse side. This indicates that it has spent a reserve from its local support. If it suffers an additional hit, it is eliminated. Flipped OBA units are turned face-up when they recover.
10.0 Reinforcements
10.1 General Rule
Reinforcements enter play on the turn and hex specified on the turn track, paying the movement point cost of the entry hex. Reinforcements entering along a road may use road march. Reinforcing brigades add their activation markers to the cup during the reinforcement step (2.35) and enter when their marker is drawn. Reinforcements entering along a road may use road march. Reinforcements are always in command when they first enter the map. Reinforcements may enter play stacked, and in any formation.
10.11 BLOCKED ENTRY: If an entry hex is occupied by a friendly or enemy unit, or is adjacent to an enemy unit, reinforcements may enter on the hex nearest to the entry hex which is neither occupied by, nor adjacent to, an enemy unit.
10.12 DELAYED ENTRY: Reinforcements may remain off-map when their activation marker is pulled. They may remain off-map indefinitely, entering any time their brigade activates.
11.0 Battle Cards
Battle cards are drawn from a common deck, kept hidden from the opponent while in a player's hand, and form a discard pile once played. Cards have text in bold type that dictates when the card can be played (Timing) and text in regular type that determines the Action or Effect of the card. Text in italics is either descriptive or incidental. While the effect of a card is meant to be self-explanatory, this section of the rules offers additional guidance.
11.1 The Deck
Prior to play, the 52 card deck is shuffled and placed face down. Both players will draw cards from the same deck. Before turn one, each player draws a number of battle cards equal to their hand size. If there are no special rules, players have a hand size of 3 cards. Hand size is important at different times during the game, but, unless the rules state otherwise, players may hold any number of cards during the game. Cards need not be drawn sequentially, as in poker. One player may draw cards first, followed by the other.
11.11 TIMING: Each card instructs players when it can be played (bold text), and what its effect is. If players attempt to play cards that say "Play at Any Time" simultaneously, roll a die to determine which card takes effect first (an odd number means the CSA player plays first, an even number, USA player plays first).
11.12 UNUSABLE CARDS: It is possible that a player will draw a card that is impossible to use (for example the card Double-Shotted when the player has no artillery). Such cards, like the Carte de Visite cards (11.3), cannot be played, only discarded.
11.2 Discarding and Drawing
A discard pile is formed next to the deck where played cards are placed face up. The card "God Wills This Contest" causes the deck and discard piles to be recombined and shuffled. There are several different times during a turn when a player may draw cards from the deck:
11.21 DRAWING DURING THE DISCARD & DRAW STEP: As the first step of the end phase, players must discard to their hand size or less. Then, players with fewer cards than their hand size draw cards up to their hand size.
11.22 DRAWING DURING THE ACTIVATION PHASE: The activation track has spaces marked with a "draw cards" symbol. When an activation marker is placed in one of these spaces, both players draw a card (hand size is disregarded).
11.23 DRAWING WHEN PASSING AN ACTIVATION: When an activation marker is drawn, the owner may choose to pass (3.221). Passing allows the player to draw a card. If the draw results in the player holding more cards than his or her hand size, one card is discarded.
11.24 DRAWING AS A RESULT OF CARD PLAY: Cards may instruct players to draw cards during the Activation Phase (hand size is ignored).
11.3 Battle Card Clarifications
Cards are listed here in their card number order along with some clarifications. Also acts as a card inventory.
- 1-2 QUICK FIRE: This card may be played to increase firepower during assault.
- 3-4 POINT BLANK FIRE: Play of this card allows a unit to conduct point blank fire any time an enemy unit enters a hex adjacent to a friendly unit (in the same way that skirmishers conduct point blank fire).
- 5-6 SKEDADDLE: This card is played when a friendly unit/stack is targeted, but before dice are rolled. Play of this card bypasses assault or fire resolution altogether, so subsequent play of a card like Slip the Bridle or Fire and Close is not allowed. A skirmisher or remnant may not be targeted by Skedaddle.
- 7-8 STAMPEDE: Resolve the stampeded unit's retreat after the first unit's retreat is complete. The stampeded unit does not gain a save from its retreat.
- 9-10 VETERAN SKIRMISHERS: This card may be played any time a skirmisher is about to disband, fire, or deploy.
- 11-12 DOUBLE SHOTTED: If firing more than two dice, roll the additional dice separately. When two artillery units are combining fire, this card affects one of them. Hits inflicted on the firing unit by this card cannot be prevented by save rolls or reserves. Double shotting was the practice of loading an artillery piece with two projectiles (or rounds of cannister) on top of one powder charge. This could inflict heavy casualties at short range, but because of added pressure, increased the risk of the barrel of the weapon exploding.
- 13-14 WELL DRILLED: This may be played when a unit/stack changes formation, or when it over-stacks during movement/retreat.
- 15-16 STAND READY: This is one of those play any time cards that literally can be played any time. It removes the Finished marker from a unit/stack. Note that this card does not give an active unit more movement points. It may be played after a unit fires, for example, to allow it to fire again, provided it has sufficient movement points remaining.
Clarifications/Errata (Christopher Moeller, 11/14/2022)
Publisher's errata document; where it conflicts with the rules above, the errata applies. This document includes a list of answers to players' questions, as well as additions, clarifications and changes to the material provided in the 1862 box. The only real rules change is to road movement (see 5.211 and 5.212 below).
Rule Book
2.32 Clean Up Step: The actions in the clean-up step (a, b, c and d) do not represent a sequence... they are resolved in any order. For example, if a brigade is both exhausted and inactive during the cleanup step, it gains a reserve and becomes un-exhausted (c), so does not place an activation marker in the exhausted brigades box (b).
2.321 addition: "A Brigade which activated using a Free Activation is not inactive (2.32c)"
2.35 clarification: Place reinforcements indicated in the space above the Turn marker near their entry hex(es) and add their activation markers to those already in play. For example: during the reinforcement step of Turn 2, reinforcements for Turn 3 add their activation markers to the pool, and the units are placed near their entry hexes.
3.31 Addition: If every space on the activation track contains activation markers and the turn has not ended, activation markers continue to be drawn, and formations activated, until a second Countdown marker has been drawn (ending the turn). Markers drawn this way are not placed on the track and will no longer trigger card draws or cause additional countdown markers to be added to the opaque container.
5.211 addition: Roads and Trails affect movement costs only (not terrain restrictions or combat). Formed Infantry and Deployed artillery ignore the effects of Roads or Trails.
5.212 change: An infantry unit which is Formed at any point during its activation does not benefit from road march.
5.37 clarification: If a unit enters and does not immediately exit (via assault or move action) a hex containing a disrupted or finished marker, it becomes disrupted/finished and its activation ends.
5.38 addition: The defender chooses which unit to eliminate.
5.42 (correction):
- long range: 2x printed range or less (-1 to hit)
- extreme range: 3x printed range or less (-1 to hit and max 1 hit)
7.12 (addition): A Unit defending against an assault may not retreat into the hex from which the assaulting unit launched its assault.
9.15 change: A skirmisher may conduct point blank fire at any enemy unit that performs a movement action to enter a hex adjacent to it.
Scenarios
12.0 addition: Add the activation markers of all Turn 1 reinforcements to the cup.
14.12 Victory Conditions correction: hex number 1109 should read 1110.
14.22 Victory Conditions correction: hex number 1611 should read 1614.
14.4-5 clarification: the artillery unit "Bonder" refers to Boundurant's battery.
15.32 correction: remove "If there is no instant victory by the end of the game, the CSA player wins."
16.011 clarification: When a card played by the USA player affects a CSA brigade commander, the player must choose one of the CSA brigade commanders as its target (and vice versa when a card played by the CSA player affects a USA commander).
Combat Resolution Player Aid
There were a number of anachronisms present on the combat resolution page of the player aid. A corrected combat resolution page is posted along with the errata document.
- Point Blank Fire correction: replace "Enemy moves from one hex adjacent to firing unit to another" with "Trigger: enemy enters an adjacent hex, then attempts to perform a move action."
- Assault correction: replace "Defending upslope +1 to Hit" with "Assaulting upslope -1 to Hit"
- Assault Correction: replace "Loser falls back 1 hex" with "Loser must retreat"
Sequence of Play
2.34 and 2.35 correction: change 2.34 to "Advance Turn Marker", 2.35 to "Reinforcement Step".
Player Aid
Artillery Correction: replace "may deploy and fire for 4 mp" with "may deploy for 2 MP (Finished)".
Counters
The picture on the "Christ" Brigade Commander counter is Crook. The picture on the "Crook" counter is Christ.
The skirmish unit for Welsh's brigade should read: 100th PA/A "Washington County".