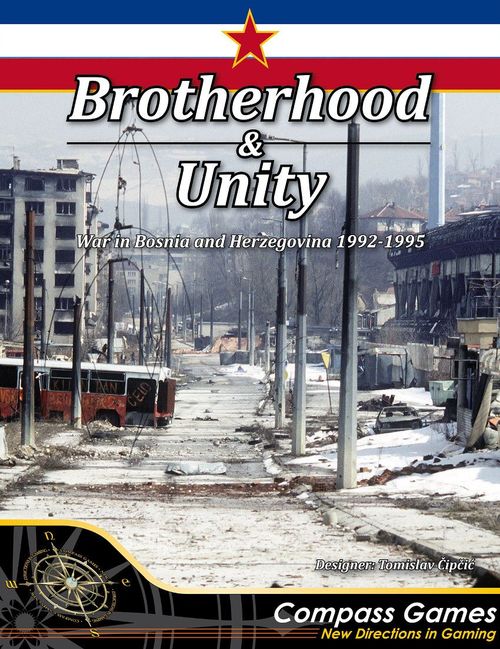
Brotherhood & Unity
Brotherhood & Unity Rulebook
Table of Contents
Table of Contents
1.0 Introduction
Brotherhood & Unity: War in Bosnia and Herzegovina 1992-1995 is a 2-3 player card-driven wargame. It depicts the most recent and bloodiest war in Europe since WW2.
Brotherhood and Unity (Bos, Cro and Srb: Bratstvo i jedinstvo) was a Yugoslav doctrine with the purpose to create a strong bond between the nations of Yugoslavia. Since Yugoslavia was an ethnically diverse country (with 7 major nations, and a score of smaller ethnic groups) – it was a way of creating a unitary Yugoslav and socialist identity.
"Guard the brotherhood and unity as a pupil of your eye." - Josip Broz Tito, Marshal of Yugoslavia
Bosnia and Herzegovina (Bosna i Hercegovina, or BiH for short) is a multi-ethnic country, consisting of three major ethnic groups: Bosniaks, Serbs and Croats. None of them has an overwhelming majority, so the country's history is a story of conflicts and compromises.
The war lasted from 1992 to 1995, and was primarily a civil war between the three local ethnic groups. But it also included various foreign forces: Serb paramilitary formations from Yugoslavia and Krajina, armed forces of Croatia, and NATO.
In the game, players will use military units, and various political, diplomatic and strategic events to achieve victory. In order to win, they will have to successfully balance military actions, affairs with foreign powers, and their people's will to fight.
The rules are mostly the same for the 2 and 3-player game. For a 2-player game add the rules from 14.0 Two Player Game.
1.1 Game Components
- 1 22"x34" Mounted Map
- 260 9/16" Counters
- 96 Strategy cards (in 3 decks: Serbian, Croatian and Bosniak)
- 3 Player aid cards
- 1 Rulebook
- 3 Ten-sided dice
- 1 Box and lid set
1.2 Map
1.2.1 Geography: The map shows Bosnia and Herzegovina at the outbreak of the war. It is a country in southeastern Europe, bordering Croatia to the west and Yugoslavia to the east. Sarajevo is the capital and largest city, while other major cities are Banja Luka, Bijeljina, Tuzla, Zenica and Mostar.
1.2.2 Symbols And Colors: Each side is represented by its symbols and colors. These are: Serbian, Croatian, Bosniak.
1.2.3 Spaces: Spaces are locations on the map which represent cities, towns, and strategic points. These spaces are used to place units and markers. Each space is under control by one of the players, and is considered 'friendly' for that player.
1.2.4 Key Spaces: These represent the strategically important areas within a region. They must be captured in order to gain control of a region, and they also serve as limited Supply Sources and reinforcement locations.
1.2.5 Foreign Spaces: Spaces in neighbouring countries and regions (Croatia, Yugoslavia, and Krajina) are Foreign Spaces. They are used as entry points for Foreign Units, as Supply Sources, and supply paths. Domestic Units can't enter those spaces, except when they need to retreat. Croatian and Bosniak units may use Croatia (CRO) spaces, while Serbian units may use Krajina (KRA) and Yugoslavia (YUG) spaces. Only the spaces with the same designation are regarded as connected (EXAMPLE: Krajina spaces are connected to other Krajina spaces).
1.2.6 Unit Setup Markers: Some spaces have unit symbols. These are unit setup locations. When setting up the game, players place their units on these spaces.
1.2.7 Roads: Spaces are connected by roads, which are shown as lines on the map. Roads are used by units when moving from space to space, and as supply paths. Two spaces connected by a road are considered 'adjacent'.
1.2.8 Terrain: Each space consists of one of these terrain types: Clear, Mountain, Swamp, City or River. Terrain affects combat as follows (See 13.4 Attack):
- DRM - DRM penalty (attacker or defender)
- No Ret - No Retreat option (defender)
- Halt - Halt advance after attack (attacker)
- Def f/f - Defender fires first
| Type | DRM | No Ret | Halt |
|---|---|---|---|
| Clear | - | - | - |
| Mountain | Atk -2 | ||
| Swamp | Atk -2 | ||
| City | Atk -4 | - | |
| Trench (ENT) | Atk -2, Def +2 | - | |
| River | Def f/f, Atk -4 | - |
1.2.9 Sarajevo Map: The city of Sarajevo is the capital and the largest urban area within BiH, with a population of more than a half million people. It is represented in detail by an insert map showing the key areas and neighbourhoods within a city.
DESIGNER NOTE: Significant forces were kept in the area of Sarajevo throughout the war. Bosniak forces continuously tried to relieve the siege of their capital, while the Serbs used it as a bargaining chip during the peace negotiations. Thus, the city and its neighbourhoods are represented in detail within the game.
1.2.10 Region Boxes: The map is divided into regions which the players fight for. Each region is controlled by one of the players, which is denoted by placing a marker on a Region Box (See 13.5.4 Check Region Control).
1.2.11 Tracks and Boxes: The game has a number of tracks used for showing important game information. These are:
- Turn Track / Sequence Of Play – shows the turn details, and sequence of play
- Foreign Attitude Track – shows the Foreign Attitude points for each player
- Strategic Will Track – shows the Strategic Will points for each player
- Bosniak Eliminated Units – box to hold the eliminated Bosniak units
- Croatian Eliminated Units – box to hold the eliminated Croatian units
- Serbian Eliminated Units – box to hold the eliminated Serbian units
- Croatian Foreign Units – box to hold the Croatian Foreign Units (in reserve and eliminated)
- Serbian Foreign Units – box to hold the Serbian Foreign Units (in reserve and eliminated)
1.3 Units
1.3.1 Unit Types: Units are playing pieces representing brigade size military units (around 1500-2000 soldiers). They are divided into:
- Units (standard/domestic) – main units, native to BiH
- Foreign Units – units of foreign countries and regions
1.3.2 Units: These are Domestic Units from Bosnia and Herzegovina. They can only move inside BiH. They can attack into Foreign Spaces, but are not allowed to advance into them. They are however allowed to Strategically Redeploy through and retreat into friendly Foreign Spaces. These units are:
- Bosniak ARBIH – Army of Republic of BiH
- Croatian HVO – Croatian Defence Council
- Serbian VRS – Army of Republic of Srpska
1.3.3 Foreign Units: These are Foreign Units from neighbouring countries and regions: Yugoslavia, Croatia, Krajina and the Autonomous Province of Western Bosnia. They are allowed to operate within Foreign Spaces and spaces inside BiH, where they can perform Operations and Strategic Redeployment, but not Replacement. Foreign Units are deployed by Strategy Cards, and their involvement reduces a player's Foreign Attitude. These units are:
- Bosniak MUJ – El Mujahid, Muslim volunteers
- Croatian HV – Croatian Army
- Serbian SDG – Serbian Volunteer Guard
- Serbian SVK – Serbian Army of Krajina
- Serbian NOZB – People's Defence of West Bosnia
1.3.4 Unit Limitations: Some units have limitations on their Combat or Movement abilities. They are denoted on the unit counter by an inverse CF or MF number (EXAMPLE: Serbian NOZB units have a white number with a black outline). The limitations are:
- Croatian HV – can only attack and capture Serbian units/spaces
- Serbian NOZB – can only move, attack and capture spaces in Cazinska Krajina, player loses 0 FA when capturing Key Spaces
1.3.5 Unit Properties: Domestic and Foreign Units can execute the following Operations: Movement, Attack and Entrench. Units are defined by the following properties:
Combat Factor (CF): The combat strength of a unit. It is used during an attack to determine how much damage will be inflicted to enemy units.
Loss Factor (LF): The unit's ability to absorb damage. The attacker's Loss Number (the damage it inflicts) must be equal to or greater than a defender's Loss Factor in order to damage the defending unit.
Movement Factor (MF): The number of spaces a unit may move.
Elite Units: This symbol marks the elite units. They have higher unit values, and advance after attack one extra space (Advance a/a +1 space).
DESIGNER NOTE: In this war there were 2 basic types of units: regular (created from civilian reservists), and professional (made up from professional soldiers). The professional ones were equipped with the best equipment, tanks, motorized transport and logistical support. They were in fact mechanized units used as offensive spearheads, and as defensive strongpoints. These units were mostly called 'Oklopne' and 'Gardijske' (meaning Armoured and Guards brigades), and are represented as Elite Units in this game.
Counter reference (Combat Factor - Movement Factor - Loss Factor):
Full-Size Unit example: VRS, Combat Factor 4, Movement Factor 6, Loss Factor 4 (shown as 4-6-4).
Reduced Elite Unit example: HVO Army (Elite, Reduced side), shown as 3-7-6.
Standard/Domestic Units:
| Faction | Unit | CF-MF-LF |
|---|---|---|
| Serbian | VRS | 4-6-4 |
| Croatian | HVO | 3-6-4 |
| Bosniak | ARBIH | 3-6-2 |
Foreign Units (deploys from):
| Faction (deploys from) | Unit | CF-MF-LF | Notes |
|---|---|---|---|
| Serbian (YUG) | SDG | 5-7-6 | |
| Serbian (KRA) | SVK | 2-5-3 | No FA loss |
| Serbian (KRA) | NOZB | 2-4-2 | Cazinska Krajina only |
| Croatian (CRO) | HV | 4-6-4 | Attacks Serbs only |
| Croatian (CRO) | HV | 6-7-6 | |
| Bosniak (CRO) | MUJ | 5-6-2 |
1.4 Game Markers
1.4.1 Foreign Attitude Marker: Used on the Foreign Attitude Track to denote the player's Foreign Attitude.
1.4.2 Strategic Will Marker: Used on the Strategic Will Track to denote the player's Strategic Will.
1.4.3 Space Control Marker: Placed on captured spaces, marking who has control of a space.
1.4.4 Region Control Marker: Placed on Region Boxes to mark control over regions. For details - see chapter: 13.5.4 Check Region Control.
1.4.5 Entrenchment Marker: Placed on a space where entrenchments are being built (IN PROGRESS) or are fully prepared (ENT).
1.4.6 Unsupplied Marker: Placed on units which are unsupplied. The marker has two sides: Low Supply, and Out Of Supply.
Marker reference by faction (Serbian, Croatian, Bosniak): Foreign Attitude marker (Serbian FA, Croatian FA, Bosniak FA); Strategic Will marker (Serbian SW, Croatian SW, Bosniak SW); Space Control marker; Region Control marker. Entrenchment marker sides: In Progress, Entrenched (ENT). Unsupplied marker sides: Low Supply, Out Of Supply.
1.5 Strategy Cards
1.5.1 Strategy Cards: The Action Phase, the main phase of the game is played using Strategy Cards. Each player plays one card from his hand, thus performing an action within the game.
1.5.2 Early And Late War Cards: The Strategy Cards are divided by the historical period of their events: Early War and Late War, as shown at the top of the cards. Early War cards are used in the early turns of the game, Turns 1 and 2, and Late War cards are used in later turns, Turns 3 and 4. Some cards are marked as "Early/Late War" and are used in both periods.
1.5.3 Card Value: Each card has a Card Value (CV) ranging from 2 to 4. This value is used for all actions in a game, and signifies the amount of actions a player can perform.
1.5.4 Event Text: Each card contains an event text. This is the effect of the card, if it is being played as an Event. The background of the events on the cards can be read at 16.2.
1.5.5 Precedence Over Rules: If there are conflicts between the game rules and the card being played – the card takes precedence.
EXAMPLE: If a player is on Intervention Level 1 (thus disabling his Advance after/attack), and the player plays an Offensive card (having "Advance a/a +1 space" ability) – his units are allowed to use the card's ability, no matter what the Intervention Level states.
1.5.6 Lasting Effect: By default, a card's effect lasts until the end of the player's active round. If the card title is underlined, the card has a lasting effect – it remains in effect for a longer duration. The duration is defined in the event text and can be: the entire turn, the entire period (Early or Late War), or the entire game.
1.5.7 Region/Space Names: If an event text mentions a region name - it is written in uppercase (e.g. SEMBERIJA). Space names are written with capitalized first letter (e.g. Srebrenica).
1.5.8 Event Types: Each card can be of one of the following types: Combat, Offensive, Interrupt, Foreign Units, or Other Event. The symbol on the card shows its type.
Combat Card: These cards can be used as a bonus during combat. They are played immediately before a combat, and modify the combat calculation for the duration of the round. They represent famous generals, special tactics and valuable military equipment.
Offensive: These events are used for Operations, and they give benefits to an attack: DRM bonuses, extending the movement and advance length, ignoring terrain effects, and artillery preparation. They represent the detailed planning and preparation for an offensive operation.
Event text "Roll to reduce before attack" represents an Artillery Preparation and its effect is applied before the actual combat calculation.
Interrupt: These cards can be played by an inactive player, during the opponent's active round. These cards interrupt the active player and cancel his event, or reduce an effect. The inactive player plays his Interrupt card before or after the opponent's action (as defined in the event text) and next discards his card.
Foreign Units: These cards allow players to deploy Foreign Units. They can be deployed immediately, or placed in the Foreign Units Box to be deployed later. If a player deploys them immediately – he must also immediately reduce his FA by one (See 6.3 Deploy Foreign Units).
Other Events: These include all other types of events, which do not fall into some specific category. These cards have no type symbol printed on them.
Card anatomy: Card Value (CV) in the top-left corner; Side and Period (e.g. "LATE WAR" plus a faction crest) in the top banner; Event Name below the card art; Event Type badge (e.g. COMBAT); Event Text describing the effect; Card ID in the bottom corner. EXAMPLE card: CV 3, Late War, "Izet Nanić", COMBAT type, event text "Use in attack. Add +3 DRM.", card ID B15.
2.0 Game Concepts
2.1 Strategic Will (SW)
2.1.1 General Info: The Strategic Will is the key measure of a player's victory fulfilment. It represents the will to fight the war, and is being tracked on the Strategic Will Track.
2.1.2 Strategic Will Shifts: Each player starts with a starting Strategic Will (as defined in Game Setup). It is affected by a number of game actions: capturing or losing regions, capturing or losing Key Spaces, eliminating or losing units, and as a result of events.
The Strategic Will Track is a two-row track: a tens row (00, 10, 20, 30, 40, 50, 60, 70, 80, 90) and a units row (0-9), holding each faction's marker (Croatian SW, Bosniak SW, Serbian SW) to track its current value, with VC (Victory Check) markers at several points along the track.
Strategic Will Shifts:
- +/-1 - Unit destroyed/lost
- +/-3 - Key space capt/lost
- +/-X - Region capt/lost
- +/-X - Card event
Victory Score: IF + SW - nonKR - 5xIL. IF: SRB=0, CRO=11, BOS=16.
2.2 Foreign Attitude (FA)
2.2.1 General Info: The Foreign Attitude represents the diplomatic stance of foreign powers (European countries, USA, Russia, and UN) towards a player. It is being tracked on the Foreign Attitude Track.
2.2.2 Foreign Attitude Shifts: Each player starts with a 0 FA (neutral attitude). It can shift to the negative (bad) side by capturing Key Spaces and by certain events. It can shift to the positive (good) side with Diplomatic Action and some events.
DESIGNER NOTE: Capturing a Key Space creates a refugee crisis, which represents ethnic cleansing and has a negative effect on the Foreign Attitude towards the player.
The Foreign Attitude Track runs from 0 down to -7 for each faction (Serbian FA, Croatian FA, Bosniak FA), passing through three escalating zones: Level 1 (-3 to -4), Level 2 (-5 to -6), and Level 3 (-7).
Foreign Attitude Shifts:
- -1 - Key space captured
- -3 - UN space captured
- -1/turn per Foreign Army depl.
- +/-X - Card event
Track zone effects: Level 1 imposes Sanctions (MF -1, no SR, no Adv. a/a). Level 2 adds Air Strikes (reduce 2 on roll 3-9). Level 3, at -7, is GAME OVER.
2.2.3 Intervention Level: At certain points, Foreign Attitude starts to impact a player by a number of negative effects. These are called Intervention Levels, and their effects are cumulative (Level 2 imposes the effects of Level 1 plus those of Level 2). Those levels are:
- Sanctions (Level 1) – effects:
- Limited Fuel – all units MF -1, no Strategic Redeployment, and units can't advance after an attack beyond the target space
- Air Strikes (Level 2) – effects:
- Level 1 Effects
- Air Strikes – NATO conducts air strikes during the opponent's rounds, on your forces
- Military Intervention (Level 3) – effects:
- Military Intervention – NATO conducts a full-scale military intervention
- GAME OVER
2.2.4 Game Over: If a player reaches Intervention Level 3, the game is IMMEDIATELY OVER. This player has lost the game, no matter his SW score. The other two players calculate their Victory Condition points to determine the winner.
2.3 Stacking
2.3.1 Three Units Per Space: A maximum of three units may stack in a single space.
2.3.2 Checking For Stacking Limits: Stacking limits are checked at the end of each action. They may be violated while executing an action, but must be obeyed at the end of that action.
2.4 Supply
2.4.1 General Info: Supply gives a unit the ability to execute actions. Without it, the unit can't move and fights with a reduced efficiency. It can even be eliminated if left without supplies for several rounds.
2.4.2 Checking Supply: Players check their supply at the beginning of their each Action Round (before playing a card).
2.4.3 Supply Sources: (Full) Supply Sources can support an unlimited number of units, and allow an unlimited number of reinforcements and replacements in a turn. All supplies come from foreign countries, as follows:
- CRO Foreign Spaces – Supply Sources for Croat and Bosniak units
- YUG Foreign Spaces – Supply Sources for Serbian units
2.4.4 Limited Supply Sources: Each Key Space is a Limited Supply Source for the side that controls it. Each can support a maximum of 3 units, but limits the number of reinforcements and replacements.
2.4.5 Supply Path: To be in supply, a unit must trace a supply path through friendly spaces to its Supply Source. Additionally, Bosniaks and Croats can use each others supply paths as if they were their own.
DESIGNER NOTE: Croats supplied the Bosniaks throughout the war and provided housing and care for a large number of Bosniak refugees. This cooperation was not broken even during the Bosniak-Croat War.
EXAMPLE: The Croat units in Livno and Tomislavgrad are fully supplied, since they have a supply path to a CRO Supply Source (Sinj). The Bosniak units in Kupres are also fully supplied because they can use Croatian supply paths and CRO Supply Sources (Sinj).
2.4.6 Unsupplied Unit: If a unit doesn't have a supply path connecting it to a Supply Source – it is unsupplied. When it becomes unsupplied, the player marks it with an Unsupplied marker (Low Supply side). Being in this state has no negative effect on a unit. But if the unit stays unsupplied for another round, its state changes to Out Of Supply, which significantly reduces the unit's performance.
2.4.7 Low Supply Effects: It has no effect on a unit.
2.4.8 Out Of Supply (OOS) Effects: Without supply, units are restricted as follows:
- No Operation: Units may not be activated for Operations (can't Move, Attack or Entrench)
- Reduced CF and LF: Units have their CF and LF reduced by half (rounded up)
- No Combat Cards: Defending units may not receive the benefit of Combat Cards
- No Retreat: Units can't retreat after an attack, and they must reduce one step instead
- No SR: Units may not Strategically Redeploy
- No Replacements: Units can't be replaced
- Reduction/Elimination: Units which are OOS for several rounds are reduced or eliminated
2.4.9 Reinforcements And Replacements: If an area is connected to a (full) Supply Source, it can receive an unlimited number of reinforcements and replacements. If an area is unsupplied (connects to 0 Supply Sources), it can receive no reinforcements and replacements. If an area is connected ONLY to Limited Supply Sources, it is considered an Enclave and has these limitations:
- 1 Reinforcement per Key Space: The enclave can receive maximum of 1 reinforcement per area Key Space
- 1 RP per Key Space per Action Round: The enclave can receive a maximum of 1 Replacement Point per area Key Space per Action Round
EXAMPLE: This Bosniak enclave is not connected to (full) Supply Sources, so it must be supplied only by its Key Spaces. It has only 1 Key Space - Bihać, so this entire enclave is limited to 1 reinforcement at the start of the turn, and 1 Replacement Point per player round. The Bihać Key Space can support a maximum of 3 units. Since there are more units than supplies, the Bosniak player has selected Velika Kladuša and Cazin to be unsupplied. If the situation persists, these units will become Out Of Supply and eventually be permanently eliminated.
2.5 UN Safe Areas
2.5.1 General Info: These are spaces designated by the UN as humanitarian corridors established to protect the local civilian population. These spaces are created by a card event, and are marked with a UN Safe Area marker (-3 FA).
2.5.2 Effects: UN Safe Areas have the following effects:
- Control/Supply Unchanged: Control of the space and supply paths does not change
- Can House Units: The space can be used for placing friendly units
- No Attack Space: The space can't be used as a space from which an attack is made (but units in the space can defend themselves if attacked)
- No Reinforcements/Replacements: The space can't be used as a reinforcement, replacement, or Foreign Unit deployment location
- FA Loss On Capture: Opponents can capture these spaces, but with a major loss in Foreign Attitude (See 13.5 Capturing Spaces And Regions).
3.0 Victory
3.1 General Rules
3.1.1 Determining The Winner: The game can be won in three ways:
- If a player during the game reaches his Victory Condition points (VC) on the Strategic Will Track (3.1.2), AND controls all Key Regions for his side (3.1.3) – he is the winner and the game ends immediately.
- If the last turn has been played and no player has won – the Victory Score is calculated for each player (See 3.1.4). The player with the highest score is the winner.
- If a player reaches Strategic Will 0, or Foreign Attitude -7 – that player surrenders, and the Victory Scores are calculated for the other two players. The player with the highest score is the winner.
3.1.2 Victory Condition: Each player has a certain number of Strategic Will points: Victory Condition points, which he has to achieve in order to win. These VC points are (also shown on the Strategic Will Track):
- Serbs: 71 SW
- Croats: 60 SW
- Bosniaks: 55 SW
3.1.3 Key Regions: Each player has certain Key Regions which he has to control in order to win. These Key Regions are shown on the map, next to the Region Boxes.
3.1.4 Victory Score: Victory Score is calculated using the following formula:
Initial Factor (IF = Serbs: 0, Croats: 11, Bosniaks: 16)
- Strategic Will (SW)
- non-controlled Key Regions
- 5 x Intervention Level
Victory Score = IF + SW – n/c Key Regions – 5 x IntLevel
EXAMPLE: The Bosniak player has a SW of 40, he doesn't control his Key Region of Podrinje (5 SW), and is at Intervention Level 2. His Victory Score is: 16 + 40 – 5 – 2x5 = 41.
4.0 Game Setup
4.1 General Rules
4.1.1 Units: Place units on the map, as shown by unit setup markers (See 1.2.6). The number of units to be placed is:
- Serbs: 25 Brigades
- Croats: 7 Brigades
- Bosniaks: 20 Brigades
4.1.2 Region Control: Place Region Control markers, as shown in the Setup section in the lower right corner within Region Boxes.
4.1.3 Turn Track: Place the Game Turn marker on Turn 1.
4.1.4 Foreign Attitude Track: Place each side's Foreign Attitude marker on 0 FA.
4.1.5 Strategic Will Track: Place each side's Strategic Will marker on 30 SW.
4.1.6 Draw Deck: Shuffle each player's Early War cards and place the decks face-down next to the players. These will be their Draw decks. Set the Late War cards aside for later use.
5.0 Sequence of Play
5.1 General Rules
GAME SEQUENCE:
- Start of Turn Phase
- Action Phase
- End of Turn Phase
5.1.1 Game Sequence: The game is played in turns, each of which is subdivided into phases. Game Phases are played in the following order:
- Start of Turn Phase — Players draw cards, place reinforcements, and deploy Foreign Units.
- Action Phase — Players successively play cards to perform actions. This phase ends when all cards have been played.
- End of Turn Phase — Players check if Victory Conditions have been met, and advance the Game Turn marker.
5.1.2 Order of Play: Each Game Phase is played in the following order:
- Turns 1-2: Serbian -> Croat -> Bosniak
- Turns 3-4: Bosniak -> Croat -> Serbian
DESIGNER NOTE: The order of play represents the initiative shift which happened during the war. The order of play can be seen on the Turn Track as the order of player icons.
Turn Track / Sequence of Play: Four Game Turns, each with a year and war period: Turn 1 (1992), Turn 2 – 1993, Early War (Bosniaks get a -1 DRM penalty), Turn 3 – 1994, Late War (Deck/Order change turn), Turn 4 – 1995, Late War. Each turn lists, per faction (Serbian, Croatian, Bosniak in that color order), the number of Cards Drawn and the number of Reinforcements available that turn:
| Turn | Serbian (Cards / Reinf.) | Croatian (Cards / Reinf.) | Bosniak (Cards / Reinf.) |
|---|---|---|---|
| 1 | 7 / 10 | 5 / 5 | 5 / 2 |
| 2 (1993, Early War, BOS -1 DRM) | 7 / - | 6 / 3 | 6 / 6 |
| 3 (1994, Late War, Deck/Order) | 6 / - | 6 / 2 | 6 / 6 |
| 4 (1995, Late War) | 6 / - | 6 / - | 6 / - |
A "-" means no reinforcements are available that turn for that faction.
Start Of Turn Phase: 1. Draw Cards 2. Place Reinforcements 3. Deploy Foreign Units.
End Of Turn Phase: 1. Determine Winner (last turn) 2. Advance Game Turn Marker.
Action Round: 1. Check Supply 2. NATO Air Strike 3. Play Card for: Operation (x1CV) / Strategic Redepl. (x1CV) / Replacement (x2 CV) / Diplomatic Act. (+1/2 FA) / Event.
6.0 Start of Turn Phase
START OF TURN PHASE:
- Draw Cards
- Place Reinforcements
- Deploy Foreign Units
6.1 Draw Cards
6.1.1 Recreate Draw Deck (only on Turn 3): On Turn 3 (Late War turn) players need to create their new Draw decks. The procedure for each player is this:
- Combine the Late War deck with the current Draw deck and the Discard deck
- Remove from this deck all Early War cards – they won't be used for the rest of the game
- Shuffle the deck and place it face-down next to the player – this will be his Draw deck
6.1.2 Draw Cards: Each player draws a number of cards from his Draw deck. The number for each player is shown on the Turn Track.
DESIGNER NOTE: The changing number of cards signifies the change of operational and logistical capabilities of each army. At the start of the war, Serbian forces were superior in all regards to the other two forces in the region. But as the war progressed, that advantage shifted in the opponent's favour.
6.2 Place Reinforcements
6.2.1 Procedure: Each player places his reinforcements on the map, in order of play.
6.2.2 Reinforcements Per Turn: The number of units available as reinforcements is shown on the Turn Track.
6.2.3 Reinforcement Locations: Reinforcements must be placed in Key Spaces, or spaces adjacent to them. Spaces must be friendly, supplied, and the stacking limit must be obeyed. If there are no such spaces available, units can't be placed and are lost. UN Safe Areas can't be used for placement.
6.2.4 Supply Limitations: An area must be fully supplied to be able to receive an unrestricted number of reinforcements. Unsupplied areas can't be used to place reinforcements. An enclave (limited supplied area) can receive a maximum of 1 reinforcement per area Key Space.
EXAMPLE: The Bosniak player receives 6 reinforcements. He can place them in Key Spaces, or spaces adjacent to them. So he decides to place 2 brigades in Tuzla (the maximum he can place is 2, since there is already one brigade there). He will place 2 brigades in places adjacent to Key Space Tuzla: Srebrenik and Gračanica. And the remaining 2 he will place in Travnik (not shown in the image). Reinforcement locations don't have to be near each other, they only need to satisfy the limitations described in the rules above. Player could have also chosen Zavidovići, Vareš, Visoko, Zenica or any other space in accordance with the rules.
6.3 Deploy Foreign Units
6.3.1 Procedure: Each player in order of play does the following:
- Return 1 eliminated Foreign Unit from the Foreign Eliminated to the Foreign Units Reserve Box, or flip 2 reduced Foreign Units to full-size (either both on the map, both in a Foreign Units Reserve Box, or one in each location).
- Return any number of Foreign Units from the map to the Foreign Units Reserve Box. Do not flip them from their reduced side to full-size, if applicable they will remain reduced.
- Deploy any number of Foreign Units from the Foreign Units Reserve Box onto the map, but not the ones which were returned during this turn (in Step 1). The player decides how many of the available units he will deploy, and he can choose to deploy no units.
- Reduce -1 FA per foreign army deployed on the map (EXAMPLE: The Serbian player has to reduce -2 FA if he deployed units from 2 foreign armies: SDG and SVK).
6.3.2 Foreign Unit Deployment Sources: Foreign Units are deployed from Foreign Spaces, as listed here:
- Bosniak MUJ – deploy from CRO Foreign Spaces
- Croatian HV – deploy from CRO Foreign Spaces
- Serbian SDG – deploy from YUG Foreign Spaces
- Serbian SVK – deploy from KRA Foreign Spaces
- Serbian NOZB – deploy from KRA Foreign Spaces
6.3.3 Foreign Unit Locations: Foreign Units must be placed on their deployment sources, or spaces connected to them by a friendly supply path. Spaces must be friendly, supplied, and the stacking limit must be obeyed. UN Safe Areas can't be used as placement locations.
EXAMPLE: The Croat player flips 1 Foreign Unit to full-size (Step 1), and then deploys another unit to Derventa (since there is a road connecting it to the CRO Foreign Space) (Step 3). He finally reduces -1 FA since he has units of one foreign army (HV) deployed on the map (Step 4).
Serbian foreign units' leaders: Vojislav Šešelj and Dragan Vasiljković (a.k.a. Captain Dragan).
7.0 Action Phase
7.1 Action Round
Action Round:
- Step 1 – Check Supply
- Step 2 – NATO Air Strike
- Step 3 – Play a Strategy Card
7.1.1 General Info: The Action Phase is played in Action Rounds. Each player executes his Action Round, followed by the next player's Action Round. During his Action Round, the player does the following procedure: checks supply, executes NATO Air Strike, and plays a Strategy Card. If a player has no cards in his hands, he can't execute his Action Round and the order of play passes to the next player.
7.1.2 End of an Action Phase: When all cards from a player's hands have been played – an Action Phase is over and the game progresses towards the next phase.
7.2 Step 1 – Check Supply
7.2.1 Procedure: The player checks the supply for his units. The procedure is this:
- If a unit is supplied and has an Unsupplied marker – remove the marker (this unit is now fully supplied and can perform actions in this round)
- If a unit is unsupplied and doesn't have an Unsupplied marker – place a Low Supply marker on the unit
- If a unit is unsupplied and has an Unsupplied marker (Low Supply side) – flip the marker to the Out Of Supply side
- If a unit is unsupplied and has an Unsupplied marker (Out Of Supply side) – reduce the unit (if it was full-size), or eliminate it permanently (if it was already reduced)
7.2.2 Elimination Due to Attrition: Reduced units without supplies are permanently eliminated due to attrition. They are not returned to the Eliminated Units Box, but are permanently removed from the game.
7.2.3 Shift SW For Eliminated Units: The player who caused the unit elimination by cutting the unit's supply path gains 1 SW per eliminated enemy unit. The owning player loses 1 SW per eliminated unit.
7.2.4 Choosing Unsupplied Units: If only some of the units within a region are unsupplied (EXAMPLE: Due to being undersupplied by limited Supply Sources) – the owning player chooses which of his units are going to be unsupplied, and marks them with Unsupplied markers. In following rounds these Unsupplied markers can't be relocated to other units.
7.2.5 Opening A Supply Path: If a player opens a supply path to his unsupplied units, their Unsupplied marker is IMMEDIATELY removed. But these units still can't execute operations in this Action Round.
EXAMPLE: The Serbian player checks his supply and finds that Zlatište is unsupplied. Since it has no Unsupplied marker - he places a Low Supply marker on that space (Step 2). Hrastova Glava is also unsupplied, and since it already had a Low Supply marker - he flips it to the Out Of Supply side (Step 3). If they remain unsupplied until the following turn - Zlatište will become Out Of Supply, and Hrastova Glava will be reduced (and still marked with an Out Of Supply marker).
7.3 Step 2 – NATO Air Strike
7.3.1 General Info: If any of the players has reached Intervention Level 2 (Air Strikes) – his opponent (the following player) will now perform a NATO Air Strike against his units. The strike is performed by choosing 2 full-size units (before the roll) and rolling a die for each of them. On the roll of 3-9, the unit is reduced. The player can roll ONLY ONCE per selected unit.
7.3.2 Strike At Once: A NATO Air Strike will also be performed whenever the player reaches Foreign Attitude Level 2. This happens immediately after reaching that level. If it happened as a result of an enemy's card play – that enemy will perform the strike. And if it happened as a result of the player's own actions – the player to his right will perform the strike.
7.4 Step 3 – Play a Strategy Card
Play a Strategy Card for:
- Operation (x1CV)
- Strategic Redeployment (x1CV)
- Replacement (x2CV)
- Diplomatic Action (+1/2 FA)
- Event
7.4.1 General Info: The player plays one Strategy Card from his hand and places it face-up on the Discard deck. Each card can be used for one of the following actions (for detailed description – see appropriate rules section):
- Operation (OP)
- Strategic Redeployment (SR)
- Replacement (RP)
- Diplomatic Action (DP)
- Event
8.0 End of Turn Phase
END OF TURN PHASE:
- Determine The Winner (last turn)
- Advance Turn Marker
8.1 Determine The Winner (last turn)
8.1.1 Procedure: If the last turn has been played, determine the winner by calculating the Victory Condition Score (See 3.0 Victory).
8.2 Advance Turn Marker
8.2.1 Procedure: If the game has not ended and the last turn of the game has not been reached, advance the Game Turn marker to the next space on the Turn Track and begin the Sequence of Play again.
9.0 Strategic Redeployment
9.1 General Rules
9.1.1 Procedure: Strategic Redeployment is used for the relocation of units over long distances. The player receives a number of Strategic Redeployment points equal to the Card Value. The player relocates units from its current spaces to any other friendly, connected and supplied spaces.
9.1.2 Must Be in Supply: A unit must begin and end its movement in a supplied space.
9.1.3 Redeployment Cost: It costs 1 Strategic Redeployment point to redeploy 1 unit.
9.1.4 Redeployment Path: The path between the two spaces must pass through friendly spaces. Croatian units can also use the Croatia Foreign Spaces, and Serbian units can use the Yugoslavia and Krajina Foreign Spaces, as long as they enter and exit the spaces with the same designation (e.g. if a unit enters through Krajina, it must also exit through Krajina). Bosniak units can't use Foreign Spaces for redeployment.
9.1.5 One Action Per Round: A unit may not make more than one action in the same Action Round.
EXAMPLE: The Serbians use 2 Strategic Redeployment points to move 2 brigades. The one on the right moves through YUG Foreign Spaces, while the one on the left moves through friendly spaces. Units may use Strategic Redeployment to move over longer distances.
10.0 Replacement
10.1 General Rules
10.1.1 Procedure: Replacements are used for increasing reduced on-map units to their full-size, or to bring back eliminated units. The player receives a number of Replacement Points equal to the Card Value x2.
10.1.2 Replacement Cost: The cost to replace units is as follows:
- Flip 1 reduced unit to its full-size side: 1 RP
- Recreate 1 eliminated unit as reduced: 1 RP
- Recreate 1 eliminated unit as full-size: 2 RP
10.1.3 No RP Storing: Any available RPs which are not spent are lost, and can't be transferred to the next turn.
10.1.4 No Successive Replacements: A player can't use a replacement action in two consecutive Action Rounds.
10.1.5 Replacement Locations: Recreated units are taken from the player's Eliminated Units Box and placed in friendly and supplied Key Spaces, while obeying the stacking limit. If there are no such spaces available, units can't be placed. UN Safe Areas can't be used as replacement locations.
10.1.6 Supply Limitations: An area must be fully supplied to be able to receive an unrestricted number of replacements. Unsupplied areas can't be used for replacements. An enclave (limited supplied area) can receive a maximum of 1 Replacement Point per area Key Space per Action Round.
10.1.7 Domestic Units Only: Players can replace Domestic Units only. Foreign Units are replaced during the Deploy Foreign Units Phase.
EXAMPLE: The Bosniak player uses 4 of his 5 Replacement Points (RP) to recreate 2 brigades, full-sized in Zenica. He also uses 1 RP to flip the reduced brigade in Travnik to full-size.
11.0 Diplomatic Action
11.1 General Rules
11.1.1 Procedure: Diplomatic Action is used for improving Foreign Attitude. The player increases his Foreign Attitude by +1 or +2 FA. If the card had a value of 2 or 3 – the player shifts his Foreign Attitude marker by +1 FA. If the card had a value of 4 – the player shifts the marker by +2 FA.
12.0 Event
12.1 General Rules
12.1.1 Procedure: The player implements an Event, as described on the Strategy Card being played.
12.1.2 Roll To Reduce: If a card states: "Roll to reduce X units" – a player must choose the units before rolling, and can roll ONLY ONCE per selected unit.
13.0 Operation
13.1 Operations In General
13.1.1 Procedure: The player receives a number of Operation Points equal to the Card Value. He uses the points to activate his spaces for Movement, Attack or Entrenchment.
13.1.2 Must Be in Supply: The space (and units in it) must be supplied in order to be activated.
13.1.3 Operation Cost: It costs 1 OP to activate 1 space for 1 Operation.
13.1.4 Order of Actions: The Operation Points can be spent for actions in any order.
13.1.5 Active Spaces and Units: When a space is active, the units in it are considered active and can be given an order. The player chooses if he wants all or some of these units to be given an order. If a unit is not given an order, it can be used in another activation for another order.
13.1.6 Multiple Activation: One space can be activated for several different actions. In that case, for each activation, 1 OP must be spent.
13.1.7 One Action Per Round: A unit may not make more than one action in the same Action Round. Units may end their movement in a space which will be later activated for some other action, but they can't take part in that subsequent action.
13.1.8 Foreign Spaces And Units: Foreign Units can initiate operations from Foreign and domestic (BiH) spaces. Domestic Units can initiate operations only from domestic spaces. If a Domestic Unit finds itself in a Foreign Space (e.g. as a result of a retreat), the only way to bring it back into a domestic space is by Strategic Redeployment.
EXAMPLE: The Croatian player plays his 4 CV Strategy Card for Operations. He gets 4 Operation Points and spends them as follows: 2 OPs to activate Novi Travnik and Vitez for an attack, 1 OP to activate Kiseljak for movement and 1 OP to activate Novi Travnik for entrenchment. A single space can be activated more than once for different actions, but the units used for these actions can't be the same (e.g. one unit from Novi Travnik was used for entrenchment, so it can't attack this round).
13.2 Movement
13.2.1 Procedure: Players activate a space for movement by spending 1 OP. He then moves his activated units, in a stack or individually using their Movement Factor.
13.2.2 Movement Cost: When entering a space which was friendly at the start of the Action Round – a unit spends 1 MF. In all other cases – a unit spends 2 MF. Terrain does not affect the movement cost.
13.2.3 Movement Path: A unit moves from one space to another using a road. It may not enter a space containing an enemy unit. It may not enter a space in which it would be Unsupplied.
13.2.4 Moving in Stacks: Stacks of units can move together if they use the same path and have the same destination, but they are not required to move together. Units in a same starting space may move to different destinations, or by different routes to the same destination.
13.2.5 Complete Movement: A unit must complete its movement before another unit moves. The movement of all units in one space must be completed before another space is activated for operation.
13.2.6 Capturing Spaces By Movement: If a unit moves into a vacated non-friendly space, it captures that space (See 13.5 Capturing Spaces And Regions).
13.2.7 Can't Enter An Initially Occupied Space: A unit may not enter a space which was occupied by an enemy unit at the start of the Action Round. A unit may not pass through a gap opened by other attacking units during the same Action Round, but may finish its movement in a friendly space from which the attack was made (obeying the stacking rules).
13.2.8 Limited Fuel Effect: If a player has reached Intervention Level 1 (Sanctions) or higher – he has limited fuel due to foreign sanctions. The Movement Factor of all his units is thus reduced by -1 MF, and he is not allowed to advance after an attack.
EXAMPLE: The Croatian player spends 1 OP to activate Kupres for movement. He moves 1 unit to Šipovo. Since it is an enemy space - the unit spends 2 MF and captures it. If he chooses to move another unit into Šipovo - that unit will also have to spend 2 MF (since it was enemy controlled at the start of the Action Round). He also moves 2 units from Kupres to Livno. Since it is a friendly space, each unit spends only 1 MF. These units can move further (since they have 3 MF left), but not into Glamoč. Glamoč was occupied at the start of the Action Round and although it's been captured, these units can't move through that gap.
13.3 Entrenchment
13.3.1 Procedure: Players activate a space for entrenchment by spending 1 OP. He places an Entrenchment In Progress marker on that space, to signify an entrenchment action. This space is not yet entrenched, but will be when the player spends another entrenchment action on that same space.
13.3.2 Two Step Process: Entrenchment is a two step process. First, an 'Entrenchment In Progress' marker is placed on a space. As a second action, an 'Entrenchment' marker is placed – the entrenchment is now built and in effect.
13.3.3 Two Entrenchments Per Round: A player may entrench (activate for entrenchment) a maximum of 2 spaces per Action Round.
13.3.4 One Unit For Entrenchment: It takes 1 unit to entrench a space, and an entrenching space must contain at least 1 unit. This unit performing the entrenchment action can't perform any other actions during this Action Round. The other units from the same space can perform other actions, providing the player spends an additional OPs to activate them.
EXAMPLE: A player activates a unit for entrenchment using 1 OP, and places an 'Entrenchment In Progress' marker. This unit can't perform other actions until the next round. To be entrenched, this space must be activated for entrenchment once again, in some other Action Round.
13.3.5 Entrench Any Terrain: Entrenchments may be built in all types of terrain. If a space already has a completed entrenchment – it can't be entrenched for a second time.
13.3.6 Remains If Vacated: If a space is vacated by units, the entrenchment remains in that space. The next friendly unit which enters the space will occupy the same entrenchment.
13.3.7 Destroyed When Captured: If an enemy captures an entrenched space, the entrenchment is destroyed. The entrenchment represents a fixed position for a specific unit on a specific section of a frontline – this section is of no use when a space is captured and a new frontline is established.
13.4 Attack
13.4.1 Designate The Attack: A player activates a space for an attack by spending 1 OP. He selects the attacking space/s and the defending space. Each player totals the CF of the units involved in the combat to determine his total CF.
13.4.1.1 Defending Space: The defending space must contain at least 1 enemy unit. If a space is empty – it can't be attacked, but can be captured by movement.
13.4.1.2 Multiple Attackers: Several attacking spaces can attack the same defending space. They must attack together (i.e. calculate losses as one battle). Each attacking space may attack only one defending space.
13.4.1.3 Foreign Spaces: Only Foreign Units may attack from or advance into Foreign Spaces. All units may attack into the Foreign Spaces.
13.4.1.4 OOS Reduces CF: If any of the units are OOS, their CF is reduced to HALF the original value (rounded up).
13.4.2 Move Before Attack: Units activated for an attack may move to adjacent friendly spaces before attacking (the space must be friendly controlled since the start of the Action Round). Several stacks of units may move before attacking, and can attack the same defending space at the same time.
13.4.3 Play Combat Cards: The attacker may play 1 Combat Card from his hand, or he can choose not to play it. After that, the defender may play 1 Combat Card from his hand, or he can choose not to play it. Played cards are placed face-up next to the map as a reminder – they are in effect for the duration of this round. After the round is over, they are discarded to a Discard deck.
13.4.4 Determine DRM: Both players calculate their Dice Roll Modifiers (DRM) based on: the defending space's terrain, Strategy Cards played, and Combat Cards played. This DRM number is added or subtracted from a player's die roll.
13.4.4.1 Terrain Effects: The terrain in the defending space helps the defender by reducing the attacker's effectiveness, or by increasing the defender's.
13.4.4.2 River: This terrain allows the defender to fire first, and gives a DRM bonus to the defender. The defender inflicts damage to the attacker first, and then (after reducing his strength) the attacker inflicts damage to the defender. River effects are applied only if the attacker attacked solely across a River. If at least one of the attacking units did not do so, this effect is not applied.
13.4.4.3 Bosniak Negative DRM: In Turn 1 the Bosniaks must add -2 DRM for all combat calculations, and in Turn 2 they must add -1 DRM. In Turns 3 and 4 they get no negative effect.
DESIGNER NOTE: This negative DRM represents the Bosniak's unpreparedness for war, and their lack of arms and command and control in the early stages of the war.
13.4.5 Roll Dice For Combat Effectiveness: Each player rolls a 10-sided die, modifies it by his DRM, and checks this table to determine his Combat Effectiveness:
| Dice Roll | CE (rnd up) |
|---|---|
| 0 | x 0.25 |
| 1-2 | x 0.5 |
| 3-6 | x 1 |
| 7-8 | x 1.5 |
| 9 | x 2 (critical) |
13.4.6 Take Losses: A Loss Number is then calculated using the following formula (the number is rounded up to the nearest integer):
LOSS NUMBER = Combat Effectiveness x CF
13.4.6.1 Step Losses: Each player applies that calculated losses to HIS OWN units. Losses are taken in steps, by reducing or eliminating units step-by-step. One Step Loss is:
- Flipping a unit from its full-strength to its reduced side
- The elimination of a reduced unit (and putting it in Eliminated Units Box)
13.4.6.2 Maximum Fulfilment: Each Step Loss adds the unit's LF towards the Loss Number. Players must fulfill as much of their Loss Number as possible. Players may not take fewer losses than required if it is possible to take the exact Loss Number. Players may not take more losses than the Loss Number.
EXAMPLE: A full-strength Serbian unit (with a Loss Factor of 6) and a reduced strength Serbian unit (LF 6) suffer an 8 Loss Number. The player may reduce the full-size unit, or he may eliminate the reduced one.
EXAMPLE 2: A full-strength Serbian elite unit (LF 7) and a reduced strength Serbian unit (LF 6) suffer an 8 Loss Number. The player MUST reduce the elite unit, because he needs to fulfill as much of his Loss Number as possible.
DESIGNER NOTE: The player whose units sustained losses has the choice of allocating these losses as he sees fit, as long as he applies maximum losses (as defined in the rules).
13.4.6.3 OOS Reduces LF: If any of the units are OOS, their LF is reduced to HALF the original value (rounded up). Use these reduced LF to calculate Step Losses and unit elimination.
13.4.6.4 Critical Hit: If a player rolls a 9 or higher (after all modifications have been applied) – he scores a critical hit. That means that he will inflict at least one Step Loss on the enemy units, even if his Loss Number didn't qualify for that.
13.4.7 Eliminate Units: The player gains +1 SW per eliminated enemy unit (regardless if the player was the attacker or the defender). The losing player loses -1 SW per lost unit.
13.4.8 Retreat After Defence: If the defender suffered 2 Step Losses more than the attacker – his units must retreat 1 space. If the difference was greater than 2, the defender must retreat 2 spaces. Units from the retreating stack may retreat to different spaces. Artillery Preparation losses are not counted for the purpose of determining the retreat.
13.4.8.1 Ignoring Retreats: Defending units in Trenches, Cities, Mountains, or Swamps may choose to ignore a retreat by taking one additional Step Loss from any defending unit. This action cancels the retreat, regardless of the number of retreat spaces required. This action can't be applied for the second retreat space only, but only for the entire retreat.
13.4.8.2 Retreat Restrictions: Retreating unit must follow the restrictions below:
- Each retreat step must move further away from the original defending space
- Must retreat into a friendly space
- Must end the retreat within stacking limits, but may retreat through overstacked spaces
13.4.8.3 Foreign Spaces: Croatian units (HVO, HV) can use Croatia Foreign Spaces for purposes of a retreat. Serbian units (VRS, SDG, SVK and NOZB) can use the Yugoslavia and Krajina Foreign Spaces in the same way. Bosniak units can't use any Foreign Spaces for retreat. If a unit retreats into a Foreign Space, it can only perform an SR operation (on one of subsequent rounds). After retreating into a Foreign Space, the unit stops its retreat – it may not continue the retreat into any other space.
13.4.8.4 Retreating OOS Units: OOS units can't move. If they need to retreat, they must reduce one or two steps instead (depending on the retreat length).
13.4.8.5 Elimination Due to Retreat: Units which cannot perform the retreat, nor ignore the retreat by taking an extra Step Loss – are eliminated.
13.4.8.6 Attacking Retreated Units: If defending units retreat into a space that is attacked later in the same Action Round, the units that have already retreated are automatically eliminated, and do not participate in the defence of that space. They are excluded from calculating the total CF and do not count towards fulfilling the Loss Number.
13.4.9 Advance After Attack: Remaining full-strength attacking units may advance if the defending units retreat, or are completely eliminated.
13.4.9.1 Advance Length: Advancing units may advance into the defender's space. Advancing elite units may advance one extra space, and so can units with an Advance a/a bonus. This extra advance step may be executed into an empty enemy space, into a friendly space, or back into the starting space. Units from the advancing stack may advance to different spaces. Advancing is optional, and the attacker doesn't need to advance if he chooses so.
13.4.9.2 Advance Restrictions: Advancing units must follow the restrictions below:
- May not enter a space containing an enemy unit
- Must stop upon entering a Mountain, Swamp, or River space
- Must end the advance within stacking limits, but may advance through overstacked spaces
- Domestic Units (ARBIH, HVO and VRS) may not advance into Foreign Spaces
- If Limited Fuel is in effect (due to the Intervention Level) – the unit may not advance after attack
13.4.10 Capture Spaces By Advance: A vacated space can be captured by advancing into it. If no units have advanced, an enemy space can't be captured, even if no enemy units were present in that space (See 13.5 Capturing Spaces).
EXAMPLE: The Serbian player uses 3 Operation Points to execute an attack. He uses 2 OP to activate Tešanj and Gračanica, and moves these units to Doboj as a move before the attack. He then uses 1 OP to activate Gradačac and attacks Derventa from these two spaces (Gradačac and Doboj) simultaneously, as one combined attack.
EXAMPLE: This is a detailed example of the Attack procedure:
- Designate The Attack: The attacker (Serbian) decides to attack Brčko (Bosniak) from 2 spaces: Bijeljina and Priboj. The attacker's total CF (sum of all his CF) is 20. The defender's total CF is 6.
- Move Before Attack: The attacker moves 2 SDG brigades from Loznica (1 to Priboj and 1 to Bijeljina).
- Play Combat Cards: The attacker plays no Combat Cards, but the Bosniak player does. He plays Mehmed Alagić for +3 DRM in defence.
- Determine DRM: The defender has no terrain DRM bonus, but receives +3 DRM for the Combat Card played. The attacker has no DRM bonus.
- Roll Dice: The attacker and defender roll their dice. The attacker rolls a 4 and the defender a 5. The attacker has a modified die roll of 4 and checks the Combat Effectiveness Table. The attacker's Combat Effectiveness is 1. The defender has a modified die roll of 8 (5+3) and his Combat Effectiveness is 1.5.
- Take Losses: The defender calculates losses: the attacker's CE x CF = 1 x 20 = 20. He takes losses by eliminating 1 unit, and flipping 1 unit to its reduced side (6+6+6=18 LF). The attacker's losses are: 1.5 x 6 (rounded up) = 9. He takes losses by flipping 1 SDG unit to its reduced side (7 LF). He can't take exactly 9 losses, so he fulfils them as much as he can.
- Eliminate Units: The Serbian player gains +1 SW for 1 eliminated Bosniak unit, while the Bosniak player loses -1 SW.
- Retreat After Defence: Since the defender suffered 2 more Step Losses than the attacker - he retreats 1 space (to Srebrenik).
- Advance After Attack: The attacker advances into Brčko.
Example card used: Mehmed Alagić, CV 2, Early War, COMBAT. "Use in attack or defence. Add +3 DRM." Card ID B1.
13.5 Capturing Spaces And Regions
13.5.1 General Info: A vacant enemy space is captured when a unit moves through it, ends its movement in it, or advances into it after a successful attack.
13.5.2 Place Space Control Marker: The player who captured the space places his Space Control marker on the captured space.
13.5.3 Key Space Capture: If the Key Space was captured – the capturing player gains 3 SW, and the losing player loses -3 SW. The player capturing the space also loses -1 FA (due to creating a refugee crisis).
13.5.4 Check Region Control: The player who captured the space checks if he gained control of the region. If the player controls a number of spaces in a region equal to its Control Value AND controls all of the region's Key Spaces (number of *), he gains control of that region. Mark region control by placing a Region Control marker in the Region Box, increase his SW by the number of Region Points, and reduce the losing player's SW by the number of Region Points. The number of spaces to control, Key Spaces and SW values for each region are shown on the map.
Region Box example: Podrinje – Control Value, Number of Key Spaces (3*), Region Points (5 SW), a place to put the control marker, and the Setup Control (starting controller).
13.5.5 Losing a Region: A player doesn't lose a region if he doesn't control the sufficient number of Control Spaces or Key Spaces, but only when another player captures it as explained above.
13.5.6 Capturing UN Safe Areas: The non-controlling player can capture a UN Safe Area by movement (if vacant) or by advancing after an attack (if the defender retreated or was destroyed). If a UN Safe Area is captured, the UN marker is removed from the space and capture SW points are gained/lost as usual. The capturing player loses -3 FA (instead of -1 FA for non-UN Key Space capture). Advance after attack, and all other attack rules apply as usual.
EXAMPLE: The Serbian player captures Foča (no SW is gained for its capture). Then he captures Goražde and gains +3 SW and -1 FA, while the Bosniak player loses -3 SW (since it is a Key Space capture). Since the Serbian player now controls a Control Value for Podrinje (3 spaces: Sokolac, Goražde and Foča) and all Key Spaces in Podrinje (Goražde) - he gains control of the region of Podrinje. He places his Region Control marker and gains a reward of 5 SW Region Points, while the Bosniak player loses the same amount.
Photo: Sarajevo's Grbavica neighbourhood just after the war, and Grbavica today.
14.0 Two Player Game
14.1 About The Variant
14.1.1 General Info: The two player game represents a war between the Serbs on one side, and a permanent Bosniak-Croat alliance on the other side. The rules for this variant are the same as for the 3-player game, with some additional rules which are explained in the following sections.
DESIGNER NOTE: A permanent Bosniak-Croat alliance is the biggest "what-if" of the war in BiH. Most sources speculate that had this alliance existed since the beginning of the war, it would have ended the war a year earlier, and with a major Bosniak-Croat victory.
14.1.2 Terminology: In the following segment, the Bosniak-Croat player will be referred to as the BC player. Sides refers to each of the three individual sides in the game: Bosniak, Croat and Serb. Allies refers to Bosniak and Croat sides.
14.2 Game Setup
14.2.1 Units: Same as the 3-player game: place units on the map, as shown by the unit setup markers.
14.2.2 Region Control: Place Region Control markers, as shown by the Setup section in the Region Boxes. Additionally, place Bosniak or Croat Region Control markers (BC player chooses) in the following regions:
- Srednja Bosna
- Sjeverna Hercegovina
- Zapadna Hercegovina
DESIGNER NOTE: Whichever marker is placed, it does not affect the Victory Condition Score calculation.
14.2.3 Turn Track: Same as the 3-player game: place the Turn Track marker on Turn 1.
14.2.4 Foreign Attitude Track: Same as the 3-player game: place each side's Foreign Attitude marker on 0 FA.
14.2.5 Strategic Will Track: Same as the 3-player game: place each side's Strategic Will marker on 30 SW.
DESIGNER NOTE: Bosniak and Croat SW and FA Tracks, and Victory Conditions are separate and are used as in a 3-player game. The BC player keeps track for all of them.
14.2.6 Draw Deck: Combine the Bosniak and Croat Strategy Card decks to create the BC player's deck. Remove from that deck all cards marked with: "Remove card for 2-player game". Shuffle each player's Early War cards and place the decks face-down next to the players. These will be their Draw decks. Set the Late War cards aside for later use.
14.3 Sequence of Play
14.3.1 Same As 3-player: The sequence of play is mainly the same as in a 3-player game, with any differences noted in the sections below.
14.3.2 Order of Play: Each Game Phase is played in the following order:
- Turns 1-2: Serbian -> Bosniak-Croat
- Turns 3-4: Bosniak-Croat -> Serbian
14.3.3 Cards Per Turn: The number of cards drawn at the beginning of each turn is as follows:
- Turn 1: Serbian 7 / Bosniak-Croat 5
- Turn 2: Serbian 7 / Bosniak-Croat 6
- Turn 3: Serbian 6 / Bosniak-Croat 6
- Turn 4: Serbian 6 / Bosniak-Croat 6
14.4 Victory
14.4.1 Victory: In order to win, the BC player must achieve the Bosniak OR Croat Victory Condition. When calculating the final Victory Score, the BC player wins if his Bosniak OR Croat score is higher than the Serbian score. When determining the BC player's non-controlled Key Regions, if an ally has control of the Key Region - that region counts as BC controlled.
14.4.2 Defeat: If either the Bosniak OR Croat side reaches the defeat condition (e.g. 0 SW or -7 FA) – the game is immediately over and the BC player has lost the game.
14.5 General Rules
14.5.1 Bosniak And Croat Alliance: The BC player uses Bosniak and Croat units, Control markers and keeps track of the SW, FA and Victory Score. He plays all actions as if the Bosniak and Croat factions were one side in the game.
14.5.2 Keeping Track: Since the SW, FA Tracks and VC are still separate for the Bosniak and Croat side, the rules for their calculation are the same as in the 3-player game. Details are explained in the following sections.
14.5.3 Card Usage: BC cards can be applied to both Bosniak and Croat side, no matter from which deck the card originates.
EXAMPLE: The BC player plays the Manpower Advantage card, giving him 10 RP for replacements. He spends 6 RP to replace Bosniak units, and 4 RP to replace Croatian units.
14.5.4 NATO Air Strike: The strike is performed by choosing 3 full-size units (instead of 2).
14.5.5 Can't Hurt An Ally: The BC player can't attack allied units, nor capture allied spaces or regions.
14.6 Operation
14.6.1 Reinforcement And Replacement Locations: During reinforcement or replacement actions, the BC player must place his units on the same-side spaces. This does not apply to Foreign Unit deployment – these units can be placed in allied spaces.
EXAMPLE: An HVO unit must be placed on a Croat controlled space (the unit is created in its own space). A HV Foreign Unit can be placed on a Croat or Bosniak space (since the Foreign Unit moves to the front for deployment).
14.6.2 Bosniak Negative DRM: If half or more of the troops engaged in combat are Bosniak – the BC player must apply a negative Bosniak DRM (-2/-1) on Turns 1 and 2, respectively.
14.6.3 Eliminating Enemy Units: When BC units eliminate an enemy unit – the side which had more units ATTACKING the enemy gets the SW reward. If both sides had the same amount of attacking units – the BC player chooses which side will get the reward. The reward can't be split and all of it is given to one side.
EXAMPLE: The BC player attacks an enemy unit and destroys it. Since there were 2 Bosniak and 2 Croat attacking units - the BC player gets to choose which side will get the reward.
14.6.4 Capturing Spaces: When BC units capture a space – it is marked by either a Bosniak or Croat marker depending on which side had more units that ENTERED the space. If both sides had an equal amount of entering units – the BC player CHOOSES which side gets control of the space, and the reward for it.
EXAMPLE: The BC player attacks a space and captures it. He enters the space with 2 Bosniak and 1 Croatian unit. The space is marked with a Bosniak Control marker, and the Bosniak side gets the SW reward.
14.6.5 Capturing Regions: When checking the region control, a player can find that neither the Bosniak nor Croat side by itself has enough spaces to capture a region. But if the allied spaces combined are enough to make a capture – the BC player captures that region. In that case he must CHOOSE which side will get control of the region, and the reward for it.
14.6.6 Losing Units And Control: When BC units are eliminated or control of the space or region is lost – the owning side loses the points.
EXAMPLE: If a Bosniak unit was eliminated – the Bosniak SW is reduced. If a Croat region was lost – the Croat SW is reduced.
15.0 Game Variants
Game variants are small changes to the rules which change the game's balance, dynamics and length. You can use them whenever you like, and even combine them.
15.1 Extended Game
15.1.1 About The Variant: In this variant, each player increases his hand size by 1 or 2 cards. E.g. during the first turn, the Serbian player will have a hand size of 8 cards, instead of 7. This will make the game a bit more unbalanced, and increases its length by approximately 30 minutes (+1 variant), or 60 minutes (+2 variant).
15.2 Fight To The End
15.2.1 About The Variant: In this variant, the game doesn't end at the end of Turn 4. Instead, Turn 4 is played over and over again until one of the players surrenders, or is defeated.
16.0 Appendix
16.1 Short History of BiH
Before the Second World War
For centuries, Bosnia and Herzegovina was a border province of the great Ottoman Empire. After the defeat in the Russo-Turkish War, and the subsequent Congress of Berlin, BiH was given over to the administration of Austria-Hungary. This eventually lead to the annexation of BiH in 1908.
After its defeat in the First World War, the A-H Empire dissolved and split into several European nations. From it, countries like Slovenia, Croatia and Bosnia and Herzegovina were formed. In order to preserve freedom during these turbulent ages, those countries merged with the Kingdom of Serbia. And thus, a new country was created: Yugoslavia – a country of Southern Slavs.
Yugoslav rulers wished to create a centralized kingdom. They abolished Yugoslavia's historic regions and countries, and tried to substitute the separate nations with a new 'Yugoslavian' nation. But in effect their goal was to create a Greater Serbia, although under a different name. The result of this absolute rule was alienation of the non-Serbs from the idea of Yugoslav unity.
The Second World War
Germany and Italy defeated Yugoslavia in an 11-day long blitzkrieg. The royal family fled to Great Britain and the country surrendered to fascist rule. Yugoslavia was divided into several countries and occupied zones. BiH was ceded to the fascist puppet state, the Independent State of Croatia (Nezavisna Država Hrvatska, NDH).
Several groups fought a war of attrition on BiH territory: German and Italian occupation forces kept a number of divisions within BiH territory in order to keep communication lines open and to protect the country from domestic uprising and Allied incursions.
Yugoslav communists under the leadership of Josip Broz Tito organized a multi-ethnic resistance group, the Partisans, who fought against German, Italian, NDH and Chetnik forces.
Croatian Armed Forces (the armies of NDH: Ustaše and Domobrani) were Croat and Bosniak pro-fascist nationalists, fighting alongside the German and Italian occupation troops against the Partisans.
Chetniks were a Serb nationalist movement with the aim of establishing an ethnically homogeneous 'Greater Serbian' state. They fought alongside the Germans and Italians against the Partisans.
All the major military offensives in Yugoslavia were conducted in BiH, and its peoples bore the brunt of the fighting. After the victory of Tito's partisan army, a new socialist Yugoslavia was created, and Bosnia and Herzegovina was made one of six constituent republics in the new federation.
Socialist Republic of Bosnia and Herzegovina
Due to its central geographic position within the Yugoslavian federation, post-war BiH was selected as a base for the development of the military defence industry. This contributed to a large concentration of arms and military personnel in Bosnia.
During this period, BiH was a peaceful and very prosperous country. It had a high employment rate, a strong industrial and export oriented economy, a good education system, and social and medical security. Its capital city Sarajevo was host for the 1984 Winter Olympics.
In 1980, Josip Broz Tito, supreme partisan leader, the founder and life-long president of Yugoslavia – died. After his death the system slowly but surely began to deteriorate.
The Breakup of Yugoslavia
During the 1980s, an increasingly nationalistic climate began to take over. The doctrine of Brotherhood & Unity (Bratstvo i jedinstvo) of all South-Slavic peoples began to lose its potency, creating an opportunity for nationalist elements in the society to spread their influence.
On November 18th 1990, after 45 years of one-party communist rule, the first democratic elections were held in BiH. Three new parties emerged as representatives of the three peoples:
- Bosniak SDA – Party of Democratic Action
- Serbian SDS – Serbian Democratic Party
- Croatian HDZ – Croatian Democratic Union
The proclaimed policy of the Serbian party was: "All Serbs in one state". That meant that if any of the Yugoslav republics wished to leave the union – they were allowed to, but they had to relinquish the Serbian populated territories. They argued that people had the right to decide if they wished to remain in Yugoslavia, and the Serbs opted to remain. That gave this conflict ethnicity as the main cause and measure of all future actions.
Meanwhile, the Croats were enjoying a national revival, the so called "Second Croatian Spring". For them, the final goal was Croatia – as an independent country, or as a highly independent member of a new Yugoslavian Confederation. Since Croatia had a significant Serbian population, they faced the same problem as BiH – a request by its Serbian population to remain in Yugoslavia. And since there was a large Croatian population within BiH as well, the Croats in BiH also wanted renegotiation of their position within BiH.
For the Bosniaks (or so called "Muslims by nationality"), Bosnia and Herzegovina was a home country. The main goal of their party was to keep BiH intact, and to keep a status quo for as long as possible.
Since these nationalistic parties had conflicting goals, a great consensus had to be made. But due to the lack of statesmanship on all sides, and due to foreign influence and interests (primarily by Great Britain, France, Germany and USA) – these differences grew even greater until a war erupted in the early spring of 1992.
The War
The war was characterized by bitter fighting, indiscriminate shelling of cities and towns, ethnic cleansing and systematic mass rape – mainly perpetrated by Serbian, and to a lesser extent by Croat and Bosniak forces. Events such as the Siege of Sarajevo and the Srebrenica massacre later became tragic reminders of a conflict that should not have been fought in the first place.
The Serbs were initially militarily superior due to the weapons and resources provided by the ex-Yugoslav Army (JNA), but they eventually lost momentum as the Bosniaks and Croats created an alliance. As a result of the Serbian atrocities committed at Srebrenica and Markale, NATO air forces intervened in 1995 with Operation Deliberate Force targeting the positions of the Army of the Republika Srpska.
The war was brought to an end after the peace negotiations held in Dayton, Ohio and signing of the General Framework Agreement for Peace in Bosnia and Herzegovina in Paris on 14 December 1995.
It is presumed that more than 100.000 people died, and more than 2 million people were displaced.
Aftermath
Today there are 14 governments in Bosnia and Herzegovina, 10 cantons, 3 nations, and 2 state entities. Nothing is singular, and everything is divided.
For centuries, the peoples of this country lived together and stuck together for better and for worse. But the war changed all that. Today each nation has its own and contradictory version of the historical events – reminiscent to the Kurosawa's story of Rashōmon.
It remains to be seen if BiH will rise above the legacy of The War and reach (or surpass) the prosperity it enjoyed during socialist Yugoslavia.
16.2 Card Notes
Serbian Deck
S1 – Slavko Lisica: Slavko Lisica was an aggressive and skilful commander, known for his use of armoured forces. He organized the capture of Kupres (a key strategic point in southern Bosnia), formed and commanded the 2nd Armoured Brigade (an elite unit used in all major offensives), and was in charge of a leading spearhead during Operation Corridor. His troops captured Bosanski Brod, the main crossing point over the river Sava – and by doing so, he denied the Croatian Army a way into northern Bosnia.
S2 – Novica Simić: Novica Simić was a distinguished commander, known primarily for his role in re-establishing a road link between the western Serbian enclave (Bosanska Krajina) and the Yugoslavian mainland. He was the commander of the 1st Tactical Group during the crucial Operation Corridor, and was later promoted to commander of the East-Bosnian Corps.
S3 – T-55 Main Battle Tank: The T-55 was a Soviet main battle tank introduced in the years following the Second World War. After the initial design problems were addressed, the T-54/55 series eventually became the most-produced tank in military history. It's been in use with the Yugoslav Army since the early 60's, and with its 1600 active vehicles it was the most numerous armoured vehicle in its inventory. It's been used throughout the war in BiH by the VRS as its main battle tank.
S4 – Posavina Corridor Offensive: Operation Corridor 92 was an offensive operation in Posavina executed by the Army of Republika Srpska in the period of June-October of 1992. In the summer of 1992, forces of ARBIH and HV succeeded in dividing Serbian controlled territory into two parts (western and eastern). As a result, the western part came under severe logistical difficulties. The Serbian Army initiated this offensive to reclaim lost territory and secure the road connecting the two parts. After 4 months of fighting, the majority of the Posavina region fell under Serbian control and the road link with the eastern enclave was re-established.
S6 – Serbian Intervention: The Republic of Serbia played a major part in the war, providing the Serbian side with: military personnel, paramilitary troops, logistics, intelligence and financial support. Srpska Dobrovoljačka Garda (Serb Volunteer Guard, SDG) was a part of that support. It was a paramilitary unit from Serbia, organized by the Serbian secret service (Resor Državne Bezbednosti), and was led by a career criminal: Željko Ražnatović – Arkan. This unit was used as an elite assault unit in all major battles. It's also being held responsible for some of the most brutal aspects of ethnic cleansing.
S7 – Declaration Of Republika Srpska: In a session on October 14-15, 1991, the People's Assembly of Bosnia and Herzegovina (then part of Yugoslavia), approved the "Memorandum on Sovereignty". It was adopted despite opposition from Serb deputies, who regarded the move as illegal. On October 24, 1991, the Serb deputies formed the Assembly of the Serb People in Bosnia and Herzegovina. The assembly tasked itself with the protection of the Serbs' interests, which they contended had been jeopardized by decisions of the Bosnian parliament. On January 9, 1992 the assembly proclaimed the Republic of the Serb People of Bosnia and Herzegovina (Republika srpskog naroda Bosne i Hercegovine), declaring it part of Yugoslavia. The name Republika Srpska was adopted on August 12, 1992.
S8 – Bosniak-Croat War: The Bosniak-Croat War was an armed conflict between the Bosniak and Croatian sides during the war. It lasted from October 1992 to February 1994, and is referred to as a "war within a war". Initially, Bosniaks and Croats fought in alliance against the Serbs, but their conflicting political goals and war attrition resulted in escalating tensions by the end of 1992. It was not an all-out war, and was mainly confined to two regions: Srednja Bosna and Zapadna Hercegovina. An agreement ending the hostilities was signed in Washington on March 18, 1994, which led to the establishment of the Federation of Bosnia and Herzegovina, and created a new Bosniak-Croat alliance that brought the war in BiH to an end.
S9 – M-84 Main Battle Tank: The M-84 was a main battle tank which was manufactured in Yugoslavia, as a variant of the Soviet T-72. It was the best armoured asset of the Yugoslav People's Army, and was during the war primarily used by the Serbian forces. Since the Croat and Bosniak side lacked any significant armour, the use of the M-84 was highly effective, particularly in the early stages of the war. The tank was unsuitable for mountainous and urban environments, so its use was limited to clear and open terrain.
S10 – Air Supremacy: The air force of the Army of Republika Srpska was inherited from the Yugoslav People's Army. It consisted of around 20 light attack aircraft, 40 light helicopters and various anti-aircraft gun and missile batteries. Since the Croatian and Bosniak sides had negligible air assets, the Serbs were able to use their air force almost unhindered, primarily in the logistical and ground support role.
S11 – Momir Talić: The war found Momir Talić in Banja Luka, at the position of the 5th JNA Corps' Chief of Staff. The corps was transformed into the 1st Krajina Corps of the Army of Republika Srpska, and Talić was promoted to its commander. He was the only officer that entered VRS with the rank of General, and he was expected to be appointed as its commander – a position which was eventually given to Ratko Mladić. He was a skilled commander, specialized in armoured warfare. After the war he was promoted to the highest military position – the Chief of Staff of the Army of Republika Srpska.
S13, S25 – Mobile Reserves, Concentrated Firepower: Despite the VRS's impressive military capability, it always lacked the manpower reserves to man the 1000 kilometre frontage. So its prevailing strategy was to use the large stockpile of heavy weapons and highly mobile reserves to plug the gaps in the defensive lines and to support the frontline units.
S14 – Alliance Of Serbian Lands: Two Serbian self-proclaimed republics (Srpska in BiH, and Krajina in Croatia) cooperated during the war. This also included a military alliance, which was created at the start of the conflict, and strengthened after the creation of a joint military staff in 1994. The Army of Republika Srpska Krajina (SVK) took part in the war, mainly in offensives in the Cazinska Krajina and Posavina regions. Although the troops of Krajina were of lesser quality than those of VRS, they nevertheless helped Srpska in achieving its military goals.
S15 – Inter-Bosniak War: On September 29, 1993 the powerful Bosniak politician Fikret Abdić took control of Velika Kladuša, a town on the north-western edge of BiH. He declared the Autonomous Province of Western Bosnia (APZB), an unrecognized puppet state sponsored by both the Serbian and Croatian leadership. He also created its paramilitary force: People's Defence of Western Bosnia (NOZB), and trained and equipped it with Serbian help on territory of Krajina. This army was used in all subsequent Serb offensives against the Bosniak enclave of Cazinska Krajina. The NOZB was disbanded in 1995, after the succesful Croatian "Oluja" or "Storm" offensive.
S18 – Serbs Help Everybody: The Serbian side exploited the Bosniak-Croat conflict by helping both sides. The help was mainly shown by: selling weapons, providing artillery support, and allowing the transit of people and supplies. This way the Serbs strengthened their own position, both strategically and diplomatically, while keeping their enemies fighting each other.
S19 – Podrinje Guerrilla: The Bosniak forces in the Podrinje region were surrounded by Serbian forces from the onset of the war. Without armament and low on supplies, they resorted to guerrilla warfare. They were led by former policeman and Slobodan Milošević's bodyguard – Naser Orić. These militiamen, armed with hunting rifles and automatic rifles from the police armoury in Srebrenica, carried out attacks on Serbian villages. These forces committed numerous atrocities on the local Serbian population, which would take revenge in 1995, after the fall of Srebrenica.
S20 – Fuel Deal With Croatia: Republika Srpska had a critical shortage of fuel. Its main supply line was from Serbia (Yugoslavia), through the narrow Posavina corridor. This line had a limited capacity and was frequently interrupted, so the leadership of Srpska struck a covert deal with the leadership of the Republic of Croatia. Croatia was to supply the Serbs with fuel using several routes: from Split to Južna Krajina, from Ploče to Istočna Hercegovina, and from Sisak to the Autonomous Province of Western Bosnia. The fuel was sold for billions of US dollars and helped the Serbs to maintain their logistical capabilities in the later stages of the war.
S24 – UN Arms Embargo: On September 25, 1991 the UN Security Council imposed an international arms embargo on Yugoslavia, in an effort to prevent escalating violence. At that time, only the Yugoslav People's Army (JNA) had significant supplies of heavy weapons. At the start of the war, JNA transformed into Army of Republika Srpska (VRS). Thus the Serbs inherited large weapons stockpiles, while the Croats and Bosniaks had to smuggle or capture weapons from Serbs. The arms embargo "cemented an imbalance in weaponry" among the sides in the conflict.
"This is not right .. this thing you're trying to achieve. The path on which you're taking Bosnia and Herzegovina is the same highway of hell and suffering, which Slovenia and Croatia have already passed. Don't think you won't take Bosnia and Herzegovina to hell, and Muslim people maybe even into extinction." – Radovan Karadžić
Croatian Deck
C1 – Hrvatske Obrambene Snage: The Croatian Defence Forces (HOS) was a paramilitary force created by the Croatian political party HSP. It was created in January 1992, and was integrated into HVO and ARBIH by the end of that year. HOS units fought against the Serb forces together with the HVO and ARBIH. They included many Bosnian Muslims (Bosniaks) in their ranks and advocated a close alliance between Croats and Bosniaks. It is presumed that HOS had around 8000 fighters, armed mainly with light infantry weapons.
C2, C20 – Radio Intercept, Centre For Electronic Surveillance: Središnjica elektroničkog izviđanja was the military intelligence unit of the General Staff of the Croatian Army. It had a significant role in collecting intelligence on the Republika Srpska. The unit successfully monitored communications of the Serbian political and military leadership throughout the war.
C3 – Srednja Bosna Offensive: Srednja Bosna was a region of strategic importance. It occupied a central geographical location, and housed several important arms production facilities and stockpiles. Bosniak and Croat forces fought for control of this region throughout the Bosniak-Croat War, and several offensives were planned and executed in this period.
C5, C6, C13 – Croatian Intervention, Incursion From Croatia, Croat-Bosniak Alliance: Croatia was involved in the war with its Croatian Army (HV), both openly and covertly. Its involvement had three distinct phases. In the first phase (Spring to Autumn 1992), the HV was fighting in alliance with the Bosniaks and against the Serbs in Posavina, Tropolje and Hercegovina. The second phase (late 1992 until March 1994) was a period of the Bosniak-Croat War, and the involvement of HV in that period is still under debate. The third period (March 1994 until the end of the war) was marked by the Split Agreement, which created a Croat-Bosniak military alliance. As a result, the HV was again legally and openly used in the war, which led to the ceasefire and peace agreement by the end of 1995.
C7, B7 – HVO Takeover, Bosniak Refugee Crisis: The Bosniak-Croat War was a complex conflict of former (and future) allies. It involved open fighting, negotiations, foreign help and mediation. During this period, the HVO successfully took over several towns before the ARBIH could react. On the other hand, the Bosniaks used their manpower advantage (increased after a significant influx of refugees) to expel the Croats from their territories.
C8 – Declaration Of Herceg-Bosna: Herceg-Bosna was an unrecognized geopolitical entity and proto-state in Bosnia and Herzegovina. It was proclaimed on November 18, 1991 under the name Croatian Community of Herceg-Bosna. On August 28, 1993 it was declared a republic following the proposal of the Owen-Stoltenberg Plan, envisioning Bosnia and Herzegovina as a union of three republics. In March 1994 the Washington Agreement was signed which ended the conflict between Croats and Bosniaks. Under the agreement, Herceg-Bosna was to be joined into the Croat–Bosniak federation, but it continued to exist until it was formally abolished in 1996.
C9 – International Recognition Of Croatia: International recognition of the Republic of Croatia was a process of diplomatic recognition after the declaration of independence on June 25, 1991. All 12 EU member states, and a significant number of other countries recognized Croatia on January 15, 1992, so that date is celebrated in Croatia as the Day of International Recognition.
C10 – Prepared For War: Unlike the Bosniaks, the Croats in BiH were prepared for the war. After JNA (Yugoslav Army) destroyed the Croat village of Ravno in BiH in October 1991, the leadership of BiH did not react accordingly. As a response, Croats began organizing themselves into a political community (Herceg-Bosna), and created their own army – HVO. They found support in the neighbouring 'mother country' of Republic of Croatia, in the person of the Croatian minister of Defence Gojko Šušak. He organized arming the HVO, and established logistics centres for sending men, weapons and ammunition to the ARBiH. So when the war between the Croats and Bosniaks broke out in 1993 – the Croats had the initial advantage over the ill-prepared Bosniak Army.
C11 – "Ludvig Pavlović" Unit: The Special Purpose Unit "Ludvig Pavlović" was an elite HVO unit. It was a volunteer, regiment sized formation which was initially formed and used during the war in Croatia. When the war in BiH broke out, the unit moved to Herzegovina where it was used in all major HVO battles.
C12 – 1st Guards Brigade: 1st Guards Brigade of HVO "Ante Bruno Bušić" was the best known HVO military unit in the war. It was founded in 1992 as a regiment, and it took part in all major actions in the war. It was also the first to be reorganized into a Guards (professional) mechanized brigade in 1994. The brigade included infantry, artillery, armour, and anti-tank formations.
C17, C24 – 66th Pioneer Regiment, Road To Dinara: "66. Pukovnija" was an engineer formation which built roads for the Croatian forces through inaccessible terrain. Its operations increased the mobility of Croatian units, and enabled swift relocations of troops in an otherwise inhospitable environment. The road to Dinara is the regiment's best known achievement, being built in a period of several months in mountainous terrain, and under harsh winter conditions.
C18 – Siege Of Bihać: Bihać is a town in north-western BiH, in the Cazinska Krajina region. It was a Bosniak enclave surrounded by Serbian territory, and it was under siege for more than three years. During that time, Bihać was under constant attack by forces of Republika Srpska, Serbian paramilitary forces, and forces of the Autonomous Province of Western Bosnia. The siege was lifted after the successful Croatian "Storm" offensive.
C19 – White Route: Bijeli put za Novu Bilu i Bosnu Srebrenu was a humanitarian convoy for the Croatian enclave in Srednja Bosna. It was carrying food and medications for Nova Bila, a Croatian town which was under siege by Bosniak forces. The convoy was travelling for 14 days, and it got significant media coverage. Bosniak authorities allowed it a right of passage, and it successfully brought desperately needed supplies to the besieged town.
C21 – ARBIH-HVO Integration: There were several attempts during the war to put units of ARBIH and HVO under one unified command. These attempts were unsuccessful, mainly because of mistrust between the Bosniak and Croatian leadership. Eventually both sides changed their approach, and requested units to subordinate to the regional commands. Most units disobeyed those orders, and were rather disbanded than to come under a (potential) opponent's flag. In some cases it was successful, and units integrated in regional command structures.
C22 – No-Fly Zone: Operation Deny Flight was a NATO operation which purpose was to enforce a no-fly zone over BiH. It lasted from 1993 to 1995 and was successful in preventing Serbians of using their air force. It was the first combat engagement in NATO's history.
C23 – Operation "Storm": Operation "Storm" (Croatian: Oluja) was the defining military operation of the HV. The aim of the offensive was to destroy the rebellious region of Krajina. It was a decisive victory for the Croatian Army, as it successfully destroyed the majority of the SVK (Serbian Army of Krajina) and relieved the Bihać pocket from a 3-year siege. This enabled the Bosniaks and Croats to change the balance heavily into their favour and to push deep into the heartland of Bosnian Serb territory – the region of Bosanska Krajina. The subsequent operations came close to capturing Banja Luka (the de-facto Bosnian Serb capital) and brought the war to an end in a couple of months.
Bosniak Deck
B1 – Mehmed Alagić: Mehmed Alagić was the commander of the 3rd and 7th Corps of ARBIH. His corps captured strategic points in Srednja Bosna, and had a major role in Operation Sana, which captured several large parts of Bosanska Krajina. After the war he worked as the mayor of his hometown Sanski Most, and became one of the most respected Bosniak generals.
B6 – Sarajevo City Hall: "Sarajevska vijećnica" was a prominent building in the centre of Sarajevo, designed in 1891 by the Czech architect Karel Pařík. At the time it was built, it was the largest and most representative building of the Austro-Hungarian period in Sarajevo. Before the war it served as a national library, containing 1.5 million volumes and over 155,000 rare books and manuscripts, the treasure of Bosnian culture and literary art. It was the target of Serbian shelling in August of 1992, which set the building on fire. Fire engulfed the building leaving it completely destroyed, together with its entire collection. The building itself was repaired and restored after the war, and is now regarded a national monument.
B8 – International Recognition Of Bosnia And Herzegovina: Bosnia and Herzegovina was recognized by the majority of EU countries and the USA in April 1992. This recognition came at the beginning of the war, and gave the Bosniak leadership legitimacy to respond to armed conflict which had already started throughout the country.
B9 – Patriotic League Formed: Patriotska liga was a paramilitary organization, organized by the Bosniak political party SDA in 1991. Its purpose was to become a core of the future Bosniak army, in the event of an escalated armed conflict in BiH. Its organization was based on the model of Territorial Defence (a component of the Yugoslav Armed Forces). The Patriotic League was used in the initial stages of the war as an armed force by the Bosniak leadership, and was integrated into the Army of BiH (ARBIH) in April 1992.
B10 – Sniper Alley: The Serbian army took control of the hills surrounding capital Sarajevo at the onset of the war. As a result, they had the whole city under observation and could fire at will. They used this superior position to execute frequent sniper attacks, especially on open areas such as squares and avenues. Avenue Zmaja od Bosne was infamous as a location of those attacks, and gained the nickname "Sniper Alley". It was a main road passing through the whole length of Sarajevo, connecting all major city districts. It was customary for civilians to run while crossing the street, or wait for UN armoured cars to provide some kind of escort. In the siege of Sarajevo, Serbian snipers have wounded 1030, and killed 225 people. Of those killed, 60 were children.
B11 – UN Safe Areas Established: United Nations Safe Areas were humanitarian corridors established during the war. The idea behind them was to protect the civilian population within the enclaves, and to provide basic humanitarian help for those under siege. Although the UN peacekeeping troops were deployed in significant numbers in BiH (under UNPROFOR mandate), they failed to protect these areas from attacks. Several Bosniak safe areas were overrun by Serbian forces, most notably Srebrenica, which resulted in the worst war crime on European soil since the Second World War.
B12 – Sarajevo Tunnel: The "Salvation Tunnel" was an underground tunnel built by Bosniak forces during the siege of Sarajevo. It ran underneath the Sarajevo airport runway and connected the two Bosniak-held neighbourhoods. It was a main supply line for the city, used for shuttling food, weapons and other supplies.
B13 – 17th Knights Mountain Brigade: 17. viteška krajiška brdska brigada was an elite military formation in the ARBIH. It was a light, mountain infantry brigade used primarily for assault and penetration actions. It was initially a part of 3rd Army Corps, and later became an integral part of the newly-formed 7th Army Corps. 17 members of this brigade were awarded the highest Bosniak military honour – the Golden Lilly. For its achievements, the brigade itself was awarded the elite titles Slavna (Famous) and later Viteška (Knights).
B14 – Atif Dudaković: Atif Dudaković is probably the most famous Bosniak General of the war. He commanded the 5th Corps of ARBIH, and successfully protected Bihać and Cazinska Krajina from being overrun by Serb forces. His forces destroyed the Bosniak separatist army NOZB, destroyed the 1st Krajina Corps of VRS, and captured Ključ, Petrovac and Sanski Most. After the war he was appointed Commander of the Joint Command of the Army of the Federation of Bosnia and Herzegovina.
B15 – Izet Nanić: Izet Nanić was the commander of 505th Knights Mountain Brigade. He is remembered as a fearless and talented commander, under whose leadership the 505th Brigade fought with success while being encircled and heavily outnumbered. He died in combat at the age of 29, hours before his troops finally broke out of the siege. Posthumously he was awarded the highest military honour in BiH: The Order of the Hero of the Liberation War.
B16 – Spring Offensive: The ARBIH "Spring Offensive" in March, 1994 was a major Bosniak strategic offensive against the Bosnian Serbs. It came after the conclusion of the Bosniak-Croat War, when the Bosniak Army could concentrate its efforts on one enemy. ARBIH employed its numerical superiority in multiple, simultaneous attacks on all fronts, hoping that the Serbs would not have the reserves to counter them all. The operation was initially a success, but the Serbs managed to use their mobile reserves to counterattack and stabilize the frontline. Nevertheless, the offensive showed the progress the Bosniak Army had made since its formation.
B20 – Foreign Volunteers: El Mudžahid was a unit in 3rd Corps of ARBIH. It was made up of Muslim volunteers – initially foreign fighters from Africa and the Middle East, and later from BiH as well. They fought against Serbian and Croatian forces, and played an important role in the battle for Vozuća against the VRS, where this unit perpetrated a brutal massacre of the Serbian population.
B23 – Srebrenica: Between July 13 and 19, 1995, the Serbian army perpetrated an organized killing of 8372 Bosniaks after capturing the UN Safe Area of Srebrenica. The victims were aged between 12 and 77 years. The executions were done by units of the VRS under the command of Ratko Mladić, while UNPROFOR failed to prevent it. It is considered to be one of the worst crimes in Europe since the Second World War, and a proof of the genocidal plan devised by the leadership of Republika Srpska.
B24 – Destruction Of Mostar Bridge: Stari Most (Old Bridge) was a famous landmark of the city of Mostar, and one of the most recognizable buildings in BiH. It was built in the 16th century by Ottoman builder Mimar Hayruddin, and was considered an exemplary piece of Balkan Islamic architecture. It was destroyed on November 9, 1993 by Croat military forces during the Bosniak-Croat War. It was reported that more than 60 shells hit the bridge before it collapsed. In 1998, UNESCO established an international committee of experts to oversee the reconstruction of the bridge. It was decided to build a bridge as similar as possible to the original, using the same technology and materials. The bridge was rebuilt and was inaugurated on July 23, 2004.
B25 – Miss Sarajevo: Inela Nogić became world-famous during the Siege of Sarajevo when she won the 1993 Miss Besieged Sarajevo beauty pageant. The contest was held in besieged Sarajevo, and held in a basement in order to avoid the sniper and mortar attacks from Serb forces. The contestants held up a banner that read "Don't let them kill us". This pageant was documented on camera, and was broadcast internationally. This provoked the international pressure to end the siege. The single "Miss Sarajevo" by the Irish band U2 was inspired by this event, and the band held a concert in Sarajevo shortly after the war.
B26 – Operation Deliberate Force: After the fall of Srebrenica in July 1995, the UN threatened the Serbs with using NATO airpower if they attacked any of the remaining UN Safe Areas. Serb forces launched attacks against the Safe Areas of Žepa, Bihać and Sarajevo, and that lead to NATO air strikes. Operation Deliberate Force began on August 30, 1995, and targeted Serbian military targets and installations throughout BiH. As many as 400 aircraft participated in the operation. Overall, 3515 sorties were flown and a total of 1026 bombs were dropped on 338 Bosnian Serb targets located within 48 complexes. The aircraft involved in the campaign operated from Aviano Air Base in Italy, and from U.S. aircraft carriers in the Adriatic Sea.
B27 – Yugoslavian Embargo: The Vance-Owen Peace Plan was a proposition for a negotiated end of hostilities in BiH. It was created in 1993 by Cyrus Vance and David Owen, and envisioned BiH as a country divided into 10 cantons, each controlled by one ethnical majority. That meant that the Serbs had to relinquish 27 percent of their territory, and that future Serb provinces would be separated by Bosniak and Croatian territories. Serbian president Slobodan Milošević accepted the peace plan, under threat of increased international sanctions. The plan was also accepted by the Bosniaks and Croats, but Bosnian Serbs rejected the offer. As a result, Yugoslavia imposed an embargo on Republika Srpska and for a while stopped the support of Bosnian Serbs.
B28, B32 – Bihać Black Market, Raid On Barracks: Since several Bosniak-held areas were encircled by enemy troops, they had to somehow acquire ammunition and supplies. So the leadership of the Bosniak enclaves resorted to raids and the art of negotiation. The town of Bihać was famous for surviving under siege. They bought their supplies from their own enemies, who earned large profits from those deals. Sometimes that wasn't enough, and meant that the Bosniaks had to resort to raiding the enemy barracks and capturing their stockpiles.
B30 – Media Coverage: The Bosniak government started the war uprepared, lacking weapons, ammunition and military organization. To balance that, they've used the media and diplomacy as a strategy, hoping to achieve either a military intervention or (at least) lifting of the weapons embargo.
"Nobody ever succeeded in ruling Bosnia, they just thought they did." - Alija Izetbegović
16.3 Selected Bibliography
OFFICE OF RUSSIAN AND EUROPEAN ANALYSIS, United States Central Intelligence Agency: Balkan Battlegrounds: A Military History of the Yugoslav Conflict (Volumes I-II). CIA, Office of Russian and European Analysis. Washington, DC, 2002-2003.
SILBER, Laura; LITTLE, Allan: Yugoslavia: Death of a Nation. Penguin Books. 1997.
MARIJAN, Davor: Borbe za Kupres u travnju 1992. Polemos: časopis za interdisciplinarna istraživanja rata i mira, Vol.III No.5. Zagreb, 2000.
MARIJAN, Davor: Domovinski rat. Despot Infinitus, Hrvatski institut za povijest. Zagreb, 2016.
SIMIĆ, Novica: Operacija "Koridor-92". Boračka organizacija Republike Srpske. Banja Luka, 2011.
MARIJAN, Davor: "Jedinstvo" - Posljednji ustroj JNA. Polemos: časopis za interdisciplinarna istraživanja rata i mira, Vol.VI No.11-12. Zagreb, 2003.
MARIJAN, Davor: Oluja. Hrvatski memorijalno-dokumentacijski centar Domovinskog rata. Zagreb, 2007.
SEKULIĆ, Milisav: Knin je pao u Beogradu. Nidda Verlag. Bad Vilbel, 2000.
MAMULA, Branko: Slučaj Jugoslavija. CID. Podgorica, 2000.
ZOVAK, Jerko: Rat u Bosanskoj Posavini 1992. Posavska Hrvatska d.o.o., Grad Slavonski Brod. Slavonski Brod, 2009.
GLENNY, Misha: The Fall of Yugoslavia. Penguin Books. 1996.
BURG, Steven L.; SHOUP, Paul S.: The War in Bosnia-Herzegovina: Ethnic Conflict and International Intervention. M.E. Sharpe. Armonk, New York, 1999.
HOLBROOKE, Richard: To End a War. Random House, Inc. New York, 1998.
SHRADER, Charles R.: The Muslim-Croat Civil War in Central Bosnia: A Military History, 1992–1994. Texas A&M University Press. College Station, Texas, 2003.
LOYD, Anthony: My War Gone By, I Miss It So. Penguin Books. 1999.
Photo: Watching over Sarajevo