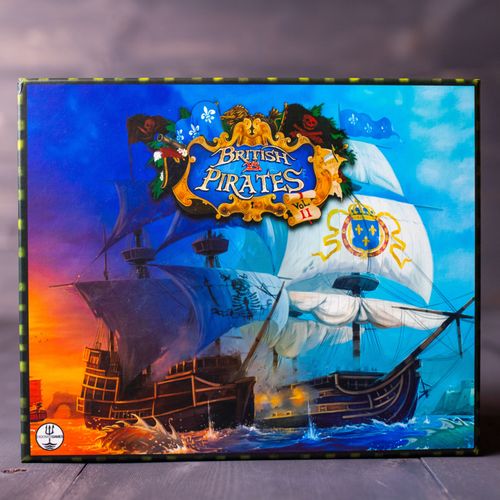
British vs Pirates: Volume 2
British vs Pirates: Volume 2 Rulebook
Table of Contents
Table of Contents
- Components
- Ship Card
- Captain Card
- Crew Token
- Skill Card
- Event Cards and Tokens
- Fort Cards
- Mission Cards
- Your Turn
- Movement Action
- Movement Action: Anchoring and Ramming
- Attack Actions: Firing Arcs and Line of Sight
- Attack Action: Targeting a Ship
- Attack Actions: Cannons
- Special Shot Types
- Attack Actions: Receiving Damage
- Attack Actions: Boarding
- Harvesting Goods
- Map Legend
- Market Prices
- Game Setup: Victory Game Mode
- FAQ
- Game Setup: Annihilation Game Mode
Components
(Not to scale)
- Sloops
- Light Zebecs
- Frigates
- Sea Monsters
- Carracks
- 3rd Rates
- Forts
- Wind Vane
- Ship Cards
- Captain Cards
- Fort Cards
- Skill Cards
- D12 dice
- D6 dice
- Crew Tokens
- Mission Deck
- Event Cards
- Tokens
- Rule Book
- Sea Tiles
Ship Card
- Ship name
- Ship class
- Faction's flag on the face of the card
- Name of the cannons
- Cannon stats
- Ship's speed, depending on the wind direction
- Ship's pivots allowed per turn
- Bow Defense: place D6 here
- Starboard Defense: place D6 here
- Stern Defense: place D6 here
- Port Defense: place D6 here
- Structure Defense: place D6 here
- Ship Size
- The amount of Cargo Tokens this ship can carry
(Matching ship mini to the ship card below.)
On the sample Venture (Light Zebec) card, the cannon stats are: Cannon Range 1 space / 2 spaces / 3 spaces / 4 spaces; Number of Dice 2 / 2 / 2 / X; Cannon Accuracy 4 / 4 / 1 / X. The Speed dial shows 4, 3, 3, 2, 2 and 1 around the hexagon, and the Pivot dial shows 3. The Bow Defense slot reads "Ship speed reduced to 1" (+2 armor). The Starboard and Port Defense slots read "Starboard/Port Cannons can not shoot" (+3 armor each). The Stern Defense slot reads "Pivot reduced to 1" (+2 armor). The Structure Defense slot is the central slot. The Ship Size is Small.
Captain Card
- Faction flag is located on the face of the card
- Name of the Captain
- Crew Morale: place D6 here
- Captain's Skill
- Crew Tokens may be placed here to obtain a different bonus
The captain card lists the Captain's stats: Grapple, Repel, Cloaked, Saboteur, Negotiator, Explorer, Commander and Helmsman.
Crew Token
- Placement of Crew Tokens
- Type of bonus
- Faction specific Crew Tokens can only be used by the same faction
Skill Card
- Faction flag is located on the face of the card
- The background colour of the Skill Card:
- Green = Speed Card
- Yellow = Defense Card
- Red = Attack Card
- Blue = Special Card
- Name of the Skill Card
- The amount of Crew Morale consumed to use this card
- Skill Card ability
- When using Skill Cards, Crew Morale D6 cannot go below 1.
- Forts and Sea Monsters cannot use Skill Cards or have Skill Cards used against them.
- Skill Cards supersede all current ship penalties for that turn.
Event Cards and Tokens
Event Cards spawn challenges, rewards or even penalties to whomever drew the card or for all players to interact with. Event Cards are shuffled and cut by opposing players then placed face down in the playing area. When the deck runs out repeat the shuffling processes above. When players draw an Event Card, they must read it aloud and play out the scenario immediately. Some Event Cards may be saved and used later during play.
Event Tokens are the result from drawing a particular Event Card, such as a Fog Token or Sea Monster. Given the instructions on the Event Card simply place the corresponding Token accordingly on the Sea Tile.
Treasure Tokens spawn the chance for players to recover a treasure chest!
Fog Tokens only impact ships that are on top of the token during an attack.
Sea Monsters act just like ships with some exceptions. Place the miniature up to 3 spaces away from one of your ships not currently occupied by tokens or other ships. Place the Event Card next to your ship card and begin issuing actions. Sea Monsters can only receive damage from other Sea Monsters or Cannons. They ignore all tokens, cannot do missions, carry cargo, attack forts, use Skill Cards, have Skill Cards used against them, receive penalties or bonuses from tokens or be part of a boarding action.
Storm Tokens only affect ships that start, end or pass over the token. Ships receive the penalties for each hexagon they pass over.
Current Tokens only affect ships that start, end or pass over the token in the same direction as the arrow during their turn.
Shallow Tokens require one skill check for a ship to pass over all of the shallow spaces in a single turn. They cannot be placed adjacent to a point of interest or a port entry.
Fort Cards
- Name of the Fort
- Name of the Cannons
- Cannon stats
- Fort Defense: place D6 here
- Special ability
- The faction this Fort belongs to
The sample card (Tobi's Bastion, 36lb Fortress Cannons) lists Cannon Range 1 space / 2 spaces / 3 spaces / 4 spaces, Number of Dice 3 / 2 / 1 / 1 and Cannon Accuracy 2 / 2 / 4 / 4. Its Fort Defense is Armor 6, and its special ability reads "Friendly ships within 1 space may sacrifice both actions to repair 1 damage". The Fort Defense slot reads "This Fort is Destroyed".
Placement: Each faction's Fort miniature is placed at the designated location on that faction's home island. See the Map Legend on page 20.
Control: One player from each faction is designated to control the Fort card. They can only use the Fort during their turn and engage targets within the Fort's firing arc.
Shooting: Forts are stationary and do not require a facing direction while shooting ships and Sea Monsters. Forts have a 360-degree firing arc and may only shoot at 1 target per turn. Just like ships they need line of sight. They cannot shoot over or through ships, islands or Sea Monsters. Forts cannot shoot at other Forts, use Skill Cards, have Skill Cards used against them, be attacked by Sea Monsters or be part of any boarding action.
Receiving Damage: Forts only receive damage from cannons (not Sea Monsters or boarding actions). When being attacked by an enemy ship's cannons, add the Fort's Armor value with the number remaining on the D6. That is the total number the attacking ship must match or beat to deal damage to the Fort. When the Fort's D6 can no longer rotate down, the Fort is destroyed and the card and miniature are removed from the game.
Mission Cards
There are 3 types of Mission Cards, shown by three faction flags (green, black and blue).
All Mission Cards are shuffled and placed face down.
How to Draw Mission Cards
- Draw 1 Mission Card per ship.
- You may discard Mission Cards on your current turn and draw new ones at the start of your next turn.
- Place the card face down next to the designated ship card and keep it concealed until your first Skill Check (located on the Mission Card).
Marks of Victory are placed on the appropriate ship card that earned it. They do not consume cargo space however they may be captured by opposing players via a successful boarding action or be lost if the ship is sunk.
Marks of Victory can be transferred from your ship card to your home island (on the Sea Tile) for safe keeping as a free action once your ship drops anchor.
Mission card layout:
- The Mission type.
- Back Story.
- Objectives, skills and destinations.
- Skill Check if you succeed or fail. These checks are completed by a D12 roll + a skill's value located on Captain Cards. Reveal the Mission Card once you complete your first skill check.
- The result of a skill check. If the mission is failed you may discard it or try again. If you succeed then continue with the mission for the reward.
- A skill check to determine your reward.
- Your reward for completing a mission may include Marks of Victory, Harvested goods or Treasure Chest. Also, you may change your ship card to one of the two sizes annotated in the reward. Rewards are delivered instantly when you complete a mission, to include changing ships and ship cards with full health.
The sample Smuggler card reads: PICK-UP: Harvest 1 Fish Token. SKILLS: Cloaked / Negotiator. DESTINATION: Gustav Port. On arrival, roll a D12 + Cloaked skill: 1-7 Mission Failed, but you manage to smuggle some of the food into town; 8+ Success, complete mission for reward. Then, if you succeed at your Cloak skill, do a D12 roll + Negotiator skill total to receive your reward. The reward bands (1-5, 6-9, 10+) are shown as gold icons on the card, and the 10+ band offers a choice of Ship Size Small or Medium. (Discard the Mission Card once all D12 checks have been complete or if the ship is sunk, or if any cargo from the mission is stolen.)
Your Turn
On your turn, each ship can move and attack in any order these are called actions. Players will also have other actions they may carry out freely. Follow the steps below when it is your turn.
1) Crew Morale: At the start of your turn, increase your Crew Morale 1 on your Captain card. Your D6 can not exceed the printed maximum die number on your Captain card's Crew Morale.
- *If your Crew Morale D6 is already at maximum, skip this step.
2) Skill Cards: Draw new Skill Cards from your faction's deck to a maximum of 3 cards in your hand. You can only discard Skill Cards during your turn and draw new ones at the start of your next turn.
- *Each player has 3 Skill Cards no matter the number of ships/captains they command. If you already have 3 Skill Cards, skip this step.
3) Event Cards: Draw an Event Card, read it aloud and play out the Event if required.
4) Movement and Attack Actions: Each ship is allowed 2 types of action per turn: a movement action and attack action. Free actions do not consume actions.
- A) A movement action consists of moving your ship miniature on the Sea Tiles. This can be done before or after your attack action. You do not have to use your ship's full movement each turn, but must move a minimum of 1 space, see page 9 for ship movement.
- B) There are two types of attack action: cannons and boarding. You are allowed to do 1 of these attack actions per ship per turn. (You do not have to use your ship's attack action every turn.)
5) Free Actions:
- Harvesting Goods
- Discarding or drawing a new Mission Card
- Collecting rewards from a Mission Card
- Selling goods at a Port
- Transferring Marks of Victory from your ship to your home port. You must be at your home port hexagon to transfer.
Movement Action
Speed: Each ship has 6 reference points for speed on the ship card. These different speeds represent how many spaces forward your ship can travel in relationship to the wind. Consult the Wind Vane and its direction to determine how many spaces a ship may move. Ships must move forward a minimum of 1 space each turn, however they do not have to use all of their ship speed. If a ship cannot move forward due to an object occupying the space, it may drop anchor, drift or ram another ship if that is what is blocking its forward movement.
Pivot: Your ship's maximum allowable pivots are located on the ship card. Each rotation within a hexagon counts as 1 pivot.
Standard Movement: During your movement action, your ship can either pivot then move forward or move forward then pivot. If you pivot your ship prior to moving forward, your ship's speed may change given the new wind angle, so double check.
Advanced Ship Movement
These types of movements cannot be combined with other movement actions, crew or Skill Cards. Also, they sacrifice their attack action. (Tacking / drift / ramming.)
Tacking: Players may choose to move forward up to their allowed ship speed, pivot 1, move forward 1 more space. Or pivot 1, move forward up to their allowed ship speed, then pivot 1 more.
Drift: Ships may choose NOT to move forward or pivot and instead allow their ship to drift 1 space sideways or backwards in the same direction as the wind. Ships cannot drift into a hex that is currently occupied, such as islands, forts, other ships, Sea Monsters or half hexagons. You cannot use Green Skill Cards while drifting.
Unauthorized Movement: Ships cannot move over land, through other ships, on half hexes, or off the map. Ships can only move sideways and backwards when drifting.
Standard Movement Example: Using the example images below, the wind is moving towards the stern (rear) of the ship. This allows the ship to move a maximum of 3 spaces forward and 1 pivot. (The example diagram shows the Speed dial with 1 at the bow-side and 3 at the stern-side, and a Pivot dial of 1. The ship moves forward 1, 2, then 3 spaces in the wind direction, with a final 1 Pivot.)
Movement Action: Anchoring and Ramming
Anchoring: A ship must drop anchor during the following conditions: if it cannot or decides not to move forward at least one space, if it wishes to harvest goods or when the ship enters a port.
Dropping Anchor: When a ship drops anchor place an anchor token next to the miniature. Dropping anchor ends that ship's movement action. Anchored ships may pivot or attack as normal while anchored.
Raising Anchor: A ship with dropped anchor cannot move until it decides to raise anchor. Raising anchor takes up all movement for that turn. When a ship raises anchor remove the anchor token from the board. That ship can take its normal movement on the next turn.
Ramming
Players may choose to ram another ship. This is an advanced ship movement and cannot be combined with other movement actions such as crew or Skill Cards. Also this consumes the attack and movement action.
Ramming must be announced prior to movement. A ship must move without pivots in a straight line a minimum of 1 hexagon towards the target ship and end the movement with the bow adjacent to the enemy ship. Use the chart below to determine how ships receive damage when ramming. Sea Monsters and Forts cannot be rammed.
The Initiating Ramming Ship: Printed Bow Armor + D12 Roll vs The Target Ship: Printed Point of Contact Armor + D12 Roll
If the initiating ramming ship's total number is lower they receive 1 D6 Bow Damage. If the target ship's total number is lower they receive 1 D6 damage at the point of contact.
If there is no remaining D6 Armor to absorb damage, the damage is dealt towards the ship's Structure. If either player rolls a 1 it is an automatic fail and they receive the damage. If both roll a 1, both re-roll.
Attack Actions: Firing Arcs and Line of Sight
Firing arcs are coloured GREEN in the example below and are located on both sides of your ship facing outward.
The line of sight is viewed from the centre of your ship's hexagon towards the centre of the target ship's hexagon. At least half of the target ship's hexagon must be visible from the centre of your ship's base to attempt a cannon attack.
Cannon range is measured from the centre of your ship's hexagon counting towards the centre of the enemy's ship.
The only time a ship is allowed to shoot twice in one turn is if there are targets on both sides of the attacking ship and they are within range, firing arc and line of sight. In this case, you make two separate attack actions with dice rolls and Skill Cards. At least half the target ship must be visible to have line of sight.
The example diagram shows which targets are valid (marked with a green tick) and which are not (marked with a red cross) for the central ship.
Attack Action: Targeting a Ship
Depending which side of the target ship is exposed will determine where damage will be dealt. In the examples below, the RED highlighted area indicates the side or sides of the target ship that may receive damage.
- Example A. The target ship's bow is the only side that can receive damage from this angle.
- Example B. The target ship has equal sides vulnerable to being attacked, the attacking ship may choose the bow or the starboard. Before using Skill Cards or rolling the dice, the attacking player must identify which side of the target ship they are attacking. Only one side may be targeted each turn.
- Example C. The target ship has one vulnerable side because another ship is blocking its port side. The stern is the only area vulnerable to cannon attack.
Attack Actions: Cannons
Cannon stats are located on the ship card. Each successful D12 rolled counts as 1 hit. When attacking a target with cannons follow these steps:
-
Identify your firing arc and what part of the target ship you are shooting (pages 13 and 14).
-
Cannon Range: determine how many spaces away the target ship is, then use the Cannon Range stat. The sample 18lb Exquisite Cannons table reads: Cannon Range 1 space / 2 spaces / 3 spaces / 4 spaces; Number of Dice 2 / 2 / 3 / X; Cannon Accuracy 0 / 1 / 3 / X.
-
Number of Dice: roll the appropriate number of D12 based on how many spaces away the target ship is (cannon range).
-
Cannon Accuracy: add the appropriate cannon accuracy and any other modifiers such as Crew Tokens, Skill Cards to your D12 roll result. Skill Cards must be played prior to all dice rolls. If your modified roll is equal to or greater than the target ship's defense, your attack is a hit! Each successful D12 roll counts as 1 damage and is dealt towards the target ship.
Any action automatically fails if players roll a 1 on a D12. If both players' total value ties, the advantage goes to the attacking or offensive player.
Example: The attacking ship is 2 spaces away from the target ship and it's aiming at their port side. The attacker rolls two D12s at the same time then adds each result to their cannon accuracy. In this case, 1 of the D12 rolls hits! The target ship receives 1 damage to the port side by rotating their port D6 down 1 (from 5 to 4). The example diagram shows one roll of 11 with +1 accuracy totalling 12 (a hit) and one roll totalling 11 against the Port D6 (a fail/miss).
Special Shot Types
These abilities must be identified prior to rolling dice and can not be used with Skill Cards, Crew Tokens, Event Cards or on Forts and Sea Monsters.
Double Shot
In a desperate attempt to deal more damage the crew load double the recommended shot in the cannons. This is risky because the guns can explode when fired!
- Conduct a cannon attack per the standard rules.
- Double the damage for every successful hit.
- After the target ship receives the damage, the attacking ship rolls a D6 to determine the amount of damage that is dealt to them self. The amount rolled is the damage the attacking player receives on the port or starboard side (whichever side was used to perform the Double Shot). If the amount is greater than the current D6 armor remove it and continue rotating the Structure D6 (the middle D6 on the ship card).
Grape Shot
The Master Gunner knows how to break the enemy's will. Stuff iron pellets in the cannons and aim for their crew.
- Conduct a cannon attack per the standard rules.
- Upon at least one successful cannon hit, the target ship's Crew Morale becomes 1 instantly. The targeted ship does NOT receive any damage, only the Grape Shot penalty.
Bar Shot
If you find your ship too slow, or the enemy ship too fast, load bar shot and the crew will aim for the rigging!
- Conduct a cannon attack per the standard rules.
- Upon at least one successful cannon hit and the targeted ship's movement becomes 1 on their next turn. Place a Bar Shot token next to the target ship as a reminder of the penalty. Remove the token after they complete their turn and resume movement on their following turn. The target ship does NOT receive any damage, only the Bar Shot penalty.
Attack Actions: Receiving Damage
When a ship is attacked and receives damage, rotate the appropriate D6 on the ship card to the next lower number. When a D6 can no longer rotate any lower remove it and continue rotating the Structure D6 (the middle D6 on the ship card).
Structure damage occurs if there are no bow, starboard, stern, or port D6s to absorb the shot. When an enemy is targeting the ship's Structure, it receives the printed defense number from the side it is being attacked.
Special ship penalties are revealed when you remove a D6 from your ship card.
When your ship is sunk it is sent back to your home island. The ship is repaired to its full health along with the Captain's Crew Morale to the max printed value. All Cargo and Mission Cards are removed.
Example: In the image below, if this ship was hit by 3 successful cannons to the stern, the ship's stern would absorb 2 damage and the remaining 1 damage would be applied to the structure. In this case, the Structure D6 will go from 6 to 5. Next time someone shoots the stern, the structure will be exposed and you'll add the Stern Defense + Structure's current value. When the Structure D6 is removed, the ship is sunk.
Note: the printed example diagram shows the Stern D6 at 4 (Stern Defense +4) and the Structure D6 at 6. The text's "absorb 2 damage" does not match the 4 shown on the stern die. Transcribed as printed; the rules text is otherwise unchanged.
Attack Actions: Boarding
Follow the steps below to perform a boarding action!
-
Both ships must be within 1 hex adjacent to each other.
-
The defending ship's ability to repel boarders will depend on which side the attacking ship is attempting to grapple.
-
Attacking player: add the values below
- Crew Morale (located on the Captain card)
- Grapple Stat (located on the Captain card)
- Skill Cards and or Crew Token (if any)
- D6 roll
-
Defending player: add the values below
- Crew Morale (located on the Captain card)
- Repel Stat (located on the Captain card)
- Skill Cards and or Crew Token (if any)
- The printed number Defense stat on your ship card. The side that is in contact with the attacking ship
-
Boarding rewards: Whichever player's total number is greater receives Maximum Crew Morale and chooses a secondary reward from below:
- A) Deal 1 Structure Damage to the target ship
- B) Reduce the enemy's Crew Morale to 1
- C) Steal 1 Cargo Token
- D) Steal 1 Mark of Victory
Harvesting Goods
How to Harvest Goods
Players can harvest Goods from specific locations on the Sea Tiles. Harvest tokens can be sold for Marks of Victory at ports or be used to complete missions. Harvesting consumes an attack action.
Harvesting goods:
-
A ship must drop anchor at the harvesting locations prior to attempting harvesting tokens.
-
Roll two D12s then select the highest roll and use the chart below to determine your success. Rolls that are 12 are auto success and place successful harvested token on the ship card.
Players can attempt one harvest roll per ship per turn. Ships cannot carry more tokens than allowed based on their ship size (cargo hold). MOV's (printed in the book; Marks of Victory) do not take up cargo space.
Ships can only offload Goods tokens to sell at ports, to complete mission objectives or if they are captured by enemy players via a successful boarding action. Players cannot discard Goods tokens any other way.
D12 Roll Harvesting Results
- Fish Token: roll of 4 or greater
- Iron Token: roll of 7 or greater
- Lumber Token: roll of 5 or greater
- Pearl Token: roll of 8 or greater
- Rope Token: roll of 6 or greater
- Jewel Token: roll of 9 or greater
Token Cargo Hold Based on Ship Size
(Unless stated otherwise on the ship card)
- Ship Size Small: (no value printed on the chart)
- Ship Size Medium: 2
- Ship Size Large: 3
- Ship Size Huge: 4
- Special Ship Fluyt: 4
Map Legend
The map tiles show these islands, with their Point of Interest, Port Entrance and Fort hexes and their harvest tokens:
- Clew Bay (Buccaneer flag)
- Port-au-Prince
- Orleans (French Navy flag)
- Cabrit Port (British Navy flag)
- Wind Vane
- Saint Vincent (Spanish Armada flag)
- Betray Bay (Pirate flag)
- Rovers Grotto
- Vanish Port (South Sea Alliance flag)
Faction key:
- Buccaneer = Clew Bay
- French Navy = Orleans
- British Navy = Cabrit Port
- Spanish Armada = Saint Vincent
- Pirate = Betray Bay
- South Sea Alliance = Vanish Port
Market Prices
The Market Prices page lists the D12 roll needed to harvest each good (shown beside its icon) and the Marks of Victory (MOV) paid at each port.
Selling Goods
Players may sell Goods to different ports for Marks of Victory (MOV). Ships entering port must end their movement on the Port Entrance hexagon and drop anchor. Once the anchor is dropped players may sell Goods as a free action. Ships on a Port Entrance are unable to attack or be attacked. Ships in port may pivot any direction as a free action prior to leaving.
Goods and Chests
- Fish (D12 roll 4 or greater): Clew Bay = 1 MOV; Orleans = 1 MOV; Betray Bay = 1 MOV; Vanish Port = 1 MOV
- Lumber / Wood (D12 roll 5 or greater): Clew Bay = 1 MOV; Orleans = 1 MOV; Port-au-Print = 1 MOV (as printed)
- Rope (D12 roll 6 or greater): Rovers Grotto = 2 MOV; Vanish Port = 2 MOV; Saint Vincent = 2 MOV
- Iron (D12 roll 7 or greater): Vanish Port = 2 MOV; Saint Vincent = 2 MOV; Orleans = 2 MOV
- Pearl (D12 roll 8 or greater): Vanish Port = 3 MOV; Betray Bay = 3 MOV; Rovers Grotto = 3 MOV
- Jewel (D12 roll 9 or greater): Clew Bay = 3 MOV; Betray Bay = 3 MOV; Cabrit Port = 3 MOV
- Shipwreck Chest (chest icon; no D12 threshold printed): Port-au-Prince = 2 MOV; Rovers Grotto = 2 MOV
- Captain Chest (chest icon; no D12 threshold printed): Port-au-Prince = 4 MOV; Rovers Grotto = 4 MOV
- Admiral Chest (chest icon; no D12 threshold printed): Port-au-Prince = 6 MOV; Rovers Grotto = 6 MOV
Game Setup: Victory Game Mode
Victory Game Mode Setup
(2-4 players, 2 or more factions) Each faction chooses 2 small ships, harvest goods to sell for Marks of Victory and complete mission objectives to unlock larger ships! Be the first faction to collectively acquire the most Marks of Victory at their home port!
- Short Game = 6 Marks of Victory, at your home port
- Standard Game = 12 Marks of Victory, at your home port
Game Setup: Place the sea tiles on the table, per page 20. If you're using the Large Map with the island miniatures for the Victory Game Mode, you'll also use the Map Legend to place the islands the appropriate amount of hexagons apart and to identify harvest locations.
-
Evenly divide players into teams using the factions. Place the Wind Vane miniature in the middle, over the text Wind Vane on the Sea Tile. Each faction then finds their home island using the Map Legend and places their ship miniatures adjacent to any side of the island. Place your Fort miniature on the designated location, see page 20.
-
Place the all Tokens near the play area.
-
Each faction starts the game with two Small Ships. The ship size is located on the bottom left of the ship card. Select any two Captain cards from your faction and Crew Tokens if you desire. The Captain card will stay the same for the remainder of the game. However you will have the opportunity to change your Crew Token and ship card when completing missions. Match your ship cards with the correct miniature ships, then place your miniatures.
-
Using the D6 provided, match and place all of the D6 on top of the corresponding printed die numbers on the Ship and Captain cards.
-
Shuffle the Mission Deck and have an opposing player cut the deck. Place the Mission Deck face down in the play area. Draw 1 Mission Card per ship. Place the card face down next to the ship card keeping it concealed until your first Skill Check. You may discard these cards on your current turn and draw new ones at the start of your next turn.
-
Each faction has their own Skill Card deck. Shuffle your faction's deck and have an opposing player cut it, then place your faction's deck face down in your play area. Each player draws 3 Skill Cards from the top of their respective Skill Card deck. These cards are to remain concealed from opposing players and can ONLY be traded with teammates when two ships are adjacent to one another. When you run out of Skill Cards, repeat the shuffling processes above and continue drawing.
Note: Yellow Skill Cards are the only cards played when it is NOT your turn and when you're being attacked.
Victory Game Mode Setup (continued)
-
At the start of the game, all players roll a D12. The player with the highest roll goes first. The 2nd highest roller then rolls a D6 to determine the direction of the wind. Use the printed D6 on the center Sea Tile to determine which direction the wind is blowing given the result of the roll. At the end of each turn, the turn order passes to the player on the left.
-
When a player's ship is sunk it is sent back to their home island. The ship is repaired to its full health along with the Captain's Crew Morale to the max value. All Cargo, Marks of Victory and Mission Cards that the ship was carrying are removed and placed back into the respective out of play pile or deck.
-
Gain Marks of Victory by successfully completing Missions, selling harvested goods at specific ports or successfully boarding an enemy ship!
-
The first faction to acquire the 6 or 12 Marks of Victory at their home port wins the game and conquer the Caribbean! To transfer Marks of Victory to your home port your ship must be on your home port hex and it is a free action.
Your Turn
- Increase your Captain's Crew Morale by 1
- Replenish Skill Cards to a maximum of 3 in your hand
- Draw an Event Card / read and play out the Event Card
- Movement and or Attack Actions in either order
- These are free actions you may do during your turn:
- Harvesting Goods
- Drawing and discarding Mission Cards (once per turn)
- Collecting rewards
- Selling goods at a Port (after your ship drops anchor)
- Transferring Marks of Victory from your ship to your home island's when you're ship is at your home port
When cutlass is not enough, I ram em! (Captain Denman)
FAQ
Answers to things you might ask... Avast!
Q: Turn order? A: Clockwise. Conduct all of your actions for all of your ships or forts, then it's the player's turn to your left.
Q: What happens if I roll a 1 during Event Cards? A: Any time a player rolls a 1 to include Event Cards, it is an automatic fail. If any player rolls a 12 it is automatic success.
Q: Can I sail on a half hexagon? A: No, that includes sailing off the map into the sunset.
Q: Can I do an attack action then sail into a port? A: Yes, however once a ship is in port entrance it cannot attack or be attacked and must end its movement by dropping anchor.
Q: Can I move shoot then finish my movement? A: No. Nor can you move forward pivot then continue moving forward. If you are going to pivot, all pivots must be done at the beginning or end of a movement action.
Q: If I have 2 enemy ships on either side of my ship and both are within my firing arc, can I shoot both on the same turn? A: Yes, and you'll roll two separate times using different Skill Cards for each cannon attack. However you cannot do a boarding attack then a cannon attack.
Q: Do Skill Cards consume Crew Morale? A: Yes, but don't worry. At the start of your next turn you gain +1 Crew Morale. Crew Morale cannot go below 1, so you'll need a Crew Morale of 2 to use a Skill Card of 1.
Q: I have broken ships. What do I do? A: If you received broken/missing parts, I apologize. Simply take a photo of the broken part, then email it to us within 30 days of you receiving the game and we' will replace it, while supplies last.
Game Setup: Annihilation Game Mode
(2+ players, 2+ factions, 60 minutes)
Annihilation game mode. Players build their fleet however they see fit. Using large, small or medium size ships with any Captain and Crew combo within the faction.
Annihilation mode is per Victory Game Mode with a few exceptions:
- Remove Mission Cards
- Remove Event Cards and Tokens
- Remove Harvesting Tokens
- Instead of each player having a turn, all players on the same team conduct their turn simultaneously. Once all players of that team / faction conducted their actions, it is the team / faction to the left's turn.
The goal of Annihilation game mode is to send the enemy ships to the crushing depths!
- Short Game = Sink 1 enemy ship to win
- Standard Game = Sink all enemy ships to win