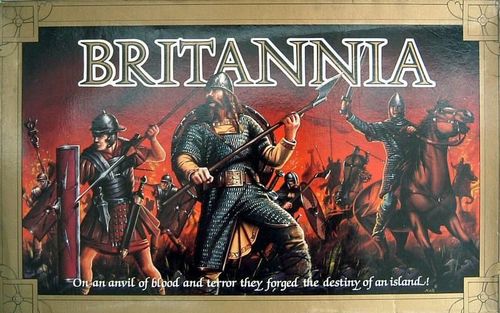
Britannia
Britannia Rulebook
Table of Contents
Table of Contents
1. Contents
24" x 19" Gamesboard
256 die cut cardboard counters in four colours: black, red, blue, purple.
Rules
17 x Victory Point Cards
4 x Turn Record Charts
5 x dice
2. The Board
The board depicts the island of Britain, divided into 37 land areas. Six sea areas surround the island. Some land areas, shaded more deeply, represent highlands or swampy terrain (both hereafter referred to as "hilands").
For several purposes Britain is divided into three regions, as follows:
WALES: Clwyd, Cornwall, Devon, Dyfed, Gwent, Gwynedd, Powys (seven areas).
SCOTLAND: Alban, Caithness, Dalriada, Dunedin, Hebrides, Mar, Moray, Orkneys, Skye, Strathclyde (10 areas).
ENGLAND: The remaining 20 areas. – A yellow border divides those regions
The Scottish areas of Hebrides and Orkneys both comprise a cluster of islands separated from the mainland by a white dividing line. The area of Skye comprises both the island and that mainland area which formed the ancient kingdom of Skye.
Note that Galloway, Lothian, Cumbria and the Pennines all meet at a point. Consequently direct movement is not possible between Lothian-Cumbria or Galloway-Pennines. Note also that Dalriada borders only the Irish Sea, and not the Icelandic Sea.
Printed on the board for convenient reference, are the Turn Record Track, Increase Population Scale, and Order of Play Table.
3. The Playing Pieces
Die-cut cardboard playing pieces are provided with the game. The pieces must be pushed out of the card framework; the square pieces may need to be separated with a sharp knife.
The pieces divide into different categories which are described below. The colours correspond to player control in the four player game.
(a) Army Units: Circular pieces, illustrated by a line drawing of a typical warrior/soldier, with the name of the nation printed below.
(b) Cavalry Units: Circular pieces, illustrated by a mounted soldier, and appropriately named. Only the Romano-British and the Normans have cavalry pieces.
(c) Leaders Hexagonal pieces, illustrated by a crown, and normally bearing the name of an historical figure. The Sweyn/Canute piece combines two historical figures into one playing piece!
(d) Increase Population Markers: Circular pieces, illustrated by a solid silhouette, with its nation's name printed below. There is no such marker for the Romans, Norwegians, or Normans.
(e) Roman Forts: Square pieces, illustrated and named appropriately. Their use is described in Rule 8.5.
(f) Turn Marker: A single circular piece, illustrated by a sword, and named.
There are also 17 Victory Point Cards, one for each nation. Each nation's card states what it must do to earn victory points, which are shown as figures in brackets. Where areas are simply listed, these must be occupied by at least one piece (normally at the end of the complete Game Turn) in order to score the Victory Points indicated. For ease of identification these carry a background silhouette coloured to match the playing pieces.
Lastly there are the four Turn Record Charts. These list all the information players require for each game turn – a vital working document.
In addition to the equipment provided, players require pencil and paper on which to record their Victory Point Scores. The paper should be large enough to allow a column for each of a player's nations, with the individual game turns in which Victory Points may be gained listed down the margin.
4. Starting the Game
Place the "Turn" marker in the Turn 1 box on the Turn Record Track on the board.
Consult rule 10 to determine who controls which nations. This depends on how many are playing. Remember, the piece colours correspond to the four player version. Each player gathers the pieces and Victory Point Cards representing the nations he or she controls.
Now the starting pieces are placed on the map. One army is placed in each of the starting areas as listed below. Fifteen Roman armies are placed in the English Channel.
When all pieces have been placed, the first turn begins. Now go to section 5. Note that this section (5) is effectively a summary of the operating procedure which governs each nation's activities throughout the game.
Starting Areas Chart
| Nation | Starting Areas |
|---|---|
| Belgae (10) | Downlands, Essex, Kent, Lindsey, N. Mercia, S. Mercia, Norfolk, Suffolk, Sussex, Wessex |
| Brigantes (9) | Bernicia, Cheshire, Cumbria, Galloway, Lothian, March, Pennines, Strathclyde, York |
| Caledonians (3) | Caithness, Hebrides, Orkneys |
| Picts (6) | Alban, Dalriada, Dunedin, Mar, Moray, Skye |
| Welsh (9) | Avalon, Clwyd, Cornwall, Devon, Dyfed, Gwent, Gwynedd, Hwicce, Powys |
5. Sequence of Play
First, at the start of each game turn players should consult their turn record chart and place whatever pieces are listed as invading in the appropriate sea area(s). Although the pieces do not come into play until the appropriate nation's turn, it is very helpful to see what is going to happen!
Throughout the game the nations play in the order stated in the Order of Play Table printed on the board. Thus Romans play first, then Romano-British, then Belgae, then Welsh, and so on. In many cases the nation listed will have no piece on the map or scheduled to invade. For example, the Romano-British and all nations listed after the Picts take no part in the first game turn. Note that unlike most other games the order of play depends on nations, not on players.
Each nation does the following during its turn. Each nation completes the entire sequence before the next nation plays.
5.1. Increase Population Phase. The controlling player counts the economic value of areas occupied by the nation's armies, and if possible places newly raised armies on the board, as explained in rule 8.
5.2. Invasion Phase. If he has not already done so, the controlling player now places the nation's invading pieces, if any, in the specified sea area(s), as explained in rule 6.
5.3. Movement Phase. The controlling player moves the nation's pieces, as explained in rule 6.
5.4. Battle Phase. When, after movement, the nation's pieces occupy a land area also occupied by another nation's pieces, a battle occurs. The procedure is explained in rule 7.
5.5. Victory Point Count Phase Referring to the nation's Victory Point Card, the player determines how many Victory Points the nation has earned in the turn, as explained in rule 11. In most cases, points counted at this time will be for the (temporary) capture of areas or destruction of opposing pieces, not points for holding (occupying) areas.
After all nations have played, several or all may be required to count Victory Points as noted on the Turn Record Track. When a Victory Point Card simply says "TURN 4" or "TURN 7", this refers to the end of the entire game turn, not to the end of the nation's turn.
The game turn is now completed. The Turn marker is moved to the next box on the Turn Record Track and the next game turn begins.
Players may discuss strategy and negotiate agreements at any time but this is best done whilst another player is taking his turn, in order to save time.
Play continues until the end of turn 16. At this time the player with the largest Victory Point total wins the game, regardless of how well or how poorly his nations have done in turn 16, and regardless of which nation has been most successful.
6. Movement
6.1. Sequence. All, any, or none of a nation's pieces may be moved during its turn. All movement occurs before any combat takes place.
6.2. Distances. An army may move up to two areas in its turn. For example, one may start in Essex, move to Suffolk, and thence to Norfolk. However, any piece must end its move when it moves into a hiland area. No piece may move into a sea area except as specified in rule 6.15 below.
6.3. Cavalry and Romans. Cavalry armies and Roman armies may move up to three land areas in one turn. In this respect they are exceptions to rule 6.2. They still end their move when they enter a hiland area.
6.4. Capacity. The number of armies of one nation allowed in a single area is strictly limited in most cases. Each nation may have one group of an unlimited number in a non-hilands area, or of four armies in a hiland area; but not both. Otherwise, all nations except the Romans may have no more than three armies in a non-hiland area or two in a hiland area. These limits are effective at the end of every nation's movement phase, but not during movement. These limits may not be exceeded during the Increase Population phase, nor may they be exceeded as a result of retreats.
6.5. Overpopulation. At the end of a nation's turn, any armies it possesses in excess of two times the number of land areas the armies occupy must be removed (controlling player's choice). For example, if the nation occupies four areas it can have no more than eight armies on the board at the end of its turn. Armies in Sea areas are not counted as population The Jutes, Angles, and Saxons are not subject to this restriction in turns 4 and 5.
6.6. The Romans are an exception to rules 6.4 and 6.5. They may have any number of armies in any area, except that no more than four Roman armies may be in a hiland area.
6.7. Leaders. Armies accompanied by a leader may move three land areas in a turn (exception to rule 6.2). Moreover, armies accompanied by a leader are not forced to stop when entering a hiland area (exception to rule 6.2). Finally, any number of armies may be in a non-hiland area with a leader (exception to rule 6.4).
6.8. Encountering Other Pieces. A player may move pieces into an area occupied by another nation's armies. This causes a battle, as described and explained in rule 7 below. A piece must stop moving when it enters an area occupied by any army of another nation. (Enemy leaders, alone, cannot cause a stoppage.) However, if armies outnumbering the occupying armies by at least two to one stop in the area, additional pieces may move through the area, provided they are able to move so far. For example, there are three Saxons in Essex, three in South Mercia, two Angles in Suffolk, and one Angle in Norfolk. The three Saxons move from Essex to Suffolk and are joined by one Saxon from S. Mercia. The remaining two Saxons in S. Mercia may now move through Suffolk into Norfolk.
6.9. Boat Building. In some turns certain nations may move via a sea area, in effect building small ships for the trip and abandoning them afterward. This is indicated on the Turn Record Charts as "Boats", followed by the nations involved.
In practice, each army of a ship-building nation may move through, but not end a move in, one sea area during a Boats turn. This may be a different area for each army, but no army may move through more than one sea area even if accompanied by a leader. Thus a "Boats" army in Kent might move to York or Cornwall; from Cheshire to Cornwall or Skye; from Mar, to York or the Hebrides.
6.10 Invading Forces. From the very start of the game, and almost continuously thereafter, new pieces are brought into play at the beginning of each game turn, starting as instructed on the Turn Record Chart. Each piece represents in broad terms the peoples who landed on the shores of Britain at a particular time in history; the strength of their presence, and the direction of their arrival. More specifically, for the purposes of this game, invading pieces are divided into three categories – Raiders, Invaders, and Major Invasion forces.
6.11 Raids. A Raid takes place when a piece starts in a sea area, lands, and then retires to the same sea area – a temporary attack to achieve short term objectives. Raiding pieces are indicated by the use of italics in the Turn Record Chart. A number of options are open to a Raiding piece: For example, the Irish Raider in Turn 3 may do any one of the following:
(a) land in any area bordering the Atlantic Ocean, and subject to normal movement rules, move one further land area if desired. (A Roman or Norman cavalry unit could move two further land areas if required).
(b) move one sea area, (to either the Irish Sea or English Channel) and then land in any bordering area
(c) remain in the sea area until the next game turn. (It effectively becomes an additional Raider in game turn 4)
(d) move one sea area, and remain there until the next game turn (as above)
A Raid is not complete, and Victory Points cannot be scored, until all surviving Raiders have returned to the Sea Area(s) in which they started. The elimination in battle of all Raiders does not in itself preclude Victory Points being scored. Having landed, Raiders may choose to remain in order to Increase Population; they then revert to being ordinary armies.
In turns 4 and 5 the Picts may raid, moving as described under 6.9 Boat Building but returning to the land area they came from.
In turn 11 all the Danish armies must Raid i.e. they must land and must retreat to sea.
6.12 Invasions An Invasion takes place when a piece starts in a sea area, and lands, intending to settle permanently. Such a piece has the same choice of action, as in (a) (b) and (c), but not (d) above.
6.13 Major Invasions A number of Major Invasions are listed on the Turn Record Chart. In this case the nation concerned takes two consecutive plays: move pieces, fight, move pieces, fight. This reflects the additional shock and impetus of a major effort that is taking place over a long period of time. Note that all a nation's units in play at the time participate in the Major Invasion turn, even if they have already settled in a previous turn.
6.14 Invasion Restrictions. Roman and Norman armies must move from the English Channel to an adjacent land area. Harald's Norwegians must move from the Frisian Sea to an adjacent land area. None of them may move to adjacent sea areas.
Scots cannot land south of Galloway nor east of Caithness and Orkneys;
Irish cannot land north of Cumbria;
Saxons and Jutes cannot land north of Cornwall (on the west coast);
Jutes, Saxons, and Angles cannot land north of Mar;
Dubliners cannot land north of Skye or south of Avalon.
In all cases, pieces can land in the named areas (for example, the Irish can land in Cumbria.)
6.15. Withdrawal to the Sea. Except for Raiders and pieces retreating from a battle in a coastal area they have must invaded, invaders cannot return to a sea area after moving into a land area.
Pieces which do return to sea in this way may join with fresh Raiders/Invaders appearing in the next game turn.
6.16. Sea Areas. Any number of invaders, of any number of nations, may be in the same sea area. No fighting occurs at sea.
6.17 Straits. There are four straits symbols marked on the board, linking the Hebrides and Skye, the Orkneys and Caithness, Dyfed and Devon, and Gwent and Devon. Pieces may move along such a symbol as though it was a bridge, travelling from one of the connected areas to the other despite the intervening water. However, this move takes an entire turn, so the piece must begin the turn in one of the two areas, and end the turn in the other. Pieces may retreat across straits.
7. Battle
7.1. Occurrence. When pieces belonging to two nations occupy the same land area at the end of a movement phase, a battle must take place. The controlling player for each nation rolls one die for each army in the area. Where one player controls both nations, he or she should appoint another player to roll for the defending nation. The dice rolls determine how many opposing armies are eliminated. Eliminated armies are removed from the board.
(a) a normal army eliminates a normal enemy army on a roll of 5 or 6.
(b) A Roman or cavalry army eliminates a normal enemy army on a roll of 4, 5, or 6.
(c) Roman and cavalry armies are eliminated only on a roll of 6.
(d) Any defending army in a hiland area is eliminated only on a roll of 6.
For example, three Scots armies are in Dalriada (hilands). Five Pict armies move in. The Scots player rolls 1, 3, and 5; the 5 kills one Pict. The Pict player rolls 2, 2, 2, 5, and 6. The 6 kills a Scot; the 5 does not, because the Scots are defending a hiland area.
7.2. Sequence. Combat is considered to be simultaneous, regardless of which player rolls the dice first. Therefore, in the example above, the Pict rolled five dice rather than four.
7.3. Combined Forces. When rolling against a mixed force of ordinary and cavalry armies, a throw of 6 automatically eliminates a cavalry army. When rolling against a mixed force of settlers and Raiders, settlers are eliminated first.
7.4. Leaders. When a leader piece is present at a battle, add one to the die roll of each army of the leader's nation in the battle. Leaders have no combat strength in themselves, so no die is rolled for one. A leader not accompanied by an army of its nation is eliminated in battle without any dice rolling required.
7.5. Retreats and Fighting After the First Round of Dice-Rolling. If a battle has been fought, and both sides have at least one surviving army in the area, the defender may retreat. If he chooses not to, then the attacker may retreat. The attacker cannot retreat if all defending armies retreat, or are eliminated, although a Raider may still withdraw to sea. If both sides have armies in the area after the opportunity to retreat, another round of battle is fought. This procedure is repeated until only one nation occupies the area (or neither if they eliminate each other). Some of a nation's surviving armies may retreat while others remain.
7.6. Where the Defender Retreats. When the defending nation retreats, the armies have a choice of retreats, and some may retreat to one area while others retreat to other areas. Available areas are: (1) adjacent areas which are solely occupied by the retreating nation's piece(s), (2) adjacent areas which are vacant and are not adjacent to an area occupied by the attacking nation's armies (other than the battle area itself). A defender can never retreat to the area from which the attacker came.
If no legal retreat area is available, the defender must remain in the battle area and fight again.
For example, the Saxons have attacked Welsh armies in North Mercia from Suffolk. There are also Saxons in Powys and South Mercia. There is a Welsh army in Hwicce. The Welsh decide to retreat from North Mercia. They can retreat to Lindsey or York if they are vacant, but not to Suffolk (where the attackers came from; it is also adjacent to South Mercia), nor to March (adjacent to Powys). They may retreat to Hwicce, even though it is adjacent to Powys, because of the Welsh army there.
7.7. Where the Attacker Retreats. When the attacking nation retreats, the armies must retreat to the area(s) from which they entered the battle area. For example, three Saxons attack Essex, two coming from Kent and one from Sussex; one is eliminated following battle and the player decides to retreat. Both surviving armies may go to Kent, or one to Kent and one to Sussex, depending on which army the player chose to remove.
If the area the attacker retreats to contains an army of another nation, the attacker cannot retreat to that area. It must remain in the battle area and fight again.
This can occur when several attackers outnumber the defenders two to one in the potential retreat area so that other attackers can move through, and either the attackers have lost the battle, or it has not yet been fought.
7.8. Where a Raider Retreats. Raiders who are withdrawing to sea to complete their raid are not bound by this way. If the area through which they entered is occupied by opposing piece(s), they may retreat to this area and enter into battle in order to achieve the desired withdrawal to sea. Raiders may only withdraw to sea along the route they entered by.
For example, 3 Angles in Turn 5 land in York. Two remain to battle with a Roman Fort, the other moves into North Mercia. The two Angles in York are defeated, but the Angle in N. Mercia succeeds against a fort there. To score the three victory points awarded for eliminating the Fort, the Angle in N. Mercia must try to withdraw to the Frisian Sea via York. If successful here in battle, the Angle will withdraw to sea, scoring 6 victory points; if unsuccessful, 3 only will be scored. Alternatively, the Angle may settle in N. Mercia, and forgo the 3 victory points he is entitled to.
8. Population Increase and Other Additions and Subtractions to Forces
8.1. Counting Occupied Territory. A nation may increase its population, and thereby its number of armies, by occupying land. The capacity for increasing population depends on the agricultural/economic value of the occupied areas.
During the Population Increase Phase at the beginning of a nation's turn, the controlling player counts the number of land areas occupied by the nation's armies. Hiland areas count only one-half each. To this sum is added any count left over from the previous turn, as indicated on the Increase Population Scale.
Now for each count of three, the nation receives one new army from among the eliminated and unused pieces. Any count remaining is saved until the next turn. This is recorded on the Increase Population Scale by placing the nation's "Increase" marker in the appropriate space.
Each nation is limited in the number of armies it may have at one time. If no army piece is available, the nation cannot receive any new armies. It may save a count of two and a half, but anything more than that is lost.
8.2. Placing New Armies. New armies raised by Population Increase are placed on areas occupied by the nation's armies. No more than one may be placed in a given area unless there is no alternative because some areas are occupied by the maximum number of armies allowed under rule 6.4.
8.3. Leaders. A leader piece represents a single individual of extraordinary ability and authority. A leader piece is not an army. It may occupy an area to score victory points, but cannot fight or prevent the movement of enemy pieces.
Leaders listed on the Turn Record enter play during the Population Increase phase for that nation. A leader may be placed in any area occupied by the nation's pieces. In some cases special conditions (noted on the Turn Record Card) must be met before a leader can be brought into play. Except for Arthur and his cavalry in Turn 7, a leader is never played if his nation has already been eliminated!
A leader is removed from the board at the beginning of its nation's next turn before any Population Increase is calculated. Thus a leader is on the board for only one cycle of turns, except Harold, Harald, and William, who (unless killed) remain in play until the end of the game. A leader in sole occupation of an area may therefore count towards both the election of Bretwalda and King, and also for re-inforcements in Turn 16. The sole occupation of an area by Harold the Saxon in Turn 16 cannot count towards population increase.
8.4. Roman Reinforcements. As a professional army based on the Continent, the Romans do not Increase Population. Instead, at the beginning of the fourth and fifth turns they receive reinforcements sufficient to increase their numbers to the minimum stated on the Turn Record. New armies appear in the English Channel and must land without moving to another sea space. If there are already sufficient Roman armies on the board, no new ones appear.
8.5. Roman Forts. When a Roman army becomes sole occupant of an area for the first time, even if only moving through, a Roman fort is built there. This fort acts as a normal army (not Roman army) that cannot move. Any Roman armies in an area must be eliminated by an attacker before the fort may be eliminated. Thus a die roll of 5 will not eliminate the fort unless any Roman armies present are eliminated by rolls of 6 during the same round of fighting.
A fort is built only the first time the area is captured by the Romans, not each time, and no Roman fort may be built after the fourth turn. All surviving Roman forts are removed from the board at the beginning of the sixth game turn.
8.6. Romano-British. At the beginning of turn 6, the Roman armies leave Britain (in order to help defend Italy and the Rhine frontier). Each Roman army is replaced by a Romano-British army, and any surviving Roman forts are removed from the board.
If there aren't enough Romano-British armies, the extra Roman armies are removed without replacement.
The Romano-British are normal armies, with victory point objectives different from the Romans. They do not Increase Population until turn 7. They also receive reinforcements during turn 7. If all Romano-British armies have been eliminated, these reinforcements can enter at any vacant area south of, (and including) York.
The Romano-British cannot attack the Brigantes or Welsh! (But the Brigantes and Welsh may attack the Romano-British).
8.7. Submission to Roman Rule. While Roman armies are on the board the Welsh, Brigantes, or Picts may submit to Roman rule when they occupy fewer than five, four, or three areas, respectively. The Romans then gain capture points for the areas occupied by the subject nation, as well as Limes (see 11.4) points if the subject nation continues to occupy the area until the end of turn 5, or abandons it and the Romans occupy it. (No Limes points are given if a Roman fort has been previously destroyed in the area.)
The Romans can no longer attack the subject nation, whilst the subjects are not entitled to Increase Population, cannot attack the Romans, and cannot receive any victory points as subjects. The Roman player can allow subjects to Increase Population, (so that the subjects can fight off other mutual enemies). Finally, Roman armies can move freely through, but not end a turn in, subject areas.
Subjection ends when the Romans leave, at the start of turn 6.
Submission can be declared after any battle finishes, or after any round of dice throwing in battle, or after any movement phase. Any Roman armies stationed on territory held by a subject nation when a submission is received must leave immediately, either to the areas from which they came, or to a wholly Roman occupied area. Such armies are not allowed a further move.
8.8. Submission to Angles. The Brigantes may submit to the Angles when they occupy fewer than three areas; areas not in Scotland, except Galloway, are not counted, and such areas cannot submit to the Angles. Each nation is free to attack the other in areas which have not submitted. The effects of submission are as described for the Romans, so the Angles can score Victory Points at the end of Turn 10 for Brigante occupied areas. Subjection ends at the start of Turn 12, or when all Angles have been eliminated.
8.9. Danish armies. At the end of the Danish fourteenth turn, four Danish armies plus the leader Sweyn/Canute must be removed from the board (they return to Denmark). If, when the Danish turn 14 begins, there are not enough Danish armies available to allow six to invade, the equivalent of the shortfall is subtracted from the four to be withdrawn. For example, if only three armies can invade (shortfall of three), only one army needs to be withdrawn at the end of the turn instead of four.
8.10 Turn 16 Reinforcements. At the beginning of turn 16 Harald of Norway gains one additional army, in the North Sea, for each area Harald's forces occupy. William's Normans gain armies in the English Channel at the beginning of turn 16 according to the areas occupied by them at the end of turn 15: one for Essex, one for Wessex, one for Hwicce, one for South Mercia; and three if Harold the Saxon was killed by the Normans. All of these are ordinary, not cavalry, armies, but the Normans can take one cavalry army in lieu of two ordinary armies.
No reinforcements can arrive if the leader (Harald or William, respectively) is dead at the end of Turn 15.
9. Bretwalda and King
9.1. Bretwalda. At the beginning of turns 9, 10, and 11, players vote for a "Bretwalda" (overlord) of England. The Bretwalda is not the king of the entire country, but is a king of a region within the country who is acknowledged lord of the kings of the other regions. The "subordinate" kings might pay tribute (or, more likely, given presents), but the Bretwaldaship is more prestige than substance. A single battle could result in a change of Bretwalda. Battles and wars commonly took place despite recognition of a Bretwalda. When the Bretwalda died a struggle among several kings for the succession often followed. Nevertheless, the Bretwalda often came from the same nation for several generations. At other times there was no Bretwalda at all.
9.2. Electing the Bretwalda. In the game, each nation has one "vote" for each English area it occupies. At the beginning of the turn players cast their votes (for a nation, not a player). If one nation gains a majority of votes (abstentions are not allowed), then the nation's king is the Bretwalda. The nation gains two victory points.
Note that if they have submitted, Brigante occupied Galloway must vote with the Angles.
Players are free to negotiate with each other prior to voting: whatever agreements are made at this stage remain in force during the subsequent game turn.
9.3. The King. About the time the Viking raids began, political integration and social development progressed to the point that one man could call himself King of England. In the game, at the beginning of turns 12, 13, 14, and 15, if any nation occupies at least four areas in England, and at least twice as many areas in England as any other nation, that nation's king is King of England. If no nation meets this criterion there is no King, but a vote is conducted for Bretwalda.
The King's nation gains four victory points and an extra army, which is immediately placed on the board as for Population Increase.
9.4. Canute. At the end of the Danish turn 14, if the Danes hold twice as many areas in England as any other nation, and the Sweyn/Canute leader is alive, Canute becomes king and the Danes gain four victory points. This is an exception to the usual kingship rules of 9.3. and no additional army awarded.
9.5. King in turn 16. In turn 16 the kingship is determined at the end of the turn by the usual rules, but only Harold, William, and Harald are eligible, (if alive!). If two of the three leaders are dead, however, the third automatically becomes king, unless some nation other than the three mentioned above holds twice as many areas as the prospective king's nation. In this case no one is king. Victory points given for endgame kingship are Saxons four, Normans five, Norwegians five.
10. Control of Nations
Nations are listed in order of play.
| Nation | 4 | 5 | 3 | 3* | No. of Armies |
|---|---|---|---|---|---|
| Romans | A | A | A | – | 15 |
| Romano-British | A | A | A | B | 8+2 cavalry |
| Belgae | D | E | B | – | 10 |
| Welsh | B | B | C | B | 13 |
| Brigantes | C | C | B | C | 14 |
| Picts | D | D | C | D | 13 |
| Caledonians | B | C | B | B | 6 |
| Irish | C | D | A | D | 8 |
| Scots | A | E | A | C | 12 |
| Norsemen | C | A | C | C | 10 |
| Dubliners | A | E | A | D | 9 |
| Danes | B | C | B | B | 18 |
| Jutes | B | B | B | B | 5 |
| Norwegians | A | A | C | – | 12 |
| Saxons | C | E | A | C | 20 |
| Angles | D | D | C | D | 15 |
| Normans | D | B | B | – | 8+4 cavalry |
*See rules for Short Game.
Other pieces included in the game: 14 leaders, 25 Roman forts, 14 "Increase" markers, 1 "Turn" marker.
Three Player Short Game
This version for three players begins after the Romans leave Britain, and ends just before the Norman Conquest. It takes only half as long to play as the standard four player game.
Nations are assigned to players as indicated above; the starting positions are given below.
Starting Positions: Bernicia, Downlands, Dunedin, North & South Mercia and Pennines are vacant, other areas are occupied by one army each.
Romano-British – Avalon, Cheshire, Devon, Hwicce, March, (Remember there is no Romano-British Increase of Population in turn 6).
Welsh – all of Wales except Devon (total six areas).
Brigantes (Later called Kingdom of Strathclyde) – Cumbria, Dalriada, Galloway, Lothian, Strathclyde.
Picts – Alban, Caithness, Mar, Moray, Skye.
Caledonians – Hebrides, Orkneys.
Irish – No land areas.
Scots – No land areas.
Jutes – Kent, Sussex.
Saxons – Essex, Suffolk, Wessex.
Angles – Lindsey, Norfolk, York.
Other nations – nothing on board.
The game begins with Turn 6 and continues to the end of Turn 13, exactly half as long as the standard game. (Turn 6 represents 442-500 AD, and Turn 7 represents 501-560 AD. The set-up is not exactly representative of 442, as far as we know it.) The game ends with tallying of points for Turn 13. There are no "end of game" points as there would be in Turn 16 of the Standard game.
11. Winning
11.1. General. The player with the largest number of victory points at the end of the game wins. Victory points are tallied by nation, then added together for each player at the end of the game. Each player should keep a running tally for his nations: or delegate one player to score for everyone. At any time, any player may ask for, and must be given, the current total for any nation or player.
11.2. Tallying. In most cases, victory points are awarded at the end of the complete game turn in specific turns (4, 7, 10, 13, end). There are exceptions, as stated on the Victory Point Cards for individual nations.
The Romans score points throughout Turns 1-3, and it is sensible to record these as they are acquired. The note for Turn 3 on the Turn Record Chart is intended to remind the Roman player that this is the last chance to do this. In contrast the Norsemen are entitled to score for capturing a named area in Turns 12-16, and again for holding it both at the end of Turn 13 and the game end.
An astute player will refer to his Victory Point Cards, and his opponents', frequently. If another player asks to see any Victory Point Card, the owner must comply.
11.3. Points. In general, there are three ways to score points. First, a nation may score for holding (being sole occupant of) an area at the end of a given game turn. Second, it may score for destroying opposing pieces. Third, it may score for capturing an area, that is, for occupying it at some time even if not at the end of a turn. All such possibilities are described on the Victory Point Cards.
11.4. Limes. This is the name given by the Romans to their defensive lines/walls such as Hadrian's Wall and the 'Saxon Shore' forts which were built as defence against barbarian raids. Points will be scored at the end of Turn 5 for each area which is
(a) occupied by a Roman Fort
(b) occupied by a subject nation (but not if a Roman Fort has previously been destroyed in this area).
12. Player Notes
BRITANNIA is different from many other games insofar as it is never immediately obvious which player is winning. Each player accumulates points at a different rate, some scoring many points early (such as the player controlling the Romans), some scoring many later in the game (such as the player controlling the Danes). Experienced players will learn to recognize who is doing better or worse than the average. If one player is clearly doing better than anyone else, the others may try to gang up on the leader.
In a game of this scope it is impossible to force players to do exactly as their nations did historically, but the game is arranged so that a player who indulges in bizarre moves, from a historical viewpoint, will fail to score many points. Moreover, because there are several players, each player is, in effect, outnumbered. If a player makes an ill-considered move in order to hurt another player, he will hurt himself as well, and the remaining player(s) will benefit. In the process of following his historical objectives each player will have ample chances to hinder his opponents.
13. Historical Notes
During World War II the British proudly proclaimed that their island had not been (successfully) invaded since 1066. Every British schoolboy knows the story of 1066 and all that, even if he knows no other date in British history. Yet before the famous "last invasion" of William the Conqueror, the island of Great Britain was the battleground for dozens of invading tribes, of great movements which caught up entire peoples, sweeping them into the highlands or into oblivion. The game Britannia depicts the violent age which began with the establishment of the Roman province of Britanniae after the second Roman invasion of 43AD, and ended with the firm imprint of Norman authority.
The first violent contact of the civilized world with what was then a "barbarian" Celtic land was Julius Caesar's punitive expeditions of 55 and 54 BC. Although Caesar defeated his enemies, he only intended to punish British tribes which supported the Gauls of France. After accomplishing this he withdrew to complete the conquest of Gaul. The Romans finally came to stay in 43AD, partly because the emperor Claudius desired some conquest to add to his list of otherwise peaceful accomplishments, and partly in response to calls for aid from British tribes allied to Rome. Four well-organized Roman legions, with auxiliary troops, rapidly conquered the south and Midlands. Wales took longer to subdue. The tribes of northern England became Roman allies. In 60-61, while the Roman armies were fighting in Wales, many British tribes rebelled under the leadership of the famous warrior queen "Boudicca" who burned London and other Romanised cities. But the legions experienced little difficulty in defeating the revolt. A generation of peace followed.
When the Romans arrived, Britain was inhabited by many independent Celtic and pre-Celtic tribes, including some recent migrants from the Continent. In the game they are somewhat arbitrarily divided into several large groups. The Brigantes, who include the largest British tribe, could just as well be called Strathclyders, for after the Romans left the northerners maintained an independent state in Strathclyde for six centuries. Other Celtic tribes became the people we know today as Welsh. "Belgae" was the name given to migrants from the Continent (especially Belgium), but southern England was actually a welter of tribes and federations. Many Celts were content if not eager to gain the advantages of life within the Empire, and those who resisted failed to cooperate effectively. In any case, the unmatched Roman military system of professional legions and stone forts was more than the ill-prepared barbarians could withstand.
Further north, the more primitive pre-Celtic Picts knew little of the benefits of Roman civilization. They raided the south, first by land and later by sea, and were never completely subdued. In the far north dwelled peoples known collectively as the Broch Builders, after the round stone towers which served as dwelling and fortress. In the game these people are called Caledonians, though this term was generally applied by the Romans to all the unconquered people of northern Britain. Before the Roman invasion they probably fought with the Picts, but later the Picts turned south and the north experienced economic decline into political oblivion.
The Romans extended their control with a campaign beginning in 78 which completed the conquest of northern England and led to the construction of fortifications in southern Scotland. The Roman general Agricola claimed to have defeated the last organized Pictish resistance in 84, but for various reasons – lack of manpower, lack of interest, a change in commanders – the Romans gradually withdrew to northern England. During emperor Hadrian's reign (117-138) a wall was built across the narrowest part of northern England to interfere with Pictish raids. At first an earthen wall, it was later replaced with stone. The wall was not manned all along its length, nor did it hold Pictish sea-borne raids, but it was an important part of the Roman system of fortification which covered (and controlled) the country. Later a turf wall was constructed further north, along the line joining where Glasgow and Edinburgh now stand, but during internal strife in the Empire late in the century this Antonine Wall was abandoned.
Thenceforth most of Britain was blessed with peace, with rare interludes when struggles among generals who declared themselves emperor stripped the frontiers of troops. Raids by Picts, Irish from the east, and Anglo-Saxons (including Jutes, Franks, Frisians, and others) from Denmark and Germany forced construction of additional defences, such as the "Saxon Shore" forts. These raids penetrated beyond the border areas only once. However, the Empire as a whole experienced a slow decline in influence beyond its borders and power within.
When Germanic barbarians threatened Gaul and Italy – Rome was sacked in 410 – the Roman legions withdrew from Britain, and emperor Honorius told the Romano-British people to look after their own defence until the Romans could return – but they never returned. As the Roman Empire crumbles history becomes uncertain. Scholars disagree about dates, sequences of events, even about the existence of important kings and the location of decisive battles. This is the true "Dark Age" in Britain. Though disunited, the British managed to hold off the Anglo-Saxon, Pict, and Irish invaders for a time. Probably Saxons were invited to settle in Britain to help the inhabitants fight invaders. At any rate, ultimately the Anglo-Saxons turned on the British, and in the ensuing war the basis of civilization was destroyed in Britain, about 440-450. The British continued to fight, ultimately under the leadership of the historical king (or perhaps "war leader") Arthur. This culminated in a great British victory which contained the Anglo-Saxons for two generations. Arthur was probably a cavalry leader but certainly not the Romantic knight of later Welsh legend. After his death and the disintegration of political unity among the British, additional invaders helped the settled Anglo-Saxons complete the defeat of the inhabitants, who were subjugated or forced into the highlands of Wales, Cornwall, and Scotland. Many Britons had migrated to Brittany, in France, while plague killed many others. By 600 the Anglo-Saxons controlled most of England, and in the next 200 years they gained the rest.
Something should be said about the nature of the invasions. While the Romans were highly organized and could depend on reinforcements and supplies from the Continent, later invaders tended to be unorganized bands of barbarians looking for plunder or, rarely, for a place to settle. The Anglo-Saxons and their contemporaries, and later the Vikings, followed this pattern. Toward the end of the period covered by the game invading groups were better organized; real invasions under acknowledged leaders instead of fragmented migrations and piracy. The first of these was the "Great Army" of the Danes which swept all before it until it broke up, and later the invasions of Sweyn of Denmark, Harald the Ruthless of Norway, and Duke William of Normandy. By the time of Sweyn the Viking homelands had become distinct centralized kingdoms which were able deliberately to equip invading armies instead of groups of plundering freebooters.
After the Romans left, the art of fortification was largely lost. Although the Danes and English of Wessex built earthen fortified town/forts, these were very rare and could not be called castles. The Normans brought the art of castle building to England (though most castles were wood and earth at this time, not stone), but that occured after the Conquest. The Normans also brought armoured cavalry to Britain, ending the dominance of infantry in battle.
Of the survivors of the Anglo-Saxon invasions, the Welsh maintained a fragmented independence until more or less conquered by the English in the late thirteenth century. The Cornish were conquered by Wessex about 870, and the Strathclyders were finally incorporated into Scotland about 1034.
In the far north, the Picts fought the Scottish invaders of Dalriada (who originated in Ireland) to a standstill. But the Picts were handicapped by their custom of inheritance descending through the female line; and finally a Scottish king of Dalriada combined the two nations into the kingdom of Alban or Scotland. The Scots predominated culturally, though the majority of the population was Pictish. This kingdom absorbed part of Northumbria, Lothian, in the late tenth century.
For two centuries after 600 the Anglo-Saxons fought among themselves, with the Welsh and with the northerners, dividing into seven kingdoms known as the Heptarchy: Kent, Sussex, Essex, East Anglia, and the larger kingdoms of Northumbria, Mercia, and Wessex. At first the kingdom of Kent, of Jutish and Frisian origins, held the upper hand, but soon the northern kingdoms of the Angles gained the most eminent position, and the Northumbrian ruler became Bretwalda or overlord. Later the Angles of Mercia overthrew the Northumbrian hegemony. The Anglo-Saxon kingdom of Wessex gained the leadership of the Anglo-Saxons just as the Viking raids began. In each case, an individual king of one of the small kingdoms might dominate much of England, but the other areas often retained their own kings and might throw off foreign domination when the old Bretwalda died.
At first the Vikings came to plunder, going home each autumn; but as organised resistance decreased they began to establish bases in England, and finally they settled permanently. The Vikings of Norway occupied the Hebrides and Orkneys in the far north, and continued down the west coast of Britain to settle in such diverse areas as Cumbria and parts of Wales. Many of the settlers came by way of Ireland, where some Norwegians established the kingdom of Dublin. The more numerous Danes roamed along the east coast, occupying much of northern England as well as parts of Continental Europe, especially Normandy. The Danish "Great Army", probably commanded at one time by the three sons of Ragnar Lodbrok, harried in France and England for many years; they were stopped by the Saxons only after the army split up, some going north to settle.
At one point, nonetheless, Mercia was controlled by Danes and King Alfred the Great of Wessex was in hiding in the swamps of Somerset. But he managed to gather an army and drive back the Danes, obtaining after some years a treaty which divided England into Saxon and Danish areas. Alfred's successors gradually reconquered the Danish parts of the country, so that by 960 the king ruled most of England. But Danes continued to come, though in decreasing numbers. In contrast King Ethelred "the Unready" (actually unraed, "no counsel") gradually lost control of the kingdom and could not withstand a great invasion by the Danish king Sweyn, whose son Canute became undisputed king of England, Denmark, and Norway when Ethelred's capable son Edmond died. However, Canute's son was succeeded by Ethelred's second son, Edward the Confessor.
Edward had no heir; both earl Harold Godwinson, who though Edward's subject probably wielded more power, and Duke William of Normandy, descendant of Vikings, claimed the throne. Harold was crowned, but immediately faced invasions from Harald the Ruthless, king of Norway – a distant heir of Canute – and from William. Harold surprised and defeated Harald's army and killed his rival, near York, but after a forced march the Saxons were beaten by the Normans near Hastings, where Harold was killed. Harold's relatives continued a desultory resistance for some years, but essentially the Saxons accepted William's claim to the throne after the deaths of his rivals. The Vikings came no more; William had more difficulty with Welsh, Scots, and French than with Scandinavians.
It was a near-run thing. The Saxons nearly won; if the wind had blown in the other direction, William's delayed invasion would have landed before Harald's, and Harold's undiminished army might have beaten William as well. But would he have beaten Harald as well?
Brief Chronology
| Date | Event |
|---|---|
| 55, 54 BC | Julius Caesar raids southern Britain |
| 43-47 AD | Romans conquer southern England and Midlands |
| 49-61 | Romans subdue Wales |
| 60-61 | Boudicca's rebellion |
| c.90 | Roman garrison reduced to three legions |
| 122-130 | Hadrian's Wall built on Solway-Tyne isthmus |
| 142 | Antonine Wall built on Glasgow-Edinburgh isthmus |
| 3rd century | Anglo-Saxon raids begin |
| 367-369 | Picts and Irish break through defences to ravage frontiers |
| 407 | Remainder of Roman garrison goes to Gaul to fight German invaders |
| c. 425 | Vortigern is ruler of a large part of southern Britain |
| c. 430 | Vortigern invites Saxons to settle |
| c. 442 | Saxons attack British. Breakdown of Roman civilisation in Britain. Migrations to Brittany. |
| 500 | British (Arthur's cavalry) defeat Anglo-Saxons at Battle of Mons Badonicus (site unknown) |
| 542 | Plague devastates Britain |
| c. 550-600 | Anglo-Saxons attack again, drive British into Wales, Cornwall, and the north |
| 597 | Kingdom of Kent converted to Christianity. Remainder of English kingdoms converted by 650. |
| c. 610-678 | Northumbrian king is normally Bretwalda (Oswiu 645-670) |
| 731-799 | Mercian king is usually Bretwalda (Offa 757-796) |
| 793 | Monastery of Lindisfarne sacked by first Viking raid |
| 838, 851 | Wessex victories over Vikings |
| 843 | Kenneth McAlpin of Dalriada unites Scots and Picts |
| 865 | Danish "Great Army" invades East Anglia, destroys northern English kingdoms |
| 871 | Great Army divides: Danes attack Wessex; Alfred the Great becomes king of Wessex (d. 899) |
| 871-876 | Mercia ruled by Danish protégé |
| 876-878 | Renewed war, Wessex nearly conquered |
| 878 | Battle of Edington saves English |