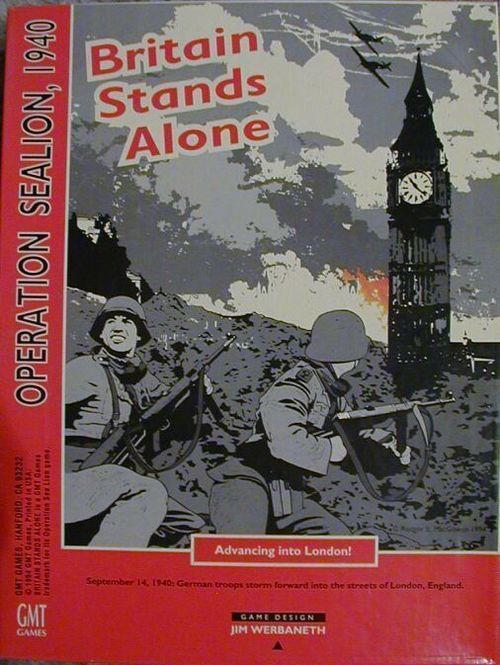
Britain Stands Alone
Britain Stands Alone Rulebook
Table of Contents
Table of Contents
- 1.0 Introduction
- 2.0 Sequence of Play
- 3.0 Weather
- 4.0 Stacking and Basing
- 5.0 Land Movement
- 6.0 Land Combat
- 7.0 Detection and Interception
- 8.0 Air Operations
- 9.0 Naval Operations
- 10.0 The Home Guard
- 11.0 Damage and Repair
- 12.0 Supply
- 13.0 Special Rules
- 14.0 Reinforcements and Replacements
- 15.0 Victory
- 16.0 Scenarios
- Errata (GMT Games, July 2, 1997)
- Appendix: Charts and Tables (from the Charts booklet and the map margins)
- Terrain Effects Chart
- Land Combat Results Table
- Auxiliary Unit and Brandenberger Table
- Demolition Table
- Weather Table
- Naval Supply Table
- Naval Combat Table
- Air Combat Table
- British Naval Release Table
- British Reinforcement and Replacement Schedule
- German Reinforcement and Replacement Schedule (legible rows only)
1.0 Introduction
Britain Stands Alone is a divisional level simulation of Operation SEALION, the German amphibious invasion of England that was planned for September 1940, but cancelled because of the RAF's victory in the Battle of Britain. The game explores the hypothetical possibilities of Operation SEALION assuming that the Luftwaffe had succeeded in winning air superiority by neutralizing Fighter Command's early-warning system, and then gone on to inflict serious losses upon the Royal Navy both at sea and in port.
1.1 Game Components
The Map
The map depicts the portion of England where Operation SEALION would have taken place had it been launched. A hexagonal grid has been superimposed upon the map in order to regulate movement and other game-related functions. The scale of the map is 10 miles per "hex."
Symbols representing various types of terrain are printed in hexes on the map. Each type of terrain has a different effect upon how units move and conduct combat (see the Terrain Effects Chart).
Important Note: A hex is always considered to consist entirely of City, Rough, Forest, or Wetlands terrain even if the terrain symbol covers only a small portion of the hex's total area.
Zones
The map area is subdivided into fifteen irregularly shaped zones. The boundaries between zones are delineated by the orange lines printed on the map, as well as coastlines, which divide land zones from sea zones. Although they are not shown, zone boundaries also exist wherever a Land zone and a Sea zone meet along a coastline. Thus, the Pas de Calais zone shares a border with the Straits of Dover zone, while the Holland zone borders on both the Straits of Dover and Southern North Sea zones.
Note: If the boundary between two land or two sea zones runs through a hex, it is always considered to lie in the zone which covers the majority of its area.
When a hex lies on the boundary between a land zone and a sea zone, it is considered to be in the land zone for purposes of Air Movement (see 7.1) and Air Detection (see 7.2), and in the sea zone for purposes of Naval Detection, Naval Transport, Over the Beaches Supply, and Amphibious Assault.
The Off Map Display
The Off Map Display depicts (on a much larger scale) the same area shown on the map, plus adjacent areas of the Atlantic Ocean, the North Sea, and Continental Europe. The display is subdivided into irregularly shaped zones, some of which are identical to the zones depicted on the map.
Important Note: Air and naval units that are located in a zone on the map are simultaneously considered to be located in the corresponding zone on the Off Map Display (and vice versa). Such units can be removed from the map and placed on the Off Map Display or vice versa at any time. It costs no movement points to do this.
Some off-map land zones contain two or more ports, not all of which border on the same sea zones. The orange dotted lines printed within such off-map land zones are there to clarify which sea zone(s) a particular port borders on. The lines have no effect on air units based in the zone; an air unit can always enter any zone that borders on the off-map zone in which it is based. Likewise, land units that are located in the zone can embark for Naval Transport or Amphibious Assault in any port located in it. They do not have to be specified as being in one specific sub-section of the zone.
Note: Scapa Flow is a special case. It is a naval base that is considered to be located in both the Cape Wrath and Shetlands zones.
The Counters
Britain Stands Alone contains 480 half-inch playing pieces, also known as counters. These come in two main types; units, which represent the land, air, and naval units that were historically present in the summer and early autumn of 1940, and markers, which are used to record various types of information during the course of play.
Land Units
Each land unit counter shows: Unit ID, Unit Size (e.g. Division), Unit Type (e.g. Mountain, Panzer), Attack Strength, Defense Strength and Movement Allowance. Armor units also show an Armor Superiority Value. A red box around the Movement Allowance indicates Motorized Movement Capability.
The unit type symbol indicates the kind of troops that comprise the unit. Land units come in two distinct varieties; motorized units and leg units. The two types expend different numbers of Movement Points to enter certain types of terrain (see the Terrain Effects Chart). All Infantry, Mountain Infantry, Airborne Infantry, and Airlanding Infantry are leg units; all other varieties of land units are motorized.
Unit type symbols: Infantry; Mountain Infantry; Airborne Infantry; Airlanding Infantry; Motorized Infantry; Motorized Infantry (Machinegun); Motorized Cavalry; Armor/Panzer; Amphibious Panzer; Army Tank.
The unit size symbol indicates the relative size of a land unit, using standard military unit terminology: Battalion; Regiment; Forward Detachment; Brigade; Brigade Group; Division.
Naval Units
Each ship counter shows: Ship Type, Ship Name, Flak Rating, Naval Movement Allowance, Naval Attack Factor and Naval Defense Factor. Naval point counters (DD, TB, AP, LC, MB, Prahm) show the ship type, Naval Movement Allowance, Naval Attack Factor, Naval Defense Factor and number of Naval Points.
Naval units come in two different varieties; ships and naval points. Each ship counter represents a single ship. Each DD point represents 3 destroyers and each TB point, 5 torpedo boats. Each AP (transport) point represents approximately 30 vessels, and each Prahm (barge), LC (landing craft), or MB (motorboat) point represents 75-100 small craft.
Note: Some naval units' Naval Attack Factors are printed in red to indicate that they have torpedoes (see 9.2).
Air Units
Each air counter shows: Unit Type, Air Combat Factor, number of Points, Air Movement Allowance, and Naval Movement Allowance. Bombers also show a Troop Bombing Factor, Installation Bombing Factor and Naval Bombing Factor.
Air units come in three different varieties; fighters, bombers, and transports.
Fighters: Spitfires, Me-109's, Me-110's, and CR.42's.
Bombers: He-111's, Ju-88's, Stukas, BR.20's, Blenheims, and Wellingtons.
Transports: Ju-52's.
Note: For the sake of simplicity, and to prevent players from manipulating the consolidation rules (see 1.2), some air units represent more than one type of aircraft. Thus, Do-17s are combined with He-111s, and Hurricanes with Spitfires, while Wellington counters also represent Hampden, Whitley, and Stirling heavy bombers.
Fighters are the only type of air unit that can fire in Air Combat (see 7.3). Bombers are the only type that can conduct Bombing Combat (see 7.4), while only transports can fly Air Transport, Air Supply, and Airborne Assault (see 7.5 and 7.6) missions. Bombers and transports cannot fire in Air-to-Air Combat; to help you remember this, their Air Combat Factors are boxed and printed in red.
Counter Abbreviations
Due to space limitations, the following abbreviations are used on the counters:
AIF = Australian Imperial Force; AP = Transport; BB = Battleship; BC = Battlecruiser; Bonvntre = Bonaventure; CA = Cruiser; Can = Canadian; CD = Coast Defense Ship; CL = Light Cruiser; CLA = Antiaircraft Cruiser; DD = Destroyer; FF = Free French; Flgr = Fleiger; GD = Gross Deutschland; Gds = Guards; LE = Legion Etranger (Foreign Legion); LL = Luftlande; Lon = London; LSSAH = Leibstandarte SS Adolf Hitler; MB = Motorboat; MMG = Motor Machinegun; NZEF = New Zealand Expeditionary Force; PB = Pocket Battleship; PD = Predreadnought; S. Holstein = Schleswig Holstein; Southmpton = Southampton; TB = Torpedo Boat; Tot = Totenkopf.
Chits and Markers
A highly varied assortment of chits and markers are used to record important information during play: Control Marker, Flown Marker, 1 Hit Marker, 2 Hit Marker, Mine Marker, Out of Supply Markers, Rail Break Markers, Railhead Marker, Rail Junction Marker, Leg Replacement Point, Armor Replacement Point, Army Tank Replacement Point, Stay/Withdraw chits, U-Boat Marker, Variable ADV Marker, Variant Chit, Naval Round Marker.
The Dice
This game includes one ten-sided dice with sides numbered from 0 to 9. Unlike some other games, a roll of "0" is always read as zero, not ten.
1.2 Consolidation
During play, air points and naval points of exactly the same type and nationality (German DD's with German DD's, French DD's with French DD's, Ju-88's with Ju-88's, etc.) can be consolidated to form 2-point units, and 2-point units can be split up to form 1-point units. Before resolving any type of combat involving air units or naval points (DD's, TB's, AP's, LC's, and Prahms), each player must consolidate his units into the minimum possible number of counters.
Note: MB points cannot Consolidate because there are only 1 point MB units.
Exception: Air units that are bombing enemy naval units can split up in order to attack more naval units (i.e., a 2 point Ju-87 unit could be split to attack two different naval units). Consolidation must occur, however, if 2 or more points of the same type of aircraft bomb a single naval unit (i.e., if 3 Ju-87 points are allocated to bomb a single naval unit, the German player must consolidate them, and will resolve two attacks - one with 2 points and another with 1 point - instead of making three attacks).
Example: If the German player has two 1-point Me-109 counters, three 1-point He-111 counters, and one 1-point Ju-88 present at the start of Air Combat, he must consolidate the Me-109's into a single 2-point counter and the He-111's into one 2-point counter and one 1-point counter. The 1-point Ju-88 unit remains as it is.
1.3 Control
Each player can only base air points and naval units at airbases and ports, and use radar staions and railroads that are located in hexes that he controls. All hexes on the map are British-controlled at the start of play, but a hex's Control status changes whenever an enemy land unit enters it and there is no friendly land unit present (Home Guard Factors - see 10.0 - do not count).
Exception: The control status of a British-controlled hex does not immediately change when it is entered by a German unit that is conducting an Airborne Assault. It becomes German-controlled only if the Home Guard Factor in the hex is eliminated in the ensuing combat.
Note: A land unit does not have to be In Supply in order to control a hex.
In most cases it should be easy to tell which side has control of a hex because it will be behind one of the player's lines. To help you keep track of ambiguous cases, we have provided Control markers that have the German flag printed on one side and the British flag on the other. We urge that you use these sparingly or the map can easily become cluttered with them.
1.4 Examining Stacks
Players can examine the contents of an enemy stack at any time.
2.0 Sequence of Play
Britain Stands Alone is played in turns, each of which is divided into seven Segments. During each turn, these Segments are played through in the order that they are listed below. All activity in each Segment (and Phase) must be completed before play proceeds to the next Segment (or Phase).
- Initial Segment
- Weather Phase: The German player rolls on the Weather Table to determine the weather for the current turn.
- Royal Navy Release Phase: The British player rolls on the Release Table to determine which - if any - types of British naval units can enter restricted zones during the current turn.
- Reinforcement and Replacement Segment
-
German Reinforcement Phase: The German player receives any naval and/or air units listed in the current turn's space on his Reinforcement Schedule, and uses Replacement Points to rebuild land and air units.
-
British Reinforcement Phase: The British player receives any land and/ or naval units and Replacement points listed in the current turn's space on his Reinforcement and Replacement Schedule, and uses Replacement Points to rebuild land and air units.
- Naval Segment
-
German Naval Detection Phase: The German player attempts to Detect all British naval units that are “at sea.” If he succeeds, he can immediately conduct Naval Interception against them. If the German player chooses to intercept with air and/or naval units, the British player can attempt to Detect them and, if successful, conduct Air Interception against them.
-
British Naval Detection Phase: Identical to the German Naval Detection Phase except that the roles are reversed.
-
German Naval Movement Phase: The German player moves his naval units one stack at a time. The British player attempts to Detect each stack in every zone that it enters and, if successful, can conduct Naval Interception against it. If the British player chooses to intercept with air and/or naval units, the German player can attempt to Detect them and, if successful, conduct Air Interception against them.
-
British Naval Movement Phase: Identical to the German Naval Movement Phase except that the roles are reversed.
-
Air Ferry Phase (German Player first): Any air unit that has not moved thus far in the Naval Segment can move to any airbase within twice its Naval Movement Allowance. It does not receive a Flown marker.
- German Operations Segment
-
Supply Phase: The German player converts up to 6 railroad hexes in England and computes how many land unit steps and air points he can supply in England. Any units and points that cannot trace a Line of Supply automatically receive Out of Supply markers; if the number of steps and points that can trace a Line of Supply exceeds the number of units that can be supplied in England, the German player must place Out of Supply markers on enough units to bring him within the limit.
-
Land Movement Phase: The German player can move all of his land units and conduct Overruns with Motorized units.
-
German Air Mission Phase: The German player can fly Bombing missions against installations, land units, and naval units in port, and conduct Air Supply, Air Transport and Air Assault missions. The British player can attempt to Detect each German air mission and, if successful, can conduct Air Interception against it.
-
British Air Mission Phase: Identical to the German Air Mission Phase except that the roles are reversed.
-
Land Combat Phase: German land units can choose to conduct Land Combat against British land units located in adjacent hexes. Amphibious and Air Assaults are also resolved at this time.
-
Motorized Movement Phase: The German player can move and conduct Overruns with any of his Motorized units that do not have Out of Supply markers.
-
British Operations Segment Identical to the German Operations Segment except that the roles are reversed, and the British Air Mission Phase precedes the German Air Mission Phase.
-
Return to Base Segment
-
German Return to Base Phase: All German air units that are located in “In Flight” boxes must land at any airbase within range; all German naval units that are at sea and do not possess No Return to Base markers can move up to the limit of their Naval Movement Allowances. No Detection attempts are made against units moving during this Segment.
-
British Return to Base Phase: Identical to the German Return to Base Phase except that the roles are reversed.
- Repair Segment (Simultaneous): Both players roll a die for each of their damaged ships that is located at a friendly naval base; if the result is a zero, the ship counter is flipped to its undamaged (front) side. Each player may also remove 1 hit from each Installation that he controls.
3.0 Weather
In the Weather Phase of each Initial Segment, the German player determines the weather for the entire turn by rolling the die and locating the result (modified by last turn's weather and the date of the current turn) on the Weather Table.
Exception: The weather is always Fair on the first and second turns of all three scenarios (see 16.0).
Weather Effects
-
Fair - Has no effect upon play.
-
Cloudy - Modify all Bombing and Air Combat die rolls by +1.
-
Foul-Modify all Bombing and Air Combat die rolls by +2, and all Detection die rolls by +1. Over-the-Beaches Supply (see 12.2) and Air Assaults are prohibited, although Air Transport and Air Supply Mission can be flown.
-
Stormy - Modify all Detection and Naval Combat die rolls by +2. Air units cannot move or attack, and Naval Transport (see 9.4), Amphibious Assault (see 9.5), Naval Supply, and Over-the-Beaches Supply (see 12.2) are prohibited. U-Boat markers have no effect during Stormy weather.
4.0 Stacking and Basing
Land Unit Stacking Limit
No more than 3 divisions of land units can stack together in a hex. A regiment, forward detachment, or brigade counts as one-third of a division for stacking purposes, while battalions do not count toward the Stacking Limit at all. Any number of land units can be located in a land zone on the Off Map Display.
Units can exceed the Stacking Limit while moving through a hex that is occupied by other friendly units, they just cannot end their movement overstacked. If a hex is overstacked at the end of any Movement, Combat, or Motorized Movement Phase, the owning player must Retreat enough units 1 hex from it so that it is no longer overstacked. If, for any reason, he cannot do so, he must eliminate enough units so that the hex is no longer overstacked.
Air Unit Basing
Wellington, Ju-88, and He-111 bomber points can only be based at on- map airbases that are printed in blue; they cannot be based at those that are printed in red. However, such air points can be based in any off-map zone.
Within the above restriction, up to 4 air points can be stacked on any airbase (red or blue) that is printed on the map. Each zone on the Off Map Display has an Airbase Capacity printed in it that lists the maximum number of air points that can be based in that zone. Note that some Off Map zones have an unlimited Airbase Capacity. If an airbase's capacity is reduced by damage (see 11.2), all Air Points based at it can still take off.
Note: Scapa Flow is a special case. It is an airbase that is located in both the Cape Wrath and Shetlands zones.
If an enemy land unit enters a hex containing an airbase at which friendly air points are based, roll a die for each air point present. If the result is 0-3, the point is destroyed; if the result is 4-9, the point can fly to any friendly controlled air base within range, even if it has a Flown marker. When the air
point lands it immediately receives a Flown marker if it did not have one already. This special form of air movement cannot be Intercepted.
Note: The value of the Spitfire Losses marker is not increased when Spitfire points are lost in this manner.
Naval Unit Basing
Each port has a Port Capacity, which is the number of ships and/or naval points that can be based at it (i.e., each DD, TB, AP, LC, MB, and Prahm point is equal to 1 ship). A port's capacity can be reduced by damage (see 11.2). If, at the beginning of the friendly Naval Movement Phase, a port has enough accumulated hits to reduce its capacity below the number of naval units currently based there, the excess naval units must move elsewhere during that Naval Movement Phase. Hits on a port are recorded by placing a Hit marker on its port symbol. However, the ships that are based at a port are placed in the port hex itself, not the hex where the port symbol is located.
Note: All British naval units except AP's can only be based at ports that are also naval bases.
If enemy land units enter a port where friendly naval units are based, the naval units are immediately moved out to sea. This movement cannot be intercepted, although the moving player must still roll for any mines or U- boats in the zone.
Inland Ports
Some ports are located inland, and cannot be used for any purpose (including Naval Supply) if enemy land units occupy any of the hexes through which they trace access to the sea. Furthermore, if there are any naval units in such a port when an enemy land unit occupies one of the hexes that gives it access to the sea, they are immediately moved out to sea. This special form of naval movement cannot be intercepted, although the moving player must still roll for any mines or U-boats in the sea zone.
The following list names all inland ports and specifies through which hexes they trace access to the sea.
| Port | Hexes | Port | Hexes |
|---|---|---|---|
| Preston | 2005, 2006 | Liverpool | 2007, 2008 |
| Milford Haven | 0819, 0920 | Pembroke | 0819, 0919, 0920, 1019 |
| Barnstaple | 1324, 1325 | Padstow | 0928, 1027 |
| Plymouth | 1330 | Exeter | 1728, 1827 |
| Weymouth | 2228 | Bournemouth | 2528 |
| Southampton | 2826, 2926, 2927 | Portsmouth | 2926, 3127 |
| Colchester |
5.0 Land Movement
5.1 Zones of Control
All land units except the four German amphibious panzer battalions project a zone of control (ZOC) into the six hexes adjacent to the one where they are located. Both sides can project ZOC's into the same hex simultaneously. Naval and air units do not project ZOC's, and ZOC's have no effect on them.
Exception: ZOC's do not project into all-Sea hexes or across Sea hexsides (even at crossing arrows - see 5.2).
ZOC Effects
- A land unit must stop moving at the instant that it enters an enemy ZOC, and can move no further during that Movement Phase.
Exception: Units that are conducting an Overrun (see 5.6) can continue moving after entering an enemy ZOC.
-
A unit that begins the Movement Phase in an enemy ZOC can move out as long as the first hex that in enters does not contain an enemy ZOC.
-
A unit cannot Retreat (see 6.2) into an enemy ZOC hex unless the hex is occupied by a friendly unit.
Exception: Units conducting Overruns and Air Assaults can retreat into enemy ZOC hexes that are not occupied by friendly units under certain special circumstances (see 5.6 and 8.6).
- A Line of Supply (see 12.1) cannot be traced through an enemy ZOC hex unless the hex is occupied by a friendly unit.
5.2 Land Movement Procedure
During his Land Movement Phase, a player can move all of his land units up to the limit of their Movement Allowances. Land units move across the map from hex to adjacent hex, paying a cost in Movement Points that is determined by the terrain in the hex being entered and on the hexside through which it is being entered (see the Terrain Effects Chart). All terrain costs are cumulative. Note that some types of terrain cost motorized land units more Movement Points than leg land units.
Example: A leg unit that moved into a forest hex (1 MP) across a river hexside (+1 MP) would have to expend a total of 2 Movement Points.
Land Movement Restrictions
- A land unit cannot enter a hex if it has an insufficient number of unexpended Movement Points to do so. Unlike many other games, a unit cannot always move 1 hex per friendly Movement Phase.
- A land unit cannot enter an all-Sea hex.
Exception: See Naval Transport ( 9.4) and Amphibious Assault (9.5).
- A land unit must stop moving immediately upon entering an enemy ZOC, unless it is conducting an Overrun (see below).
Note: Advance After Combat (see 6.3) is not considered movement. Units can advance directly from one enemy ZOC to another.
- A land unit cannot enter a hex occupied by an enemy unit, unless it is conducting an Overrun (see below).
Note: An airborne unit that is conducting an Airborne Assault (see 8.6) can be airdropped into a hex occupied by an enemy unit, but that is not considered land movement.
Crossing Arrows
Certain sea hexsides on the map (ex. 3922-3923) have crossing arrows printed on them. Land units can move and attack through/across such a hexside. However, ZOC's are not projected across a hexside that has a Crossing Arrow, and land units may not retreat across it.
5.3 Motorized Movement
Motorized units whose Movment Allowances are printed in a red square can move twice during each friendly Operations Segment: once in the Movement Phase and again during the Motorized Movement Phase.
Restrictions
- Motorized units that are Out of Supply cannot move during the friendly Motorized Movement Phase.
- An Amphibious Panzer Battalion can move in the German Motorized Movement Phase only if it moves in a stack with another German motorized unit that is not an Amphibious Panzer Battalion.
5.4 Railroad Movement
Railroad Movement is a special form of movement that can be conducted by any ground unit that begins the friendly Movement Phase in a hex or zone that contains a railroad and is not in an enemy ZOC.
A unit that is conducting Railroad Movement is given a Rail Movement Allowance of 30, but it can move only from railroad hex to connected railroad hex, paying 1 Rail Movement Point for each hex entered. It cannot enter enemy ZOC's or pass through enemy controlled cities or airbases (even if they are not occupied by enemy units).
Exception: A unit that is conducting Railroad Movement must expend 10 Rail Movement Points to enter a railroad hex containing a Rail Break marker.
All Off Map land zones are considered to be linked by railroads. Units can conduct Railroad Movement on the Off Map Display by expending 10 Rail Movement Points for each zone entered.
Restrictions
-
At the beginning of each friendly Movement Segment, the British player rolls a die. The result is the number of land unit steps that can conduct Railroad Movement during the Phase.
-
German units cannot conduct Railroad Movement in England.
-
An unlimited number of German units can conduct Railroad Movement between adjacent land zones located on the Off Map display.
-
A unit conducts Railroad Movement instead of normal Land Movement. It cannot do both during the same Movement Phase.
-
Railroad Movement cannot be conducted during a Motorized Movement Phase.
German Rail Conversion
The German player can never move units by railroad in England, but he can use an English railroad to extend his Line of Supply (see 12.1) if it has been converted. The German player can convert only 6 hexes per turn, and each hex must be adjacent to a hex that has already been converted (except that a German- controlled port hex containing a railroad can always be converted).
Note: In effect, all converted rail lines must originate in German- controlled ports.
Hexes containing British land units or British-controlled cities or airbases cannot be converted, and a hex that a British land unit projects a ZOC into can be converted only if it is occupied by a German land unit.
Use the German Railhead markers to record which hexes have been converted, and the Rail Junction markers to record which direction a converted rail line takes when leaving a hex where two or more railroads intersect. British units can neither use Railroad Movement to enter, nor trace supply along a railroad that passes through a converted railroad hex.
However, a converted railroad hex is immediately “de-converted” if it is restored to British control (i.e., a British land unit occupies the hex and no German land units are present).
Hits on Converted Rail lines
Each hit inflicted on a converted railroad by Bombing Combat or Auxiliary Unit attack eliminates one converted railroad hex. No matter what converted railroad hex is the target of the attack, the converted railroad hex eliminated is always that which is located the furthest from the port in which the converted rail line originates. In other words, a hit anywhere along the length of a converted rail line has the effect of “shortening” it by one hex.
If two or more converted railroad hexes are equally distant from the port in which a converted rail line originates, the German player always chooses which is eliminated. If a hit is inflicted on a converted rail line that is no longer linked to a German-controlled port because hexes in between have been “deconverted” by British units, eliminate the converted hex that is the furthest from the port to which the rail line used to be linked.
Example: A German-controlled rail line originates in the port of Yarmouth (hex 4313) and extends five hexes inland to the city of Thetford (3815). If a British bombing mission inflicts 2 hits on the converted railroad in hex 4213, the 2 hexes at the furthest extent of the railroad (hexes 3815 and 3915) are eliminated, so the Railhead marker is moved back to hex 4014.
5.5 Off Map Movement
Entering the Off Map Display British land units can move or Retreat from the map into the Northern England zone on the Off Map Display by way of the northern mapedge.
A British unit that is located in the last hex row adjacent to the northern mapedge must expend 1 additional Movement Point in order to move off the map. A unit that is conducting Railroad Movement (see 5.4) can enter the Off Map Display from a railroad hex located on the northern mapedge by expending 10 Rail Movement Points.
A unit that leaves the map and enters the Off Map Display cannot reenter the map during the same turn. Thus, if a British unit retreated off the northern mapedge during the Land Combat Phase of the German Operations Segment, it could not reenter the map until the British Operations Segment of the following turn.
Leaving the Off Map Display
A land unit that is located in the Northern England zone can move into any hex on the northern mapedge by expending half of its Movement Allowance. A unit that is located in the Northern England zone and is conducting Railroad Movement can enter a railroad hex on the northern mapedge by expending 10 Rail Movement Points.
Movement on the Off Map Display
A land unit that is located in an Off Map zone can move to any adjacent land zone on the Off Map Display by expending its entire Movement Allowance. Land units cannot move into Off Map sea zones.
Exception: Land units can be moved into and through Off Map sea zones by Naval Transport (see 9.4).
All Off Map land zones are considered to be linked by railroads. Units can conduct Railroad Movement on the Off Map Display by expending 10 Rail Movement Points for each zone entered.
5.6 Overrun
Overrun is a special type of combat that can occur during a Land Movement or Motorized Movement Phase and can be conducted only by motorized units. Stacks of motorized units can Overrun together as long as they start a Movement or Motorized Movement Phase stacked in the same hex. No units can be “picked up” by a moving stack before or after it conducts an Overrun.
Exception: The only British motorized units that can conduct Overruns are those possessing the Armor and Army Tank unit type symbols. However, British units possessing the Army Tank symbol cannot Overrun during the British Motorized Movement Phase because they cannot move in that phase.
Overruns may not be conducted into Major City or Wetlands hexes.
To conduct an Overrun, a motorized stack that is located in a hex adjacent to enemy units expends enough Movement Points to enter the enemy- occupied hex plus 2 additional Movement Points. Then, the attacker immediately resolves Land Combat against all the enemy units in the hex. This combat is resolved normally, except for the following differences:
-
If an overrunning stack Retreats, the first hex retreated into must always be the hex from which it entered the Overrun hex. If that hex is located in the ZOC of any enemy unit except those that were just attacked and contains no friendly units, the overrunning stack suffers 1 step loss (see 6.2).
-
If all of the defending units are neither eliminated nor forced to Retreat, the overrunning stack must Retreat from the Overrun hex no matter what the combat result.
-
If an overrunning stack applies any portion of an adverse combat result as a Retreat (see 6.2), the stack must stop moving (and therefore can conduct no further Overruns in that Phase).
Design Note: An overrunning unit can retreat into a vacant hex in an enemy ZOC because it is assumed that the unit is strung out in a road column that extends back into the hex from which it launched the overrun. Thus, the hex is not really “empty” at all.
There is no limit to the number of Overruns that a unit can conduct in a single Movement Phase except that imposed by its own Movement Allowance. The same enemy unit(s) can be Overrun any number of times in a single Movement Phase, and can be Overrun more than once by the same stack of enemy motorized units.
Special Overrun Rules
- Units that are conducting Overruns can enter hexes occupied by enemy units, in violation of the normal movement rules.
- Units that are conducting Overruns can move directly from one enemy ZOC into another, in violation of the normal movement rules.
- Neither attacking nor defending units can Advance After Combat (see 6.3) in an Overrun.
Note: Capable units can mix Overruns with normal movement during the same friendly Movement Phase. When moving normally, the restrictions on entering enemy-occupied hexes and moving directly from one enemy ZOC to another apply as usual.
Example: It is the Land Movement Phase of the German Operations Segment and the reduced-strength (i.e., 1-step) 8th Panzer Division is in hex 3823. The British 24th Guards Brigade is at Tonbridge (3623) and the 20th Guards Brigade is in hex 3624. The German player moves the 8th Panzer into hex 3724 (1 MP) and declares an Overrun against the 24th Guards (which costs 2 MP for the Overrun, plus 1 MP to enter the Tonbridge hex).
The German Attack Factor is 7 and the British Defense Factor is 3 (2 for the 24th Guards plus a Home Guard Factor of 1), so the Initial Combat Odds Ratio is 2-to-1. However, the German player declares that he is committing the 8th Panzer for Armor Superiority, so the odds ratio will be increased by 3. There is no terrain in the Tonbridge hex that would cause the odds ratio to be reduced, so the Final Combat Odds Ratio is 5-to-1 (Attack Factor 7 versus Defense Factor 3).
The German player's combat die roll is "4," so the combat result is a bold italicized "D2." Since the result was printed in bold italics, the British player must eliminate the 24th Guards in order to satisfy the mandatory step loss. The loss of the 24th Guards automatically eliminates the Home Guards as well. Yet, even though all the enemy forces were destroyed, the 8th Panzer cannot Advance After Combat because this is an Overrun.
However, the 8th Panzer still has 4 Movement Points remaining, so the German player now declares an Overrun against the 20th Guards (which costs him 1 MP to enter hex 3624 along the Railroad, plus 2 MP for the Overrun). Here the Initial Combat Odds Ratio is 3-to-1 (Attack Factor of 7 versus Defense Factor of 2), and the Final Combat Odds Ratio is again 5-to-1 (increased by 3 for Armor Superiority, decreased by 1 for Forest terrain). The German player's combat die roll is "9" and the combat result is "A1/D1."
The British player chooses to apply the "D1" by retreating the 20th Guards into hex 3625. The German player also decides to retreat (rather than applying the "A1" as a step loss and thus eliminating the 8th Panzer). Since it conducted an Overrun, the 8th Panzer must retreat into Tonbridge, because that was the hex from which it entered the Overrun hex. Although the 8th Panzer still has 1 Movement Point remaining, it must stop moving at this point because it retreated.
6.0 Land Combat
During the Land Combat Phase, friendly land units can attack enemy land units that are located in adjacent hexes - unless the hexes are separated by a Sea hexside that does not have a Crossing Arrow (see 5.2) printed on it. Land Combat is voluntary, so units are never forced to attack, and every friendly unit that is adjacent to an enemy unit does not have to attack.
All of the enemy units stacked in a hex must be attacked together in a single Land Combat. They cannot be attacked separately. However, all of the units in a friendly stack do not have to attack the same enemy units(s). They can attack different enemy-occupied hexes in separate combats if desired. No unit can attack or be attacked more than once per Land Combat Phase.
Multi-Hex Land Combat
An enemy-occupied hex can be attacked in a single Land Combat by friendly units located in up to all six of the adjacent hexes. Likewise, a single stack of friendly units can attack the enemy units located in up to all six of the adjacent hexes in a single Land Combat.
6.1 Land Combat Procedure
The active player resolves Land Combats in any order he wishes, using the following procedure in each case.
-
Designate all units that will attack in a particular Land Combat and identify which enemy-occupied hex(es) they will attack.
-
Total the Attack Factors of all the attacking units, divide the sum by the total of all the defending units' Defense Factors (plus any Home Guard Factor), and express the result as a ratio (rounding down). This is called the Initial Combat Odds Ratio.
Note: Units that are attacking across River hexsides and Crossing Arrows have their Attack Factors halved (See the Terrain Effects Chart).
Example: Units with a total Attack Factor of 26 are attacking enemy units with a total Defense Factor of 7, yielding a result of 3.71, which rounds down to 3-to-1.
-
The attacker and defender can each commit a single armor/panzer, amphibious panzer, or army tank unit for determining Armor Superiority (see 6.4) - assuming they have a unit or units of the appropriate types involved in the combat.
-
Determine the Final Combat Odds Ratio by adjusting the Odds Ratio by the following values. All of them are cumulative.
| Adjust | Reason |
|---|---|
| -1 | If any defending unit occupies a Forest, Rough, or Minor City hex. |
| -2 | If any defending unit occupies a Major City or London hex. |
| +/- ? | The Armor Superiority modifier (see 6.4). |
| -2 | If any unit conducting an Amphibious Assault was transported by a Prahm or MB point. |
| -1 | If all units conducting an Amphibious Assault (see 9.5) were transported by LC points. |
| -1 | If units conducting an Amphibious Assault attack a hex that is in the ZOC of a 2-step enemy division that has no hits on it. |
-
Roll the die and cross-index the result with the Final Combat Odds Ratio column on the Combat Results Table. Each combat result consists of two parts; the portion printed to the right of slash applies to the defending units, the portion printed to the left of the slash applies to the attacking units.
-
Conduct any Advance After Combat.
6.2 Applying Combat Results
Combat results are always applied to the defending units before they are applied to the attacking units. There are six different kinds of combat results:
D#: The defending force must (A) Retreat that number of hexes; (B) lose that number of Steps (see below); or (C), do some combination of the two. Of course, if the defending units cannot Retreat, the entire combat result must be satisfied by eliminating Steps. Also, if a result is printed in bold italics, at least 1 step must be eliminated when applying the combat result.
Exception: See British Armor Losses (6.4).
D#R: Same as above, except that the defending force must Retreat at least 1 hex.
Exception: If there is no hex available into which the defending force can Retreat (as explained below), it applies the entire result as step losses.
A#: Same as above, except that it is the attacking force that is affected.
Example: A group of two attacking 2-step divisions suffers a combat result of "3." The owning player can choose to Retreat both divisions 3 hexes; eliminate one of the divisions (2 steps) and flip the other to its reverse side (1 step); flip one division and Retreat both 2 hexes; flip both divisions and Retreat them 1 hex; or eliminate one division and Retreat the other 1 hex.
A#R: Same as above, except that the attacking force must Retreat at least 1 hex.
De: The entire defending force is eliminated (all steps).
Ae: The entire attacking force is eliminated (all steps).
Land Unit Steps
All divisions have reduced Attack and Defense Factors printed on their reverse sides. When a division is at full-strength (that is, with the side displaying its full-strength Attack and Defense Factors showing face- upward), it has 2 Steps. If a Step is eliminated from a 2-Step division, flip it over to its reverse (reduced-strength) side; if a Step is removed from a division that is already on its reduced-strength side, it is eliminated.
All brigades, regiments, forward detachments and battalions have only 1 Step. If a Step is removed from such a unit, it is eliminated.
Note: Home Guard Defense Factors (see 10.0) cannot be eliminated to satisfy step losses.
Retreat
When a player chooses to apply all or part of a combat result in the form of Retreat (or must do so because of an A#R or D#R result), all of his units that participated in that particular Land Combat must retreat. Stacks of units can split up during Retreat, with each unit taking a different path and ending up in a different hex.
If a retreating unit ends up in a hex occupied by other friendly units that are attacked at some later point during the same Land Combat Phase, the retreated units never add their Defense Factors to the defender's total, but are affected by any adverse combat result suffered by the defending side.
Retreat Restrictions
-
A retreating unit must end up the indicated number of hexes away from the hex where it began retreating; the retreat path cannot double back on itself.
-
A unit cannot Retreat into Sea hexes or across Sea hexsides (including those that have crossing arrows).
-
A unit cannot Retreat into an enemy ZOC hex unless the hex contains a friendly land unit.
Exception: Retreating airborne units ignore the ZOC's of enemy units located in the hex that they air assaulted.
Exception: Overrunning units that Retreat ignore the ZOCs of the enemy units that they just tried to Overrun. Also, they can always Retreat into the hex from which they launched the Overrun even if it is in the ZOC of an enemy unit that they did not try to Overrun.
If a unit must Retreat because of an A#R or D#R result, but cannot because of these Retreat Restrictions, it suffers 1 step loss instead.
Extended Retreat
Units can Retreat through stacks of friendly units without regard to the Stacking Limit (see 4.0), but cannot end up overstacked. However, if the only legal path of Retreat leads to a hex in which the retreating unit would be overstacked, it Retreats 1 additional hex. This option cannot be used if any alternate, legal path exists.
Note: It is possible that the extra 1 hex Retreat will force the retreating unit into another hex where it would be overstacked, in which case it would Retreat 1 hex more. This process can continue for several hexes in a row until the retreating unit can reach a hex in which it will not be overstacked.
6.3 Advance after Combat
If all of one side's units that participated in a Land Combat are eliminated or Retreat, units on the opposing side that were not eliminated or retreated can Advance After Combat. This is not considered movement, Movement Points are not expended, and Overruns are not possible.
Exception: Although overruns are resolved using the Land Combat Procedure, they are not Land Combats. Thus, participating units cannot Advance After Combat.
Units can Advance After Combat the same number of hexes that the opposing units retreated; if all the opposing units were eliminated the victorious units can advance 2 hexes. Advance After Combat is always voluntary and units do not have to advance the full number of hexes allowed. Some can advance the full distance while others advance less and stacks can split up to advance in different directions.
Note: A unit that is conducting an Amphibious Assault (see 9.4) can only advance into the partial sea hex that is the target of the assault. It can advance no further.
The first hex advanced into must have been occupied by an enemy unit that retreated or was eliminated. However, the second and third hexes (if any) of an Advance After Combat can be made into any hexes that the owning player wishes except those that contain enemy units or are inaccessible due to Sea hexsides. Enemy ZOC's are ignored during Advance After Combat; advancing units can advance from one enemy ZOC into another without restriction.
Note: A German unit that uses the second or third hex of an advance to enter a hex containing a Home Guard Defense Factor (see 10.0) cannot advance any further.
6.4 Armor Superiority
Design Note: The Armor Superiority Value assigned to a unit depends less upon the number and performance of its tanks than on the effectiveness of its tactics. The Germans, for instance, employed a highly effective combined-arms tactical doctrine which - as future events in North Africa and Russia would show - allowed them to get very good results even with panzer “divisions” that had been attrited to the point where they were left with as few as a dozen tanks and several hundred infantrymen. The British Army, on the other hand, did not learn how to carry out effective combined arms operations until 1944 - and even then they never became anywhere near as proficient as the Germans. During the early period of the war portrayed in this game, coordination between British armor, artillery and infantry was abysmally bad.
Whenever armor/panzer, amphibious panzer, or army tank units participate in a Land Combat, there is a possibility that the Combat Odds Ratio will be increased or decreased by an Armor Superiority Modifier.
Exception: There cannot be an Armor Superiority Modifier if any of the defending units in a Land Combat is located in a Wetlands or Major City hex.
If a player has armor/panzer, amphibious panzer, or army tank units participating in a Land Combat, he can choose to commit any one of them for Armor Superiority purposes. However, a player is never forced to commit a unit for this purpose.
Exception: An attacking armor/panzer, amphibious panzer or army tank unit that occupies a Wetlands hex cannot be committed for Armor Superiority purposes.
To compute the Armor Superiority Modifier, subtract the Armor Superiority Value (ASV) of the armor unit committed by the defending player from the ASV of the armor unit committed by the attacking player. The Armor Superiority modifier is added or subtracted (as appropriate) when computing the Final Combat Odds Ratio in Step #4 of the Land Combat Procedure (see 6.1).
Exception: A unit's ASV is reduced by 1 (to a minimum of zero) for each hit it has accumulated. Thus, if a panzer division had accumulated 2 hits, its ASV would be 1.
Note: Land units can accumulate a maximum of 2 hits.
Example: A British force that includes an army tank brigade that has been commited for Armor Superiority purposes is attacking a German force that includes a panzer division that has likewise been committed. Neither unit has accumulated any hits. The initial combat odds are 3-to-1. The ASV of the panzer division (3)is subtracted from that of the army tank brigade (2), yielding an Armor Superiority Modifier of - 1. Thus, the Combat Odds Ratio is reduced by 1, to 2-to-1.
Amphibious Panzer Battalions
If an amphibious panzer battalion with no hits is participating in an Amphibious Assault, it must be commited, and always counts for purposes of computing the Armor Superiority Modifier even if the partial sea hex being assaulted contains Wetlands or Major City terrain.
British Armor Losses
If the British player commits an armor or army tank unit for Armor Superiority purposes and suffers an adverse combat result, he must apply at least 1 point of the combat result in the form of a step loss to the armor or army tank unit if he:
- Chooses to apply any part of the combat result in the form of step losses. Suffers a combat result that mandates a step loss.
- Suffers a combat result that includes an asterisk when attacking.
Design Note: This rule represents the fact that at this stage in the war the British had not yet mastered combined arms tactics. Thus, when British tank units became involved in major attacks or counterattacks, they almost always advanced without adequate infantry or artillery support. As a result, they usually presented easy pickings for German artillery and anti-tank guns which badly out-ranged them, and which they - lacking the ability to fire HE shells from their 2-pounder main armament - could not engage effectively.
Example: The German 17th Infantry Division, the reduced-strength 35th Infantry Divison, and Amphibious Panzer Battalion A located in hex 4023 are attacking the British 35th Infantry Brigade and 1st Armored Brigade in Canterbury (4022). The German 1st Mountain Division is located at Ramsgate (4221). The total German attack factor is 20 versus a total British defense factor of 5 (2 for each of the British units, plus a Home Guard Defense Factor of 1), so the Initial Combat Odds Ratio is 4-to-1. Both sides commit their tank units for Armor Superiority, so the Odds Ratio is unchanged (i.e., increased by 1 for Amphibious Panzer Battalion A and decreased by 1 for the 1st Armored Brigade). However, the Forest terrain in 4022 reduces the Final Odds Ratio by 1, to 3-to-1.
The German player's die roll is “2,” so the combat result is a bold italicized “D2.” Since the combat result is printed in bold italics, the British player will have to eliminate at least 1 step; because he committed the 1st Armored Brigade for Armor Superiority computation, it must be the unit that suffers the step loss. The British player would like to apply the remaining point of his combat result by retreating the 35th Brigade, but he cannot because all of his possible retreat routes are blocked by German ZOCs (it could have retreated into hex 3923, 4122 or 4123 if any one of them was occupied by a British land unit). Therefore, he must apply it as a step loss instead, eliminating the 35th Brigade.
Since all of the defending have been eliminated, the attacking German units can advance 2 hexes - the first of which must be 4022. As soon as the first German unit advances into 4022, Canterbury's Home Guard Defense Factor is eliminated and the city becomes German-controlled.
7.0 Detection and Interception
Detection and Interception are crucial elements of the Britain Stands Alone game system. Whenever enemy naval units move out to sea, or enemy air units conduct an Air Mission, friendly air and/or naval units can Intecept if the moving enemy force is Detected. Intercepting air and naval units then move across the map until they are located in the same hex or zone as the enemy force that they are intercepting and resolve Bombing or Naval Combat against it (whichever is appropriate). In some cases, intercepting units can, in turn, be Detected and Intercepted by other enemy units.
7.1 Naval Detection
Each sea zone on the map and the Off Map Display has a German Naval Detection Value and a British Naval Detection Value (NDV). All NDV's are fixed and never change during the course of play.
Naval Detection Procedure
Naval Detection can be attempted in three different situations:
- Moving enemy naval units can be Detected in each and every zone entered while moving.
Exception: Withdrawing (see 9.2) naval units cannot be Detected (and therefore, cannot be Intercepted either).
-
Non-moving stacks of enemy naval units that are at sea can be Detected during the Naval Detection Phase of the Naval Segment.
-
Enemy naval units that are participating in Naval Combat can be Detected after each even-numbered round of the combat as long as neither side has Withdrawn.
To resolve a Naval Detection attempt, roll a die and add the Weather modifier (if any). If the modified result is less than or equal to your NDV in the zone, the enemy naval units are Detected.
7.2 Naval Interception
If the Detection attempt against a stack of enemy naval units succeeds, subtract the modified detection die roll from your NDV in the zone. For each point of difference, you can Intercept with:
-
2 air points, OR
-
2 naval units, OR
-
1 coast artillery point. This last option is available only to the German player, and only in the Straits of Dover Zone.
Exception: If the difference between the modified die roll and his NDV is zero, a player can still Intercept with 2 naval units, or 2 air points, or 1 coast artillery point.
Example: A stack of German naval units enters the Southern North Sea zone, and the British player attempts to detect it. He rolls a die and compares the result to his Naval Detection Value. The British player's NDV in the zone is 8 and his die roll result is 6, so the difference is 2. Thus, he has Detected the German stack and can Intercept it with 4 air points or 4 naval units, or 2 air points and 2 naval units.
Intercepting With Air Points
Organize and resolve an Air Mission (see 8.2) with the intercepting air points. Any air points that are within range of the sea zone currently occupied by the stack of moving naval units can participate. The air mission is subject to Air Detection and Air Interception by enemy fighters in its target zone as usual. It does not resolve Bombing Combat against the enemy stack that it is intercepting until after any combat caused by enemy Air Interception has been completed.
Note: A maximum of 8 air points can participate in an Air Mission, no more than 4 of which can be bombers. Only 1 Air Mission can Intercept each time that an enemy naval stack is Detected.
Intercepting With Naval Units
Organize intercepting naval units into a stack, move it (if necessary) to the zone where the Intercepted enemy stack is located, and resolve Naval Combat against it. All of the rules concerning Naval Movement (see 9.0) apply normally, except that intercepting naval units may expend no more than 2 Naval Movement Points.
An intercepting naval stack is subject to Detection and Interception as usual in each zone that it enters, but intercepting naval units cannot be Intercepted by enemy naval units. However, an intercepting naval stack can be intercepted by enemy air units; any Bombing Combat resulting from this is resolved before the intercepting naval stack resolves Naval Combat against the enemy stack that it is intercepting.
Note: A maximum of 6 naval units can move in a stack, so no more than 6 naval units can Intercept at once. Only 1 stack of naval units can Intercept each time that an enemy naval stack is Detected.
Intercepting With Coast Artillery
See the German Coast Artillery rules (13.1).
Multiple Interceptions
Each time that he Detects a stack of enemy naval units, a player can Intercept it with an air mission and coast artillery, or an air mission and a naval stack, but he cannot Intercept with all three. An intercepting Air Mission is always resolved before a stack of intercepting naval units moves or coast artillery points fire.
Note: Coast Artillery can support intercepting friendly naval units in Naval Combat.
Naval Interception Restrictions
-
During the British and German Naval Detection Phases, only one attempt can be made to Detect and Intercept each non-moving stack of enemy naval units that is at sea.
-
An air or naval unit can perform Naval Interception only once per Naval Segment.
Exception: Air points can Intercept any number of times in a single Naval Segment as the result of Special Naval Interception During Naval Combat (see 9.2).
-
Naval units which are moving to intercept detected enemy naval units cannot be intercepted themselves by other enemy naval units.
-
Naval units cannot Intercept after each even-numbered round of a Naval Combat, only air units can Intercept in this case.
-
A naval unit that has already moved cannot Intercept during the same Naval Segment and vice versa.
7.3 Air Detection
Each zone on the map and the Off Map Display has a German Air Detection Value and a British Air Detection Value (ADV). These are used to determine whether or not enemy air missions are Detected.
Variable British ADV's
The British ADVs are variable in twelve of the zones on the map; the British player records changes to a variable ADV by adjusting the Variable ADV marker on its ADV Track. Each ADV Track records the current value of the Variable ADV in two adjacent zones (one land, one sea). The six “linked” pairs of land and sea zones are:
- Humber - Central North Sea — * East Anglia - Southern North Sea
- SE England - Straits of Dover * Bristol Channel - Western Approaches
- Southern England - ¢ Devon & Cornwall -
Eastern English Channel Western English Channel
At the start of play, a Variable ADV marker is placed on each ADV Track to record its status. During play, the value of a Variable ADV can be reduced by hits inflicted on sector airbases and/or radar stations in its land zone (see 11.2- Damage Effects), and increased by Repair (see 11.3). When the value of a Variable ADV is reduced or increased, if effects the British ADV in both the land zone where the Hits were inflicted or repaired, and its “linked” sea zone. A variable ADV cannot be reduced to less than the number in the leftmost numbered box on its ADV Track, and cannot be increased to greater than the number in the rightmost numbered box on the track
Variable ADV Effects on Bordering Zones
If the Variable ADV in a zone has been reduced to 3 (i.e., the leftmost box on the ADV track), add +1 to all British Air Detection die rolls made in all zones that also have Variable ADVs and border directly on it. To record the fact that this modifier applies, flip all affected zone's Variable ADV markers to their “+1” sides. However, if the Variable ADV is later increased to a value of 4 or higher by Repair, this die roll modifier no longer applies (although it is immediately reinstated if the ADV is once again reduced to 3).
Design Note: This modifier reflects the fact that if the Germans had succeeded - even temporarily - in punching a sizable hole the British air detection network, the Luftwaffe could have outflanked the surviving portions of the British air defense system by vectoring air raids through the gap and approaching their targets from inland - in the “blind spot” of the seaward- facing British radar stations.
Example: If the current value of the Variable ADV in the Southeast England zone is 3, the British player must add +1 to all Air Detection die rolls that he makes in the Southern North Sea, Eastern English Channel, Straits of Dover, East Anglia, and Southern England zones.
Air Detection Procedure
Air Detection can occur in two different circumstances during play:
- After an Air Mission reaches its target hex or zone, the enemy player can try to Detect it so he can Intercept. If the attempt fails, he cannot Intercept.
- If an Air Mission is Detected and Intercepted, the player who is conducting the mission must attempt to Detect the intercepting force.
Note: An Air Mission cannot be Detected while flying to and from its target; there is no way to Intercept an enemy Air Mission except in its target hex or zone.
To resolve an Air Detection attempt, roll a die and apply the following modifiers (if appropriate):
+1 If the weather is Foul.
+1 If the British player is attempting to detect enemy air units in a zone that has a Variable ADV and the current value of the Variable ADV in any bordering zone is 3.
Exception: Ignore this modifier if the current value of the Variable ADV in the zone where the Air Detection attempt is being made is also 3.
If the modified result is less than or equal to your ADV in the zone, the enemy air units are Detected.
7.4 Air Interception
When you successfully Detect an enemy Air Mission, subtract the the modified detection die roll from your ADV in the zone. For each point of difference, 2 points of friendly fighters can Intercept, but no more than 8 fighter points can Intercept a single enemy Air Mission. If the difference between the detection die roll and your ADV is zero, you can still Intercept with 2 fighter points.
Air Interception In The Operations Segments
If an enemy Air Mission is Detected during an Air Mission Phase of an Operations Segment, friendly fighter points can Intercept by moving into the target hex. Intercepting fighters can move up to their full Air Movement Allowance and do not have to move as a stack. If the target of an Air Mission is located in a zone on the Off Map Display, fighters based on the map can fly off map in order to Intercept it. Likewise, if the target of an Air Mission lies in an off-map zone, fighters based off-map can expend their entire Naval Movement Allowances in order to Intercept.
- After a fighter point performs Air Interception during an Operations Segment, it must land at any friendly airbase within range, and has a Flown marker placed on top of it. It cannot Intercept again or conduct an Air Mission for the rest of the turn.
Air Interception In The Naval Segment
If an enemy Air Mission is Detected during the Naval Segment, any friendly fighter points that are within range of the zone can Intercept. Intercepting fighter points can move up to their full Naval Movement Allowance and do not have to move as a stack.
A fighter point can perform Air Interception only once per Naval Segment. After a fighter point performs Air Interception during the Naval Segment, it is placed "In Flight" in the zone where it conducted the interception. It cannot Intercept again or conduct an Air Mission for the rest of the turn.
Exception: A fighter point that is "In Flight" in a zone can Intercept or escort Bombing missions a theoretically unlimited number of times during a single Naval Segment as the result of Special Interception during Naval Combat (see 9.2).
Example: The British player Detects a German Air Mission in the Southern North Sea Zone, where his ADV is currently 5. His detection die roll is “3.” Subtacting 3 from 5 leaves a difference of 2, so the British player can Intercept with up to 4 fighter points. However, if his detection die roll had been “0” (in which case the difference would be 5) he could have Intercepted with a total of only 8 fighter points (not 10), because 8 is the maximum number that can ever Intecept an Air Mission.
8.0 Air Operations
8.1 Air Movement
Air movement can take place in both the Naval Segment and the Operations Segments, but different procedures are used in each case.
Air Movement In The Naval Segment
During the Naval Segment, air units move using their Naval Movement Allowances, expending 1 Naval Movement Point for each zone that they enter. Movement is permitted only between zones that share a common border; an air unit cannot move “diagonally” between zones that meet only ata single point (for example, air units cannot move directly from the France Zone to the Straits of Dover Zone). During the Naval Segment, air units can move between zones on the map and zones on the Off Map Display without restriction (note that in some cases the same zones are depicted in both places).
Return to Base
Air units that move during the Naval Segment cannot fly Air Missions or Intercept (see 7.2) during the Operations Segments. To record this, air units that move during the Naval Segment remain “in flight” until the Return to Base Segment - that is to say, they remain located in the “in flight” box of the zone in which they performed missions during the Naval Segment.
During the Return to Base Segment, all air units that are “in flight” move up to the limit of their Naval Movement Allowances. By the end of this movement, all such air units must land at friendly airbases. Those that cannot are eliminated.
Air Ferry
During the Air Ferry Phase of the Naval Segment, an air unit can move up to double its Naval Movement Allowance, but must land immediately at an airbase in the last zone it enters. Ferrying air units cannot be Intercepted. The German player performs all his Air Ferry before the British player.
Unlike other air units that move during the Naval Segment, air units that move during the Air Ferry Phase can fly Air Missions and perform Air Interception (see 7.2) during an Operations Segment.
Note: When a Ferrying air unit lands it is not marked with a Flown marker.
Air Movement In The Operations Segments
During the Operations Segments, air units move using their Air Movement Allowances, expending 1 Air Movement Point for each hex entered. Air units can move freely through hexes containing enemy units and their ZOC's at no additional cost.
Exception: If all the units that participate in an air mission during an Operations Segment are based in an off-map zone and the target of the mission is located in an off-map zone, the participating air units move using their Naval Movement Allowances.
Air Movement to and from the Off Map Display
Air units can fly to and from the Off Map Display during the Operations Segments. Many of the hexes along the edges of the map have numbers and alphabetical codes printed in them. Each code corresponds to a specific zone on the Off Map Display, while the numbers indicate the number of Air Movement Points that an air unit based in that zone must expend in order to enter that hex. An air unit moves normally after flying onto the map in this way, expending 1 Air Movement Point for each hex that it enters.
Likewise, air units that are located on the map can enter a zone on the Off Map Display by moving into a hex that contains that zone's code, and then expending the indicated number of Air Movement Points.
8.2 Air Missions
Air missions can be conducted during the Naval Segment and during the British and German Air Mission Phases of the Operations Segments.
Air Missions in the Operations Segments
During the Air Mission Phases of an Operations Segment, Air Missions are conducted as follows:
-
The player moves a stack of up to 8 air points to a target hex or zone (if attacking a target on the Off Map Display). Each moving air unit can expend its full Air Movement Allowance. No more than 4 of the Air Points can be bombers. Only air points that are located at airbases (on or off map) and do not possess Flown markers are eligible to conduct Air Missions during the Operations Segments.
-
After an Air Mission stops moving in the hex or zone where its target is located, the enemy player can attempt Air Detection against the moving stack. If he succeeds, he can perform Air Interception.
Only fighter points that are located at airbases (on or off map) and do not possess Flown markers are eligible to perform Air Interception during the Operations Segments.
-
If Air Interception occurs, the moving player attempts to detect the intercepting units. Whether he succeeds or fails, Air Combat is immediately resolved between the intercepting stack and the Air Mission.
-
Each enemy Air Point that performed Air Interception against the Air Mission moves a second time up to the limit of its Air Movement Allowance. By the end of this movement, all units must land at friendly airbases; those that cannot are eliminated.
-
If any bombers remain in the Air Mission after Air Combat has been resolved, the moving player identifies which specific target in the hex or zone he is bombing.
Note: An entire stack of naval units in port is considered a single target for purposes of this rule. All of the bombers in an air mission do not have to attack the same naval units, but all the
naval units attacked by a single air mission must be part of the same stack.
-
Bombing Combat is resolved.
-
Each unit participating in the Air Mission moves a second time up to the limit of its Air Movement Allowance. By the end of this movement, all units must land at friendly airbases; those that cannot are eliminated.
-
Place Flown markers on all air points that participated in the Air Mission, and performed Air Interception against it.
Air Missions in the Naval Segment
Air Missions during the Naval Segment are conducted exactly like those that occur during the Operations Segments except for the following differences:
-
Air units move using their Naval Movement Allowances instead of their Air Movement Allowances.
-
The number of Air Points that can participate in an Air Mission is variable.
-
Air points that conduct Air Missions or perform Air Interception during the Naval Segment do not land at friendly airbases at the end of the mission, but return to the “in flight” box of the zone from which they took off, where they may be used for subsequent special naval interceptions.
Forming Up Air Missions During Movement
An air mission stack can “pick up” additional air units by passing through the hex(es) or zone(s) where they are based while heading toward its target hex or zone. However, remember that no more than 8 air points can ever participate in a single air mission and that no unit can exceed its Air or Naval Movement Allowance.
8.3 Air Combat
Air Combat occurs whenever an Air Mission is Intercepted during the Naval Segment or an Operations Segment. In an Air Mission Phase, a maximum of 16 air points can participate in an Air Combat (8 points in the Air Mission stack, plus 8 points of intercepting fighters).
Organizing Air Combat
Air Combat is organized in one of two different ways depending upon whether only one player Detected the other's air units, or both did.
Only One Player Detects
If one player detects the other's air units, but his units are not detected in turn, he is automatically the attacker.
After Consolidation (see 1.2) both players place all of their participating air units on the Air-Naval Combat Display. Then, the attacker places any defending unit in the first “Defender” space on the Display, and allocates one of his fighters to attack it by placing the fighter unit in the first “Attacker” space. The defender then places one of his air units in the second “Defender” space and the attacker places one of his fighter units in the second “Attacker” space. This process continues, with the players alternately choosing defending units (so that the attacker organizes all odd-numbered matchups) until either there are no unattacked defending units remaining, or the attacker has no fighters left.
-
If the attacker has more fighters than there are defending air units, he can use the excess to “double up” against defending units. No more than 2 air units can ever fight a single enemy air unit, so if the attacker still has unused fighters left after he has “doubled up” against all defending units, the excess cannot participate in that Air Combat.
-
If the defender has unattacked fighters left after all of the attacker's fighters have been allocated, he can use the the excess to “double up” against attacking fighters. If an attacking fighter has been allocated to fire ata defending bomber, the defender can allocate only 1 of his excess fighters to fire at the enemy fighter (since no more than 2 air units can ever fight a single enemy air unit).
Both Players Detect
If both players Detect each other's air units, subtract the German ADV from the British ADV in that zone and add this value (which can be negative) to the result of a die roll.
- If the modified die roll is 4 or less, the German player is the attacker.
- If the modified die roll is 5 or greater, the British player is the attacker.
Note: If a player has no fighters, he cannot be the attacker. Thus, if both sides Detect, but only one of them has fighters, dispense with the die roll; the player who has the fighters is automatically the attacker.
The Air Combat is organized exactly as if only one player had Detected except that the attacker organizes every odd-numbered matchup beginning with the third. Thus, the only practical difference is that the defending player gets to choose which of his air units is the target of the first attacking fighter.
Resolving Air Combat
After an Air Combat has been organized, both sides' fighters fire at the enemy units that they are matched-up against (recall that bombers and transports cannot fire). The attacker always fires first, but since all Air Combat is simultaneous, no damage is applied to defending fighters until after they have fired.
To resolve a fire, consult the Air Combat Table and cross-index the firing unit's Air Combat Factor with the target unit's Air Combat Factor. This cross-indexing will yield a hit number. Roll the die and add the Weather modifier (if any). If the modified die roll result is less than or equal to the hit number, 1 air point is eliminated from the target unit.
If two fighters are firing at a single enemy air unit, their fire is conducted simultaneously. Thus, if the first “shot” eliminates 1 point from a 2-point enemy unit, the second does not use the Air Combat Factor printed on the target unit's reduced strength side. If the first shot eliminates a 1-point unit, the second shot is wasted.
8.4 Bombing Combat
Bombing Combat can occur in two different circumstances:
-
When friendly bombers perform Naval Interception against enemy naval units during the Naval Segment.
-
When an Air Mission that includes bombers reaches its target hex or zone (after any Air Combat resulting from Interception has been resolved) during an Operations Segment.
Note: Naval units that are at sea (including those possessing No Return to Base markers) during the Air Mission Phase of an Operations Segment cannot be bombed. Naval units in port can be bombed.
Bombing Naval Units
The same procedure is used to resolve bombing attacks against naval units at Sea and naval units in port. The defending player removes all of his participating naval units to the Air-Naval Combat Display and sets them up in a line. The attacking player then allocates each of his bombers to attack a
specific naval unit by placing it next to it on the tabletop. There is no limit to the number of bomber units that can be allocated to attack a single naval unit; every bomber point present could conceivably go after the same target.
Special Rule: When bombers are attacking naval targets, they do not have to Consolidate (see 1.2). Indeed, the attacking player can choose to break a 2-point bomber unit down into two 1-point units so that it could attack 2 different naval targets. However, all bomber points attacking the same naval unit must consolidate. Thus, if two points of the same type of bombers (say Ju-88's) are bombing a single ship, they must Consolidate into a single 2-point unit.
After all bombers have been allocated, Bombing Combat is resolved against the target units one at a time in any order the attacking player desires. All attacks against a single naval unit are resolved at the same time (i.e., all attacks against one naval unit must be resolved before any can be resolved against another target unit). Bombers use their Naval Bombing Factors when attacking naval units.
Note: If two or more bomber units are attacking the same naval unit and one of them sinks it before the rest get to attack, the remainder cannot be reallocated to bomb another target. In effect, their attacks are wasted.
Before Bombing Combat is resolved, the defender conducts anti-aircraft fire against each bomber unit that is attacking the target naval unit. He does this by adding together the Anti-Aircraft Factors of the target unit and the naval units that are lined up on either side of it (the unit on the left end of the line is considered to the next to the one on the right end of the line and vice versa), and rolling a die. If the die roll result is less than or equal to the combined total of the Anti-Aircraft Factors, one is added (+1) to that bomber unit's (and only that bomber unit's) Bombing Combat die roll. Anti-aircraft fire is conducted against all of the bombers that are attacking a particular naval unit before any of them resolve Bombing Combat.
If a target naval unit is hit in Bombing Combat, the effects are applied immediately. Thus, it is possible that one of the naval units on either side of a target unit will have had its Anti-Aircraft Factor reduced by damage received in a preceding attack. If one or both of the units next to a target unit have been sunk, their AA Factors are not added to that of the target unit (you do not add in the AA Factor of the next nearest naval unit on that side).
Each bomber is rolled for separately when naval units are being attacked. The attacking player rolls the die and adds the Weather and Anti-Aircraft mofidiers (if any). If the modified result is less than or equal to the bomber's Naval Bombing Factor, the target naval unit suffers 1 hit. However, if the modified result is less than or equal to the bomber's Naval Bombing Factor minus 2, the target naval unit has suffered a Critical Hit (see 11.2).
Special Rule: Add one (+1) to the Bombing Combat die roll if the naval unit that is being attacked is located in a port.
Bombing Land Units
If enemy land units are the target of an Air Mission, each bomber attacks two steps of land units in the target hex (i-e., one full-strength division, or any two other units). Roll a die for each target unit and add the Weather modifier (if any); if the modified die roll result is less than or equal to the bomber's Troop Bombing Factor, the land unit suffers 1 hit. Land units that are located in Off Map Zones cannot be bombed.
Exception: If the land unit(s) that are the target of an Air Mission are situated in a Woods or Major City hex, add one (+1) to the Bombing Combat die roll.
Very Important Note: It is possible that the Weather modifier will make it impossible for a bomber unit to hit some (or any) types of targets on certain turns. This is intentional, and applies to all kinds of Bombing Missions.
Bombing Installations
If an enemy airbase, railroad, port, or radar station is the target of an Air Mission, each bomber attacks separately. Roll the die and add the Weather modifier (if any); if the modified die roll result is less than or equal to the bomber's Installation Bombing Factor, the target suffers 1 hit.
Exception: If a radar station or port (including one that is also a naval base) is the target of an Air Mission, add one (+1) to the Bombing Combat die roll.
Note: Bombing hits on an airbase may also destroy air points based there (see 11.2).
Bombing Strategic Targets
British bombers can attack strategic targets (factories, power plants, oil refineries, etc.) in Germany by flying a Bombing mission to the Germany zone. Each bomber attacks separately. Roll the die and add the Weather modifier (if any); if the modified die roll result is less than or equal to the bomber's Installation Bombing Factor, the German player's Other Victory Point total is immediately reduced by 1 (see 15.1).
Note: Strategic targets can only be bombed at night.
Night Bombing
Wellingtons, BR.20s, Ju-88s, and He-111s can bomb railroads and strategic targets at night. To conduct a night bombing mission, simply declare that you are doing so whenever you begin organizing an air mission. Night bombing missions are resolved exactly like normal bombing missions except:
- The mission cannot be Detected or Intercepted.
- All bombers' Installation Bombing Factors are reduced by one (-1).
8.5 Air Transport
Air transports can carry airborne infantry, airlanding infantry and mountain infantry land units from from one area of the map to another, or between the map and the Off Map Display. Each air transport point can carry a single step of eligible land units.
Exception: The German 1st Mountain Division cannot be carried by air transports (it had been beefed-up with too much heavy equipment).
An air transport point and the unit that it is transporting must begin the Air Mission Phase located at the same airbase. However, a land unit that moved in the Movement Phase cannot be air transported in the immediately following Air Mission Phase.
Air Transport Procedure
An air transport mission is conducted exactly like a normal Air Mission, except that it is flown to and lands ata friendly airbase. The enemy player can Detect and Intercept a transport mission before it lands. After Interception and Air Combat (if any), the transports land on the airbase and disembark the carried land units. They then have the option of either flying back to another friendly airbase (as usual), or of staying at the airbase at which they landed.
Note: Land units can be transported to or from an airbase that is located in an enemy ZOC so long as a friendly land unit that is not being transported occupies the airbase hex.
Land units that have been air transported can attack without restriction in the immediately following Land Combat Phase.
Air Transport and Air Combat Losses
When an air transport point is eliminated in Air Combat, the land unit step that is is carrying is also eliminated.
Air Transporting Leg Replacement Points
Air transports can also carry Leg Replacement Points. This is conducted exactly like a normal Air Transport Mission except that is takes 2 Ju-52 points to carry a single Leg Replacement Point, and the replacement point is eliminated if either of the Ju-52s is shot down.
The German player can attempt to air transport only 1 Leg Replacement Point per turn. Thus, if one attempt to transport a Leg Replacement Point fails because one or both of the transporting Ju-52 points is shot down, he cannot try to use another 2 Ju-52 points to transport a second replacement point.
Air Supply Missions
Air Transports that are based on the Off Map Display can fly supplies to England. An air supply mission is conducted exactly like an air transport mission except that no land units are transported. Each air transport point that flies an air supply mission can remove the Out of Supply marker from 1 land unit step or air point that can trace a Line of Supply (see 12.1) of 2 hexes or less to the airbase where the supplies were landed.
Exception: Each motorized land unit step or bomber point counts as 2 steps or points for supply purposes.
Parachute Air Supply Missions
An air supply mission can be flown toa hex that does not contain a friendly airbase, in which case it is assumed that the supplies are being delivered to the land units by parachute. Each 2 air transport points that fly a parachute air supply mission can remove the Out of Supply marker from 1 land unit step that is located in the mission's target hex.
Note: Since a motorized land unit step counts as 2 steps for supply purposes, it would take 4 air transport points to remove the Out of Supply marker from a motorized step.
8.6 Airborne Assault
Airborne units have the special ability to conduct Airborne Assaults. An Airborne Assault is conducted exactly like an air transport mission except that:
-
Only airborne units can be transported.
-
Instead of being landed at a friendly airbase, the airborne units are “airdropped” into a target hex. Only a Clear, Minor City, or Reference City hex can be the target of an Airborne Assault.
-
The transports (obviously) cannot land in the target hex.
Disruption Check
When an airborne unit is airdropped, roll a die and compare the result to the total enemy defense strength in the hex (including any Home Guard Factor). If the hex does not contain a British unit, but is in the ZOC of a British division or any British motorized unit, subtract two (-2) from the die roll (results of less than zero are possible).
-
If the die roll result is less the total defense strength and the difference between the them is 2 or more the airborne unit is eliminated.
-
If the die roll result is less than the total defense strength but the difference between them is not 2 or more, the airborne unit suffers 1 hit (see 11.2).
The Sturm Regiment When conducting a Disruption Check for the Sturm Regiment of the 7th Flieger Division, add two (+2) to the die roll.
Design Note: The Sturm Regiment is less vulnerable to disruption because it lands by glider rather than by parachute, and is therefore less liable to scatter during an airdrop.
Example: All four parachute regiments of the 7th Fleiger Division are conducting an Airborne Assault against North Weald airbase (hex 3619). There are no British land units in the hex, but the 1st Motorized Recon Brigade is located at Chelmsford (3720). A hex that does not contain a British land unit and would not normally have a Home Guard Defense Factor always defends with a Home Guard Factor of 1 when it is the target of an Airborne Assault.
Thus, the German player must roll a die for each of his regiments and compare it to the total British defense factor of 1. If the result is -1 or less, the regiment is destroyed; if the modified result is 0 or 1, the regiment suffers a hit. The German player must subtract 2 from all of the his die rolls because North Weald is in the ZOC of a British motorized unit, but he will add 2 to the die roll he makes for the Sturm Regiment.
Airborne Assaults And Land Combat
Airborne units that conduct an Airborne Assault cannot attack enemy units in adjacent hexes during the immediately following Land Combat Phase. However, if an airborne unit airdrops into a hex that contains an enemy land unit and/or Home Guard Defense Factor, it must attack it in the subsequent Ground Combat Phase. It can attack in concert with friendly land units that are attacking from adjacent hexes (including units conducting Amphibious Assaults).
If the attacking side suffers any adverse result in Land Combat, at least 1 Step of airborne units must be eliminated. Also, if all the defending units (and/or Home Guard Defense Factors - see 10.0) are neither eliminated nor forced to retreat, the airborne units must Retreat no matter what the combat result. If they cannot do so, they are eliminated instead. Air assaulting units Retreat normally, but cannot Advance After Combat (see 6.3).
Exception: Retreating airborne units ignore the ZOC's of enemy units located in the hex that they assaulted.
8.7 Airborne and Airlanding Unit Defense Factors
Whenever a German parachute or airlanding regiment conducts an Airborne Assault or is carried by an Air Transport mission, it always arrives on its weaker strength (ie., “2-1-4”) side. It remains on its weaker side until the first German Reinforcement Phase in which it is either in the same hex with a full-strength German division, or in the ZOC of one. If this condition can be satisfied, the regiment is immediately flipped onto its stronger (“2-2- 4”) side.
Design Note: Because of the requirement that they be completely air- transportable, the 7th Fleiger and 22nd Luftlande Divisions possessed very little in the way of artillery and anti-tank weaponry. However, once these units linked up with friendly ground troops, they would be heavily reinforced with corps and army level artillery units and Luftwaffe heavy flak (88mm) units.
8.8 Spitfire Pilot Losses
The British player can never have more than 30 Spitfire points in play at any one time. If the British player is eligible to receive Spitfire Replacement Points that would put him over this limit, he does not recieve them. However, unreceived Spitfire points are not lost, they can be accumulated and used on future turns (if possible). To record how many Spitfire Replacement Points the British player has saved up, adjust the Spitfire Replacements marker on the Spitfire Track.
Each time that a Spitfire point is eliminated during play, record the loss by adjusting the Spitfire Losses marker on the Spitfire Track. As Spitfire losses accumulate, the maximum number of Spitfire points that the British player can have in play will gradually decline from 30.
Exception: If a Spitfire point is eliminated while on the ground at an airbase (by German bombing attack or capture of the airbase), the value of the Spitfire Losses marker is not increased.
-
When the value of the Spitfire Losses marker is between 0 and 10, the Pilot Loss Multiplier is 3. What this means is that each 3 Spitfire points eliminated reduces the number of Spitifire points that the British can have in play by 1.
-
When the value of the Spitfire Losses marker is between 11 and 20, the Pilot Loss Multiplier is 2.
-
When the value of the Spitfire Losses marker is 21 or more, the Pilot Loss Multiplier is 1.
When a Spitfire point is eliminated during play, place it in the Eliminated Spitfires box printed on the map. During the British Reinforcement Phase of each turn, divide the number of Spitfire points in the Eliminated Spitfires Box by the Pilot Loss Multiplier. The result is the number by which the maximum quantity of Spitfire points that the British player can have in play is reduced. Decrease the value of the Maximum Spitfires marker to record the new limit.
Exception: If a Spitfire point is eliminated while on the ground at an airbase (by German bombing attack or capture of the airbase), it is not placed in the Eliminated Spitfires box.
If the number of Spitfire points in the Eliminated Spitfires Box is not evenly divisible by the Pilot Loss Multiplier, ignore the excess, but remove all points that were “divided” from the box. The excess points remain in the box.
Example: The current value of the Spitfire Losses marker is 7, so the Pilot Loss Multiplier is 3. There are 4 Spitfire points in the Eliminated — Spitfires Box. Dividing 4 by 3 yields a result of 1 with a remainder of 1. The maximum number of Spitfire points that the British can have in play is reduced by 1, and 3 of the Spitfire Points in the Eliminated Spitfires Box are removed (those that were “divided”). The remaining Spitfire Point remains in the box.
Design Note: It was the lack of fully-trained pilots, not a shortage of Spitfires, that almost cost the British the Battle of Britain. For, although fighter production rose steadily throughout the battle, the rapid attrition of Fighter Command's cadre of experienced pilots made it increasingly difficult to find qualified men to put in the cockpits. By mid-September, 1940, the pilot situation was so desperate that the RAF almost succumbed to the German assault. The Spitfire Losses rule simulates the cumulative effect of RAF fighter pilot casualties by limiting the number of Spitfires that the British can have in play no matter how many planes they have available.
Incidentally, there are no Hurricane units in the game because rules lawyers would always use oddnumbers of Hurricanes and Spitfires when intercepting.
Since aircraft of different types do not Consolidate, an intercepting force of 3 Spitfire and 1 Hurricane points would fight as three different units, and thus have a much better chance of getting a shot at a German bomber than, say,
4 Spitfire points, which would have to be combined into two units.
9.0 Naval Operations
9.1 Naval Movement
Naval movement is conducted in the Naval Movement Phases of the Naval Segment, and during the Return to Base Segment. Naval units move identically to air units that move during the Naval Segment (see 8.1). However, note the following differences:
-
A naval unit that is located in port may only enter the adjacent sea zone that gives access to the port, even though more than one sea zone may be adjacent to the land zone where the port is located. Plymouth, for example, is accessible only from the Western English Channel zone, although the Devon and Cornwall zone (where the port is located), also borders on the Western Approaches zone.
-
Each naval unit can move only once per Naval Segment, and a unit that performs Naval Interception is considered to have moved.
-
If a ship is damaged while moving, it must stop moving immediately in the zone where it was damaged. This applies to ships only, not to naval units consisting of DD, TB, AP, LC, MB, or Prahm points.
-
Naval units can move in stacks of up to 6 units. Naval units that begin the friendly Naval Movement Phase in different ports can move as a stack only if the ports are located in the same land zone. Naval units that begin the friendly Naval Movment Phase in different zones (whether on or off-map) cannot move as a stack. Units can be “dropped off” as a stack moves, but additional units cannot be “picked up” in zones that a stack enters. Naval units belonging to two or more stacks can never be combined or otherwise reorganized while at sea even if they are located in the same zone.
Exception: Naval units belonging to two or more stacks can be combined or reorganized if they are at sea in the same zone during the friendly Return to Base Phase.
-
Stacks of naval units that are at sea at the beginning of either player's Naval Movement Phase can split into two or more stacks, and move and Intercept separately.
-
Naval units that enter a port during a Naval Movement or the Return to Base Phase cannot leave it during the same phase.
-
All British naval units except AP's can only enter ports that are also naval bases.
-
Moving (not Withdrawing) naval units can be Detected and Intercepted in each and every zone that they enter.
Return to Base
During the friendly Return to Base Phase, all friendly naval units that are at sea anywhere on the map or the off-map display can move up to the limit of their Naval Movement Allowances. This movement can neither be detected or intercepted, but U-Boat and/or Mine attacks are resolved as usual. Naval units do not have to Return to Base during the Return to Base Segment; they can remain at sea at the owning player's option.
Note: Naval units that are located in a port cannot move during the Return to Base Segment.
Exception: LC and Prahm points that are marked with No Return to Base markers cannot move in the Return to Base Segment. A No Return to Base marker is placed on a naval unit when it disembarks a land unit in a partial-sea hex during an Amphibious Assault or Naval Transport.
9.2 Naval Combat
Naval Combat occurs whenever friendly naval units Intercept enemy naval units during the Naval Segment.
Important Note: Friendly naval units cannot initiate Naval Combat against enemy naval units during the friendly Naval Movement Phase. Friendly naval units can only attack enemy naval units by Intercepting them during the enemy Naval Movement Phase, or the Naval Detection Phase.
Organizing Naval Combat
After Consolidation (see 1.2) both players remove all of their participating naval units to the Air-Naval Combat Display. If only one side Detected the other, it is automatically the attacker; if both sides Detected each other, subtract the German NDV from the British NDV and add this value (which can be negative) to the result of a die roll. If the result is 4 or less, the German player is the attacker; if the result is 5 or greater, the British player is the attacker.
Exception: If one side is Withdrawing (see below) and the other is not, the side that is not withdrawing is always the attacker. If both sides are withdrawing, roll as usual to determine which of them is the attacker.
Naval Combat is organized almost exactly like Air Combat (treat AP, LC, MB and Prahm units as bombers and all other units as fighters). If one player has more naval units (not including AP, LC, MB, or Prahm points) than his opponent does, he can allocate the excess to attack enemy units in any way he desires. Any number of naval units can be allocated to attack a single enemy naval unit.
Note: This is a major difference from Air Combat, in which a maximum of 2 air units can fight a single enemy air unit.
Resolving Naval Combat
Naval Combat is resolved identically to Air Combat (including that all fires are resolved simultaneously), except that the firing unit's Naval Attack Factor is cross-referenced with the target unit's Naval Defense Factor on the Naval Combat Table in order to determine the hit number.
Exception: A special +2 modifier is applied to all Naval Combat die rolls when either side is Withdrawing (see below).
Torpedoes
A naval unit whose Naval Attack Factor is printed in red possesses torpedoes. Only a naval unit that possess torpedoes can fire in Naval Combat if cross-referencing its Naval Attack Factor with the target's Naval Defense Factor on the Naval Combat produces a hit number that is printed in bold italic type.
Example: If the CL Nurnberg (Naval Attack Factor 2) was matched up against the BB Barham (Naval Defense Factor S) the hit number is a bold italicized “0.” Since the Nurnberg has torpedoes, it can fire. However, — if the damaged PD Schlesien (Naval Attack Factor 2) was matched up against the Barham, it could not fire because it does not have torpedoes.
Multi-Round Naval Combat
A Naval Combat can continue for any number of rounds, each of which is resolved as described above. Both sides are always considered to have detected one another on each round of a Naval Combat after the first, but you still roll to see which side is the attacker. A Naval Combat ends only if (A), all of one player's units are eliminated, or (B), one or both sides Withdraw.
Withdrawal
At the beginning of any round of Naval Combat, including the first, a player can declare that his units are Withdrawing. At the beginning of around of naval combat, each player takes one of the two Stay/Withdraw chits and places it on the tabletop, concealing which side of the chit is facing upwards with his hand. When both players have made their choices, they simultaneously lift away their hands to reveal whether they are going to “Stay” or “Withdraw.”
If either or both sides are Withdrawing, the round is resolved normally except that a +2 modifier is applied to all Naval Combat rolls. After the round has been completed, the withdrawing naval units are moved into either:
- A friendly on-map port that is accessible from the sea zone where the Naval Combat occurred, or a friendly port located in an off-map land zone that borders on the sea zone.
Exception: Withdrawing German naval units cannot enter a port located in England (that is, even if the port is German- controlled).
- A sea zone bordering the one where the Naval Combat took place.
Some withdrawing units can go into port while others move into a bordering zone, but all withdrawing units must enter the same bordering sea zone. Withdrawing naval units can neither be Detected nor Intercepted, but if a withdrawing naval unit enters a zone that contains a German Mine or U- Boat marker (see 9.6), or British Mines (see 9.6), an attack is resolved against it as usual.
Special Naval Interception During Naval Combat
After each even-numbered round of Naval Combat, both sides can attempt to Detect the enemy naval units that are participating in the combat. If the enemy units are Detected, only friendly air units can Intercept, naval units and coast artillery points cannot intercept at this time. The German player always resolves Special Naval Interception before the British player does.
Furthermore, fighter and bomber points that have already flown a mission during the Naval Segment and are “in flight” in the zone where the Naval Combat is taking place can Intercept again (essentially “for free”). Likewise, enemy fighter points that are “in flight” in the zone can Intercept such an air mission “for free” if its is Detected. The same air points can Intercept several times during the same Naval Combat (assuming it lasts four or more rounds without either side Withdrawing) and/or can Intercept several times in the course of different Naval Combats that occur in the zone.
However, a single fighter point cannot both escort friendly bombers and Intercept enemy bombers at the same point during the same Naval Combat; it can only do one or the other. There is, on the other hand, nothing to prevent a fighter point from Intercepting at the end of one even-numbered round and escorting at the end of the next.
Design Note: At first glance it may seem strange that aircraft attacking ships can fly several missions a turn, while those bombing ground targets can only fly once. However, this seeming paradox arises from the simple fact that naval targets are inherently much more vulnerable than ground units, airbases, dock installations and radar stations. After all, a single well-
placed bomb is not going “sink” an armored division or the port of
Southampton. Unless a land unit is caught moving in road column in wide- open terrain, it will probably suffer heavy casualties only if it is bombed and strafed steadily over a period of several days.
Thus, each bombing mission targeting a land unit represents many sorties flown over the course of the three-day turn. A mission flown against naval vessels, on the other hand, represents a single sortie. Our assumption is that most naval combat is taking place at night, as the Royal Navy tries to get in its licks against the German convoys and make a clean getaway before the Luftwaffe shows up at dawn. However, if the British decide to stick around for a second round of combat, they won't be able to get out of range before daylight; if they continue a naval engagement well into the morning hours (i.e., fight a 4th, 6th, etc. round), the Luftwaffe (and the RAF's Coastal Command) will be able to attack again and again.
9.3 Naval Transport
AP, LC, MB, and Prahm points can transport land units across sea zones during the Naval Movement Phases. Each point can carry 1 leg step or one- half a motorized step (1.e., it takes 2 AP points to carry a motorized brigade or regiment, and 4 to carry a motorized division). At the start of the friendly Naval Movement Phase, an AP, LC, MB or Prahm point can embark any land unit(s) that are located in the same port as it. It can move normally (with the embarked land unit on board) during the same Naval Movement Phase.
Note: Land units can embark in a port that is located in an enemy ZOC as long as a friendly land unit that is not being embarked is in the port hex.
Transporting Amphibious Panzer Battalions
An amphibious panzer battalion can be carried “for free” by two AP, LC, MB, or Prahm points that are carrying other land units in Naval Transport or an Amphibious Assault.
Naval Transport Procedure
AP, LC, MB, and Prahm points that are transporting land units move normally during the friendly Naval Movement and the Return to Base Phases. Land units that are being transported are disembarked at the end of the friendly Naval Movement Phase (after all Naval Interception has been resolved). LC, MB, and Prahm points can disembark transported land units either in a friendly-controlled port or any friendly-controlled partial-sea hex that does not contain Cliff hexsides; AP points can only disembark land units in a port.
It costs the transporting naval unit(s) 1 Naval Movement Point to disembark a land unit in a partial sea hex. Disembarked land units can move and attack normally in the following friendly Operations Segment. Place No Return to Base markers on all naval units that disembark transported units in partial- sea hexes; these units cannot move during the Return to Base Phase.
Naval Transport Restrictions
-
Land units can only embark on LC, MB, and Prahm points in a port, they cannot embark in partial-sea hexes.
-
An AP, LC, MB, or Prahm point that begins a Naval Segment at sea with a land unit aboard must disembark it during that same Segment.
-
Naval Transport is prohibited during Stormy weather. However, an AP, LC, MB, or Prahm point that begins a Naval Segment at sea with a land unit aboard, can - and must - disembark it during the Naval Segment.
Naval Transport and Combat Losses
When a naval unit point is eliminated in Bombing or Naval Combat, the transported land unit is also eliminated.
-
If 2 points are carrying a full-strength leg division and one of them is eliminated, 1 Step is removed from the division.
-
If2 points are carrying a motorized step and one of them is eliminated, place 2 hits on the unit. A motorized step is eliminated only if both of the points transporting it are eliminated.
-
An amphibious panzer battalion is eliminated only if both of the points carrying it are sunk; if only one is eliminated the battalion survives with 2 hits.
9.4 Amphibious Assault
Amphibious Assault allows certain kinds of land units to move during the Naval Segment and then attack enemy land units located in partial sea hexes during the friendly Land Combat Phase. Only LC, MB, and Prahm points can transport land units in Amphibious Assaults. Place No Return to Base markers on all naval units that conduct Amphibious Assaults in order to record that they cannot move during the Return to Base Phase.
Amphibious Assault is conducted like Naval Transport except that instead of disembarking in a friendly port or partial-sea hex, the transported land units can attack any partial sea hex in the bordering land zone during the friendly Land Combat Phase. A transporting naval unit must expend 1 Naval Movement Point in order to conduct an Amphibious Assault.
Amphibious Assault Restrictions
-
Amphibious Assaults cannot be conducted against land zones on the Off Map Display.
-
Only leg and amphibious panzer units can conduct Amphibious Assaults.
-
Only mountain divisions can conduct Amphibious Assaults in partial- sea hexes that contain Cliffs.
-
Land units conducting an Amphibious Assault cannot attack a partial- sea hex that is not adjacent to an all-sea hex.
-
The Stacking Limit (see 4.0) must be observed during an Amphibious Assault, so no more than 3 divisions worth of land units (not counting amphibious panzer battalions) can attack a single partial-sea hex.
Amphibious Assault And Land Combat
Units that are conducting an Amphibious Assault can attack in concert with friendly land units that are attacking normally or conducting an Airborne Assault, but all of the following rules still apply in full.
Note: If a partial sea hex contains no British land units, it still defends with a Home Guard Defense Factor of either 2 or 3 (see 10.0).
-
If any of the amphibiously assaulting units involved in a particular attack was transported by a Prahm or MB point, reduce the Combat Odds Ratio by 2.
-
[fall of the amphibiously assaulting units involved in a particular attack were transported by LC points, reduce the Combat Odds Ratio by 1.
-
If the partial sea hex that is the target of an Amphious Assault is in the ZOC of a 2-step enemy division that has accumulated no hits, reduce the Combat Odds Ratio by 1.
Exception: This does not apply if the target hex itself is occupied by a British division. In that case the combat odds reduction does not count. (The defense strength of the division will be a formidible enough obstacle to overcome.)
Land Combat Results in Amphibious Assaults
All combat results inflicted upon the attacking side in an Amphibious Assault must be used to eliminate steps; they cannot be applied as Retreats. If all the defending units are neither eliminated nor forced to retreat, the amphibiously assaulting units are placed back on their Prahm or LC points at sea in the zone.
Units that are conducting an Amphibious Assault can only Advance After Combat into the partial-sea hex that they attacked; they are prohibited from advancing into a second or third hex.
Reduction of Defending Divisions
Whenever the German player conducts an Amphibious Assault against a partial-sea hex that does not contain a British unit but is in the ZOC of a British division, record the combat result and which British division is involved. At the end of German Land Combat Phase, tally up all of the “D#” combat results recorded for each particular British division; if the result is 2 or more, eliminate a step from the division.
Design Note: British divisions assigned to coastal defense deployed a significant proportion of their combat strength on the beaches. This is reflected by the Home Guard Defense Factors used against amphibious assault (see 10.0). However, if the troops defending the beaches are hit hard, the combat strength of the division will suffer accordingly.
If the German player is conducting an Amphibious Assault against a hex that is in the ZOC of more than one British Division, the British player can choose which division to assign the combat result to.
Example: The German player conducts Amphibious Assaults against hexes 4019 and 4119, both of which are in the ZOC of the British 15th Infantry Division in hex 4018. The combat results in the two assaults are “D1” and “AI/D2.” Since the total “D#” combat result is 3, a step is 1 removed from the 15th Infantry Division.
9.5 Special Naval Rules
Royal Navy Release
A British naval unit can enter the Southern North Sea, Straits of Dover, or Eastern English Channel zones, or any zone containing the German mine marker, only if it has been Released. During the Royal Navy Release Phase of each turn, the British player refers to the Royal Navy Release Table and cross-references the current value of the Naval Victory Points marker with that of the Other Victory Points marker, and rolls a die.
Cross-referencing the value of the Naval Victory Points and Other Victory Points markers will yield a result in the form of three numbers or symbols separated by slashes (for example 0/4/7). The leftmost number or symbol refers to battleships (BBs) and battlecruisers (BCs); the central number applies to heavy cruisers (CAs); while the right-hand number applies to light cruisers (CLs or CLAs) and destroyers (DDs). The British player compares his die roll result to each of these numbers; if the roll is less than or equal to the number, the ships of the corresponding type are Released - if the die roll result is greater than the number, they are not. If a dash “-” is printed instead of a number, then the naval units of the corresponding type cannot be Released on that turn.
Exception: See Automatic Release (below).
Note: Only 1 die roll is made in the British Naval Release Phase, not one for each of the three classes of naval units.
British naval units are Released for only one turn at a time. If a British naval unit that was not Released in the current turn is at sea in one of the restricted zones at the beginning of the Naval Segment, it must move out at the first opportunity, and cannot Intercept German naval units entering any of the restricted zones. However, Released British naval units that are at sea in the same stacks with non-Released units can move and Intercept without restriction even though the non-released naval units cannot.
Automatic Release
If a German BB, BC, or PB enters any of the restricted zones at any point during the German or British Naval Movement Phases, all British naval units are Released for the remainder of the turn. Likewise all British naval units are Released if a German BB, BC, or PB begins the Naval Segment in port in the Holland, Pas-de Calais, France, or Brittany zone(s).
British Capital Ship Basing Restrictions
British BBs and BCs cannot enter any port accessible from a restricted zone at any point during play. This holds true even if these ships have been Released during the current turn.
Motorboats
Each motorboat (MB) point can conduct either one Naval Transport or one Amphibious Assault per game. At the instant that the unit that it is transporting disembarks or amphibiously assaults (in the Land Combat Phase) - but before any attack is resolved - permanently remove the MB point from play. If an amphibious assault fails to eliminate all the defending units or cause them to retreat, the attacking land unit is eliminated (since it has no naval point that it can “retreat” onto).
The only land units that can be transported by Motorboats are the Forward Detachments (see 13.4) of the German 6th Mountain, and 8th and 28th Infantry Divisions, and amphibious panzer battalions.
German Prahm And Lc Losses
For each 2 Prahm or LC points that the German player loses in combat, he recieves 1 point of the appropriate type as a reinforcement two turns later. As Prahm or LC points are eliminated during play, place them in the Eliminated Shipping Box. During the German Reinforcement Phase of each turn, the German player removes as many Prahm and LC points as he can from the box 2 at a time. For each 2 points that he removes from the box, he places 1 point in the next turn's space on the Turn Record Track to indicate that he will receive it as a reinforcement on that turn. If the number of Prahm and/or LCs points in the box is odd, one point will have to remain in it until another point of the same type is lost and placed in the Eliminated Shipping Box. Then, during the next German Reinforcement Phase, both points may be removed.
British Ap Losses
If, during any British Reinforcement Phase, the British player has fewer than 6 AP points in play, he receives enough AP points as reinforcements to bring his total up to six. The reinforcing APs can be placed in any British off- map port. The German player gets 1 Other Victory Point for each British AP point brought into play as a reinforcement.
Recording Use Of Naval Transports
You must keep track of which of your AP, LC, MB, and Prahm units are carrying supply and which are carrying land units (and which specific land units they are carrying) during each Naval Segment. Use the alphabetical codes printed on the AP, MB, LC, or Prahm counters to record what each is carrying on a piece of scrap paper. Units that are recorded as carrying supply can provide either Naval Supply or Over-the-Beaches Supply (see 12.2). At the end of the Naval Segment, each player is entitled to examine his opponent's list.
Exception: AP units cannot provide Over-the-Beaches Supply.
Dummy Prahms
The German player has two dummy Prahm units that he may use to conduct phony amphibious assaults, or to distract British attacks away from real Prahms moving in the same stack. Dummy Prahms move and are otherwise treated exactly like real Prahm units in all respects (including that they occupy Port Capacity), except for the following differences:
-
Dummy Prahms can neither carry land units, nor provide Naval or Over-the-Beaches Supply.
-
If a dummy Prahm is fired upon in Naval or Bombing Combat, or suffers a "hit" from British mines, the German player immediately reveals that it is a dummy and permanently removes it from play.
German Mines
The German player has a single Mine marker, which he can place in any sea zone that is adjacent to a German-controlled port. In the Operation SEALION scenario, the German player places the marker during his inital setup; in the Battle of Britain and July Invasion scenarios, the German player places the marker during the German Reinforcement Phase of the turn before that on which he will first attempt an Amphibious Assault. Once placed, the Mine marker cannot be moved or removed for the rest of the game.
Whenever a British naval unit enters the zone containing the Mine marker for any reason (including Withdrawal, Return to Base, and being forced out of port, see 4.0), the German player rolls a die. If the result is 0 or 1, a hit is inflicted on the naval unit.
Mine attacks are also resolved against all British naval units that are in the same zone as the Mine marker at the beginning of the Naval Detection Phase. All mine attacks are resolved before rolling for Detection.
U-Boats
The German player has two U-Boat markers, which he can place in any sea zones desired at the beginning of that German Naval Movement Phase in which he will first attempt to conduct an Amphibious Assault. During each subsequent German Naval Movement Phase, the German player can move the U-Boat markers into any sea zones he desires. However, both U-Boat markers cannot be placed in the same zone, nor can they be put in the same zone as the Mine marker. U-Boat markers attack British naval units in exactly the same way as the Mine marker does except that a hit is only inflicted on a die roll of 0, not 0 and 1.
Exception: U-Boat markers have no effect whatsoever during Stormy weather .
British Mines
The British player is assumed to have Mines laid in the Northern, Central, and Southern North Sea; Straits of Dover; Eastern and Western English Channel; and Western Approaches zones. These are present at the beginning of all scenarios and function exactly like the German Mine marker except:
-
German naval units are damaged only on a roll of 0, not 0 and 1.
-
No mine attack roll is made against a German naval unit if the total Port Capacity of all British-controlled ports that are accessible through that sea zone has been reduced to less than 4 by damage and/or capture. However, the mines once again become “active” as soon as the British- controlled Port Capacity is increased to 4 or more.
Escorts
Ships that are not adequately escorted are more vulnerable to Mines and U-Boats than those that are. One DD or TB point can escort up to two ships are moving in the same stack with it. If a ship is unescorted, subtract one (-1) from all Mine and U-Boat die rolls made against it. The moving player always specifies which ships in a stack are unescorted if there are insufficient TB and DD points present to escort all the ships in the stack.
Note: DD, TB, Prahm, LC, and AP units do not have to be escorted. They are never subject to the -1 die roll modifier.
10.0 The Home Guard
Many hexes in England possess Home Guard (HG) Defense Factors that represent large numbers of volunteer militia. These affect both combat and the movement of German units. The following types of British-controlled hexes possess HG Defense Factors.
-
Reference Cities have an HG Defense Factor of 1.
-
Minor and Major Cities have an HG Defense Factor of 2.
-
London hexes have an HG Defense Factor of 3.
-
Any hex that is the target of an Airborne Assault and is not occupied by a British land unit has an HG Defense Factor of 1.
-
Any hex that is the target of an Amphibious Assault and is not occupied by a British division (1 or 2-step) has an HG Defense Factor of 2.
Exception: If such a hex contains a port with a capacity of 2 or more, it has an HG Defense Factor of 3.
Home Guard Effects
- A moving German land unit cannot enter a British-controlled city unless it expends a number of additional Movement Points equal to the value of the city's HG Defense Factor.
Exception: German units that are Overrunning a hex that has an HG Defense Factor pay only the usual 2 Movement Points - not 2 MPs plus the value of the HG Factor.
-
A German land unit that Advances After Combat into a city that has an HG Defense Factor can Advance no further.
-
An HG Defense Factor is added to the total Defense Factor of British land units stacked in the same hex when it is attacked in Land Combat or Overrun.
-
An HG Defense Factor cannot be attacked or overrun by itself (i.e., without a British land unit being present) unless its hex is the target of an Amphibious or Airborne Assault.
Eliminating Home Guard Defense Factors
A Home Guard Defense Factor is automatically eliminated if the German player gains control of its hex (i-e., a German land unit enters the hex during Movement or Advance After Combat and there is no British land unit present).
-
If an HG Factor was defending along with British land units, German units can freely advance into the hex if all the enemy land units were either eliminated or Retreated.
-
If an HG Defense Factor was defending by itself against an Amphibious or Airborne Assault, German land units can Advance into the hex - and thereby eliminate the HG Factor - only if the British player suffered an adverse combat result (of any type).
Restoring Home Guard Defense Factors
If a British land unit recaptures a German-controlled hex and restores it to British control, the hex's HG Defense Factor is automatically restored as well. A single HG Defense Factor can be eliminated and restored any number of times.
Design Note: The Home Guard was a volunteer militia hastily organized during June, 1940. Poorly-equipped and ill-trained, the Home Guardsmen would have presented only a minor obstacle to the German invaders, except when defending in urban areas. The Home Guard Factors used against Amphibious Assaults actually represent the beach defenses of British Divisions.
11.0 Damage and Repair
11.1 Demolition
Besides damage caused by Bombing Combat, hits can be inflicted upon Installations when their hex is entered by an enemy unit during movement or Advance After Combat.
Note: Hits can also by inflicted by Auxiliary Unit and Brandenberger attacks (see 13.2).
Railroad Demolition
-
Whenever a German unit gains control of a British railroad hex, a 2 hit Rail Break marker can be placed in the hex.
-
Whenever a British unit gains control of a German converted railroad hex, it “de-converts” the hex.
Note: To record that a hex has been “de-converted,” place German Railhead markers in all adjacent German converted railroad hexes that are linked to the de-converted hex.
Airbase, Radar Station and Port Demolition
-
Whenever a friendly unit gains control of a hex containing an enemy Airbase, Radar Station, or Port, a 2 Hit marker can be placed on the installation. This occurs during movement, Overrun, and Advance After Combat.
-
Whenever an enemy unit gains control of a hex containing a friendly Port or Airbase, the owning player can try to damage it by Demolition. He consults the Demolition Table and rolls the die. Cross-referencing the die roll result with the column corresponding to the type of installation yields a number, which is the quantity of hits inflicted on the installation.
11.2 Damage Effects
Hits caused by Bombing Combat and Demolition have different effects depending upon whether they are inflicted on land units, naval units, or installations.
Naval Units
-
If a hit is inflicted on an undamaged ship or 2-point naval unit, it is flipped onto its damaged or 1-point side. If a hit is inflicted on a damaged ship or 1-point naval unit, it is eliminated (sunk).
-
If a ship (not an 2-point naval unit) is damaged while moving, it must immediately stop moving in the zone where it was damaged.
-
If a Critical Hit is inflicted on an undamaged ship, it is eliminated (sunk). Critical hits have no effect upon naval points of any type.
Exception: If a Critical Hit is inflicted onan undamaged battleship (BB) or battlecruiser (BC), it is treated as a regular hit (i.e., instead of sinking the ship, the hit merely damages it).
Land units
The first hit on a land unit reduces its Attack Factor to half of its printed value (rounded down); a second hit reduces its Defense Factor and Movement Allowance to half of their printed value as well (again, rounded down, but not to less than 1). A land unit can accumulate a maximum of 2 hits.
Also, each hit that an armored/panzer or army tank unit has accumulated reduces its Armor Superiority Value (ASV) by 1.
Ports Each hit on a port reduces its capacity by 1. A port cannot accumulate a number of hits greater than its capacity.
Railroads
-
If a hit is inflicted upon a British-controlled railroad hex, place a 1 Hit Rail Break marker in the hex; if a second hit is inflicted in the same hex, flip the marker to its 2 Hits side. A British unit that is conducting Railroad Movement must expend 10 Rail Movement Points to enter a hex that contains a Rail Break marker. A railroad hex can accumulate a maximum of 2 hits.
-
If a hit is inflicted upon a converted German railroad hex, the length of the German rail line is reduced by one hex (see 5.4).
Radar Stations
If a radar station has accumulated any number of hits, the British Variable ADV in the zone where the radar station is located is reduced by 1. A radar station can accumulate a maximum of 2 hits.
Note: If two or more radar stations in a zone have accumulated hits, the effect is cumulative.
Airbases
-
Each hit inflicted on an airbase reduces its Airbase Capacity by 1.
-
Each hit onan airbase eliminates 1 Air Point based there if the Bombing Combat die roll that caused the hit was “0” or “1”. If more than one type of air point is present at an airbase, the bombing player always chooses what kind is destroyed.
-
If a sector airbase has accumulated any number of hits, the British ADV in the zone where the sector airbase is located is reduced by 1.
Note: If two or more sector airbases in a zone have accumulated hits, the effect is cumulative.
An airbase can accumulate a maximum of 3 hits.
11.3 Repair
Land unit and Installation Repair
During the Repair Segment, 1 hit can be removed from each land unit and installation that has accumulated hits (i.e., a player is never forced to remove a hit from an installation). Of course, a player cannot repair an installation that is located in an enemy-controlled hex. Thus, for example, a damaged British radar station that is located in a German-controlled hex cannot be repaired.
Note: There is no requirement that a unit or installation must be in supply in order to repair a hit.
Naval Unit Repair
During the Repair Segment, the players roll a die for each of their damaged ships (not 1 -point naval units) that is located at a friendly naval base. If the die roll is “0” the ship is repaired and is flipped over to its undamaged side.
Note: Liverpool, Milford Haven, Portsmouth, Plymouth, Sheerness, Harwich, Hull, Scapa Flow, Northern Ireland, and the eastern and western ports in Scotland are British naval bases. Germany is the only German naval base.
12.0 Supply
In order to function at full effectiveness, land and air units must be in supply. In order to be in supply, a unit must be able to trace a Line of Supply during the friendly Supply Phase.
Exception: When a unit performs an Amphibious or Air Assault it is automatically in supply during that turn and entire following turn, even if it cannot trace a Line of Supply.
If a unit cannot trace a Line of Supply, place an Out of Supply-1 marker on it. If the unit cannot trace of Line of Supply during the friendly Supply Phase of the following turn, the marker is replaced with an Out of Supply- 2 marker. However, if a unit that possesses an Out of Supply-1 or Out of Supply-2 marker can trace a Line of Supply during a friendly Supply Phase, the marker is immediately removed.
Exception: Air Supply Missions (see 7.5).
Out of Supply Effects
Out of Supply land units cannot conduct Railroad Movement, or move in the Motorized Movement Phase. Furthermore:
-
A land unit that possesses an Out of Supply-1 marker has its Attack Factor halved (rounding down), but continues to defend at full strength.
-
A land unit that possesses an Out of Supply-2 marker also has its Defense Factor and Movement Allowance halved (rounding down).
Out of Supply air units can fly only during the Air Ferry Phase. Thus, they cannot Intercept, or conduct Bombing, Air Transport, or Airborne Assault missions.
Hits and Out of Supply Effects
The effects of Hits and being Out of Supply are cumulative. Thus, a unit that possesses both a 1 Hit marker and an Out of Supply-1 marker has its Attack Factor quartered (rounding down). A unit that possesses a 2 Hit marker and an Out of Supply-2 marker has its Defense Factor and Movement Allowance quartered as well (rounded down, but not to less than 1). If a unit possesses either a 2 Hit marker and an Out of Supply-1 marker or vice versa, only the effect of the higher-valued marker is applied.
12.1 Lines of Supply
A Line of Supply consists of a path of hexes no more than 5 hexes long traced from a unit to a Supply Source. It cannot be traced through hexes containing enemy-controlled airbases or cities (of any type), all-sea hexes, sea hexsides, or hexes containing enemy units or ZOC's.
Exception: A Line of Supply can be traced through a hex containing an enemy ZOC if it is occupied by a friendly land unit.
Exception: A Line of supply can be traced across a Sea hexside that has a Crossing Arrow printed on it.
Supply Sources
-
All land and partial-sea hexes on the northern mapedge act as Supply Sources for British units.
-
A British Major City hexes acts as a Supply Source for British units if it can trace a path of British-controlled Railroad hexes (of any length) either to any other British-controlled Major City hex or a hex on the northern mapedge.
Note: This path of Railroad hexes is blocked by German- controlled cities and airbases, and German land units and their ZOCs just as if it were a line of supply.
- A Railroad hex can act as a Supply Source if it is connected to another Supply Source by an unbroken chain of Railroad hexes that does not pass through an enemy-occupied hex, or an enemy-controlled city or airbase at any point. The path of Railroad hexes can be traced through an enemy ZOC only if the hex in question is occupied by a friendly land unit.
Note: German units can only trace supply over railroad hexes that have been converted (see 5.4).
-
Friendly-controlled ports can act as Supply Sources when using Naval Supply (see below).
-
Friendly-controlled partial-sea hexes can act as Supply Sources when using Over-the-Beach Supply (see below).
A Major City hex cannot act as a Supply Source if it is occupied by an enemy unit, and a mapedge hex cannot act as a Supply Source if it is either occupied by an enemy unit.
Off Map Supply
All land and air units located on the Off Map Display are automatically in supply.
12.2 Naval Supply
A port can act as a Supply Source only if there is at least one friendly AP, LC, or Prahm point carrying Naval Supply in the sea zone that gives access to the port.
Example: Although the Southern North Sea, Eastern English Channel, and Straits of Dover sea zones all border upon the Southeast England land zone, only the Straits of Dover zone gives access to the ports of Folkestone, Dover, Ramsgate, and Rye.
In order to provide Naval Supply, an AP, LC, or Prahm point must be at sea during the friendly Supply Phase and have no land units embarked. Furthermore, a German naval point that is providing Naval Supply must be within 3 Naval Movement Points of a port in a friendly off-map land zone.
Exception: AP, LC and Prahm points that Withdrew from Naval Combat cannot provide Naval Supply.
Note: Naval points that are providing Naval Supply do not actually enter a port, but remain at sea in a bordering sea zone.
Ports located in a land zone to which friendly naval units are carrying Naval Supply act as Supply Sources for a limited number of friendly steps or air points. Find the current Port Capacity of all friendly-controlled ports in the zone on the Naval Supply Table and determine the Naval Supply Multiplier. Multiply the total number of AP, LC, and Prahm points providing Naval Supply in the zone by the Naval Supply Multiplier; the result is the number of land unit steps and/or air points that can be supplied. Supply capacity is judged on a port-by-port basis; only those units that can trace a Line of Supply to a port may be supplied through it.
Exception: Each Motorized step or bomber point counts as 2 steps or points for supply purposes.
Example: The German player has 4 Prahm points providing Naval Supply in the Straits of Dover zone. In the Southeast England zone, he controls the ports of Dover (current Port Capacity 3) and Rye (current Port Capacity 1). The Naval Supply Table shows that with a Port Capacity of 4, the Naval Supply Multiplier is “x 2.” Thus, the German player can supply 8 steps and/or air points that can trace a Line of Supply to either Dover or Rye. However, only 2 steps or points can be supplied from Rye, and only 6 from Dover. If no German units could trace a Line of Supply to Rye, only 6 steps or points that could trace to Dover could be supplied.
Over-the-Beaches Supply
LC and Prahm points that are at sea and not carrying land units can be used to augment the Port Capacity in a bordering land zone during the friendly Supply Phase. To record that an LC or Prahm point is being used for this purpose, temporarily place it in any friendly-controlled partial-sea hex in the zone that does not contain Cliff hexsides. However, no more than 2 LC or Prahm points can be placed per hex.
Exception: LC and Prahm points cannot provide Over-the- Beaches Supply during Foul or Stormy weather (see 3.0).
Each LC or Prahm point that provides Over-the-Beaches Supply increases the friendly Port Capacity in the zone by 1, and each hex occupied by such an LC or Prahm point acts as a Supply Source for friendly land and air points. However, a point that provides Over-the-Beaches Supply cannot also provide Naval Supply. At the end of the Supply Phase, place all LC and Prahm points that provided Over-the-Beach Supply back at sea in the same sea zone where they began the Supply Phase.
13.0 Special Rules
13.1 German Coast Artillery
Each turn, the German player has 10 Coast Artillery Points that he can expend in the Naval Segment or during his Land Combat Phase. He records the expenditure of Coast Artillery Points by adjusting the marker leftward on the Record Track. At the beginning of each turn, the marker is placed back in the “10” box on the track.
Note: German coast artillery cannot be attacked in Bombing Combat.
Coast Artillery in the Naval Segment
During the Naval Segment, the German player can expend Coast Artillery points to fire at British naval units under two different sets of circumstances:
-
The German player uses Coast Artillery points to Intercept British naval units that have been detected in the Straits of Dover zone.
-
German naval units are engaging British naval units in Naval Combat in the Straits of Dover zone.
Coast Artillery Interception
When the German player uses Coast Artillery points to intercept a stack of British naval units, he can allocate the points to fire at any unit or units in the stack. However, no more than 3 Coast Artillery points can be allocated to fire at a single naval unit.
Coast artillery fire is resolved exactly like one naval unit firing at another in Naval Combat; the Naval Attack Factor used is equal to the number of
Coast Artillery points that have been allocated to fire at a particular naval unit. Obviously, the Naval Attack Factor generated by Coast Artillery fire is a non-torpedo Naval Attack Factor.
Exception: When Coast Artillery is firing at a British DD unit, the Naval Attack Factor equals 1/2 the number of Coast Artillery points allocated to fire at the unit (rounded down).
There are no multiple rounds of “combat” when Coast Artillery is used to Intercept British naval units; the German player gets only one opportunity to fire.
Coast Artillery in Naval Combat
After a Naval Combat has been organized, the German player can allocate Coast Artillery points to fire at any of the participating British units. If points are allocated to attack a British naval unit that is not being fired at by a German naval unit, resolve their fire exactly as described in the preceding section.
If Coast Artillery points are allocated to fire at a British naval unit that is being fired at by a German naval unit, add togetether the Naval Attack Factors of the Coast Artillery points and the German naval unit. If the German naval unit has torpedoes, the combined Naval Attack Factor is torpedo-capable. Again, no more than 3 Coast Artillery points can be allocated to fire at a single British naval unit, and those firing at British DD units are halved.
Coast Artillery points that are allocated to fire during a Naval Combat round do not carry over into subsequent rounds of the same combat. Thus, if the German player wishes to use Coast Artillery in the second or later round of a Naval Combat, he must expend additional Coast Artillery points (assuming he has any remaining).
Example: At the start of a particular Naval Combat, the German player has all 10 Coast Artillery Points available. In the first round of a Naval Combat, he allocates 7 of them to fire at British naval units. If the Naval Combat continues into a second round, he will be able to allocate only 3 Coast Artillery points.
Coast Artillery In The Land Combat Phase
Whenever a hex that German land units are attacking in a Land Combat or Airborne or Amphibious Assault is situated within 3 hexes of the hex containing the coast artillery symbol (hex 4326, Cap Gris Nez), the German player can expend up to 2 Coast Artillery Points. Each Coast Artillery Point adds 1 point to the German's total Attack Factor.
13.2 Auxiliary Units and Brandenbergers
The British and German players both possess limited capabilities to conduct special warfare activities (sabotage, subversion, commando operations, etc.) that are expressed in terms of Auxiliary Unit and Brandenberger points.
British Auxiliary Units
The British player has 15 Auxiliary Unit points that he can expend during the course of the game. When an Auxiliary Unit point is expended, it is gone for good; additional points are not received during the course of play. To record the expenditure of an Auxiliary Unit point, adjust the as on the Record Track.
Declaring Auxiliary Unit Attacks
Auxiliary Unit Attacks can be declared at any point, and in any sequence, during the British Land Combat Phase, the German Land Combat Phase, or the German Supply Phase. The British player simply expends an Auxiliary Unit Point and designates the exact hex and target in that hex that he is attacking. Any hex in England can be the target of a Auxiliary Unit Attack.
Exception: No more than 4 Auxiliary Unit Attacks can be made per zone in a single turn.
The target of an Auxiliary Unit Attack is always a single installation or land unit in a hex. Only 1 Auxiliary Unit point can be expended per attack, and no installation or land unit can be the target of more than one Auxiliary Unit Attack per phase.
Resolving Auxiliary Unit Attacks
To resolve an Auxiliary Unit Attack, roll the die and modify it by +1 if the target hex is in an enemy ZOC or by +2 if any enemy land unit except an amphibious tank battalion occupies the target hex (these modifiers are not cumulative).
Exception: These modifiers are ignored when a ground unit is the target of an Auxiliary Unit Attack (they are built into the Ground Unit row on the Auxiliary Unit and Brandenberger Table).
Consult the Auxiliary Unit And Brandenberger Table and cross-reference the modified die roll result with the type of target being attacked to determine if the attack succeeded or failed (the Auxiliary Unit point is still expended even if the attack fails). If the attack succeeds, 1 hit is inflicted on the target unit or installation.
German Brandenbergers
The German player has 5 Brandenberger points that he can expend during the course of the game. When a Brandenberger point is expended, it is gone for good; additional points are not received during the course of play. To record the expenditure of a Brandenberger point, adjust the marker on the Record Track.
Declaring Brandenberger Attacks
Brandenberger Attacks are conducted during the German Land Combat Phase, the British Land Combat Phase, or the British Supply Phase in exactly the same way as Auxiliary Unit Attacks. The only difference is that Brandenberger Attacks can only be declared against targets that are within 5 hexes of a German land unit (the 5 hex path cannot be traced through all- sea hexes or across sea hexsides that do not have Crossing Arrows - see 5.2).
All restrictions that apply to Auxiliary Unit Attacks apply equally to Brandenburger Attacks, except that all 5 Brandenberger Points can be expended in a single phase without restriction.
Resolving Brandenberger Attacks
Brandenberger Attacks are resolved exactly like Auxiliary Unit Attacks.
Brandenberger Counter-Demolition Operations
Whenever a German land unit gains control of a hex and the British player attempts the Demolition (11.1) of an installation in the hex, the German player can expend one (and only 1) Brandenberger point to try to reduce the damage. If a point is expended it causes a-1 DRM to be applied to the British player's roll on the Demolition Table.
13.3 British National Leaders
Winston Churchill
Churchill can move as either a leg or motorized unit at the British player's discretion, but he cannot mix both types in a single Movement Phase. He can conduct Railroad Movement and can enter zones on the Off-Map Display. Churchill can Advance or Retreat after land combat only if stacked with a British land unit.
The Churchill unit has no Attack or Defense Factors and does not exert a ZOC, but if he is located in a hex that is attacked in Land Combat by German units, the British player rolls a die. If the result is 0-6, add one (+1) to the combat resolution die roll; if the result is 7-9, subtract one (-1) from the combat resolution die roll.
Design Note: This rule reflects the fact that Churchill's charismatic presence would inspire British troops to fight with greater determination. However, there is also the distinct possiblity that “Winnie” will start interfering in tactical and operational decision-making - to the inevitable detriment of British combat effectiveness.
Churchill is captured and removed from play if all of the British land units with which he is stacked are eliminated in combat, or if a German unit enters his hex during the German Movement Phase. Also, after each combat in which Churchill was involved, the German player rolls a die; if the result is zero (“0”) Churchill has been captured.
Exception: Churchill is not captured when German units that are conducting an Overrun (see 5.6) enter his hex unless all of the British land units in the hex are eliminated as a result of the Overrun.
The Royal Family The Royal Family functions exactly like Churchill in all respects except that:
- It has no Movement Allowance and therefore cannot move. It can, however, Advance or Retreat after land combat if stacked with a British land unit.
- It automatically adds +1 to the combat resolution die roll when the hex where it is located is attacked by German units.
Note: If both Churchill and the Royal Family are defending in the same Land Combat, the die roll is increased by +1 because of the Royal Family's presence. Churchill's presence is ignored.
At any point during the British Movement Phase, the British player can declare that he is sending the Royal Family into exile and permanently removes it from play no matter where it is located (even if it is completely surrounded by German units and ZOC's).
13.4 Forward Detachments
The only land units that can be transported by Motorboats (see 9.6) are the Forward Detachments of the German 6th Mountain, 8th and 28th Infantry Divisions, and the four amphibious panzer battalions. The German player can create a division's Forward Detachment during the German Reinforcement Phase by flipping the division from its 2-step side to its 1-step side (1-step divisions cannot create forward detachments) and placing its forward detachment in the same hex or off-map land zone. A 1-step division cannot be rebuilt to 2 steps using Replacement Points (see 14.0) as long as its Forward Detachment remains in play.
Forward Detachments are treated like normal land units for all purposes except that they cannot be rebuilt using Replacement Points (see 14.0). Furthermore, during any German Reinforcement Phase in which the Forward Detachment and its “parent” division are located in the same hex, the German player can remove the Forward Detachment and flip the divison back to its 2-step side.
Note: The German player is not forced to consolidate a Forward Detachment and a parent division that are in the same hex. It is his choice.
13.5 British Garrisons
The British player must maintain garrison units in Northern Ireland and in each zone in England (on or off-map) except the Midlands Zone at all times. Two full-strength (2-step) divisions must be kept in the Humber, East Anglia, Southeast England, and Southern England zones. One full-strength division must be kept in each of the other zones except the Midlands zone.
Note: This does not prevent the British player from moving his units within a zone and he can always allow a particular division to leave a zone simply by moving another one in.
The requirement to keep a garrison in a particular zone is permanently lifted at the instant that a German land combat unit enters any hex in that zone. However, at least one full-strength division or three brigades must be kept in London at all times, and this garrison requirement is never lifted. Furthermore, the unit(s) garrisoning London do not count toward the garrison requirement of the zone(s) in which they are located.
14.0 Reinforcements and Replacements
During the course of play, additional units and replacement points arrive during the Reinforcements and Replacements Segment.
14.1 Reinforcements
Both sides receive additional units during the course of play according to the Reinforcement and Replacement Schedule printed on the map (unless specified otherwise in the scenario instructions; see 16.0).
Land and naval unit reinforcements appear in any off-map land zone controlled by that side. Air unit reinforcements can be placed at any friendly- controlled airbase on the nap or Off Map Display within the basing limit.
Exceptions: German ships (not MBs, Prahms, LCs, TBs, or DDs) that arrive as reinforcements can only be placed in Germany. British DD reinforcements taken from the Western Approaches (see 16.0) likewise can only be placed at certain specific on-map naval bases.
14.2 Replacements
Both sides can use Replacement Points to rebuild eliminated and weakened land and air units during the course of play.
-
Both sides receive Air Replacement Points on every turn as specified in the scenario instructions (see 16.0).
-
The British player receives land unit (Leg, Armor, and Army Tank) Replacement Points on the turns and in the quantities listed on the Reinforcement and Replacement Schedule.
-
The German player has an unlimited number of land unit (Leg and Armor) Replacement Points available in all off-map land zones.
Note: The fact that the German player has an unlimited number of Replacement Points available is not as great an advantage as it might seem because he still has to transport them - or the units that they are used to rebuild - to England for them to do him any good.
Unused Replacement Points
British land unit Replacement Points can be saved up for future use; record how many of each kind is available using the Replacement Point markers. The only kind of Air Replacement Points that can be saved up are Spitfire Points; all other types of Air Replacement Points must be used immediately when they become available, or they are permanently lost.
Note: There can never be more points of a particular aircraft type in play than there are counters of the appropriate type available in the countermix. The players cannot add handmade aircraft counters if there are no more of a particular type available.
Land Replacement Points
Land Replacement Points can be used to restore reduced-strength divisions to full strengh or to bring eliminated land units back into play. Land Replacement Points come in three different varieties: armor, army tank, and leg. Armor Replacement Points can rebuild armor steps and army tank Replacement Points can rebuild army tank steps, while Leg Replacement Points can rebuild all other kinds of land units.
Exception: Amphibious panzer, airborne, airlanding, and mountain infantry units cannot be rebuilt with replacement points.
Land Replacement Points can be expended during the friendly Reinforcement and Replacement Phase for the following purposes:
-
Expending 1 Replacement Point will bring a reduced-strength division that is in supply back to full strength (i.e., increasing it from a 1-step unit to a 2-step unit), or bring an eliminated brigade or regiment back into play in any friendly off-map zone.
-
Expending 2 Replacement Points will bring an eliminated division back into play in any friendly off-map zone. It is placed on its 1-step side.
If 2 Replacement Points are expended in order to bring an eliminated division back into play (on its l-step side), another Replacement Point cannot be expended to build it back up to full strength in the same Reinforcement and Replacement Phase.
Transporting German Land Replacement Points
The German player cannot rebuild reduced-strength divisions located in England unless he transports Replacement Points there by Naval or Air Transport.
- A Leg Replacement Point counts as a leg step when computing naval transport capacity, and an Armor Replacement Point counts as a motorized step.
Note: If one of the two LC, AP or Prahm points that is transporting an Armor Replacement Point is sunk, the point is not eliminated, but receives a 2 Hit marker. If the Armor Replacement Point is used to rebuild a German armor unit before these hits are removed, add that number of hits to the unit that was rebuilt.
- 2 Ju-52 points can carry 1 Leg Replacement Point by Air Transport; Armor Replacement Points cannot be moved by Air Transport.
Note: The German player can attempt to move only 1 Leg Replacement Point by Air Transport per turn.
A Replacement Point remains at the port or airbase to which it was transported until it is used. A German unit in England can be rebuilt only if it is both in supply and can trace a path of hexes no more than 10 hexes long to a port or airbase containing a Replacement Point of the proper type. The path connot be traced through hexes containing enemy units or their ZOC's, enemy-controlled airbases or cities, or all-sea hexes.
Note: German Replacement Points do not consume supply.
Any number of Replacement Points can be located at a single port or airbase, they have no effect upon stacking, and cannot be attacked in Bombing Combat or by Auxiliary Units. However, if the British player gains control of a port or airbase that contains German Replacement Points, they are immediately eliminated.
Air Replacement Points
Air Replacement Points can be used to bring a new 1-point air unit into play, or to increase a 1-point air unit to 2-point strength. Air Replacement Points can be expended in any hex that contains friendly-controlled airbase that can trace an LOS and is not in a enemy ZOC, or any friendly-controlled off-map zone.
Exception: Air Replacement Points can be expended in an airbase that is in an enemy ZOC if the hex is occupied by a friendly land unit.
15.0 Victory
The winner of a scenario is determined by the number of Victory Points that the German player has accumulated at its end. Points are added to and subtracted from the Victory Point Total according to the Victory Point Schedule printed below and are recorded by adjusting the markers on the Record Track.
The Victory Points gained by the German player for damaging and eliminating British naval units are recorded separately from Victory Points gained for other reasons. Thus, when the German player gains Victory Points for damaging or eliminating a British ship or naval point, adjust the Naval Victory Points marker on the Record Track. When Victory Points are received for any other reason, adjust the Other Victory Points marker.
15.1 Victory Point Schedule
Other Victory Points
| VP | Event |
|---|---|
| +2 | Germans gain control of a British Minor City |
| -2 | British regain control of a British Minor City |
| +5 | Germans gain control of a British Major City |
| -5 | British regain control of a British Major City |
| +15 | Germans gain control of all seven London hexes |
| -15 | British reduce the # of German controlled hexes to less than 7. |
| +1 | Germans gain control of a British airbase |
| -1 | British regain control of a British airbase |
| +15 | Royal Family captured |
| +10 | Royal Family sent into exile |
| +15 |
Naval Victory Points
| VP | Event |
|---|---|
| +1 | British DD point redeployed from Western Approaches |
| +1 | British DD point sunk |
| +1 | British CA or CL damaged |
| -1 | British CA or CL repaired |
| +1 | British CA or CL sunk |
| +2 | British BB or BC damaged |
| -2 | British BB or BC repaired |
| +2 | British BB or BC sunk |
15.2 Victory Conditions
If the game is played for its full length (i.e., no Sudden Death Victory occurs), the winner is determined by adding together the Naval Victory Point and Other Victory Point totals.
| Total Victory Points | Result |
|---|---|
| 86 or more | German Decisive Victory |
| 70-85 | German Substantial Victory |
| 60-69 | German Marginal Victory |
| 40-59 | British Marginal Victory |
| 20-39 | British Substantial Victory |
| 1-19 | British Decisive Victory |
| 0 or less | British Crushing Victory |
German Sudden Death Victory
If, at the end of any turn, the German player has satisfied any three of the following Sudden Death Victory conditions, he can choose to declare that the game is over. The German player automatically wins a Marginal Victory (assuming his Victory Point Total does not entitle him to a higher level of victory).
-
Control all seven London hexes
-
Control Birmingham, Manchester, and Sheffield
-
Control any three Major City hexes (London hexes do not count)
-
Capture the Royal Family or drive it into exile
-
Capture Churchill
-
Accumulate 36 Naval Victory Points
-
Accumulate a total of 70 or more Naval and Other Victory Points
British Sudden Death Victory The British player can choose to declare a Sudden Death Victory at the end of any turn in which both of the following conditions have been satisfied:
-
At least 5 turns have passed since a German land unit first invaded England by Air or Amphibious Assault.
-
The total Port Capacity of all German-controlled ports in England is less than 5. For this purpose only, port capacity is computed at full value even if the port has accumulated hits.
The British player automatically wins a Marginal Victory (assuming his Victory Point Total does not entitle him to a higher level of victory).
16.0 Scenarios
German Mine And U-Boat Markers
The German Mine marker is set up on the map at the beginning of the Operation SEALION scenario, but in the other two scenarios, the German player puts it on the map during the turn before he will first attempt to conduct an Amphibious Assault. In all three scenarios, the German player places the U-Boat markers on the map at the start of the same Naval Movement Phase in which he will first attempt to conduct an Amphibious Assault.
Note: See 9.5 for more details about how, when, and where the Mine and U-Boat markers are placed.
Variable Air Detection Values
Variable British ADVs always start a scenario at maximum value. In the Operation SEALION scenario, however, the German player puts hits on British sector airbases and radar stations before play begins (thus reducing the value of the Variable ADVs in the zones where the hits are placed).
British Naval Movement Restrictions
In all three scenarios, no British naval units can leave port unless a German naval unit has entered any on-map sea zone, or any off-map sea zone except the Norwegian Sea, Norwegian Leads, Jutland Coast, or Bay of Biscay zones. This permanently releases all British naval units from the movement restriction.
Exception: A British naval unit may leave port if the port where it is located is bombed by a German air mission (it doesn't matter whether the air mission attacked the port itself or naval units based at it). However, the unit must enter another port by the end of the Return to Base Phase of the same game turn that it left the original port.
British Land Unit Movement Restrictions
In all scenarios, no British land units can move until at least one German land unit occupies a hex in England at the beginning of a British Land Movement Phase.
Exception: In the Battle of Britain scenario, the New Zealand and 42nd Infantry Divisions can move on the turn that the German player places his Mine marker if it is placed anywhere except in the Straits of Dover zone. They must be moved to a hex that is within 5 hexes of London and no closer than 3 hexes to an all-sea hex. They both act as reserve units in whatever zone they are moved to.
1st Turn of Invasion
- The only British units that can move are those that are either, (A) located within 3 hexes of a German unit at the beginning of the British Movement Phase, or, (B) are located in zones where German units are present and are designated reserve (including GHQ Reserve) units.
- British land units cannot conduct Railroad Movement.
2nd Turn of Invasion
- The only British units that can move are those located in zones where German units are present at the beginning of the British Movement Phase, plus all GHQ Reserve Units.
- Railroad movement is permitted on this and all subsequent turns.
3rd Turn of Invasion
- Only 5 British divisions or the equivalent (3 brigades being equal to a division), can move in addition to the units that could move on Turns #1-2.
4th Turn of Invasion
- Only 5 British divisions or the equivalent can move in addition to the units that could move on Turns #1-3.
5th and All Subsequent Turns of Invasion
- No restrictions on British movement except for garrison requirements (see 13.5).
Air Replacement Points
In all three scenarios, the playeers receive Air Replacement Points according to the following schedule:
- The German player recieves 1 Air Replacement Point on each odd- numbered turn and 2 Air Replacement Points on each even-numbered turn. However, Ju-52, Ju-87, and Me-110 Replacement Points can only be taken on odd-numbered turns. No air replacements are received on the first turn of any scenario.
Note: There are no Italian Air Replacement Points.
- The British player receives 2 Spitfire Replacement Points every odd- numbered turn, and 1 Spitfire and 1 Blenheim or Wellington Replacement Point every even-numbered turn. However, no air replacements are received on the first turn of any scenario.
Western Approaches Destroyer Reinforcements
In all scenarios the British player has 10 DD points that he can choose to bring into play during any British Reinforcement Phase. These DD points must be placed at Plymouth, Milford Haven, Liverpool, western Scotland or Scapa Flow. However, the number of DD points that the British player has on the map cannot be increased to greater than 17 by this method. Furthermore, for each DD point that the British player brings into play in this way, the German player gains one (1) Other Victory Point.
The British player can start the Operation Sealion scenario with some of these DD points already on the map if the German player's preliminary attacks on British naval units (see 16.1) have eliminated any DD points.
Design Note: These ten DD points represent destroyers assigned to convoy escort duty in the Western Approaches. The German player gets victory points when these destroyers are used to counter his invasion because the trade-off for the British would have been heavier merchant marine losses from U-boats.
16.1 Operation SEALION
This scenario begins on the September #6 turn.
Preliminaries
This scenario assumes that the Luftwaffe defeated the RAF in the Battle of Britain by concentrating its attacks against British sector airbases and radar stations, and then went on to attack the Royal Navy in its bases. Thus, before either player deploys his units the German player must do the following:
- Allocate 12 hits among any British radar stations and/or sector airbases of his choice - although at least 10 of the hits must be placed in a single zone. Furthermore, all of the radar stations and sector airbases selected must be within 15 Air Movement Points of a German airbase.
- "Attack" four British DD units, three CLs, and two CAs (the ships to be attacked are chosen by the British player) by rolling a die for each. If the die roll result is 6-8, inflict a hit on the naval unit; if the result is 9, it suffers a critical hit. Any damage or loss of British naval units resulting from these "attacks" will cause the German player's Naval Victory Point total to increase.
Note: Critical hits have no additional effect on DD units. If a critical hit is rolled for one, it is not sunk but simply suffers a single hit.
- Place his Mine marker in any sea zone that is adjacent to a German-controlled port.
British Initial Deployment
The British player sets up first. A boldface "R" printed following a unit's setup hex indicates that it is a reserve unit.
Note: The movement of reserve units is limited to a lesser degree than that of other British land units (see British Land Unit Movement Restrictions, 16.0).
British Land Units
Northern Command
- 1st Infantry Division: 3509
- 2nd Infantry Division: 3305
- 44th Infantry Division: 2907 R
- 59th Infantry Division: 3202
- 24th Army Tank Brigade: 2702 R
Western Command
- 2nd London Division: 2021
- 38th Infantry Division: 2109
- 3rd MMG Brigade: 2410 R
- 23rd Army Tank Brigade: 2113 R
- 36th Infantry Brigade: 2416 R
Southern Command
- AIF Division: 3123 R
- 3rd Infantry Division: 2322 R
- 48th Infantry Division: 1329
- 50th Infantry Division: 2227
- 1st Armored Brigade: 2224 R
- 21st Army Tank Brigade: 2624 R
- 70th Infantry Brigade: 1827
Eastern Command
- New Zealand Division: 3723 R
Exception: If the German Mine marker is placed in a zone other than Straits of Dover Zone, the New Zealand Division can be deployed anywhere on the map within 5 hexes of London and no closer than 3 hexes to an all-sea hex. It acts as a reserve unit in whatever zone it's placed in.
- 1st London Division: 4123
- 4th Infantry Division: 3126
- 15th Infantry Division: 4018
- 18th Infantry Division: 4213
- 45th Infantry Division: 3625
- 52nd Infantry Division: 3616 R
- 55th Infantry Division: 4216
- 1st Recon Brigade: 3720 R
- 1st MMG Brigade: 3326
- 29th Brigade Group: 3426
- 35th Infantry Brigade: 3922
- 37th Infantry Brigade: 3912
London (deploy in any London hex)
- 3rd London Brigade
- 20th Guards Brigade
- 24th Guards Brigade
- Churchill
- Royal Family
GHQ Reserve
- 1st Canadian Division: 3423 R
- 1st Armored Division (10-7-7): 3324 R
- 2nd Armored Division (6-4-7): 3317 R
- 42nd Infantry Division: 3121 R
Exception: If the German Mine marker is placed in a zone other than Straits of Dover Zone, the 42nd Division can be deployed anywhere on the map within 5 hexes of London and no closer than 3 hexes to an all-sea hex. It acts as a reserve unit in whatever zone it's placed in.
- 43rd Infantry Division: 3419 R
- 1st Army Tank Brigade: 3424 R
- 31st Brigade Group: 3219 R
Northern Ireland Zone
- 53rd Infantry Division
- 61st Infantry Division
- 148th Infantry Brigade
Scotland Zone
- 5th Infantry Division
- 51st Infantry Division
Northern England Zone
- 46th Infantry Division
- 54th Infantry Division
- 2nd MMG Brigade
British Air Units
Air points can be set up on any British airbases within the basing limit. At least 1 Spitfire point must be set up at Scapa Flow and in the Northern Ireland Zone.
- Spitfire: 20 points
- Blenheim: 8 points
- Wellington: 10 points
The value of the Spitfire Losses and Maximum Spitfires markers are both set at 20.
British Naval Units
British naval units can be set up in any British naval bases within the limit of the Port Capacities, although BB and BC units cannot be set up in ports accessible from restricted zones. However, no British naval units of any type can be set up in one naval base of the German player's choice that is accessible from the zone where his Mine marker is located.
At least one BB or BC, four CAs and/or CLs, and two DD points must be set up at Scapa Flow. At least one DD point must be set up at Plymouth.
- BB: Nelson, Rodney, Revenge
- BC: Hood, Repulse
- CA: Norfolk, Sussex, Birmingham, Manchester, Newcastle, Berwick, Southampton, Sheffield, Glasgow, Kenya, Nigeria
- CL: Aurora, Galatea, Cardiff, Naiad, Bonaventure, Coventry
- DD: 17 points
- AP: 6 points
Operation MENACE Reinforcements
The British player receives the BB Barham, CAs Devonshire, Fiji, and Australia, and 1 DD point as reinforcements during the British Reinforcement Phase of the second turn after the German player first lands a unit in England by Airborne or Amphibious Assault.
Force H Reinforcements
The British player receives the BB Resolution, BC Renown, and 3 DD points as reinforcements during the first British Reinforcement Phase that the German has accumulated a total of 50 or more Naval and Other Victory Points.
Historical British Naval Deployment
- Scapa Flow: BC Repulse; CAs Norfolk, Berwick, Glasgow, Kenya and Nigeria; CLA Coventry; and 1 DD point.
- Scotland (East): BBs Nelson and Rodney; BC Hood; CLAs Naiad and Bonaventure; and 4 DD points.
- Scotland (West): CA Sussex.
- Hull (3205): CAs Newcastle, Manchester and Sheffield; and 2 DD points.
- Harwich (4119): CLs Aurora and Galatea; and 2 DD points.
- Sheerness (3922): 3 DD points.
- Portsmouth (3026): CA Southampton and 4 DD points.
- Plymouth (1429): BB Revenge; CA Birmingham; CL Cardiff; and 1 DD point.
German Initial Deployment
The German player sets up second.
German Land Units
The following land units are set up in any German-controlled off-map land zones.
- Amphibious Panzer Battalions: A, B, C, D
- 7th Flieger Division (4 regiments)
- 22nd Luftlande Division (3 regiments)
- Mountain Divisions: 1, 6
- Infantry Divisions: 3, 6, 7, 8, 10, 12, 14, 15, 17, 18, 19, 24, 25, 26, 27, 28, 30, 33, 34, 35, 45, 58, 69, 78, 164, 214, 256
- Panzer Divisions: 4, 7, 8, 10
- Motorized Divisions: 20, 29, Totenkopf
- Motorized Regiments: Gross Deutschland, LSSAH
German Air Units
Air points can be set up on any German-controlled airbases within the basing limit. At least 1 Me-109 point must be set up in the Norway zone.
- Me-109: 20 points
- Me-110: 3 points
- Me-110L: 1 point
- Ju-87: 8 points
- Ju-88: 8 points
- He-111: 13 points
- Ju-52: 4 points
German Naval Units
Deploy the PB Scheer in Germany or Norway, and all of the following naval units in any German-controlled ports within the limit of the Port Capacities.
- PD: Schlesien, Schleswig Holstein
- CA: Hipper
- CL: Emden, Koln, Nurnberg
- DD: 2 points
- TB: 5 points
- MB: 3 points
- Prahm: 12 points
Historical German Air Deployment
- Pas de Calais: six He-111, four Ju-88, six Stuka, sixteen Me-109, three Me-110, and four Ju-52 points.
- Holland: two He-111 points.
- France: five He-111, four Ju-88, two Stuka, three Me-109, and one Me-110L points.
- Norway: one Me-109 point.
Historical German Ground Deployment
- Pas de Calais: 7, 24, 26, 34, and 58 Infantry Divisions; Amphibious Panzer Battalions A and C; and the 1st Mountain, 7th Flieger, and 22nd Luftlande Divisions.
- Holland: 12, 17, 30, and 35 Infantry Divisions; and Amphibious Panzer Battalions B and D.
- Norway: 69 and 214 Infantry Divisions.
- France: 6, 8, 15, 28, 45, 78, and 164 Infantry Divisions; the 4, 7, 8, and 10 Panzer Divisions; the 20, 29, and Totenkopf Motorized Divisions; the 6 Mountain Division; the LSSAH Brigade; and the GD Regiment.
- Brittany: 256 Infantry Division.
- Germany: 3, 10, 14, 18, 19, 25, 27, and 33 Infantry Divisions.
Historical German Naval Deployment
- France: 2 DD and 3 MB points.
- Pas de Calais: 8 Prahm and 2 TB points.
- Holland: 1 TB and 4 Prahm points.
- Norway: 2 Dummy Prahm units and 1 TB point.
- Germany: PB Scheer, CA Hipper, CLs Koln, Emden, and Nurnberg, and 1 TB point.
Design Note: Historically, the naval units based in Germany and Norway were to participate in Operation HERBSTREISE, an elaborate amphibious feint that was to be mounted in the central North Sea. If he does not intend to duplicate this operation, the German player may ignore the last two entries in the preceding section and deploy all of the units listed under them - except the Scheer - wherever he wants.
16.2 Battle of Britain
The scenario begins on the August #5 turn.
British Initial Deployment
The British player sets up first.
British Land Units
The setup is exactly the same as for the Operation SEALION scenario except as follows. A boldface "R" printed following a unit's setup hex indicates that it is a reserve unit.
- The 14th Foreign Legion Regiment (Free French) is deployed in London.
- The 23rd and 24th Army Tank Brigades and the 1st Armored Brigade are not included in the setup. They are, however, available to be rebuilt with Replacement Points.
- Any 5 British infantry divisions of the British player's choice are set up on their reduced-strength (1 step) sides. However, there must be at least one reduced-strength division in each of the Southern England, East Anglia, and Humber zones.
GHQ Reserve
- NZEF Division: 3123 R
Northern England Zone
- 42nd Infantry Division
British Air Units
Air points can be set up on any British airbases within the basing limit. At least 1 Spitfire point must be set up at Scapa Flow and in each of the Scotland, Northern England, and Northern Ireland zones.
- Spitfire: 29 points
- Blenheim: 9 points
- Wellington: 10 points
The value of the Spitfire Losses marker is set at 1, while the value of the Maximum Spitfires marker is set at 30.
British Naval Units
British naval units can be set up in any British naval bases within the limit of the Port Capacities, although BB and BC units cannot be set up in naval bases accessible from restricted zones.
At least three BBs or BCs, four CAs and/or CLs, and three DD points must be set up at Scapa Flow. At least two DD points must be set up at Plymouth.
- BB: Nelson, Rodney, Barham
- BC: Hood, Repulse
- CA: Norfolk, Sussex, Birmingham, Manchester, Newcastle, Berwick, Southampton, Sheffield, Glasgow, Devonshire, Australia, Fiji
- CL: Aurora, Galatea, Cardiff, Naiad, Bonaventure, Coventry
- DD: 18 points
- AP: 6 points
Force H Reinforcements
The British player receives the BB Resolution, BC Renown, and 3 DD points as reinforcements during the first British Reinforcement Phase that the German has accumulated a total of 50 or more Naval and Other Victory Points.
Operation MENACE
During each British Reinforcement Phase beginning with the August #9 turn, the British player rolls a die and adds a value equal to one-half (rounded down) of the number of Prahm points that are currently in play. If the result is 5 or less, remove one British BB, 3 CAs, 1 DD point, and the 14th Foreign Legion Regiment from the map (all ships must be undamaged).
Exception: No roll is made if the German player has already landed a unit in England by Airborne or Amphibious Assault.
All of these units, except the 14th Foreign Legion Regiment, return as reinforcements in the British Reinforcement Phase of the second turn after the German player first lands a unit in England by Airborne or Amphibious Assault.
Design Note: These units are being withdrawn to participate in Operation MENACE, the Anglo-Free French invasion of the Vichy French port of Dakar in western Africa. Historically, this operation, which involved the battleship Barham, cruisers Devonshire, Fiji and Australia, and four destroyers, failed utterly in September, 1940. The 14th Foreign Legion Regiment remained in Africa.
Historical British Air Deployment
- Place 1 Spitfire point at each of the following locations: Filton, St Eval, Middle Wallop, Northolt, Westhampnett, Kenley, West Malling, Manston, Hornchurch, North Weald, Debden, Duxford, Martlesham Heath, Coltishaw, Wittering, Kirton-in-Lindsey, Church Fenton, Scapa Flow, and the Northern Ireland zone.
- Place 2 Spitfire points at each of the following locations: Tangmere, Biggin Hill, Digby, and the Northern England and Scotland zones.
- Place 1 Blenheim point at each of the following locations: Roborough, Gosport, Detling, Bircham Newton, Wyton, Watton, Wattisham, and the Northern England and Scotland zones.
- Place 1 Wellington point at each of the following locations: Driffield, Linton-on-Ouse, Doncaster, Scampton, Waddington, Marham, Newmarket, Honington, Bicester, and Upper Heyford.
German Initial Deployment
The German player sets up second.
German Land Units
The German player has the exact same land units available as in the Operation Sealion scenario, and deploys them in exactly the same way.
German Air Units
Air points can be set up on any German-controlled airbases within the basing limit. At least 1 Me-109, 2 He-111, 1 Me-110L, and 2 Ju-88 points must be set up in Norway.
- Me-109: 30 points
- Me-110: 7 points
- Me-110L: 1 point
- Ju-87: 8 points
- Ju-88: 16 points
- He-111: 24 points
- Ju-52: 4 points
German Naval Units
Deploy all of the following naval units in any German-controlled port within the limit of the Port Capacities.
- PD: Schlesien, Schleswig Holstein
- CL: Emden, Koln, Nurnberg
- DD: 2 points
- TB: 5 points
Scenario Options
- The German player receives all Prahm, MB, and AP reinforcements 6 turns ahead of schedule. Thus, the 2 Prahm and 1 MB points that he would normally receive on the September #1 turn arrive on August #5 instead.
- The German player does not receive the Prahm, MB, and AP points printed on the German Reinforcement and Replacement Schedule. Instead, he has 12 Prahm and 3 MB points available at the beginning of the scenario (August #5), and receives 2 Prahm points as reinforcements on August #6, and 2 Prahm and 4 AP points on August #8.
Design Note: Historically, the Germans did not begin planning to invade England until July, 1940. Up until that point, Hitler had been convinced that Britain was on the verge of suing for peace. Thus, by the time that the Germans finally began invasion preparations, they had lost more than a month of precious time. The first optional scenario assumes that the Germans had begun planning for Operation SEALION immediately after France surrendered on June 22, 1940. The second assumes that planning had been started at the beginning of June.
Historical German Air Deployment
- Pas de Calais: eight He-111, four Ju-88, two Stuka, seventeen Me-109, and five Me-110 points.
- Holland: four He-111 points.
- France: ten He-111, ten Ju-88, six Stuka, twelve Me-109, and two Me-110 points.
- Norway: two He-111, two Ju-88, one Me-110L, and one Me-109 point.
- Germany: four Ju-52 points.
Historical German Ground Deployment
It is identical to that listed in the Operation SEALION scenario.
16.3 The July Invasion
This scenario begins on the July #3 turn.
British Initial Deployment
The British player sets up first.
British Land Units
The setup is exactly the same as for the Operation Sealion Scenario except as follows. A boldface "R" printed following a unit's setup hex indicates that it is a reserve unit.
- The 14th Foreign Legion Regiment is deployed in London.
- The 21st, 23rd, and 24th Army Tank Brigades and the 1st Armored Brigade are not included in the setup. They are, however, available to be rebuilt with armor and army tank Replacement Points.
- The 29th and 31st Brigade Groups are not included in the setup. They arrive during the scenario as reinforcements.
- The 1st Armored, 4th, 5th, 42nd, 44th, 45th, 46th, 48th, 50th, 55th, NZEF, 1st London and 2nd London Divisions are set up on their reduced-strength (1 step) sides.
Southern Command
- AIF Division: 2624 R
GHQ Reserve
- NZEF Division: 3123 R
Northern England Zone
- 42nd Infantry Division
British Air Units
Air points can be set up on any British airbases within the basing limit. At least 1 Spitfire point must be set up at Scapa Flow and in each of the Scotland, Northern England, and Northern Ireland zones.
- Spitfire: 27 points
- Blenheim: 9 points
- Wellington: 10 points
The value of the Spitfire Losses marker is set at 3, while the value of the Maximum Spitfires marker is set at 29.
British Naval Units
British naval units can be set up in any British naval bases within the limit of the Port Capacities, although BB and BC units cannot be set up in naval bases accessible from restricted zones.
At least four BBs or BCs, three CAs and/or CLs, and three DD points must be set up at Scapa Flow. At least two DD points must be set up at Plymouth.
- BB: Nelson, Rodney, Barham
- BC: Renown, Repulse
- CA: Norfolk, Sussex, Birmingham, Manchester, Newcastle, Southampton, Sheffield, York
- CL: Cardiff, Coventry, Galatea
- DD: 17 points
- AP: 6 points
Force H Reinforcements
The British player receives the BBs Valiant and Resolution, BC Hood, CLs Arethusa and Enterprise, and 2 DD points as reinforcements during the first British Reinforcement Phase that the German has accumulated a total of 50 or more Naval and Other Victory Points.
Historical British Naval Deployment
- Scapa Flow: BBs Nelson and Rodney; BCs Repulse and Renown; CAs Sussex, Norfolk and Southampton; and 3 DD points.
- Scotland (East): CAs Birmingham and York; CLA Coventry; and 4 DD points.
- Liverpool (2108): BB Barham.
- Hull (3205): CAs Newcastle, Manchester and Sheffield; and 2 DD points.
- Harwich (4119): 3 DD points.
- Sheerness (3922): CL Cardiff and 1 DD point.
- Dover (4223): 2 DD points.
- Portsmouth (3026): 2 DD points.
- Plymouth (1429): CL Galatea.
Historical British Air Deployment
The historical British air deployment is identical to that given in the Battle of Britain scenario in all respects except as noted below:
- No Spitfire points are placed at West Malling or Westhampnett.
- Only 1 Spitfire point is placed at Biggin Hill.
- 1 Spitfire point is placed at Hawkinge.
German Initial Deployment
The German player sets up second.
German Land Units
The German player has the exact same land units available as in the Operation Sealion scenario, and deploys them in exactly the same way.
Exception: Amphibious Panzer Battalions A, C and D; and the Sturm Airborne Infantry Regiment (of the 7th Flieger Division) are not included in the setup. They are not available in this scenario.
German Air Units
Air points can be set up on any German-controlled airbases within the basing limit. At least 1 Me-109, 2 He-111, 1 Me-110L, and 2 Ju-88 points must be set up in Norway.
- Me-109: 25 points
- Me-110: 5 points
- Me-110L: 1 point
- Ju-87: 6 points
- Ju-88: 12 points
- He-111: 18 points
- Ju-52: 3 points
German Naval Units
Deploy all of the following naval units in any German-controlled port within the limit of the Port Capacities.
- PD: Schlesien, Schleswig Holstein
- CL: Emden, Koln, Nurnberg
- DD: 2 points
- TB: 5 points
- Prahm: 4 points
German Naval Reinforcements
The German player does not receive the Prahm, MB, and AP points printed on the German Reinforcement and Replacement Schedule. Instead, he receives Prahm and AP reinforcements as listed below.
- 2 Prahm points each on turns July #6 through August #1.
- 4 AP points on July #7.
"Historical" German Air Deployment
- Pas de Calais: six He-111, three Ju-88, two Stuka, fourteen Me-109, and three Me-110 points in the Pas de Calais zone.
- Holland: two He-111 points.
- France: eight He-111, seven Ju-88, four Stuka, ten Me-109, and two Me-110 points.
- Norway: two He-111, two Ju-88, one Me-110L, and one Me-109 points.
- Germany: three Ju-52 points.
"Historical" German Naval Deployment
All German naval units are deployed in the Pas de Calais zone.
"Historical" German Ground Deployment
Besides the missing units noted above, the German ground deployment is identical to that listed in the Operation SEALION scenario except that the 6th Mountain Division and all units in Holland are placed in the Pas de Calais zone instead.
Design Note: This scenario somewhat unrealistically assumes that the Germans began planning to invade England even before the Royal Navy started evacuating the BEF from Dunkirk. It is based upon Kenneth Macksey's book Invasion: The German Invasion of England, July 1940, which argues that the Nazis could have conquered England with relative ease if the invasion had been launched while the British Army was still crippled by its equipment losses in France and Belgium. As you will see as you play this scenario, Macksey's point about the weakness of British land forces is well taken, but he does not give sufficient consideration to how much a lack of shipping would have hamstrung a mid-July invasion.
16.4 Historical Variants
If desired, the players may agree to play any scenario using historical variants. These are fully explained in the rules printed on the Historical Variant player-aid card.
Errata (GMT Games, July 2, 1997)
Source: the official GMT Games Britain Stands Alone errata page. Items marked with an asterisk in the original are additions to the previous version of the errata, first issued in December 1994.
COUNTERS (Clarification): German airborne regiments are always one-step units, even when on their 2-2-4 sides.
OFF-MAP DISPLAY (Clarification): Scapa Flow is a port on both the Cape Wrath and Shetlands sea zones.
8.4 Bombing Combat
(Clarification): There is no limit to the number of times that a single unit, installation or land unit can be bombed in a single turn. Multiple missions can be launched against any target in the same turn.
(Addition): Neither side may bomb the other's off-map units or installations.
8.8 Spitfire Pilot Losses
(Clarification): The maximum number of Spitfire points in play can only go down; it can never go up during the course of the game.
(Correction): Ignore the reference to "Hurricane points" in the Design Note; during the course of development, Hawker Hurricanes were combined with Spitfires to produce a single type of British single-engined fighter point.
9.5 Escorts
(Addition): German motorboats do not need to be escorted.
13.2 Auxiliary Units and Brandenburgers
(Correction): The die roll modifiers for resolving auxiliary unit attacks given in the rules are correct; ignore those on the Auxiliary Unit and Brandenburger Table.
(Play Suggestion): There is no "x10" counter for British auxiliary points. Players should keep the one marker on the "x1" line of the Record Track, keeping it inverted when there are ten to fifteen points are available. The number of points available is thus the number occupied by the marker, plus ten. When the British player is down to nine auxiliary points, he turns the marker right side up for the rest of the game.
13.3 British National Leaders
(Clarification): Winston Churchill's leg movement allowance is 5, and his motorized movement allowance is 8. He cannot move in the motorized movement phase.
15.1 Victory Point Schedule
(Clarification): German "Other Victory Points" can be driven below zero by British strategic bombing.
Appendix: Charts and Tables (from the Charts booklet and the map margins)
Source: the official GMT Games Britain Stands Alone Charts booklet (scanned). The tables below are transcribed from it. Bold italic entries in the printed Combat Results Table are shown as bold italic here. The map-art pages of the booklet (map sections, off-map display with detection values, port and airbase capacities, tracks) are not rules text and are not transcribed. In this scan the early (July-August) rows of the German Reinforcement and Replacement Schedule printed on the map margin fall in a gap between scanned pages and could not be read; only the rows legible in the scan are given below.
Terrain Effects Chart
| Terrain Type | Leg Cost | Motorized Cost | Combat Effects | Special Effects |
|---|---|---|---|---|
| Clear | 1 | 1 | Airborne Assaults are permitted | |
| Forest | 1 | 2 | Reduce Combat Odds by 1 | +1 to Troop Bombing die rolls |
| Rough | 1 | 2 | Reduce Combat Odds by 1 | |
| Wetlands | 2 | 2 | No Armor Superiority (see 6.4) when attacking into or out of. No overruns. | |
| Reference City | 1 | 1 |
Land Combat Results Table
Rows are the die roll; columns are the Combat Odds Ratio.
| Die Roll | 1-4 | 1-3 | 1-2 | 1-1 | 2-1 | 3-1 | 4-1 | 5-1 | 6-1 | 7-1 | 8-1 | 9-1 |
|---|---|---|---|---|---|---|---|---|---|---|---|---|
| 0-1 | A2/D1 | A1/D1 | A1/D1 | D1 | D2R | D3R | D3R | D3R | A1/De | De | De | De |
Explanation of combat results:
- D# - Defending Force Retreats that number of hexes and/or loses that number of steps.
- A# - Attacking Force Retreats that number of hexes and/or loses that number of steps.
- De - All defending units are eliminated.
- Ae - All attacking units are eliminated.
- R - At least one point of the combat result must be applied as a Retreat.
- * - If the attacking force includes a committed British armor or infantry tank, it must lose a step.
If a result is printed in bold italic type, at least one point of the combat result must be applied as a step loss.
Auxiliary Unit and Brandenberger Table
| Target | Success | Failure |
|---|---|---|
| Airfield | 0-2 | 3-9 |
| Radar Station | 0-2 | 3-9 |
| Port | 0-1 | 2-9 |
| Railroad | 0-4 | 5-9 |
| Land Unit | 0-2 | 3-9 |
Die Roll Modifiers (not cumulative):
- +1 If target hex in enemy ZOC.
- +1 If target is located in the same hex as an enemy unit.
These modifiers do not apply if the target of the attack is itself a land unit. (See also the errata for 13.2.)
Demolition Table
| Die Roll | Port | Airbase |
|---|---|---|
| less than 0 | 0 | 0 |
| 0-1 | 1 | 0 |
| 2-3 | 2 | 1 |
| 4-5 | 3 | 2 |
| 6-7 | 4 | 3 |
| 8-9 | 5 | 3 |
The result is the number of hits inflicted on the installation.
Die Roll Modifiers (cumulative):
- -1 If Brandenberger point expended.
- -1 Airborne Assault in progress.
- +2 Port capacity is 6 or higher.
Weather Table
| Die Roll | Weather |
|---|---|
| 0-4 | Fair |
| 5-6 | Cloudy |
| 7-8 | Foul |
| 9+ | Storms |
Die Roll Modifiers:
- -1 If last turn Fair
- -1 If before September turn #6
- +1 If last turn Stormy
- +1 If October turns #1-5
- +2 If October turn #6 or later
Naval Supply Table
| Port Capacity in the Zone | Naval Supply Multiplier |
|---|---|
| 1-3 | 1 |
| 4-5 | 2 |
| 6-7 | 3 |
| 8-9 | 4 |
| 10+ | 5 |
Naval Combat Table
Cross-reference the firing unit's Naval Attack Factor (rows) with the target unit's Naval Defense Factor (columns) in order to determine the Hit Number. If the Hit Number is printed in bold italic type, the attacking unit may not fire unless it has Torpedoes (see 9.2). Roll the die and add the Weather and Withdrawal modifiers (if necessary); if the result is less than or equal to the Hit Number, 1 hit is inflicted on the target naval unit (see Damage, 11.2).
Modifiers: +2 if either side is Withdrawing; +2 Stormy weather.
| Attack Factor \ Defense Factor | 0 | 1 | 2 | 3 | 4 | 5 | 6 | 7 | 8 |
|---|---|---|---|---|---|---|---|---|---|
| 0 | 3 | 2 | 1 | 0 | 0 | 0 | 0 | 0 | 0 |
| 1 | 3 | 3 | 2 | 1 |
Naval Battle Round track: rounds 1 to 6; Special Interception during Naval Combat is possible after the shaded (even-numbered) rounds.
Air Combat Table
Cross-reference the firing unit's Air Combat Factor (rows) with the target unit's Air Combat Factor (columns) in order to determine the Hit Number. Then roll the die and add the Weather modifier (if any). If the result is less than or equal to the Hit Number, 1 air point is eliminated from the target unit.
Weather Modifiers: +1 Cloudy Weather; +2 Foul Weather.
| Firing Factor \ Target Factor | 0 | 1 | 2 | 3 | 4 | 5 |
|---|---|---|---|---|---|---|
| 1 | 2 | 2 | 2 | 2 | 1 | 0 |
| 2 | 3 | 3 | 3 | 2 | 1 | 0 |
| 3 | 4 | 4 | 3 | 3 | 2 | 1 |
| 4 | 5 | 4 | 4 |
British Naval Release Table
Cross-reference the Naval Victory Point total (columns) with the Other Victory Point total (rows) and roll the die. If the result is less than or equal to the number on the left, all BBs and BCs are released; if it is less than or equal to the middle number, all CAs are released; and if it is less than or equal to the right-hand number, all CLs, CLAs, and DDs are released.
| Other VP Total \ Naval VP Total | 0-6 | 7-12 | 13-18 | 19-24 | 25-35 | 36+ |
|---|---|---|---|---|---|---|
| 0-5 | 2/8/9 | 1/6/9 | 0/4/7 | -/2/5 | -/1/3 | -/0/1 |
| 5-10 | 2/8/9 | 2/8/9 | 1/6/9 | 0/4/7 | -/2/5 | -/1/3 |
| 11-15 | 4/8/9 | 2/8/9 | 2/8/9 | 1/6/9 | 0/4/7 | -/1/3 |
| 16-25 | 6/8/9 | 4/8/9 |
British Reinforcement and Replacement Schedule
| Turn | Reinforcements / Replacements |
|---|---|
| July #6 | CA Devonshire |
| July #7 | CA Australia, 4 x Leg RP |
| July #8 | CA Glasgow, CLA Coventry |
| July #9 | CA Berwick, Army Tank RP; 29th and 31st Brigade Groups |
| July #10 | CL Aurora, Leg RP |
| August #1 | CLA Bonaventure |
| August #3 | BC Hood, CA Fiji, Leg RP, Armor RP |
| August #5 | CLA Naiad, Leg RP |
| August #7 | Army Tank RP, Leg RP |
| August #8 | CA Nigeria |
| August #9 | 2 x Leg RP |
German Reinforcement and Replacement Schedule (legible rows only)
| Turn | Reinforcements |
|---|---|
| Sept. #1 | 2 x Prahm points, MB point |
| Sept. #2 | 2 x Prahm points |
| Sept. #3 | 2 x Prahm points, MB point |
| Sept. #4 | CA Hipper, 2 x Prahm points |
| Sept. #5 | PB Scheer, 2 x Prahm points, MB point |
| Sept. #6 | 2 x Prahm points |
| Sept. #8 | 4 x AP points, 2 x Prahm points |
| Oct. #1 | CA Prinz Eugen, DD point |
| Oct. #6 | 2 x BR.20 points, 2 x CR.42 points |
Historical Variants
At the beginning of a scenario, the players decide whether or not they want to play with variants and how many variants they will use. No more than 3 variant chits can be used per side per game. If variants will be used, place all 7 German variant chits in an opaque cup and all 7 British variant chits in another cup. Then each player draws the agreed number of variant chits from his cup and applies them as described below.
Keep all variant chits that are being used in the scenario being played separate from all those that are not. At the end of the scenario increase and/or decrease the German player's Other Victory Point by the values shown below. Increased Other Victory Point values are listed as "VP + #" and decreased values as "VP - #."
German Variant Chits
-
Lighter Naval Losses in Norway: Add the BC Gneisenau, CA Blucher, CL Karlsruhe, and 2 DD points to the German initial setup; and the CA Suffolk, CLA Curlew and 2 DD points to the British initial setup. VP -5
-
Prewar Amphibious Warfare Development: Replace 4 Prahm points with 4 LC points in the German initial setup. If there are no Prahms in the German initial setup, replace the first four Prahm points scheduled to arrive as reinforcements with four LC points.
-
Captured Ships Added to the Kriegsmarine: Add the CD's Thetis, Nymphe, Adler, Nordland, and 1 TB point to the German initial setup. This variant cannot be used in combination with Variant #1 and vice versa. VP -15
Design Note: The captured 1890s-vintage Norwegian coast defense ships Harald Harfage and Tordenskjold were incorporated into the Kriegsmarine as the Thetis and Nymphe in 1941. In 1943, the coast defense ships Niels Jules (1918) and Peder Skram (1910) were seized from Denmark - along with six modern torpedo boats - and commissioned as the Nordland and Adler by the Germans.
-
Newly-Commissioned Ships Rushed into Service: Add the BB Bismarck and CA Prinz Eugen to the German initial setup. This variant cannot be used in the July Invasion scenario. VP -5
-
German Torpedo Defects Resolved in 1939: Roll a die for each of the following ships; if the result is 6-8 the ship suffers a hit, if it is 9, the ship suffers a critical hit. BB Nelson, and CA's Sheffield and Southampton. VP -5
-
Drop Tanks For Me-109's: The Air Movement Allowances of all Me-109's are increased to 22 and their Naval Movement Allowances to 2.
British Variant Chits
-
French Ships in Britain Join the Free French: Add the BB's Paris and Courbet to the British initial setup.
-
French Ships in the Mediterranean Join the Free French: Add the BC's Dunkerque and Strasbourg, and 4 DD points to the British initial setup. VP +5
Note: French naval units are subject to all provisions of the Royal Navy Release Rule (see 9.5).
-
No Armor Reinforcements Sent to Egypt: The British player has 2 Armor Replacement Points available at the start of the scenario. VP +10
-
Greater Free French Recruitment: Add the 1st, 2nd, and 3rd Free French Divisions to the British initial setup. Remove the 14th Foreign Legion Regiment from the British initial setup. Only one division can be deployed per zone, and must be at least 3 hexes away from any partial-sea hex. VP +10
-
Aggressive Royal Navy Doctrine: The British player subtracts 2 from his die roll when rolling to Release his naval units during the British Naval Release Phase of each turn. VP +30
-
Arms From America: The British player has 3 Infantry Replacement Points available at the start of the game. VP +5
-
Increased Tank Production: The British player receives the 1st and 2nd Armored Division counters that have Attack Factors of 12 and Defense Factors of 9 instead of the weaker, historical versions. The 1st Armored Brigade is removed from the British player's initial deployment (It cannot be rebuilt with an Armor Replacement Point.). VP +5