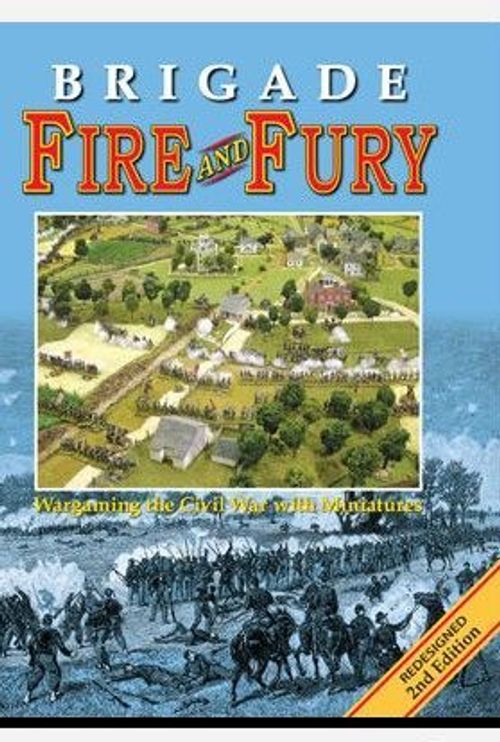
Brigade Fire and Fury: Wargaming the Civil War with Miniatures
Brigade Fire and Fury: Wargaming the Civil War with Miniatures Rulebook
Table of Contents
Table of Contents
Introduction
The ebb and flow of Civil War conflict has been recreated in Fire and Fury, an innovative game system using miniature armies to recreate battles of the American Civil War. The system, the result of five years of development, emphasizes playability without sacrificing historical accuracy. The comprehensive and easily learned rules move quickly, allowing players to refight a major battle in a single evening.
The scale of the game is grand tactical, and the basic combat unit is a brigade of infantry or cavalry. Each brigade is made up of a variable number of stands. Each stand contains a group of two to five miniature figures representing 150 to 200 troops. With less than two hundred miniature figures, a player can take command of a division or an entire corps. A game involving several players can recreate battles between opposing armies of 15,000 to 100,000 men per side. This scale allows you to refight Gettysburg, Antietam, Shiloh, and other epic battles of the war. The rules are not intended for use in small actions or skirmishes, or to recreate the details of regimental and company tactics.
Constant reference to the rule book during play should not be necessary, since all turn activity is summarized on a set of procedure tables. The first of these is the Maneuver Table. Brigade morale, battlefield effectiveness, and the fog of war have all been captured on this one table. A brigade's ability to move, rally and change formation in the midst of battle is determined by a single die roll on the Maneuver Table.
The deadliness of the weapons used during the conflict is accurately portrayed in the Musketry & Cannonade Table. Each brigade or battery may be fired upon in one combined fire consisting of all enemy units within range. This speeds up play by minimizing the number of die rolls. A unit may become disorganized and suffer casualties as a result of fire combat. A stand of figures is removed when a casualty occurs, thus eliminating complex record keeping, figure counting, and individual figure casualty markers.
Gallant assaults are resolved on the Charge Table, where victory is never guaranteed. To resolve charge combat, the opposing players each roll a decimal die. The difference between these die rolls yields a result on the table which can range from an attacker's bloody repulse to the defender being swept from the field.
It is important to make good use of your leaders' ability to command their troops. You must judge the correct moment for a leader to personally take command of a crucial charge. Players who throw their generals into the thick of combat might find them at risk on the Fallen Leader Table.
Fire and Fury, however, is much more than simply a rule book. The first chapter is entitled Mustering Your Forces, and contains information on recreating the armies of North and South. Additional information on purchasing, painting, and mounting the miniature figures on stands is also included. This chapter also describes the various markers that will be needed during the course of the game.
Guidelines to assist you in designing your own scenarios are presented in the Prepare for Battle chapter. This chapter also contains important set up information for the Gettysburg scenarios included in the book.
The rules of play are explained in the next chapter, Fighting the Battle. This chapter is divided into three major sections, corresponding to the three major phases of each player turn. In the Maneuver Phase, players learn how to move their units across the battlefield. The various formations are described, and the importance of leaders in moving and rallying troops is explained. The Musketry and Cannonade Phase contains all information necessary to resolve fire combat. Target selection, fire strength, fields of fire, and fire combat effects are all explained in this section. The last section explains the procedure for resolving the combats which take place during the Charge Phase. This section explains how to determine the attacking and defending forces, along with a description of charge combat modifiers and effects.
The next chapter is an historical description of the campaign and the three day Battle of Gettysburg. There are five separate scenarios, varying in size and playing time, that allow you to refight the battle. Three historical scenarios allow you to refight the First Day's Battle, Longstreet's attack on Little Round Top, and Pickett's Charge. Two "what if" scenarios are included that let you explore the possibilities of a continued Confederate attack on July 1st and an earlier, all-out Confederate attack on July 2nd.
The last chapter, Building Battlefield Terrain, provides a detailed description for construction of terrain. Several different methods of construction are presented, which will allow you to recreate the terrain shown throughout the book.
Mustering Your Forces
It is time to gather your forces. The stages of recruiting involve purchasing miniature figures, painting the figures, mounting them on stands and finally organizing the stands into an army.
The Figures
The rules are designed for 15mm lead figures, the most commonly used miniature wargaming scale in the country. Larger scale figures in 25 or 30 mm can be used by doubling the base size, movement rate, fire ranges, command radius and of course the playing area. The smaller scale 10mm can be used by halving the size and distances mentioned and playing on a smaller gaming area. There are many manufacturers to choose from.
Figures may be purchased painted or unpainted. In either case, the uniform theme will depend on the troops you wish to build and the battles you wish to fight. In the early years of the war, many flamboyantly uniformed units marched into battle. They were spectacular to watch but unfortunately they made excellent targets. As the war continued, these impractical uniforms faded away. The Confederate forces were especially less consistent in their uniforms. They may be painted to taste in shades of grey, butternut or homespun browns. Union soldiers were better equipped and should reflect a more regular appearance of Union blue coats with militia blue trousers.
We would recommend reading the Osprey book series for information on unique units such as the Zouave Regiments. The identity of individual regiments is lost when playing with brigade size units. Consider painting the stands of an entire brigade with a distinctive uniform for those players who wish to show the fancier side of war. One concept often used in painting is to use a subtle color scheme for each brigade to help keep the troops easily recognizable on the game table. Confederates could have a common hat, blanket roll or coat color within a brigade. Since Union uniforms used the same color schemes, blankets, backpacks or canteens could be color coded. Union Kepis may also be dotted with red, white, or blue to signify first, second or third brigades.
The Stands
The soldiers are now uniformed and ready to be mounted on stands. Stands are rectangular shaped bases cut with a mat knife from thin sheets of balsa wood, cardboard, or plastic. Metal bases may also be used. Metal bases are better for transporting figures if you line your carrying cases with magnetic strips. Once mounted, the bases should be painted in a green or ground color and coated with a textured surface material called flocking. Refer to Figure 1 for complete basing information.
Please note that if your figures are already mounted within 1/8" of the base sizes, it will not affect play.
Troop stands. Each infantry and cavalry brigade is represented by a group of troop stands. The number of stands will vary with the brigade's combat strength, with the average brigade containing 6 to 12 stands. The brigade's stands must always remain with their unit and may be arranged in various tactical formations. Stands act as the unit of measure for combat losses and are removed as a brigade suffers casualties.
The number of figures placed on each infantry stand is for visual effect only and is irrelevant to the play of the game. Although soldiers were drilled to fight shoulder to shoulder, the parade style formations tended to look more ragged in battle. Figures should be staggered in one or two ranks. Various poses may be intermixed for a more pleasing visual effect.
Cavalry are mounted much the same as infantry. You will need to have mounted stands, dismounted stands, and horseholders (see Markers) for each brigade. When dismounting a mounted unit, one out of every four stands will need to be a horseholder. Therefore, an eight stand mounted brigade would dismount into 6 combat stands and 2 horseholders. It is recommended that you build your cavalry last, since they did not play an important role in most major battles.
Brigade command stand. One troop stand of each infantry and cavalry brigade will represent the brigade's command staff. The stand should be easily recognizable and contain an officer and one or two standard bearers. A musician, such as a drummer or bugler, will add to the stand's visual effect. Union stands can carry the stars and stripes and/or the Union battle flag (an eagle on a blue field). Confederate flags were less standardized. Flags ranged from the classic stars and bars to a number of state and regimental flags. Flags can also aid playing table identification by having brigades of the same division use the same flags.
The command stand serves as an important reference in battle. It bears the adhesive label with information on the effective levels and organization details. It is positioned as the last stand on the right of a line or at the head of a column as a point of reference on the battlefield to help identify the different brigades. The command stand is always the last stand to be removed as a casualty.
Gun stand. Artillery is represented by a gun stand with a single cannon and is referred to as a battery. It is important to understand that this stand actually represents a number of guns (6-8) and is not based on the number of batteries actually
fielded by each army. The gun stand moves without using the Maneuver Chart. It uses the limbered formation to move, fires from the unlimbered formation, and has specific rules limiting the number of activities it may perform in one turn.
The gun stand consists of a single miniature cannon with 2 to 3 crew figures. A great variety of cannons were used in the war from the smoothbore Napoleon to a variety of rifled weapons. The general differences between Northern and Southern artillery are built into the combat tables. The actual artillery piece mounted on the stand is irrelevant to play. For visual effect, Union gun stands should have a larger proportion of rifled gun castings, while Confederate gun stands should have a larger proportion of smoothbores.
Leader stand. A leader stand represents either the division or corps commanders and his immediate staff.
Each division leader is a solitary mounted figure. A different leader pose for each division adds to the table's appearance. The corps commander's stand should consist of 3 figures representing the leader and his staff. Mounted or dismounted figures may be used.
The leader stand may either maneuver independently as a detached leader or with a brigade as an attached leader. Leaders may add die roll modifiers for maneuver rolls and charge combat. A stand to represent the army commander is optional. For visual effect, an army headquarters might be represented by a corps sized base with a group of officers gathered around a tent.
Optional frontages. The textbook frontages for artillery and cavalry stands have deliberately been condensed. An artillery stand should be closer to 2" wide with one gun casting. In our opinion, however, the larger bases are less visually pleasing and are difficult to use on uneven terrain. If you use 1" basing for artillery, you should leave a 1" gap between adjacent limbered batteries.
A more accurate cavalry stand should be 1-1/2" wide, with 3 mounted or dismounted figures. The smaller base sizes in the rules were given to limit the considerably greater expense in raising cavalry, since a mounted and dismounted version of each brigade will be required.
Markers
Special stands, called markers, are used to indicate changes in a brigade's or battery's status, order, or movement mode. Players should use special figures mounted on rectangular or coin size bases. Refer to Figure 2 for information on creating these markers.
Figure 1. Stand basing. (Table of stand types, number of figures, front width and stand depth. The width and depth columns are illegible in the scan; the legible figure counts follow.)
| Stand | # of figures |
|---|---|
| Infantry | 3 to 5 |
| Brigade Command | 3 to 5 with officer, standard bearer(s) |
| Dismounted Cavalry | 2 to 3 |
| Mounted Cavalry | (illegible) |
| Artillery | 1 gun, 2 to 3 crew |
| Division Leader | 1 mounted officer |
| Corps Leader | 3 with officer and staff |
Figure 2. Marker basing.
| Marker | # of figures | Front width | Stand depth |
|---|---|---|---|
| Horseholder | 1 man with 2-4 horses | 1 1/2" | 1 1/8" |
| Limber | 1 limber with 1 driver and 2 horses | 1" | 1 3/4" |
| Disorder/Silenced | 1 man casualty | 3/4" square or round base | |
| Low on Ammunition | 1 man loading for a brigade, 1 ammo chest for a battery | 3/4" square or round base | |
| Damaged Battery | Broken cannon or limber debris, with or without a slain horse or man | 3/4" square or round base | |
| Breakthrough | 1 Officer waving sword | 3/4" square or round base |
Disordered/silenced marker. Brigades thrown into disorder or batteries silenced in combat have this marker placed adjacent to their stand(s). A single prone casualty figure on a coin sized base is recommended for use. The marker is removed when the unit fulfills its rally requirements.
Low on ammunition marker. A brigade and/or artillery piece becomes low on ammunition when an unmodified "10" is rolled on the Musketry & Cannonade Table. The marker is placed adjacent to the brigade or battery to indicate its status. It is removed after the brigade/artillery stand retreats to replenish ammunition. A single figure loading a weapon or reaching into a cartridge box is recommended for a brigade.
Damaged battery marker. A battery that suffers a damaged combat effect is labeled with a damaged battery marker. It stays with the battery for the remainder of the game or until the battery is destroyed. A 3/4" base containing a wheel, slain horse, or gun wreckage is recommended.
Limber marker. When an artillery stand limbers up to move, a limber marker is placed with the gun stand. The gun stand is placed in tow behind the limber. This marker is a stand consisting of an artillery limber (a small two wheeled cart), a driver, and a two horse team. A four horse team is optional. When the battery unlimbers, the stand may be placed in close proximity for visual effect or removed from play until it is needed again. If a gun stand moves and unlimbers and thus cannot fire, this marker should be placed perpendicularly across the gun muzzle to indicate its inability to fire.
Horseholder marker. When a cavalry brigade dismounts and fights on foot, a number of its stands are converted into horseholder markers. A horse holder is converted back into a mounted cavalry stand when the brigade mounts up. A horseholder marker is a stand consisting of a single cavalry figure holding the reins of three or four horses.
Breakthrough marker. An attacking brigade that obtains a "swept from the field" or "driven back" result on the charge table is marked with a breakthrough charge marker. Any brigade with such a marker is entitled to a +1 modifier if it conducts any further charge combat that turn. A breakthrough charge marker is a stand consisting of a single figure waving a sword or flag.
Painting Miniatures
Painting miniature figures to equip a wargame army doesn't require great artistic skill. By following a few simple steps, even beginning painters, with reasonable care and moderate effort, can turn a crowd of unfinished figures into proud miniature soldiers ready for battle.
The first step is to clean and prime the figures. First, with a sharp hobby knife (such as Exacto) and a small needle file, remove any flash metal and mold lines left by the casting process. Next wash figures in a warm, soapy solution to remove any mold release agent. After figures are dry, apply a white or grey undercoat. Floquil and Testors market ready-made primers, in bottle or spray-can, that work well. This undercoat protects the metal figure from deterioration and helps other paint stick to the figure. Once the primer is dry, figures are ready to paint.
There are three basic types of paints: Artists oils, enamel hobby paints and water-based acrylics. Artists oils are readily available and give a unique luster, but dry slowly and you must mix your own colors. Enamels (such as Testors, Humbrol, or Floquil) come in a great variety of useful, pre-mixed colors and cover well, but use hazardous turpentine or di-sol for thinning. Acrylics are readily available, come in tubes or the ready-mixed type made by Polly-S or Howard Hues, and use water as a thinner. The technique below is based on acrylics, but many painters use a mixture of paint types.
Brushes are made of nylon or of natural hair, such as camel or sable. Nylon brushes cost less, but natural brushes are better quality and are more durable. Buy a selection of sizes: a 3"0", a 1"0", a 1, a 2, and a 3 or 4. Avoid the mistake of using too small a brush, use the largest brush possible for the area being painted. After use, always clean the brush in warm, soapy water and form the tip into a point.
The key to painting an army is to use an assembly line process. First paint one detail on a figure, then paint that same detail on another figure, and so on. If you are just beginning, work with 3 to 5 figures at a time. Then try putting a brigade on the assembly line.
To start, paint all flesh areas, such as head, hands, legs, etc. This starts to give each figure character, and lets you see him as a miniature soldier. Next paint the color that covers the greatest amount of the figure, usually the coat or pants. If possible, paint dark colors over lighter colors. With acrylics, by the time you are finished painting one color on the last figure on the assembly line, the first figure is dry, and you can start another color. Using this method, you'll be surprised how quickly you finish painting a unit.
As you become more practiced, you can try more advanced techniques. One is "washing". To apply a wash, take a dark color, such as black or brown, thin it until it is almost transparent, then wash it over the figure with a large brush. The dark wash will flow into the folds and creases, and give the effect of depth. To go one step further, try "dry-brushing". Lightly touch a soft #4 or #5 brush in white, khaki or tan paint. Next, stroke the brush on a piece of scrap paper to remove almost all the paint. When this is about dry, brush over the figure very softly. The almost dry paint will be picked up on the high areas of the figure. These two techniques will really bring your figures to life.
The final step is to protect the paint job. Since wargame figures are sometimes roughly handled on the field of battle (war is hell!), one or two coats of clear lacquer or clear acrylic should be either sprayed or brushed over each figure.
That's about all there is to it. Don't be afraid to experiment with new techniques or ask other painters for tips. Most painters will be flattered at your interest and willing to share their experience. With practice, you will discover your own best way.
Prepare for Battle
An outline of the important organizational details and scenario design is presented in this section. There are five scenarios provided in this book which allow you to refight the three days of Gettysburg. Future books in this series will present other major battles of the war. For those wishing to refight their favorite battles, the following guidelines are presented to aid in the creation of balanced, playable scenarios. This section also contains necessary set up information for the Gettysburg scenarios.
Game Scale
There are two scales used for distance, troop strength per stand, and number of artillery pieces per stand. Players decide which scale to use depending upon their army size and gaming table. The Gettysburg scenarios are designed on the 200 Scale.
150 Scale. 1" of terrain equals about 45 yards, 1 stand of infantry or cavalry equals about 150 men, and 1 stand of artillery equals 6 guns.
200 Scale. 1" of terrain equals about 60 yards, 1 stand of infantry or cavalry equals about 200 men, and 1 stand of artillery equals 8 guns.
One game turn simulates a half hour of battle in all scales.
The Order of Battle
The next order of business is the same problem faced by any army commander. How do I organize this mob into a fighting force? It is recommended that you select the year of battle and then select an army as a model. This text uses 1863 and the army organization found at Gettysburg.
The various stands are organized according to an Order of Battle. The Order of Battle is the organization of an army at the time the battle was fought. A number of troop stands and one command stand are grouped to form a brigade. From 2 to 5 brigades and 1 division leader stand comprise a division. Each corps leader stand commands 2 or 3 divisions. From 2 to 6 batteries (gun stands) are distributed to each corps or assigned directly to a division. The Union army also has an artillery reserve which gives the army commander the ability to assign batteries to individual commanders when needed.
One of the most flexible features of the game system is the removal of complete stands as casualties. It is not necessary to worry about remounting your figures from battle to battle and year to year. All stands are equal and act as a vast replacement pool. The stands will supply changing brigade strengths from battle to battle and year to year. If you want to keep a large inventory of different brigades, all you really need is a supply of different command stands labeled for those brigades. It is recommended that a player build 10-12 brigades per side to supply a minimum two player game.
It is very important to create a master written Order of Battle for your permanent record. You may use the Gettysburg order as a guide. You can thus build a reference guide to the different army organizations by year and theater. Future volumes will cover the other major battles and we hope to provide an order of battle for most major battles of the war. The selection of Gettysburg is an excellent starting point for your army and can easily be adapted to non-historic scenarios. Recommended Order of Battle reference sources are The Official Records of the Civil War and Battles and Leaders of The Civil War.
The actual organizational procedure is quite simple. Players should select a corps size command for the Union and a division size command for the Confederates as their basic forces. Determine the manpower of the parent force (Union corps or CSA division). Divide that strength total by either the 150 or 200 (men per stand) scale to determine the total number of stands for the command. This number of stands is the guide used to round off the brigade strengths. It is important that the total number of stands of a corps or division be as close as possible to its battlefield strength, rather than an exact count for each brigade. You must deduct one stand from the total for each battery assigned to the division or corps, to represent the men assigned to artillery crews. Next, find the strength for each brigade and divide by the scenario scale (150 or 200), rounding down. Compare the total number of stands in each brigade against the corps and division total and add any additional stands to the larger brigades. Thus if a CSA division should have 40 stands, and your brigade count is 38 stands, add one stand each to the two largest brigades.
EXAMPLE: The historical battlefield strength of Pickett's Infantry Division at Gettysburg was 5,473 men and 18 guns. 5,473 divided by the 200 Scale yields 27 stands. The 18 guns divided by 8 (200 Scale) per gun stand equals 2 gun stands. The equivalent of 2 stands is then deducted for the artillery crews leaving 25 troop stands of infantry. The strengths of Pickett's three brigades were Armistead 1950, Kemper 1634, and Garnett 1459. The troop stands are distributed proportionately 10, 8, and 7 stands. Pickett's Division in miniature would be as follows:
- Pickett—1 division leader stand
- Armistead's Brigade—9 troop stands and 1 brigade command stand
- Kemper's Brigade—7 troop stands and 1 brigade command stand
- Garnett's Brigade—4 troop stands and 1 brigade command stand
- Division Artillery—2 gun stands (batteries)
Brigade Effectiveness
Each cavalry and infantry brigade has three effectiveness levels: fresh, worn, and spent. A fresh brigade represents troops newly committed to battle at full battlefield strength. The unit's effectiveness level will drop to worn, and then to spent as stands are removed to signify mounting losses from combat.
The number of stands that a unit must lose to lower its effectiveness level from fresh to worn and then to spent is determined before the battle begins using the tables below. The scenario designer must first consider the relative troop ratings: crack, veteran, or green, found on the Brigade Effectiveness Table, displayed in Figure 3. When creating an order of battle the scenario designer assigns each brigade a battlefield strength (total number of stands) which is scaled to the actual strengths of a brigade in an historical battle or assigned for play balance in a fictitious scenario. By cross-indexing the brigade's strength with the appropriate troop rating, the unit's fresh, worn, and spent levels are determined. In some scenarios a player may lower a brigade's rating to represent a unit that force marched to the battlefield, or perhaps one that suffered heavy losses from the previous day's fighting. Please note that the rating system applies to infantry and cavalry brigades only. There are no fresh, worn, and spent levels for batteries. The differences between Union and Confederate artillery are built into the Range and Fire Point Chart.
A brigade's current level of effectiveness is expressed as a die roll modifier on the Maneuver and Charge Combat Tables. A fresh unit adds a +2 modifier to the die result when rolling on either table. Worn troops have no modifier. Spent troops give a -2 modifier to the die result.
The brigade effectiveness level remains constant throughout a player turn. If the brigade loses stands for any reason in any one player turn, the effectiveness level is not reduced in that player turn. The lower level will begin in the very next player turn.
EXAMPLE: An 8 stand Union brigade begins the Confederate Turn "fresh" (8/7/5). It is charged by a 9 stand Confederate brigade which is also "fresh" (10/8/5). During fire combat, the Union brigade loses two stands reducing it to 6 stands and the Confederate brigade loses one stand and has 8 stands remaining. Both brigades would be counted as fresh for the charge combat because they both began the Confederate Turn as fresh brigades. In the melee that follows, each brigade loses another stand. It is now the beginning of the Union Turn. The Union Brigade now has a strength of 5 and is rated spent. The Confederate Brigade now has a strength of 7 and is rated worn.
Figure 3. Brigade Effectiveness Table. (Table with columns Crack / Veteran / Green, listing fresh/worn/spent stand counts per brigade strength, for strengths of about 2 through 18+ stands. The numbers are illegible in the scan and could not be transcribed; entries are written as "fresh/worn/spent", e.g. "8/7/5", "10/8/5" as in the example above.)
Exceptional Leaders
The superior abilities of certain division, corps, and brigade commanders are recognized by rating these deserving commanders as exceptional. The process of rating leaders is very subjective, and is one of the most difficult tasks of scenario design. Leaders varied in their performance from battle to battle, and as they progressed in rank. For example, the A.P. Hill rated exceptional at the Battle of Antietam, was not exceptional in game terms at the Battle of Gettysburg. A good rule of thumb is to limit exceptional leaders and brigade commanders to perhaps 10% of the army's total. To determine what leaders, if any, will be rated exceptional, the scenario designer is advised to refer to several books and/or historical board games dealing with the battle. A leader's rating can be determined by how well his command performed historically during the battle.
Exceptional corps and division leaders increase the value of their die result modifier by one additional point when rolling on the Maneuver Table. Brigade commanders are irrelevant to the play of the game unless they are rated exceptional. Exceptional brigade commanders add one to the die result when rolling on either the Maneuver Table or Charge Table.
Exceptional leaders that were killed, wounded, or captured are removed from play for the duration of the battle. A replacement leader can never be rated as an exceptional leader. The only brigade commanders that may become casualties are the exceptional brigade commanders. If the exceptional brigade commander becomes a casualty, the brigade simply loses the exceptional rating for the balance of the game.
Labeling
A labeling system is used to track the chain of command on the battlefield, identify brigades and leaders, and to provide an easy reference to a brigade's effectiveness level. Before beginning a battle, a label is prepared for each brigade command stand, gun stand, and leader. A 3/4" by 1/2" adhesive label is best for this purpose. The label is simply placed on the bottom of the command stand.
The information required to prepare the labels for the Battle of Gettysburg is provided in the historical Order of Battle on pages 63 and 64. Each label contains specific information as described in this section.
Brigade command stand label. This will contain the division leader's name, the brigade's name, the brigade's effectiveness levels and, if an exceptional leader, the letter "E".
Battery label. This will state the division or corps to which the battery is assigned. This plays an important role in the gun's ability to unlimber.
Division or corps leaders label. This will contain the corps or division ID, the leader's name and, if exceptional, the letter "E".
Figure 4. Labeling for a corps leader, division leader, brigade command stand, and battery. Examples shown: Corps leader label — "I Corps / Longstreet / E" (Corps / Corps leader / "E" = rated exceptional); Division leader label — "Longstreet / Hood / E" (Corps leader / Division leader / "E" = rated exceptional); Brigade command label — "Hood / Robertson / E 3/6/4" (Division leader / Brigade name / Brigade effectiveness rating, and "E" if brigade commander is rated exceptional); Battery label — "Hood / Battery #2" (Corps or division leader / Battery #).
The Battlefield
The playing area should be a steady waist high table. A comfortable playing size is 6' x 8' for two to four players. If more players are participating, expand the length of the playing area. Always try to keep the width about 5 to 6 feet for convenience of reach.
The terrain for non-historical battles should reflect that of famous battlefields. Cornfields, wheatfields, orchards, and stone walls were found on many battlefields. The key consideration is to ensure that the playing area does not hinder game play.
Whether a battle is historical or fictional, keep your battlefield simple. Terrain features that should be set out are those that affect movement and/or combat. Major roads, towns, dense woods, broken ground, sunken roads, stone walls and streams are good examples. Hills and elevation variations should be easily visible to the eye and clearly marked. Where hills or ridge lines affect play or block line-of-sight, use small stones or lichen to mark the crest. Additional terrain may be added for visual effect only. Rail fences and individual buildings, such as farms, are good examples. Lichen, small stones, or individual trees may be added for color.
To determine which terrain features played a major role, you should refer to accounts of the selected battle. Sources to be consulted for information on the terrain of a particular battlefield include: Battles and Leaders of the Civil War, The Official Records of the Civil War, and The West Point Atlas of the American Wars. A detailed guide to the building of generic battlefield terrain will be found later in this book.
Troop Placement
The last step is the placing of your forces on the table. The status of a unit in the game will be one of the following: activated units, reserve units and off board reinforcements. The status of each unit should be indicated in all scenario setups.
Activated units are those that are committed to battle and ready for the player to move. It is suggested that scenarios begin with these troops within two to three moves of each other to maximize your battle time. Battles and Leaders of the Civil War and The Official Records of the Civil War are good sources for troop commitment times.
Reserve units are those that begin a game on the playing table but may not be moved until they are committed to battle. Reasons for a unit to be in reserve are its distance from the battle, a commander's ability to commit troops to battle, lack of command coordination, or simply play balance of a scenario. Good historic examples of reserve status are the Union V Corps on the second day of Gettysburg and the Union forces encamped at Shiloh.
Reinforcements are off table units that enter at a designated time and place. A good example are the Confederate forces arriving on the First Day of Gettysburg. It is very important to properly determine the turn and place of arrival for play balance. The best way to determine the time is to count the distance backwards from the historical time of contact with the enemy to the arrival point. This distance is then divided by the unit's movement rate to determine how many turns it will take to arrive at the designated point. You now can determine the unit's historical appearance on the gaming table.
As the creator of a scenario, you may choose to randomize the historical appearance time of a unit. Players are usually too familiar with the historical times of arrival at Gettysburg. One way to avoid this is to appoint a referee to oversee a secret die roll for each reinforcement that will determine whether the historical times of arrival are to be varied. This will change the historical flow of the battle but will present the players with a very interesting scenario and will help to recreate the fog of war. To randomize arrival times use a 10 sided die and the following table:
| Die roll | Result |
|---|---|
| 1 | 3 turns late |
| 2 | 2 turns late |
| 3, 4 | 1 turn late |
| 5, 6, 7 | on time |
| 8, 9 | 1 turn early |
| 10 | 2 turns early |
This table may be used with any battle, historical or fictional.
Playing Time
If you are designing your own scenario you should remember to plan the game to fit the amount of time you have to play. The intention of the design is to provide an easy to learn fast playing system. It will take an average of 20-40 minutes of playing time to play the historical half hour game turn. This will vary depending on the number of players and brigades. A large multi-player game such as Gettysburg may take as long as an hour of play per game turn. A battle involving 2 or 3 experienced players per side, each commanding a Union corps or Confederate division, should take less than 30 minutes per game turn.
Length of a Battle
Most scenarios do not start at dawn and end at dusk. In determining the time the battle begins and which side moves first, the scenario designer should take into consideration the opposing armies deployments, the tactical situations, and objectives of the attack. It is suggested that whichever side is the attacker should move first.
A good example of variable scenario starting times is the second day at Gettysburg. Longstreet's I Corps launched its attack sometime after 4:00 in the afternoon after losing several hours counter-marching to avoid being observed. To play a historical scenario, the first half hour game turn could start with the 4:00 or 4:30 P.M. Confederate Player Turn. A "what if" scenario could be created by allowing the Confederates to begin their attack at 1:00 P.M. as planned.
The number of game turns in a battle will also depend upon the time of day the battle begins. Battles were rarely fought after nightfall. Armies would use the night either to withdraw, rest, or redeploy. In addition, command control problems increased greatly in the dark. Refer to Figure 5 to determine the amount of daylight available for battles.
The referee or one specified player should be the time keeper. He should record the completion of each player turn and game turn. He should also have the responsibility of keeping the game moving at a good pace. The game is more enjoyable when players have a time limit per Maneuver Phase, rather than an unlimited amount of time in which to plan each inch of movement.
Figure 5. Dawn to Dusk Tables. (A table of dawn and dusk times by month, January to December, in four-digit military time. The times are illegible in the scan and are not transcribed.)
Winning the Battle
The battle is won by the side that accumulates the most victory points. Victory points are totaled at the completion of the last game turn of each scenario. After both sides total their points, the level of victory is determined. The scenario designer must determine what constitutes a decisive victory, tactical victory, or draw. The victory conditions for the five scenarios presented in this book illustrate several approaches to this question.
Victory points are awarded for reducing the effectiveness level of enemy brigades, eliminating enemy gun stands, enemy leader casualties, and control of geographical objectives. It is recommended that each player record on a master roster his brigades' effectiveness levels as the game progresses to speed up the point count. The victory point (VP) schedule for casualty points is detailed in Figure 6.
The referee should determine what features are key geographic objectives before starting a battle. The terrain should have a role to play in the outcome of the battle. Recommended terrain types are hilltops, key ridge lines, river crossings, key road junctions or exits, supply lines, a town, or field fortifications. Examples of major terrain at Gettysburg are Little Round Top, Cemetery Hill, and Culp's Hill.
Victory points are assigned to terrain objectives by the scenario designer. The number of points awarded should be relatively small. The First and Second Day scenarios for the Battle of Gettysburg listed elsewhere in this book illustrate this point.
Figure 6. Casualty Points Chart. (Scan is partly illegible; entries read as best as possible:)
| VP | Each |
|---|---|
| 1 VP | worn enemy brigade |
| 1 VP | wrecked or captured gun stand |
| 1 VP | enemy division leader or exceptional brigade commander killed, wounded or captured |
| 2 VP | spent enemy brigade |
| 2 VP | corps leader or exceptional division leader killed, wounded or captured |
| 4 VP | enemy brigade that [illegible: "quits the field"?] or is eliminated |
| 4 VP | exceptional corps leader killed, wounded or captured (partly illegible) |
Game Referee
If possible, one person should be designated the referee to oversee all game activities and clarify any rules questions that arise. Since the decision of the referee is final, he should be very familiar with the rules. The referee may also be a participant in the game, but neutrality is guaranteed if he does not actually play. If a unique situation arises that is not covered by the rules and a referee is not present, use common sense to resolve the situation.
Fighting the Battle
This section explains in detail all activities allowed in the three phases of each player turn. Constant reference to the rule book should not be necessary once players have become familiar with the rules.
Playing Sequence
The wargame battle is fought in segments of simulated time. Each half-hour segment is represented by a single game turn. Each half-hour game turn is divided into an alternating Union Player Turn and a Confederate Player Turn.
Each Union and Confederate turn consists of three phases that must be played in the sequence outlined on page 18. A phase must be completed before proceeding to the next phase. A player turn ends after all three phases have been played.
After completing both player turns, a game turn is completed. The designated time keeper marks off another completed half-hour of battle. Players then begin the next half-hour game turn.
Union Player Turn
Maneuver (1st) Phase. The Union players maneuver their brigades, batteries and leaders.
- Replace fallen leaders, attach and detach leaders
- Move brigades and batteries
- Move detached leaders
Musketry & Cannonade (2nd) Phase. The Confederate player resolves his defensive fire combat and applies all combat effects. The Union player then resolves his offensive fire combat and applies all combat effects.
Charge (3rd) Phase. The Union and Confederate players simultaneously resolve combat for all charges made during the maneuver phase and breakthrough. All combat effects are simultaneously applied at the resolution of combat.
Confederate Player Turn
Maneuver (1st) Phase. The Confederate players maneuver their brigades, batteries and leaders.
- Replace fallen leaders, attach and detach leaders
- Move brigades and batteries
- Move detached leaders
Musketry & Cannonade (2nd) Phase. The Union player resolves his defensive fire combat and applies all combat effects. The Confederate player then resolves his offensive fire combat and applies all combat effects.
Charge (3rd) Phase. The Confederate and Union players simultaneously resolve combat for all charges made during the maneuver phase and breakthrough. All combat effects are simultaneously applied at the resolution of combat.
Tables & Charts
All information necessary to play the game is clearly displayed on a separate Tables & Charts Card provided with the game. Players will usually find it necessary to use one or more tables and charts during each phase of a turn. How to read and use each table and chart is explained within each rules section for the phase in which they apply. The tables and charts are as follows:
Playing Sequence Chart. Provides an outline for playing a half-hour of battle.
Maneuver Table. Provides the information necessary for moving units, changing formation, or removing disorder markers.
Movement Rates Chart. Provides information on the distances units and leaders may move; and terrain effects upon movement.
Musketry & Cannonade Table. Provides the information necessary to resolve each fire combat.
Range & Fire Points Chart. Used in conjunction with the Musketry and Cannonade table, this chart provides information on the relative effectiveness of weapons used in fire combat.
Fallen Leader Table. Used in conjunction with the Musketry & Cannonade table, this table is used to determine if a leader attached to a unit has become a casualty during fire combat.
Charge Table. Provides the information necessary to resolve each charge combat.
Die Roll Procedures
In order to play the game, players must have one or more ten-sided dice, also called decimal dice, which can be purchased in a toy or hobby shop. Multi-player games will proceed more quickly if each player has his own die to roll. When a "0" is rolled it is read as a "10" result. The dice should be rolled on a hard, flat surface, preferably in a shallow box or tray within easy reach. This will keep the dice from knocking over the miniature figures, and away from irregular battlefield terrain and the edge of the gaming table.
To use all tables except the charge table, players must follow a simple die roll procedure. The number rolled on a single decimal die is called the basic die result. Die roll modifiers require numbers to be added or subtracted from the basic die result to get a modified die result. The modified result is indexed on the table to determine the effects of the die roll.
When resolving a combat on the Charge Table, both sides roll a die. The defender's modified die result is subtracted from the attacker's modified result to get a die result difference. The difference is then indexed on the table.
When none of the modifiers listed for a table are applicable, the basic result is used. There are no modifiers when rolling on the Fallen Leader Table and the basic result is applied directly to the table.
Die roll modifiers. Each die roll modifier's plus or minus value and description is listed in a column adjacent to each table. The modifiers listed generally do not require additional explanation. Those that do are explained in the rules for the phase in which the modifiers apply.
Players should total their modifier values before rolling the die. Then roll and call out: the basic die result, the cumulative modifier value, and the modified die result.
EXAMPLE: A player is rolling for a unit that has a +1 modifier and a -2 modifier for a cumulative modifier of -1. He then rolls a basic die result of 8 and announces "eight minus one equals seven." The 7 result would then be indexed on the table. However, if this were an attacker's result in a charge combat, the defender would also call out his basic result, cumulative modifier, and modified result of, "six plus two equals eight." After deducting the defender's result from the attacker's result the player announces "attacker loses by minus one." The die result difference of -1 would then be indexed on the Charge Table to find the effect.
Table effects. The modified die result is indexed to a table effect. Each table effect is listed with a descriptive title (in bold letters) followed by a short narrative describing what actions the players must take. Actions will require the player controlling the affected units and leaders to:
- Remove one or more stands or leaders
- Place or remove disordered markers on brigades
- Place silenced or damaged markers on batteries
- Place low on ammunition markers on brigades or batteries
- Restrict movement or change of formation
- Continue combat
- Conduct retreat movement
Phase I: Maneuver
The player attempts to maneuver each leader, brigade, and battery under his control during the first phase of a turn. Confederate stands maneuver only during the Confederate Turn and Union stands maneuver only during the Union Turn. The player rolls for each brigade individually on the maneuver table. He must complete the movement for each brigade before he rolls for any other brigade.
Actions are performed during the phase in the following order:
- replace leaders
- attach and detach leaders
- maneuver brigades and batteries
- move detached leaders
After the player has completed maneuvering the brigades, batteries, and leaders that he wishes to move, the Maneuver Phase ends and the 2nd Phase—Musketry & Cannonade begins.
Replacing Leaders
Division and corps leaders removed from play due to combat are replaced in the game by new replacement leaders. The only brigade commanders that may become casualties are the exceptional brigade commanders. If this occurs, the brigade simply loses the exceptional rating for the balance of the game.
The player begins the Maneuver Phase by replacing all fallen or captured leaders. These leaders remain out of play for one friendly player turn. The brigades of the lost leader's command lose the benefits of the leader's modifiers until he is replaced. The replacement leaders are returned to play on the second friendly player turn. The replacement leader is placed adjacent to any brigade of his command. A replacement leader can never be rated an exceptional leader.
Leader Movement
Before maneuvering any of his brigades and batteries, the player must first determine each leader's status as being either attached or detached. An attached leader personally takes command of a single brigade. A detached leader influences all brigades of his command within his command radius. The command radius is an 18" distance within the leader's line-of-sight that extends in all directions.
Leaders have a basic movement rate of 18". They may freely maneuver in any direction. They may combine off road and on road movement in the same turn.
Attaching & Detaching Leaders
The second action of the Maneuver Phase is to attach or detach leaders. Leaders that began the player turn detached may be moved and attached to a brigade of their command. A leader is attached by simply moving into contact with any stand of the brigade. Leaders that began the player turn attached may either remain attached to the brigade or detach from the brigade. The newly detached leader is positioned 2" to the center-rear of the brigade.
Attached Leaders. An attached leader has no command radius. The leader only modifies the brigade to which he is attached. The benefit of attaching a leader is the additional modifier the brigade receives in the Maneuver Phase and the charge combat modifier.
It is important to remember that a leader may not move more than its 18" movement distance in a single game turn. The newly attached leader will complete any remaining movement when the brigade attempts to maneuver. The Brigade and leader now move together as one unit. The two may be limited to the balance of movement of the leader or any brigade movement restrictions, whichever is less.
EXAMPLE: A leader has moved 10" to attach to a brigade. It has 8" of movement left. If the brigade rolls a "well handled", the two may move only a maximum of 8", the balance of the leader's move. If the brigade rolls a "tardy," the two may only move 6", the maximum movement of the brigade.
Detached Leaders. A detached leader gives a die roll modifier to each brigade of his command within his 18" command radius. The advantage of having a detached leader is the ability of the leader to modify a large number of brigades. Division leaders may modify all brigades of their division. Corps leaders may modify all of the brigades of all the divisions of their corps.
Detached leaders move after all brigades and batteries have completed their movement. The players should keep in mind that the positioning of the detached leader during movement will be important for the following player turn. The ability of a leader to modify the next maneuver die roll of his subordinate brigades will be affected by where he is placed.
Command radius. Each Detached leader has a command radius of 18" in all directions within his line-of-sight. This distance is not affected by terrain movement effects. It cannot be traced through impossible terrain and enemy brigades. A leader must be able to see a brigade to command it.
PROCEDURE: A ruler is used to determine a detached leader's line-of-sight and the distance to his brigades. The line-of-sight is traced in a straight line from the closest edge of the leader stand to any edge of any stand in the subordinate brigade. The line-of-sight may pass through friendly or enemy units. A line-of-sight cannot penetrate through more than 2" of town or woods. Elevation changes may also block line-of-sight. To measure distance, the player must be able to trace a path from the leader to the brigade not to exceed the full movement rate of 18". This path does not have to be traced in a straight line and it must go around impossible terrain, enemy brigades, and enemy batteries.
Exceptional Brigade Commanders. Scenario Orders of Battle will list certain brigades as being commanded by exceptional leaders. This exceptional commander is part of the brigade and is not represented by a separate leader stand. If a brigade has an exceptional leader, the brigade's label will contain an "E". Exceptional brigade commanders modify the die rolls on the Maneuver Table and add a modifier for charge combat. These commanders may become casualties as would any other leader. They have no replacements.
Figure 7 illustrates how leader modifiers are distributed to a corps of two divisions of two brigades each.
Figure 7. Attached and detached leaders. The corps commander overlooking his command from a hill, gives a +1 modifier to each of the three brigades within his command radius. The 2nd Brigade of his 2nd Division is over one full mounted move distance (18") away and does not receive his modifier.
The 1st Division commander is an exceptional leader and applies a +2 modifier to his 2nd Brigade only. His 1st Brigade is not within his line-of-sight and therefore cannot be modified. The two brigades in the 2nd Division cannot be modified because they are not within the 1st Division's chain of command. If the leader was attached his modifier would be +3.
The 2nd Division commander is first moved to, and then attached to, his 1st Brigade. This leader is not rated exceptional and gives a +3 modifier to that brigade only. An attached leader has no command radius and therefore cannot modify any other brigade.
An exceptional brigade commander is leading the 2nd Brigade in the 1st Division. The leader is intrinsically part of the brigade and is not represented by a leader stand. The brigade receives a +1 modifier, in addition to all other applicable modifiers.
Maneuver Procedure
A Brigade must roll on the Maneuver Table if it attempts to move, change formation, or begins the player turn disordered. The owning player selects one brigade, rolls the die for it, and completes its movement according to the table effects before proceeding to the next brigade or battery. A disordered brigade must attempt to remove the disorder marker with a die roll on the Maneuver Table even if a player does not intend it to move or change formation. A die roll is not mandatory for a brigade in good order that remains in its current position and formation. Leaders and batteries do not require a die roll on the Maneuver Table to maneuver.
The procedure for using the Maneuver Table in Figure 8 is as follows:
STEP 1: The player selects a brigade and determines which die roll modifiers (1) apply. All modifiers are then totaled.
STEP 2: The player rolls a decimal die to obtain the basic die result. All modifiers are applied to determine the modified die result. The modified result is found on the die result (2) column.
STEP 3: The die result is cross-referenced to the appropriate effects column. The brigade is then maneuvered according to the effects listed in the appropriate column. Disordered brigades use the Disordered Effects column (3). All other brigades use the Good Order Effects column (4).
Figure 8. Maneuver Table procedure.
Maneuver Table
Modifiers (1)
| Modifier | Condition |
|---|---|
| +1 | For each detached corps or division leader within command radius (+2 if leader is exceptional) |
| +2 | For each attached corps or division leader (+3 if leader is exceptional) |
| +1 | Exceptional brigade commander |
| +1 | In column formation |
| +2 | Fresh troops |
| -2 | Spent troops |
Die Result (2), Disorder Effects (3), Good Order Effects (4)
| Die result | Disorder Effects | Good Order Effects |
|---|---|---|
| 0 or less | Quits the field—the entire brigade skedaddles and is removed from play. | Retire—brigade retreats a full move. |
| 1, 2 | Broken—brigade retreats a full move in disorder and one stand skedaddles. | Disengage—brigade retreats beyond enemy musketry range. |
| 3, 4 | Wavering—brigade holds ground in disorder. | Hold ground—brigade cannot move or change formation. |
| 5, 6 | Shaken—brigade rallies and holds ground. | Tardy—brigade halves movement and cannot change formation. |
| 7, 8, 9 | Rally—brigade rallies and may move half but cannot change formation. |
All leader modifiers are cumulative. One brigade may benefit from the modifiers of all leaders in its chain of command. The brigade could receive modifiers in any one maneuver phase from its exceptional brigade commander, its division leader, and its corps leader. The modifiers may be even greater if the division and/or the corps leaders are exceptional. The brigade effectiveness level may add (if fresh), subtract (if spent) or have no effect (if worn) on the maneuver die roll. Brigades in field column or march column receive a plus one modifier.
Maneuver Table Modifiers
Maneuver Table modifiers are awarded for leadership, brigade effectiveness, and column formation. Leader modifiers are based on the leader being attached, detached, and/or exceptional.
Formations
Brigades and batteries are kept in order on the battlefield through the use of formations. Each formation has its particular tactical advantages and disadvantages. As the army commander, it is important for you to have your units in the right place at the right time in the right formation.
Line of Battle. This is the most effective formation to maximize a brigade's fire power. It is formed by placing a brigade's stands in a single line, the side of each stand touching the side of the stand(s) adjacent to it, with all stands maintaining the same facing. This formation is used by infantry brigades and mounted cavalry. It is the only formation dismounted cavalry is allowed to form.
Supported Line of Battle. This is a double line of battle that adds depth for charge combat situations. Two lines are formed, with half the stands in the front line and half in the second line. The second line must be within 1" of the front line. The stands must be distributed as evenly as possible between the two lines to the extent that losses are taken from both lines to maintain the formation. Each line must have all stands touching and have the same facing as described above for line of battle. Only the front rank may fire in normal musketry fire, but both ranks may fire if the unit is engaged in charge combat. In charge combat, a +1 modifier is awarded to a brigade in this formation. It is also possible to form a supported line of battle by having one brigade in the first line and a second brigade positioned within 1" of the front line thus forming the second line of support. This second brigade must have at least as many stands as the first brigade to provide a supported line. If the second brigade is too small to provide the required number of stands, then a third brigade may be positioned beside the second brigade as part of the supported line. These brigades together must have at least half as many stands as the first brigade. This formation is used by infantry brigades and mounted cavalry.
Field Column. This is a massed column used for massed assaults and open field marches. A brigade is formed into successive lines two stands wide. All stands must be touching and have the same facing. The column is more flexible during movement. It receives a +1 on the Maneuver Table and can freely change its facing direction. It costs half of a brigade's movement to form field column from line of battle or march column. After changing to field column, the brigade may then use its remaining half move. It fires and fights as a supported line. It is a more vulnerable target to enemy fire and may suffer from enfilade and other fire modifiers. Small brigades of three or four stands lack sufficient mass to form a field column and are treated as a supported line of battle when deployed two stands wide. It is used by infantry and cavalry brigades.
March Column. This formation is generally used when brigades are marching on roads, but it may be used for off road movement. It is the only formation that allows the brigade to utilize the road movement bonus. The formation is formed by placing a brigade's stands one behind the other, maintaining the same facing for all stands. It also receives a +1 modifier on the Maneuver Table and can freely change its facing direction. When marching along a road, it follows the winding path of a road without movement penalties for changes in direction. Only the first stand in the column may fire. When in charge combat, the first two stands in line fire and fight. The column is vulnerable to enemy musketry and will suffer enfilade from all directions. This formation is used by infantry and mounted cavalry brigades.
Movement Modes
Cavalry brigades and artillery batteries may maneuver in one of two modes. Cavalry may be mounted or dismounted. Artillery may be limbered or unlimbered. Infantry remains on foot at all times.
Cavalry maneuver modes. Cavalry may maneuver in one of two modes, mounted or dismounted. When it is mounted, the brigade may use any of the four basic formations. When mounted, the brigade has the advantage of speed and maneuverability. It will, however, suffer a +1 die roll modifier if fired upon. As the Civil War progressed, cavalry weaponry and tactics improved. Cavalry brigades were able to dismount and conducted fire fights with infantry units. Dismounted cavalry may use only one formation, the line of battle. The mounted stands are removed and replaced by dismounted cavalry stands and horseholder markers. The cost of mounting or dismounting is half the full cavalry movement rate (9"). This will enable the unit to move half its rate after changing its maneuver mode. Note that a tardy result allows only 9" of movement and consumes all the brigades movement allowance to mount or dismount.
When cavalry fought dismounted every third or fourth rider held the horses' reins behind the firing line. When a cavalry brigade dismounts a number of stands are replaced by horseholder markers instead of dismounted cavalry stands. The following list gives the number of total mounted stands, and shows how many of them will be replaced by horseholder markers.
| Mounted Stands | 2-3 | 4-7 | 8-11 | 12-15 |
|---|---|---|---|---|
| Horseholder Markers | 0 | 1 | 2 | 3 |
The horseholder markers must be positioned in a second line within 2" behind the unit's front. A horseholder marker cannot engage in fire or charge combat. Horseholders remain in their unit's rear and must advance and retreat with their brigade. When the brigade remounts each horseholder marker is replaced by a mounted cavalry stand.
Refer to Figure 9 for an example of cavalry movement modes.
Figure 9. Cavalry movement modes. An eight stand brigade dismounts and advances half the dismounted movement rate of 6". Two stands are replaced by horseholder markers and placed in the rear.
Artillery maneuver modes. Artillery stands function in one of two modes, limbered or unlimbered. Limbered guns are attached to limber markers and are able to move. Limbered guns pay no penalties for facing changes. They also receive the road movement bonus. If the owning player wishes to use the gun stand in fire combat, it must be unlimbered. An unlimbered gun may not move, though it may change its facing up to 45 degrees, and may conduct fire combat. It counts as one stand in charge combat.
Changing artillery modes is not a function of movement but rather the number of maneuver phase actions that a stand is allowed to perform in a single turn. An artillery stand (battery) may perform any two of the following actions in a single maneuver phase, limber, unlimber, move, change facing while unlimbered, or fire. It is possible to move and unlimber. It is not possible to move, unlimber, and fire in the same player turn.
Artillery may unlimber only when positioned by a leader as described below. Artillery does not require a leader to limber-up, move, or remove markers. Artillery that starts the phase silenced must attempt to rally by limbering-up and retreating at least half its movement rate.
Positioning artillery. Army, corps, and division leaders may position any number of artillery stands that are assigned to their command. Artillery may only unlimber when positioned by a leader. To be positioned, the battery must be within the leader's command radius. A brigade commander may position any number of batteries attached to his brigade.
Attaching artillery. Artillery may be attached to an infantry or cavalry brigade. Both the brigade and the battery must end their movement with the artillery stand unlimbered and in contact with any one stand belonging to the brigade.
The battery may be positioned upon either flank of the brigade formation, or within the formation's front line. When attached to a column the battery must be positioned upon either flank. The attached artillery stand must have the same facing as the brigade. Any number of batteries may be attached to a single brigade. If a battery is to be attached within the front line of a brigade in line of battle, one stand from that brigade may be shifted to the flank (or from the first to the second line of a supported line formed by one brigade), to create space for the battery. The brigade and battery may maneuver separately in their next maneuver phase. Refer to Figure 10 for an example of artillery movement modes.
Figure 10. Artillery movement modes. Artillery stand A limbers-up and moves its full movement rate. Unlimbered artillery B pivots in place 45 degrees and can fire in the next phase. Artillery C moves, unlimbers and attaches to an infantry brigade. One stand in the brigade shifts to the left to make room for the battery. Because it moved and unlimbered battery C will not be able to fire in the next phase.
Movement Rates
Leaders, infantry, cavalry, and artillery have movement rates as listed on the Movement Rates Chart in Figure 11. The rate listed is the unmodified maximum distance a brigade, battery, or leader may move during the maneuver phase. The table also provides information on movement rate modifiers.
Move distance is measured in inches from the front edge of a stand. Distance for artillery stands is measured from the front edge of the gun stand when limbering up and moving. When in a limbered movement mode, the distance is measured from the front of the limber.
Figure 11. Movement Rates Chart.
| Basic | Road | Rough | Fording | |
|---|---|---|---|---|
| Infantry | 12" | x2 | x1/2 | -3" |
| Cavalry & Leaders | 18" | x2 | x1/3 | -3" |
| Artillery—foot | 8" | x3 | x1/4 | -4" |
| Artillery—horse | 12" | x3 | x1/4 | -6" |
Infantry and cavalry -3" for passage of lines.
Movement
Each infantry and cavalry brigade is moved immediately after it has been selected and rolled for on the Maneuver Table. The movement of each brigade is limited by the table effects. Each battery moves without requiring a die roll on the Maneuver Table. The types of movement permitted for leaders and brigades are as follows:
Advance and withdraw. An infantry or cavalry brigade in line or field column formation may either advance to its front or withdraw to its rear. A brigade cannot advance and withdraw in the same phase. A brigade can move up to its full movement rate when a "well handled" or "rally with elan" effect is rolled. A "tardy" or "rally" effect allows the brigade to move at only half its movement rate.
A brigade may spend up to its entire movement rate going straight forward or backward. To move in another direction, a brigade in line formation must wheel, oblique or move by the flank. A line formation may not change its facing more than 45 degrees during its movement. Columns are more flexible, and may change direction without restrictions.
A brigade must contact the enemy in order to conduct charge combat. A brigade may not voluntarily advance to within 1" of an enemy brigade or battery without being involved in a charge combat in that player turn.
About face. Any brigade that withdraws more than half its movement rate to the rear is considered to have done an about face. A brigade may about face without any movement costs during the Maneuver Phase and move its full movement rate. The brigade may again about face and front the enemy.
A brigade may also about face when moving by the flank or holding its ground. A brigade using an about face is subject to a plus one fire modifier if fired upon in that player turn's defensive fire phase. A brigade may withdraw without the use of an about face if it uses half or less of its available movement rate, and such a brigade is not subject to the +1 fire modifier.
Moving by the flank. An infantry or cavalry brigade in either line or field column formation may move by the flank (move sideways to the left or right). The unit's movement rate is automatically halved when moving by the flank. As the brigade moves by the flank it can angle its direction of movement up to 45 degrees from its original position. A brigade moving by the flank may not contact an enemy brigade or battery. The brigade must maintain its facing to the enemy, and must remain at least 1" from any enemy units.
Wheel. A brigade may wheel to the left or right as it advances or withdraws. To wheel a formation, the end stand on either flank pivots in place to assume a new facing, while all the other stands swing forward or backward to conform to the new facing. A brigade in line may wheel up to 45 degrees during the phase. A column can wheel to face in any direction. Movement is measured from the front edge of the stand which wheeled the furthest distance.
Figure 12. Brigade movement. (Diagram showing advance, withdraw, wheel, oblique and by-the-flank movement.)
Oblique. A brigade may oblique 45 degrees to the left or right as it advances or withdraws. To oblique, all stands maintain their current facing and formation, and move at an angle forward or backward. The stands maintain the same angle of 45 degrees or less during the phase.
Figure 12 shows several possible brigade movements.
Refuse the flank. A brigade in line formation may refuse one or more stands on its flanks. To refuse the flank of a brigade, the flank stand(s) swings backward up to 45 degrees. A brigade may refuse both flanks up to 45 degrees each.
A brigade can refuse the flanks as it advances, withdraws, moves by the flank, or changes into a line formation. A brigade may not refuse its flanks when charging or in a column formation.
The refused stands must wheel into a straight line when the brigade moves forward out of its position. When withdrawing, the stands simply fall back into a straight line. When moving by the flank, the stands move in a straight line from the end stand. At the end of any of these maneuvers, the brigade may again refuse its flanks. Figure 13 shows a brigade refusing both flanks after it advances.
Figure 13. Refusing the flanks.
Advancing the flank. A brigade may advance its flanks to conform to a defensible terrain feature. The flanks may not bend more than 45 degrees.
Charge. Only infantry or cavalry brigades and their attached leaders may charge. Artillery cannot charge. An enemy brigade or unattached battery must be selected as the target of the charge, and must be contacted by the charging brigade. A charging brigade advances toward the enemy by the most direct route. This route is traced from the center of the charging brigade to the closest point of the defending unit. The charging brigade may wheel before moving forward to charge. The charging brigade may oblique towards the enemy in a direct path. The charging brigade must halt immediately upon making contact with the enemy. A brigade in march column on a road simply charges along the road until contact is made.
A brigade that intends to support a charging brigade in line must be able to end its move within 1" or less of the friendly charging brigade. A brigade may not charge during a turn in which it has changed formation, moved by the flank, or made an about face.
Refer to Figure 14 for an example of charge movement.
Road movement. Infantry and cavalry brigades in march column, and all leaders and limbered batteries, receive the road movement bonus when moving along a road.
Brigades in march column, limbered artillery, or leaders simply follow the path of the road. There are no limitations or penalties imposed on these units for changing facing or turning more than 45 degrees. They may move forward in the direction they are currently facing, or about face and then move along the road in the opposite direction.
Roads in good condition double the movement rate for infantry, cavalry, and leaders and triple the rate for limbered artillery. Brigades, leaders, and limbered artillery may combine on and off road movement by prorating the distance traveled on the road.
EXAMPLE: A brigade moves down a road in road column for 12". The road movement is prorated by a multiple of two therefore the brigade only expends 6" of its movement rate. The brigade may continue to move 6" off the road, or another 12" (6" x2) on the road.
A battery limbers-up and moves 4" before reaching a road. It then continues movement on the road at the prorated rate for its remaining 4". The distance traveled on the road is prorated by a multiple of three so that the battery may actually move up to 12" (4" x3) on the road.
Figure 14. Charge movement. Brigade A charges obliquely toward the enemy by the most direct route and halts after making contact. A second brigade B charges straight ahead and halts less than 1" behind A in support. Brigade C wheels 45 degrees and then charges in a straight line.
Retreat Movement
A number of table effects in both the Maneuver and Charge Phases require an infantry or cavalry brigade to involuntarily move away from the enemy. The retreat distance can be a full move, to beyond enemy musketry range, or to end the retreat 2" from the enemy.
A retreating brigade or leader ignores movement penalties for rough terrain and fording. Batteries that are required to retreat must pay all movement penalties as specified on the Movement Rates Chart. Retreat paths may only be blocked by enemy brigades, batteries or impassible terrain. In all other cases, a retreating unit is required to move the penalized distance. The direction of the retreat must be away from the enemy and toward friendly lines. The retreating brigade may wheel and oblique even greater than 45 degrees to complete its retreat requirements. A retreat cannot be used as an offensive tactic, such as an advance or to threaten an enemy flank.
Retreats may cause a change in movement mode. Infantry or mounted cavalry must maintain its current formation. Dismounted cavalry will maintain its formation when required to retreat 2" from enemy units. For any other retreat results, the cavalry must mount. Artillery batteries must always limber to retreat.
Retreating a full move. A brigade or battery that cannot complete its required retreat movement because of the presence of enemy brigades, batteries, or impassible terrain will face penalties. A brigade or battery that starts the retreat in good order will move the maximum distance available and end the retreat as a disordered brigade or silenced battery. A brigade that starts the retreat disordered or a silenced battery, "quits the field" and is removed from play. Leaders are not affected and are simply displaced to the nearest friendly brigade of their command. A brigade or battery forced to retreat off the game table is out of play and counts as an eliminated brigade or battery for victory point purposes.
Retreating beyond enemy musketry range. A brigade or battery may be required to withdraw away from the enemy until just beyond the enemy's effective musketry range (8"). The retreating brigade or battery must end its move 8" away from any enemy brigade or battery regardless of the enemy's mode or formation. For purposes of retreat only, the enemy musketry range is considered to extend beyond the enemy brigade in every direction.
The withdrawing brigade may only halt when out of range or line-of-sight. The brigade halts movement if the enemy fire is blocked by terrain features such as woods, towns or the reverse slope of a hill.
Friendly brigades and batteries in this case do not block line-of-sight and the retreat must continue to the proper distance. A brigade or battery may not move more than its basic movement rate when attempting to retreat beyond enemy musketry range. No other penalties are applied to a unit unable to get beyond enemy musketry range after completing a full retreat move. Refer to Figure 15 for an example of retreating beyond enemy musketry range.
Retreat 2" From Enemy. A charge combat result may require a defeated brigade to fall back a distance of only 2" from the enemy. As the enemy involved in the charge combat advances to occupy the vacated position, the retreating brigade must continue to fall back to maintain the 2" distance. Dismounted cavalry has the option of remaining on foot in this case.
Figure 15. Retreating beyond enemy musketry range. Two brigades A & B are required to retreat beyond enemy musketry range. A must continue to retreat after passing through friendly brigade C because it is still considered to be under fire. A halts movement just over 8" from enemy brigade X. Brigade B retreats and halts just over 2" deep into a woods because the enemy's line of sight is blocked beyond that distance.
Skedaddle
Skedaddle is a maneuver or charge combat effect which requires a single troop stand, or all remaining stands in a brigade, to retreat panic-stricken off the battlefield. The brigade or stand is removed from play for the duration of the battle. When a brigade has been reduced to a single stand, the sole remaining stand automatically skedaddles and the brigade is out of action. A "quits the field" effect on the Maneuver Table requires the entire brigade to skedaddle.
Rough Terrain & Fording
Specified terrain features on the battlefield may be designated as rough or impassable. The crossing of streams, creeks, and rivers may require the additional movement cost of fording. These should be specified before beginning a scenario.
Rough terrain. Only extreme terrain features such as towns, dense woods, swamp, broken ground, or steep slopes, should affect movement.
For each 1" traveled at the rough terrain movement rate, the following costs apply: 2" for infantry, 3" for cavalry and leaders, 4" for foot artillery and 6" for horse artillery. The presence of more than one rough terrain feature in an area reduces movement only once. The effects are not cumulative. Movement in march column along a road negates the effects of rough terrain.
EXAMPLE: An infantry brigade moving 6" up a steep and wooded hill would expend all 12" of its movement rate. (6" x 2=12")
Movement is not affected by less severe terrain features such as woods cleared of underbrush, orchards, gentle slopes, isolated buildings, low walls, and rail fences.
Fording. Each one inch of ford traveled costs infantry brigades, cavalry brigades, and leaders 3" of movement. Each inch of ford will cost foot artillery 4" of movement, and horse artillery 6" of movement.
A brigade or battery that does not have enough of its movement remaining to complete its fording requirement must halt in mid-stream. There are no combat penalties for remaining in mid-stream. Any unused movement will reduce the cost of fording the stream in the next friendly maneuver phase.
EXAMPLE: An infantry brigade moving "tardy" has 6" of movement. It takes 4" to reach a fordable stream 1" wide. It enters the stream with its remaining 2". Since it takes 3" to cross a ford, 1" of his movement rate during the next friendly player turn will be spent on completing the fording move.
Shallow fords may be considered as minor terrain features that do not impede movement. The fordable length of the stream may vary from a narrow crossing no wider than a stand's width to the entire length of the stream. Road movement over bridges negates the effects of fording.
Figure 16 illustrates movement through rough terrain and fording.
Figure 16. Rough terrain and fording. Cavalry brigade A moves 3" in open terrain, then 2" through woods to a 1" fordable stream. The distance traveled through the woods is prorated, costing the brigade 6" of its movement. The brigade expends 3" fording the 1" stream and continues to move with its remaining movement of 6".
Infantry brigade B moves through a woods for 3" and halts before crossing the stream. The distance traveled through the woods was prorated, costing the brigade 10" of its movement rate. B halts in mid-stream because it does not have enough remaining movement (needs 3", has 2") to ford the stream. The remaining 1" fording cost is expended next turn.
Battery C moves 2" to the edge of the woods, but can only travel an additional 1-1/2" into the woods (1-1/2 x 4 = 6"). If battery C wants to continue through the woods and over the ford, it will take two additional turns. The two inches of woods remaining costs 8" to the stream. The following move it will spend 4" to ford with 4" remaining to continue its move.
Passage-of-Lines
All friendly units may pass through other friendly forces. Brigades or unattached batteries may not end a Maneuver Phase intermingled with another friendly unit. If during voluntary movement the brigade or unattached battery does not have enough movement for all its stands to completely pass through the other's formation, the moving brigade or battery must halt its movement before beginning to move through the other unit. Involuntary movement causing retreats will require the moving formation to pass through friendly units regardless of movement rate costs.
Infantry and cavalry brigades must expend 3" of their movement rate when passing through other brigades. Leaders and batteries may pass through units without penalty. There is no cost to pass through batteries or leaders. A brigade loses 3" only once during movement, regardless of the number of formations it passes through. The brigade being passed through does not suffer a movement penalty.
Changing Formation
During the maneuver phase, the controlling player has the option to change an infantry or cavalry brigade's formation. To do so, he must have rolled a "well handled" or "rally with elan" effect for that brigade. Any other die roll requires the brigade to maintain its current formation. The formation change must be the first action taken by the brigade. Other voluntary movement is then conducted following the change. The following changes of formation are permitted:
Redeploy a line. A brigade may be in either a single line or a double supported line. The brigade may move its stands to extend or contract its formation's frontage and depth. This new line formation must maintain its original facing. A brigade may not move if changing line formations. It may refuse its flanks as it changes formation.
A brigade in a single line formation may contract its frontage into a supported line. The stands must be distributed evenly between the two lines. The brigade may remove stands from one or both flanks and reposition them in a second line behind the remaining front line. To change a double line formation into a single line, the procedure is reversed. Stands in the rear line are moved to extend one or both flanks of the front line to form a new single line. Figure 17 illustrates how to redeploy a line.
Deploy column into line. To change formation from field column into a single or double line, one stand in the current column formation is selected as a guide on which to form. The guide stand must maintain its position, but can be pivoted in place to face in any direction. The remaining stands are then moved to a position in line behind or upon one or both flanks of the guide stand to form the line formation. As the brigade changes formation, it may refuse its flanks up to 45 degrees.
A march column changing to line uses the same procedure as a field column. The guide stand must always be the lead stand in the march column formation.
Figure 18 shows examples of how to change from column into line formations.
Figure 17. Redeploying a line formation. Infantry brigade A is extending its line by moving from a supported line to a single line. The four stands in its second line move to the left flank of the front line. As the stands are moved to their new location, the flank is refused.
Brigade B is contracting its line from a single line to a supported line. Two stands from its left flank and two from the right are moved to form a second line.
Figure 18. Changing from column into line. Brigade A in field column deploys into a single line formation. The front left stand is selected as the guide stand and is turned to a new facing. All other stands are moved to either flank. Brigade B in march column redeploys into a double line on both flanks of the guide stand.
Forming field column. To change from either line formation into a field column, any two adjacent stands in the current line formation are selected as guide stands and may pivot in place to face in any direction. The remaining stands of the brigade are then moved to form a field column behind the guide stands. A field column cannot refuse its flanks.
The procedure for changing a march column into a field column is similar to that for changing from line into field column. The guide stands must always be the two lead stands of the road column formation. They may be pivoted in any direction to become the leading two stands of a field column. After changing into a field column from either a line or march column, the brigade may then move up to half its normal movement rate. Figure 19 shows examples of forming field column.
Forming march column. To form a march column, select any one stand of the current formation as a guide stand. The guide stand may be pivoted to face any direction. The guide stand must now move the allowed half movement rate. The remaining stands in the formation simply fall in behind the guide stand, regardless of movement rate, to form the new march column formation. For game play purposes, the brigade's command stand is switched with the guide stand to take its proper place at the head of the column. Refer to figure 20 for an example of forming march column.
Figure 19. Forming field column. Infantry brigade A in line changes into a field column. It then moves 6". A second brigade B has changed from march column to field column before moving its remaining half move.
Figure 20. Forming march column. A guide stand is selected and pivoted to face the road. It now moves 3" to the road and another 6" on the road (prorated 3x2=6"). The balance of the brigade now falls in behind the guide stand in a single file. The command stand is then switched to the head of the column.
Removing Markers
Markers for disorder, silenced, and low on ammunition may be removed only during the Maneuver Phase. Damaged battery markers are permanent and cannot be removed for the duration of the battle. Limber and horseholder markers are removed and placed into play based on the movement mode of the battery or brigade.
To remove a disorder, silenced, or low on ammunition marker, the following procedure must be followed:
Rallying. Disordered brigades and silenced batteries can remove their markers by rallying.
Disordered infantry and cavalry brigades must make a mandatory die roll on the Maneuver Table at some point during the Maneuver Phase in an attempt to rally. The marker is removed when a "rally", "rally with elan", or "shaken" result is rolled on the Maneuver Table.
Silenced batteries do not require a die roll to rally. They simply retreat at least half their movement rate away from the enemy during the Maneuver Phase. A silenced battery that ends its move out of enemy musketry range is considered to be rallied and the silenced marker is removed after its movement is completed. A battery may not unlimber during the turn in which a silenced marker is removed.
Replenishing ammunition. A low on ammunition marker is removed from infantry or cavalry brigades that are beyond enemy musketry range or line-of-sight at the end of the Maneuver Phase.
Artillery must limber, retreat at least half its movement rate, and be out of enemy musketry range or line of sight at the end of the Maneuver Phase to remove a low on ammunition marker. Artillery must be limbered to remove the marker.
Replenishing ammunition is optional. Brigades and batteries may remain in position with low ammunition or continue to move with the marker.
Phase II: Musketry & Cannonade
In the second phase of a turn, Union and Confederate brigades and batteries conduct fire combat. Fire combats are resolved using the Musketry and Cannonade (M&C) Table. The phase begins after the completion of the Maneuver Phase. Each M&C Phase consists of a round of defensive fire combat followed by a round of offensive fire combat.
The Confederate turn consists of the Union defensive fire followed by the Confederate offensive fire. During the Union turn, the order is reversed, with the Confederate defensive fire followed by the Union offensive fire.
After both fire combat rounds are completed, the M&C Phase ends and the Charge Phase begins.
Fire Combat Procedure
Each individual fire combat is resolved separate in any order desired by the controlling player. To resolve a fire combat, the player controlling the firing brigades and batteries first designates a target. The range is measured for each stand firing upon that target. The player then follows a die roll procedure using the tables and chart in Figure 21.
STEP 1: Determine the fire points for each stand using the Range and Fire Points Chart (1). Each stand's basic fire points may be halved or doubled by the fire modifiers (2).
STEP 2: The player then rolls a decimal die. He adds or subtracts the applicable fire modifiers from the basic die result. When multiple stands are firing upon the same target, the player who controls the most fire points rolls the die.
STEP 3: The sum of the stands' fire points is indexed down the Fire Points column (3) on the M&C Table to the appropriate fire point value.
STEP 4: The fire point value is cross indexed to the Die Result column (4) that lists the modified die result value.
STEP 5: Listed above each results column are its fire combat Effects (5). Combat effects may require the target to be marked as disordered, silenced, or damaged. The firing stands may be marked low on ammunition. The target may also be required to remove stands. The player controlling the target unit may also be required to make an additional die roll on the Fallen Leader Table.
Fire Restrictions
Each stand of infantry, dismounted cavalry, or unlimbered artillery may fire at a target that is within its range, line-of-sight, and arc of fire. A stand can fire only once each round. A brigade or battery may only be fired at once each round.
Generally, only the front line of stands in an infantry or dismounted cavalry brigade may fire. For those units engaged in charge combat, both the first and second lines may fire.
Mounted cavalry may not fire. Dismounted cavalry may fire, even if it dismounted during the preceding Maneuver Phase.
Silenced and limbered artillery may not fire. An unlimbered battery may fire. A battery must select fire combat as one of its two actions in a player turn in order to fire. Artillery stands may fire over enemy and friendly brigades or batteries, as explained in the indirect fire rules.
Defensive & Offensive Fire
A unit firing in defensive fire has the opportunity to select an enemy unit as a target at any point during the previous Maneuver Phase. The firing unit must have had a clear line-of-sight to the target as it moved into or through the firer's range and arc of fire. The actual fire combat is not resolved until the first round of the current M&C Phase.
For offensive fire the range, arc of fire and line-of-sight between firing unit and target is determined after all movement is completed. Offensive fire combats are resolved after the round of defensive fire has been completed. Figure 22 illustrates defensive fire.
Selecting a Target
Targets are selected by the player controlling the firing stands. Each fire combat is resolved before the next target is chosen. Once selected as a target and fired at, an enemy unit may not be fired upon again that round.
A target can be an enemy infantry brigade, cavalry brigade, or a single stand of artillery. An artillery stand attached to a brigade is treated as a special target as detailed in the Fire Points section.
A special target situation exists for brigades that will be involved in charge combat that player turn. A target is normally one brigade. When a second brigade moves up to provide a second line of support for the charge combat, they are treated as a single target. They both suffer the same fire combat effects for disorder, checking for fallen leaders, and if applicable, low on ammunition. The removal of stands is explained in the Inflicting Casualties section.
Fire Points
Each artillery, infantry, or cavalry stand's fire point strength is listed on the Range and Fire Points Chart. Fire points will vary with target range and whether the firing unit is Union or Confederate. In any fire combat, the fire points of all stands firing on the same target are combined into a single fire point value. All fractions are rounded down. A brigade may split its stands to fire at separate targets, but the fire strength of any individual stand may not be divided. Each artillery stand must use all of its fire points on a single target. Brigades and batteries may combine fire on a single target.
When infantry or cavalry stands fire upon a battery attached to a brigade, at least half of the total fire points must be
Figure 22. Defensive fire. During the Union Maneuver Phase, an infantry brigade has advanced from location A to location C, moving through the arc of fire and range of a Confederate battery. The Confederate player controlling the artillery unit makes a mental note that at location B the artillery opened fire upon the target. During the upcoming round of Confederate Defensive Fire of the Union Musketry & Cannonade Phase, the combat is resolved as though the target occupied location B.
applied to the brigade. The balance of the fire points may then be applied to the attached battery. Artillery may counter-battery fire the targeted attached artillery and ignore the brigade.
A unit being charged must bring its maximum fire points to bear upon the charging unit if it fires. Any unit not being charged may fire at any target within its field of fire.
Figure 23. Arc of fire. Each stand of infantry brigade A has an arc of fire of 45 degrees to either side. Artillery battery B has a 30 degree arc of fire to either side as illustrated. (Diagram labels: maximum 8" musketry range; maximum 4" canister range; maximum shot & shell range; Arc of Fire Gauge.)
Fire Modifiers
The fire point modifiers that either halve or double the basic fire points of a unit, or modify the basic die result, are as follows:
Halve the fire points—for infantry or cavalry stands marked disordered or low on ammo. Artillery marked as a damaged battery is halved. The firepower of unmarked stands firing at the same target is unaffected. These effects are not cumulative. A firing stand is halved only once.
Double the fire points—of all stands enfilading a target (see enfilade fire rule).
Add One to the basic die result—when the target is limbered, in column, mounted cavalry, changing formation or mode, or conducting an about face. These modifiers are not cumulative. Note, the modifiers apply if the target qualified for the modifier anytime during its movement and while within the firing unit's field of fire.
Subtract One or two from the basic die result—when a battery or at least half the brigade is in cover such as woods, town, broken ground, breastworks, stonewalls, sunken roads, or is dismounted cavalry. Dismounted cavalry anywhere on the battlefield will receive the -1 benefit. These modifiers are not cumulative. The scenario designer will designate what, if any, terrain or fieldworks qualify for a -2 modifier.
EXAMPLE: A five stand brigade of Confederate infantry and a battery are firing at the same target. The infantry has markers for being low on ammunition and disordered. Their total of five fire points is halved for the two markers to two and one half points. The battery is firing from a range under 16" and therefore is valued at three points. The 6 stand target brigade has three stands behind a stone wall and benefits from a -1 modifier to the firer's die roll. The combined fire points value for the infantry and artillery is five points with a -1 on the upcoming die roll.
Field of Fire
To determine if an enemy brigade or battery is a legitimate target, it must be within the firing unit's field of fire. The field of fire for infantry is the area within the firer's 45 degree arc of fire, 8" weapon range and clear line-of-sight. The field of fire for artillery is the area within the gun stand's 30 degree arc of fire, the 32" range and line-of-sight.
During defensive fire, any time a potential enemy target either ends its maneuver in or passes through the defender's field of fire, it may be selected as a target.
For offensive fire, the enemy target must be within the field of fire at the time the target is selected in the Musketry & Cannonade Phase.
Figure 24. Line-of-sight. Battery A has a clear line-of-sight to two potential targets. Brigade X can be fired upon because it is less than 2" deep in the woods. Battery Z is also a target since there is a 1" gap between the woods and brigade W. Line-of-sight to brigade Y is blocked because it passes through more than 2" of woods.
Brigade B has a clear line of sight to brigade W. The line-of-sight to battery Z is blocked by brigade W. Please note that two stands of brigade B do have a clear line of sight to brigade X.
Range. Range is determined by measuring in a straight line from the front edge of each firing stand to the edge of the closest stand of the target. Infantry and cavalry have a maximum range of 8". Artillery has a shot and shell range out to 32", and a 4" canister range. Cavalry and artillery have varying firepoint values based on the distance to the target.
When firing at a brigade, the firing unit must have at least two enemy stands within its range for the enemy brigade to be considered a target. Any part of a stand, no matter how small, counts as one stand within range. This two stand requirement is also applied to determine which artillery or cavalry firepoint value is used.
Arc of fire. The arc of fire is measured from the front of a stand at a 45 degree arc for infantry and cavalry and a 30 degree arc for artillery. An arc of fire gauge is included in the book. It should be photo-copied, cut out, folded and glued together for use. To use the gauge, place the short side flush against the edge of the firing stand. One side of the gauge has the left arc of fire for infantry and the right arc of fire for artillery. Flip the gauge over for the right arc for infantry and the left arc for artillery. See figure 23 for arc of fire examples.
Line-of-sight. Each firing stand must be able to trace a straight and clear line-of-sight (LOS) to the target. LOS may be blocked by terrain. LOS is blocked if it passes through more than 2" of town or woods. An intervening hill crest also blocks LOS. Both friendly and enemy infantry and artillery stands block line-of-sight. Leader stands do not block LOS. Artillery has a special indirect fire rule that allows it to fire over stands under special circumstances.
There must be a 1" gap between blocking stands and/or terrain features for the LOS to remain unblocked. Artillery firing canister must have a gap equal to its 30 degree arc of fire to have a clear LOS. Figure 24 illustrates line-of-sight.
Indirect Fire
Artillery may fire over friendly or enemy stands at a target within its field of fire. This is called indirect fire. Indirect fire can only be conducted using shot and shell. If a target is within canister range, use the closest shot and shell fire point values. Indirect fire may only occur when artillery is firing from high ground or the target is on higher ground than the artillery and the intervening stands.
Firing from higher ground. The stand being fired over must have its front edge at a lower elevation than the firing artillery. The friendly stands must be closer to the firing artillery than to the target. The target's elevation is irrelevant provided the intervening stands satisfy this requirement. Please note that enemy stands on lower ground than the firing artillery may be fired over regardless of the distance between firer and target.
Firing from lower ground. A target may be selected if on higher ground than the firing artillery and intervening stands. The intervening stands must be over 4" from the front edge of the firing artillery stand and also must be closer to the firing artillery stand than to the target. The intervening stand may be on the same or higher elevation as the firing artillery stand.
Refer to figure 25 for examples of indirect fire.
Figure 25. Indirect fire. Battery A on high ground is able to fire at target X over friendly brigade B. B is on lower ground and less than half the distance to the target.
Battery C can fire at target Y on higher ground over friendly brigade D. D is at least 4" away from C and on the same elevation. D is also less than half the distance to the target.
Enfilade Fire
Each stand firing from an enfilade position doubles its basic fire point value. A march column that is fired upon is always considered to be enfiladed. A line, double line, or field column must have its position measured to determine the enfilade.
To determine if a target is enfiladed, trace a straight line along the front edge of the target's first line. Extend this line until it intersects the firing stands. Any stand or part of a stand firing from a position behind this line is firing in enfilade. All other stands must fire normal fire. Figures 26 and 27 show examples of enfilade fire.
Figure 26. Enfilading a column. The three stands in the front line of brigade A past the enfilade line will double their fire points against target brigade X in column formation. Also all fire upon a field column adds a +1 die roll modifier.
Figure 27. Enfilading a line. The four stands of brigade A past the enfilade line will double their fire points against target brigade X in line formation.
Cover
A target in cover receives a modifier that decreases the firer's die roll. The actual value of the cover modifier is determined before beginning a scenario. Generally, targets in woods, towns, or broken ground benefit from a -1 modifier. Targets behind a stonewall, breastworks, or in a sunken roadway receive a -1 or -2 modifier. Dismounted cavalry will always receive a -1 modifier when in open terrain. Minor terrain features such as isolated buildings, fences, and orchards do not provide cover.
A modifier only applies when half or more of the target's stands are behind or in the cover.
The cover modifier for stone walls, sunken roads, or breastworks is negated if at least half of the total modified fire points upon the target do not cross the cover.
Refer to the photo below for examples of cover.
Inflicting Casualties
Certain fire combat effects require the removal of troop stands from a brigade. Stands are removed from play for the duration of the battle. This loss of stands contributes toward lowering a brigade's effectiveness from fresh to worn, and eventually to spent. A brigade involved in charge combat receives a -1 die roll modifier for each stand lost during the preceding Musketry and Cannonade Phase.
Losses from a single fire combat are distributed as evenly as possible among the target units involved. The front line unit loses a stand first, next each unit in support takes a loss and so on. If there is more than one unit in support the losses are applied to the largest unit first, then the next largest and so on. If there are more stands lost than units involved the front unit receives the heavier losses.
Losses to each brigade must be removed in such a way that the unit's formation is not changed. When removing stands from a column the stands in the rear line are removed first. If there are not enough stands remaining to form a field column two stands wide, then reduce the column to a double line formation. When removing stands from a double line of battle, remove them equally from both lines, in order to keep the number of stands in both lines as equal as possible.
The unit's command stand must be the last stand removed. When a unit has been reduced to a single stand, that stand automatically skedaddles and the entire unit is taken out of play.
Target cover. The Union brigade has three potential targets. The dismounted cavalry brigade, if fired upon, will receive a -1 modifier even though it is in open terrain. The other Confederate brigade will receive a -1 modifier since half or more of its stands are in the woods. The artillery battery, although attached, will not receive a cover modifier since it is in open terrain. Note that the fence does not provide cover.
Damaged & Wrecked Batteries
Artillery will suffer losses as a result of fire or charge combat. When a battery is damaged, its fire points are halved for the remainder of the game. A damaged battery marker cannot be removed. When a second damaged battery effect is rolled upon the same stand, it is removed from play. When only part of a battery is captured, the stand is marked as a damaged battery.
A wrecked battery effect requires the removal of one gun stand from play for the remainder of the battle. If an artillery stand that has already been damaged receives a second damage effect it is considered to be wrecked and is removed from play.
Disordered Brigades & Silenced Batteries
Disordered is a fire combat or charge combat effect requiring a disorder marker to be placed upon an infantry or cavalry unit. The fire of disordered brigades is halved. Disordered units must attempt to remove the marker by rolling a Rally effect during the maneuver phase.
Silenced is a fire combat or charge combat effect that requires a silenced marker to be placed upon an artillery stand. Silenced artillery cannot fire. Silenced artillery must attempt to rally by limbering-up and withdrawing during its next maneuver phase.
If half or more of the total stands involved in a charge combat are silenced and/or disordered, a -1 modifier is applied.
Low on Ammunition
Whenever an unmodified "10" is rolled during fire combat, all artillery that participated and any brigade firing at least half its stands, is considered to have become low on ammunition. A low on ammunition marker is immediately placed on these units. When low on ammunition the fire points of infantry and cavalry are halved and artillery may fire canister only. The marker may be removed during the maneuver phase. If half or more of the stands participating in a charge combat are low on ammunition a -1 charge combat modifier is applied. Ammunition may be replenished as described in the Maneuver Phase.
Fallen Leaders
On an unmodified die result of "10" during fire combat, the player owning the target unit must roll for a fallen leader on the Fallen Leader Table. Each attached corps or division leader is rolled for individually. In addition, if the brigade has an exceptional brigade commander, a fallen leader die roll is conducted for that brigade commander. Unattached leaders are not affected by a fallen leader result.
A killed or wounded effect removes the leader from play. His command will be without a leader figure on the table for a full player turn. On the second player turn following the leader casualty, the commander is replaced (see Maneuver Phase). A replacement leader is used as a substitute when a leader is killed, captured, or wounded. The replacement leader may never be rated as an exceptional leader. An exceptional brigade commander that is killed or wounded is permanently removed from play.
Figure 28.
Fallen Leader Table
| Die result | Effect |
|---|---|
| 1 | Felled by sniper |
| 2 | Shot dead in the saddle |
| 3 | Mortally stricken |
| 4 | Grievously wounded |
| 5 | Disabled |
| (1-5) remove leader and replacement appears after one full turn. | |
| 6 | Mere flesh wound |
| 7 | Coat pierced but unscathed |
| 8 | Horse shot out from under |
| 9 | Staff officer struck |
| 10 | Cooly ignores the fire |
Phase III: Charge
The third and final phase of a player turn is the Charge Phase. It begins after all Musketry & Cannonade Phase fire combats have been resolved. Enemy brigades and batteries in contact at the start of the Charge Phase conduct a joint action called charge combat. Each charge combat will consist of a minimum of one charge combat round. Depending on the results of the first round, a "desperate struggle" and/or a second round of "breakthrough" charge combat may follow.
Although the charge combat rules are not overly complex, they do require careful reading. This phase of the game turn is the one most open to interpretation. If a referee is present, regard his decisions as final. If you do not have a referee available, use common sense if a unique situation arises not covered by the rules.
During the Maneuver Phase, the player whose brigade will enter into charge combat selects one brigade or unattached battery as the target of the charge. As specified in the maneuver section, a charging brigade must advance toward the enemy by the most direct route. The target of the charge is used to determine the direction of the charge.
The player controlling the attacking brigades resolves the charge combats in any order he chooses. Union players determine the order in the Union Player Turn and Confederate players determine the order in the Confederate Player Turn. After all charge combats have been completed, the current player turn ends and the next player turn begins.
Charge Combat Procedure
Each charge combat is resolved individually through a die roll procedure. The attacker selects the order in which the charge combats will be resolved. Once the attacking and defending forces have been identified, the players follow the die roll procedure explained below to obtain a charge combat result from the Charge Table shown in figure 29.
STEP 1: Each player determines his die roll modifiers (1). Each player then rolls a decimal die. The players then add or subtract any die roll modifiers which may apply and announce the modified die result. In multi-player games, the player with the larger contingent in the force rolls the die.
STEP 2: The attacker then subtracts the defenders result from his own to get a die result difference.
STEP 3: The result is indexed down the Die Result Difference column (2) on the Charge Table to find the charge combat Effects (3).
STEP 4: When the die result difference is greater than zero, the attacker is the victor in the charge combat. A less than zero (negative) difference means the defender is the victor. On a die roll difference of zero, "A Desperate Struggle" occurs, casualties are applied, and the combat continues with a second die roll procedure.
STEP 5: Charge combat effects are simultaneously applied to each side. Stands are removed as casualties. Disordered brigades and guns that were silenced or damaged are marked appropriately. Retreats are conducted. Attacking brigades who received a carry the position effect are now moved. Attacking brigades who will participate in breakthrough combat receive a breakthrough marker. After all results are completed, the next charge combat is resolved.
STEP 6: After all first round combat is resolved, breakthrough movement is conducted. A second round of combat may then occur following the procedure outlined in steps 1 through 5 above.
Figure 29. Charge Table Procedure.
Charge Table
Modifiers (1)
| Modifier | Condition |
|---|---|
| +1 | Attached leaders, or exceptional brigade commander |
| +2 | Fresh troops |
| -2 | Spent troops |
| +1 | Confederates charging |
| +1 | Mounted cavalry |
| +1 | Supported |
| +1 | Breakthrough charge |
| -1 | Outnumbered by 3:2 or |
| -2 | by 2:1 or |
| -3 | by 3:1 or greater |
| -1 | Disordered |
| -1 | Low on ammunition |
Die Result Difference (2) and Effects (3)
| Die result difference | Effects |
|---|---|
| 7 or more | Swept from the field—defenders retreat a full move disordered/silenced. One troop stand is captured and one troop stand skedaddles. A leader and a battery, if present, are captured. An additional troop stand is captured for each die result point difference over 10. Attackers breakthrough and must continue to charge a half move toward the nearest enemy with the breakthrough charge modifier. |
| 4, 5, 6 | Driven back—defenders retreat disordered/silenced beyond enemy musketry range. One troop stand skedaddles. Part of a battery, if present, is captured (mark one gun stand damaged). Attackers either carry the position, or may continue to charge a half move toward the nearest enemy with the breakthrough charge modifier. |
| 1, 2, 3 | Hard pressed—defending brigades are disordered and retreat until 2" from the enemy. Batteries are silenced and retreat beyond enemy musketry range. Attackers carry the position. |
| 0 | A desperate struggle—both sides are disordered and lose one stand of troops or guns. Continue charge combat and roll again with adjusted modifiers. |
| -1, -2, -3 | Assault checked—attackers are disordered and retreat 2" from the enemy. |
| -4, -5, -6 |
(The "Hard pressed" retreat distance is blurry in the scan; read as 2" consistent with the "Retreat 2" From Enemy" rule.)
The Attacker
All attacking brigades that have contacted an enemy stand are considered participating brigades. A participating attacking brigade is one that will count all its allowed stands in one charge combat and will suffer all effects of that combat as specified in the Charge Table. An attacking brigade may never split its stands and allocate them to more than one charge combat. Artillery stands may never charge.
The number of stands that may add their strength to charge combat is based on the attacker's formation as follows:
Line of battle. All stands in the brigade will count their strength, provided any one stand is in contact with the enemy target.
Supported line. All stands of the double line will count their strength provided any one stand is in contact with the enemy brigade. Players should note that the supported line may consist of two or more brigades in line formation, a front line charging and a second line in support. If additional brigades form the line of support, they must be within 1" of the front line. If the second line of support is formed by a brigade in supported (double) line, only the front line of that brigade will count toward numbers. The attacker may never count more than two lines deep.
Field column. All stands of the brigade will count, provided any one stand of the front line is in contact with the enemy. If a field column has not contacted an enemy stand, it may not participate in the charge combat.
March column. Only the first two stands in the column count in the charge combat, provided the first stand is in contact with the enemy. Players should note that a march column may charge down a road.
Counting stands in charge combat is shown in Figure 30.
Figure 30. Counting stands in charge combat. For a participating brigade the formation of the attacker or defender will determine the number of stands that will add their strength to charge combat as follows:
A. Brigade in line of battle formation—all stands are counted. Please note that only a defender may have attached artillery in a charge combat.
B. Brigade in supported line formation—only the front line of three stands is counted because you never count more than two lines deep for a supported line.
C. Field column—no stands are counted because contact is not made.
D. Supported line—all stands in both lines are counted.
E. Field column—all stands are counted because contact has been made.
F. March column—only the first two stands are counted.
G. Unattached battery—can only participate as a defender in charge combat. If contact has been made, the stand will always count toward numbers.
Figure 31. Counting incidental stands. Battery A is the target of brigade X, which has made incidental contact with brigade B and its supporting brigade C. Brigade Y has charged brigades B and C and made incidental contact with brigade D. Only the front line of stands of brigade C will count toward numbers because you never count more than two lines deep for a supported line. Brigade D can allocate up to four stands against Y. Brigades B and C must count five stands against brigade Y and at least one stand against brigade X. The other three stands can be allocated to either combat at the option of the defender. Battery A must of course be used against brigade X.
The Defender
All defending brigades that have been contacted by an enemy brigade during the maneuver phase will be involved, either participating brigades or as incidental stands. A participating defending brigade is a brigade that has been selected as a target by the attacker, or any brigade where more than half the stands have been contacted by the attacker. Actual physical contact with the defending stands is not required. After contact has been made with the target, any defending stands directly in the path and within 1" of the attacking brigade may be counted to determine whether the defending brigade is participating. In certain circumstances described below a participating defending brigade will be forced to allocate its stands among more than one combat. Regardless of how many charge combats its stands are allocated among, a defending brigade will always abide by the Charge Table effects of the one combat in which it is a participating brigade.
Incidental stands. Any defending brigade which has had half or fewer of its stands contacted by the enemy is not a participating brigade unless it was specifically picked as a target by a charging brigade. Such brigades may include up to half their stands in combat against the brigade(s) that contacted them. These stands are counted only for determining the size of the defending force, and can not suffer losses, disorder, or retreat results applied to the participating defending brigades. If these incidental stands are part of a losing defending force, they simply retreat the minimum distance required to allow the victorious attacker to occupy the vacated defender's position. The retreat may be either a refusal of the flank and/or a move backwards, whichever will take them out of contact with the enemy.
A defending brigade must allocate at least one stand against each brigade which made incidental contact with it. If a defending brigade is a participating brigade and is also involved in an incidental combat, up to half of its stands may be allocated to the incidental combat. This allocation is made by the defender after the attacker has specified all the attacks he intends to make during the current charge phase.
The number of stands that may add their strength to charge combat is based on the defender's formation as follows:
Single line. All stands of a participating defending brigade will count their strength either in their brigade's combat or as incidental stand(s) in another combat.
Supported line. All stands of a participating defending brigade will count both lines either in their brigade's combat or as incidental stand(s) in another combat. Players should note that the supported line may consist of two or more brigades in line formation, one front line defending and one second line in support. If additional brigades form the line of support, they must be within 1" of the front line. If the second line of support is formed by a brigade in supported (double) line, only the front line will count toward numbers. The defender may never count more than two lines deep.
Field column. All stands of the brigade will count, provided it is a participating defending brigade. Incidental contact occurs if only one stand of the front line is in contact with the enemy and it is not a participating brigade. When incidental contact occurs, the defending player may use up to half of the brigade's stands in the charge combat.
March column. March column has its own special rules as a defender. It will always be considered a participating brigade. Only the first two stands in the column count in the charge combat, provided the first stand is in contact with the enemy. If charged on the flanks, only the stands in contact with the enemy count their strength in combat.
Defending artillery. Artillery batteries that are detached will always be treated the same as a participating brigade. Attached batteries are considered as part of a brigade and are treated as any other stand of the attached brigade. It may be either participating or incidental. If a battery is an incidental stand and is forced to fall back, it must limber and fall back a full move. A battery forced to make such a move is not considered silenced and may freely move and/or unlimber in its next turn.
Refer to figures 30 and 31 for examples of counting participating and incidental stands in charge combat.
Figure 32A. One attacker vs. one defender. Brigade A has targeted and charged into contact with enemy brigade X. A has also overlapped half or less of brigade Y which is within 1". Brigade Y will not be a participating brigade, but will be able to count up to three incidental stands (half its strength) toward numbers for the charge combat. Only brigades A and X will be affected by the Charge Table results.
Figure 32B. One attacker vs. multiple defenders. Brigade A has targeted and charged into contact with enemy brigade X. A has also overlapped more than half of brigade Y which is within 1". All three brigades will therefore be participating brigades in one charge combat with all affected by the Charge Table results.
Figure 32C. Multiple attackers vs. one defender. Brigades A and B have targeted and charged into contact with enemy brigade X. A has also overlapped half or less of brigade Y which is within 1". Brigade Y will not be a participating brigade, but will be able to count up to three incidental stands toward numbers for the charge combat. Brigades A, B, and X will be participating brigades in one charge combat and all three will be affected by the Charge Table results.
Figure 32D. Dividing multiple unit combats. Brigades A and B have targeted and charged into contact with enemy brigade X. A has also overlapped more than half of brigade Y which is within 1". Since it is not possible for two or more attacking brigades to attack two or more defending brigades as a single charge combat, this attack must be divided into two combats. To accomplish this, brigade A must attack brigade Y as one charge combat, while brigade B attacks brigade X as a separate combat. Please note that the defender must allocate between one and three stands of X as incidental stands toward the other charge combat.
Figure 32E. Dividing multiple unit combats. Brigades A and B have targeted and charged into contact with enemy brigade X. A has also overlapped more than half of brigade Y which is within 1". However brigade C has also targeted and charged into contact with enemy brigade Y. Since it is not possible for two or more attacking brigades to attack two or more defending brigades as a single charge combat, this attack must be divided into two combats. To accomplish this, brigades A and B will attack brigade X as one charge combat, while brigade C attacks brigade Y as a separate combat. Please note that the defender must allocate between one and three stands of Y as incidental stands toward the other charge combat.
Combat Situations
There are three basic combat situations that may occur in the charge combat phase. The situations are categorized by the number of brigades and stands contacted by the charging brigades. Once the categories are determined, brigades and batteries will be considered as either a participating brigade or as an incidental stand for the calculation of the charge combat.
One attacker vs. one defender. The charge combat will consist of one participating attacker versus one participating defender and any incidental stands. Players should note that only one stand from the attacker and defender are required to be in contact to make both brigades participating brigades.
One attacker vs. multiple defenders. The charge combat will consist of one participating attacker versus more than one participating defender and any incidental stands.
Multiple attackers vs. one defender. More than one participating attacking brigade versus one participating defending brigade and any incidental stands.
It is not possible for two or more attacking brigades to attack two or more defending brigades as a single charge combat. In such a situation, each defending brigade must be attacked separately. This may mean that an attacking brigade will actually engage in charge combat with a brigade other than the one originally specified as its target.
Figures 32A through 32E illustrate how to determine which combat situation applies.
Charge Combat Modifiers
Outflanked. The defender is considered to be outflanked if the attacker begins his initial charge movement or breakthrough movement with at least two stands past the defender's flank. The defender will receive a -3 modifier for being outflanked.
The method used to determine if the defender is outflanked is similar to that used in enfilade fire. Trace a straight line from the front outside corner of one flank to the opposite corner. If two or more attacking stands began their charge movement behind this line, the defender is considered to be outflanked. See figure 33 for an example of being outflanked.
Outnumbered. The opposing side with the smaller number of stands must determine if it will receive a negative combat modifier. Subtract one from the basic die result if it is outnumbered by a ratio of 3:2 but less than 2:1. Subtract two if 2:1 but less than 3:1. If outnumbered by 3:1 or more subtract three. Stands removed as casualties during the preceding Musketry and Cannonade Phase are not used in the calculation of this ratio. They are considered to be lost before the attacker closes for charge combat.
Figure 33. Outflanked. Brigade A began its move with only one stand past the flank of brigade X. Although it ends the Maneuver Phase with four stands past the flank of X, the defender would not receive the -3 outflanked modifier if attacked by A alone. Brigade B, however, began its move with two stands past the flank of brigade X, and the defender will be subject to the outflanked modifier if attacked by B. Please note that only one attacking brigade must outflank the defender for the modifier to apply.
Brigade effectiveness. Both the attacker and defender add two to the basic die result when half or more of their stands in the charge combat are fresh, and subtract two if half or more of their stands are spent. If exactly half of all stands are fresh and the other half are spent, neither modifier applies.
The brigade effectiveness level remains constant throughout a player turn. If the brigade loses stands in the preceding Musketry and Cannonade Phase, the effectiveness level is not reduced during the following Charge Phase. The lower level will apply in the very next player turn.
Losses from fire combat. Both the attacker and defender subtract one from the basic die result for each troop stand removed as casualties during the preceding Musketry and Cannonade Phase.
Disorder and silenced. The attacker and/or defender subtract one from the basic die result if half or more of their stands are from disordered brigades and silenced batteries.
Low on ammunition. The attacker and/or defender subtract one from the basic die result if half or more of their stands are from brigades and batteries that are low on ammunition.
Support. The attacker and/or defender add one to the basic die result if half or more of their stands are in a supported line or field column formation.
Attached leaders. The attacker and/or defender add one to the basic die result if at least one of the participating brigades has an attached leader or exceptional brigade commander. No modifier is given for a leader removed as a casualty on the Fallen Leader Table. This modifier is a +1 regardless of the number of attached leaders.
Confederates charging and mounted cavalry. The Confederates add one to the basic die result when infantry charges. Both the Union and Confederates add one to their die result if one of their participating attacking or defending brigades is mounted cavalry. These modifiers are not cumulative.
Fieldworks and favorable ground. The defender may receive charge combat modifiers for occupying favorable ground and defensive positions. The actual value of the modifier should be determined before beginning the scenario.
A +1 or +2 modifier is given for favorable ground when at least half of the defending stands occupy woods, a town, or broken ground, and/or half or more of the attacker's stands are charging uphill, across a ford, or through a swamp. Normally these terrain features are worth a +1 modifier but the scenario designer may specify certain defensive positions to receive the +2 modifier. Examples of +2 terrain would include the wooded slopes of Culp's Hill and the rocky crest of Little Round Top.
The defender may also receive a +1 or +2 modifier for defenses when at least half of the front line stands occupy a position with breastworks, stone walls, sunken roads, a railroad cut or embankments. Strong defensive positions such as entrenchments and heavy fieldworks may receive a +3 value. There are no modifiers for minor terrain features such as gentle slopes, narrow or shallow streams, isolated buildings, orchards, groves, or rail fences.
A Desperate Struggle
On a die result difference of zero, a "desperate struggle" occurs. Each side suffers one casualty and becomes disordered/silenced. Before resolving any other combat, a second round of charge combat is fought. Each side recalculates its strength and modifiers. Players should note the only possible changes of modifiers will be for disorder, stands lost, and the outnumbered ratio. Players now repeat the die roll procedure as before. "A desperate struggle" may reoccur any number of times in a single combat, limited only by the number of stands available to be removed as casualties. When a die result difference other than zero occurs, the desperate struggle ends and the new charge combat effects are applied.
Capturing Stands
Stands are removed in charge combat as casualties, from skedaddling or if captured. One or more troop stands, all or part of a battery, and a leader or exceptional brigade commander may be captured if their side is defeated.
Retreat After Combat
When a charge combat calls for a defeated brigade to retreat, it must retreat away from the enemy, ending its retreat disordered and facing the enemy. Terrain effects are ignored for retreats.
The distance of the retreat will vary with the charge combat effect. The retreat distances may be:
- End the retreat 2" away from the enemy.
- Retreat beyond enemy musketry range.
- Retreat a full move.
The retreat is performed by the brigade that was defeated in the charge combat, attached leaders, and attached batteries. The incidental stands defeated in the charge combat must fall back and/or refuse their flanks. This flank refusal must be far enough to allow the attacking brigade to advance and carry the position.
When participating artillery stands are defeated and survive the combat effects, they are immediately silenced and must limber-up. They retreat their full movement rate away from the enemy and are affected by rough terrain.
A participating brigade may have one or more of its stands fighting a separate charge combat as incidental stands. These incidental stands will retreat with their parent brigade, suffering the same combat results. These stands will count, however, in the incidental combat regardless of the order in which the charge combats were resolved.
Carrying the Position
On a "Hard Pressed" or "Driven Back" effect, the attacker may carry the position of the defender. At least one of the attacking brigades must advance a minimum of 1" to occupy the vacated position. Brigades that attacked from the flank or at an angle may advance to the center of the vacated position to satisfy this result. Once the position has been occupied, an attacker in line formation may refuse one or both flanks up to 45 degrees. A field column may wheel up to 45 degrees as it advances to occupy the vacated position. See figures 34 and 35A and B for an example of carrying the position.
Figure 34. Retreat after combat. Enemy brigade X has made a flank attack against brigade A. Brigade A has lost the combat and must retreat 2" from the enemy. Brigade X carries the position, advancing to the center of A's former position. Thus, the 2" retreat distance can not be determined until after the completion of the advance of brigade X.
Breakthrough
Breakthrough movement may occur as a result of a combat effect of "Driven Back" or "Swept from the Field". On a "Driven Back" result, the breakthrough move is optional; the attacker may either breakthrough or carry the position. On a "Swept from the Field" result, the breakthrough move is mandatory.
A breakthrough allows the attacker to continue to charge an additional half move after all initial (first round) charge combats have been resolved. Movement is conducted as a normal charge move. The breakthrough move is measured from the position of the attacker at the point of contact and not after the attacker carries the position. The movement must be conducted toward the nearest enemy brigade or unattached artillery stand. If more than one target is available, the charging player selects the target. If more than one brigade participated in the attack, each may conduct a breakthrough move toward the same or different targets. If the attacker does not have enough movement to make contact, it halts after expending all its movement. After all breakthrough movement has been completed, a second round of charge combat will take place between the attacker and the newly contacted enemy brigade or artillery stand.
The attacker again decides the order in which the combats are resolved. No fire combat is conducted by the units involved in this second round of charge combat. Both sides now follow the charge combat procedure, starting with the computation of the charge combat modifiers. Disorders from the initial round of charge combat do apply to any units involved in this second round. Fire combat casualties still apply from the previous M&C Phase as well as any stands lost in "A desperate struggle". Remember that the brigade effectiveness is based on the level at which the brigade started the current player turn.
A brigade may only conduct one breakthrough move in a Charge Combat Phase. If a breakthrough effect occurs in the second round of charge combat, the attacker may only carry the position. Refer to figures 35A and 35C for an example of breakthrough movement.
Figure 35A. Initial positions. Brigade X has targeted and charged brigade A. X has also made contact with half or less of brigade B and its attached battery. The participating brigades in the charge combat are A and X, but the defender must include from one to four incidental stands of B toward numbers for the combat. During the charge combat the attacker achieves a result of "Driven Back" on the Charge Table. This result allows the attacker to either occupy the enemy position or to conduct a breakthrough charge. Refer to figures 35B and 35C for examples of these two options.
Figure 35B. Carrying the position. Brigade X has achieved a "Driven Back" result while charging brigade A, which requires A to retreat beyond enemy musketry range. Brigade B was not a participating brigade, and therefore does not suffer the effects of the combat. Brigade X has the option of carrying A's position or conducting a breakthrough charge. In either case, brigade B must refuse its flank to allow X to advance. The attached battery must limber up and retreat a full move in good order. In this example, the attacker chooses to occupy brigade A's former position with X, and declines the opportunity to conduct a breakthrough charge. Brigade X may refuse its flank as it advances.
Figure 35C. Breakthrough charge. All combat and retreats have taken place as described in Figure 35B. In this example, however, the attacker chooses to conduct a breakthrough charge. The nearest enemy unit is brigade B. Brigade X wheels into contact with B and conducts a second round of charge combat. Please note that the attached battery has already limbered up and moved away and will therefore not count toward numbers in the second round of charge combat.
The Battle of Gettysburg
Transcription note: the printed historical narrative of the Gettysburg campaign and of the three days of battle (pages 50-52 and the introductions to each day's scenarios), the maps and the photographs are not transcribed. The scenario rules, orders of appearance, victory conditions and orders of battle follow.
First Day Scenarios
There are two scenarios provided for refighting the First Day of Gettysburg. The first scenario listed below will take approximately 7 hours to play and can accommodate up to 7 players. The second scenario will take approximately 9-10 hours and can handle up to 9 players. The terrain, starting positions, and arrival times of units are the same for both scenarios. The only differences are the number of turns and victory conditions as described below.
Terrain. Terrain should be laid out as shown in Map 1. Important terrain elements are McPherson Ridge, Seminary Ridge, the unfinished railroad cut, the town of Gettysburg, Cemetery Hill, Culp's Hill, Willoughby Run, and Rock Creek.
The following terrain features are considered to be rough terrain and will affect movement: the wooded portion of Culp's Hill and any movement through Gettysburg not on roads. Rock Creek and Willoughby Run are 1" in width and are fordable along their entire lengths. Movement across the railroad cut is conducted as fording. A unit in march column may move down the cut without penalty.
The following terrain features will provide a -1 fire combat modifier for cover: woods, the sunken road, the railroad cut, and the town of Gettysburg.
The following terrain features will provide a +1 charge combat modifier for favorable ground: defending behind Rock Creek or Willoughby Run; defending on the crest of McPherson Ridge, Seminary Ridge, or Cemetery Hill; defending in woods or in Gettysburg. A +2 modifier applies when defending Culp's Hill. Favorable ground modifiers are not cumulative.
The following terrain features will provide a +1 charge combat modifier for defensive: stone walls, the sunken road, and the railroad cut.
Starting Positions. Map 1 indicates the starting positions of all units as of 1000 July 1st. The order of battle on pages 63 and 64 lists the strengths of all units who participated in the first day's battle.
UNION STARTING UNITS
- Buford's Cavalry Division, Buford - Gamble, Devin, 1 horse battery.
- I Corps, Reynolds - 1st Division, Wadsworth - Meredith, Cutler, 2 batteries. - 3rd Division, Doubleday - Rowley, Stone, 1 battery.
CONFEDERATE STARTING UNITS
- III Corps - Heth's Division, Heth - Pettigrew, Brockenbrough, Archer, Davis, 2 batteries. - III Corps Artillery - 2 batteries.
Order of Appearance. All units enter in march column along the road specified except Rodes' division of the II Corps. Any brigade may spend the designated turn of entry offboard, using that turn to change into a different formation. On the following turn that unit may enter within six inches to either side of the entry point road.
UNION ORDER OF ARRIVAL
| Turn | Road | Units |
|---|---|---|
| 1100 | Road G | I Corps - 2nd Division, Robinson - Paul, Baxter, 1 battery. |
| 1100 | Road F | XI Corps - 3rd Division, Schurz - Schimmelfennig, Krzyzanowski, 1 battery. |
| 1130 | Road G | XI Corps, Howard - 1st Division, Barlow - Von Gilsa, Ames, 1 battery. |
| 1200 | Road F | XI Corps - 2nd Division, Von Steinwehr - Coster, Smith, 1 battery. |
| 1700 | Road E | XII Corps, Williams - McDougall, Ruger, 1 battery. |
| 1730 | Road E | XII Corps, Slocum - 1st Division, Geary - Candy, Kane, Greene, 2 batteries. |
CONFEDERATE ORDER OF ARRIVAL
| Turn | Road | Units |
|---|---|---|
| 1130 | Road A | III Corps, A.P. Hill - Pender's Division, Pender - Perrin, Lane, Thomas, Scales |
| 1200 | Road A | III Corps - Pender's Artillery - 2 batteries. - III Corps Artillery - 2 batteries. |
| 1300 | All brigades of this division enter between roads B and C in single or double line. | II Corps, Ewell - Rodes' Division, Rodes - Daniel, Iverson, Doles, Ramseur, O'Neal, 2 batteries. |
| 1400 | Road D | II Corps - Early's Division, Early - Hays, Avery, Smith, Gordon, 2 batteries. |
| 1700 | Road A | III Corps - Anderson's Division, Anderson - Wilcox, Mahone, Wright, Lang, Posey, 2 batteries. |
Scenario 1: The Gathering Storm
Game length. Play begins with the Confederate 1000 turn and ends after the Union 1700 turn. The troops listed as arriving on the 1700 turn are not used in this scenario.
Victory conditions. Casualty points are accumulated as listed in the Casualty Points Chart. In addition points are awarded to each side for control of the following geographic objectives. A player controls the listed objective by having an infantry brigade occupying the crest of the hill at the end of the scenario.
| Union | Confederate | |
|---|---|---|
| Cemetery Hill | 5 pts | 20 pts. |
| Culp's Hill | 5 pts. | 20 pts. |
Decisive victory— Accumulate at least 30 victory points and at least twice as many as the opposing side.
Tactical victory— Accumulate at least 15 victory points and more than the opposing side.
Draw— If neither side accumulates 15 victory points or both sides accumulate the same number of points.
Scenario 2: Ewell Presses the Attack
Game length. Play begins with the Confederate 1000 turn and ends after the Union 1930 turn.
Victory conditions. Casualty points are accumulated as listed in the Casualty Points Chart. In addition points are awarded to each side for control of the following geographic objectives. Control of a geographic objective is the same as defined in the scenario 1 rules listed above.
| Union | Confederate | |
|---|---|---|
| Cemetery Hill | 10 pts. | 10 pts. |
| Culp's Hill | 10 pts. | 10 pts. |
Decisive victory— Accumulate at least 35 victory points and at least twice as many as the opposing side.
Tactical victory— Accumulate at least 20 victory points and more than the opposing side.
Draw— If neither side accumulates 20 victory points or both sides accumulate the same number of points.
Second Day Scenarios
There are two scenarios provided for refighting the Second Day of Gettysburg. Unlike the first day scenarios these differ greatly in terms of size and scope. For that reason each will be listed separately in its entirety.
Scenario 3: The Battle for the Round Tops
Terrain. Only the southern half of the battlefield will be used in this scenario. Only that portion of Map 2 will be needed. Terrain should be laid out as shown in Map 2. Important terrain elements are Big Round Top, Little Round Top, Devil's Den, the Peach Orchard, the Wheatfield, Seminary Ridge, Cemetery Ridge, and Plum Run.
The following terrain features are considered to be rough terrain and will affect movement: woods adjacent to the Wheatfield and Devil's Den, the entirety of Little and Big Round Top, and Devil's Den. Plum Run is 1" in width and is fordable along its entire length.
The following terrain features will provide a -1 fire combat modifier for cover: woods and stone walls. The following terrain features are extremely broken ground and will provide a -2 modifier for cover: Devil's Den, the crest of Little Round Top, and all of Big Round Top.
The following terrain features will provide a +1 charge combat modifier for favorable ground: defending behind Plum Run, in woods, or the western slope of Little Round Top. A +2 modifier applies when defending Devil's Den, the crest of Little Round Top, or all of Big Round Top. Favorable ground modifiers are not cumulative. Cemetery Ridge does not provide a modifier for charge combat.
Stone walls will provide a +1 charge combat modifier for defenses.
Starting Positions. Map 2 indicates the starting positions of all units as of 1600 July 2nd. The order of battle on pages 63 and 64 lists the strengths of all units who participated in the second day's battle.
UNION STARTING UNITS
- I Corps, Newton (Reynolds) - 3rd Division, Doubleday - Rowley, Dana (Stone), Stannard, 1 bty. - 2nd Division, Robinson - Coulter (Paul), Baxter, 1 bty. (1700)
- II Corps, Hancock - 3rd Division, Hays - Carroll, Smyth, Willard, 1 bty. - 2nd Division, Gibbon - Harrow, Webb, Hall, 1 bty. (1700) - 1st Division, Caldwell - Cross, Kelly, Zook, Brooke, 2 bty. (1630)
- III Corps, Sickles - 1st Division, Birney - Graham, Ward, deTrobriand, 2 bty. - 2nd Division, Humphrey - Carr, Brewster, Burling, 2 bty. (1600)
- V Corps, Sykes - 1st Division, Barnes - Vincent, Sweitzer, Tilton, 1 bty. (1600) - 3rd Division, Crawford - McCandless, Fisher, 1 bty. (1630) - 2nd Division, Ayres - Day, Burbank, Weed, 1 bty. (1700)
- Artillery Reserve - 14 bty. (One battery is released each Union turn)
CONFEDERATE STARTING UNITS
- I Corps, Longstreet - Hood's Division, Hood - Law, Anderson, Robertson, Benning, 2 bty. (1600) - McLaws' Division, McLaws - Kershaw, Semmes, Barksdale, Wofford, 2 bty. - I Corps Artillery - 4 bty. (1600)
- III Corps - Anderson's Division, Anderson - Wilcox, Mahone, Wright, Lang, Posey, 2 bty. - III Corps Artillery - 2 bty. (1700)
The units listed above are the only ones who take part in this scenario. They may not move from their positions until the time listed. They may conduct fire combat, defend in charge combat, and counter-charge an enemy that seizes their position.
Game length. Play begins with the Confederate 1600 turn and ends after the Union 1930 turn. There are 8 turns in this scenario, which can be played in approximately 4-5 hours. There are enough units to accommodate up to 6 players.
Victory conditions. The Confederates can achieve a decisive victory by fulfilling the following two conditions:
- Have an infantry brigade on the crest of Little Round Top at the end of the 1930 turn.
- Inflict at least 20 casualty points on the Union and obtain at least a 2:1 ratio in casualty points.
The Confederacy will achieve a tactical victory by fulfilling one of the conditions listed.
The Union wins a decisive victory if the Confederacy fails to achieve either condition listed above.
Scenario 4: Lee's Grand Attack
Terrain. The entire battlefield (14' by 6') will be used in this scenario. Terrain should be laid out as shown in Map 2. Critical terrain features include the town of Gettysburg, the continuation of Seminary Ridge, Cemetery Hill, Culp's Hill, and those features listed in Scenario 3. A one foot wide extension to the east of Culp's Hill could be added to hold Johnson's Division. As an alternative, the position of the units could be kept offboard until they enter to assault Culp's Hill or at any location north of the hill. In addition to those terrain features listed in scenario 3 as affecting movement and providing fire and charge combat modifiers, the following also apply.
The following terrain features are considered to be rough terrain and will affect movement: the wooded portion of Culp's Hill and any movements through Gettysburg not on roads. Rock Creek is 1" in width and is fordable along its entire length.
The following terrain features will provide a -1 fire combat modifier for cover: woods, the sunken road, breastworks, and Gettysburg.
The following terrain features will provide a +1 charge combat modifier for favorable ground: defending behind Rock Creek; defending on the crest of Seminary Ridge, or Cemetery Hill; defending in woods or in Gettysburg. A +2 modifier applies when defending the wooded portions of Culp's Hill. Favorable ground modifiers are not cumulative.
The following terrain features will provide a +1 charge combat modifier for defenses: stone walls, the sunken road, the breastworks along Culp's Hill and Cemetery Hill.
Starting Positions. Map 2 indicates the starting positions the units could have occupied as of 1300 July 2nd. The order of battle on pages 63 and 64 lists the strengths of all units who participated in the second day's battle. All units listed in Scenario 3 are available in addition to the following:
ADDITIONAL UNION STARTING UNITS
- I Corps - 1st Division, Wadsworth - W. Robinson (Meredith), Cutler, 1 bty.
- XI Corps, Howard - 3rd Division, Schurz - von Amsberg (Schimmelfennig), Krzyzanowski, 1 bty. - 1st Division, Ames (Barlow) - Von Gilsa, Harris (Ames), 1 bty. - 2nd Division, Von Steinwehr - Coster, Smith, 1 bty.
- XII Corps, Slocum - 2nd Division, Williams - Mcdougall, Ruger, Lockwood, 1 bty. - 1st Division, Geary - Candy, Kane, Greene, 2 bty.
ADDITIONAL CONFEDERATE STARTING UNITS
- II Corps, Ewell - Rodes' Division, Rodes - Daniel, Iverson, Dole, Ramseur, O'Neal, 2 bty. - Early's Division, Early - Hays, Avery, Smith, Gordon, 2 bty. - II Corps Artillery - 4 bty.
- III Corps, A.P. Hill - Pender's Division, Pender - Perrin, Lane, Thomas, Scales, 2 bty. - Heth's Division, Pettigrew (Heth) - Marshall (Pettigrew), Brockenbrough, Fry (Archer), Davis, 2 bty. - III Corps Artillery - 2 bty.
All units except the Union Artillery Reserve are available to move without restriction on the first turn. The 14 batteries of the Reserve are released one per Union turn beginning with the 1300 turn. On the turn that a Confederate infantry brigade advances to within 12" of the reserve, all remaining unreleased batteries must retreat a full move during the Union turn. On subsequent turns the batteries are available to move without restriction.
Order of Appearance. All units enter in march column on the road specified. Any brigade may spend the turn of arrival offboard, using that turn to change formation. On the following turn that unit may enter within 6" to either side of the road.
If room is not available to construct a one foot extension to the east of Culp's Hill, Johnson's Division may be held offboard and the position and formation of each unit noted on paper. Those units may enter north of location X on Map 2 during any Confederate turn.
UNION ORDER OF ARRIVAL
| Turn | Road | Units |
|---|---|---|
| 1530 | road E. | VI Corps, Sedgwick - 1st Division, Wright - Torbert, Bartlett, Russell, 2 bty. |
| 1600 | road E. | VI Corps - Howe's Division, Howe - Grant, Neill, 2 bty. |
| 1630 | road E. | VI Corps - 3rd Division, Wheaton (Newton) - Shaler, Eustis, Nevin (Wheaton), 2 bty. |
CONFEDERATE ORDER OF ARRIVAL
| Turn | Road | Units |
|---|---|---|
| 1300 | above X | II Corps - Johnson's Division, Johnson - Steuart, Williams, Walker, Jones, 2 bty. |
| 1400 | road A. | I Corps - Pickett's Division, Pickett - Garnett, Armistead, Kemper, 2 bty. |
Game length. Play begins with the Confederate 1300 turn and ends after the Union 1930 turn. There are 14 turns in this scenario. Due to the large number of units involved this scenario will take approximately 8-10 hours to play and can accommodate up to 12 players.
Victory conditions. Casualty points are accumulated as listed in the Casualty Points Chart. In addition points are awarded to each side for control of the following terrain objectives: Culp's Hill, Cemetery Hill, and Little Round Top. A player controls the listed objective by having a brigade occupying the crest of the hill at the end of the scenario.
The Confederate player receives 10 points for each objective he controls at the end of the 1930 turn. The Union player receives 15 points if he controls all three objectives at the end of the 1930 turn. If the Union player has lost control of even one objective, he receives no terrain objective points.
Decisive victory— Accumulate at least 40 victory points and at least twice as many as the opposing side.
Tactical victory— Accumulate at least 40 victory points and more than the opposing side. (As printed.)
Draw— If neither side accumulates 40 victory points or both sides accumulate the same number of points.
Third Day Scenario
Scenario 5: Pickett's Charge
Terrain. Terrain should be laid out as shown in Map 3. Important terrain elements are Seminary Ridge, Cemetery Ridge, Ziegler's grove, the stone wall and breastworks.
The following terrain features will provide a -1 fire combat modifier for cover: woods, stone walls, and breastworks.
Defending in woods will provide a +1 charge combat modifier for favorable ground. Cemetery Ridge does not provide a modifier for charge combat.
Stone walls and breastworks will provide a +1 charge combat modifier for defenses.
Starting Positions. Map 3 indicates the starting positions of all units as of 1500 July 3rd. Only those units participating in the attack are shown. All other Union and Confederate units present are not shown and do not need to be set up for this battle. The order of battle on pages 63 and 64 lists the strengths of all units who participated in the battle.
UNION STARTING UNITS
- I Corps, Newton (Reynolds) - 3rd Division, Doubleday - Rowley, Dana (Stone), Stannard - 2nd Division, Robinson - Coulter (Paul), Baxter - I Corps Artillery - 2 bty.
- II Corps, Hancock - 3rd Division, Hays - Smyth, Sherrill (Willard) - 2nd Division, Gibbon - Harrow, Webb, Hall - 1st Division, Caldwell - McKeen (Cross), Kelly, Fraser (Zook), Brooke - II Corps Artillery - 4 bty.
- III Corps - 2nd Division, Humphrey - Carr, Brewster, Burling
- Artillery Reserve - 5 bty.
CONFEDERATE STARTING UNITS
- I Corps, Longstreet - Pickett's Division, Pickett - Garnett, Armistead, Kemper.
- III Corps - Heth's Division, Pettigrew (Heth) - Marshall (Pettigrew), Brockenbrough, Fry (Archer), Davis - Pender's Division, Trimble (Pender) - Scales, Lane.
Order of Appearance. The following Confederate units enter along Seminary Ridge in single line formation:
- 1530 III Corps - Anderson's Division, Anderson - Wilcox, Lang, Wright
Game length. Play begins with the Union 1500 turn and ends after the Confederate 1730 turn.
Victory conditions. The Confederate player wins a decisive victory at the end of the turn on which 3 non-spent Confederate brigades cross the Taneytown Road between points A and B on Map 3.
The Union wins a decisive victory if the Confederacy fails to achieve the condition listed above or causes 6 Confederate brigades of the attacking force to become spent and/or eliminated. The game ends immediately when 6 of the 9 brigades under Longstreet's command become spent and/or eliminated.
Scenario Special Rules.
- The 9 Confederate brigades available at start are the attacking force. They are under the command of Longstreet and his modifier can be used for all of those units. The brigades of Anderson's Division are a covering force to protect the flanks of the attack. Anderson's brigades can not use Longstreet's modifier. Anderson's brigades must remain at least 6 inches west of Cemetery Ridge at all times.
- The Confederate attack was centered on the copse of trees. The Confederate brigades can charge Cemetery Ridge only between points C and D on Map 3. Numerous VI Corps units were just south and east of Cemetery Ridge and would have stopped any Confederate breakthrough on the southern portion of the Ridge.
- No Union artillery may move west of Cemetery Ridge.
- The Confederate at start units are placed three inches east of Seminary Ridge to start the game. All at start brigades in good order during the Confederate 1500 turn must advance a full move in a straight line toward Cemetery Ridge. These units are free to move in any manner desired starting with the 1530 turn subject to the restrictions of scenario special rule #2 above.
Gettysburg Order of Battle
On June 30th, 1863 the Union's Army of the Potomac numbered 115,000 officers and enlisted men, with over 360 guns. It consisted of 51 infantry brigades organized into 19 divisions, which in turn were organized into 7 infantry corps and a cavalry corps of 3 divisions. Artillery was distributed to each corps with 114 guns held as the Army Artillery Reserve.
The Confederacy's Army of Northern Virginia numbered 76,000 men and over 270 guns. After the death of Stonewall Jackson it was reorganized into three infantry corps and a cavalry division. There were three divisions in each corps and most divisions had four brigades. Artillery was distributed at both the division and corps level.
The Order of Battle below lists the organization and strength of the opposing armies. Brigades, leaders, and batteries that were present are listed individually for each day of the battle. Losses inflicted during the first two days of the battle are reflected by the reduced strengths of units on the second and third days. All units present on the third day are listed although most will not be necessary to fight scenario 5, Pickett's Charge. They are provided for those gamers wishing to design alternative third day scenarios.
As explained in the rules each infantry or cavalry brigade consists of a number of stands. The first number listed for each brigade is the strength of that brigade for that day of the battle, and represents the brigade at the fresh level. When the brigade has suffered stand losses reducing it to the second number, it loses effectiveness and is now considered worn. When the remaining stands in the brigade are reduced to the third number, the brigade is spent. The effects of being fresh, worn, or spent are explained in the brigade effectiveness section of the rules.
Leaders marked as "E" in the Order of Battle are rated exceptional. In addition, certain brigades are also marked "E", which identifies their brigade commander as exceptional. The effects of exceptional leaders are explained in the rules.
An identification label must be prepared for each brigade, leader, and battery. Instructions for preparing these labels can be found in the labeling section of the rules.
Gettysburg was the largest battle of the Civil War. Fairly large miniature armies are needed to recreate the battle, particularly the second day's fighting. To field both armies the players will need 10 corps leader stands, 29 division leader stands, 69 artillery batteries, 14 stands of cavalry, 11 stands of dismounted cavalry, 582 stands of infantry, and assorted markers.
Transcription note: the Confederate and Union Orders of Battle (pages 63-64) are tables listing, for each corps, division, brigade and battery, its leader, strength for July 1st, 2nd and 3rd as "fresh/worn/spent" stands and an "E" marker for exceptional commanders. The halftone scan available is too degraded to read the strength figures reliably, so the tables are not transcribed here rather than risk misstating them. The Union Order of Battle covers the I, II, III, V, VI, XI and XII Corps, Buford's and Farnsworth's cavalry and the 14-battery Artillery Reserve; the Confederate Order of Battle covers the I, II and III Corps.
The Aftermath
Of 90,000 Union troops and 75,000 Confederates, there were more than 51,000 casualties. The Army of the Potomac lost 3,100 killed, 14,500 wounded, and 5,300 prisoners and missing. Of the Army of Northern Virginia, 3,900 were killed, 18,700 wounded, and 5,400 missing and prisoners.
Both sides had fought hard and with great valor. Meade, new to army command, had conducted an able and resolute defense. If Chancellorsville was Lee's best battle, Gettysburg was clearly his worst; but the reverse did not unnerve him or reduce his effectiveness as a commander. The invasion failed and he retired at once toward the Potomac, but it was several days before the Confederate Army could cross the flooded Potomac and return to Virginia.
President Lincoln was elated by Meade's victory and Grant's capture of Vicksburg. He thought the war could be brought to an end in 1863 if Meade pursued and destroyed the Army of Northern Virginia on the north bank of the Potomac. But Lee still had a considerable force and Meade, exhausted from going almost completely without sleep during the whole campaign, moved only with reluctance, for which he was severely criticized. Gettysburg was the last important action in the eastern theater during 1863. After Gettysburg and Vicksburg the focus of the war shifted to Tennessee.
Building Battlefield Terrain
Once upon a time, armies were pushed across a vast expanse of bare table, the monotony relieved perhaps by a few books serving as hills and scraps of cloth passing for woods and fields. Things are different today. All of the terrain and structures appearing in the photographs in this book are for the most part the product of "unskilled" labor. The terrain is not professionally built, although it might appear to be so. We are sure you will agree that it gives you, the gamer, more of a feeling that you are indeed at Gettysburg. This is always of paramount importance to an historical miniatures gamer. To be able to glance around the table and instantly recognize all of those salient features which so dominated and described the battlefield is the source of no small thrill to any historical gamer. After all, it wouldn't really be Gettysburg without Little Round Top and the Peach Orchard, Devil's Den and Cemetery Hill.
The effect, the all important "look", of the terrain is the product of vast amounts of trial and effort. This section is intended to give you the benefit of our mistakes, and to save you time by steering you down the right path toward recreating the 1860s in your garage or basement.
The Table. This is often the source of some controversy and difference of opinion. Large tables, like old ping-pong tables, can be converted to wargame tables. You can buy lumber and build a table to your own specifications, or simply lay plywood over sawhorses (be careful if you lean on this). In our opinion, commercially available heavy duty folding tables, available in four to eight foot lengths, and usually 30 inches wide, are the best recommendation. You can sit or lean on these, they can be struck down when space isn't available, or used for other purposes. Butting several of them together can provide you with very close to the exact size table you might need.
A note of caution. The best wargames table width is six feet. Any wider and you will have difficulty reaching the middle. Much narrower and you'll get less of a battlefield than a terrazzed bowling alley.
The Ground. Commercially available terrain systems are very nice but tend to be expensive. If you don't have the spare cash, think in terms of old bedspreads, blankets, or felt, any or all in a shade of medium to light green. As will be explained, it is preferable that the fabric be fiberwoven, so that you may stick nails through it without causing holes or other damage. Most cloth and felt is available in six-foot widths at fabric stores. Remember that heavy weight material, like blankets and felt, is less likely than thinner material to slip and slide.
Hills. Hills can be made to lie beneath the cloth or on top of it. If hills are beneath, trees made of toothpicks or nails can be pushed through the cloth into the hills. If on top, they will have to be surfaced and finished, but when finished will look great. Our photographic battlefield uses both. Hills are best built of an easily obtained building material called continuous bead extruded polystyrene. This is the dense, even material that comes in large boards, usually four by eight feet in size and blue or white, hence its nickname of blueboard. Blueboard is not the irregularly textured styrofoam in which appliances come packed and which keeps the beer cold at a picnic. This cooler chest styrofoam is difficult to work with, as it cuts and breaks irregularly because of its texture. Although more costly, blueboard is infinitely preferable and easier to work.
Research into the topography of actual battlefields will indicate what types of hills you will need. Often a master map of the battlefield will need to be drawn on graph paper, and this then used to determine the size (using the scale of the game) and shape of the necessary hills, as well as the location of appropriate contour lines for multi-level hills. Assembly line construction of several hills at once is recommended. Once you have decided on the hills, draw the shape of the largest, or bottom, level on a sheet of blueboard. Then cut it out using a flexible-blade hobby or craft knife, and also use the knife to bevel the cut edges at an angle. Prepare the second and subsequent levels in the same way, and glue them on top of the first with plenty of white glue, and must dry completely.
Recreating irregularly rolling terrain is much easier than you might suppose. What you will need to do is take the rough hills you have constructed by cutting, gluing and beveling, as already described, and contour them using several types of tools. A wire brush will cut away large amounts of blueboard, and can be useful for ravines and gullies. It will leave a very rough surface, but sandpaper can cure some of this. The better alternative is to use a Stanley "Surform" tool, which comes in several types as shown in the photograph. The cutting side of a "Surform" is much like a cheese grater, and when repeatedly pushed across the surface of your hills will wear them away like accelerated glacier action, and slowly cause them to resemble natural terrain. This takes a fair amount of work, as it slowly grinds down the board and gentles the squarish edges, leaving smooth, flowing curves, with only the barest trace of the regular, flat surfaces that you began with. The key is to remember that slopes do not occur just at a contour line, but flow in a continuous process from the very highest points to the very lowest. A cross-section will show you that a slope is a very nearly continuous line from contour to successive contour, and not an abrupt drop at each contour line, separated by stretches of perfectly flat ground. A brief consideration of this proposition will explain the difference between steep and gentle slopes—or what is known as the degree of grade.
Alternatively, you may choose to make your terrain less than utterly realistic, and comparatively more playable. As mentioned, hills naturally occur in smooth and/or irregular curves, and not in a wedding cake-like series of flat levels joined by regular slopes. This latter phenomenon, which describes most commercial and homemade terrain systems, is much easier to use from a gaming standpoint, as there is little room for argument as to the location of contour lines and hill crests. Terrain sculpted as above into aesthetically satisfying and natural looking slopes can present some difficulties in interpretation for the referee. If you so choose, you may diminish the degree of contouring that you administer to the hill slopes, leaving larger portions between them flat or flatter. It remains your decision. In the photographic terrain, we chose to use the former, more realistic, method.
At this point, you must decide whether you will put your hills on top of or beneath the ground cloth. If placed below, you will not need to terrain the surface of the hill, and at this point may consider yourself done with this work. If hills are placed below the cloth, you can push trees through the cloth and mount them in the unsurfaced hills as and where you need them. This cannot be done with surfaced hills.
The hills are best surfaced with spackling compound, which has the dual advantages of being both cheap and easily available. When the spackle is dry, you can paint it to match the cloth, or can mix water-based paint into the spackle before you apply it. When this colored surface is drying, liberally apply the colored grass terrain material (flocking) in a blend of colors, pressing it into the wet surface. Shake or gently brush off the excess after it is completely dry. You may choose to add walls or fences, bits of lichen, etc., for effect. If roads are desired, they should remain unflocked, and can be painted in later to match your other roads.
Roads and Streams. Roads and streams are laid upon the ground cloth in sections of irregular length and curvature, roughly 4-12 inches. Roads can be made of masking tape colored with chalk, or heavy cloth (felt and blanket material work well) in the appropriate color. The average width is one inch for roads and streams, or two inches for larger streams.
Streams can easily be made of cloth. A more realistic looking method, as shown in the photo, is to use heavy dark blue or brown transparent acetate (plastic). This should be painted on the bottom side, dark in the center and lighter toward the edges. The edges should be very irregular, and the ends should be rounded to overlap properly when laid down. When laid down, a scattering of fine gravel gives the stream an especially natural look.
Woods and orchards. Woods are well represented by irregular pieces of cloth in a darker shade of green than the ground cloth. Individually based trees can be scattered about each woods section, or set in rows for orchards. These cloth pieces and individual trees are easily stored and can be set up in many different shapes, depending on your needs. Woods also can be made in permanent sections. Irregularly shaped pieces of sheet plastic, balsa or basswood, or illustration board (dense, heavyweight cardboard) can have trees permanently mounted on them, with the woods section then terrained as the hills were. It must be noted that as good as these will look, they also are very difficult to use on uneven terrain, since they cannot conform to the surface.
Trees. Trees are available commercially in many types, shapes, sizes, colors, and price ranges, and are useable right out of the box, or with minor modifications. For evergreens, this is your best option, since making an evergreen by hand is a daunting prospect. On a Civil War battlefield, however, most if not all trees will be of the far more easily made deciduous type.
To make trees by the assembly line method, start with the cloth pom-poms taken off of bedspread trim. For a trunk, push a nail or a round toothpick through the center of the pom-pom. Coat the tree with an adhesive (spray, rubber cement, white glue), and roll the tree in flocking, in shades of green, and set aside to dry.
These trees are mounted in various ways. To make free standing individual trees, make a base for each from 3/4 inch diameter fender washers, covered with spackle or ribbon epoxy. Set the tree into this, and terrain the base. If you want to mount the trees in one of your terrained hills, while constructing the hills make wells or sockets for the trees using cut-down sections of plastic cocktail straws. Slip the tree into these as needed. A few wells will not be especially noticeable, and won't mar the surface of the hill.
To mount the trees into unterrained hills under the cloth, the sharp end of the nail or toothpick trunk is pushed through the cloth and into the hill. This permits endless variations. In all cases, trees should be no less than two inches apart, to accommodate stands between them without damage to troops or terrain.
Fields. This is truly an area to use your imagination. Almost anything can look like a field. Cloth, especially felt or corduroy, works well. Flocking, sawdust, pencil shavings, model railroad ballast, or kitty litter can be added for texture by using spray adhesive. Furrows can be indicated using a marker pen. Consider using the following, with or without added terrain material: indoor outdoor carpeting, drapery material, artificial fur, and plastic grass (doormat astroturf) with a dull yellow-brown wash liberally applied to alleviate the sheen. Fields should be about 4-8 inches on a side, in irregular rectangles or with at least two parallel sides. Occasional small stones on the fields will add to the look.
Walls and fences. Flat toothpicks make excellent post and rail fences. The posts are about 3/4 inch tall and set in pairs, with the rails of about a half toothpick length, and sandwiched between them. Fence section lengths of 2-3 inches are most usable. Insert the center posts of each length of fence into a small ball of ribbon epoxy as a base, and squash this flat on the bottom. The fence will stand by itself on this one base.
Worm fences are built of flat toothpicks, and laid upon each other five high at about a 15 degree angle. For both types of fences, cut or break plenty of toothpicks into the proper lengths that you need. Before you use them, wash the toothpicks in a solution of black paint and turpentine, which will immediately color them the shade of aged and weatherbeaten wood, without the necessity for a laborious paint job.
Picket fences are made out of 1/2 to 3/4 inch wide strips of white index card, with the vertical "spaces" between the pickets drawn in with a marker, and the strip then folded in half lengthwise. These can be bent to form corners.
Stone walls are best built by hand, using tweezers, white glue, and coarse kitty litter or very fine gravel. These can then be painted and dry brushed.
Fortifications. The most common sort will be piles of fence rails about 1/4 inch high. Black-wash them, as you did the fence material, and glue them together. Simple earthworks can be built of quarter-round molding strips 1/4 and 1/2 inch in width. The curved outside is covered with white glue and dirt-colored flocking, ballast, sawdust, and pencil shavings. The vertical inside is covered with lengths of round toothpick affixed as shoring, with parallel toothpicks touching horizontal pieces, and vertical supports glued to them every inch or so.
Railroads. The best gauge for track is either N or Z for 15mm figures, or HO or N gauge for 25mm figures. Railway roadbed can be made from asphalt roofing shingles, or heavy cloth with kitty litter, gravel and/or ballast glued to it. For an embankment or cut, a steep section of hill should be made with these glued to what will serve as the sides of the cut.
Buildings. Commercially available Civil War buildings are varied, plentiful, and usually quite good. Specific buildings of particular historical import, like the Lutheran Seminary with its famous cupola, will need to be built by hand. A drawing of the structure is best made on paper, and then can be colored. A copy of this should be preserved by photocopying. The cut-out building should be glued to heavy cardstock or board, such as art board, and this then cut out and glued together, and colored last. Roofs should be made in similar fashion, with large sections of various types of roofing material (shingle, board, tile) being drawn, then affixed to the roof of a building made out of card. This also can be colored either before or after assembly. Washes work well and will not obscure the features drawn on the pattern. Windows are best done separately, and then glued on the outside of the building where needed.
Miscellaneous. Lichen should be added judiciously to the battlefield, to give the appearance of scrub, and in similar fashion small stones can serve as occasional rock outcroppings. These have no effect on the game, and are for aesthetic purposes only, in the same fashion as single buildings. Occasional man-made objects, such as fence gates, cemetery markers and monuments, and the like, are available commercially.
Arc of Fire Gauge
The arc of fire gauge should be photo-copied, cut out, folded and glued together for use. To properly use the gauge, place the short side flush against the edge of the firing stand. One side of the gauge has the left arc of fire for infantry and the right arc of fire for artillery. Flip the gauge over for the right arc for infantry and the left arc for artillery. (The printed gauge shows 45 degree and 30 degree arcs, a 0 to 8 inch scale and shaded canister range areas.)
Tables & Charts
The Maneuver Table, Play Sequence Chart, Movement Rates Chart, Fallen Leader Table and Charge Table are reproduced in the sections above, with the text of the Tables & Charts card matching them.
Musketry & Cannonade Table
Range & Fire Points (Union / Confederate)
| Stand | Range band | Fire points |
|---|---|---|
| Infantry | 0 to 8" | 1 / 1 |
| Cavalry | 0 to 4" | 2 / 1 |
| Cavalry | 4" to 8" | 1 / 1 (second figure blurry in the scan) |
| Artillery | 0 to 4" (canister) | 10 / 10 |
| Artillery | 4" to 16" | 4 / 3 |
| Artillery | 16" to 24" | 3 / 2 |
| Artillery | 24" to 32" | 2 / 1 |
Modifiers
| Modifier | Condition |
|---|---|
| x 1/2 | fire points for infantry and dismounted cavalry stands marked disordered or low on ammunition |
| x 1/2 | fire points for each artillery stand marked as a damaged battery |
| x 2 | fire points for each stand firing from enfilade |
| +1 | to die result when firing at a target that is limbered, in column, mounted cavalry, changing formation or movement mode, or about facing |
| -1 or -2 | from die result when firing at a target in cover: woods, town, broken ground, breastworks, stone wall, sunken road, or dismounted cavalry |
Effects (columns of the table, from lowest to highest result)
- Desultory fire—no effect.
- Lively fire—troops disordered or battery silenced.
- Telling fire—troops disordered and lose 1 stand, or damage and silence a battery.
- Deadly fire—troops disordered and lose 2 stands or battery wrecked.
- Withering fire—troops disordered and lose 3 stands or battery wrecked.
On a basic die roll of 10 the following two effects apply: Fallen leader—the player controlling the target rolls on the Fallen Leader Table for each attached leader and exceptional brigade commander. Low on ammunition—upon any brigade or battery with half or more of its stands firing at the target.
Table body. The grid that cross-references total fire points (rows 0 through 50 or more) to the die-result ranges that produce each effect is too blurred in the available scan to be read reliably, and is therefore not transcribed. Only the first (Desultory fire) column is partly legible: it begins at "9 or less" for 0 fire points and falls to about "1 or less" for 15 to 19 fire points and "0 or less" for 20 to 24 fire points.