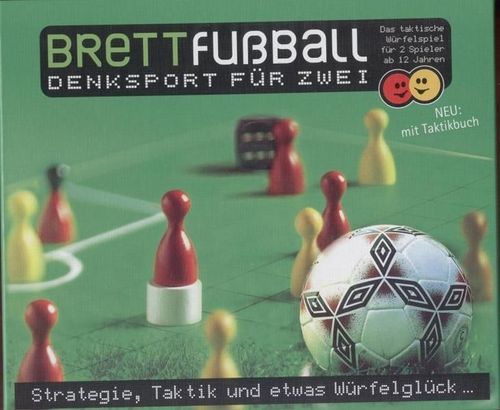
Brettfußball
Brettfußball Rulebook
Table of Contents
Table of Contents
Symbol Key
The rules sheet records game situations as pictures. The symbols used in them mean:
- Red figure without ball
- Red figure with ball
- Yellow figure with ball
- Yellow figure without ball
- Red goalkeeper
- Red arrows: movement of a red figure
- Yellow arrows: movement of a yellow figure
- White arrows on a green square: path of the ball
The Playing Field
The playing field diagram labels the following areas: goal (Tor), corner square (Eckfeld), goal line (Torauslinie), halfway line (Mittellinie), centre circle (Mittelkreis), penalty area (Strafraum), touchline (Seitenlinie). The field has marked squares: a filled dot marks the squares where each player sets up their figures, a ring marks the goalkeeper's square in front of the goal, and a two-coloured dot marks the square for the player who does not start.
Brettfußball Rules
Content: 1 playing field, 22 figures, 1 ball (round disc), 1 die, rules.
Object of the Game
The aim is to shoot the ball into the goal in the opponent's half of the playing field as often as possible. The player who has scored more goals by the agreed end of the game has won. If both players have scored the same number of goals, the game ends in a draw.
Preparation
Each player receives 11 figures of one colour and sets them up in one half of the playing field, on the squares marked with a filled dot. The goalkeeper stands in front of the goal, on the square marked with the ring.
Now the starting player is determined in any way you like. The starting player places the ball under one of their figures in the centre circle. The other player removes their figure from the centre circle and places it on the square with the two-coloured dot in their own half of the playing field.
Start of the Game and Course of Play
The starting player begins the game by shooting the ball in any direction from the kick-off point in the centre circle. After that, the players roll the die in turn and each time carry out one of the following three actions. Depending on the situation, not always all three actions are available.
1. Moving One of Your Own Playing Figures
A playing figure may only be moved by a player who is not forced to shoot the ball because of an attack by the opponent in the previous turn, or by a game rule (kick-off, restart after a goal, throw-in, corner kick or goal kick).
2. Shooting the Ball
The ball can only be shot if one of your own playing figures is standing on it. A playing figure cannot move with the ball.
3. Attack
Only an opposing figure that is standing on the ball can be attacked. Through the attack, the opponent is forced to shoot the ball in their next turn.
2. Shooting the Ball
When a player has a playing figure standing on the ball, they can shoot the ball in their turn. When shooting, the ball is moved horizontally or vertically (not diagonally) by the number rolled on the die. The figure that shoots the ball stays on its square. In one turn, a figure and the ball can never both be moved, so a figure cannot run with the ball. The ball never changes direction during a shot.
The ball can be shot:
- onto occupied squares
- onto unoccupied squares
- over own and opposing playing figures
- out of the playing field
- and of course into the goal, which is the aim of the game.
The ball cannot be shot over an opposing goalkeeper who is standing in their own penalty area.
Permitted shots (picture captions):
- A three was rolled. With the shot, the ball is moved three squares onward; the figure stays where it is.
- The red figure (A) shoots the ball with a five over the yellow figure to another red figure (B). Figure B now has the ball.
Forbidden shots (picture captions):
- The ball does not bounce off the touchline. It rolls straight on and leaves the playing field.
- Diagonal shots are not possible!
3. Attack
An attack is the move of a playing figure onto the square on which an opposing playing figure with the ball is standing. After the attack, the attacking figure is placed on a free adjacent square.
Only an opposing figure that is standing on the ball can be attacked. Through the attack, the opponent is forced to shoot the ball in their next turn.
Example: Yellow has rolled a three, moves in the direction of the arrow and thereby attacks the red figure. The attacking yellow figure is then placed on one of the squares marked with x. Through the attack, Red is forced in their next turn to shoot the ball. Only if all x squares are occupied may the attacking figure be placed on a diagonally adjacent square (D).
The Goalkeeper
- The ball cannot be shot over an opposing goalkeeper who is standing in their own penalty area.
- A goalkeeper may not stop balls that were shot by one of their own playing figures.
- A playing figure may of course shoot the ball to its own goalkeeper at any time, with exactly the matching number rolled.
- The goalkeeper is moved in exactly the same way as all other playing figures.
- The goalkeeper can be attacked by the opponent when the goalkeeper has the ball.
- The goalkeeper may hold the ball for as long as they like, as long as they are not attacked by the opponent.
- Outside their own penalty area, and also in the opponent's penalty area, the goalkeeper has the same function as the other playing figures.
Examples (picture captions): In both pictured examples, Yellow has rolled a six and shoots in the direction of the arrow. In each case the ball is then pushed under the red goalkeeper; the goalkeeper has caught the ball.
Goal
A goal is scored when the ball touches one of the four goal squares. The ball does not have to stay exactly in the goal. A goal may also be shot from the side.
Example (picture captions): From point A, a goal can be shot with a four, five or six. From point B, a goal can also be shot with a four, five or six. From point C, no goal can be scored, because the goalkeeper stops the shot on its way to the goal.
Play Continues After a Goal
The scorer takes their playing figures from the opponent's half and from the centre circle and places them on the marked squares (dot, ring, two-coloured dot) in their own half of the playing field, but not in the centre circle. The figures already in the scorer's own half may stay where they are or be moved to marked squares within their own half.
The other player places all their playing figures from the opponent's half back onto marked squares in their own half. Figures in the centre circle and figures in their own half may be left where they are or moved, as they wish. They now place the ball and one of their own playing figures on the kick-off point (filled dot) in their half, in the centre circle. From there, in their next turn, they must immediately shoot the ball in any direction. Play then continues normally.
Ball Out of Play
When the ball leaves the playing field, there is either a throw-in, a corner kick or a goal kick.
Throw-in
If a player shoots the ball over the touchline out of the playing field, the other player gets a throw-in. They place the ball on the edge square through which the ball left the playing field, place any one of their own playing figures on the ball and shoot immediately. If the edge square is occupied by an opposing figure, the throw-in is taken from the next square without an opposing figure.
Example (picture captions): Red has shot the ball out of the playing field with a five in the direction of the arrow. Yellow therefore gets a throw-in. The ball is placed on square A; Yellow places a figure of its choice on the ball and must shoot immediately. If square A is occupied by a red figure, Yellow may choose from which adjacent square (x) the throw-in is taken.
Corner Kick
If a player shoots the ball over the goal line next to their own goal, the opponent gets a corner kick. The ball is placed on the corner square nearest to the point where the ball left the playing field. The opponent now places any one of their figures on the ball and must shoot immediately.
Example (picture captions): Red shoots the ball over the goal line next to its own goal after an attack with a three. Yellow therefore gets a corner kick. The ball is placed on the corner square (arrow). If the corner square is occupied by a red figure, Yellow may choose from which of the squares marked with x it takes the corner kick. Yellow must now shoot the ball immediately.
Goal Kick
If a player shoots the ball over the goal line next to the opponent's goal, the other player gets a goal kick. The goal kick must be shot immediately.
Where is the goal kick shot from?
- If the goalkeeper is in their own penalty area, the goalkeeper must shoot the goal kick immediately from the square where they are standing.
- If the goalkeeper is not in their own penalty area, another playing figure of the defending side that is standing in its own penalty area must take the kick, from its current position.
- If no figure of the defending side is standing in the penalty area, the goalkeeper is placed on the ring in front of their own goal. There they receive the ball and must shoot immediately. If this square is occupied by an opposing figure, the goalkeeper shoots from an adjacent square.
End of the Game
Before the game begins, the two players determine the length of the game. There are several options for this:
Example 1: It is determined how many goals a player must score to win.
Example 2: The game ends when a score of 3:0, 3:1 or 2:2 is reached. At a score of 2:1, play therefore continues until the next goal is scored.
Example 3: The game ends after a set time. It is recommended to agree on at least 90 minutes. When the time has run out, play continues until one player has the ball in their own half of the playing field, or until the attacker scores a goal (extra time).
Example 4: Combination of goals and time: if the agreed number of goals has not yet been reached after three hours, the game is ended. Whoever has scored more goals by then is the winner.
1. Moving a Playing Figure
- In principle, each player may move only their own playing figures.
- The playing figure is moved horizontally or vertically by the number rolled on the die. The full number rolled must be moved.
- A figure may change direction during a turn only at the edge of the playing field (touchline, goal line and goal) and when making an attack.
- Diagonal moves are not allowed.
- Own and opposing figures, including goalkeepers, may be jumped over.
- Only one playing figure may stand on each square.
- A figure that in one turn reaches the edge of the playing field or the goal turns at a right angle and continues with the remaining number rolled in the new direction.
Permitted moves (picture captions):
- The figure moves onto a free square.
- The figure moves onto a free square and jumps over another figure on the way.
- The figure reaches the goal, turns at a right angle there and moves on.
- The figure reaches the edge of the playing field, turns at a right angle, reaches the goal, turns at a right angle again there and moves on.
- The figure reaches the edge of the playing field, turns at a right angle and moves on.
Forbidden moves (picture captions):
- A three was rolled. A move in the direction of the arrow is not possible, because another figure without the ball stands on the target square.
- The figure may not turn at a right angle if it could still continue straight on.
- Diagonal moves are forbidden.
- A figure may turn only when it reaches the edge of the playing field; then it must be moved along the edge (picture of a yellow figure: "Die Figur darf nur abknicken, wenn sie zum Rand kommt, dann muss sie am Rand entlang gezogen werden").
- In a corner square and in the corner at the goal, the figure must turn at a right angle; a 180° turn is not allowed.