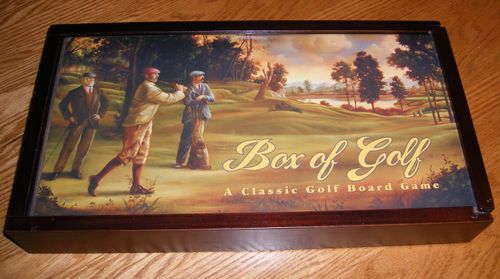
Box of Golf: A Classic Golf Board Game
Box of Golf: A Classic Golf Board Game Rulebook
Table of Contents
Table of Contents
Detailed Rules
Object of the game
Play against par for nine or eighteen holes of golf to win gems. The player with the most gems at the end of the game wins, so the strategy is to use these gems wisely.
Object of each hole
Attempt to complete each hole in the fewest strokes. Try to beat par and your opponent to win more gems.
Contents
Nine two-sided playing boards, over 100 gems, four playing pieces, five dice.
How to Play
To Start
- Decide whether to play nine or eighteen holes. A group of beginning players may play fewer holes.
- Make sure playing boards numbered 1 through 9 are placed into the box facing up, in order, with board 1 on the top and board 9 on the bottom.
- Each player selects four gems: one of each color (blue, green, yellow and red). Place all remaining gems into the box.
- Each player selects a playing piece. This piece represents their ball on the board.
- All players place their playing piece on the Tee Box space of the first hole.
- Choose a player to go first.
Symbols, Obstacles, Hazards
Each Golf Ball, Arrow, Star, and the Flag on the Putting Surface counts as one space.
- Golf Ball: This is one of several spaces you move onto as you play each hole. A Golf Ball may appear in a Fairway, Bunker, Tree, Rough, Green or in the Water.
- Directional Dots: These little dots indicate your direction of play only, they are not spaces.
- Fairway: The Fairway is the lighter green "main road" from the Tee Box to the hole. You may land on various spaces on the Fairway.
- Par: The average number of strokes it takes to complete a hole. Each playing board has a par number shown in the upper left-hand corner.
- Divot: A divot is a chunk of turf ripped up from the Fairway by a golf club when making a shot.
- Tee Box: Start here on each hole. When shooting from the Tee Box black dice can be re-rolled with the other non-scoring dice.
- Fairway: Good lie. When shooting from the Fairway, black dice cannot be re-rolled.
- Bunker (Sand trap): When shooting from a Bunker, black and purple dice cannot be re-rolled or counted.
- Rough: When shooting from the Rough, one space must be deducted from the final roll, i.e. a roll of four is reduced to three.
- Water: When a shot lands in the Water, one penalty stroke is assessed and the player must move back one space to dry land.
- Tree: When a Tree is in the path of a shot, the player must take a Tree Test to determine if the shot cleared the tree. Take one die, roll it once, if it comes up anything other than black, continue to move the total number of spaces allowed by the original roll. If black, then the shot stops at the tree. When shooting from a Tree, one space must be subtracted from the final roll, i.e. a roll of four is reduced to three.
The Dice are the Luck
Choose your "CLUB" wisely. The dice are how you move your playing piece throughout the game.
Select one to five dice
The number of dice you choose to roll equals the "club" size. Take care selecting the club size to avoid overshooting the green or other target. The larger the club, the farther you may hit the ball. Various spaces, hazards or obstacles will affect your choice of "Club" and how many spaces you can move.
Roll up to three times on each turn
You are trying to match colors. After each roll, collect the one color you have the most of. Join any "Wild" purples with your matching color. Re-roll the remainder of your non-matching dice. See exceptions for purple and black dice.
When your rolling is completed
Count the highest number of matching dice (including any "wild" purple) to determine how many spaces to move, one space per matching color. Move your playing piece along the spaces toward the Green.
What the dice mean
- Red, Green, Yellow and Blue dice are equal in value, no color being better than the other to collect.
- Purple dice are "Wild" and become the color you are matching. They CANNOT be re-rolled. *Exception: When shooting from a Bunker, purple dice have no value, and CANNOT be re-rolled or counted.
- Black dice are "Divots" and have no value. They CANNOT be re-rolled. *Exception: When shooting from the Tee Box or Star, black dice can be re-rolled.
Examples
- Example #1: You roll five dice the first time. Three matching reds came up. You re-roll the remaining two dice, hoping to get more reds to add to your total.
- Example #2: You roll five dice. One red, two yellow, and two purple come up. You must count the two yellow, plus the two "wild" purple for a total of four. Place those four dice to the side if you are attempting to move five spaces and re-roll the fifth dice in hopes of getting another yellow or a purple.
- Example #3: You roll five dice the first time. Only two matching blues came up (the rest were one of each color). You re-roll the remaining three dice. On your second roll, three yellows come up. You take the three yellow dice as your total, and decide whether to re-roll the two blue again...going for yellows now.
- Example #4: You roll five dice. Two red, two black and a yellow come up. You are hitting from the Tee Box or the Star space, therefore you can re-roll the black dice as well as the yellow. You roll two more reds and a black. Once again you can re-roll that black in hopes of getting another red or a purple.
The Gems are the Strategy
Spend your gems wisely. Various spaces, hazards or obstacles will affect your choice of whether to spend a gem.
Collecting Gems
Similar to match-play in golf, whoever completes the hole in the fewest strokes (or turns) wins the hole. Gems are rewarded for landing on a Star, winning the hole, and beating par. Rewards are as follows:
- Landing on a Star from the Tee Box - collect ONE gem
- Winning the hole outright - collect TWO gems
- Tying the hole - each winning player collects ONE gem
- Beating par - collect ONE gem for each stroke under par, whether you win the hole or not.
Spending Gems
This is where strategy wins the game. Your gems assist your moves after the final roll of your turn. Only one gem can be spent per turn. If you decide to spend a gem, simply put it back in the main pile and move your playing piece according to that gem. Spending a gem can help you:
- win the hole
- beat your opponent
- get out of a hazard
- reach a target
- change the number of gems an opponent can collect
- change the color of a gem that is in your stash
Example: You land in the water which is a one-stroke penalty just like real golf. Spend a blue "Wind" gem to blow over the water to the next space and avoid the penalty.
Your decision to spend a gem can alter the number of gems your opponent will be able to collect.
Example: Spend a green "Gimmee" gem to make your putt good to beat or tie your opponent.
Gem colors
- Blue gem represents a favorable "gust of wind." A player may use a blue gem to add or subtract one space from their shot. Blue gems may not be used on the "Putting Surface". Blue gems may not be used after having landed on an Arrow, or after a failed "Tree Test".
- Green gem is a "gimmee". A green gem will redirect any missed "putt" into the "hole", in essence making a putt that missed, into a putt that did not miss. Play a green gem only after having missed the "cup" with a putt on the Putting Surface.
- Yellow gem represents "backspin". Backspinning assists any shot landing on the Green to continue moving closer to the Flag or if lucky, maybe right into the cup. To do this, roll all five of the dice one time only, and count the largest matching color group plus the wild purple to determine how many spaces to move further on the putting surface.
- Red gem represents a "mulligan". Playing a mulligan allows a "redo" or "do over" of an entire turn. You may take as many redos as you have red gems. Mulligans are not allowed when playing on the Putting Surface.
At the end of each hole, players with less than four gems can replenish their stash back to four.
Landing on the Green
Be aware that if a particular board has spaces continuing beyond the Green, that the Green as a target can be "overshot" if too many matching dice are scored. If a Green has no spaces beyond it, then it cannot be "overshot". On the game boards you will notice two "Greens". One Green is much larger than the other and has its own symbols upon it, this larger Green is referred to as the "Putting Surface". Once a player successfully lands on the small green, they should then move over to the Putting Surface placing their player on the "P" (putting start symbol). A player's next turn will start from the "P".
Overshooting the Green could occur on holes #5, 7, 8, 9, 11, 14, 16, 17 and 18. If you do overshoot, move your piece to the overshot space and try for the Green again on your next shot.
Scoring a "natural"
When a shot lands on the Green by rolling all the same color dice and exactly the number you need, you've scored a "natural". Purple dice, gems or Arrows Cannot be used. For such a fine shot, you are entitled to a FREE backspin! As an extension of your turn, roll all five dice one time only. Count the highest number of matching dice (including any "wild" purple) to determine how many additional spaces to move on the Putting Surface.
The Putting Surface
Each shot on the Putting Surface is called a "putt," and is counted as a regular stroke. Players roll the dice as usual with the target being the "Flag" symbol (this represents the "cup" or "hole" that players are attempting to get their ball into to finish the Hole). Be careful not to "overshoot" the "cup".
Finishing the Hole
Once all players have made it into the cup (sunk the putt), they remove their playing pieces from the playing board. Then each player adds up his/her strokes for the hole. Compare your total to the par for that hole (shown on the playing board), and collect one gem from the box for each stroke under par you scored. No Peeking! Note: If you are over par, you do not give gems back.
Beginning a New Hole
Lift the top board out of the box, flip it over, and slide it under the remaining eight playing boards in the box. You are now ready to play the next hole.
The player who completed the prior hole in the fewest strokes is said to "have honors" and will go first on the next hole.
Winning the Game
After all golfers have completed nine or eighteen holes, each player counts up his/her gems. No color has more value than any other. The player with the most gems wins!
Occasionally, players may debate the interpretation of a rule. If this happens, use your own best judgment and decide as a group how to proceed. That also adds to the fun! Please feel free to modify the rules for younger players. For example, you might consider eliminating the impact of course obstacles until beginners get used to the game.