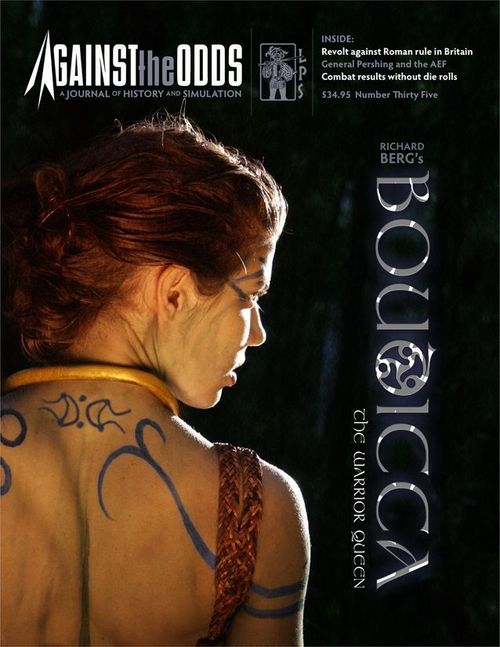
Boudicca: The Warrior Queen
Boudicca: The Warrior Queen Rulebook
Table of Contents
Table of Contents
- 1.0 Introduction
- 2.0 Components
- 3.0 Initial Deployment
- 4.0 The Sequence of Play
- 5.0 Impulses
- 6.0 Stacking
- 7.0 Movement
- 8.0 Civilians
- 9.0 Towns, Settlements, and Posts (Municipia, Oppida, et Castra)
- 10.0 Combat
- 11.0 Mobilization and Revolts
- 12.0 Leaders
- 13.0 Solitaire Play
- 14.0 Winning the Game
- 15.0 Sources
- Tribes Table
- Player's Aid Charts
- Operations (4.0)
- Terrain Effects Chart (MP cost)
- Combat Results Table (10.0)
- Interception (7.3)
- Leader Killed Table (12.1.2)
- Druid Invocation Table (5.3.1b)
- Rampage Table (5.3.1c)
- Legio II Mobilization (11.1.3b)
- Tribal Revolt Table (11.2.4)
- "Hail Caesar!" Event Card Choices (5.3.2c)
- Spontaneous Revolt Table (11.2.6)
1.0 Introduction
The overall structure of the rules follows the game's sequence of play in introducing concepts. The rules are written in the Case System: Modules (each dealing with a major aspect of play) are divided into Sections (major sub-topics), and most of each Section consists of Cases, the specific detailed rules that govern play. Numbering follows a logical progression: a Case numbered 3.1.4 is the fourth Case of the first Section of the third Module.
Learning to Play the Game
Begin by familiarizing yourself with all of the components. Then skim through the charts and rules, reading all the titles of the Modules and Sections. Set up a game scenario or portion of a scenario and play a trial game against yourself, referring to the rules only when you have a question. The rules are not designed to be memorized.
1.1 Game Scale
Each hex on the map covers about 5 miles, and each turn represents a week of real time. Each Roman Strength Point represents about 100 men, while tribal strengths vary greatly.
1.2 Terminology
The definitions below are general; they are not, in themselves, rules.
- Active: The state of units that allows players to activate them (move and attack with them).
- Activation Point (AP): A simple numerical measure of the military hearts and minds needed to undertake operations in this campaign. An AP is used to perform an Activation with active units on the map.
- Auxilia: Non-legion-specific infantry, e.g., light infantry, archers, attached to a legion to augment its abilities or used as garrisons.
- DR: Die roll.
- DRM: Die roll modifier, a numerical adjustment to whatever DR is needed.
- Druids: Celtic pagan priests (and possibly more, perhaps representing an elite "learned" class) with considerable political power.
- MA (Movement Allowance): A numerical evaluation of a unit's mobility for an activation.
- Mobilize: Activation of Roman units.
- MP (Movement Point): The numerical cost of terrain or an action that is subtracted from a unit's MA as it moves on the map.
- Operation: What units can do when they are activated.
- Oppidum (plural Oppida): Tribal Settlement (that may be part of a Roman town) that is the tribal capital. Each Tribe's oppidum hex's border on the map is shaded in the color matching its tribal counters. There is a Tribal Oppidum Table (Tribes Table) at the end of the rules.
2.0 Components
- 1 Mapsheet
- 2 Counter sheets totaling 240 counters
- 36 cards (18 per side)
- These rules and 2 PACs
- Players must supply 2 six-sided dice of different colors to play the game.
2.1 The Game Board
The game board is a map of the island province of Britain during the early years of Roman occupation. The road network includes only those roads built in the Julio-Claudian period (prior to 69 AD). The game map also contains several tracks and boxes to aid in play.
2.2 The Units
Each Combat unit is represented by a counter. Blue counters are Britons, and red are Romans. There are also Leaders who may be used for combat effectiveness and stacking ability, as well as various game markers.
Historical Note: The Tribal armies contained a lot of chariots. These chariots were used mostly as transportation and were of little, if any, tactical help in a battle (except when the Britons formed them into a circle and defended behind them).
2.3 The Cards
BWQ comes with Operations (OPs) cards (18 cards per side) which need to be separated so that each player can form their play deck. The cards provide players with Activation Points (APs) as well as throwing in some unusual opportunities, which players may choose to take advantage of (Section 5.2).
3.0 Initial Deployment
The units that start the game on the map, as noted below, should be placed in their designated hexes. The units that will enter as Reinforcements should be placed to the side of the map.
3.1 Briton Units
3.1.1 The following tribes start the game active (In Revolt). All their units start in their tribal capitals, as listed below:
| Hex | Tribe |
|---|---|
| Combretovium (3529) | Trinovantes |
| Venta (4432) | Iceni, Boudicca |
3.1.2 The Briton player places two Druids, one each, in any Tribal Capital on the game-map, except not in the oppida of either the Brigantes or the Parisii.
Historical Note: The Oppidum of the Trinovantes was Camulodunum (Colchester), which was, at the time, the chief Roman municipium (town) in Britain. The Trinovantes had, in essence, been evicted, which made them quite unhappy.
3.2 Roman Units
Civilians: Place 2 Civilian counters each in Londinum (2523) and Camulodunum (3030) and one each in Corinium and Lindum.
Legions on the map (these units are not active; Section 11.1):
- Lindum (5119): IX Legion (Hispania), all Cohorts plus three (3) Cavalry units and three Auxiliaries.
- Viroconium (4503): XX Legion (Valeria Vitrix), Cohorts 2-7; 1 Cavalry, 1 Auxiliary.
Legions off-map (on Mona Island, west of Deva, whacking druids): XIV Legion (Gemina) (with 1 Cavalry and 1 Auxiliary) and the other four cohorts of the XX Legion, as well as Governor Suetonius Paulinus, are off-map. They must be activated as per Case 11.1.3a.
II Legion (Augusta): all 10 cohorts plus one Cavalry unit (see Case 11.1.3b for entry).
Roman Auxilia on the map (these units are active; Section 11.1):
| Hex | Auxiliaries |
|---|---|
| 3031 (Camelodunum) | One cavalry unit; one auxiliary |
| 3108 (Corinium) | One cavalry unit; two auxiliaries |
Historical Note: Camelodunum was unfortified. According to Tacitus, the Romans had a garrison of only 200 troops when the Iceni and Trinovantes torched it. Corinium, ostensibly the tribal center for the Dubonni, was the second largest town in Roman Britain at the time. The Dobunni had settled some distance from the town until it was abandoned by the Romans about 10 years after the rebellion.
In addition, the Roman Player gets 5 Cavalry units and 7 Auxiliaries. He may place three units (of any type) in each Roman Post on the map (there are 4 of these, so they fit nicely).
4.0 The Sequence of Play
The game consists of six Game-Turns. Each Game-Turn consists of the following Sequence of Phases, which must be undertaken strictly.
A. OPs Card Selection Phase: Each Player shuffles all of his 18 cards and then draws the number of OPs Cards he is to get that turn, as noted on the Turn Track and possibly modified (Case 5.1.4).
B. Civilian Movement Phase: The Roman Player may move any/all of his Civilians (Module 8.0).
C. Determine Initiative Phase (Section 4.1)
D. The Operations Phase: Each Game-Turn consists of an indeterminate number of alternating Player Impulses. A player in each of his Impulses plays 0 to 2 of his OPs Cards from his hand. These cards provide him either Opportunity Events or Activation Points.
When that player has finished his Impulse, play passes over to his opponent, who then performs his Player Impulse. Play passes back and forth, until both players have played all the cards they had for that Turn, or both have passed consecutively (even if cards remain in either or both player's hands). When that happens, the Game-Turn is over.
If one player has no cards left to play, the other player then gets to perform a final Impulse for the turn, in which he may play all of his remaining cards. All unplayed cards are discarded.
A player may always choose not to play some/any of his cards; if he does so (or has no cards left), he Passes.
E. End of Turn Phase: Both players remove all Used and Rampage markers from their units on the board and the Game Turn Marker is advanced one box along the Game Turn Track to start the new Turn. If this is the last Turn of the game, Victory is determined.
4.1 Initiative
4.1.1 The player who has the Initiative in each turn chooses who will go first.
4.1.2 On the first game-turn, the Britons automatically have the Initiative.
4.1.3 For all other game-turns, each player rolls one die; high DR gets the Initiative.
4.1.4 A player may modify this DR upwards by playing one of his OP Cards and using the AP value on that card as a positive DR modifier (DRM) for his initiative roll. This choice must be made before the dice are rolled.
4.1.5 If players tie on their modified DR results, roll again (include their played OP Card DRM again).
5.0 Impulses
A player performs Activations and/or Events when it is his Player Impulse. The list of possible Activations is found on the PAC. Each Activation usually requires the use of 1 AP. Players have available the number of APs for the Impulse as determined from the total of the values printed on the OP Cards that they played for the impulse.
5.1 General Rules - OPs Cards
Each player has a deck of 18 OPs Cards.
5.1.1 At the start of each Game-Turn, players shuffle all of their OPs Cards.
5.1.2 Each player then draws the number of cards they get for that turn as listed on the Game Turn Track. (Example: On game turn 1, the Briton player draws 10 cards and the Roman player draws 6.)
5.1.3 Cards are kept secret until played from a player's hand.
5.1.4 The Briton player draws one additional OP card for each Roman Town he occupies that has not been sacked by him.
Game Play Note: The Briton player does not get cards for Sacking towns, but he does get Victory Points (VPs) for doing so, and no VPs for occupying!
5.1.5 If a player's card draw for the turn is all OP event cards (Section 5.3), the player may declare a "Mulligan," show his opponent his hand, and then reshuffle all his cards and draw a new hand for the turn. The player must use this new hand (cannot "Mulligan" again).
5.1.6 When it is a player's Impulse he may play 0, 1 or 2 OPs cards.
5.1.7 If he plays 2 cards, he does not have to play them together but may play the second after using the first.
5.1.8 A player may discard a card without using it, and that is considered as "playing" that card.
5.1.9 A player who plays no (0) cards essentially Passes. If both players "Pass" consecutively, the game-turn is over, regardless of any cards they have left in their hands.
5.1.10 If a player has no cards left he must pass, and his opponent performs a Final Impulse in which he may then play any/all of his remaining cards.
5.2 Activation Point OPs Cards
5.2.1 Both Players have 13 of these cards.
5.2.2 They have a value on them that is the number of Activation Points (APs) a player receives to use during the Impulse.
Game Play Note: The Romans have slightly more APs (in total) on their cards than do the Britons. The Romans also get more cards in the long run... unless the Britons decide to occupy rather than Sack.
5.2.2 (second Case so numbered in the original) Expending one AP enables a player to perform an activation as per the list in the Activation Table on the PAC.
5.3 Event OPs Cards
Five Briton and five Roman cards provide events (but no APs). Some of these events involve using a table; others just enable the player to do something he could not do otherwise.
5.3.1 Briton
a) Spontaneous Revolt. See Case 11.2.5.
b) Roll on Druid Invocation Table (see the PAC). Make a DR and apply the result.
c) Roll on Rampage Table (see the PAC). Pick one hex with Briton units in it and roll for effect. Mark units with a Rampage marker if applicable.
d) Draw Another Card if the Britons have won a Major battle this turn. Play this card face up in front of the Briton player until it is used. If the Briton player wins a major battle later in the turn, he can then discard this card and draw another card.
5.3.2 Roman
a) Governor Suetonius Paulinus may be moved anywhere on the map, even if he is not yet on the map.
b) Force March. See Section 7.2.
c) Hail Caesar! This card is played directly from the player's hand when the listed conditions allow in either of the two options detailed on the PAC. The Roman player chooses which one he will use when he plays this card. The second event may only be used once per game.
6.0 Stacking
6.1 General Rules
6.1.1 There are no limits to the number of units that may stack in any one hex, except as delineated below.
6.1.2 Different Tribes may not stack together unless in the same hex with Boudicca or a Druid.
6.1.3 Units of different Legions may not stack together unless Paulinus is in that hex.
6.1.4 No more than 5 Roman auxilia units may be in any one hex, unless Paulinus is in that hex.
6.1.5 Civilians have no effect on stacking restrictions.
6.1.6 Roman stacks may not move through other stacks while using Road movement.
6.1.7 Stacking limitations apply at the end of movement (Exception Case 6.1.6).
Game Play Note: Thus, one stack may move through another, if it is not Romans using Road Movement.
6.1.8 Enemy units have no affect on opponent's stacking restrictions.
6.1.9 The Roman Player may use his Legion markers to note a hex where all/most of the active cohorts of that Legion are. Place the individual cohorts and any auxilia or cavalry in the Legion Box on the map. All units in the box are assumed to be in the hex where the marker is.
6.1.10 The Briton has 3 "Horde" markers and may use them to note a hex that contains a large stack of tribal units by placing the units in its corresponding Horde box on the map. All units in the Horde box are assumed to be in the hex with the Horde marker on the map.
6.1.11 If the death of a leader creates stacking violations, the player must correct these violations with his very next Impulse.
7.0 Movement
7.1 General Rules
7.1.1 A Player may activate and move all units in one hex, a stack of units, by expending 1 AP.
7.1.2 The units in that stack may then move together or separately.
7.1.3 The stack may not pick up other units for that Movement Operation.
7.1.4 Activated units may move a maximum total of MPs expended up to their MA (Exception Rampage).
7.1.5 A stack that moves has an MA of its slowest unit.
7.1.6 Units move from one hex into an adjacent contiguous hex.
7.1.7 Each unit/stack pays a cost in MPs from their remaining MA to enter a given hex. The MP costs to do so are listed on the TEC (see the PAC).
7.1.8 A unit/stack may not enter a hex for which it does not have sufficient MA remaining to expend.
7.1.10 Roman units (only), and Civilians, may use Road movement if they are moving directly from one Road hex into a contiguous road hex.
7.1.11 Tribes may not use Road movement.
7.1.12 Units do not have to use all their MPs, but they may not save MPs from one turn to the next or transfer MPs to another unit.
7.1.13 Units may not enter a hex occupied by an enemy combat unit unless they are going to attack that enemy stack and must pay the MP cost to enter that hex to do so.
7.1.14 A unit may move only once in an Impulse (Exception Section 7.2) and a maximum of twice in a turn.
a) Mark units that have moved once in a turn with a Used I marker.
b) When units have moved a second time in the turn, flip the Used marker over to its Used II side.
7.1.15 Units may not cross an unbridged river to move directly into an enemy-occupied hex.
7.2 Roman Forced March
7.2.1 The Roman player may move a stack of units twice in the same impulse by playing a Force March card immediately after they have activated the stack.
7.2.2 Units using Forced March may do so only on Roads.
7.2.3 Units that have engaged in combat already in that turn may not Force March.
7.2.4 Place a Force March marker on top of such units to indicate they have done so.
7.2.5 Units that have Force Marched have a detrimental DRM if attacked in that status (Case 10.2.4).
7.2.6 The marker is removed at the start of the Roman player's next Impulse (even if this occurs in the next turn).
7.3 Interception
Interception allows the non-Phasing player to (possibly) move to attack enemy units that are moving nearby.
7.3.1 A stack of combat units may try to intercept an enemy moving stack (not one that has not started movement) that is not more than 3 MPs away, not counting the hex of the interceptor.
7.3.2 Interception may not be traced into/through impassable hexes/hexsides, unbridged rivers, or into or through towns or enemy-occupied hexes (excluding the target).
7.3.3 A stack may attempt only one Interception per opponent's Impulse, although different stacks may attempt to do so against the same moving target.
7.3.4 To see if Interception is successful, treat each hex distant as worth 2 Interception Points (IPs). Roll one die, modify it by the listed modifiers (see the PAC) and if the modified roll result is higher than the total IPs, Interception is successful.
7.3.5 If Interception is successful, move the interceptors to the target hex, thus ending the moving stack's movement, and initiate combat.
7.3.5 (second Case so numbered in the original) The Interceptor is the attacker (and gets a nice DRM for the first round of combat).
7.3.6 Interception does not require the use of APs.
7.4 Bridges
7.4.1 Destruction: Either player may destroy a bridge. To do so, the player must have an infantry unit start its Impulse adjacent to the bridge hexside with no enemy unit within 2 hexes of either hex the bridge connects. The player then spends 1 AP and the bridge is destroyed. Place a Destroyed Bridge marker to so indicate.
7.4.2 Construct/Rebuild: The Roman player, only, may rebuild destroyed bridges or build new bridges over any river hexside. To do so, the Roman player must have a Cohort infantry unit start its Impulse adjacent to the to-be-built/rebuilt bridge hexside and have no enemy unit within 2 hexes of either hex the bridge connects. The Roman then spends 2 APs and the bridge is rebuilt/constructed. Either remove the Bridge Destroyed marker, or place a new Bridge marker pointing to the hexside the bridge is in.
8.0 Civilians
Five towns start the game with Civilians (resident Romans and Britons friendly to the Romans). These are targets for revolting tribes (and Briton player Victory Points).
8.1 General Rules
8.1.1 Civilians are moved by the Roman player in the Civilian Movement Phase.
8.1.2 Civilians have no defense strength.
8.1.3 If not stacked with a Roman combat unit, any Tribal unit that enters their hex automatically eliminates those Civilians at the cost of 1 MP.
8.1.4 The Briton may save his MP by leaving the Civilians alone and not eliminating them.
8.1.5 The Civilians are also eliminated if the Romans they are stacked with are eliminated or retreat.
Game Play Note: An interesting question is, why move Civilians and where would they go? Well, historically, they were trying to get away from what they perceived (realistically) as a bad threat. As to where they go, we would say as far away from revolting tribes as possible.
9.0 Towns, Settlements, and Posts (Municipia, Oppida, et Castra)
There are three types of "urban" locations on the map: Towns (municipia) and Settlements hold civilian populations. Some settlements are Tribal oppida. The Romans also built a fair number of fort-like camps or posts (castra).
9.1 General Rules
9.1.1 Roman Posts provide a defensive benefit (see CRT notes) for Romans in that hex, but not Britons.
9.1.2 There is no additional movement cost to enter a Post hex, although tribes must attack an occupied Post to do so.
9.1.3 Towns and Settlements provide no defensive benefit in combat.
9.1.4 There is no additional cost to either side to enter/move through a Town or Settlement.
9.2 Sacking Towns/Oppida/Posts
9.2.1 Any friendly unit that has not moved yet and is currently in an unoccupied enemy Town, Oppidum, or Post, may sack that location by expending 1 AP.
9.2.2 The sacking unit(s) may not move after sacking the location that Impulse.
9.2.3 Sacking destroys the location's Town/Oppidum/Post for the rest of the game, rendering it useless. Place a Sacked marker on the hex with the appropriate sacking player's side face up.
9.2.4 The Players receive Victory Points for sacked enemy Towns, Oppida, and Posts (Module 14.0).
9.2.5 There are 5 Towns that are also Tribal Oppida. Both players can sack these locations. When these locations have been sacked by both players, place a "Both Sacked" marker on the hex.
10.0 Combat
Combat, a battle, occurs during Movement, when one stack of units (or unit) enters a hex occupied by enemy units. The resulting battle is resolved immediately; nothing else may take place until it is resolved.
10.1 Size of a Battle
A battle is either a Skirmish or a Major Battle, and that column on the CRT will be used for the combat die rolls. That status is determined at the start of combat and is retained until the battle is fully resolved.
10.1.1 If both sides have at least 10 Strength points involved, it is a Major Battle.
10.1.2 If only one side has 10 Strength Points it is still a Major Battle, unless the strength odds/ratio, attacker to defender, is either 1:1 or 1:2.
10.1.3 If both sides have less than 10 SP, it is a Skirmish.
10.2 How to Conduct a Battle
A battle is a series of rounds of combat in which both players roll one or more dice to inflict casualties, the rounds continuing until one player withdraws, or one army is completely eliminated (as sometimes happened in this era).
10.2.1 At the start of each round of combat, each player needs to determine how many dice he will roll. To do this, determine the odds ratio of the Combat Strengths between the two armies, rounding down to its simplest form and expressing the ratio from the point of view of the attacker (the player whose Impulse it is, or the Intercepting player if battle was joined due to Interception, Section 7.3). These odds are rounded off mathematically, with 0.5, the halfway point, favoring the defender. Thus 16:10 would be 2:1, while 15:10 would be 1:1. Note: Odds will always have one player with a 1 as part of it (There are no 3:2 odds).
10.2.2 Each player gets to roll the number of dice equivalent to his value of the odds ratio. Thus, if the Roman is attacking at 2:1, he rolls two dice while the Briton rolls only one. If he were attacking at 1:2, he would roll one die with the Briton rolling two.
10.2.4 Each individual die rolled may be adjusted by several factors, as listed with the CRT for the attacker and defender (see the PAC). Unless stated otherwise, all these DRMs are cumulative.
10.2.5 Withdrawal and Pursuit may occur at the end of each round of combat (Section 10.4).
10.2.6 Overrun. If the attacking odds/ratio is 7:1 or greater, the defender is automatically eliminated. The attacker is finished in terms of movement unless the odds were 10:1 or greater, in which case the attacker may continue movement (if able) after expending 2 MPs as the cost of Overrun.
10.2.7 An attack of 1:5 odds or worse automatically eliminates all the attacker's forces with no cost to the defender. If this odds ratio is due to the play of the Hail Caesar! event card (Case 5.3.2c), resolve the combat normally.
10.3 Combat Results
See the Combat Results Table on the PAC.
10.3.1 A number result means that number of steps must be lost.
10.3.2 Each unit has two steps. If it takes one step loss, it flips to its Reduced side; if it takes 2 step losses it is eliminated.
10.3.3 The 1st Cohort of each Legion has 4 steps; when it takes a second step loss it is simply replaced by its second counter.
10.3.4 Which units take step losses is determined by the owning player.
10.3.5 If the result has an "H", it requires the first step loss to be taken from the unit in the army with the highest strength (owner's choice if more than one). This requirement does not apply to the 1st Cohorts of Legions.
10.3.6 If the result has a "D", the army incurs one Disrupted marker. Each Disrupted marker an army has causes a -1 DRM in future rounds of combat. All Disrupted markers are removed automatically when combat is finished.
10.4 Withdrawal and Pursuit
10.4.1 At the end of any round of combat, Withdrawal may occur under the following circumstances:
a) The player with the fewer Strength Points may choose to withdraw, thus ending the battle.
b) The player with the most Strength Points may attempt to withdraw. Roll one die (1d6). If there is a Leader present, add his/her Combat Rating to that DR. If the modified DR is 6 or more, that army may then withdraw, ending the battle.
c) If both players have the same number of Strength Points, Withdrawal is not allowed.
10.4.2 If the Roman chooses to withdraw, he moves his stack its full MA towards the nearest Roman-held Post or Town. It may stop if it reaches either.
10.4.3 Withdrawing Britons are moved their full Movement Allowance, each tribe towards its own oppidum. If that oppidum is Roman-occupied, it may move towards the nearest friendly Briton-controlled oppidum. It may stop if it reaches that oppidum.
10.4.4 Pursuit: If the victorious army/stack has more cavalry Strength Points than the Withdrawing units (treating the withdrawing tribes as one stack), the winner may cause more casualties by Pursuit.
a) Take the difference of the cavalry strength of the two forces, halve it (rounding down but not less than 1).
b) Using that value, roll a die that many times on the Skirmish Results Table.
c) Ignore any Disorder results.
d) The Pursuer chooses which units take results.
Example: Winner has 5 cavalry strength points and the withdrawing loser has 2. That is a superiority of 3 SP. Halved, rounding down, provides the winner with 1 additional DR on the Skirmish Table.
11.0 Mobilization and Revolts
Units must be Active to do anything (except defend).
11.1 Legions
The Roman Legions in Britain in 61 AD were II Augusta, IX Hispania, XIV (sometimes written as XIIII) Gemina, and XX Valeria Victrix.
11.1.1 All Roman Cohorts, and auxiliaries and cavalry stacked with them, start the game Inactive (un-mobilized), as do all Legion units not yet on the map. All other Roman auxilia and cavalry not stacked with Legions on the map start the game mobilized (Active).
11.1.2 It costs 1 AP to mobilize any one hex with Roman Legion cohorts. After they have been mobilized, APs can be spent to activate them and perform movement and combat.
11.1.3 Reinforcements (off-map troops)
a) It costs 1 AP to mobilize the XIV Legion, along with 1 cavalry and 1 auxiliary and the remaining 4 units of the XX Legion that start off-map. When an additional 1 AP is spent to activate these units, they may enter the game map through hex 5503 (Deva). It costs each unit 1 MP to be placed there. Suetonius Paulinus may enter with either of these Legions.
b) II Legion is a problem for the Romans. It is stationed in Isca Dumnoniorum (Exeter), which is about 50 miles off the map to the southwest (via the road that leads off hex 1901). Its Prefect, Poenus Postumus, ignored all requests for help from Paulinus and was never involved in the uprising. (Poenus committed suicide when he heard of the Roman victory, finally succumbing to the Roman code of Honor and Discipline.) Therefore, to mobilize the II Legion will be rather difficult. The Roman player can once a turn spend one AP to attempt to mobilize the II Legion and then make a DR.
If the roll's result is lower than the current game-turn, the II Legion, along with one cavalry unit, is mobilized. On a later Roman Impulse, the expenditure of 1 AP will allow the II Legion to enter the map through hex 1901 (spending 1 MP to enter that hex).
If the DR is >= the game-turn, the II Legion remains un-mobilized for the rest of that turn.
11.1.4 If any un-mobilized Legion's units are attacked, they are automatically and instantly mobilized and can activate the next Roman Impulse.
11.2 Tribes and Revolts
11.2.1 Only two tribes start the game in Revolt (active): the Iceni and the Trinovantes.
11.2.2 All other tribes are not in Revolt and their forces do not start on the map.
11.2.3 Each at-start non-active (not in Revolt) tribe has a Not In Revolt marker that is placed on its oppidum at game start to indicate they have not revolted yet.
11.2.4 All the non-revolting tribes are incited to revolt in one of two ways:
a) If the Roman player sacks (Section 9.2) a non-revolting tribal oppidum, the tribe immediately revolts and its units are placed on the board within two hexes of their oppidum.
b) If Boudicca or a Druid is in an inactive tribe's oppidum, the Briton player may spend one AP and make a roll on the Tribal Revolt Table (see the PAC) to see if the tribe whose oppidum is in that hex revolts. Not every attempt at raising a tribe to revolt is successful, as all the OP Point does, along with the requirements below, is allow the Briton player to roll on the Tribal Revolt Table (see the PAC).
11.2.5 If Boudicca is in the hex, a -1 DRM is applied to the Revolt DR.
11.2.6 Spontaneous Revolt: This occurs when the Briton player plays the event card. When played, the Briton player rolls 2 dice and consults the table (see the PAC) for the result.
a) If the result is a tribe that is inactive, that tribe has now revolted and is active.
b) If the result is a tribe that is already active, treat it as "No revolt."
c) "No revolt" means just that.
11.2.7 If the tribe Revolts, remove its Not in Revolt marker from the map and place all the units for that tribe in its Oppidum (Exception 11.2.4a). They are now Active.
12.0 Leaders
12.1 General Rules
12.1.1 Leaders may never enter an enemy-occupied hex unless stacked with a friendly combat unit.
12.1.2 A lone leader in a hex, or one left after all his combat units are eliminated, can be killed if the enemy has a cavalry unit in the hex. Roll one die and consult the Leader Killed Table on the PAC. If they have no Cavalry, the Leader escapes (implement the 4-6 result of the table).
12.1.3 Governor Suetonius Paulinus. He enters the game when the off-map XIV Legion is activated. He will be placed on the board either by card play or when the off-map Legion units enter the board (Case 11.1.3).
a) His Battle Bonus is added to each Roman combat DR.
b) Two Legions, and/or friendly tribes, may not stack together unless Paulinus is in that hex.
c) He may be moved anywhere on the map with the Roman play of the card that allows him to be moved thus.
12.1.4 Boudicca has several attributes:
a) Her Battle Bonus is added to each Briton combat DR.
b) Subtract one (-1) from any Revolt DR if she is in that tribe's oppidum hex.
c) Different tribes may stack together when with her.
12.2 Druids
12.2.1 There are four Druid counters in the game, which is a game limit.
12.2.2 There may never be more than two (2) Druids in play at any one time.
12.2.3 If a Druid is killed, the Roman player keeps the unit for VP purposes. For 1 AP, a new Druid can be recruited from off-map available Druids in any succeeding Briton Operations Phase. The new Druid is placed in any hex within 2 hexes of Deva. (He's coming over, escaping, really, from the Isle of Mona.)
12.2.4 Druids allow tribes to stack together.
12.2.5 If the Briton plays a Druid Invocation card, and he has Druids in play, the Briton may designate the Druid for whom he is rolling and then roll on the Druid Invocation Table, applying the results immediately. There is no AP cost to perform this.
12.2.6 Tribal Convocation. At the cost of one AP, the Briton Player may designate a Druid on the map and have him call a Convocation. This applies to any/all tribal units that are within 3 MPs of the Druid's hex. Those tribal units are immediately moved to the Druid's hex, at no Movement Cost.
13.0 Solitaire Play
There are no specific rules for playing solitaire, you just play the side whose Impulse it is. As for the cards, when you deal them out, place them face down on the table and draw them, unseen (2 per Impulse).
14.0 Winning the Game
Each player consults their VP chart below and tallies up their total VPs. The player with the most Victory Points at the end of Game-turn 6 wins the game.
Briton Victory Points
| VPs | Event |
|---|---|
| 4 | Each Town Sacked |
| 2 | Each Post Sacked |
| 10 | Each Legion Destroyed (all 10 cohorts eliminated) |
| 5 | Each Legion reduced to less than 22 Strength Points remaining on the map (not applicable if Legion Destroyed) |
| 5 | Kill Governor Suetonius Paulinus |
| 1 | Each Civilian counter eliminated |
Roman Victory Points
| VPs | Event |
|---|---|
| 5 | Venta Icenorum sacked |
| 3 | Each other Tribal Oppidum sacked |
| 5 | Boudicca killed |
| 2 | Each Druid killed |
| 2 | Each Civilian counter in play at game's end |
| 1 | For each counter of a tribe who revolted and all the tribe's units have been eliminated. (Example: eliminating all the Briganti counters earns the Roman Player 6 VPs) |
15.0 Sources
- de la Bedoyere, Guy, The Buildings of Roman Britain (Tempus, 2001)
- Bellini, Vincenzo, Norma. (Yes, it's an opera that has nothing to do with Boudicca. But it is all about Romans in Britain, in a somewhat funny way, and the war chorus of the Druids will get your blood boiling.)
- Berg, Richard, Druid (A game published by West End Games, 1984)
- Codrington, Thomas, Roman Roads in Britain (Society for Promoting Christian Knowledge, London, 1903)
- Tacitus, Annals, Book XIV, Chapters 29-37
- Talbert, Richard J.A., Barrington Atlas of the Greek and Roman World (Princeton Univ Press, 2000)
- Trow, M.J., Boudicca: The Warrior Queen (The History Press, 2005)
- "Roman Roads in Britain", en.wikipedia.org
Tribes Table
| Tribe (counter name) | Tribal Oppidum (Hex) |
|---|---|
| Atrebates (ATRBTES) | Calleva (2416) |
| Belgae (BELGAE) | Venta Belgae (1814) |
| Brigantes (BRGNTI) | Isurium (6415) |
| Cantii (CANTII) | Durovernum (1929) |
| Catuvellauni (CTVLNI) | Verulamium (2821) |
| Corieltauvi (CORTVI) | Ratae (4516) |
| Cornovii (CORNVI) | Viroconium (4503) |
| Dobunni (DOBUNNI) | Corinium (3108) |
| Durotriges (DRTGES) | Durnovaria (1404) |
| Iceni (ICENI) | Venta Iceni (4432) |
| Parisi (PARISI) | Peturia (6019) |
- Venta appears to have been the tribal capital of the Belgae after the rebellion, their capital at the time being probably somewhere in the same area.
- Durovernum (Canterbury) had been a Roman post until 60 AD, when the Romans left and the Cantii, or Cantiaci, moved in and the town grew rapidly.
- Ratae (Leicester) was originally a Roman military post, but it appears to have been abandoned as such, remaining the oppidum for the Corieltau.
- Viroconium is the base of the XX Legion. Therefore, if the Cornovii are activated, place them in any hex within 2 hexes of Viroconium.
- Although originally the oppidum of the Dobunni, the Romans occupied Corinium at the time of the revolt. If the Dobunni are activated, place them in any hex within 2 hexes of Corinium.
Player's Aid Charts
Operations (4.0)
Each costs 1 AP unless otherwise noted.
| Roman Only | Both Players | Briton Only |
|---|---|---|
| Construct/Rebuild a bridge (costs 2 APs) (7.4.2) | Activate one hex and move/attack with all active units in that hex | Recruit new Druid (12.2) |
| XIV Legion Mobilization (11.1.3a) | Sack a Town or Oppidum (9.2) | Tribal Revolt Attempt (11.2) |
| II Legion Mobilization attempt (11.1.3b) | Destroy a bridge (7.4.1) | Tribal Convocation (12.2.6) |
Roman: Mobilize a Legion and attached units in one hex on the map (11.1). Enter II or XIV Legion units onto the map.
Terrain Effects Chart (MP cost)
| Terrain | Roman Infantry | Roman Cavalry | Briton Infantry | Briton Cavalry |
|---|---|---|---|---|
| Clear [a] | 2 | 2 | 1 | 2 |
| Road [b] | 1 | 1 | Other terrain in hex [d] | Other terrain in hex [d] |
| Rough [c] | 3 | 3 | 2 | 3 |
| Woods | 3 | 3 | 2 | 3 |
| Woods/Rough | 4 | 6 | 3 | 4 |
[a] This terrain is not really clear. It represents grassy terrain with some shrubbery, usually undulating but susceptible to rain. [b] Road Cost is applicable only if hex is entered from a contiguous road hex. [c] Mostly hills, with some almost mountainy. [d] Britons do not benefit from roads.
Combat Results Table (10.0)
Result numbers are steps lost; [D] = Disrupted; (H) = one of the step losses must be highest strength enemy unit.
| Modified Die Roll (DR) | Major Battle | Skirmish |
|---|---|---|
| 1 or less | 0 | 0 |
| 2 | [D] | 0 |
| 3 | 1 | [D] |
| 4 | 1(H) | 1 |
| 5 | 2 | 1 |
| 6 | 2(H) | 1(H) |
| 7 | 2(H) | 2 |
| 8 | 3(H) | 2(H) |
| 9 or more | 4(H) |
- Units attacking across a bridged river have their strength halved (rounding down) for the first round of combat.
- Roman units defending in a Post have their strength doubled.
- Odds of 7:1 or more is an Overrun (Case 10.2.6).
- If 10:1 or more, the battle costs 2 MP and the attacking stack can keep moving if able.
- Odds of 1:5 or less is automatic attacker elimination except if due to play of the "Hail Caesar!" card.
- Withdrawal from Battle Roll (Case 10.4.1b): Roll a d6. Add Leader modifier if present. If the Result is 6 or more, larger army can withdraw.
- Pursuit Rolls (Case 10.4.4): Difference of Winner's Cavalry Strength versus Loser's Cavalry Strength halved (rounded down but not less than 1) as unmodified Skirmish Column die rolls.
| DRM | Condition |
|---|---|
| +1 | Attacker is Roman and has at least 10 cohorts |
| +1 | If any units are on Rampage (if applicable) |
| +2 | Attacker has Intercepted the defender (1st round only) |
| +? | Leader's Battle Rating |
| -1 | For each Disrupted marker with the army |
| -1 | Defender is Roman in an un-sacked Post |
Interception (7.3)
Use all DRMs that apply. Modified DR must be greater than number of hexes distant x 2.
| DRM | Condition |
|---|---|
| +1 | Cavalry unit with intercepting stack |
| +1 | Intercepting stack is Roman in a Post |
| -1 | Target is Briton Tribe in woods (Romans only) |
| +1 | Interceptor is Tribe in a Woods hex |
| +1 | Target is Romans Force Marching |
Leader Killed Table (12.1.2)
Roll d6.
| DR | Result |
|---|---|
| 1-3 | Killed. |
| 4-6 | Leader escapes and may be placed in the nearest friendly occupied hex. |
Druid Invocation Table (5.3.1b)
Roll d6.
| DR | Result |
|---|---|
| 1 | Briton player draws one extra OPs Card from his deck. |
| 2 | Bad Weather & Storms. For the rest of the turn, for all players: all Movement Costs increased by one, except for Roads; Unbridged Rivers may not be crossed; No Forced Marches allowed. |
| 3 | Druidic Curse strikes Suetonius Paulinus. He falls ill and may not move for the rest of the game-turn. |
| 4 | Briton Player may designate one Tribe and roll on the Rampage Table for that tribe. |
| 5 | Druids bring out the wicker baskets and scare the pants off all tribes with which they are stacked for the rest of the turn. These tribes have their MAs halved. Mark them with a "Scared" marker. |
| 6 | Bad augury. Britons may not attack Roman units for the rest of the turn. They may attack/sack unoccupied towns/posts, etc. |
Rampage Table (5.3.1c)
Roll d6. (If 1-5, mark tribal units with Rampage marker.)
| DR | Result |
|---|---|
| 1 | Designated tribal units increase their MA by 2, and get a +1 DRM to all Attacks. |
| 2-3 | Designated tribal units increase their MA by 2. |
| 4 | Designated tribal units get +1 DRM to all Attacks. |
| 5 | Designated tribal units may sack any town/post this turn without paying any APs. |
| 6 | Tribal units stay calm. Nothing happens. |
Legio II Mobilization (11.1.3b)
Roll d6.
| DR | Result |
|---|---|
| Result < Turn | Mobilizes. |
| Result >= Turn | Does not mobilize. |
Tribal Revolt Table (11.2.4)
Roll d6. -1 DRM if Boudicca is in the hex.
| DR | Result |
|---|---|
| 1 | Tribe revolts. Roll on Rampage Table and apply the result to that tribe only. |
| 2-4 | Tribe revolts. |
| 5-6 | No revolt. |
"Hail Caesar!" Event Card Choices (5.3.2c)
- If the Romans have won a Major Battle this turn, the player may play this card to take another card
-- OR --
- When a Rampaging Briton force attacks a Roman Legion force at 2:1 odds or greater and this is a Major Battle (Section 10.1) he can play this card. The Romans are in a very defensible location. The odds for the battle will always be in favor of the Roman for the rest of the battle (i.e. if the normal odds are 3:1 favoring the Britons, their attack is now a 1:3 attack and the Romans will roll 3 dice while the Britons will roll 1 die). At the end of each battle round, roll a die; if the result is < the number of hits the Romans inflicted, the Britons rout and withdraw from the battle. The Romans then get full pursuit attacks using the Major Battle column instead of the Skirmish column, plus not taking into account any Briton cavalry and not dividing by 2 to determine the number of dice. If a Briton Leader or Druid is present, roll a die: 1-3 they are killed, 4-6 they escape with their forces. Note: May only be chosen once in a game.
Spontaneous Revolt Table (11.2.6)
Roll 2d6. Declare one die as the 10s and the other as the 1s die. So if the 10s die result was a 2 and the 1s a 5, that would be a 25. 31-66 = No revolt.
| DR | Result | DR | Result |
|---|---|---|---|
| 11 | Briganti | 21 | Dobunni |
| 12 | Cornovii | 22 | Durotriges |
| 13 | Silures | 23 | Atrebates |
| 14 | Belgae | 24 | Cantii |
| 15 | Regni | 25 | Corieltauvi |
| 16 | Parisii | 26 | Catuvellauni |