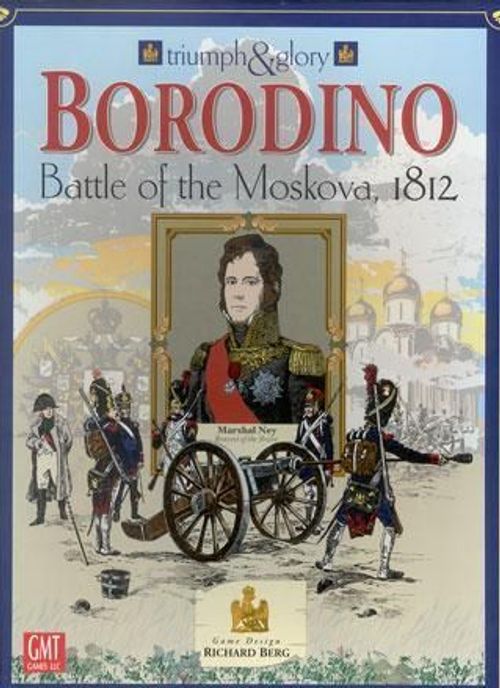
Borodino: Battle of the Moskova, 1812
Borodino: Battle of the Moskova, 1812 Rulebook
Table of Contents
Table of Contents
- 1.0 Introduction
- 2.0 Components
- 3.0 Sequence of Play
- 4.0 Initiative
- 5.0 Orders and Activation
- 6.0 Facing, Stacking, & Zones of Control
- 7.0 Movement
- 8.0 Artillery Fire
- 9.0 Shock Combat
- 10.0 Rally and Recovery
- 11.0 Jaegers
- Scenario: The Battle for the Schevardino Redoubt (September 5, 1812)
- Scenario: The Battle of Borodino (September 7, 1812)
- Player Aid Charts
1.0 Introduction
The Triumph & Glory system covers battles of the Napoleonic Wars, with an emphasis on accessibility and playability, plus as much historical flavor as we can slather on. Given a choice between playability and detail, we have tended to "err" on the side of the former.
This game uses version 2.2 of the Triumph & Glory system. It contains several significant changes from the original rules, specifically in the Cavalry Charge mechanics as well as the replacement of the Rout rules with the new Withdrawal rules. Experienced Triumph & Glory players should read the rules thoroughly with this in mind.
2.0 Components
The game of Borodino includes the following items:
- 1 22" x 34" game map
- 1 1/2 counter sheets
- 1 rules booklet
- 1 player aid card
- 1 ten-sided die
2.1 The Map
The game map covers the area over which the battle was fought. The map is overlaid with a grid of hexagons—hexes—that are used to regulate movement.
2.2 The Counters
Borodino includes counters representing infantry, cavalry and artillery units, plus Leaders, Activation Markers, Orders Markers, etc.
There are three different types of combat units: infantry, cavalry and artillery. They are all color-coded for ease in identifying to which Activation Group they belong. Most combat units are printed on both sides; the reverse shows the unit in a "Disordered" state.
Counter layout:
- Infantry unit: Unit Designation, Activation Group Color Bar, Corps ID, Defensive Fire DRM, Shock Strength, Cohesion, Movement Allowance.
- Artillery unit: Unit Designation, Activation Group Color Bar, Effective Fire Range, Maximum Fire Range, Fire Strength, Cohesion, Movement Allowance.
- Cavalry unit: Unit Designation, Activation Group Color Bar, Cavalry Type (L = Light, H = Heavy, C = Cossack), Corps ID, Shock Strength, Cohesion, Movement Allowance.
- Overall Commander: Name, Delay Rating, Orders Rating (?), Command Rating DRM, Orders Range (2 hexes), Movement Allowance. ( Kutusov's Orders Rating depends on which army he is activating; see Special Rules.)
A symbol has been printed on multi-unit infantry brigades to help make these units stand out. Two units from the same brigade may stack with one artillery unit—allowing a player to have three units in a hex (6.21).
Because of the changes in command structure, the counters' Unit Designations often reflect differing hierarchy and unit type. Each scenario briefly describes what the counters for that unit represent.
The Activation Markers indicate which group of units will get to move next (see Section 5).
The Orders Markers designate which Orders Commands are "Under Orders" or have "No Orders."
2.3 The Die
The game uses a ten-sided die to resolve combat. A '0' is a "zero," not a "ten."
2.4 Definitions/Abbreviations
Awareness of the following terms will help as you read through the rules:
- AM: Abbreviation for Activation Marker. Each Activation Group has two Activation Markers.
- Activation Group: A group of combat units from the same parent organization (usually a corps), as defined by the Activation Group Indicator line on the counter.
- Brigade: Units of the same brigade are identified by the Unit name, followed by a letter. For example, Dumon a, and Dumon b all belong to Dumon's brigade.
- Cohesion: A rating used to represent Morale, Training, Weaponry, etc. Used for a variety of purposes, and probably the most important of the ratings.
- Combat Units: Infantry, Artillery and Cavalry units are considered combat units; Leaders and markers are not.
- Commitment: The ability of an individual unit to engage in Shock.
- DRM: Die Roll Modifier.
- Horse Artillery: Artillery units with a Movement Allowance of 8.
- Orders Command: All or part of an Activation Group operating under the same order.
- Shock Strength: A unit's ability when involved in Shock, a number based on how many men are present.
- The Pool: An opaque cup used to hold the Activation Markers.
- ZOC: Zone of Control, or the ability of a unit to extend its presence into adjacent hexes.
2.5 Game Scale
The map scale is approximately 325 yards per hex. Each turn covers about 75 minutes of real time. Each Infantry Shock Strength Point equals about 200 men; while each Cavalry Shock Strength Point equals about 150 men/horses. Units are usually, but not always, regiments. Each Artillery Strength Point represents about 4 guns, sometimes adjusted for effectiveness.
3.0 Sequence of Play
Each game-turn follows a set sequence. Within that sequence individual units move only when their Activation Marker is drawn.
A. Orders Phase:
- Players roll for possible Orders Delay. Napoleon in Borodino does not roll for Delay (5.29).
- Players decide which Orders Commands will receive Orders (5.21).
B. Initiative Determination Phase.
- Each player rolls a die to see who has the Initiative (4.0). In the case of a tie, neither player has the Initiative.
- Initiative Player (if any) selects one Activation Marker which will Activate first in the turn.
- All other Activation Markers for Groups that are either on the map or scheduled to enter that turn are placed in The Pool.
C. Activation Phase
- Draw Activation Marker from Pool (except for the first Activation, when the one selected by the Initiative Player is used).
- Reveal Order Status for each command in the Activation Group. Commands with No Orders may attempt to convert to Under Orders at this time (5.28).
- Activation Sequence (in order): a. Artillery Fire (8.0). b. Units Move (7.0). c. Shock and/or Cavalry Charge (9.0). d. Rally—for units that did none of the above (10.1).
This Phase is repeated until there are no Activation Markers left in the Pool. When that happens, go to the Reserve Phase.
D. Reserve Phase Each player may activate one Reserve Group (5.5).
E. Group Morale Phase
- Check for Collapse (10.5).
- RECOVERY PHASE: players attempt to Recover units in the Recovery Box. After all Recovery attempts are completed, units are moved from the Withdrawn Box to the Recovery Box for Recovery attempts during this phase of the next turn.
F. Overall Commander Movement Phase Each Player may move their Overall Commander.
4.0 Initiative
In the Initiative Determination Phase, each player rolls one die, to which he adds his Overall Commander's Orders Rating (see scenario). High total has the Initiative for that turn. If there is a tie, no player has the Initiative, and all Activation Markers go into The Pool.
The Player with the Initiative may choose one of his Activation Marker—and therefore, Activation Group—he wants to start with that turn. That group may be either Under Orders or No Orders. Additionally, the Player with the Initiative chooses which side goes first during the Reserve Phase and the Overall Commander Movement Phase.
5.0 Orders and Activation
5.1 Commands and Groups
5.11 Activation Groups consist of all units with the same Activation Group Indicator (generally a Corps). Every unit in the group is activated when that command's Activation Marker is drawn, regardless of where they are on the map.
5.12 Orders Commands are groups of units operating under the same orders, as defined below. All units of an individual Orders Command also must be members of the same Activation Group. An Orders Command may be an entire Activation Group, or a subset of units from an Activation Group.
- Units of a single Orders Command must be from the same Activation Group.
- Each unit in an Orders Command must be within two hexes of another unit in that Orders Command. This "chain" may be continued for any length.
- Individual units that are more than two hexes from any unit in that Orders Command are treated as a separate Orders Command. The presence of an enemy unit blocks tracing that range; however, an enemy ZOC does not.
- Regardless of the Orders Command a unit belongs to, it is activated when the appropriate Activation Marker is drawn for its Activation Group.
EXAMPLE: In the French initial set-up for the September 7th scenario, Eugene's IV corps units are separated into at least two separate Orders Commands. Each command would be Activated by Eugene's Activation Marker, but they each receive separate "Orders."
5.2 Orders
For an Orders Command to operate at peak efficiency it must receive Orders.
5.21 At the beginning of each turn, each Player decides which of his Orders Commands will receive Orders, thus placing them Under Orders, and which will not. Orders Delay may prevent a player from changing his orders.
5.22 The number of Orders Commands a player may place Under Orders is limited by his Overall Commander's Orders Rating for that scenario.
EXAMPLE: At Borodino, Napoleon has an Orders Rating of '3'. He may place three of his commands Under Orders. All other commands, in excess of that number, will have No Orders.
5.23 Players indicate the Orders status of each Orders Command by placing an Orders marker, face/status down, either near that command on the map, or in the appropriate Command/Orders box printed on the map. The Orders marker is not revealed until that Orders Command's first Activation Marker of the turn is drawn.
5.24 If a unit becomes separated from its Orders Command, it still uses the Orders status assigned at the beginning of the turn. If an Orders Command that began Under Orders has separated into more than one Orders Command, the separate Commands retain the Under Orders status until the beginning of the next Orders Phase, at which time the player will have to decide which Orders Command remains Under Orders (with the remainder becoming No Orders). Units of separate Orders Commands which return into range of each other may adopt the Orders Status of either command during the Orders Phase of the subsequent turn.
PLAY NOTE: This means that, if during the turn, unit "A" becomes separated from its Orders Command (the "proximity" requirement) it still uses the Orders it received at the beginning of the turn. However, if still separated at the beginning of the next turn, it is then treated as an individual Orders Command.
5.25 Reinforcements. Reinforcements may be placed Under Orders, use Reinforcement Extended Movement, or have No Orders. See the Reinforcement rules (7.4) for details.
5.26 Units of an Orders Command that is Under Orders may:
- Fire Artillery;
- Use Normal Movement;
- Use Extended Movement (7.13), if eligible; or
- Shock Attack.
5.27 Units of an Orders Command with No Orders may:
- Fire Artillery;
- Use Restricted Movement (7.12); or
- Shock Attack, but add one (+1) to their Commitment Die Roll, unless the unit is within the Orders Range of its Overall Commander.
5.28 Individual Orders. If an Orders Command has No Orders, the player may wish to attempt to put that Command Under Orders when its Activation Marker is drawn. To do so, the player rolls the die and compares it to the Orders Rating printed on the Activation Marker just drawn. If any unit in the Orders Command is within the Orders Range of the Overall Commander, the Overall Commander's Command Rating is subtracted from the die roll.
PLAY NOTE: Thus a French Orders Command at Borodino that has No Orders but wishes to die roll for Under Orders would, if any unit in the Command was in Napoleon's Range, subtract two (-2) from that die roll.
- If the adjusted die roll is less than or equal to the Activation Marker's Orders Rating, its units are Under Orders for that Activation only. The Command reverts to No Orders status when finished with that Activation.
- If the adjusted die roll is higher than the Rating, the units of that Command may not do anything, except to Rally.
5.29 Orders Delay. Each scenario provides an Orders Delay rating, which limits an Overall Commander's ability to change the Orders he already has in place. In the Orders Phase of each turn, other than the first, the player can roll the die. If the die roll is less than or equal to the Orders Delay rating, the player can issue new orders to all Orders Commands. If the die roll is greater than the Orders Delay rating, the player's army operates with the same Orders as the previous turn.
- For each turn a player fails his Orders Delay roll, subtract one from the next die roll (i.e., if the player fails once, subtract 1; twice, subtract 2, etc.).
- Napoleon does not roll for Orders Delay. He may always issue new orders every turn.
HISTORICAL NOTE: Most of the armies of the day did not have the staff necessary to implement dissemination of orders. Consequently, it took a great deal of time to change Orders, or even issue new ones. The French, however, with Napoleon's massive and excellent staff of aides-de-camp had mastered the art.
5.3 Activation Markers
5.31 Activation Markers are used to determine the order which each player's units move and fight. Each Activation Group has two Activation Markers representing it. Activation markers are drawn one by one from a single pool during the Action Phase of the turn, which determines the order in which each Activation Group is activated.
EXAMPLE: The Borodino Activation Marker for Davout/I would apply to—and activate—all I Corps units, regardless of where they are on the map. All commands of the I Corps with "Orders" could move and attack normally. All commands of I Corps with "No Orders" must either operate under the restrictions of 5.27 or roll for full activation. A die roll of 0-6 would put the command "Under Orders." If Napoleon was within three hexes of one of the units of the command, the die roll needed would be 0-8.
5.32 At the beginning of each turn, the Activation Markers for all on-map units and reinforcements for that turn are placed in The Pool. Note that some reinforcements only receive one Activation Marker the turn they enter (see scenarios for details).
5.33 Artillery Barrage Marker. In some scenarios, an Artillery Barrage Activation Marker may be available for one or both players. Placing this Activation Marker in the Pool costs the player one Orders Rating Point. Only one Artillery Barrage Activation Marker may be placed in the Pool by a player each turn. In some scenarios, use of this Activation Marker may be restricted.
5.34 Combined Group Activation Marker (not used in Borodino). Depending on the scenario, players may have the ability to use the Combined Group Activation Marker. This is used to Activate two Activation Groups at the same time. To use this AM, the player places it in the Pool, retaining one AM from each of two groups he wishes to Activate together. The retained markers will designate which groups are to be Activated by the Combined Group marker. When the Combined Group AM is drawn, both Activation Groups move as if they were one Activation Group. The number of times a player may use the Combined Group AM during the game is indicated in the special rules for each scenario.
PLAY NOTE: When using the Combined Group Activation Marker, one AM from each chosen Activation Group is held out, while the other is still placed in the Pool.
5.35 The decision to use either the Artillery Barrage or Combined Group Activation Markers (if available) is made after Initiative is determined, but before the Initiative Player chooses his initial AM. Either of them may be chosen, if desired, by the Initiative Player as his first AM.
5.4 Using Activation Markers
5.41 The first Activation Marker used in each game turn is selected by the Initiative Player. He may choose any of his Activation Markers (even the Combined Group AM or the Artillery Barrage AM) as the first Activation.
5.42 All remaining Activation Markers are drawn randomly, one at a time, from the Pool.
5.43 When an Activation Marker is drawn, the units of that Activation Group may Move and engage in Combat, though this varies according to their Orders status. Disordered units that neither move nor engage in Combat may attempt to Rally, regardless of Orders status.
5.44 When all the units of the selected Group finish their actions, that Activation Marker is set aside and a player draws another Activation Marker, repeating the above process, until all Activation Markers have been drawn.
5.5 Activation As Reserves
5.51 In the Reserve Phase, each Player may activate one of his Orders Commands. The Initiative Player chooses which player will go first in this phase. If there is no Initiative Player, each player rolls a die to see who goes first during Reserve Activation, with the high roll going first (re-roll any ties).
PLAY NOTE: This means that it is possible for an Orders Command to get three Activations in one turn.
5.52 In order to be activated in the Reserve Phase,
- At least one unit of the Orders Command must be in the Overall Commander's Orders Range.
- Only units in Orders Command not adjacent to an enemy unit may be activated as Reserves.
5.53 Units activated as Reserves function as if they had No Orders. They may not roll for Orders (5.28), nor may they Rally.
5.54 Each non-artillery unit that moves during a Reserve Activation must roll a die for possible Disorder when it finishes movement. If the die roll is higher than its Cohesion, the unit is Disordered. Already Disordered units that fail Withdraw.
5.55 Artillery does not roll for Disorder when moving during a Reserve Activation, but does roll for Disorder if it fires during that Activation.
5.56 Non-Artillery units that do not move during a Reserve Activation and Artillery units that do not Fire during a Reserve Activation do not roll for Disorder.
5.57 The Reserve Phase may not be used to activate Commands that did not have an Activation Marker in the Pool. This usually refers to restrictive rules on using the various Guard units.
5.6 Overall Commanders
5.61 Each scenario has an Overall Commander. The Overall Commander has four ratings:
- Command DRM: used to modify the die roll when rolling for Under Orders status and for Shock Commitment.
- Orders: the number of Orders Commands the Overall Commander can automatically place Under Orders, subject to Delay.
- Orders Delay: used to change orders during the game.
- Orders Range: the range, in hexes, over which the Overall Commander can use his Command DRM. Count the range from the Overall Commander to the unit, excluding the hex the Overall Commander is in.
5.62 The Overall Commander may move only in the Overall Commander Movement Phase. Unless specified in the scenario, Overall Commanders have a Movement Allowance of '8'.
5.63 If a hex containing an Overall Commander is entered by enemy units, either during combat or movement, the Overall Commander is immediately moved to the nearest friendly unit. Overall Commanders are not affected in any way by combat.
6.0 Facing, Stacking, & Zones of Control
PLAY NOTE: Facing—the position of a unit—affects the ability of that unit to fire and/or engage in Shock. Zones of Control are independent of facing; they restrict the movement capability of enemy units. To a certain extent, this is a bit different from many historical games.
6.1 Facing
6.11 All units must be faced in a hex so that the top of the unit (the side with its unit name) faces towards a vertex (joint) of the hex it is in—not a hexside—as per the diagram. All units in a hex must be faced the same way, except as noted below. The two hexes to the front are called the Frontal Hexes; the four behind, the Rear.
Exceptions:
- Infantry units (only) in Villages, Castles and Redoubts have frontal facing into all six hexes surrounding them.
- Cavalry that is not Disordered has a special "Defensive Facing," wherein the two frontal and the two "flank" hexes (as per the diagram) are all considered Frontal for purposes of deciding attacker position (only). Disordered cavalry has standard facing.
6.12 Facing and Movement. Facing has no effect on movement or Zones of Control, and a unit is free to change its facing at any time during and at the end of movement. Units do not pay any movement point cost to change facing. Units do not have to be facing a particular hex to enter that hex.
6.13 Facing and Combat. Facing does have an effect on combat:
- A unit may fire or shock into/from only its Frontal hexsides.
- When a unit is attacked through its Rear hexes, there are negative effects.
6.14 If an artillery unit is stacked with an infantry or cavalry unit the two units do not have to have the same facing. Any facing effects on the Shock die roll apply to the infantry or cavalry unit's orientation.
6.2 Stacking
6.21 Stacking Limits. There may never be more than three (3) combat units in any one hex. Stacking restrictions apply at the end of Movement and during Combat (Shock and/or Fire). Markers and Overall Commanders do not count for stacking purposes.
- Infantry and Cavalry may never stack with each other.
- A maximum of two infantry or two cavalry units is allowed in a hex, unless all units in the hex are from the same brigade, in which case three units may stack together.
- Jaegers count as infantry for all stacking purposes.
- ARTILLERY: A maximum of two artillery units from the same Activation Group, with a combined total of no more than 6 Strength Points, may be stacked in 1 hex as long as no non-artillery units are in the hex.
- No more than one artillery unit may be stacked with any non-artillery unit.
- Artillery may only stack with two infantry or two cavalry units if the infantry/cavalry units are both from the same brigade.
6.22 Stacking and Enemy Units. A unit may never move into or through a hex containing an enemy combat unit.
6.23 Stacking and Combat. Stacking affects combat in the following ways:
- All units in a stack may Shock, but only the top unit has to pass the Commitment Die Roll. Failure to pass the Commitment Die Roll by the top unit results in no Shock attack by the entire stack.
- Artillery may Fire regardless of where it is in a stack.
- Only the top Infantry unit in a stack may use its Defensive Fire rating to adjust enemy Commitment Die Rolls.
- Artillery Fire affects all units in a Stack, except for Artillery Reaction Fire against an infantry Shock attack, which affects only the top infantry unit (8.6).
- When a stack is required to make a Cohesion Check, only the top infantry/cavalry unit in the stack makes the Cohesion check, with the results of that Cohesion check applied to all units in the stack.
6.24 Stacking Order. A unit moving into and stopping in a hex occupied by another unit always is placed at the bottom of the stack. Stacking order may be changed at the beginning or end of that unit's Activation Marker phase and at no other time. In addition a unit in an enemy ZOC may not change stacking order.
6.3 Zones of Control (ZOC)
Zones of Control represent the presence a unit extends outside its immediate area.
6.31 Each combat unit usually exerts a ZOC into all six hexes surrounding it. The following units do not have a ZOC:
- Artillery units.
- Disordered units.
- Units in Square.
- Russian Militia units.
6.32 ZOCs and Terrain. ZOC do not extend across impassable hexsides, nor do they extend across Bridges. They do extend across Fords and crossable Streams/Rivers, unless noted otherwise.
6.33 Entering an Enemy ZOC. Units must stop moving upon entering an enemy ZOC (although they may alter their facing as they enter that hex). There is normally no cost to enter an enemy ZOC, except for Disordered units, which pay an additional Movement Point to enter an enemy ZOC. A unit that enters an enemy ZOC may change Facing before it ends its move.
PLAY NOTE: Yes, artillery may enter an enemy ZOC, even if alone. This has more to do with the scale than tactical doctrine of the era.
6.34 Exiting an Enemy ZOC. Units may leave an enemy ZOC if they start their activation there, but:
- to do so costs one additional Movement Point, and
- that unit may not enter an enemy-controlled Frontal Hex during that activation. (That means they may move directly to a non-Frontal controlled hex, at which point they stop).
Note: This rule allows a unit to move from one ZOC to another, as long as it does not enter a Frontal ZOC in that activation.
6.35 ZOCs and Facing. A unit that begins an Activation in an enemy ZOC may change facing.
7.0 Movement
7.1 Movement Allowances
7.11 Normal Movement. Each combat unit has a Movement Allowance printed on the counter. This represents the maximum number of Movement Points that unit may "normally" expend during a single Activation Phase (when Under Orders). Units may always move less than their allowed Movement Allowance.
7.12 Restricted Movement. If a unit has No Orders, it may only expend Movement Points up to one-half of its printed Movement Allowance (rounded up). Thus, infantry without orders has a Movement Allowance of 2, Light Cavalry, 4, etc.
7.13 Extended Movement. A command Under Orders may have its units use Extended Movement, as long as no unit starts or moves within three hexes of an enemy combat unit. Extended Movement applies to the entire Orders Command; all units must use it, or none may. If the player wishes to move any unit in the Orders Command closer than three hexes from an enemy unit, the entire Orders Command may not use Extended Movement.
- Units using Extended Movement double (x2) their printed Movement Allowance.
- Units that are using Extended Movement may not move through other friendly units.
- Non-artillery units may not stack during Extended Movement. Non-Artillery units may begin Extended Movement stacked, but may not remain that way.
- Artillery units may stack with other artillery units, up to the 6 Strength Point limit, during Extended Movement.
- Disordered units may not use Extended Movement.
PLAY NOTE: You may use only one type of movement during any given phase. You may not start using Extended and then switch to Normal.
7.2 Movement and Terrain
7.21 A unit expends Movement Points for each hex it enters. Movement Point costs depend on unit type; see the Terrain Chart. Note that horse artillery units use the artillery movement column.
7.22 Units using Roads pay the Road cost if they are entering that hex from a hex containing a connecting Road/Path hex; otherwise, they pay the cost of the other terrain in the hex. Roads/Paths do not negate elevation costs.
7.23 Certain hexes/hexsides are impassable; units may not enter or cross them unless they are traversed by a Bridge or Road.
7.24 Roads negate the Movement cost of crossing Streams, even if there is no Bridge. Where they do this, it is called a Ford. In Borodino, the only fords are those that are marked with a Ford symbol.
7.3 Movement Restrictions
7.31 As a unit moves, it traces a path of contiguous hexes through the hex grid, paying the cost of each hex entered. Each unit moves separately, and one unit's movement must be completed before another can begin.
7.32 A unit may never move into or through a hex containing an enemy combat unit.
7.33 A unit may be moved in any direction or combination of directions. A unit's Facing has no effect on how or where it may move.
7.34 A moving unit must have enough Movement Points to pay the terrain cost of entering a hex. If it does not, it may not enter that hex.
7.35 Minimum Move. A unit may always move one hex if the hex moved into is not prohibited to that unit. Units using a Minimum Move may not enter an enemy Zone of Control.
7.36 Artillery Movement. All artillery fire is resolved before any unit moves. Artillery units that fire are marked with a "Fired-1/2 Move" marker. After all artillery fire is completed, artillery may move. Those with a Fired 1/2 Move marker may use only half their Movement Allowance and may not move adjacent to an enemy unit.
EXAMPLES OF MOVEMENT: The five units move forward expending MPs as shown. Note that the cavalry unit at the top moves through the woods hex along a path, the path reduces the cost of the woods to 2 MPs (Path = 1/2 of OTIH with fractions rounded up). The cavalry unit then pays 3 MPs to enter a woods hex and becomes disordered. The two infantry units pay 1 MP for cultivated and 2 MPs for woods or village hexes. The artillery unit pays 2 MPs for clear terrain, 3 MPs for cultivated and 1 MP for the road. The cavalry unit at the bottom pays 1 MP for clear and 2 MPs for cultivated hexes. Note that moving up one elevation level does not cost any additional MPs. Had it been a steep elevation change it would have cost the cavalry unit +2 MPs.
After all movement is completed, remove the Fired-1/2 Move markers. Artillery may not Fire when using Extended Movement.
7.37 Roads and Enemy Units. Units may not use Road costs to move adjacent to an enemy unit; they must use the Movement Point cost of the "other" terrain in the hex. They may, however, use Ford costs.
7.38 Moving Through Friendly Units. It costs +1 Movement Point to enter a friendly-occupied hex in order to move through that stationary unit. See the Stacking rules for the effects of stopping in such a hex.
7.39 Cavalry and Jaeger Reaction Retreat. If an infantry unit moves into the ZOC of a Cavalry unit, or a Jaeger unit alone in a hex, the Cavalry or Jaegers (regardless of facing) may retreat one hex voluntarily. Such voluntary retreats may be into a friendly occupied hex and the retreated unit may change facing in its new hex. The moving unit ceases movement, and may not advance into the vacated hex. The Jaegers may not fire.
Note: Scenario instructions will indicate whether units identified as Jaegers are able to use this rule.
7.4 Reinforcements
7.41 Reinforcements enter the game when their Activation Marker is drawn. (Thus, their Activation Markers are available the turn they are scheduled to enter). They enter, by Activation Group, through the Entry hex stated in the scenario as if they were in a "line" extending off the map: the second unit in that Group pays the cost of the entry hex plus the cost that the first paid for that entry hex, etc.
7.42 Reinforcements and Orders. A Player has a choice when he has commands entering as Reinforcements. He may either:
- Use one of his Orders Points to give them Orders, or
- Have them enter using Reinforcement Extended Movement. This allows the units in that command to use Extended Movement. However, they may do so only if they use, and stay on, a Road. Use the "Ext Move" marker as its Orders counter. Whenever the units can no longer use Extended Movement, they change immediately to "No Orders" status.
- Barring the above two choices, reinforcements will enter with "No Orders."
7.43 Reinforcements and Extended Movement. Reinforcement Extended Movement is available only for the first Activation Marker drawn for that command in the first turn of its entry. When the next Activation Marker is drawn, the command changes to No Orders status.
7.44 Enemy Entry Hexes. No unit may move within two hexes of an enemy Entry Hex until all reinforcements have entered the game.
8.0 Artillery Fire
8.1 Artillery Fire in General
Artillery may Fire before moving or instead of moving; they may not fire after moving. Pivoting within the hex is considered movement. Artillery may never Shock attack. Disordered Artillery may not Fire.
8.2 Fire Strength
Artillery fires using its Fire strength, possibly modified by factors listed below.
Each unit fires separately, with the following exceptions:
- If two artillery units are stacked in the same hex, they may combine fire. To do so, use the higher Strength (do not combine the strengths) and add two (+2) to the die roll.
- When an Artillery Barrage Activation Marker is drawn, the player may fire all artillery units, and may combine the fire of any artillery units that are stacked or adjacent. Add two (+2) to the die roll for each unit over the first. It costs one Orders Point to use the Artillery Barrage Activation Marker, and only one may be used per turn. See specific scenarios for any further restrictions.
Units may be attacked by Artillery more than once in an Activation. The results of each fire are implemented prior to any additional fires.
8.3 Fire Range
Artillery units are rated for Effective Fire Range and Maximum Fire Range (in hexes). The latter is the maximum distance over which an artillery unit may fire. Range affects the die roll, as follows:
- Fire at a range of one hex (adjacent) against non-artillery units: +1 DRM.
- Fire within Effective Range, excluding the above: 0 DRM.
- Fire within Maximum Range: -2 DRM for each hex beyond Effective Range.
DESIGN NOTE: Fire at extended ranges was diminished not so much by the capability of the guns, but the inability to see and gauge a target at over 1000 or so yards.
Example: The French MR artillery unit has an Effective Range of 3 and a Maximum Range of 5. The large numbers are the Range DRMs.
8.4 Line of Sight (LOS)
Artillery firing at a range of two hexes or more (do not count the hex the firing unit is in) can fire only if they can see (have a LOS to) the target. LOS runs from the center of the firing hex to the center of the target hex.
- Line of Sight is blocked if any intervening hex is of a higher elevation than both target and firing hex.
- If any intervening hex between target and firer is Woods, and neither target nor firer is at a higher elevation than that Woods hex, the Line of Sight is blocked. If both are higher than the Woods hex, the Line of Sight is not blocked.
- If the firing hex is higher than the target hex and an intervening Woods hex, the LOS is blocked if the Woods are halfway between the two or closer to target hex.
- If the target hex is higher than the firing hex and an intervening Woods hex, the LOS is blocked if the Woods are halfway between the two or closer to the firing hex.
- Combat units and Villages do not block Line of Sight. However, if there are any enemy units in an artillery unit's adjacent Frontal hexes, the artillery unit must fire at one of those units rather than another unit.
- If the Line of Sight coincides with a hexside, the hexside terrain on the hex spine is considered as if it were an intervening hex.
- Flood Walls (not in Borodino) have no effect on Artillery fire at a range greater than one.
- LOS is only traced through Frontal hexsides.
EXAMPLES OF LINE OF SIGHT: In the first diagram, A can see Y and Z, B can see Z, C cannot see any of the four hexes beyond the woods hex. In the second diagram, hexes A through F are not in the LOS of the artillery unit. A-D are blocked by the Woods. E is blocked by the steep slope hexside, and F by a higher elevation in an intervening hex. All other hexes are visible to the artillery unit. Note that the village and dirt wall have no effect on LOS.
8.5 Fire Resolution
Artillery fire is resolved by rolling the die, adding the (range-adjusted) Fire strength to the die roll, applying any possible modifiers and then consulting the Artillery Fire Table.
- Artillery Fire affects all units in the target hex (exception 8.6). Any results that require an additional die roll are applied, separately and individually, to each unit in that hex.
- Artillery may change facing (without leaving the hex) and Fire in the same friendly phase. It may not change facing, fire, then move, however, in the same Activation.
See the Artillery Fire Table for results of the adjusted die roll.
8.6 Artillery Reaction Fire
A non-disrupted artillery unit in a hex that is the target of a Shock Attack receives one free Reaction Fire. It may only target an attacker in one of its frontal hexes—it may not change facing. If attacked from both frontal hexes, the artillery unit may fire at only one. Artillery Reaction Fire takes place after Commitment Die Rolls and before Shock Resolution. Infantry or non-Charging cavalry units that are Disordered due to Artillery Reaction Fire have their Shock attack cancelled—this also applies to all the units they are stacked with. Charging Cavalry that is Disordered due to Artillery Reaction Fire must either continue with the charge, or attempt to stop the charge with the Recall procedure (9.82).
TOP UNIT ONLY: Artillery Reaction Fire against an infantry Shock attack effects only the top infantry unit. The Massed Target Modifier (8.9) can still apply.
8.7 Counter-Battery
A non-disrupted artillery unit may fire back at any artillery unit that fires at it. Such fire is not simultaneous; it occurs after the original fire. A unit may Counter-Battery only once per Activation or Reserve Activation. An artillery unit that uses Counter-Battery may still use Reaction Fire, and vice versa.
8.8 Misguided Friendly Fire
If an intervening friendly unit-occupied hex is adjacent to the target hex, there is a possibility that the artillery fire hits the friendly unit or units, not the target. If the unadjusted Fire die roll is '2' or less, the intervening friendly unit undergoes a Cohesion die roll with a -2 DRM. If the adjusted roll is greater than the unit's cohesion, the unit suffers a Disorder result.
8.9 Massed Target Modifier
When artillery fires at any hex in which there are two or more non-artillery, non-Jaeger units stacked, it gets a +1 DRM for each target unit in that hex beyond the first.
Exception: The exclusion of Jaegers from the Massed Target Modifier does not apply to the Jaeger units belonging to the Coalition in Austerlitz or the Russians at Borodino.
9.0 Shock Combat
9.1 General Procedure
Shock Combat includes Infantry Shock, Cavalry Shock, and Cavalry Charge. Cavalry Charge is explained in detail in rule 9.8. The following steps are followed, in order, to resolve Infantry Shock and Cavalry Shock.
STEP 1: The phasing player declares all Shock attacks (and Charges [9.8]).
STEP 2: Eligible Cavalry, Horse Artillery, and Jaegers may Retreat before Shock. If this occurs, the attacking unit(s) may advance into the vacated hex (9.31 and 9.32).
STEP 3: The phasing player performs a Commitment Die Roll for each stack of infantry or cavalry units wishing to shock—use only the top unit (9.4). Infantry and Cavalry Shock Commitment Die Rolls are modified by the defender's Defensive Fire Rating (9.42).
STEP 4: The non-phasing player may conduct Artillery Reaction Fire (8.6). If any Infantry or non-Charging cavalry are Disordered by Artillery Reaction Fire, their Shock Attack is canceled.
STEP 5: Remaining Shock attacks are resolved in the order the attacking player chooses.
9.2 Which Units May Shock Attack
9.21 An Active, Committed unit that is not Disordered may Shock attack any enemy unit(s) in its Frontal hexes, except if separated by impassable terrain. Cavalry units may Shock attack only if they began the Activation adjacent to the enemy unit to be attacked, or if they are Charging (9.8).
9.22 Multi-hex Shock Combat. A unit attempting to Shock must do so against all enemy units in its Frontal hexes, unless one (or more) of those enemy units is also being Shocked by another friendly unit. In the situation where a friendly unit is attacking only one of two stacks of enemy in (each of) its Frontal hexes because the other is being attacked by another friendly unit, and the latter fails its Commitment check or becomes Disordered by Artillery Reaction Fire, the former must now shock both enemy units!
DIFFERENT HEXES, DIFFERENT DRMS: If a single Shock Attack targets two different hexes, and each hex has different modifiers (i.e., one is in square, the other isn't) apply the same Shock Combat die roll to both hexes, but modify the die roll separately for each.
9.23 Multi-Group Shock Combat. Infantry, Charging Cavalry and non-Charging Cavalry may not combine their strengths when attacking the same unit. Each attack is resolved separately, in the following order: Cavalry Charge, Cavalry Shock, and Infantry Shock. Advance after combat (9.71) is allowed only to the group that actually cleared the defender's hex.
9.24 Disorder and Shock. Disordered units may not Shock attack. Units stacked underneath a Disordered infantry or cavalry unit may not Shock attack. Charging Cavalry which is Disordered by Artillery Reaction Fire may still Shock; however, they lose all Charge DRMs.
9.25 Artillery and Shock. Artillery may not participate in Shock Combat (either offensively or defensively)—they have no Shock strength.
- If stacked with units that must retreat, it must also retreat. Otherwise, it suffers the same result (if any) as the unit or units it is stacked with.
- If Shocked while alone in a hex (or stacked with another artillery unit), it is automatically eliminated—you may not capture guns.
9.3 Retreat Before Shock
9.31 Cavalry Retreat Before Shock. Cavalry and Horse Artillery may retreat one or two hexes before being Shocked by infantry, as may Light Cavalry/Horse Artillery being Shocked or Charged solely by Heavy Cavalry, even if it is Disordered. No die roll is necessary—it is automatic if the non-phasing player wishes. The non-phasing player must make this decision before the attacker makes his Commitment Die Roll. In this case, the attacker may advance into the vacated hex.
POSSIBLE DISORDER: Light Cavalry/Horse Artillery which retreats before Shock from Charging Heavy Cavalry must roll against its Cohesion for possible Disorder (which may cause already Disordered units to Withdraw).
ENEMY ZOCs: Cavalry/Horse Artillery that retreats before shock may not do so into a ZOC of another enemy unit, nor may they retreat through the ZOC of the unit they are retreating from.
PLAY NOTE: Cavalry may not Retreat before being fired at by artillery.
9.32 Jaeger Retreat Before Shock. Jaegers may retreat one hex before being Shocked by infantry. However, such a decision must be made before the attacker rolls for Commitment, and it applies to unstacked or stacked Jaegers. The attacker may advance into the vacated hex. Jaegers that retreat before shock may not do so into a ZOC of another enemy unit, nor may they retreat through the ZOC of the unit they are retreating from.
9.4 Commitment Check
9.41 Procedure. In order for a unit to Shock Attack or a Cavalry unit to Charge, it must pass a Commitment Die Roll. The player rolls for the top unit in each stack with which he wants to attack. This rule applies to all attacking units regardless of Orders status. Defenders do not undergo Commitment.
9.42 Commitment Check Modifiers. The following DRM may apply:
- If the Orders Command of the unit is Under Orders, and at least one unit from that Command is within the Overall Commander's Range, the player may use his Overall Commander's Command Rating (a negative DRM) to adjust the Commitment Die Roll (down).
- If the unit has No Orders, add one (+1) to the die roll.
- If the attacker is attacking through the defending units' frontal hexes, add to the Commitment Die Roll the defender's Defensive Fire Shock DRM of the top unit (if infantry) in each target hex. This modifier is not used in Cavalry Charges.
EXAMPLE: French unit Guy/CM shocks two Russian units through their frontal hexes. The Commitment Die Roll must be modified by +1 for the PsK Jgr's Defensive Fire Shock DRM. Only the top unit is used.
DESIGN NOTE: The Defensive Fire Shock DRM represents the use of skirmisher-style musket fire infantry to deter the approaching line of attackers from closing for Shock.
9.43 Commitment Results
- If the adjusted Commitment Die Roll is the same as or lower than the attacking unit's Cohesion Rating, that unit, and all other units in that stack (unless subsequently Disordered by Artillery Reaction Fire), must Shock.
- If the adjusted die roll is higher than the unit's Cohesion Rating, that unit may not Shock or Charge.
EXAMPLE: A unit with a Cohesion of '5' that is Under Orders and within range of its OC, who has a -2 Command Rating, that is rolling for Commitment against a defender with a Defensive Fire Rating of '1' would need to roll a "natural" 6 or less to Commit.
9.44 Charge Markers. A player must announce and pre-designate, all Shock attacks (and Charges) before rolling for Commitment for any attack. Charge markers are provided for indicating cavalry units.
9.45 A Commitment Die Roll is only done by the top unit in a stack. If it passes, all other non-artillery in the stack pass as well. If it fails, no units in the stack may Shock. If the top unit in the stack is Disordered, that stack may not Shock Attack.
9.46 All Commitment Die Rolls must be made before any Shock combat is resolved.
9.5 Shock Resolution Modifiers
Adjusts the Shock die roll by the following, where/if applicable:
9.51 Strength Ratio. To determine the DRM for the Strength ratio, each player totals the strength of all his units involved in the Shock (exception: 9.23). The attacker then compares the strength of his units with that of the defending units, stated as an odds ratio reduced to its simplest form and rounded off in favor of the Defender. See the Odds/Ratio Chart for the applicable DRMs.
EXAMPLE: A 9 point unit attacking an enemy 5 point unit would undertake a Shock at 3-to-2. A 3-2 provides a +1 DRM.
9.52 Cohesion Differential. The attacker subtracts the defender's highest Cohesion rating from the Attacker's highest, and the difference is the DRM. Obviously, if the defender's Cohesion is better than the attacker's, that DRM will be a negative. Artillery Cohesion is not used for this determination.
9.53 Terrain Effects. See the Terrain Effects Chart. If the attacker is attacking the same unit or stack from different hexes, and the defender occupies any terrain or is behind any hexside feature that gives a beneficial modifier (at least a -1), the Defender chooses which terrain modifier to use. Otherwise, the attacker may choose.
THE CLEAR TERRAIN MODIFIER: The +1 Shock DRM for defender in Clear Terrain is only applicable if:
- The Attacker is attacking from one or more of the Defender's Frontal Hexes.
- At least one of the two hexes in the Defender's Zone of Control adjacent to the Defender's Frontal Hexes (the flank hexes) is vacant and does not have a different unit belonging to the Defender exerting a Zone of Control upon it.
Infantry attacking Cavalry never receive this DRM.
EXAMPLE: In four diagrams, Unit A is attacking. Only when it attacks unit D will it receive the +1 for Clear Terrain, because unit D has an open flank hex (X) not covered by another friendly unit or its ZOC.
9.54 Positional Modifiers.
- [1] REAR: If defending units are being attacked through their Rear hexside(s): +2*. If the Shock Combat targets two or more hexes, all defender's must have their rear towards the attacker.
- [2] FRONT AND REAR: Any frontal or rear attack in which at least one (each) of the defender's Rear and Frontal hexes are occupied by an enemy unit which has as one of its Frontal hexes the defender's hex, +3*. This is not cumulative with the Rear +2 DRM. In multi-hex shock combat situations, all hexes must qualify or no modifier is received.
Note: Positional modifiers apply only if all defenders are being attacked through a Rear hexside [1] or through Frontal and Rear hexsides [2]. Additionally, to qualify for either of these modifiers, at least one attacking unit in the defender's Rear hex must not be in a Frontal hex of another enemy unit.
EXAMPLE: In A the two French units qualify for the +3 Front and Rear Positional Modifier. In B they do not because the unit attacking the rear hex is in a frontal hex of a Russian unit.
9.55 Other Shock Modifiers:
- Charge Modifiers: See 9.83.
- Cavalry Charging Square (-2): See 9.85.
- Light Cavalry successfully counter-charged by Heavy Cavalry (-1): See 9.86.
- Cumulative Pursuit Cavalry Charges (-1). See 9.87.
9.6 Combat Results
9.61 Attacker/Defender Automatic Disorder. All attacking or defending units are Disordered. A unit that suffers a Disorder result is flipped to its Disordered side. If it is already Disordered it Withdraws. Disordered units suffer the following penalties:
- Have no ZOC.
- May not Shock attack (except for Charging Cavalry Disordered by Artillery Reaction Fire).
- Artillery may not Fire.
- May neither form Square nor Counter-Charge.
- If Jaegers, may not retreat before Shock Combat.
- Pay +1 Movement Point to enter an enemy ZOC.
- May not use Extended Movement.
9.62 Retreat Cohesion Check. Each affected unit must undergo a Cohesion Check Die roll (CDR). If the CDR is higher than its Cohesion, the unit must retreat one hex. A unit that retreats must move one hex away from the enemy unit that caused the retreat. It maintains the facing it had before retreating; it may not change facing. See 9.25 if artillery is stacked with retreating units.
EXAMPLE OF SHOCK ATTACK: The French player announces that his three infantry units will attempt to Shock Attack the Russian unit. Napoleon is far away and cannot lend his Command DRM. The three units are part of a command that is not Under Orders so the Commitment die rolls must be modified by +1. In addition, the two top French units in the frontal hexes must modify their Commitment die roll by +1 for the Russian unit's Defensive Fire Shock DRM. For (A) he rolls a 5 (5+1=6) which is greater than the unit's Cohesion Value—that unit may not Shock. For the stack (B) he rolls a 4 (4+2 = 6) which is equal to or less than the top unit's Cohesion Value so the stack may Shock Attack. The total Shock modifier is +3 in favor of the attacker: +2 for the Odds Ratio (14 to 5 [2-1]) and +1 because the defender is in Clear Terrain. Both the Attacker and Defender have a Cohesion Level of 6 so no Cohesion Differential DRM is received. No positional modifiers are available since the flanking French unit failed its Commitment Check. The French player rolls a 5 which is modified to 8. An 8 results in "Defender Automatic Disorder and Retreat Cohesion Check." The Russian unit is flipped to its Disordered side and the Russian player makes a Cohesion Check. If it fails, the unit must be retreated one hex. The attacking French units must then advance into the vacated hex.
9.63 Retreat Restrictions.
- A unit that is forced to retreat into an enemy occupied hex or across or into prohibited terrain is eliminated.
- A unit that retreats into an unoccupied enemy Frontal Hex Withdraws (9.66).
- A retreating unit may not enter a friendly occupied hex, unless that is the only path of retreat (see 9.64).
9.64 Retreat Into Friendly Units. If a unit is forced to retreat into a friendly-occupied hex, and stacking limits are not violated, then the retreated unit's facing is changed to be the same as the units currently in the hex.
9.65 Retreat Through Friendly Units. If a unit's only path of retreat is into a friendly unit with which it cannot stack, the retreating unit retreats an additional hex, through the stationary unit. The stationary unit then undergoes a Disorder Cohesion check. If the stationary unit fails this check, it receives a Disordered result (which means that already Disordered units Withdraw). This may be repeated until the retreating unit finds a hex in which it can stay.
9.66 Withdrawal. A Disordered non-artillery unit that suffers an additional Disorder result Withdraws. When a unit Withdraws it is immediately removed from play and placed in the player's Withdrawn Box, regardless of its situation on the map. A Withdrawn unit ignores any retreat obligations.
ARTILLERY UNITS: A Disordered artillery unit that suffers an additional Disorder is eliminated, and is not eligible for Recovery.
DESIGN NOTE: Withdrawal refers to a unit's inability to stay in combat, whether it be from losses, fatigue, or simply it's just "had enough."
9.7 Advance and Secondary Shock
9.71 Advance. If a defender vacates its hex (Retreats [9.62], Withdrawals [9.66] or is eliminated) as a result of Shock, the stack which has the unit with the highest Cohesion must advance into the vacated hex.
- The unit or stack may change facing as it enters that hex (unless using 9.73).
- If more than one unit or stack has the highest cohesion, the attacker chooses which one advances. When comparing two or more stacks, use the unit in each stack with the highest Cohesion for comparison.
- If a unit advances into a hex which would normally automatically Disorder the unit, it becomes Disordered.
9.72 If Cavalry or Jaegers retreat before Shock, any advance is optional.
Exception: In determining who advances, Charging cavalry always take precedence over infantry, even if latter has a higher Cohesion.
9.73 Secondary Shock. There are two possible results in which a unit may continue to attack, or, possibly, counter-attack: Breakthrough (infantry)/Pursuit (charging cavalry), and Counter-Shock. A unit may use Secondary Shock only once per Phase, with the exception of Pursuit (charging cavalry only). Non-Charging cavalry may not use Pursuit or Breakthrough.
- Breakthrough/Pursuit. If the result was a possible Breakthrough or Pursuit, an Advancing Attacker may, if the player wishes, Shock again, but without changing Facing. If the player chooses to continue, a Commitment Die Roll is not required (i.e., Shock is automatic), but the attacker must Shock all enemy units in its Frontal Hexes.
- Counter-Shock. If the result was a possible Counter-Shock, the defender may move one hex, without changing facing, and shock any enemy units it places in its Frontal hex(es), as per normal shock rules. This is resolved before proceeding to any other Shock resolution. This Counter-Shock does not require a CDR.
9.8 Cavalry Charge
9.81 Cavalry Charge is a version of Shock Combat in which the cavalry unit starts the Activation at least two hexes, but not more than three hexes away from its designated target. It does not move that turn as "Movement"; instead it charges as part of Shock resolution. Note that cavalry that does not start the Activation adjacent to an enemy unit must Charge if it wishes to Shock Attack.
RESTRICTIONS:
- Disordered cavalry may not charge. If disordered during the charge by Reaction Artillery Fire they may continue or try to Recall.
- A cavalry unit may charge only against a target it could see (had a Line of Sight to) before it would have started its charge.
- Cavalry which begin their Activation in an enemy Zone of Control may not Charge, and may only use Shock combat against the unit or units in whose Zone(s) of Control they begin the Activation.
- TERRAIN: Cavalry may not Charge a unit in a Marsh, Woods or Village/Castle/Redoubt hex. The Cavalry movement cost of each hex entered during the Charge, as well as the target hex cannot be more than 2 Movement Points.
- If the designated route of a Charge passes through (not into) an enemy cavalry Frontal ZOC, the Charge is not allowed.
PROCEDURE:
STEP 1: The phasing player announces the charge and designates the target and the one or two hexes being Charged through. The charging cavalry may change facing up to one vertex per hex entered.
STEP 2: Light Cavalry or Horse Artillery being charged solely by Heavy Cavalry may retreat before Shock (9.31). If they do, roll for possible Disorder. The attacker may advance into the vacated hex.
STEP 3: The phasing player performs a Commitment Die Roll for each stack of cavalry units wishing to charge—use only the top unit (9.4). Commitment Die Rolls for Charging are never modified by the defender's Defensive Fire Rating (note that this is different than for regular Shock Combat [9.1]). Cavalry that have successfully passed their Commitment Die Rolls are moved adjacent to the target hex at this time.
STEP 4: The non-phasing player may attempt to form Square (9.85) if infantry is the target or try to Counter-Charge (9.86) if cavalry is the target.
STEP 5: The phasing player may try to Recall his cavalry that are charging units in Square (9.82).
STEP 6: The non-phasing player may conduct Artillery Reaction Fire (8.6) at 1-hex range. The phasing player may try to Recall his cavalry if they are disordered by the Reaction Fire (8.6).
STEP 7: The Charge is resolved as Shock combat benefitting from the Charge DRMs (9.83).
STEP 8: If a 10+ is rolled on the Shock Table the cavalry units may pursue (9.87).
STEP 9: All cavalry units that charged are now disordered (9.84).
9.82 Recall. Recall is available only if the target has formed square or the cavalry was disordered from Artillery Reaction Fire. Roll the die—if the die roll is less than or equal to the unit's Cohesion it has been Recalled. It does not Charge; instead, it stays where it is, changing facing as it wishes. If the die roll is higher than the unit's Cohesion, it must Charge.
EXAMPLE OF CAVALRY CHARGE: The French player announces he will attempt to charge the two Russian units Y and Z. Cavalry units A and B will charge unit Y, while unit C will charge Z. Note that all charges are within the two hex limit. The French player rolls a Commitment die roll for each unit and ignores the Defensive Fire Ratings on the Russian units. Unit A needs a CDR of 3 or less, units B and C need a CDR of 4 or less. All three CDRs turn out to be successful and the French player is now looking at a +3 DRM (heavy cavalry charging) in the upcoming Shock attack. The Russian player announces he will attempt to form square with both units. He needs a CDR of 6 or less for unit Y and a CDR of 5 or less for unit Z. Unit Y fails its CDR and becomes disordered (and now has a cohesion value of 5), while unit Z passes and a Square marker is placed on it. The French player now wants to try and Recall unit C because the square formation will cause it to suffer a -2 DRM to its Shock attack. Unit C needs a CDR of 4 or less, which it fails and so must continue with the charge.
A & B: The Shock Attack on Russian unit Y gets a +4 DRM for Strength Ratio, a +3 DRM for heavy cavalry charging, a -1 DRM for Cohesion Differential and a +1 DRM for defender in clear terrain. Cavalry unit B does not qualify for the +3 Positional Attack DRM because it ends its charge in a frontal hex of a different enemy unit. The total DRM is +7. The modified die roll is a 10+ resulting in Automatic Disorder and Retreat and Pursuit. Since the Russian unit is already Disordered it is removed to the Withdrawn Box and the cavalry unit with the highest cohesion advances into the vacated hex and stops. Both A and B charging cavalry are now disordered.
C: The Shock Attack on Russian unit Z gets a -1 DRM for Strength Ratio, a -2 DRM for cavalry charging a unit in Square, a -1 DRM for Cohesion Differential and a +1 for defender in clear terrain. There are no positional DRMs. The total DRMs is -3. The modified die roll is 2 resulting in an Attacker Automatic Disorder and a Retreat Cohesion Check. The cavalry unit is disordered and must roll a 4 or less to avoid retreating one hex. Since C is already disordered from the combat result, it does not disorder again for the charge.
NOTE: Pursuing Cavalry may not Recall; it must charge (9.71).
9.83 Charge DRMs. A Charge earns the following Charge DRM:
- If at least one charging Heavy cavalry unit is involved in Shock, add three (+3) to the Shock die roll;
- If at least one charging Light (but no Heavy) Cavalry unit is involved in Shock, add one (+1).
The above apply even if the defender is also being attacked, by infantry and/or non-charging cavalry.
9.84 Automatic Disorder. At the conclusion of a Charge (or Pursuit), all charging, counter-charging and/or pursuing cavalry units become Disordered, except for those already Disordered. This does not apply to cavalry involved in Shock that are not charging. Charging Cavalry not actually performing Shock (i.e., Recall) is not Disordered following Shock resolution.
9.85 Square. Infantry units that are the target of a Charge (but not a Counter-Charge) and are not Disordered or in an Enemy ZOC, may attempt to form Square to protect themselves, even if charged from the Rear.
RESTRICTIONS:
- If there are any Disordered infantry units in a stack, that stack may not attempt to form Square. Disordered Jaegers and artillery do not prevent forming square by the infantry in the stack.
- Infantry that is Charged by Pursuing Cavalry may roll to form Square. Note that the Cavalry may not roll for Recall in this instance.
- Artillery and Jaegers may not do so, unless stacked with infantry, in which case it does whatever the infantry does.
PROCEDURE: To form Square, roll the die after all Charges have been declared, using the Cohesion of the top infantry unit in the stack. If the die roll is the same as or lower than the unit's Cohesion the stack has formed Square. Place a Square marker over it. If the die roll is higher than the unit's Cohesion, the stack has not formed Square, and all units in the stack (including Jaegers and artillery) become Disordered (unless already Disordered, in the case of artillery or Jaegers).
EFFECTS OF SQUARE:
- Charging Cavalry does not gain any Charge benefit. Instead, subtract two (-2) from its Shock die roll.
- Artillery units firing on units in Square receive a +1 DRM. This is in addition to any Massed Target Modifier.
- Cavalry Charging square may attempt to Recall.
- Units in Square have no ZOC; however, all of the surrounding hexes are treated as Frontal hexes for purposes of combat and fire.
- Units in Square may not Shock Attack; however they defend normally.
- Units in Square may move one hex only, as long as they do not begin or move into an enemy ZOC, and the terrain being moved into costs 2 or less Movement Points to enter. There is no Minimum Move for units in Square.
LEAVING SQUARE: It costs 1 Movement Point to leave Square. Infantry may not leave Square if they are in the ZOC of an enemy unit. Infantry in Square that suffer a Disorder result go automatically out of Square, in addition to becoming Disordered.
9.86 Counter-Charge. If the target of a Cavalry Charge is a cavalry unit that is being charged through its Frontal hexes, the defender may attempt to Counter-Charge. If the target cavalry unit is Disordered or was in the Frontal ZOC of an enemy unit at the moment the charge was declared, it may not Counter-Charge.
DESIGNER'S NOTE: This is the ability of a defending cavalry unit to counter the inertia of the oncoming enemy troops by supplying some of its own, under the "Best Defense is a Good Offense" theory.
PROCEDURE: Roll a die prior to resolving the Charge, adding two (+2) to the die roll if the Counter-Charging unit is a Light cavalry unit attempting to counter-charge oncoming Heavy cavalry:
- if the die roll is the same as or lower than the Counter-Charging unit's Cohesion, the counter-charge is successful. The (original) attacking cavalry unit does not gain any Charge benefit.
- if the die roll is higher than the Counter-Charging unit's Cohesion, there is no counter-charge and the Charge, or Infantry Shock, is resolved as per the normal Charge rules.
ADDITIONAL SHOCK DRM: If Light Cavalry Charged, but was successfully countercharged by Heavy Cavalry, then the Light Cavalry suffers a -1 DRM to its Shock die roll.
MULTI-HEX CHARGES: If the Charge is composed of two or more cavalry units in different hexes, the Counter-Charge need only target one of the hexes (counter-charging player's choice).
AGAINST SHOCKING INFANTRY: If the target of an infantry (only) attack is a cavalry unit that is not Disordered, and it is being shocked through its Frontal hexes, the defending cavalry may choose (no die roll necessary) to Retreat, Stand or Counter-Charge. If he chooses Counter-Charge, the infantry may not attempt to form Square and the counter-charging cavalry get the usual Charge DRM.
PLAY NOTE: Using infantry to attack cavalry can be a tricky proposition for both players.
9.87 Pursuit. If the charge die roll is 10+, then the charging cavalry units must Pursue.
PROCEDURE: If the defender retreats, the charging cavalry advances into the defender's vacated hex and must immediately conduct another charge (see exception below). Pursuing Cavalry must change facing in order to face towards the unit they are Pursuing. If the defender was removed (withdrawal), the charging cavalry advances into the vacated hex and stops.
STACKING RESTRICTIONS: The number of cavalry units that Pursue is limited only by stacking restrictions. If there are more units than would be allowed, Heavy Cavalry has precedence, and then Cohesion Rating. Note that precedence is determined differently in 9.71.
WHEN PURSUIT IS NOT MANDATORY: If the Pursuit ends with only the retreating enemy unit in the pursuing unit's Frontal Hex, the pursuing cavalry unit(s) must charge that unit. If the Pursuit ends so that a different enemy unit is also in its Frontal hex, it may, if the player wishes, shock/charge both units (see 9.22 for multi-hex shock combat) or stop the pursuit.
DISORDER AND PURSUIT: Automatic Disorder (9.84) is not applied until the Pursuit is completed.
MULTIPLE PURSUITS: There is no limit to how many times Pursuit may occur in a turn; however, each time that a unit Pursuit Charges, subtract one (-1) from its Shock Combat Table die roll.
10.0 Rally and Recovery
10.1 Rally
Disordered units that have not moved, changed facing, or fired may undertake Rally attempts at the end of their Activation Group's Activation Phase. Units adjacent to an enemy unit may not undertake Rally. Rally is not dependent upon Orders status.
PROCEDURE: To rally a Disordered unit, roll the die. If the die roll is the same as or lower than the unit's (Disordered) Cohesion, flip the unit to its Normal side and reface it as desired. If the die roll is greater than the unit's (Disordered) Cohesion, it fails the Rally attempt, and remains Disordered.
10.2 The Recovery Phase
In the Recovery Phase, all Withdrawn units in each player's Recovery Box are eligible for Recovery (and return to the game). If an entire Activation Group (all units) has been Withdrawn/Eliminated, none of its units are eligible for Recovery. That Activation Group is out of the game.
PROCEDURE: To check for Recovery, the player rolls the die for each eligible unit, comparing the DR to the unit's Disordered Cohesion Rating. There are no adjustments.
- If the DR is the same as or lower than the Disordered Cohesion, the unit Recovers, and is returned to the game (10.3).
- If the DR is higher than the Disordered Cohesion, the unit is permanently eliminated.
SEQUENCE: Most of the time players can perform this phase simultaneously. If sequence becomes important players may roll a die to see who goes first.
10.3 Return to Map
Recovered units are placed back on the map, in Disordered status:
- Within 3 hexes of a unit from the same Activation Group, and
- At least three (3) hexes from an enemy unit. If this is not possible, the Player must wait for a turn in which it is.
Independent units that Recover must be placed within 3 hexes of a unit from the same Army.
10.4 Withdrawn Boxes
After all Recovery attempts have been made for a game turn, all units in the Withdrawn Boxes for each side are moved to the respective Recovery Boxes for attempted Recovery the next turn.
10.5 Collapse
10.51 Each Activation Group will "collapse" (cease to function as a group) when it takes excessive losses. Collapse is determined in the Group Morale Phase, prior to Recovery.
10.52 When at least 2/3 of the units (not strength points) in an Activation Group—not counting artillery or Russian Militia, they have no bearing on this rule—have either been Withdrawn or been eliminated, all of the remaining units in that Activation Group are automatically Disordered. Already Disordered units are placed in the Withdrawn Box, while units already in the Withdrawn Box are eliminated. Units in the Recovery Box are not affected by Collapse. Units in a Collapsed Activation Group may never recover from Disorder for the remainder of the game, even if some of the Withdrawn units return. An Activation Group can collapse only once per game.
EXAMPLES: A group with five units would collapse when it loses its fourth unit. A group with seven units would collapse when it loses its fifth unit.
11.0 Jaegers
(Not used in BORODINO)
11.1 Movement Properties
Jaegers have the following special Movement properties:
- Stacking (see the Stacking rules).
- Jaegers are treated as a regular infantry unit for Extended Movement.
- Jaegers not stacked with non-Jaeger infantry may not form square.
- Jaeger ZOC is the same as regular infantry.
- Jaegers may not enter an enemy ZOC unless there is already a friendly unit in that hex.
11.2 Combat Properties of Jaegers
Jaegers have the following special Combat properties:
- SHOCK DEFENSE: Jaegers may add their Strength Points to those of the entire hex. However, if the player wishes, after his opponent's Commitment Die Roll, for which the Jaegers have supplied a DRM, he may retreat the Jaegers one hex before resolving the actual Shock, which means they do not add their SP in, nor are they affected by the combat.
- SHOCK ATTACK: Jaegers may never Shock attack by themselves. However, if at the top of an attacking stack, the Jaeger Defensive Fire Rating is subtracted from the Defensive Fire Rating of the target unit when determining the DRM for Commitment. When used in this manner they are subject to any negative results incurred.
- JAEGER COHESION: This rating may not be used to determine Cohesion differential, unless the Jaegers are the only unit being shocked.
- If alone in a hex when an enemy infantry unit moves into its ZOC, and not Disordered, Jaegers may retreat one hex regardless of facing. They may not fire, but the enemy unit stops, ceasing movement for the turn (no advance). Note this occurs during enemy movement, not during Shock.
- Disorder Jaegers may not retreat before combat.
Scenario: The Battle for the Schevardino Redoubt (September 5, 1812)
Introduction
This scenario is an excellent way to learn the game's movement and combat systems, as it does not use the Command and Activation systems of the full game.
Length of Game
Ignore the Turn Track, as this scenario uses a somewhat different approach. There are five Turns (although here a Turn is somewhat different). It should take about 2 hours to complete, maybe less.
Game Balance
Heavily favors the French.
HISTORICAL NOTE: When the battle ended and the redoubt had been captured for good, the French realized that they had not taken a single unwounded prisoner. It was a portent of things to come.
French Initial Deployment
[Units may be Faced as desired]
| Hexes | Unit |
|---|---|
| 4307-10 | Compans' Division, I Corps (9 units, incl. artillery) |
| 4215, 4315, 4415 | Morand's Division, I Corps (5 units, incl. artillery) |
| 4515, 4615, 4715 | Friant's Division, I Corps (6 units, incl. artillery) |
| within 1 hex of 4819 | II Cavalry Corps (9 units, excluding artillery) |
| 5009 | II Cavalry Corps Artillery (2 units) |
French Reinforcements
[See Rules below]
| Enter | Units |
|---|---|
| 5108 | I Cavalry Corps (11 units, including artillery) |
| 4400 | V Corps (8 units, including artillery) |
Russian Initial Deployment
[Units may be Faced as desired]
| Hexes | Unit |
|---|---|
| 4008 | IV Cavalry Corps Horse Artillery (1 unit) |
| 4006-7 | Shakhovsky's Jaeger Regt (2 units) |
| 4009-10 | Gogel's Jaeger Regt (2 units) |
| 3807-8 | 27th Division/VIII Corps (2 units) |
| 3810-12 | IV Cavalry Corps (6 cavalry units) |
| 3604, 3704 | 2nd Cuirassiers Cavalry (4 units) |
| 3106, 3206, 3306 | 2nd Grenadiers/VIII Corps (3 units) and VIII Corps artillery (2 units) |
Turns
This scenario uses no AM, and it does not use the Orders system. All units are considered "Under Orders". It consists of five (5) Turns, in each of which the French move and fight with all their "active" units, as below, followed by the Russians doing the same. Each side gets to "go" only once, but they can use all their active units.
Activating French Units
The French have six "commands":
- Compans' Division (starts active)
- Morand's Division
- Friant's Division
- I Cavalry Corps (enters as Reinforcements)
- II Cavalry Corps
- V Corps (enters as Reinforcements)
As noted above, only Compans' Division is automatically active at the start of the battle. At the beginning of each turn, including the first, the French player may activate one (and only one) of the other, inactive, commands. Once activated, that command remains "active" for the rest of the battle.
Exception: V Corps may not be so activated until the 3rd Turn at the earliest.
Russian Activations
All Russian units start the game active and available for use, with the exception of the 2nd Grenadiers and their accompanying VIII Corps infantry. Those units become active and available Turn 2.
Movement Restrictions
No French units may move east of the 3600 row (they may move into the 3600 row). Units forced to so move are eliminated.
No Russian unit may enter 4400 until after the French V Corps arrives.
The only bridge existing across the Kalatcha River is at 3813.
Winning the Game
The player who occupies the Schevardino Redoubt at the end of the 5th Turn wins.
Scenario: The Battle of Borodino (September 7, 1812)
Division-Level Command ID
FRANCE:
- YG - Young Guard (commanded by Mortier)
- OG - Old Guard (commanded by Lefebvre)
- WL - Walther (Imperial Guard Cavalry)
- MR - Morand (1/I)
- FR - Friant (2/I)
- GR - Gerard (3/I)
- DS - Desaix (4/I)
- CM - Compans (5/I)
- GI - Girardin (I Corps Cavalry)
- LD - Ledru des Essarts (10/III)
- RZ - Razout (11/III)
- MC - Marchand (25th [Wurttemburg]/III)
- MU - Mourie (III Corps Cavalry)
- DL - Delzons (13/IV)
- BR - Broussier (14/IV)
- LC - Lecchi (Italian Royal Guard/IV)
- ON - Ornano (IV Corps Cavalry)
- BV - Bavarian Cav/IV (commanded by von Preysing-Moos)
- KR - Krasinski (16/V)
- KN - Kniaziewicz (18/V)
- SB - Sebastiani (V Corps Cavalry)
- TH - Tharreau (23/VIII)
- OC - Ochs (24/VIII)
- BY - Bruyeres (1st Light/I Cav Corps)
- SG - Saint-Germaine (1st Hvy/1st Cav Corps)
- VL - Valence (5th Hvy/1st Cav Corps)
- PJ - Pajol (2nd Light/II Cav Corps)
Russian Wings
The two Russian armies were further divided into "wings", an effect not covered in this game.
- Miloradovich commanded the Right Wing (II, IV, and the I and II Cavalry Corps);
- Dokturov commanded the Center (VI Corps and III Cav Corps);
- Gorchakov commanded the Left Wing (VII, and VIII Corps plus IV Cav Corps; and
- Constantine commanded the Reserves (V Corps, the Artillery Reserve and several other contingents).
Additional Abbreviations
RUSSIAN:
- CGB - Combined Grenadier Brigade
- CGD - Combined Grenadier Division
- LG - Leibguards (Life Guards)
- Cur or Cr - Cuirassier
- Jgr - Jaegers
Length of Game
The battle starts with the 0600 Game-Turn and ends at the conclusion of the 1945 Game-Turn. It should take about 5 hours to play ... unless you linger over each move.
Game Balance
Historically, it was a very close "victory" for Napoleon.
French Initial Deployment
[Units may be faced as desired]
| Hexes | Unit |
|---|---|
| 3908 | Napoleon |
Imperial Guard
| Hexes | Unit |
|---|---|
| 4108-09 | Old Guard (4 units) |
| 4209-10 | Lnb/YG and Boy/YG (2 units) |
| 4308-9 | Vistula Legion of the Young Guard (2 units) |
| 4110-12 | Imperial Guard Cavalry (5 units) |
| 4409-11, 4508-9 | Imperial Guard Artillery (9 units) |
I Corps (Davout) [a]
| Hexes | Unit |
|---|---|
| 3614, 3713, 3813 | Morand's (MR) Division (3 units) [a] |
| 4005-7 | Friant's (FR) Division (4 units) |
| 3714-5, 3815 | Gerard's (GR) Division (3 units) |
| 3905-6 | Dessaix's (DS) Division (4 units) |
| 3706-7, 3806-7 | Compans' (CM) Division (7 units) |
| 3709 | DS artillery (1 unit) |
| 3607-10 | MR, FR, GR and CM Artillery (2 units each) |
| 3708 | I Corps Reserve Artillery (1 unit) |
III Corps (Ney) [b]
| Hexes | Unit |
|---|---|
| 3710-12 | III Corps infantry (7 units) |
| 3611-13 | III Corps Artillery (5 units) |
IV Corps (Prince Eugene) [a]
| Hexes | Unit |
|---|---|
| 3618-19 | Delzon's (DL) Division (4 units) |
| 3817-8 | Broussier's (BR) Division (4 units) |
| 3916-7 | Lecchi's (LC) Italian Royal Guard (2 units) |
| 3622-3, 3721-2 | IV Corps Cavalry (4 units) |
| 3517-19 | IV Corps Artillery (6 units, incl. horse artillery) |
V Corps (Poniatiowski; the Polish Corps)
| Hexes | Unit |
|---|---|
| 3801-2 | Krasinski's (KR) Division (3 units) |
| 3900-1 | Kniaziewicz's (KN) Division (2 units) |
| 4001-4100 | Sebastiani's (SB) Cavalry (2 units) |
| 3801, 3900, 4000 | V Corps Artillery (3 units) |
VIII Corps (Junot; the Westphalian Corps)
| Hexes | Unit |
|---|---|
| 3810-11 | Tharreau's (TH) Division (3 units) |
| 3911 | Legras' Brigade of Och's (OC) Division (1 unit) |
| 4012 | von Hammerstein's VIII corps cavalry (1 unit) |
| 3910 | VIII Corps artillery units (2 units) |
The Cavalry Reserve (Murat)
I Cavalry Corps
| Hexes | Unit |
|---|---|
| 4203-4, 4303-4, 4405 | I Cavalry Corps (9 units, excluding artillery) |
| 4403 | I Cavalry Corps Horse Artillery (2 units) |
II Cavalry Corps
| Hexes | Unit |
|---|---|
| 4205-6, 4305-6, 4406-7 | II Cavalry Corps (9 units, excluding artillery) |
| 4207 | II Cavalry Corps Horse Artillery (2 units) |
III Cavalry Corps
| Hexes | Unit |
|---|---|
| On Road 4015-4515 | III Cavalry Corps (6 units, including artillery) |
IV Cavalry Corps
| Hexes | Unit |
|---|---|
| 4202, 4302 | IV Cavalry Corps (3 units, excluding artillery) |
| 4402 | IV Cavalry Corps Horse Artillery (1 unit) |
Attached Cavalry
| Hexes | Unit |
|---|---|
| 4505 | I Corps Cavalry (2 units) [a] |
| 4407 | III Corps Cavalry (2 units) [b] |
| 4506 | III Corps Cavalry Horse Artillery (1 unit) [b] |
a—Morand's and Gerard's Divisions are attached to IV Corps. The I Corps cavalry is attached to the I Cavalry Corps of Murat's Cavalry Reserve.
b—The III Corps cavalry is attached to the II Cavalry Corps of Murat's Cavalry Reserve.
A Note on French Cohesion Ratings: The Cohesion Ratings of French infantry and, especially, the cavalry, are based on the fact the march into Russia had sapped the strength of La Grand Armee to the point where it was acting at about 50% efficiency. Cavalry strength, in terms of mounts available, had been reduced drastically.
A Note on French Artillery Movement Ratings: The reduced Movement Allowances for French artillery reflect the very sorry state of their horses.
Russian Initial Deployment
[Units may be Faced as desired]
| Hexes | Unit |
|---|---|
| Any Hex | Kutuzov |
1st Western Army (Barclay-de-Tolly)
Independent Units
| Hexes | Unit |
|---|---|
| within 1 hex of 2226 | Vlasov and 3 Bug Cossacks (2 units) |
| 1624 | Paskov Jaeger Regt (2 units) |
| 3217, 3316 | LG Jaeger Regt (2 units) |
| 2717-18 | 11th and 13th Jaeger Regts |
| 2720-1 | Vuich's Jaeger Regt (2 units) |
| 2623, 2421 | Aleksapol's 'a' and b Jaeger Regts [a] |
| 1617-8, 1716-7, 1816-7, 1916 | Platov's Cossacks (8 units, incl. horse artillery) |
| 1821, 1920 | Smolensk Militia (2 units) |
II Corps (Baggovut)
| Hexes | Unit |
|---|---|
| 2023-5 | 4th Division (3 units) |
| 1923-4 | 17th Division (2 units) |
| 1520, 1620 | II Corps Artillery (2 units) |
IV Corps (Osterman-Tolstoy)
| Hexes | Unit |
|---|---|
| 2221, 2320, 2420, 2519 | 11th Division (4 units) |
| 2220, 2319, 2419 | 23rd Division (3 units) |
| 2719 | IV Corps artillery (1 unit) |
VI Corps (Dokhturov) [c]
| Hexes | Unit |
|---|---|
| 2716, 2816 | 7th Division (2 units) |
| 2715, 2815 | 24th Division (2 units) |
| 2716, 2816 | VI Corps Artillery (2 units) |
1st Cavalry Corps (Uvarov)
| Hexes | Unit |
|---|---|
| 1317-8, 1417-8 | I Cav Corps (5 units, including horse artillery) |
II Cavalry Corps (Korff)
| Hexes | Unit |
|---|---|
| 2119, 2219, 2318, 2418 | II Cav Corps (5 units, including horse artillery) |
III Cavalry Corps (Kreutz)
| Hexes | Unit |
|---|---|
| 2517-8, 2617-9 | III Cav Corps (5 units, including horse artillery) |
2nd Western Army (Bagration)
Independent Units
| Hexes | Unit |
|---|---|
| 3215, 3213 | Gogel's Jaeger Regt (2 units) |
| 2810-11 | Shakhovsky's Jaeger Regt (2 units) |
| 2812 | 2nd Combined Grenadiers (1 unit) |
| 2710-11 | 2nd Cuirassier Cavalry Division (4 units) |
| 3001-2, 3100-1 | Karpov's Cossacks (4 units) |
| 2801-5 | Moscow Militia (5 units) |
| 2507-8, 2608 | All 4SP Artillery units of the 2nd Western Artillery Reserve [d], one per hex (3 units) |
| 3010, 3008, 2812 | All 3 SP units of the 2nd Western Artillery Reserve [d], one per hex (3 units) |
III Corps (Tuchkov)
| Hexes | Unit |
|---|---|
| 3102-4 | 1st Grenadier Division (3 units) |
| 3003-4 | 3rd Division (2 units) |
| 3105-6 | Aleksapol's 'c' and 'd' Jaeger Regts (2 units) [b] |
| 3203, 3102-4 | III Corps Artillery (5 units) [c] |
VII Corps (Rayevski)
| Hexes | Unit |
|---|---|
| 3113-4 | 12th Division (4 units) |
| 3014-5 | 26th Division (4 units) |
| 3113-4 | VII Corps Artillery (2 units) |
VIII Corps (Borozdin)
| Hexes | Unit |
|---|---|
| 3008-10 | 2nd Grenadier Division (3 units) |
| 2908-9 | 27th Division (2 units) |
| 2907 | VIII Corps Artillery (2 units) |
IV Cavalry Corps (Sievers)
| Hexes | Unit |
|---|---|
| 2913-4, 2814 | IV Cavalry Corps (6 units) |
| 2915 | IV Cavalry Horse Artillery (1 unit) |
The Reserve (Constantine)
| Hexes | Unit |
|---|---|
| 2311-13, 2412-15 | 1st, 2nd and 3rd LG Divisions (5 units) plus the 1st Combined Grenadiers (2 units) |
| 2212-4 | 1st Cuirassier Cavalry Division (3 units) |
| 2015, 2115-7, 2215-7 | 1st Western Army's Artillery Reserve (20 units) [e] |
a - The 'c' and 'd' units of Aleksapol's Jaeger's have been assigned to the Left Wing / 2nd Western Army.
b - The 'a' and 'b' units of Aleksapol's Jaeger's have been assigned to the independent units of the 1st Western Army.
c - This group of 72 guns was a sort of reserve attached to Tuchkov's Utisa command.
d - The exact deployment of about half of these guns is difficult to determine.
e - These units may overstack to 3 per hex until they move or fire. Then they must obey normal stacking rules. This group comprises half the guns in the Russian army.
Reinforcements
Neither side has any Reinforcements.
Initiative
The French automatically have the Initiative for the 0600 game-turn. After that, it's by die roll.
Combined Group Activation
Neither side has this capability, and the markers may not be used.
Special Rules
1. Russian Command and Activation
During the Orders Phase the Russian player rolls a die and consults the Delay Rating on Kutusov. If he passes his Delay Roll (5.29), he removes the Orders Markers from the previous turn and then secretly places new ones (5.21). He can either:
- put 3* commands of Barclay's 1st Army Under Orders,
- put 2* commands of Bagration's 2nd Army Under Orders,
- put 1 command of the Russian Reserve Under Orders.
*The Russian player may reduce this number by one and place the Russian Artillery Barrage marker in the Activation Pool.
Russian Army Designations (pin stripe on the counters): White Pin Stripe = Barclay's 1st Army; Yellow Pin Stripe = Bagration's 2nd Army; Dashed Pin Stripe = Reserve Units.
If he does not pass his Delay roll, all the Orders Markers from last turn remain in effect.
NOTE: Kutusov does not roll for Delay on Turn 1.
Barclay's Army has seven (7) possible Activation Groups, including all the 1st Western Army "independent" units (to which we have assigned the Cossacks).
Bagration's army has five (5) Activation Groups, including all the 2nd Western Army independent units.
The Reserve is comprised of two (2) Activation Groups: the "Guard" (all infantry) plus the 1st Curraissier Division, and the Artillery Reserve of the 1st Western Army. If the Reserve is not given Orders by Kutuzov in the Orders Phase, it may not move or try to Change Orders.
INDIVIDUAL ACTIVATION: Activation Groups that do not receive Orders, and are not part of the Reserve, must wait until their AM is drawn to try and change their Orders as per 5.28.
HISTORICAL NOTE: Barclay and Bagration were not on speaking terms, and neither was overly happy to have Kutuzov around.
2. The French Cavalry Reserve
The French cavalry Reserve consist of four cavalry corps (I, II, III and IV), plus the attached divisions of I and III Corps. All of these units are under the Command of, and are activated by, Murat (and his AM).
However, if Napoleon gives Orders to his Cavalry Reserve, Murat must transmit those Orders, as per the second rating on his AM counter.
The small number-'2'-represents the number of Cavalry commands-of the six, above-that may be given Orders directly, without die roll, in the Orders Phase.
The larger number-'5'-is the Orders Rating for those commands not given Orders (the other four).
EXAMPLE: It's the 0830 Game Turn. Napoleon uses one of his Orders points to allow Murat to give Orders in the Orders Phase. Murat gives Orders to Grouchy's II Cavalry Corps and Nansouty's I Cavalry Corps. All other cavalry commands are without Orders. The Murat AM is drawn. The French player decides to try to change the Orders of Montbrun's II Cavalry Corps. He rolls a '6'. The orders have not arrived and Montbrun, as per 5.28, sits awaiting further instructions.
3. The French Imperial Guard
Units of the Imperial Guard may be activated only if they have been Given Orders by Napoleon in the Orders phase. They may not "Change" Orders, which is why Mortier's AM says "Nap".
4. Artillery Barrage AM
Players may use their Artillery Barrage AM only when they have "Given Orders" (in the Orders Phase) to do so.
5. Activation Marker: Destruction
The Russians have a special Activation Marker: Destruction. They may use this, when it is drawn, without needing any Command or Activation Points. The Destruction AM always goes into the Pool. Placement therein is not voluntary.
When the Destruction AM is drawn, the Russian player may either set fire to one Village, or destroy one bridge - he may not do both.
Burn Village: To set fire to a Village, the Russian Player must have an infantry unit in that village hex, and there may be no enemy unit adjacent to the hex. He announces he is burning the village. He moves the infantry unit to any adjacent hex not adjacent to an enemy unit and to which the unit could normally move. There is no cost to move, and the unit is not, nor does it have to be, activated or under Orders. Place an On Fire marker in the hex.
No unit may enter a hex with an On Fire marker. However, every time the Destruction AM is drawn, roll one die:
- If the dr is 0-3, the fire is out. Flip the counter to "Rubble" and use the Rubble line on the Terrain Effects Chart.
- If the dr is 4-9, the fire still blazes.
Destroy Bridge: The Russian Player may destroy any bridge to which he has an infantry unit adjacent, there is no enemy unit adjacent and there is no enemy artillery unit within "Effective" Range. Simply place a "Bridge Destroyed" marker over the bridge.
PLAY NOTE: There is not much chance of the Russians ever getting an opportunity to destroy a bridge, but one never knows, does one?
HISTORICAL NOTE: Russian villages were entirely constructed of timber. As such, they offered very little in the way of "protection", and, with their narrow streets, were difficult to move through. Burning them down was a good way to deny any movement into that "hex". Hex 3213 is the site of the village of Shmynovskaya, which had been torched the previous day and was now just a pile of ashes.
6. Kutuzov's Movement
Kutuzov wasn't in the best of shape, and was hardly able to get onto a horse. For the most part, he was carried around in a nice little carriage, which kept him comfortable but greatly reduced his mobility. Thus, Kutuzov has a Movement Allowance of '4' (but still moves as a commander).
7. Napoleon's Movement
Napoleon was suffering from what would become more common as his career dragged on: a curious lethargy probably brought on by a bladder infection (at Borodino) and other psychological factors. To reflect this, before the French Player can move Napoleon (in the Overall Commander Movement Phase) he rolls the die. The result is the number of Movement Points (from 0 to 9) Napoleon has that turn.
8. Extended Movement Restrictions
The Russians may not use Extended Movement.
9. Notes on Terrain
Elevations: The ground at the Borodino battlefield was mostly gently rolling. However, those slight rises and "valleys" are too minimal to be handled at the scale of the game. The "Level-1" terrain behind the Russian redoubts is a large depression (which was what almost everybody was feeling at the end of the day.)
Streams: The several streams cutting through the battlefield were not wide. However, their banks varied from gradual to almost (militarily) uncrossable.
Fords: Roads only negate the movement cost of crossing Streams where there is a ford symbol.
The Moskva River: Units may not cross the Moskva River, except by bridge (at no extra cost).
The Utitsa Woods: Long a source of contention among game players and designers, and often given as the reason Napoleon did not attempt Davout's suggested flanking maneuver, we have opted to use recent information which shows the area immediately around the village of Utitsa was clear of the thick, tangled bush and secondary growth to the north and south. The greater bulk of what we call "woods" was off-map (to the south), and is what the sources refer to when discussing the Davout Flank.
10. Stacking
Artillery may stack up to 8 SP's per hex, if there are no other units in that hex (not 6 as per 6.21).
11. Cossacks
Russian Cossack cavalry units have no back side and so are placed in the Withdrawn Box if they are disrupted. For Shock combat purposes, Cossack cavalry units are treated as Light Cavalry.
12. Russian Jaegers
Russian Jaeger units are jaegers in name only; none of the rules for jaegers apply to them.
13. Russian Militia
The Russians have 7 Militia units, representing a large number of useless troops, mostly armed with pikes and little or no training. The hope was their presence would add to the perception that the Russians had more men than they effectively had. The Russian militia units have the following properties:
- They may not stack with any other units, even other militia.
- They have no Zones of Control.
- They may not attack.
- They do not count towards collapse.
- If they suffer any adverse result, they are, instead, eliminated.
14. French Flanking Maneuver (Optional)
Here's the rule to either warm the hearts of Napoleonic gamers (and Borodino Buffs), or give those same hearts a 3-Turn burn.
Davout had suggested to The Emperor that a fair-sized force be sent to the French right, around the Russian position at Utitsa, to catch the Russian left in the rear and, at least, to force them to pull back their wing to face it. Napoleon mulled it over for a short while. Then, seeing his (usually excellent) maps showed extensive, heavily wooded areas in that region, decided against it, insisting he had no idea how long it would take such a force to accomplish such a movement and, if it took too long, would greatly weaken his attack on the Russian center. You can see if he was right or wrong.
Prior to beginning actual play, the French Player must decide if he is going to undertake a Flanking maneuver. He makes a note of his decision and the Turn in which the units he has chosen to so move will do so. It requires one of Napoleon's Orders to fully activate the chosen units, and those units are considered to be one Orders Command, regardless of the location of each unit in that group.
At the end the Turn Napoleon has chosen to undertake the Flanking Maneuver, all chosen units not adjacent to an enemy unit are removed from the Board and placed in the Flank Maneuver Box.
Beginning two turns after the units are placed in the Flank Maneuver Box, at the start of every Turn the French Player places one of his "Flanking Command" AMs in The Pool (or may choose to use it as his selected AM if he won the Initiative). For example, if the units were placed in the Flank Maneuver Box on Turn 2, beginning Turn 4 the AM is eligible for Pool placement or selection.
When that AM is drawn/selected, the French Player rolls two six-sided dice:
- If he rolls an (adjusted) 12 or more, the Flanking units may enter the map through any southern edge hex from 2400 to 2800 inclusive.
- If he rolls an adjusted 7-11, nothing happens-try again next turn, but add one (+1) to the dice roll. He receives the +1 each time a 7-11 is rolled and they do accumulate.
- If he rolls an adjusted 2-6, he may choose to recall the Flanking units and have them enter the game-map through any southern edge hex from 3500 to 5100 inclusive. Or he may treat it as Nothing Happened. There is no DR addition.
No Russian unit may enter hexes 2400-2800 inclusive until the French Flanking Command has re-entered the map.
The Flanking Command is always Under Orders; there is no need to expend one of Napoleon's Orders points to do so.
14. Winning the Game (numbered "14" a second time in the rule book)
"If we kill more Frenchmen than they kill Russians, we win. If the French kill more Russians than we kill Frenchmen, they win." "What do we win?" "Do you want your children to be forced to eat all those fatty French foods and souflés?" -from Woody Allen's "Love and Death"
The game is won by the player who amasses the most Victory Points. As Napoleonic battles sought to crush and destroy the opponent's army, VP are awarded mostly for causing enemy Activation Groups to Collapse. In addition, the game has geographic objectives, to reflect each side's plan for that day. VP are totaled at the end of the game and awarded as follows:
15. Group Collapse VP
The French get 3 VP for each Russian Activation Group, other than the Russian Imperial Guard (V Corps), that Collapses. They receive 10 VP for the Russian Imperial Guard.
The Russians get 4 VP for each French Activation Group, other than the French Imperial Guard, that Collapses. They receive 10 VP for the French Imperial Guard.
16. Geographic VP
The Coalition receives 10 VP for occupying hex 3417. The French receive 10 VP for occupying hex 3417. (as printed in the rule book)
The player with the most VP wins - the larger the margin, the greater the victory.
Player Aid Charts
Shock Resolution Table
| Adjusted Die Roll | Result |
|---|---|
| < 0 | Attacker Automatic Disorder; Retreat Cohesion Check; Possible Defender Advance and Counter-Shock |
| 0-4 | Attacker Automatic Disorder; Retreat Cohesion Check |
| 5-9 | Defender Automatic Disorder; Retreat Cohesion Check |
| 10+ | Defender Automatic Disorder and Retreat; Possible Breakthrough Shock (Infantry) or Pursuit (Cavalry)* |
*Non-charging cavalry may not use Breakthrough or Pursuit.
Explanation of Results: Shock Results apply to all units in the hex. Apply the printed result first; if any additional effects result occur (e.g., unit Withdraws) apply that afterwards.
- RETREAT COHESION CHECK: Each affected unit must undergo a Cohesion Check die roll. If the die roll is higher than its Cohesion, the unit must retreat one hex.
- AUTOMATIC DISORDER: All units in the target hex are disordered.
- AUTOMATIC RETREAT: The defender retreats one hex.
- POSSIBLE DEFENDER ADVANCE AND COUNTER-SHOCK: See 9.73
- POSSIBLE BREAKTHROUGH SHOCK OR PURSUIT: See 9.73
Die Roll Modifiers for Shock:
- +/-? Strength Ratio (9.51).
- +/-? Cohesion Differential (9.52).
- +/-? Terrain of Defender. Note that some terrain adjusts the Cohesion Check DR, not the Shock DR.
- +2 Rear Positional Modifier (9.54).
- +3 Front and Rear Positional Modifier (9.54).
- +3 Heavy Cavalry Charging (9.83).
- +1 Light Cavalry Charging (9.83).
- -2 Cavalry Charging Square (9.85).
- -1 Light Cavalry Charging, but successfully countercharged by Heavy Cavalry (9.86).
- -1 Cumulative Pursuit Cavalry Charges (9.87).
Automatic Disorder: Charging Cavalry is automatically Disordered after pursuit unless it is already Disordered.
Strength Ratio DRM Chart (9.51)
| Odds/Ratio | Shock DRM |
|---|---|
| 4-1 or higher | +4 |
| 3-1 | +3 |
| 2-1 | +2 |
| 3-2 | +1 |
| 1-1 | none |
| 2-3 | -1 |
| 1-2 | -2 |
| 1-3 | -3 |
| 1-4 or worse | -4 |
Artillery Fire Resolution
| Adjusted Die Roll | Result |
|---|---|
| < 9 | No Effect* |
| 9-12 | Disorder Cohesion Check |
| 13-14 | Automatic Disorder |
| 15+ | Automatic Disorder, Retreat** |
*On an unadjusted roll of 2 or less, check for Misguided Friendly Fire (8.8). **If the unit is in a Village it does not retreat.
Die Roll Modifiers:
- +1 If the target is in Square (9.85).
- +2 Stacked Artillery Firing (8.2).
- +1 Fire at a range of one hex (adjacent) against non-artillery units.
- -2 Fire within Maximum Range. DRM is for each hex beyond Effective Range.
- +? Artillery Barrage. The player may fire all artillery units, and may combine the fire of any artillery units that are stacked or adjacent. Add two (+2) to the die roll for each unit over the first.
- +1 For each non-artillery unit in the target hex beyond the first (Massed Target, 8.9).
- ? Terrain (see the Terrain Chart)
Explanation of Results:
- DISORDER COHESION CHECK: Each target unit must undergo a Cohesion Check Dieroll. If the die roll is higher than its Cohesion, it suffers a Disorder Result.
- AUTOMATIC DISORDER: All units in the target hex are Disordered.
- AUTOMATIC DISORDER, RETREAT: All units in the target hex are Disordered and must retreat one hex.
Note: the Terrain Effects/Movement Chart on the separate player aid card is not included in the rule book PDF and is not transcribed here.