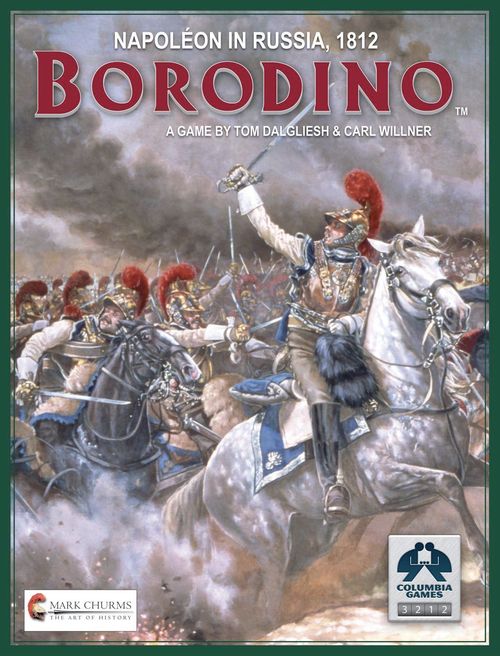
Borodino: Napoleon in Russia, 1812
Borodino: Napoleon in Russia, 1812 Rulebook
Table of Contents
Table of Contents
Game Scale
Borodino involved about 135,000 French and 150,000 Russian troops. The main battle on September 7th was the single bloodiest day of fighting in the 19th century.
Units represent infantry divisions, cavalry corps or divisions, or artillery brigades. Each step is 1600 infantry, 1200 cavalry, or 24 guns. The map is roughly 7.1 miles (11.5 Km) by 6.2 miles (10 Km).
Fog of War
Fog of War is a great feature of all block games. Except in combat, the units stand upright, their label facing the owner. This promotes bluff and innovative strategies because players are never sure of the strength or identity of an enemy unit. You must be bold and decisive in an atmosphere of doubt and deception.
Random Initiative
Random initiative simulates the uncertainty of battle. Player 1 moves first and controls the battle sequence, but Player 2 can react to enemy movement. Coping with the chaos produced by random initiative is more realistic than fixed alternating turns.
Game Equipment
- Game Map
- 103 hardwood blocks: 47 French (blue), 56 Russians (green)
- Label sheet (for the units)
- Order of Battle Cards (2)
- Dice (4)
- These rules
1.0 Deployment
Borodino was fought over two separate days; a September 5 meeting engagement between the vanguard of the French army and the left wing of the Russian army, and the main battle on September 7. You may play each battle separately, or combine them into a three day battle.
1.1 Orders of Battle (OB)
The game includes two OB cards, one French and one Russian. These cards are a roster of all units in the game.
Choose sides (French or Russian) and the scenario to be played. The Russian Player deploys first, then the French Player, as outlined in 9.0, Scenarios.
Important: Units start at full strength, except as noted in 9.2.
1.2 Map Deployment
Headquarters (HQs) are deployed in the areas indicated on the map, such as Russian 7th Corps HQ in the Great Redoubt area. Units attached to each HQ are deployed as desired, subject to command range and stacking. Militia, Jägers, and Voltigeurs are deployed within range of any friendly HQ. Details: 9.0.
2.0 Game Turns
Borodino 1812 is played in Game Turns that simulate one hour of real time. Each Game Turn has four distinct phases: Initiative, Action, Battles, and Supply.
Night TURN: There is no actual night turn; this is when victory is determined or players prepare for the next day in the campaign game
2.1 Initiative
To start each Game Turn, both players roll two six-sided dice. High total is Player 1 for this Game Turn. French win ties.
Exception: French player has the first turn for all scenarios (no roll).
2.2 Action
Player 1 completes all three Action phases, then Player 2 does the same:
- Command friendly units by activating (turning face-up) any/all HQs in their current location. HQs may instead move into an adjacent friendly or vacant area and then activate.
- Bombard with any desired artillery under command of an active HQ. Artillery bombard into adjacent areas; firepower may be modified by terrain.
- Move any/all friendly units (except Artillery that bombarded) within command range of an active HQ. Units generally move to an adjacent area, but can move further by road (5.41). After all movement is complete, active HQs are reduced one step and can move normally.
Note: subject to a Straggler Roll (5.7), units may move without command.
2.3 Battles
After both players have completed their actions, battles are fought between opposing units in the same area. They are fought one at a time in any sequence determined by Player 1. The attacker must win a battle by the end of round 3, or retreat in round 4 taking pursuit fire.
2.4 Supply
After all battles are resolved, a simultaneous Supply Turn is played. This phase simulates a complex variety of battle effects, such as restocks of ammo or rallying troops. There is rarely enough supply to keep all units at full strength so players will have to make choices and defend their supply lines.
3.0 Map
3.1 Areas
The map is divided into Areas which govern the location and movement of units. Areas are separated by Borders which restrict movement into battles.
Startline: A dashed green line that runs northeast to southwest across the map is an area border that also divides the battlefield for scenarios.
The French player sits along the west edge of the map, the Russian player along the east edge (roads to Moscow).
3.2 Terrain
A variety of terrain types appear on the mapboard. Some types apply to Areas, some to Borders, some to both. For movement and combat effects, see the Terrain Effects Chart (back cover).
- CLEAR: fields of crops and pasture.
- WOODS: mostly light woods. Artillery and cavalry have combat penalties. Impassable to artillery unless entering or moving along a road.
- SWAMP: marshy ground covered by light woods and brush. Artillery and cavalry have combat penalties. Impassable to artillery unless entering or moving along a road.
- REDOUBT: The map has five redoubt areas: Shevardino, Great Redoubt, Les Flèches, Gorki, and Maslovo. Redoubts give the Russian player defensive advantages (6.51).
- VILLAGE: Scattered across the map are numerous small villages. Attacking units have a combat penalty.
- RIVER & STREAM: The Moskva and Kolocha rivers are impassable, except at Bridges, Dams, and Fords. All other waterways are Streams that can be crossed anywhere, but easier via Bridges, Dams, or Fords.
- BRIDGE, DAM, & FORD: All are treated the same. French Bridge (crosses the Kolocha river west of Borodino) is only in play for fighting on September 7; see 9.2.
- SLOPE: The top of a slope is indicated by the dark line. Slopes modify Battle Limits and Bombarding.
- ROAD: Roads do not alter terrain; a slope traversed by a road is still a slope. See Road Movement 5.41.
Borodino Terrain: For such a major battle, Borodino terrain was difficult, well chosen by the Russians for it favored the defense, but tempted a French offense.
Woods: The woods depicted were mostly light with scattered brush. They could be easily traversed by infantry, but obstructed artillery fire and cavalry charges.
Swamps: The swamps depicted were marshy, lightly wooded areas with some stagnant ponds. Unlimbering artillery off-road in swamps was not generally possible, and even where it could be done, cannon balls did not perform well on soft ground.
Villages: Borodino, Yelnya, and Utitsa were larger villages, but the rest were a small collection of log cabins called izbas.
Rivers & Streams: The Moskva River seen in the northeast corner of the map eventually flows through Moscow. At this point it was about 40 feet wide and 4-6 feet deep. The river section shown is now a lake called the Mozhaisk Reservoir. Most of the streams were just 2-4 feet wide and shallow at this time of year (September) due to a long hot summer. But moving a division of 5000-8000 men across these small streams was still difficult. Dense brush lined most banks and the lower water meant steep banks. There were also a large number of deeper millponds created by dams.
Redoubts: The redoubts were field defences hastily built a few days before the battle. They amounted to an earth wall created from a perimeter ditch, with embrasures for guns, reinforced with log ramparts and wolf pits to trap attackers. The redoubts were defended mainly by artillery, but players may deploy any one unit there.
Roads: All roads are treated the same. Three main roads cross the map from east to west. They lead to supply sources.
Multiple Terrain:
- Stream+Woods: Battle Limit 1 (stream); Battle effects for Woods.
3.3 Terrain Effects
Movement, Combat, and Stacking are affected by terrain. Border terrain can differ from Area terrain. For example, a Woods area might have one or two Woods borders, one Clear border, and one Stream border.
3.31 Stacking Limits
Stacking is the maximum number of units that can occupy an area. It varies with area terrain. See Terrain Effects Chart (back cover).
Stacking Limits apply separately to each player for battles. Hence, each player can have 4 units in a clear terrain battle, or 3 units in a woods battle, etc.
Stacking Limits apply to all units, regardless of strength. These limits can be ignored during movement, but apply at the end of a player's Action Phase. Units may not overstack, but see 6.75.
3.32 Battle Limits
Borders do not limit movement except to Attack, Reinforce, Retreat, or Regroup. In these cases there is a Battle Limit across each border per Action Phase. See Terrain Effects Chart (back cover).
Bombard: Battle Limits are not affected by bombarding.
3.33 Multiple Terrain
Applicable terrain is that which predominates in an Area or Border. If multiple terrain types exist, use the Border terrain with the lowest Battle Limit for movement, but most restrictive Area Terrain for combat.
The Psarevskii Wood area has three villages, but additional villages have no extra defensive effect.
Some river/stream borders have multiple fords or other crossings; this does not increase Battle Limits.
3.34 Bombard Terrain
Woods, Swamps, and Slopes modify Bombard fire. Combat effects are cumulative such as when firing upslope into a woods area. See Terrain Effects Chart, back cover.
3.4 Off-Board Movement
Units cannot move or regroup offboard, but can retreat offboard. They cannot return to the game, but do not count as enemy VPs.
4.0 Units
The units represent French (blue) and Russian (green) forces. One sheet of die-cut labels is included. One label must be attached to each unit, blue on the blue units, and green on the green units. Lightly position each label, ensure it is centered and straight, then press firmly.
4.1 Unit Data
(A diagram in the original labels a sample unit: Corps (4th), Division (14th), Type (Infantry), Strength (4-3-2-1), and Firepower (C2).)
4.11 Unit Strength
The current strength of a unit is the number on the top edge when the unit is standing upright. Strength determines how many six-sided dice are thrown for a unit in combat. For a unit at strength 3, roll three dice.
4.12 Step Reduction
For each hit taken in combat, strength is reduced by rotating the unit 90 degrees counter-clockwise. The diagram below shows the same unit at strength 3-2-1.
Some large divisions have maximum strengths of 5 or 6, and steps that increase by multiples of 2, such as 6-4-2-1. One hit will still reduce this unit from 6 to 4.
4.13 Firepower
Firepower is a letter and number such as A1 or C2. The letter determines when a unit fires, the number is the maximum roll that scores a hit in combat.
Example: a unit rated B1 scores a hit for each "1" rolled, and one rated B3 scores a hit for each 1, 2, or 3 rolled.
4.2 Unit Types
4.21 Headquarters (HQs)
HQs represent commanders, staff, couriers, and an escort guard. They are treated like other units for movement, combat, and supply, but have a unique command ability. HQs have a zero (0) step.
The French have one Army Headquarters (AHQ), Napoléon, and seven (7) Corps HQs (CHQs).
The Russians have three (3) AHQs, Barclay commanding the 1st Army (green corps box), Bagration the 2nd Army (red corps box), and Kutuzov the supreme commander of both armies. They also have nine (9) CHQs.
4.22 Infantry
Units with a crossed musket symbol. They represent divisions, approximately 1600 men per step.
Guard infantry, cavalry, and artillery in both armies are indicated by a gold unit symbol.
Both armies had detached regiments of light infantry, called jägers or voltigeurs. These were agile soldiers, often rifle-armed, most useful for skirmishing and covering flanks and forward outposts. Historically, the Russians deployed jäger detachments in the village of Borodino and the Utitskii Forest at the start of the battle.
4.23 Cavalry
Units with a crossed saber symbol. They represent corps or divisions, 1200 men per step.
4.24 Artillery
Units with a crossed gun barrel symbol represent collected batteries of 24 guns. There are three artillery types: Light, Heavy, and Horse. All types can bombard, but only Light and Horse guns can move into battles. Heavy guns cannot move into battles, but can defend in them.
Unit Types
Unit French Russian HQs 8 12 Infantry 19 21 Cavalry 9 9 Artillery 11 14 TOTAL 47 56 NOTE: light infantry voltigeurs and jägers, and Russian militia are included in the Infantry totals.
The French Imperial Guard: Napoléon maintained an elite Imperial Guard corps of infantry, cavalry, and artillery, marked with the letter "G". These were the best units in the French army, and likely in all of Europe. Foreign guard units like the Polish Legion of the Vistula and the Italian Guard are treated like Guards. Napoléon was reluctant to commit his elite Guard to battle as these veterans could not easily be replaced.
5.0 Action Phase
5.1 Area Control
Area control is determined by the current location of units, Areas can either be Friendly, Enemy, Contested, or Vacant:
- Friendly areas contain only one or more friendly units.
- Enemy areas are those friendly to the enemy player.
- Contested areas contain units of both players, awaiting battle resolution. They are friendly to neither player.
- Vacant areas are neutral, meaning controlled by neither player.
IMPORTANT: Changes to area control are effective immediately. Friendly areas become immediately neutral when left vacant. Similarly, attacking an enemy area immediately converts it to contested status.
5.2 Command
HQs command the movement and combat of other units. The first action in a Player Turn is to activate (turn face-up) any number of desired HQs. They may move to an adjacent friendly area (no overstacking) or vacant area and then activate. Active HQs can:
- Reveal and bombard attached guns within command range.
- Move attached units within command range, except any guns that bombarded.
After commanding movement, each active HQ is reduced one (1) step and may then move normally, including by road, even if it moved when it activated.
Important: HQs at strength zero (0) cannot activate.
5.21 Command Range (CR)
HQs have a command range (CR) of 1, 2, or 3 (yellow number). CR is the maximum number of areas an HQ may command. CR can be traced into or through friendly or vacant areas, but never through enemy areas, nor over impassable rivers. Command can be traced in/out of contested areas, but never through them.
Command Range: HQs with CR1 command in the same or adjacent areas, HQs with CR2 command within two areas, HQs with CR3 command within three areas. CR ratings reflect a commander's ability to handle troops spread over a wider range.
5.22 Corps Command (CHQs)
CHQs may only command units attached to their own Corps.
EXCEPTIONS: Murat may command any French cavalry or horse artillery within command range. Platov can command any Cossack unit.
5.23 Army Command (AHQs)
The French AHQ is Napoléon. The Russians have three AHQs, Kutuzov, Barclay, and Bagration. Napoléon and Kutuzov command any friendly units. Barclay commands only 1st Army units, Bagration only 2nd Army.
AHQs do not command like CHQs. They command friendly units equal to their current strength within their command range. An active AHQ may move itself after commanding and this does not count as one of its moves.
Army Command: Barclay at strength 2 commands any 2 units within his army at CR3; at strength 1, any 1 unit at CR3; and at strength 0, no units. AHQs may also command artillery to Bombard, hence Napoléon at strength 3 could command two artillery units to Bombard, and one unit to Move, all within his CR3.
The Russian I and II Army reserve units can only be moved by their own (Barclay or Bagration) AHQ Command, or by Kutuzov, or as stragglers. They are not like corps units that can all be moved when their CHQ activates. AHQs may command any units within their army to move. AHQs can move CHQs, but cannot activate them – CHQs must have a step for that. An active AHQ can move itself and this does not reduce the number of other units it can command.
Multiple CHQs: Only AHQs can command units of different corps. When two CHQs are located in the same area, both need to activate to command their own attached units. Uncommanded units can move as Stragglers (5.7).
5.24 Special Command
Jägers, Voltigeurs, and Militia can be commanded by any active AHQ or CHQ in command range.
DIAGRAM 1 (a map diagram in the original; its caption text follows)
Player 2 (French): activates 4th Corps HQ (Eugene) with Command Range 2.
- Heavy Gun in Bezzubovo bombards Russian units in Loginovo. Because of the slope-up, bombarding is -1 (A3=A2). One hit on the Russian 3C2, now 2C2.
- Horse Gun bombards Loginovo at A1 (due to -1 for swamp border); misses.
- 14th Infantry attack Loginovo via Ford. Battle Limit is 1 because of Swamp.
- 13th Infantry attacks Loginovo via the Stream/Slope border.
- Cavalry attacks uphill to Loginovo.
- Italian Guard moves by road to Bezzubovo, then north to the area held by the Horse Gun.
- HQ deactivates, minus one step, and moves to Bezzubovo.
Round 1: Russian infantry declines square. All French units are -1 fire in Round 1 for Village.
- Russian 2A3; 1 hit on 5C2.
- French 3B2 (-1 village); misses.
- Russian 2C2; retreats eastward.
- French 4C2 (-1 village); 1 hit on 2A3
- French 4C2 (-1 village); 1 hit eliminates 1A3, ending the battle.
French now Regroup as desired.
5.3 Bombard
All artillery types can bombard. The active player may reveal any artillery units commanded by a CHQ or AHQ, and fire them into an adjacent enemy area. Bombarding hits are applied normally including double defense for the single redoubt defender. Players do not have to reveal the units taking hits.
Only one (1) artillery unit can bombard through each border. This has no effect on Battle Limits.
Rivers and Streams do not affect artillery bombardment, but modifiers and restrictions apply to some terrain types. See Terrain Effects Chart (back cover).
Players may bombard adjacent contested areas (where a battle is pending but not yet resolved) but rolls of "6" are friendly hits in that area, applied normally.
Bombarding hits never eliminate the last step of any unit. Instead, the unit is forced to retreat (6.7) and is only eliminated if it has no possible retreat or would be overstacked.
Exception: one step units in Redoubt areas ignore a bombardment hit; they are not forced to retreat, but can at owner discretion.
Grand Battery: Artillery units bombarding into one area through multiple borders of that area simulates the grand battery tactic favored by Napoléon. For example, if three French artillery units are positioned in three areas adjoining the Fleches and all bombard in the same turn, perhaps commanded by the Napoléon AHQ, this can amount to over 200 guns firing into the Fleches.
5.4 Movement
The active player can move any/all units under command except artillery that just bombarded.
Units entering an enemy area have border limits that vary (3.32) with terrain.
Units can only attack/reinforce an adjacent area. Light and Horse guns can move into battles; Heavy guns cannot.
Units can move only once per Player Turn, except to Retreat or Regroup.
5.41 Road Movement
Units can move further by road. Most units can move 2 areas along a road, but HQs, Cavalry, and Horse Guns can move 3 areas. The roads must be directly connected. Battle Limits (3.32) are not modified by roads.
Important: Units can never attack, reinforce, retreat, or regroup using the road bonus.
Bridges, dams, and fords do not impede road movement. For example, Infantry can road move from Borodino to Gorki, crossing a bridge. Cavalry can road move from Borodino to Maloye Selo, crossing two fords.
Battle Limits: Movement of units in/out of battles cannot exceed the Battle Limit (3.32) of any border. Hence, with a border rated 2, two units can enter the battle, or two can withdraw, or one of each. Only unpinned units can withdraw from a battle as a Player 2 move.
5.5 Pinning
Attacking units prevent an equal number of defending units from moving. The defender chooses which units are pinned. Unpinned units may leave the battle (Battle Limits apply) but not via any border used by the Attacker; they cannot attack or reinforce another battle this turn.
HQ OPTIONS: Unpinned HQs may activate in a battle, or move to an adjacent vacant or friendly area and then activate; Battle Limits apply. A pinned HQ may not activate.
Battle Headquarters: Headquarters must be unpinned to activate in a battle. Unpinned HQs may also move to an adjacent friendly or vacant area to activate and command normally, including adding units to the battle they just left, and/or withdrawing other unpinned units from that battle. Moving units in/out of battle areas is always subject to Battle Limits. An HQ which moves out of a battle area to activate counts as one unit for the Battle Limit of the border used.
5.6 Player 2 Actions
After Player 1 has completed all bombardments and movement, Player 2 can activate any HQs normally. Options:
- Bombard with desired artillery units under command.
- Move units under command normally, including starting a new battle. Units that reinforce are Reserves (6.4).
5.7 Stragglers
Units without command can move with a straggler roll. Unpinned units in a contested area may leave the battle with a straggler roll.
Make straggler rolls after all friendly movement is done, but before combat. For each unit, roll 1d6:
- 1-3: Unit moves/retreats but loses one step; elimination possible.
- 4-6: Unit moves/retreats with no loss.
ATTACKING: Units that attack or reinforce with a straggler roll, subtract 1 from the die roll (1-4 causes a step loss). Step losses are taken before battle.
Squares: Units in square require a straggler roll when retreating.
BOMBARD: Straggle rolls can never be used to bombard.
[ ] Flanking (optional): When attacking via two or more borders, one border (attacker choice) must be declared the Main Attack. Units crossing all other borders are placed in Reserve. Reserve units are delayed one round but have +1 firepower (C2=C3) on their first battle round only. This flank attack bonus does not apply if the main attack units are eliminated in round 1.
Flanking rules also apply when Player 2 is attacking or reinforcing. Main reinforcements arrive in round 2 and flank reinforcements arrive in round 3.
This rule simulates the difficulty of coordinating separate attacks in battles, but gives a bonus for the surprise effect of outflanking.
6.0 Battles
6.1 Attacking
Units entering an enemy area are attacking; the enemy units are defending. Units may attack or reinforce from multiple areas subject to Command (5.2), Stacking (3.31), and Battle Limits (3.32).
6.2 Battle Sequence
Battles are fought one by one after all moves are completed. Player 1 determines the sequence. Reveal units in the first battle by tipping them forward at current strength. After that battle is done, stand all units upright, regroup (6.8) if desired, then Player 1 selects the next battle.
Battle Sequence: The sequence of fighting battles is determined by Player 1 and changes to area control are effective immediately. Consider the effect of being Player 1 and attacking an enemy group with just one unit. This may not pin all enemy units in that area, but it will deny retreats or regroups into that area until this battle is resolved. Player 2 can also use this tactic to restrict attacker retreats, but the effect is less certain since Player 1 controls battle sequence.
6.3 Battle Rounds
Battles are fought over four rounds or less. If not resolved sooner, the attacker must retreat during round 4. See 6.73.
6.31 Battle Turns
Each unit has one battle turn per battle round and may either Fire or Retreat. The sequence of turns depends on firepower ratings. "A" units, then "B" units, then "C" units. With the same letter code, the defender goes first.
6.4 Battle Reserves
Any units moved by Player 2 that reinforce a battle started by Player 1 are Reserves. Such units may not fire, retreat, or take hits in Round 1. They are revealed and arrive at the start of round 2.
If all defending units are eliminated in round 1, the Attacker is now the Defender for that battle. This affects firing order and changes who must retreat in the 4th round.
Important: some fire penalties apply for the first combat round, which is Round 2 for Reserve units.
6.5 Battle Hits
Each unit in its battle turn rolls as many dice as its current strength. A hit is scored for each die roll equal to or lower than the unit's firepower.
Example: an infantry unit with three steps rolls 3 dice. It it has B2 combat, rolls of 1 and 2 are hits.
Each hit is applied separately to the strongest enemy unit at that instant. When two or more units share the highest strength, the owner chooses which to reduce. Units at their lowest strength are eliminated if they take one more hit.
Note: Combat is not simultaneous. All hits are applied immediately.
Battle Hits Example: French 3C2 unit rolls two hits against two Russian units, one 2C2 and one 3C2. The first hit must be taken on the highest strength Russian 3C2. The Russian player may apply the second hit to either unit because they are now both 2C2.
DIAGRAM 2 (a map diagram in the original; its caption text follows)
The Russian defends the Great Redoubt area with 4 units.
Player 1 French
- Activate CHQ Eugene and CHQ Ney.
- 4th Corps: Bombard the Great Redoubt area with 2A3 Heavy and 2A2 Horse Guns. There is no bombardment modifier since the border is both upslope and downslope. With no D2, two hits reduce both Russian infantry to 2C2.
- 3rd Corps: attack Great Redoubt over ford with 3A2 and 4C2, and 3C2 (11th Infantry) across the stream from Les Flèches.
Player 2 Russian: Russian could activate 6th CHQ and II AHQ to Bombard French attacking the Great Redoubt, but declines because of potential self hits.
Round 1:
- Russian 1A3; 1 hit on 4C2.
- French 3A2; 1 half hit on 2C2.
- Russian CHQ Rayevski 2B2; 1 hit on 3A2.
- Russian 2C2; 1 hit on 3C2.
- Russian 2C2; misses.
- French 3C2; 1 half hit. Russian 2C2 now 1C2.
- French 2C2; misses.
Round 2:
- Russian 1A3; 1 hit on 3C2.
- French 2A2; misses.
- Russian CHQ Rayevski 2B2; 1 hit on 2A2.
6.51 Redoubt Combat
All defending Russian units in a redoubt area (3.2) have double defense (D2) in melee combat (battles). D2 applies only to one unit for Bombarding hits.
Important: French units do not get Redoubt D2; they were open to the east.
Redoubt Combat: In melee combat (battles) in Redoubt areas all defending Russian units have D2, but under Bombardment, only one unit has this benefit. The Russian player should locate one chosen unit on the redoubt image to handle this.
6.52 Double Defense
Units with D2 require two hits to lose one step. Each "half-hit" has no effect, except the next half-hit must be taken on the same unit. A half-hit carries forward between battle rounds, but is recovered after the battle ends.
Firepower Penalties: Firepower penalties can reduce a unit to firepower 0, such as a unit at B1 taking a -1 penalty. (B1=B0). In such cases the units cannot fire that round.
6.53 Bayonet Charges
Infantry in line (not square) have the option to declare a bayonet charge on their Battle Turn. This increases firepower +1 (C3=C4), but rolls of "6" are self-hits.
Bayonet Charges: The Russians used bayonet charges with great effect, but they could lead to disaster. The +1 is justified as a "terror weapon" and the self hit reflects the higher casualties that often resulted while closing to bayonet combat.
6.6 Squares
At the start of each Battle Round, including Round 1, after Reserves are revealed, Infantry units may Form Square, or Break Square. Squares cannot be formed in Woods or Swamp areas, but can form in Redoubt areas. Mark units in square with a coin.
Both players (defender first) may form square in the same battle. Declarations cannot be changed once a round begins.
6.61 Sheltering
A square can "shelter" one artillery, or one cavalry, or one HQ of equal or lesser strength. The sheltered unit fights like the sheltering infantry. See 6.63.
Sheltering in Squares: Units sheltering in a square fight just like their infantry protector at C1. Sheltered artillery would usually be deployed at the corners of their square with restricted space, and sheltered cavalry would fight dismounted.
6.62 Square Targeting
Targeting occurs when some enemy units are in square and some not. Infantry cannot target; hits are distributed normally. Cavalry, Artillery, and HQs must target the units in square OR the units not in square (if any). Hits are allocated normally within each target group; surplus hits are forfeit.
6.63 Square Effects
- All Cavalry or HQs that target squares have B1 firepower. Cossacks, who are already B1, are -1 strength (3B1=2B1).
- Artillery that target squares are +1 (A2=A3).
- Infantry in square have -1 firepower (C2=C1). Militia in square, who are already C1, are -1 strength (3C1=2C1); this applies to militia in square only, not generally.
- All sheltered units have C1 firepower.
- Squares or sheltered units retreat subject to a Straggler roll (5.7).
DIAGRAM 3: Battle Reserves (a map diagram in the original; its caption text follows)
Player 1 (French): activates CHQ Davout and CHQ Ney. Ney bombards Les Flèches with 3A2 (-1 for woods and misses), and commands infantry 4C2 and 3C2 to attack Les Flèches. Davout bombards Les Flèches with 3A2 scoring one hit on 3C3. Davout also attacks Utitskii Forest (Stacking 3) with infantry 5C2, 4C2, and 3C2 via the fords. Reduce both HQs one step.
Player 2 (Russian): AHQ Bagration activates with two command steps. He commands Artillery 3A2 to Les Flèches, and Infantry 2C3 in east Utitskii Woods to reinforce infantry 3C2 in west Utitskii Woods. These reinforcements cannot fight until Round 2. Reduce AHQ Bagration one step.
Round 1: French choose Utitskii battle first.
- Russian Infantry 3C2 fires; 1 hit on 5C2.
- French 2nd Infantry 4C2 fires; misses.
- French 5th Infantry 4C2 fires; 1 hit on 3C2.
- French 4th Infantry 3C2 fires; 1 hit on 2C2, reducing it to 1C2.
Round 2: Russian reserve 2C3 arrives
- Russian Infantry 2C3 fires; 1 hit.
- Russian Infantry 1C2 fires; misses.
- French 2nd Infantry 4C2 fires; 1 hit on 2C3.
- French 4th Infantry 3C2 fires; misses.
- French 5th Infantry 3C2 fires; 1 hit on 1C2 (eliminated).
Round 3:
- Russian Infantry 1C3 retreats east to woods
- French can now regroup any/all units in the woods battle, subject to border and stacking limits. but cannot move to any pending battle such as Les Flèches, or any area held by Russian units. Battle for Les Flèches is then resolved.
6.7 Retreats
Each unit may retreat in its battle turn (instead of firing), except Light and Heavy artillery cannot retreat in Round 1. Attacking Cavalry ("B" units) can retreat before infantry can fire, except against enemy jaegers/voltigeurs. Units in square must make a straggler roll (5.7) when retreating.
Retreats: Attacking or reinforcing through a border makes that border available for retreats for any friendly units, but not into enemy or contested areas. It is not necessary to remember the exact border each unit used to enter the battle.
Players must be wary of Retreat Limits. It is possible that a planned retreat area for the Attacker is occupied by a Player 2 Move before the battle starts.
Remember that battle limits apply per round. Units can retreat through the same border(s) over several rounds.
Retreats & Regroups: Area control applies at the instant of retreat or regroup. Player 1 chooses the sequence of battle resolution. Retreats and regroups in one battle may change available options for later battles.
6.71 Retreat Limits
Battle Limits (3.32) apply to retreating units each Battle Round. Units can never retreat to enemy or contested areas.
6.72 Attacker Retreats
Attacking units must retreat via borders used to attack and/or to friendly adjacent area(s), but never via any borders used by the Defender to Reinforce.
6.73 Pursuit Fire
When a battle lasts into the 4th round, attacking units must retreat on their normal battle turn. Defending units fire normally, but Cavalry are +1 fire (B2=B3), and Cossacks are +2 (B1=B3).
Example: Attacker has Artillery A2 and Infantry C2. Defender has Infantry C2 and Cossack B1. Round 4 sequence:
- Attacking Artillery A2 retreats (no fire).
- Defending Cossack fires at B3 (+2).
- Defending Infantry C2 fires.
- Attacking Infantry C2 retreats (if it has survived enemy fire).
Attacking units that cannot retreat in Round 4 are eliminated.
Note: Pursuit fire only applies to 4th round retreats.
6.74 Defender Retreats
Defending units retreat to any friendly or vacant adjacent areas, but never via any borders used by the Attacker to start the battle.
6.75 Overstacked Retreats
A unit can retreat into a fully stacked friendly area, but loses one (1) step (elimination possible) and must immediately move to an adjacent friendly (understacked) or vacant area or suffer elimination.
6.8 Regroups
When a battle ends the victor may regroup. All units in the battle (including any in Reserve) can move to any adjacent area(s) that are friendly or vacant.
IMPORTANT: units may never Regroup to enemy or contested areas. Hence, regrouping units cannot start a new battle, or reinforce an existing one. Battle Limits (3.32) apply to regroups.
Regroups: Regroups simulate two effects. First, the advantage that can be gained from disruption of a retreating enemy. Second, the high morale effect of a victory.
6.9 Eliminated Units
Units are permanently eliminated. Place them off-board, upright and hidden, with the enemy player to be counted as Victory Points (VPs).
6.91 HQ Elimination
An HQ that loses its zero step in combat is eliminated like any other unit. Loss of an HQ gives the enemy player significant VPs. See 8.3.
6.92 CHQ Elimination
Eliminated CHQs are not replaced. Any surviving units of that corps can be moved individually as stragglers (5.7) or by AHQ command normally.
6.93 AHQ Elimination
If an AHQ is eliminated the most senior surviving leader assumes command. Order of command succession for both armies is given in the sidebar.
Exception: If Barclay falls, or replaces Kutuzov, Dokhturov becomes commander of 1st Army. Should Bagration fall, Dokhturov replaces him. Should another Russian AHQ fall, Tuchkov would succeed, etc. Platov was not considered for higher command.
A new AHQ also functions as the CHQ of his own corps, but never both in the same turn.
COMMAND SENIORITY
FRENCH: Napoléon, Emperor; Murat, Marshal, King of Naples; Eugene, Viceroy of Italy, General of Division; Mortier, Marshal; Ney, Marshal; Davout, Marshal; Junot, General of Division; Poniatowski, General of Division
RUSSIAN: Kutuzov, General; Barclay, General, Minister of War; Bagration, General; *Platov, General, Ataman Don Cossacks; Dokhturov, General; Tuchkov, Lieutenant General; Borozdin, Lieutenant General; Golitsyn, Lieutenant General; Osterman-Tolstoi, Lieutenant General; Baggovut, Lieutenant General; Rayevski, Lieutenant General; Lavrov, Lieutenant General
*Platov, the most senior of the corps commanders, commanded the Cossack irregulars. He had a reputation for heavy drinking and was not seen as suitable for higher command. Dokhturov, who commanded 6th Corps in the 1st Army, took over command of the 2nd Army when Bagration was mortally wounded at Borodino.
The portrait shown for Lavrov is that of Grand Duke Konstantine, brother of Tsar Alexander I, and official commander of the Russian 5th Corps. Lavrov commanded in the Duke's absence, but there are no known portraits of him.
7.0 Supply Phase
7.1 Supply Points
After all battles are resolved, both players get 3 or 4 Supply Points (SP). Player 1 expends SPs first.
7.2 Supply Steps
Expending 1sp adds one step to most units, including an HQ, and all double step units like the French 5th infantry.
Exception: French Guard units cost 2sp per step, but Mortier CHQ is still 1sp.
Important: maximum increase is one (1) step per area. Any unused SPs are forfeit.
Eliminated units cannot be rebuilt; they are permanently eliminated.
Supply Phase: Adding steps to units is not adding replacements. The steps simulate restocks of ammo and rallying troops.
Routed Units: When a unit loses its last step and is eliminated this does not imply that all the soldiers are casualties. Units could rarely remain effective in combat after sustaining 25% casualties although many units suffered more than 50% losses at Borodino. Units eliminated in game play are really routed or shattered units.
French Guard Supply: The higher 2sp cost to replace French guard steps reflects the extra supply given to these elite troops and the difficulty of replacing them deep in Russia. Without a strong guard Napoléon might not have escaped from Russia during the retreat from Moscow.
7.3 Supply Sources
Each player's Supply Points originate from the supply sources along their friendly map edge. These are marked with a green (Russian) or blue (French) supply symbol. One of the areas has two symbols (main source) and the other two areas each contain one symbol.
7.31 Supply Lines
To receive a SP a unit must be on or adjacent to a road that connects to a supply source. The supply road must be continuous and pass only through Friendly or Vacant areas.
Important: Each unit must get their supply from a different supply symbol – two units from main supply.
Supply Isolation: Supply Points must be allocated to units that each have a supply line to a specific source. For example, if three French units are located in the south, but they can only trace to the Supply source at Yelnya, then only one of these units can get a supply point. The three other supply points from the north cannot be used for the southern units unless they have a supply line that connects.
7.32 Supply Loss
When a Supply Source is enemy occupied during the Supply Phase, SPs from that source are forfeit while this occupation is maintained. Note that one Supply Source causes a loss of 2sp, the others 1sp each.
7.33 Supply Capture
When an enemy supply source is first occupied, 2sp are gained per supply symbol. These must be expended immediately on friendly units with a supply line to that source or are forfeit.
7.34 Supply Attrition
Unsupplied units command, move and fight normally, but cannot receive SPs until their Supply Line is reopened.
Any unit that is unsupplied on the 8pm Supply Phase, is subject to a one step loss; elimination possible.
7.4 Bridge Burning
At the end of a Supply Phase each player can burn one bridge. If both sides of the bridge are friendly-occupied, the burning is automatic. If only one side of the bridge is friendly-occupied, roll a die, and on a 1-3 the bridge is burned. Mark the destroyed bridge with a coin for the rest of the game; the border as River or Stream as applicable.
Dams cannot be destroyed within the time constraints of this game.
DIAGRAM 4: SUPPLY LINES & SUPPLY LOSS (a map diagram in the original; its caption text follows)
Since Cavalry can move 3 areas along a road, breakthroughs into the enemy rear are always a danger.
Platov's Cossacks have galloped along the northern road from Loginovo isolating the Gryaz supply source from all French units even though Gryaz is vacant. The Gryaz SP is forfeit this turn. Occupation of Gryaz by at least one Russian would have the same effect, plus 2sp would be immediately captured.
The French now move north from Borodino to cut Platov's supply line. It will not immediately help; units only need supply to build-up. The Russians will still receive all of their supply points, but they cannot get supplies to Platov's Corps.
The French need to defend their main supply line while trying to recover Gryaz.
8.0 Victory
8.1 Victory Points
Victory is always determined after the last Game Turn of each scenario. Victory Points (VP) are scored for holding redoubts and for destroying enemy units.
The higher VP total wins the scenario; Russians win ties.
Victory Points: Victory is based mainly on eliminated units because the battlefield had little strategic importance to either side. The French goal was to engage and destroy the Russian army, while preserving their own. However, some VPs are awarded for the redoubts since they became the focus of action and thousands of lives were sacrificed to attack or defend them.
Historically, the French won the Battle of Borodino and occupied Moscow one week later. However, French losses at Borodino could not be replaced, and they did not inflict sufficient casualties on the Russians to force a peace. Five weeks after occupying Moscow the French began a winter retreat that ended with almost total destruction of their army by a rejuvenated Russian army.
The French must do better than history to win the game, which means inflicting a more severe defeat on the Russians.
Play Balance: Ideally, players should play both sides once and determine victory from both games. Add together the VP from both games and then compare the totals.
Optionally, players can bid to play their preferred side. Roll two dice and high total bids first, such as "French bid 2vp margin to win". Each player in turn may then increase the bid until the highest bid is determined.
8.2 Unit VPs
Except as noted below, each eliminated French unit is worth 2vp, and each eliminated Russian unit is worth 1vp.
8.3 HQ VPs
- Napoléon: 6vp
- French CHQ: 4vp
- Russian AHQ: 3vp
- Russian CHQ: 2vp
8.4 Guard VPs
Eliminated units of the French Imperial Guard and Italian Royal Guard, are worth 4vp each.
Eliminated units of the Russian Guard (5th Corps, except 1st Combined) are worth 2vp each.
Guard CHQs: Guard CHQs like Mortier have the same VPs as in 8.3.
NOTE: Players should keep hidden the identity of eliminated units. Players will then be uncertain of exact VP totals until they are counted.
8.5 Redoubt VPs
Each occupied Redoubt at the end of the game is worth 2vp to either player. Redoubts must be held by at least one friendly unit to be counted.
Exception: Redoubts are only worth 1vp each to the Russians for the Sept 5th Shevardino scenario.
9.0 Scenarios
9.1 Shevardino, Sep 5
After weeks of retreat from Smolensk, the Russians halted to fight for Moscow. The battlefield they choose was Borodino, planning to defend the Kolocha River. Shevardino redoubt was built to anchor the western end of this line. Historically, the French won control of the Shevardino redoubt by 7pm and retained it against a Russian counterattack. Russian losses exceeded French losses.
TIME: 2pm to 8pm (7 turns).
RUSSIANS: Deploy HQs in their noted map areas except as noted below. Attached units deploy in HQ areas or within command range of their HQ, subject to stacking limits.
- CHQ Tuchkov (3rd Corps) at Gorki. This corps is with the 1st Army today.
- CHQ Platov (Cavalry) at Novoye Selo.
- CHQ Borozdin (8th Corps) at Shevardino Redoubt. Attached are two B2 Jägers. The B3 Jäger must be deployed with the 1st Army (historically in Borodino).
- CHQ Golitsyn (Cavalry) at Les Flèches.
- Militia deploy on Old Smolensk Road atop Utitskii Kurgan.
- 1st Army CHQs are reduced by 1 step.
FRENCH: Remove 3rd and 8th Corps, and Murat's 3CC, 4CC, and Horse 2 gun from the game. They do not appear until the next day (Sep 6).
- Deploy one corps (ignore stacking) per entry area; 4th Corps in Gryaz, 5th Corps in Yelnya, and Murat's partial Cavalry Corps with Napoléon in the New Smolensk Post Highway entry area (two supply symbols). Voltigeurs are deployed one per entry area.
- French move first. Activate deployed CHQs and move normally for 2pm turn, subject to Battle Limits and Stacking.
- Each following French turn, one corps deploys in any entry area (ignore stacking limit) and moves normally.
FRENCH BRIDGE: Does not exist on this day.
SUPPLY: Both players only have 3sp per Game Turn this scenario – the double supply source provides only 1sp.
VICTORY: Determine Victory after the last Supply Turn is played. VPs are awarded normally (see 8.1).
French Entry: All entering French units including HQs initially deploy in the three supply source areas, and are not affected by stacking limits. French HQs deploy at full strength (deployment does not require their activation). They must activate, and lose a step, to move further that turn beyond the entry area, unless moving as stragglers. When a French HQ activates, it can also move to an adjacent area normally.
if a French supply source is occupied by the Russians, scheduled French reinforcements can attack into the supply source area along the entry road subject to all normal rules; one French artillery may bombard from offmap. French units that cannot attack due to battle limits must wait until a later turn to enter. If the attacking French units fail to win, they retreat offboard, but can try again on a later turn. The French may delay the arrival of any reinforcing corps to a later turn.
Shevardino Victory Example: French have captured Shevardino (2vp). They have also eliminated 5 Russian units. Russians hold the other four redoubts (4vp) and have eliminated 1 French unit.
French: 2+5 = 7vp Russian: 4+2 = 6vp French win with a 1vp margin.
9.2 Borodino, Sep 7
The French army attempts to breach or turn the Russian defensive line, while the Russians seek to hold their positions.
Deploy HQs in the areas noted on the map. Their attached units deploy in those same areas or within command range of their HQ, subject to stacking limits.
TIME: 6am to 8pm (15 turns).
RUSSIANS: Deploy first, move second. Deploy all units at full strength, except reduce the 27th Infantry and the 2nd Grenadiers each by one step. Jägers and Militia are deployed within command range of any CHQ or AHQ. All Russian units must be deployed east of the Startline (3.1).
FRENCH: Deploy second, move first. Deploy all units at full strength, except reduce the 5th Division by one step. Voltigeurs are deployed within command range of any CHQ or AHQ. All French units must be deployed west of the Startline (3.1).
NOTE: The 1st and 3rd infantry divisions of the 1st Corps (Davout) were attached to the 4th Corps (Eugene) throughout this day of battle. These two units have a 4th Corps symbol above their 1st Corps designation. The French player must attach these units to the 4th Corps for the entire day.
FRENCH BRIDGE: The bridge west of Borodino represents several small bridges that were built in this area by French engineers on Sept. 6 to shift wagons and guns over the Kolocha river. The bridge can be used by either player, unless burned.
SUPPLY: French and Russian double supply source now worth 2sp giving 4sp per side.
VICTORY: Determine Victory after the last Supply Turn is played. VPs are awarded normally (see 8.1).
Example: French have captured Shevardino, Les Flèches, and the Great Redoubt (a total of 6vp). They have also eliminated 12 Russian units, plus one guard unit. Russians hold Gorki and Maslovo redoubts (4vp). They have eliminated 7 French units, plus CHQ Davout.
French: 6+12+2 = 20vp Russian: 4+14+4 = 22vp Russian 2vp victory.
9.3 Campaign, Sep 5–Sep 7
SEP 5: Play Shevardino scenario until the 8pm turn is completed. Victory conditions for this scenario are ignored.
SEP 6: Deploy French units that did not enter on Sep 5. The two cavalry and one horse gun deploy within command range of Murat. CHQ Ney and CHQ Junot must deploy in any friendly area within Command Range of Napoléon, subject to stacking; attached units deploy in friendly or vcant areas within command range of their CHQs.
Historically, the French 1st and 3rd divisions of 1st Corps were transferred to Eugene's 4th Corps for the Battle of Borodino. In the Campaign Game, the French player has the option to redeploy these two divisions for that purpose, transfer only one of them, or keep both under Davout's 1st Corps.
French Bridge is built if both sides of the bridge are French controlled at the end of Sep 5th. The bridge is built on Sep 6th and can be used by either player on Sep 7th unless burned.
- The Russian player can now move any two (2) CHQs to any friendly area, subject to stacking; attached units deploy within command range.
- Tuchkov's corps transfers to Bagration's 2nd Army, as indicated by the coloring in its corps box. Barclay no longer has any command of this corps.
- Each player now receives double their Sep 5 Supply Points to rebuild HQs and forces as desired, maximum of 2 steps per area. Hence, if players still have 3sp from Sep 5, they would now each get 6sp of rebuilding.
SEP 7: Continue the battle. Determine Player 1 with die roll for 6am.
Supply: 4sp per side.
VICTORY: Determine Victory after the last Supply Turn is played. VPs are awarded normally (see 8.1).
TACTICAL OPTIONS: The burden of attack lies with the French since the Russians start with an advantage in redoubts. They have three main strategies.
Northern Attack: The Russians feared that the French would make a sweeping move north of the Kolocha, then cross the river in the Russian rear. Napoléon encouraged this fear by sending his 4th Corps north, reinforced by two large divisions from the 1st Corps and the 3rd Cavalry Corps (Grouchy). An attack here by the Russians may have good prospects if the French are bogged down in the center or south. Historically the Russians launched a large cavalry attack in the north that was repulsed by French squares near Valuyevo.
Central Attack: The tactical option actually followed by Napoléon, with feints to the north and south. The attack started with a massive artillery bombardment, followed by attacks on Les Flèches, Semyonovskoye Village, and the Great Redoubt. Les Flèches fell around 10:30 am, the village by noon, and the Great Redoubt soon after 3pm. It was an exceedingly bloody day and ended with the French occupying Borodino, but gaining only 1-2 miles of ground.
Southern Attack: Napoléon assigned his Polish 5 Corps to advance along the Old Smolensk Road and then turn north to trap the Russians against the Kolocha River. The Russians deployed sufficient forces in the south and the day ended in a stalemate at Utitskii Kurgan, even after Junot's 8 Corps was added to the southern attack. Marshal Davout urged Napoléon to avoid a costly central assault and instead conduct a strong flanking maneuver in the south. Napoléon rejected this option because it might provoke the Russians into further retreat and he wanted a battle to win. The southern terrain is a tough slog, but success offers the best prospects of cutting Russian supplies.
Variations: Any two of these tactical options can be combined, perhaps with equal weight, perhaps favoring one over the other. For example, a French attack in the north and south, defending the center, perhaps luring the enemy westward, with the goal of enveloping the Russian army.
Game Turns (Back Cover Summary)
- INITIATIVE: Roll two dice. High roll is Player 1. French win ties.
- PLAYER 1: Three Phases
- COMMAND: Activate HQs (Deploy if desired)
- BOMBARD: Reveal and fire commanded artillery.
- MOVE: Move any commanded units that did NOT bombard. Units entering an enemy area must stop.
- PLAYER 2: Same as Player 1, except pinned units may not move, and artillery in a contested area may not Bombard.
- RESOLVE all battles, one by one, in a sequence determined by Player 1. The Attacker must retreat during Round 4 if not victorious after Round 3.
- SUPPLY: Player 1 and then Player 2 use their Supply Points (SP) to add steps to HQs and/or depleted units, maximum of one (1) step per area. Units receiving SPs must have a supply line to a supply source.
Terrain Effects Chart (Back Cover)
| Terrain | Stack (Areas) | Battles (Areas) | Battle Limit (Borders) | Effects (Borders) |
|---|---|---|---|---|
| CLEAR | 4 | No Effect | 3 | No Effect |
| WOODS¹ | 3 | Cavalry (all B1); Artillery -1f; No Squares | 2 | Bombard -1f (in/out) |
| SWAMP² | 2 | Cavalry (all B1); Artillery (all A1); No Squares | 1 | Bombard In -1f; Bombard Out (Ø) |
| REDOUBT | 4 | D2 (Russians) | D2 one unit (Russian) | D2 one unit (Russian) |
| VILLAGE | Other Terrain | Attacker -1f (Round 1 Only) |
- Woods: Bombard -1f applies even if firing Clear to Clear across a Woods border. Bombarding woods to woods is -2f (-1 out; -1 in)
- Swamp: Bombard prohibited out of swamp.
- Slopes: Bombard modifiers are cumulative. Firing upslope into Woods is -2, but downslope into Woods is zero ( +1 and -1).
Index
(The original's back-cover index of rule numbers is omitted here.)