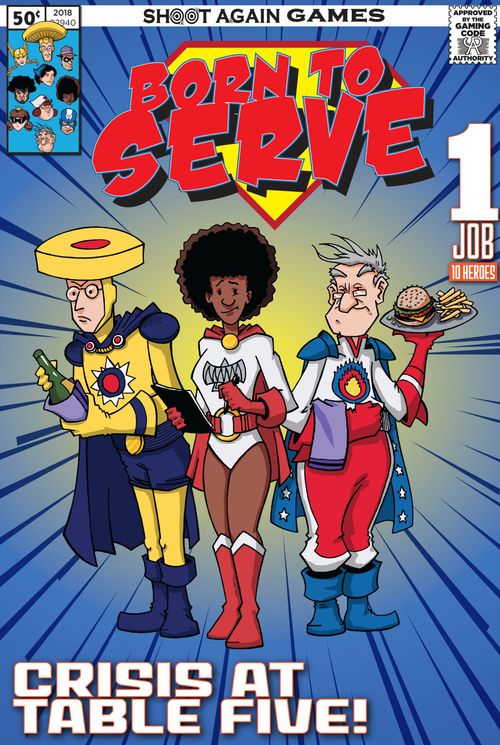
Born to Serve
Born to Serve Rulebook
Table of Contents
Table of Contents
Game Components
- 9 Table Tiles labeled from 1 to 9
- 46 Tip Cards with a dollar amount on each (23 Lunch and 23 Dinner)
- 65 Service Markers in five colors (13 for each of five players)
- 5 player score markers with a +125 label on one side
- 8 Staff labeled: Bartender, Busboy, Hostess, Owner, Chef, Maître D', Valet, and Washroom Attendant
- 1 double-sided +3 counter and 3 double-sided +$2 counters (for use with the Hostess and Chef, respectively)
- 10 Superheroes
- 10 Superhero Selection Cards
- 1 First Hero Marker
- 1 Score Chart
- 5 Fortress of Loneliness (1 for each player)
- 5 Player Aid Cards (1 for each player)
- 1 Phantom Realm
Set-Up
Each player receives 13 two-sided Service Markers, a score marker and a Fortress of Loneliness that all match in color. The Phantom Realm is placed where all players can reach it. The Scoring Chart is placed so all players can readily see it, and each player places their score marker at 0. Finally, each player places all 13 of their Service Markers on their Fortress of Loneliness.
Don Your Cape
Players now shuffle the Hero Selection cards and deal one to each player. This is the hero that they will be for the game. If this is your first game it is STRONGLY recommended that choices are limited to Adam Amp, The Human Pinball, Madam Mystique, Nuclear Nelly, or Whoosh.
Listen here Sunshine, I get it. You want to swoop right in headfirst and that's all well and good, but trust me you have to jump before you can fly. Just think of your first game as the calm before the storm and stick to the suggested hero lineup.
Set the Tables
Set out the tables in numerical order.
- For two players use tables 1 to 3
- For three players use tables 1 to 5
- For four players use tables 1 to 7
- For five players use tables 1 to 9
The Staff Arrives
Take the Washroom Attendant from the pile of Staff cards, and place it near the tables. The last player who went out to eat at a restaurant takes the First Hero Marker and is the first player (in case of ties, determine the first player randomly). The person to that player's right selects one of the remaining Staff and places them near the tables along with the Washroom Attendant. Continuing to the right, each player adds one Staff to the restaurant with the first player selecting the final Staff member to be placed in the restaurant. In a two-player game each player chooses two Staff. Unselected Staff are returned to the game box and are not used for that game.
If this is your first time playing Born to Serve, we recommend drafting from among the Bartender, Bus Boy, Hostess, Owner, and Valet, in addition to using the Washroom Attendant.
- For Two Players: Washroom Attendant plus four additional staff
- For Three Players: Washroom Attendant plus three additional staff
- For Four Players: Washroom Attendant plus four additional staff
- For Five Players: Washroom Attendant plus five additional staff
Here Come the Customers
In Born to Serve there are two types of customers that are seated for both lunch and dinner, which are represented by the green and yellow Tip Cards.
The green Tip Cards represent the customers who are practically fixtures at the restaurant, dining there very frequently. These customers are known quantities who always leave the same tip day in and day out. As a result, the green Tip Cards are more limited in value.
On the other hand, the yellow Tip Cards represent new or infrequent customers who are an unknown quantity. They could be a group of broke and starving artists (who don't tip much) or wealthy businesspeople trying to impress a client (who might tip a lot!). These yellow Tip Cards have a wider range of values.
Take the green Tip Cards labeled Lunch. Use only the Tip Cards that have the icon on the lower right that are equal to or less than the number of players in the game. Example: in a three-player game you would only use the cards with the 2+ and the 3+ icons on them. Return the unused green Tip Cards to the game box.
Next, take all of the appropriate yellow Lunch Tip Cards and shuffle them up face-down. The number of yellow Lunch Tip Cards used in the game is determined by the number of players.
- For two players use four cards.
- For three players use six cards.
- For four players use seven cards.
- For five players use nine cards.
Set the unused yellow Lunch Tip Cards to the side without revealing them.
Next, shuffle the green Lunch Tip Cards with the yellow Lunch Tip Cards, face down and place them into a single stack.
Repeat this same procedure for the Dinner Tip Cards to create a single stack of Dinner Tip Cards. Finally, combine the two decks by placing the Lunch card stack on top of the Dinner card stack. If this is your first game you may want to play the Short Order variant which only uses the Dinner Tip Cards. See Short Order in the Variant section for details.
The Lunch stack is used first; once all the patrons arriving for lunch have been seated (in other words, the Lunch stack has run out), the Dinner stack is then used.
Place one Tip Card from the top of the Lunch stack face down on the card space on each table. Flip up the green Tip Cards so that the tip value is revealed and leave the yellow Tip Cards face-down. Once the game is under way, any new green Tip Cards will be placed face-up and yellow cards left face-down.
Prepare to Serve
Each player takes five Service Markers from their Fortress of Loneliness, placing them next to their Superhero Card. These are the Service Markers you use for the first round. Each player then flips over one of those 5 Service Markers to the +$1 (high priority) side.
[Figure in the rulebook: a typical starting setup for a four-player game.]
Summary of Play
Born to Serve is played in a series of rounds until the restaurant closes and all the customers leave. Each round is broken into two phases: the service phase and the scoring phase.
Service Phase
During this phase, beginning with the first player and continuing clockwise, each player in turn takes one of three possible actions.
- Placing a Service Marker on a table: A player may place their Service Markers on any table that has open spaces. The Service Marker must be placed on the lowest numbered open space on the table the player chooses.
- Placing a Service Marker on a Staff member: A player may place their Service Marker on any open Staff position. If the Staff is red, the player performs the effect described immediately when their Service Marker is placed on that Staff. A player may place their Service Marker on any open Staff space without restriction. If a player places their +$1 marker on a Staff card it is turned face down and becomes a normal Service Marker.
- Take a Break: A player takes a break by putting one of this round's Service Markers on their Fortress of Loneliness.
This process continues until all players have placed all of the Service Markers they removed from their Fortress of Loneliness at the start of the round. Once all players have placed their Service Markers, the round moves to the Scoring Phase. Important: Players do not use Service Markers from their Fortress of Loneliness during a round.
In addition to the above actions, players may once per round use one of their two superpowers. See the Superhero Powers section for how to use your powers.
Scoring Phase
During this phase tables will score, will be unserviced, or will remain as they are, based on the number of Service Markers on them. Specifically:
- Tables completely filled with Service Markers score this round. Filled tables are scored as described starting in the Determine Table Winner section.
- Tables with no Service Markers on them are unserviced. Unserviced tables have their Tip Cards returned to the game box (the customers storm off due to the lack of service).
- Tables only partially filled with Service Markers stay unchanged with the Service Markers and Tip Card remaining in place for the next round. These customers are still eating.
Tables are scored starting with the lowest numbered table and proceeding to each next higher numbered table to be scored this round. Each table eligible to score is completely scored for all relevant players before moving on to the next table.
Determine Table Winner
Tables are fully scored only by the player who won the table: the player with the most Service Markers on that table. If there is a tie, then the tied player with their Service Marker on the highest numbered space wins that table. Players that helped service the table (have Service Markers on it) but did not win the table only receive a partial tip (see Bus the Table below).
Determine Tip Value
Green Tip Cards have their value already revealed while yellow Tip Cards on tables that are scoring this round need to be turned face up to reveal their value. To determine the tip value for the table, take the value on the Tip Card for the table you are scoring and add one additional point for each high-priority Service Marker (the ones with a +$1 side face-up on that table). All high-priority Service Markers add to the value of that table's Tip Card regardless of which player they belong to. In addition, for a four-seat table add +$1, or for a five-seat table add +$2, as indicated on the Table tiles.
Example: The Tip Card on a four-seat table currently being scored is $7. Diane (green markers) and Laurel (black markers) each played a +$1 Service Marker to the table so $2 is added to the Tip Card. Then $1 is added because it is a four-seat table, for a total of $10. Although Laurel and Diane have the same number of Service Markers on the table, Diane wins because her Service Marker is on the highest numbered space.
Collect the Tips
The winning player must score at least one Service Marker and may optionally score a second Service Marker (assuming that player has a second Service Marker on that table). The winning player receives the full tip value for each Service Marker on that table that they choose to score, and advances their scoring marker on the Score Chart by the amount of the tip(s). The winning player's Service Markers used for scoring are sent to the Phantom Realm. Service Markers not used for scoring are returned to that player's Fortress of Loneliness.
Service Markers in the Phantom Realm are effectively out of the game (although players may be able to retrieve some of them, for example, with the help of the Washroom Attendant).
Bus the Table
All non-winning players on a scored table return their Service Markers from that table to their Fortress of Loneliness and gain half the total tip value (rounded down) for each Service Marker.
The Tip Card from the scored table is returned to the game box.
Continuing Play
Once all of the tables are scored, refill any empty tables in numeric order. Take the top Tip Card from the Tip Card stack and place on the table card space with green cards placed face-up and yellow cards placed face-down. Note: it is very likely that some customers will still be eating lunch as the first dinner customers are seated. Once the last Dinner Tip Card is placed on a table, it's close to closing time so the next round will be the last round of the game (see Closing Time section).
Players with Service Markers on any Staff have those markers returned to their Fortress of Loneliness. This is also the point when the Hostess's counter is returned to her card and players on the Bartender score points for their markers on that card.
Players place their Superheroes face-up to indicate that their abilities are eligible to be used again (see Superhero Powers for details on those abilities).
Players then take five more Service Markers from their Fortress of Loneliness, or whatever number they have left if they have fewer than five, place them next to their Superhero, and then flip one to the high priority (+$1) side.
Finally, the First Hero Marker is passed to the left and a new round begins.
Closing Time
At the end of the Scoring Phase, if all of the Dinner Tip Cards have been used, then the next round will be the last round of the game. If any tables do not have Tip Cards placed on them, remove those Tables for the final round.
Sometimes, during the last round of the game there will be so few tables left that there may not be enough table spaces to hold all of the player's Service Markers for that round. In this case, the game ends immediately when the last table space is filled with a Service Marker. Note this may leave some available Staff card spaces unfilled.
For this final round, during the scoring phase, score all tables regardless of how many Service Markers they have.
The player with the highest score is the winner! They made the most tips and got a permanent server job at the restaurant. That whole crime-fighting thing might be important too, but not for now…
Staff Members
The heroes vying for the waiter job know the regular staff of the restaurant and can work with them in an attempt to get them to help their cause. Players may place Service Markers on Staff during the service phase of the game. The Staff each have one or more spaces (circles) showing how many Service Markers may be played on each. The Washroom Attendant has three spaces, but the third space may only be used in games with four or five players. Each Staff has a brief description that explains the effect a player gains from placing their service marker on that Staff. The Staff effects are covered in more detail below.
Expanded Staff Explanations
Bartender: The Bartender may have a total of three Service Markers placed on him. A player may have more than one Service Marker on the Bartender. At the end of the scoring phase, each Service Marker on the Bartender scores $4 for that player and the Service Marker is then returned to that player's Fortress of Loneliness.
Busboy: The Busboy may have one Service Marker placed on him. During the scoring phase, a player with a Service Marker on the Busboy may fully score up to 2 Service Marker(s) that they have on one table that was won by another player, instead of the partial scoring as explained in Bus the Table. The actual winner of the table scores normally. To use the Busboy's ability, you must have at least one Service Marker on the table you wish to score. The player on the Busboy may score none of their Service Markers, if they wish. Any Service Markers scored by the Busboy are sent to the Phantom Realm. The Busboy may only score one table for the player using him.
Example: a five-seat table (+$2) with a $9 Tip Card is currently being scored. There are no high priority Service Markers on the table. Harry (blue markers) had three Service Markers on the table and Alex (yellow markers) had two. Harry scores the table and decides to turn in two Service Markers for 22 points ($9 Tip Card +$2 for the 5-seat table bonus makes $11 per Service Marker, times 2 Service Markers). Harry returns the third one to his Fortress of Loneliness (since two is the maximum number of Service Markers he can score). Alex has a Service Marker on the Busboy and decides to score both of his Service Markers on this table. He places both Service Markers into the Phantom Realm and scores 22 points.
Chef: The Chef has three +$2 counters that should be placed on him at the start of the game. The Chef may have two Service Markers placed on him. A player may have more than one Service Marker on the Chef. When a player places a Service Marker on the Chef, they immediately place one +$2 counter on any table that doesn't already have a +$2 Chef counter on it. The +$2 counter may be placed on the same table as the +$3 Hostess counter. Each Chef counter adds +$2 to the value of the Tip Card for the table it is on during the scoring phase on the round that the table is scored, regardless of who wins the table. A Chef counter remains on its table until the scoring round in which that table is won. If all of the Chef's +$2 counters are on tables, placing Service Markers on the Chef has no effect. Chef tokens are placed on the gray circles on the selected table tile.
Hostess: The Hostess has a +$3 counter which should be placed with the Hostess at the start of the game. The Hostess may have only one Service Marker placed on her. When a player places a Service Marker on the Hostess, they immediately place the +$3 counter on any table. This counter adds +$3 to the value of the Tip Card on that table no matter who wins it for the following scoring phase only. Regardless of whether the table scores or not, the +$3 is returned to the Hostess at the end of the scoring round. The Hostess's +$3 token may be placed on a table that already has one of the Chef's +$2 tokens on it. Hostess tokens are placed on the gray circles on the selected table tile.
Maître D': The Maître D' may have only one Service Marker placed on it. At the end of the service phase, a player with a Service Marker on the Maître D' places that marker on any table they choose before the scoring phase begins.
Owner: The Owner may have only one Service Marker placed on him. When a player places a Service Marker on the Owner, they immediately exchange one of their Service Markers on a table for any other player's Service Marker on any table.
Valet: The Valet may have only one Service Marker placed on her. During the scoring phase, a player with a Service Marker on the Valet may score any one table even though it is not filled with Service Markers. They do not have to be winning or even be on the table they chose to score. Scored Service Markers go to the Phantom Realm or the players' Fortress of Loneliness, as usual.
Washroom Attendant: The Washroom Attendant may have up to two Service Markers placed on him (or three in a four or five player game). A player may have more than one Service Marker on the Washroom Attendant. When a player places a Service Marker on the Washroom Attendant, they immediately take one of their Service Markers from the Phantom Realm and return it to their Fortress of Loneliness.
Superhero Powers
Each player starts the game with a superhero that has two powers that allow them to break the game's rules in some way. Superpowers can only be used on your turn unless the power indicates otherwise. Only one of these powers may be used on each round. When a player uses one of their superhero's powers they should turn their Superhero over to indicate that they have done so. There is an icon to the right of each power that shows which game phase the power can be used during.
Superhero Powers use icons in place of some terms:
- Service Marker = the Service Marker icon (a star inside a circle)
- Tip Cards = the dollar-sign icon ($)
If there is ever a conflict between the game's rules and a Superhero power, the Superhero's power text overrides the game's rules.
Expanded Super Power Explanations
Firecracker Kid:
- What's the Rush: In a game with the Maître D' any Service Marker placed on the Maître D' is played after the Firecracker Kid uses this power.
- Better Late than Never: You may place a Service Marker on a table you already won; however, this Service Marker scores as if you Bused the Table.
Human Pinball:
- Shoot Again: When you use this power you do not place any other Service Marker on that turn (you may of course place Service Markers on subsequent turns, if applicable).
Madam Mystique:
- Change of Mind: Unused Tip Cards are the ones that were put aside during Set-up. If you run out of unused yellow Tip Cards, shuffle all discarded yellow Tip Cards to form a new unused Tip Card deck for Madam Mystique to draw from.
Mighty Mertyl:
- Persuasive Gaze: You may only claim a Staff member that has no Service Markers placed on them.
Nuclear Nelly:
- Booster Shot: The Service Marker you flip does not have to be yours.
Note: the rulebook does not print the full text of each hero's two powers. Those are printed on the Superhero cards, which are not part of this PDF. Only the expanded explanations above appear in the rulebook.
Variants
The Diner of Doom
So, you think you have it so rough do yah? Well, back in my day we didn't have the luxury of taking bathroom breaks whenever we wanted and a Washroom Attendant was only something for those Park Avenue dandies' restaurants. You were lucky if your local diner had a bathroom! Washroom Attendant? BAH!
In the Diner of Doom you may not use the Maître D', the Valet, or the Washroom Attendant. Note: this means that you have no way to retrieve Service Markers that have been sent to the Phantom Realm.
Secret Identity
You can play the game without using the Superheroes. The game play is identical to the regular game with the exception that each player does not get a superhero at the start of the game.
Short Order
For a quicker game, use only the Dinner Tip Cards. Set up the Dinner Tip Cards just as described in the "Here Come the Customers" section of the Set-up. With this variant, the Washroom Attendant is optional.