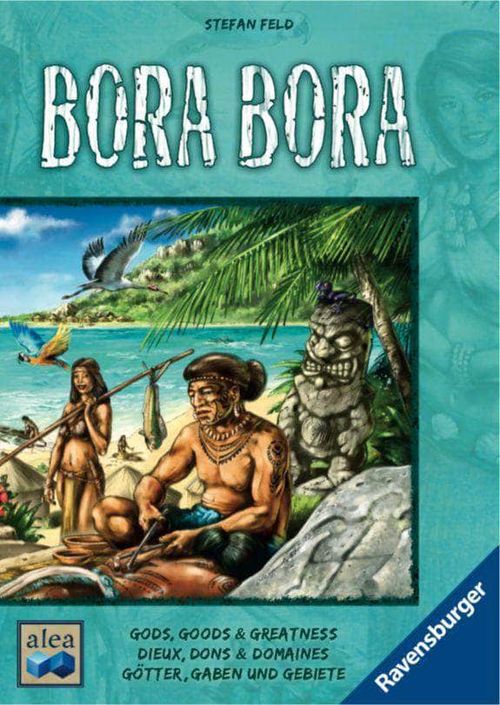
Bora Bora
Bora Bora Rulebook
Table of Contents
Table of Contents
Game Components
- 6 cardboard frames (before playing for the first time, carefully remove the cardboard components from their frames), containing:
- 18 offerings
- 36 shells
- 12 fish tiles
- 36 woman tiles
- 36 man tiles
- 60 task tiles (+ 2 replacements)
- 24 jewelry tiles
- 7 action tiles
- 10 God tiles
- 24 building tiles
- 4 turn order tiles
- 1 game board
- 30 building materials (10 each of sand, stone and wood)
- 60 God cards (12 per color)
- In each player color:
- 12 huts
- 4 priests
- 2 markers
- 3 dice
- 1 player board
If you are reading these rules for the first time, we recommend ignoring the bold text in the right-hand column of each page. These bolded texts summarize the rules to help players quickly recall details during subsequent games.
Game Setup
Place the game board in the middle of the table. It shows:
- The "Fishing" action space
- The scoring track (0–100)
- 5 islands with a total of 12 regions (3 each of mountain, beach, forest and plains); each region has one building space
- The status track
- Regions are connected by either land paths or water paths
- The temple
- The jewelry tile display
- The task tile display
- The man and woman tile display
- A summary of a game round
Place the building materials, shells, and offerings in a common supply next to the game board, easily accessible to all players.
Place action tiles – depending on player count – face up next to the game board:
- 2 players: 5 tiles → Helper, Temple, Build, Man / Woman (together), Land / Water Path (together) (see also "The Two or Three Player Game")
- 3 players: 6 tiles → Helper, Temple, Build, Man, Woman, Land / Water Path (together)
- 4 players: 7 tiles → Helper, Temple, Build, Man, Woman, Land Path, Water Path
Randomly place the 12 fish tiles face up onto the spaces intended for them adjacent to the 12 regions, so that one tile is next to each region.
Separately shuffle the man and woman tiles (36 of each), and place them face down in two separate supply piles next to the game board. Draw 6 from each pile and place them face up onto the orange and turquoise spaces in the bottom right hand corner of the game board.
Separate the 7 light green and the 53 dark green task tiles, and shuffle each pile. Give each player one randomly-drawn light green (crane) tile and two randomly-drawn dark green (parrot) tiles. Players will place these tiles later in any order they choose face up onto the three spaces intended for them in the lower right hand corner of their player boards. Remove the remaining light green tiles from the game and place the remaining dark green tiles in a supply pile next to the game board. Draw additional dark green tiles equal to player count plus two (i.e. 4 to 6 tiles) and place them face up onto the corresponding spaces on the game board.
Shuffle the 24 jewelry tiles and then randomly place them face up onto the 6 x 4 jewelry tile display spaces intended for them on the game board.
Place 6 of the 10 God tiles in a pile on the corresponding temple space on the game board.
Shuffle the God cards and place them in a pile face down next to the game board. Draw and reveal the top five cards, placing them next to the pile.
Give each player:
- 1 player board in his color;
- 12 huts in the same color, placed on the 12 corresponding hut spaces on his player board;
- 6 building tiles in the same color, placed dice-side up on the 6 corresponding spaces on his player board;
- 1 God tile, placed on the corresponding space on his player board;
- 3 dice in the same color, placed next to his player board;
- 4 priests in the same color, placed next to his player board;
- 2 God cards drawn from the pile, and added to his hand (hidden from the other players);
- 2 offerings from the supply, placed next to his player board;
- 1 turn order tile (randomly drawn), placed next to his player board.
When playing with fewer than four players, return all unused game components (huts, priests, building tiles, dice, as well as unused turn order and God tiles) to the game box.
Now the player who drew the #1 turn order tile places one of his markers on the victory point starting space on the scoring track (marked "0/100"), and the other marker on the status track below the 0 space. The second player places his first marker on the 1 victory point space on the scoring track and his second marker underneath the start player's on the status track. The remaining players follow in turn (first markers on the 2 / 3 victory point space, and second markers underneath the previous player's on the status track).
In reverse turn order, each player:
- places one of his huts on an empty building space on one of the four regions next to a 1-fish tile on the central game board;
- receives from the general supply the resource corresponding to the one indicated on his region, i.e. either a building material (sand, wood or stone), or an offering tile;
- immediately either places the building material on a free, matching ceremony space on his player board, or places the offering tile next to his board.
Continue in reverse turn order to the next player, and so on. Ignore the fish tiles of those regions for now.
The player board
The player board contains:
- Spaces for the huts (note: place 2 huts on the 12th space, bottom right)
- Spaces for man and woman tiles
- Spaces for God and jewelry tiles
- The ceremony spaces, i.e. spaces for building materials and/or built building tiles
- Spaces for not yet built building tiles
- Spaces for not yet completed task tiles
- Space for completed task tiles
- A summary of the trading options for the Helper dice action
- A summary of the 12 different men and women
- A summary of the effects of the 5 different Gods
- A summary of the Fire Bonus
- A summary of additional victory points awarded at game end
Game Rules
The game lasts six rounds, with each round consisting of three consecutive phases – A, B and C (see summary on the bottom left corner of the game board).
Phase A: Roll and place dice, carry out actions
Players simultaneously roll all three of their dice. The first player chooses one of his dice and places it on the action tile of his choice and immediately carries out the corresponding action. The next player then does the same, placing one die and carrying out the corresponding action. Play continues, in turn order, until all players have placed their three dice.
Important! When placing a die on an action tile, you can only place a die showing a value that is lower than the lowest value currently on that action tile (regardless of color). (Exception: Blue God, see "The Gods".)
Example: A 5 and a 3 are currently on an action tile. You could place a 1 or 2 there but not a 3, 4, 5 or 6.
The individual action tiles
"Expand" action (via land path or water path)
Expanding means settling a region adjacent to one in which you already have a hut. You can expand via an adjacent land path (brown arrow) or water path (blue arrow). The number showing on your die indicates the highest-value land or water path along which you can expand (lower numbers are always allowed). You are not allowed to expand diagonally.
For example, you could use a 5 or 6 to expand via water path from the central island's mountain region to the south island's plains. You could also use a 4, 5 or 6 to expand to the east island's beach. Via a land path, you could use a 4, 5 or 6 to expand to the plains to the north, or a 2, 3, 4, 5 or 6 to expand to the beach to the west. You could not expand to the forest regions of either island, as these are only diagonally adjacent to your region!
To expand, take a new hut from your player board (you may choose any hut, but it is better to save the 12th space until the end of the game) and place it on the building space of the new region. You now have a free space on your player board that you can later fill with a man or woman tile (see below).
Additionally, from the new region you may take either the building material (adding it to your ceremony space) or the offering tile (placing it next to your player board).
Finally, you must decide now and only now whether or not you want to score victory points for the fish tile adjacent to the new region. More details on this can be found under "Red God". Fish tiles can only be scored once per player per region, and only during expansion.
If there is already a hut on your new region's building space, move it off to the side, but make sure it stays in the same region.
Important! Each player can have no more than one hut per region!
"Woman" action
Each woman tile on the game board is placed upon one of six numbered positions. Take one woman tile from any position that is less than or equal to the value of the die that you had placed upon the woman action tile.
So if, for example, you had placed a 4-die on the woman action tile, you can take one woman tile from the board in any of the places numbered 1-4, but not in places 5 or 6.
Place the tile onto a free space on your player board (i.e. one of the 12 spaces along the right hand side of your player board not currently covered with a hut or a tile), such that the tile covers the green checkmark at the top of the space but leaves the status / shell at the bottom of the space visible. If you don't have a free space, then you cannot choose this action.
Note: Placing the new tile doesn't do anything further – that is, you can't carry out the action shown on the right or left hand side of the tile yet!
"Man" action
Carry this action out in the same manner as the woman tile (see above).
"Helper" action
Trade for various items. The die result indicates how many items you can trade for. The trade value is shown in the upper left hand corner of each player board. Tattooing, shell collecting, or scoring 1 victory point each costs 1 die point. An offering, God card, or building material of your choice each costs 2 die points, as does moving a hut onto your 12th space.
The individual "Helper" trading options:
- Tattooing (man tiles): For each die point used, shift one not yet tattooed man on your player board down, i.e. so that the green checkmark on that space becomes visible while the status / shell area is covered. The man is now tattooed and may not be tattooed again for the rest of the game. Move your status marker one space to the right along the status track for each status symbol displayed on the left side of the man tile. If you land on an occupied space on the status track, place your marker on top of the pile. You may spend additional die points to tattoo additional men but are not obligated to do so.
- Collecting Shells (woman tiles): Carry this out in the same manner as tattooing: For each die point used, shift one woman tile down and take the number of shells from the general supply that corresponds to the number of shells displayed on the left side of the woman tile. Place the shells next to your player board so that all players can see them.
Example: Anna uses two of the five die points she has available for the tattooing "Helper" action, and shifts two of her man tiles down. A total of 5 status symbols are on those two man tiles, so she moves her status marker from 0 to the first space below the 4 on the status track. She uses an additional die point to shift one of her woman tiles down in exchange for 3 shells from the general supply. She plans on using the final two points for an offering (see below).
- Victory points: Move one space forward along the victory point track for each die point you are trading in for victory points.
- Offerings: Take one offering from the supply for every two die points you are trading in for offerings. Place the offerings next to your player board so that all players can see them.
- God cards: Take one God card and add it to your hand for every two die points you are trading in. You can take either the top card of the draw pile or one of the five face up cards. If you take one of the face up cards, immediately replace it with the top card from the draw pile. You can use God cards during the course of the game to make offerings. More information under "The Gods".
- Building materials: Take one building material of your choice from the supply and place it on a matching ceremony space for every two die points you are trading in. Should you not have an open matching space, then place it next to your player board instead. Should the supply run out of the necessary building material, use something else as a temporary replacement. The supply of building materials, offerings, and shells is unlimited.
- Move hut: Move one of the huts on your player board to the last, 12th, space (bottom right, with a slightly lighter border) of your player board for every two die points you are trading in. You can have as many huts as you want on the 12th space. Each movement allows you to make space for additional man and woman tiles without having to use the "Expand" action first. Note: you cannot move huts that have already been placed onto the game board.
Example of different "Helper" actions: Ben has placed a 6-value die onto the "Helper" action tile. He takes one wood (-2), tattoos one man (-1) and collects some shells with a woman (-1). He moves his scoring marker ahead 2 spaces along the victory point track for his final two die points. Or: Ben could have also chosen to draw 1 God card (-2), 1 offering (-2) and 1 building material of his choice (-2). Or: Ben could have shifted 6 man / woman tiles down. Or: ... taken 2 God cards and 2 victory points… etc., etc.
"Temple" action
Take a priest from your supply and add him to the temple on the game board. The die result indicates the highest-value space you can place your priest onto (lower values are always allowed). Should a priest already be located on this space, shift him one space in the direction of the arrows. This can in turn shift additional priests, until either an empty space is filled or the last priest in the row drops off the end and is returned to the supply of his owner.
Each newly-placed priest immediately awards a one-time Fire Bonus (see below). Additionally, all priests in the temple are worth victory points at the end of a round. More details under "Phase C".
"Build" action
Build one of your as-yet unbuilt building tiles. The die result indicates the highest-value tile you can build (lower values are always allowed). Remove building materials from two horizontally or vertically adjacent ceremony spaces on your player board, returning them to the general supply. Then place the chosen building tile (die side down) onto the two spaces. Depending on the current round, you score either 10, 7 or 4 points for this. The points are shown above the jewelry tile spaces on the game board. You also receive the one-time Fire Bonus (see below).
If you don't have two adjacent building materials in your ceremony space, then you cannot choose this action. Building materials or building tiles, once placed onto a ceremony space, cannot be moved again.
Should you build so that you have individual spaces left at the end of the game, then you will not be able to fully complete the ceremony spaces (see also "Final Scoring").
The Fire Bonus
When you receive this bonus (either by adding a priest to the temple or by placing building tiles on ceremony spaces), you immediately choose either a God card or an offering and either move ahead one space on the status track or take one shell. For details, see "Helper" action.
Example: Cleo places a priest. For her Fire Bonus, she immediately takes a God card (instead of an offering) and a shell (instead of a status step). She is not allowed to take two offerings, nor is she allowed to take an offering and a God card.
"Fishing" action
Score 2 victory points for any die (regardless of its number) placed in the "fishing" action space in the upper left hand corner of the game board.
Important! When using the "fishing" action, the rule that new dice must be of lower value than those already placed is not in effect. In other words, you can place any die here and score 2 victory points.
Phase B: Use man and woman actions
In turn order, players may use one of their man and one of their woman tiles; the order of usage is up to each player individually.
The available actions depend on the symbols indicated on the right hand sides of the tiles. If you have multiple identical women, then you can use these tiles together for a more powerful single action (but you may not use them to carry out multiple separate actions). The same goes for the men – but never for men and women together!
The individual locations of your man and woman tiles on your player board doesn't matter, nor does whether or not they have been shifted down. Using them doesn't change them; they are neither shifted nor discarded.
Example: Don adds the values of his two male Pathfinders (one is tattooed, one is not) together to use them to expand across one land path of value 4 or less; he could not use them to expand across two paths of value 2 or less. Should he also have a female Pathfinder, he could then use her to expand again – independently from the men – but is not obligated to do so.
The individual woman (and man) actions
(See also the corresponding summary on each player board. In each case, the values in parentheses apply when you use two / three identical tiles together.)
- Land Path: Expand just as if you had placed a die of value 2 onto the "land path" action tile. (If you have two such women or men, then you can use a land path of value 4 or less; if you have all three such women or men, then you can use any land path.)
- Water Path: Expand in the same way as described above, only via a water path.
- Woman: Take a woman tile from the game board as if you had placed a die of value 3 onto the "woman" action tile. (Or, if you have two such women or men, as if you had placed a die of value 6. Note: the third matching woman or man tile has no effect!)
- Man: Take a man tile in the same way as described above.
- Build: Build one of your building tiles as if you had placed a die of value 3 on the "build" action tile. (Or, if you have two such women or men, as if you had placed a die of value 6. Note: the third tile has no effect!)
- Building materials: Take one building material of your choice from the supply and place it onto a matching ceremony space on your player board. (Or take 2 or even 3 building materials. Note: they can be different types.)
- Move hut: Move one of your huts onto the 12th space of your player board. (Or move 2 or even 3 of your huts.)
- Victory points: Move your scoring marker two spaces forward on the scoring track. (Or 4 or even 6 spaces forward.)
- God card: Take a God card into your hand. (Or take 2 or even 3 God cards.)
- Offering: Take an offering from the supply. (Or take 2 or even 3 offerings.)
Phase C: Assess the right half of the game board
Always deal with the status track first, followed by the temple, then the jewelry tiles, and finally the task tiles.
1.) Status track
Each player scores the number of victory points that corresponds to the space his status marker is below, in other words, between 0 and 15 points. Then, return all players' status markers to the 0 space, making sure that the player who was the furthest back is on the bottom and the player who was the furthest ahead is on top. Finally, reassign the turn order tiles: the player on top of the pile is the start player and gets the "#1" tile, etc.
2.) Temple
Players score victory points for the priests they have in the temple. In the first two rounds each priest is worth 1 victory point; in the next two rounds each priest is worth 2 victory points and in the final two rounds each priest is worth 3 victory points (as also indicated along the bottom of the temple).
Then, the player with the most priests in the temple receives the top God tile, adding it to his player board. In the case of a tie, the God tile goes to the player among those who tied whose priest is furthest to the left. Should there not be any priest in the temple, then the corresponding God tile is removed from the game.
3.) Jewelry tiles
In the new turn order, players may choose to buy one jewelry tile from the current round's column, paying for it by returning as many shells to the supply as indicated on the chosen tile. Place jewelry tiles face down on the appropriate spot on your player board; you will score the victory points for them at the end of the game (see "Final Scoring").
If you can't or don't want to buy a jewelry tile, then your turn is skipped. Any leftover jewelry tiles from the current round are discarded.
The six columns illustrate what round the game is currently in, and how many victory points building tiles or priests are worth.
4.) Task tiles
In the new turn order, players one at a time complete one of their three task tiles. If the player can complete the task without help, he scores 6 VPs. If the player requires the help of the Yellow God to complete it (see "The Gods"), he scores 4 victory points. After the task is completed, the player places the tile face down on the space with the checkmark on his player board, where it remains until the end of the game.
If the player can't complete any of his three tasks, he must choose one task tile to surrender, and return it to the game box. No points are scored.
Finally, in turn order, each player chooses a new task tile from the game board and adds it to the newly freed space on his player board (note: this is also required during round 6).
The round is now over. Prepare for the next round by returning to the game box the two task tiles that were not chosen, and any remaining man or woman tiles. Then, add six new man and six new woman tiles to the board, along with new task tiles (player count plus 2). Do this at the beginning of round 6 as well.
Each player takes their three dice back from the action tiles. The next round can now begin...
Game End
The game ends after round 6. Each player now completes his three task tiles (each one is completed as at the end of the individual rounds; 6, 4 or 0 VP each).
Final scoring: (see also the summary in the bottom left corner of the player boards); players receive:
- 2 victory points for every own unused God tile;
- 1-6 victory points for each fish tile adjacent to a building space containing a hut of their color;
- 1-9 victory points for each of their jewelry tiles.
Additionally, each player scores 6 victory points for each of the following:
- 9 completed task tiles;
- 6 claimed jewelry tiles;
- all 12 ceremony spaces full (regardless of whether it is full with building materials and/or building tiles);
- all 6 building tiles built;
- huts added to all 12 regions;
- all 12 man / woman spaces filled with man or woman tiles.
Remaining building materials, shells, offerings or God cards are not worth anything.
The player with the most victory points is the winner. In the event of a tie, the winner is the player among those who tied who went earlier in turn order during the last phase C.
The Gods
To play any God card, you must also give up an offering. If you don't have an offering then you can't play a God card. Place used God cards face up onto a discard pile next to the draw pile and used offerings back into the general supply. If the God card draw pile runs out, shuffle the discard pile and use it, face down, as a new draw pile.
Important! You may play two God cards of the same color, paying only one offering, for the ability to choose any God action you desire.
Blue God — If you play a Blue God (only possible in Phase A), then you can add a die to an action tile even if its value is the same as or greater than the lowest die value on that tile. Note: You must use one Blue God card per die. Thus, if anyone wants to play an equal or greater value die later in the round, they must also play a Blue God card. White or Red Gods may also be played.
White God — If you play a White God (only possible in Phase A), then you can add a die to an action tile as if its value was 6. Do not change the die's value to 6, it remains as it was!
Red God — You may only play a Red God (in Phases A or B) when expanding, i.e. when placing a hut onto a new region's building space. The Red God allows you to score the fish tile adjacent to the new region, i.e. to score as many victory points as indicated by the fish tile. Important: The fish tile remains in place after scoring so that it is available to the other players. Note: Players can play no more than one Red God per region, and thus can score each fish tile at most once.
Example: Anna plays a Blue God (and makes an offering) to be able to place a 3-die on the "water path" action tile, which already shows a die with a 1. Additionally she plays a White God (and makes another offering) to be able to use the 3 as a 6, i.e. allowing her to expand over a water path with a value of 6, and places a new hut in the new region. Finally she plays a Red God (and makes a third offering) to score 5 victory points for the fish tile adjacent to the new hut.
Green God — If you play a Green God (only possible in Phase B), then you can do one of the following:
Either: Double the effect of the man or woman type you are currently using. If you are using multiple identical man (or woman) tiles, double the total amount, i.e. after taking into account the effect of multiple tiles. (Note: multiple actions are still not possible.)
Example 1: Cleo has two woman tiles that will score her 4 victory points when activated together. By using the Green God, she can double this to 8 victory points. Example 2: Ben is able to build at most a 3-value building tile. By using a Green God, he can build a 4, 5 or 6 value building tile (but not a second 3-value building tile).
Or: Activate a second, different, man or woman type.
Example: Don uses his two woman tiles together to expand via a 4-value land path. He then uses a man tile that allows him to take one God card. He picks a Green God card that he immediately plays (after paying the requisite offering). He decides to activate another of his women tiles, and chooses one that lets him take one man tile from the game board.
For clarity: You can play at most one Green God in Phase B and use it to either double the effect of one man/woman action or use one additional man/woman action.
Yellow God — If you play one Yellow God (only possible in Phase C), then you can replace exactly one of a task tile's requirements.
If, for example, the task tile requires 3 wood, then you can use a Yellow God to need only 2 wood. Or, if huts in 9 regions are required, then you can use a Yellow God to need huts in only 8 regions.
Using a Yellow God to help with a task tile means that you only score 4 victory points for that tile (instead of 6). Note: At the end of the game, when players complete their three remaining task tiles, you may use one Yellow God per tile, thus allowing you to use up to three total cards. You must pay one offering for each.
God tile: God tiles can be used in place of any God card of your choice. When used, return the God tile to the game box. You do not need to give up an offering to use a God tile.
The Two or Three Player Game
Fewer action tiles are laid out, so that some actions are combined:
- In the 2 player game — In addition to the "Build", "Temple" and "Helper" actions, there are combined "Man / Woman" and "Land / Water Path" actions. Use the "Woman" and "Land Path" tiles face down, and return the "Man" and "Water Path" tiles to the box. A total of five action tiles are thus available.
- In the 3 player game — In addition to the "Build", "Temple", "Helper", "Woman" and "Man" actions, there is a combined "Land / Water Path" action (use the "Land Path" face down), and return the "Water Path" tile to the box. A total of six action tiles are thus available.
The rules for placing dice remain the same as in the 4 player game. Always place lower die values (exception: Blue God) and, when choosing a double action tile, choose one of the two available actions.
Example: Don places a 3-value die onto the combined "Man / Woman" action tile and takes a woman tile. Subsequent players must now place either a 2-value or 1-value die here, but are free to choose a man tile instead of a woman tile. The same goes for the combined "Land / Water Path" action tile.
The Task Tiles
The task tiles begin with the 7 starting task tiles (light green backs with a crane) and are followed by the 53 remaining task tiles (dark green backs with a parrot). In general, all tasks indicate a minimum requirement – not an exact number. Thus, you can always have more of what is required, but not less.
Note: You never need to give anything up when completing task tiles. You only need to show that you have them.
A task tile is considered "complete" when you...
- ...have a man and a woman tile on your player board.
- ...have a woman tile on your player board and a priest in the temple. (Similar: "A man tile on your board and a priest in the temple" or "Three priests in the temple".)
- ...have a woman tile and a jewelry tile on your player board. (Similar: "A man tile on your board and turn order tile #1".)
- ...have a hut in any three regions. (Similar: "Huts in any nine regions" or "At least one hut on all five islands".)
- ...can show three identically-colored God cards. (Similar: "Two God cards of a specific color" (total of 5, 1 per color) or "Four different God cards".)
- ...have three different man tiles on your player board. (Similar: "Three different woman tiles" or "Three different jewelry tiles".)
- ...have any four man tiles on your player board. (Similar: "Any four woman tiles" or "Any four jewelry tiles" or "Any four built building tiles".)
- ...have two "Necklace" jewelry tiles. (Total of 6, 1 per jewelry type.) (Similar: "Two God tiles", "Four offerings" or "Five shells".)
- ...have three stone building materials on your ceremony spaces or next to your player board. (Total of 3, 1 per building material type.) (Similar: "Any five building materials".)
- ...have a hut in each of the three mountain regions (do not need to be on the regions' building spaces). (Total of 8, 1 per region type and 1 per fish tile type.)
- ...have four huts on the 12th space of your player board.
- ...have any three man tiles shifted down on your player board. (Similar: "Any three woman tiles shifted down" or "Any five person tiles shifted down".)
- ...have two of the depicted person tiles (women and/or men) on your player board. (Total of 12, 1 per person type.)
Important! God cards required by task tiles cannot be replaced by God tiles or by using two identical God cards!
© 2012 Stefan Feld. © 2013 Ravensburger Spieleverlag.