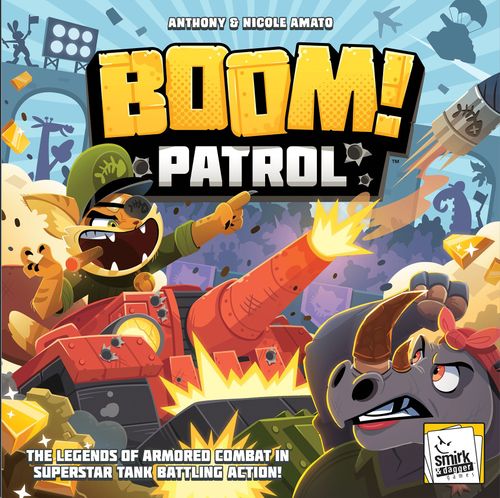
BOOM! Patrol
BOOM! Patrol Rulebook
Table of Contents
Table of Contents
- Setup
- League Rules
- Order of Play
- Command Cards
- Command Cards (continued)
- Crushing Buildings, Ramming Tanks
- Combat / "Fire Away!"
- Destroying a Tank
- Tank Wreckage
- Rattled!!
- Out of Bounds
- Clocktower / Vault
- Medals / Glory
- Earning Medals (Reference Card)
- Situation Report / End Phase
- Captains
- Building Key
Setup
Build the BOOMburg Arena. You will need a roughly 2.75' x 5' flat surface to play on (2.5' square for the arena itself). There is no board. You will mark out the playing area by setting the 4 Rally Points as the corner boundaries of the arena. Place the two Range Rulers end to end along one edge of the table and place the tip of a Rally Point at both ends. Then position them at a 90° angle to place the next Rally Point. Continue until you have a square playing area marked out. In the center, place the Clocktower disc. Place the Range Rulers to one side, out of bounds, for use during play.
Each player chooses a color and takes the matching player board, tank, and Command deck. Place these outside the arena, beside one of the Rally Points. The tank is placed anywhere along the long edge of the Rally Point. Place so that the REAR of the tank is flush against the edge and not extending off any side. Your turret may be positioned between any two hash marks.
Player Count Configurations
a) In a 4-player game, each player commands a single tank and will set up at the Rally Point nearest them.
b) In a 2-player game, each player will command two tanks, acting as a team against the other player. They will start at the Rally Points on their side of the table.
c) In a 3-player game, each player commands a single tank. However, the third player will not set their tank against a Rally Point. Instead, they will position along the boundary line on their side of the table, equidistant from both Rally Points.
Take a white Glory cube and place it on the "0" of the Glory Points track.
Each player's Command deck is identical and contains a Forward, Back 'er Up, Veer Right, Veer Left, Fire Away, Again & Captain's Orders (all described in detail later). Take the two "Rattled" penalty cards out of your Command deck and place them face-up to one side, out of play.
Each player then chooses a favorite Tank Captain card, or draws one randomly from the deck.
Leave room to program three cards beside your Command deck (the Command row).
Create the Initiative deck. Take the 3 Total Carnage Round cards, shuffle them and place them face-down without looking at them. Then, take a Tank card for each color tank being played, shuffle them and place them face down on the Total Carnage Round cards. In this way, each color tank will be have the opportunity to take the first turn before Initiative is determined by other criteria later in the game. Place them to one side of the table (a).
Shuffle the Gear cards (b) and place face-down within reach.
Place the 6 Wreckage cards (c) and the Boom card (d), as well as the Hold Up Template (e), nearby.
Sort the tokens by type: Medals (f), Gold (g), Supercharge (h), Patch Kit (i), The Relic (j), Ammo (k), & black Critical Hit cubes (L) - and create piles for each on the other side of the table.
Set the Buildings:
Gather the Building tiles, shuffle them face-down and distribute roughly equal piles to the players. Players may not examine them. Players will take turns placing them face-down, one at a time, into the arena battlefield.
Placement Guidelines:
-
Tiles can be placed on any open spot on the field, but must remain completely within the imaginary border lines of the field as marked by the Rally Point corners.
-
Tiles do not have to adhere to any grid or angle and can be placed in any orientation.
-
Place tiles approximately one tile width away from any other tile or object. Do your best. It doesn't have to be exact. Get used to the idea that this will not be a precision game. :)
The field is set. Tank Crews are standing by and we are ready to roll at the BOOMburg Games. 10 seconds until the ringing of the clocktower bell to start the match.
League Rules
Objective: Earn 6* Medals (*9 combined in 2-player Team Play).
- After all the Regulation Rounds have been completed (Rounds with Initiative cards showing tanks, one for each color tank in play), the Crew or Team with the highest number of Medals, 6* or over, claims Victory. Earning 6 Medals before the end of Regulation does not stop the match.
- If no one has claimed 6* Medals, or if a tie for the lead exists after Regulation, ALL combatants move into the Total Carnage Rounds, where the dice get more punishing. At the end of any Total Carnage Round where one Crew/Team has taken the lead with over 6* Medals, the match ends and they claim Victory.
(see Earning Medals, p. 10)
Order of Play
- Battle Plan Phase A. Program Command Cards B. Reveal Initiative
- Combat Phase A. Execute Command #1 B. Execute Command #2 C. Execute Command #3
- Situation Report A. Gain Gold for closest to Vault (if revealed) B. Crate Gold C. If Regulation is over, check for Victory D. If not, return to Step 1.
1. Battle Plan Phase
1A: Program Command Cards
All players simultaneously choose and secretly program three Command cards, face-down in a row, outside the battlefield area. They will resolve from left to right, so plan accordingly. Note: programming cards occurs before Initiative is drawn, so you will not know if you will act before or after an opponent this round. When you are ready, announce it aloud.
You can always look at your face down cards.
1B: Reveal Initiative
When all players signal that their Battle Plan is ready, draw the top Initiative card and reveal it. The tank color revealed becomes the first player for this Battle Round. In the Total Carnage Rounds, the first player is determined by the conditions printed on the card.
2. Combat Phase
2 A, B, C: Execute Commands
Starting with the first player, and proceeding clockwise*, each player will take turns revealing and executing the first Command card in their Battle Plan, until all players have completed their first Command card. Continue in the same manner through Commands 2 and 3. When all three Commands have been completed by all Tanks, the Combat Phase ends.
*In 2-Player Team Play, set 2 Command rows each. Initiative shows the first tank to act. Then, alternate play back and forth between players. The 2nd player of a round can choose which of their tanks to activate first.
Command Cards
Each set of Command cards is exactly the same except the color of the backs. Command cards maneuver your tank, fire its cannon and repair it. You begin with all of your Command cards available, and each round you may program any of them freely - until they become Damaged (see Damage p 8).
All Movement-based Commands feature an intuitive interface that show exactly how far to move and to what new facing your tank turns. Simply line up the colored edge of your tank on the matching color edge of the card, then reposition the tank so it touches the destination line. See the below examples.
FORWARD!
This will move your tank straight forward. Place the FORWARD! card in front of the tank with its Front green line touching the green line on the edge of the card (a). Then, place your tank on the card so that the red Rear line covers the red line on the card (b). Slide the card out from under the tank and place it back into your Command row.
BACK 'ER UP!
This will move your tank straight backwards. Place the BACK 'ER UP! card behind the tank with the red Rear line touching the red line on the edge of the card (c). Then, place your tank on the card so that the red Rear line covers the red line on the mid point of the card (d). Slide the card out from under the tank and place it back into your Command row.
VEER LEFT! / VEER RIGHT!
This will move your tank forward and turn it 30º. Place the VEER! card in front of the tank with its Front green line touching the green line on the edge of the card (e). Then, place your tank on the card so that the green FRONT line covers the angled green line on the card (f). Slide the card out from under the tank and place it back into your Command row.
(NOTE: see Crushing/Ramming on p7 for how your tank interacts with board elements for ALL movement cards)
CAPTAIN'S ORDERS!
Activate your Captain's ability as described on your Captain card. Since each player has a different Captain, this card provides a signature move that only you can perform. Some of these abilities are so powerful that they require you to damage your Captain's Orders card after use. (This requires you to REPAIR [p6] before it can be returned to your hand for future use.)
Captains are the superstar celebrities of BOOM Patrol. Their unique tactics provide a strategic edge that may bend or break the standard rules. You will likely end up with favorites that mirror your own strategic sensibilities - but mix it up occasionally to discover different paths to victory.
Command Cards (continued)
AGAIN!
This card acts as a duplicate of the last Command you played. It cannot be played as your first Command in a round, and it cannot duplicate CAPTAIN'S ORDERS! It will, however, duplicate HOLD UP! and REPAIR! if that was the most recent Command (see Alternate Commands below) - but never the unplayed face of the card.
FIRE AWAY!
Your tank may turn its turret one 'click' across an adjacent hash mark and fire upon a declared target in range.
If you do not have a target in range, or choose not to Fire, you may turn your turret two 'clicks' instead. (See Combat / Fire Away! [p 8] for more details)
ALTERNATE COMMANDS:
It may be that the conditions on the field require a last-minute change of tactics. You may always choose NOT to reveal a card in your Command row if you no longer wish to play it. Instead, you may activate one of the two other Commands printed on the back of the card, HOLD UP! or REPAIR!. To do so, simply turn the card 90º so the Command you wish to perform is right-reading, then take the listed action below.
REPAIR!
This Command allows you to regain cards into your hand that have been discarded as damage. (See Damage, p 8)
When activated, you may choose half of your Damaged Command cards (rounded up) and place them back into your hand. They are once again able to be used. (It does not remove Crit tokens)
HOLD UP!
This Command pivots your tank in place up to 70º. You may stop pivoting shy of the full 70 degrees, of course, but the template is provided for an easy demarkation of maximum rotation.
In addition, you may turn your turret one 'click.'
Crushing Buildings, Ramming Tanks
One of the primary features of the battlefield is the 36 Building tiles strewn across it. Buildings are very easily destroyed, either from shooting at them from a distance or by crushing them by moving your tank across them. Once destroyed, they are flipped over and revealed, showing the tile's effect. Most have positive effects and items to be gained, like Gold, with a handful of tiles featuring hazards like Mine Fields or Glue Traps.
After flipping and revealing the tile, consult the icons listed on the Building chart in the back of the rulebook for specifics on their effects. Most helpful power-ups can only be claimed by moving your tank on top of them. If you revealed it by "Crushing" the Building, you immediately claim its reward. If you fired upon it, it is revealed but will be claimed by the first tank to move onto it. Therefore, it can be advantageous to Crush buildings to assure you get the item before anyone else.
Hazards, on the other hand, are safer to shoot and reveal at a distance. There are far fewer of them, but occasionally firing at a Building can save you from a hazard that could potentially destroy your tank or otherwise create challenges for you.
Most Building tiles are removed from the game after revealing and resolving their effects. But a few, like Bunker and Accelerator, remain as permanent objects on the field. (After revealing, do your best to reposition them in the same spot and orientation as you discovered them.) These tiles are marked with the (∞) symbol. As permanent objects on the field, they are subject to MOVE OFF rules.
MOVE OFF: A tank cannot end a movement that has it touching or overlapping any other object. So, if sitting on a permanent tile, the tank must MOVE OFF MOVE OFF. This means it will continue its movement, in the exact same direction and angle, until it is no longer touching the tile. This can lead to additional Buildings being Crushed and resolved. If it leads to a tank overlapping another permanent object as a result, the process repeats until it has Moved Off all objects. These same rules apply to a tank that comes to rest on another tank (Ramming) or the Clocktower/Vault.
Should a tank be forcibly moved during another player's turn, it will Crush Buildings as normal, resolve any effects, and is also subject to any Move Off effects, continuing its forced movement until it is no longer on top of any permanent objects.
RAMMING: When a tank moves onto another tank, it is said to be Ramming that tank. This is a "free" damaging attack. The attacking player rolls one Combat die against the crushed tank and assesses any damage immediately -- even if it is a friendly target in 2-player Team play! Then the attacking tank Moves Off until it is no longer in contact. (see Damage [p 8] for Attack die results)
Should two tanks be forcibly pushed into each other by another player, the tank who caused it rolls the die and claims any credit for the damage or destruction.
NOTE: Contact made through HOLD UP! will crush a Building but does not cause Ramming damage. The moving tank ends its rotation (a), and if still on the tank, backs away (b) until they are no longer in contact.
Combat / "Fire Away!"
To "FIRE AWAY!," some portion of the target must be within your Firing Arc, within Range AND within Line of Sight of your tank.
The Firing Arc of your tank resides between the hash marks of your turret's orientation. Before firing, you may turn your turret one 'click' across an adjacent hash mark. This provides a relatively wide choice of targets.
Name a target and use the Range Ruler to verify the target is within range and has an uninterrupted Line of Sight. Place the notched end of the ruler against the plastic hub of the turret. A target is in range if any portion can be touched by the end of the ruler (or is closer).
A target is in Line of Sight if a straight line may be drawn between the end of the turret and some portion of the target without touching another object. The Range Ruler verifies this at the same time as range.
You may change targets if desired or necessary. Once you have a legal target, you may Fire Away!
Firing at Buildings:
Roll a Combat die. If you score a HIT (anything besides a blank), the Building is destroyed. Flip the tile over.
Firing at Tanks:
When attacking a tank, Combat dice are rolled to determine the severity of the hit. Use only the white Combat dice in the Regulation rounds. The closer you are, the more devastating a hit you are likely to score. Use the Range Finder to see if you are in Long, Mid or Close Range. The color band pointer for a given range must be able to touch some portion of the tank to be considered in that range length.
Close Range: Roll 2 Combat dice. Assign the most damaging result to the target, ignoring the other.
Mid Range: Roll 1 Combat die. The result is applied to the target.
Long Range: Roll 2 Combat dice. Assign the least damaging result to the target, ignoring the other.
DAMAGE:
- MISS: A blank die face is a complete miss. No damage or Knock Back (see below).
- COMMAND CARD: HIT! For each Command card icon shown, damage a Command card in the opponent's hand, selected at random by the attacker. A card in the Damaged pile cannot be used by that player until it is placed back into their hand through a Repair! Command. IMPORTANT: Cards in your Command Row, revealed or not, are not considered in your hand and cannot be damaged.
- CRITICAL HIT: HIT! For each Critical Hit icon shown, the target takes 1 CRIT. Place a CRIT token on the target's board. It takes 3 CRITS to destroy a tank.
KNOCK BACK: If a tank is HIT by an attack, it is ALSO pushed back, away from the attacker. If the attacker drew Line of Sight to the side of the tank, the tank is pushed one card width away. If the tank is targeted on the front or back, it is pushed one card length away. Use the BOOM card for measurement. If the tank is pushed into Buildings or other tanks, resolve the all effects, including Move Off. Any additional damage resulting is scored by the attacker. If target is pushed out of bounds, the attacker gains 2 Glory (see Glory p10).
Destroying a Tank
A tank is destroyed when it receives its 3rd Critical Hit token. The opponent assigning the third Critical Hit to the tank is awarded 2 Medals (see Medals / Glory p10).
The destroyed tank is replaced on the field with a Tank Wreckage card, which becomes a new hazard on the field (see Tank Wreckage below). It is not kicked back, just replaced. All the tank's previously collected tokens (Gold, Ammo, Relic, etc) are lost and placed onto the Wreckage card. If the tank had a Gear card, this is placed on the Wreckage as well. Medals, however, are never lost.
Fear not. When the destroyed tank would next reveal a Command card, it immediately respawns, with its Rear flush against any unobstructed Rally Point – even one they did not start at. Remove all Critical Hit tokens and place all Damaged Command cards back into the player's hand. All Rattled cards are placed out of play. Choose a new card for your Command Row if necessary. This tank will execute any remaining Command cards in its Command row as normal, starting from their new location.
Tank Wreckage
Tank Wreckage on the battlefield will block Line of Fire. It can be removed from the field by attacking it. A tank can Crush Wreckage by moving onto it and immediately Moving Off. This destroys the Wreckage and removes it from the battlefield. All tokens and Gear sitting on it are claimed by the attacker. If they already have a Gear card, they must choose one and discard the other. However, the cost of rolling over the burning Wreckage is potential damage to your tank. Roll 1 Combat die and apply the result to your tank. (Note: If that destroys your tank, you'll get the Glory and then deposit ALL items on your new Wreck.)
Range is used when firing on a Wreck. If any HIT is rolled, destroy the Wreck along with any Gear and most of the tokens on it, removing them from the game. Only Gold and the Relic will remain in place on the battlefield, where they can be claimed by moving on top of them. Destroying Wreckage is worth 2 Glory (see Glory p10).
Rattled!!
Minefields, Gear and certain Tank Commanders can force a tank to become Rattled Rattled. This disorienting condition causes that tank to place a Rattled card into their hand (Note: a tank only has two and can never take more). The next time they program their Commands for a round, all Rattled cards in hand MUST be programmed in place of a Command card - but they may choose the order in which they are placed.
When a Rattled card is revealed on your turn, have another player choose a card at random from your hand – and execute that Command card instead. You can't choose to Hold Up or Repair, so you may find yourself heading in a direction you hadn't planned or firing even if no target is in range. At the end of the Round, Rattled cards in the Command row are placed out of play again.
Out of Bounds
- If an opponent forces a tank out of bounds, beyond the imaginary boundry line, they will score 2 Glory. The same is true if a tank is forced onto a Rally Point. The forced out tank will immediately respawn on any unobstructed Rally Point of their choice.
- If a tank uses a Command to move their tank and it would place it touching a Rally Point, movement stops at the point of contact. There is no penalty. This includes movement stemming from Rattled.
- If, while pivoting during a HOLD UP!, one of the tank's corners clips a Rally Point, ignore it and continue the rotation. If it comes to rest on the Rally Point, Move Off away from the Rally Point.
- However, a tank that drives out of bounds suffers a penalty. This is true whether intentional, by accident or through a RATTLED movement. Each opponent gains 2 Glory and the tank immediately respawns on an unobstructed Rally Point chosen by their opponents.
Clocktower / Vault
The Clocktower sits at the center of the arena and blocks Line of Sight. As a permanent object, it also has the MOVE OFF effect for any tank that moves on top of the disc. But the Clocktower hides a secret - a Vault filled with Gold that can be accessed once the tower is destroyed.
The Clocktower has 3 Critical Hit boxes and will take damage each time a Critical Hit is scored upon it in an attack. It can be shot at (with range finder) or it can be rammed for 1 die of damage each time a tank moves onto it (and Moves Off). Only Crits count as damage - all other results are ignored. Upon taking its 3rd Crit, the Clocktower is destroyed, awarding a Medal to the attacker. Flip the disc over to reveal The Vault.
Once the Vault has been revealed, it becomes a source for gaining Gold Bars. At the end of each Round, use the Range Finder to see if any tanks are within Close Range of the Vault (turret hub to edge of Vault). All tanks within Close Range gain 1 Gold each, with the closest tank to the Vault earning an additional Gold.
Gold can be the difference between victory and defeat, so don't ignore the chance to open the Vault and move in close to claim your share.
Medals / Glory
Medals are obtained primarily through destroying an opponent's tank, which grants 2 Medals. But at the end of every round, players may Crate Up (exchange) 3 Gold for 1 Medal. It can only be done once per round, but is the second most important way to earn Medals.
1 Medal is also awarded to the tank who destroys The Clocktower, providing an extra incentive.
Finally, a tank can gain 1 Medal by shooting from a Bunker and scoring 1 or more Critical Hits Critical Hit. Bunker shots are always fired as disadvantaged Long Range shots, regardless of actual distance. This makes scoring a Crit difficult and worth celebrating.
Glory
Medals can also be earned over time by earning Glory points. Each time you receive your 5th Glory, you gain 1 Medal. Any excess Glory earned rolls over towards the next Medal. Advance the Glory token on the tracker a number of spaces as shown below:
- When you Damage but do NOT destroy a tank: Gain 1 Glory for each Command card & Critical Hit icon scored.
- Gain 2 Glory for forcing an opponent out of bounds. This is most often done through a Knock Back. Pushing a tank onto a Rally Point is considered out of bounds as well.
- Destroying / removing tank Wreckage gains 2 Glory.
- Gain 1 Glory for each Critical Hit scored on the Clocktower that does NOT destroy it.
NOTE: Once earned, Medals cannot be taken from a player. However, the Relic, which counts as 1 Medal, can be stolen when Ramming the tank who possesses it.
Earning Medals (Reference Card)
- Destroy enemy tank: 2 Medals
- OR 1 Medal when you:
- Crate Up 3 Gold during End Phase (once per End Phase)
- Score a Critical Hit when shooting from a Bunker.
- Destroy The Clock Tower.
Gain a Medal by earning Glory (track: 1, 2, 3, 4, 5 – Roll Over Extra):
- When you damage but do NOT destroy a tank: 1 for each Command card & Critical Hit rolled.
- Force a player out of bounds: 2
- Remove Tank Wreckage: 2
- When you damage but do NOT destroy The Clock Tower: 1 for each Critical Hit rolled.
Situation Report / End Phase
After all tanks have executed their Commands and the Combat Phase has completed, the End Phase begins. Follow these steps.
a) If the Vault has been revealed, use the Range Finder to see if any tanks are within Close Range of the Vault. They gain 1 Gold each – and the closest of them to the Vault earns an additional Gold.
b) Tanks may Crate Up (exchange) 3 Gold Bars for a Medal, once per Round. Keep any remaining Gold.
c) Check for Victory!
- If still in Regulation, with more colored tank Initiative cards still unrevealed, go back to step one and begin a new Round (even if a tank has 6 Medals).
- If all Regulation Initiative cards have been completed (the ones with colored tanks), check to see if any tanks have earned 6 Medals or more (or 9+ combined Medals per Team in a 2-player game). If so, the tank with the most Medals is the winner!
- If not, and no one has earned enough Medals, or if more than one player is tied for 6+ Medals, continue to the Total Carnage Round, flipping the Initiative card and beginning a new round.
NOTE: In the Total Carnage Rounds, replace one of the white Combat dice with the far more damaging, purple Carnage die. This becomes your primary die, especially when rolling one, and brings the end game to a head.
If tied for Initiative, only the tied tanks check the next tie-breaker.
Captains
Each player chooses a favorite Tank Captain card, or draws one randomly from the deck. Captains are the superstar celebrities of BOOM Patrol. Their unique tactics provide a strategic edge that may bend or break the standard rules.
"Boxy" – Capt. Robert Turtle, Hell's Shells
Boxy isn't an old-timer for nothing... he is a defensive specialist. Measure the forward movement with the short side of any card. For the rest of the round, all attacks upon Boxy are considered Long Range, doing the least possible damage.
Ability: Move one card width forward. All attacks on you this round are treated as Long Range. (Damage Captain's Orders)
"Payday" – Capt. Elliott Gold, Bull Market Marauders
Payday, the King of Bling, has a whole different strategy - and it is about amassing a lot of Gold to turn into Medals. He'll even help out an opponent, if you cut him in. Now make sure the Vault is opened up early to score some extra bars!
Ability: Gain a Gold. Your enemies may also gain a Gold. If they do, gain another for each. (Damage Captain's Orders)
"Crash" – Capt. Rosie Rhino, Charging Armored
Crash loves to Ram opponents! Use your Hold Up to aim your tank, then move forward TWO card lengths - the longest move in the game! If you are able to Ram, you'll get the best attack of two dice. But with Move Off rules, you might find yourself farther across the field than you planned!
Ability: Hold Up & Move Forward x2. If you crush a tank, roll as a Close Range attack. (Damage Captain's Orders)
"Red" – Capt. Felicia Fox, Sly Company
Red is downright sneaky. Put your Captain's Orders card next to her, because you never have to program it - just decide when you want to swap it into your Command row. No one is going to slip behind you EVER. Because you just spin around and advance on them. Also great for getting back in the action after a run across the field.
Ability: Instantly replace a card in the Command row with Captain's Orders. Turn your tank up to 180º then move one card length forward. (Damage Captain's Orders)
"Copycat" – Capt. Jonesy Ninelives, Crew Tomcat
Copycat is agile. Turning to face any direction is a huge advantage on the field. And, if you can figure out when your neighbor is likely to fire, you might just copycat your way into firing three times!!
Ability: Face your tank in any direction. You may copy the last card played by any enemy tank. (Damage Captain's Orders)
"Chompy" – Capt. Tiberious Rex, Thunder Lizards
Chompy doesn't need a tank to strike fear in his opponents. Range and Line of Sight still apply, but Chompy can take a big bite out of your Command deck at Close Range, 360º around his tank. Or if you are at Mid Range, that roar is gonna Rattle your crew! Tiberious intimidates and shuts opponents down.
Ability: Ignore firing arcs. Choose an enemy tank: Close Range: two Command cards; Mid Range: one Critical Hit.
Building Key
Gold Bar! (x4) – Gain 1 Gold Bar token.
Gold Bars! (x3) – Gain 2 Gold Bar tokens.
The Relic! (x1) – Gain the Relic token. The Relic is worth 1 Medal towards Victory. However, it can be stolen by the Magnet tile - or by any tank that Rams you.
Patch Job! (x2) – Gain a Patch Job token. Spend this token anytime on your turn. Roll the two white Combat dice and take the best die result. Remove a number of Crits and/or regain lost Command cards equal to the icons shown on the die.
Super Charge! (x2) – Gain a Super Charge token. Spend this token during the Battle Plan phase to set a 4th Command into your Command row. This Command is executed BEFORE Initiative is drawn.
Hazard! Glue Trap (x1) – A tank touching this tile cannot move again for the rest of the round. Instead, treat all movement-based Command cards as Fire Away! This is a permanent tile - but is discarded at the end of the round.
Minefield! (x2) – Hazard! If you revealed this tile by Crushing the Building, take 1 Critical Hit and place both of your Rattled cards into your hand (if available). If you revealed this tile by firing at the Building, all tanks within Long Range, including you, place one Rattled card into their hands.
Accelerator (x1) – This is a permanent tile & remains on the field the whole game. Move Off when touching it. Shots fired at it are rerouted. Use this tile's centerpoint as the new 360º firing position & recalculate Range. (Would have been Long Range. Recalculated to Short Range.)
Gear Up! (x4) – Draw 1 Gear card. If you already have a Gear card, choose one and discard the other. Gear adds to your tank's abilities and is permanent until the tank is destroyed.
Air Drop! (x2) – You may immediately relocate your tank to any open area on the field and may change your tank's facing to any direction. You may not land on or touch any object on the field. Your turret does not rotate.
Magnet! (x1) – Steal a Gold or The Relic from the nearest opponent's tank that has one. If none are available, gain 1 Gold from the token pool.
Mortar! (x2) – Choose an opponent anywhere in the arena. Ignore Range, Line of Sight and Firing Arcs. Roll 1 Combat die and assess the damage on the named opponent.
Intel! (x1) – Choose an opponent. Peek at an unused card from their hand. You may execute this Command immediately for yourself, OR you may force the card's owner to execute it instead.
Bunker (x3) – This is a permanent tile & remains on the field the whole game. A tank touching this tile gains an Ammo token then Moves Off. If shot at, it blocks the shot and is otherwise unaffected.
Once in your possession, Ammo tokens can be spent anytime during your turn as a free action. This allows the player to fire a shot at any target from the center point of any revealed Bunker on the field. Line of Sight is still in effect, and the Firing Arc is 360º around the Bunker. The target must be in Range of the ruler; however, ALL shots from a Bunker are considered Long Range, regardless of the actual distance. If you score Crits from a Bunker, gain 1 Medal. You do not have to be touching the Bunker to use Ammo.