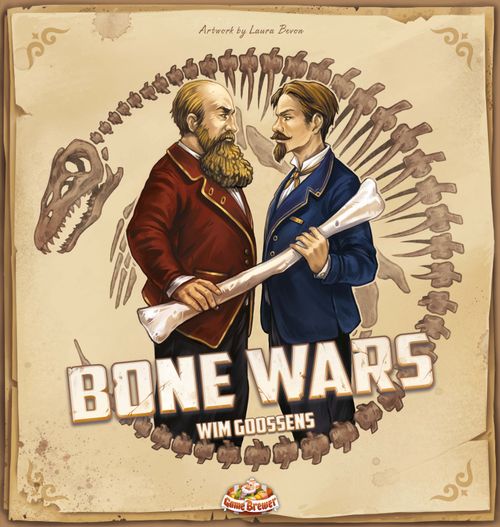
Bone Wars
Bone Wars Rulebook
Table of Contents
Table of Contents
Notes and Information
Note on Species Card Artwork
Some animals on the species cards are deliberately pictured wrong or outdated. This was intentional to better depict the way paleontologists in the late 1800s thought these animals looked. For example, we now know that many dinosaurs were much sleeker and covered in early feathers and the Uintatherium did not have a trunk and had different horns. Three especially fascinating cases are the stegosaurus, the elasmosaurus, and the dryptosaurus/laelaps.
The stegosaurus on the species card looks nowhere near the stegosaurus we are used to but is based on one of the first drawings made of the animal based on Marsh's initial description.
The elasmosaurus on the species card looks like how Cope first composed the fossilized skeleton. He put the skull on its tail and thought the long neck was its tail instead.
The artwork on the dryptosaurus and laelaps cards is intentionally identical. Laelaps was first described by Cope based on (what he thought was) a three-fingered forepaw (we now know that this dinosaur was a tyrannosaurid and only had two fingers on its forepaws). However, it was later discovered that laelaps was already the name of a mite genus, and Cope's rival Marsh renamed it dryptosaurus.
Main Players of the Bone Wars
Joseph Mellick Leidy (°1823 - †1891) — American paleontologist who described the hadrosaur was Cope's mentor but supposedly debunked Cope's elasmosaurus. Left paleontology because of the rivalry between Cope and Marsh.
William Harlow Reed (°1848 - †1915) — American fossil collector who collected for Marsh. Had to destroy a site for Marsh to prevent Cope from getting fossils.
Charles Sternberg (°1850 - †1943) — American paleontologist who worked with both Marsh and Cope.
William Parker Foulke (°1816 - †1865) — American geologist who discovered one of the first full dinosaur skeletons in North America (Hadrosaurus).
George Peabody (°1795 - †1864) — Marsh's uncle built the Peabody Museum of Science and left Marsh with a large inheritance.
John Wesley Powell (°1834 - †1902) — Head of the United States Geological Survey in 1881 who placed Marsh at the head of the consolidated government survey.
William Edwards Carlin (°1866 - †1928) — American fossil collector who first worked for Marsh, later for Cope.
Samuel Wendell Williston (°1852 - †1918) — American entomologist and paleontologist and former student of Marsh.
Arthur Lakes (°1844 - †1917) — American geologist who worked for both Marsh and Cope (increasing the animosity).
Oramel William Lucas (°1849 - †1935) — American naturalist who collected fossils for Cope.
Game Materials
1 Game Board.
4 Player Boards (torso, tail, skull, and limb sides).
48 Species Cards (front and back).
77 Bone Tokens:
- 15 torsos
- 15 tails
- 12 carnivore skulls
- 12 herbivore skulls
- 8 paws
- 7 flippers
- 6 claws
- 5 wings
20 Minor Find Tiles (4 each of fossils, bugs, footprints, hammers, and plants).
24 Paleontologist Cards (front and back).
2 "No Digging" Strips.
1 Round Marker.
1 Endgame Tile.
1 Bone Tile Bag.
14 Grant Tiles (front and back).
6 Dig Site Action Tiles (front and back).
8 Bonus Tiles (front and back).
32 Dollar Coins (24x and 8x denominations).
In each of the 4 player colors (Yellow, Red, Green, Blue):
18 Award Tiles (6x each of type A, B, and C).
45 Paper Tiles:
- 15 level 2
- 15 level 3
- 15 level 4
6 Team Cards (3 basic, 3 upgraded).
1 Player Aid.
3 Cover Tiles (front and back).
1 Patron Tile (front Marsh, back Cope).
10 Neutral Paper Tiles.
3 Specialists.
1 Team Marker.
46 Reputation Tokens (20x, 8x, and 18x denominations).
1 Paleontologist.
1 Profession Marker.
16 Upgraded Action Slot Tiles.
4 Base Camps.
3 Award Markers.
24 Solo Cards (12x basic, 6x advanced, 6x expert).
2 Loyalty Markers.
1 Grant Marker.
Game Setup
Note: Specific setup steps for 2-player games are marked in pink, and specific setup steps for 3-player games are marked in blue. As a general rule, all spaces marked for 3- and 4-player games are only used in a 3- and 4-player game, and spaces marked for 4-player games are only used in a 4 player game!
- Place the game board in the middle of the table.
- In a 2-player game, cover up the rows of the minor finds area marked for 3- and 4-player use with a "no digging"-strip. In a 3-player game, only cover up the row marked for 4-player use. In a 4-player game, you do not cover up any of the rows.
- Collect as many minor find tiles of each type as there are players. Shuffle these and randomly allocate 1 tile to each open spot in the minor finds area.
- Shuffle all 8 bonus tiles and randomly allocate 1 to each column of the minor finds area as well as every blank space on the round track (rounds 1, 2, and 3).
- Put the round marker on the first space of the round track (1877-1882).
- Collect 2 of each bone token and place these on their respective spot in rare bones display.
- Put the rest of the bone tokens in the bone bag.
- Fill all 6 dig sites by placing (a) a random species card, (b) a random dig site action tile, and (c) 3 bone tokens from the bag.
- Shuffle the paleontologist cards and place the deck next to the game board. Then draw 3 cards and place them in an open display next to the deck.
- Sort the awards in their respective piles (A, B, C). Shuffle each pile and randomly draw 1 tile from each pile to be used in this game and place them on the corresponding spots on the awards zone. The remaining tiles are discarded back into the box.
- Shuffle all grant tiles and randomly take 4 to be used in this game. Place the chosen grants on the universities. The leftover tiles are discarded back into the box.
- In a 2-player game, cover up the Bookshelf spots marked for 3- and 4-player use with neutral book tiles. In a 3-player game, only cover up the bookshelf spots marked for 4-player use. In a 4-player game, you do not cover up any of the bookshelf spots.
- Place all remaining components (dollar coins, species cards, paper tiles, upgraded action slot tiles, reputation tokens, and endgame tile) within easy reach of all players in a general supply.
The Game Board
Paleontologist actions — This is where you'll place your paleontologist to perform paleontologist actions (see Paleontologist Actions).
Awards zone — This is where you'll be able to claim awards during the game to score loyalty points (see 3. Claim an Award).
Rare Bones display — Certain actions will allow you to swap your bone tokens with the ones present in this zone (see 4. Exchange Rare Bone Tokens).
Minor Finds Area — This zone hosts the minor finds that you found during your excavations with your paleontologist (see 4. Make a Minor Find).
Round track — This track indicates the current round and current round bonus.
Universities — This is where you will start and end each round with your team (see Player Setup and B. Passing).
Bookshelf — This track is the heart of the game, it will allow you to publish papers under Cope or Marsh's name, and score loyalty points (see Loyalty).
Dig Sites — This is where you will travel with your team and perform team actions (see Team Actions).
Player Setup
- Every player takes a player board and all components of their chosen color.
- Place your Patron tile in the locket. For the time being, it doesn't matter which side you place face-up.
- Place the 3 cover tiles on the 6 rightmost crate spaces of your player board.
- Place your 4 base camp markers on their designated spaces.
- Take your 3 basic team cards in your hand.
- Place your specialist tiles and upgraded team action cards face down next to your player board in a reserve. You will need those later on, so make sure to keep them separate from the rest of your game components.
- Place your claim markers and player aid next to your player board.
- Place a loyalty marker on space "x0" of both loyalty tracks of the bookshelf.
- Each player draws 1 paleontologist card from the top of the deck, places it into their hand, and takes $5.
- Put your paleontologist, team, profession, and grant marker near at hand.
The Player Board
Archive — This is where you archive your species cards (see B. Archive your Species Card).
Crates — This is where you store your bone tokens (see Team Actions).
Locket — You store your Patron tile here to show your current allegiance.
Base Camp Spaces — Your base camps are stored here, and indicate how many species cards you can store, and how many movements your team meeple can make.
Action slots — This is where you will play your Team cards, Species cards and Paleontologist cards to perform actions.
Determining Player Order
Once the game and player setup are done, you must perform a few additional steps before the game can start.
-
Deal x+1 species cards (where x is the number of players) and place them next to the board within easy reach of all players. Then, randomly deal 2 bone tokens from the bone bag on top of each of the species cards.
-
Randomly determine a first player. Players must then, starting with the first player and continuing clockwise around the table, choose between two setup bundles: a. Take a species card (and place it in their hand) and the matching bone tokens from the offer, OR b. Choose a career path by: i. Placing their profession meeple on an available profession space in the left-most column and receiving the associated bonuses; ii. Placing their team marker on an available university space as well as their grant marker on the corresponding grant (see Grants' Abilities); iii. Once that is done, flipping their patron tile in their locket to match the university they start from.
In a 2-player game, both players are obliged to choose a different patron at the start of the game.
-
Then, in reverse order (starting with the player who chose last and continuing counterclockwise), everybody gets to choose another, but different setup bundle.
-
Discard the remaining species card from the offer and return the bone tiles on it to the bag.
-
When playing with less than 4 players, you must make the following adjustments: a. First, take the player pieces of the unused player color(s). These will represent your virtual opponent(s). b. In both a 2-player or 3-player game, place the 3 award markers of one virtual opponent on the places marked for virtual opponents on each of the 3 award tiles. c. In a 2-player game, place the base camp from the virtual opponents on each of the base camp spaces marked for 3- and 4-player use. In a 3-player game, only cover up the spaces marked for 4-player use. d. In a 2-player game, place the virtual opponent's team marker on the university space where the first team marker was placed. In a 3-player game, place the virtual opponent's team marker on the leftover empty university space.
-
The player whose profession meeple is now highest on the profession track now becomes the first player of the first round. Player order continues according to the position of the profession markers on the profession track (from top to bottom).
Gameplay
BONE WARS is a competitive game that is played over the course of 4 rounds, each divided into a variable number of turns.
During a player's turn, they either:
A. Perform an action by playing a card under their player board, or B. Pass and prepare for the next round.
Players can either play team cards, species cards, or paleontologist cards. The team cards trigger team actions, the paleontologist cards trigger paleontologist actions, and the species cards can trigger both types of actions.
Whenever a player can no longer (or chooses not to) perform actions, they pass and prepare for the next round by choosing a new profession, choosing their patron and grant for the next round, and potentially receiving loyalty bonuses from the university.
At the end of the 2nd round, players will perform a mid-game scoring. And at the end of the 4th round, players will perform a final scoring. The player with the most reputation points (RP) wins the game. In case of a tie, whoever has the most species cards in their archive wins the game. If there is still a tie, the player with the greatest cranial circumference wins the game (since according to 19th-century logic, a person with a larger brain was considered to be smarter than someone with a smaller brain).
Loyalty
Before we explain the actions more in detail, we want to explain an important game concept: loyalty. In the game, you will support the paleontological research of both Othniel Marsh and Edward Cope. When you start the game, you will either be under the patronage of Marsh or that of Cope (see Determining Player Order).
When you perform certain actions, you will gain loyalty points, which are indicated by the two columns on the left and right of the bookshelf on the game board. When your patron tile shows Marsh, you will advance your loyalty marker located on the left loyalty track, and when your patron tile shows Cope, you will advance your loyalty marker located on the right loyalty track. During the mid-game scoring and final scoring, you will earn reputation points (RP) depending on your position on BOTH loyalty tracks.
And this is where the subtle balance of the game comes into play. All players will help publish and debunk papers in favor of one or the other famous paleontologist. Publishing papers will result in paper tiles getting added to the bookshelf. Debunking papers will result in paper tiles switching sides. As the rows of the bookshelf start to fill up with paper tiles, your loyalty towards one or the other will start to earn you more or less RP than your opponents (see Mid-Game and Final Scoring).
The essence of the game is to help either Marsh or Cope in their research but also to switch allegiance to score more RP than your opponents during both scorings of the game. Every time you pass (but also through certain actions), you will be able to either stay loyal to your current patron or leave him to help his competitor.
A. Performing Actions
In player order, every player plays one of their hand cards in the leftmost open slot at the bottom of their player board. As a reminder, this can either be a team card, a species card, or a paleontologist card. Before a player can perform actions, they must pay the activation costs in Dollars. These are indicated on each action slot (and vary between $0 and $3) as well as on each team card (these also vary between $0 and $3). The player needs to pay all indicated costs to perform actions in their turn.
Example: In her third turn, Elisabeth wants to play a paleontologist card. The total activation costs for this are $3: $2 as indicated by the action slot and $1 as indicated on her paleontologist card. She pays $3 and performs a team action.
Once the activation costs are paid, you will either be able to perform one or more team actions or a paleontologist action, or either, depending on which type of card you played from your hand:
- Team Cards — Allows you to perform one or more team actions.
- Paleontologist Cards — Allows you to perform one paleontologist action.
- Species Cards — Allows you to perform either a paleontologist action OR one or more team actions.
Let's take a look at the different types of cards in more detail. They each give you practical information, which you must observe while playing the game:
Team Cards show the activation cost, the number of action points the card provides, the depth at which you can dig up bones, and the name of the card. Some team cards show a torn up picture, this means the card can receive a specialist.
Paleontologist Cards show the activation cost, a bonus action, the name of the paleontologist, and their year of birth and death.
Species Cards show the species' category (reptile, mammal, bird, amphibian), the author and year of discovery, a prize bonus, the name of the species, the monogram of the discoverer, the required bone tokens for assembly of the species' skeleton when performing the 'Publish a Paper' action, and the minor find icon (Bug, Footprint, Fossil, Hammer, Plant).
Important: Whenever you place a species card in an action slot that shows a minor find icon that matches the minor find on the species card itself, you receive the indicated prize bonus (see Prize Bonuses), either before or after performing actions.
Team Actions
Team actions can be performed by playing either a team card (basic or upgraded) or a species card from your hand. Both these types of cards give you a number of action points that you can spend as you please, and indicate how deep you can dig when you perform the team action "dig for bones" (see further).
Team cards directly show you how many action points you get, and how deep you can dig. In this example, you would get 3 action points and could dig up to level 1. With species cards, it works differently: it's the action slot where you place the card that decides how many action points you get, and how deep you can dig. In this example, you would get 2 action points and could dig up to level 3.
There are 6 different kinds of team actions. You can see all the team actions summarized on your player aid. You will be able to perform these based on the location of your team marker. There are 6 different dig sites where you can perform these team actions.
Before, after, or while spending action points, you are allowed to move your team marker a free number of steps as indicated on your player board. This is called your free move. You may ONLY move by following the arrows. At the start of each round, you must move your team marker to one of the two dig sites connected to the university you start from. You start the game with 1 free move but can upgrade this to 2 or 3 moves by setting up base camps (see next page). Once you have 2 or 3 free moves, you can even split these up between performing actions.
Important: You can only perform a team action at the dig site where your team marker is currently located! (with one exception, see action n°3.) This may force you to move your team marker in order to perform a team action, either by using up your free moves or by performing the "move your team" action. At the start of each turn, you must move your team marker to move from a university to a dig site.
1. Dig for Bones
(cost: 1 action point)
You may take one bone token from your current dig site. The team card/action slot you chose indicates from which depth you can take the bone token:
- You can only take the bone token in the topmost slot.
- You can take either the topmost or middle bone token.
- You can take any one bone token.
Note: if there are no bone tokens available in the slots you have access to, you cannot perform this action.
Place the bone token in an available crate on your player board. Each crate can only hold 1 bone token. If you don't have an available crate to store the bone token you can choose to discard a bone token of your choice by returning it to the bone bag.
Note: At the beginning of the game, you only have 4 crates available. But as the game progresses, you will be able to access more crates by removing the cover tiles that cover up some crates through the "remove cover tile" action, as explained on page 19.
2. Discover
(cost: 2 action points)
You may take the species card from your current dig site and place it into your hand. Note that if there is no card available in your current dig site, you cannot perform this action.
Example: Nello decides to play a team card. He has to pay $4 ($3 for the card itself and $1 for the action slot). He has 3 team action points, but can only dig down to level 1. He has 3 'free moves', and first decides to move from Montana to Wyoming. He spends 1 action point, performs the 'Dig for Bones' action and takes the topmost bone token, and stores it on his player board. He then spends one more remaining 'free move' to move to Colorado and spend his 2 final action points to perform a 'Discover' action and takes the local species card into his hand. He has one 'free move' left but decides to forfeit it.
3. Dig Site Action
(cost: 1 action point)
You can perform the action shown on the dig site action tile, either in the dig site where your team marker is located or in any dig site that contains one of your base camps. All dig site actions are listed on page 26 (see Dig Site Actions in the Appendix).
4. Establish Base Camp
(cost: 1 action point)
You choose 1 base camp from your player board and place it on a free space in your current dig site. Note that you cannot establish a base camp in a dig site where you already have a base camp.
Established base camps do 2 things:
- When performing a dig site action, you can choose to perform a dig site action where you have established a base camp, on top of your current dig site.
- They unlock bonuses on your player board: either extra movement for your team marker or extra capacity for your archive (see B. Archive your Species Card).
5. Dig Deeper
(cost: 1 action point)
Remove all bone tokens and species cards from your current dig site and refill all bone token and species card spots.
6. Move your Team
(cost: 1 action point)
If your team's free move is spent, you can use action points to move your team marker. Each extra move costs 1 action point.
Paleontologist Actions
Paleontologist actions can be performed by playing either a paleontologist card or a species card from your hand. Both these types of cards will allow you to perform one of the four paleontologist actions on the game board. The paleontologist cards, however, will allow you to enjoy a specific bonus when you play the associated paleontologist action (see Paleontologist Cards for a full list of the paleontologist bonuses).
Paleontologist cards will give you certain bonuses IF you perform the matching paleontologist action as depicted on the bottom half of the card. Species cards simply allow you to perform one paleontologist action, without any specific bonus.
There are 4 different kinds of paleontologist actions. You can see all the paleontologist actions depicted on the game board. You will be able to perform these based on the location of your Paleontologist. Every time you want to perform a paleontologist action, you must move your Paleontologist to another paleontologist action location (which is symbolized by the paper notes at the top of the game board).
The first two actions can be performed multiple times in your turn, whereas the last two can only be performed once per turn.
1. Publish a Paper
You may publish one or more papers by playing one or more species cards from your hand. For each paper you want to publish, you have to perform the following steps:
A. Discard Bone Tokens
Discard 2, 3, or 4 different bone tokens from your crates to the bone bag to assemble the skeleton of the dinosaur depicted on your species card.
Each species' skeleton consists of 4 different parts:
- Torso: These are generic and each torso bone token can be used to assemble the skeleton of any species card.
- Tail: These are generic and each tail bone token can be used to assemble the skeleton of any species card.
- Skull: Your species card will require you to pay either a carnivore or herbivore bone token. Note that some species cards allow you to use either type of skull token.
- Limb: Your species card will require you to pay either a paw, flipper, claw, or wing bone token. Note that some species cards allow you to use either type of limb token.
Based on how complete your skeleton is, you will earn certain bonuses:
- With 2 different bone tokens, you get 1 loyalty.
- With 3 different bone tokens, you get 1 loyalty. You also get the prize bonus depicted on the species card.
- With 4 different bone tokens, you get 2 loyalty. You also get the prize bonus depicted on the species card, as well as the current round bonus (see Mid-Game and Final Scoring).
Note: You have to play all species cards you want to publish and allocate bone tokens to each species card before you receive any rewards or bonuses from performing this action. Once all bone tokens have been paid, you can resolve the bonuses gained in any order you see fit.
Note: The species cards you use all have the name and monogram of a paleontologist on them. But this is totally unrelated to your current patron.
B. Archive your Species Card
Next, slide each species card into your archive, in the envelope whose icon corresponds to the minor find photograph on the species card. You receive the indicated bonus of the envelope as many times as the number of cards now present in that archive envelope.
Note: Each archive envelope can only hold a certain number of species cards, as indicated on your player board. At the beginning of the game, you may only archive 1 species card per envelope, but as you establish more base camps, you will be able to archive 2, or even 3 species cards per envelope.
C. Add a Paper to the Bookshelf
Finally, for each paper you publish, you will add one paper tile to the bookshelf, on the side of the bookshelf matching your current patron (Cope or Marsh). The amount of different bone tokens you discard determines the value of the paper tile you add to the bookshelf. For example: If you discarded 3 different bone tokens, you get to add a value-3 paper to the bookshelf of your current patron.
If the bookshelf ever were to get full, store excess paper tiles in the topmost shelf underneath the patron's portrait.
Example: Ellen decides to play a paleontologist card. Her current patron is Edward Cope. She pays a $1 fee and moves her paleontologist to the "Publish a Paper" section. She decides to publish 2 papers, one about the Ichtyornis and one about the Archaeotherium. For the Ichtyornis, she discards 1 carnivore skull and 1 wing bone token from her crates. For the Archaeotherium, she discards 1 torso, 1 herbivore skull (she could have also discarded a carnivore skull but didn't have one), and 1 paw bone token from her crates. As a reward, she receives 1 loyalty for the 2 bone tokens she used for the paper regarding the Ichtyornis. But she decides to use the bonus from her paleontologist card and receives one more loyalty since she used 3 bone tokens or less. She receives another loyalty for her paper about the Archaeotherium, and also gets the prize bonus from her species card. In this case, she gets to draw 2 bone tokens from the bone bag. Next, she archives both species cards. She gets $2 from archiving the Archaeotherium, and 2 species cards from archiving the Ichtyornis (since it's the second card in that archive). Finally, she adds one value-2 and one value-3 paper token on Cope's side of the bookshelf.
2. Debunk a Paper
You may debunk one or more papers by discarding sets of identical bone tokens from your crates. For each paper you want to debunk, you have to perform the following steps:
A. Discard Bone Tokens
Discard 2, 3, or 4 identical bone tokens from your crates to the bone bag to debunk a published paper from your current patron's opponent.
Based on how many bone tokens you discard, you will earn certain bonuses:
- With 2 identical bone tokens, you get 1 loyalty.
- With 3 identical bone tokens, you get 2 loyalty.
- With 4 identical bone tokens, you get 4 loyalty.
B. Flip a Paper Tile
For each set of identical bone tokens you discard, you take a paper token whose value matches the number of bone tokens you discarded from your current patron's opponent's side, flip it to its other side, and move it to your current patron's side of the bookshelf.
Important: You may only debunk a paper if you can discard the exact amount of identical bone tokens that match the value of the paper you are trying to debunk.
Once you are done, you must slide down any paper tiles on the opposite side to fill up any gaps left.
Example: Robert plays a species card and decides to perform the 'Debunk a Paper' action. Since the action slot matches his species card's minor find, he unlocks the prize bonus and removes one cover tile from his player board. This also grants him $2 or 1 RP, and he decides to get $2. Robert's current patron is Marsh. He now discards his 3 torso bone tokens, which earns him 2 loyalty. He takes a value-3 book from Cope's side, flips it to its red side, and places it on the first available spot on Marsh's side of the bookshelf. He still has 2 identical bone tokens left in his crates, but there isn't a single value-2 paper published on Cope's side, so he cannot debunk another paper. Finally, he slides down the value-4 paper on Cope's side to fill the newly-created gap.
3. Claim an Award
You may claim one award with this action, by placing one of your available award markers on a free space on the award you want to claim (each space can only be occupied by a single award marker). You can only place your award marker on a space if you have met or exceeded the indicated condition. Note that you can only have 1 claim marker on each of the 3 award tiles. Once you place your award marker, you immediately score any loyalty depicted next to your award marker. There are 3 kinds of award tiles:
- Type A: You must have a number of species cards in your archive that were discovered by the indicated paleontologist (Marsh, Cope, or Leidy).
- Type B: You must have a number of species cards of the indicated type (reptile, mammal, bird).
- Type C: You must have a number of species cards in the indicated archive envelope (A, B, C, D, or E).
Note: Species cards with an Amphibian icon count as any type of species card for the B-awards.
On top of the loyalty reward, you also gain the current round bonus (meaning the bonus depicted on the bonus tile next to the round marker).
Example: Nello plays a paleontologist card and decides to claim an award. He has 3 reptiles, 1 bird, and 1 amphibian in his archive. Since he meets the requirements of the bottom spot (the amphibian counts as wild and can take on the role of a bird), he places his award marker and earns 4 loyalty. He also gains the current round bonus, which earns him 3 bone tokens from the bag.
4. Make a Minor Find
You may make one minor find by choosing a species card from your hand that you wish to place in your archive. Same as with the 'Publish a Paper' action, you must slide the species card into your archive, in the envelope whose icon corresponds to the minor find photograph on the species card (don't forget to respect your archive limit, though!). You receive the indicated bonus of the envelope as many times as the number of cards now present in that archive envelope.
Next, you must choose an available minor find tile from the minor finds area that corresponds to the minor find icon on the chosen species card. Take the matching tile and remove it from the game.
Important: If there is no matching minor find tile available, you may not perform this action.
Finally, gain the bonus depicted on the bonus tile placed in the same column as the removed tile.
Example: Elisabeth wants to make a minor find. She decides to archive her Ornithomimus. The card shows a "hammer" minor find, so she slides it in the "hammer" archive envelope and receives 2 reputation points (since it's the second species card archived in this envelope). She then takes a "hammer" minor find token from the minor find area, discards it, and then receives the matching bonus. She receives 2 rare bone tokens, and places them in her crates on her player board.
Other Actions and Bonuses
On top of the main team and paleontologist actions, there are other actions and bonuses you will get throughout the game by performing various actions. You will find them on dig sites, on bonus tiles, on your archive, as prize bonuses, on the professions track, and so on.
Numbers and Indications
Before we dive into this overview, we want to explain the significance of the numbers you may see next to some icons in different colors:
- If there is no number, it means you receive ONE of the indicated item.
- If there is a green number, it means you RECEIVE the indicated amount.
- If there is a red number, it means you need to PAY the indicated amount.
- If there is a black number, it means you need to OWN the indicated amount.
1. Receive Money
You receive the indicated amount of Dollar coins. Dollars are used to pay the activation costs of your various cards.
2. Receive Bone Tokens from the Bag
You receive the indicated amount of bone tokens from the bag, drawn at random, and place them in your crates. If you don't have enough room in your crates, you may always discard bone tokens of your choice from your crates to make room for the new ones or discard the ones you just drew.
3. Receive Rare Bone Tokens
You receive the indicated amount of rare bone tokens from the rare bones display, and place them in your crates.
4. Exchange Rare Bone Tokens
You may exchange one of your bone tokens from your crates with one from the rare bones display.
5. Swap Patron
You may immediately flip your patron token to change allegiance. This means all actions that are influenced by your patron are now in favor of your new patron.
6. Remove your Paleontologist
You may take back your paleontologist. This means that you can – before performing next paleontologist action – place your paleontologist in a paleontologist action field of your choice, including the one you just left.
7. Draw and Keep Species Cards
You may look at the top 3 cards of the species card deck, and keep one. Return the other cards to the discard pile.
8. Draw a Species Card
You draw the top card of the species card deck and add it to your hand. If the draw deck ever runs out, shuffle back all species cards from the discard pile to form a new draw deck.
9. Draw a Paleontologist Card
You draw one of the 3 face-up paleontologist cards, and add it to your hand. If you get to draw more than 1 paleontologist card, immediately refill the display to make sure there are always 3 cards in the display. If the draw deck ever runs out, shuffle back all paleontologist cards from the discard pile to form a new draw deck.
10. Perform Dig Site Actions
You may perform the indicated amount of dig site actions. You may perform the same dig site action more than once. You may perform any of the 6 dig site actions this way; you are not restricted to the dig site actions of your current dig site or the one(s) where you established a base camp.
11. Get Loyalty
You advance the indicated number of steps on the loyalty track of your current patron. If you ever reach the topmost spot of a loyalty track, every time you gain loyalty from that patron, you receive 1 RP for each loyalty over the limit.
12. Move an Archived Species Card
You may move an archived species card to another envelope of your choice. If you do so, you get the envelope bonus once.
Example: Nello unlocks the prize bonus of his species card by placing it in the matching action slot. He decides to move his Hadrosaurus to his first archive envelope. He gains $2 (and not $4 since he only gets the envelope bonus once).
13. Upgrade an Action Slot
You receive an upgraded action slot tile, and you place it either:
- Over one of your existing action slots, OR
- Next to your player board, as indicated at the right edge of your player board.
These tiles will help you improve your action slots, or even increase the amount of action slots that are available to you each turn. These can offer you a significant advantage throughout the game.
14. Remove a Cover Tile
You remove a cover tile on your player board and discard it from the game. This will allow you to store more bone tokens during the game.
Every time you remove a cover token, you also get a bonus of either $2 or 1 RP. You also get this bonus each time you are allowed to remove a cover tile but have none left on your player board.
15. Upgrade a Team Card
You receive an upgrade to your team cards. This gives you one of two options:
A. Replace one of your basic team cards — You choose one of your basic team cards, discard it from the game, and take an advanced team card of your choice from your reserve. These advanced cards all offer better stats than their basic counterparts.
A. Hire a specialist — You choose one of your specialists from your reserve. These specialists can be placed on any team card that shows a torn-up picture when you place them under an action slot. Each of them offers a specific bonus:
- Miner: You may move an archived species card.
- Sketch artist: You gain the current round bonus.
- Ichnologist: You receive a paleontologist card.
B. Passing
Once you decide to pass, you immediately perform the end-of-round sequence, as indicated on your player board:
-
Choose Profession: You must move your profession meeple to a new (and available) profession space in a different row and column. You immediately take all associated bonuses.
-
Return Team: Your team meeple must be placed on an available university space. You also flip your portrait tile to the patron corresponding to the location of your team meeple (if necessary).
Important: when playing with fewer than 4 players, the first player to pass moves the neutral team to the next university space in numerical order (so from 1 to 2, 2 to 3, 3 to 4, and from 4 to 1) BEFORE returning their own team.
-
Claim Grants: You place your grant marker to the grant tile associated with your chosen university space (unless you chose the same university place, in that case, you simply leave your grant marker in its place).
-
Gain Loyalty Bonus: Depending on your position on the loyalty track of your current patron, you gain the loyalty bonus(es) (1 loyalty and/or $1) indicated on or above your loyalty marker on the loyalty track. Once you pass these spaces on the loyalty track, you do not gain this bonus anymore.
Note: In the final round of the game, when you decide to pass, only perform step 1 ('Choose Profession').
Example: Robert decides to pass, and moves his profession marker on the profession track. He receives a Team card upgrade, $2 and 1 paleontologist card. For the team card upgrade, he decides to unlock the miner and places him face-up close to his player board. Next, since it's a 3-player game, he moves the neutral team marker from space 2 to space 3. He then decides to place his team marker on space 1. He changes allegiance, and since Marsh is his new patron, he flips his portrait tile to the 'Marsh' side. Robert now claims a new grant and moves his grant marker on the new grant right above his team marker which will offer him a new ability for the next round. Finally, he gains his loyalty bonus. Since Robert is still below both bonus icons, he gains 1 loyalty and $1.
Resetting the Board
Once all players have passed, the round is finished and the board is reset for the next round.
- Push all remaining bone tokens upwards in each of the dig sites and replenish each empty spot (if needed).
- Remove all the species cards from the dig sites and deal a new species card to each dig site.
- Players take back their played team cards into their hand but discard all played species and paleontologist cards. Discarded cards go back into their respective discard piles.
- Move the round marker to the next round. If it reaches the 3rd round, a mid-game scoring is triggered (see below). If it reaches the 4th round, place the endgame tile as indicated. When you pass in round 4, you will gain loyalty instead of normal profession bonuses. In a 2-player game, you cannot use the spaces marked for 3- and 4-player use. In a 3-player game, you ignore the space marked for 4-player use.
The player order for the following round changes based on the new order on the profession track (from top to bottom).
Mid-Game and Final Scoring
At the end of the 2nd round, players perform a mid-game scoring (when the round marker is moved to the third round, there is a visual reminder to hold this scoring). Players will now score RP based on their progress on both loyalty tracks.
To score the bookshelf, establish the credibility of each patron. Every shelf with at least 1 paper is worth 1 credibility (except for the smaller shelf directly underneath each portrait). Note that in both a 2-player and a 3-player game, you ignore the neutral paper tiles. Only the coloured paper tiles (blue and red) are taken into account.
For each patron, each player now multiplies the position of their loyalty marker with the credibility of that patron, and gains as many RP tokens. Next to each loyalty track, you will find multiplication reminders to help you calculate your score, which varies between 0 and 7.
Example: It's time for final scoring. Marsh has 2 credibility, and Cope has 4. Robert scores 6 RP for his position on Marsh's loyalty track (2 credibility x 3) and 20 RP for his position on Cope's loyalty track (4 credibility x 5).
At the end of the 4th round, there is no need to reset the board. Instead, proceed to the end game scoring. Score the bookcase again as described above. Add up the value of all your reputation tokens to calculate your final score.
Whoever has the most reputation points wins the game. In case of a tie, whoever has the most species cards in their archive wins. If there is still a tie, the player with the greatest cranial circumference wins the game (that player has the largest brain and thus, is the smartest).
Solo Mode
You have been digging for days in the blistering sun. The sweat dripping from your forehead is turning the sand around you into mud. The whole horizon looks like one big blur and the desert bugs are making so much noise you have a hard time thinking straight. Time for a break. As you take a sip from your gourd, you hear that damn snake of Theodore exclaim: "FOUND IT!". You sigh. This is gonna be a tough day …
Setup
Set up the game for 2 players, choosing an unused color for Theodore. Instead of giving Theodore a set of 3 basic team cards, he receives his set of 12 basic solo action cards instead. Shuffle these and place the deck face down next to Theodore's player board.
Shuffle the 6 upgraded solo action cards and place them to the side for now. (For a more challenging game, you can take the 6 expert solo action cards instead of the advanced solo action cards.)
Both you and Theodore choose a setup bundle in the following order:
- Theodore chooses a species card/bone tokens according to this order: a. A species card that is needed for an award (in order A-B-C) b. A species card that can be placed in the right-most archive slot c. The first species card in alphabetical order
- You choose a species card/bone tokens.
- You choose a career path.
- Theodore chooses a profession and the starting location of his team. He always chooses the highest possible profession available to him, and will always let his team start at the other university, on the highest numbered space.
Rules Changes
Theodore:
- Gains bone tokens as normal, placing them in his crates if able. If a bone token cannot be placed due to space limitations, remove a lid token automatically but do not give Theodore a bonus. If all of his crates are full, he will remove bone tokens if this would let him gain more different bone tokens. If not, he does not gain a bone token. All skull tokens and limb tokens are the same to him (respectively).
- Can remove cover tiles. If Theodore has less than $5, he will choose to take $2. Otherwise, he will take a reputation token.
- Gains species cards as normal.
- Gains paleontologist cards as normal (always from the top of the deck). If Theodore performs a paleontologist action and he has a paleontologist card that corresponds to that action, he discards the card and gains 1 loyalty (instead of the normal bonus).
- Gains rare bone tokens as normal. He always takes the type that is the least available. In the case of a tie, he claims in this order: skull (any), limbs (any), ribs, tail.
- Can upgrade his cards. If he may perform an upgrade, he takes the top-most standard solo action card from his deck and replaces it with the top-most advanced solo action card. Remove the replaced standard solo action card from the game.
- Can reclassify species cards in his archive. If Theodore may perform an archive reclassification, he will always switch a card from the left-most slot to the right-most available slot. If all slots are filled, he foregoes this action.
- Gains upgraded action slots as normal. He uses them in this order: cover $3 slot, create extra action slot, cover $2 slot, create extra action slot, … He will never place it on top of an action slot that already costs $1.
- Gains money and reputation tokens as normal.
- Can use the bonus from his grant as normal. If he has the choice to take any era bonus, he always chooses to gain 1 loyalty. If he can choose a museum bonus instead of the era bonus, he always chooses the era bonus anyway.
Theodore's Turn
During his turn, Theodore flips the top solo action card of his deck and adds it to his action row below his player board in the leftmost open slot.
This is his current solo card. The card that now sits on top of the deck is called the next card. Theodore only needs to pay the cost of the slot, as his solo action cards have no cost on him.
Depending on the colour and icon on the back of the next card of this draw deck (paleontologist or team), he now performs either the top half (paleontologist, purple) or bottom half (team, green) of the drawn solo action card. If the card shows the team icon, there are 2 possible scenarios:
- Theodore has a species card whose minor find icon corresponds to the action slot's minor find in which he placed his solo action card, he gains that species card's prize bonus and discards the species card. Then, he performs team actions based on the values indicated on the current action slot.
- If he does not have a corresponding species card, he performs team actions according to the values indicated on the back of the next card of his draw deck.
Start with the first action shown on the card. If Theodore cannot perform this action, follow the arrow to the next action, and so on, until he spends all of his action points.
Example: You draw the top card from Theodore's deck and place it in the leftmost available folder action slot. The current topmost card shows a team action backside. You check and see that Theodore doesn't have a species card showing an Amber symbol so you check his next card, and see that he gets 1 action point and can dig up to level 1. He must now first take a 'Discover' action, but he doesn't have enough action points for that. So you follow the arrows and see he now has to establish a base camp.
Upgraded Solo Action Cards
If the back of the next card shows one of more of these actions, please perform the following steps:
- Theodore takes back his paleontologist meeple before performing his paleontologist action.
- Theodore gains the indicated amount of loyalty from the rival patron (so the patron he is NOT currently supporting).
If the back of the current card shows one of more of these actions, please perform the following steps:
- This indicates that Theodore will perform the paleontologist action loop twice.
- Theodore performs a 'Move an Archived Species Card' action before performing any team actions.
- Theodore gains the current round bonus before performing any team actions.
- Theodore gains a paleontologist card before performing any team actions.
Passing
Theodore will play a number of solo action cards equal to the number of slots at his disposal (5 to start with, but +1 for extra action slots he acquired) or until he cannot pay for an action slot – whichever happens first. Then, he will pass.
- Profession: Theodore always chooses the highest possible profession available to him (following the same rules as normal players) that is still useful – for example: should he have all his upgrade cards, he will not choose the second profession anymore. Same goes for the end of the game. In addition, Theodore will always gain 1 species card from the top of the deck.
- Team: Theodore's team marker will go back to a university according to these criteria:
- The side with the most published papers
- The same side as his current patron
- The highest-numbered university spot
- A free spot
- Discard all played solo action cards. If the deck runs out, shuffle the discard pile and form a new deck.
Team Actions (Solo)
Each solo action card depicts the number of team actions, the digging level at which these can be performed and in which direction the team moves if needed.
Excavate — Take the species card from the region where Theodore's team marker is located. For Theodore, this only costs 1 action point.
Dig — Take the bottom-most bone token available to Theodore's team.
Base Camp — Place a base camp in the region Theodore's team is located. He will place base camps in this order: movement, archive limit, movement, archive limit.
Move — Move Theodore's team one step in the direction shown on the solo action card. Theodore will use his free movement first and will then pay with action points. Theodore will always use up all his movement points.
Dig Site Actions — When Theodore has to perform dig site actions, do not look at his base camps. Instead, look at Theodore's next card for the dig site action order (they are all the same). Theodore will perform dig site actions in this order, performing each option as often as possible AND as allowed to, before moving on to the next. Note that switching patron and removing his paleontologist are only possible once.
Paleontologist Actions (Solo)
Note that Theodore is bound by (mostly) the same rules as a normal player. This means that he cannot perform a paleontologist action his paleontologist meeple is standing on at the start of his turn.
If Theodore cannot perform any of the depicted paleontologist actions, the action card will guide him to the team action half of the card. He will then perform actions with his team according to the action slot the current card is in and the team actions depicted on the card.
Publish a Paper — This action cannot be performed if Theodore's archive slots are full. If performing this action, follow these steps:
- Choose a species card available to Theodore (in the following order): a. A species card that is needed for an award, in order A-B-C. b. A species card that can be placed in the right-most available archive slot. c. The first species card in alphabetical order. d. Pay 2-4 different bone tokens – as many as possible (Theodore does not need to match the depicted skull or limbs, but each skull and limb token counts as the same token (respectively)).
- Theodore gains the benefits of publishing just like a normal player.
- Theodore will publish as many species cards as possible.
Debunk a Paper — Just like a normal player, but each skull and each limb token counts as the same token (respectively) to pay the same kind of bone tokens. Theodore will always debunk the highest possible papers first. Theodore will debunk as many times as possible.
Claim an Award — Theodore claims the award for which he gains the most loyalty AND is available to him. Otherwise from A to B to C. He will only claim an award if he can at least claim the second row. He gains the Era bonus as normal.
Make a Minor Find — This action cannot be performed if Theodore's archive slots are full. When performing this action, follow these steps:
- Choose a species card available to Theodore (in the following order): a. A species card that is needed for an award (in order A-B-C) b. A species card that can be placed in the right-most available archive slot c. The first species card in alphabetical order
- Choose a museum token from left to right that is available AND corresponds to a species card Theodore has.
- Theodore gains the benefits of donating just like a normal player.
End of Game
In case of a tie, Theodore has a head circumference of 56 cm.
Appendix
Paleontologist Cards
Arthur Lakes: When performing the 'Claim an Award' action, you can choose to gain loyalty with any patron (and even divide the gained loyalty between the two).
Oramel W. Lucas: When performing the 'Claim an Award' action, you can place your award token on an occupied space (but are still restricted to 1 claim token per player per award tile).
Charles Sternberg: When performing the 'Debunk a Paper' action, you can choose to gain loyalty with any patron (and even divide the gained loyalty between the two).
Othniel C. Marsh: When performing the 'Publish a Paper' action, you can use one bone token as a bone token of any type.
Edward D. Cope: When performing the 'Claim an Award' action, you can choose to gain a round bonus of your choice.
Samuel W. Williston: When performing the 'Publish a Paper' action with 3 or fewer bone tokens, you gain 1 extra loyalty.
George Peabody: When performing the 'Make a Minor Find' action, you can choose a space where the minor find tile has already been taken (and consequentially you do not take a minor find tile) and still get the associated bonus.
William E. Carlin: When performing the 'Publish a Paper' action, you can choose to gain loyalty with any patron (and even divide the gained loyalty between the two).
John Wesley Powell: When performing the 'Make a Minor Find' action, you can archive your species card into an envelope of your choice.
William H. Reed: When performing the 'Debunk a Paper' action with 3 or fewer bone tokens, you gain 1 extra loyalty.
Joseph Leidy: When performing the 'Debunk a Paper' action, you can use one bone token as a bone token of any type.
William Parker Foulke: When performing the 'Make a Minor Find' action, you can take any available minor find tile. You gain the bonus of the column of the chosen minor find tile.
Dig Site Actions
- You may flip your portrait tile.
- Discard 1 species card from your hand to look at the top 3 species cards. Choose 1 to keep and discard the other 2.
- You gain $1.
- Draw 1 bone token from the bag.
- Exchange 1 bone token from your crates with 1 rare bone token.
- Remove your paleontologist meeple from the game board. This means that you can move it to any paleontologist action spot during your next paleontologist action.
Prize Bonuses
- You gain $3.
- You may draw up to 2 bone tokens from the bag.
- You may remove 1 cover tile from your player board. You receive $2 or 1 RP.
- You may upgrade 1 basic team card to an advanced team card, or you may take 1 specialist tile.
- You may move 1 archived species card.
- You perform up to 3 dig site actions of your choice, identical or different. You may perform any of the 6 dig site actions this way; you are not restricted to the dig site actions of your current dig site or the one(s) where you established a base camp.
Bonus Tiles
- You receive up to 2 rare bone tokens.
- Draw 3 species cards and choose 1 to keep. Discard the other 2.
- You may upgrade 1 basic team card to an advanced team card, or you may take 1 specialist tile.
- You may draw up to 3 bone tokens from the bag.
- You gain $3.
- You receive 1 upgraded action slot tile.
- You remove 1 cover tile from your player board. You receive $2 or 1 RP.
- You perform up to 3 dig site actions of your choice, identical or different. You may perform any of the 6 dig site actions this way; you are not restricted to the dig site actions of your current dig site or the one(s) where you established a base camp.
- You gain 1 loyalty with your current patron.
Grants' Abilities
- The hammer small find icon counts as any small find icon.
- The footprint small find icon counts as any small find icon.
- The bug small find icon counts as any small find icon.
- The fossil small find icon counts as any small find icon.
- The plant small find icon counts as any small find icon.
- Each time you draw bone tokens from the bag, you can draw 1 extra to choose from. After choosing, place 1 bone token back in the bag.
- Your team can use up to 2 extra free moves.
- If you perform the 'Make a Minor Find' action, you can choose to gain the round bonus instead of the usual small find bonus.
- If you perform the 'Publish a Paper' action with 4 bone tokens, you can choose to gain a round bonus of your choice instead of the current round bonus.
- If you perform the 'Debunk a Paper' action, you can choose to gain 1 loyalty less to also gain a round bonus of your choice.
- When performing a paleontologist action, you do not have to move to a different action space.
- When you gain a round bonus, you can choose to gain any small finds bonus instead.
- Each time you move your team marker to a dig site containing another player's team marker, or if another player moves their team marker to a dig site containing your team marker, you gain $1.
- When you Move an Archived Species Card, you receive all the envelope bonuses, instead of only once (as if you had placed the card there for the first time).
Iconography
Move, Take Back, Move Paleontologist, Exchange, Repeat/Flip, Clockwise, Counterclockwise, Take, Look At, Perform/Confirm, Discard/Remove, Species Card, Paleontologist Card, Team Card, Loyalty, Reputation Point — general action and card icons.
Bone Token, Rare Bone Token, Bone Bag, Reptile, Mammal, Bird, Amphibian, Bug Minor Find, Footprint Minor Find, Fossil Minor Find, Hammer Minor Find, Plant Minor Find, Prize Bonus, Dollars, Cover Tile — resource and card-detail icons.
Team Marker, Paleontologist, Loyalty Marker, Award Marker, Team Action (with topmost/topmost-or-middle/any bone token depth icons), Dig Site Action, Paleontologist Action, Marsh's Paper Tile, Cope's Paper Tile — board-marker icons.
Archive, Single Archive Envelope, Minor Find, Minor Find Bonus, Current Round's Bonus, Grant, Grant Marker, University, Publish a Paper, Debunk a Paper, Claim an Award, Make a Minor Find, Upgrade Team Card, Upgrade Action Slot, Loyalty Toward Rival — archive and action icons.
Edward D. Cope, Othniel C. Marsh, Joseph M. Leidy — the three historical paleontologist icons used throughout the game.