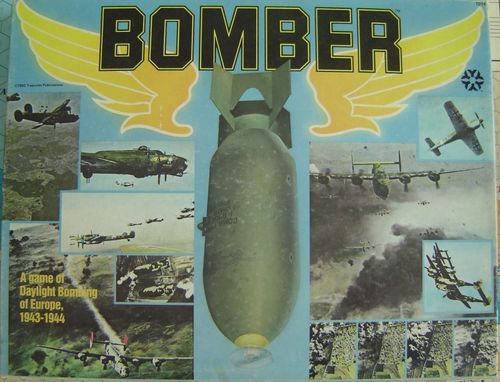
Bomber: A Game of Daylight Bombing of Europe, 1943-1944
Bomber: A Game of Daylight Bombing of Europe, 1943-1944 Rulebook
Table of Contents
Table of Contents
- Introduction to the Game
- Set Up and Preparation for Play
- The Basic Game Rules
- VIII. The Basic Game Sequence of Play
- IX. General Game Procedures and Rules
- X. The Plane Readiness Phase
- XI. The Initiative Roll Phase
- XII. The Movement Phases - How to Move
- XIII. The Combat Phases - How to Have Combat
- XIV. The Turn Record Phase and Ending the Game
- XV. The Victory Conditions - How to Win
- The Introductory Game
Introduction to the Game
I. General Introduction
BOMBER recreates, in game form, the most decisive air battles fought over Europe during World War II. The period covered, from the middle of 1943 to early 1944, was the time when the issue was in doubt - when the United States Army Air Force and the German Luftwaffe matched their strengths in the daylight skies over occupied Europe. The game covers the major plane types used in the actual battles, and all the key elements of the actual events. Although based on history, the game is not necessarily bound to the historical course of events. The players take command at certain points in time, and their actions and decisions will determine the results of each game.
BOMBER is basically a two-player game, although multiple subordinate commanders can be used on both sides. Information is provided in these rules for setting up a number of different situations ("scenarios"), to provide a great variety of games that can be played using the same rules.
At first glance, these rules may seem formidably long and complex, but their bulk is deceptive. The rules do not need to be memorized, only carefully and thoroughly read. The most commonly used information is given on the Game Cards, but where rule reference is made to something on the Game Cards, check one of the Game Cards to find the section and familiarize yourself with its location and uses. After the first reading, the rules should be used as reference for questions that arise during the playing of a game - a Table of Contents is included for ease in locating needed rules. The rules do not have to be learned at one sitting. Games can and should be played using only the Basic Game Rules, with selected Optional Rules introduced as the player's mastery of the game increases.
II. Game Scales
Each hex on the mapboard is roughly forty miles across. Each Strength Point represents 8 to 12 (average 10) planes in flying condition. Each Turn represents one half hour of actual time.
III. Game Components
The following components are used for play of the game. Please inspect these components carefully, and familiarize yourself with them while reading through this section.
A. MAPBOARD: The mapboard shows the areas of Europe over which the historical air battles were fought. A hexagonal grid has been superimposed on the map to regulate movement, and to allow for the precise positioning of the playing pieces. Individual hexagons are called "hexes". Each hex contains a four-digit identification code as its individual designation. The mapboard features are as follows:
- TURN RECORD CHARTS: These two Charts are used to record game times by placing Turn units.
- ENTRY HEXES: These are hexes where units may enter or exit the mapboard from or to Bases located off the mapboard in Africa. They contain a number and a letter. The number gives the number of Turns required to reach the hex from the off-board Base. The letter gives the name of the off-board Base that uses that particular Entry Hex.
- A: Algeria
- L: Libya
- T: Tunisia
- (Example: A6)
- RUHR HEX: This large hex is a "blow-up" of hex 3527, which contains more targets than could be easily printed in the hex itself.
- BATTLE LOCATION DISPLAYS: These three very large hexagons are used to resolve combats.
- AFRICAN BASE BOXES: These are used to hold off-board units that are in, moving to, or moving from African Bases.
- WEATHER AREA BOXES (OP): The use of these boxes is explained in the Optional Rules. They are not needed for play of the Basic Game.
- SEQUENCE BOX: This box is used to hold the Sequence units.
- MAPBOARD LEGEND: Other mapboard features are identified here.
B. UNIT COUNTERS: Die-cut counters of contrasting colors are provided for the play of the game, and must be punched out of their frame for use. These are the game's playing pieces, and are called "units". Keep these units separated by color and type once punched out, as this greatly speeds the set up of a game. The blue units show the American forces, the black units show the German forces and the other units can be used by either side. The units contain information needed to play the game.
-
PLANE UNITS: These are the basic combat units employed in the game, each representing an American "Group" or a German "Gruppe". The unit counter shows the Unit Designation (for example IV/JG3), the Plane Model and Pictorial Symbol, whether the letter "R" is shown (indicating rockets can be carried), the Movement Factor, and the Plane Type.
a. PLANE MODELS: The "Model" indicates the airplanes that comprised all or the bulk of the strength of the unit.
b. PLANE TYPES: The "Type" indicates the function of the planes in a unit. Letters indicate the following Types:
- B: Bombers. Heavy four-engined planes with ten or more crewmen.
- D: Destroyers. Heavy two-engined planes that are formidably armed to destroy the tough Bombers.
- F: Fighters. Fast, maneuverable planes with one crewman.
- N: Night Fighters. Heavy two-engined planes that are radar equipped, and designed to find and attack Bombers at night.
c. UNIT DESIGNATIONS: American Army Air Force Groups were usually consecutively numbered, then titled according to their mission type. For example, the 4th Group, a Fighter Group, is called the "4th Fighter Group". The 100th Group, a heavy bomber unit is called the "100th Bombardment Group (Heavy)". American Groups could be assigned to higher headquarters with no change in their designations. German Luftwaffe Gruppes were organized as parts of "Geschwaders" ("Wings"), and assigned Roman numerals to indicate their positions in the larger organization. For example, the notation II/JG3 indicates the "II (2nd) Gruppe of JG (Jagdgeschwader) 3. A Geschwader could consist of up to five Gruppes. Gruppes and Geschwaders could be redesignated with changes in mission type or higher headquarters. The abbreviations have the following meanings:
- JG: Jagdgeschwader = Fighter Wing
- KG: Kampfgeschwader = A Fighter Gruppe organized as part of a Bomber Wing. Actually, these Gruppes were either Destroyer or Fighter units.
C. UNIT SORTING AND STORAGE TRAYS: A compartmented plastic tray is included for the separation and storage of the units. Sort the units into the pockets of the tray, dividing them by side, Model, and Type. After sorting, label the pockets with a china marker. Sorting the units greatly speeds up the set up of the game, and time spent sorting the units as they are punched out is time well spent. If the game box is kept flat and upright for storage, simply lay the tray in the bottom of the box. Arrange the mapboard and other game components on top to completely cover the tray, and these will hold the units in their proper pockets. If the game box is not stored flat, or is usually carried on its side, care must be taken to prevent the units from falling out of their proper pockets. A cardboard "lid" should be made for the tray, secured at the sides with cellophane tape "hinges".
D. GAME CARDS: Each Card contains the most frequently used game information. Two identical Cards are provided so that both sides have one available for reference.
E. AIR STATUS CARDS: These two large identical Cards (one for each side) are used to hold and organize the Plane units.
F. MISSION SHEET PAD: One Mission Sheet from this pad is needed by the American player for each game.
G. RULEBOOK: This book contains all the rules for playing BOMBER, information for the scenarios, and additional reference material.
H. SCREENS: The two blank folded screens are placed to block views of the Air Status Cards.
I. TARGET CARDS SHEET: The individual cards on this sheet must be carefully cut out to prepare them for use in a game.
J. DICE: Two dice are included, one for each side.
K. OTHER: The American player requires a pencil (not provided) with an eraser.
Set Up and Preparation for Play
IV. General Set Up
A. PLAYING AREA: BOMBER requires a fair amount of space to be played. It can be played on any smooth surface, but a large table is best. There should be room on the table for the mapboard, the Air Status Cards and screens, and all other needed game components. The German player should sit at the southeast edge of the mapboard, and the American player at the northwest edge. The Air Status Cards should be set up so they cannot be seen by the opposing player - place the screens to block vision, or place the Air Status Cards on chairs or small tables below the level of the main table.
B. SCENARIO AND SIDE SELECTION: Select a scenario from the Scenarios section of this rulebook. All specific information needed for set up is listed in the individual scenarios. For a first game, one of the first seven scenarios is suggested, as the number of units needed is smaller than in later scenarios. After a scenario is selected, decide who will command each side by mutual agreement, or by competitive dice rolling for choice.
C. AMERICAN TARGET DETERMINATION: The German player should thoroughly shuffle the Target Cards. The possible targets that the American side may attempt to Bomb during a scenario include the historical target or targets listed in the scenario, plus targets listed on a number of Target Cards that are drawn from the shuffled deck. The number of Target Cards that the American player may draw is given in the individual scenarios. The German player is not allowed to examine the deck or the Target Cards that have been drawn. As the Target Cards are drawn, certain Cards may have to be discarded; the American player keeps drawing until the proper number have been drawn and can all be kept. Discard all Target Cards containing the word "short", after the first one, or, if one or more of the historical target is "short" (see the scenario), discard all "short" Target Cards. Discard all Cards that say that they must be discarded, considering the scenario date. Discard any Target Card that completely duplicates a historical target given in the scenario. Discard any duplicate "Shuttle Mission" Cards; only one of these needs to be kept - discard all "Shuttle Mission" Cards drawn if the scenario date is prior to August 17, 1943. Target Cards that say they may be discarded, considering the scenario date, may be kept or discarded, as the American player wishes, but the decision must be made before another Target Card is drawn. Note that some Target Cards list two Target Cities - these can be used to Bomb either or both of the listed targets. Once all Cards are drawn, the American player must conduct some careful planning to decide exactly what targets will be used; these decisions influence the set up of the American Air Status Card and the Mission Sheet. The Reduced Mapboard on the back of these rules can be a convenient reference while planning. NOTE: Ignore the "Campaign Target" information (contained in a box on the Card) - this is explained in the Optional Rules. For further information about the possible targets, see the "City Boxes" at the bottom of the Air Status Cards, which present their information in the following format:
Figure (City Box example, labels as printed): TARGET NAME: REGENSBURG. TARGET VALUE: 7. TARGET HEX LOCATION: 3520. STRENGTH POINTS OF HEAVY FLAK: 2H. STRENGTH POINTS OF LIGHT FLAK: 1L. A dot marked "THERE IS A TARGET CARD FOR THIS CITY" appears below the box.
V. Air Status Cards Set Up
A. AIR AND ENDURANCE UNITS: Both sides place their Air and Endurance units in the correspondingly numbered "Air Boxes" of their Air Status Cards.
B. FLAK UNITS: The number of Flak units available is given in the individual scenarios. The German player places the available Flak units as desired in the City Boxes of his Air Status Card. Each Flak unit placed increases the Flak Strength Points in that City by "1". For example, if 1 Heavy Flak unit is placed in the "Aachen" City Box (which lists 1H = 1 Heavy Flak Strength Point), this target now has 2 Heavy Flak Strength Points available. The total Flak Strength Points in any one City may never exceed 4 of each Type.
C. PLANE UNITS: The numbers, Models, and Types of Plane units for both sides are given in the scenarios. Players may select the exact historical Plane units listed in the scenario, or (much faster) simply select the correct number of Plane units, which is also given. The players may place the Plane units in the "D" box of their Air Boxes as desired, with some restrictions. The Plane units must be placed so that they all fit in no more than the forty given Air Boxes. All Plane units in the same Air Box must be of the same Model and Type. Although more may be possible, normally one to four Plane units are placed in each Air Box, with the maximum allowable number in any Air Box not to exceed a total of 12 Strength Points. For German Plane units that can carry Rockets, a Rocket unit may be stacked on top of the Plane unit or units. Although not marked, all American Bomber units are considered loaded with Bombs.
GAMING HINT: German Air units are usually most useful with two or three Plane units each. American Bomber units are generally best with eight to twelve Strength Points per Air Box. American Fighter Air units are best with only one Plane unit per Air Box.
D. SAMPLE AIR BOX SET UP READY FOR PLAY: The figure labels a sample Air Box as follows: GROUND SECTIONS ("On the ground"), AIR UNIT, ENDURANCE UNIT, PLANE UNITS IN "D" BOX, and FLIGHT SECTIONS ("Flying" has Altitude Level boxes). The sample Air Box shows the Altitude Level boxes REFUEL, REARM, LOW (0), MEDIUM (1), and HIGH (2), with the Endurance unit placed in the box for its Air unit.
NOTE: Be careful to keep the American Plane units that are listed for different geographical areas in separate Air Boxes.
VI. Mapboard Set Up
A. GENERAL MAPBOARD SET UP: Place the Turn units in the "1" boxes on the respective German and American Turn Record Charts. Place the two Sequence units in the Sequence Box. Place the three Battle Location units in the correspondingly numbered Battle Location Displays.
B. GERMAN SET UP: The German player now removes the German Air units from their Air Boxes and places them anywhere on the mapboard in German Base hexes, although Special Rules in a scenario may restrict this set up somewhat. The number printed in a Base hex (the Base "Capacity") must at least equal the number of Plane units in the Air unit or units placed in the hex. In earlier scenarios, the German player has the use of all Base Hexes except those in Great Britain. In later scenarios, the Base hexes behind Allied lines in Italy cannot be used - consult the scenario date and the dates printed on the "Ground Lines" in Italy, which show the limits of the Allied ground advance on various dates. Extra Air units, containing no Plane units, may be placed as a "bluff" - these units may never be moved, only left in the hexes.
C. AMERICAN SET UP: The American player sets up after the German player. The American Air units are removed from their Air Boxes and placed on the mapboard. Plane units listed in the scenario as being in certain geographical areas must be placed there. Air units representing Plane units at African Bases are placed in their respective African Base Boxes on the mapboard. Base hexes in Italy are available depending on the scenario date and the dates of the Ground Lines in Italy. For the Americans, the Base Capacity of a Base hex may be exceeded by the number of Plane units placed in it. Extra Air units may be placed as a "bluff", the same as for the Germans.
D. AIR UNITS TO REPRESENT OTHER AIR UNITS: A major purpose of using Air units on the mapboard instead of the Plane units is to provide "limited intelligence" information to the other side. To further deception, and also to avoid huge stacks of Air units in the same hex, the players may also use any extra Air units to replace other Air units on the mapboard. For example, Air units 1-5 might be represented on the mapboard by Air unit 40. Simply place Air unit 40 on the mapboard, and place Air units 1-5 in Air Box 40 on the Air Status Card. Such an Air unit is only a "cover" unit - when the rules refer to Air units, they refer to Air units that actually contain Plane units in their Air Boxes.
VII. Mission Sheet Set Up
The American player must fill in a Mission Sheet before play begins. The manner in which this is filled in reflects the strategy developed by the American player. The information for each Bomber Air unit is filled in on the line containing the number corresponding to each Air unit's number. Nothing is written for the Fighter Air units; their use can be improvised during the game.
A. TARGETS: The targets for the Bomber units must be planned in advance.
-
PRIMARY: Simply write the name of the target, the word "feint", or the word "no" (indicating that the Air unit will not take off or be used during the game). "Feint" Air units may not enter German land hexes, but are intended only to draw off attention from real attacks. Where a target is plotted, the Bomber unit must (unless wiped out) eventually Bomb that target and no other. All Plane units in an Air unit are used to Bomb the same Target. The "Primary Targets" must be selected from the historical targets and/or the drawn Target Cards. Other Cities may be Bombed, and their names are written in the "Primary" column on the Mission Sheet, but these are not Primary Targets, and do not apply towards the Bombing Bonus for Victory Points.
-
SECONDARY OR STRAFE: This column is not filled in for the Basic Game. Its uses are explained in the Optional Rules.
B. BOMBING:
-
ALTITUDE: Fill in the Altitude Level ("0", "1", or "2") from which the Bombing will take place. The Plane units must be at this Altitude Level when the target is Bombed, although other Altitude Levels may be used moving to and from the target.
-
HITS: This is not filled in until Bombing is resolved. Then, the number of hits scored is noted for later reference.
C. FORMATION TYPE: Write "0" for an Open Type Formation, or "T" for a Tight Type Formation. This may be erased and changed during the course of the Game.
D. TAKE OFF TURN: Write a number here to indicate the Turn in which the Air unit is to take off.
E. LAND: This needs to be filled in only for units that will conduct a "Shuttle Mission". A Shuttle Mission may only be conducted if a Shuttle Mission Target Card was drawn, otherwise, the units must land in the same geographical area from which they took off. The abbreviations for these areas are on the Mission Sheets.
F. SAMPLE PORTION OF FILLED IN MISSION SHEET: The sample sheet has the columns AIR UNITS, TARGETS (PRIMARY; SECONDARY OR STRAFE), BOMB ALT, HITS, FORM TYPE, TAKE OFF TURN, and LAND. Air units 1 and 2 are both filled in with the Primary target Paris, Bomb Altitude 2, Form Type T, Take Off Turn 1.
The Basic Game Rules
The Basic Game Rules cover the play of BOMBER in its simplest form, and is concerned with the mechanics and basic concepts of the game. The Optional Rules add additional topics, complexity, and detail to concepts and mechanics that have become familiar through the play of the Basic Game. The Weather and Base Hit units are not used to play the Basic Game. After reading the Basic Game Rules, carefully go through the Introductory Game, which is a portion of a sample game showing the Basic Game rules in use.
VIII. The Basic Game Sequence of Play
The game starts when all set up and preparation is completed. The game is played in "Turns". The number of Turns in a game can never exceed 33. Each Turn is divided into "Phases", which must be performed in the order outlined below, and explained in more detail later in the rules. Some Phases are further subdivided into "Steps", which must also be performed in their listed order.
A. THE PLANE READINESS PHASE: This phase is simultaneously performed. Plane units are moved from box to box in the ground sections of their Air Boxes.
B. THE INITIATIVE ROLL PHASE: The dice are rolled to see which side has the initiative for the Turn.
C. THE FIRST SIDE MOVEMENT PHASE: The side that won the initiative moves first. This Phase should be performed in the following order.
- THE LANDING STEP: Land all Air units that are doing so.
- THE NORMAL MOVEMENT STEP: Move the remaining flying Air units.
- THE TAKE OFF STEP: Take off all Air units that are doing so.
D. THE FIRST SIDE COMBAT PHASE: All Combats caused by the First Side Movement Phase are resolved. Separate Battles may be resolved in any order, but each Battle must be resolved in the following order:
- THE AIR COMBAT STEP: All Combats between opposing Plane units are set up and resolved.
- THE FLAK COMBAT STEP: All Flak Combats are resolved.
- THE BOMBING COMBAT STEP: All Bombing Combats are resolved.
E. THE SECOND SIDE MOVEMENT PHASE: The other side now moves, in the same manner as the first side moved.
F. THE SECOND SIDE COMBAT PHASE: The other side now handles Combat caused by the Second Side Movement Phase in the same manner as for the First Side Combat Phase.
G. THE TURN RECORD PHASE: Both sides simultaneously advance their Turn units on their Turn Records.
IX. General Game Procedures and Rules
The following all play a part in several different Phases of a Turn, and are grouped together in this section to avoid repetition.
A. CONTROLLING PLAYER DEFINITION: A player always performs all moves and die rolls for the units of the side he commands. Thus, a player is always the "controlling player" for his own units. Whenever the rules refer to units being moved or a die being rolled, always know that this means the controlling player is doing these things.
B. UNIT FACING INFORMATION: The units are placed in various "facings" to convey information about the units for the information of the players. The "front" of a unit is considered to be the top of the unit as shown: (FRONT, shown on a Plane unit counter).
-
GERMAN AIR UNIT FACING: The German side has a large number of Air units spread out on the mapboard, and it can be difficult, at a glance, to determine which are "flying", and which are on the "ground". This can easily be shown by placing all Air units that are on the ground facing in one direction, while all Air units that are flying can be faced in another direction. These directions can be any that the German player finds convenient. For example, below Air units 3 and 5 are on the ground, while Air unit 33 is flying.
-
AMERICAN AIR UNIT FACING: There is no need to readily see which American units are flying and which are on the ground. Instead, it is far more useful to know in what direction they are flying, and this also plays an important part in Air Combats for Bomber units. Face the American Air units (and Battle Location units that may replace them on the mapboard) in the direction in which they entered a hex, as shown below. The American Air unit entered the hex from the position shown by the arrow, and remains facing in that direction (START to END).
All American Bomber Air units in the same hex must be facing in the same direction if they are at the same Altitude Level.
-
PLANE UNIT FACING:
a. GROUND SECTIONS FACING: The facing of Plane units in the ground section of an Air Box shows how many of them can be "Readied" in their current Base hex. Planes that can be Readied should face the top of the Air Box, while those that cannot should face sideways. For example, three Plane units are part of an Air unit located in a Base hex with a Base Capacity of "2". Since only two of the Plane units can be readied, face two of them towards the top of the Air Box, and face the third one sideways.
b. FLIGHT SECTIONS FACINGS: The facing of Plane units in the flight section of an Air Box shows if they are in separate Formations, or organized into multi-unit Formations. Plane units that are organized together into one Formation should all be faced in the same direction. Plane units that are in separate Formations should be faced in different directions.
C. STRENGTH POINTS: The number of Flak Strength Points in each possible target is given in the City Boxes. This can be added to by placing Flak units in the City Boxes, each Flak unit adding one Strength Point of the appropriate Type. The initial Strength Points in Plane units is given in and varies with each scenario. German Plane units may vary in initial Strength Points from two to three, American Bomber units may vary in initial Strength Points from two to four, and American Fighter units may vary in initial Strength Points from four to six. These initial Strength Points are listed in the individual scenarios. These are usually easy to remember, but players can note them on some scrap paper, if desired.
D. PLANE UNITS PER AIR UNIT LIMITATIONS: A single Air box may never contain Plane units with a total number of Strength Points in excess of 12 Strength Points. All Plane units in the Air Box must be of the same Model and Type.
E. FORMATION LIMITS: For all but Bomber units, the Plane units in the same Air Box may be separate or organized into one or more combined Formations, and this may be changed while moving. For Bombers, all Plane units must be organized into one Formation in the Air Box before the Air unit may be moved from the Base hex where it took off, and this single Formation must then be maintained as long as it flies. All Plane units must remain in their original Air Box for the entire game; no switching is permitted.
F. AIR UNIT LIMITATIONS: For all but Bomber units, there are no limits on the number of Air units that may be present in the same hex at the same time. For Bomber Air units, there may never be more than six Air units in the same hex at the same Altitude at the same time, and to do so all six must face in the same direction.
G. RULES OF OBSERVATION: The Air units on the mapboard serve to hide the strength and composition of the Plane units they represent from the opposing player. Information, based on possible observation, must be made available in certain game conditions. The information to be made available depends on their closeness to enemy land hexes (including hexes containing only islands), or Plane units. Distances for figuring observation never include the hex from which the observation is made, but the count always includes the hex containing the observed units. For example, the numbers show the distances from the blackened hex (the figure shows hexes numbered 1 through 4 from the blackened hex).
-
GENERAL OBSERVATION: Some representational Air units must always be on the mapboard. No Plane units can ever be completely hidden in the Basic Game, no matter what their location. When an Air unit is two or three hexes distant from the nearest enemy land hex, the controlling player must reveal the Altitude Level or Levels of the Plane units present. When an Air unit is one hex distant, the controlling player must reveal the Altitude Level or Levels and the number of Plane units present. When an Air unit is actually in an enemy land hex or shares a hex with an opposing Air unit, the controlling player must reveal the Altitude Levels, the numbers, and the Types and Models of the Plane units present. For example, if 9 B-17 and 2 P-47 Plane units are present at Altitude Level "2" in a hex, the German player is told "Altitude Level "2", 11 Plane units, B-17s and P-47s". More exact information does not have to be revealed until Combat occurs. Observation information may be demanded from the opposing player at any times during a Turn. This information is summarized on the Observation Reports Chart on the Game Cards.
-
COMBAT OBSERVATION: When setting up for Combat, all of the usual observation information is available, plus Bomber Type units can be differentiated from other Types. No other information needs to be revealed until the Basic Hit Tables are figured to resolve Combats.
H. BASE CAPACITY: The Base "Capacity" numbers are printed on the mapboard in the Base hexes, the German numbers being in parenthesis, and the American numbers being circled (note that some Italian Bases have both - the one to use depends on the scenario date). The Base Capacity is the number of Plane units that may take off and be Readied in a Base hex during any one Turn. It does not limit the number of Plane units that may be placed on the ground in the hex (exception - see German Set Up, VI.B.) or the number of Plane units that may land in the hex during one Turn - there are no limits on these.
X. The Plane Readiness Phase
Moving Plane units through the ground section of the Air Boxes on the Air Status Cards represents the fueling, arming, and servicing of planes while they are on the ground. This Phase is performed simultaneously by both sides.
A. SERVICING PROCEDURE: Any single Plane unit may be advanced only one box per Turn. A Plane unit is moved from the "A" to the "B" box, then from the "B" box to the "C" box, and finally from the "C" box to the "D" box. If a Rocket carrier, a Rocket unit may be placed on the Plane unit or units as it is moved into the "D" box to show such armament. Otherwise, a Plane unit in the "D" box is considered to be equipped with Drop Tanks (if possible), which can increase the number of Turns that the Plane units may remain "flying".
B. SERVICING CAPACITY: The number of Plane units that can be moved from box to box in the ground section of an Air Box depends on the "Capacity" of the Base hex occupied by the Air unit. For example, if the Capacity of a Base hex is "3", up to three Plane units may be moved from box to box each Turn.
C. COMPLETE READINESS: Once a Plane unit has been moved into the "C" or "D" box, it is ready for possible take off during the side's Movement Phase. All Plane units, except for Bombers, may take off, land, go through servicing, take off again, etc., as many times as the player wishes. Bomber units may only take off once per game (or "day").
XI. The Initiative Roll Phase
This Phase determines which side will move its units first during the Turn. One die is rolled by each side - break ties by rolling again. The high roll side gets the First Side Movement and Combat Phases. To record the side going first, adjust the Sequence units in the Sequence Box on the mapboard. Place the Sequence unit for the side going first on top of the other Sequence unit.
XII. The Movement Phases - How to Move
These Phases represent the movement of planes in the air, and are performed separately. One side moves up to all of its Air units during the First Side Movement Phase, then, after a Combat Phase, the other side moves during the Second Side Movement Phase. The rules for movement are the same during both of these Movement Phases. Key rules are summarized in the Movement Notes section on the Game Cards.
A. MOVEMENT PHASE SEQUENCE: Plane units are always kept in Air Boxes on the Air Status Cards, and are represented on the mapboard by identically numbered Air units. To avoid confusion, these Phases should be performed in the following order:
-
THE LANDING STEP: Any Endurance units in the Turn Record Box containing the Turn unit indicate that the correspondingly numbered Air units must land that Turn. Other Air units may also be landed, if desired. A Movement Phase should begin with the controlling player first moving all Air units that are landing, placing them (if possible) in friendly Base hexes.
a. Landing Procedure: (1) Face the Air unit to show that it is on the ground. (2) Place all of the Plane units in the Air Box in the "A" box. This shows that they have "just landed". (3) Remove the Air unit's Endurance unit from the Turn Record, and replace it in the Air Box. (4) Place one Hit unit in the Air Box. Every Air unit receives one hit every time it is landed. If this causes the elimination of a Plane unit, remove the Hit units and the eliminated Plane unit from the Air Box. (5) Any number of Plane units may be landed in a hex during one Turn, regardless of the Base Capacity (if any) of the hex.
b. Night Landings: The number of "Daylight Turns" is given in each scenario. Any units that land after the indicated number of Turns are making "Night" landings. Each Air unit that makes a Night landing must have a die rolled for it. If a "6" is rolled, an additional Hit unit must be placed in its Air Box. EXCEPTION: This does not apply to Night Fighter units - these land normally at "Night".
c. Non-Base Landings: The Base hexes shown on the mapboard represent the major, operational Bases. Actually, almost every non-Mountain hex on the mapboard contained some sort of airstrip that could be used in an emergency. Any Air units that land in a friendly non-Base, non-Mountain hex land normally, but cannot be "readied" in these hexes - they are out of the game for the remainder of the scenario (or "day").
d. Crashes: Any Air units that cannot be moved to a friendly non-Mountain land hex "crash" (landings are possible in Mountain hexes containing Bases). All Plane units involved in crashes are eliminated.
-
THE NORMAL MOVEMENT STEP: The controlling player should now move all remaining "flying" Air units as desired. Show adjustments in the Plane unit's Formations in the Air Boxes by changing the facings of the Plane units. Show changes in Altitude Levels by moving the Plane units to the appropriate Altitude Level boxes in the Air Boxes.
B. GENERAL MOVEMENT RULES: The dice are not used to determine movement. A player moves only his own units, never any opposing units. Each Plane unit has a movement capability available during a Turn. This "Movement Factor" is printed on the Plane unit. Movement Factors may not be transferred from unit to unit, or accumulated from one Turn to another. A player may move as many or as few Air or Plane units during a Turn as desired, and may move them as far as their Movement Factors permit. Movement is always completely voluntary. Air units may be moved in any direction or combination of directions. Movement from hex to hex must be consecutive - a unit may not "skip" hexes. Air units may be moved into, out of, and/or through hexes containing opposing Air units with no penalty, unless the hex was recently the site of Air or Strafing (see Optional Rules) Combat (see XII.C.4.), and they are breaking contact. No Plane unit may have more Movement Factors expended per Turn than the number printed on the unit, but no Plane unit is required to use all of its Movement Factors during a Turn, except returning Bombers (see XII.G.).
C. MOVEMENT FACTOR EXPENDITURES: The Movement Factors of Plane units are expended in a number of ways. The movement capabilities of an Air unit depend on the Movement Factors of its Plane unit or units.
-
MAPBOARD MOVEMENT: One Movement Factor is expended for every new hex entered in the mapboard.
-
ALTITUDE LEVEL CHANGES: Altitude Level changes are recorded by moving Plane units in the flight sections of their Air Boxes. The possible Altitude Levels are "0" (Low), "1" (Medium), and "2" (High). In most hexes, any Altitude Levels are possible, but in Mountain hexes the Altitude Levels must be "1" or "2", except during take off or landing. When taking off from or landing in a Mountain hex that contains a Base, the Plane units may briefly be at Altitude Level "0" during the operation. All flying Plane units in the same Air Box must always be at the same Altitude Level.
a. Diving: Diving, or changing from a higher to a lower Altitude Level, expends no Movement Factors.
b. Climbing: Climbing, or changing from a lower to a higher Altitude Level, does expend Movement Factors, the number expended depending on the Plane unit being climbed.
(1) Bombers and Rocket carriers: These Plane units expend one Movement Factor for each Altitude Level climbed.
(2) Me-109AS: These Plane units expend one Movement Factor if one, two, or three Altitude Levels are climbed during a Turn.
(3) All other Plane units: All other Plane units other than Bombers, Rocket carriers, and Me-109AS expend one Movement Factor if one or two Altitude Levels are climbed during a Turn, and expend two Movement Factors if three Altitude Levels are climbed during a Turn.
-
PLANE UNIT FORMATION CHANGES: Plane units that "form" together represent planes flying together in a single Formation that can fight together. In game terms, a "Formation" may consist of one or more Plane units. An individual Air unit may have all of its Plane units organized into one Formation, or into several different Formations.
4. BREAKING CONTACT: In any hex in which Air Combat and/or Strafing Combat (see XVII.B.) took place during the last Combat Phase, one Movement Factor must be expended to exit the hex or to climb in that hex for all Destroyer, Fighter, and/or Night Fighter Plane units in the hex if the hex contains an opposing Fighter unit at their same or at a higher Altitude Level.
5. MOVEMENT FACTOR EXPENDITURE SEQUENCE: Movement Factors may be expended in any order which the controlling player desires. For example, a player could choose to expend Movement Factors to move across the mapboard, then expend some to climb, or could choose to climb first, then move, etc.
D. JETTISONING: Rockets and Drop Tanks can be jettisoned (dropped from the planes). Jettisoning expends no Movement Factors.
-
JETTISONING ROCKETS: The German player may jettison Rockets during the German Movement Phase, if desired. The German player must Jettison Rockets if engaged in Air combat by American Fighter units. In both cases, show the jettisoning by removing the Rocket unit from the Plane unit or units.
-
JETTISONING DROP TANKS: Plane units must Jettison Drop Tanks if they participate (a die is rolled for a hit attempt) in Air Combat or Strafing Combat. Adjust the Air unit's Endurance unit on the Turn Record, if necessary to show that only Internal Endurance remains. This adjustment is not necessary if the Plane units have already been flying long enough to have equalled or exceeded their Drop Tank Endurance. For example, on Turn 10 an Air unit containing Ju-88s participates in Air Combat. Its Endurance unit is in the Turn 18 box of the Turn Record Chart. The Endurance unit must be adjusted to the Turn 16 box, as only the Internal Endurance of "7" is still available.
E. ENTERING AND EXITING THE MAPBOARD: In the earlier scenarios, some American Plane units are located in off-board African Bases (Algeria, Libya, and/or Tunisia). Some time is required for units using these Bases to move from them to the edge of the mapboard or from the edge of the mapboard to these Bases. When not on the mapboard, keep the Air units representing off-board Plane units in the appropriate African Base Boxes on the mapboard.
-
MAPBOARD ENTRY: Any Air units, regardless of the Plane units that they represent, that take off from African Bases are placed in any of their indicated Entry hexes on the mapboard edge on the indicated Turn after take off. For example, an Air unit that took off from the Tunisia Base could be placed in the "4T" Entry Hex four Turns after take off. If take off was on Turn 3, the Air unit would be placed in the "4T" Entry Hex on Turn 7. The Plane units can be at any desired Altitude Level or Levels, and in any desired Formation Type when the Air units are placed on the mapboard. The German player is not informed if anything is coming until the Air units are actually placed on the mapboard. On the first Turn on the mapboard, the Air unit or units are placed in the Entry Hex, and end movement there. Normal movement begins the Turn after placement in the Entry Hex. Air units may enter the mapboard only at an Entry Hex containing their off-board African Base letter.
-
MAPBOARD EXIT: Landings are accomplished at off-board Bases by reversing the entry procedures. The Air unit is moved into an Entry hex on one Turn, then removed from the mapboard on the next Turn. The exiting Air unit lands at the off-board Base the indicated number of Turns after reaching the Entry Hex. For example, an Air unit that reached "L6" Entry Hex on Turn 17, would land at the Libyan Base six Turns later on Turn 22. Air units may exit the mapboard only at Entry Hexes, and only American Air units may do so. Plane units that exit the mapboard in any other manner are eliminated.
F. PROHIBITED HEXES: Some mapboard hexes may not be entered.
-
PARTIAL AND NEUTRAL HEXES: The dark blue partial hexes along the edges of the mapboard may not be entered by any Air units. The gray hexes on the mapboard show the neutral countries of Sweden and Switzerland. Air units may not be moved into hexes that are totally gray, or be moved through hexsides that are all gray, although they may enter partially gray hexes or cross partially gray hexsides.
-
ALLIED AIR DEFENSE HEXES: Since BOMBER covers only the daylight strategic air campaign, literally thousands of other Allied planes are not included in the game. The numerous short-ranged Allied air defense and tactical fighters are an ample threat to keep German units out of certain hexes. No German Air units may be moved into a Great Britain hex or into the Allied Air Defense hexes (see the Mapboard Legend for their contrasting shade of blue) around Great Britain. The hexes to the south of the current Ground Line in Italy and the adjacent Allied Air Defense hexes also may not be entered by German Air units - the hexes that apply depend on the date of the scenario.
G. BOMBER MOVEMENT LIMITATIONS: Bomber units may be moved by any desired route to their Target, but, once they have Bombed, they must be moved towards their landing Base at full speed (expending their maximum Movement Factors every Turn) until landed, and by the most direct route (the one requiring the fewest hexes to be entered) possible.
H. SHUTTLE MISSIONS: American units must land in Base hexes in the same geographical area from which they took off (not necessarily exactly the same Base hex), unless a Shuttle Mission Target Card was drawn. If a Shuttle Mission Card was drawn, units may land at a Base in a different geographical area from that which they took off from. For example, units that took off from Tunisia could land in Algeria, Italy (if possible), Libya, or Great Britain, or if desired, return normally to Tunisia. No Shuttle Missions are possible prior to August 17, 1943. Discard any Shuttle Mission Card drawn for scenarios prior to that date. From August 17, 1943, to August 31, 1943, only B-24 and seven B-17 Plane units may be used in Shuttle Missions. Starting October 1, 1943, any American units may be used for Shuttle Missions if a Shuttle Mission Target Card is drawn.
I. BATTLE LOCATIONS: Air Combat may occur when opposing Air units occupy the same hex on the mapboard. As a player moves Air units into a hex containing flying opposing Air units, remove the Air units from the mapboard, and place them in one of the "Battle Location Displays". Place the correspondingly numbered Battle Location unit in the Combat Hex. As Air units enter the hex, place them on the Battle Location Display to show their positions and directions of entry into the hex. The direction of entry only matters in Combats against Bombers - otherwise, just place the Air units in the Battle Location Display to show where they are. Only three Battle Location Displays are provided - if four or more Combats occur (fairly rare), involved Air units should be just stacked together on the mapboard until another Air Combat is resolved, and they can be moved into that Battle Location Display - try to do this with the smaller Combats and/or ones that do not involve Bombers. (It is also often convenient to place more than one Battle Location within the same hex if Air units are at several different Altitude Levels.)
BATTLE HEX AND BATTLE LOCATION DISPLAY SET UP: The figure shows a Battle Hex with clock positions 2, 4, 6, 8, 10, and 12 (FRONT arrow at 12), and a Battle Location Display, with the example "Battle Location Number 2", showing its 2 o'clock, 8 o'clock, and 10 o'clock entry arrows, and the Formation boxes (FORM. 4, FORM. 5, FORM. 6) of the display.
(1) Place all Bomber Air units in these boxes, in the order of their Air unit numbers. (2) Place all American Fighter Air units in this box. (3) Place all German Air units in the "o'clock" boxes determined by the direction in which they entered the hex, based on the facing of the American Bomber units, with the 12 o'clock position being from the front of the American Bomber units, etc. German Air units that remained in the hex and did not enter it that Movement Phase are placed in the 6 o'clock box.
XIII. The Combat Phases - How to Have Combat
These Phases represent various forms of Combat, and are used to resolve them during "Battles".
A. GENERAL RULES OF COMBAT: Units must occupy the same hex to have Combats. All Combat Steps that occur in the same hex are collectively called a "Battle". These Combat Steps are resolved in the exact order given in the Sequence of Play (see rules VIII.D. and VIII.F. and the Game Cards). Skip Combat Steps that do not apply in a particular Battle. Players must always decide what opposing Air units or Target they are engaging before rolling the die. Separate Battles may be resolved in any order decided upon by the side which just moved. All Combat Steps in an individual Battle must be completed before starting to resolve another Battle.
B. INTERPRETING THE HIT CHARTS: The Rocket Hit, Air Hit, Flak Hit and Bombing Hit Charts on the Game Cards are all used to find the "Basic Hit Tables" for various Combats. Collectively they are known as "Hit Charts".
-
THE ROCKET HIT CHARTS: These Charts display all of the Basic Hit Tables for use by German Rocket carrying Plane units when firing Rockets at Bomber units. The Basic Hit Table is found by crossgridding the type of German Plane unit (Destroyer or Fighter), the number of Strength Points in the firing Formation, the "Launch Type" ("Close" or "Distant"), and the Formation Type of the target Bomber Formation. For example, a Formation of Me-110 Destroyer Plane units has three Strength Points. The German player decides to make a Close Launch (this represents the attacking planes moving inside the defensive range of the Bomber's guns before launching - a Distant Launch represents the attacking planes firing their Rockets from long range), and the target Bomber Formation is in Tight Formation. This gives a Basic Hit Table of "2".
-
THE AIR COMBAT CHARTS: These Charts display all of the Basic Hit Tables for use in Air Combats. The Basic Hit Table is found by crossgridding the Plane Model and Type with the number of Strength Points in the firing Formation and the type of Plane units in the target Formation. For example, a Me-109G Formation with four Strength Points has a Basic Hit Table number of "2" against B-17s, and "3" against B-24s. The FW-190 and the P-38 both have two numbers listed in some columns. Both of these fighters were less efficient at high altitudes. The first number listed is the Basic Hit Table if Combat occurs at Altitude Levels "0" or "1". The second number listed is the Basic Hit Table if the Combat occurs at Altitude Level "2".
-
THE FLAK HIT CHARTS: These Charts display all of the Basic Hit Tables for use in Flak Combats. The Basic Hit Table is found by crossgridding the Flak Type (Heavy or Light) with the number of Flak Strength Points firing, the "Target Type" (always Bombing in the Basic Game), and the Altitude Level of the target Formation. For example, two Strength Points of Heavy Flak used against a Bombing Formation at Altitude Level "2" has a Basic Hit Table of "1".
-
THE BOMBING HIT CHARTS: These Charts display all of the Basic Hit Tables for use in Bombing Combats. For the Basic Game, only the "Weather Condition 1" columns of the Charts are used. The Basic Hit Table is found by crossgridding the Bomber Model and current Strength Points with the Bomber's Altitude Level and the number of Turns that the Bombers have been "in the air" (i.e. Turns since take off).
C. THE BASIC HIT TABLE MODIFIERS: All "Modifiers", when they apply, change a Basic Hit Table number to a "Hit Table Number". If no Modifiers apply, or if they cancel each other out, the Basic Hit Table and Hit Table numbers may be identical. If more than one Modifier applies, their results are cumulative. No Basic Hit Table number can be Modified to less than Hit Table "1", or more than Hit Table "26". These Modifiers are summarized on the Combat Modifiers Chart on the Game Cards.
-
AIR COMBAT MODIFIERS: These Modifiers apply to Basic Hit Table numbers found in the Air Hit Charts and apply during Air Combats.
a. No Altitude Loss Possible: If a Destroyer, Fighter, or Night Fighter Plane unit is engaged in a Combat where a loss of an Altitude Level is impossible (i.e. the Plane unit starts the Air Combat at Altitude Level "1" in a Mountain Hex, or at Altitude Level "0" in another hex), the Modifier to the Destroyer, Fighter, or Night Fighter units is "-1".
b. For Bombers in Open Formation: A Modifier of "-1" applies to Bomber Formation's Basic Hit Tables if they are in an Open Type Formation.
c. For Bombers vs. Head-On: A Modifier of "-1" applies to Bomber Formations in Air Combat with opposing units that entered the Battle Hex from the 12 o'clock direction. This modifier does not apply if no Altitude loss is possible for the attackers.
d. Fighter vs. Destroyer, Night Fighter, or Rocket Carrier: A Modifier of "+1" applies to American Fighter units in Air Combat with German Plane units that fall into one or more of these categories.
e. No Combat: Rocket carrying Plane units in Air Combat with American Fighter units have a Hit Table of "0" - they are unable to cause hits on the American Fighter units. In addition, the Rockets must be jettisoned.
f. vs. Me-262 (OP): This is explained in the Optional Rules.
-
ROCKET COMBAT MODIFIER: This Modifier applies to Basic Hit Table numbers found in the Rocket Hit Charts and applies during Rocket Combats. A Modifier of "+1" applies if the target Bomber Formation has seven or more Strength Points.
-
FLAK COMBAT MODIFIERS: These Modifiers apply to Basic Hit Table numbers found in the and apply during Flak Combats.
D. RESOLVING COMBATS: Combats are resolved similarly for all types of Combat. The procedure for all Combats is as follows:
- Find the Basic Hit Table number in the appropriate Hit Chart, depending on the type of Combat.
- Modify the Basic Hit Table by all applicable Modifiers to find the Hit Table number.
- For Air Combats (except Rocket Combats) both sides are considered to be making their die rolls simultaneously, although they can be made in any convenient order. For all other Combats, only one side is rolling the die.
- The Combat Results Tables on the Game Cards are used to resolve all Combats. Find the Hit Table number being used for the Combat along the top of the Tables. Then, crossgrid the number rolled on the die with the
For example, if the Hit Table number "5" is being used and a "4" is rolled, one hit is scored on the target. If Hit Table "20" is used, and a "2" is rolled, three hits are scored on the target.
E. MARKING HITS - THE EFFECTS OF HITS:
-
HITS ON PLANE UNITS: The game's Hit units resemble the "kill" markings painted on planes during World War II. The Germans painted a black bar, usually on the rudder, for each "kill". The Americans painted either a swastika or a Greek cross, usually on the side or nose of the plane, for each "kill". For the game, this printing is just decorative, and hits can be marked on either side using either type of Hit unit, each of which indicates one Hit. The third type of Hit unit is two-toned and has a "2" printed on it, and can be used to indicate two Hits - use these in place of two of the other Hit units. When a Hit is scored, place a Hit unit or units in the Air Box of the target Air unit. Each hit reduces the Strength Points of the Plane unit or units in the Air Box by one. When the number of Hit units in an Air Box equals the number of Strength Points in one of the Plane units in that Air Box, the Hit units are removed, and one of the Plane units is eliminated.
-
BOMB HITS ON TARGET CITIES: Each hit scored by Bombing Combat is marked on the Mission Sheet in the "Hit" column next to the number of the Bombing Air unit. Hits on cities have no game effects, they are used only for determining Victory Points.
F. THE AIR COMBAT STEP: In this Step all Combats between opposing flying Air units are resolved. Only flying Air units participate in these combats. The same Air unit could be involved in air combats during both Combat Phases of a Turn.
-
AIR COMBAT CONDITIONS: Air Combat takes place only if the opposing Air units are in the same hex and at the same Altitude Level. For Air Combat to occur, the Combat Phase must be the German Combat Phase, or if it is the American Combat Phase, only in a hex where Air Combat occurred during the last Combat Phase (of either side). American Bomber units may never initiate Air Combats, they may only defend themselves if attacked. It is possible for American units to enter a hex containing German flying units and be unable to initiate Combat. German units that enter and remain in a hex containing American units and at the same Altitude Level must initiate Combat, even if excess German units do not participate.
-
GENERAL RULES OF AIR COMBAT: The side which just moved is the "attacker" during a Combat Phase. The other side is the "defender". In all Air Combat set ups, if the attacker has less Air units involved, excess defending Air units are ignored and do not participate in the Combat. If the attacker has more Air units involved, excess attacking Air units may be used to "gang up" on opposing units for additional Combats, or kept out of participation in the Combat entirely (this might be done to avoid jettisoning Rockets or Drop Tanks). Each separate Air unit and/or Formation fights separately against each separate Air unit and/or Formation opposing it. The Models and Types of the Plane units in involved Air units are not revealed (except that Bombers can always be differentiated from Fighters) until the time comes to determine the Basic Hit Tables and roll the dice. When more than one attacking Air unit and/or Formation engages the same defending unit, the attacking player decides the order in which the attacking units will resolve their Combats. Hits scored on the defending unit apply in determining its Basic Hit Table for succeeding Combats. In every case where more than one attacker faces one defender, the defending Formation rolls for hits separately and repeatedly against each attacking Formation in succession (the defender's Basic Hit Table may drop for later Combats due to hits suffered from earlier attackers). If a defender is totally eliminated due to earlier attackers before an Air unit participates, that Air unit does not participate. It does not jettison Drop Tanks, and may not be shifted to attack a different defender.
-
AIR COMBATS NOT INVOLVING BOMBERS: This type of Combat occurs when no Bomber units are present, when Bomber units are present but the American side is the attacker, or in Combats involving escorting Fighter units. The defender lines up all of his participating Air units in the Battle Location Display. The attacker then lines up all of his participating Air units opposite the defending units, in any desired manner. Then Air Combat is resolved for each set of opposing Air units, with hits marked and Plane units eliminated as necessary after each pair of dice rolls. If one or both of an opposing pair of Air units contains more than one Formation, the Plane units may be taken out of their Air Boxes and laid out in the Battle Location Display and opposed to each other just as the Air units were (invert the Planes to hide their identity until all units are laid out). If hits have already been marked on the Air Box, the controlling player decides which of his Plane units carries the hits and his reduced Strength Points. Return the Plane units to their places in the Air Boxes when the Combat is over.
G. THE FLAK COMBAT STEP: In this Step Flak Strength Factors are used to Combat Bomber units. Basic Game Flak Combat is directed only against Bomber Air units about to Bomb the Target City containing the Flak Strength Points, and is only used during the Combat Phase in which the Bombing Combat takes place. The American player announces that Bombing will occur, and the German player conducts Flak Combat, making one die roll against each separate Bomber Formation that is about to Bomb the target. At Altitude Level "1" both the Light and the Heavy Flak can be used to conduct Flak Combat, one die roll being made for each against each separate Bomber Formation. Resolve Flak Combat against the Bomber Air units in the order of the Air unit's numbers. Only the Flak Strength Points actually in the Target City may be used for Flak Combat. Other Flak Strength Points in the same or adjacent hexes are not used.
H. THE BOMBING COMBAT STEP: In this Step, Bomber units Bomb their designated Target City. Bomber units may Bomb only during the American Combat Phase. The American player conducts the Bombing Combat, and makes one die roll for each separate Bomber Air unit that is Bombing the Target City. Air units must Bomb in the order of the Air unit's numbers. Hits scored are marked on the Mission Sheet. Each Bomber Air unit may Bomb only one target per game (or "day").
XIV. The Turn Record Phase and Ending the Game
The completion of one Turn and the start of the next Turn is recorded by both sides advancing their Turn units unto the next sequentially numbered box on their Turn Record Charts. A game ends after the thirty-third Turn is completed, or when both players agree that there is nothing more to be done - this usually occurs when the last American Bomber unit lands or moves beyond the reach of German interception. Any Plane units not landed by the end of Turn 33 are eliminated. If the game "ends" earlier, players should still go ahead and land all Air units before counting Victory Points.
XV. The Victory Conditions - How to Win
After a game ends, the Victory Points gained by both sides are counted to determine the winner. Basically, the side that gains the most Victory Points wins. However, the scenarios are not always well-balanced (the historical situation frequently favored one side or the other), and the scenario's Special Rules should be checked. These may give extra Victory Points to be added or subtracted from the German side to balance the game. After these Victory Points are added or subtracted, then the side with the largest number of Victory Points is determined to be the winner.
A. VICTORY POINTS EXPLANATION: Players may gain Victory Points for their side in a number of ways, as explained below. These are summarized and detailed in the Victory Points Chart on the Game Cards.
-
NO INTERCEPTION: If no German Air unit ever engages in Air Combat in the same hex as an American Bomber Air unit which successfully Bombs and hits a Primary Target City, and then lands successfully, the American side gets 6 Victory Points for each Bomber Plane unit involved. [Editor's note: the scan's numeral here is hard to distinguish between 5 and 6; transcribed as 6. Check against the Victory Points Chart on the Game Cards.]
-
ELIMINATED PLANE UNITS: Victory Points are awarded for every opposing Plane unit that is eliminated. The number of Victory Points depends on the Type of Plane unit eliminated, and its original Strength Points, as shown in the Victory Points Chart. For example, if a two Strength Point "D" (Destroyer) Type Plane unit is eliminated, 12 Victory Points are awarded to the other side.
-
BOMBER BONUS: The German side can gain "bonus" Victory Points if large numbers of "B" ("Bomber") Plane units are eliminated. A 20 Victory Point bonus is gained for every eight 2 Strength Point, six 3 Strength Point, and/or four 4 Strength Point Bomber units eliminated. Fractions do not count.
-
PLANE UNIT HITS: Victory Points are awarded for hits marked on opposing Plane units that are not eliminated. The number of Victory Points depends on the Type of Plane unit hit, as shown in the Victory Points Chart.
-
BOMBING HITS AND BOMBING BONUS: The Victory Points gained for the American side by Bombing are found by multiplying the number of hits scored on a Target City times the Target Value of the City. For example, if three hits are scored on Schweinfurt (Target Value of "9"), this gives 3 X 9 = 27 Victory Points. In addition, bonus Victory Points are available if enough different Primary Targets were hit. The number of different Primary Targets that must be hit to acquire various bonus levels depends on the year the scenario takes place, and is shown on the Victory Points Chart. For example, in a 1943 scenario, if three different Primary Targets are hit, their total Victory Points can be doubled, and if four or more different Primary Targets are hit, their total Victory Points can be tripled. This Bombing Bonus does not apply for Bombing hits scored on Cities that were not Primary Targets. There is no limit on the number of hits that may be scored on an individual Target City.
B. THE VICTORY POINT TALLY: The Mission Sheet contains a form at the bottom that can be filled in to total up the Victory Points on both sides. A filled-in sample is shown below:
| American Points | German Points | ||
|---|---|---|---|
| NO INT. | 0 | "B" ELIM. | 192 |
| "N" ELIM. | 48 | "B" BONUS | 20 |
| "D" ELIM. | 30 | "F" ELIM. | 0 |
| "F" ELIM. | 33 | "B" HITS | 24 |
| "N" HITS | 8 | "F" HITS | 16 |
| "D" HITS | 12 | "SPECIAL" | 0 |
| "F" HITS | 24 |
The Introductory Game
This section presents a portion of an actual game of BOMBER being played, and is intended to help players learn and understand the rules. New players should set this game up on the mapboard, moving the units and following the commentary as an aid in mastering the mechanics of the game. The scenario being played is Scenario 16 (XXXVIII.), and only the Basic Game Rules are used.
SET UP: Among the Target Cards drawn by the American player was "Paris". The American player decides to use this Card, and only the raid on Paris is discussed below - other units are engaged elsewhere, but not shown. The initial set up for both sides is shown below:
| Air Unit | Plane Units in Air Box (as printed) |
|---|---|
| 1 | 3 X B-17 |
| 2 | 3 X B-17 |
| 4 | 1 X P-47 |
| 3 | 1 X P-38 |
| 21 (German) | 2 X FW-190 |
| 22 (German) | 2 X Me-109 |
| 23 (German) | 2 X Me-109 |
| 24 (German) | 2 X Me-110 |
All American Air units (1-4) start in hex 3934. German Air unit 21 is in hex 4228, 22 is in hex 4229, 23 is in hex 4129, and 24 is in hex 4026.
The sample Mission Sheet shows the following entries (hand-written on the scan; Air unit 3's take off turn is read as "2"): Air units 1 and 2: Primary target Ploesti, Bomb Altitude 1, Form Type T, Take Off Turn 1. Air units 3 and 4: Primary target Munich, Bomb Altitude 2, Form Type T, Take Off Turn 2 and 3 respectively; Land "A" for both.