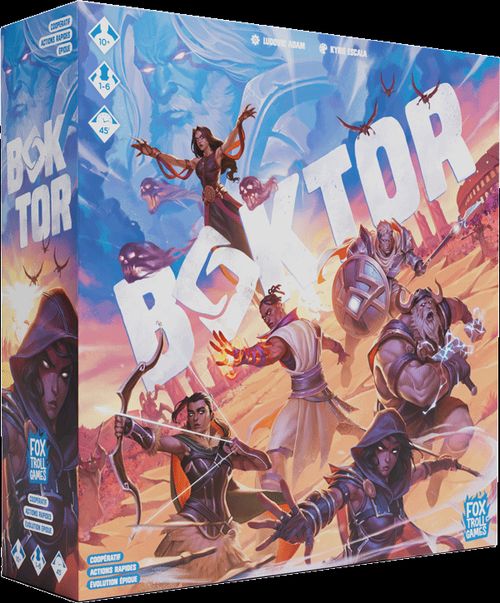
Boktor
Boktor Rulebook
Table of Contents
Table of Contents
Introduction & Goal of the Game
Boktor is a cooperative game in which you are united in both victory and defeat. You may communicate freely, but each Player remains in control of their own Hero's actions.
To save the world of Boktor and win the game, Players take on the role of Heroes tasked with tracking down and defeating the fearsome Tyrant before the Vortex it is summoning destroys everything in its path.
Components
1 Standing Base
The base has folding parts that allow it to stand upright and is used to hold a Tyrant Board. It also includes 2 Health Wheels to track the Tyrant's Health Points.
4 Tyrant Boards with Custom Wheels
Each Board represents one of the 4 Tyrants, showing its maximum Health Points and its Difficulty level from 1 (easy) to 4 (hard).
Each Board is also connected to a Vortex Wheel, which generates effects and can eventually trigger the end of the game.
1 Experience Track and 1 Experience Marker
Used to track the collective progression of the Heroes. The Track features two key spaces: Level Up and Energy Boost.
28 Monster Cards
Each Tyrant has a deck of 7 Monster Cards that determine the actions of both the Tyrant and its Monsters.
41 Wooden Monster Meeples and Tokens
There are 7 different types of Monsters: 4 Tyrants, 8 Scarabs, 1 Mega Scarab, 10 Harpies, 1 Mega Harpy, 8 Nagas, 1 Mega Naga and 11 Swords.
6 Hero Wooden Meeples, 6 Hero Boards, and 12 Wooden Cubes
Each Hero has 1 Board, 1 Meeple, and 2 Cubes in their color. Each Board includes tracks for Health and Energy, as well as 3 basic Actions: Move, Attack and Defend.
90 Experience Cards
Each Hero has a deck of 15 Experience Cards. They are Powers or Magic Items acquired every time they Level Up.
12 Item Tokens
Each Hero has 2 tokens for their corresponding Magic Items. Place the token on the Hero Board once the Item is acquired.
20 Elemental Tiles
Each Tile shows a Path and an Element: Fire, Ice or Poison. Tiles also display symbols such as Monsters, Portals, or Health Scrolls. The back of each Tile is numbered from 1 to 5.
4 Tyrant Tiles
One Tile for each Tyrant, with the back indicating the level required to unlock it and its position in the Tile pile.
1 Starting Tile (double-sided)
Indicates the Heroes' starting position and includes both a Portal and Monsters.
3 Portal Tokens
Mark the locations where Monsters spawn.
1 Active Player Token
Indicates which Player's turn it is.
5 Wooden Health Scroll Tokens
When activated, 1 Hero of your choice regains 2 Health.
6 Player Aids
1 Twenty-Sided Die
Game Setup
Tyrant setup
- Choose a difficulty and place the corresponding Tyrant Board on the Standing Base. For your first game, it is recommended to choose Galios.
- Rotate the Vortex Wheel so that the Flag symbol aligns with the active section (top of the window). Set the Health Wheels to the Tyrant's maximum Health Points shown on its Board.
- Place the Experience Marker on the "Level Up" space of the Experience Track.
- Shuffle the 7 Monster Cards of the chosen Tyrant and place them face down next to the Tyrant Board. Return the other Monster Cards to the box.
- Set the Monsters aside, together with the chosen Tyrant's Meeple, Swords, Item Tokens, Health Scrolls, and Portal Tokens. Return the 3 Mega Monsters to the box.
- Sort the Elemental Tiles by the number on their backs and shuffle each stack separately, then form a single face-down pile in descending order, with the "1" Tiles on top. Insert the chosen Tyrant Tile into the pile at the position indicated on its back.
Hero setup
- Each Player chooses 1 Hero Board. Take 2 Cubes of your color: place 1 on the highest value of your Health Track and the other on space 1 of your Energy Track. Shuffle your Hero's 15 Experience Cards and place them in a face-down pile next to your Hero board.
Solo mode: Select 1 or 2 Heroes. If playing with a single Hero, take 2 Health Scrolls and remove all Experience Cards displaying the snowflake symbol in the bottom-right corner.
- Each Hero draws 2 Experience Cards, keeps 1 face up next to their Hero Board, and places the other at the bottom of their Experience Deck.
- Place the Starting Tile on the side of your choice.
- Place the components on the Starting Tile as indicated: 1 Portal Token on the area marked with the Portal icon. Monsters on the areas marked with Monster icons. Heroes on the areas marked with a Flag symbol.
- Choose a starting Player. Give them the Active Player Token.
Setup example for 2 Players
In this example, the Tyrant Tile of Galios must be placed face down in the Tile deck, between the "2" Tiles and the "3" Tiles.
Game Turn
I. Hero Phase
The Active Player increases their Energy Track by 3.
All Players (including the Active Player) may:
- Move
- Activate Powers (Hero symbol)
In addition, the Active Player may also:
- Perform a Core Attack
- Activate Powers (Core symbol)
II. Monster Phase
The Active Player draws a Monster Card and resolves its effects in order:
- If the Tyrant is already in play, it performs its Action.
- On each Tile with a Portal Token, a Monster of the indicated type appears.
- All the Monsters of the indicated type move toward the nearest Hero, if possible.
- All the Monsters of the indicated type attack a Hero within Range, if possible.
- All Players may activate Powers with the Monster symbol.
III. End of Turn
Pass the Active Player token to the next Player in clockwise order, who will start a new Turn.
Hero Phase
Active Player Energy Gain
Each Hero has an Energy Track going from 0 to 7. A Hero's Energy cannot go below 0 or exceed 7.
At the start of the turn, the Energy Track of the Active Player goes up by 3.
Hero Actions
All Players can spend Energy to perform the following Actions:
- Move
- Activate a Power marked with the Hero symbol
In addition to the above actions, the Active Player can also perform these Actions:
- Perform a Core Attack
- Activate a Power marked with the Active Player symbol
Before performing an Action, reduce your Energy Track by the energy cost indicated on your Hero Board or your Experience Card. This Energy is spent even if the Action fails.
Players may alternate actions freely in any order, and perform the same action multiple times, as long as each player can pay the required Energy cost. You can also save Energy to use later on.
Move
Spend 1 Energy to move your Hero the number of Tiles indicated on its Hero Board, following paths shown in gray. Monsters on a Tile do not hinder movement.
Each time your Hero enters a Tile, reveal Tiles for every unrevealed adjacent space connected to it by a path: draw the required number of Tiles from the pile and place them face up next to your Hero's Tile. You may choose how to place and orient them, but you must avoid closing paths whenever possible.
If your Action allows your Hero to move several Tiles, you cannot split it to perform another Action in between. After each Tile moved, reveal Tiles as above, then decide whether to continue or stop.
Note: There's no limit to how many Heroes and Monsters can be on the same Tile, and their exact placement on the Tile is not important.
Symbols on the Tiles
Each Tile shows an Elemental symbol (Fire, Ice or Poison) and one or more additional symbols. When the Tile is revealed, immediately place the corresponding Token or Meeple indicated by the symbol.
- Portal: place a Portal Token from the reserve onto the Tile. If none are available, take the Portal Token from the farthest Tile that already has one. The Portal's color is irrelevant.
- Monsters: place the indicated Monster on the revealed Tile. If none are left in the reserve, replace them with another Monster type of your choice, until all Monsters are in play.
- Health Scroll: place 1 Health Scroll upon revealing the Tile.
Tyrant Tile
Place this Tile face down on the Tile adjacent to the Hero. It is automatically revealed once at least 1 Hero has the required number of Experience Cards. When revealed, place the Tyrant Meeple and all indicated Meeples and Tokens on the Tile. From that moment on, always apply the Tyrant's effect as indicated on its Monster Cards.
Example: For Galios, the Tile is revealed as soon as at least 1 Player has 4 Experience Cards.
Movement Example
Thras uses 1 Energy to do 1 Move: he moves 1 Tile along a path to an adjacent Tile. It automatically reveals 2 adjacent Tiles. The top Tile is not revealed since there is no path upward. He places 2 Scarabs on the left Tile and a Health Scroll on the right tile, as indicated on each Tile.
Core Attack
Spend 1 Energy to perform a die roll to attempt to deal Damage to a Monster within Range, as indicated on your Hero Board.
Range
- A Core Attack or a Power with Range 0 targets a Meeple on the same Tile.
- Adjacent Tiles (orthogonally) are at Range 1.
- Range 0-2 targets a single Tile, at Range 0, 1 or 2.
- All Core Attacks must respect Line of Sight: the target must be on a Tile connected by a straight path. Diagonal attacks are not allowed.
Attack Roll Difficulty
To perform a Core Attack, roll the die.
- If the result is equal to or higher than the indicated Difficulty, the Core Attack succeeds and deals Damage to the Monster.
- If the result is lower, the Core Attack fails and has no effect.
- The Difficulty of the Core Attack Roll depends on each Hero's situation.
Damage
When a Core Attack succeeds, the targeted Monster loses Health Points equal to the Damage shown on the Hero Board.
- If an Attack deals 2 Damage: both points are applied to a single target. If the Monster has only 1 Health Point, the extra Damage is lost.
- If an Attack deals 2x1 Damage: deal 1 Damage on two different targets, OR 2 Damage to the same target. Only 1 Core Attack Roll is made.
Hero Core Attack Difficulty by Character
Heka — Her Core Attack succeeds on a roll of 3 or higher when she has 1 to 3 Health, 7 or higher with 4 or 5 Health, and 12 or higher with 6 or 7 Health.
Thras — His Core Attack succeeds on a roll of 3 or higher against Nagas, 7 or more against Scarabs, and 13 or higher against Harpies and Tyrants.
Thalia — Her Core Attack succeeds on a roll of 5 or higher against a Monster at Range 2, 9 or higher at Range 1, and 15 or higher at Range 0.
Axios — His Core Attack succeeds on a roll of 4 or higher if there are 1 or 2 Monsters on his Tile, 9 or higher with 3 or 4 Monsters, and 15 or higher with 5 or more Monsters.
Damas — His Core Attack succeeds on a roll of 4 or higher if his Tile is empty, 7 or higher if there is at least 1 Ally but no Monsters, and 13 or higher if there is at least 1 Monster (even if Allies are present).
Nyssa — Her Core Attack succeeds on a roll of 3 or higher if there are at least 2 Allies on her Tile, 7 or higher with 1 Ally, and 12 or higher with no Allies.
Monster Health
- Nagas and Harpies have 1 Health Point.
- Scarabs have 2 Health Points: if you deal only 1 Damage, insert a Sword through it to mark it as injured.
- When a Tyrant takes Damage, reduce its Health on the Standing Base by the number of Damage dealt.
If the Health of a Monster drops to 0, remove it from its Tile and advance the Experience Track by 1 space.
Experience Track and Level Up
When a Monster is eliminated, advance the Experience Track by 1 space clockwise. The Vortex Wheel may also cause the Experience Track to advance.
Each time the marker reaches or passes the Energy Boost space:
- All Heroes increase their Energy Track by 1.
Each time the Experience Marker reaches or passes the Level Up space:
- Each Hero draws 2 Experience Cards from their pile.
- Choose 1 card to place face up beside the Hero Board. Place the other card on the bottom of the pile.
There are 2 types of Experience Cards
Powers grant the Heroes an additional type of Action.
Magic Items add a permanent, passive bonus to the Heroes. They do not cost Energy to be activated.
When a Magic Item improves your Hero's default abilities, place the corresponding token on their Board.
Examples of Core Attacks
Thras's Core Attack is Range 0 and deals 2x1 Damage. He can therefore only target the Monsters on his Tile: 1 Scarab and 1 Naga.
For 1 Energy, he chooses to target both, because he can deal 2x1 Damage. He rolls a 6 on his Core Attack Roll. He therefore deals 1 Damage to the Naga (3+) but misses the Scarab (7+). The Naga is removed from the Tile and the Experience Track advances by 1.
Thalia's Core Attack deals only 1 Damage, but it can target a Monster at Range 0, 1, or 2.
For 1 Energy, she targets the Scarab on the adjacent Tile (Range 1). She must roll a 9 or higher. The die result is 10, so she deals 1 Damage to the Scarab, which loses 1 Health. She puts a Sword through the Scarab. The Experience Track does not advance.
Activate a Power
Powers may include several characteristics:
1. Activation Phase
Indicates when you can use your Hero's Power:
- During the Hero Phase, only if you are the Active Player.
- During the Hero Phase, whether or not you are the Active Player.
- During any Monster Phase.
2. Activation Cost
The amount of Energy or Health Points required to activate the effect. Reduce your Energy or Health Track by the indicated cost, even if the Power fails. The card is kept after use.
3. Power Roll
Roll the die:
- If the result is equal to or higher than the indicated value, the Power succeeds. Otherwise, it fails.
If no Power Roll is indicated, the Power automatically succeeds.
4. Effect
Describes the Power's effect when activated.
- If a Range is specified, Line of Sight must be respected as with Attacks, even if the Power targets an Ally.
- If no Range is specified, the Power can affect any Tile, regardless of Line of Sight.
- Dealing Damage never requires a die roll, while performing a Core Attack always requires a Core Attack Roll.
- The term Hero may refer to your own Hero or to an Ally.
- Push: Move a target at Range 0 to an adjacent tile, following a connected path.
- Pull: Move a target closer to you, following connected paths.
Note: Magic Items that improve Core Attacks do not modify the Range, Roll, or Damage of Powers. Exception: if a Power instructs you to "Perform a Core Attack", those bonuses apply.
5. Elemental Bonus
If the Hero is on a Tile of the matching Element, replace part of the Power's effect or conditions with the Elemental version.
Example: To activate 'Burning Hands', the Hero normally needs a Power Roll of 13 or more. On a Fire Tile, only 3 or more is required.
Even if the Power affects another Tile or includes movement, only the Element of the Tile where the Hero activates the Power is taken into account.
6. Single Use
Some Powers do not cost Energy but are discarded after use. Place the card at the bottom of your Experience pile once used.
Monster Phase
The Active Player draws a Monster Card, places it face up next to the pile, and resolves its effects from top to bottom.
- At any time during this phase, all Heroes (including the Active Player) can spend Energy to activate Powers with the Monster Phase symbol.
- When the Monster Deck is exhausted, shuffle the discard pile to form a new face-down deck.
1. Tyrant Activation
- If the Tyrant has not appeared yet, skip this step.
- If the Tyrant is in play, it performs the indicated actions, following the same rules as other Monsters.
- The Tyrant is considered a Monster.
Note: When a Tyrant teleports, pushes or pulls a Hero, that Hero cannot make a Defense Roll to resist the movement.
2. Spawning on Portals
On each Tile containing a Portal Token, place 1 Monster of the type indicated on the Monster Card.
If there are 2 Monster symbols, place these 2 Monsters on every Tile containing a Portal Token.
Note: If a Monster type is no longer available in the supply, replace it with another type of your choice. If no Monsters remain in the supply, none are placed. You are already dealing with enough monsters!
3. Monster Attacks
All Monsters with the indicated symbol, including those just spawned, attack 1 Hero within Range. To do so, check their Range and respect Line of Sight.
- If several Heroes are within Range, the Active Player chooses the target.
- If no Heroes are within Range, the Monster does not attack.
Defending Against Monsters
Each time a Monster attacks you, make a free Defense Roll with the Difficulty shown on your Hero board:
- If the result is equal to or higher than your Defense, the attack fails and has no effect.
- Otherwise, you take the Damage shown on the Monster Card and reduce your Health Track accordingly.
Note: An Attack that deals 2 Damage only affects one Hero. If the attack deals 3x1 Damage, it may be split among Heroes within Range, each making a Defense Roll.
4. Monster Movement
- All Monsters with the indicated symbol, including those just spawned, move toward the closest Hero. If there is a Hero on their Tile, they stop moving.
- They move along the paths up to the number of Tiles indicated.
- If several Heroes are the same distance away, the Active Player chooses which Hero the Monster moves toward.
Exception: Nagas always stop at Range 1 from Heroes. They never move onto a Tile containing a Hero, because they can perform Ranged Attacks. If a Hero moves onto their Tile, they remain there.
Monster Phase Example
-
The Tyrant Galios can only attack Heka (Range 0). Heka must roll a 13 or higher on her Defense Roll to avoid losing Health. The die result is 7, so she loses 1 Health Point as the Tyrant deals 1 Damage. He then pushes Heka to an adjacent Tile. She chooses to move onto a Tile containing a Portal.
-
Place 2 Harpies from the supply: one on each Portal Token.
-
The Harpy on Heka's Tile attacks her: Heka rolls a 15 on her Defense Roll (13+), which is a success, so she takes no Damage.
The 2 other Harpies have no Heroes within Range 0, so they do not attack.
- The Harpy (4A) on Heka's Tile does not move, as it is already at Range 0 from a Hero.
The Harpy (4B) moves 1 Tile toward the Heroes. It cannot move directly onto Axios' Tile since it must move along a path. The Active Player decides that Harpy (4C) moves onto Heka's Tile, as both Heroes are equidistant.
All Nagas (4D) move 1 Tile toward the Heroes.
Vortex Card
Each Tyrant's deck of 7 Monster Cards contains 1 Vortex Card.
When drawn:
- No Monsters act or appear.
- Rotate the Vortex Wheel on the Tyrant Board by 1 space and apply the effect shown in the Active Section to all Heroes simultaneously. Possible effects include:
- Level Up
- Gain Experience: advance the Experience Track by the indicated number
- Lose Health Points
- Gain Energy
- If the skull symbol on the Tyrant's Vortex Wheel reaches the Active Section, the game is immediately lost.
Example: The Active Player draws the Vortex Card and rotates the Vortex Wheel by 1 space, triggering the Gain Experience 5 effect. The Experience Marker advances by 5 spaces, which triggers Energy Boost. All Heroes gain 1 Energy.
Appendix Rules
Critical Successes and Failures
When you perform any die roll (Core Attack, Defense, or Power):
- On a roll of 20: Gain 1 Energy.
- On a roll of 1: Lose 1 Energy.
These effects are produced only when the die shows the exact value before applying any modifiers.
Health Scrolls
When a Hero moves onto a Tile containing a Health Scroll, they take it and place it on their Hero Board.
During any Hero Phase or Monster Phase, discard a Health Scroll to give 2 Health Points to any Hero (including yourself), wherever they are. Increase their Health Track by 2 without exceeding the maximum.
Picking up or using a Health Scroll does not cost Energy.
KO Heroes
When your Hero's Health Track reaches 0, they are KO: Lay their Meeple down.
- This Hero is ignored by Monsters, can no longer take actions nor become the Active Player.
- Place any Health Scroll they were carrying onto their Tile.
- A Hero at 0 Health still Levels Up and gains Energy along with the rest of the group.
- A KO Hero may return to play if another Hero restores Health Points using a Power or a Health Scroll.
End of the Game
- The game is won as soon as the Tyrant reaches 0 Health.
- The game is lost if the Vortex Wheel reaches its last space, or if all the Heroes are KO (0 Health).
Advanced Modes
If you have mastered Boktor, increase the difficulty with one of these optional rules.
Mega Monsters
During setup, place 1 Mega Monster of your choice on the Starting Tile instead of its standard version.
When defeated, it grants 1 Experience Point as normal, then returns to the supply.
Whenever this Monster type would spawn, place the Mega Monster in priority, if not already in play, on the Portal Token closest to a Hero.
Mega Monsters activate and follow the same rules as their standard equivalent, except as noted below.
Mega Harpy
- Moves after the Tyrant, but before all other Monsters. Its moves have double the number indicated on the Monster Card.
- If it is on a Hero Tile, each of its subsequent movements must be toward the Tile with the highest number of Monsters, carrying all Heroes on its Tile with it.
- Do not count the Mega Harpy itself when determining the most crowded Tile. In case of a tie, target the closest eligible Tile, following the path with the highest number of Monsters.
Mega Naga
- At the start of each Monster Phase, if a Hero is on its Tile, it moves to 1 adjacent Tile chosen by the Active Player.
- Its attacks have double the Damage and double the Range shown on the Monster Card.
- Its attacks ignore Line of Sight.
Mega Scarab
- It has 4 Health Points. Use Sword tokens to mark its wounds.
- Heroes must spend 2 Movement to exit its Tile.
Dual Tyrant Mode
Choose 2 Tyrants. Select one as the first Tyrant and the other as the second Tyrant.
Setup
- Use the Board and Monster Cards of the first Tyrant.
- Insert the first Tyrant Tile into the Tile pile between Tiles 1 and 2.
- Insert the second Tyrant Tile into the Tile pile after Tiles 5.
Tyrant Tiles
Tyrant Tiles ignore Experience requirements:
- The first Tyrant Tile is revealed immediately when drawn.
- The second Tyrant Tile cannot be revealed until the first Tyrant is defeated.
When the first Tyrant is defeated
- Place 2 Health Scrolls where it was defeated.
- All Heroes Level Up.
- Replace the current Tyrant Board and Monster Cards with those of the second Tyrant.
- Reset the Vortex Wheel to its starting position.
Symbol Glossary
Core Attack, Defense, Movement, Range, Damage, Energy, Health, Fire Tile, Ice Tile, Poison Tile, Single Use, Energy Cost, Health Point Cost, Roll Difficulty, Hero Phase (all Players), Hero Phase (Active Player), Monster Phase, Tyrant, Naga, Scarab, Harpy, Vortex, Portal, Experience, Level Up, Difficulty Level, Push, Pull.