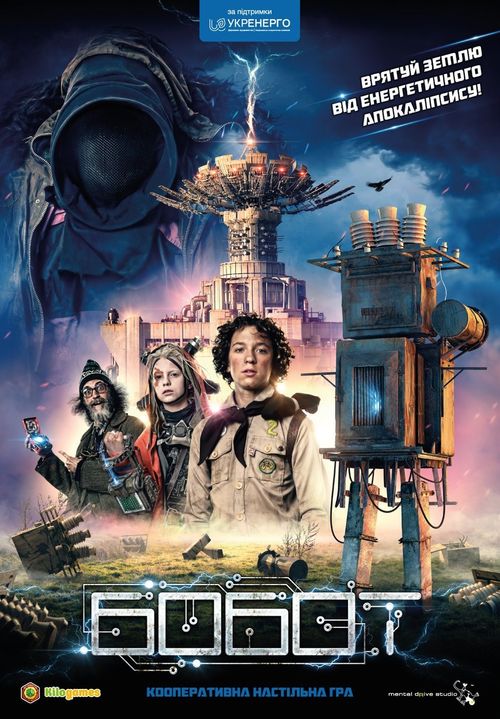
Bobot
Bobot Rulebook
Table of Contents
Table of Contents
Components
- Game board: 1
- Character boards: 4
- Location cards: 60
- Energy tokens: 30
- Part tokens: 21
- Dice: 5
- Event cards: 20
- Equipment cards: 20
- Artifact cards: 9
- Scenario cards: 8
- Character and Smittar tokens: 8
- Tool cards: 25
- Drezina and time tokens: 2
- Rulebook: 1
Setup
-
Place the game board in the centre of the table.
-
Separate the location cards into decks according to the image on their backs. Shuffle each deck and place it face down next to the game board.
-
Shuffle the event cards and place them face up next to the game board.
-
Choose a scenario for this game, either at random or by preference. Place the scenario card face up on the location “Station” (“Станція”).
-
Choose the difficulty level indicated on the scenario card: easy, medium or hard. Place the solar storm marker on the track on the left side of the game board, at the value shown for the chosen difficulty level. Find the Battery cards (“Батарейка”) in the tool deck and give each player the number of Battery cards shown for the chosen difficulty level.
-
Separately shuffle the equipment and tool decks and place them face down next to the game board. Lay the artifact cards out face up.
-
Turn the energy tokens and the part tokens face down, shuffle them, and place them in separate piles next to the game board.
-
Choose a character for yourself. This can be done at random (each player draws a random character sheet) or by agreement. Character sheets are placed on the table in front of each player. If the Professor is in the game, the player who has him takes two random part tokens and places them on their character sheet. If there is a Bobot, the player finds two atomic energy tokens among the energy tokens and places them on their character sheet, then shuffles the remaining energy tokens (which must be face down).
-
Place the drezina marker on level “2” of the location “Drezina”.
-
Place the character tokens and the Smittar tokens for all characters on the location “Drezina”.
Note: the setup page shows a numbered diagram (game board, character boards, location deck, scenario card, storm track, tokens and decks). The diagram's callout numbers are not reproduced here; the numbered steps above carry the setup text as printed.
Two-Player Game
If you want to play a two-player game, you must take the characters “Vlad” (“Влад”) or “Girl” (“Дівчинка”) when choosing characters.
For your first game we recommend the short scenario “Weather Anomaly: Dust Storm” (“Погодна аномалія: Пилова буря”) at medium difficulty.
You are ready to start the game!
Game Flow
In this game all participants play together. The goal is to fulfil the conditions of the Scenario (the location card “Station”) before time runs out (the solar storm track). During play you must cooperate, collect resources, exchange them, and agree on the best actions together, but the decisive word belongs to the active player (the player whose turn it is).
Starting with the first player, each participant must fully complete their turn, after which they pass the turn on clockwise.
Each player chooses which character to play. Depending on the character, its abilities and skills are determined.
Resources
Energy tokens (hexagonal) come in four types: atomic, thermal, hydroelectric and alternative. Atomic energy is the most common; alternative is the rarest. Energy tokens must be kept on the character card in the Accumulator. They are needed to fulfil the conditions of the Scenario, and they also give one-time bonuses.
Part tokens (square) come in three kinds: high-voltage insulators, power connectors and power cables. Part tokens must be kept on the character card in the Backpack. They are needed to fulfil the conditions of the Scenario, and they also give one-time bonuses.
Sidebar: The distribution of energy tokens in this game reflects the current state of energy in Ukraine. We rely most on atomic energy; second are thermal power plants, which run on fossil fuels; then hydroelectric power plants; and then other alternative energy sources such as the sun and wind.
Equipment, Tools and Artifacts
Equipment cards give permanent bonuses to the player when they are put on (equipped) by the character. Equipment is worn on the head, the hands and the body. Each character can wear at most 4 equipment cards, one in the matching zone of the character board. An equipment card may also be held in hand, but in that case it does not give its bonus.
Tool cards are one-time bonuses that can be used to help yourself or another player at the required moment. Players keep tool cards in hand.
Artifact cards are very powerful tools and equipment that give strong bonuses. Artifacts are also needed to fulfil certain Scenarios.
For how to receive resources, read the section “Reward”. Note: the printed rulebook refers to “page 5” here; the Reward section is printed on page 14.
Player Turn
The turn of each player consists of three phases:
I. Movement (optional) II. Action (mandatory) III. New Event (mandatory)
I. Movement
At the start of the turn the player decides whether his character will move or stay in place. A character can move only to an adjacent location. Adjacent locations are connected by paths. One Movement per turn.
Note: Drezina is adjacent to Camp, Container Park, Field and Dump.
During the Movement phase the active player may also put equipment on or take it off his character, or swap it for another equipment card from his hand. Equipment that is taken off returns to the player's hand.
If other characters are in the same location as the active player, he may exchange resources with them, i.e. give his own and receive something from others.
Exchange rules: the active player may exchange any tokens from the character card (energy and parts), as well as tools and equipment cards held in other players' hands. Equipment that is worn by a character must first be taken off (this can be done only by the player performing the Movement phase).
The player may decide not to go anywhere and stay in the current location, where, if he wishes, he may simply exchange tokens or equipment.
Example: At the start of his turn Anton is in the same location as Olena, in the Camp. First he decides to take 2 energy from her, so that he can use it this turn at the location Station (see page 19 for location details). After this he moves to Station, where Maxim is. The players decide that one equipment card on Anton's character card suits Maxim better, so Anton takes it off and gives the equipment card to Maxim, who places it in his hand. Maxim will be able to put it on his character at the start of his own turn. With this, Anton's Movement phase ends and the Action phase begins.
II. Action
After the player has moved (or has declined to move), the Action phase begins. Depending on the location he is in, the player must do one of the following:
- In the locations Camp, Container Park, Field, or Dump / Alien Ship, play the top card of the location deck.
- In the location Drezina, roll the Drezina die and play its effect.
- In the location Station, leave the resources indicated in the Scenario conditions.
Action in the locations Camp, Container Park, Field, and Dump / Alien Ship
In these locations you play cards in order to receive resources. Each location shows the icons of the resources that most often turn up there.
The player takes the top card of the location deck (the back of each deck matches the image on the game board). The card shows which situation his character has fallen into and which abilities can help him get out of it. In these locations players must gain game resources that help them complete the Scenario and win.
To receive the reward, the player must pass a skill check (“перевірка здібностей”).
The card anatomy is: the card name; the event text; the check requirements; and the reward for success.
Each character has four abilities: Strength, Agility, Intellect and Communication. Each corresponds to one die of a certain colour, shown at the bottom of the character card. Depending on the level, the die may be: red with values from 1 to 6, yellow (1–8), green (1–10), or blue (1–12). This means that abilities with a red die are the weakest, and abilities with a blue die are the strongest, because a higher value can come up.
On most location cards there is a choice of which ability to use for the check. The player whose turn it is decides, at his discretion, which ability to use to get his character out of the situation.
Check difficulty is the minimum value that must be rolled on the die of the chosen ability in order to get out of the situation successfully.
Example: Olga, who plays Bobot, is in the location Field and draws the card “Broken Smittar Machine”. Here she must pass a check: Agility, rolling 5 or more, or Strength, rolling 7 or more. Bobot's ability dice are: Agility, a die with values 1–6; and Strength, a die with values 1–12. Olga decides to take the Strength check. If the die shows 7–12, the check succeeds and Olga takes the Reward, a part token, and places it on the Bobot card. If the die shows 1–6, the check fails.
Bonuses to skill checks
Energy tokens and part tokens, as well as some equipment and tool cards, help with skill checks. This often saves players when they fail to roll a successful value.
Equipment cards work only if they are placed in the matching zone on the character card, and they give permanent bonuses to the owner. There are four types:
- Cards that add +X to the value of the die of a specific ability. For example, the effect “Equipment – ‘+2 to Intellect’”.
- Cards that improve the level of a specific ability's die to a better one (red to yellow, yellow to green, green to blue).
- Cards that add one extra purple die (1–4) to the check of a certain ability. When checking that ability, the player rolls the corresponding die together with the purple die and adds the results of both.
- Cards that grant Acceleration. After receiving the reward for a successful check, the character may, if the player wishes, begin the turn again from the start of the Movement phase.
Energy tokens and part tokens can be used after the player has rolled the ability die. If the result is unsatisfactory, the player may spend any energy token to re-roll the die. The old value becomes invalid and cannot be returned to. If the new result is again unsuccessful, the player may spend another energy token to re-roll the check die again. In addition to this (or instead of it), the player may use any part tokens on the character card, each adding +1 to the value on the die.
Some tool cards that players hold in hand give bonuses to skill checks. They may be used both for the player's own check and for the checks of other players.
Example: Maxim plays the Professor. Strength is a red die with values 1–6, and Intellect is a blue die with values 1–12. He decides to check Intellect. However, this character has the equipment card “Crowbar” (“Лом”), which adds +2 to Strength checks, so the chance of success on a Strength check is higher. Maxim rolls the red die and gets “2”. 2 (die) + 2 (Crowbar) = 4, and the Strength check requires 5 or more. So Maxim discards 1 part token to add +1 to the result. The check succeeds, and the player receives the reward, an equipment card.
Mutual aid: other players who are in the same location as the player taking the check may help him improve the result by spending their own energy tokens and part tokens, which act in this way. However, they cannot use the bonuses of their own equipment to help another player.
Used tokens and tool cards go to the discard. Used tool cards may be placed in a face-up pile next to the tool deck. Used energy and part tokens are not returned to the active reserve; place them in a separate face-up pile next to the game board. Only when the whole supply of a resource is exhausted, turn over all tokens or cards of that resource from the discard, shuffle them and form a new pile or deck.
Note: use resource tokens economically if they are also needed to complete the main Scenario.
If the active player did not manage to obtain a successful result on the check, his Action phase on this turn ends.
Reward
If the player managed to get a result equal to or higher than the value shown on the location card, he receives the reward shown.
If you must take energy or part tokens, take the indicated number, turn them over, and decide which ones and how many you want to keep. You may not hold more energy tokens than fit in your Accumulator, and not more part tokens than fit in your Backpack. You may swap tokens on the character card for new ones. All tokens you cannot keep are sent to the discard in a separate face-up pile. Do not return them to the active reserve!
If you received equipment, take the top card of the equipment deck. You may place it immediately in the matching spot on the character card. If equipment of that type is already there, you may take the old card into your hand and place the new one in the freed spot, or keep the old one and take the new card into your hand.
If you received a new tool, keep the card in your hand. The number of cards in hand is unlimited. A tool may be played at any moment of the game, not only on your own turn. If you must receive an artifact, take one of those lying next to the field.
Note: each location “specializes” in certain types of reward, shown by the symbols on each location. Important: if you need to draw a new card from the location deck, or from the equipment or tool decks, and the deck has run out, shuffle the discard cards and form a new deck.
Artifacts are especially powerful items. In each location there is only one such item, except for the secret location “Alien Ship”. In all other respects artifacts work like tool and equipment cards.
Remember: you may give unneeded equipment to another player who is in your location during the Movement phase (yours or the other player's).
The secret location “Alien Ship”
Deep in the Dump, hidden from human eyes, lies the alien ship of the Smittars. Therefore the Alien Ship is not a separate location, but a branch of the location “Dump”. However, to draw a card from the “Alien Ship” deck during the Action phase, instead of from the “Dump” deck, the character must have access to the alien ship.
The following characters have access to the Smittar ship:
Girl (“Дівчинка”), because she is an ally of the Smittars and knows exactly where their ship is hidden. While she is in the Dump, she may decide on each turn of the Action phase whether to draw a card from the Dump deck or from the Smittar Ship deck.
Vlad, because he can find the way to the ship. But Vlad must manage to get inside, which means passing an Intellect check with difficulty 5. Each time Vlad is in the Dump and wants to draw a card from the Smittar Ship deck, he must successfully pass an Intellect check. If the roll fails, he draws a card from the Dump deck. The Intellect die can be improved or changed with energy and part tokens, as in other skill checks.
Any character with the equipment card “Smittar Suit” (“Костюм Сміттяра”). Any character may infiltrate the alien ship if they have successfully disguised themselves, even Bobot. The Smittar Suit can be used only while it is worn by the character. The Smittar Suit can be found in the equipment deck when you receive an equipment reward for a successful adventure in the locations.
If a player has access to the Smittar Ship, he may take the top card of the Smittar Ship deck and perform the check on it, or pay one energy token and draw one more card so as to choose one of two cards. If neither suits, the player may spend one more energy token to draw a third card and choose from three, and so on. This is needed to find the artifact or resource required for repairing the Station, as the Scenario requires. All unused Ship cards go to the discard, and the player performs the skill check as in other locations.
Other players in the location “Dump” may help the active player on the Alien Ship by the usual rules.
Energy cannot be created or destroyed. It can only be transformed from one type into another.
Action in the location “Station”
Station is the key location for winning the game. The materials needed to repair it must be brought to Station in good time.
With his Action, the active player may leave at Station any one type of resource indicated in the Scenario conditions. In one turn the player may give ONE resource (but no more than the requirements ask for). Energy tokens of different types and part tokens of different types are seven separate types of resource.
Resources left at Station cannot be taken back or used for a Battle against Smittars (see page 20).
Example: if repairing the Station requires 2 atomic energy and 3 thermal energy, the player may give one or two atomic energy tokens, or from one to three thermal energy tokens, but not atomic and thermal energy in the same turn. If a player wants to give two or more types of resource, he must stay at Station for two or more turns, giving one type of resource per turn.
Attention! You may give a smaller number of resources of one type than the repair requires. For example, if 4 atomic energy are needed but the player has only 2, he may give only two. The other two can be brought later by any of the players. But do not forget that the number of turns in the game is limited. Each handover of a resource always costs a turn, so it is wise to give the necessary number of tokens of one type immediately, each turn.
Action in the location “Drezina”
Drezina is adjacent to all locations except Station. It allows players to move quickly between distant places, such as Camp and Dump.
If the player is in Drezina during the Action phase, he does not draw any location card. Instead he rolls the Drezina die to see whether he succeeds in a ride. Which die is rolled depends on the level of the Drezina:
- Level 1: red die, values 1–6
- Level 2: yellow die, values 1–8
- Level 3: green die, values 1–10
- Level 4: blue die, values 1–12
At the start of the game the Drezina level is 2.
During the game the Drezina level may change depending on the effect of Event cards (see page 20). Whenever a card says to raise or lower the Drezina level, move the Drezina marker one level up or down. If this is impossible, nothing changes.
Drezina effects
Depending on the value rolled, the active player must carry out the corresponding Drezina ride effect:
- 1: Discard equipment or a tool. The player must discard one equipment or tool card of his choice. If he has no equipment or tool cards, he discards nothing.
- 2: Player is detained. The player ends his Action phase, lays his character token horizontally, and moves to phase III, New Event. On his next turn this player does not move from his place (but he may exchange resources). He then stands the token upright and immediately rolls the Drezina die.
- 3–4: Nothing happens. The player simply ends his Action phase, with no positive or negative consequences.
- 5: Re-roll the die with +1. The player immediately re-rolls the Drezina die and adds 1 to the new result.
- 6: Re-roll the die with +2. The player immediately re-rolls the Drezina die and adds 2 to the new result.
- 7–8: Extra turn. The player immediately gets the chance to move to an adjacent location and perform the Action there. If he wishes, the player may not move, but stay on Drezina and perform its Action again.
- 9: Extra turn and a tool. The player draws a card from the tool deck and takes an extra turn (as for 7–8).
- 10: Extra turn and equipment. The player draws a card from the equipment deck and takes an extra turn (as for 7–8).
- 11: Extra turn and 2 part tokens. The player draws 2 part tokens from the supply and places them on his character card. If they do not fit, he discards the excess. He then takes an extra turn (as for 7–8).
- 12: Extra turn and 3 energy tokens. The player draws 3 energy tokens from the supply and places them on his character card. If they do not fit, he discards the excess. He then takes an extra turn (as for 7–8).
To influence the result of the Drezina die, the player may spend energy tokens to re-roll the die, and/or spend part tokens to add +1 to the result.
Bonuses from equipment cards do not apply to Drezina die rolls, because the Action of this location is not a skill check of the character.
Important rule: the player may always choose the effect of a lower value than the one that came up.
III. New Event
Regardless of the location in which the player performed his Action, after the end of this phase he must always play an Event card. The Event deck lies face up next to the game board, so the players always know which event comes next (see the Setup, step 3). Each Event card consists of two parts: the actual Event and New Information.
To play an Event card, the player takes the top card of the Event deck and places it on the game board in the active event zone. Then the following steps must be carried out, in this order:
- move the time marker one step towards zero;
- check whether a Battle against a Smittar is possible;
- carry out the conditions of the Event.
Details of these steps:
The solar storm is approaching! The solar storm marker moves forward one space, which reduces the time left for completing the Scenario.
Battle. If at this moment a character is at Station, and a Smittar token is in the Battle zone (the last space of the Smittar Attack track), that character may carry out a Battle against the Smittar. A Battle can be carried out only at the start of playing an Event card (therefore every Event card begins with the step “Battle”). It is not compulsory that the character who is active takes part; it may be any of the characters at Station. If there are several of them, the players must choose which one will fight the Smittar. Only one Battle may be carried out per turn, so if the chosen character does not win, the Battle ends, even if other characters are also at Station.
Important: players are not obliged to fight the Smittars, and can concentrate all their forces on quickly searching for the components needed to repair the Station. But do not forget that each enemy that reaches Station reduces the total number of turns.
Fighting the Smittars is not compulsory, because they do not attack the characters. Their aim is to reach Station, further damage it, and thus take away the precious time before the solar storm.
A Battle is a Strength skill check. The difficulty of the check depends on the strength of the Smittar and is shown in the upper left part of its token. The player who has chosen to fight must pass the Strength check. He may use all skill check bonuses (equipment, energy tokens, part tokens, tools). Other players at Station may help in this check. For more details on bonuses to checks, see page 12.
If the character passes the check successfully, he wins. The Smittar token leaves the board, and the player receives the reward shown in the lower right corner of the token (if there is one).
If the check fails, the Smittar wins. Its token stays in the Battle zone, and the player receives the penalty shown in the lower left corner of the Smittar token (if there is one).
Note: on the Smittar Attack track there can be only one Smittar token at a time. When such a token is removed from the board, it returns to the rest of the Smittar tokens and may later be brought back into play by an Event card.
Event
All events are divided into two kinds:
- Story events, which affect the game in some way. Players simply carry out what is written on the card.
- Smittar Attacks. This event takes the form of a question, “Is there a Smittar token on the Attack track?”, after which there are two options. If there is no token (NO), place the Smittar token indicated on the indicated space of the track. If there is a token (YES), move the Smittar along the track towards Station by the indicated number of spaces. If in this way the token enters Station, remove it from the board and move the solar storm marker forward by the number of spaces shown in the upper right corner of the token.
If a Smittar token is on a space of the “Battle zone”, this does not mean that the Smittar has reached Station. It must take one more step.
After the active player has played the Event, his turn ends. The next turn belongs to the player on the left (turns continue clockwise).
New Information
Besides the events described above, every Event card has another part, written along its right-hand edge. This is New Information, which changes the rules of the game for the entire next turn. The Event card remains lying on the field, so that the players always see the current information and can use its possibilities. Among them there may be useful effects (for example, the possibility to choose the needed equipment or tool card when receiving a reward, or to look at the top cards of the location decks) and harmful ones (for example, a character cannot move, or cannot use energy or part tokens).
Note: in the first turn of the game the effects of New Information do not apply to the active player, because no Event card has yet been played.
Remember that you can also see the next Event card. Plan your turns according to the coming events and information.
As soon as a player takes the last card from the Event deck and places it in the active event zone, shuffle the other Event cards and form a new Event deck face up, so that the next card is visible.
End of the Game
The game can end in two cases.
Defeat. If the solar storm marker reaches zero on the track, you did not manage to repair the Station in time. The solar storm destroyed all the modern electronics on the unprotected Earth. Databases were lost, communication networks were destroyed, the energy supply was cut, and numerous industries were damaged. Although humanity survived, the plans of the Smittars were also set back by hundreds of years.
Victory. If the players have fulfilled all the repair requirements of the Station shown on the Scenario card, you win. The game ends right after the active player brings the last necessary resources to Station. The protective field of the Earth was activated in time; the solar storm only affected the columns of thermometers. The plan of the Smittars failed. Humanity is free to develop, produce and consume more and more energy. But will this not, in time, lead to a technological catastrophe and the fall of civilization, as the Smittars feared? Only people themselves can answer that question.
Player Reference (Quick Guide)
The printed rulebook closes with a quick reference card, reproduced here.
Player turn:
- Movement (optional): you may move between adjacent locations, and exchange equipment, tools and resources.
- Action (mandatory): perform the action for your character's location. In a location, draw the top card of the matching deck. On Drezina, roll the Drezina die and carry out its effect. At Station, leave the resources required by the Scenario.
- New Event (mandatory): resolve all three parts of the new Event card: the time marker moves one step (“-1 hour”), the question “Is there a Smittar on the Attack track?”, and the New Information.
Effects:
- Acceleration (“Прискорення”): an effect granted by some artifacts. After a successful check, the Movement and Action phases may be performed one more time in the same turn.
- Detained (“Затриманий”): if the character is detained, then instead of moving to another location in the Movement phase, he must remain in place and perform the Action again in the same location. The effect works for one turn only.
Battle:
A Smittar in the Battle zone may be attacked only by a character located at Station, and only once per turn of the active player.