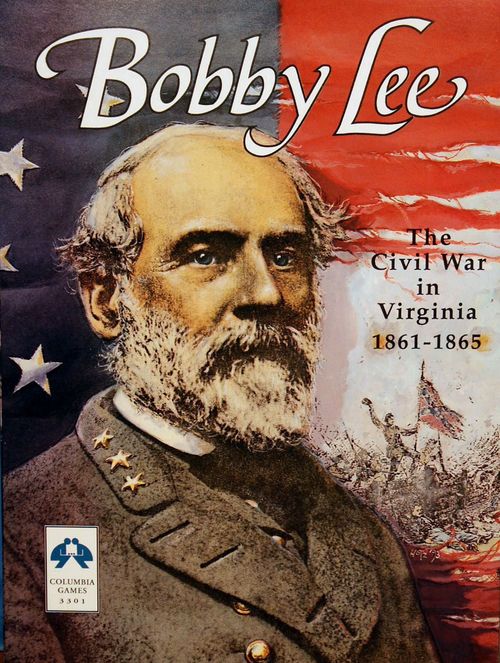
Bobby Lee: The Civil War in Virginia 1861-1865
Bobby Lee: The Civil War in Virginia 1861-65 Rulebook
Table of Contents
Table of Contents
1.0 GAMEPLAY
The game is divided into four Years, 1861-64, but can extend into 1865 or later. Each year is divided into four Quarters, Spring, Summer, Autumn, and Winter. Each Quarter consists of a varying number of alternating Player Turns, followed by a simultaneous Supply Turn.
1.1 PLAYER INITIATIVE
Players "bid" to determine who has the Initiative (first turn) in a Quarter. Each player sets a die on the mapboard, hidden by his hand, showing the number of Leaders he will activate on the first Player Turn.
The higher bid wins the initiative and that player must activate the exact number of Leaders bid (no more and no less). The CSA has the initiative in case of tie bids. If both players bid "zero" (a "6" on the die), two Pass turns have been bid and the Quarter ends immediately.
IMPORTANT: The losing bidder is not required to follow his losing bid.
1.2 PLAYER TURN
Each Player Turn starts by activating one or more Leaders. These units command the movement of any units within their rated Command Range of Ø, 1, or 2 hexes.
Each time a Leader is activated it loses one (1) step which limits how much action is possible in any Quarter before an army must rest and rebuild.
PASS TURN: Players can "Pass" a turn by activating no Leaders. They can Pass one turn, and still play a normal Player Turn later. However, two consecutive Pass turns (one by each player) ends the current Quarter.
1.21 Movement Phase
Units within Command Range of an active Leader can move 1 to 3 hexes, depending on their Speed, terrain entered, and the current Season. Active Leaders are then reduced one step, returned to upright mode, and moved according to their own speed. Forced marches (if any) are now resolved. All movement must be completed before starting the Battle Phase.
1.22 Battle Phase
Battles result when the Active player ("Attacker") moves units into enemy occupied hexes. If either player has only one or two units to start the battle, a Skirmish is fought. Otherwise, the Defender deploys his units on a Battle Board into three (3) Positions and an optional Reserve, then the Attacker does the same. The battle is fought to a conclusion with a series of alternating Battle Turns, Attacker first. Each Battle Turn has four segments:
- Retreat: any/all units to adjacent hexes if desired.
- Morale: check for all strength 1, engaged units. Some of them might flee.
- Combat: move OR fire units in any sequence to gain any advantage. Units that move may not fire, and vice-versa. Exception: Outflank, 6.5.
- Reinforce from adjacent hexes. Small battles may develop into large battles that last for several days.
Each day is separated by a Night turn that enables players to retreat more easily, or reinforce and re-deploy for another day of battle. Extra days of battle require the expenditure of Leader steps.
Several battles in different locations often occur at the same time. These are fought, one by one, in any sequence chosen by the Active Player, except all Skirmishes (6.1) must be resolved before any battles.
1.3 SUPPLY TURN
A Quarter ends when two consecutive "passes" are made. A Supply Turn is then played. See 9.0.
The Supply Turn is simultaneous, but if a conflict arises as to who performs any action last, the CSA player has this right.
Each new Quarter then begins with an initiative bid to determine 1st Player.
GAME EQUIPMENT
- Mapboard
- Battle Maps (1)
- Wood Blocks (96) & Labels
- Order of Battle Cards (2)
- Dice: 4
- These rules
2.0 THE MAPBOARD
The mapboard covers most of the state of Virginia, plus adjacent parts of Maryland, Pennsylvania, & West Virginia. A hexagonal grid determines the location and movement of forces.
Except for Ft. Monroe (SE corner of map) and West Virginia (2.71) all territory south of the Potomac River is friendly to the CSA. Territory north of the Potomac is friendly to the USA.
2.1 HEXES
The mapboard is divided into hexagons (called hexes) to determine the location and movement of units. Partial and coastal hexes are playable.
2.2 TERRAIN
Map features affecting play include rivers, forests, mountain gaps, marshes, towns, ports, and railroads. Some types apply to Hexes, some to Hexsides, some to both. A hex or hexside may contain two or more terrain types; the most restrictive terrain always applies. For coastal hexes, only land terrain is considered.
See Terrain Effects table on the back cover for movement and combat effects.
- CLEAR: cleared fields of crops and pasture separated by light woods.
- FOREST: Units must stop when they enter a vacant forest hex, but can move through if the hex was friendly-occupied at the start of this Player Turn. Forest affects battles (6.66).
- MARSH: There are no Marsh hexes, only Marsh hexsides. Units must stop after crossing a Marsh hexside.
- GAP: Mountain hexsides are impassable except where a Gap (pass) is named.
- RIVER: All river hexsides are impassable except where a marsh, bridge or ford exists, or a temporary Pontoon Bridge (5.41) is built.
ERRATA: Add a bridge over Antietam Creek on the Campton Gap hexside.
- SEAS: The most upstream port on a river is called "Head of Navigation." These ports are named in 8.2. Movement across rivers or between friendly ports downstream of the Head of Navigation requires a Sea Move. Players can also Sea Attack into vacant or occupied enemy ports. Non-port hexes are considered unsuitable for sea attacks.
2.21 Hexside Limits
When NOT attacking, units ignore Hexside Limits. Attack Limits control the number of units which can start battles via that hexside. The Reinforce Limit controls the number of units that can reinforce a battle across a hexside per Battle Turn. The Retreat Limit is the same as the Attack Limit. Both Reinforce and Retreat limits are doubled during a Night Turn (6.81).
River hexsides (with no crossing) and Mountain hexsides (with no Gap) are impassable. Supply Lines (9.2) and Command Range (5.12) cannot be traced through impassable hexes or hexsides.
Hexside limits are reduced in Mud, sometimes to zero, which means Gaps and Marshes become impassable for reinforcements.
2.3 TOWNS
Towns that contain a number are major towns that provide Victory and Replacement benefits to a player controlling their hex. The number is a Victory Point value if held by the enemy player. New units are deployed in Rail Entry hexes, or in friendly supplied major towns within Home Territory.
2.31 Fortresses
Five towns, Alexandria, Baltimore, Petersburg, Richmond, and Washington, plus Fort Monroe are fortified. They provide extra defensive benefits (6.65) to defending units.
2.32 Ports
Coastal and river settlements with an anchor symbol are Ports. Some ports are towns, some only smaller settlements with no VP value. Control of these ports enables Sea Movement (8.3) and Sea Supply (9.2). Fort Monroe and Baltimore are Major ports.
2.4 RAILROADS
The Virginia and Maryland rail net was sparse in 1861, especially in the Tidelands region north and east of Richmond. This rich farming area almost sat out the war because a lack of railroads discouraged mounting operations there.
Units can move by rail with Strategic Movement (5.4) and rail supply is traced along controlled railroads (7.1).
2.5 SUPPLY HEXES
Supply hexes are map edge rail hexes marked with Red (CSA) or Blue (USA) supply symbols to indicate original ownership. These hexes are supply sources for rail supply. One new unit may appear per friendly Supply hex each Supply Turn.
2.6 ROADS
The few paved (macadamized) roads that existed in 1861 are shown as brown lines on the map. Units starting, moving, and ending a move on roads add one ( +1) to Speed. Roads also function like a railroad for supply, but do not allow Rail Movement.
Valley Pike: connects Staunton with Martinsburg. It allows faster movement and connects with Rail Supply in the Shenandoah Valley. The road can be used by both players.
National Road: connects Baltimore with Cumberland and westward to Ohio. The CSA can use this road for faster movement, but not for supply; the USA can do both.
2.7 HEX CONTROL
Control of Ports and Rail Lines is important for Supply. Control of towns also affects Victory Points. Control is determined by the location of units at the end of the Movement Phase, after each battle or skirmish ends, and during the Supply Turn. Prior occupation and/or movement through an enemy hex, does not affect hex control.
EXAMPLE: the USA must have at least one unit in Winchester at the end of their Movement Phase to keep control. If they vacate the hex, control reverts back to the CSA, who then regain 1vp.
2.71 HOME TERRITORY
In general, all hexes north of the Potomac are Home Territory to the USA, and those south of the Potomac to the CSA player.
EXCEPTIONS: Ft. Monroe and "West Virginia" (all hexes on both sides of the South Branch of the Potomac River except Brandywine, and hexes to the west of the river) are friendly to the USA. The B&O rail hexes from Cumberland to Harper's Ferry are also USA "territory". The relevant hexes all contain a blue settlement.
ENEMY Territory is Home Territory for the enemy player.
2.72 FRIENDLY HEX
A hex is friendly when it is occupied by one or more of your units, or is a vacant hex in Home Territory.
3.0 THE UNITS
3.1 NATIONALITY
Wooden blocks, called units, represent USA (blue) and CSA (gray) forces. A die-cut, adhesive label identifying units must be attached to each block. USA units are blue with blue labels. CSA units are gray with butternut labels.
3.2 FOG OF WAR
Units stand upright, labels facing the owning player. This prevents players from observing enemy unit types and strengths until revealed in combat.
3.3 UNIT STRENGTH
The current strength of a unit is the number on its top edge when standing upright. Strength determines how many six-sided dice (d6) are rolled in combat. For example, a unit at strength 3, rolls 3d6.
3.4 STEP REDUCTION
For each hit taken in combat, strength is reduced by rotating the unit 90 degrees counter-clockwise. The diagram below shows the same unit at strength 3-2-1.
[Diagram: a unit block rotated through four strengths, ST 3, ST 2, ST 1, and 0 (eliminated), showing strength values 3, 2, 1 on successive edges of the block.]
3.5 UNIT ATTRIBUTES
A unit's type determines its Speed and Firepower. See: Unit Data chart (back cover).
3.51 Speed
Speed is the number of hexes a unit can move per Player Turn. Add one (+1) to Speed with a Forced March (5.31), but the unit is then subject to attrition from stragglers.
3.52 Firepower
Firepower is indicated by the letter "F" and a number, such as F1 or F3. The number is the maximum roll that scores a hit in combat.
EXAMPLE: a unit rated F1 scores a hit for each "1" rolled, but a unit rated F2 scores a hit for each 1 or 2 rolled.
Note that Artillery have two firepowers, F1 for long-range fire and F3 for short range fire.
3.6 UNIT TYPES
Five main types of units are found in the game: Leaders, Infantry, Garrisons, Cavalry, and Artillery. Unit types are identified by the symbols in label centers. Each side has three green entrenchment labels for blue and gray blocks. There are also four brown labels for the common red blocks.
3.61 Leaders
Leaders represent army level headquarters of command and logistics. Some Leaders are 4-step, some 3-step, some 2-step. The yellow number (bottom right) is their command range. For details on leaders, see 5.1.
Each side also has one Supreme Leader with special abilities (5.4), namely Lincoln for the USA and Davis for the CSA.
3.62 Infantry
Units with crossed muskets. Each step is one brigade of 3,000 to 4,000 men. CSA infantry can build to 4-step, USA to 3-step. Both have F2 firepower.
3.63 Garrisons
Low quality troops used mainly on defense. Garrisons have F1 firepower and Move 1. USA garrisons build to 4-step, CSA to 3-step.
3.64 Cavalry
Units with crossed sabres and yellow centers. Each step is roughly 800-1,200 troopers. They are excellent for screening and raiding, but move like infantry in battle, and only have F1 in combat. CSA build to 3-step, USA to 2-step.
3.65 Artillery
Units with crossed gun-barrels and red centers. They represent about 24 guns per step. Artillery have two fire ranges, F1 Long and F3 Short. USA artillery build to 4-step, CSA to 3-step.
3.66 Entrenchments
Both sides have three (3) blocks that mark entrenched positions in battles. One entrenchment is added to the mix each year starting in 1862 to reflect the gradual escalation of entrenchments. See 6.9.
The Units
Each step of infantry equals one brigade of 3,000-4,000 men. A full strength division (on paper) contained three brigades of 4,000 for a total of 12,000 men. In practice, however, few divisions exceeded 9,000, and later in the war most were lucky to muster 6,000 men.
The CSA tended to have larger divisions of four or five brigades.
Shenandoah Valley
The scene of Stonewall Jackson's famous Valley Campaign of 1862, this fertile valley runs between the Allegheny and Blue Ridge mountains from Staunton north to Harpers Ferry. The Valley provided significant foodstuffs for the Confederacy, and an easy route to invade the North, screened from Union observation by the Blue Ridge Mountains. For the Union it was less useful, since moving up the Valley (toward Staunton) led them further and further away from Richmond.
The Wilderness
Much of Virginia was wooded in 1861; forests are shown only where large, dense tracts existed, such as the Wilderness. Maneuver was difficult there because of dense undergrowth and roads were few and primitive. Vicious battles were fought here in 1863 and 1864.
The Peninsula
The narrow neck of land stretching SE from Richmond to Fort Monroe. Although the Peninsula had been settled for over 250 years (Jamestown was founded in 1607) the region was still mostly wooded and swampy in 1861. Having moved the Army of the Potomac by sea transport to Fort Monroe, McClellan mounted his ill-fated Peninsula campaign here in Spring 1862.
Markers
The four dark brown labels are attached to the four red blocks. These are markers to keep track of Victory, Year, Quarter, and Battle Time.
4.0 VICTORY
4.1 VICTORY TRACK
A Victory Track is printed along the eastern edge of the mapboard. A counter is moved on this track in response to certain conditions noted under Victory Points (4.3). Each player seeks to move the counter into his own Decisive Victory box. See 9.0.
4.2 CAMPAIGN GAME
The game starts in Summer 1861, and continues until one side gains a victory. Consult the Order of Battle cards and deploy forces on the map at their noted 1861 strengths and locations.
4.21 Game Victory
If neither side gains a Decisive victory by the end of Autumn 1864, the CSA wins if they have a Marginal victory (reflecting the upcoming election). If Stalemate, continue play into 1865 (and beyond if necessary) using 1864 RP. A Marginal Victory can now win for either side.
4.22 Free Deployment
Players have the option to deploy units as per scenario and then exchange them as desired, always keeping the same number of units at each location.
4.3 VICTORY POINTS
The "V" counter is moved one space on the Victory Track in the appropriate direction for each Victory Point (VP) won.
4.31 Town VP
Some towns have VP values based on economic, political, and military factors. Players ignore VP towns of their own color, except when liberating them from enemy occupation. For example, Winchester is a 1vp CSA town. The CSA gain nothing for it. The USA wins 1vp each time it occupies Winchester, but the CSA wins 1vp each time it regains control.
IMPORTANT: Towns in Enemy Territory must be occupied by friendly units to maintain control.
4.32 Time VP
The burden of attack rests with the USA. The South has declared its independence and need only defend itself to win. The CSA can win the game simply by parrying USA invasions of Virginia and letting the passage of time gain them victory. 1vp is scored by the CSA player during the Supply Turn of every Quarter.
4.33 Victory Track RP
In addition to the fixed quota of Replacement Points (RP) noted on the back cover, one player gains bonus RP equal to the track space number of the Victory marker. That is, if the marker is located on the "1864" space, the CSA gain 2rp, but if located on the "1863" space, the USA gain 2rp. Maximum bonus is 6rp (above that a player has won).
4.4 EMANCIPATION
Once per game, during any Supply Turn of 1862 or later, the USA may announce the Emancipation Proclamation. This cannot be done if the CSA currently has any units north of the Potomac.
Emancipation gives the USA 3vp, but the CSA immediately get 6rp reflecting a brief surge of Southern volunteers.
4.5 DRAFTS
Both sides imposed draft laws after volunteer support ebbed with the bloody battles of 1861 and 1862. The drafts were never popular and caused some riots, but the threat of being drafted plus a bounty to volunteer did encourage men to join.
Each Supply Turn, players may choose to call one draft from their Replacement Pool. Drafts do not cost RP, but 1vp is awarded to the opponent regardless of the result.
PROCEDURE: Roll 1d6 and consult the Draft table (back cover) to determine the cadres (if any) received. Deploy draft cadres at step-1 like new units (9.52).
4.6 SHORTER GAMES
Each year takes 60-90 minutes to play. Shorter games can be played by starting the game with the given OBs for 1862, 1863, or 1864. Deploy forces according to these OBs, and position the Victory marker in the same year on the Victory Track. All such games start in the Spring.
NOTE: If starting a game in 1863 or 1864, Emancipation cannot be proclaimed. The 3vp for Emancipation are already factored into 1863 and 1864 starting VP.
4.61 One Year Games
Start any year in the Spring (Summer for 1861) and end after the Autumn turn is played. Victory goes to the player who, after the Autumn supply turn, has improved his Victory Track position from the starting year position.
Free Deployment
This option better reflects the doubt regarding enemy strength which always plagued the commanders prior to opening a campaign.
Emancipation Proclamation
The American Civil War began as an issue over States' rights, not slavery. The conflicting rights of Free and Slave states had long been established by the Missouri Compromise of 1820. But changing demographics and economics became a festering wound to national unity. The war began when Lincoln disputed the right of Southern states to secede from the Union.
President Lincoln, an ardent anti-slavery Republican, knew that very few Northerners would fight to abolish slavery. He eventually persuaded his reluctant Cabinet to support emancipation because it would discourage foreign support for the Confederate side, and provide the North with "a just cause" to continue the war against growing opposition. Lincoln agreed that emancipation be delayed so that it would not be viewed as a cynical ploy to save the Union. A "victory" at Antietam gave Lincoln his chance and the proclamation became law January 1, 1863.
The Emancipation Proclamation changed perception of the war, from a War of Southern Independence to a war against slavery. The proclamation abolished slavery only in the Confederacy (abolished as a right of war), but was strengthened by the 13th Amendment (1865) that abolished it nationwide.
1864 Election
Failure to defeat the Confederacy after three years of war threatened the re-election of Lincoln in November 1864. Up until the dramatic victory at Atlanta in 1864, defeat for Lincoln seemed likely. Especially so because no president had been elected to a second term since Andrew Jackson in 1832.
Lincoln's opponent, McClellan, the former commander of the army fired in Nov/62, initially supported the Democratic Party "Peace Plank" to negotiate a cease-fire, then call a States Convention to seek a constitutional compromise. This was a popular policy in 1863, but became a liability after the fall of Atlanta in Aug/64.
McClellan tried to moderate his party's "peace effort" to no avail. He was defeated by a Lincoln landslide of 212 to 21 electoral votes, although the popular vote was much closer at 55% to 45%, and, of course, no Southern votes were counted.
5.0 MOVEMENT
5.1 LEADERS
Movement is commanded by Leaders. Both sides have 1 Supreme Leader and 3 Army Leaders. Army leaders can be Major (4-steps) or Minor (2 or 3 steps). There can only be one Major Army Leader per side in play at any time, except see 5.22.
5.11 Leader Activation
Leaders are activated by tilting them forward, face-up in the hex they occupy. After commanding movement all active Leaders are reduced one step, returned to upright (hidden) mode, and may then move at their own speed. They may force-march.
IMPORTANT: Leaders may never be activated at 1-Step since this would eliminate them. Nor can they force-march at 1-Step. They can be eliminated by battle losses, but can then be rebuilt. See: 5.2.
5.12 Command Range
Army Leaders have a command range (CR) indicated by the yellow number in the lower right corner. Leaders with CR Ø, command the movement of friendly units in their own hex. Leaders with CR1, extend command out to all adjacent hexes. Leaders with CR 2 extend command out one extra hex.
Command Range cannot be traced through impassable terrain nor through enemy-occupied hexes.
NOTE: Supreme Leaders do not have a command range, but rather control Strategic Movement (5.4).
5.2 LEADER CHANGE
Each Supply Turn both players must make a Leader Roll. Roll 2d6 and modify the total by the player's position on the Victory Track. This modifier is positive if a player is losing, but negative if winning. A leader change is made if the modified total is 7+.
If a change is rolled, draw a new leader from the face-down pool of leaders. A new major leader must replace the existing major leader; a new minor leader must replace any minor leader. New leaders are deployed at the same location and strength as those they replace. No RP cost is involved. Supreme Leaders are not replaced except see 5.22.
NOTE: Grant & Sheridan are kept out of the USA pool until 1864. See 5.22.
Replaced leaders are withdrawn from play, except Beauregard, Longstreet, and Butler are returned to their respective leadership pools and can be redrawn again; a second draw and change is permanent.
5.21 Leader Death
If one or more army leaders are lost in battle, replacement leaders are drawn in the next Supply Turn (4rp each leader) and deployed at strength 1 like any other cadre. A minor leader must replace a minor leader; redraw if necessary.
5.22 General Grant
This USA leader is not available until Winter 1864, when he is added to the USA pool. If drawn, Grant replaces Lincoln at current strength and location. He operates either as an Army Leader OR a Supreme Leader, but never both in the same turn.
5.3 UNIT MOVEMENT
Units are moved individually for 1-3 hexes, depending on their current Speed. Units can only move once per Player Turn, except they may also Reinforce, Retreat, or Regroup.
5.31 Stacking
Any number of units can be stacked in a playable hex, but note the attrition for being unsupplied (9.3) and foraging limits (9.4).
5.32 Hex and Hexside Limits
Except where terrain requires units to stop, any number of units may enter or pass through a vacant or friendly hex/hexside. Units that enter a hex containing enemy units are Attacking; they must stop and fight.
When attacking, Attack Limits apply. See Terrain Effects Table, back cover. Once the current Attack Limit of any battle hexside is met, that hexside is closed to all further movement other than Reinforcements, Retreats, and Regroups. Attack Limits vary with terrain and season.
5.33 Movement Rates
All units move a number of hexes equal to their Speed, but attack at –1 Speed. That is infantry and artillery can attack from 1 hex away (adjacent), cavalry attack from 2 hexes away, and garrisons must force-march to attack from 1 hex away.
5.34 Force-Marching
A player has the option to Force March any moving unit. Units can force-march to Attack, but not to Reinforce or Retreat.
PROCEDURE: move the force-marching unit one extra hex and identify it with a die. After completing all other moves, roll 1d6 for each force-marching unit on the Force March table (back cover). Rough Terrain modifier applies if a unit crosses any non-clear hexside during the move, or crosses or ends its move in any non-clear hex.
Leaders
Leaders represent more than individual generals. They are centers of command and logistics and include an escort guard, staff, and hundreds of men involved in logistics.
A full strength 3-step leader may have to be replaced by a 2-step leader, meaning 1-step of command is lost.
Note: 4-step Leaders use the commander name as strength "1".
Leader Roll (Example)
If the VP marker is located on the "1863" space, the modifier would be USA –2, but CSA +2. A USA roll of 6 would be modified to 4; A CSA roll of 7 would be modified to 9. The CSA would make a leader change, but not the USA player.
Depleted Leader Pool
If a player's leader pool is empty, Leader Rolls and Leader Draws to replace eliminated leaders stop. That is, no more Leader Changes.
Weather
The weather is always DRY for the Spring, Summer, and Autumn quarters, and MUD for the Winter quarter.
[ ] Weather Change (optional)
During the Spring and Autumn quarters, a player begins each Player Turn with a 1d6 weather roll:
| QUARTER | MUD | DRY |
|---|---|---|
| Spring | 1-2 | 3+ |
| Autumn | 1 | 2+ |
The weather change applies only for the current Player Turn, although it affects both players for Reinforcements, Retreats, and Regroups. The player holding the initiative must honor any initiative bid regardless of weather.
Force-Marching
Force-marching favors the CSA. Southern armies typically marched faster because they had shorter logistical tails and lighter backpacks. Some Confederate units were popularly called "foot cavalry."
Players must complete all moves before making any force-march rolls. This ensures a player cannot make a move in response to a force-march result.
Force-March Attacking Example
Alexandria and Manassas are two (2) hexes apart. Infantry or Artillery in Alexandria must force-march to attack Manassas. Cavalry can attack without force-marching. Garrisons cannot attack from Alexandria even if they force-march.
5.4 STRATEGIC MOVEMENT
Strategic Movement is possible when a player activates his Supreme Leader. This leader does not have command range, but instead can strategically move a number of friendly units (that do not otherwise move) located anywhere on the mapboard. Each unit can only move once strategically per turn.
The number of Strategic Moves available equals the current strength of the active Leader; Strength 4 can command four strategic moves, Strength 3 can command three moves, etc.
After each activation, the Supreme Leader is reduced one step, turned upright, and may then move normally by land, or by a free Rail or Sea move if desired.
5.41 Strategic Moves
There are four (4) kinds of Strategic Move:
- LAND MOVE: Move one (1) unit normally, even if unsupplied. Force-march allowed.
- RAIL MOVE: one unit that is already on a railroad can move any distance along controlled railroads (see: 7.1). Units may not attack by rail movement.
- SEA MOVE: USA units located in a friendly port may move to another friendly port (8.3) or invade a coastal or river hex (8.4).
- PONTOON BRIDGES: Units may cross River hexsides by temporary Pontoon Bridges, but not in Mud turns. They must start their move on one side of the river, and stop after crossing the river. Each unit expends one (1) strategic move if the destination hex is friendly, but two (2) strategic moves if enemy (whether occupied or vacant). The Attacker can Reinforce (1 unit) or Retreat (2 units) per turn via the "bridge."
NOTE: downstream of Heads of Navigation (8.2), units can cross rivers by Pontoon Bridge only if all ports on the River are friendly.
6.0 BATTLES
Battles occur when the Active player (the Attacker) moves units into hexes containing enemy units (the Defender). They are fought to a conclusion with a series of alternating Battle Turns. Battles end when one side retreats or is eliminated.
Several battles may occur at the same time. Multiple battles are fought one by one in a sequence determined by the Active player, except all Skirmishes (6.1) must be resolved before any battles.
6.1 SKIRMISHES
If either player has only one (1) or two (2) units involved, a skirmish is fought instead of a battle. All skirmishes are fought before any battles are deployed, in a sequence chosen by the Attacker.
For each Skirmish, players reveal units and conduct one round of combat. The Defender fires first (apply hits) then the Attacker fires. All units fire at F1.
After the single combat round, the player with the fewer units must retreat normally; if tied the Attacker must retreat. Reinforcements are not allowed.
Units that retreat are disrupted (6.35). Regroups (6.34) are not allowed. Units that win can reinforce an adjacent pending battle.
6.2 BATTLE DEPLOYMENT
Battles are fought on the tactical board. The Defender deploys first, one unit per Left, Center, and Right positions. Extra units are deployed into any of these same positions or the Reserve as desired.
The Attacker now deploys units in the same manner as the Defender, who cannot alter deployment once the Attacker begins to deploy. Once both sides have deployed, the Attacker has the first (Dawn) Battle Turn.
Each Battle Turn consists of four phases, resolved in sequence:
- Retreats (6.3)
- Morale (6.4)
- Combat (Move 6.5 or Fire 6.6)
- Reinforcements (6.7)
6.3 RETREATS
The first segment of a Battle Turn allows a player to Retreat any/all units from a Battle into adjacent hexes. Units can retreat from any battle position, but units that are engaged at the instant of Retreat, take Rout Attrition (6.33).
6.31 Retreat Hexes
The Attacker must retreat into adjacent hexes via hexsides used to attack/reinforce the battle. The Defender must also retreat to adjacent hexes, but not via hexsides used by the Attacker to start or reinforce the battle.
If a retreat hex is vacant but enemy controlled, a loss of one (1) step applies to each unit.
Neither player can retreat to a pending battle hex.
Supreme Leaders
Supreme Leaders are the most powerful single units in the game because they command the movement of friendly units anywhere on the board and control strategic movement by rail or sea. Activating them more than once per Quarter is certainly possible, but the number of units they control declines with each use, yet the cost to replace each step (2rp) is the same.
Fog of Battle
Units are deployed in upright mode to hide their strength. They remain hidden until they fire. Engaged units are not revealed until the end of the current Battle Turn. Once revealed, units must remain face-up until they move to the Reserve (or Retreat). Units that take a hit from long range artillery are not revealed.
Skirmishes
Although normally the Attacker will be the stronger force, this is not mandatory. A player may attack a larger defending group with one or two units, hoping for an upset.
Battle Deployment
Note the consequences of Rout (6.33) when making your Battle Deployment. A weakly defended position may quickly lead to a rout and a mandatory retreat with heavy losses.
Retreat & Reinforcement Hexsides
Reinforcing via a hexside makes it available for retreats by any attacking blocks. Players can force-march to a hex adjacent to a pending battle, establish control of that hex, then reinforce from it and retreat back to it.
The attacker usually controls the hex(es) attacked from, but with a force-march attack of 2 hexes, this may not be true; leaving a unit behind to make the hex friendly avoids the 1-Step loss.
Battle Deployment Example
Four (4) blue units deploy one Right, one Left, and two Center. Seven (7) gray units deploy, two Left, two Center, one Right, and two Reserve.
[Diagram: the Battle Board, showing the Defender's Right/Center/Left positions across the top (blue units) and the Attacker's Left/Center/Right positions across the bottom (gray units), with a Reserve row beneath.]
6.32 Retreat Limits
Retreating units are subject to hexside Retreat Limits (Terrain Effects Table, back cover) per Battle Turn during Day retreats. This limit is doubled for Night retreats.
6.33 Rout Attrition
A rout occurs when any one position of a battleline is occupied by an unopposed enemy unit. A rout is treated as an immediate and mandatory retreat, subject to all normal Retreat rules, including Retreat Limits (6.32) except all units (including those in the Reserve) of the routed player suffer a 1-step loss (not just engaged units). Units that cannot Retreat are eliminated.
6.34 Regrouping
When a battle ends, the Victor may Regroup, meaning he can Retreat units from the battle OR Reinforce (not both) with adjacent units. Units that Regroup must do so at the instant of victory and are Disrupted (6.35) until the end of the current Player Turn. All normal hexside limits apply, including double limits for Night Turns.
6.35 Disruption
Units that Retreat or Regroup (6.34) are disrupted and cannot be used to Reinforce another battle that Player Turn. Turn these units face-down until they recover at the end of the current Player Turn.
6.4 MORALE CHECKS
All friendly 1-step units, currently engaged by enemy units, are required to make Morale Checks. Roll 1d6 for each 1-step unit.
- 1-3 Morale Poor: Unit must make a Disengage battle move, and cannot otherwise fire or move this turn. Morale failure of the last unit in a friendly battleline Position causes a Rout (6.33).
- 4-6 Morale Good: Unit may conduct any desired fire or move.
BATTLE EXAMPLES
Engage: Infantry (CSA Right) engages the USA Left. It cannot fire until next CSA turn.
Disengage: Infantry (CSA Left) fails morale roll and disengages to CSA Reserve. CSA Artillery there fires short-range (F3) into USA infantry.
Redeploy: Infantry (CSA Center) redeploys to Reserve. From there it may later move to any of the three positions as needed. Units cannot move laterally from the CSA Center to the Left or Right, or vice-versa. CSA artillery (center) fires long-range into enemy Center.
Outflank: One Cavalry in CSA Reserve can outflank USA Left which is engaged by infantry 3 on CSA Right in the same battle turn. With a 1d6 Outflank roll of 4+ this cavalry can engage and fire normally at F1. Otherwise, it returns to the Reserve minus one step.
6.5 BATTLE MOVES
Any unit that fires in a Battle Turn may not move that same turn, except as noted in Outflank. Note that lateral or diagonal movement is prohibited, and units can never move to the enemy Reserve. All unit types move at the same speed in battles.
ENGAGE: Moving unengaged units to a position containing enemy units, even if that position already contains friendly units. All unit types can engage, but Artillery that do so fire only at F1. Engaged units are not revealed until the end of the current Battle Turn.
DISENGAGE: Moving engaged units to an unengaged, friendly position, such as from the enemy Right to friendly Left, or from an engaged friendly Right to the Reserve. Disengaging units are NOT subject to rout attrition unless this causes a Rout (6.33).
REDEPLOY: Moving unengaged units to unengaged positions, such as from the Reserve to the Right Flank.
OUTFLANK: A special type of Engage move from the Reserve to the right or left flank of the enemy battleline. A maximum of one (1) unit can outflank each flank per Battle Turn. The enemy flank must first be engaged by friendly unit(s), even if engaged this Battle Turn. Only infantry and cavalry can outflank. Each outflanking unit makes a 1d6 roll. A roll of 4+ is successful, and the outflanking unit can engage and fire immediately (infantry can melee). Otherwise, the unit gets lost and immediately returns back to the Reserve, minus one step for stragglers.
6.6 BATTLE FIRES
Any unit that moves in a Battle Turn may not fire that turn. Units located in the Reserve may not fire or be attacked. Except for long-range artillery fire, units must first make an Engage move (firing next turn) or they can fire at enemy units that have already engaged them.
Units that are able to fire may do so once per Battle Turn, in any order desired. To fire a unit, reveal it, and roll as many dice as its current strength. A hit is scored for each die roll equal to or lower than the unit's firepower.
EXAMPLES: For F1, every "1" thrown scores one hit. For F2, every "1 or 2" thrown scores one hit. For F3, every "1, 2, or 3" thrown scores one hit.
Units with modified firepower FØ cannot fire, but can take hits.
6.61 Firepower
- LEADER firepower reflects their aggressiveness. They fight normally in battles or skirmishes, even if alone.
- INFANTRY generally fire at F2. They can also melee (6.64) at F3.
- GARRISONS fire at F1.
- CAVALRY fire at F1.
- ARTILLERY: Have two ranges, long (unengaged) and short (engaged). Long range allows guns to fire at F1 into enemy units in the opposing battle position, but they cannot fire into an engaged position, nor fire long range if they are engaged. Enemy units cannot be eliminated by long-range fire; instead, they must immediately redeploy to the Reserve. Short range (firing at engaging enemy units) gives F3 for the first fire, and F1 for all subsequent fires. Elimination of enemy units is possible at short range.
IMPORTANT: Artillery units that move to engage only fire at F1.
6.62 Counter-Battery
Unengaged artillery units may, if desired, target revealed enemy artillery units at long range and may themselves be targeted if engaged by enemy units. When targeting, a unit fires at a specific artillery unit; all hits apply to the target, but surplus hits are forfeit.
6.63 Battle Losses
For every "hit" scored, an engaged (or targeted) enemy unit is immediately reduced 1-Step. Each hit is applied separately to the strongest enemy unit in that battle position, regardless of type; the owner may choose which of several equal-strength units takes a loss. When a cadre (1-Step unit) takes a hit it is eliminated and moved to your Replacement Pool.
EXCEPTION: Long Range Artillery Fire does not eliminate. Instead, the hit forces a unit to Redeploy to the reserve.
6.64 Melee
Engaged infantry, whether Attacking or Defending, have the option to Melee instead of firing. A player can Melee with some infantry units, and Fire with others. Units that Melee have +1 combat (F2=F3) but lose one step on each roll of "6", reflecting the simultaneous casualties of close combat.
6.65 Fortress Battles
Fortress battles have special rules:
- SKIRMISH: Defending units have Double Defense (see below). After one exchange of fire, defender firing first, the Attacker must Retreat unless the Defender is eliminated.
- BATTLES: Both players deploy only in the Center and Reserve, and resolve the battle without reference to Flanks or Outflanking. Entrenchments are prohibited for the Defender, but the Attacker may dig them normally. Defending units have +1 Morale. Melee is not allowed from or against the fortress.
- DOUBLE DEFENSE: For units defending a fortress, a 1-step loss requires two (2) hits. A one-eighth rotation of a unit indicates a "half-hit" taken, and the next hit must be taken on that unit. A half-hit carries over throughout a day of battle, but is recovered at Night. The fire of units with a "half-hit" is not reduced.
6.66 Forest Battles
Battles fought in Forest hexes are fought with three Positions normally, except Infantry firing in their own battleline (Attacker or Defender) have +1 (F2=F3).
In addition, Artillery cannot fire long range. With Skirmish in a forest, defending infantry are +1 fire.
Units in a forest battle can melee (6.64) normally. Melee and Forest bonuses are cumulative. This means Infantry in its own battleline melee at +2 (F2=F4).
Units in a forest battle may dig Entrenchments (6.9) normally.
Disruption
Units are Disrupted when they Retreat from a battle or Regroup to ensure that they cannot reinforce battles still to be fought this Player Turn. Units recover from Disruption when the current Player Turn ends.
Melee Example
CSA Turn: Infantry 4 and Infantry 4 could fire at F2, but decide to melee at F3. CSA roll 1:1:2:3:4:4:5:6 getting 4 hits and lose 1-Step for the "6". USA unit is eliminated and one CSA unit is reduced to strength 3.
Fortress Double Defense
The USA initiates a battle for Richmond. The CSA could remain on defense and get double defense, but elects to go on offense and engage the USA units in their battleline, hoping to defeat them before they can reinforce in strength. In doing so, however, they lose their double defense advantage. The CSA units can still disengage to their own line during the battle and again obtain double defense.
6.7 REINFORCEMENTS
As the last step in a Battle Turn, non-disrupted units in adjacent hexes (but not other pending battle hexes) can be brought into a battle as reinforcements. They enter the friendly Reserve and are available for use in the next friendly Battle Turn like any other Reserve units.
6.71 Reinforcement Limits
A player may reinforce a battle with as many adjacent units as he can get into the Battle Hex, subject to Reinforcement Limits (Terrain Effects Table).
Reinforcements are not allowed through impassable hexsides such as Mountains or Rivers, except at Fords/Bridges, including pontoon bridges (5.41). Gap and Marsh hexsides become impassable in Mud.
6.72 Victorious Units
Units of the victorious player in a battle, excluding those that Regrouped, may reinforce another battle in an adjacent hex at normal day or night hexside limits.
6.8 BATTLE TIME
A day of battle involves four (4) pairs of alternating Battle Turns (Dawn, Morning, Afternoon, and Dusk) followed by a Night Turn for each side.
6.81 Night Turns
When a night turn arrives, players must disengage to their own Battleline. The Attacker, who has the first night turn, now has two basic choices:
- Retreat any/all units from the battle with double hexside limits, or
- Reveal a Leader within Command Range of the battle to supply another day of fighting.
If the Attacker continues the fight, the Defender must then reveal a leader for a second day of fighting OR conduct a Night Retreat with double hexside limits.
Units of either side that must retreat (no leader step) but cannot because of hexside limits are eliminated.
If both players have revealed an active Battle Leader (must be 2-step or higher) both players (Attacker first) may add available reinforcements subject to double hexside limits, and both leaders are reduced one (1) step. A new day of battle is then fought starting with the Attacker's Dawn Battle Turn.
NOTE: Supreme Leaders can be Battle Leaders if located IN the Battle Hex.
6.9 ENTRENCHMENTS
Both sides have three (3) units that are used to represent entrenched positions in battles. There is one entrenchment for each year, 1862, 1863, and 1864. This means that no entrenchments can be used in 1861, one in 1862, two in 1863, and all three in 1864 or later. This simulates the gradual escalation of entrenchments during the war.
The Defender in any battle may deploy any/all available entrenchments while deploying for battle. They are deployed face-up in desired friendly-occupied position(s).
The Attacker may not deploy entrenchments until the first Night Turn, when both players may deploy them in friendly-occupied positions. Deployed entrenchments cannot be moved.
- Units firing on entrenched units are –1 strength, meaning they roll one less die per unit. This applies to engaged units and long range artillery. Units at strength 1 cannot fire.
- Outflank Roll is +1 against entrenched units. If successful, combat is still -1 strength.
- Units defending entrenchments have +1 morale.
- Entrenchments can be placed in forest battles.
- Players attacking or defending Entrenchments can melee.
NOTE: entrenchments can be reused in different battles of the same Player Turn. They can never be used in a Skirmish.
BATTLE TACTICS
- Fight battles on your terms. Try to have some future battle sites in mind and seek to have maximum reinforcements available for them.
- It is tempting to get all your units in a battle engaged with the enemy. However, you should try to keep some reserves when possible. They give the flexibility to stave off defeat and the power to mass against the weakest enemy position for a breakthrough.
- Seek to engage two enemy positions with the minimum necessary strength to engage that position and then try to destroy the remaining position with overwhelming strength. This works best if the enemy has 'committed' his reserve and has few, if any, reinforcements available to shore up the position you hope to rout.
- Cavalry are much too valuable for campaign maneuver to be wasted in battles where they fight poorly. Keep them in Reserve unless essential.
- The destructive fire of massed-guns can be decisive. However, this destructive potential may cause the enemy to charge your guns. Unless you have sufficient infantry to beat off such an attack it is wiser to divide your guns between two or three positions.
- Keeping artillery in the Reserve is risky. If they move from the Reserve to engage in their own battleline, they do NOT get F3 firepower in their first turn. Artillery should be deployed in their own battleline at the start of the battle, unless you plan to retreat early.
- If you have any doubt about winning a battle, an early retreat must be considered. Retreating while engaged is costly; try to retreat while unengaged or from the Reserve. Retreating at night is often the best option if you can hold the line until then.
- The consequences of a rout can be harsh. Routed units each lose one (1) step, and may then be scattered or eliminated if available retreat hexsides are limited. It may take considerable time to reform a scattered army, especially with an aggressive enemy army in pursuit.
7.0 RAILROADS
7.1 RAILROAD CONTROL
Players automatically control railroads in Home Territory (unless the enemy controls them). The CSA can never move or supply along railroads in Northern Home Territory, including the B&O rail hexes between Cumberland and Harper's Ferry.
The USA may move and supply along CSA railroads that are controlled. A unit controls the rail hex it occupies, but need not occupy every rail hex, just every second rail hex. The vacant rail hex between two USA units is USA controlled. Other adjacent hexes are not controlled.
EXCEPTION: USA must always physically occupy a major town to maintain a supply line through that hex. For example, if the USA occupied Aquia Landing and Bowling Green, the intervening rail hex of Fredericksburg (major town) is not controlled unless it is friendly-occupied.
A rail supply line is cut by a gap in controlled hexes, and (of course) by an enemy unit blocking the railroad.
7.2 RAIL ENTRY HEXES
Each side has Rail Entry hexes, labeled with a blue (USA) or red (CSA) supply symbol to indicate their initial control. These are Supply Sources to which a rail supply line is traced. These hexes can also be used to deploy new cadres entering play, maximum of one unit per hex.
7.3 RAIL MOVEMENT
A Rail Move consists of moving one unit any distance along controlled railroads, and costs one Strategic Move (5.4).
To make a rail move, a unit must begin, travel along, and end its move on controlled railroads. Units may never rail into or through uncontrolled rail hexes, nor can they attack by Rail Movement.
Rail movement off-board is prohibited.
8.0 SEA MOVES
8.1 SEA CONTROL
The USA had sea supremacy throughout the Civil War. The USA player can use sea movement and supply between two friendly ports, including river ports. Sea Supply is ultimately traced to a major port. The CSA player cannot move (or supply) by sea.
8.2 NAVIGABLE RIVERS
Major rivers are navigable by Sea Movement to the highest upstream port, referred to as the Head of Navigation:
| River | Head of Navigation |
|---|---|
| Potomac | Washington |
| Rappahannock | Port Royal |
| York | West Point |
| James | Bermuda Hundred |
| Susquehanna | Harrisburg |
8.3 SEA MOVEMENT
A Sea Move is a move of one unit from one friendly port to another friendly port. One Sea Move costs one Strategic Move. A unit can not combine a Sea Move with any other type of movement in the same turn.
IMPORTANT: A unit can never Sea Move past an enemy port, even if vacant.
8.4 SEA INVASIONS
Only USA infantry can make Sea Invasions, defined as a Sea Move from a friendly port to an enemy port, even if vacant. Invasions expend two (2) Strategic Moves per invading unit. Invasion battles cannot be reinforced by sea movement.
Invasions may not be combined with a land attack into the same hex, but they can reinforce an adjacent battle normally.
IMPORTANT: All opposed Sea Invasions are skirmishes, because a maximum of two units can sea invade.
8.41 Sea Retreats
Only invasion units can retreat by sea. They retreat to the port they came from, minus 1-Step per unit.
9.0 SUPPLY TURN
At the end of each Quarter, players simultaneously execute a Supply Turn. Follow these steps in the order given. A victory (4.0) is declared immediately at the end of each step if applicable.
- Supply: Determine Supply status of all friendly units. See 9.3 for supply attrition.
- Town VP: Check that all Town VP have been awarded.
- Time VP: CSA gains 1vp.
- Replacements: Expend RP to build and deploy new units and add steps to existing units in supply. See 9.5.
- Leader Change: Each player makes a leader roll. See (5.2).
- Draft: Conduct a Draft if desired, USA then CSA. See 4.5.
Railroads
All major railroads of the period are shown. Railroads were largely absent in the Tidelands where deep rivers offered cheap water transport. This proved to be a major problem for both armies, but especially for the Confederacy because of Union naval dominance.
RR Control Example
USA occupy Alexandria, Manassas Junction, and Culpeper. Centreville and Warrenton are USA controlled, but Gainesville is not. The USA must occupy Salem to control Gainesville. Controlled but vacant RR hexes like Warrenton are friendly to the controlling player for all purposes. Enemy rail movement or supply into or through that hex is prohibited, but enemy land movement is still possible.
Baltimore & Ohio RR
The B&O railroad from Cumberland to Harper's Ferry is friendly to the USA unless cut by a CSA unit.
River Batteries
Each port location had a CSA shore battery opposing sea movement. Civil War generals would not risk sending unarmored troop ships past these batteries.
Sea Movement Example 1
Aquia Landing, unless USA-occupied, prevents USA sea movement from Washington to Fort Monroe via the Potomac River. USA could, however, conduct a Sea Invasion into Aquia Landing.
Sea Movement Example 2
USA player controls Fort Monroe which is downriver of Norfolk. USA could Sea Attack Norfolk, but no further upriver.
Design Note
Players cannot Sea Invade non-port hexes. The absence of a port assumes swampy or rocky shore, unsuitable for marine landings of this unit size.
NOTE: the Supply Turn is simultaneous so that players cannot pay full attention to their opponent's replacement strategy. However, if a conflict arises as to which player performs an action last, the CSA player always has this right.
9.1 SUPPLY SOURCES
9.11 Rail Entry Hexes
Friendly Rail Entry hexes (7.2) in Home Territory are Supply Sources.
9.12 Major Ports
Two major ports (Baltimore and Fort Monroe) are Sea Supply sources for the USA, even if isolated from rail supply. Sea Supply can originate from either port.
9.2 SUPPLY LINES
A hex is supplied when it is on or adjacent to a friendly Supply Line. A friendly supply line requires a continuous link to a friendly Supply Source. Rail, Road, and Sea Supply lines may link to form a continuous Supply Line, except the CSA can never trace supply north of the Potomac River. A chain of units is not inherently a Supply Line. Adjacency cannot be traced through impassable hexsides.
- Rail Supply exists to units on or adjacent to a friendly railroad hex, via friendly rail hexes back to a Rail Entry hex or Major Port.
- Road Supply is controlled just like Rail Supply (occupy every other hex) and can be interdicted in the same manner.
- Sea Supply exists from a Major Port to friendly ports provided enemy ports (even if vacant) are not bypassed.
EXAMPLE: The USA has units in Fair Oaks, White House, West Point, Williamsburg, and Yorktown.
The units in Fair Oaks and White House can trace a rail supply line to West Point, then by Sea Supply to Fort Monroe or Baltimore, but only because Yorktown is USA-occupied. If Yorktown is re-captured by the CSA (or even if left vacant by the USA), then the sea supply line to West Point is cut and all units tracing to this town are subject to Supply Attrition in the upcoming Supply Turn.
The unit in Williamsburg is supplied because it is adjacent to Yorktown. However, Williamsburg is not itself a link in the supply line. Hence, there is NO supply line beyond Williamsburg, such as Sea Supply to Suffolk.
9.3 SUPPLY ATTRITION
During the Supply Turn, all unsupplied units, except those with Leader Supply (9.31) are reduced 1-step, elimination possible.
9.31 Leader Supply
A Leader can provide supply to all unsupplied units within its command range. Reveal the Leader and reduce it 1-Step to negate supply attrition for all friendly units within command range.
NOTE: unsupplied leaders can provide Leader Supply. Leaders at 1-step cannot provide HQ supply.
9.4 FORAGE LIMITS
One or two units can exist without a Supply Line depending on terrain and season, but only in Home Territory (2.71).
| Dry | Mud | |
|---|---|---|
| Clear | 2 | 1 |
| Forest | 1 | 0 |
| Marsh | 1 | 0 |
9.5 REPLACEMENTS (RP)
Each player receives a specified number of Replacement Points (RP) each Quarter. These vary by year, and by the current location of the Victory Marker. Any unspent RP are forfeit – use 'em or lose 'em.
EXAMPLE: In 1862 Supply Turns, CSA has 15rp and USA has 24rp. If the Victory marker is located on the space "1864", the CSA would have +2rp for a total of 17rp.
9.51 Replacement Steps
Generally, each step costs 1rp, except Leader steps cost 2rp. Steps can be added to any existing units in supply, with a maximum of 4rp per hex per Supply Turn. The USA limit increases to 6rp in a sea-supplied port.
IMPORTANT: Supreme Leaders cost 3rp per step when NOT located in their capital (Washington for Lincoln and Richmond for Davis). NOTE: This means that Grant costs 3rp per step if not in Washington.
9.52 New Cadres
Except for Garrisons, new unit cadres cost double RP. Cadres must be deployed in supplied, home, major towns, or Rail Entry hexes, maximum of one (1) unit per location. The USA may deploy a cadre in Fort Monroe and Harper's Ferry, but not in Moorefield (no supply). Steps may NOT be added to cadres until the next Supply Phase.
If a Supreme Leader is killed in battle (5.21), cost to replace is 4rp in the capital, but 6rp if deployed elsewhere.
GAME TURN
[1] INITIATIVE
Bid for 1st Player Turn: 1st Player must honor bid; 2nd Player need not.
[2] 1ST PLAYER TURN
MOVEMENT PHASE
- Optional Weather Roll
- Activate Leaders (or Pass)
- Move Units in Command
- Deactivate and Move Leaders
SKIRMISH PHASE Resolve all skirmishes, one by one, in sequence chosen by the Attacker. Each skirmish is one exchange of fire, defender firing first. Player with the least units must then retreat. Attacker retreats if equal.
BATTLE PHASE Resolve all battles, one by one, in sequence chosen by the Attacker. Each battle is resolved by a sequence of alternate Battle Turns starting with Attacker Dawn.
Battle Turn
- Retreats
- Morale Checks
- Combat (Move or Fire)
- Reinforcements
Repeat Battle Turns until one player retreats or is eliminated.
[3] 2ND PLAYER TURN
Repeat 1st Player Turn. Alternate Player Turns are repeated until two consecutive Passes.
[4] SUPPLY TURN
Simultaneous Supply Turn
- Supply Check
- Town VP
- Time VP
- Leader Change
- Replacements
- Emancipation/Draft
UNIT DATA
| UNIT TYPE | SPEED | FIREPOWER Long | FIREPOWER Engaged | REPLACEMENT Cadre | REPLACEMENT Step |
|---|---|---|---|---|---|
| Infantry | 2 | • | F2¹ | 2 | 1 |
| Garrison | 1 | • | F1 | 1 | 1 |
| Cavalry | 3 | • | F1 | 2 | 1 |
| Artillery | 2 | F1 | F3² | 2 | 1 |
| Leader |
¹ F3 in Melee. ² F3 first fire only, then F1.
TERRAIN EFFECTS
| TERRAIN | Attack/Retreat (Dry/Mud) | Reinforce (Dry/Mud) | Move | Forage (Dry/Mud) | Defense |
|---|---|---|---|---|---|
| Clear | 4/2 | 2/1 | No Effect | 2/1 | Basic |
| Forest | 3/2 | 2/1 | STOP (if vacant) | 1/0 | Inf +1, Arty −1 |
| Bridge/Ford | 3/2 | 2/1 | N/A | N/A | N/A |
| Marsh | 2/1 | 1/0 | STOP | 1/0 | Inf +1, Arty −1 |
REPLACEMENTS (RP)
| YEAR | 1861 | 1862 | 1863 | 1864+ |
|---|---|---|---|---|
| USA | 18 | 24 | 30 | 24 |
| CSA | 12 | 15 | 18 | 15 |
FORCE MARCH
| USA (1d6) | CSA (1d6) | RESULT |
|---|---|---|
| 1-3 | 1-2 | One extra hex but -1 step for stragglers |
| 4-6 | 3-6 | One extra hex with no penalty |
−1 Rough Terrain, −1 Artillery, −1 Mud, +1 Cavalry. Modifiers are cumulative.
DRAFTS
| 1d6 | None | 1 Cadre | 2 Cadres |
|---|---|---|---|
| USA | 1 | 2-3 | 4-6 |
| CSA | 1 | 2-4 | 5-6 |
Cadres deploy normally (see 9.52). 1vp is awarded to the opponent.