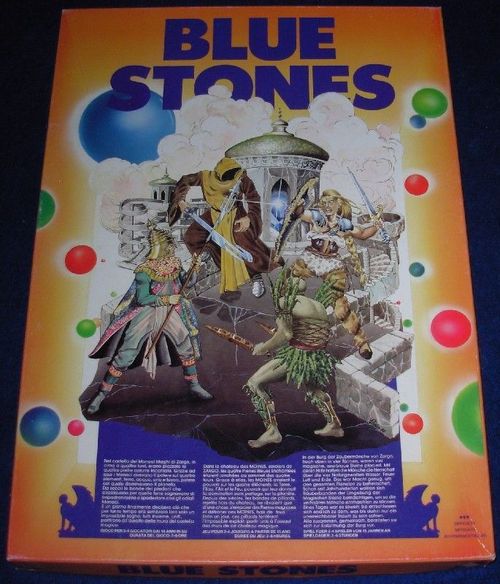
Blue Stones
Blue Stones Rulebook
Table of Contents
Table of Contents
Contents of the Box
The box contains 1 die, a game board, a table for combats and distance fire, the Monk, Arborei, Nordic and Oriental counters, and 4 people cards.
The Story
In the castle of the Zargo Mage Monks, at the top of the four towers, the four enchanted Blue Stones were placed. Thanks to them, the Monks had power over four elements, Earth, Water, Air and Fire, a power that gave them domination over the planet.
For centuries, the bands of marauders who roamed the surroundings had dreamed of seizing these precious Stones and of toppling the Monks, whom everyone hated. At last one day these marauders wished to attempt what remained for them an impossible dream: to march together, united, in the assault on the walls of the magic castle.
But even before the first attack, it became clear that sharing among the rival bands would be difficult. Indeed, the possibility of holding these precious Stones, which grant such power, would inevitably bring about a terrible struggle among the attackers.
The Board
The board represents the castle of the Zargo Mage Monks, drawn with its various levels, each level having a different colour. This castle is surrounded by a very high crenellated wall, along which run glacis that open onto the internal corridors themselves. These corridors are also separated from other crenellated walls. Along all these glacis are placed sentry boxes for the guards.
The internal and external glacis are interrupted by armoured doors, above which pass unstable little bridges that ensure the passage between the walls. Inside the castle, four towers are raised in which the magic Precious Stones are guarded. The different levels of the towers, the glacis and the corridors are connected to one another by sloping ramps.
Inside the corridors one finds Trees and numbered Wells. Also on the board, but outside the enclosing walls, are:
- a turn counter;
- a summary table of the different terrain types;
- a table and two numbered wells, I and II, which serve to calculate the arrival point of the players who use the wells, and the corridors which pass through the underground passages.
In order to calculate the movement of the counters, and their placement, a grid of hexagons is superimposed on the game board.
What the Counters Represent
In general each counter represents a man, an animal or a character belonging to one of the 4 families who occupy the castle. Each people is represented by a different colour (yellow for the Monks, green for the Arborei, red for the Orientals and brown for the Nordics). Some special characters, such as the dragon for example, are represented by more than one counter.
On each counter is drawn the silhouette of the character, and at least two numerical factors are printed. The number at the bottom left is the Combat Factor (CF) of this piece, in fact its value during combats; at the bottom right is the Movement Factor (MF), which represents its capacity to move a number of hexagons. We will see later the meaning of these factors in the chapters on movement and combat (1). We will also see that certain counters bear letters.
Preparation of the Game
Blue Stones can be played by 2, 3 or 4 players. One of the players must play the Monk people, since the castle must be defended.
The other players may choose among the different peoples as they wish.
In all cases, a player may use the characters of only one people (so he cannot, for example, have Arborei and Nordic counters).
The Monk player, whatever the number of opposing players, has at his disposal the whole set of counters of the Monk people.
The Monks' setup depends on the number of players:
- if 3 players fight against the Monks (4 players in total), the Monks do not use their infantry counters (see the description of the counters);
- if 2 players fight against the Monks, the Monks take all their counters and only two infantry counters;
- if there is a game for 2 players only (one player against the Monks), the Monks use all the counters.
The other players, for their part, have different setups depending on the number of players in the game.
When each player has in front of him all the counters of his setup, the placement of the counters on the board may begin.
The order of placement of the counters is as follows:
-
The Monks place their infantry counters, which must occupy all the sentry boxes present on the outer walls and on the doors of the internal walls.
-
The other player or players place all their counters as they wish on hexagons outside the castle and adjacent to the outer walls. The order of the players for placement is set as follows: the three remaining people cards are shuffled and placed face down away from the board; one player draws the first card; the player representing that people carries out its placement, and so on in turn.
-
Finally the Monks place their remaining counters on hexagons inside the castle (free choice), with the sole exception that they may not place any counter on hexagons adjacent to the outer wall.
The rules to follow for the placement and gathering of counters are explained later, in the chapter on movement.
The Goal of the Game
The player or players who represent the marauder bands always play first. The order of the players is established as seen in the previous chapter.
Once all the attackers have moved their counters and resolved the various combats generated by their movements, it is the Monks' turn to move and fight (see the chapter on movement and combat). This whole set of movements and combats constitutes one game turn.
A game is played over 15 turns. The player who, at the end of these fifteen turns, controls the greatest number of towers where the magic stones lie wins the game.
Controlling a tower means having a counter on the hexagon where the magic stone is located.
If, at the end of the game, two players control the same number of stones, the game is a draw. To track the turns, the player playing the Monks moves, at the end of each game turn, the small indicator on the turn counter drawn on the board (2).
Movement
General Rules
On each turn, the players may move all the counters they possess (excluding of course eliminated counters). Unlike chess, in which only one piece is moved at a time, here all the counters may be moved, some of them, or even none.
Each counter may be moved in any direction, even zigzag, a number of hexagons at most equal to its Movement Factor (FM) (example: a counter with FM 5 may be moved 1, 2, 3, 4 or 5 hexagons in any direction) (3).
Counters may not cross hexagons held by enemy counters. However, if the player concerned allows it, counters may pass through hexagons held by allies. Two counters of the same people may be placed on the same hexagon, provided they do not represent magical beings or animals.
FMs cannot be transferred from one counter to another, and they cannot be accumulated from one game turn to the next.
THE DIE NEVER INFLUENCES MOVEMENT.
Special Rules
For certain hexagons or sides of hexagons, special movement rules apply:
-
Trees. Hexagons in which trees are drawn are not accessible to counters, with the exception of creatures representing flying animals, which in no case may end a movement on these hexagons.
-
Walkways along the walls. On the walkways along the walls above the doors, counters may pass but may in no case stop there. Each counter ending its movement on this square is considered to be on the lower level, in the armoured door. When a counter is placed on one of these hexagons, another counter may pass over this walkway without any problem if the movement takes place along the glacis.
-
Wells. Wells are like trees: inaccessible, except to counters that wish to use the underground passages, which therefore jump into these wells in order to use the passages linking the different wells together.
In any case, given the darkness reigning in the underground, the well from which the counter using this movement emerges is determined at random. The simulation of this movement is therefore as follows:
a) the counter that enters the well, regardless of the movement points it still has left during this turn, is moved and placed on the large well drawn beside the castle, numbered I;
b) on the next move, its movement consists of transfer to the side well, numbered II;
c) on the following move, the player throws the die and the counter is placed on the well bearing the number shown on the die (the wells are numbered up to 6). If the exit does not suit him, he may put this counter back on well I and start the whole operation again.
If, on the contrary, the exit seems interesting to him, he begins his movement from the exit well hexagon.
This system is followed for all counters using the wells (these exiting by the well given by the die roll). Inside the wells, combat is forbidden.
-
Walls. To cross a wall hexagon, whether climbing or descending, certain special rules must be respected:
Combat
In this chapter the terms "attacker" and "defender" are used regardless of the position of the counters on the board.
- The attacker is the player whose turn it is to play; the one who suffers the action is the defender.
- To attack, it is enough to place a counter in the ZoC of an enemy counter (6). It is possible to attack with several counters, either by gathering them on the same hexagon or by placing them on the hexagons directly adjacent to the hexagon held by the enemy counter (respecting the movement rules seen above) (7).
- The attacker's Combat Factor (CF) for each combat is calculated by adding the CF of all the counters it uses for that combat. It is obvious that if the attacker is defeated in a combat, all of its counters are eliminated.
- Each combat is the result of the attacker's CF against the defender's CF, modified by a die throw. The die result, read on the Combat Table drawn on the board, gives the final result of the combat (as we will see later).
- A defender that has 2 counters in the combat also adds the CF of both counters.
- A counter can attack only one hexagon at a time, even if other enemy counters are in its ZoC.
- Attack is not compulsory: two or more counters of different peoples may stand next to each other without fighting, and this may last for several turns.
- Combats are resolved at the end of each player's turn. They are determined by the counters moved during this turn or during preceding turns that are adjacent to enemy counters.
For each attacked hexagon, the player whose turn it is designates the counters that fight and adds their CF to obtain his total CF for each combat. From this total is subtracted the total CF of the enemy counters attacked in this combat. The final result, which may be negative (for example −2), is therefore the difference between the CF of the two combatants. Having obtained this result, the attacker consults the combat table and throws the die. On the line corresponding to the die result, at the intersection with the column for the CF difference in play, the result of the combat is read.
These operations are repeated for each hexagon the attacker wishes to attack, in whatever order it wishes.
On the combat table, the following results may be obtained:
- AE: all the counters that attacked this hexagon are eliminated.
- A1, A3, A5: all the counters that attacked this hexagon must retreat 1, 3 or 5 hexagons (as we will see further on).
- DE: all the counters located in the attacked hexagon are eliminated.
- D1, D3, D5: all the counters located in the attacked hexagon must retreat 1, 3 or 5 hexagons (as we will see further on).
Combat Example
Two Arborei counters with CF 7 and 4 attack Monk counters with CF 4 and 5 that are on the same hexagon.
The total CF is therefore 11 against 9, a difference of +2. The die result is 4. On line 4 of the combat table, crossing the column for the CF difference + 2 (1/3), one reads D1. This means that the attacked counters (that is, the defender's) retreat one hexagon.
The compulsory retreat of these counters, as indicated by the table, can only be made onto hexagons free of obstacles (walls, wells or trees) and not in forbidden enemy ZoCs. It is however allowed to retreat across or onto friendly counters, without violating the rules seen on the gathering of counters and on movement, and without those friendly counters finding themselves, on their turn, in an enemy ZoC. A counter which, in view of these rules, has no possibility of retreating far enough is eliminated.
After a positive combat, the attacker may, if it wishes, advance these counters and occupy the hexagon left free by the counter(s) eliminated or retreated, and this with one or two of its counters which took part in the combat. This can be done only immediately after the combat, before any other combats are engaged on the board. This is impossible for the defender, who has eliminated attacking counters or even counters that retreat.
Terrain Influence on Combat
Certain details of the board may influence combats.
- If the attacker must attack enemy counters defending behind a wall, it must subtract 3 points from the CF of each of its counters taking part in this operation. This penalty applies only to the counters attacking across a wall. In a combined attack with counters on the other side of the wall and counters that must cross the wall, the penalty applies only to the latter.
- The strength of each defending counter behind an armoured door, on the contrary, is greatly increased. The CF of these counters is multiplied by 3 (a counter with a CF of 4 is worth 12 in these conditions).
Control of the Precious Stones
Having a Lord counter on a hexagon containing a precious stone gives all counters of that player one extra point of CF, both for attack and for defence. This does not apply to beings or animals of that people, which are not subject to any magical influence.
Ranged Combat (Archers, Crossbowmen, Slingers)
Certain counters, besides their normal CF, have the capacity to attack counters that are not on hexagons adjacent to them, by means of certain weapons.
These counters may choose how to attack: either use their missile weapons, or fight like normal counters.
If they use the first option, these attacks are always resolved before the other combats.
Each such counter may shoot at only one enemy counter per turn, and in that case it cannot fight normally with its CF. Several of these counters may, on the other hand, concentrate their fire on the same enemy counter (target). Before shooting, the targets that are to be shot at must be named.
Rules for shooting:
a) The number of hexagons between the counter and the target is counted.
b) The die is thrown.
c) On the shooting table, at the intersection of the two values (distance and die), one obtains the number of arrows the attacker will aim at its target.
d) The player whose counter is targeted by these arrows must, for each of them, throw the die. If the result is 1 or 2 (or only 1 if the attackers are the less skilled Monks), the attacked counter is eliminated. For any other die result the arrow has no effect.
One adds 1 to the number of hexagons to be crossed by the arrows if, between the counter and the target, there are hexagons occupied by walls, trees or wells (1 for each such hexagon) (8). Such an obstacle is considered when a shot is to be made and a straight line drawn between the counter and the target touches a hexagon occupied by a well, a wall or a tree or, in the case of a wall, a side of the hexagon that contains it.
The shooting power of each of these counters is printed on it at the top right: 8 hexagons for Archers and Crossbowmen, 5 for Slingers.
If an Archer or Crossbowman is adjacent to an enemy counter, that counter forbids it the use of its missile weapon and obliges it to use its normal CF, for attack and defence, in each type of combat.
In no case may a counter placed on a door hexagon be attacked with a missile weapon.
Summary of the Phases of a Game Turn
A) 1) Determine the first player (draw a people card). 2) Placement or movement of the counters of this first people. 3) Declaration of any shots by that player. 4) Check of the number of arrows reaching the target. 5) Check of the effects of these arrows. 6) Check of the combat results generated by the placement of the counters.
B) 1) Determination of the second player (if applicable). Then 2), 3), 4), 5) and 6) as above.
C) 1) Determination of the third attacker (if applicable). Then 2), 3), 4), 5) and 6) as above.
D) 1) Movement of the Monk people. Then 2), 3), 4), 5) and 6) as above.
- Movement of the Monk player's indicator one space along the turn counter.
The next turn begins again at A, after the people cards have been shuffled.
The Counters with Special Rules
Many counters have very particular powers, which are explained in this chapter. It is important that all these powers are known to all players, even if some do not use them directly, since every player must know what risks they run when meeting them during the game.
At the end of the rules, a summary of the powers of each of these counters will be found on a sheet in the box. This sheet is to be displayed so that everyone can consult it during play.
1. The Monks
a) The Lords. These are the chiefs of the people. They have no particular powers, but if they are placed on a hexagon containing a precious stone, they add one point to the CF of each Monk counter, both for attack and for defence, except for the bats and the evocators. These additional points are cumulative (two Lords on two stones give 2 extra points to the CF of the counters; 3 Lords, 3 points, and so on). The control of a precious stone ceases at the moment the Lord occupying it dies or leaves the hexagon where it is located.
b) The Evocators (E). These counters have the power to transform themselves into fantastic animals by making evocations. To do so, before moving a counter of this type, the Evocator Monk throws the die and replaces this counter by another one corresponding to its evocation: a result of 1 or 2 gives a chimera, 3 or 4 a feline, 5 or 6 a monster. Consequently, it is these evocation counters that will be moved and will fight, with the CF values printed on them, and with the power of flight described below for the bats.
At the start of the following turn, however, the evocation has no more effect: the Evocator Monk counter is placed back on the board, and it can no longer make evocations during that game turn.
An evocation counter never retreats and is never eliminated in combat. Elimination is possible only for the Evocator Monk counter, before that counter is replaced by an evocation counter.
c) The Visionaries (V). In addition to their CF for combat, they have the capacity to create illusions for the enemy in order to make them flee, but only during an attack; in defence they act normally with their CF.
To create an illusion, the objective at which it will be attempted (one counter per turn) must be indicated before the combats begin. The target must also be at most 5 hexagons away from the Visionary.
The die is then thrown, and the result of the illusion is read on the combat resolution table, at the intersection of the corresponding lines. The result may be:
- Max: the counter that is the target of the illusion must retreat a number of hexagons equal to its full FM. If this retreat is not possible, the counter is eliminated.
- Max-1 / Max-5: the target counter of the illusion must retreat a number of hexagons equal to its FM minus 1, 2, 3, 4 or 5, according to the result. If this retreat is not possible, the counter is eliminated.
No obstacle alters the results of an illusion, but illusions have no effect on animals and plants.
d) The Bats (chauves-souris). They have the power of flight. Consequently they can cross any type of obstacle, fly over enemy ZoCs or even enemy counters. They cannot stop on forbidden hexagons, but they can stop in ZoCs in order to fight. When taking part in combats they regain normal movement (in the case of a negative combat result, they retreat like the other counters).
Being part of the Animals, they are not subject to the effects of the magic stones, and therefore cannot receive extra points to their CF. Nor may they be placed on hexagons occupied by enemy human or animal counters.
e) The Infantry. No particular power.
f) The Archers. No particular power. They fight according to their CF and may shoot as described above.
2. The Nordics
a) Helwiron. He is the undisputed chief of the Northern marauders. He has the power to add 3 points to the CF of each of the Nordic counters adjacent to him (excluding the other chiefs), and this both in attack and in defence. This rule applies only to counters that are really adjacent.
If this chief arrives on a hexagon containing a stone, he adds 1 CF point to all his counters, excluding the Dragon.
Note on the source: the printed text spells this chief "Helwiron" in this entry and "Elwiron" in the entry for the Lords below. Both spellings are kept as printed.
b) The Lords. They are the chiefs of the different tribes of Northern marauders. They have the same characteristics as Elwiron, except a smaller bonus (+1 point) to add to the CF of their directly adjacent counters. The CF bonus points are not cumulative. Example: a counter adjacent to Elwiron and to a Lord has only 3 extra points to its CF.
c) The Dragon. It is made up of an indivisible stack of 5 counters. For movement and combat, no division is possible. Its CF is 25, that is, the sum of the 5 CF of the five counters that make it up.
Each time this counter suffers a setback (from an arrow hit, a negative combat result, or even an elimination), one of the counters forming the stack is lost. This reduces its CF by 5 points for each setback, until it is entirely eliminated.
Its FM works in the same way: it loses 1 FM at each setback.
It can never be placed on an already occupied hexagon.
d) The Infantry. No particular power.
e) The Morions. These are infantry who have undergone a special training and have a more developed FM.
f) The Crossbowmen (Arbalétriers). They have no particular power. If they are placed on hexagons containing magic stones, they add 1 point to the CF of the counters of their people.
3. The Arborei
a) The Lords. They have no particular power. If they are placed on hexagons containing magic stones, they add 1 point to the CF of the counters of their people.
b) The Vegetable Octopus (Pieuvre végétale). It has no particular power. Being a special being, it cannot be placed together with any other counter, friend or foe.
c) The Carnivorous Plants. During combats they can never retreat, thanks to the mobile roots they possess. Otherwise they have no particular power, and they cannot be gathered with other counters.
d) The Infantry. No particular power.
e) The Archers. No particular power. They fight with their CF and may use their power of shooting arrows as seen previously.
4. The Orientals
a) The Lords. No particular power. They add 1 point to the CF of the counters of their people if they occupy a hexagon containing a magic stone.
b) The Tigers. Unlike all the other Animal counters, they may also be placed on hexagons already occupied by normal counters. They cannot, however, be joined with other counters, friend or foe.
c) The Acrobats. They move like the other counters, except when they leave from outside the castle. In that case they have the possibility of arriving directly at the place they have chosen. However, these jumps are random and imprecise, and they take place during the movement phase, according to the following rules:
- one places this counter on the hexagon of one's choice;
- observing the jump table drawn outside the castle on the game board, one throws the die and checks on the table the direction in which the jump is deflected;
- one throws the die again and notes by how many hexagons the jump is deflected in the direction just found;
- finally one places the counter on the hexagon thus defined.
If the landing point of this counter is occupied by a friendly or enemy counter, or if that point lies in an enemy ZoC, the counter is eliminated. It is also eliminated if it lands on an impassable hexagon.
These procedures are repeated for each of these counters during the turn in which the jumps are made. It is not compulsory to make all the jumps during the same game turn.
d) The Infantry. No particular power.
e) The Slingers. No particular power. They fight with their CF and may throw stones as seen previously.
Diagrams and Counter Key
The printed diagrams on the last two pages of the rulebook are not captioned in words; they are referred to by number only (1 to 8). They show:
- An example counter (a Monk Lord), with its Combat Factor on the left and its Movement Factor on the right, both 7 in the example.
- A three-dimensional piece, not described in the text.
- Movement: a counter with FM 5 may move to hexagons 1 to 5 in different directions, including zigzags.
- Zone of control: the six hexagons around a counter are shaded.
- Zone of control across a wall: the zone of control does not extend beyond the wall.
- A single counter moving in a straight line toward a hexagon, shown with an arrow.
- Several attackers placed on hexagons adjacent to the same enemy counter.
- Shooting distance: the number of hexagons is counted along a straight line from the shooter to the target, with an obstacle hexagon (marked 4/5 on the diagram) counted as an extra hexagon.
The counter key at the foot of the last page shows, for each people, the counters with the lettering used in the text: Monks (a) Lord, (b) Evocator and its evocations, (c) Visionary, (d) Bat, (e) Infantry, (f) Archer; Nordics (a) Helwiron, (b) Lord, (c) Dragon pieces, (d) Infantry, (e) Morion, (f) Crossbowman; Arborei (a) Lord, (b) Vegetable Octopus, (c) Carnivorous Plant, (d) Infantry, (e) Archer; Orientals (a) Lord, (b) Tiger, (c) Acrobat, (d) Infantry, (e) Slinger.
Note: the combat resolution table, the shooting table, the jump table and the turn counter are printed on the game board itself, not in the rulebook. The rules refer to them, and this transcription does not reproduce them.