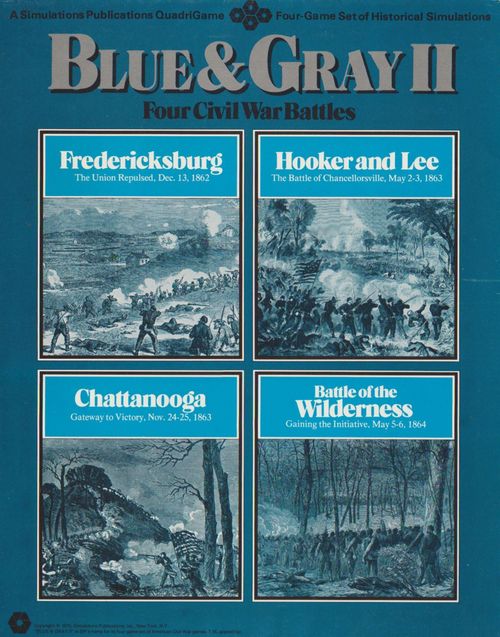
Blue & Gray II: Four Civil War Battles
Blue & Gray II: Four Civil War Battles Rulebook
Table of Contents
Table of Contents
- Standard Rules
- Fredericksburg: The Union Repulsed, December 13, 1862 (Exclusive Rules)
- Hooker and Lee: The Battle of Chancellorsville, May 2-3, 1863 (Exclusive Rules)
- Chattanooga: Gateway to Victory, November 24-25, 1863 (Exclusive Rules)
- Wilderness: Gaining the Initiative, May 5-6, 1864 (Exclusive Rules)
Standard Rules
1.0 Introduction
Blue & Gray is a set of games based on battles fought during the American Civil War. The games included are Chickamauga, Shiloh, Cemetery Hill, First Bull Run and Second Bull Run.
2.0 Components
2.1 Rules
The rules are organized in numbered paragraphs, like this one. When they refer to another, related section, this is noted parenthetically, like this: (2.21). Rules for each separate game, called scenario rules, are included after the game rules, which apply to all four games.
2.2 Map
The maps are divided into hexagonal areas, called hexes, which regulate movement and combat much like the squares on a chessboard. They cover the areas over which the battles were fought at a scale of about 400 meters across each hex. Note that the First Bull Run and Second Bull Run games use the same map.
2.3 Charts and Tables
The charts and tables are used to regulate game play. The Terrain Effects Chart (abbreviated TEC) describes the terrain found on the maps and its effect on movement and combat. The Combat Results Table (abbreviated CRT) is used to resolve combat.
2.4 Counters
The pieces represent units which fought or could have fought in the battles. Union units are blue; Confederate units are gray.
2.5 Definitions
Movement Allowance: A relative measure of a unit's ability to move, expressed in movement points (abbreviated MPs).
Strength Point: A relative measure of a unit's combat strength. A unit's combat strength is stated as a number of strength points. Each strength point (abbreviated SP) represents 250 to 350 men.
4.0 Sequence of Play
The game is divided into a series of game-turns, each composed of two player-turns. Each player-turn is divided into a series of phases, which must be performed in the exact order stated below. The player conducting his turn is called the phasing player; his opponent is called the non-phasing player. All activity in one phase must be concluded before the next phase may begin. The scenario rules will indicate which player conducts his turn first.
I. First Player-Turn
A. Movement Phase. The phasing player may move his units (7.0). The phasing player's reinforcements, if any are available, are brought into play.
B. Combat Phase. The phasing player's units may attack (8.0) adjacent enemy units.
II. Second Player-Turn
The non-phasing player now becomes the phasing player and repeats the sequence above. Once his combat phase is complete, advance the turn marker one space on the Turn Record Track and begin the next turn.
5.0 Zones of Control
Units exert a zone of control (abbreviated ZOC) into the six hexes adjacent to the hex they occupy. Units must stop moving when they enter an enemy zoc.
5.1 No unit may leave an enemy ZOC except as a result of combat (8.5).
5.2 ZOC's do not cancel one another: a hex may include ZOC's of both sides.
5.3 ZOC's do not extend across river or creek hexsides or into river hexes. They do extend across stream, ford and bridge hexsides.
5.4 If a unit is eliminated in combat (8.0), its ZOC immediately ceases to exist as well.
6.0 Stacking
Up to two combat units of the same side may occupy the same hex. This is called stacking. Stacking limits apply only at the end of the movement and combat phases: any number of units may move through the same hex during the movement phase. (Clarification: Units may not end their individual movement or retreat in violation of stacking)
7.0 Movement
During his movement phase the phasing player may move all, some or none of his units (except those in enemy ZOC's). As a unit moves it expends MPs from its movement allowance according to the type of terrain it enters (see the TEC).
7.1 Unused MPs may not be accumulated from one turn to the next.
7.2 A unit may not enter a hex if it lacks sufficient MPs to pay the movement cost shown on the TEC (exception: see 7.4 below).
7.3 Movement costs are cumulative: therefore, a unit crossing a stream into a wooded hex would pay five MP5: two to cross the stream and three to enter the woods.
7.4 A unit not in an enemy ZOC may always move a minimum of one hex per movement phase, regardless of terrain costs.
7.5 Units may move along roads at a cost of one MP per hex, and along trails at a cost of two MPs per hex, regardless of any other terrain in the hex. To obtain the movement benefit of roads or trails, movement must follow the road or trail across a hexside containing the road or trail, not merely into or out of a hex containing it.
8.0 Combat
During the combat phase, the phasing player's units attack adjacent enemy units and his artillery may project its strength over intervening hexes to attack as well. All of the phasing players units which are in enemy ZOC's must attack. All enemy units in friendly ZOC's must be attacked. The phasing player (the attacker) chooses which of his units will attack which enemy units, and in what order.
8.1 Resolving Combat
Total the combat strengths of all units attacking an enemy-occupied hex and compare the total to the total combat strength of all defending units occupying the hex under attack. State the comparison as a ratio of attacker's strength to defender's strength (like this: 2:1). Round off the ratio in favor of the defender to conform to the odds found on the CRT; thus, an attack of 19 against 7 becomes 2:1. The phasing player rolls the die. Read the result on the appropriate line under the odds column. Apply the result immediately, before resolving any other attacks.
8.2 Modifiers
Attacks across certain types of hexsides or into certain types of terrain may affect the defender's strength, as shown on the Terrain Effects Chart.
8.3 Results
AE All attacking units are eliminated.
DE All defending units are eliminated.
AR All attacking units must retreat (see 8.5 below) one hex and may lose effectiveness (10.0).
DR All defending units must retreat one hex.
EX All defending units are eliminated, along with attacking units with a total combat strength equal to or greater than the printed defense strength of the defending units (attacking player's choice of units).
8.4 Restrictions
8.41 No unit may attack more than once per combat phase and no unit may be attacked more than once per combat phase. Any number of units may combine their factors to attack an enemy-occupied hex, as long as all attacking infantry and cavalry units are adjacent to the hex under attack and all attacking artillery units are within range (see 8.7). A unit may never divide its strength to participate in more than one attack.
8.42 Attacking units stacked together may not attack separate enemy-occupied hexes. The phasing player may attack with only one of the units if he so chooses and not attack at all with the other.
8.43 If a unit (or units) is adjacent to more than one enemy-occupied hex it may attack all of them in a single combat, as along as all attacking units (other than artillery) are adjacent to all defending units.
8.5 Retreat
If the combat result requires units to retreat, the owning player immediately moves them to an adjacent hex.
8.51 Units may not retreat off the map or into hexes occupied by or in the ZOC's of enemy units. Units forced to retreat which are unable to do so are eliminated.
8.52 Units forced to retreat may retreat into hexes occupied by friendly units; if this results in a violation of stacking limits one of the units in the hex must be moved to an adjacent hex (within the restrictions above). If this cannot be done, the retreating unit is eliminated.
8.6 Advances
If the combat result clears a hex of all units (through retreat or elimination), one unit which participated in the successful attack or defense may advance into the hex. This must be done before the next attack is resolved. If more than one hex is cleared of enemy units, the advance is still limited to one unit.
8.7 Artillery
Artillery units (including horse artillery) may attack enemy units within three hexes of their position (count the target hex, but not the artillery unit's hex). They may add their combat strength to that of friendly units making an attack, or may attack by themselves. Artillery units adjacent to enemy units must attack the adjacent enemy units and suffer any adverse results of the attack. Artillery may not advance after combat.
8.71 Artillery units attacking non-adjacent enemy units must trace a line of sight to their target. A straight edge between the center of the artillery unit's hex and the center of the target hex. If the line crosses any forest or town hexes, the line of sight is blocked and the attack is not allowed. If the line of sight runs along the line between two hexes, it is blocked only if both are forest or town hexes. Rivers and other units (both friendly and enemy) never block lines of sight, nor does the terrain in the artillery unit's hex and its target hex.
8.72 Artillery attacking non-adjacent units never suffers any adverse result (though any friendly units adjacent to the target hex and participating in the attack would suffer them). Defending artillery units suffer any adverse results.
8.73 Attacks by artillery alone against non-adjacent units must be made at odds of 1:3 or greater.
8.74 When adding their strength to friendly infantry or cavalry units attacking defenders in more than one hex (8.43), the artillery need only be within range of one of the hexes occupied by the defender.
8.75 Artillery units may not advance after combat.
8.76 Participation by attacking artillery units does not affect terrain modifiers for streams, bridges and fords.
8.8 Voluntary Odds Reduction
Before resolving an attack, the attacker may choose to reduce the combat odds. There is no penalty for doing so, but the attacker may not change his mind once the die has been cast.
9.0 Night
During night turns (shown on each game's Turn Record Track) there is no combat phase. Units adjacent to enemy units may not move. Units may not enter enemy ZOC's during night turns.
10.0 Attacker Effectiveness
Whenever a unit receives an Attacker Retreat (AR) result due to combat, its combat value highlighted in red and it becomes 'ineffective'. It remains ineffective until a night turn or the end of the game, whichever comes first. Ineffective units may not attack but may move and defend themselves.
10.1 Only attacking units lose effectiveness. Units which suffer a DR (defender retreat) result suffer no additional penalty.
10.2 Ineffective units may not enter enemy ZOC's. If an ineffective unit is in an enemy ZOC at the beginning of its side's combat phase, it must retreat (8.5). This does not allow enemy units to advance (8.6). Note that ineffective units not in enemy ZOC's at the start of the combat phase do not retreat if an enemy unit moves adjacent to them (as the result of an advance) during the course of the combat phase.
10.3 Artillery which is not adjacent to the units it attacks does not lose attacker effectiveness.
10.4 At the end of a night turn, all ineffective units return to their effective status.
11.0 Other Rules
11.1 Strategic Movement (Not allowed in Cemetery Hill, Shiloh or Second Bull Run)
Units which begin their movement phase at least four hexes from the nearest enemy unit (three intervening hexes) may use strategic movement. Infantry and artillery units add three MPs to their movement allowance; cavalry units add four. Units using strategic movement may not move closer than four hexes to the nearest enemy unit during their movement phase and may not combine strategic movement with regular movement.
11.2 Cavalry Retreat
Cavalry units attacked solely by enemy infantry or artillery may retreat two hexes (observing all retreat restrictions above) before combat is resolved. The attacking units may not attack other units, but one of them may advance into the vacated hex.
Fredericksburg: The Union Repulsed, December 13, 1862 (Exclusive Rules)
13.0 Introduction
Fredericksburg is a tactical level simulation of the battle between Ambrose E. Burnside's Army of the Potomac and Robert E. Lee's Army of Northern Virginia. During the bloody battle 114,873 Union soldiers took the field and were hurled against 73,867 well-fortified Confederates. The result was predictable: an easy victory for the Confederacy.
14.0 Initial Deployment Chart
On the Initial Deployment and Reinforcement Charts, an "a" following the unit's strength means the unit is artillery; a "c" means cavalry; all other unspecified units are infantry.
14.1 Union Army
| Hex | Strength | Designation |
|---|---|---|
| 1703 | 6 | 1/1/1 |
| 1802 | 5 | 2/1/1 |
| 1703 | 5 | 3/1/1 |
| 1802 | 6 | 4/1/1 |
| 1601 | 5 | 1/2/1 |
| 1702 | 4 | 2/2/1 |
| 1702 | 5 | 3/2/1 |
| 1601 | 12 | 3/1 |
| 0810 | 15 |
14.2 Confederate Army
| Hex | Strength | Designation |
|---|---|---|
| 1113 | 10 | Ransom |
| 0519 | 5 | Wilcox |
| 0818 | 3 | Wright |
| 0917 | 5 | Mahone |
| 0916 | 3 | Perry |
| 0914 | 4 | Fthrstn (Featherstone) |
| 1112 | 6 | Cobb |
| 1512 | 7 | Kershaw |
| 1611 | 5 |
14.3 Player Sequence
14.31 The Confederate Player is the First Player. His Player-Turn is first in each Game-Turn.
14.32 The game consists of eleven Game-Turns. Turns One and Seven are Fog Turns. Game-Turn Six is a Night Turn.
15.0 Reinforcements
General Rule: Both Players receive reinforcements according to their Reinforcement Charts. These reinforcements are placed on the edge of the map in the hex indicated on the chart. Reinforcements arrive during the Player's Movement Phase of the Game-Turn indicated, or during the Player's Movement Phase of a future Game-Turn, at the Player's choice. If a reinforcement entry hex is blocked by an Enemy unit, the arriving units may not enter until the route becomes unblocked. Reinforcements may enter into Enemy controlled hexes.
Cases:
15.1 Restrictions
15.11 The Owning Player may enter his reinforcements on the map at any point during his Movement Phase.
15.12 Once a unit has entered the map, it may move and attack freely, just as any other unit already present.
15.13 Each reinforcing unit expends one Movement Point to be placed on the entry hex. Units may exceed the stacking restrictions when entering the map on the same hex, as long as they conform to the stacking restrictions by the end of the Movement Phase.
15.2 Reinforcement Chart
15.21 Union Army
Arriving on Game-Turn Four on hex 0113:
| Strength | Designation |
|---|---|
| 6 | 1/2/V |
| 8 | 2/2/V |
| 5 | 3/2/V |
15.22 Confederate Army
Arriving on Game-Turn One on hex 1901:
| Strength | Designation |
|---|---|
| 1a | Pelham |
Arriving on Game-Turn Two on hex 2501:
| Strength | Designation |
|---|---|
| 20 | Early (or the following units): |
| 7 | Lawton |
| 4 | Trimble |
| 5 | Hoke |
| 4 | Hays |
Arriving on Game-Turn Three on hex 2501:
| Strength | Designation |
|---|---|
| 6 | Rodes |
| 4 | Doles |
| 6 | Colquit |
| 4 | Iverson |
| 4 | Grimes |
16.0 Terrain Features
16.1 Pontoons
Pontoons are identical in their use to Ferry hexes (see Case 5.24), except for the entry cost (see 9.0).
16.2 Redoubts
The "enemy" side of a redoubt hexside is the side which contains the "barbed" redoubt terrain symbol (see the Terrain Key). A defending unit only receives the benefit of the redoubt hexside when attacked exclusively across redoubt hexsides from the enemy side (see the Terrain Effects Chart). Zones of Control do extend across redoubt hexsides. Both Confederate and Union units are eligible to gain the defensive bonus for any redoubt hexside.
17.0 Victory Conditions
General Rule: These Victory Points are awarded for a variety of actions detailed on the Victory Point Schedule. At the end of Game-Turn Five, each side totals its Victory Points. If the Confederate Player has a total in Victory Points of 3 to 1 or greater than the Union Player (counting Points for elimination of Enemy units only), and if the Union Player does not occupy hex 1113, 1711, or 2401, the Confederate Player automatically wins the game. If, however, these conditions are not met, Players continue the game through Game-Turn Eleven. Points are then totaled for each Player (including those for occupation of terrain and exiting units). The Player with the higher number of Points wins the game. Players may wish to retain eliminated Enemy units and exited Friendly units to double-check their totals at the end of the game. Infantry Divisions are the six combat units with 10 or more strength points.
17.1 Victory Point Schedule
17.11 Points Awarded During Play
One Victory Point for every Enemy combat Strength Point eliminated.
17.12 Points Awarded for Exited Units
- a. One Victory Point to either Player for each Friendly artillery or infantry brigade exited from hex 2027.
- b. Two Victory Points to either Player for each Friendly infantry division or cavalry brigade exited from hex 2027.
- c. One Victory Point for each Union artillery or infantry Combat Strength Point exited from hex 2501.
- d. Two Victory Points for each Union cavalry Combat Strength Point exited from hex 2501.
- e. One Victory Point for each Union artillery or infantry brigade exited from hex 0113.
- f. Two Victory Points for each Union cavalry brigade or infantry division exited from hex 0113.
- g. One Victory Point for each Confederate artillery or infantry Combat Strength Point exited from hex 0113
- h. Two Victory Points for each Confederate cavalry Combat Strength Point exited from hex 0113
- i. One Victory Point for each Confederate artillery or infantry brigade exited from hex 2501.
- j. Two Victory Point for each Confederate infantry division or cavalry brigade exited from hex 2501.
17.13 Points Awarded at the Game's End For Occupation of Hexes
- a. 15 Victory Points to either Player for occupation of hex 1113.
- b. 25 Victory Points to either Player for occupation of hex 2401.
- c. 8 Victory Points to the Union Player for occupation of hex 1711.
- d. 5 Victory Points, to the Confederate Player for occupation of hex 1504.
- e. 5 Victory Points to the Confederate Player for occupation of hex 0511.
- f. 8 Victory Points to the Confederate Player for occupation of hex 0206.
17.2 Occupation
17.21 Occupation is defined as having a Friendly unit physically on the hex or having been the last to have moved a Friendly unit onto the hex in question.
17.22 The occupation definition can be met by moving a Friendly unit through the hex in question.
17.23 The Confederate Player is considered to occupy hexes 1113, 1711 and 2401 at the beginning of the game. The Union Player is considered to occupy hexes 0206, 0511 and 1504 at the beginning of the game.
17.3 Exiting the Map
17.31 Units exit the map by expending one Movement Point from the map edge hexes they are on.
17.32 Units may only exit the map from hexes 0113, 2027 or 2501.
17.33 Units may only exit the map during the movement portion of their Turn. Exited units are not considered destroyed. Units forced to retreat off the map are eliminated instead and treated as such for Victory Point considerations.
17.34 Once a unit exits the map, it may not return.
17.35 The Confederate Player starts the game with four Victory Points as a result of a previous exit.
18.0 Fog
General Rule: Game-Turns One and Seven represent Turns when fog was present on the battlefield. To reflect this situation, artillery may not bombard during these Game-Turns and all Movement Allowances are reduced by a half i.e. 8 to 4 and 6 to 3.
19.0 Union Movement Restrictions
General Rule: Due to ambiguous orders from Army Headquarters, much of the Union Army did not move in the battle of Fredericksburg. In the game, only 15 Union units may move per Turn. This restriction is lifted as soon as the Confederates move a unit into or through Burnside's headquarters (hex 0206), either due to movement, or retreat or advance after combat. Furthermore, all Union artillery and cavalry units on the eastern side of the Rappahannock River are immobile (may not move) until released by a variety of Confederate movements.
19.1 Immobility
19.11 All Union cavalry and artillery units are released from immobility as soon as any Union unit exits the map from hexes 2501 or 2027.
19.12 All Union cavalry and artillery units are released from immobility as soon as a Confederate unit enters a pontoon bridge or ford hex. This movement can occur at any time during the Confederate Player's Movement Phase or as a result of advance or retreat after combat.
19.13 Each individual cavalry and artillery unit can be released from immobility if a Confederate unit comes within three hexes of the immobile unit. This movement, as in the cases above, can result from movement, or advance or retreat due to combat.
Hooker and Lee: The Battle of Chancellorsville, May 2-3, 1863 (Exclusive Rules)
13.0 Introduction
Hooker and Lee is a battle-level simulation of the engagement at Chancellorsville on May 2nd and 3rd, 1863. Union General Joe Hooker had just completed a brilliant strategic maneuver, trapping Lee's Army of Northern Virginia. Hooker's failure to follow up this stroke not only enabled Lee to escape the trap, but also allowed Lee to inflict a tactical beating on the Union Army. Unfortunately, Confederate casualties made theirs a Pyrrhic victory.
14.0 Initial Deployment Chart
On the Initial Deployment and Reinforcement Charts, an 'a' following the unit's Strength means the unit is artillery; a 'c' indicates cavalry; all other unspecified units are infantry.
14.1 Union Army
| Hex | Strength | Designation |
|---|---|---|
| 0912 | 9 | 2/V |
| 1013 | 4a | V |
| 1115 | 19 | 1/V |
| 1316 | 9 | 3/V |
| 1020 | 3c | 1/ Plesntn (Pleasanton) |
| 1120 | 4c | 2/ Plesntn (Pleasanton) |
| 1416 | 16 | 1/II |
| 1715 | 12 | 3/II |
| 1615 | 2a |
14.2 Confederate Army
| Hex | Strength | Designation |
|---|---|---|
| 2014 | 4 | Wright/A |
| 2115 | 5 | Mahone/A |
| 1914 | 4 | Posey/A |
| 1812 | 3 | Perry/A |
| 1913 | 4a | Garnett/A |
| 1811 | 4 | Wofford/M |
| 1710 | 5 | Semmes/M |
| 1608 | 6 | Kershaw/M |
| 1810 | 4a |
14.3 Player Sequence
14.31 The Confederate Player is the First Player; his Player-Turn is first in each Game-Turn.
14.32 The game consists of 9 Game-Turns. Game-Turn Five is a Night Turn.
15.0 Reinforcements
GENERAL RULE
The Union Player, only, receives reinforcements according to the Reinforcement Chart. These reinforcements are placed on the edge of the map in the hex indicated. Reinforcements arrive during the Player's Movement Phase of the Game-Turn indicated. If a reinforcement entry hex is blocked by an Enemy unit (not solely by an Enemy Zone of Control), the arriving units may not enter that hex until the hex becomes unblocked. The Union Player may enter his reinforcements onto the map at any time during his Movement Phase. The Union reinforcement units are not subject to the Union Movement Restrictions (Case 16.0) at any time during the game.
15.1 Restrictions
15.11 Each reinforcing unit expends one Movement Point to be placed on the entry hex. Units may exceed the stacking limitations when entering the map, as long as they conform to those restrictions at the end of the Movement Phase.
15.12 Once a unit has entered the map, it may move and engage in combat freely, just as any other unit already present.
15.2 Reinforcement Chart
15.21 Union Army [only]
Arriving on Game-Turn Four on hex 0111:
| Strength | Designation |
|---|---|
| 19 | 1/I |
| 12 | 2/I |
| 7 | 3/I |
| 5a | 1 |
Arriving on Game-Turn Five on hex 0128:
| Strength | Designation |
|---|---|
| 4c | 1/Averill |
| 3c | 2/Averill |
16.0 Exiting the Map
16.1 Union Player
16.11 The Union Player can voluntarily have his units exit the map only through hexes 1501, 2001 and 2107, and then only if those hexes are not occupied or controlled by the Confederate Player's units. The Union Player receives one Victory Point for each Combat Strength Point of his units so exited.
16.12 Even though such units are not considered eliminated, they nonetheless may not return to the game. The Union Player cannot otherwise voluntarily have his units leave the map. Thus, any units forced (by combat) to exit through these, or any other hexes, are considered eliminated.
16.2 Confederate Player
16.21 The Confederate Player can voluntarily have his units exit the map through hexes 1501, 2001 and 2101 if these hexes are not occupied or controlled by the Union Player's units. The Confederate Player receives no Victory Points for units so exited, and such units cannot return to the game. Confederate units exiting the map through these hexes for any reason (even as a result of combat) are not considered eliminated.
16.22 During the first two Game-Turns, the Confederate Player may voluntarily exit a combined total of 20 units from the map at the Southern edge through hexes 2518 and/or 2514. [This simulates Jackson's flanking maneuver of May 2nd.]
16.23 Units exited as per Case 16.22 must later re-enter the map at the Western edge as follows: Units which exited on Turn One will return on Game-Turn Four; those which exited on Turn Two will return on Game-Turn Five (the Night Game-Turn).
16.24 Units re-enter the map at the Western edge anywhere between hexes 1027 and 1928, inclusive, paying the entrance cost of the first hex they are placed on.
16.25 The Confederate Player should visualize the re-entering units as a column of units entering the map from a chain of hexes off-map, of the same terrain-type as the entry hex. (For example, the first unit re-entering expends one Movement Point; the second unit expends two Movement Points, etc.) If there are more re-entering units scheduled to arrive than can physically be entered onto the map during a given Game-Turn, the un-entered balance is simply brought back into play on the following Game-Turn.
16.26 These re-entering units are subject to the normal stacking limitations. Re-entering units may enter into Enemy Zones of Control; however, if they are then forced to retreat off the map, they are eliminated.
16.27 Units leaving the map by this route (the Southern map edge hexes) after Game-Turn Two are eliminated.
17.0 Movement Restrictions
17.1 Movement Quota
The Union Player may not move all his units. He may move only six units (of his choice) each Game-Turn. (There is no limitation, however, to the number of units which may attack.) There is no restriction on the number of units advancing and retreating as a result of combat. Union reinforcements arriving on Game-Turns Four and Five are not subject to or affected by this restriction at any time during the game. The Confederate Player has no movement restrictions.
17.2 Averill's Division
The units of Averill's Cavalry Division may not cross Ely's Ford until the Union Player rolls a '1' on the die. The die is rolled once for each Game-Turn. As soon as a '1' is rolled, both Averill units may cross (on that Turn or a following Turn). These units may not cross at any other Ferry hex.
18.0 Demoralization
Demoralization demonstrates the effect of extensive combat losses. (Players should not use the Attack Effectiveness Option, Case 11.0, in Hooker and Lee.)
18.1 Union Player
If the Union Army suffers combat losses in excess of the following, it becomes demoralized: Before all I Corps units cross river, 47 Strength Points; after all I Corps units cross river, 58 Strength Points. Union losses must exceed these totals to bring about demoralization.
18.11 Demoralized units may move and attack normally; however, they may not advance after combat.
18.12 The effect of demoralization is immediate; as soon as the Union Player exceeds his limit, the rest of his units are demoralized. If there are any further battles to be fought that Game-Turn, they are resolved in a demoralized state, with the exception that all combat at odds of less than 1-3 that have already been scheduled for that Game-Turn may be resolved.
18.13 Union reinforcements arriving on Game-Turn Four (Reynolds' I Corps) may act to 'rally' a demoralized army. [The Union reinforcements arriving on Game-Turn Five (Averill) may not rally Union units.] If all the reinforcement units of Reynolds' I Corps arrive, and Union losses are lower than 59 Strength Points, the Union Player's units are 'rallied.' Union reinforcements have no effect on rallying/demoralization until they all actually cross the Rappahannock River. Rallied units are no longer considered demoralized.
18.2 Confederate Player
If, at any time during the game, the Confederate Player suffers combat losses in excess of 52 Strength Points, his army becomes demoralized.
18.21 The effect of demoralization on the Confederate Army is the same as it is on the Union Army.
18.22 Confederate units may never be 'rallied.'
19.0 Union Stacking Restriction
GENERAL RULE:
Union units may not stack. Only one Union unit is allowed to occupy any one hex at the end of a given Phase. A Union unit may move through hexes containing other units, but may never end either the Movement Phase or the Combat Phase stacked with another unit. Confederate units may stack normally.
20.0 Victory Conditions
Section 20.0 is not in the exclusive-rules page. The text below is from the publisher's separate Victory Conditions page for Hooker and Lee on hexwar.com.
General Rule: Victory is determined by the accumulation of Victory Points. Victory Points are awarded, as play progresses, for the elimination of Enemy Combat Strength Points. Victory is also determined by the occupation of certain hexes.
Procedure: These Victory Points are awarded for a variety of actions as detailed in the Victory Point Schedule (20.1). At the end of the game, the number of Points is totaled for each Player, and the Player with the higher number of Points is awarded a victory.
20.1 Victory Point Schedule
1. The Confederate Player receives: 2 Victory points for each Union Strength Point eliminated, and 10 Victory Points, each, for occupying hexes 0328, 0511 and/or 1501.
1. The Union Player receives: 3 Victory points for each Confederate Strength Point eliminated, and 1 Victory Point for each Union Strength Point exited voluntarily through hexes 1501, 2001 and/or 2101. He also receives 15 Victory Points for occupying hex 1501.
(The source numbers both paragraphs "1.".)
20.2 Levels of Victory
Stated as a ratio of Confederate Victory Points to Union Victory Points:
- Confederate Decisive Victory: 2 to 1 or greater
- Confederate Substantive Victory: at least 1.5 to 1, but less than 2 to 1
- Confederate Marginal Victory: greater than 1 to 1, but less than 1.5 to 1
- Union Marginal Victory: 1 to 1 or less, but greater than 1 to 1.5
- Union Substantive Victory: 1 to 1.5 or less, but greater than 1 to 2
- Union Decisive Victory: 1 to 2 or less
20.3 Effects of Demoralization on Victory Level
If one side or the other is demoralized, but wins a victory, that Victory Level is dropped one level (a Substantive becomes a Marginal Victory). If both sides are demoralized, there is no effect.
Chattanooga: Gateway to Victory, November 24-25, 1863 (Exclusive Rules)
13.0 Introduction
Chattanooga is a tactical level simulation of the battle between General Ulysses Grant, commanding the Armies of the Cumberland and of the Tennessee, and General Braxton Bragg, commanding the Army of Tennessee.
14.0 Initial Deployment Chart
On the Initial Deployment and Reinforcement Chart, an "a" following the unit's strength means that the unit is artillery; a "c" means cavalry; all other unspecified units are infantry.
14.1 Union Army
| Hex | Strength | Designation |
|---|---|---|
| 1704 | 5 | 1/2/Xv |
| 1604 | 5 | 2/2/Xv |
| 1705 | 4 | 1/2/Xvii |
| 1605 | 4 | 322/Xvii |
| 1506 | 4 | 3/2/Xvii |
| 1606 | 5 | 1/4/Xv |
| 1507 | 5 | 2/4/Xv |
| 1304 | 1a | Sherman |
| 1204 | 6 |
14.2 Confederate Army
| Hex | Strength | Designation |
|---|---|---|
| 2004 | 3 | Liddell |
| 2305 | 5 | Polk |
| 2305 | 4 | Wright |
| 2106 | 5 | Smith |
| 2207 | 2a | Calvert |
| 2109 | 5 | Lowrey |
| 2209 | 1a | Martin |
| 2110 | 5 | Wilson |
| 2210 | 5 |
14.3 Player Sequence
14.31 The Union Player is the First Player. His Player-Turn is the first in every Game-Turn.
14.32 The game consists of ten Game-Turns. Game-Turn Five is a Night Game-Turn.
15.0 Reinforcements
General Rule: The Union Player receives reinforcements according to the Reinforcement Chart. These units must arrive during the Union Player's Movement Phase of Game-Turn Two and are placed on the edge of the map in one of the specified hexes.
15.1 Restrictions
15.11 The Union Player may bring his reinforcement units onto the map at any time during his Movement Phase of Game-Turn Two.
15.12 Reinforcing units may not enter an entry hex which is also an Enemy controlled hex. If the reinforcing units are not able to enter the map on Game-Turn Two, they are considered eliminated and count as Union units eliminated for Victory Conditions.
15.13 Each reinforcing unit must expend the necessary Movement Point cost for the terrain to enter the entry hex.
15.14 Once a unit has entered the map, it may move and attack freely, just as any other unit already present.
15.15 Units may not exceed the stacking restrictions when entering the map.
15.2 Reinforcement Chart
15.21 Union Army [only]
Appearing on Game-Turn Two on hex 0427, 0528, 0627 and/or 0728:
| Strength | Designation |
|---|---|
| 4 | 1/2/Xll |
| 4 | 2/2/Xll |
| 4 | 3/2/Xll |
16.0 Union Artillery
General Rule: For the months of October and November, 1863, the Confederate Army decided to starve the Union Army at Chattanooga into submission by cutting off the Union supply sources. During the two month siege the Union Army used their horses as a source of food rather than as a means of drawing artillery. Not until a portion of Sherman's cavalry were impressed for artillery duty could the Union move their guns any appreciable distances.
16.1 Restrictions
16.11 No Union artillery units (except the la "Sherman") may be moved. If forced to retreat due to combat, these artillery units are eliminated instead. These artillery units may not advance after combat in any attack.
16.12 Union artillery functions in the same fashion as other artillery units in every other way.
16.13 The Union la "Sherman" may move normally.
17.0 Movement Restrictions
17.1 Union Movement Quota
17.11 During any one Movement Phase, the Union Player may move no more than eleven units. There are no limitations as to the number of Union units which may attack.
17.12 Union reinforcements arriving on Game-Turn Two do not count toward the movement restriction until Game-Turn Five. Thereafter, they behave as any other Union unit, i.e., they may either be moved as part of the movement quota or left stationary.
17.13 Union units which advance or retreat as a result of combat do not count as part of the movement quota.
17.14 The Union Player may move an additional seven units during any Movement Phase in which he controls hex 1025. If the Union Player subsequently loses control of hex 1025, he may not move the additional units.
17.15 "Control" is defined as having a unit in the hex or being the last to have a unit move through the hex.
17.16 Confederate units do not have any extraordinary movement or combat limitations.
17.2 Night Game-Turns
No Union units may move during the Night Game-Turns. Confederate units may move during the Night Game-Turns; they may not enter, but may exit Enemy ZOC's during Night.
18.0 Redoubt Hexes
18.11 When the term redoubt is used, it refers to both the Union Entrenchments and the Confederate Rifle Pits. They are considered equal in terms of defensive and movement cost purposes.
18.12 The "enemy" side of a redoubt hexside is the side which contains the "barbed" redoubt terrain symbol (see the Terrain Key). A defending unit only receives the benefit of the redoubt hexside when attacked exclusively across redoubt hexsides from the "enemy" side (see the Terrain Effects Chart).
18.13 Zones of Control do extend across redoubt hexsides. Both Confederate and Union units are eligible to gain the defensive bonus for any redoubt hexside.
19.0 Ferry Hexes
19.1 Restrictions
19.11 Any units may cross through the Ferry Hexes - 1305, 1013, 0814 and 0517. Units may only enter and leave a Ferry Hex in the direction of the arrows shown on the map. The Movement Point Cost to enter a Ferry Hex is three Movement Points.
19.12 No unit may end its Movement Phase in a Ferry Hex; hence no unit may attack from a Ferry Hex.
19.13 Any unit which is forced to retreat into a Ferry Hex is eliminated instead.
20.0 Victory Conditions
General Rule: Victory is determined by the accumulation of Victory Points. Points are awarded to each Player according to the Victory Point Schedule for the elimination of Enemy units and/or for the control of certain hexes.
Procedure: These Victory Points are awarded for a variety of actions as detailed on the Victory Point Schedule. At the end of the game, the number of Points is totaled for each Player. The Confederate Player subtracts his Point total from the Union Player's Point total to compute a differential. The Players then refer to the Levels of Victory Chart to determine the winning Player.
20.1 Victory Point Schedule
20.11 Points Awarded During Play
- The Confederate Player receives three Victory Points for each Union unit eliminated.
- The Confederate Player receives four Victory Points for either of the following hexes 1514 and 1417 if he ever controls either hex during the game (or eight Victory Points if he ever controlled both hexes). These Points are awarded only at the time of control of the hexes, and are only awarded once during the game (see Case 17.15 for definition of "control").
- The Union Player receives two Victory Points for each Confederate unit eliminated.
20.12 Points Awarded at Game's End
- The Confederate Player receives four Victory Points for each Chattanooga town hex which is in the Zone of Control of one (or more) Confederate infantry units. The presence of a Union unit in a Chattanooga town hex does not negate the Zone of Control for Victory Point purposes.
- The Union Player receives four Victory Points for each of the following hexes 2207, 2311, 2416 and 2419 if he is the last Player to control these hexes (see Case 17.15 for definition of "control").
20.2 Levels of Victory
Stated as a differential; Union Victory Points minus Confederate Victory Points
- Union Decisive Victory: +26 or more.
- Union Substantive Victory: between +16 and +25.
- Union Marginal Victory: between +6 and +15.
- Draw: between -5 and +5.
- Confederate Marginal Victory: between -15 and -6.
- Confederate Substantive Victory: between -25 and -16.
- Confederate Decisive Victory: -26 or less.
Wilderness: Gaining the Initiative, May 5-6, 1864 (Exclusive Rules)
13.0 Introduction
Battle of the Wilderness is a tactical level simulation of the battle between the Union Army of the Potomac and the Confederate Army of Northern Virginia, which took place during early May, 1864, in the area south of the Rapidan River in Virginia known as "the Wilderness."
14.0 Initial Deployment Chart
On the Initial Deployment and Reinforcement Charts, an "a" following the unit's Strength means the unit is artillery; all other unspecified units are infantry.
14.1 Confederate Army
| Hex | Strength | Designation |
|---|---|---|
| 0414 | 5 | Stafrd (Stafford) |
| 0415 | 6 | Stnwall (Stonewall) |
| 0416 | 5 | Stuart |
| 0417 | 6 | Stuart |
| 0318 | 6 | Battle |
| 0319 | 5 | Doles |
| 0419 | 7 | Doles |
| 0217 | 7 | Gordon |
| 0218 | 6 |
14.2 Union Army
| Hex | Strength | Designation |
|---|---|---|
| 0616 | 12 | 1/1/V |
| 0717 | 6 | 2/I/V |
| 0816 | 9 | 3/I/V |
| 1016 | 4 | 1/2/V |
| 1116 | 6 | 2/2/V |
| 1117 | 4 | 3/2/V |
| 1217 | 6a | V |
| 0923 | 6 | 1/3/V |
| 0922 | 4 |
14.3 Player Sequence
14.31 The Confederate Player is the First Player. His Player-Turn is the first Player-Turn in every Game-Turn.
14.32 The game consists of sixteen Game-Turns. Turn Eight is a Night Game-Turn.
15.0 Reinforcements
General Rule: Players may receive Reinforcements according to the Reinforcement Chart. These reinforcement Units are placed on the edge of the map in the hex indicated on the Chart. Reinforcing units arrive during the Player's Movement Phase of the Game-Turn indicated. Reinforcing units arrive in column formation (one behind the other), during the Player's Movement Phase of the Game-Turn indicated. The Owning Player may determine the exact order of arrival at the point at which he moves the reinforcements onto the map. Note: The order in which the reinforcement units are listed is the historically correct order of arrival.
Procedure: The Player should visualize the reinforcements as arriving from a chain of hexes which are off the map. Thus, the first unit to arrive at that hex in the Turn is considered to have expended one Movement Point to get there; the second unit is considered to have expended two Movement Points to get there, and so forth.
Cases:
15.1 Restrictions
15.11 The Owning Player may enter his reinforcements on the map at any time during his Movement Phase.
15.12 Once a unit has entered the map, it may move and engage in combat freely, just as any other unit already present.
15.13 Reinforcements may enter the map directly into an Enemy Zone of Control. They may not enter an occupied hex. If the entry hex is occupied, the reinforcing unit may enter the nearest unoccupied hex.
[5.14] Units forced off the map by combat are considered eliminated for Victory Point purposes.
15.15 Reinforcement units expend one Movement Point to be placed on the entry hex.
16.0 Reinforcement Chart
16.1 Confederate Army
Appearing on Game-Turn One on hex 0128:
| Strength | Designation |
|---|---|
| 7 | Cooke |
| 9 | Kirklnd (Kirkland) |
| 8 | Walker |
| 6 | Davis |
| 8 | Lane |
| 7 | Thomas |
| 8 | Scales |
| 8 | McGwn (McGowan) |
| 2a | 3 |
Appearing on Game-Turn Five on hex 0118:
| Strength | Designation |
|---|---|
| 5 | Johnstn (Johnston) |
| 6 | Ramseur |
Appearing on Game-Turn Nine on hex 0728 or hex 0627:
| Strength | Designation |
|---|---|
| 8 | Henagan |
| 6 | Hmphrys (Humphreys) |
| 6 | Bryan |
| 7 | Wofford |
| 6 | Andran (Anderson) |
| 6 | Gregg |
| 5 | Benning |
| 6 | Law |
| 7 | Jenkins |
| 6 | Harris |
| 3 | Perry |
| 6 | Perrin |
| 7 |
16.2 Union Army
Appearing on Game-Turn Four on hex 2326:
| Strength | Designation |
|---|---|
| 10 | 2/3/lI |
| 10 | 1/3/lI |
| 9 | 1/4/lI |
| 9 | 2/4/II |
| 10 | 3/2/II |
| 6 | 2/2/II |
| 10 | 1/2/II |
| 6 | 2/1/II |
| 7 | 1/1/II |
| 7 | 3/1/II |
| 7 | 4/1/II |
| 6a | II |
Appearing on Game-Turn Seven on hex 0102:
| Strength | Designation |
|---|---|
| 7 | 4/1/VI |
Appearing on Game-Turn Nine on hex 0102:
| Strength | Designation |
|---|---|
| 4 | 2/1/IX |
| 12 | 2/2/IX |
| 13 | 1/3/IX |
| 10 | 2/3/IX |
| 4a | IX |
17.0 Special Rules
17.1 Confederate Movement
17.11 All Confederate units may move along trails at the Road Movement rate, i.e., one Movement Point per hex.
17.12 Confederate units may enter forest hexes as though they were moving along trails, i.e., two Movement Points per hex.
17.13 These changes in the Terrain Effects only affect the movement of Confederate units and in no way alter the normal combat effects associated with the terrain.
17.2 Union Movement
17.21 During the first day (Game-Turns One through Seven), Union units may not move into or through forest hexes, except along roads and trails. However, they may always enter a hex in an Enemy Zone of Control, regardless of terrain.
17.22 During the second day (Game-Turns Eight through Fifteen), Union units may enter any hex adjacent to a clear terrain hex or road or trail hex.
17.23 Union units may never advance after combat into a hex they are prohibited from entering during the Movement Phase. They may retreat into such a hex as a result of combat only if it is the only path of retreat open to them.
17.24 Starting a Movement Phase in a prohibited hex (due to combat) does not affect the unit's ability to move in that Phase. Exit is not prohibited. It is possible that a unit will find itself in a hex completely encircled by prohibited hexes. In such a case, the unit may not move.
17.3 Union Train Defense Units
The Union Train Defense units, identified by the code "TD," represent the two brigades of 1/IX which were assigned to guard the huge supply tail of the Union Army. The units include the actual brigades and the various supply wagons and rear echelon paraphernalia.
17.31 The Train Defense units may never attack an Enemy unit. If a "TD" unit should find itself adjacent to an Enemy unit during the Union Combat Phase, it automatically suffers an Ar (Attacker retreat) result before any Union attacks are resolved. The Confederate unit(s) to which the unit was adjacent may advance after combat.
17.32 The Train Defense units may never enter an Enemy controlled hex.
17.33 A Train Defense unit may never stack with any other unit. It may not enter an occupied hex during movement nor may any other unit enter a hex containing a Train Defense unit.
17.34 The Train Defense units have a normal Movement Allowance of 6 Movement Points. They may only enter hexes containing roads and/or trails. If forced to retreat to a non-road, non-trail hex as a result of combat, they are eliminated.
17.35 The Train Defense units may displace and be displaced as long as the special stacking and terrain restrictions for them are observed.
18.0 Victory Conditions
General Rule: Victory is determined by the accumulation of Victory Points. Victory Points are awarded for Enemy Strength Points destroyed and occupation of certain territorial objectives, according to the Victory Point Schedule. At the conclusion of Game-Turn Sixteen, the Players total their Victory Points and the Player with the higher total wins.
18.1 Victory Point Schedule
18.11 The Confederate Player receives:
- Three Victory Points for every Union Strength Point destroyed.
- Fifteen Victory Points each for occupation of Spottswood (hex 0810), Wilderness Tavern (hex 1415), and Hickman (hex 1920) at the end of the game.
- Fifteen Victory Points for the destruction of both Union Train Defense units.
18.12 The Union Player receives:
- Two Victory Points for every Confederate Strength Point destroyed.
- Fifteen Victory Points each for occupation of Spottswood (hex 0810), Wilderness Tavern (hex 1415), and Hickman (hex 1920) at the end of the game.
18.13 Occupation
Occupation is defined as being the last Player to have a unit (or Zone of Control) in the hex in question. Occupation for Victory Point purposes, is calculated at the end of Game-Turn Sixteen.
19.0 Optional Rules
19.1 Pickett's Division
One of the main concerns of the Union commanders on the second day was the whereabouts of Pickett's Division, and the possibility that it might appear on the battlefield and turn the Union flank. In actuality, the division did not arrive. But the following rule allows for this possibility.
Arriving on Game-Turn Nine on hex 0118 or 0128:
| Strength | Designation |
|---|---|
| 7 | Hunton |
| 7 | Corse |
| 5 | Terry |
19.2 General Burnside
At the beginning of each Union Movement Phase, whenever any unit of the Union IX Corps is to be moved, a special die roll is required. If the result is a "6," none of the IX Corps units may move during that Movement Phase. They may attack and defend normally during that Game-Turn. This represents the effects of the corps commander, General Burnside. TD units are not affected.
19.3 Lethargic Union Army
After years of war, it seemed as if the Union Army had finally learned to act quickly upon its decisions. However, it was possible for them to revert to their former selves and bring to ruination a perfectly viable plan by lethargic execution. The following rules show what would have happened if such had been the case in the Wilderness. There is no Union Initial Deployment when using this rule. Rather, the Union Player substitutes the following Reinforcement Schedule for the historical one given.
Appearing on Game-Turn One in hexrow 0001:
| Strength | Designation |
|---|---|
| 10 | 2/3/Il |
| 10 | 1/3/II |
| 9 | 1/4/II |
| 9 | 2/4/Il |
| 10 | 3/2/II |
| 6 | 2/2/lI |
| 10 | 1/1/11 |
| 6 | 2/1/11 |
| 7 | 1/1/II |
| 7 | 3/1/11 |
| 6a | II |
Appearing on Game-Turn Two in hexrow 0001:
| Strength | Designation |
|---|---|
| 12 | 1/1/V |
| 6 | 2/1/V |
| 9 | 3/1/V |
| 4 | 1/2/V |
| 6 | 2/2/V |
| 4 | 3/2/V |
| 6a | V |
| 6 | 1/3/V |
| 4 | 3/3/V |
| 12 | 1/4/V |
| 5 | 2/4/V |
| 5 | 3/4/V |
Appearing on Game-Turn Three in hexrow 0001:
| Strength | Designation |
|---|---|
| 9 | 1/1/VI |
| 7 | 2/1/VI |
| 8 | 3/1/VI |
| 8 | 1/2/VI |
| 8 | 2/2/VI |
| 8 | 3/2/VI |
| 7 | 4/2/VI |
| 6a | VI |
| 8 | 1/3/VI |
| 9 | 2/3/VI |
Appearing on Game-Turn Nine on hex 0102:
| Strength | Designation |
|---|---|
| 7 | 4/1/Vl |
| 6 | Td |
| 10 | Td |
Appearing on Game-Turn Eleven on hex 0102:
| Strength | Designation |
|---|---|
| 4 | 2/1/IX |
| 12 | 2/2/Xi |
| 13 | 1/3/IX |
| 10 | 2/3/IX |
| 4a | IX |