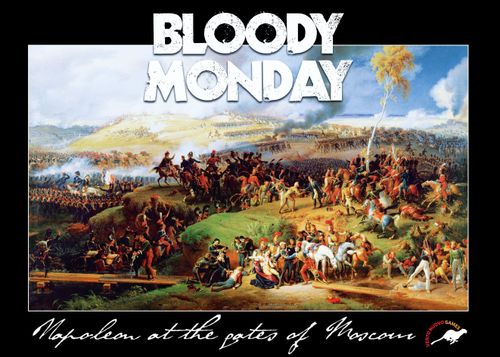
Bloody Monday
Bloody Monday Rulebook
Table of Contents
Table of Contents
Armies
Napoleon and the French, 53 blocks
- Imperial Guard - 7 blocks (Bessieres) - blue
- 1st Corps - 9 blocks (Davout) - orange
- 3rd Corps - 6 blocks (Ney) - yellow
- 4th Corps - 8 blocks (Eugene de Beauharnais) - green
- 5th Corps - 5 blocks (Poniatowski) - brown
- 8th Corps - 5 blocks (Junot) - pink
- Cavalry Reserve - 12 blocks (Murat) - red
Kutuzov and the Russians, 62 blocks
- Russian Guard - 10 blocks (Lavrov) - red
- 1st Army - 20 blocks (Barclay de Tolly) - yellow
- 2nd Army - 17 blocks (Bagration) - light blue
- Cossacks - 10 blocks (Platov) - brown
- Militia - 4 blocks - white
Unit abbreviations
- At = Ataman
- B (Russian leader) = Bagration
- BT (Russian leader) = Barclay de Tolly
- Ba = Bashkirs
- Bav = Bavarians
- Bu = Bug
- C = cavalry
- D (French leader) = Davout
- DC = Don Cossacks
- E (French leader) = Eugene de Beauharnais
- G = Guard
- Gr/CGr = Grenadiers / Combined Grenadier Division
- H = heavy cavalry
- IRG = Italian Royal Guard
- J (Russian light infantry) = Jagers
- J (French leader) = Junot
- L (Russian leader) = Lavrov
- LC/L = light cavalry
- LG/LGJ = Life Guard / Life Guard Jagers
- M (French leader) = Murat
- N (French leader) = Ney
- P (French leader) = Poniatowski
- P (Russian leader) = Platov
- R = reserve
- Te = Teptyar Cossack Regiment
- VG/GJ = Old Guard / Young Guard
- VL = Vistula Legion
- Wes = Westphalians
Introduction
BLOODY MONDAY recreates in game form the bloodiest day of the Napoleonic Wars. According to history, between 70,000 and 90,000 people died on the field of Borodino on that fateful day.
Although no decisive victory was achieved, Napoleon entered Moscow a few days later but could not bring Alexander I to peace negotiations. What came next is well known.
Each player commands one of the two armies: the first must fight its way to Moscow, the second builds a powerful defence while waiting for the right moment to counter-strike.
The game is played on a detailed map and uses a fog of war mechanism, so the players do not know the real composition of the enemy's forces until they come into contact with them and begin a battle.
A game usually lasts 1-2 hours, but may last much less or much more depending on the players' skill and luck.
Thanks to the fog of war the game is well suited for solo play.
Stickers
Apply the 2 round stickers to the large white disk and the 115 square stickers to the 115 blocks (use the 53 blue blocks for the 53 stickers with a blue background, the 62 green blocks for the 62 stickers with a green background).
Game Components
- Blocks: 53 blue, 62 green
- 1 turn marker
- 1 initiative disk
- Game board, rules, stickers, reference sheets
- Game markers (4 each): French Control, Artillery Fire, Isolated, Russian Control, Inspired, Kolocha Crossing
- Cubes: 5 light blue and 5 green (the component list's cube counts for the other colours are shown only in an illustration)
Setup and Fog of War
Place the map in the centre of the table. The French player sits at the western edge, the Russian player opposite at the eastern edge. The wooden blocks represent the real historical units that took part in the Battle of Borodino.
The game features fog of war, so blocks are placed upright with their stickers facing the owning player so that the opponent cannot see them.
During the game some blocks must be revealed, by laying them down so the opponent can see them. Concealing a block means returning it to the upright position.
At the start of the game the French control all areas west of the red dotted line and the Russians control all areas east of it. During the game control of an area is determined as described below.
Controlled area
The player who was last and alone in an area is considered to control that area. Areas controlled by the enemy come under friendly control the moment they are occupied exclusively by friendly troops.
Contested area
A contested area is one in which both players have units. The player who last occupied the area controls the contested area and keeps his units in it concealed, while the other player keeps his units revealed.
Units do not have to stop in an empty area to gain control. Players may use cubes of the corresponding colour to mark control.
Initial setup is carried out by both players simultaneously.
Each block represents a unit of a certain type:
Units
Combat units: Infantry (Line, Light/Jagers, Militia) and Cavalry (Light, Heavy). Support units: Leaders (Tactical leaders and Commanders-in-Chief) and Artillery (Foot, Horse).
Unit characteristics are described in section 2.0.
Units are always set up at full strength (the greatest number of dots/cannonballs/stars at the top of the block).
Commanders-in-Chief and tactical leaders (except Bessieres and Lavrov, who are in reserve) start the game in the area bearing their designation. Example: Napoleon starts in area 21, Kutuzov in area 69, etc.
The other units are grouped by corps colour (see the army list on page 2), then by type (jagers, infantry, cavalry, artillery). For each designation on the board, randomly select a block of the corresponding colour and type, one block per designation.
Example: in area 42 one of the six jager blocks is placed at random, in area 72 one of the two light-blue Russian cavalry blocks (it may be light or heavy), etc.
Once the setup is complete, each player places the 7 remaining units in reserve.
The French reserve consists of 7 units: Bessieres, blue cavalry, three blue infantry units, one of the two blue artillery units*, one of the six red heavy cavalry units*. (*drawn at random)
The Russian reserve consists of 7 units: Lavrov, one of the five red artillery units*, one of the four yellow artillery units*, one of the three yellow cavalry units* and three of the nine brown units. (*drawn at random)
At the start of the game the French player holds the initiative.
Player with the initiative
The French player begins the game with the initiative disk and plays the first impulse of the first turn.
During the game, if the French player spends the initiative (see 6.0), the disk passes to the Russian player, who becomes the player with the initiative and can also spend the disk, returning it to the French player, and so on.
Active player
The active player (attacker) is the player currently playing an impulse. That is, the French player is the active player while playing a French impulse, and the Russian player is active while playing a Russian impulse.
The other player during the opponent's impulse is the inactive player (defender).
Game Overview
How to win
A player wins immediately if he fulfils at least one of the following conditions:
- A. kills the enemy Commander-in-Chief;
- B. controls all 7 victory areas;
- C. destroys 10 enemy units.
Russian militia, jagers and cossacks do not count towards this.
If none of the three conditions is met by the end of the game on turn 4, the player who controls more victory areas wins.
The game can end in a draw if each player controls 3 victory areas and neither controls all the flèche areas (57, 58 and 59).
Sequence of play
- Logistics Phase (skipped on turn 1)
- Impulse Phase
- a) Tactical Action
- b) Initiative Action
- c) Pass
- Final Phase
Logistics Phase (3.0)
During the Logistics Phase both players bring in reinforcements and restore artillery, tactical leaders and combat units.
Impulse Phase (4.0)
During the Impulse Phase players may Pass, take a Tactical Action, or take an Initiative Action.
a. Tactical Action (5.0). When taking a Tactical Action, the active player may: activate a tactical leader; move units; fight battles.
b. Initiative Action (6.0). This special action can be taken only if the active player has the initiative disk. He may move his units and fight battles without activating a tactical leader. After this the initiative disk passes to the other player.
c. Pass (7.0). By passing, the active player may move only one of his units. The turn ends when both players pass consecutively.
Final Phase (8.0)
Advance the turn marker one turn. A turn represents three hours of real time.
1. The Game Board
The board is divided into 111 areas, each with a unique number (1 to 111) inside a coloured circle (green, yellow or red).
There are also 7 gold stars on the board. For each area with a gold star under his control a player gets 1 victory point.
1.1 Victory areas
Victory areas are marked with a star icon and are counted when determining the winner at the end of the game. Control of all 7 areas is an immediate victory.
Areas 19, 41, 55, 62, 69 and 107 are all victory areas on the board. The Flèches are a special victory area consisting of three areas, 57, 58 and 59.
A player who controls all three flèche areas gets 1 victory point. If at the end of the game each player controls three victory areas and nobody controls the flèches, the game is a draw.
1.2 Terrain
There are three different types of terrain (green, yellow and red) and one river (the Kolocha).
Note: roads, bridges, small rivers, lakes, towns, orchards and buildings are shown only for historical interest and do not affect the game.
The colour of an area affects the movement points needed to enter it, the maximum number of units (per player) that may be in the area (stacking limit), and also determines the area's defence bonus, which the defending player receives.
Green area. A green area is open terrain, where it is easier to attack and harder to defend. Defence bonus: none; stacking: 4 units per player; movement cost: 1 MP.
Yellow area. A yellow area is wooded terrain, where it is harder to attack and easier to defend. Defence bonus: 1; stacking: 2 units per player; movement cost: 2 MP.
Red area. A red area is a hilltop or fortified redoubt, where it is very hard to attack and much easier to defend. Defence bonus: 2 (if the defender controls the area); stacking: 1 unit per player; movement cost: 2 MP.
| Area | Defence bonus | Stacking | MP |
|---|---|---|---|
| Green | 0 | 4 | 1 |
| Yellow | 1 | 2 | 2 |
| Red | 2 (if in control) | 1 | 2 |
1.2.1 Defence bonus
The defence bonus allows the defender to ignore the first (1 or 2) hits in each battle. The defender may claim the defence bonus in a yellow area regardless of who controls it. The defence bonus in a red area, however, the defending player receives only if he controls the red area.
1.2.2 Engaging / disengaging
A unit must stop if it enters an area occupied by enemy units, that is, it engages. When a unit leaves an area occupied by the enemy, that is, disengages, it may continue moving within its movement allowance.
Engaging and disengaging each cost +1 MP.
1.2.3 Kolocha River
The Kolocha is the only river that affects play. Crossing the Kolocha River costs +1 MP.
Attack across the Kolocha. If a unit crosses the Kolocha and engages as well, the unit pays TWO additional MP: one for crossing the Kolocha and one for engaging.
If the area was not already contested at the start of the impulse (a new contested area), the unit is marked with a light-blue cube (its strength in battle will be halved).
Example: moving a unit into area 42 costs 2 MP, and moving a unit into area 54 costs 3 MP, because there were no French units in the area at the start of the impulse, that is, it is a new battle. A unit making such a move is marked with a blue cube. Its strength in battle is halved.
1.2.4 Activating support units
Activating a support unit costs +1 MP.
| Event | Additional MP |
|---|---|
| Engaging | +1 |
| Disengaging | +1 |
| Crossing the Kolocha | +1 |
| Activating a support unit | +1 |
2.0 Units
A unit block shows: Strength (1-5), corps colour, unit type (e.g. infantry), the general's name, and affiliation (e.g. 5th Infantry Division).
2.1 Movement allowance
The maximum movement range of each unit is expressed in movement points (MP).
Fast units are marked with a horse's head image (black or white) and have 5 MP: cavalry, horse artillery, some tactical leaders and Commanders-in-Chief.
Slow units have 3 MP: infantry and foot artillery.
2.2 Firepower
Firepower determines the probability of each unit inflicting damage. The probability is determined by the colour of the cannonball (dot) on the unit's block. An artillery pawn counts as one black dot. The heart shown on the blocks of Commanders-in-Chief and tactical leaders counts as one red dot.
- Black: Single Fire (SF) - hit on 6
- White: Double Fire (DF) - hit on 5, 6
- Red: Triple Fire (TF) - hit on 4, 5, 6
- Blue/green: Quadruple Fire (QF) - hit on 3, 4, 5, 6
2.3 Strength
A unit's strength is determined by the number of dots, cannonballs or stars, from 5 to 1, shown on the block, and shows the size of the unit. When attacking, combat units and activated artillery roll as many dice as their strength.
Example: the five units shown have strength 1, 2, 3, 4 and 5 respectively. They therefore roll 1, 2, 3, 4 and 5 dice when attacking.
If a support unit (see 2.6) is in an area in which a battle is taking place, it rolls only one die and has SF (Artillery) or TF (tactical leaders and Commanders-in-Chief), regardless of its strength.
Example: the three units shown all have strength 4. If they are directly involved in battle, they roll only 1 die and hit on 6 (artillery pawn) or on 4, 5 and 6 (leader/Commander-in-Chief - heart).
2.3 Taking damage
For each hit taken in battle, a unit's strength is reduced. Turn the block 90 degrees counter-clockwise. Units with strength below one are destroyed.
Exception: a single hit is enough to destroy a support unit, regardless of its strength.
Note: Commanders-in-Chief, tactical leaders and artillery are vulnerable. Do not leave them unguarded!
Destroyed units are placed on the corresponding morale track, starting from cell 10. The game ends immediately if a player destroys 10 enemy units.
Destroyed Russian jagers, militia and cossacks (brown Russian light cavalry) do not count towards this; they are removed to the box rather than placed on the morale track. But Platov himself, when destroyed, is placed on the morale track!
2.4 Combat units
A combat unit is a large infantry or cavalry formation. They must be destroyed first (priority target). The silver shield shown on some combat units is used when playing with optional rule 9.6.
2.5 Combat units (types)
2.5.1 Infantry
There are three different infantry subtypes in the game: line infantry, jagers and militia. In the basic game they differ only in that militia and jagers do not count on the morale track. All infantry have 3 MP.
Infantry have special abilities when playing with the optional rules (9.1; 9.3).
2.5.2 Cavalry
As the fastest unit on the battlefield (5 MP), cavalry can easily reach key positions. In the basic game there is no difference between light cavalry (black horse's head) and heavy cavalry (white horse's head and silver shield), except that the brown Russian light cavalry (cossacks) do not count on the morale track.
Cavalry have special abilities when playing with the optional rules (9.3).
2.5.3 Support units
Artillery, tactical leaders and Commanders-in-Chief are support units. All support units are considered secondary targets (5.3.6.1).
They play a key role in moving units or supporting combat units, but have minimal effect if the battle takes place in the area they occupy. In that case they roll only one die (TF for tactical leaders, SF for artillery).
One hit is enough to destroy a support unit, regardless of its strength.
2.6.1 Artillery
Artillery can be used to support combat units in adjacent areas. Each time artillery is activated to fire at an area, its strength is reduced. Once reduced to the pawn level, the artillery is considered exhausted and can no longer fire until it is restored.
Thus the two artillery units shown can fire three and two times respectively before becoming exhausted.
Artillery can be restored ("reloaded") in the Logistics Phase.
When directly involved in a battle, artillery has a limited attack (SF - 1 die) regardless of its strength and even if exhausted.
Most artillery in the game is foot artillery (3 MP), but there is also horse artillery (5 MP).
Activating artillery costs ONE additional MP.
Example: during an impulse foot artillery can move into a friendly, uncontested yellow area (2 MP) and be activated there (+1 MP) to support battles in any adjacent areas.
ONE hit is enough to destroy an artillery unit regardless of its strength.
Every artillery unit has a gold shield, used when playing with optional rule 9.6.
2.6.2 Tactical leaders
A tactical leader can be activated to command units. Each time a tactical leader is activated, its strength is reduced. After the strength is reduced to the last level, the leader becomes exhausted.
Thus the two leaders shown can be activated three and one times respectively before becoming exhausted.
Tactical leaders can be restored in the Logistics Phase.
When directly involved in a battle, a leader has a limited attack (TF - 1 die) regardless of its strength and even if exhausted.
Tactical leaders have 5 MP.
Activating a tactical leader costs ONE additional MP.
Example: a tactical leader can move into two friendly, uncontested yellow areas (2 MP each) and be activated (+1 MP) in the last area the leader entered.
ONE hit is enough to destroy a tactical leader regardless of its strength.
2.6.3 Commanders-in-Chief
A Commander-in-Chief can be activated in the Logistics Phase to call in reinforcements and restore exhausted units. Each time a Commander-in-Chief is activated, his strength is reduced.
Note: since three Logistics Phases are available during a game, each Commander-in-Chief can be activated three times per game. However, it is not necessary to activate him in every Logistics Phase; sometimes it may be sensible to save his strength.
When directly involved in battle, he has a limited attack (TF - 1 die); ONE hit is enough to destroy a Commander-in-Chief, regardless of his strength.
Commanders-in-Chief have 5 MP.
The strength of a Commander-in-Chief governs:
- the maximum number of tactical leaders that may be activated during each impulse;
- the maximum number of new battles the attacking player may start during a tactical impulse or special initiative action;
- the maximum number of battles the attacker may resolve during a tactical impulse or special initiative action;
- the maximum number of artillery units that may fire into an area where a battle is taking place.
When a Commander-in-Chief is exhausted his strength is "0", so tactical leaders cannot be activated, new battles cannot be started, no battle can be resolved, and artillery cannot be activated to fire!
3.0 Logistics Phase
The Logistics Phase is carried out by both players at the start of each turn (except turn 1). Each player chooses whether or not to activate his Commander-in-Chief. The player who does not have the initiative chooses first.
3.1 Activating the Commander-in-Chief
If a player decides not to activate his Commander-in-Chief, he cannot call in reinforcements or restore units, but his Commander-in-Chief does not reduce his strength.
A Commander-in-Chief cannot be activated if he is in a contested area and cannot disengage into a controlled, uncontested area.
If a player decides to activate his Commander-in-Chief, he must reveal (+1 MP) the Commander-in-Chief's block in a controlled, uncontested area. The Commander-in-Chief may also move before activation (but not after) within his available MP. Disengaging and crossing the Kolocha cost ONE additional MP each.
Then the Commander-in-Chief may, in the following order:
- call in reinforcements
- restore tactical leaders
- restore artillery
- restore combat units.
For each player the number of available reinforcements, restored combat and artillery units, and tactical leaders equals the Commander-in-Chief's logistic value.
At the end of the Logistics Phase players reduce the strength of their activated Commander-in-Chief.
3.2 Logistic value
The Commander-in-Chief's logistic value is expressed in logistic points (LP) and is calculated by adding:
- the strength of the Commander-in-Chief (number of stars);
- the number of victory areas under the player's control, even isolated ones.
In the Logistics Phase the logistic value is used to determine:
- the number of reinforcements placed;
- the number of artillery steps, tactical leader steps and combat unit steps restored.
Example: the French player activates Napoleon. Napoleon (strength 4 stars) is revealed in Shevardino (this costs 1 MP). Napoleon's logistic value is 6 = 2 (control of Shevardino and Borodino) + 4 (Napoleon's strength). The player places 6 reinforcements, then restores 6 tactical leader steps, 6 artillery steps and 6 combat unit steps (6 black, 3 white, 2 red or any permitted combination) (see 3.3). At the end of the Logistics Phase Napoleon's strength is reduced to 3 stars, and the block is concealed.
3.3 Placing reinforcements
The player draws reinforcements at random from the reinforcement pool and places them in any of the six victory areas other than the flèches, if the area is controlled, not contested and not isolated.
The Russian player places reinforcements in the order below, in sequence, until the stacking limit is reached in each area:
- Tatarinovo
- Gorki
- Utitsa
- Great Redoubt
- Shevardino
- Borodino
The French player's order for placing reinforcements is the reverse:
- Borodino
- Shevardino
- Great Redoubt
- Utitsa
- Gorki
- Tatarinovo
The Commander-in-Chief does not count towards the stacking limit.
Example: the Russian player has 9 logistic points and 7 available units in reserve. He draws his first reinforcement at random and places it in Tatarinovo, using his second, third and fourth logistic points. When the stacking limit is reached in Tatarinovo, the player places his fifth unit in Utitsa, as Gorki is already full. Since the player has no other victory area under control, the last two units remain in reserve.
3.4 Restoring artillery
To restore one step of artillery, the player turns the block 90 degrees clockwise. Each step costs 1 logistic point.
3.5 Restoring tactical leaders
To restore one step of a tactical leader, the player turns the block 90 degrees clockwise. Each step costs 1 logistic point.
3.5 Restoring combat units
To restore a step of a combat unit, the player turns the block 90 degrees clockwise. Each step costs from 1 to 4 logistic points depending on the colour being restored:
- Blue / green = 4
- Red = 3
- White = 2
- Black = 1
Example: the Russian player spends two logistic points to restore a Life Guard Jager brigade to full strength.
Example: the French player has nine logistic points. To restore the 5th Infantry Division from its minimum strength to its maximum requires 11 points. The French player may spend 7 points to restore the 5th Infantry Division from the minimum to three steps, and the 2 remaining points to restore other units (one white step or two black steps).
Isolated victory areas cannot be used for placing reinforcements. Isolated units cannot be restored during the Logistics Phase.
4.0 Impulse Phase
During the Impulse Phase players may Pass, take a Tactical Action, or take an Initiative Action.
At the start of each of the above actions the active player must perform an isolation check.
4.1 Isolation check
The player checks whether ALL of his units and controlled victory areas have a line of communication to his Commander-in-Chief.
Units and areas that do not have a line of communication are marked with a white cube and are considered isolated until they can trace a line of communication in any subsequent friendly isolation check.
4.1.1 Line of communication
A line of communication is a continuous path of unlimited length that can be traced from the unit/area to its Commander-in-Chief. This path must not pass through or end in an area controlled by the enemy or in a contested area.
However, the line of communication may start in any area, regardless of whether it is controlled or contested.
Example: in the illustration three Russian units (Bagration and two yellow infantry) are isolated. Bagration can still be activated, but he can command only one of the two infantry blocks, namely the one that is in the same area as Bagration at the moment of activation, because the blocks (yellow) and Bagration (light blue) are different colours. The player decides that Bagration will move to area 71 to restore the line of communication with Kutuzov. The three isolated Russian units keep a white cube until the next Russian impulse, when a new isolation check will be made.
5.0 Tactical Action
- Activating a tactical leader
- Movement
- Battle
- Deactivating support units
5.1 Activating a tactical leader
Tactical leaders have 5 MP, which allows them to move up to 4 MP and then activate by spending the remaining 1 MP. Exhausted tactical leaders cannot be activated.
During each impulse the player may activate a number of non-exhausted tactical leaders, depending on the strength of his Commander-in-Chief.
Activation of tactical leaders is not simultaneous. Thus, if a tactical leader wants to move into an area where the stacking limit is reached and there is another tactical leader, the latter must move and activate before the first can do so.
For each activated leader the player may start ONE new battle and resolve ONE current battle.
After activation a tactical leader may give orders:
- to any units in the area where he was activated, including the Commander-in-Chief and other tactical leaders, and
- to units of his own colour (including militia) located within that tactical leader's tactical range.
Example: the French start the game with 7 tactical leaders on the board, but since Napoleon's strength is only 4 stars, in one impulse the French player can activate a maximum of 4 tactical leaders and resolve a maximum of 4 battles.
5.1.1 Tactical range
Tactical range is a continuous path of a given length (see below) that must be traced from the unit to its tactical leader. This path must not pass through or end in areas controlled by the enemy or in a contested area.
However, the tactical range may start in any area, regardless of whether it is controlled or contested.
The length of the path is determined by the strength of the tactical leader: 4 stars = 4 areas; 3 stars = 3 areas; 2 stars = 2 areas (and so on, one area per star).
5.2 Movement
- Moving units and activating artillery
- Inspiring combat units
During movement each eligible unit may move within its maximum MP, each eligible artillery unit may be activated, and each activated tactical leader may inspire ONE of his combat units. Unused MP are lost.
Units that enter a new battle across the Kolocha River are marked with a light-blue cube.
Movement of units is not simultaneous. They must move one at a time; before beginning the movement of one unit the player must complete the movement of the previous unit. Thus, if a unit wants to enter an area where the stacking limit has been reached, one unit must first be moved out of that area.
Example: the French player wants to attack Gorki with his cavalry (5 MP). The cavalry spends 4 MP (yellow area 2 MP, engaging +1 MP, Kolocha crossing +1 MP). Unused MP are lost.
5.2.1 Activating artillery
During movement a player may activate artillery by spending 1 MP to reveal the block.
During battle, artillery can give support in any contested area adjacent to the chosen artillery.
5.2.2 Inspiration
Immediately after the movement of all units has been completed, and before battles begin, a player may inspire some of his combat units by marking them with a yellow cube:
- Each activated tactical leader may inspire one of his combat units (infantry or cavalry);
- The inspired combat unit must be of the same colour as the tactical leader (the colour requirement does not apply to militia) and be in an area adjacent to the leader;
- An inspired combat unit gets a hit bonus in battle:
- An inspired SF unit hits on 5 and 6;
- An inspired DF unit hits on 4, 5 and 6;
- An inspired TF unit hits on 3, 4, 5 and 6;
- An inspired QF unit hits on 2, 3, 4, 5 and 6.
Note: the game includes only 4 yellow cubes, as it is impossible to activate more than 4 tactical leaders per impulse, so it is impossible to inspire more than 4 combat units per impulse.
Example: Murat inspires the 1st Light Cavalry Division.
5.3 Battle
Battles are resolved in the third step of the tactical action, after leaders are activated and all eligible units have moved, in an order chosen by the active player, but always first the battles begun in this impulse, and then the rest.
Each battle must be resolved fully before moving on to the next.
Order of resolving a battle:
- Artillery fire
- The defender distributes damage from the artillery
- Defender's retreat (6.4)
- Revealing blocks
- Ground combat
- Distribution of damage
- Blocks of the area's owner are concealed
5.3.1 Artillery fire
The attacker may activate artillery units in adjacent areas to support the battle, marking each artillery unit involved with a red cube. The maximum number of artillery units involved cannot exceed the strength of the Commander-in-Chief.
Each activated artillery unit has Triple Fire (TF) and rolls as many dice as its strength (not halved when firing across the Kolocha).
The defender immediately distributes the damage without showing his units to the attacker. The defence bonus counts against artillery bombardment.
Then each activated artillery unit that fired into the area reduces its strength by one, but remains active, since it can fire into any other adjacent area during the same impulse.
5.3.2 Defender's retreat
After the defending player has distributed the damage from the attacker's artillery fire, he may retreat by playing the initiative disk (see 6.4).
5.3.3 Revealing units
If the defender did not retreat, both players simultaneously reveal their units in the contested area.
5.3.4 Ground combat
After the units have been revealed, the players simultaneously roll the dice (unless a combined attack is being made), count the hits and distribute the damage taken by their units (see 5.3.6).
5.3.5 Combined attack
If the battle takes place in a green area, and one of the players has combined infantry and cavalry forces (and at least one unit of each type is not marked with a blue Kolocha-crossing cube), while the opponent has no such forces, then that player may make a combined attack.
Combined attack: the player rolls his dice before the opponent rolls, and the damage is applied immediately. Then the opponent rolls the dice for his remaining units.
Example: three French units (two infantry and a cavalry) attack a green area beyond the Kolocha, occupied by two Russian units. One of the two French infantry units has crossed the Kolocha, so it is marked with a blue cube. After revelation the two Russian units turn out to be infantry. The French player then makes a combined attack: he rolls for ALL three of his units (the strength of one infantry unit is halved because of the Kolocha crossing) before the opponent's roll, and damage is dealt immediately. After that the surviving Russian infantry, if any, may return fire.
Example: the cavalry did not begin the battle in the area immediately after crossing the Kolocha, so it is not marked with a blue cube. However, the attacker cannot make a combined attack, because his infantry began the battle across the Kolocha and is marked with a blue cube.
5.3.6 Distribution of damage
Each player distributes the damage to his own units himself. Before distributing, the defender may use the area's defence bonus to ignore damage (one or two hits).
Hits are applied first to priority targets, and then to secondary targets.
Hits are distributed one by one to the units that have the greatest strength at the moment the damage is dealt. If two or more units have equal strength, the player chooses which of his units takes the damage.
5.3.6.1 Target priority
Damage cannot be assigned to secondary targets until all primary targets are destroyed.
Priority targets: combat units (infantry and cavalry).
Secondary targets: support units (Commanders-in-Chief, tactical leaders, artillery).
Example: the French player attacks with two infantry units and one cavalry unit. The battle takes place in a green area beyond the Kolocha, held by four Russian units (two infantry, one artillery, and one tactical leader).
The French cavalry crosses the Kolocha and is marked with a blue cube. Bessieres has inspired the Old Guard (yellow cube), which in this battle gets Quadruple Fire instead of Triple. The French player does not use artillery. The defender does not have the initiative disk and so cannot retreat. The players simultaneously reveal their units, and then roll the dice simultaneously, since neither can claim a combined attack.
The French player inflicts six hits, the Russian four. The French player distributes two hits to each infantry unit (the strongest units), while the Russian player applies the first four hits (two each) to the infantry units (priority targets), after which both units are destroyed. Then the remaining two hits are taken by both support units (one each). Note that the three destroyed Russian units are removed from the map and placed on the Russian morale track, while the jager unit is simply removed from the board, as it does not count when placed on the morale track.
5.3.7 Concealing blocks
After both players have distributed damage, the battle is over. Remove the yellow and blue cubes from the board.
If all of one player's units are destroyed, then the other player (the area's owner) conceals his units.
If after the battle the area is still contested, the player who controls the area (see 5.3.7) conceals his units, while the other player leaves his revealed. After that the active player may choose and resolve another battle.
Note: if an artillery unit is in an area adjacent to more than two contested areas, the player does not conceal it until the end of the impulse. The unit may give artillery support in other battles of that impulse.
5.4 Deactivating support units
After all battles have been resolved, the player deactivates all his activated support units (tactical leaders and artillery).
6.0 Initiative Action
A player with the initiative disk may spend it to take one of four initiative actions:
- Call in reinforcements (active player, instead of a tactical action);
- Special initiative movement and battle (active player instead of a tactical action);
- Cavalry raid (active player, after a tactical action);
- Retreat from battle (inactive player, during a battle).
After playing one of the actions above, the initiative disk is considered spent and is passed to the other player, who places it in the special cell on the game board.
6.1 Calling in reinforcements
The active player spends the initiative disk to place a number of reinforcements equal to the logistic value of his Commander-in-Chief. Reinforcements are placed as described in section 3.3.
6.2 Movement and battle
The active player, instead of passing or taking a tactical impulse, calculates the logistic value and spends the initiative disk to move his units. The number of units is determined by the logistic value.
Each unit may move within its MP.
Engaging, disengaging and battles are permitted. The maximum number of new battles and current battles must not exceed the strength of the Commander-in-Chief (3 stars = no more than 3 new battles and 3 current battles).
6.3 Cavalry raid
After a tactical impulse the active player spends the initiative disk to move cavalry units. Their number is determined by the logistic value. Each cavalry unit may move within its MP. A unit may not start a new battle or disengage, and current battles may not be resolved.
6.4 Defender's retreat
The inactive player may spend the disk to retreat from one battle. The retreat is made after artillery fire. The retreat includes all friendly units in the attacked area. The retreating units must move to any adjacent area under friendly control without violating the stacking limit.
Units that cannot retreat because of the stacking limit are destroyed, at the choice of their controlling player.
7.0 Pass
By passing, the active player may move only one of his units. Engaging is forbidden. Support units may NOT be activated, but one of the current battles may be resolved.
After both players have passed consecutively, the turn ends and a new one begins.
8.0 Final Phase
Apply Battle Fatigue (optional rule 9.10).
Players advance the turn marker. If the 4th turn has ended, each player counts the victory areas under his control to determine the winner.
9.0 Optional Rules
Optional rules offer players a deeper sense of the historical battle, add new aspects to the game, more strategic options, but also a higher level of difficulty.
We recommend using the optional rules only after the players have mastered the standard rules.
Optional rules must be used in order. Using any rule without using the previous ones may upset the balance of the game.
9.1 Russian jagers
During ground combat, after damage from artillery fire has been distributed, in a yellow/red area each Russian jager unit at full strength (attacker or defender) may skirmish or ambush the enemy.
Skirmish: the jager unit takes one hit (but the terrain defence bonus may be used) and retreats to any adjacent area under friendly control without violating the stacking limit.
Ambush: the jager unit rolls a die before any other units; damage is applied immediately.
In addition, during setup Russian jagers are treated as ordinary infantry, so they are grouped by colour and mixed with the regular infantry, and then placed at random.
Example: in areas 42 and 71 one of the 12 yellow Russian infantry units (six jagers, six regular infantry) is placed. In area 72 one of the 11 light-blue Russian infantry units (four jager units, seven regular infantry) is placed. Units are chosen at random.
Example: in Borodino during setup any of the three red infantry units may be placed, not only the Life Guard Jagers.
9.2 Grand Battery salvo
At the start of the game, before the 1st impulse, the French player may fire a salvo (without moving or activating units) with the four artillery units placed in areas 16, 28, 31 and 32.
The French player places one red cube in each area occupied by the enemy that he wants to fire at. The area must be adjacent to the firing artillery. Then the player rolls 4 dice (Triple Fire) for each artillery unit, 16 dice in total.
The Russian player may claim the terrain defence bonus, if any, and the shield bonus (when using optional rule 9.6). Each artillery unit may fire only once.
Example: the French player applies the Grand Battery salvo. His four available artillery units fire as shown in the image.
After the Grand Battery salvo the French player starts the 1st impulse. As a result of the bombardment up to four areas occupied by Russian units may be completely cleared.
Note: the Russian player does not show any of his units while distributing damage.
9.3 Mobility
Murat, light cavalry (with a black head on the block) and jagers get +1 MP, and militia lose 1 MP.
- Murat and light cavalry: 6 MP;
- Jagers: 4 MP;
- Militia: 2 MP.
9.4 First Sabre of the Empire
Murat, after activation, may move any cavalry unit, regardless of its colour, within his tactical range, and inspire any adjacent cavalry unit, regardless of its colour.
9.5 Cossacks
Platov may under no circumstances command any unit other than cossacks. Cossacks are not considered a cavalry unit for determining a combined attack or for defending against a combined attack (see 5.3.5).
9.6 Steadfast units
Each unit with a shield icon (silver for a priority target, gold for a secondary target) may ignore the first hit inflicted on it.
Note: the shield benefit applies only when the unit could take damage under the normal damage distribution rules. So NON-steadfast 4-step units still take damage before 3-step steadfast units can ignore that damage.
Example: consider the application of this rule to the example on page 14 (5.3.6.1). The Russian player could use the silver shield of an infantry unit to absorb the first hit. Then four hits would destroy two infantry units. The sixth hit would be absorbed by the gold shield of the artillery, which would save both Russian support units from destruction.
The same would hold for the French. The player could absorb the first hit with the silver shield of an infantry unit, so one infantry unit would be reduced to two steps, and the other to one step.
9.7 Exhausted tactical leader
An exhausted tactical leader can now be activated. An exhausted tactical leader's tactical range is reduced to "0", so he can command only units (of any colour) in the area he occupies at the moment of activation.
Activated exhausted tactical leaders count towards the maximum number of tactical leaders that may be activated in each impulse.
However, an exhausted tactical leader may be activated only if at least one non-exhausted tactical leader has already been activated during the impulse.
Exhausted tactical leaders do not reduce their strength when tactical leaders are deactivated at the end of the impulse.
9.8 General Offensive
If a player in the Impulse Phase has chosen a tactical action, he may spend the initiative disk to make a General Offensive.
A General Offensive allows the active player to activate his tactical leaders, fire artillery, start new battles and resolve current battles as if his Commander-in-Chief had maximum strength (4).
Example: at the start of the Impulse Phase of turn 4 Napoleon is exhausted. The French player decides to make a General Offensive and spends the initiative disk. Thus, during the tactical impulse the French player may activate up to 4 tactical leaders, enter 4 new battles, resolve 4 current battles and activate 4 artillery units.
9.9 Advanced combat
If the battle takes place in a yellow/red area, units attack and inflict damage immediately in the following order:
- Russian jagers
- Infantry
- Russian militia
- Light cavalry
- Heavy cavalry
- Secondary targets
Example: the French player attacks with two units (one infantry and one heavy cavalry). The yellow area is occupied by two Russian units (jagers and infantry).
Since the battle is in a yellow area, the Russian jager unit attacks first, and its hits (if any) are immediately applied to the French. Then both players simultaneously attack with infantry and distribute damage (each to his own units). The Russian player may claim one terrain defence bonus (yellow area). The French heavy cavalry attacks last. Damage is distributed accordingly.
9.10 Battle fatigue
At the end of each turn, during the Final Phase, each involved non-steadfast unit takes one hit. The terrain defence bonus is ignored.
9.11 Barclay/Bagration: command limit
The board is divided by a white line into two parts: northern and southern. This line marks the command limit of Barclay de Tolly and Bagration.
Bagration and Barclay de Tolly may not move across this line and may not command any unit beyond this line.
Note: an area belongs to the northern part of the board if its coloured circle is north of the line, and to the southern part if its coloured circle is south of the line.
9.12 Barclay/Bagration: extreme command limit
In addition to all the restrictions of 9.11, Russian units of the 1st Army (yellow) may not enter areas in the southern part of the map, and Russian units of the 2nd Army (light blue) may not enter areas in the northern part of the map.
10.0 Last Blood
The "Last Blood" scenario must be played with ALL the optional rules and offers a completely new game experience with harsher victory conditions.
The scenario lasts much longer than a game under the basic rules and has a higher level of difficulty. We recommend playing this scenario only after you have played under the basic rules two or three times.
Victory conditions
The victory conditions are the same as for the standard game, but if the game lasts to the end of turn 4, victory points are counted by special rules to determine the winner (see below).
Victory points
At the end of the fourth turn each player receives victory points for the following factors:
- 3 points for control of the flèches*;
- 2 points for each controlled victory area;
- 5 points for each destroyed enemy unit with a gold shield;
- 3 points for each destroyed enemy unit with a silver shield;
- 2 points for each destroyed enemy unit without a shield;
- 1 point for each destroyed Russian jager, militia and cossack unit.
*Note: only if the player controls ALL THREE flèche areas; otherwise one or two of the areas are worth nothing.
NOW TO BATTLE!
Frequently Asked Questions
Which blocks are grouped together during initial setup under the basic rules? ANSWER: Light cavalry and heavy cavalry are grouped together, and foot artillery together with horse artillery.
Will any blocks remain after all units have been placed on the board and in the reinforcement reserve? ANSWER: No.
May the attacking player bring support units into battle? A player might want to do this to hold an area if it is attacked. ANSWER: No, support units cannot engage, but they can disengage.
May the active player choose not to resolve a battle in an area that was already contested at the start of the impulse, in order to resolve another battle instead? ANSWER: Yes, he may.
May the active player decline to resolve a battle that began in the current impulse? ANSWER: No. He is obliged to do so.
May the active player choose not to resolve a battle in an area that was already contested at the start of the impulse, even if his Commander-in-Chief has enough strength to do so? ANSWER: Yes, he may. Only battles begun in the current impulse are mandatory.
Does the active player choose the order in which to resolve battles, and if so does he choose them one at a time or name them all at once? ANSWER: Yes, one at a time.
How many impulses may a player play during the Impulse Phase? ANSWER: Players alternate impulse actions as long as they have tactical leaders to activate or can use an initiative action. The Impulse Phase ends when both players pass consecutively.
Players distribute damage simultaneously. What happens when a player wants to see first how his opponent distributes damage? Is there an order of damage distribution in such a case? ANSWER: The inactive player applies damage first.
During the special initiative movement and battle action:
- May support units be moved? ANSWER: Yes, but they cannot be activated (artillery does not fire, a leader does not inspire).
- May the Commander-in-Chief be moved? ANSWER: Yes.
- Does moving a support unit reduce its strength? ANSWER: No, strength is reduced only after a unit is activated.
Is there any way to move a Commander-in-Chief other than during the Logistics Phase, a pass, or a retreat? ANSWER: During any impulse, if the special impulse conditions are applied.
May a tactical leader be moved without activating him, and if so, may an exhausted tactical leader be moved? ANSWER: Yes: during a pass, during the special initiative movement and battle action, and during a tactical impulse if another tactical leader is activated in the same area - see 5.1.
Does the movement of a tactical leader count towards the number of activations granted by the Commander-in-Chief? ANSWER: No, but it counts as 1 unit of logistic value during the special initiative movement and battle action.