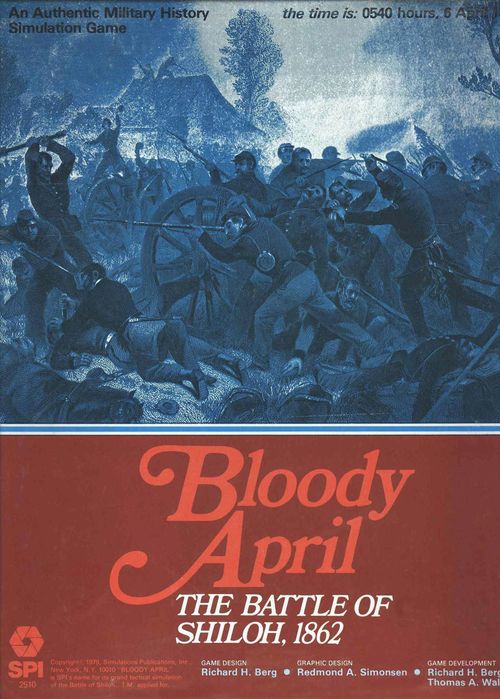
Bloody April: The Battle of Shiloh, 1862
Bloody April: The Battle of Shiloh, 1862 Rulebook
Table of Contents
Table of Contents
- How to Read the Rules
- Contents
- [1.0] INTRODUCTION
- [2.0] GAME EQUIPMENT
- [3.0] SETTING UP THE GAME
- [4.0] SEQUENCE OF PLAY
- [5.0] MOVEMENT
- [6.0] FORMATIONS
- [7.0] FACING
- [8.0] STACKING
- [9.0] FIRE COMBAT
- [10.0] ZONES OF CONTROL
- [11.0] AMMUNITION
- [12.0] MELEE COMBAT
- GENERAL RULE:
- PROCEDURE:
- CASES:
- [12.1] DEFINITION OF MELEE STRENGTH
- [12.2] RESTRICTIONS ON ABILITY TO MELEE
- [12.3] TERRAIN EFFECTS ON MELEE
- [12.4] EFFECTS OF LEADERS ON MELEE
- [12.5] EFFECTS OF MORALE AND ROUT ON MELEE
- [12.6] DETERMINING THE MELEE DIFFERENTIAL
- [12.7] STACKING IN MELEE
- [12.8] RETREAT BEFORE MELEE
- [13.0] MORALE AND ROUT
- [14.0] RETREATS
- [15.0] STRAGGLERS
- [16.0] LEADERS
- [17.0] SPECIAL CAVALRY RULES
- [18.0] SPECIAL ARTILLERY RULES
- [19.0] BATTLE FATIGUE
- [20.0] THE UNION ALERT SYSTEM
- [21.0] UNION GUNBOATS AND FERRIES
- [22.0] REINFORCEMENTS
- [23.0] NIGHT
- [24.0] FIRE CO-ORDINATION (Optional Rule)
- [25.0] ADDITIONAL OPTIONAL RULES
- [26.0] THE ROSTER SHEETS
- [27.0] MULTI-COMMANDER PLAY
- [28.0] ADAPTING BLOODY APRIL TO TSS
- [29.0] THE SCENARIOS
- COMMENTARY:
- CASES:
- [29.1] THE CONFEDERATE ATTACK
- [29.2] THE FIRST DAY
- [29.3] THE BATTLE OF SHILOH
- [29.4] HYPOTHETICAL SCENARIOS
- [29.41] Confederate Hypothetical Situations
- [29.42] Union Hypothetical Situations
- [29.44] The Random Hypothetical Situation Table
- [29.5] INITIAL UNION DEPLOYMENT
- [29.6] CONFEDERATE INITIAL DEPLOYMENT
- [30.0] VICTORY
- [31.0] THE ORDERS OF BATTLE
- [32.0] NUMBERS AND TYPES OF GUNS ASSIGNED TO BATTERIES
- [33.0] BIBLIOGRAPHY: BLOODY APRIL
How to Read the Rules
The rules of this SPI simulation game are organized in a format known as the Case System. This system of organization divides the rules into Major Sections (each of which deals with an important aspect of play). These Sections are numbered sequentially as well as being named. Each of these Major Sections is introduced by a General Rule, which briefly describes the subject of the Section. Many times this General Rule is followed by a Procedure which describes the basic action the Player will take when using the rules in that Section. Finally, the bulk of each Major Section consists of Cases. These are the specific, detailed rules that actually regulate play. Each of these Cases is also numbered. The numbering follows a logical system based upon the number of the Major Section of which the Cases are a part. A Case with the number 6.5, for example, is the fifth Primary Case of the sixth Major Section of the rules. Many times these Primary Cases are further subdivided into Secondary Cases. A Secondary Case is recognizable by the fact that it has two digits to the right of its decimal point. Each Major Section can have as many as nine Primary Cases and each Primary Case can have as many as nine Secondary Cases. The numbering system is meant as an organizational aid. Using it, Players can always easily tell where a Case is located in the rules. As a further aid, an outline of the Major Sections and Primary Cases is given at the beginning of the rules.
How the Section and Case Numbers Work: Major Section Number, Primary Case Number, Secondary Case Number — [6.53] is the third Secondary Case of the fifth Primary Case of the sixth Major Section of the Rules.
How to Learn to Play the Game
Familiarize yourself with all of the components. Read all of the General Rules and Procedures and read the titles of the Primary Cases. Set up the game for play (after reading the pertinent Section) and play a trial game against yourself referring to the rules only when you have a question. This procedure may take you a few hours, but it is the fastest and most entertaining way to learn the rules short of having a friend teach them to you. You should not attempt to learn the rules word-for-word. Memorizing all that detail is a task of which few of us are capable. SPI rules are written to be as complete as possible — they're not designed to be memorized. The Case numbering system makes it easy to look up rules when you are in doubt. Absorbing the rules in this manner (as you play) is a much better approach to game mastery than attempting to study them as if cramming for a test.
Contents
1.0 INTRODUCTION 2.0 GAME EQUIPMENT: 2.1 The Game-Map; 2.2 Game Charts and Tables; 2.3 The Playing Pieces; 2.4 Definition of Terms; 2.5 Game Scale; 2.6 Inventory of Game Parts; 2.7 The Commander/Officer Rank Symbol 3.0 SETTING UP THE GAME 4.0 SEQUENCE OF PLAY 5.0 MOVEMENT: 5.1 Prohibitions Against Movement; 5.2 Terrain Effects on Movement; 5.3 Special Terrain Features; 5.4 Breakdown; 5.5 Terrain Effects on Movement Chart 6.0 FORMATIONS: 6.1 Unit Formations; 6.2 Changing Formation; 6.3 Effects of Formation on Combat; 6.4 Encamped Units 7.0 FACING: 7.1 Effects of Facing on Movement; 7.2 Effects of Facing on Fire Combat; 7.3 Effects of Facing on Melee; 7.4 Prone Formation 8.0 STACKING: 8.1 Unit Stacking Restrictions; 8.2 Effects of Stacking on Combat; 8.3 Density and Fire Combat; 8.4 Stacking Order 9.0 FIRE COMBAT: 9.1 The Small-Arms Fire/Gun Strength; 9.2 Weapon Type and Range; 9.3 Multiple Unit and Split Fire; 9.4 Terrain Effects on Fire Combat; 9.5 Line of Sight; 9.6 Elevated Artillery Fire; 9.7 Fire Combat Results Table; 9.8 Results of Fire Combat Casualties 10.0 ZONES OF CONTROL: 10.1 Withdrawal Fire; 10.2 Retreat Fire; 10.3 Effect of ZOCs on Ammunition Supply; 10.4 Effect of ZOCs on Leader Command; 10.5 Extent of Zones of Control 11.0 AMMUNITION: 11.1 Use of Ammunition; 11.2 Supply Wagons; 11.3 Confederate Supply; 11.4 Union Ammunition Supply; 11.5 Union Camps and Ammunition Supply; 11.6 Birge's Sharpshooters; 11.7 Designer's Note 12.0 MELEE COMBAT: 12.1 Definition of Melee Strength; 12.2 Restrictions on Ability to Melee; 12.3 Terrain Effects on Melee; 12.4 Effects of Leaders on Melee; 12.5 Effects of Morale and Rout on Melee; 12.6 Determining the Melee Differential; 12.7 Stacking in Melee; 12.8 Retreat Before Melee; 12.9 Results of Melee Combat 13.0 MORALE AND ROUT: 13.1 Morale Ratings; 13.2 When Units are Routed; 13.3 Determining Rout; 13.4 Effects of Rout; 13.5 Effects of Stacking on Rout; 13.6 Rally; 13.7 Catastrophic Rout 14.0 RETREATS: 14.1 Restrictions on Retreats; 14.2 Retreating Through Enemy ZOCs; 14.3 Presence of Friendly Units and Retreat; 14.4 The Path of Retreat 15.0 STRAGGLERS: 15.1 Units Susceptible to Straggling; 15.2 Movement and Straggling; 15.3 Combat and Straggling; 15.4 Looting; 15.5 Recovering Stragglers; 15.6 Straggler Table 16.0 LEADERS: 16.1 How Leaders Are Used; 16.2 Effect of Presence of Leaders; 16.3 Leader Stacking Restrictions; 16.4 Changing Regimental Assignments; 16.5 Leader Casualties; 16.6 Battlefield Promotions; 16.7 Aides-de-Camp; 16.8 Grant's Bad Leg 17.0 SPECIAL CAVALRY RULES: 17.1 Cavalry Retreat Before Melee; 17.2 Cavalry Charge; 17.3 Combat Adjustments for Mounted Cavalry; 17.4 Cavalry and Leaders; 17.5 Horse Holders; 17.6 Use of Cavalry 18.0 SPECIAL ARTILLERY RULES: 18.1 Artillery Units; 18.2 Restrictions on Artillery Movement and Fire; 18.3 Rapid Fire; 18.4 Exploding Caissons 19.0 BATTLE FATIGUE: 19.1 Fatigue Points; 19.2 How Fatigue Points Are Used; 19.3 Effects of Fatigue; 19.4 Rest; 19.5 Simplified Fatigue 20.0 THE UNION ALERT SYSTEM: 20.1 Pickets; 20.2 How Union Units Become Alerted; 20.3 Effects of Being Unalerted 21.0 UNION GUNBOATS AND FERRIES: 21.1 Union Gunboat and Ferry Movement; 21.2 Ferry Transport; 21.3 Union Gunboats 22.0 REINFORCEMENTS: 22.1 Entering the Map; 22.2 Blocking Entrance; 22.3 Lew Wallace's Division 23.0 NIGHT: 23.1 Duration of Night; 23.2 Effects of Night; 23.3 Rain; 23.4 Reforming Artillery Batteries 24.0 FIRE COORDINATION: 24.1 How to Coordinate Fire; 24.2 Fire Coordination Table 25.0 ADDITIONAL OPTIONAL RULES: 25.1 Forest Fires; 25.2 Weapons Exchange; 25.3 Mistaken Fire 26.0 THE ROSTER SHEETS: 26.1 How to Use the Sheets 27.0 MULTI-COMMANDER PLAY 28.0 ADAPTING BLOODY APRIL TO TSS: 28.1 Changes to Movement-Oriented Rules; 28.2 Changes to Combat-Oriented Rules; 28.3 Additional Rules Changes; 28.4 Individual Gun/Battery OB 29.0 THE SCENARIOS: 29.1 The Confederate Attack; 29.2 The First Day; 29.3 The Battle of Shiloh; 29.4 Hypothetical Scenarios; 29.5 Initial Union Deployment; 29.6 Initial Confederate Deployment; 29.7 Confederate Reinforcement Schedule; 29.8 Union Reinforcement Schedule; 29.9 Ammunition Levels 30.0 VICTORY: 30.1 Standard Victory Conditions; 30.2 Confederate Attack Victory Conditions 31.0 THE ORDERS OF BATTLE: 31.1 Union: Army of the Tennessee; 31.2 Union: Army of the Ohio; 31.3 Confederate: Army of the Mississippi; 31.4 Confederate: Army of the Trans-Mississippi; 31.5 Replacement Officers 32.0 NUMBERS AND TYPES OF GUNS ASSIGNED TO BATTERIES: 32.1 Union Batteries; 32.2 Confederate Batteries; 32.3 Gun Classifications; 32.4 Simplified Battery Weaponry 33.0 BIBLIOGRAPHY: BLOODY APRIL
[1.0] INTRODUCTION
Bloody April is a grand tactical, regimental-level simulation of the Battle of Shiloh (Tennessee), April 6-7, 1862. BA uses the award-winning system for Civil War battle games first introduced in Terrible Swift Sword (Gettysburg). The system may seem somewhat difficult to those not familiar with it. However, it is a system that plays quite smoothly and is easy to learn. It is thus suggested that Players first study the Sequence of Play (4.0), as it is the backbone of the game. Those Players already familiar with TSS and/or Stonewall should read the rules carefully, as there have been some subtle changes and many additions. Bloody April also contains a large number of optional rules that players may use to increase historicity with a concomitant loss in ease of play. In all, Bloody April is somewhat more complex than TSS.
[2.0] GAME EQUIPMENT
[2.1] THE GAME-MAP
The Game-Map is composed of two separate 22" x 34" mapsheets which, when placed together, form the battlefield at Shiloh. A hexagonal pattern is printed on the game-map to regulate movement and location of the playing pieces, as well as to calculate ranges when units engage in fire combat. There are several different types of terrain on the game-map, all of which are covered in Terrain Effects (Case 5.2).
[2.2] GAME CHARTS AND TABLES
Various visual aids are provided with the game to simplify and illustrate certain game functions. Some of these are printed directly on the game-map: the Turn Record Track, the Casualty and Captured Tracks, and the Terrain Key. There are other charts and tables on separate sheets of paper: Fire and Melee Combat Results Tables, the Terrain Effects Chart, the Range Effects Chart, the Stacking Restriction Chart, the Density/Fire Adjustment Chart, the Straggler Table, the Leader Casualty Table and the Fire Coordination Table. The Orders of Battle and the Reinforcement Schedules are also found in this rule book.
[2.3] THE PLAYING PIECES
There are 1200 Playing Pieces, called "Counters", in Bloody April. Many of these are Informational Counters. These include Strength Counters, Pinned Counters, Routed Counters, Column Formation Counters, Limbered Counters, Encamped Counters, Prone Counters, et al. All of these Informational Counters convey information about the status of a given combat unit or situation. The actual units in the game — the combat regiments, artillery crews and batteries, generals, colonels and aides-de-camp, supply wagons, gunboats, etc. — are represented by Organizational Counters. These come, for the most part, in two colors: blue for Union and grey for the Confederacy. (Confederate Leaders are red.) These contain historical designations, weapon type and numerical strength or leadership ratings.
[Illustrations of the unit types, with the printed callouts:]
- INFANTRY (Front, line): Brigade Officer, Unit, Morale, Original Strength, Weapon, Line formation (example: 1 Ark / Gibson, Morale 4, Original Strength 8, Weapon M).
- INFANTRY (Back, column): Column formation, Morale, Weapon.
- CAVALRY (Front, Mounted): Parent Formation, Unit, Morale, Original Strength, Weapon, Mounted (example: Morgan/Trabue, Morale 5, Weapon P, Strength 1).
- CAVALRY (Back, Dismounted): Dismounted, Morale, Original Strength, Weapon.
- ARTILLERY CREW (Front, Full Strength): Parent Formation, Unit, Morale (example: Wtrhse, 5/Tenn, Morale 4).
- ARTILLERY CREW (Back, Reduced Strength): Reduced Strength.
- OFFICER (Front only): Command, Effectiveness Radius, Rally Points, Name, Rank (example: Peabody, 1/6/T, 4-2, rank symbol).
- COMMANDER (Front only): Command, Command Points, Name, Rank (example: Bragg, II Corps, 0, rank symbol).
Summary of Unit Types (Front / Back): Commander; Officer; Aide-de-Camp; Replacement Colonel; Supply Wagon (back: Routed); Union Gunboat (Steam Up / Docked); Union Ferry (Steam Up / Docked); Union Picket (Line / Column); Infantry (Musket) (Line / Column); Infantry (Rifled Musket) (Line / Column); Infantry (Green) (Line / Column); Infantry (Henry Repeater) (Line / Column); Cavalry (Pistol) (Mounted / Dismounted); Cavalry (Carbine) (Mounted / Dismounted); Cavalry (Rifled Musket) (Mounted / Dismounted); Artillery Crew (Full Strength / Reduced Strength); Cavalry (Shotgun) (Mounted / Dismounted); Ammunition Available (Ammo Avail / TransMiss).
[Informational counters shown on the counter-type pages: Captured; Killed/Wounded; Encamped (back: Camp Depleted); Siege Gun (SG 5/4); Heavy Rifled Gun (TB 6/5); 30-lb. Parrott Gun (PC 6/5); 24-lb. Howitzer (HB 2/1); 6-lb. Smoothbore (L 2/1); 6-lb. Rifled Gun (TA 4/3); 12-lb. Howitzer (HA 2/1); 12-lb. Napoleon (N 4/3); 10-lb. Parrott Gun (PA 4/3); 20-lb. Parrott Gun (PB 4/3); Pinned (back: Routed); Fatigue (back: Prone); Limber (back: Camp Depleted); Engaged (back: Broken Down); Forest Fire; Fatigue; Stragglers (Union Stragglers); Strength Points; Replacement Officer; In Park (back: Routed).]
[2.31] There are two types of Organizational Counters: combat units (such as infantry, cavalry, artillery and gunboats) and non-combat units (such as leaders, aides-de-camp, ferries, supply wagons, etc.) Combat units may be represented by two counters: the Organizational Counter and a Strength or Gun Counter. The latter is placed under the Organizational Counter and it represents the actual strength of the unit at that time. (See, however, Section 2.32.) Infantry and cavalry use Strength Counters; artillery units use Gun Counters. The Strength/Gun Counter may be changed as the strength of the unit is reduced by combat. Players should note that the "strength" printed on the Organizational Counter is the original and maximum strength of that unit. The unit's strength at any given time (its Base Strength) may not necessarily be that which is printed on the Organizational Counter. A unit's Base Strength is always that of its Strength/Gun Counter (unless the Players are using the Roster Cards; Cases 2.32, 9.13 and 26.0).
[2.32] Players not wishing to use the Strength/Gun Counters may use the Roster Cards. Section (Case 26.0). Please see that section for complete details.
[2.33] Infantry units are printed on both sides. One side represents the unit when it is in Line formation, the other when it is in Column. (See Case 6.1). The Line formation side gives values for the unit's strength (maximum) and morale, as well as the type of weapons used. The Column side is the same, except that it does not give the strength of the unit. Both sides contain the regimental designation as well as the officer commanding that regiment (on a brigade level).
[2.34] Cavalry units are printed on both sides, each side representing a different status. A cavalry unit may be either mounted or dismounted (See Cases 6.14 and 6.15). Whatever that unit's status, that particular side of the counter should be placed face-up.
[2.35] Artillery unit counters represent the gun crews for that battery; they do not represent the guns and they contain no information as to the type of guns in that battery. Artillery unit counters are printed on both sides, each side representing the "strength" of the crew. The front side represents the crew at "Full Strength". The reverse side indicates the crew is operating at "Reduced Strength". See 18.13. The strength of a battery — its guns — is represented by Gun Counters (Case 2.36), or the Roster Cards.
[2.36] Gun Counters are similar to Strength Counters (See Cases 2.31). However, each Gun Counter represents a specific number and type of Gun (See Cases 9.1 and 9.22). Thus, an artillery battery with 2HA and 4PB would contain two 12-pounder howitzers and four 20-pounder Parrotts. These counters may be used like change (within the specific gun-type) to represent losses, or such losses may simply be noted on the Roster Card. The types of guns assigned to a given battery can be found in Cases 32.1 and 32.2.
[2.37] The top line on a typical combat unit is that unit's historical designation. E.g., 1 Neb is the 1st Nebraska regiment. Beneath the historical designation, Infantry units list the name of the officer for the brigade to which that regiment is assigned. Artillery and cavalry units list the historical designation of the parent unit (e.g., 1/T — 1st Division, Army of Tennessee). The numbers and letters at the bottom represent the Strength, Morale and Weapon Type used by that unit. See Sample Units.
[2.4] DEFINITION OF TERMS
Combat Unit: Any unit in the game that is capable of engaging in combat (fire/melee) in that it has a Strength or Gun Rating and Weapon Type. Leaders are not combat units. Units reduced to a strength of "0" are eliminated, with the exception of gun crews, which may exist independently of their guns.
Combat/Base Strength: The Combat, or Base, Strength is used for each infantry and cavalry unit. It is a single number on either the Combat Strength Counter or represented by the number of boxes on the Roster Card unaffected by casualties. This number represents the Fire Power and Melee Capability of that unit. The Combat/Base Strength may be reduced by combat and/or stragglers, in which case the counter or card is adjusted to reflect the loss. See Case 9.1.
Gun Strength: This is the same as the Combat Strength, except that it applies to artillery and does not represent Melee Capability for that battery. The Melee Capability of an artillery unit is either "1" if the crew is Full Strength, or "0", if the crew is Reduced. See Case 9.15.
Movement Allowance: This represents the mobility of a unit as a numerical rating. Basically, a unit expends one Movement Point for each hex of clear terrain (of which, admittedly, there is little in Bloody April) entered. (See the Terrain Effects Chart, Case 5.5). Units do not have their Movement Allowance printed on the counter. The following is a list of all Movement Allowances:
| Unit Type | Movement Allowance |
|---|---|
| Infantry, dismounted cavalry | 6 |
| limbered artillery*, supply wagons | 9 |
| mounted cavalry, leaders, aides | 12 |
| gunboats, ferries | 40 |
*see 18.21 for exceptions.
Fire Strength: Fire Strength represents the Combat/Gun Strength of a unit when firing its weapons at the enemy. This strength may be adjusted for Range Effects (See Case 9.2).
Melee Strength: Melee Strength is the capability of a unit to engage in hand-to-hand combat. The Melee Strength is always the Combat Strength (except for gun crews, as above) adjusted for the Morale of the unit and, possibly, the terrain.
Morale Rating: This is a rating given to all combat units and is used to express that unit's training, esprit de corps and ability to stand under fire. All Morale Ratings are numbers from "5" (best) to "1" (worst). Some units have a "?" instead of a rating. These units are "green"; they have never fought before. Green units do not acquire a Morale Rating until they engage in combat. See Section 13.14.
Leader: The term "leader" refers to all officers and commanders of general and colonel rank. Officers are the immediate leaders at brigade-level for the combat units. Cavalry and artillery units do not have leaders. Commanders are higher-echelon leaders; they control officers, as opposed to combat units. See Case 16.0. Leaders have Effectiveness Radii, Rally Ratings and Command Ratings, all of which are explained in that section. Aides-de-camp are not leaders.
[2.5] GAME SCALE
Each hexagon on the map represents approximately 115 yards of actual terrain. Each infantry/cavalry Strength Point represents approximately 100 effective men, and each Gun Point is equivalent to one gun.
[2.6] INVENTORY OF GAME PARTS
A complete game of Bloody April includes: One rules booklet Six 200-piece countersheets (1200 counters total) One historical situation briefing booklet Two identical chart & table booklets Two different roster sheet booklets Two different game-map sections (soft) One plastic die One game box assembly
If any of these parts are missing or damaged, fill out the Complaint Card enclosed in the game and return it to SPI with the appropriate items checked on the card. Note: The process used in the manufacturing of the die-cut counters used in SPI games sometimes results in colors from one counter overlapping the color of a neighboring counter, or in the slightly off-center printing of the letters and/or numbers on a counter. SPI cannot replace counters displaying these minor manufacturing inaccuracies. Only counters that are illegible can be replaced by SPI.
[2.7] THE COMMANDER/OFFICER RANK SYMBOLS
Virtually all ranks of officers — from lieutenant up through general — are represented in Bloody April. However, the Confederacy and the Union differed as to the symbols used for their officers, and we have chosen to use each country's system. Thus what looks like a "modern" major general on a Confederate Officer Counter is actually a lieutenant colonel. Moreover, the Confederate symbol for general covered all ranks of general: brigadier, major, lieutenant and full. Thus, only one symbol is used to represent any (and all) of these ranks.
Note that there are no Union majors included in Bloody April.
Actually, most of the rank symbols are easy to follow, and as rank is not important for actual play — and as all ranks are listed in the Order of Battle at the end of the rules — we felt this touch of artistic historicity might be nice. The symbols and their corresponding ranks are pictured below for easy identification:
Union: Major General: two stars. Brigadier General: one star. Colonel: eagle. Lieutenant Colonel: a leaf-shaped symbol. Captain: two bars. Lieutenant*: one bar.
Confederate: General (all ranks): wreathed-star symbol. Colonel: three stars. Lieutenant Colonel: two stars. Major: one star. Captain: three bars. Lieutenant*: one bar.
*The ranks of 1st and 2nd Lieutenant have been combined into one rank, indicated by the symbol for 1st Lieutenant.
[3.0] SETTING UP THE GAME
As noted, the game-map is in two sections, both of which combine to form one large map of the battlefield. The map is easy to align; simply note the Tennessee River at the bottom of the map and place both sections so that the river runs together, with Map B slightly overlapping Map A. The many counters of the game should be sorted into their Divisional designations for facilitation of play. After this, Players may look through the rules, consult the initial set-up, place their units on the map, and begin.
Aficionados of Terrible Swift Sword and Stonewall should note again that there have been some changes to the rules. Many of these are quite subtle. It is suggested that both old and new players familiarize themselves with the rules before proceeding.
[4.0] SEQUENCE OF PLAY
GENERAL RULE:
Bloody April is played in successive Game-Turns, each of which is composed of alternating Player-Turns. During each Player-Turn, the Phasing Player maneuvers his units and resolves combat in sequence, within the limits of the rules. At the conclusion of the final Game-Turn the Victory Conditions are consulted and a winner declared.
SEQUENCE OUTLINE:
Each Game-Turn is divided into a first Player-Turn (Confederacy) and a second Player-Turn (Union). [Transcriber's note: the booklet prints the sides in this order here, but the Sequence outline below and the Abbreviated Sequence of Play on the last page give the first Player-Turn as Union and the second as Confederate.] The Player whose turn is currently in progress is called the Phasing Player; the other is the non-Phasing player. The Sequence of Play must be followed in the order presented.
1. FIRST PLAYER-TURN
A. The Union Alert Phase: The Union Player determines whether he has succeeded in Alerting any of his officers or commanders. (Important: this phase applies only to the Union Player. Furthermore, once all units have been alerted this Phase is ignored.)
B. Picket and Patrol Phase: The Union Player, if he is the Phasing Player, may move any of his pickets as per the rules for such. (Case 20.1). In addition, all movement by aides-de-camp (both sides) takes place in this Phase.
C. Initial Command Phase: The Phasing Player checks the Effectiveness Radii of all his officers to see whether the infantry units in that officer's command may move and fire. Cavalry, artillery and leaders are not affected by the Initial Command Phase.
D. Movement Phase: The Phasing Player moves all, some, or none of his units as he desires, within the limits and restrictions of the Movement Rules Section (Case 5.0). The Phasing Player may bring reinforcements into the game, as determined by the Reinforcement Schedule (29.7 and 29.8). The non-Phasing Player's units may not be moved during this Phase.
E. Defensive Fire Phase: The non-Phasing Player may now fire with any of his units that are capable of firing at any of the Phasing Player's units, within the provisions and restrictions of Fire Combat and Line of Sight Rules. The Phasing Player notes the use of ammunition on his Roster Cards. Neither Player may move his units during this Phase, except where mandated by combat.
F. Offensive Fire Phase: The Phasing Player may now fire, using the same procedure as in Phase E.
G. Retreat Before Melee Phase: The non-Phasing Player now has the option to retreat all his units that are in danger of being meleed (Phase H). They may retreat one or two hexes, at his choice, thus avoiding melee. Such retreating units may have to undergo withdrawal fire (Case 10.1) and they must, in any case, check for possible rout at the end of such retreat — whether a casualty has been inflicted as a result of withdrawal fire or not. The Phasing Player may advance into any hex so vacated. see Case 12.8.
H. Melee Phase: The Phasing Player may use any Phasing infantry or cavalry units which begin this Phase adjacent to an Enemy combat unit, other than one that has retreated before melee (Phase G), to enter the hex occupied by that Enemy unit(s) and engage it in melee combat. Meleeing units may move one hex to do this, but they may move only into an enemy-occupied hex. The Melee Differential is determined and any retreats and/or casualties are taken as a result of such melee.
I. Final Command Phase: The Phasing Player may attempt to rally any of his routed units, within the provisions for such. He may also try to round up stragglers and resupply units needing ammunition. All pinned marked are removed from Friendly, Phasing units.
2. SECOND PLAYER-TURN
The Second Player now becomes the Phasing Player and proceeds to follow the Sequence of Play, steps B through I.
3. GAME-TURN RECORD INTERPHASE
The Game-Turn Marker(s) should be advanced one space (20 minutes for daylight turns, one hour for night turns) on the Game-Turn Record Track to mark the passage of one Game-Turn. Players should note that BA uses modern military time notation (i.e., a full 24-hour cycle; 8 AM = 0800 and 11 PM = 2300). This was adopted for efficiency, rather than historicity.
Note: A complete game of Bloody April will take anywhere from 36 to 60 hours, depending on the intensity of play.
[5.0] MOVEMENT
GENERAL RULE:
During the Movement Phase the Phasing Player may move as many or as few of his units as he wishes. They may be moved in any direction or combination of directions, limited only by their Movement Allowances (Section 2.4), command control and terrain. Remember, Movement Allowances are not printed on the counters; they are listed in Case 2.4 and with the charts and tables.
PROCEDURE:
Units are moved one at a time, or in stacks, tracing a path of contiguous hexes through the hex grid. As a unit enters each hex it must pay a portion of its Movement Allowance for entering the hex and/or crossing the particular hex-side. These costs are listed on the Terrain Effects Chart (Case 5.5).
CASES:
[5.1] PROHIBITIONS AGAINST MOVEMENT
Movement may never take place out of sequence. A Player's units may be moved only during his own Movement Phase (or Picket/Patrol Phase, for aides and pickets). In addition, units may be moved voluntarily in the Melee Phase and/or the Retreat Before Melee Phase. However, these movements are limited by their own rules and they do not require the expenditure of Movement Points. A unit may be forced to move involuntarily (retreat) as a result of combat. Retreats are not considered to be movement, because they do not require the expenditure of Movement Points.
[5.11] Friendly units may not be moved during an Enemy Player's Movement Phase, and, other than possible advance into a hex vacated by an Enemy unit retreating before melee (see Case 12.8), there is no advance after combat.
[5.12] A unit may enter a hex containing an Enemy unit, but it may do so only in the Friendly Movement Phase. At all other times units are prohibited from entering hexes occupied by Enemy units (see Section 12.0). Friendly-occupied hexes may be entered; see Section 8.0.
[5.13] Generally, no combat takes place in the Movement Phase. However, see Withdrawal Fire, Case 10.1.
[5.14] Units are free to move in and out of hexes adjacent to Enemy units, but may be subject to withdrawal fire. There are no Zone of Control restrictions on movement; see, however, Case 6.14. Players should also note the special rules pertaining to pickets (Case 20.1). See also Case 5.17.
[5.15] The number of Movement Points expended by a unit during a single Movement Phase may not exceed its total Movement Allowance. A unit may expend any portion of its Movement Allowance, but unused Movement Points may not be accumulated from turn to turn or transferred between units.
[5.16] Movement from hex to hex must be consecutive; unit may not "skip" hexes.
[5.17] Infantry and dismounted cavalry (which is treated like infantry) outside the Effectiveness Radius of their officer during the Initial Command Phase have a Movement Allowance of one Movement Point or one hex, whichever the owning Player desires, for the ensuing Movement Phase. Such units may not move adjacent to an Enemy unit; if they are already in such a position, and they wish to move, they may only move out of such a hex (into a hex not adjacent to an Enemy unit).
[5.18] All of the above rules pertain to land units, as do the rules in Cases 5.2 and 5.3. For Union gunboat and ferry movement rules, see Case 21.1.
[5.19] A unit may not be moved or retreat off the game-map. A unit which would be forced to retreat off the map is instead captured.
[5.2] TERRAIN EFFECTS ON MOVEMENT
The Movement Point Cost to enter and/or cross all types of terrain (i.e., hexes and/or hexsides) is listed on the Terrain Effects Chart, Case 5.5. Certain hexsides act as barriers which bar all movement, e.g., no land-unit may cross an all-river or all-creek hexside.
[5.21] Fields are hexes which represent the relatively open land converted to farm or other personal use and under some sort of cultivation. These fields were not flat and clear; they were often rolling, with shrubbery, high grass and other hindrances. For that reason they are differentiated from the open and clear terrain near both landings: they are more difficult for artillery units to traverse. One of the fields contains the infamous Peach Orchard, covered in Section 5.34.
[5.22] Woods hexes represent the incredible tangle of trees, bushes, and twisting undergrowth that makes the Shiloh battlefield such a spectacular display of difficult terrain. All units pay additional costs to enter Woods hexes, as per the TEC. (Players familiar with the TSS system will note here that units in Column formation may enter woods hexes.) Roads and trails will negate woods hexes for movement purposes; see Case 5.28 et seq.
[5.23] Much of the terrain on the battlefield is layered with bog and swamp, a result of the many run-off streams from Snake and Owl Creeks. Much of this has been incorporated into the woods hexes. However, there were several particularly difficult swamp and marsh areas, and these are noted on the map as swamp. The cost to enter these hexes is quite high; some units (artillery and cavalry) may not even enter these hexes. In addition, the Player must roll one die for each unit as he moves it into a swamp hex to see if that unit has become pinned (i.e., stuck in the marsh). On a roll of 1 or 2, the unit is pinned (see Case 9.85) in that hex.
[5.24] Slopes are hexsides that represent changes in elevation. All units expend additional Movement Points to cross slope hexsides, whether moving up or down slope. (See the Terrain Key on the map for the difference between upslope and down-slope.) Note that the "stream" side of a slope is always downslope. Slope hexsides may affect Lines of Sight (see Case 9.5). Slope movement costs are negated by roads and trails for Column and artillery/wagon movement purposes only. (TSS fans will note that the old ridge-slope-crest system is gone.)
[5.25] Ravines are deep depressions between two sets of slopes, usually coinciding with the presence of steams. There are two types of ravines: Hexside Ravines (the ravines created by two opposite slopes sandwiching a stream, usually running alongside the same hexside), and Full-Hex Ravines (hexes between two downslope hexsides). The latter are treated as normal hexes (i.e., whatever terrain is in that hex), and players pay only the cost for crossing the slopes as per Case 5.24. However, Hexside Ravines are treated as a special case for movement, and they are listed separately on the TEC. Movement across Hexside Ravines is quite difficult. Usually it will require all of a unit's points to so move, and guns and wagons will often break down when crossing such a hexside unaided by a road or trail. Players should check the effect of both types of Ravine on combat; Ravines are negated by roads and trails for column and artillery/wagon movement purpose only.
[5.26] Creeks are deep runs of water, swollen at the time of the battle by spring rains to a depth of 12 feet in some areas. They are uncrossable, except at bridges and fords. No unit may ever cross a creek hexside unless it is moving across a bridge or ford. However, there is no additional cost in Movement Points to cross a bridge or ford hexside. (See, however, Case 5.36.) Infantry must be in Column formation to cross at a bridge or ford, and cavalry (and limbered artillery) may also cross bridges and fords. (Note how the creeks and the Tennessee River form an effective ring around the Union army!) Units may always fire over creek hexsides.
[5.27] Streams are the "runoffs" from the three large creeks that circle the battlefield. The streams on the map represent only the larger ones; there are many small and inconclusive rivulets and little streams all over the area. Streams may be crossed by all units, at rates listed on the TEC. Trails and roads negate the effect of streams for column and artillery/wagon movement only.
[5.28] There are two types of thoroughfares on the map: roads and trails. It is difficult to tell from the maps of the battle (the Thom and Michler maps) what is a road and what is a trail. Therefore, later maps (specifically the Reed map) were sometimes used to delineate between the two. For a unit to gain any benefit from movement on any of these thoroughfares it must move from one thoroughfare hex directly into an adjacent, connected thoroughfare hex through a thoroughfare hexside. Units which are moving on thoroughfares ignore, for Movement purposes, any other terrain (including slopes and ravines) in the hex. See, also, Case 8.14. Thoroughfares are treated as follows:
-
Roads: these were well-travelled highways that had a hard-packed dirt surface. Because of the rain of the previous day (and, additionally, the downpour of the night of April 6-7) these roads were in less than acceptable condition. Movement along roads is conducted as per the rate of the unit type moving. In addition, infantry in Line formation and dismounted cavalry derive no benefit from roads; they must move as per the terrain in the hex.
-
Trails: these represent the network of paths through the tangled undergrowth, usually connecting one field to another. They are like roads, but with different Movement Rates. See Case 5.5.
[5.3] SPECIAL TERRAIN FEATURES
[5.31] The Tennessee River. The river is uncrossable to all land units, except by ferry. See Case 21.2. Units may fire across the Tennessee normally (i.e., the river does not obstruct LOS). Union boats may use the Tennessee (only). This does not include entering the creeks from the river (e.g., through hexes A2847or B1950).
[5.32] The Sunken Road: The sunken road — actually a trail that runs depressed slightly below ground level — forms a kind of minor trench. It has no special effect on Movement in any way; it is a trail. There is an effect on combat; see Case 9.45. (Does every Civil War battle have a sunken road and a peach orchard?)
[5.33] Shiloh Church and Pittsburg Landing: The buildings represented at these locations have no effect on the game. They are included for historical purposes.
[5.34] The Peach Orchard: The Peach Orchard, famous as part of the deadly "Hornet's Nest", has no effect on Movement. It does affect Fire Combat (not melee). See Case 9.42.
[5.35] Union Camps: The Union Army had been settled into the Pittsburgh Landing area for some time, and their camps had taken on a quasi-permanent status. Each campsite had a supply of ammunition as well as all the personal belongings of the individual soldiers. These proved to be ripe targets for Confederate looting. Such campsites are noted with a symbol, cavalry and artillery campsites being differentiated from the other campsites. These campsites have no effect on terrain or movement, with three exceptions: See Cases 11.4, 15.4 and 19.4.
[5.36] The Snake Creek Bridge (hex B2226). This bridge is unusual in that it encompasses an entire hex and links two other hexes. The bridge thus covers three hexes, in effect. The rules concerning movement and combat for this bridge are the same as for regular, Hexside Bridges (See Section 5.26). However, it costs one Movement Point to enter the Snake Creek Bridge, and units may move across that bridge only from hex B2326 to hex B2127, and vice versa. Units on the bridge may fire (units in column can fire through their one frontal hexside, see Case 6.11) and they may be fired at. If a unit is fired at while on the bridge, the Fire Column is adjusted one column to the right (in favor of the attacking unit). The bridge may not be destroyed.
[5.4] BREAKDOWN (Optional Rule)
Any time that an artillery unit (with guns) or a supply wagon crosses a Hexside Ravine without the aid of a trail or road the Player must check to see whether the limbers and/or wagons have broken down as a result of crossing the rough terrain. The Player rolls one die; if he rolls a '6' the artillery unit or wagon has broken down and must stop in the hex which they have entered after crossing the ravine. In the Final Command Phase of that Player-Turn the Player rolls one die to see if he can "fix" the breakdown. A roll of 1-3 fixes the unit; otherwise the unit is still broken and may not move. It may fire. Use a Broken-Down counter to indicate such status. Players not wishing to bother with such minutiae may ignore this rule.
[5.5] TERRAIN EFFECTS ON MOVEMENT CHART
(see Charts and Tables)
[6.0] FORMATIONS
GENERAL RULE:
All combat units must be in some formation at any given time. Infantry units are either in Line or Column. Artillery batteries are either limbered or unlimbered. Cavalry units are either mounted (and considered to be in the equivalent of Column) or dismounted (the equivalent of Line). Gunboats and ferries are either docked or in steam up. Leaders, aides and supply wagons have no formation. Note that the terms "Line" and "Column" are used solely for game purposes; they only loosely correspond to the actual line and column formations used tactically during the period.
PROCEDURE:
Units may exist in only one formation at any given time. Units change formation according to the following rules, in which case they pay a cost in Movement Points as they do so. A unit's formation will affect its ability to move and fight.
CASES:
[6.1] UNIT FORMATIONS
[6.11] Infantry units in Column gain increased mobility while sacrificing combat capability. An infantry unit in Column may not stack with other combat units, nor may another combat unit ever use a road or trail in a hex occupied by a combat unit in column, or vice-versa (but a combat unit could be in a hex with a unit in column using a road or terrain in the hex, provided that unit was "in" the other terrain in the hex). Only one Strength Point of infantry in Column may fire, regardless of the total strength of that unit. Infantry in Column may never initiate melee, though they defend normally in melee. The facing (Section 7.0) of units in Column is different from those in Line, as units in Column have five enfilade hexsides (see Case 7.22) and only one frontal hexside. Infantry units may use roads, trails, fords and bridges only when in Column. To designate an infantry unit in Column, place its In Column side face up.
[6.12] Infantry units in Line formation are in what is essentially a combat formation. Their movement capability is reduced (and, in some cases, non-existent), but they are more effective when firing and meleeing. Infantry units are in Line when that side of the counter is face up. Line infantry units melee and fire normally, within stacking restrictions for such. Infantry in Line may not use roads, trails, fords or bridges.
[Illustration: a Heavy Rifled Gun counter, TB 1.]
[6.13] Artillery (i.e. the guns, not the crew) is either limbered or unlimbered. When an artillery battery is limbered it is prepared to move; when it is unlimbered it is prepared to fire. Limbered artillery may move only; it may not fire. Unlimbered artillery may only fire; it may not move. When artillery is meleed the status of the gun crew is considered (see Case 18.13). (The same applies to small-arms fire, which affects only the gun crew.) Gun crews are always considered to be in Line, although they are never used as such unless meleed, fired at, or moved without guns. See Cases 18.1, and 12.12. When a battery is limbered place a limbered counter on it to indicate such status. Otherwise, the battery is considered to be unlimbered.
[6.14] Cavalry units operate either mounted or dismounted. Mounted cavalry are always considered to be in Column (and thus have Column Facing, as per Case 7.0). Mounted cavalry may melee normally or, under special circumstances, they may charge (Case 17.2). Mounted cavalry firing pistols or shotguns may fire while mounted, but in doing so there is an automatic Column shift of one to the left (in favor of the defender). Mounted cavalry are unusual in that they exert a Zone of Control into all six hexes surrounding the hex they are in. An Enemy unit must stop when entering such a controlled hex, unless the hexside separating the two hexes is a creek, Hexside Ravine or is Upslope (from the cavalry). Cavalry units are printed on both sides, indicating either mounted or dismounted.
[6.15] Dismounted cavalry is treated in all respects like Line infantry, except that dismounted cavalry may use bridges and fords. They may not use roads or trails. Dismounted cavalry also suffers a penalty in terms of strength loss because of men assigned to horse holding duty. See Case 17.5 for details.
[6.16] Supply wagons, leaders and aides have no formation, nor are they affected by formation rules.
[6.2] CHANGING FORMATION
[6.21] Changing formation is a function of movement. Therefore, any unit that cannot pay the necessary cost in Movement Points may not change formation, with the exceptions noted in Case 6.24.
Example: An infantry regiment in Line formation is outside the Effectiveness Radius of its officer in the Initial Command Phase. As it has a Movement Allowance of one for that turn it may not change formation during the ensuing Movement Phase (see Case 6.23 for costs).
[6.22] Infantry and artillery units may change formation at any time during a Friendly Movement Phase, as long as they have the Movement Points to do so. Gunboats and ferries require an entire turn to go from docked to steam up (see Case 21.1), but there is no cost in time or Movement Points to do the reverse. Cavalry units may become mounted or dismounted only at the end of a Friendly Movement Phase; that is, a cavalry unit may move no further after changing formation. When a cavalry unit changes formation its Movement Allowance for the turn is determined by its formation at the beginning of the phase in which it does so. Thus, a dismounted cavalry regiment that has expended four Movement Points in movement may not become Mounted at the end of the Movement Phase as it does not have the necessary three points remaining to do so.
[6.23] The costs in Movement Points to change formation are as follows:
| Unit | Change | Cost in MP's |
|---|---|---|
| Infantry | Line-Column | Two MP's |
| Artillery | Limber-Unlimber | Four MP's |
| Cavalry | Mount-Dismount | Three MP's |
| Boats | Dock to Steam Up | One Game-Turn |
| Boats | Steam Up to Dock | No cost |
[6.24] If an infantry unit is in Column and such unit is fired upon — whether it sustains casualties, is pinned, is routed or not — such unit changes automatically to Line formation after any casualties or retreats have been taken. If such unit is owned by the Phasing Player it expends two points to change (if it has them available, otherwise there is no penalty but the unit stops moving). If such unit is in non-Phasing status there is no cost, either. (See Case 10.16 and 10.17).
[6.25] A gun may not limber, unlimber, or do anything else without a gun crew.
[6.3] EFFECTS OF FORMATION ON COMBAT
[6.31] A unit's formation itself has no effect on defense against fire (i.e., being fired at); this is a change from the old TSS rules. Whether a unit is in Line or Column will affect fire only in that a unit in Line will present a different facing than a unit in Column. See Case 7.2
[6.32] Limbered artillery units may not fire.
[6.33] Infantry in Column may never initiate melee. A unit's formation has no other effect on melee, except that mounted cavalry may have its strength doubled when in melee with infantry. See Case 17.31. Infantry in Column may fire through its frontal hexside only, and only one Strength Point may fire from such a unit.
[6.34] The only mounted cavalry units that may fire are those with pistols and shotguns. There is no point limit on the firing of such a unit. See Case 6.14.
[6.4] ENCAMPED UNITS
[6.41] At the beginning of the battle — 0540, April 6 — all Union units are encamped; i.e., they are not in a battle formation. Encamped artillery is in park status (see Case 18.25); encamped cavalry is dismounted (and considered to be infantry in column); and encamped infantry is in Column.
[6.42] Encamped units may not move or fire at all. They may defend in melee, but may not initiate melee. If an encamped unit is meleed it defends with a strength one lower than its Base Strength.
[6.43] Confederate units do not begin the game encamped. However, no Confederate unit, other than the 3rd Mississippi of Wood's Brigade and the 15th Arkansas (Cleburne), Hardee's Division, may move until the 0600 turn, April 6.
[6.44] Union units may leave encamped status after they become alerted. See Case 20.2. When leaving encamped status, a unit may be placed in any formation the owning Player wishes (although movement and combat is still somewhat restricted). The standard cost for changing formation to the new formation is paid immediately. However, a unit alerted by Enemy fire or melee remains in encamped status until the end of the Player-Turn in which it was alerted.
[6.45] Encamped Union units are noted by placing an encamped marker on the brigade officer counter. The marker is removed as soon as one of the units in that brigade (or the officer) becomes alerted.
[6.46] Once a unit becomes alerted it may never become encamped again.
[6.47] All union units leave encamped status automatically at the beginning of the Union Player-Turn of the 0900 Player-Turn, if they have not already been alerted. Such units may be placed in any formation desired, as per Case 6.44.
[7.0] FACING
GENERAL RULE:
All infantry, artillery and cavalry units have a specific facing dependent on their formation. Line Infantry, dismounted Cavalry and Unlimbered Artillery have three hexsides which are considered to be "Frontal" hexsides, and three which are "enfilade" hexsides. (See following diagram.) The "front" of each unit is the top of each unit counter, the top hexside and the hexsides to either side of that top hexside. The three rear hexsides are the "enfilade" hexsides. Infantry in column, limbered Artillery and Mounted Cavalry have only one frontal hexside, the hex directly at the top of the unit. All other hexsides are enfilade hexsides for those units. All other types of units have no facing and thus are all considered to present frontal hexsides at all times.
PROCEDURE:
Each unit is so oriented that the top of the unit counter is facing towards a specific hexside and is not situated between two adjacent hexsides.
[Diagrams: Example of Line Facing (three frontal hexsides at the top, three enfilade hexsides behind); Example of Column Facing (one frontal hexside, five enfilade).]
CASES:
[7.1] EFFECTS OF FACING ON MOVEMENT
[7.11] Facing has no effect on movement, except when initiating Melee (See Case 7.3). A unit may move into any adjacent hex regardless of which hex it was facing before it moved. However, to enter a hex a unit must do so by orienting the unit so that the top of the unit is facing directly at the hex that unit is to enter. Thus, a unit may never "back" into a hex. This is important in terms of Withdrawal Fire (Case 10.1)
[7.12] There is no cost in Movement Points to change facing. All units may change facing freely throughout the Friendly Movement Phase. Changing facing is not Movement; therefore, units normally restricted in movement (out of command radius, for example) may still change facing during their Movement Phases. There is no restriction as to the number of hexsides which may be turned.
[7.13] Generally, units may change their facing only during a Friendly Movement Phase. Once that Phase has ended a unit must remain in the Facing in which it has been set. However, units may rearrange their Facing after Melee.
[7.2] EFFECTS OF FACING ON FIRE COMBAT
[7.21] Units may fire through only their frontal hexsides.
[7.22] Units may be fired upon through any hexside. A unit which is fired upon through one of its enfilade hexsides is enfiladed. A unit which is enfiladed by at least one firing enemy unit has the Total Fire Strength being directed against it adjusted one column to the right (in favor of the Firing player). If a Line of Fire bisects a frontal hexside and an enfilade hexside, the unit is considered to be fired on through its frontal hexside.
[7.23] If a unit is in column and it is fired upon solely through its Frontal hexside by Small-Arms fire (only) (Case 9.22), the firing player adjusts his Fire Strength Column one to the left (in favor of the defender). (Regiments in column present a much smaller target frontally, and small-arms have poor penetration power; see 18.25.)
[7.24] The Facing/Firing Effect Table (see charts and tables)
[7.3] EFFECTS OF FACING ON MELEE
[7.31] A unit advancing into a hex to melee an Enemy unit may do so only through one of its frontal hexsides. This is an exception to the rule that units may move into any hex regardless of facing (see Case 7.1).
[7.32] Other than the provisions of Case 7.31, facing has no effect on melee combat. Units in melee combat have no facing. When melee is concluded, the Players may rearrange the facing of the involved units (exception to Case 7.13).
[Diagram: Example of Line of Fire — a 25 Mo Peabody unit (M5) "In Line and Artillery" firing through its three frontal hexsides, and a unit "In Column" firing through its single frontal hexside.]
[7.4] PRONE FORMATION (Optional Rule)
Infantry in Line formation and Dismounted cavalry may adopt a tactical "formation" called Prone to reduce the effect of Enemy fire considerably. This simulates an infantry tactic used with great effectiveness at Shiloh, mostly because of the terrain. It enables units to gain an extra bit of cover and protection with the added facet of surprise in fire capability. Units may fall prone to reduce the effect of Enemy fire. At certain restricted times they may get up again. Prone units may not fire (exception: see Case 7.44). This is an optional rule, to be used by players desiring greater accuracy and scope.
[7.41] Units within the Command Radius of their officer may fall Prone only in the Initial Command Phase. Prone status is indicated by placing a "Prone" marker on the unit. Pinned units may fall Prone. All Prone units within the Command Radius of their officer may "get up" (remove the Prone marker) during an Initial Command Phase.
[7.42] Prone units that are Pinned or not within the Command Radius may not leave Prone status; they remain Prone until unpinned or again in the Command Radius. Routed units and units not in Command Radius may not fall Prone (exception: see Case 7.47). If a Prone unit is routed it loses its Prone status immediately.
[7.43] There is one exception to Case 7.42. If an Enemy unit is adjacent to a Prone unit and is in the Prone unit's frontal hex(es) during the Prone Unit's Defensive Fire Phase, the Prone marker may be removed and the unit may stand up and fire. This does not apply to Prone pinned units.
[7.44] Prone units have no Zone of Control (Section 10.0). They may not fire at any time, unless the Prone unit is either Dismounted cavalry with carbines or pistols or units with Henry repeaters. Such units may fire as if they were not prone.
[7.45] Units that are Prone may not move, nor may they change facing as long as they are Prone. Prone units are considered to be in Line for facing and combat purposes. Prone units may not initiate melee, but may defend against melee normally. Once meleed, the unit is no longer Prone. Note that Prone units may not retreat before melee.
[7.46] If a Player uses his units to fire at a Prone unit(s) the Fire Strength Column on which the combat is resolved is shifted two columns to the left if the firing unit(s) is small-arms or artillery firing at two hexes or less; the adjustment is only one if the firing unit(s) is artillery firing at a range greater than two hexes or the defending unit is in a woods hex. If a Player combines artillery fire from both ranges the adjustment is only one column. These effects are cumulative with any terrain effects.
[7.47] If one unit in a hex is Prone all units (except artillery or leaders) are considered to be Prone (and all must get up to remove such status). Artillery may co-exist with Prone units in the same hex.
[7.48] Falling Prone is always a voluntary maneuver. It is never the result of combat. Remember, though, a unit may fall prone only in its Initial Command Phase.
[7.49] Prone units may not be resupplied with ammunition.
[8.0] STACKING
GENERAL RULE:
Generally, units may move through other, Friendly, units freely (with the exception of units in Column using a road/trail, Case 8.14). However, the number of Strength Points that may do so is limited. There is no cost in Movement Points to stack or unstack, but stacking restrictions apply at all times (TSS/Stonewall players should note that the Stacking provisions have been changed considerably.)
CASES:
[8.1] UNIT STACKING RESTRICTIONS
[8.11] The number of units and/or Combat Strength/Gun Points that may occupy any single hex at the same time is dependent on the type of terrain and, for infantry, whether or not the unit is in Column. The Stacking Restrictions Chart, (8.19), lists all the limits.
[8.12] For purposes of stacking, the Combat Strength/Gun Points of a unit (unadjusted by terrain, etc.) is its number of Stacking Points, with the exception of supply wagons, which are worth four Stacking Points. Thus an artillery battery with three guns is worth three stacking points.
[8.13] Leaders, aides and informational markers never count against stacking restrictions. Any number of these counters may be in any one hex. Furthermore, Union gunboats never affect stacking restrictions in a shore hex.
[8.14] Infantry units in Column formation may never stack with any other combat unit. Infantry in Column may move through other combat units during a Movement Phase, and vice versa, with one exception. If a unit in Column occupies and is using a road or trail, a unit passing through that occupied hex may not use the road or trail; it must use the other terrain in the hex, in effect going around the Column unit in the Road/Trail.
[8.15] Mounted cavalry units may stack only with other Mounted cavalry units, leaders, aides or supply wagons. All other types of units may intermix freely.
[8.16] A few examples to illuminate the Stacking Restrictions Chart, below:
Example: The 4th Tennessee Regiment, strength of '8', is in a woods hex. Although the chart says two units may stack in such hex, the SP maximum is '8', which is the strength of the 4th Tennessee. Thus that unit may be the only infantry unit in that hex. (See 8.17, for an exception.)
Example: A field hex has two small regiments of '3' points each, plus a six-gun battery. The three units, worth 12 points, may stack. Furthermore, 4 or those infantry points plus all of the guns may fire through any one hexside (Case 8.21).
[8.17] There is one important exception to the Stacking Restrictions Chart. In a woods hex, if one of the units in such a hex is an artillery battery it may stack with the other, non-artillery unit, regardless of the size of the unit. Moreover, in a clear or field hex, if one of the units is an artillery battery, it may stack with the other, non-artillery units, regardless of the size of the units (as long as the non-artillery units did not exceed 12 points). Remember, this exception is in effect only if one of the units is artillery. In all other instances the chart is followed strictly.
[8.18] All stacking restrictions apply at all times, and a Player may not move a unit (or units) into a hex if to do so would violate those restrictions. However, if a unit is retreating, and the only path of retreat open to it is one that would take it through or into a friendly-occupied hex in violation of stacking restrictions, the unit may retreat through that hex. The units that were retreated through or into must then undergo an automatic Rout.
[8.19] Stacking Restrictions Chart (see charts and tables)
[8.2] EFFECTS OF STACKING ON COMBAT
[8.21] The Stacking Restrictions Chart (8.19) delineates the maximum number of Strength Points and/or batteries that are stacked in the same hex that may fire out of that hex through a given hexside at the same target or at a different target. The key word in this rule is "hexside", and all limits apply to fire through a hexside. Example: Three infantry regiments worth '3' points each are in a field hex. Only four of these nine points may fire through any one hexside, regardless of the target. Four more points (out of the remaining five) may fire through a different hexside, while the last remaining point may fire through the remaining frontal hexside. If one of those units were artillery, four of the infantry points plus all of the guns could fire through the same hexside (albeit at different times).
[8.22] Normally, only the top unit in a stack takes losses when fired on by small-arms fire or by artillery at a range of two hexes or less. However, if a combat result calls for losses greater than the number of Strength Points possessed by the top unit the remainder or losses must be taken from the next unit in the stack. Thus, if a '1' Strength Point (S.P.) infantry unit is stacked on top of a '3' S.P. unit and the units undergo fire with a casualty result of '2', the top unit is eliminated and the bottom unit loses one Strength Point. The exception to this is if one of the units in the stack is artillery. In such case the Player may ignore the artillery and take losses from the next highest unit, if available. Otherwise the artillery takes the loss.
[8.23] If a stack of units is fired upon by artillery at a range of three hexes or greater all units in the stack are affected equally. The die is rolled once for each unit in the hex, top unit first. Any result to one unit affects only that unit. If a higher unit is routed as a result of combat all units beneath it must roll for rout, even if they do not suffer any losses. All units in the hex take fire before checking for rout.
[8.24] For purposes of Case 8.23, above, the Density rules in Case 8.3 apply to each, individual unit — even though they are being affected individually. Thus, if three units, each with 4 points, were fired on in that situation, when checking for results the player would adjust two columns to the right for density, even though the individual unit is only worth 4 points. (The stack is worth 12).
[8.3] DENSITY AND FIRE COMBAT
[8.31] The number of Strength/Gun Points in a hex may affect the efficiency of Enemy Fire. The more "crowded" the hex, the more effective the enemy fire will be.
[8.32] In determining the column for Fire Strength on the Fire Combat Results Table the Player must consult the Density Adjustment Chart (8.34). He looks under the column with the correct number of Strength Points in the hex, and makes any column adjustment as given. Thus, if a field hex contained two regiments worth 10 points, all fire would be adjusted two columns to the right, in addition to any other adjustments.
[8.33] Important: for the purposes of Density only, each artillery battery is worth only one Strength Point. Thus, an infantry regiment of '4' plus a battery with six guns would still be worth only five points for purposes of Density.
[8.34] Density Adjustment Chart (See charts and tables)
[8.4] STACKING ORDER
[8.41] Within the restrictions and provisions of all the stacking rules, the top unit in each stack has priority in firing. Thus, if only four points could fire and the top unit contained four points, that unit alone must do all the firing (if any). See Case 8.42.
[8.42] There is an exception to Section 8.41. When artillery is stacked with infantry either type may fire, regardless of position (or both, if terrain permits). Moreover, when artillery is stacked with infantry, regardless of position of stacking, the Player may take losses as he sees fit. as long as all losses are taken. In that way, infantry protects artillery. Thus artillery can fire from anywhere in a stack, Stacking Restrictions Chart permitting.
[8.43] Units may stack, or change their stacking order, only during a Friendly Movement Phase, with one exception: If the top unit runs out of ammunition (Section 11.0) the Player may change the Stacking Order at the end of the Fire Phase in which depletion occurred. Otherwise, it remains the same.
[8.44] All units stacked in the same hex must maintain the same facing. Units moving into a hex assume the facing of the unit in the hex.
[9.0] FIRE COMBAT
GENERAL RULE:
All combat units may fire their weapons at Enemy units in accordance with the rules below: Range, Line of Sight and Fire as well as Stacking and Formation/Facing rules. There is both offensive and defensive fire within each Player-Turn (as well as possibilities for withdrawal and retreat fire, covered in Section 10.0), so that each Player gets an opportunity to fire at least once per Player-Turn with each of his units. The results of Fire Combat are taken from the Fire Combat Results Table (CRT); Case 9.8.
PROCEDURE:
Total the number of Fire Strength or Gun Points of all units firing into a given hex. The Player consults the Fire CRT, and the proper column is located for that number of Fire Strength Points. Certain terrain, Density and facing effects may adjust that column to either the left or the right. After the final Strength Point column is determined, a die is rolled and the result found by cross-indexing the number rolled with the Adjusted Fire Strength column. The result is the number of Strength Points or Guns eliminated, a "Pinned/Routed" result, or No Effect. Results are applied immediately.
CASES:
[9.1] THE SMALL-ARMS FIRE/GUN STRENGTH
[9.11] The Base Strength Counters represent a unit's manpower, while Gun Counters represent Guns. For infantry and cavalry, small-arms Fire Strength as well as Melee Strengths are taken from the Base Strength Points as represented by the Base Strength Counter (or Boxes on the Roster Card; Section 26.0). Gun Points represent Fire Strength only. A battery's Melee Strength is determined from its crew's status.
[9.12] All infantry and cavalry units have a Fire and Melee Strength equal to their Strength Counter (or marked boxes on the Roster Card). Thus, the strength printed on the organizational counter — the original strength — may not be the actual strength at any given time (although at the beginning of the game they usually are the same).
[9.13] All artillery batteries have a Fire Strength equal to the strength of their Gun Counters (or Gun Points on the Roster Card), in a fashion similar to Case 9.12. However, all artillery batteries Melee with their crews. Crews have a Melee strength of "1" when at Full Strength and "0" when at Reduced Strength. (Since Melee combat is differential, the "0" can be used mathematically.) Artillery crews may never initiate Melee; they use their Melee capability only to defend against Melee (See Case 12.25.)
[9.14] When using Strength Counters for infantry/Cavalry, the Players place one of the numbered markers under the Organizational Counter for that unit to indicate the Combat Strength of that unit. Artillery batteries use a Gun Counter under the crew counter to indicate the number and type of guns in that battery (see Case 2.36). The original strength of all units, except artillery, is printed on the Organizational Counter; Gun types and strengths for batteries may be found in Case 32.0.
[9.15] The strength of each unit may be reduced by a variety of combat and/or straggler losses. Each time a Base Strength or Gun Point is lost, place an appropriately reduced counter number (or correctly numbered Gun type) underneath the organizational counter for that unit, or cross off a box on the Roster Card to indicate such loss. Strength and Gun counters are neutral; they may be used by both sides interchangeably.
[9.2] WEAPON TYPE AND RANGE
[9.21] The type of weapon fired by each individual unit is noted on the Organizational or Gun Counter(s) for that unit or battery. Only combat units have weapon types, and only units with weapons may fire.
[9.22] Weapon types are as follows:
Small-Arms (on Organizational Counter) R = Rifled Musket (Muzzle-loaded Enfields, and some Springfields, with modern rifling producing extended range) M = Muskets (Flintlocks, fifty-year-old Austrian rifled muskets, hunting guns, etc.; all with short range) C = Carbines (A cavalry weapon; a small, light, rifled weapon, not quite the modern weapon we know now) S = Shotguns P = Pistols (and other hand-held weapons) H = Henry Repeating Rifles
Artillery L = Six-Pounder Smoothbores N = Twelve-pounder Napoleons (smoothbores) TA = Six-pounder rifled guns TB = Heavier rifled Guns (including Wiards, Blakely's, James's, the standard Confederate 3" rifled cannon, etc.) HA = Twelve-Pounder Howitzers HB = Twenty-four pounder Howitzers PA = Ten-pounder Parrots PB = Twenty-pounder Parrots PC = Thirty-pounder Parrots SG = Twenty-four-pounder Siege Guns G = 8" Naval Shell Guns (Gunboats only) Note: The term "pounder" refers to the approximate weight of the shell or projectile.
[9.23] Each weapon has a maximum range (in hexes) at which it can fire at an enemy unit. Ranges are found on the Range Effects Charts (9.26 and 9.27). No unit may fire at an Enemy unit that is outside the maximum range, in hexes, for that weapon. Calculate the distance in hexes, from the firing unit to the target hex. The firing unit's hex is not counted, the target hex is.
[9.24] A unit's weapon type delineates how effective a given unit is at a given range. This is presented on the Range Effects Chart as a multiplier of the Base or Gun Strength. Thus, a Musket (M) unit firing at a range of one hex has its Base Strength multiplied by two. When firing, Players must first consult the Range Effects Chart to see what the multiplier is for that weapon type. Important: See 18.25.
[9.25] Adjacent opposing units may engage in Fire Combat against each other, or they may fire at other, more distant units.
[9.26] Small-Arms Range Effects Chart (see charts and tables)
[9.27] Artillery Range Effects Chart (see charts and tables)
[9.3] MULTIPLE UNIT AND SPLIT FIRE
More than one unit may fire at a given target hex. In addition, a given unit may split its Fire/Gun Strength between different targets. The rules on Formations, Facing and Stacking all come into play in this case.
[9.31] In Fire Combat, infantry or artillery units firing from different hexes at the same hex must combine their strengths into one total strength. Each unit's Fire — or Gun — Strength is computed separately for range, and then all are added together. Infantry/Cavalry Fire Strengths and Artillery Gun Strengths are never added together; these units always fire separately. However, when a unit is fired on by both artillery and small-arms units, it takes casualties (if any) from both before checking for Rout.
[9.32] Within the restrictions of Case 9.31, no unit may be fired upon more than once in any given Fire Phase by small-arms fire, and no unit may be fired on more than once in a Fire Phase by artillery. A unit may be fired on by small-arms and artillery in a given Phase, but only once by each. Withdrawal and retreat fire are not considered part of a Fire Phase and thus do not come under this one-time restriction.
[9.33] A unit may use its full strength only once in a given Fire Phase. (See, however, Cases 10.1 and 10.2).
[9.34] A Player may choose to split a unit's Fire or Gun Strength, directing part of it at any number of target hexes, as long as the total strength is not exceeded and the facing rules are observed.
Example: An infantry regiment with a strength of "3" may fire with a strength of "1" at three different hexes, or it may fire with a strength of "2" at one hex and "1" at another.
[9.35] In splitting fire the Base (or Gun) Strength is divided, not the final, adjusted Fire Strength as affected by range, density, terrain, etc).
Example: A battery of six guns can possibly fire at one Enemy unit that is one hex away plus one that is ten hexes distant. The firing battery must split its strength before adding in the effects or range, et al.
[9.36] In splitting a unit's Fire/Gun Strength the strength may not be divided so as to make the final Fire Strength directed against any one hex less than one.
Example: A battery of six guns could not fire at six individual targets, each ten hexes distant because the final Fire Strength would (theoretically) be halved for each of those targets (the guns are L's). The battery would have to split its fire amongst only three of the target regiments to produce the necessary one-Point-minimum-per-target. This restriction applies only when splitting/halving Fire Gun Strengths. It does not apply to Column adjustments (e.g., terrain, density, etc.), and a unit may always fire its entire Strength at a single target, no matter how much it is reduced by halving.
[9.4] TERRAIN EFFECTS ON FIRE COMBAT
The various terrain features on the Game-Map have an effect on the ability of units to withstand enemy fire. A defending unit may derive the benefit of such terrain as long as at least one of the firing units is firing into or through that terrain. These effects, summarized on the Terrain Effects on Combat Chart, (9.49) are adjustments to the Fire Strength Column in either one direction or the other. The rules below serve to clarify the numbers on the chart.
[9.41] Units in woods, swamps or orchard hexes derive a defensive benefit from such hex if fired on (or through, in case of an orchard hex). When computing such Fire Strength, the Fire Strength Column (small-arms or gun) is adjusted one to the left in favor of the defender.
[9.42] If a unit is adjacent to a slope hexside and it is fired upon from a lower elevation or the same elevation through that hexside the Fire Strength Column is adjusted one to the left (in favor of the defending unit), in addition to any other terrain effects for the hex the unit is in. The benefit is not derived if the firing unit is "higher" than the target unit. Furthermore, the beneficial slope hexside must be part of the hex the target unit is in. (Remember, only one enemy unit need fire "upslope" or from the same elevation for the defending unit to gain the benefit.)
Example: Eight enemy strength points are firing from A0945 at a Friendly unit in A0943; the fire is directed from a lower level through an adjacent slope hexside into a woods hex. This results in a two-column adjustment to the left, to the 1-3 column.
[9.43] If a unit is adjacent to a hexside ravine and it is fired on through that hexside (regardless of the elevation of the firing unit) there is a one-column adjustment to the Fire Strength Column to the left, in favor of the defender.
[9.44] If a unit in a Full-Hex Ravine Hex (a hex which has two or more non-connecting hexsides containing slope both/all of which are upslope from the unit) is fired on by an enemy unit through one of the slope hexsides that form that ravine (in essence, the firing unit is firing down at the defending unit) the Fire Strength column is adjusted one to the right (in favor of the firing unit!). (For TSS aficionados, this is similar to the railroad cut). Units firing upslope (out of the full-hex ravine) follow all normal adjustments (Case 9.43).
[9.45] Roads/trails have no effect on combat in any way, except as noted below. For any terrain effects for units in roads/trails use the other terrain in the hex. The sunken road is an exception in that it does affect Fire Combat. (This is not so much because of the sunken nature of the trail, which was minimal, but more for the heavy, wood fence running along it.) Units in the sunken road, if fired upon, have the Fire Strength column being used against them adjusted one to the left, in addition to any other adjustments. (This makes the sunken road a very difficult position to take.) However, if such fire is directed along the line of the sunken road (in a sort of "bowling alley" effect) there is no such benefit. Artillery may not fire out of the sunken road, although they may fire over or "down" the road (again, the alley effect). The sunken road does not affect movement or Line of Sight, and artillery may fire through (over) units in the sunken road.
[Diagram: a unit (70 Ohio, R8) on the sunken road; hexes along the road marked "Yes" (benefit applies) and "No" (fire along the road, no benefit).]
[9.46] Creeks, streams, and rivers (including bridges and fords) have no effect on Fire Combat in any way. However, see 5.36.
[9.47] In Fire Combat, terrain effects may adjust the Fire Strength Column to the left (in favor of the defender), or, in the case of units in Full-Hex Ravines, to the right, in favor of the firing unit. Thus, a '4', S.P. unit firing at a unit in a woods hex would fire on the 1-3 column. Effects of terrain are cumulative, but the final net adjustment on the Fire CRT may never be more than three columns in any direction. Thus, you may adjust four to the left and one to the right for a final adjustment of three to the left, but you may never adjust four to the left as a final adjustment.
Example: Infantry units with a total Fire Strength of '16' are firing at a "1" Strength regiment that has fallen prone in a woods hex behind a hexside ravine. Theoretically, such a defensive position would be a four column adjustment: one for prone, one for density, one for the woods and one for the ravine. However, there is a maximum three-column adjustment, so the Fire would be resolved on the 4-6 column, instead of the 15-20 columns.
[9.48] There is a Fire Strength Column entitled "Less than 1". This column is used if — and only if — an adjustment to the Fire Strength Column or a halving (of a strength of 1) moves the column to the left of 1-3. Units without a Fire Strength or units that, for some reason, cannot fire, do not use this column. Note that the columns are never adjusted further than "Less than 1" or the "51+" column.
[9.49] Terrain Effects on Combat Chart (see charts and tables)
[9.5] LINE OF SIGHT
The ability of a unit to fire from the hex it occupies to some other hex depends on the terrain entered or crossed by the Line of Sight (LOS). LOS is defined as the ability to see the target; it is represented by a straight line drawn from the center of the firing hex to the center of the target hex. With the exception of Elevated Artillery Fire, the LOS is always blocked if it passes through a blocking hex or through a blocking hexside which is not common with or adjacent to either the firing unit or the target hex. In addition, a LOS may always be drawn into a blocking hex, but it usually may not be drawn beyond that blocking hex/hexside. If there is no LOS, fire is not possible. However, units may always fire into an adjacent hex. (Since LOS rules are always difficult for a significant portion of the gaming audience, Players should trust their common sense in dealing with sticky problems.)
[9.51] There are two types of blocking terrain: woods/swamp hexes and slope/ravine hexsides. In addition, combat units, Friendly or enemy, may block LOS. Whether terrain or units actually block LOS is dependent on the elevation (height of both the firing and target units). Certain guns are capable of Elevated Fire, with which they may fire over otherwise blocking terrain or units (see Case 9.6).
[9.52] For the purposes of simplicity there are two levels of terrain: ground-level and bluff-level (or, up slope level). (The term bluff is used as the slopes at Pittsburg Landing and environs formed several series of bluffs and rises). The bluff-level consists of terrain on the upslope side of a slope hexside and adjacent to that slope or ravine hexside. Ground-level hexes are all other hexes: those hexes not situated at the top of bluffs. In essence, the elevation itself does not block LOS — the type of terrain at that elevation does the blocking. Thus, all blocking terrain is capable of blocking LOS, depending on the elevation of the units.
[9.53] Units adjacent to and sighted through an upslope hexside (or sighting through a downslope hexside) are said to be on bluff-level elevation. (The same applies to hex-side ravines.) Any slope or ravine hexside which is part of the hex from which firing is occurring or into which fire is directed does not block LOS.
[9.54] Units may always fire into a woods or swamp hex (there being no other blocking hex/hexside). However, a unit may not fire through a woods or swamp hex unless the firing unit or target unit is at a higher elevation (See Case 9.55) or the firing unit is using Elevated Artillery Fire. (The peach orchard has no effect on LOS).
[9.55] To judge LOS between hexes located on the same elevation for units not capable of Elevated Fire, lay a straight edge from the center of the firing hex to the center of the target hex. If any point of this straight line passes through a Blocking Hex (woods/swamp or combat unit) that is of the same or higher elevation than the height of the firing and target hexes, or a hexside (slope/ravine) that is of a higher elevation than the height of those two hexes, then the LOS is blocked, unless the blocking terrain is actually part of the firing or target hex (Case 9.53). If such an edge passes along a hexside containing blocking terrain the LOS is blocked. If the LOS is blocked, Fire Combat may not take place. Any ambiguous cases which seem to defy the printed word, geometry, and even common sense should be decided in favor of the defender. Remember, this section applies only to units incapable of Elevated Fire.
[9.56] To judge LOS for small-arms fire between hexes located on different elevation levels, follow the same procedure with the straightedge as in Case 9.55, using the following guidelines. If the intervening, blocking terrain is of the same elevation as the higher of the two levels or hexes (firing/target) the LOS is blocked, unless such terrain is part of either of those two hexes. However, if the intervening, blocking terrain is on ground-level (and the blocking terrain is not part of either hex,) there is a possibility that LOS may be drawn, under the following circumstances:
-
If the firing hex is on ground-level and the target is on bluff-level, the LOS is blocked only if the intervening, blocking terrain/units are halfway between the two hexes or closer to the firing hex than it is to the target.
-
If the firing hex is at bluff-level and the target is on ground-level, the LOS is blocked only if the intervening terrain or units was halfway between the two or closer to the target hex than to the firing hex.
[Diagrams: LOS Blocked examples with a ridge, woods and units between a 57 Ohio (M5) and a 9 Ark (R4).]
Remember, this section applies only to small-arms fire (and to artillery fire only where noted; Case 9.57). Players will also note that, given the terrain at Shiloh, extended LOS's will be difficult to attain. Most small-arms fire will be at virtually point-blank range.
[9.57] When artillery is firing and the target is at bluff-level while the guns are at ground-level, Case 9.56/1 applies. However, if the guns are at bluff-level (firing downslope) and there are no intervening slopes or ravines that are not part of the firing or target hex such battery may fire at any target within range. If a LOS could normally be attained (no intervening, blocking terrain), fire is conducted normally. If a LOS could not normally be attained — there was intervening blocking, ground-level terrain as per Case 9.56/2 — the guns may still fire but at half their strength, rounded down, in addition to any other effects. This is somewhat similar to Elevated Fire (Case 9.6); however it is not Elevated Fire, and all guns may take advantage of this.
[9.58] No small-arms unit may fire through a woods/swamp hex that is directly adjacent to the firing unit, regardless of elevation. Guns may so fire under the circumstances of Cases 9.57 and 9.6 (Elevated Fire).
[9.59] If two small-arms units (Friendly or otherwise) are in adjacent hexes separated by a ravine hexside neither unit may fire through the other. If the firing unit is Artillery, LOS depends on the guns' Elevated Fire capability. All units on Bluff-Level may always fire over the heads of units in adjacent ground-level hexes, regardless of the situation. In the same vein, units in the Sunken Road do not block LOS.
[Diagram: Elevated Fire — a unit (Dresser 1/Tenn, 4) firing along a row of Woods hexes; hexes marked "Yes" for the first four and "No" for the last.]
[9.6] ELEVATED ARTILLERY FIRE
Most artillery batteries have guns capable of Elevated Fire (i.e., the angle of elevation of the gun is such that it can fire over intervening terrain or units, providing that intervening terrain/unit is on the same level or lower than the gun.). Elevated Fire increases the number of targets that a gun can hit, at a reduced effectiveness in both strength and target acquisition. Guns using elevated fire must check to see whether they have actually hit the hex they fired at. If not, they then check to see where the shells did land. After target determination, fire strengths and then casualties are determined.
[9.61] Only those guns marked with an (E) on the Range Effects Chart (9.27) are capable of using Elevated Fire. (This means that L's, TA's and N's may not use Elevated Fire). Naturally, small-arms may not use Elevated Fire.
[9.62] Guns capable of Elevated Fire may ignore a maximum of any three blocking terrain hexes or blocking units on the same or lower elevation. They may thus fire at a target that would normally be blocked (in terms of LOS) by those three (or fewer) hexes/units. No battery of guns may ignore intervening terrain or units that are on a level higher than the guns.
[9.63] The Union gunboats' naval shellguns have a unique "Indirect Fire" capability. They may fire at any hex within range, regardless of intervening terrain or elevation. Note that if these boats do fire at a target that would normally be blocked (LOS) they do so with the adjustment to accuracy used for all Elevated Fire (Case 9.64).
[9.64] When using Elevated Fire the Player must check for the accuracy of his guns. To do so he notes the hex he wishes to hit and rolls one die:
- If the die-roll is 1 or 2 the guns have hit the designated target hex;
- If the die-roll is 3, 4, or 5 the guns have not hit the target but have hit some other hex. The Player must check for Scatter (Case 9.65);
- If a 6 is rolled the firing has been so scattered and desultory that, in effect, nothing was hit. It is considered a wasted shot, except that ammunition is expended.
[9.65] When a Player must check to see if his artillery fire has Scattered (Case 9.64/2), he rolls one die and consults the Scatter Diagram on the Game-Map. This pattern shows him into which hex the fire has actually been directed. Thus, if a Player used Elevated Fire against hex A2017 and his fire scattered, he would roll a die. If that die-roll were a "1," his fire would hit hex A2016. If there was nothing in that hex he would subtract his ammo and go on to his next fire combat. If he hit a different target, whether it be his own men or an enemy, he would then check for results as per Case 9.66.
[9.66] Regardless of what hex is hit, when using Elevated Fire to ignore blocking terrain/units all Gun Strengths are halved, rounding down, in addition to any other reductions or adjustments. This is not a column adjustment, so the Fire Strength may still be adjusted three columns in any one direction.
[9.67] No gun may use Elevated Fire at a range of less than three hexes.
[9.68] Elevated Fire always consumes ammunition, regardless of the result. Rapid Fire (Case 18.3) may not be used with Elevated Fire.
[9.7] FIRE COMBAT RESULTS TABLE
(see charts and tables section)
[9.8] RESULTS OF FIRE COMBAT (CASUALTIES)
Each casualty number on the Fire CRT represents a Strength Point of men killed/wounded or one Gun Destroyed, depending on which type of unit is firing. Other results are either pins or routs, both of which restrict an affected unit's actions.
[9.81] When the Fire CRT gives a numerical result and the target unit is infantry or cavalry, that unit has lost that number of Strength Points. The Player adjusts his Strength Counter (or marks the loss on the Roster Card) for that loss and then reflects such loss on his Casualty Track. (Each Strength Point equals 100 men.) Players should keep an accurate count of losses as they are worth Victory Points.
[9.82] If an artillery battery is hit by small-arms fire only the crew is affected. If a battery suffers a result of "1" the gun crew counter is flipped over to its Reduced Strength side. Another point loss and the crew is eliminated. Guns themselves are affected only by Artillery Fire, as are the crews in the following fashion. Each odd-numbered point in a given artillery fire result eliminates a gun; each even-numbered point affects the crew as described. Thus, a result of "2" destroys one gun and reduces the strength of the crew. The type of gun to be lost is decided by assigning guns a number from 1 through 6 (or less, as necessary), rolling one die; the die-roll corresponding to the gun indicates which gun is eliminated. See also Case 9.84.
[9.83] Certain results on the Fire CRT have an asterisk (*). This means that if the firing unit is artillery and the affected unit infantry, Dismounted cavalry or a supply wagon, the result is ignored in terms of casualties. Instead, the result it considered to be a "P/R" effect; see 9.84. below.
[9.84] Certain results on the Fire CRT are P/R results. "P" stands for pinned; "R" stands for routed. When a P/R result is obtained, the player owning the affected unit must determine which will apply. To do so he first notes the unit's Morale (Case 13.1) rolls one die and compares the dieroll to the Morale Rating. (He does not use the Morale Table.) If it is higher than the Morale Rating, the unit is routed; if it is the same as or lower than the rating the unit is pinned. When rolling for P/R results, if the unit has been enfiladed add one to the die-roll. There is one exception to this case: if the affected unit is an Unlimbered Artillery Battery that battery's crew will rout only if a "6" is rolled, regardless of the battery's Morale Rating. This applies only to "P/R" results, not to other rolls for possible rout.
[9.85] When a unit is pinned, place a PIN marker on top of it. A pinned unit may not move (except to retreat as a result of Melee; not before); nor may it fire in a Friendly, Offensive Fire Phase. In addition, pinned units may not use Withdrawal or Retreat Fire. They may not initiate Melee, although they may engage in Melee when so attacked. They may not retreat before Melee. Pinned units have no Zones of Control, and if a battery crew is pinned the guns may not fire. Pinned units may fire in the Friendly, Defensive Fire Phase, but artillery batteries with pinned crews halve their strength (rounding down) when so firing (in addition to any other adjustments). If the top unit in a stack becomes pinned, all units in that stack below it are pinned; however, routed units may become pinned (and remain routed!). Pinned units may change facing, but they may not change formation. Pinned units may fall Prone, but once Prone they may not get up until they are no longer pinned. For the rules on rout see Section 13.0.
[9.86] PIN markers are removed in the Friendly, Final Command Phase. A pinned result does not cause casualties or Stragglers.
[9.87] Leaders and aides may be killed or wounded by Enemy Fire. See Case 16.5. A leader or aide may be pinned, but such leader does not lose his effectiveness as a result of such pin. He simply cannot move.
[9.88] Each Player has a Casualty Track. Each Casualty Track is divided into three sections, enabling the Players to keep track of accumulated losses: 100's, 1000's, and 10,000's. As losses are taken the Casualty markers are moved to record such losses. When an artillery crew is eliminated (not reduced), then a 1-point loss (100 men) is recorded. (For those wanting to keep close track of the carnage, count a reduced crew as a loss of 50 men). The Casualty Track and Roster Cards can be used to check the accuracy of each other. In case of a discrepancy the Roster Card always prevails.
[9.89] When a gun is destroyed record it in the Guns Destroyed Box. Captured guns are kept by the capturing Player. They may be used (Case 18.15) only if placed with understrength batteries; no battery may ever have more guns than the total listed (regardless of type). Captured guns are also worth victory points.
[10.0] ZONES OF CONTROL
GENERAL RULE:
All infantry and cavalry units, as well as Unlimbered Artillery, have a Zone of Control (ZOC) extending into the hexes adjacent to their frontal hexsides (see Section 7.0). These hexes are called Controlled Hexes. Supply wagons, leaders/aides, and other non-combat units and markers do not have a ZOC.
The ZOC of a unit affects combat, supply and command. The presence of a unit in an Enemy-controlled hex does not mandate combat; combat is always voluntary. Units leaving an Enemy ZOC may trigger withdrawal fire. Units retreating into an Enemy-controlled hex may draw retreat fire. ZOC's have no other effect on movement, per se; but see Case 6.14.
CASES:
[10.1] WITHDRAWAL FIRE
An Enemy unit may fire at a moving, Friendly unit in its ZOC before it leaves. In addition, changing formation in an enemy ZOC may also trigger withdrawal fire.
[10.11] Withdrawal fire occurs during the withdrawing unit's Movement Phase before the withdrawing unit leaves the hex; i.e., the range is considered to be one hex. Withdrawal fire never occurs in a Melee Phase.
[10.12] Withdrawal fire is in addition to any normal Offensive or Defensive Phase Fire. A given unit may use withdrawal fire any number of times in a given Turn, subject only to available ammunition. Remember, withdrawal fire occurs when the unit leaves the hex, not enters it.
[10.13] If two or more units leave an Enemy ZOC together, the rules pertaining to firing only at the top unit apply (see Case 8.19). If only one of a stack of units wishes to withdraw it may do so without being fired upon, regardless of its position in the stack. However, in such a case, the unit remaining in the hex (top unit if more than one) may be fired upon (as if drawing withdrawal fire) even though it is not moving! In effect, it is "covering" for the withdrawing unit.
[10.14] A unit suffering casualties during withdrawal fire is subject to all effects of regular fire: the Player must check for rout, leader loss, etc. If a unit becomes pinned while withdrawing it may move one hex (out of the ZOC) and then it becomes pinned. If it routs it starts rout Movement (Case 13.41) in the first hex outside the hex in which it was fired on. Routed units routing out of an Enemy-controlled hex do not draw withdrawal fire. They may, however, draw retreat fire (See Case 10.2).
[10.15] A unit may withdraw from an Enemy ZOC through any hexside it wishes, as long as it does not enter an Enemy-occupied hex. (It may enter an Enemy controlled-hex.). However, if, in withdrawing, a unit presents its enfilade hexsides to the firing, Enemy unit, that Enemy unit gains the advantage of enfilading the withdrawing unit. Remember, a unit may not "back out" of a hex; therefore, a unit that is withdrawing will almost invariably present its enfilade to an Enemy unit.
[10.16] In addition to drawing withdrawal fire by movement, any unit that changes formation in the ZOC of an enemy unit may trigger withdrawal fire from that enemy unit. In such case the results of such withdrawal fire take effect in the hex in which the unit changes formation. If the unit suffers any adverse result (pin, rout or step loss) the attempt to change formation is unsuccessful; (Exception, see 6.24).
[10.17] In addition to Case 10.16, if a Player wishes to Limber or Unlimber an artillery battery, and that battery is within range and LOS of an enemy infantry or cavalry unit, those enemy units may fire at that battery before it changes formation. Any result and the formation change is unsuccessful and the battery may move no further. This rule applies regardless of the position a battery may have in a stack. Moreover, an enemy unit may fire at each and every battery, within the above rules, attempting such a change (This case uses the same procedure as withdrawal fire.).
[10.18] Withdrawal fire takes place only in the Movement Phases and the Retreat Before Melee Phases. It is an exception to the rule that no combat takes place during a Movement Phase. A unit that is forced to retreat from an Enemy-controlled hex during a Fire Phase does not draw withdrawal fire. Furthermore, as withdrawal fire is not part of a Fire Phase, units that use withdrawal fire may still fire regularly in any Fire Phase.
[10.2] RETREAT FIRE
A unit that is forced to retreat into the ZOC of an Enemy combat unit other than the unit that caused the retreat may undergo retreat fire. The procedure for retreat fire is the same as for withdrawal fire (above) with the exception that units entering the ZOC trigger the fire, as opposed to units leaving the ZOC (as in withdrawal fire). Each time that unit retreats into a hex controlled by a different Enemy unit, retreat fire may be triggered. Therefore, a retreating unit may be fired upon by more than one Enemy unit as it retreats. Retreating routed units that suffer casualties from retreat fire do not roll for additional rout; however, such units do check for stragglers (see Section 15.0) as if it had routed again! There is no limit to the number of times a unit may fire retreat fire (subject only to running out of ammunition). However, units may not split their fire when firing retreat fire. Retreat fire does not impede a unit's ability to fire in the normal Fire Phases.
[10.3] EFFECT OF ZOC'S ON AMMUNITION SUPPLY
Units attempting to trace a Line of Supply (Case 11.25) to a Friendly supply wagon may not trace this line through an Enemy ZOC. The presence of a Friendly unit negates Enemy ZOC's for this purpose.
[Diagram: Zones of Control for a 71 Ohio Stuart unit (R6) in Line and in Column; shaded hexes = Zone of Control.]
[10.4] EFFECT OF ZOC'S ON LEADER COMMAND
The Command Radii of leaders may not be traced through an Enemy Zone of Control. The presence of Friendly units in a hex negates the effect of an Enemy ZOC for this purpose.
[10.5] EXTENT OF ZONES OF CONTROL
ZOC's do not extend through hexsides through which a unit could not move (i.e., which are impassable). Furthermore, the presence of a Friendly combat unit negates an Enemy ZOC for the purposes of tracing Ammunition Supply lines and Command Radii. Friendly units do not negate Enemy ZOC's for the purpose of retreat or withdrawal fire. See, also, 11.19.
[11.0] AMMUNITION
GENERAL RULE:
Every time a combat unit — any combat unit — fires at an enemy unit it expends one Ammunition Point, regardless of the type of fire it is using (defensive, retreat, withdrawal, etc.) Each unit starts the game with a given number of Ammunition Points which can be reduced by firing, or augmented by being resupplied. Units that have no ammunition points available may not fire at all. Ammunition is available from supply wagons, Union camps, and Pittsburg Landing (Union only). Players keep track of Ammunition Point Levels on their Roster Sheets.
CASES:
[11.1] USE OF AMMUNITION
[11.11] Every unit receives an initial Ammunition Point level, listed in the Initial Deployment (29.9). Note that there are a few units that have levels different from other units. Such levels will be so indicated.
[11.12] Each Ammunition Point represents one round of ammunition. Exceptions: See Cases 11.6 and 18.3. Thus each and every time a unit fires it expends one Ammunition Point.
[11.13] As an additional exception to Case 11.12, the Union gunboats Lexington and Tyler have an unlimited ammunition supply and thus there is no need to keep track of their fire.
[11.14] Each Roster Sheet (Section 26.0) has a portion devoted to the Ammunition Point level: a series of boxes, each box representing a point. Players use the boxes to keep track of the number of points available for use. Players may use whatever system of checks or notation they wish, as long as it is clear to both of them.
[11.15] The maximum number of Ammunition Points any infantry regiment or artillery battery may have at any time is ten (10). Cavalry units may never have more than five (5) at any time.
[11.16] When a unit's ammunition level reaches zero (0), it is out of ammunition. Units out of ammunition may not fire under any conditions. They may Melee normally. If a unit is out of ammunition such status is recorded only on the Player's Roster Cards. A Player need not tell the opposing Player that his unit is out of ammunition at any time; he may keep such status secret. This calls for a certain level of honesty, which the designer assumes the players have.
[11.17] Ammunition Points supply both small-arms and artillery units. Furthermore, despite the fact that, historically, the plethora of weapons types often meant that certain ammunition was useless to certain types of weapons, this has been ignored for play purposes (or abstracted, as in the Union Camp Ammunition Supply Table). Both sides use Ammunition Points without hindrance.
[11.18] Melee combat never uses ammunition.
[11.19] Units that are out of ammunition do have ZOC's for the purpose of negating supply and Command Radius lines (only).
[11.2] SUPPLY WAGONS
[11.21] Supply wagons are not combat units and they have no combat strengths. If an Enemy unit enters a hex containing only a Friendly supply wagon that Enemy unit captures that supply wagon (and the Enemy Player will use that supply wagon counter henceforth).
[11.22] Supply wagons are considered to have a Stacking Value of four points.
[11.23] Supply wagons may be moved freely — they are not restricted by the command rules or leaders; they exert no ZOCs but are affected by Enemy ZOCs.
[11.24] Small-arms fire has no effect on supply wagons. Artillery fire does. If a supply wagon is hit by Enemy artillery fire, the unit is treated as if it were a "normal" (combat) unit, with the following results:
P/R: Same as usual. All wagons have a morale of "2".
PIN: The wagon is pinned, and may not be used to resupply units; movement is restricted as with other units.
ROUT: Unit retreats three hexes and is pinned
"1", "2", etc.: Unit loses 10% of its Ammunition Points times number rolled. Thus, a wagon suffering a "2" would lose 20% of its Ammunition Points.
[11.25] The number of supply wagons is limited by the counters provided. Lost wagons may not be replaced (as described in Case 11.21). Captured wagons are used as if they belong to the Player capturing them. Either Player may destroy a supply wagon at any time during his Friendly Offensive Fire Phase.
[11.26] Supply wagons are used to resupply units with ammunition. To be resupplied, a combat unit must be within its Movement Allowance of the wagon (counting from the unit to the wagon and using the most advantageous movement rate available), and neither unit may move during any Phase of the Friendly Player-Turn in which supply occurs. If the unit being supplied has not moved, and is within range of the wagon, the unit (regiment or battery) receives up to five (5) Ammunition Points in the Final Command Phase. The route from unit to wagon may not pass through impassable terrain, Enemy units or Enemy ZOCs.
[11.27] Each wagon may resupply any number of Friendly units within range during a Final Command Phase, subject to each wagon's total Ammunition Points available (see Cases 11.31 and 11.41). Players should keep track on the game-map of each wagon's Ammunition Points level.
[11.28] A unit does not have to be within Command Radius of an officer or commander to be resupplied from any source. However, routed units may not be resupplied.
[11.29] Combat units may not transfer Ammunition Points between themselves. Units may obtain Ammunition Points only from the specific supply listed in this Case and the following Cases.
[11.3] CONFEDERATE SUPPLY
[11.31] The Confederate Player receives six supply wagons. (He gets more if Van Dorn's Army is being used.) Each Wagon may hold up to 150 Ammunition Points, and each starts the game with that many. Confederate combat units are resupplied from these wagons, as per Case 11.25.
[11.32] Confederate supply wagons may pick up additional loads of ammunition by exiting the Game-Map through hex A0102 or A0103. To exit the map they simply must expend one Movement Point to leave. For each full Game-Turn a wagon spends off the map (not including the Turn in which it left the map) it picks up 75 Ammunition Points. A wagon may not re-enter the Game-Map in a turn in which it picks up ammunition. To re-enter the game-map the wagon uses A0102 or A0103, paying the terrain cost for the first hex entered. See Reinforcements, Section 22.0.
[11.33] Units not in Command Radius may be resupplied.
[11.34] Confederate units may also be resupplied by looting Union camps. See Case 11.5.
[11.4] UNION AMMUNITION SUPPLY
[11.41] The Union Player receives ten supply wagons, which are used exactly like the Confederate supply wagons (Case 11.3) with one important exception: each Union wagon holds only 100 Ammunition Points.
[11.42] Union supply wagons may be resupplied at Pittsburg Landing, at hex B0645 (the Union supply dump). For every full Game-Turn that a Union supply wagon spends in that hex it receives 50 Ammunition Points. There is no limit to the number of Ammunition Points which may be obtained from Pittsburg Landing.
[11.43] Individual units may be resupplied at Pittsburg Landing. Any Combat unit that spends a full Game-Turn in hex B0645 receives ten (five for cavalry) Ammunition Points. Such a unit must be in that hex; the usual supply range (as described in Case 11.26) does not apply to the Landing supply dump.
[11.44] The Confederate Player may use the Landing supply dump as above, if he controls it (occupancy by combat unit).
[11.45] The Union Player may use his camps (Case 11.5) as sources of ammunition.
[11.5] UNION CAMPS AND AMMUNITION SUPPLY
[11.51] Each Union camp is marked on the Game-Map (see the Terrain Key). Cavalry camps, which contain no ammunition, are differentiated from other camps. Artillery camps, which contain artillery ammunition only, are also delineated.
[11.52] For every Player-Turn that a Union combat unit spends in a non-depleted (see Case 11.54) Union camp, that unit receives two Ammunition Points. The unit may not move and it may not fire or melee during that Player-Turn. It may change formation and facing, but it may not fall Prone. Remember, cavalry camps contain no ammunition and do not apply to this rule (see, also, Case 11.55).
[11.53] Any Confederate combat unit that spends an entire Player-Turn (as per Case 11.52) in a non-depleted Union camp (see case 11.55) may, in the Final Command Phase, use the Union Camp Ammunition Supply Table (11.56). The Confederate Player rolls one die. He references that die-roll to the table and produces a number of Ammunition Points that that unit (or units) receives for the turn. As soon as the die has been rolled the camp is depleted. A Depl counter is placed on the camp to indicate such status. Important: See Case 11.55.
[11.54] Union units never deplete their own camps. However, starting with the 0500 turn of the second day (April 7) all camps are considered depleted.
[11.55] Players will note that there are three types of Union camps: infantry, artillery and cavalry. Players may not get any ammunition from cavalry camps, and thus cavalry camps cannot be depleted. However, the rules concerning Confederate looting of camps still applies to cavalry camps. Infantry and cavalry units get ammunition only from infantry camps, and artillery camps provide artillery ammunition only. Thus, a Confederate infantry regiment in a Union artillery camp will not be able to obtain (roll for) ammunition — and thus not deplete the camp — as it cannot get ammunition from that camp. Again, all looting rules (Case 15.4) apply, regardless of the camp type.
[11.56] Union Camp Ammunition Supply Table (see charts and tables section)
[11.6] BIRGE'S SHARPSHOOTERS
The Union 14th Missouri Regiment (2/2/Tenn), also known as Birge's Western Sharpshooters was armed with Henry Repeating Rifles, a weapon far in advance or the normal muskets and muzzle-loading rifles. Its rate of fire was approximately 6-7 times that of the Enfields — theoretically. However, the weapons often jammed (they were new), and in their enthusiasm to take advantage of the rapidity of breech-loading many men often misused the weapons. (To top it off, Birge's Sharpshooters were sent to guard the Snake Creek bridge the first day!) Moreover, given the rate of fire, the Henry's ate up a huge amount of ammunition. To account for these facts the Fire Adjustment multiples for the Henrys are quite high; every time Birge's unit fires it consumes two ammunition points. If the 14th has only one Ammunition Point available it may fire, but at half strength (rounded down). It may not so conserve ammunition unless this situation occurs. (As far as research could tell this was the only unit so armed. Mention was made of Sharps' rifles, but no specific information could be uncovered.)
[11.7] DESIGNER'S NOTE
The ammunition rules (which have changed somewhat from the TSS rules) are an integral part of the game system — not optional. However, they do require a bit of bookkeeping, something many Players are loathe to do. Therefore, for those wishing to play a quicker, more facile game, the ammunition rules may be ignored in entirety. Be warned, however, that doing so will raise the casualty rates about 30 to 40 percent and change the balance of the game in favor of the Union; and thus we strongly recommend against dispensing with these rules.
[12.0] MELEE COMBAT
GENERAL RULE:
Melee combat represents hand-to-hand fighting that takes place when Friendly units attempt to dislodge Enemy units from a given position. Melee occurs in the Melee Phase, when the Phasing Player moves a unit (or units) into a hex occupied by an Enemy unit(s). The ensuing combat is mandatory, and the result is taken from the Melee Combat Results Table.
PROCEDURE:
A unit that wishes to Melee an Enemy unit must begin the Friendly Melee Phase adjacent to that Enemy unit. Then, in the Melee Phase, it moves into the hex with the Enemy unit. The Melee Strengths of the opposing units are compared, adjusted for any terrain, leadership or morale effects, and the resulting combat differential is then resolved on the Melee CRT. Thus, if an attacking unit has two more Strength Points than the defending unit, it attacks with a Differential of +2. As a result of Melee units may be captured, suffer casualties, be forced to retreat (and possibly be routed), or remain engaged in the Melee. Melee may occur only in the Melee Combat Phase.
CASES:
[12.1] DEFINITION OF MELEE STRENGTH
[12.11] Infantry units always Melee with their present Combat Strength (which is the same as their Fire Strength).
[12.12] Artillery batteries melee with the Strength of their crew. The Melee Strength of a full-strength gun crew is "1". The Melee Strength of a reduced-strength gun crew is "0". (Remember, Melee Combat uses a Differential, so the "0" may be used as comparison figure.) Note that gun crews may never initiate Melee (see Case 12.25).
[12.13] The Melee Strength of a cavalry unit is its Base Strength at the time of combat. However, if Mounted cavalry are charging (See Case 17.4) their Melee Strength is double their Base Strength.
[12.2] RESTRICTIONS ON ABILITY TO MELEE
[12.21] To engage in Melee a combat unit must begin the Friendly Melee Phase adjacent to the Enemy unit it wishes to Melee. Furthermore, the Friendly unit must be able to move through one of its frontal hexsides into the enemy-occupied hex.
[12.22] Units may never fire at one unit and Melee another. If a unit wishes to Melee after firing, it must Melee with a unit it fired at. If it did not fire in the immediately preceding Fire Phase it may Melee any unit, within the provisions of Case 12.21.
[12.23] Melee is never mandatory; simply because a unit is adjacent to an enemy unit does not mean it has to melee. However, once a unit moves into that enemy-occupied hex it must Melee that enemy unit — unless the enemy unit retreats before Melee (Case 12.8).
[12.24] Infantry in Column may never initiate Melee, although they may be Meleed by enemy units. (However, see 12.33). If a unit in column is Meleed such unit goes into Line as soon as Melee is resolved.
[12.25] Gun crews may not initiate melee. Exception: If a gun crew is meleed and an "Engaged" result is obtained, the crew may melee in its ensuing Friendly Melee Phase.
[12.26] Units that Split Fire (see Case 9.3) between two or more hexes may melee units in only one of those hexes. Units may not split their Melee Strength between hexes.
[12.3] TERRAIN EFFECTS ON MELEE
[12.31] Any units that enter an Enemy-occupied hex for melee purposes by crossing a stream (not including a hexside ravine; see Case 12.32) or moving upslope (again, not including a hexside ravine) have one point subtracted from their total Melee Strength.
[12.32] If a unit crosses a hexside ravine to melee, its strength is reduced by two (to a minimum of "0").
[12.33] Only one unit may melee across (or onto) a bridge or ford. Furthermore, if a unit melees across (or onto) a bridge or ford its Melee Strength is halved, rounded down ("1" halved would be "0"). This rule is an exception to the one that states a unit may cross a bridge or ford only in column. In such an instance, a unit may melee across the bridge or ford in the reduced status, despite the restriction about column status being necessary to utilize a bridge or ford.
[12.34] If an Engaged result (see Case 12.96) results from melee, there are no terrain effects on subsequent melee in that hex, except for additional units joining such melee.
[12.35] A unit may melee into a hex only if it could move into that hex normally. Units meleeing into a swamp hex ignore the roll for pin which accompanies movement into a swamp hex. However, a unit that remains in a swamp hex after all Enemy units have been eliminated or retreat out of the hex due to melee is automatically Pinned.
[12.36] Woods have no effect on melee, and the Sunken Road has no effect on melee.
[12.4] EFFECTS OF LEADERS ON MELEE
If a stack of units initiating Melee or defending against Melee contains a leader (not an aide-de-camp) that stack may add one Strength Point to its total strength. This does not apply to gun crews.
Example: An infantry regiment worth "5" and stacked with a leader crosses a stream and melees an Enemy unit worth "2". The latter is also stacked with a leader. The final Melee Differential would be +2: the "5" Strength Point stack adds 1 point for its leader, but subtracts one for crossing the stream, for a total of "5," but the defender adds 1 for the leader for a total of "3". 5 - 3 = 2. Note that the ratings of leaders have no effect on Melee; mere presence is enough.
[12.5] EFFECTS OF MORALE AND ROUT ON MELEE
[12.51] If a routed unit defends against melee, that unit defends at one-half its given strength (rounded down). Routed units may not initiate melee; if "Engaged" in melee (see Case 12.96) a routed unit must retreat from melee, if possible. If the routed unit cannot retreat from the melee, it is captured.
[12.52] If, in a melee, the unit with the lowest morale in a stack of Friendly, meleeing units has a Morale Rating that is at least two points higher (better) than the highest Morale Rating of an Enemy unit that is in the same melee, the Friendly meleeing units add one to their strength. This is not a column shift, simply an increase in strength. Whether a unit is attacking or defending is immaterial.
Example: Two Union units, both with Morale Ratings of "2" initiate melee against two Confederate units, with Morale Ratings of "4" and "5". Because the lowest-rated CSA unit is two better than the highest-rated Union unit ("2"), the Confederate Player adds one to his Melee Strength for that melee.
[12.6] DETERMINING THE MELEE DIFFERENTIAL
The Melee CRT is a "differential" CRT. The combat ratio is expressed as a difference between the total Base Strength Points of the attacker (the Phasing Player) and the total Strength of the Defender. The Defender's points (adjusted for terrain, Leaders or Morale) are always subtracted from the attacker's regardless of who has more points. Thus, a defender with "8" total points attacked by a unit with a total strength of "5" would produce a Differential of minus three (-3). Differentials lower than -4 or higher than +7 are treated as -4 or +7, respectively. Note that a unit may adjust a total of 4 points: two for terrain, one for a Leader, and one for Morale. (Remember, these are point adjustments for Melee and not Column adjustments for Fire. Thus, there is no restriction here to the number of adjustments, as there is with Fire Strength Columns.)
[12.7] STACKING IN MELEE
[12.71] The number of units and/or Strength Points that a Player may melee with in a single hex is listed in the Stacking Restrictions Table (8.19).
[12.72] Note that in woods — the predominant terrain feature — only one unit or four (unadjusted) Strength Points (whichever is larger) may melee per side. If the defending Player has more units (or Strength Points) then is allowed for melee, the Strength Points over the maximum do not participate in the melee; however, they are affected by such combat in all respects. The attacker may not enter a hex to melee with more Strength Points than are allowed above.
[12.73] Stacking limits in melee apply to each side separately. Thus both Players may have up to 12 Strength Points in a clear terrain hex for melee.
[12.74] If infantry or dismounted cavalry is stacked with a gun crew in melee, losses are taken from the infantry/cavalry before the gun crew, regardless of the stacking order of the units. Otherwise, losses are taken by the owning Player as desired.
[12.75] Friendly units may enter the same hex to Melee from different hexes.
[12.76] Units may not move through a hex where units are Engaged in Melee.
[12.8] RETREAT BEFORE MELEE
During the Retreat Before Melee Phase, the attacking Player (i.e., the Player whose Melee Phase immediately follows the current Retreat Before Melee Phase) must announce which defending units he intends to melee. The defending Player must either immediately exercise his option to retreat before melee (if it is available to him), or declare that he will accept the melee.
[12.81] Prior to the Melee Phase, the non-Phasing Player may choose to retreat units subject to melee rather than have them undergo attack. Thus, in the Retreat Before Melee Phase the non-Phasing (retreating) Player may move any units subject to melee one or two hexes away from the Enemy unit.
[12.82] Retreating units may not enter an Enemy ZOC.
[12.83] Most units that retreat before melee are subject to withdrawal fire. See Case 10.14 and Section 13.0. Retreating (before melee) units must check for rout, regardless of whether or not they suffer casualties as a result of withdrawal fire (exception: see Case 12.84).
[12.84] Mounted cavalry and pickets (see Case 20.13) may retreat before melee without drawing withdrawal fire. They are simply moved the one or two hexes. They do not check for rout.
[12.85] Phasing units may be advanced into a hex vacated by a unit retreating before melee if the advancing units were going to melee the retreating units. The advancing units are still bound by the Stacking Restrictions Table (8.19). A unit so advancing may not melee in that Turn.
[12.86] Unlimbered artillery gun counters may not retreat before melee. Gun crews may always retreat before melee. Gun crews retreating without unlimbered guns abandon the guns (see Case 18.14).
[12.87] Normally, only units subject to melee (i.e., when an Enemy unit is about to enter the hex) may retreat before melee. However, when a unit not subject to melee is adjacent to two (or more) Friendly units that are both subject to melee and are actually retreating before melee, that third Friendly unit may also retreat before melee, if it is within the Effectiveness Radius of its officer. An adjacent Enemy unit may advance into the vacated hex and/or execute withdrawal fire.
[12.9] RESULTS OF MELEE COMBAT
As a result of melee, Units/Strength Points may be captured, suffer casualties, be forced to retreat, or remain engaged.
[12.91] A "K" result on the Melee CRT means that one Base Strength Point (100 men) from the side affected has been killed and/or wounded. A Gun Crew suffering a "K" result is eliminated; it is not turned over to Reduced Strength.
[12.92] A result of "R" plus a number (e.g., "R2") means that the affected unit(s) must retreat the given number of hexes. At the end of the retreat those units then roll for possible rout. The path of retreat should be away from the Enemy lines and towards one's own lines (Use common sense, please). For the Union, that will be toward Pittsburg Landing; for the South, towards the roads leading off the SW corner of the game-map (to Corinth). Unlimbered Gun Counters may not retreat, and if they suffer an "R" result the guns are captured. (The Crew can retreat).
[12.93] A result of "C" plus a number means that that number of Base Strength Points has been Captured. The affected unit(s) is reduced by that number of points and that total is recorded on the captured Track. Prisoners cannot escape.
[12.94] Captured gun counters can be recaptured (in the same way that they were captured originally). However, guns may not be used by the Enemy Player unless he has a "spare" gun crew around (i.e., one that has lost its old guns) or a battery reduced in strength and capable of adding guns (see Case 18.15). Otherwise, to move a captured battery of guns the Player simply stacks any combat unit with the guns and moves them as if they were regular artillery. They can fire only if they have crews, however.
[12.95] A result of "engaged" means that all units in the hex are engaged; i.e., the fighting is still raging. Engaged units may neither fire nor move, nor may they be fired upon by other, unengaged, units. Engaged units have no ZOCs. Leaders that are "engaged" may not rally other units; their Effectiveness Radius, however, remains unaffected. Other units may not move through a hex with engaged units, although under the circumstances below units may be moved into the hex. A counter indicating that the meleeing units are engaged is placed on the units. In the ensuing Player-Turn the former defending Player has the following options:
-
He may fight another melee in his Melee Phase with the same units, recomputing the differential if necessary (remember Case 12.34); or
-
He may, within stacking restrictions, bring in reinforcements and fight another melee as in 1; or
-
He may choose to retreat his engaged units two hexes, rolling for rout at the end of such retreat. Units that he chooses to retreat from melee do not suffer withdrawal fire. (Note this difference from retreat before melee.) There is no advance by the units left in the hex. Unlimbered gun units may not use option 3. Furthermore, options 2 and 3 or 1 and 3 may not be combined.
[12.96] If, in melee, the result is such that both sides would be totally eliminated (via a "K" or "C" result) ignore that result and consider it to be an "engaged" result.
[12.97] Melee Combat Results Table. (see charts and tables)
[13.0] MORALE AND ROUT
GENERAL RULE:
Each combat unit possesses a Morale Rating. A unit's Morale Rating is used for a variety of reasons: adjusting Melee strengths, determining straggler rates, and, especially, determining whether or not a unit will rout. Any time that a unit suffers a casualty as a result of Fire Combat, receives a retreat result of the Melee CRT, or receives a rout result on the fire CRT there is a possibility that the unit will rout. Routed units are forced to retreat — and they remain routed until rallied by a Leader. Routed units are restricted in what they can do.
CASES:
[13.1] MORALE RATINGS
[13.11] Each combat unit has a Morale Rating, consisting of a number running from "5" (best morale) to "1" (worst); see the sample units (Case 2.3).
[13.12] Some units have a printed Morale Rating of "?". These units are considered "green" (see Case 13.14).
[13.13] Numbered Morale Ratings are permanent; they never change (see, however, case 13.14).
[13.14] Green units — those units with a "?" Morale Rating have no Morale Rating until they are required to use their Morale Rating as a result of their first taste of combat (known as "Seeing the Elephant"). When a green unit "Sees the Elephant" for the first time, and needs a Morale Rating, the Player immediately refers to the Seeing the Elephant Table (13.15). He also rolls two dice to find what the new Morale Rating of the green unit is. The Morale Rating is now the permanent rating for that unit; it should be recorded on the Roster Sheet in the approprate section (see Section 26.0).
[13.15] Seeing the Elephant Table (see charts and tables)
[13.2] WHEN UNITS ARE ROUTED
Units check for possible rout each time they suffer a casualty (e.g., "1") on the Fire CRT, receive a P/R result on the Fire CRT (see Cases 9.84 and 13.39), receive a "retreat" result on the Melee CRT, or retreat before or from Melee. A pinned result does not call for a rout check.
[13.3] DETERMINING ROUT
[13.31] When there is a possibility that a rout will occur, the Player with the affected unit (or units) checks the Morale Rating of the unit (remember Case 13.14) and refers to the Morale/Rout Table, Case 13.38. Important: Read Case 13.39.
[13.32] The Player rolls one die for each unit for which there is a possibility of rout and cross-references that die-roll with the unit's Morale Rating on the table. Thus a unit with a "3" Morale Rating on the table for which a roll of "5" results will rout.
[13.33] All casualties are taken prior to determining rout.
[13.34] If a unit is stacked with a leader (not an aide), subtract one from the die-roll.
[13.35] If a unit has suffered greater than 50% losses from its original, printed Strength) add one to the die-roll.
[13.36] Unlimbered gun counters never rout. However, their crews may rout, thus abandoning the guns. See Case 18.24.
[13.37] At any time that a unit is checked for rout as a result of Enemy fire, and that unit has been enfiladed by the Enemy fire, add one to any rout check as a result of that fire.
[13.38] Morale/Rout Table (see Charts and Tables)
[13.39] Players will soon notice that there is a seeming dichotomy pertaining to die-rolls for rout. Most use the Rout Table, above. Others use the Morale Rating of the unit without referring to the table: e.g., P/R results, rallying artillery and cavalry. This is not a mistake, and although it may seem somewhat unnecessary, it is not. The designer apologizes for any mental discomfit caused.
[13.4] EFFECTS OF ROUT
[13.41] Units that are routed must retreat three hexes (not an expenditure of Movement Points), in addition to any other retreats that may have been mandated in that Combat Phase. Units unable to retreat those three hexes for any reason (terrain or enemy units) surrender in their entirety. They are captured (see Case 12.98).
[13.42] Routed units may not engage in any kind of Fire Combat. They may not initiate Melee, and if forced to Melee they Melee at half-strength (rounded down), with a minimum Melee Strength of "0". Routed units have a Movement Allowance of one hex per Turn, regardless of terrain costs. Routed units may not retreat before or from Melee, and they have no Zone of Control.
[13.43] Supply wagons indicate routed status by flipping them over to their routed side ("Rtd"). Rout is indicated for other units by placing a routed ("Rtd") marker on top of the routed unit.
[13.44] A unit that is routed and suffers additional casualties while in a state of rout will rout again. Routed units suffering a second rout result (e.g., from a P/R result on the Fire CRT) must retreat an additional three hexes, remaining routed. Routed units that become pinned are both pinned and routed; but a pinned unit that routs is no longer pinned — it is routed.
[13.45] Every time a unit routs — or suffers a rout result — it must check for Stragglers (Section 15.0).
[13.46] Leaders and Aides are never Routed. They are not affected in any way by a Rout result. (However, see Case 13.53).
[13.5] EFFECTS OF STACKING ON ROUT
[13.51] If there is more than one unit in a hex for which there is a rout check, each unit is checked separately.
[13.52] If only the top unit is affected by the combat, (as in fire) only that unit is checked for rout. If there is no rout, the units beneath it do not check for rout. If there is a rout the unit under it does check for rout. Furthermore, if the top unit is eliminated entirely, the unit beneath it must check for rout — even though there was no rout check on the eliminated unit (see Case 13.54).
[13.53] All units in a hex receive the benefit of any leader in a hex. Leaders in a stack may choose to retreat with a routed unit or remain with the unit beneath (and take their chances there).
[13.54] If a stack suffers casualties from artillery fire firing from a range of three hexes or greater, all units in the hex check for rout.
[13.6] RALLY
[13.61] Routed units remain in a routed state until they are rallied in a Friendly Final Command Phase.
[13.62] Infantry units are rallied under the following circumstances:
- They are stacked with any Friendly leader (not aide); or
- They are adjacent to or stacked with a Friendly commander; or
- They are within three hexes of their immediately superior officer for that unit and that officer expends a Rally Point (see Case 16.16) to rally that unit. Exception: officers with an Effectiveness Rating of less than three use that rating as their Rally radius; not three hexes.
[13.63] The three hex (or less) radius in Case 13.62 (3) may not be traced through Enemy combat units, Enemy Zones of Control (although the presence of a Friendly unit in that hex negates the effect of such a ZOC), impassable terrain, or three consecutive woods hexes. Thus, in the woods, the Rally radius of officers is effectively reduced to two (woods hexes). The radius includes the combat unit hex; it does not include the hex the leader is in.
[13.64] Routed artillery gun crews and cavalry units are not rallied by leaders. Instead, they use the following morale check procedure based on their Morale Rating (see Case 13.1). During the Final Command Phase, if this type of unit is routed the Player simply rolls one die. If the die roll result is higher than the unit's Morale Rating, the unit remains routed. Otherwise, the unit rallies. Thus, a cavalry unit with a Morale Rating of "4" would be rallied on a roll of "4". Leaders do not affect this procedure. Do not use the Morale Table.
[13.7] CATASTROPHIC ROUT (Optional Rule)
This is an optional (but recommended) rule that is suggested for those who wish some nice historicity; it also helps the Confederacy a bit. It reflects the total routs that occurred in some rare instances, routs which effectively eliminated whole units.
[13.71] Whenever a green Union combat unit is attacked (by Fire or Melee) while unalerted (see Case 20.3) and that unit checks for "Seeing the Elephant," if that unit gets a "1" Morale Rating it must check for catastrophic rout.
[13.72] When checking for catastrophic rout the Union Player rolls one die (after finding the "1" Morale Rating). If that die is a 1, 2, or 3 then all but one point of that unit has straggled. Example: the 21st Missouri (Peabody/6th Division) is fired upon while unalerted. Prior to checking for the result the Union Player rolls to determine the morale of that unit. It comes out a "1", the Union Player now rolls another die; he rolls a "2". Thus, 5 out of the 6 Strength Points of the 21st Missouri immediately become stragglers. The Confederate Player now checks for casualties.
[13.73] Determination of catastrophic rout precedes any check on the CRT; however, it does not replace the CRT. Thus a unit can get both a catastrophic rout and a point loss (or P/R or any other result).
[13.74] The odds are that from 2 to 3 units will suffer catastrophic rout in a game.
[14.0] RETREATS
GENERAL RULE:
Units may be forced to retreat as a result of rout or as a direct outcome of a result of the Melee CRT. The number of hexes that a unit must retreat depends on the combat result received. Retreating units must follow certain conditions when retreating.
CASES:
[14.1] RESTRICTIONS ON RETREATS
A retreating unit may not move through an Enemy unit or an impassable hexside. (Retreating units may move through Enemy leaders alone in a hex without affecting the leader). Retreating units may not retreat off the Game-Map (see Case 5.19). If a unit is unable to retreat, it is captured.
[14.2] RETREATING THROUGH ENEMY ZOC'S
Retreating units may pass through or into Enemy ZOC's. However, in so doing they may be subject to retreat fire (Case 10.2). A unit retreating into an Enemy-controlled hex that is also occupied by a Friendly combat unit may not be fired upon (retreat fire) unless the Friendly unit occupying that hex is forced to rout out of the hex, as explained in Case 14.3. If that does happen, then — and only then — will the original retreating unit draw retreat fire.
[14.3] PRESENCE OF FRIENDLY UNITS AND RETREAT
A retreating unit may not retreat through a Friendly unit if there is another path open to it (unless that path would enter an Enemy ZOC). If the retreating unit is forced to retreat onto or through a Friendly unit, that Friendly unit must check for possible rout (for green units this is "Seeing the Elephant," Case 13.15). If the unit retreated onto is already routed, that unit automatically "routs" again (and must check for stragglers and retreat an additional three hexes).
[14.4] THE PATH OF RETREAT
All units are retreated by the owning Player. In determining the path of retreat the Player must attempt to retreat the unit through the terrain/path of least resistance (least movement points to enter), away from the enemy and towards their own lines (See 12.93). The retreating unit must always end its retreat the number of hexes it is mandated to retreat away from the hex in which it began the retreat. It may not enter the same hex twice during any one retreat. In anomalous situations use common sense; however, the retreating Player has the final say. Players should note here that there is usually no advance after retreat by a Friendly unit into an Enemy-vacated hex, unless such retreat is a retreat before Melee (see Case 12.85).
[15.0] STRAGGLERS
GENERAL RULE:
The number of men on both sides who simply left the battle (either running or walking) was striking. Pittsburg Landing was choked with frightened Union soldiers seeking to avoid battle. Stragglers are a form of "temporary casualty," in that the strength of a unit is reduced, albeit not necessarily permanently. Stragglers result from Rout, Movement, and (for the South) Looting; they are based on the Morale of the unit involved. Stragglers may be recovered under certain circumstances. The straggler rule requires a certain amount of record-keeping. Forewarned is forearmed; players may omit this rule if they wish an easy, if inaccurate, game.
CASES:
[15.1] UNITS SUSCEPTIBLE TO STRAGGLING
Only infantry units with a strength of 2 or more lose Strength Points due to straggling. Cavalry units, gun crews, and any units with a strength of "1" never check for stragglers (However, see Case 15.43). Stragglers are "1" Strength Point casualty losses, and they should be recorded as such on the Roster Sheets. Since stragglers may be recovered, players should use a form of notation that will enable them to both differentiate stragglers from other casualties and also erase straggler casualties when recovered.
[15.2] MOVEMENT AND STRAGGLING
Any unit (as per Case 15.1) that has a Morale Rating of "2", "1" or "?" undergoes a straggler check when it finishes its movement if it has used more than one Movement Point. The Player rolls one die for each such unit; if he rolls a "6" one Strength Point is removed as stragglers. However, if such a unit is stacked with a leader (not aide) the Player does not check for stragglers. Note that a green unit checking for stragglers through Movement is not "Seeing the Elephant" and does not determine its Morale Rating at that time.
[15.3] COMBAT AND STRAGGLING
[15.31] Whenever a unit (15.1) suffers a rout result, or whenever a routed unit is not rallied in the Final Command Phase, that unit must immediately check to see whether any straggling occurs.
[15.32] In the situation where a unit suffers a rout result (regardless of how and where) the Player checks the Morale Rating of such unit. If the Morale Rating is a "?" the unit has "Seen the Elephant" and must determine its Morale Rating. Using the Morale Rating and rolling two dice, the Player refers to the Straggler Table (15.6) If the diceroll falls within the range listed next to the Morale Rating under Table "A" that unit suffers a loss of "1" point to stragglers.
[15.33] In the Friendly Final Command Phase, if a unit that is already routed is not Rallied it must check for stragglers. In this instance it uses the same mechanism as in Case 15.32; however, under this circumstance it uses Straggler Table "B" (not "A").
[15.34] If a unit is stacked with a leader when checking for stragglers, one is added to the dice roll
[15.35] Any Straggler Checks are undertaken after any rout retreats are finished but before proceeding to the next Phase.
[15.4] LOOTING
Confederate soldiers were amazed at the riches they found in abandoned Union camps. Many soldiers simply ignored the battle, loaded up with whatever they could find, and headed to the rear (or simply ate/drank themselves into oblivion). Looting produces stragglers.
[15.41] Any time that a Confederate infantry unit enters an un-depleted Union Camp (except by retreat) the Confederate Player must check for looting (aside from any other checks he must or may make).
[15.42] If a Confederate unit moves adjacent to any Union Camp (depleted or un-depleted) during the First Day, and there are no Union combat units in or adjacent to that camp, then the Confederate unit must enter that camp hex as his next hex of movement (excepting retreat, of course).
[15.43] To check for looting, the Player uses the Morale Rating of his units and Straggler Table "A", with two dice. If he rolls the requisite number, that unit loses one point as stragglers regardless of the strength of the unit!
[15.44] Looting dicerolls occur at the instant a unit enters the camp. If a leader is present in that hex, add one to the diceroll.
[15.45] If there is a Union combat unit adjacent to a camp or a Union combat unit within three hexes with a clear LOS to the camp hex (and such Union unit has the facing to fire at that hex) then no looting (or rolls for ammunition, Case 11.53) takes place. (Remember to differentiate this from Case 15.42).
[15.46] Looting dicerolls take place prior to ammunition-gathering dicerolls.
[15.47] When a unit loots it halts movement for that Player-Turn. It may not move until the next turn (unless combat forces it to).
[15.5] RECOVERING STRAGGLERS
[15.51] In a Friendly Final Command Phase, any unit that has not used any Movement Points, is not routed or pinned, and is at least four hexes distant from the nearest enemy combat unit may attempt to recover a Straggler Strength Point (except: see Case 15.53). The Player rolls one die. If he rolls a 1, 2, or 3 that unit recovers one point (and the notation of loss of one Strength Point on the Roster Sheet is erased). If he rolls a 4, 5, or 6 nothing happens.
[15.52] If, in the situation described in Case 15.51, the unit wishing to recover a Strength Point is adjacent to a Friendly, Mounted cavalry unit that has not moved either, there is no need for a dieroll, The Straggler Point is automatically recovered. (The cavalry is considered to be out rounding them up.)
[15.53] A unit that has undergone artillery bombardment by a Union gunboat may not recover stragglers in the turn it is so fired upon, whether the unit suffers any casualty or not. (However, the hex must be hit; if the fire scatters to another hex the unit may recover stragglers.)
[15.54] Units that have been eliminated entirely may not recover stragglers to reform.
[15.6] STRAGGLER TABLE
(see Charts and Tables)
[16.0] LEADERS
[Counter examples: Raith 3/1/T 3-1 (eagle); Maney R2/2/IC 3-1 (three stars).]
GENERAL RULE:
Various historical generals and colonels are provided with the game. These "leaders" have no combat values and are not combat units; however, they are necessary for co-ordinating troop movements, rallying routed units and aiding in Melee Combat. There are two types of leaders: officers and commanders. In addition, each Player is provided with a number of aides-de-camp, representing historical captains, lieutenants, and political figures. Aides are not leaders; they are used mostly in the optional multi-commander game rules. They also are used by the Union to help alert his units in the opening hours of the battle.
PROCEDURE:
In the Initial Command Phase, the Phasing Player checks to see which of his units are not within the Effectiveness Radius of their respective officers. Any units not within that radius are restricted in their movement and combat capabilities. The Officer's Effectiveness Radius may be extended by his commander if he is within three hexes of that commander. In the Final Command Phase, units that have been routed may be rallied by officers or commanders.
CASES:
[16.1] HOW LEADERS ARE USED
There are two types of leaders: officers and commanders. Each of these leaders has differing functions, and it is important that the Players keep these differences in mind. Each leader has his own counter; there is no second (or strength) counter. A leader is not a combat unit and may not engage in combat on his own, although a leader may become a casualty. Leaders have a Movement Allowance of twelve.
[16.11] Officers are brigade leaders, controlling all regiments assigned to a brigade. The Orders of Battle (Section 31.0) list all regiments within a given brigade, and each (infantry) regimental command unit has the name of its officer printed on its counter. Only infantry regiments have officers. Officers have two ratings on their counters: the first rating in his Effectiveness Radius and the second is his Rally Rating. Officers may affect only units that are under their command.
[16.12] The Effectiveness Radius is the maximum number of hexes a unit may be from its officer during the Initial Command Phase in order to have full movement and combat capability. A unit that is not within the radius has its Movement Allowance for that turn reduced (see Case 6.17). Furthermore, such a unit may not fire during the Offensive Fire Phase and may not initiate Melee (unless already engaged in one). However, such units may still fire Withdrawal and Retreat Fire and they still do exert a Zone of Control. For example, Clifton's 4th Alabama Battalion is five hexes distant from its officer, Colonel Robert Trabue, in the Initial Command Phase. As Trabue's Effectiveness Radius is "4", the 4th Alabama will be severely restricted in its capabilities for the ensuing Player-Turn. Note, also, that a unit not within the Effectiveness Radius may still fire defensively (in that Phase) and defend against Melee.
[16.13] The Effectiveness Radius of an officer may be augmented by his commander(s). An officer that is within three hexes of his commander may have his Effectiveness Radius augmented by a maximum of two hexes by that commander, if the commander possesses the necessary Command Points (see Case 16.17).
[16.14] The path of hexes for the radii listed in Cases 16.12 and 16.13 may not be traced through Enemy units, impassable terrain or Enemy ZOCs (unless such is negated by the presence of Friendly combat units). In addition, no more than three consecutive hexes in an Effectiveness Radius may be woods and/or swamp. If such woods hex is traversed by a road or trail running in the direction in which the path is being traced then the hex is not considered to be a woods hex for these purposes. In other words, unless a Player can make use (abstractly) of roads or trails, his officers' Effectiveness Radii are effectively limited to "3" in the woods. (Remember to differentiate this from the woods restriction for rallying units, which is two hexes, not three. See Case 13.6.)
[16.15] There are four exceptions to Cases 16.12 and 16.13:
-
Any unit within three hexes of a commander for a parent unit that that regiment is in (division, corps or army) may be moved and fought with normally. Thus, using the example above, if Clifton's 4th Alabama is outside Trabue's radius but within three hexes of, say, Brigadier General Breckenridge (the corps commander for Trabue) it could be moved and used to fight. But Major General Hardee would have no effect on the 4th Alabama, as Hardee's Corps is the Third and the 4th Alabama's corps is the Reserve.
-
Mounted cavalry units are always able to be moved and used to fight without the benefit of a leader (see Case 17.6). Dismounted cavalry units must be attached to a leader (see Case 16.44) to function normally.
-
Artillery and supply wagons (as well as leaders themselves) are not affected by leaders; they may be moved and used to fight without recourse to a leader.
-
There are certain, odd units that enter the game as reinforcements (or are already on the map but out of place, such as the 16th Iowa) without a leader. These units may move, in column, to their assigned leader, using the normal movement rates. Once they are within that officer's radius they come under his aegis and function according to standard rules. If, for any reason, the unit is forced to change formation it is then considered to be a unit out of command range. While a unit is being moved in column the unit may not be used to fire during the Offensive Fire Phase, but can fire during any other phase. See Case 16.4.
[16.16] Officers' Rally Ratings are used to rally routed units during the Friendly Final Command Phase. For each point in his Rally Rating an officer may rally one unit in his command that is within three hexes (see Case 13.63) of that officer, unless that officer's Effectiveness Radius is less than 3. If less than 3, the Effectiveness Radius is the Rally Radius. An officer may never rally more units than he has Rally Points, nor may he rally units that are not under his command. In addition, any unit stacked with an officer is automatically rallied during the Final Command Phase without the expenditure of Rally Points by the officer.
[16.17] Commanders are higher echelon Leaders: Divisional, Corps and Army Leaders. Some Confederate formations have no Divisions (or Divisional Commanders); e.g., Hardee's Third Corps has no Divisional organizations. The hierarchy of leadership, for the novice, is Brigade-Division (if present)-Corps-Army. Commanders have only one rating: the Command Rating. The Command Rating is equivalent to the number of hexes by which a Commander may increase his Officers' Effectiveness Radii. Commanders may only increase the Effectiveness Radii of Officers under their command, and the Officers must be within three hexes of that Commander. (For a different, optional method of increasing these radii see the rules for Aides; Case 16.74).
[16.18] Commanders may increase an Officer's Effectiveness Radius by up to two additional hexes (remember terrain restrictions), if the Commander has the requisite Command Rating. The total number of additional hexes added to an Officers' Radii may never be more than the Command Rating of the Commander. Example: Brig. General William "Bull" Nelson has a Command Rating of "3". He may increase Colonel Ammen's rating by '2' (to '4'). He then has one point remaining to distribute. (The system is somewhat different when using Aides; see Case 16.74.).
[16.19] A Commander may rally any routed unit with which it is stacked or to which it is adjacent, regardless of unit designation or parent formation. The Commander does not use any points to do this; it is automatic.
[16.2] EFFECT OF PRESENCE OF LEADERS
Any unit stacked with at least one Leader during a Melee may add one point to its Melee Strength. Units stacked with Leaders and checking for rout may subtract one from the dieroll. A unit stacked with a Leader when checking for Stragglers after rout has one added to the diceroll. All of these considerations are covered in detail elsewhere in the appropriate rules sections.
[16.3] LEADER STACKING RESTRICTIONS
[16.31] There is no limit to the number of leaders that may be in a given hex. However, only one leader can have effect on a unit in that hex (in terms of adjusting die-rolls for combat, stragglers, etc.) regardless of how many leaders are in that hex.
[16.32] Leaders must always end a Movement Phase stacked with a combat unit, with one exception: if the leader is five or more hexes distant from the nearest Enemy unit at the completion of all movement, it may remain in the hex alone.
[16.33] If a leader is stacked with a combat unit(s) that is totally eliminated by fire combat — and the leader does not suffer a casualty — the leader is immediately placed on the nearest combat unit in his command. If, as a result of fire or melee, a leader is alone in a hex that is surrounded by Enemy units, Enemy ZOCs and/or impassable terrain, that leader is captured (see Case 11.53).
[16.4] CHANGING REGIMENTAL ASSIGNMENTS
[16.41] Infantry regiments may be detached from the Brigade to which they are assigned and attached to a new, different Brigade. Unassigned regiments may also be attached to a Brigade.
[16.42] A Brigade may detach as many of its component units as it wishes. If it detaches all its units it ceases to function as a formation and the Brigade Officer is removed from play, at least temporarily. It may reform at any time the Player wishes, simply by placing the Officer back on the map with the reforming unit(s).
[16.43] Only one regiment may attach itself to a new Brigade. Thus, a Brigade may add only one new regiment at any given time.
[16.44] In order for a dismounted cavalry unit to function normally, it must attach itself to an Infantry Brigade so as to be able to take orders from an Officer. Dismounted Cavalry not attached to an Infantry Brigade function as if they were out of Effectiveness Radius.
[16.45] A regiment may change assignment only if it is stacked with or adjacent to the officer in command of its new brigade.
[16.46] An officer's Effectiveness Radius never changes, regardless of what is attached to or detached from his brigade.
[16.47] Players should keep track of such switches in assignments on their Roster Sheets. Such reassignments must be clearly noted; if they are not, they are not considered to have occurred.
[16.48] For Players not wishing to be encumbered by this type of rule, it may be ignored. If that is the case, consider this rule optional. However, it does simulate actual events that occurred because of the difficult terrain and the fragmentation of brigade formations.
[16.5] LEADER CASUALTIES
[16.51] Leaders may be killed, wounded or captured as a result of being involved in combat.
[16.52] Whenever a leader is stacked with a unit that suffers a combat casualty (e.g., a "2" loss which is not due to stragglers) the (owning) Player rolls two dice and refers to the Leader Casualty Table (16.56), following the instructions therein.
[16.53] Each leader in a hex is rolled for separately.
[16.54] If a leader becomes a casualty he is immediately removed from the game and placed in the appropriate Leader Casualty Box. If a leader is the only counter in a hex after a melee (or there are other leaders or supply wagons), it may not retreat; it is captured (see Case 11.53).
[16.55] Remember, leaders never rout, although they may retreat with units that do rout.
[16.56] Leader Casualty Table (see charts and tables)
[16.6] BATTLEFIELD PROMOTIONS
Because of casualties incurred in battle, Officers and/or Commanders may have to be replaced, other Leaders being promoted in their place. No command — Brigade, Division, Corps or Army — may ever be without a Leader (if it began the game with one).
[16.61] If a Commander becomes a casualty (or is Captured), he must be replaced by the highest ranking lower-level Commander or, if none are below him, highest-ranking Officer from his command. If there are two Leaders of equal rank, take the Leader with the best rating (total points). If these are again even, the choice is up to the owning Player. Thus, Army Commanders are replaced by a Corps Commander, who would then be replaced by a Division Commander (if present), who would then, in turn, be replaced by a Brigade Officer. A new Leader would then replace the promoted Brigade Officer (see Case 16.63). Players should keep track of all changes on their Roster Sheets.
[16.62] An officer promoted to Commander has a Command Rating of one.
[16.63] If an Officer is removed from his command (either as a casualty or because he has been promoted to Commander) he must be replaced by a Replacement Officer. Replacement Officers are provided, and each Brigade has two Replacement Officers (see Case 31.5). These counters do not enter the game until they replace a departing Officer. Thus, if Col. John Thayer, Officer in command of the Second Brigade of Lew Wallace's Division, is killed, his place will be taken by Colonel Valentine Bausenwein.
[16.64] If all Replacement Officers have been eliminated or promoted, several "Colonel" counters — anonymous officers — are provided for substitution. The Player may take any Colonel Counter available and use it. Colonel counters may never be promoted to Commander status unless all other historical figures have been eliminated (in which case that Player will be in deep trouble anyway).
[16.65] All promotions take place at the end of the Friendly Final Command Phase of the Game-Turn in which the promotion is necessary, regardless of when the leader needing replacement was removed. New leader counters are placed on the game-map with any combat unit in their command.
[16.66] The Confederacy has two Army Commanders: General Albert Sydney Johnston and General P.G.T. Beauregard. Johnston is in actual command, with Beauregard as his second-in-command. If Beauregard is removed and Johnston is still around, no one replaces Beauregard. If Johnston is removed, he is replaced by Beauregard (and still no one replaces Beauregard). However, if both Johnston and Beauregard are eliminated, Major General Braxton Bragg will be placed in command unless he himself has been eliminated.
[16.67] The First Brigade of Hardee's Third Corps had an unusual situation. Brig. General Thomas Hindman was nominally in charge of this Brigade. However, Hardee had detached him for duty with III Corps as a sort of quasi-divisional commander. Thus, Hindman is considered a Commander for the Third Corps (under Hardee) with a Command Rating of "2" at the start. Colonel R.G. Shaver is in command of the First Brigade. If Shaver is eliminated, Hindman will take his place. If Hindman is killed while in status as a Divisional Commander, he is not replaced by anyone.
[16.7] AIDES-DE-CAMP
Aides-de-camp (or simply aides) are used in Union alert system (Section 20.0), which is a standard rule. Aides are captains, lieutenants and political figures (such as Tennessee Governor Isham Harris, Johnston's voluntary aid) who acted as liaison to other units. Aides are, essentially, the only means of communication on the battlefield. Aides are used mostly with the multi-commander optional rules (see Section 27.0). There they enable different Players to communicate. Aides are also the method by which commanders may augment the radii of their officers (in the multi-player game).
[16.71] Each commander in the game has an aide, who starts the game stacked with that commander. These aides are listed in the Orders of Battle, Section 31.0.
[16.72] Aides are similar to leaders only in that they have the same Movement Allowance (twelve). However, they never aid other leaders or combat units. They are simply messengers.
[16.73] Union aides are used in the Union alert system (Section 20.0). Once a commander has been alerted he may send his aid to alert other brigades and/or divisions. When being used to effect an alert, aides move in the Union Picket Phase, which is considered to be their movement for the turn. If an aide starts a Union Picket Phase with an officer or commander that aide may alert such officer or commander.
[16.74] In the optional multi-commander game, aides are used so that individual Players (acting as the actual commanders) may communicate with one another. Orders may be sent from commanders to subordinates only through aides, who carry the messages. There is no other communication. Further elucidation may be obtained in Section 27.0.
[16.75] Also, in the multi-commander game, commanders may augment officers' Effectiveness Radii only by sending an aide with the "message". That is, the aide "carries" the additional points from the commander to the officer. It costs two Movement Points to deliver such message, and an aide may visit as many officers as he can reach in a turn. To transfer these points the aide must start the Player-Turn stacked with the commander. He then, in the Initial Command Phase, moves to each officer he wishes to give points to, as far as his Movement Allowance permits. This is considered to be the aide's movement for the turn. Only if an aide reaches an officer and expends two Movement Points may an officer increase his radius.
[16.76] Aides do not have to remained stacked with combat units. They may move freely and alone.
[16.77] If an Enemy combat unit moves into a hex occupied solely by an aide, that aide is captured. Otherwise, aides alone in a hex may be fired on, as if there were a combat unit in such hex. If the firing unit achieves a result that would normally produce a casualty, then check for leader casualties as per Case 16.5. When firing at an aide alone in a hex, consider the unit density to be "1" (for a - 1 adjustment). Aides stacked with combat units take casualties normally.
Note: Players may at first be puzzled by the difference between the leader and aide rules. Historically, aides were constantly putting their lives in peril in the midst of peril, while no sane commander would go anywhere without his guard.
[16.78] Unless Players are using the multi-commander rules, the Confederate Player does not use his aides. Union aides should be removed (there being no multi-commander game) after all units are alerted.
[16.79] If an aide is eliminated, simply place the eliminated aide counter back on the map two Game-Turns following the elimination, in the Final Command Phase. He is placed with his commander. (His place is taken by someone else, to be sure, but let's not quibble...)
[16.8] GRANT'S BAD LEG (Very Optional Rule)
Several days before the battle the Union Commander, General Grant, suffered an accident. Riding in the slippery mud his horse stumbled and fell on top of him, pinning his leg. The leg was severely bruised (the mud probably saved it from being broken) and, as a result, Grant's mobility was limited for many days after. To account for this, Players should lower Grant's Movement Allowance to '6'.
[17.0] SPECIAL CAVALRY RULES
CASES:
[17.1] CAVALRY RETREAT BEFORE MELEE
Mounted Cavalry units in danger of being Meleed solely by Infantry or Dismounted Cavalry may refuse Melee and retreat one or two hexes. Unlike normal Retreat Before Melee, the Cavalry pays no penalty for this retreat; it does not roll for Rout or undergo Withdrawal Fire. However, if the retreating Cavalry unit enters an Enemy ZOC it must undergo any Retreat Fire mandated by the move. Dismounted cavalry units Retreat Before Melee as if they were infantry.
[17.2] CAVALRY CHARGE
[17.21] Mounted Cavalry units may Charge Enemy units. A Charge gives the Cavalry added Melee Strength. However, Charges may be conducted only over certain types of terrain. Because of the nature of the battlefield there will be few — if any — charges during this battle.
[17.22] Mounted Cavalry may Charge any unit, including other Mounted Cavalry units.
[17.23] The target unit — the unit being charged — may not be in a Swamp hex or any Up slope or Ravine hexsides. Units in a Woods, Peach Orchard or Sunken Road hex may be charged. Cavalry may Charge through any hexes other than Woods, Swamp, or Ravine (hex or hexside). Remember "through" is different from the target hex. The initial starting hex for the Charge may be in any terrain.
[17.24] To mount a Charge, the Cavalry units must begin the Friendly Movement Phase no more than four hexes from the target hex. A Cavalry unit more than four hexes from a target hex may not charge that Player-Turn, although it may melee normally.
[17.25] If the mounted cavalry unit satisfies Case 17.24 it may then move adjacent to the target hex. If it is still adjacent to the target hex at the beginning of the Melee Phase it may charge, conducting the melee with double its Base Strength. Thus, a cavalry unit with a normal strength of four would charge with a strength of eight (see, however, Case 17.33).
[17.26] After completing a charge, Cavalry units are automatically routed, unless they have already been routed in the melee. They may be rallied (Case 13.64).
[17.27] Units being charged (except mounted cavalry) may not retreat before melee. Mounted cavalry units may retreat before melee in the face of an Enemy charge, in which case the charging units are not routed.
[17.3] COMBAT ADJUSTMENTS FOR MOUNTED CAVALRY
[17.31] A Mounted Cavalry unit has a Zone of Control (for the purposes of retarding Enemy Movement and initiating Melee) that comprises all six surrounding hexes. However, for purposes of Fire and being Fired upon, Mounted Cavalry is always considered to be In Column.
[17.32] Mounted Cavalry Meleed by Infantry and/or dismounted Cavalry defends at twice its Base Strength.
[17.33] When one Mounted Cavalry unit Charges another Mounted Cavalry unit they both Melee with their Base Strengths. Neither attacker nor defender doubles its strength.
[17.34] Mounted Cavalry units with Pistols (P) or Shotguns (S) only may fire while Mounted. However, when they do so there is an automatic column adjustment of one to the left, in addition to any other adjustments. Despite the fact that Mounted Cavalry are considered to be in Column, each Mounted cavalry unit may Fire, when Mounted, as if it were in Line (i.e., full strength, plus adjustments through frontal hexsides; see Case 8.18). Mounted Cavalry with Muskets or Carbines may not fire.
[17.4] CAVALRY AND LEADERS
Cavalry units do not have Leaders. Mounted Cavalry functions entirely without benefit of Leaders, and Leaders never add a benefit to any Cavalry unit for any reason. Leaders may stack with cavalry. See also, 17.6.
[17.5] HORSE HOLDERS
Whenever Cavalry units dismount, someone has to hold the horses! Therefore, when computing the Fire Strength of Dismounted Cavalry units, for every unit that has a Base Strength of three or more deduct one strength point from its Fire (not Melee) Strength before computing any other changes. This deduction pertains only to Fire, not to Density, Stacking, etc.
[17.6] USE OF CAVALRY
During testing there arose some problems as to how cavalry was to be used. Several testers grouped their cavalry together in informal "brigades" and used them to spearhead attacks. Clearly this is not a tactic used during the Civil War, and especially not at Shiloh. However, the designer is loathe to restrict players in what they can and cannot do. Therefore, the following is suggested (not mandatory): For the Confederates, until the Brigade that the Cavalry unit is nominally attached to gains contact with the enemy, no Cavalry unit may be more than six hexes away from the Officer for that Brigade. No more than one cavalry unit may be attached to a given brigade. Furthermore, for both sides, no Commanders may be assigned to Cavalry units as Leaders for those units.
[18.0] SPECIAL ARTILLERY RULES
[Counter examples: Silverspar (-/Tenn) 4; L 2.]
CASES:
[18.1] ARTILLERY UNITS
[18.11] Artillery units — or batteries — consist of a Gun Crew (the Counter with the name of the historical unit on it) and the Gun Counter(s), the neutral marker(s), with the number and type of guns on them.
[18.12] The number of guns available to a given crew for any given scenario is listed in Section 32.0. Players may choose to use either a Gun Counter or the Roster Cards.
[18.13] To review, Gun Crews may not engage in Fire Combat except to fire any Guns that they have with them. The crew is not a combat unit unless it has Guns. A Crew counter may defend against Melee or Attack if Engaged. Gun Crew counters are at Full Strength (front side), with a Melee Strength of "1," or at Reduced Strength (flip side), with a Melee Strength of "0." Gun Crews suffering casualties by Fire are Reduced if suffering a one point loss; they are eliminated if suffering a two point loss (or a one point loss while reduced.) A Gun Crew that suffers a "K" or "C" in Melee is eliminated entirely, regardless of status. Gun Crews do not have a Formation; they are considered to be Limbered or Unlimbered, along with their guns. If they are separate from their guns, they are considered to be in column.
[18.14] Gun Counters may not move, unless they are stacked with a Gun Crew (see Case 18.16). Gun Counters without a crew are considered abandoned. Thus a Crew with unlimbered guns that is Routed will leave the guns behind (because they cannot move when they are unlimbered). Abandoned guns are available for anyone who picks them up, but they can only be used by Gun Crews.
[18.15] If a Player wishes to add captured Guns to his batteries he may do so, but only under the following provisions (See, also, Case 23.4):
- He may add only captured Enemy Guns; and
- He may add guns only to those batteries that have lost guns previously; and
- The type of gun added must be the same as at least one of the guns in the battery being added to.
[18.16] Guns may be moved by any type of infantry or cavalry unit. Units being used to move guns (captured or otherwise) are considered to be In Column.
[18.2] RESTRICTIONS ON ARTILLERY MOVEMENT AND FIRE
[18.21] The Movement Allowance of most Guns is listed on the map. This applies to whoever is hauling the guns, be it crew, infantry, or cavalry. (Cavalry hauls in a Dismounted or a mounted state; it is up to the Player). However, certain Union guns have further movement restrictions, as follows:
-
Markgraf's and Madison's Batteries (consisting of 30-pounder Parrots and 24-pounder Siege Guns, respectively) have Movement Allowances of four, not nine, as in most guns. They may not cross any terrain that they cannot afford to cross in terms of Movement Points; and
-
Silfversparre's Battery (of 20-pounder Parrots) had no horses. The guns had to be dragged. Thus, this battery may move only one hex per Game-Turn. Moreover, it may not enter a Swamp hex or cross a Stream (at any point) or an Upslope or Ravine hexside (unless using a road or trail). It may enter Woods.
[18.22] Artillery (all units) may either move or fire in any one Player-Turn. They may not do both. Once an Artillery Battery has fired, it may not move in the same Player-Turn (not Game-Turn). and vice versa. However, if the only "movement" a battery makes is to limber or unlimber, it may fire.
[18.23] Unlimbered Gun counters may never move — they do not Rout when unlimbered, even if a result calls for it. This does not, of course, apply to the Gun Crew, which is treated separately for movement purposes (especially Rout). A battery that receives a result calling for possible Rout always checks for Rout. But it affects only the Crew — not the guns. If the crew is able and willing to take any limbered guns with them, they may do so. However, see Case 18.24.
[18.24] An Unlimbered Battery that receives a "P/R" result on the Fire Combat Results Table checks for Rout or Pin in the normal manner, with one exception. The crew will Rout only if a "6" is rolled; otherwise it is considered to be pinned. This rule applies only to "P/R" results and not to other checks on Morale and Rout.
[18.25] Whenever artillery fires at Infantry or Dismounted Cavalry the strength of the battery (after adjusting for range) is halved, rounding down — with one exception: if all such artillery fire is directed through the frontal hexside of a unit in Column, the fire is not halved (to account for the "bowling ball" effect).
[18.26] Union artillery units that start the game Encamped are in a unique status: they are considered In Park. They remain In Park until alerted. In Park artillery are neither limbered nor unlimbered; for receiving fire they are considered to be Enfiladed regardless of which hex the fire enters. As soon as a battery becomes alerted it must spend four Movement Points to enter either Limbered or Unlimbered status (choice is up to the player). After it spends that cost it is no longer In Park and may then function according to its status. If fired on while In Park, consider the battery Unlimbered.
[18.3] RAPID FIRE (Optional Rule)
Once (per battery) in any given Game-Turn a Player may wish to increase the Firepower of his guns at a cost in ammunition. This is called Rapid Fire. In such a case, he doubles his Gun Strength (before making any other calculations); he also consumes three "rounds" (points) of Ammunition. No Gun Battery may fire Rapid Fire two Game-Turns in succession, and Union Gunboats and Madison's and Markgraf's batteries may not use this rule at all. This rule should be used only if Players are using the ammunition rules.
[18.4] EXPLODING CAISSONS (Optional Rule)
Any time that an artillery battery is hit by Artillery fire and suffers a loss of "1," "2," etc., there is a chance that some ammunition was lost, too. (The shells hit the caissons, blowing up the ammo.) In such case, the Player suffering the loss rolls a second die; if he rolls a "1" then a Caisson has been hit. The Player now rolls one die again; the resultant number is the number of Ammunition Points lost.
[19.0] BATTLE FATIGUE
GENERAL RULE:
Combat is, to put it mildly, hard work. To push a unit — or an individual — too hard is to exhaust him/it to the point of relative uselessness. Fatigue was a major factor in unit performance at Shiloh. Essentially, each unit can perform for only a certain number of Game-Turns. When it has reached this limit it becomes fatigued, and it suffers a concomitant loss of efficiency. Players may recover lost Fatigue Points by resting.
Note: This is another rule which requires extensive record keeping. Dispensing with the rule will result in the game being extremely unfaithful to the battle, and the Confederate Player will win almost every time.
CASES:
[19.1] FATIGUE POINTS
At the beginning of the first day, each infantry unit has a total of 24 Fatigue Points available for use. When a unit has used all 24 points it is fatigued. Players should keep track of the Points on the appropriate Roster Sheets. Again, note that only infantry units may be so affected. Gun crews, cavalry, and leaders are never fatigued.
[19.2] HOW FATIGUE POINTS ARE USED
Each time an infantry unit does any one of the following, it accrues one Fatigue Point:
- expends more than one Movement Point in a Player-Turn; or
- is involved in melee; or
- fires or is fired upon (includes Retreat and Withdrawal Fire); or
- retreats in any way; or
- is routed or remains in routed status at the end of a Player-Turn.
Note that once a unit has reched its total of 24 it does not earn more Fatigue Points. It simply remains fatigued until that total can be reduced (see Case 19.4). A unit may not accrue more than one Fatigue Point per single Game-Turn, regardless of the number of criteria (above) it fulfills that Game-Turn.
[19.3] EFFECTS OF FATIGUE
A fatigued unit may not fire in an Offensive Fire Phase, nor may it perform Retreat Fire. Such a unit may fire in a Defensive Fire Phase, and may perform Withdrawal Fire once per Game-Turn. Its Movement Allowance is halved, but it may always move at least one hex. A fatigued unit may still fall prone and has a Zone of Control for all purposes. A fatigued unit may not enter an Enemy zone of Control voluntarily or initiate melee. If such a unit is engaged in melee, it does so with its Base Strength reduced by one, in addition to any other adjustments. When a fatigued unit is checked for possible rout, the owning Player adds one to the die-roll. Fatigued units have their Morale Rating reduced by one (unless it is already "1").
[19.4] REST
[19.41] Day Turns
For each full Game-Turn in which an unpinned or unrouted unit does not move, change formation or facing, and is not involved in any way in combat (including being retreated into and/or through by Friendly units) and is not checked for stragglers — in essence for each Game-Turn that is does nothing — it recovers one Fatigue Point.
[19.42] Night Turns
-
For each night Game-Turn that unit spends under the conditions listed in Case 19.41 and is in a hex with a Union camp symbol (regardless of type), that unit recover three Fatigue Points.
-
For each night Game-Turn that a unit spends under the conditions listed in Case 19.41 in any hex other than a camp hex — and it is not raining — the unit recovers two Fatigue Points.
During rain Game-Turns (see Case 23.3) only units in camp hexes can recover Fatigue Points.
No unit may recover Points if it is adjacent to an Enemy combat unit.
[19.5] SIMPLIFIED FATIGUE (Optional Rule)
For those Players who are not willing to keep track of each and every unit but are willing to do some bookkeeping, the following easier — albeit less accurate and more abstract — method for denoting the effects of fatigue is offered. The simplified fatigue method uses the same system as the standard method, with one difference: it is applied by brigade, rather than by individual regiment. If any regiment within a brigade performs any of the functions listed in Case 19.2 the brigade accrues a Fatigue Point. When the brigade reaches 24 Fatigue Points it is fatigued, and all infantry units in the brigade are considered fatigued. Likewise, rest applies to a brigade: if at least two-thirds (rounded up) of the regiments are resting, lost Points are regained as per Case 19.4. Players can keep track of Fatigue Points lost and accrued next to the brigade officer's name on the Roster Sheet. Again, this method is easier than the standard rules, because there are fewer units to keep track of; however, accuracy and historicity will suffer to some extent.
[20.0] THE UNION ALERT SYSTEM
COMMENTARY:
Despite the fact that 40,000 troops were moving in on them and that they had seen evidence of such for days, virtually every Union soldier and officer was caught unaware by the Confederate attack. In some places, officers and pickets were able to alert the Union troops in time; in others, the first inkling of any trouble occurred when a wave of Johnny Rebs came screaming out of the woods. That many Union units withstood such a surprise is a credit to a handful of officers, especially General William Sherman and Colonel Everett Peabody. This rule recreates that surprise in a naturalistic manner.
GENERAL RULE:
All Union units are encamped at the start of the game. To be fully effective they must be alerted. Units may be alerted by pickets, aides or by Enemy units (either visual or contact). All Union units are automatically alerted by 0900 hours. Unalerted Union units may not move or fire. The variety of stages or alert may seem complex at first. Players should apply the appropriate rule to the particular situation, rather than learning the rule by rote.
CASES:
[20.1] PICKETS
[20.11] At the beginning of the first day (April 6th) — and any scenario that starts at that time — certain Union brigades have small patrols of troops on picket duty to their front. These brigades are: Peabody (6th Division), Miller (6th Division), and any one brigade from the 5th Division. These pickets are represented by Picket counters (see Sample Units, Case 2.38), and to use them the Union Player must subtract one Strength Point from any one regiment in the brigade from which the picket originated prior to starting play. (Note such subtraction with a Base Strength counter or on the Roster Sheet.) The picket assumes the weaponry of that unit.
[20.12] Pickets act and move as normal infantry, with some exceptions. They may be in Line or Column, and their facing is important in determining whether they can spot Enemy units. They may "see" only through their frontal hexsides. Pickets have no Zone of Control, and Enemy units may move adjacent to and past a Union picket without stopping. However, if a unit does so, it may draw fire (unless the picket has chosen to retreat, see Case 20.13).
[20.13] The first time an Enemy combat unit enters a hex adjacent to a picket's frontal hexside, that picket has the option to retreat one or two hexes (this instance occurs before the picket is revealed, see Case; 20.15). This does not require the expenditure of Movement Points but may only be done this one time. In essence, pickets may use this initial contact retreat like cavalry units. Such a retreat does not draw fire. All subsequent retreats before Melee are treated normally.
[20.14] Pickets have an unusual initial deployment. Pickets are not placed on the game-map at the beginning. The Union Player simply notes where he is placing them in any hex within "x" hexes of their given initial set-up hex (29.5). Then after noting such placement (the counters are not on the game-map), he plans — in advance — the first nine turns of Movement for each Picket — before any other units have been placed on the game-map, (see Case 20.15).
[20.15] Until a picket has spotted or encountered an Enemy unit it may move only one hex per Game-Turn. Thus, all movement planned under 20.14 is for one hex per Game-Turn — never more (although it does not have to move at all!). As soon as an Enemy unit is spotted or encountered, the picket is placed on the game-map, at the instant spotting or encounter would have occurred. When a picket is on the game-map it may move normally.
[20.16] Pickets may see only through their frontal hexsides, so remember that when determining if a picket has spotted an Enemy unit., It is possible for a picket to be passed unseen by an Enemy unit that does not enter one of its frontal hexsides. For this purpose, until pickets are on the game-map they are considered to be In Line.
[20.17] Starting with the 0820 Game-Turn (first day) all pickets not spotted are placed on the map.
[20.18] Players may return pickets to the unit from which they came (see Case 20.11) simply by moving their picket into the same hex as its parent unit. To do so, stacking restrictions may be ignored, but the absorption is made immediately. Players should note that pickets may not be used for combat duty: they either alert other units or they return, if possible, to their regiments. Only if such maneuver is impossible may a picket resort to active combat.
[20.19] Pickets may never be pinned. When they receive a result of P/R they always check for rout ignoring a pinned result. All pickets have a Morale Rating of "4", regardless of the rating of the unit from which they came. Pickets do not have to be rallied by leaders (although they may be, if desired). Pickets are rallied in a fashion similar to cavalry and gun crews (see Case 13.64). See, also, Case 20.25).
[20.2] HOW UNION UNITS BECOME ALERTED
[20.21] At the beginning of the first day all Union units are encamped in unalerted status (see Cases 18.26 and 20.3). All Union units are automatically fully alerted at the beginning of the 0900 turn, First Day.
[20.22] A brigade becomes alerted when a picket belonging to any unit in that brigade begins an Alert Phase stacked with the brigade officer. If this is the first Game-Turn that such a picket is stacked with that officer, the Player must roll one die. If he rolls a 1 through 4 the unit is alerted; if he rolls a 5 or 6 the officer ignores the information. If it is the second Game-Turn (consecutive or not) that the picket is stacked with that officer (at the beginning of the Alert Phase) then the alert is automatic. Under this case, alert means that the units may fire normally. However, they may not move until the Game-Turn following this alert (except to retreat as a result of combat). Thus a brigade alerted by this method in the Alert Phase of 0700 may move in the 0720 Game-Turn. All infantry units in an alerted brigade are alerted (officers included), as well as any artillery or cavalry within three hexes of that leader.
[20.23] A division becomes alerted if a picket belonging to any regiment in that division follows the procedure of Case 20.22, and stacks with a division commander. All restrictions and results are the same, except that all units in the division (including artillery and cavalry) are alerted (not just the brigade). There is one exception to this: Stuart's Brigade (Fifth Division) will not be alerted as a result of Sherman being alerted. Stuart, several miles east of Sherman, must be alerted separately.
[20.24] Any division Commander that has been alerted may use his aide to alert other divisions or brigades as soon as the commander is alerted. Thus the aide may move immediately. The procedure for using aides to alert is the same for using pickets, except that aides may alert any division or brigade. (Pickets may alert only units in their brigade or division; i.e., Buckland's pickets could alert either Buckland or Sherman, but not McDowell or Hildebrand.)
[20.25] A Picket may be used for alert whenever one of the following happens:
-
It sees an Enemy unit of any type. Use the Line of Sight rules to determine whether it can see the Enemy unit; or
-
It is fired on or in any way attacked by an Enemy unit.
When either of these has occurred, the picket is placed on the map and is free to return with the news. Pickets in a state of rout may pass information (see Case 20.27).
[20.26] If an alerted combat unit (a) Spots an Enemy unit (i.e., a visual LOS), or (b) is fired on by an Enemy unit, or (c) is meleed by an Enemy unit, then that Union unit and the units in its brigade become alerted in the Union Player-Turn following such alert mechanism. However, if a unit (brigade) is alerted in this fashion its Movement Allowance is halved (rounding down) for the first Friendly Player-Turn in which it moves. Moreover, for the Player-Turn (Friendly or Enemy) in which the alert actually occurs (a, b, and c, above), the unit(s) is still considered Unalerted.
Example: In Confederate 0700 Player-Turn the 15th Arkansas fires at the encamped 46th Ohio. That unit — and all other units in McDowell's Brigade — remain unalerted for the remainder of the Confederate 0700 Player-Turn. In the Union 0700 Player-Turn the brigade becomes operational, with the provision that its Movement Allowances are halved.
[20.27] If a routed picket or unrouted combat unit that has been alerted moves adjacent to a Friendly, non-alerted unit, that non-alerted unit, and only that unit, becomes alerted in the following Friendly Player-Turn. (This is an inefficient way to alert units.) A picket may alert another picket in this manner.
[20.28] If all brigades in a division have been alerted, the divisional commander is automatically alerted in the Friendly Player-Turn that all such brigades are fully alert.
[20.29] Alerted units must still follow movement and leader effectiveness restrictions. Certain brigades are quite spread out, and it takes some time to get them into an efficient battle/movement formation.
[20.3] EFFECTS OF BEING UNALERTED
Unalerted units may not move or change facing or formation. They may not fire at all, nor may they initiate melee or retreat before melee (they defend against melee normally; see Case 6.42). Moreover, any unalerted unit that suffers a P/R result adds two to his die roll for possible rout. Unalerted units are considered to be In Column, facing in the direction in which they are deployed (however, for artillery, see Case 18.26). Players should note that, in accordance with Cases 20.22 through 20.24, units that have been alerted may still not move until the following Friendly Movement Phase. These units, however, are still alerted. For purposes of alert, artillery and cavalry are considered to be divisional units, and are alerted only if the division is alerted, or if they are within three hexes of an alerted unit. In the latter case, such a unit can be alerted as part of a brigade. Unalerted leaders do not function for command effectiveness purposes.
[21.0] UNION GUNBOATS AND FERRIES
GENERAL RULE:
The Union controls the portion of the Tennessee River on the map, and he has several vessels which he uses for ferrying purposes as well as for combat. Several Union divisions arrive via ferry; some from the east bank of the Tennessee, others from downriver at Savannah. Ferries are used to transport the Union regiments across the river or up the river to Pittsburg Landing, and vice versa. Ferries are the only means by which units may move on or across that river. In addition, the Union player receives two gunboats, paddle-wheeled steamboats with 8" Naval Shellguns with which he may bombard Confederate troops that wander too near the shore. Only the Union Player may use boats. All boats appear per the Reinforcement Schedule or Initial Deployment (Section 29.0).
CASES:
[21.1] UNION GUNBOAT AND FERRY MOVEMENT
[21.11] Union Gunboats and Ferries may enter only Tennessee River hexes and may cross only hexsides that contain at least part of the Tennessee River. They may not cross an all-land hexside, nor may they enter Creeks or inlets through hexsides such as B1949 or A2947.
[21.12] Gunboats and ferries have a Movement Allowance of 40, when they are in steam-up "formation." All ferries and Gunboats that remain in the same hex for more than one Game-Turn are considered docked — unless they are gunboats firing their naval guns. Docked boats may not move and must get steam-up before moving. Each ferry and gunboat counter has a steam-up side and a docked side.
[21.13] It takes one full Game-Turn to change from docked to steam-up. This is done in the Friendly Movement Phase simply by flipping the counter over. In the Game-Turn after a boat attains steam-up it may move.
[21.14] A boat may dock simply by turning over the counter at any time. Ferries transporting troops do not have to dock to debark or embark units. They may remain steam-up as long as they keep moving, as per Case 21.12. Exception: Case 21.24.
[21.15] Each hex of the Tennessee River costs one Movement Point for boats to enter.
[21.16] Ferries and gunboats may enter and leave the map at any point along the river at any time, as long as they have one Movement Point remaining. If they leave they must remain at least one full Game-Turn off the map. They may return any time after that by entering a river hex from the map edge they exited. The Player pays the cost of the first hex they enter, and such entering boat has a Movement Allowance of 40 when it enters.
[21.17] Only one boat counter may occupy a hex at any time.
[21.2] FERRY TRANSPORT
[21.21] Each Union ferry may transport (carry) one regiment, one Supply Wagon, or one battery, plus any number of leaders/aides.
[21.22] Ferries may pick up and debark Union units only in landing hexes. Units may also be taken off the map via the river. But such units may not return during the game at any time.
[21.23] Regardless of the Movement Rate/Allowance of ferries it takes an entire Game-Turn to transport a unit from the east bank landings to the west bank landings (and vice versa). It also takes one full Game-Turn to return (empty). This accounts for loading/unloading and docking time.
[21.24] In order for a land unit to use a ferry it must start a Friendly Movement Phase in a landing hex with a ferry. The ferry may be either steam-up or docked. The land unit is then placed on the ferry and the ferry is moved to its destination. At this point (still the Movement Phase) the land unit is debarked. Such land units may move no further that Game-Turn (unless combat dictates). The ferry may move no further either (although it may remain steam-up if it is going to continue transporting units).
[21.25] Land units may be transported without a leader. But they still must be within the command radius of a Leader to move when they reach the landing hex.
[21.26] Ferries may be fired at by Enemy artillery (only). For density purposes, each ferry has a Defense Strength of 8. For each casualty point suffered (other results have no effect) a point is removed from the Defense Strength. When the ferry's Strength reaches zero the ferry is sunk. Otherwise, reductions applied against the Defense Strength have no effect.
[21.27] Ferries may not be fired on during night Game-Turns, and all firing at ferries is conducted at an automatic adjustment of one column to the left (in favor of the defender). If a ferry sinks it takes with it any troops; otherwise, firing at ferries has no effect on the troops being transported.
[21.28] Ferries may not be captured if they are in steam-up mode. If, however, they are docked and a Confederate unit enters the hex, they are considered destroyed. No Confederate units may ever use ferries for any reason.
[21.3] UNION GUNBOATS
[21.31] Union gunboats are "floating batteries." However, as such, they have a slightly different facing situation, vis a vis their ability to fire. They may fire only through the two "Firing Hexsides" (see following diagram) that face the shore (western bank).
[Diagram: Gunboat Facing For Firing — the gunboat 'Lexington' (5G) with arrows indicating the two firing hexsides facing the shore.]
[21.32] Union gunboats consume no ammunition when firing and need no ammunition. They fire freely.
[21.33] Gunboats may fire at any hex (within range) regardless of terrain. But if terrain does intervene to block the line of sight, elevated fire (and its scatter and reduced effectiveness results) must be used.
[21.34] Gunboats may fire at night in the same fashion as they fire during daylight, except that during night Game-Turns all fire is considered elevated.
[21.35] Confederate units not in Union camps during night Game-Turns that are the subject of a gunboat bombardment (regardless of whether or not there is an actual casualty or adverse result) may not regain any Fatigue Points during that Game-Turn (see Case 19.4).
[21.36] Gunboats may not be used to ferry troops. They may be used to ferry leaders and aides.
[21.37] Gunboats may be fired on by Confederate artillery (only). Fire takes place in the same fashion as per Case 21.26, except that gunboats have a Defense Strength of 10.
[22.0] REINFORCEMENTS
GENERAL RULE:
Reinforcements arrive at various times throughout the game according to the Reinforcement Schedule (Case 29.7 and 29.8). Most of the reinforcements are Union troops and gunboats, although a few Confederate regiments (mostly cavalry) arrive. Reinforcements scheduled to arrive at a Pittsburg Landing hex are simply placed in one of those hexes; units arriving elsewhere are placed in the designated hex and moved onto the map in column.
CASES:
[22.1] ENTERING THE MAP
[22.11] Union reinforcements scheduled to enter the game at Pittsburg Landing may be placed in any of the two landing hexes (B0448 or B0848). They may not move in the Game-Turn of their arrival, and, if necessary, they may exceed stacking limits for that arrival Game-Turn. Such units are considered to be in Line. They may not fire or melee, but may defend if meleed.
[22.12] All other land units arrive at a hex on the edges of the map. All infantry units are considered to enter in column, all cavalry, mounted and all artillery, limbered. Each unit pays the cost of entering the first hex. If more than one unit is to enter, as happens with many Union reinforcements, each unit is considered to be behind the other, entering in a column of march. The first unit pays the terrain cost of the first hex it enters, the second pays the cost of that hex plus one such hex addition, the third two additional, and so on. Simply imagine a column of units entering by means of a series of hexes extended off the game-map.
[22.13] Union gunboats enter the game via river hex B2554 in steam-up condition. They pay the cost of the first hex entered and continue to move.
[22.14] All units entering the map at any hex other than Pittsburg Landing may move and fight normally.
[22.15] Units may not debark at the Upper Landing. Units may be landed only at the two designated landing hexes. (Players should note that Union reinforcements arriving at the landing are theoretically being brought in by ferry. Such ferries are not provided, and they need not use the ferry boats actually supplied.)
[22.16] Units arriving at the landing or being ferried over to the landing use a Fatigue Point for that turn. The Fatigue Level of all arriving reinforcements is listed in 29.7 or 29.8. See, also Case 22.23.
[22.2] BLOCKING ENTRANCE
[22.21] If a Confederate reinforcement entry hex is blocked (by Enemy units or their ZOC's), arriving units may use the unblocked hex closest to the blocked entry hex along the South edge of the game-map.
[22.22] Union reinforcements scheduled to enter at Pittsburg Landing (including those being ferried over from the eastern shore of the Tennessee; i.e., Nelson's Fourth Division) may not enter the game or debark in a Landing hex if that hex is occupied by an Enemy unit or is in an Enemy Zone of Control. If this occurs, but the Landing hex is later cleared of Enemy presence, the reinforcements may then land, one Brigade per Game-Turn for those units brought in late. In essence, if the Confederates control the Landing they stop Union reinforcements from arriving from that direction.
[22.23] If the Confederates hold the Landing, as per Case 22.22, Union reinforcements scheduled to arrive that are blocked by this may be brought in eight hours later in hex B2625. The Union Player must make that decision at the time the reinforcements are supposed to arrive. He may make the decision in secret, but he must write it down as a check. If he chooses not to re-route his reinforcements such reinforcements must wait until the Landing is cleared. Any such reinforcements arrive with a total of 16 Fatigue Points accumulated.
[22.24] For the use of the Snake Creek Bridge and Lew Wallace's Division, see Case 22.3.
[22.3] LEW WALLACE'S DIVISION
Commentary:
Brigadier General Lew Wallace's Division was encamped to the north of Snake Creek, guarding Crump's Landing and Stoney Lonesome. Ordered to march to the battlefield on the morning of the 6th, Wallace took his division down the road leading to the Purdy Bridge over Owl Creek, not being aware of the road towards the battlefield over Snake Creek. Warned by Grant's aides that the Confederates held the Owl Creek bridge Wallace decided to countermarch (rather than simply reverse the order of march, a huge waste of time) to the Snake Creek Bridge. By the time he arrived and crossed the bridge the first day's battle was just about over. For the literary-minded, the unfortunate Wallace is the same Lew Wallace who wrote the famous novel Ben-Hur. (Maybe he should have used chariots...)
[22.31] The Reinforcement schedule shows Wallace's Third Division entering the game via the Snake Creek Bridge (hex B2625) at about 1800. This is the standard reinforcement schedule.
[22.32] If the Confederates have not taken and do not hold the bridge across Owl Creek (hex A3703) by 1200 hours on the first day, the Union Player may choose to bring in Wallace in hex A3801. He may either cross the Purdy bridge or try to fight his way across if held when he arrives. The Union Player must make up his mind by the end of the 1200 Game-Turn, 1st Day (April 6). If the Confederates do hold the bridge at that time Wallace must use the standard reinforcement place (Snake Creek).
[22.33] Regardless of where he enters, Wallace must cross a bridge to enter the game. If the bridge is blocked by a Confederate Unit Wallace must fight his way across, under the provisions of Case 12.33. Remember, fire across a creek is normal (the creek has no effect).
[22.34] The main problem, in terms of the "game," with Wallace's Division is that the Confederate Player has the hindsight of knowing Wallace is arriving — and where. It is next to impossible to simulate this lack of knowledge without making useless speculations. Players will have to live with that fact.
[23.0] NIGHT
GENERAL RULE:
Movement and combat may take place at night, as happened during the actual battle. However, there are restrictions to such combat. Moreover, night is the best time for recovering from the effects of fatigue (especially if a unit is bivouacked in a campsite hex). This latter consideration is affected by the onslaught of a spring downpour that occurred during the night, bringing misery to everyone not under shelter. The number of Game-Turns available to the Players during nighttime have been compressed to simulate the restricted maneuverability; weapon ranges have also been severely restricted because of poor vision. Stragglers may be rounded up at night, and rallying of units is limited to specific instances.
CASES:
[23.1] DURATION OF NIGHT
Sun sets, for game purposes, with the 1840 Game-Turn, which is the first night Turn (6:40 P.M.). The sun rises at the beginning of the 0500 Game-Turn (5 A.M.). All Game-Turns from 1840 through the end of 0400 are night Game-Turns.
[23.2] EFFECTS OF NIGHT
[23.21] Small-arms units may not fire at a range greater than one hex. Fire effectiveness at that range is normal.
[23.22] Artillery units, excluding gunboats, may not fire at a range greater than two hexes and they may not use elevated fire. Gunboats may fire at their normal ranges, using Elevated Fire for all night fire.
[23.23] The Effectiveness Radius of all officers is reduced by one. In addition, officers may not have their Radii increased by their commanders unless they are stacked with that commander. (The aide-de-camp method, Case 16.74, may still be used.)
[23.24] Units may be rallied only if they are stacked with the officer for their brigade or the commander for their division/army. Routed cavalry/artillery use the normal method for rallying.
[23.25] For the effects of night Game-Turns on rest, see Case 19.4.
[23.26] In attempting to recover stragglers, a unit must be at least two hexes distant from an Enemy combat unit at night (not the normal four, as in Case 15.51). All other straggler rules remain in effect.
[23.3] RAIN
During the hours of 2300 through 0200 a heavy rain fell over the battlefield. During these hours (Game-Turns 2300, 2400, 0100, 0200) no unit may move more than one hex and the use of rest is severely restricted (see Case 19.4). Artillery may not fire during rain Game-Turns, although gunboats may. No unit may be rallied during a rain Game-Turn and units may not roll for recovery of stragglers.
[23.4] REFORMING ARTILLERY BATTERIES
[23.41] If an artillery battery has been reduced to two guns or fewer, the Player may transfer those guns to a battery that has been depleted by at least the same number of guns. This may be done only in non-rain night Game-Turns.
[23.42] To reform such batteries, both artillery units must be in the same hex. Simply add the guns to the unit being reformed and remove the remaining crew counter. If — and only if — the crew of the reformed battery has been reduced to half-strength, that removed crew counter may be used to bring the other gun crew up to full strength.
[23.43] No battery may ever have more guns than its original strength.
[23.44] Any unused ammunition is also transferred to the reformed unit, up to a maximum of 10 points.
[23.45] Crews without guns (battery destroyed or captured) may not be reformed in this manner; only partially depleted batteries may be reformed.
[24.0] FIRE CO-ORDINATION (Optional Rule)
GENERAL RULE:
Many units at Shiloh were green, with little tactical training. Thus, efforts to co-ordinate the fire capability of the various units was often unsuccessful. The following rule is optional and will have little effect on the game balance. It does add some nice tactical flavoring and makes units with good morale even more valuable. In essence, the lower the Morale of the units wishing to combine fire at a single target, the less chance they have of doing it effectively. If such units do not coordinate, the fire is conducted at a less effective rate. Presence of a leader and distance between units will have an effect on the chances of coordination.
CASES:
[24.1] HOW TO COORDINATE FIRE
[24.11] Whenever more than one Friendly unit fires at a single target hex (containing one or more Enemy units), the Friendly Player must determine if the fire can be coordinated.
[24.12] For two (or more) units wishing to coordinate (combine their fire strengths) the Player notes their Morale Rating. If either unit is green, check to see what morale will be assigned to that unit. The Player then consults the Fire Coordination Table to see what die-roll he needs to successfully coordinate. For example, a "5" morale unit being combined with a "3" morale unit would require a die-roll of 1 through 5 to coordinate.
[24.13] If there is a leader in either hex, subtract one from the die-roll. (Only one leader is used; more than one has no further effect.)
[24.14] If the firing regiments are from different brigades, add one to the die-roll.
[24.15] Add to the die-roll the shortest possible distance in hexes between the two units, not counting the hexes the units themselves occupy. This route may not pass through Enemy units; it may pass through Enemy ZOC's and impassable terrain. If the route is more than four hexes, fire coordination is impossible and the firing units must suffer the penalty (see Case 24.17).
[24.16] If more than two units wish to combine, check each group of two units separately, starting with the two nearest units. Thus, the Player checks for W and X, then for X and Y, then for Y and Z. He need not check for W and Z; he just must check "down the line."
[Diagram: Coordinate Fire attempt — two hex distance between firing units (2 Confed Bowen R3; 54 Ohio Stuart R6; 55 Ill Stuart R5).]
[24.17] For each group of two units that is uncoordinated, the Player must adjust the total Fire Strength one column to the left, in favor of the defender. Remember, a defending unit may be fired at only once, so the fire strengths are still added together.
Example: The 8th Illinois (5 Strength Points, 2 Morale), the 18th Illinois (4,3) and the 29th Illinois (4,4) occupy hexes A1727, A1828, and A1628 respectively. They wish to fire at a unit in hex A1728. No leader is present, and note that the 29th Illinois is from a different brigade than the other two units. First the 8th and 18th Illinois check for coordination. One is a 2, and the other a 3, and they are one hex apart. Thus, they need a die-roll of "1" to coordinate (1-2 on the table, minus one for the hex distance). A "3" is rolled, so there is no coordination. The Player now checks for the 18th and the 29th. They are a 3 and 4 Morale respectively, with one hex distance and the additional problem of a different brigade. They thus need a die-roll of 1 or 2 (1-4 minus one for the distance and one for different command). The Player rolls a "1" so fire there is coordinated. He thus must adjust his total Fire Strength one column to the left, in addition to any other changes.
[24.18] During night Game-Turns, add two to every coordination die-roll.
[24.19] Fire coordination applies to artillery as well as small arms fire.
[24.2] FIRE COORDINATION TABLE
(see Charts and Tables)
[25.0] ADDITIONAL OPTIONAL RULES
CASES:
[25.1] FOREST FIRES
Here's a bit of fun for the historically-minded. Several times during the battle the intense fire from both sides caused the surrounding woods to catch fire, causing some casualties and, in general, adding to the confusion and panic. The night rains eventually put all fires out.
[25.11] If, at any one time, sixteen (16) or more unadjusted Strength Points (small-arms or artillery) fire into the same woods hex there is a chance of a forest fire in that hex. The firing Player rolls one die. If he rolls a "6," the woods hex has caught fire. Mark the hex with a Forest Fire marker.
[25.12] Forest fires may spread. On every hourly turn (e.g., 0900, 1000, etc.) the Union Player rolls one die for each forest fire hex. If he rolls a "6" for that hex, the fire spreads. He then consults the Scatter Table and rolls another die to determine which hex, in relation to the hex already burning, has also caught fire. If the Scatter Table indicates a hex other than a woods hex keep rolling until a woods hex is attained. If a forest fire hex is not adjacent to another woods hex that fire cannot spread.
[25.13] If, during an hourly Game-Turn, the Union Player rolls for forest fire spread and he rolls a "1" the fire has gone out in that hex. All fires go out at the start of the 2300 Game-Turn, first day.
[25.14] No forest fires may start after the 2300 Game-Turn of the first day. Players ignore this rule after that Game-Turn.
[25.15] Units in a hex that has caught fire must be retreated immediately, regardless of the combat result achieved against them. The Player then checks that unit for rout, adding two to any such die-roll. After such retreat, any casualties are applied. If a unit in a hex on fire cannot be retreated it is eliminated.
[25.16] No unit may ever be moved into a forest fire hex. It is completely impassable.
[25.17] Forest fires block the Line of Sight completely in the hex they occupy, regardless of elevation. Elevated Fire may not be directed through a hex on fire. However, gunboats may fire through (over) such a hex, using the principles of Elevated Fire.
[25.18] A Player may never fire with his units at a hex without Enemy units in an attempt to start a forest fire.
[25.2] WEAPONS EXCHANGE
Throughout the battle units armed with older muskets would take the captured and discarded Enfields left by enemy units and use them for their own. Players may simulate this event, under the following restrictions.
[25.21] Exchanging of weapons may occur only during the Friendly Final Command Phase.
[25.22] Any infantry unit that has not expended any Movement Points or been engaged in combat (i.e., has rested) may perform a weapons exchange, per the following schedule:
-
For every two Enemy R-type Strength Points captured by a unit or stack of units that unit (usually a M) can exchange one M Strength Point for one R; and
-
For every five Enemy R-type Strength Points eliminated (killed) the Friendly player may exchange one M point for one R point.
[25.23] Only unrouted or unpinned infantry units may exchange weapons. Strength Points killed or captured may be used for exchange only once, so the Players will have to keep track of which R-type points have been used. Furthermore, a unit must exchange all of its Base Strength Points at the same time if any exchange for the unit takes place. Example: A two Strength Point M-type unit has not moved or engaged in combat. The Enemy Player has lost a total of 35 R-type Strength Points and has had 11 R-type Strength Points captured. In the Final Command Phase, the Friendly Player makes an exchange: his two M-point unit becomes a two R-point unit. He has used up — by choice — four of the captured R points. He could also have used 10 of the eliminated R points, or 5 of the eliminated R points and two of the captured "R" points. Note This is the type of bookkeeping rule many players abhor, so the rule is optional and recommended for those interested mainly in utmost historicity.
[25.3] MISTAKEN FIRE
One of the great tragedies at Shiloh was the number of men killed by their own troops. The number of instances where regiments — even whole brigades — fired at approaching men that turned out to be their own is depressingly high. Many factors contributed to this: the difficult terrain, the lack of training, and the wide variety of colors used in uniforms (Louisiana regiments wore blue!). Such occurrences are difficult to simulate, except when using hidden movement and game-referees.), etc. The following rules attempt to simulate this for the standard two (or more)-player games.
[25.31] Only green units (whatever their Morale) and infantry units with Morale Ratings of "3" or lower will fire mistakenly. Artillery and cavalry never fire mistakenly.
[25.32] At any time a Friendly unit moves into the ZOC of a Friendly unit (as defined in Case 25.31), the latter may mistakenly fire at that Friendly unit, in a sort of reverse (and perverse) Withdrawal Fire. The firing occurs when the unit enters the hex. When such a moving unit enters such a hex the phasing Player rolls two dice; if he rolls an "11" or "12" the Friendly unit fires at the Friendly moving unit, using normal Fire Combat rules.
[25.33] A Friendly, non-moving unit checks only the first time (hex) that the Friendly moving unit moves into the former's ZOC in that Game-Turn.
[25.34] Mistaken fire applies to any and all types of movement, including retreats and routs!
[25.35] No mistaken fire takes place prior to the 0700 Game-Turn, First Day. Moreover, unalerted Union units are not subject to, nor will they engage in, mistaken fire.
[25.36] Units In Column do not engage in (but are subject to) mistaken fire. Only units in Line will fire mistaken fire.
[26.0] THE ROSTER SHEETS
COMMENTARY:
Many of the rules in Bloody April require the use of bookkeeping; that is, noting necessary information that cannot be shown by the counters on a separate sheet of paper. The Roster Sheets are a handy method of recording this number work. The Roster Sheets also provide handy, concise organization displays of the Players' units. Although use of the Roster Sheets is optional, the Players will find that they are easier to use than scrap paper for the rules that require written records, and easier than using the changing Strength Markers for all the combat units.
GENERAL RULE:
The following rules require bookkeeping: Ammunition (11.0), Green Units (13.1), Stragglers (15.0), Changing Regimental Assignments (16.4) and Fatigue (19.0). It is recommended that the Roster Sheets be used for any or all these rules. The Roster Sheets may also be used in place of Strength Markers and to note battlefield promotions (16.6).
The sample Roster Sheets are blank, except for the Command Staff Sheets. The Players use one sheet for each brigade they control, filling in the spaces where needed. The Players should make photocopies of these sheets before using themso that they have plenty of copies for future use.
CASES:
[26.1] HOW TO USE THE SHEETS
[26.11] Each Player receives a Roster Sheet for his Command Staff. The Command Staff Sheets are already completed, giving all necessary information on all the Commanders, as well as their aides-de-camp.
[26.12] The Union and Confederate Players have different types of Roster Sheets, owing to the peculiarity of their organizations. Players should make sure they are using the correct sheets before filling them out. The major difference between the two is that Confederate Artillery is usually attached directly to the brigade; Union Artillery is separate and is grouped together as part of a division. The sheets reflect this difference. In addition, Players should list unassigned units on a separate Roster Sheet so as to keep easy track of them.
[26.13] Each Roster Sheet contains the following information, to be filled in or used as described below:
Unit: Name of regiment or battery. Players fill in all the regiments/batteries for that brigade in the correct slot.
Roster: This applies to infantry and cavalry only. It is the number of Strength Points at the start of the game. Since every blank Roster Sheet has eight boxes, the Player must cross out the boxes not being used by that particular regiment. For example, the Georgia Dragoons have only one Strength Point. When placing the Georgia Dragoons on the Roster Sheet the Confederate Player would cross out the last seven boxes on that line, leaving one for the Dragoons.
Guns: This applies to the number and type of guns for each battery, to be found on the Order of Battle. There should be a separate line for each type of Gun, with the Player crossing out the unnecessary boxes. Thus, a battery with four TA and two HA would put TA on the first line for that battery, crossing out two boxes, then place HA on the second line, crossing out the four necessary boxes.
Fatigue: Only infantry units have Fatigue Boxes. There are 24 of them. Players place a mark in a Fatigue Box as it earns Fatigue Points. Use a pencil, as you will probably have to erase some of your marks as the game progresses.
Ammunition: Infantry and artillery have ten boxes, cavalry five. These are the maximum amounts available at any time. However, most units do not start with the maximum, so Players should note how many boxes (or Ammunition Rounds) are available and adjust this boxes to that level. For example, a given unit starts the game with only six rounds of ammunition. The Player would then section off the other four boxes to denote that that unit has only six rounds to use. As he adds ammunition to that unit he may adjust his boxes to so indicate.
Morale: The Player notes the Morale Rating of the unit here, mostly for play ease. However, this is a good place to write down the actual morale of green units that have "seen the elephant."
Attached Regiment: If a regiment from another unit, or an unassigned regiment, is attached to that Brigade list it here.
Replacement Officers Available: List all replacement Officers available in case of leader casualty for that brigade, for handy reference.
Notes: Space for any other information.
Division Commander: List the division commander for that unit, if any (Confederates may not have divisional commanders).
Corps Commander: For Confederates only, list the corps commander for that unit.
Commanding Officer: The officer for that brigade is listed here.
[26.14] The Union Player receives separate sheets for each group of divisional artillery and cavalry, while the Confederate Player may list all his cavalry on one sheet (as they operated independently for the most part anyway.)
[26.15] Players should use a different notation to indicate killed, captured or straggler, the last for obvious reasons.
[27.0] MULTI-COMMANDER PLAY
GENERAL RULE:
Bloody April is a game that lends itself quite well to play by a large group of people, whether it be face-to-face or by mail. These groups tend to prefer as complete a simulation as possible, and the following suggestions may be used when engaging in multi-commander play:
-
Use the aides-de-camp as messengers, as well as for the functions suggested in Case 16.74. Players should adopt a historical personality (e.g., Grant, Bragg, Sherman, etc.) and then communicate only through their aides when not in the same hex. There are no set rules for this, except that no message should exceed 10 words (battlefield commanders did not write essays) and that such messages — and orders — should be read only when the aide has arrived. Without a message, the commander continues to do what he was ordered to do at the beginning of the game. Players can expand on this as they wish.
-
Hidden movement is a definite possibility, especially if a referee can be obtained. In such a situation neither player knows where the other is. He must find him, using cavalry and pickets plus the LOS rules. For this purpose the Confederate Player may use two units to supply two pickets. The referee supplies all the information revealed by such scouting. Of course, when units are spotted they can be placed on each Player's map, until they withdraw again. The gamers may even decide to adapt a form of the mistaken fire rule to the uncertainty provided by hidden movement.
-
It is suggested that Players adopt an extended form of command control, a sort of pyramidic hierarchy. Thus, no unit may move or attack unless it is within six hexes (non impassable) of its immediate superior, unless it receives specific orders from an aide to do so. Thus, regiments are controlled under the standard rules by their brigade officers. But the brigade officers must each be within six hexes of their divisional or corps commander for the brigade to function, and so on up to the commanding General. Again, players may experiment with this type of restriction, and it should be used in conjunction with aides.
All other rules are in effect, and everything above is in the way of suggestion. Multi-player get-togethers can provide some exceptional insight into battlefield problems, and Players should feel free to experiment in this area.
[28.0] ADAPTING BLOODY APRIL TO TSS
COMMENTARY:
Bloody April is based on the game system used for SPI's simulation of the Battle of Gettysburg, Terrible Swift Sword. However, as two years have passed since the introduction of TSS, several flaws in the original system have come to light. In addition, comments by Players as well as new trends and thoughts by the designer have produced many minor changes — as well as some major additions — to the original system. For those Players who have both games we have included some suggestions on how to adapt these changes of your TSS game, if you so desire. The major part of this is the completely revised artillery battery OB, provided by Dr. David Martin. It not only corrects many of the mistakes made in the original OB but also allows the player to use the BA Artillery system with his TSS game. Players are free to use whatever changes they wish — or make their own, for that matter; the Sections below are only suggestions. It is felt that none of the changes given below will markedly affect TSS play balance, unless so stated.
CASES:
[28.1] CHANGES TO MOVEMENT-ORIENTED RULES
[28.11] Players should retain the original TSS movement allowances, as the BA allowances were geared to a slightly smaller scale as well as a much different terrain.
[28.12] Players should also retain the TSS Play Sequence, which includes additional Battery Fire Phases. This allows players to engage in artillery duels, which did not occur at Shiloh.
[28.13] Infantry in column should be allowed to move through Woods hexes at the rate given in BA. Artillery should not be so allowed. The reasons for this may seem arbitrary (and, as such, may — and probably will — be ignored by many), but batteries at Gettysburg tended to avoid the woods. They couldn't do that at Shiloh.
[28.14] Bloody April Case 5.17 should be used. Case 5.4 should not.
[28.15] The entire BA system for facing and formation can probably be adapted to TSS, and should be. It is slightly different from the original (TSS). Ignore the Section on encamped units; it does not apply to TSS. Players may experiment with the prone rule (Case 7.4). If they do, then they should ignore the rule in TSS which gives defensive benefits to certain units that can fire when lying down. That is taken into consideration in the prone rule.
[28.16] The new Stacking Restrictions — especially as apply to fire capabilities — should be used if greater accuracy is desired. The BA rules reflect the designer's feeling (prompted by many letters) that in this area players were willing to sacrifice playability for historicity. In any case, the Fire Density Table should be used regardless of which system is preferred.
[28.2] CHANGES TO COMBAT-ORIENTED RULES
[28.21] Retain the TSS Small-Arms Range Table, but use the slightly revised BA Artillery Range Table — especially if Case 28.4 is being used.
[28.22] Use the new elevated artillery fire rule (Case 9.6) as well as Case 9.57, adapting the latter to the terrain types at Gettysburg. This should solve many of the LOS problems brought about by blocking units.
[28.23] If any change is to be made to TSS it should be to incorporate the revised Fire CRT into the game. The TSS Fire CRT is based entirely upon statistics; it does not take into account a great number of items not in the game, and especially the predilection of Players to continue to use units long after they, realistically, should not be so used. The result: grotesquely high casualty rates. The BA Fire CRT (as well as the fatigue system) is adjusted for this and will produce more realistic casualty results.
[28.24] There are some minor adjustments to the withdrawal fire rules; they should be adopted.
[28.25] The BA Ammunition System is virtually completely different from that used in TSS. It is no more accurate; it is just less random, the Players having more control over what they do. Players wishing to use the BA system in TSS will have to wrestle with the problem of the CSA ammunition levels. Redoing that heavy bit of mathematical interpretation is far beyond the extent to which this designer will go to please his public. Sorry.
[28.26] Melee is just about the same in TSS and BA; there have been some rules additions clarifying points brought out in some letters about TSS. There are also some additional adjustments to Melee Strength, such as that for morale. They can be incorporated into TSS easily.
[28.27] The morale rules are adapted from the TSS errata. They are only slightly different in that they have been expanded. it would be good to use the "Seeing the Elephant" rule; however, to do so, one would have to have a list of "green" units at Gettysburg. There weren't that many, and several of the available sources could provide them. It is suggested that Players ignore the stragglers rule given in BA, as the problem was much greater at Shiloh than at Gettysburg. Instead, the straggler rule suggested in the TSS errata can be used.
[28.28] The artillery system has been changed entirely. Players wishing to use the new system should see Case 28.4 in these rules. Remember, Retire By Prolonge is not a rule in Bloody April; it is in TSS. For that matter the same can be said of breastworks, which is the most misused rules section in all of TSS. (TSS is not supposed to be a simulation of Burgoyne's Saratoga campaign.)
[28.3] ADDITIONAL RULES CHANGES
[28.31] The leadership system is somewhat different in BA: gone are the HQ's. I think Players would be better off sticking with the TSS leader rules in TSS. Perhaps they may wish to use the aides-de-camp rule when engaging in multi-Player games. Either make up the names of aides or check the Official Records (ORs) and unit histories. (All aides in Bloody April are historically accurate, with one minor exception where no aide name was given.)
[28.32] One of the most important rules additions in Bloody April (vis a vis TSS) is the extensive Fatigue system. I recommend that it be used in TSS in some form or another. The major problem is in determining the fatigue level of units arriving as reinforcements. As a rule of thumb, for each hour after daybreak that a unit arrives (or fraction thereof) the unit earns two Fatigue Points up to a maximum of 18 for arriving reinforcements. Units arriving after sunset have earned no Fatigue Points until they enter the map.
[28.33] The optional fire-coordination rule is a good one for Players interested in historicity. Use it if desired. The weapons exchange rule is also usable; but the mistaken fire rule should not be used.
[28.34] The Roster Sheet system is, of course, eminently adaptable to TSS and may be used so.
[28.35] To reiterate, Players are free to adapt any of BA's rules to TSS. Some are more usable than others, while a few do not apply at all. A bit of experimentation and discussion will probably enable a group of Players to arrive at those changes they deem best.
[28.4] INDIVIDUAL GUN/BATTERY OB
The following information was compiled entirely by Dr. David Martin, and it is printed with his permission. It lists all guns individually for each battery present at Gettysburg. Players wishing to adapt the new (Bloody April) artillery system to TSS should simply use the information here — and the Gun Counters provided (and/or make up their own). TSS battery counters should represent the crews, and players should therefore ignore the Gun Strengths on those counters when using this sytem. The revised Artillery Range Table should be used, except for the Whitworth guns, which remain the same as in TSS.
Following the list of batteries is a brief note on how the gun strengths was compiled, also printed with permission of Dr. Martin.
Cabell 1 1 NC: 2 x Napoleons, 2 x 3" Rifles [tab] Pulaski: 2 x 3" Rifles, 2 x 10 lb. Parrotts [tab] 1 Rich How: 2 x Napoleons, 2 x 3" Rifles [tab] Troup: 2 x 12 lb. Howitzers, 2 x 10 lb. Parrotts [tab]
Dearing 1 Fauquier: 4 x Napoleons, 2 x 20 lb. Parrotts [tab] Hampden: 2 x Napoleons, 1 x 3" Rifle, 1 x 10 lb. Parrott [tab] Rich Fayette: 2 x Napoleons, 2 x 10 lb. Parrotts, 4 x Napoleons [tab] Blount: 4 x Napoleons [tab]
(The Cabell 1 and Dearing 1 entries above are printed once more, with identical contents, under the next heading.)
[28.41] Confederate Artillery Strength at Gettysburg
Battalion Corps Battery: Strength [Source]
Cabell 1 1 NC: 2 x Napoleons, 2 x 3" Rifles [tab] Pulaski: 2 x 3" Rifles, 2 x 10 lb. Parrotts [tab] 1 Rich How: 2 x Napoleons, 2 x 3" Rifles [tab] Troup: 2 x 12 lb. Howitzers, 2 x 10 lb. Parrotts [tab]
Dearing 1 Fauquier: 4 x Napoleons, 2 x 20 lb. Parrotts [tab] Hampden: 2 x Napoleons, 1 x 3" Rifle, 1 x 10 lb. Parrott [tab] Rich Fayette: 2 x Napoleons, 2 x 10 lb. Parrotts [tab] Blount: 4 x Napoleons [tab]
Henry 1 Branch: 1 x 6 lb. Howitzer, 1 x 12 lb. Howitzer, 3 x Napoleons [tab] German: 4 x Napoleons [tab] Palmetto: 2 x Napoleons, 2 x 10 lb. Parrotts [tab] Rowan: 2 x Napoleons, 2 x 3" Rifles, 2 x 10 lb. Parrotts [tab]
Alexander 1Res Ashland: 2 x Napoleons, 2 x 20 lb. Parrotts [tab] Bedford: 4 x 3" Rifles [tab] Brooks: 4 x 12 lb. Howitzers [tab] Madison: 4 x 24 lb. Howitzers [tab] Parker: 3 x 3" Rifles, 1 x 10 lb. Parrott [tab] Taylor: 4 x Napoleons [tab]
Eshleman 1Res (Wash.La.Art.) 1 co.: 1 x Napoleon [tab] 2 co.: 1 x 12 lb. Howitzer, 2 x Napoleons [tab] 3 co.: 3 x Napoleons [tab] 4 co.: 1 x 12 lb. Howitzer, 2 x Napoleons [tab]
Carter 2 Jeff Davis: 4 x 3" Rifles [tab] King Wm.: 2 x Napoleons, 2 x 10 lb. Parrotts [tab] Morris: 4 x Napoleons [tab] Orange: 2 x 3" Rifles, 2 x 10 lb. Parrotts [tab]
Jones 2 Charlsville: 4 x Napoleons [tab] Courtney: 4 x 3" Rifles [tab] Staunton: 4 x Napoleons [tab] La Gd.: 2 x 3" Rifles, 2 x 10 lb. Parrotts [tab]
Latimer 2 1 Md.: 4 x Napoleons [tab] Alleghany: 2 x Napoleons, 2 x 3" Rifles [tab] Chesapeake: 4 x 10 lb. Parrotts [tab] Lee: 1 x 3" Rifle, 1 x 10 lb. Parrott, 2 x 20 lb. Parrotts [tab]
Dance 2Res 2 Rich How: 4 x 10 lb. Parrotts [tab] 3 Rich How: 4 x 10 lb. Parrotts [tab] Powhatan: 4 x 3" Rifles [tab] 1 Rockbridge: 4 x 20 lb. Parrotts [tab] Salem: 2 x Napoleons, 2 x 3" Rifles [tab]
Nelson 2Res Amherst: 3 x Napoleons, 1 x 3" Rifle [tab] Fluvanna: 3 x Napoleons, 1 x 3" Rifle [tab] Milledge: 2 x 3" Rifles, 1 x 10 lb. Parrott [tab]
Garnett 3 Don'ville: 2 x 3" Rifles, 1 x 10 lb. Parrott [tab] Huger: 2 x Napoleons, 1 x 3" Rifle, 1 x 10 lb. Parrott [tab] Lewis: 2 x Napoleons, 2 x 3" Rifles [tab] Norfolk: 2 x 12 lb. Howitzers, 2 x 3" Rifles [tab]
Poague 3 Albemarle: 1 x 12 lb. Howitzer, 2 x 3" Rifles, 1 x 10 lb. Parrott [tab] Charlotte: 2 x 12 lb. Howitzers, 2 x Napoleons [tab] Madison: 1 x 12 lb. Howitzer, 3 x Napoleons [tab] Brooke: 2 x 12 lb. Howitzers, 2 x Napoleons [tab]
Lane 3 (Sumter Art.) co. A (Ross): 1 x 12 lb. Howitzer, 1 x Napoleon, 1 x 3" Navy Rifle, 3 x 10 lb. Parrotts [tab] co. B (Patterson): 4 x 12 lb. Howitzers, 2 x Napoleons [tab] co. C (Wingfield): 3 x 3" Navy Rifles, 2 x 10 lb. Parrotts [tab]
McIntosh 3Res Danville: 4 x Napoleons [tab] Hardaway: 2 x 3" Rifles, 2 Whitworth Rifles [tab] 2 Rockbridge: 4 x 3" Rifles [tab] Johnson: 2 x Napoleons, 2 x 3" Rifles [tab]
Pegram 3Res Crenshaw: 2 x 12 lb. Howitzers, 2 x Napoleons [tab] Fred'burg: 2 x Napoleons, 2 x 10 lb. Parrotts [tab] Letcher: 2 x Napleons, 2 x 10 b. Parrotts [tab] Pee Dee: 4 x 3" Rifles [tab] Purcell: 4 x Napoleons [tab]
Beckham Cav Breathed: 4 x 3" Rifles [tab] McGregor: 2 x Napoleons, 2 x 3" Rifles [tab] Chew: 4 x Napoleons [GUESS-NO EV.] Griffin: 4 x 10 lb. Parrotts [Rebels 333] Hart: 4 x Blakely Rifles (3.1 inch?) [B&L 3.422] Moorman: 4 x 3" Rifles [GUESS-NO EV.]
Att. to Jenkins Jackson: 2 x 12 lb. Howitzers [tab]
Att. to Imboden McClanahan: 6 x Napoleons [B&L 3.422,425]
[28.42] Union Strength at Gettysburg
Brigade Battery: Strength [Source]
I Corps 2 Maine: 6 x 3" Rifles [OR 27.1.229; G&C 554] 5 Maine: 6 x Napoleons [OR 27.1.230; G&C 554] EL 1NY: 6 x 3" Rifles [OR 27.1.230,355; G&C 554] B 1Penn: 4 x 3" Rifles [OR 27.1.229; G&C 554] B 4US: 6 x Napoleons [OR 27.1.230; G&C 554]
II Corps B 1NY: 4 x 10 lb. Parrotts [OR 27.1.236; G&C 554] A 1RI: 6 x 3" Rifles [OR 27.1.236; G&C 554] B 1RI: 6 x Napoleons [OR 27.1.236; G&C 554] I 1US: 6 x Napoleons [OR 27.1.236; G&C 554] A 4US: 6 x 3" Rifles [OR 27.1.236; G&C 554]
III Corps 2 NJ: 6 x 10 lb. Parrotts [OR 27.1.235; G&C 554] D 1NY: 6 x Napoleons [OR 27.1.234,582; G&C 554] 4 NY: 6 x 10 lb. Parrotts [OR 27.1.234,582; G&C 554] E 1RI: 6 x Napoleons [OR 27.1.235; G&C 554] K 4US: 6 x Napoleons [OR 27.1.235; G&C 554]
V Corps 3 Mass: 6 x Napoleons [OR 27.1.235,236; G&C 555] C 1NY: 4 x 3" Rifles [OR 27.1.236; G&C 555] L 1OHIO: 6 x Napoleons [OR 27.1.236; G&C 555] D 5US: 6 x 10 lb. Parrotts [OR 27.1.236; G&C 555] I 5US: 4 x 3" Rifles [OR 27.1.235,236; G&C 555]
VI Corps 1 Mass: 6 x Napoleons [GNMP (same at Wilderness, OR 36.1.285)] 1 NY: 6 x 3" Rifles [OR 27.1.239; G&C 555] 3 NY: 6 x 10 lb. Parrotts [GNMP] C 1RI: 6 x 10 lb. Parrotts [Guess—strength at Wilderness, OR 36.1.285] G 1RI: 6 x 3" Rifles [Guess—strength at Wilderness, OR 36.1.285] D 2US: 4 x Napoleons [GNMP (same at Wilderness, OR 36.1.285)] G 2US: 6 x Napoleons [GNMP] F 5US: 6 x 10 lb. Parrotts [GNMP]
XI Corps I 1NY: 6 x 3" Rifles [OR 27.1.230,747; G&C 555] 13 NY: 4 x 3" Rifles [OR 27.1.230,747; G&C 555] I 1OHIO: 6 x Napoleons [OR 27.1.229,747; G&C 555] K 1OHIO: 4 x Napoleons [OR 27.1.230,747; G&C 555] G 4US: 6 x Napoleons [OR 27.1.747; G&C 555]
XII Corps M 1NY: 4 x 10 lb. Parrotts [OR 27.1.233,237; G&C 555] E Pa: 6 x 10 lb. Parrotts [OR 27.1.233; G&C 555] F 4US: 6 x Napoleons [OR 27.1.232; G&C 555] K 5US: 4 x Napoleons [OR 27.1.232; G&C 555]
1 Horse Artillery 9 MICH: 4 x 10 lb. Parrotts, 2 Howitzers (12 lb.?) [GNMP] 6 NY: 6 x 3" Rifles [OR 27.1.1023-26] BL 2US: 6 x 3" Rifles [GNMP (same at Wilderness, OR 36.1.285)] M 2US: 6 x 3" Rifles [GNMP (same at Wilderness, OR 36.1.285)] E 4US: 4 x 3" Rifles [GNMP]
2 Horse Artillery EG 1US: 4 x Napoleons [GNMP] K 1US: 6 x 3" Rifles [GNMP (same at Wilderness, OR 36.1.285)] A 2US: 6 x 3" Rifles [OR 27.1.229; G&C 556] C 3US: 6 x 3" Rifles [GNMP (same at Wilderness, OR 36.1.285)]
Attached to Cav. H 3PennHeavy (section): 2 x 3" Rifles [OR 27.1.833; G&C 556]
1 Regular H 1US: 6 x Napoleons [OR 27.1.233; G&C 553] FK 3US: 6 x Napoleons [OR 27.1.235; G&C 553] C 4US: 6 x Napoleons [OR 27.1.235; G&C 553] C 5US: 6 x Napoleons [OR 27.1.235; G&C 553]
1 Volunteer 5 Mass: 6 x 3" Rifles [OR 27.1.235; G&C 553] 9 Mass: 6 x Napoleons [GNMP; G&C 553] 15 NY: 4 x Napoleons [OR 27.1.235; G&C 553] CF Penn: 6 x 3" Rifles [OR 27.1.235;G&C 553; GNMP]
2 Volunteer B 1ConnHeavy**: 4 x 4½" Rifles [OR 27.1.872; G&C 554] M 1ConnHeavy**: 4 x 4½" Rifles [OR 27.1.872; G&C 554] 2 Conn: 4 x James Rifles, 2 x 12 lb. Howitzers [OR 227.1.235; G&C 554] 5 NY: 6 x 20 lb. Parrotts [OR 27.1.233; G&C 554]
3 Volunteer 1 NH: 6 x 3" Rifles [OR 27.1.233,749; G&C 554; GNMP] H 1OHIO: 6 x 3" Rifles [OR 27.1.233,749; G&C 554] FG 1Penn: 6 x 3" Rifles [OR 27.1.238; G&C 554] C WVa: 4 x 10 lb. Parrotts [OR 27.1.233; G&C 554; GNMP]
4 Volunteer 6 Maine: 6 x Napoleons [G&C 554 (same at Wilderness, OR 36.1.284)] A Md: 6 x 3" Rifles [OR 27.1.237; G&C 554; GNMP] 1 NJ: 6 x 10 lb. Parrotts [OR 27.1.239; G&C 554] G 1NY: 6 x Napoleons [OR 27.1.235; G&C 554] K 1NY: 6 x 3" Rifles [OR 27.1.239; G&C 554]
**Left at Westminster and Taneytown and not engaged.
[28.43] Source Abbreviations
Union G&C: Grape and Canister, L. VanLoan Naisawald (1960) GNMP: Gettysburg National Military Park research staff OR: Official Records of the War of the Rebellion See also The Guns at Gettysburg, Fairfax Downey (1958).
Confederate B&L Battles and Leaders of the Civil War, Popular Edition (1956) Rebels Here Come the Rebels, Wilbur S. Nye (1965) tab iron tablets erected on the battlefield See also The Long Arm of Lee, Jennings Cropper Wise (1915).
[28.44] The Confederate battery strengths, with the exception of the horse artillery, are taken entirely from the iron tablets which have been erected on the battlefield to honor each battery. These numbers differ only slightly from a list published in OR 27.2.355-356 as an addendum to General William Pendleton's (Chief of Artillery, Army of Northern Virginia) report on Gettysburg. Pendleton's list, however, is undated, and contains only battalion totals; thus it would be of only limited use in establishing individual battery composition, could its accuracy be verified. Determining the composition of the eight batteries of horse artillery is most difficult. Three (Breathed, McGregor, Jackson) are given by the tablets. Imboden in an article in Battles and Leaders 3.420-429 says Hart had four guns (perhaps the four Blakely Rifles of undetermined calibre originally bought for the battery by Wade Hampton — see The Guns at Gettysburg 188), and McClanahan had six guns (some of which were Napoleons, as they were firing canister in B&L 3.425). The composition of Griffin is from Nye's Here Come the Rebels. I could find no information concerning Chew and Moorman, and assign them each four guns (the average Confederate battery strength), and make one battery Napoleons and the other 3" Rifles (the most common cannon types). Additional sources may furnish more information.
The Union battery strengths are based primarily on those given in General Henry J. Hunt's (Chief of Artillery, Army of the Potomac) report on Gettysburg in OR 27.1.228-243 and the tabulation by Naisawald in Grape and Canister 553-556. Where these two sources differed in number or type of guns, I referred to the individual battery reports in OR, and to the research staff of the Gettysburg National Military Park for verification. Determining the composition of the unengaged VI Corps batteries and some batteries of the Horse Artillery was at times difficult. In these cases a comparison with the strengths of the spring 1864 campaign was used. Educated guesses (based on 1864 composition) were used on only two batteries: C 1RI and G 1RI of the VI Corps.
[29.0] THE SCENARIOS
COMMENTARY:
One of the major problems in designing a simulation of the Battle of Shiloh is that it does not lend itself easily to a scenario type treatment. There are few places/times where a designer can stop the action and recreate a specific incident. Moreover, the natural division of the battle into two days still is of no avail, as, militarily and strategically, the second day's outcome is a foregone conclusion given the strengths and dispositions of both sides. Therefore we have decided to use the scenarios to explore the hypothetical possibilities at Shiloh, to see what would have happened if certain events had not occurred or certain troops had or had not been present. Just possibly these hypothetical scenarios may gain us some insight into questions that have been puzzling us for years.
CASES:
[29.1] THE CONFEDERATE ATTACK
This scenario recreates the opening attack on the first day of the battle. It is the only "short" scenario in the game, and it can be played in about 8-10 hours, excluding set-up time. The situation is one in which the Confederate Player must exploit his initial surprise and use that impetus to push the Union Army as far back as possible. The Union Player must regroup and attempt to stop a force that is, at times, almost three times as large as that available to him. This scenario is recommended for two players or solitaire play.
[29.11] The scenario starts with the 0540 Game-Turn, April 6. It ends with the conclusion of the 1000 Game-Turn of the same day.
[29.12] Both Players use the Initial Deployments listed in Cases 29.5 and 29.6. Any Reinforcements (Cases 29.7 and 29.8) that arrive between 0540 and 0940 of the First Day may be taken.
[29.13] Consult Case 30.2 for Victory Conditions.
[29.14] Players may use whatever optional rules they wish, and all standard rules apply. Players may not use the What-If Scenario changes for this scenario.
[29.2] THE FIRST DAY
Historically, the Battle of Shiloh was decided on the first day. The Confederate failure to drive the Union army back across (or into) the Tennessee by sundown proved their undoing, for the next morning saw a revitalized and reinforced Union Army much superior to its worn-out Southern counterpart. The conclusion on the Second Day was foregone — at least historically. Therefore, the First Day scenario might be considered the "important" scenario for Bloody April. Both players know clearly what their tasks are; whether they can accomplish them using simulation gaming is all about.
[29.21] The scenario starts with the 0540 Game-Turn on the first day (April 6). It ends with the conclusion of the 1820 Game-Turn, same day. A complete game of the first day should take at least 24 hours to play.
[29.22] Both Players use the Initial Deployments and Reinforcement Schedules given in Cases 29.5 through 29.8. Victory Conditions are given in Case 30.1.
[29.23] All optional rules are available. However, the hypothetical situations do not apply here.
[29.3] THE BATTLE OF SHILOH
Quite simply, this scenario covers the entire course of the battle. It starts with the 0540 Game-Turn, April 6, and runs to the conclusion of the 1700 Game-Turn, April 7. It is a long game, taking anywhere from 40 to 72 hours, depending on the Players and their sense of organization. Initial Deployments and Reinforcements are as given in Cases 29.5 through 29.8, and all optional rules may be used, if the players so desire. Victory conditions are the same as for The First Day (Case 30.1). However, the use of the Hypothetical Situations (Case 29.4) can change the victory schedule somewhat. A complete description of the actual battle can be found in the accompanying historical booklet. Players can use that booklet and the map therein to check their progress against that of history.
[29.4] HYPOTHETICAL SCENARIOS
Each of the situations given below hypothesizes an event that might have taken place but did not. Players may use the hypothetical situations to see what could have happened if those events had occured. Players are also free to conjure up their own possibilities, as the game lends itself quite easily to that sort of historical curiosity. Players may choose any of the Hypothetical options by mutual consent, or they may use the Hypothetical Table (29.44). The latter manages to take away a great deal of the "gamer's hindsight" that is an unfortunate but indelible part of gaming. Hypothetical situations are to be used only with a full battle game (both days). Adjustments to the levels of Victory (Section 30.0) are given in Case 29.43, so that the effect of these changes is accounted for in terms of play balance.
[29.41] Confederate Hypothetical Situations
Situation I: Confederate Free Deployment
The initial deployment of the Army of the Mississippi was devised not by Johnston but by his second-in-command, General Beauregard. An ardent student of Napoleon, Beauregard sent in the Confederate Army in a monstrous Line Abreast, a formation right out of Waterloo (literally). As most players will soon see, given the terrain and the communications problems, that tactic was a disaster for the South. Chain of command disappeared in the woods, and units disintegrated trying to keep a Line in the thick undergrowth. Divisions and Corps Commanders lost track of their far wings and the result was chaos.
Therefore, in Free Deployment, the Confederate Player may deploy his I, II, and III Corps in any way he sees fit, as long as no unit (other than the two units assigned to picket duty: 3rd Mississippi and 15th Arkansas, or any two units so designated by the Confederate player) moves any further north/northeast than the original/historical line of hexes (See Historical Initial Deployment Case 29.7). The Reserve Corps still arrives in historical fashion. Victory adjustment of minus one level.
Situations II/III/IV: Van Dorn's Army of the Trans-Mississippi
The flamboyant, but erratic, Confederate General, Earl Van Dorn, commanded a force of over 12,000 men in Arkansas. Johnston had ordered Van Dorn to proceed towards Corinth (and the gathering Confederate army) for use as a fifth corps. Van Dorn, however, became embroiled in the Battle of Pea Ridge and didn't reach Tennessee until days after Shiloh had taken place. In Bloody April we have included most of Van Dorn's Trans-Mississippi Command. (Several small detachments and local units were not included.) However, it is virtually certain that not all of these units would have travelled with Van Dorn had he marched directly to join Johnston at Corinth. Most certainly, the Indian Territory Army would have stayed West of the Mississippi (and it did).
The battles of Iuka and Corinth, in which much of this command fought, give some indication as to what was available; however, by the time of those battles Van Dorn's command had seen much re-organization, and units had assumed different names, etc. Therefore, for closer (if hypothetical) historicity players should refrain from using Pike's Indian Army when using this What-If. However, for a Confederate Player who cannot resist using these remarkable units, please note that all Indian units have an asterisked () Morale Rating. The () means that if an Indian unit is fired on by Enemy artillery while the Indian unit is in clear or Field terrain, and that Indian unit suffers any form of casualty, rout, pin, etc., that Indian regiment automatically routs (so ignore the Pin result) after casualties are taken. Such routed Indian unit moves four hexes, regardless of terrain, until rallied. It can be rallied only by rolling a "6" on the die during the Initial Command Phase — and only Pike can rally that unit. (This rule may seem somewhat overly severe, but it reflects Indian tactics and morale at Pea Ridge; they hated artillery.) Below are the following situations in which Van Dorn can be used:
Situation II. The Command arrives at 0900 hours, April 6, entering through hex A/0102 and/or A0103. All units have used 10 Fatigue Points and all are carrying 8 rounds of ammo, except for cavalry, which carry 4. (The latter applies only to those cavalry not specifically stated as fighting dismounted.) Van Dorn's supply wagon has 200 rounds. Victory adjustment of minus three levels.
Note: In any situation in which there is a victory adjustment of three levels (either plus or minus), the Player against whom the adjustment is assessed cannot win in game terms. When using victory adjustments, Players should keep in mind that they are playing to learn the historical lessons of the battle, not to win the game.
Situation III. The Command arrives at 0600, April 7, same entrance hexes and ammunition levels. No Fatigue Points assessed. Victory adjustment of minus one level.
Situation IV. The Trans-Mississippi Command uses a variable arrival schedule, as per the following table. The Confederate Player takes eight Strength Point markers, so that he has enough markers to give him a 1-8 possibility; he draws one blind. He then refers to the Trans-Mississippi Command Arrival Table for the result:
Trans-Mississippi Command Variable Arrival
| Chit | Arrival Time | Fatigue | Victory Adjust |
|---|---|---|---|
| 1 | 4/6, 0900 | 10 | -3 |
| 2 | 4/6, 1100 | 12 | -3 |
| 3 | 4/6, 1200 | 13 | -2 |
| 4 | 4/6, 1300 | 14 | -2 |
| 5 | 4/6, 1400 | 15 | -2 |
| 6 | 4/6, 1500 | 16 | -2 |
| 7 | 4/6, 1600 |
[29.42] Union Hypothetical Situations
Situation I: No Surprise
In this situation, the Union Player retains his historical initial deployment. However, all Union units are considered alerted. Even though alerted, no Union unit may move until the 0700 Game-Turn, or until its brigade is attacked, whichever occurs first. Victory adjustment of minus one level.
Situation II: Wallace Takes the Right Road
This situation presupposes that General Lew Wallace scouted his position at Crump's Landing correctly and was aware of the road to the Snake Creek Bridge. If this situation is used, Wallace's Third Division arrives via the Snake Creek Bridge at 1200 hours, April 6. Victory adjustment of minus one level.
Situation III: Union Free Deployment
Actually, the situation title is somewhat misleading, as the Union Player is not entirely free to set his units up as he wishes. However, the Union Player does have five divisions. One division (any one) must be set up, in any fashion desired, within 10 hexes of B1338. The other four divisions may be deployed anywhere, as long as no Union unit is deployed further south/southwest than the original deployment (historical). All non-attached units are deployed historically. Unless this situation is used in conjunction with Union Situation II, all Union units are still considered unalerted. Victory adjustment minus two levels.
Situation IV: Buell Fails to Arrive
This situation presupposes that Major General Buell had even more trouble crossing Tennessee and was even more cautious than usual. As a result, he fails to arrive with his Army. The Union Player receives no reinforcements from The Army of the Ohio. Victory adjustment plus two levels.
Situation V: Buell Arrives Early
This is self-explanatory and works as follows: All units in the IV/Ohio push their arrival forward by four hours (or less, if the Union Player wishes to use a little bluffing.) Units of the V/Ohio push their arrival forward four hours also, but those of the II and VI/Ohio push their arrival forward by two hours only. Victory adjustment of minus two levels.
Situation VI: Buell Arrives Much Later
Again, this is self-explanatory. The IV/Ohio and Buell arrive at 0600-0700 hours, April 7. The V/Ohio arrives 0900-0940 hours. The II/Ohio arrives 11-1200 hours and the VI/Ohio does not arrive at all. Victory adjustment of plus one level.
[29.43] Players will note that each situation has a Victory Adjustment. This is an adjustment of the level of Victory vis a vis that Player. Thus, if the Confederate Player uses Confederate Situation III and he wins, what would normally have been a Confederate Tactical Victory (see Case 30.1) is dropped by one level, to Union Marginal Victory. Players should note that these adjustments are to see who "wins" the game; they are for play purposes only. The Victory Levels in 30.1 reflect actual historical conditions (more or less) and adding different situations will not change what has to be accomplished historically.
[29.44] The Random Hypothetical Situation Table
Players may use this table to throw a little spice into the proceedings. Prior to setting up the game both Players each place eight Strength markers with numbers 1-8 on them into a receptacle. Each Player picks one marker (using some form of notation to distinguish which side of the marker is being used and which side is to be ignored) and refers to the Table, below. He holds onto that marker as proof of his choice, which remains secret until revealed. The marker/number picked corresponds to the Hypothetical Situation(s) that the Player must follow. He will, of course, adjust his victory levels accordingly. If the situation calls for later/earlier arrivals, etc., the Player may delay these even further to confuse his opponent.
Confederate Random Situation Table
| Marker | Situation |
|---|---|
| 1 | I |
| 2 | II |
| 3 | III |
| 4 | IV |
| 5 | I and III |
| 6 | I and IV |
| 7 | I |
| 8 | Use Historical Situation |
Union Hypothetical Situation Table
| Marker | Situation |
|---|---|
| 1 | I |
| 2 | II |
| 3 | III |
| 4 | I and III |
| 5 | IV |
| 6 | V |
| 7 | VI |
| 8 | Use Historical Situation |
[29.45] If the Players are using the Random Hypothetical Situation Tables — and only if they are using those tables — the Confederate Player has the option of Early Withdrawal. This is a strategic option that the Confederate Player will use if he thinks that his army has done well but cannot fight any longer. The Confederate Player, at any time starting with the April 6 1700 Game-Turn until — and through — the 1900 Game-Turn may end the game by stating he withdraws. He cannot withdraw after 1900, April 6. He must make this statement before Victory Points are counted. If the Confederate Player chooses to withdraw, he adjusts his Victory Level by minus one.
[29.5] INITIAL UNION DEPLOYMENT
All Union units are deployed encamped. Most combat units are deployed in Union Camp hexes, except for a few batteries near the Landing. All combat units list the hex as well as the facing of all units in that hex, using the Scatter Diagram. Thus a unit with a deployment of A2223/6 is on Map A, in hex 2223, facing towards hexside "6" (west). Union units are listed, below, by divisions.
First Division/Tenn
| Hex/Facing | Unit |
|---|---|
| B0325/1 | 11 Iowa, Col. Hare |
| B0525/1 | 18 Illinois |
| B0825/1 | 8 Illinois |
| A3822/1 | 11 Illinois |
| A3622/1 | 20 Illinois; Col. Marsh |
| A3522/1 | 48 Illinois |
| A3321/1 | 45 Illinois |
| A2723/6 | 49 Illinois |
| A2821/6 | 43 Illinois; Col. Raith |
| A2921/6 | 29 Illinois |
| A2920/6 | 17 Illinois |
| A3121 |
Second Division/Tenn
| Hex/Facing | Unit |
|---|---|
| B0939/1 | 2 Iowa |
| B0941/2 | 14 Iowa; Col. Tuttle |
| B1142/2 | 7 Iowa |
| B1243/2 | 12 Iowa |
| B1332/1 | 81 Ohio |
| B1133/1 | 14 Missouri |
| B1023/6 | 9 Illinois |
| B1234/1 | 12 Illinois; Gen McArthur |
| B1236/4 | 13 Missouri |
| B1037/4 | 52 Illinois; Col. Sweeny |
| B1237/4 | 7 Illinois |
| B1338/4 |
Fourth Division/Tenn
| Hex/Facing | Unit |
|---|---|
| B0233/2 | 15 Illinois |
| B0634/2 | 14 Illinois |
| B0636/2 | 46 Illinois |
| B0638/2 | 25 Indiana; Col. Veatch |
| A3136/1 | 28 Illinois |
| A3236/1 | 32 Illinois |
| A3435/6 | 41 Illinois |
| A3535/6 | 3 Iowa; Col. Williams |
| A3538/1 | 31 Indiana |
| A3539/6 | 44 Indiana; Brig. Gen. Lauman |
| A3540/6 | 17 Kentucky |
| A3441/6 |
Fifth Division/Tenn
| Hex/Facing | Unit |
|---|---|
| A3308/6 | 6 Iowa |
| A3209/6 | 46 Ohio |
| A3211/6 | 40 Illinois |
| A3412 | Col. McDowell |
| A2117/1 | 53 Ohio |
| A2518/6 | 57 Ohio |
| A2517/1 | 77 Ohio; Col. Hilderbrand |
| A2615/6 | 70 Ohio |
| A2714/6 | 48 Ohio |
| A2812/6 | 72 Ohio; Col. Buckland |
| A2718/5 | Taylor's Battery |
| A2318/6 |
Sixth Division/Tenn
| Hex/Facing | Unit |
|---|---|
| A1726/6 | 21 Missouri |
| A1626/6 | 16 Wisconsin |
| A1924/6 | 12 Michigan |
| A2023/6 | 25 Missouri; Col. Peabody |
| A1427/6 | 18 Missouri; Col. Miller |
| A1428/6 | 61 Illinois |
| A1429/6 | 18 Wisconsin |
| B0747/1 | 16 Iowa |
| A1827/5 | Hickenlooper's Battery |
| A1928/5 | Munch's Battery |
| A1929/6 | 1/2, 11 Illinois Cavalry; Brig. Gen. Prentiss; Lieut. Moore (Aide); 6th Division Supply Wagon. |
Unassigned
| Hex/Facing | Unit |
|---|---|
| B0748/1 | 15 Michigan |
| B0447/1 | Madison's Battery; Markgraff's Battery |
| B0546/6 | Powell's Battery |
| Any Landing Hex | Ferries Warner and Minnehaha |
Union Picket Deployment
-
The picket from Peabody's Brigade deploys in any hex within two hexes of A1314. (Historically, it would set-up in A1312.)
-
The picket from Miller's Brigade sets up anywhere within three hexes of A1517.
-
The picket from the 5th Division may deploy anywhere within five hexes of the Commanding Officer of the brigade from which it was drawn.
[29.6] CONFEDERATE INITIAL DEPLOYMENT
At the start of the game (first day, 0540) the CSA III and II Corps are deployed in Napoleonic battle line, entering from the SW corner of the map. Behind them, entering in Columns of Brigades, are the I Corps and, afterwards, the Reserve Corps. The III and II Corps units may start with any fac- ing they wish, and the player may place his Officers and Commanders with any units or in any hex behind the first line of units that he wishes. III and II Corps units are deployed as follows:
| Hex | Units |
|---|---|
| A1309 | 3rd Miss (Wood) |
| A1504 | Bates (2nd) Tenn (Cleburne) & 24 Tenn (Cleburne) |
| A1404 | 35 Tenn (Cleburne) and 6 Miss (Cleburne) |
| A1305 | 23 Tenn (Cleburne) |
| A1506 | 15 Ark (Cleburne) |
| A1403 | Trigg's and Calvert's Batteries |
| A1304 | Hubbard's and Robert's Batteries |
| A1205 | 27 Tenn (Wood) and 16 Ala (Wood) |
| A1106 | 44 Tenn (Wood) and 9/14 Ark (Wood) |
| A1006 | 8 Ark (Wood) and 55 Tenn (Wood) |
| A1005 | Harper's Battery |
The following officers and commanders (with their Aides) plus all Supply Wagons for the Corps are stacked with or within one hex of the above units: Gladden, Shaver, Wood, Cleburne (Officers); Hardee, Hindman (Commanders plus Aides, if any).
| Hex | Units |
|---|---|
| A1501 | 38 Tenn (Pond) |
| A1401 | Crescent La (Pond) |
| A1302 | 18 La (Pond) |
| A1202 | Orleans Grd (Pond) and 16 La (Pond) |
| A1301 | Ketchum's Battery |
| A1201 | Jenkins Alabama Cavalry |
| A1103 | 20 La and 9 Texas (Anderson) |
| A1003 | 1 Fla Bn (Andrsn), Conf Gds Rsp (Andrsn) and 17 La (Andrsn) |
| A1002 | Washington (La) Battery |
| A0904 | 4 La (Gibson) |
| A0804 | 13 La (Gibson) |
| A0705 |
The following Officers and Commanders (with their Aides) plus all Supply Wagons for the Corps are stacked with or within one hex of the above units: Pond, Anderson, Gibson, Jackson, Chalmers (Officers); Johnston, Beauregard, Bragg, Ruggles, Withers (Commanders, plus Aides)
All batteries are Limbered; no Confederate unit — except for the 3rd Miss (Wood) and 15 Ark (Cleburne) Regiments — may move until 0600. The above two regiments may move/fight normally the first turn (0540).
The Confederate Player should note that two hexes (A1003 and A0307) are slightly overstacked. This is allowed for the set-up. However, once the CSA begins to move, all stacking restrictions apply. Infantry units may adopt either Line or Column formation in the 0600 turn at no cost to do either. Cavalry are all Mounted.
[29.7] CONFEDERATE REINFORCEMENT SCHEDULE
[29.71] The two additional Confederate Corps (I and Reserve) arrive as follows:
-
On Game-Turn 0600, April 6, the I Corps (Polk) arrives in a column of brigades through hexes A0102 and/or A0103. All units arrive in column, in the following Brigade order: Stewart, Russell, Johnson, and Stephens. The 1st Mississippi Cavalry is with Johnson's Brigade; Brewer's Mississippi and Alabama Cavalry Battalion is with Russell's Brigade. All batteries and Leaders are with their respective assigned units. No Fatigue points assessed; ammunition is assigned as per Case 29.9.
-
On Game-Turn 0700, April 6, the Reserve Corps (Breckinridge) enters the game in the same fashion and location as I Corps, in the following order: Trabue, Bowen, and Statham (minus the 19th Tennessee Regiment). Two Fatigue Points are assessed to each unit.
[29.72] The remainder of the Confederate units arrive as follows (Turn: Unit [Hex/Fatigue Level]):
| Turn | Unit [Hex/Fatigue Level] |
|---|---|
| 4/6, 1300: | Georgia Dragoons [A0144/NA]; Adam's Miss Cavalry [A0144/NA] |
| 4/6, 1100: | Wharton's Texas Rangers [A3801/NA] |
| 4/6, 1400: | Forrest's 1st Tenn Cav [A0135/NA]; 19th Tennessee [A0135/10] |
| 4/7, 0600: | 47th Tennessee [A0102/0] |
[29.8] UNION REINFORCEMENT SCHEDULE
(Turn: Unit [Hex/Fatigue Level])
| Turn | Unit [Hex/Fatigue Level] |
|---|---|
| 4/6, 0740 | 23rd Missouri (may be assigned anywhere) [Landing Hex/2] |
| 4/6, 0800 | Bouton's Battery [Landing Hex/NA] |
| 4/6, 0820: | Silfversparre's Battery [Landing Hex/NA] |
| 4/6, 0840 | 15th Iowa (may be assigned anywhere) [Landing Hex/3] |
| 4/6, 0920: | Grant; Steamboat "Tigress" [Landing Hex/NA] |
| 4/6, 1440: | Buell [0754/NA]; Gunboat "Tyler" (steam up) [B3554/NA] |
| 4/6, 1640: | 10/4/Ohio Brigade [B0754/16] |
| 4/6, 1720: | 22/4/Ohio Brigade [B0754/17]; Gunboat "Lexington" (steam up) [B3554/NA] |
| 4/6, 1740: | 1/3/Tenn Brigade; Thompson's Battery [B2625/14] |
| 4/6, 1820: | 2/3/Tenn Brigade [B2625/12] |
[29.9] AMMUNITION LEVELS
Confederate
All batteries have 10 rounds.
All cavalry units have 5 rounds.
All infantry regiments, etc. have 10 rounds, except for Jackson's Brigade (3/2/II), which has 5 rounds.
All above rates also apply to arriving reinforcements.
Union
All batteries have 6 rounds.
All cavalry have 5 rounds.
All infantry regiments, except as listed below, start with 6 rounds.
-
Infantry in Prentiss's Division (6th) start with 4 rounds.
-
18 Wisconsin (2/6/T) starts with 2 rounds.
-
15th Michigan (unassigned) starts with 0 rounds. It may not pick up any ammunition until it is within three hexes of the commander of the division to which it is assigned.
[30.0] VICTORY
COMMENTARY
Victory in a game about Shiloh is a little difficult to assess. Historically, the Confederates had to crush the Union in such a way that the Union would have to retire. Essentially, this meant pushing it back across the Tennessee. Anything short of that would leave a Union Army in a position to strike anywhere within the Deep South, a threat to cut the Memphis-Charleston Railroad. Thus (historically), the Confederate Player has, in effect, only one level of victory. He either wins or he loses (which is somewhat of a tautology): there are no marginal victories — at least in terms of the strategic situation. However, in light of the fact that people will often be playing Bloody April as a game, rather than a simulation, we have adjusted history somewhat in arriving at a viable set of victory conditions.
CASES:
[30.1] STANDARD VICTORY CONDITIONS
These Victory Conditions apply to all scenarios except Case 29.1, the Confederate Attack.
[30.11] Victory is expressed in levels attained, as is stated below. The greater the level of success on the field the higher the level of victory. The levels of Victory are usually measured by two items: losses and physical possession of or proximity to Pittsburg Landing.
[30.12] At the end of the game/scenario, both Players should first note the location of their units vis a vis the victory conditions given below. Then each Player totals his Casualties (both killed/-wounded as well as captured); see Case 30.13.
[30.13] Each Strength Point (Men) Killed/-Wounded or Captured equals one Casualty Point. Each Gun Lost equals one Casualty Point; a Captured Gun equals two points (for the Player losing the gun). All leaders and aides below the rank of Colonel are worth one point Killed/Wounded, twice that captured. For higher ranking officers, see the chart below:
| Rank | Casualty Points if Killed | Wounded | Captured |
|---|---|---|---|
| Lt. Col/Col | 3 | 1 | 4 |
| Brig. Gen | 4 | 2 | 5 |
| *Maj. Gen | 5 | 2 | 7 |
| †Commanders | 10 | 5 | 25 |
*Does not include Grant or Buell †Grant, Buell, Johnston, or Beauregard
[30.14] The Victory Levels are as follows:
-
Confederate Total Victory: No Union combat units remaining west of the Tennessee (and South of the Snake/Owl Creek barrier) that are within Effectiveness or Command range of any Union Leader.
-
Confederate Strategic Victory: The Confederate Player controls (has a combat unit in or was the last the pass through) either one of the two Landing hexes at Pittsburg Landing, regardless of the losses taken. Such units must be within range of a leader and be able to trace a path free of Enemy units/ZOCs to A0102.
-
Confederate Tactical Victory: Have at least 40 Strength or Gun Points within 10 hexes of a landing Hex and have fewer Casualty Points.
-
Union Marginal Victory: The Confederate Player has at least 40 Strength/Gun Points within 10 hexes of Landing hex but the Confederate Player has the same number or more Casualty Points than the Union.
-
Union Tactical Victory: Union losses (Casualty Points) exceed those of the Confederacy, but the Confederates have less than 40 SP's within 10 hexes of a Landing hex.
-
Union Strategic Victory: Confederate losses exceed or equal those of the Union (in Casualty Points) and the Confederacy does not have 40 SP's within 10 hexes of the Landing. (This is the historical outcome of the battle).
[30.15] Players should remember that if they are using the hypothetical situations these levels may be adjusted. The above levels read from 1-6 for the Confederacy and from 6-1 vis a vis the Union. Adjust accordingly.
[30.2] CONFEDERATE ATTACK VICTORY CONDITIONS
[30.21] Players should use these Victory Conditions when they are playing the Confederate Attack scenario, Case 29.2.
[30.22] The victory conditions for this scenario revolve around controlling Fields. The Confederate Player gauges his success by the number of Fields (e.g., Reay Field, Barnes Field, etc.) he controls. The more fields he controls, the better he will do. Only named fields (not just field hexes) count toward victory.
[30.23] The Confederate Player controls a field if there is at least one Confederate combat unit in or adjacent to that field and there are no unrouted Union combat units in or adjacent to that field.
[30.24] Victory is determined as follows:
| Fields Controlled by CSA | Level of Victory |
|---|---|
| 1-3 | Union Strategic |
| 4-6 | Union Tactical |
| 7-8 | Confederate Marginal |
| 9-10 | Confederate Tactical |
| 11+ | Confederate Strategic |
[31.0] THE ORDERS OF BATTLE
CASES:
[31.1] UNION: ARMY OF THE TENNESSEE
Commanding General: Major General Ulysses S. Grant. Capt. W.S. Hillyer, Aide-de-Camp.
FIRST DIVISION
Commanding: Major General John McClernand. Capt. Warren Stewart, Aide-de-Camp.
First Brigade: Commanding: Col. Abraham M. Hare; 8th Illinois, 18th Illinois, 11th Iowa, 13th Iowa
Second Brigade: Commanding: Colonel C. Carroll Marsh; 11th Illinois, 20th Illinois, 45th Illinois, 48th Illinois
Third Brigade: Commanding: Colonel Julius Raith; 17th Illinois, 29th Illinois, 43rd Illinois, 49th Illinois
Artillery: Dresser's Battery (D), 2nd Illinois Light Artillery; McAllister's Battery (D), 1st Illinois Light Artillery; Schwartz's Battery (E), 2nd Illinois Light Artillery; Burrow's Battery, 14th Ohio Light Artillery
Cavalry: 1st Battalion, 4th Illinois Cavalry; Carmichael's Company, Illinois Cavalry; Stewart's Company, Illinois Cavalry
SECOND DIVISION
Commanding General: Brigadier General William H.L. Wallace. Capt. T.J. Newham, Aide-de-Camp
First Brigade: Commanding: Colonel James Tuttle; 2nd Iowa, 7th Iowa, 12th Iowa, 14th Iowa
Second Brigade: Commanding: Brig. Gen. John McArthur; 9th Illinois, 12th Illinois, 13th Missouri, 14th Missouri (Birge's Sharpshooters), 81st Ohio
Third Brigade: Commanding: Colonel Thomas Sweeny; 8th Iowa, 7th Illinois, 50th Illinois, 52nd Illinois, 57th Illinois, 58th Illinois
Artillery: Willard's Battery (A), 1st Illinois Light Artillery; Major Cavendar's Battalion of Missouri Artillery, consisting of: Richardson's Battery (D), 1st Missouri Light Artillery; Welker's Battery (H), 1st Missouri Light Artillery; Stone's Battery (K), 1st Missouri Light Artillery
Cavalry: Companies A and B, 2nd Illinois Cavalry; Company C, 2nd United States Cavalry and Company I, 4th United States Cavalry
THIRD DIVISION
Commanding General: Major General Lew Wallace. Lieut. John Ross, Aide-de-Camp.
First Brigade: Commanding: Colonel Morgan Smith; 11th Indiana, 24th Indiana, 8th Missouri
Second Brigade: Commanding: Colonel John Thayer; 23rd Indiana, 1st Nebraska, 58th Ohio, 68th Ohio (not at battle; guarding Crump's Landing)
Third Brigade: Commanding: Colonel Charles Whittlesey; 20th Ohio, 56th Ohio (not present at battle; guarding Crumps's Landing), 76th Ohio, 78th Ohio
Artillery: Thompson's Battery, 9th Indiana Light Artillery; Buel's Battery (I), 1st Missouri Light Artillery
Cavalry: 3rd Battalion, 11th Illinois and 3rd Battalion, 5th Ohio Cavalry (both not present; guarding Crump's Landing)
FOURTH DIVISION
Commanding General: Brigadier General Stephen A. Hurlbut. Lieut. John Long, Aide-de-Camp.
First Brigade: Commanding: Colonel Nelson Williams; 28th Illinois, 32nd Illinois, 41st Illinois, 3rd Iowa
Second Brigade: Commanding: Colonel James Veatch; 14th Illinois, 15th Illinois, 46th Illinois, 25th Indiana
Third Brigade: Commanding: Brig. Gen. Jacob Lauman; 31st Indiana, 44th Indiana, 17th Kentucky, 25th Kentucky
Artillery: Ross's Battery, 2nd Michigan Light Artillery; Mann's Battery (C), 1st Missouri Light Artillery; Myers's Battery, 13th Ohio Light Artillery
Cavalry: 1st Battalion, 5th Ohio Cavalry; 2nd Battalion, 5th Ohio Cavalry
FIFTH DIVISION
Commanding General: Brig. Gen. William Tecumseh Sherman. Lieut. John Taylor, Aide-de-Camp.
First Brigade: Commanding: Colonel John McDowell; 40th Illinois, 6th Iowa, 46th Ohio
Second Brigade: Commanding: Colonel David Stuart; 55th Illinois, 54th Ohio, 71st Ohio
Third Brigade: Commanding: Colonel Jessee Hildebrand; 53rd Ohio, 57th Ohio, 77th Ohio
Fourth Brigade: Commanding: Colonel Ralph Buckland; 48th Ohio, 70th Ohio, 72nd Ohio
Artillery: Taylor's Battery (B), 1st Illinois Light Artillery; Waterhouse's Battery (E), 1st Illinois Light Artillery; Morton's Battery, 6th Indiana Light Artillery
Cavalry: 2nd and 3rd Battalions, 4th Illinois Cavalry; Thielemann's two companies of Illinois Cavalry
SIXTH DIVISION
Commanding General: Brig. Gen. Benjamin M. Prentiss. Lieut. Edwin Moore, Aide-de-Camp.
First Brigade: Commanding: Colonel Everett Peabody; 12th Michigan, 21st Missouri, 25th Missouri, 16th Wisconsin
Second Brigade: Commanding: Colonel Madison Miller; 61st Illinois, 18th Missouri, 18th Wisconsin, 16th Iowa (assigned on paper to this brigade; fought independently after leaving Landing)
Unbrigaded: 15th Iowa (arrived April 6th, ordered to duty with 16th Iowa, later with McClernand's Div.; assigned on paper to 6th Division); 23rd Missouri (arrived April 6, reported to division)
Artillery: Hickenlooper's Battery, 5th Ohio Light Artillery; Munch's Battery, 1st Minnesota Light Artillery
Cavalry: 1st and 2nd Battalions, 11th Illinois Cavalry
UNASSIGNED UNITS
Infantry: 15th Michigan (at Landing April 6, marched to Prentiss's Division with no ammunition, retired; on Monday April 7 fought with 4/2/Ohio); 14th Wisconsin (arrived late Sunday night, April 6)
Artillery: Silfversparre's Battery H, 1st Illinois Light Artillery (arrived April 6 without horses to pull guns); Bouton's Battery (I), 1st Illinois Light Artillery (arrived April 6 without drill and with untrained horses); Powell's Battery (F), 2nd Illinois Light Artillery (camped at Landing, supposedly awaiting orders to report to 1st Division); Madison's Battery (B), 2nd Illinois Artillery (parked on Landing Bluff, finally brought into use afternoon of April 6); Markgraf's 8th Battery, Ohio Light Artillery (supposedly assigned to 3rd Division/Tenn, but never reported)
[31.2] UNION: ARMY OF THE OHIO
Commanding General: Major General Don Carlos Buell. Lieut. A.F. Rockwell, Aide-de-Camp.
SECOND DIVISION
Commanding General: Brig. Gen. Alexander McD. McCook. Lieut. S.W. Davies, Aide-de-Camp
Fourth Brigade: Commanding: Brig. Gen. Lovell H. Rouseau; 6th Indiana, 5th Kentucky, 1st Ohio, 1st Battalion/15th U.S., 1st Battalion/16th U.S., 1st Battalion/19th U.S.
Fifth Brigade: Commanding: Colonel Edward N. Kirk; 34th Illinois, 29th Indiana, 30th Indiana, 77th Pennsylvania
Sixth Brigade: Commanding: Colonel William H. Gibson; 32nd Indiana, 39th Indiana, 15th Ohio, 49th Ohio
Artillery: Terrill's Battery (H), 5th U.S. Artillery
FOURTH DIVISION
Commanding General: Brig. Gen. William "Bull" Nelson. Lieut. William Anderson, Aide-de-Camp.
Tenth Brigade: Commanding: Colonel Jacob Ammen; 36th Indiana, 6th Ohio, 24th Ohio
Nineteenth Brigade: Commanding: Colonel William B. Hazen; 9th Indiana, 6th Kentucky, 41st Ohio
Twenty-Second Brigade: Commanding: Colonel Sanders D. Bruce; 1st Kentucky, 2nd Kentucky, 20th Kentucky
FIFTH DIVISION
Commanding General: Brig. Gen. Thomas L. Crittenden. Lieut. Louis M. Buford, Aide-de-Camp.
Eleventh Brigade: Commanding: Brig. Gen. Jeremiah T. Boyle; 9th Kentucky, 13th Kentucky, 19th Ohio, 59th Ohio
Fourteenth Brigade: Commanding: Colonel William Sooy Smith; 11th Kentucky, 26th Kentucky, 13th Ohio
Artillery: Bartlett's Battery (G), 1st Ohio Light Artillery; Mendenhall's Batteries (H and M), 4th U.S. Artillery
SIXTH DIVISION
Commanding General: Brig. Gen. Thomas J. Wood. Capt. George W. Lennard, Aide-de-Camp.
Twentieth Brigade: Commanding: Brig. Gen. James A. Garfield; 13th Michigan, 64th Ohio, 65th Ohio (This brigade was never actually engaged, arriving at the field too late.)
Twenty-First Brigade: Commanding: Colonel George D. Wagner; 15th Indiana, 50th Indiana, 57th Indiana, 24th Kentucky
[31.3] CONFEDERATE ARMY OF THE MISSISSIPPI
Commanding General: General Albert Sidney Johnston. Gov. Isham G. Harris, Aide-de-Camp.
Second-in-Command: General Pierre Gustave Toutant Beauregard, Lieut. Col. S.W. Ferguson, Aide-de-Camp.
FIRST ARMY CORPS
Commanding General: Maj. Gen. Leonidas Polk. Lieut. W.B. Richmond, Aide-de-Camp.
First Division
Commanding General: Brig. Gen. Charles Clark. Lieut. William Yerger, Aide-de-Camp.
First Brigade: Commanding: Colonel Robert M. Russell; 11th Louisiana, 12th Tennessee, 13th Tennessee, 22nd Tennessee, Bankhead's Tennessee Battery
Second Brigade: Commanding: Brig. Gen. Alexander P. Stewart; 13th Arkansas, 4th Tennessee, 5th Tennessee, 33rd Tennessee, Stanford's Mississippi Battery
Second Division
Commanding General: Major General Benjamin F. Cheatham. Capt. F.H. McNairy, Aide-de-Camp.
First Brigade: Commanding: Brig. Gen. Bushrod R. Johnson; Blythe's Mississippi Regiment, 2nd (Walker's) Tennessee, 15th Tennessee, 154th Tennessee (Senior). Polk's Tennessee Battery
Second Brigade: Commanding: Colonel William H. Stephens; 7th Kentucky, 1st Tennessee Battalion, 6th Tennessee, 9th Tennessee, Smith's Mississippi Battery
Unassigned: 47th Tennessee (arrived April 7)
Cavalry: 1st Mississippi; Brewer's Mississippi & Alabama Battalion
SECOND ARMY CORPS
Commanding General: Major General Braxton Bragg. Lieut. Towson Ellis, Aide-de-Camp
First Division
Commanding General: Brig. Gen. Daniel Ruggles. Lieut. M.B. Ruggles, Aide-de-Camp.
First Brigade: Commanding: Colonel Randall L. Gibson; 1st Arkansas, 4th Louisiana, 13th Louisiana, 19th Louisiana, Vaiden, or Bain's Mississippi Battery
Second Brigade: Commanding: Brig. Gen. Patton Anderson; 1st Florida Battalion, 17th Louisiana, 20th Louisiana, Confederate Guards Response Battalion, 9th Texas, Washington (Louisiana) Artillery (Fifth Company)
Third Brigade: Commanding: Colonel Preston Pond, Jr.; 16th Louisiana, 18th Louisiana, Crescent (Louisiana) Regiment (The Kid Glove Regiment), Orleans Guard (Louisiana) Regiment, 38th Tennessee, Ketchum's Alabama Battery
Cavalry: Jenkins's Alabama Battalion
Second Division
Commanding General: Brig. Gen. Jones M. Withers. Lieut. D.F. Withers, Aide-de-Camp.
First Brigade: Commanding: Brig. Gen. Adley Gladden; 21st Alabama, 22nd Alabama, 25th Alabama, 26th Alabama, 1st Louisiana, Robertson's Alabama Battery
Second Brigade: Commanding: Brig. Gen. James R. Chalmers; 5th Mississippi, 7th Mississippi, 9th Mississippi, 10th Mississippi, 52nd Tennessee, Gage's Alabama Battery
Third Brigade: Commanding: Brig. Gen. John K. Jackson; 17th Alabama, 18th Alabama, 19th Alabama, 2nd Texas, Girardey's Georgia Battery
Cavalry: Clanton's 1st Alabama Regiment
THIRD ARMY CORPS
Commanding General: Major General William J. Hardee. Lieut. William Clare, Aide-de-Camp.
First Brigade: Commanding: Colonel R.G. Shaver (Brig. Gen. Thomas C. Hindman assigned directly to Hardee and not in command of brigade); 2nd Arkansas, 6th Arkansas, 7th Arkansas, 3rd Confederate, Swett's Mississippi Battery (Warren Light Artillery). (Some returns also list Pillow's Flying Artillery, also known as Miller's Tennessee Battery; however, there is no mention made of this battery in any reports.)
Second Brigade: Commanding: Brig. Gen. Patrick R. Cleburne; 15th Arkansas, 6th Mississippi, 2nd (Bate's) Tennessee, 5th (Hill's, or 35th) Tennessee (redesignated to 35th to distinguish it from other 5th regiment), 23rd Tennessee, 24th Tennessee, Shoup's Battalion of Artillery, consisting of: Trigg's (Austin) Arkansas Battery, Calvert's (Helena) Arkansas Battery, Hubbard's Arkansas Battery, and Robert's Arkansas Battery (the latter is listed as unassigned in the returns, but most probably was part of Shoup's Battalion)
Third Brigade: Commanding: Brig. Gen. Sterling A.M. Wood; 16th Alabama, 8th Arkansas, 9th (or 14th) Arkansas Battalion (again, redesignated 14th to distinguish it from other 9th unit), 3rd Mississippi Battalion, 27th Tennessee, 44th Tennessee, 55th Tennessee, Harper's (Jefferson Mississippi) Battery; Avery's Georgia Dragoons (Cavalry)
THE RESERVE CORPS
Commanding General: Brig. Gen. John C. Breckinridge. Capt. Samuel Gray, Aide-de-Camp.
First Brigade: Commanding: Colonel Robert P. Trabue; Clifton's 4th Alabama Battalion, 31st Alabama, 3rd Kentucky, 4th Kentucky, 5th Kentucky, 6th Kentucky, Crew's Tennessee Battalion, Lyon's (Cobb's) Kentucky Battery, Byrne's Kentucky Battery, Morgan's Squadron, Kentucky Cavalry
Second Brigade: Commanding: Brig. Gen. John S. Bowen; 9th Arkansas, 10th Arkansas, 2nd Confederate, 1st Missouri, Pettus Flying Artillery (Hudson's Mississippi Battery), Watson's Louisiana Battery; Thompson's Company, Kentucky Cavalry (not engaged, guarding right flank)
Third Brigade: Commanding: Colonel Winfield S. Statham; 15th Mississippi, 22nd Mississippi, 19th Tennessee (arrived afternoon 1st day, on flank duty with Forrest), 20th Tennessee, 28th Tennessee, 45th Tennessee; Rutledge's Tennessee Battery; Forrest's Regiment 1st Tennessee Cavalry
UNASSIGNED
McClung's Tennessee Battery Wharton's Texas Ranger Regiment, Cavalry Wirt Adams's Mississippi Regiment, Cavalry
[31.4] CONFEDERATE: ARMY OF THE TRANS-MISSISSIPPI
Note: This command was not present at Shiloh. It had been ordered to join Johnston's Army but failed to reach that force because of its involvement at Pea Ridge. The Order of Battle is included for purposes of the hypothetical situations connected with it.
Commanding General: Major General Earl Van Dorn. Lieut. C. Sulivane, Aide-de-Camp.
THE MISSISSIPPI STATE GUARD
Commanding General: Major General Sterling Price. Capt. Henry Hector Loutsch, Aide-de-Camp.
Escort: Cearnal's Cavalry Battalion
First Brigade, Missouri Volunteers: Commanding: Colonel Henry Little; 1st Infantry, 2nd Infantry, 1st Cavalry, Wade's 1st Battery, Clark's 2nd Battery
Second Brigade, Confederate Cavalry: Commanding: Brig. Gen. William Slack, Hughes's Regiment Infantry, Bevier's Regiment Infantry, Rosser's Regiment Infantry, Riggin's Regiment Cavalry, Lucas's Light Battery Artillery
Third Brigade, Missouri Volunteers: Commanding: Colonel Colton Greene; Frazier's Infantry Regiment, Freeman's Infantry Regiment, Schnable's 3rd Infantry Regiment, Confederate Cavalry Squadron, 3rd Brigade Cavalry Battalion
STATE TROOPS
Second Division, Missouri State Guard: Commanding: Brig. Gen. Martin Green; 1st Infantry Regiment, 2nd Infantry Regiment (The regimental OB is speculative; there is little information on this division)
Third Division, Missouri State Guard: Commanding: Colonel John Clark, Jr.; 1st Infantry Regiment, 2nd Infantry Regiment, 3rd Infantry Regiment, 4/5th Infantry Regiment, 6th Infantry Regiment
Fifth Division, Missouri State Guard: Commanding: Colonel James Saunders; 1st Infantry Regiment, 2nd Infantry Regiment, 3rd Infantry Regiment (Infantry regiments are speculative because of poor information); Gates' Cavalry (actually a detachment of cavalry from the 1st Brigade, Mo. Vol); Kelly's Battery
Sixth Division, Missouri State Guard: Commanding: Major D.H. Lindsay; 1st Infantry Regiment, 2nd Infantry Regiment (the infantry regiments are speculative); Gorham's Battery
Seventh/Ninth Divisions, Missouri State Guard: Commanding: Brig. Gen. D.M. Frost; McBride's (7th Division) Infantry; McBride's (7th Division) Cavalry; Guibor's Battery, MacDonald's (The St. Louis) Battery
Eighth Division, Missouri State Guards: Commanding: Brig. Gen. James Rains; Erwin's Infantry, Bowman's Infantry, Pearcy's Infantry, Stemmon's Infantry; Shelby's Cavalry Company; Bledsoe's Battery
McCULLOCH'S DIVISION
Commanding General: Brig. Gen. Ben McCulloch. Capt. A. Dotson, Aide-de-Camp.
The Infantry Brigade: Commanding: Colonel Louis Hebert; 4th Arkansas, 14th Arkansas, 16th Arkansas, 17th Arkansas, 21st Arkansas, 3rd Louisiana
The Cavalry Brigade: Commanding: Brig. Gen. James McIntosh; 1st Arkansas Mounted Rifles, 2nd Arkansas Mounted Rifles, 3rd Texas, 6th Texas, 9th Texas (listed in reports as 4th Texas; that is a mistake), 11th Texas. (This brigade fought dismounted as infantry at Pea Ridge, Iuka and Corinth.)
Artillery: Hart's Battery, Provence's Battery, Gaines's Battery, Good's Battery
INDIAN TERRITORY ARMY
Commanding General: Brig. Gen. Albert Pike. Lieut. L.W. Pike, Aide-de-Camp.
Col. Stand Watie's Cherokee Regiment (Infantry), Colonel John Drew's Cherokee Regiment (Cavalry), Colonel D.N. McIntosh's Creek Regiment (Infantry), Welch's Squadron of Texas Cavalry.
Note: Several other units, unassigned, were at Pea Ridge. They have not been included in this Order of Battle.
[31.5] REPLACEMENT OFFICERS
Listed below, for each side, are the replacement officers available, in case of a casualty to the Brigade Officer. The officers are listed by Brigade, and the order in which they are listed is the order in which they must be taken. Replacement Officers (marked with an R) may not be used in any way until they replace an officer that has either been promoted or suffered a casualty. Then they function like any other officer.
Union: Army of the Tennessee
1/1/T: Col. Marcellus Crocker, Lt. Col. William Hall. 2/1/T: Col. Isham Haynie, Lt. Col. Thomas Ransom. 3/1/T: Col. Enos Wood, Lt. Col. Phineas Pease. 1/2/T: Col. William Shaw, Col. Joseph Woods. 2/2/T: Col. Thomas Morton, Col. August Mersy. 3/2/T: Col. Silas Baldwin, Col. Moses Bane. 1/3/T: Col. George McGinnis, Col. Alvin Hovey. 2/3/T: Col. Valentine Bausenwein, Col. William Sanderson. 3/3/T: Col. Charles Woods, Col. Mortimer Leggett. 1/4/T: Col. John Logan, Col. Isaac Pugh. 2/4/T: Col. Cyrus Hall, Col. John Davis. 3/4/T: Col. Charles Cruft, Col. John McHenry. 1/5/T: Col. Stephen Hicks, Col. Thomas Worthington. 2/5/T: Col. T. Kilby Smith, Col. Rodney Mason. 3/5/T: Lt. Col. Americus Rice, Col. Jesse Appler (Note, that although Appler is ranked higher than Rice his behaviour at the start of the battle was such that no one would have trusted him even to fetch horses, no less command.) 4/5/T: Col. Peter Sullivan, Col. Joseph Cockerill. 1/6/T: Col. David Moore, Col. Benjamin Allen. 2/6/T: Col. Jacob Fry, Col. James Alban
Union: Army of the Ohio
4/2/O: Col. Thomas Crittenden, Col. Harvey Buckley. 5/2/O: Col. Sion Bass, Col. Frederick Stumbaugh. 6/2/O: Col. August Willich, Col. Thomas Harrison. 10/4/O: Col. William Grose, Lt. Col. Frederick Jones. 19/4/O: Col. Gideon Moody, Col. Walter Whitaker. 22/4/O: Col. David Enyart, Col. Thomas Sedgewick. 11/5/O: Col. Benjamin Gryder, Col. James Fyffe. 14/5/O: Col. Pierce Hawkins, Lt. Col. Cicero Maxwell. 20/6/O: Col. Michael Shoemaker. 21/6/O: Col. Lewis Grigsby.
Confederate: Army of the Mississippi
1/1/I: Col. Samuel Marks, Col. Alfred Vaughan. 2/1/I: Col. Rufus Neely, Col. Alexander Campbell 1/2/I: Col. Preston Smith, Col. A.K. Blythe. 2/2/I: Col. George Maney, Col. Henry Douglass. 1/1/II: Col. Benjamin Hodge, Col. James Fagen. 2/1/II: Col. August Reichard, Col. Wright Stanley. 3/1/II: Col. Alfred Mouton, Col. Robert Looney. 1/2/II: Col. Daniel Adams, Col. Zach Deas. 2/2/II: Col. Albert Fant, Col. Benjamin Lea. 3/2/II: Col. Joseph Wheeler, Col. John Moore. 1/III: Col. Daniel Govan, Col. John Marmaduke. 2/III: Col. Benjamin Hill, Col. John Thornton. 3/III: Col. William Patterson, Col. James McKoin. 1/RES: Col. Thomas Hunt, Col. Joseph Lewis. 2/RES: Col. John Martin, Col. Isaac Dunlop. 3/RES: Col. Joel Battle, Col. Nathan Bedford Forrest.
Confederate: Army of the Trans-Mississippi
1/Mo Vol: Col. Elijah Gates, Col. John Burbridge 2/Mo Vol: Col. Thomas Rosser, Col. G.W. Riggins. 3/Mo Vol: Col. Frazier, Col. Schnable. 8/MoStGd: Col. Williams Erwin, Lt. Col. A.J. Pearcy.
[32.0] NUMBERS AND TYPES OF GUNS ASSIGNED TO BATTERIES
CASES:
[32.1] UNION BATTERIES
1/Tenn: Dresser's Battery (6 x James Rifles); McAllister's Battery (4 x 24-pounder Howitzers); Schwartz' Battery (2 x 6-pounder smoothbores, 2 x 12-pounder Howitzers); Burrow's Battery (4 x 6-pounder Wiards, 2 x 12-pounder Wiards)
2/Tenn: Willard's Battery (4 x 6-pounder smoothbores, 2 x 12-pounder Howitzers); Richardson's Battery (4 x 20-pounder Parrotts); Welker's Battery (2 x 10-pounder Parrotts, 2 x 20-pounder Parrotts); Stone's Battery (4 x 10-pounder Parrotts)
3/Tenn: Thompson's Battery (4 x 6-pounder smoothbores, 2 x 12-pounder Howitzers); Buell's Battery (4 x 6-pounder smoothbores, 2 x 12-pounder Howitzers)
4/Tenn: Ross's Battery (2 x 6-pounder smoothbores, 4 x 10-pounder Parrotts); Mann's Battery (2 x 6-pounder smoothbores, 2 x 12-pounder Howitzers); Myers' Battery (2 x 6-pounder smoothbores, 4 x James Rifles)
5/Tenn: Taylor's Battery (4 x 6-pounder smoothbores, 2 x 12-pounder Howitzers); Waterhouse's Battery (6 x James Rifles); Morton's Battery (4 x 6-pounder smoothbores, 2 x 12-pounder Howitzers)
6/Tenn: Hickenlooper's Battery (2 x 6-pounder smoothbores, 4 x James Rifles); Munch's Battery (2 x 12-pounder Howitzers, 4 x James Rifles)
Unassigned: Silfversparre's Battery (4 x 20-pounder Parrotts); Bouton's Battery (6 x James Rifles); Madison's Battery (5 x 24-pounder Siege Guns); Powell's Battery (6 x 6-pounder smoothbores); Markgraff's Battery (6 x 30-pounder Parrotts*)
*This is somewhat speculative, as there is no hard evidence as to the exact makeup of Markgraf's guns.
2/Ohio: Terrill's Battery (4 x 12-pounder Napoleons, 2 x 10-pounder Parrotts)
5/Ohio: Bartlett's Battery (4 x 6-pounder smoothbores, 2 x 12-pounder Wiards); Mendenhall's Batteries (2 x 12-pounder Howitzers, 2 x 3" Rodman Rifles)
[32.2] CONFEDERATE BATTERIES
First Corps: Bankhead's Battery (4 x 6-pounder smoothbores, 2 x 12-pounder Howitzers); Stanford's Battery (3 x 6-pounder smoothbores, 2 x 12-pounder Howitzers, 1 x 3" Rifle); Polk's Battery (4 x 6-pounder smoothbores, 2 x 12-pounder Howitzers); Smith's Battery (4 x 6-pounder smoothbores, 2 x 12-pounder Napoleons)
Second Corps: Vaiden/Bain's Battery (2 x 6-pounder smoothbores, 2 x 12-pounder Howitzers); Washington Artillery (2 x 6-pounder rifles, 2 x 6-pounder smoothbores, 2 x 12-pounder Howitzers); Ketchum's Battery (4 x 6-pounder smoothbores, 2 x 12-pounder Howitzers); Robertson's Battery (4 x 12-pounder Napoleons); Gage's Battery (2 x 12-pounder Howitzers, 2 x 3" rifles); Girardey's Battery (4 x 6-pounder smoothbores, 2 x 12-pounder Howitzers)
Third Corps: Swett's Battery (4 x 6-pounder smoothbores, 2 x 12-pounder Howitzers); Trigg's Battery (2 x 6-pounder smoothbores, 2 x 12-pounder Howitzers); Calvert's Battery (2 x 6-pounder smoothbores, 2 x 12-pounder Howitzers); Hubbard's Battery (2 x 6-pounder smoothbores, 2 x 3" rifles); Roberts' Battery (2 x 6-pounder smoothbores, 2 x 12-pounder Howitzers); Harper's Battery (2 x 6-pounder smoothbores, 2 x 12-pounder Howitzers)
Reserve Corps: Cobb's Battery (4 x 6-pounder smoothbores, 2 x 12-pounder Howitzers); Byrne's Battery (4* x 6-pounder smoothbores, 2 x 12-pounder Howitzers); Pettus' Flying Artillery (2 x 6-pounder smoothbores, 2 x 12-pounder Howitzers, 2 x 3" rifles); Watson's Battery (4 x 6-pounder rifles, 2 x 12-pounder Howitzers); Rutledge's Battery (4 x 6-pounder smoothbores, 2 x 12-pounder Howitzers)
*Shiloh National Park states this battery had 7 guns, 5 of which were smoothbores. Since it was almost unheard of at this time for a battery to have more than six guns we have listed this as 6 guns.
Unassigned: McClung's Battery (2 x 6-pounder smoothbores, 2 x 12-pounder Napoleons)
Van Dorn's Trans-Mississippi Army:
(Designer's Note: most of the batteries listed below are given gun types of a speculative nature. There is little information readily available about this force, especially as to weaponry.)
Wade's 1st Battery (6 x Napoleons); Clark's 2nd Battery (4 x 6-pounder smoothbores); Lucas's Light Battery (4 x 6-pounder smoothbores, 2 x 12-pounder Howitzers); Kelly's Battery (3 x 6-pounder smoothbores, 2 x 12-pounder Howitzers); Gorham's Battery (4 x Napoleons); Guibor's Battery (4 x 6-pounder smoothbores); MacDonald's Battery (2 x 6-pounder rifles, 1 x 6-pounder smoothbore); Bledsoe's Battery (4 x Napoleons, 2 x 6-pounder rifles); Hart's Battery (4 x 6-pounder rifles); Provence's Battery (4 x 6-pounder smoothbores, 2 x 12-pounder Howitzers); Gaine's Battery (4 x 6-pounder smoothbores, 2 x 12-pounder Howitzers); Good's Battery (4 x 6-pounder rifles)
[32.3] GUN CLASSIFICATIONS
| Letter | Type of Gun |
|---|---|
| L | 6-pounder Smoothbores |
| TA | 6-pounder rifles, 6-pounder Wiards |
| TB | James Rifles, 12-pounder Wiards, 3" Rodman Rifles, 3" Rifles (Blakelys) |
| HA | 12-pounder Howitzers |
| HB | 24-pounder Howitzers |
| N | 12-pounder Napoleons |
| PA | 10-pounder Parrotts |
| PB | 20-pounder Parrotts |
| PC | 30-pounder Parrotts |
| SG | 24-pounder Siege Guns |
| G | 8" (32-pounder) Naval Shellguns |
[32.4] SIMPLIFIED BATTERY WEAPONRY (Optional Rule)
There are a fairly large minority of Players who cannot abide any form of record keeping. As the individual gun system used in BA will surely bring about a sense of discomfit in these people — and for those people who simply want to make things easy and care little for minute accuracy — we suggest that they give each gun battery only one gun type (with the total number of guns remaining the same). Players may use any method to arrive at these types they see fit. Try to maintain an approximate ratio of gun-types vis a vis the actual ratio.
[33.0] BIBLIOGRAPHY: BLOODY APRIL
War of the Rebellion: Official Records of the Union and Confederate Armies. Series I, Vol VIII; Series I & II. Vol X. These are the famous OR's. The first volume (VIII) was used for OB for Van Dorn's army. The other two books cover Shiloh. Sine qua non for any research.
The Battle of Shiloh and the Organizations Engaged, compiled by Major D.W. Reed, Washington, 1903. This volume, published under the auspices of Shiloh National Military Park Commission, is a game designer's dream. It is a compilation of all information in the OR's, including a magnificent Order of Battle, complete with regimental strengths for most units, initial starting positions, and such other minutiae. Good maps (if somewhat inaccurate).
Shiloh: Bloody April, by Wiley Sword, New York, 1974. An excellent account of the battle with much detail. Sword conveys an exceptional feel for the battle. Good information on unit morale, weapons, strengths, etc.
Shiloh—In Hell Before Night, by James Lee McDonough, Knoxville, Tenn., 1977. Another good narrative of the battle, more interested in whys and wherefores than numbers. McDonough differs with Sword on several points. Good insight.
Regimental Losses in the American Civil War, 1861-1865, by William F. Fox; Albany, 1898 (reprinted). Lots of numbers for individual regiments—mostly losses. Has holes, but is very interesting if you like statistics.
Artillery and Ammunition of the Civil War, by Warren Ripley, New York, 1970. Everything you wanted to know about guns and cannon, including great tables on elevation, range, etc. Definitive and exhaustive. Excellent.