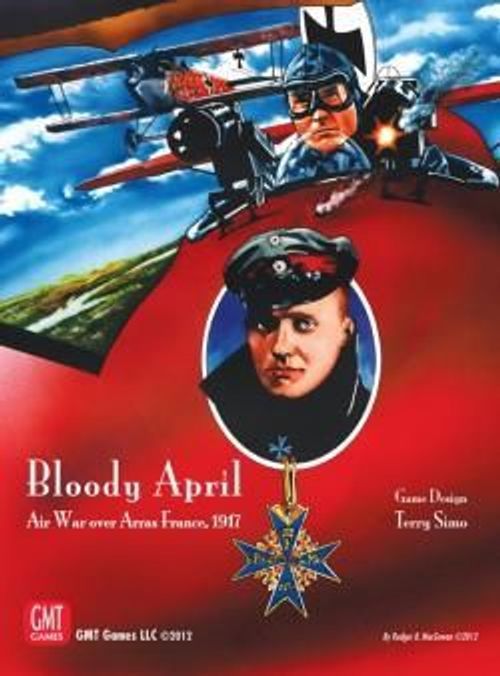
Bloody April, 1917: Air War Over Arras, France
Bloody April, 1917: Air War Over Arras, France Rulebook
Table of Contents
Table of Contents
- 1. Introduction
- 2. Game Equipment
- 3. Sequence of Play
- 4. Scenarios
- 5. Air Units
- 6. Random Events
- 7. Weather
- 8. Detection
- 9. Initiative
- 10. Movement
- 11. Aerodrome Operations
- 12. Task Planning
- 13. Air-to-Air Combat
- 14. Air Unit Damage
- 15. Post-Combat Procedure
- 16. Anti-Aircraft Artillery
- 17. Air-to-Ground
- 18. Air-to-Ground Attacks
- 19. Ground Target Damage
- 20. Track Phase
- 21. Night
- 22. Ground Units
- 23. Campaign Day Scenario
- 24. Solitaire Rules
- 25. Designing Bloody April
- 26. Tactical Hints
- "Time to Climb" Conversion Tables
- German Scout Aircraft Availability Matrix
1. Introduction
Bloody April is a game of air warfare over the Arras Sector in France during March through May 1917. This area was the scene of some of the most brutal air warfare to occur during WW1. In Bloody April, the players command the air forces of the British Royal Flying Corps (RFC) and Deutsche Luftstreitkräfte/German Air Force (DLS). They will also control ground units for their respective sides (e.g., Flak and Observation Balloons).
Design Note: The British Royal Naval Air Service (RNAS) was a separate air force until combining with the RFC to be come the RAF in 1918. For purposes of simplicity, the RNAS Squadrons are considered to be part of the RFC for all game purposes.
1.1 Players
Two players are required; one to play the Royal Flying Corps (RFC) side and one to play the Deutsche Luftstreitkräfte (DLS) side. Both sides control aeroplanes and defensive forces for their side. It is possible to play with multiple players on one or either side by dividing the forces or taskings per player. Success for the British results from completing their air taskings and successfully recovering their aeroplanes.
Success for the Germans results from successfully defending targets and preventing the British from accomplishing their taskings.
1.2 Rules
The rules are divided into standard, advanced and optional rules. The advanced rules add detail and make for a more complete simulation. The optional rules add more realism but also increased complexity. Players learning the game may skip the advanced and optional rules until they are familiar with the standard game mechanics.
1.21 Rule Conventions
Rules are numbered. Cross-references to other rules are listed [in square brackets]. Design notes describe some of the background and thought processes behind the rules.
1.22 Learning Bloody April
New players might wish to start by following the examples of play in the playbook. This tells you which rules sections to read first and summarizes some of the more important combat rules.
1.3 Glossary of Game Terms
Abort. Flights that are no longer able to conduct their mission will 'abort' and run for home.
Ack Ack (AA). Anti-aircraft artillery, also termed 'Archie'.
Active Aerodrome. Any aerodrome that is listed in the scenario Order of Battle for a particular date.
ADC. Aeroplane Data Card, a play aid that lists the performance and capability data for each aeroplane type.
Aeroplane. British term for aircraft or airplane.
Aggression Value. A value representing pilot training, leadership and élan.
Arcs/Hemispheres. Arcs are 60-degree areas around a flight. The three forward arcs of an aeroplane flight make up the front hemisphere, and the three rear arcs constitute the rear hemisphere. (See the Arcs diagrams on the play aids.)
Artillerie Flieger Abteilungen (FA(A)). German artillery ranging and infantry support units.
Bouncer. A flight that attacks into an existing dogfight.
Campaign Day. A campaign day consists of a number of taskings that take place over one complete day.
Detected. A detected flight represents one that has been spotted by ground observers and has its location passed on to the aerodromes but is still a tough find for airborne flights.
Dogfight. Two or more flights engaged in prolonged aerial combat.
DRM. Die Roll Modifiers. The DRM is used to alter the results of a die roll by adding or subtracting to the total rolled.
Dummy. A fog of war term used to denote any flight that does not consist of real aeroplanes. Dummy flights are used to confuse the enemy player on the location of real flights.
Enemy/Friendly. Friendly units are all units assigned to the player by the scenario or campaign information. An enemy unit is a unit controlled by the other player.
Flaming Onion. An incendiary 37mm anti-aircraft battery used by the Germans to attack Allied aeroplanes attacking Observation Balloons or other defended assets.
Flieger Abteilungen (FA). German long range recon units.
Flugmeldedienst. German Ground Observation Posts that were instrumental in helping the Germans to maintain an effective defensive posture.
Flight. A unit of 1-6 aeroplanes of the same type in formation.
Friendly Territory. Map area that consists of all non-trench hexes that are on a particular side of the map (e.g., British Friendly Territory is on the west side of the map that does not have trench hexes).
Jasta. German term for their scout squadrons, loosely translated it means Hunting Squadron, condensed from Jagdstaffel.
No Man's Land. Any hex between the British and German trench hexes is considered not controlled by either side except where noted by SSR.
Patrol. Small scale scenario with a limited number of flights per side.
Scenario. A scenario can be on three levels; Patrol, Show or Campaign Day and vary in complexity and amount of activity.
Schutzstaffel. German term for their two-seater units that provided protection for Recon (FA) and Artillery Cooperation (FA(A)) tasked units. Shortened name is Schusta.
Scout. Term used to describe the single seat fighters used by both sides.
Service Ceiling. Maximum altitude that an aeroplane type can fly as denoted on its ADC.
Show. Medium scale scenario.
SSR. Scenario Special Rule. A scenario special rule is only applicable to that scenario or campaign. If a regular rule and the SSR conflict, the SSR takes precedence.
Tally. Codeword used by the British, meaning that an enemy flight has been visually sighted. The term Visually Sighted and Tally have the same meaning for game rule interpretation.
Tasking. A particular mission type or "job" that a flight is performing for that scenario.
Time to Climb (TtC). A term used as a compilation of an aeroplane's rate of climb and the amount of time needed to climb to a new altitude band.
Trench Line. Trench line consists of both British and German controlled hexes. Initial British trench depictions are blue and German trenches are red. Any hexes and portions of hexes between the trench lines that do not have trench artwork in them are considered to be No Man's Land.
Wind Up. British slang term denoting that a pilot/flight has become scared and they are avoiding combat or running from it. This is wind as in windy, not winding.
1.4 Scale
Hexes are one nautical mile across. Movement Points are multiples of 30 MPH. Game turns are two minutes long. There are five altitude bands, representing a flight's height above the ground, as follows: Deck (Surface-3,999 feet), Low (4,000-9,999 feet), Medium (10,000-15,999 feet), High (16,000-18,999 feet) and Very High (19,000+).
Altitude within an altitude band is tracked with Time to Climb markers that vary in value based on aeroplane performance.
1.5 Dates
Bloody April scenarios represent battles that took place from March through May 1917. Dates are usually listed by month and year.
Example: Apr 17 is April 1917.
2. Game Equipment
2.1 Dice
Bloody April uses ten-sided dice. Some die rolls are the sum of two dice (thus generating a number from 2 to 20), and some rolls only require one die (thus generating a number from 1 to 10). Play Aid tables have dice symbols in the table's upper right corner indicating the number of dice used for that table. One die symbol means one die is rolled on that table. Two dice symbols mean two dice are rolled.
2.11 Die Roll Modifiers
Some tables require players to apply die roll modifiers. These are added to or subtracted from the dice result.
2.2 Map
Design Note: The map shows the area of France where the majority of the air battles were fought during the March through May 1917 time frame.
The game map portrays a portion of France, with Arras, Cambrai and Lens as the main cities displayed on the map.
2.21 Hex Grid
A hex grid has been superimposed on the map to regulate the position and movement of the playing pieces. Each hex is individually numbered. Where a four-number map reference is given, the first two digits (00xx) indicate the hex column on the map, while the last two digits (xx00) indicate the hex row.
Distances on the map are counted in hexes. To calculate a distance, trace the shortest possible path from one map hex to another and count the number of hexes the path enters.
Example: An adjacent hex is one hex distant, the hex beyond is two hexes distant, and the one beyond that is at three hexes. When counting the distance to a flight occupying a hexside count to the nearer of the hexside's two hexes and vice versa (count from the nearer hex when counting distance from a flight on a hexside to another hex).
Half-hexes on map borders are not playable.
2.22 Terrain Features
A key describes the features of the map. Land, Forest or Urban artwork indicate types of land. Water artwork indicates rivers, lakes, canals and drainage systems. If more than 50% of the hex is water (e.g., hex 3717) or enclosed by water (e.g., hex 5301) then it is treated as a water hex and is a hazard to aeroplanes attempting a forced landing. If players are in dispute as to whether a hex is land or water, flip a coin to settle the matter.
A hex with at least 50% Urban or Forest artwork is considered an Urban or Forest hex otherwise they are considered Open land.
Example: Hex 2316 is Urban, but hex 2215 is Open, and hex 2008 is Forest but hex 1909 is Open land.
Any hex that has road artwork run through it is treated as a road hex.
The terrain type extends to the hexsides so that flights on hexsides are 'in' that terrain.
2.3 Playing Pieces
Punch out the counters from the sheets of die-cut playing pieces. Counters come in four general types: air units, ground units, chits and markers.
2.31 Air Units
Air units represent small groups of 1-6 aeroplanes also called flights. RFC flights are tan in color and DLS flights are blue.
2.32 Ground Units
Ground unit types include: AA/Flaming Onion concentrations, Artillery and British and German ground units [22]. Observation Balloons are also considered to be ground units.
2.33 Chits
Initiative chits are used to order the movement of flights.
2.34 Markers
All other counters are markers, used for indicating the status of air or ground units, or to act as a reminder for the players of the game turn or weather state.
2.4 Charts and Tables
Various charts and tables are provided for the players as reference and to resolve certain game functions.
2.5 Scenarios/Campaigns
Players have a choice of game scenarios to play. Scenarios are listed in the Playbook and describe the forces, objectives and special rules for Patrol, Show or Campaign Day scenarios. Solitaire players will find the special rules for solitaire play in this rulebook [24].
2.6 Order of Battle
Design Note: For the most part, both nations used a multitude of different aeroplane types to attack and defend their territory.
The Playbook will list the composition of forces for a given scenario [4.1] and the taskings assigned for that day and time frame.
All of the individual aeroplanes on the game's counter sheets are part of the actual rosters of those Squadrons/Jasta units (exception German FA/FA(A) and Schusta units are generic). Most will be listed in the Taskings or SSRs for a particular scenario. A consolidated listing of all the British Squadrons and German Jasta units is available as free downloadable product at www.gmtgames.com
The pilot/crew rosters can be used to populate your flights and add a level of role playing to the game. NOTE: Not all pilot ranks are listed, especially for 2-seater crews. 2-seater crews are listed Pilot/Observer. Pilots with a rating of 0 or higher are Aces or achieved Ace status during their career. Aircrew with a NR rating have to roll on the Flight Quality Table to get their Aggression Value.
2.7 Planning Map
The Planning Map is a reduced-size copy of the game map and is used to plot task locations and other planning before starting play.
2.8 ADC
Design Note: Both sides use many types of aeroplanes. The game not only distinguishes between major types of aeroplanes, such as the FE2, but the versions of each type. So the FE2b and FE2d are regarded as two separate types of aeroplane in the game and have different capabilities.
The Aeroplane Data Cards (ADC) list all the performance and combat information for the aeroplane in an easy to read format. Each aeroplane type has a separate unique ADC.
2.81 Data
The ADC data includes the number of crew members and service ceiling of the aeroplane. The performance area of the ADC lists the aeroplane's Level Speed, Manoeuvre rating, Time to Climb and Dive Speed rating for each altitude band. Firepower rating and Damage Factor are listed as well as the Ammo Depletion number and Endurance. The notes area lists any special equipment or weapons and/or any limitations of the aeroplane.
2.9 Flight Logs
There are separate flight log sheets for the British and German players. These track the status of air units [5] and also have spaces to keep track of AA/Flaming Onion concentrations, Balloons and Ground Units.
3. Sequence of Play
A scenario consists of multiple flights attempting to accomplish their taskings and/or stop the other player from accomplishing his taskings. Air units of both sides may start either in the air, on an aerodrome, or enter the map and attack ground targets, perform recon or conduct air-to-air combat and return to base or exit the map. The German and/or British player defends with air units and AA defences.
Each tasking must be planned in advance. After setting up the map and components, the scenario/campaign is then played out. Scenarios are divided into game turns. During each turn the players follow a Sequence of Play in which they conduct various game actions.
The Sequence of Play for a scenario is as follows, (where several activities are listed for a phase, perform them in the order indicated):
3.1 Prior to scenario
Weather Determination Phase. Players will roll for at-start weather conditions. Players may re-roll weather results by mutual agreement if the rolled conditions would prevent the scenario from being successfully completed. Place the Sun marker on the appropriate time slot for the time of day.
Ground Planning Phase. Both players determine map locations for hidden AA concentrations, Observation Balloons or Ground Units. Record these on their log sheets [2.9]. Any dummy unit locations will also be determined and marked on the log sheets.
Ground Deployment Phase. Both players set up non-hidden AA [4.41], Ground Units and Balloons [22] on-map.
Scenario Planning Phase. Both players determine their target(s) and plot the target hex(es) for their tasking(s) as required. Log sheets are filled out [2.9].
Air Deployment Phase. Both sides set up flights at readiness at aerodromes or in the air if allowed [4.42].
Activation Phase. Both players may activate any AA concentrations.
3.2 During the Scenario
During a scenario, resolve each game turn as follows:
Random Events Phase. One player rolls a die and if a one (1) or less is rolled then an additional two dice are rolled for a Random Event [6]. Random Event checks start on game turn two and continue every game turn thereafter.
Weather Phase. Every game turn follows this sequence:
- Weather Event Sub-Phase. First if the game turn is a multiple of ten (10) then roll on the Weather Table to see what Weather Event occurs.
- Wind Drift Sub-Phase. Check for wind drift every game turn and adjust Flight, Dogfight, and Defensive Wheel markers as appropriate. Drift of a flight (not Dogfight) may trigger an Archie attack and placement of a Barrage marker.
Detection Phase. Conduct a Ground Observer Sub-Phase and Visual Detection Sub-Phase.
- Ground Observer Sub-Phase. Roll to detect undetected flights.
- Visual Detection Sub-Phase. Flights within range may attempt to Tally enemy flights [8].
At the end of the phase remove any previously placed Barrage markers from Archie attacks [8.34].
Movement Phase. Flights enter/exit defensive wheels [10.5] and Spinning Flight effects are resolved [10.31] before initiative chit draw. Draw initiative chits [9.1]. Flights move in initiative order. During movement, flights may engage enemy air units [13.2]. During movement, (Advanced Rule) Dogfights may be activated and resolved or Bounced [13.41], AA/Flaming Onion may fire on moving flights [16.3, 16.33 and 16.4]. Bombing attacks may take place [18]. Photo recon runs take place [12.216]. Flights that are landing are resolved [11.2] and if a crash landing occurs [11.4] it is resolved. (Advanced Rule) Any flights that are still locked in air-to-air combat are removed to the Dogfight play aid and a Dogfight marker is placed in their hex [13.41]
Track Phase. Some detected or visually identified flights automatically become undetected and some visually identified flights may become detected. Flights with a Tally marker on an enemy flight must roll to maintain Tally [20]. Flights may voluntarily drop a Tally on an enemy flight during this phase.
Admin Phase. Recon tasked flights are credited with Photos taken [12.216]. Roll for Artillery Cooperation results [12.212]. Split flights [5.14]. Generate dummy counters [5.13]. Reload Ammo Drums [13.34]. Activate AA [16.2]. Observation Balloons that were under attack are winched down to the ground and removed from play if not destroyed [12.217]. Flights that will takeoff on the next game turn are placed on the map at their start aerodrome [11.1].
After the Admin Phase has finished, begin a new game turn.
3.3 Completing the Scenario
The scenario finishes when the last German or British flight has left the map, returned to its aerodrome or is destroyed, or when both players agree to quit [4.5]. After completing the scenario, conduct the following phases:
Recovery Phase. Roll for recovery of any remaining on-map flights [11.4].
Victory Phase. Players check for victory in the scenario [4.6].
4. Scenarios
Design Note: While most of the scenarios try to recreate the order of battle and conditions for an historical date, exact data on flights that may not have been involved in combat are not listed.
Each scenario provides the information required to set up and play. Every scenario will be a Patrol or Show but some can be combined and played as a Campaign [23].
4.1 Patrol or Show Scenario Format
The information in the scenario is as follows:
Scenario Date. Date of the scenario. Certain aeroplanes, weapons or capabilities may not be available on the given dates. Check the Orders of Battle tables and ADC notes for date information.
Historical Outcome. This section provides background information on the scenario.
Time of Day. This lists at which time the scenario takes place either during the day or at night [21], and the time block and number of game turns (using the 24 hour clock). If time of day is later than 1900 (7 PM) but not designated as night then Dusk conditions apply to visual sighting.
Weather. Either a specific weather condition will be listed or, more likely, players will be directed to roll on the Weather and Wind Tables for the scenario month.
Ground Setup. Listing of British and German ground units for that scenario.
Taskings. Taskings for both players will be listed and any specific parameters for the taskings.
RFC Order of Battle. This lists the order of battle to be used for the scenario including the number of dummy air units. The OOB also lists which aerodromes are active for the units.
DLS Order of Battle. This lists the order of battle to be used for the scenario including the number of dummy air units. The OOB also lists which aerodromes are active for the units.
Scenario Special Rules. This lists any SSRs that apply.
Victory Conditions. This lists any changes or alterations to the standard victory conditions [4.6].
4.2 Planning Phases
See the Sequence of Play [3.1] for the exact order in which planning functions must be completed.
4.21 Planning
Each player plans the required flight route hexes for each tasking and the game turn of entry for each flight. Players should record these locations and timing on the log sheets.
4.3 Flight Quality Generation
Design Note: Pilot quality is a decisive factor in combat as reflected in the Aggression Value. It is the product of each air force's experience and training. Notably Scout pilots may have a higher training level than 2-Seater squadrons.
The scenario will list pilot training levels for the forces on each side: Trained, Regular, Veteran or Ace. When filling out the flight details on the log sheet, roll two dice for each flight on the Flight Quality Table, referencing the flight's pilot training level to determine the Aggression Value. Note the value on the flight log sheet.
4.31 Delayed Aggression Roll (Optional Rule)
Do not roll for a flight's Aggression Value until the first time the value is needed for air-to-air combat or a Wind-up check.
4.32 Individual Flight Members
Players are encouraged to use the available unit rosters and pick pilots/crews for each available slot within a flight. These values will then be used if the flight breaks up into individual aeroplanes. The Aggression Value for these aeroplanes will then be the printed value or, if no value, the one rolled for individually on the Flight Quality Table.
4.33 Highly Skilled Flight Leaders
Flights that are led by highly skilled flight leaders defined as a pilot or pilot/crew with an Aggression Value equal to or higher than the highest possible value for the unit's pilot training level will use that pilot or pilot/crew's value in lieu of rolling on the Flight Quality Table. Some flights may have a lower value to represent a historical situation.
Example: If a pilot with a +5 rating is leading a Jasta 11 flight (Jasta 11's training level is Ace with a max +3 value) then the flight is considered to have a +5 value unless that pilot has been shot down or separated from the flight.
Example: 29 Squadron's pilot training level is Regular. Its flight leader's Aggression Value of 0 does not classify him as a highly skilled flight leader as the maximum Aggression for Regular pilot training level is +2.
4.34 Pilot/Crew Rosters
Design Note: These rosters are based on the historical pilots and crews that fought during these battles. Some went on to greater glory but most gave their life for their country in the brutal skies over the Western Front battlefield.
4.4 Set Up
Scenario Setup general rules can be found in more detail on page 9 of the Playbook.
4.41 AA Set Up
In the Ground Deployment Phase all AA upgrades and all non-hidden AA concentrations (not AA points) must be set up on the map, either active or inactive as desired [16.2]. 1/5 of the listed AA concentrations (fractions round down) may setup hidden and inactive at the start of play.
AA concentrations must be placed in any land hex. No more than one concentration can be set up in a hex (so additional AA cannot be stacked in a hex with another AA concentration).
4.42 Flight Set Up
In the RFC Air Deployment Phase and DLS Air Deployment Phase the players place flights at aerodromes or already positioned in the air. Dummy flights may set up in the air, or at an aerodrome. Dummy flights can take off like regular flights.
Flights that start in the air near aerodromes are placed at any altitude band (limited per the ADC) within three hexes of an active aerodrome (one that is in play for the scenario).
Only one flight from each aerodrome can start airborne unless noted by SSR. All other flights from that aerodrome must take off on game turn 1 or later.
All flights begin the scenario undetected.
4.5 Scenario Completion
The scenario is completed either when the last attacking flight has landed, or both players agree to end the raid because it is unlikely that there will be any more combats.
4.6 Victory Conditions
At the end of a scenario, both the RFC and DLS players total their Victory Points. The side with the highest point total is the winner.
5. Air Units
Air units represent flights of between one and six aeroplanes, all of the same type. The number of aeroplanes in a flight is determined by the scenario.
5.1 Flights
Flights and Single Aeroplane counters have the characteristics of the aeroplane that makes up that flight, as described on the ADC [2.8]. Flight/Single Aeroplane counters have a front (or forward) and rear edge.
Flight counters have a Squadron/Jasta designation and British Squadrons and German Schusta/FA(A) units will also have a Flight Identifier. Single aeroplane counters have an historical pilot/observer or ace name printed on the counter and single aeroplane counters may include a preset Aggression Value. This should be noted on the log sheet. The flight counter also indicates the specific type of aeroplane in the flight.
All flight/single aeroplane non-generic counters have two sides: the visually identified side and a detected previously visually identified side.
5.11 Generic Counters
Design Note: Generic counters are used to conceal the true identity of air units.
Until it is visually identified [8.31], a flight is represented on the map by a generic Undetected counter or a generic Detected counter. Generic counters are identified by a letter (German) or number (British). Players should note the letter/number of each flight's generic counter on the log sheet.
No information is listed on a generic counter other than the identifying alpha numeric. When a flight is visually identified, replace the generic counter with the actual flight counter. The actual flight counter will continue to be used unless the counter is outside both Tally and Ground Observation range in which case it would revert back to a Generic Undetected counter with a new letter/number if desired.
5.12 Dummies
Design Note: Dummy flights allow both sides to add a level of fog of war to a scenario and provide a means to mask locations of real flights and aeroplanes. Without radar detection systems both the British and Germans relied on ground observers to report the location of enemy flights to allow some level of advanced warning. This is especially helpful for the Germans who are at a numerical inferiority and must hold their limited numbers back until they are needed.
A scenario will allocate the RFC and/or DLS player a number of dummy flights. Dummies use generic counters. Dummies contain no aeroplanes and only exist to confuse the other player. These will be moved as if they were real units. However, they may not attempt to gain a Tally, engage or attack enemy flights. Detected dummy flights are immediately removed from the map. Dummies can be voluntarily removed from the map at any time. Removed dummies can reappear through dummy generation. During a turn, neither side is required to have its entire allotment of dummies on the map and may keep unused dummies 'in reserve' for later use.
5.13 Dummy Generation
In the Admin Phase, if allowed by the scenario, one or both player(s) may generate a dummy flight by placing it on the map at any scenario listed aerodrome. Dummies may also be generated in the same hex and altitude band and with the same heading as an Undetected generic flight counter. Only Undetected generic flight counters (including other dummy counters) generate dummies. Flights that have been Detected [8.2] no longer generate dummies but can do so again if they later become Undetected. Each flight counter may generate one dummy every Admin Phase.
When a dummy counter is generated by a flight, that flight may secretly swap its current generic counter ID with that of the dummy. A flight that swaps with a generated dummy loses any Tally it holds. Note the flight's new counter ID on the log sheet.
Example: A flight using generic counter H generates a dummy. Dummy counter B is placed in the same hex at the same altitude and with the same heading. The player may choose to keep counter H as the flight's generic counter, or adopt counter B instead. He decides to swap the flight to counter B, making counter H the new dummy.
Dummies may be regenerated any number of times, but the players may never have more dummies than their starting allowance in play at any time.
5.14 Splitting Flights
Design Note: This rule allows the player to send crippled or dud engine aeroplanes home, freeing the rest of the flight to continue with its mission.
A flight of two or more aeroplanes may split into two or more flights in the Admin Phase. This may only be done if one or more aeroplanes in the flight are crippled or have dud engine effects. Add a new single aeroplane flight counter to the map for each cripple and create a new flight log for the split flight(s). Once flights are split they may not rejoin.
One flight must comprise all the non-crippled aeroplanes. All the crippled aeroplanes must be generated as separate single aeroplane counters. All flights have the same ammo, endurance, ordnance, and tasking status as the original. Aggression Values, if not present on the single aeroplane counter, must be rolled for on the Flight Quality Table cross-referenced with the Squadron/Jasta pilot training level.
5.15 Stacking Flights
Two flights of the same nationality may stack together in the same hex/hexside and altitude band (time to climb may be different) and they can move together as long as both flights start and end in the same hex/hexside. Flights may only end in the same hex/hexside and at the same altitude if they declare stacking and must move together on the next game turn. If the two flights no longer want to move together after the first game turn of stacking they must move separately during the Movement Phase and cannot end in the same hex/hexside. This must be declared prior to moving the flights and cannot consist of partial movement of a flight then separating them.
Flights on the hexsides are not considered stacked with flights fully on the hex although they may be attacked by flights in either hex.
Stacked flights are not engaged as a single entity but must be engaged separately. The attacking flight(s) select which flight in the stack they will attempt to engage.
In the rare situation where more than two flights of the same nationality are stacked together, the owning player must move excess flights to nearest hexsides to reduce stacking to two flights per hex.
5.2 Log Sheets
Each flight has a space on the log sheet noting the flight's name, generic counter, task, Aggression Value and various ordnance and formation states. These states apply to all aeroplanes in the flight. In addition there are check boxes to note air-to-air weapons depleted and endurance expended in a tasking.
Log sheets should be filled out in the Planning Phases and the RFC/DLS Air Deployment Phase.
5.21 Aeroplane Boxes
The log sheet has six boxes numbered one to six. Each box represents the status of a single aeroplane in the flight.
Aeroplanes with empty boxes are operational and undamaged. A slash through a box indicates the aeroplane is damaged. A crossed out box indicates the aeroplane has been crippled. A crossed out and circled box means it has been shot down. Black out a box if the aeroplane does not exist in the flight.
Example: If the flight starts with two aeroplanes, black out boxes three to six.
6. Random Events
Design Note: Random events cover facets of the air war that can be modelled with an event versus a game rule to allow players to focus on the most important rules but still have some thematic effects.
In the Random Events Phase (starting on the second game turn), initially roll a D10 and if the result is a 1 or less then roll on the Random Events Table. This D10 is modified by the number of Real/Dummy flights total from both sides that are airborne at the beginning of the game turn. For every multiple of 10 flights airborne (fractions round down) for both sides, the DR is modified by –2. There is a Flight tracking marker available to aid players in tracking the total number of flights airborne. Place it on the game turn track.
If a random event occurs, roll two dice and look up the resulting event on the Random Events Table. Follow the instructions given there. Some Random Events may be excluded by SSR.
7. Weather
Design Note: Weather had a profound effect on air combat in WW1. The pilots and crew were exposed to the elements in open cockpits with poor or non-existent instruments while attempting to navigate through atrocious weather and wind conditions.
Weather effects in the game include Environmental Conditions, Line of Sight, Weather Change and Wind Drift.
7.1 Environmental Conditions
Environmental conditions cover the entire map.
7.11 Clear
No Weather Effects. Clear marker placed in Weather Box.
7.12 Mostly Sunny
Broken Cloud marker placed in Weather Box. Visibility restricted between bands. A cloud layer exists between two altitude bands which makes visual detection [8.0, 8.3] tougher (–4 DRM) between the bands. The altitude bands on either side of the layer define it.
Example: A broken cloud layer at Deck/Low altitude is considered to be between the Deck and Low altitude bands.
7.13 Mostly Cloudy
Cloudy marker placed in Weather Box. Clouds affect the entire altitude band and block LOS.
NOTE: If a Cloudy marker occurs in the Deck band, flights may still carry out their taskings (except Recon and Artillery Cooperation) at Deck+0 and that altitude level is considered Clear [7.11].
7.14 Rain or Snow
Cloudy in the band designated and visibility effects in all bands lower (Snow –5 DRM, Rain –3 DRM). Place a Rain or Snow marker in the Weather Box.
7.15 Fog
Visibility effects in the band designated (–7 DRM). Place a Fog marker in the Weather Box. Flights may not conduct Recon, Artillery Cooperation or Bombing taskings while in or above a Fog altitude band. AA may not fire on flights in or above a Fog altitude band.
7.2 Sun Arc (Optional Rule)
Based on the time of day for the scenario, place the Sun marker during daytime scenarios on the proper slot on the sun track above the compass rose on the game map. The Sun Arc may adversely affect visual detection attempts during the Detection Phase [8.3] and Engagement [13.2]. See Detection Playaid for more details.
If during the scenario the number of game turns would increase the time of day into the next block then move the Sun marker to the new time block.
Example: A scenario starts at 1000am so the Sun marker is placed in the "0800am-1059am" block. If the new game turn is now turn 30 then 60 mins have elapsed (each game turn is 2 minutes of real-time) and it is now 1100am. Move the Sun marker to the "1100am-1259pm" block.
7.3 Line of Sight
Many game functions rely on there being an unblocked Line of Sight (LOS) from one unit to another.
There is no LOS to, from, within or through an altitude band that is Cloudy. There is LOS between bands marked with a Broken Cloud marker but visibility is restricted requiring application of a –4 DRM to any detection attempts.
If the LOS is blocked, then no detection [8.2] or visual sighting [8.3] is possible and no bomb runs are permitted [18.2]. Flights may not attempt to engage in air-to-air combat without a LOS to the enemy.
Aeroplanes and/or Observation Balloons do not block LOS traced through them.
7.4 Weather Change Phase
In the Weather Change Phase (starting game turn 10 and every ten (10) game turns thereafter), roll two dice and look up the resulting event on the Weather Change Table. Follow the instruction there and change any weather markers as required on the map. Some Weather Change events may be excluded by SSR.
7.5 Wind Drift Phase
The Wind Drift Phase occurs every game turn and will affect every airborne flight on the map (exception takeoff [11.1] and landing [11.2]).
7.51 Wind Drift Procedure
When the wind condition is anything besides calm, every airborne flight will have a drift effect as listed in [7.52]. The scenario at-start conditions or random wind generation will determine from which direction the wind is blowing and at what speed in 15 MPH increments.
7.52 How to plot wind drift effects
There are 12 possible headings on the map. Five will be with the wind, five will be against the wind and two will be perpendicular and drift in the direction of the wind. The three cases are as follows:
a. If heading into the wind direction, a flight will be marked with a –.5 marker if the wind is 15 MPH. If the wind speed is 30 or 60 MPH, the flight will drift one or two hexes respectively 180 degrees opposite to the flight heading.
b. If heading with the wind direction, a flight will be marked with a +.5 marker if the wind is 15 MPH. If the wind speed is 30 or 60 MPH, the flight will drift one or two hexes respectively in the same direction as the flight heading.
(NOTE: 45MPH winds would cause 1 hex drift and placement of a +.5/–.5 marker as appropriate for cases a and b)
c. If the heading is perpendicular to the wind direction, a flight will only drift if the wind speed would produce a full hex shift (1 hex drift per 30 MPH or 2 hexes drift per 60 MPH). Do not place a +.5/–.5 marker when perpendicular to wind direction.
Example: The wind direction is from the NW at 15 MPH, if a flight was in a hex heading NW then they have a headwind drift of –.5. This –.5 marker will negate any +.5 marker already on the flight or will reduce speed by .5 this game turn. If the flight had been heading South, the flight would have had a tailwind and gain a +.5 marker. If there already was a +.5 marker on the flight then they would immediately drift 1 hex south. Finally, if the flight was heading NNE in one of the three hexes then the flight would not drift as .5 drifts are ignored if perpendicular to wind. If heading NNE and the winds are from the NW at 30 MPH, the flight would drift one entire hex to the SE.
7.53 Dogfight and Defensive Wheel Drift Procedure
During the Weather Phase, move a Dogfight and/or Defensive Wheel marker one or more hexes based on wind speed and direction as determined by the scenario setup rules, Weather Table or by random event. Dogfights and Defensive Wheels only drift if the wind will move them completely one or two hexes. Dogfights and Defensive Wheels never gain a +.5/–.5 marker.
Example: If the wind is out of the northwest at 30 MPH then each Dogfight marker on the map is moved 1 hex southeast. If the wind was only 15 MPH then the marker would not drift.
8. Detection
Design Note: The detection of enemy flights is vital to combat. Detection is the product of many factors, from ground observation to detection in the air.
8.1 Detection States
Airborne flights will be in one of four states; Undetected, Detected, Visually Sighted (VID) and Detected Previously Visually Sighted. Undetected flights can be real or dummy. Detected flights are real flights that have been spotted by ground observers or have attacked ground targets and may be engaged in air-to-air combat at a reduced probability of engagement. Visually sighted flights have been detected (Tally) by airborne flights and may be engaged in air-to-air combat with the highest probability of engagement. Detected Previously Visually Sighted flights are flights that had been visually sighted but are no longer under a Tally marker and have been flipped to the reverse side of the actual flight counter.
8.2 Detection of Flights
Design Note: Detected units have been located and friendly units alerted to their presence. The Germans in particular had a highly dedicated group of ground observer stations that reported via telephone to the Jasta units when enemy flights had crossed over the front.
Each Detection Phase, both players roll two dice for each undetected enemy flight on the map that is within detection range (consult the Detection Table play aid). Calculate the range and modify the roll by the applicable DRMs. The result will be No Effect (the flight remains undetected), or Detection. Detected flights have their generic Undetected counter replaced with the Detected side of their flight counter. If the detected flight is a dummy, remove it from the map [5.12].
In addition to regular detection rolls, players may make visual sighting (Tally) attempts [8.3] against enemy flights that will allow them a greater probability to engage that flight in air-to-air combat.
8.21 Special Detection Cases
Any undetected flight that is successfully engaged (a hit is achieved whether causing damage or not) by anti-aircraft (Archie) artillery and/or conducts a ground attack (e.g., Balloon Busting, Strafing, Bombing) will automatically have their detection status changed to detected. The defending player must provide information on the flight as per [8.33] but the flight is not marked with the actual flight counter unless visually identified by another aeroplane [8.3].
8.3 Visual Sighting
Design Note: Detected flights allow a player to know that there is flight activity in his area but visually sighting them gives him exact information on altitude, numbers and type and makes for the highest probability engagement roll.
A player may make a visual sighting detection roll for each enemy flight within five hexes (each altitude band difference between flights adds one to the range) and Line of Sight [7.3] of each friendly non-dummy flight (Dummy flights may not attempt Tallies). Choose an eligible friendly flight to make the sighting attempt. The owning player must decide in what order to attempt visually sighting as the first success will be the flight that they visually sight (Tally) (i.e., each flight may have only one Tally marker on the map). Roll two dice and apply the Visual Sighting Modifiers. If successful, mark the enemy flight with a Tally marker that matches the searching flight.
NOTE: The order of visual sighting rolls and their results may influence subsequent attempts by other flights.
Example: A flight from a squadron flying SE5s is within four hexes of an undetected enemy flight. The flight attempts to visually sight the enemy flight and is successful, marking the enemy flight with a Tally marker. Any other attempts on this enemy flight by other flights will no longer have the Undetected –3 DRM.
Do not roll for visual sighting at night [21.12]. If a scenario time of day goes beyond 1900 pm but is not designated a night scenario then Dusk conditions apply which will reduce visual sighting to two hexes. Aborting flights may attempt visual sighting and should do so to avoid being attacked easily. Aeroplanes in spinning flight may not visual search.
8.31 Visual Identification
Flights use generic flight counters (Undetected) or flip side of generic flight counter (Detected) [5.11] until they are visually identified, at which point they are replaced with the actual flight counter. Flights not visually identified during the detection phase become visually identified if the flight enters air-to-air combat.
Flights cannot be visually identified at night [21.12].
8.32 Effects of Visual Identification
Flip the flight counter to its visually identified side.
Identified flights cannot generate dummies [5.12]. The owner of the identified flight must give Visual ID information to his opponent [8.33].
8.33 Visual ID Information
Players keep the information on their log sheet secret from their opponent. However, if a flight is visually identified [8.32], the following information must be given:
a. The total number of aeroplanes. b. The type of aeroplane. c. The actual altitude of the flight in feet. d. The number of damaged and crippled aeroplanes.
8.34 Removal of Barrage Markers
Any Archie Barrage markers are removed at the end of the Detection Phase.
9. Initiative
Design Note: Air battles are fluid and dynamic. The initiative system models this 'organized chaos'.
At the beginning of each Movement Phase, the German player will decide whether to move first or second. Once this decision has been made the RFC and DLS players alternate movement, the number of aeroplane flights moved being determined by the draw of initiative chits.
9.1 The Chit Pool
The DLS and RFC players maintain a 'chit pool' consisting of numbered initiative chits, usually kept in a cup or other opaque receptacle.
Chits are drawn from the pool during play. The chits are double-sided with a Large Force side and Small Force side. The player checks the value on the appropriate side. After a chit has been drawn and flights equal to the chit value have moved, it is immediately placed back in the cup.
9.2 Drawing Initiative Chits
Design Note: The proximity of the ground observers gives the defenders an edge. They get to choose to move first or second. The RFC doctrine as set forth by their commander in chief Hugh Trenchard was to be on the offensive and take the fight to the Hun. The German player will be on the defensive.
The player for the side that moves first draws an initiative chit from the pool. The chits are double-sided with a large force side and a small force side [9.22]. The resulting value is the number of flights (real or dummy) the player must move and/or the number of Dogfights where the player is the attacker or bouncer that he may activate. The player may choose which flights to move or Dogfights to resolve and in which order. Once flights/Dogfights equal to the chit value have moved or been activated, play passes back to the other player who must draw a chit and move the requisite number of flights or activate Dogfights. Chits are returned immediately to the pool after they are used and could be drawn again.
Flights stacked together that will be moving together count as one flight for initiative use but count as two flights for overall force size. Play passes back and forth between the players until all flights and Dogfights on the map have moved or been activated. Drawing a "0" chit immediately passes play back to the other player without moving any friendly units.
No flight may move or Dogfight activate more than once per Movement Phase. If all flights on one side have moved or there are no Dogfights to activate, play passes to the other player who must move all remaining flights or activate Dogfights. (No chit draws necessary.)
9.21 Non-Chit Pool Usage
For game turns where flights have not crossed the trench lines [1.3] and are at least 10 hexes or more from an enemy flight there is no chit pull required. The German player will move all of his flights and the British player will move all of his flights. If at the start of any game turn, any flight has crossed the trench line then a normal chit pull sequence occurs.
9.22 Large Force and Small Force Chit Pools
Use the Large Force side for 10 or more flights and Small Force side for 9 or less flights. Force size is calculated separately for each side. All airborne flights (including dummies) count for the force pool size. All flights that start the turn on the ground are not considered for the force pool count until they become airborne (e.g., they will count towards your total during the next game turn).
Example: The RFC player has 10 flights in play, he will use the Large Force side. The DLS player has 3 flights in play, he will use the Small Force side. The DLS player is the defender and decides that the RFC player will go first. The RFC player draws a "3" initiative chit. He moves three RFC flights. Play passes to the DLS player. He draws a "0" chit. The DLS player does not move any flights and play passes back to the RFC player.
The RFC player now draws a "4" chit. He must move four RFC flights. (These can't be flights that have already moved.) The DLS player now draws a "1" chit, which means he must move a single DLS flight.
After the DLS flight has moved, the RFC player draws a "5" chit. However, he only has three unmoved flights remaining. So the RFC player moves the three RFC flights and immediately passes play to the DLS player. Since all the RFC flights have moved, the DLS player does not need to draw again. He just moves his remaining two flights.
10. Movement
Design Note: When wargaming large-scale air battles, it's not necessary to portray the physics of flight or three-dimensional movement in the same detail as a tactical level game. However, aeroplanes must keep moving or they will fall out of the sky, while altitude bands show how high above the ground they are and their position within that altitude band.
10.1 Counter Placement
Flight counters are placed on the map either in the centre of hexes, or on hexsides facing a hex corner.
10.11 Flight Facing
Flights must face their front sides toward hexsides or hex corners. When moving, move flights into the hex directly ahead, unless they are pointing at a hex corner, in which case move them onto or off the hexside.
Turning alters facing. Each hex corner or hexside turned is an increment of 30 degrees.
A flight that turns while occupying a hexside moves into the hex in the direction of the turn.
10.12 Hexsides
For the purposes of combat, a flight occupying a hexside occupies both hexes sharing that hexside. Attacks against the flight can be made into either hex. When attacking a flight on a hexside, designate which hex the attack takes place in. Treat the flight as if it occupies that hex, without changing its location or facing.
Air-to-air attacks by a flight on a hexside can be made from either hex. If the attack results in an engagement slide the flight into the hex the attack takes place from.
10.13 Altitude
Flights can fly in five altitude bands. From lowest to highest they are: Deck, Low, Medium, High and Very High. Mark the altitude of each flight by placing an Altitude marker on or near it.
10.14 Time to Climb
Within each altitude band, flights will have a designated Time to Climb (TtC) value that differentiates how high within a given altitude band the flight is flying. The aeroplane ADC will also list the maximum time to climb rate for each altitude band which will most likely be different between different aeroplane types. This is important for tracking how long it takes to climb to the next altitude band and is also used in combat to determine the altitude advantage [10.15]. Some ADCs may have a split value for an altitude band. The first value denotes the highest level they can climb within that band and the second value denotes the climb rate when looking at the Altitude Conversion Tables.
Example: Halberstadt D.II has a TtC value of 7/13M in the Medium Band. The highest value TtC marker they can have is Med+7 but on the conversion table you would look at TtC Med 13 column to find their altitude values which in this case Med+7 equals 13220ft, the D.IIs service ceiling.
Flights flying at the lowest level of an altitude band will be marked with Alt Band+0 markers to show they are at the bottom of the band. Any subsequent game turns spent climbing will increment the Time to Climb value by one.
NOTE: Common practice is to have the current value always facing to the top or towards North of the map. Players may set their own preference for this but should come to a standardized agreement to avoid any confusion.
10.15 Calculating Altitude Advantage
Design Note: Time to Climb values are used for calculating the altitude advantage which is a modifier for air-to-air combat or when a player wants to compare the relative altitude of two flights.
To calculate altitude advantage, players will compare the Time to Climb values of the two opposing flights. The flight that is higher within the band has an altitude advantage. There are two ways to quickly find relative altitude. The first is to compare fractional values of the relative time to climb and the time to climb rate for that aeroplane and altitude band. The flight that is higher within the band has the altitude advantage.
The other method is to use the conversion charts to find the actual relative altitudes. The Time to Climb tables can be found on pages 37-39 of this manual.
Example: A flight of SE5s are at Time to Climb Medium +5 and a flight of Alb DIIIs are at Time to Climb Medium +5. The SE5 have a maximum Time to Climb value of 7 for the Medium band so their fraction is 5/7 while the Alb DIII has a maximum time to climb value of 8 at the Medium band for a fractional value of 5/8. 5/7 is greater than 5/8 so the SE5 is higher and has altitude advantage. Using the conversion tables, the SE5s at Medium +5 are at 14250ft and the Alb DIIIs at Medium +5 are at 13750ft.
10.2 Movement Points
Design Note: The number of Movement Points available determines how far a flight moves on the map.
Flights move in the Movement Phase by expending Movement Points (MP). A flight's total MP for the Movement Phase is based on its current speed and any +.5/–.5 marker. A flight's speed is determined by its aeroplane type, altitude, and max allowable speed for the movement type selected for that game turn.
The ADC lists the maximum speed values. Values are listed for each altitude band. Aeroplanes use the speed value for the altitude band in which they begin the game turn. If no value is listed for an altitude band, the aeroplane cannot move in that band or enter it.
To move a flight, first decide which movement type to select and then cross check for max allowable speed. Then announce the flight's total MP before it begins to move. This MP total is the flight's speed for the game turn. The flight must expend all its MP when moving.
10.21 Speed Setting
For the movement type selected, announce the MPs equal to the maximum allowable speed, or up to one less than this number. A flight's speed can never be less than one MP (unless affected by drift which could reduce speed below one). Speed setting may be listed as a fractional value and if that is the case then the next game turn's speed will have a +.5 marker to denote potential added movement. A flight may be marked with a +.5 or –.5 marker due to wind drift effects [7.52].
Example: If the maximum speed for an altitude band on the ADC is 3, a speed of 2, 2.5 or 3 MP can be announced.
Example: If the speed selected is 2.5 then a +.5 marker will be placed on the flight at the end of its movement. On the next game turn if 2.5 is selected again, it will have a total MP allowance of 2.5+.5.
For AA attack purposes a flight's speed is equal to its speed setting plus/minus any wind drift and if climbing, flight speed is equal to the reduced MPs. If diving, flight speed is equal to the diving speed.
Example 1: A flight selects a speed of 3MP but has a –.5 marker. The flight's speed is considered 2.5MP for any Archie DRMs.
Example 2: A flight in climbing flight with a speed of 3MP will have only 2MPs available for movement and the flight's speed is considered 2MP for any Archie DRMs.
Example 3: A flight in diving flight with a diving speed of 4MP will have 3MPs if diving to another altitude band or 4MPs if staying within the same band. For Archie DRM purposes it's speed is considered to be 4MPs in either case.
On the game turn that landing begins a flight may announce MP between 1 and its maximum speed [11.2].
10.3 Movement
10.31 Movement Types
The movement type must be selected at the beginning of the turn. Flights cannot mix and match different movement types and the entire game turn's movement is executed with the one selected movement type:
-
Level Flight. Move one hex straight ahead for each MP allowed. On entering a hex the flight can make a free turn up to the allowance indicated on the Turn Table [10.32]. A flight may also use one MP to turn up to the flight's maximum turn value without leaving the hex [10.32]. Flights in level flight will maintain their current time to climb marker (i.e., they do not gain or lose altitude).
-
Climbing Flight. Climb one increment after the expenditure of any MP during the game turn (i.e., increase the Time to Climb marker by one). After each MP expended the flight can make a free turn minus 30 degrees. If the flight has completed the required time to climb to the next altitude band it can be marked with the next higher altitude band marker (i.e., Low replaced by Medium) otherwise continue to mark it with the appropriate Time to Climb marker incremented one tick. A flight that selects climbing flight uses the same maximum speed settings as Level flight but has its total MPs reduced by one to represent the vertical component of its flight movement. Mark the flight with a Climb marker if the possibility exists for the flight to be engaged to denote the reduction in Manoeuvre rating. A flight may also use one MP to turn up to the flight's maximum turn value without leaving the hex [10.32].
Example: A Sopwith Pup in the Medium band has a Max Level Speed of 3.0. If it selected Climbing flight its Climb Speed would be a value from 1.0-2.0 MPs and only those reduced MPs would count for movement and turning and any Archie DRMs.
-
Diving Flight. Dive to a lower altitude within the current altitude band (i.e., lower Time to Climb value) or one complete altitude band lower using Dive Speed MPs. Altitude change is considered to occur after expenditure of last MP. On expending a MP the flight may make a free turn up to the allowance indicated on the Turn Table. If the flight dives into a lower altitude band then the flight must subtract one MP from its total MPs to represent the vertical component of its flight movement, otherwise the flight's MPs are equal to its Dive Speed.
A flight can select any allowable value for its Time to Climb marker for the new band that it dived into or a lower value within the band it started in. A flight can also use one MP to turn up to the flight's maximum turn value without leaving the hex [10.32].
For AA attack purposes, the flight's speed is considered to be the total Dive Speed.
Example: A flight diving one altitude band has a Dive Speed of 4MP – 1MP for diving an altitude band. Any AA attacks on the flight would use the 4MP DRM as the total speed but the flight is only moving 3MP horizontally.
Dangerous Dive Limitation: Some ADCs may list a Dangerous Dive Limitation. If these aeroplane types attempt to dive at their max dive speed they risk structural damage or even structural failure. At the end of each movement segment where they dove at max dive speed, roll a D10. On a (1-4 no effect), (5-7 damaged), (8-9 crippled), (10 aeroplane destroyed (crew KIA)). Use random selection to determine which aeroplane within a flight is affected by the result.
10.32 Turning
Design Note: Aeroplanes of this era are flying quite slow compared to those modelled in Downtown and Elusive Victory but are highly manoeuvrable. The manoeuvres shown by turning are the formation turns to change direction outside of the swirling ballet of a dogfight.
The Turn Table lists a free turn allowance, based on the flight's speed that applies whenever a flight moves a hex. On entering a hex, a flight may freely change facing at no MP cost up to its free turn value. MPs used while in Climbing Flight allow a free turn minus 30 degrees.
Turn Table
| Speed (MP) | Free Turn | Max Turn |
|---|---|---|
| 1-4 | 90° | 180° |
| 5-6 | 60° | 120° |
If a flight wants to turn more than its free turn allowance in a hex it must pay one MP (Turn MP) [10.31]. The Turn Table lists the maximum amount a flight can turn in a hex based on its speed. A flight cannot add this maximum to the free turn allowance; the maximum is the limit for all turning in that hex.
Example: A Sopwith Triplane using level flight at a speed of 4MPs moves into a hex with its first MP and turns 90 degrees to the left (free turn allowance). With its next MP it could stay in place and turn up to 90 degrees left for a total of 180 degrees (max turn allowance). The Sopwith Triplane has already turned 180 degrees and cannot turn again in the same hex so could move forward one hex and turn 90 degrees left with its third MP and use its fourth MP to finish off the 180 degree turn with another 90 degree turn to the left, and would be marked with a Turn marker.
A flight that begins its Movement Phase in a hex it did not use a Turn MP on its last MP may use its first MP to turn up to its max turn allowance minus any free turn used on last MP of previous game turn (this will require some bookkeeping to track). Mark flights that have used a Turn MP on their last MP of previous game turn with a Turn marker and they may not use a Turn MP on first MP of next game turn even if max turn allowance not reached.
Flights cannot make consecutive turns in the same hex once they have used their maximum turn allowance of a combination of either a free turn and turn MP or a max turn MP. They must leave the hex before turning again.
10.33 Manoeuvre Markers
Design Note: Manoeuvre markers represent the consequences of dogfight combat, where hard turns eat up speed and reduce movement.
Manoeuvre markers are placed on flights after scattering in air-to-air combat (see [15.2] for exceptions). Do not place markers on flights already marked with Manoeuvre markers or flights marked with a Dogfight marker.
A flight that begins movement with a Manoeuvre marker must expend 1 MP from their allowance to remove the marker before they expend any other Movement Points.
10.34 Dogfight Markers
Design Note: Dogfight markers represent that the combatants are locked in aerial combat and will not manoeuvre out of that hex for the next game turn. Dogfights can last up to 20 minutes (10 game turns). While some dogfights did last longer than this it was quite rare and a limit was placed for playability.
During the Movement Phase, Dogfight markers are placed on an engagement where neither flight was shot down or disengaged. Place the Dogfight marker in the appropriate hex and move the flight counters to the Dogfight play aid with the defending flight in the defender slot and attacking flight in the attacker slot. Initially the bouncing flight slot will be empty on the Dogfight play aid but may be filled on subsequent game turns. Place a "1" marker in the Dogfight Time Slot on the Dogfight play aid to show that this is the first game turn of a dogfight.
10.4 Endurance (Optional Rule)
Aeroplane types have an Endurance rating in minutes of flight on their ADC. Endurance used varies based on the flight type selected and whether maximum allowable speed is selected.
- Level Flight: 2 pts for maximum allowable speed, 1 pt for any speed below maximum
- Climbing Flight: 2 pts for maximum allowable speed, 1 pt for any speed below maximum
- Diving Flight: 1 pt for all speed regimes
- Gliding Flight/Dud Engine: 0 pts
- Takeoff: 2 pts for 2 game turn process
- Landing: 1 pt for 2 game turn process
- Dogfight: 2 pts per game turn
10.41 Exceeding Endurance
Flights that exceed their Endurance rating or have their engine knocked out by special damage results can only select Gliding Flight as their flight type. Any flight that starts at Deck altitude and must select Gliding Flight will land or crash land in the last hex moved into based on the terrain type of that hex. Roll for crew survival on the Crash Landing Table.
10.5 Defensive Wheel
Design Note: In the defensive wheel, aeroplanes fly in a circle so that each aeroplane covers the tail of the one in front. Wheels are used as 'bait' to draw in enemy fighters, or to protect less manoeuvrable and vulnerable aeroplanes from attack. This was primarily done only by two-seater aeroplanes which is why the rule is only allowed for that type of aeroplane.
10.51 Entering Defensive Wheel
Only a non-disordered two-seater aeroplane flight may enter a Defensive Wheel formation at the beginning of the Movement Phase, before any other flights move. Place a Defensive Wheel marker on the flight. Only a flight comprising of two or more of the allowed aeroplane types may form a defensive wheel. If a defensive wheel is reduced to a single aeroplane, the Defensive Wheel marker is removed.
Flights in a defensive wheel do not expend MP. The player cannot move flights in defensive wheels or count them toward the number of flights moved for initiative purposes. If stacked flights are eligible to enter a defensive wheel then each flight becomes a separate defensive wheel in the hex (keep a sidenote as to which flight applies to each defensive wheel). Flights in a defensive wheel are subject to wind drift [7.53].
Note: Flights tasked with Recon or Artillery Cooperation that enter a Defensive Wheel cannot perform those taskings during game turns spent in a Defensive Wheel.
10.52 Defensive Wheel Benefits
Flights in a defensive wheel have no heading. All arcs are treated as the forward arc for combat purposes.
Flights in a defensive wheel never suffer the penalties of disadvantage and attackers can never claim surprise against them [13.232]; they do not scatter and cannot be marked with a Manoeuvre marker. They use their Manoeuvre rating as listed on their ADC.
10.53 Exiting Defensive Wheel
A flight may exit a defensive wheel formation at the beginning of any Movement Phase, before any flights on the map move. To exit, remove the marker from the flight. The flight may face in any heading desired. The flight can now move normally in that Movement Phase.
10.6 Flight Abort
Design Note: Sometimes flights 'abort' or get "Wind Up" and break for home and safety.
Flights abort as a consequence of random events, a wind up check, damage, lack of ordnance or depletion of air-to-air ammunition. The player may choose to abort a flight at any time. Note the abort state on the flight log sheet. Optionally, use an Abort marker to mark the flight.
Any flight that aborts may move freely, unrestricted by the flight path rules. Aborted flights cannot initiate air-to-air combat or conduct air-to-ground attacks and must jettison all bombs [18.11]. There are no specific restrictions on aborted flight behaviour because there are too many variables that would influence it, but an aborted flight should avoid all combat and attempt to land at an aerodrome owned by their side [11.0]. Players should attempt to land at the flight's home aerodrome but due to damage or lack of endurance any aerodrome on their side of the lines can be used.
10.7 Flight Navigation
Flights may be required by their tasking to predetermine start and end hexes (Offensive/Line Patrols). Bombing flights must predetermine their bombing hex. Recon flights must predetermine which hexes they will attempt to photograph. The hexes are determined during mission planning and players should write them on their log sheets or use another written method to prove to their opponent which hexes were used to fulfil their taskings. Other than these hex requirements, flights are not restricted in routing to get to their required tasking's hex(es).
10.71 Navigational Error (Advanced Rule)
If an altitude band is completely covered with Clouds, flight within that altitude band risks disorientation. At the end of a movement segment that started and ended within a Cloud band, roll a D10. If the flight turned 30 degrees modify this roll by –2 DRM and a turn of 60 degrees or more by –3 DRM. On a modified result of 0 to 1 a navigational error has occurred. Conduct a scatter check [15.2] and mark the flight with a Manoeuvre marker. If the modified result is less than 0 then one aeroplane in the flight has entered a spin. Use random selection to determine which aeroplane within the flight has entered a spin and follow the Spinning Flight rules for that aeroplane [10.31].
NOTE: BE2 aeroplanes may only enter a spin by Navigational Error which simulates the aeroplane being flown in an unusual attitude causing loss of control.
11. Aerodrome Operations
11.1 Take off
Taking off from an aerodrome is a two game turn process. On the first game turn of take off, place the flight on the aerodrome hex that it is taking off from and mark it with a Deck +0 Altitude marker. On the second game turn of take off, the flight may now move in level flight at Deck Speed –2 or 1MP whichever is greater and is still considered to be at Deck +0 for time to climb (Wind Drift does not affect the flight on this game turn). During the second game turn of take off the flight may do free turns but is restricted as if it is climbing (60 degrees max free turn) and may increment its Time to Climb marker [10.14] by 1 if free turning 30 degrees or less for the game turn. On the third game turn, the flight may freely select Level or Climbing Flight type. Endurance used for all flights during take off is 2 Endurance points for the two game turn process (1 per game turn).
11.11 Takeoff Direction (Optional Rule)
Aeroplanes must take off into the wind. Depending on the current wind direction, on the turn of take off the flight must be placed facing opposite the wind direction or any heading if the wind is calm. For aerodromes that are on the map border, use any legal heading for take off if the wind direction would cause the take off to go off the map.
11.12 Takeoff Attrition (Optional Rule)
Design Note: WW1 era aeroplanes were not the most reliable aeroplanes and many an Ace was lost not to combat but to engine malfunctions or other flight related mishaps.
Roll a D10 for every flight taking off at the end of the first game turn of take off. On a result of one (1), that flight has suffered an engine malfunction (apply a –1 DRM if the flight's size is four or more). Roll a subsequent D10 and on a result of 1-3, one aeroplane has crashed. Roll for crew survival. On a result of 4-10, the aeroplane has recovered successfully but is out of the scenario.
11.2 Landing
Landing at an aerodrome is a two game turn process. On the first game turn of attempting to land, the flight must end its Movement Phase adjacent to and facing an aerodrome at Deck+0 or Deck+1 and declare landing. On the second game turn of landing, in lieu of normal movement, the flight is moved 1 hex to over the aerodrome and will land. Remove the flight from the map. Endurance used is 1 total for the two game turn process (i.e., 1 for the first game turn and 0 for the second game turn).
11.21 Landing Direction (Optional Rule)
Aeroplanes must land into the wind. Depending on the current wind direction, on the final game turn of landing the flight must be facing opposite the wind direction or any heading if the wind is calm. Use any heading for aerodromes that are on the map border if unable to land into the wind.
11.3 Manoeuvre Restriction Take off/Landing (Advanced Rule)
Flights have their Manoeuvre ratings reduced to one while taking off and landing. The penalty lasts from the moment take off commences and the flight is placed on the map until the end of the second Movement Phase of flight [11.1]. It lasts from the moment landing begins until the aeroplane is on the ground [11.2]. Bomb laden aeroplanes' maximum Manoeuvre rating is one at all times [18.11].
11.4 Crash Landing and Recovery
Design Note: Damaged and fuel-low aeroplanes didn't always make it home. Great efforts were made to nurse cripples back to an aerodrome but more often than not the aeroplane came down in a field or no man's land. While some pilots and crew landing in enemy territory possibly could escape it was very rare due to the trench system and the majority were captured.
If a flight is unable to land at an active aerodrome then they are considered to crash land. In most cases this will be due to Dud Engine [14.24] damage or by exceeding the aeroplane's Endurance [10.4] that forces the use of Gliding Flight [10.31]. The terrain type of the hex landed in is used to determine whether the crash landing is successful or not; roll for Crew Survival on the Crash Landing Table. Crew surviving in enemy territory are automatically captured and taken POW.
If a flight lands at an aerodrome or the scenario ends while it is still on the map, it must roll for recovery if the flight has damaged or crippled aeroplanes.
Rolls take place in the Movement Phase that the flight lands in or immediately if the flight ends the scenario on the map.
Roll two dice for each aeroplane (not flight). If the roll is 2 or more the aeroplane recovers (lands) safely at a friendly aerodrome, otherwise it is destroyed. Modify the roll as follows:
- –2 the aeroplane is damaged.
- –7 the aeroplane is crippled.
11.5 Off-Map Locations
There is one RFC aerodrome that is located off-map. Flights taking off from this aerodrome will always start the game airborne in the entry hex on the map having expended Endurance equal to their starting Time to Climb marker plus two for takeoff. Flights roll for any take off attrition (optional rule [11.12]) prior to the scenario start. Flights landing at this aerodrome must end their movement in the entry hex on the map and then calculate their Endurance used to land.
Example: Treizennes legal entry hexes are 0801 and/or 0901 unless Scenario SSRs list a different entry hex.
12. Task Planning
Design Note: Each flight during a scenario is given a specific tasking. Multiple flights may have the same tasking to accomplish within the scenario time frame.
12.1 Taskings
Each tasking will have specific objectives that a flight has to meet to complete the tasking. Some taskings (e.g., Artillery Cooperation) may require the player to complete a matrix of tasks in order before the tasking is complete.
12.2 Task Definitions
Design Note: Each flight in a scenario has a specific job to perform, as reflected by their tasking.
Flights are assigned tasks that determine their behaviour for the scenario. Note tasking on the flight log in the Planning Phase. Tasks are listed below. The air-to-ground entry lists the ground targets the flight is allowed to attack. If 'none' is listed, the flight may not attack ground targets. If the air-to-air entry lists 'attack and defend' the flight may freely attack or defend against enemy flights. If it lists 'defend', the flight may not initiate an attack in air-to-air combat. The altitude restriction entry will list either an entire altitude band or a maximum altitude regime that the tasking must comply with although the flight may attempt the task at a lower altitude.
| Task | Air-to-Ground | Air-to-Air | Other Behaviour | Altitude Restrictions |
|---|---|---|---|---|
| Bombing | Attack targets in the target hex; also AA concentrations in or adjacent to the target hex | Defend | None | Max Altitude 8-10,000ft |
| Artillery Cooperation | None | Defend | Must follow Artillery Cooperation Matrix. May be assigned more than one artillery battery to work tasking | Max Altitude 5-7,000ft |
| Offensive Patrol/Line Patrol | None | Attack and Defend | Must abort when all air-to-air weapons are depleted and/or jammed | None |
| Contact Patrol | None | Attack and Defend | SSR will list the number of ground units that must be contacted for a successful tasking. Must abort when all air-to-air weapons are depleted and/or jammed | Deck band |
| Close Escort | None | Attack and Defend | Must abort when all air-to-air weapons are depleted and/or jammed. Reverts to Offensive Patrol if the escorted flight is shot down or aborts | None |
| Recon | None (Only Recon-capable flights may fly this task) | Defend | Conducts reconnaissance of target hexes. | Max Altitude 15,000ft*; Min Altitude Deck+1 or 1,500ft whichever is higher |
| Balloon Attack | None | Attack and Defend | Must abort when all air-to-air weapons are depleted/jammed | Deck/Low band |
| Trench Strafing | Attack targets in the target hex with MGs or Bombs; also AA concentrations in or adjacent to the target hex | Attack and Defend | Must abort when all air-to-air weapons and ordnance are depleted or expended | Deck band |
| Defensive Scrambles | None | Attack and Defend | Must abort when all air-to-air weapons are depleted/jammed | None |
12.21 Task Descriptions
Each flight's task may have some unique characteristics or requirements for that flight to successfully accomplish its task. Flight size is normally determined by rolling on the appropriate chart or as listed by the SSR.
12.211 Bombing
Any flight size from two to six aeroplanes may be assigned a Bombing (B) tasking (single aeroplane flights may not except by SSR or if night bombing) and the aeroplane type must be able to carry bombs. Bombing taskings may have a Close Escort tasked flight escort them on their tasking. Bombing flights must either meet the Close Escort over their aerodrome, the Close Escort flight's aerodrome or designated rendezvous hex.
12.212 Artillery Cooperation
Artillery Cooperation (AC) taskings are undertaken by single aeroplane flights (exception: the Germans may use two aeroplane flights with one aeroplane fulfilling the Schusta role—the German player should note on his log sheet which aeroplane is performing Artillery Cooperation and which is the escort).
Artillery Cooperation flights must be assigned one or more on-map artillery batteries to complete their tasks. Unless a SSR states otherwise the max effective range for Artillery is 6 hexes.
Eligible targets are enemy artillery batteries, road/railway junctions, AA units, ground troops and trench line hexes. Targets may be limited by SSR. The player notes the firing battery and its target during the Planning Phase of the mission and reveals it to his opponent when the friendly artillery battery begins firing. During the Artillery Cooperation tasking the flight must maintain LOS between the firing unit and target unit. LOS from the flight to the target or firing battery is simply calculated as altitude/1,000 = range (round down to nearest whole number).
Example: A flight at 4,000ft can spot a target 4 hexes away. If LOS is lost for any reason (e.g., weather, outside of range) then the process is halted until a LOS is re-established. Flights that break off the Artillery Cooperation tasking due to hostile aeroplanes must re-establish Battery Sighting and Battery Contact and once completed can continue with the last step completed prior to breaking off the tasking. Flights may not conduct Artillery Cooperation taskings if flying in a Fog band.
Artillery Cooperation taskings follow the sequence of the Artillery Cooperation Matrix to resolve (see that playaid for more details).
Damaged aeroplanes may continue with an Artillery Cooperation Tasking.
Markers used in conjunction with the Artillery Cooperation Matrix: BTY CON = Battery Contact, CF = Commence Firing, CFHA = Cease Fire Hostile Aircraft, FFE = Fire for Effect.
12.213 Offensive Patrol / Line Patrol
Any flight size from one to six aeroplanes may be assigned an Offensive Patrol (OP)/Line Patrol (LP) tasking. Offensive Patrol taskings take place on the enemy side of the trench lines while a Line Patrol takes place within two hexes from any "active" trench line hex. Both patrol types require designating a start and end hex for the patrol that meets the type requirement and the two hexes must be at least 10 hexes apart. SSR may predetermine hexes for the start and end point or add more than two hexes for the patrol.
An Offensive Patrol or Line Patrol cannot count any hexes flown in a weather band (i.e., if flight is flying in the Low band and that band has cloud cover) towards the total hexes for the patrol. It must be conducted below or above any solid weather (clouds, fog).
12.214 Contact Patrol
Any flight size from one to six aeroplanes may be assigned a Contact Patrol (CP) tasking. A Contact Patrol is flown at the Deck band and requires the flight to overfly ground units to determine whether they are friendly or hostile. To identify a ground unit, the flight must spend an additional MP in the hex to conduct the spotting. After the MP is expended, the ground unit is flipped over from its generic side to show its type (Infantry, Cavalry or MG). Contact Patrols score VPs by the number of friendly forces spotted. A flight must return to its home aerodrome or another friendly aerodrome for VP credit to be scored.
12.215 Close Escort
Any flight size from one to six aeroplanes may be assigned a Close Escort (CE) tasking. A Close Escort tasking will have an associated Bombing tasked flight that they will escort either to or from the bombing location or some portion of the Bombing tasked flight's route as listed by SSR. Close Escort flights may move when their Bombing flight moves as a single initiative order (i.e., Stacked [5.15]) or move separately but remain within one hex of the Bombing flight by the end of movement phase. Prior to moving, a Close Escort flight can break off from their escorted flight and attempt to engage an enemy flight but at that point they are no longer considered a Close Escort and will move separately on subsequent game turns. Both flights still move on one initiative order for the game turn they split up. Flights can move together later if they meet stacking criteria again [5.15].
12.216 Recon
Any flight size from one to six aeroplanes may be assigned a Recon tasking (Maximum of two aeroplanes equipped with cameras). The other non-camera equipped aeroplanes in the flight are providing escort to camera equipped aeroplanes. There are two types of Recon—Trench Recon and Long Range Recon. Trench Recon consists of one or more aeroplanes equipped with a camera taking photographs of target hexes within three hexes of the current trench line. Long Range Recon consists of one or more aeroplanes that fly behind enemy lines (beyond three hexes of the current trench line) to report on troop concentrations and enemy movements or other items of interest to Higher HQ and will usually have the flight fly to a specific hex versus a range of hexes.
Each camera equipped aeroplane may attempt to take a maximum of 10 hexes worth of photos or as directed by SSR. The hexes flown over for photography must be over flown straight and level and only MPs used without turning can be used to take a photograph. Hexsides are not valid for photography, only full hexes.
Example: A flight may enter a hex without turning on the 1st MP, and take a photo then use the 2nd MP to turn within the hex up to its turning limit.
Recon aeroplanes that are damaged by AA or are engaged in combat do not count any of the hexes flown over for total photographed hexes during that game turn. Damaged aeroplanes can continue with the tasking on a subsequent game turn.
Determine if hexes flown over were valid during the Admin Phase (players may keep a side log of this on their log sheets).
Legal hexes for Recon are any Enemy Trench line, Road, Rail, Town, Aerodrome or Open (non-wood) hex. Once a Recon flight has landed they will roll on the Photography Plate Table to see how many VPs they scored based on the number of hexes photographed and whether the flight suffered any damage.
Flights assigned a Recon tasking must assign which aeroplanes in the flight are equipped with cameras and mark that info on their log sheet (to be revealed to opponent only after the mission). All other aeroplanes in the flight are escorting the camera equipped aeroplanes.
Most aeroplanes are limited by the 15,000ft restriction or their Service Ceiling but some aeroplanes may be able to fly higher for Recon as denoted on their ADC.
German recon flights normally had one aeroplane from the FA or FA(A) units and one aeroplane from a Schusta unit escorting it. The German player denotes on his log sheet which aeroplane is camera equipped and which is an aeroplane assigned to a Schusta. Formations with Schusta aeroplanes get a modifier on disengagement.
Example: A flight of 4 FE2bs are on a Trench Recon tasking and aeroplanes #3 and #4 have cameras. During air-to-air combat aeroplane #3 was shot down but aeroplane #4 made it home safely. VPs for Recon would be rolled for only one aeroplane on the Photography Plate Table.
12.217 Balloon Busting
Any flight size from one to six aeroplanes may be assigned a Balloon Busting tasking. Balloon Busting can only take place at Deck or Low altitude based on the Balloon height. Balloons have an increment of 1,000ft per Time to Climb marker. The owning player can set Balloons at Deck+2 (2,000ft), Deck+3 (3,000ft) or Low+0 (4,000ft). This altitude is set at the scenario start and will not change other than to lower the balloon due to engagement.
Aeroplanes without Le Prieur or Buckingham ammunition will only destroy a Balloon with a shot down result. Aeroplanes with Le Prieur rockets or Buckingham ammunition can destroy a Balloon on a crippled and/or shot down results. Attacking aeroplanes must have a Tally on the Balloon prior to attempting to engage it (note: Balloons are never considered Detected—they are either Undetected or Tallied). Aeroplanes can only make one attack attempt per Balloon as the Balloon will be pulled down to the ground during the Admin Phase of the turn an engagement is attempted whether it was successful or not. Balloons are considered to have a Manoeuvre rating of two for Manoeuvre determination due to their difficulty to hit and an Aggression rating of 0. Balloons are not considered flights and do not incur the –3 DRM for being Undetected during the Visual Sighting Phase.
12.218 Trench Strafing
Any flight size from one to six aeroplanes may be assigned a Trench Strafing tasking. Trench Strafing can only occur at Deck altitude. Trench Strafing occurs in the target hex and is rolled on the Air-to-Ground Table for determination of hit success. Legal targets are enemy ground units (but not Balloons). Some other targets may be designated by SSR such as road/railway intersections.
12.219 Defensive Scrambles
Any flight size from two to six aeroplanes may be launched on a Defensive Scramble. This is the primary means of launching German Scout flights.
13. Air-to-Air Combat
Design Note: Air-to-air combat was still in its infancy in WW1 but the pilots of both sides quickly developed the tactics and techniques that are still valid today.
Flights can attack enemy flights in air-to-air combat. A flight must first engage an enemy flight. If successful it can then manoeuvre for a shot. Shots are resolved to determine damage.
13.1 Air-to-Air Weapons
13.11 Weapon Classes
Design Note: Combat during this time frame is up close and personal with either forward firing or rear firing machine guns. Aces such as Albert Ball typically fired from only 20 yds.
The ADC lists the types of weapons an aeroplane can carry. There are two types of guns; Rear firing and Forward firing. Forward firing guns will be either mounted above the wing to fire above the propeller arc or synchronized to fire through the propeller arc. Rear firing guns are only counted for flights that are considered the defender [13.2]. Exception: Bristol F2a and F2b's can count their Rear guns while attacking if their Manoeuvre rating is less than or equal to the enemy flight.
Design Note: The Bristol 2-seater was flown very aggressively after their initial failures in combat which is why as an Attacker they can use their rear guns against more manoeuvrable enemy, taking into account opportunities for rear gunners to shoot while attacking and defending.
13.12 Multiple Guns
Some ADCs list multiple Forward firing guns and those aeroplanes can utilize both or either weapon in combat and some may have reloadable weapons [13.34]. A weapon that depletes its ammo cannot be used for the rest of the scenario. The flight no longer has that weapon available. A flight with multiple weapons, Forward and/or Rear, may decide not to use all of them in combat in order to conserve ammo.
13.13 Special Ammo
Some ammo types have special effects against certain types of targets such as Observation Balloons [12.217]. If a flight is listed as having Buckingham ammunition then any crippled result in combat is reduced to a damaged result against another aeroplane.
13.14 Firepower Rating
Design Note: The German scout pilots have a significant combat advantage due to their use of dual machine guns while the British pilots normally only had a single machine gun.
Each weapon has a Firepower Rating from 1 to 6 listed on the ADCs.
13.2 Engagement
Design Note: To initiate combat an attacking flight has to spot an enemy and manoeuvre into an attack position. If a defender fails to spot the enemy or react in time he may be jumped on by surprise and be in a disadvantaged position. Most air-to-air kills are the result of surprise.
Flights may attempt to attack an enemy flight or enter an existing non-activated Dogfight at any point during their movement. The moving flight is the attacker and non-moving flight is the defender or in the case of a Dogfight, the moving flight is the bouncer. Engagement must be rolled for to determine whether combat can begin [13.23].
A flight may not attempt to engage the same flight more than once per Movement Phase. However, if the attacking/bouncing flight fails to engage it may try to attack another flight in a different hex later in that Movement Phase. If there are stacked flights in the hex, the attacker must declare which flight they are attempting to engage.
If the Dogfight advanced rule is not used then all combat is ended after one game turn.
13.21 Prerequisites
A flight may not attack in air-to-air combat unless it has expended at least 1MP in the Movement Phase. The following additional conditions must be met:
a. The attacker must have an air-to-air weapon and be allowed by their tasking to engage. (Depleted weapons can't be used in combat.)
b. The defender must be detected or visually identified [8]. NOTE: Flights in a Dogfight are considered detected for the duration of the Dogfight but may have a Tally attempted on them with a Dogfight modifier.
c. The defender must be in the same hex as the attacker and at the same altitude or lower within the attacker's altitude band, or the altitude band immediately below and attacker must not have climbed during the game turn (except per 13.22).
d. Flights may not attack if all aeroplanes in the flight are damaged/crippled or out of ammo.
13.22 Engagement Prerequisite Exception
An attacker who is unable to climb above the altitude of the defender due to cloud cover may declare Climbing Flight to engage a higher flying defender and, if successful in engaging it, is considered to be at the defenders altitude but is not considered to have climbed for manoeuvre rating value determination. If unsuccessful, the attacking flight is considered to remain at their current Time to Climb but is marked with a Climb marker. If attacked by another flight it is considered to have climbed for Manoeuvre rating value determination.
13.23 Engagement Roll
If the prerequisites have been met, the attacker and defender make separate engagement rolls or in the case of a Dogfight, only the bouncer makes an engagement roll to enter the fight. The engagement value used for the roll is shown on the Engagement Table and is based on the detection status of the enemy flight.
Roll two dice on the Engagement Table and modify as indicated. If the result is equal to or greater than the engagement value, the flight engages the enemy.
13.231 Engagement Roll Modifiers
Aggression Value applies to the flight making the roll. "Target" modifiers are applied to the enemy flight.
13.232 Engagement Results (Non-Dogfight)
There are four possible results of the engagement roll:
a. If the attacker engages but the defender does not, combat commences. The attacker has surprise and the defender is disadvantaged.
b. If attacker and defender both engage, combat commences but there is no surprise or disadvantage.
c. If neither attacker nor defender engages no combat takes place (do not resolve combat or post-combat effects) and the attacker/bouncer continues its movement, remaining at its original altitude.
d. If the defender engages but the attacker does not, the defender can choose to commence combat. There is no surprise or disadvantage.
The defender cannot commence combat if it has no air-to-air weapons, has aborted or is marked with a Manoeuvre marker, or participated in air-to-air combat earlier in that Movement Phase.
If the defender does not begin combat, treat this as result c. above—no combat takes place.
NOTE: Once combat begins, remove any Tally markers the flights involved have on the map. They are too busy fighting to watch for other flights outside of their combat.
13.24 Surprise and Disadvantage
The engagement roll may give the attacker the advantage of surprise and bonuses in combat. The defending flight may start the engagement disadvantaged, resulting in penalties to combat and wind-up.
Defensive Wheels never suffer disadvantage penalties and attackers can never claim surprise against them [13.232].
13.3 Combat
Combat as a result of engagement commences at the defending flight's altitude and uses up all of the attacking flight's remaining MPs. All flights involved in a combat are visually identified [8.31].
13.31 Manoeuvre
Design Note: To shoot, a flight has to manoeuvre into a good shooting position, usually right on the enemy aeroplane's tail. This is difficult if the enemy is manoeuvring to avoid the shot.
Each attacking and defending flight in a combat rolls for Manoeuvre. Roll two dice, modify as indicated and consult the Manoeuvre Table, cross-referencing the roll on the Air-to-Air Column with the number of undamaged aeroplanes in the flight. Exception: Always use the 1 aeroplane column if rolling for a Defensive Wheel [10.5, 13.44].
The value obtained from the Manoeuvre Table is the number of shot opportunities the flight has. Shot opportunities are resolved using the shot resolution system [13.32].
If a flight has no air-to-air weapons it may not roll for Manoeuvre or take shots at enemy flights.
13.32 Shot Resolution
Design Note: The high manoeuvrability of the aeroplanes and limited range of the weapons made shot attempts very hard to come by against an aware opponent. Aeroplanes with multiple weapons may let fly with everything they have.
To resolve a flight's shot, select a weapon or weapons to shoot with, roll two dice and modify this before consulting the Shot Resolution Table.
Shots from both sides are considered to occur simultaneously and are resolved in any order as determined by the players. Allocate and apply damage [14.1, 14.2] after all shots have been rolled. A player may refuse to roll for a shot if he wishes.
Example: An SE5 flight has two shots. The first succeeds in shooting down the last aeroplane in an enemy flight. The second shot can be refused.
13.321 Rear Gun Equipped Flights Shot Exception
Design Note: Disengaging aircraft have positioned themselves to attempt to run away from a fight which may allow rear gunners better opportunities to get shots off.
In a dogfight, flights equipped with a rear firing gun(s) may roll for shots (if ammo remaining and gun(s) not jammed) equal to one half the attacker's shots rounded down on combat rounds where they failed a disengagement attempt. Shot total cannot exceed the number of undamaged aeroplanes in the flight.
13.33 Ammo Depletion
Design Note: A shot can represent one burst or all of an aeroplane's remaining ammo. Depletion also models weapon jams which cannot be repaired until the aeroplane is back on the ground, a fairly common occurrence in WWI.
After all shots in a combat have been resolved, roll one die for each flight that resolved a shot. (Roll per flight that took a shot and not per shot taken.)
Look up the depletion number of each weapon used to shoot. If the result is less than its depletion number, that weapon's depletion number is increased by twice the number of shots taken otherwise the depletion number is increased by the number of shots. If a weapon's modified depletion number is greater than or equal to 10, the weapon is depleted and can no longer be used in combat [13.3]. If it was an Ammo Drum then that Drum is depleted and a new Ammo Drum can be loaded during the Admin Phase for guns manned by an observer or if a single seat aeroplane when it attempts to disengage [13.42]. Any future depletion rolls will then be subjected to the new modified depletion number until the weapon is depleted (value 10 or higher and/or no Ammo Drums available) unless a new Ammo Drum was loaded which resets the depletion number to that of the new Ammo Drum.
13.34 Ammo Drum Reload
Some aeroplanes have guns that are fitted with ammo drums that can be changed in flight. Ammo drums will be listed as XdY (X is number of drums and Y is the depletion number for that drum) on the ADC. Once the last ammo drum is depleted that weapon is out of ammo. Ammo drums cannot be reloaded during a Dogfight unless the flight attempts to disengage. Whether the disengaging flight succeeds in disengaging or not does not matter and the ammo drum would be reloaded. Otherwise an ammo drum can be reloaded during the Admin Phase of any game turn.
Exception: Rear gunners/observers may reload an ammo drum during the Admin Phase even during a Dogfight.
13.4 Special Combat Rules
The following rules cover special combat situations and Advanced and/or Optional rules which should only be used by experienced players as they add complexity and play time.
13.41 Dogfight (Advanced Rule)
Design Note: As the speeds of modern aeroplanes increased the amount of time spent in a dogfight decreased tremendously, however, in WW1 some dogfights could last 15-20 minutes as the aeroplanes manoeuvred violently and had to get very close to their adversary to score hits.
A Dogfight marker is placed on any fight which is not completed in one game turn. Combat will end in one game turn either by both flights running out of ammo or one side shot down or unable to continue the fight due to damage. If a Dogfight marker is located in a hex then on subsequent game turns both sides will have to decide whether to continue to fight or disengage. The maximum amount of game turns that the same two flights may be in a dogfight is 10 game turns. If 10 game turns have occurred both flights are auto-disengaged at the start of the 11th game turn as per Step b. below, otherwise follow the sequence below:
a. Both sides declare whether to continue the Dogfight or Disengage; Defender declares first, Attacker next then Bouncing flight if present. If all the Attacker aeroplanes are damaged then the Defender is automatically disengaged. If all the Defender aeroplanes are damaged or crippled they must attempt to Disengage even if the results would be an automatic failure.
b. If both sides declare Disengage then the Dogfight is over and both flights are placed back on the map in the current location of the Dogfight marker and follow the Post Combat Procedure [15].
c. If only the Defender declares to Disengage then there will be a check made whether they are successful by first comparing their Level Speed then Dive Speed for the current Altitude band against the Attacking flight. If their Level Speed or Dive Speed is greater than the Attacking flight then the disengaging flight will escape after the attacker rolls on the Manoeuvre Table using all applicable Dogfight Manoeuvre DRMs including Disengagement Success [13.42]. Otherwise add the Aggression Level and Manoeuvre Rating and the number of undamaged aeroplanes in each flight as a DRM. Both sides then roll a die and add their total DRM. If the disengaging flight has a higher total they are successful and will Disengage from the Dogfight, after the Attacker rolls on the Manoeuvre Table.
Example: A flight of 3xSopwith Pups from 66 Sqn are attempting to disengage from 5xAlb DIIIs from Jasta Boelcke. The Pups Aggression and Manoeuvre Ratings are +2/+8 and the number of undamaged aeroplanes is 2 (1 Pup is damaged) so they have a total DRM of +12. The Albatri have Aggression and Manoeuvre Ratings of +3/+6 and 5 undamaged aeroplanes for a total DRM of +14. If the Pup flight rolls a 4 and the Albatros flight rolls a 1 then the Pup flight has disengaged (Pup total 16/Albatros total 15) and the Albatros flight rolls on the Manoeuvre Table with all applicable Dogfight Manoeuvre DRMs including disengaging success. If the total was higher in favor of the Albatros flight, then the Pups must remain in the Dogfight and the Albatros flight would roll on the Manoeuvre Table with all applicable Dogfight Manoeuvre DRMs including disengaging failure. In both cases, the Pups would not roll on the Manoeuvre Table.
d. If the Attacker (only) attempts to Disengage (following the procedure in c. above) and fails, and the Defender did not declare disengagement then the roles of Attacker and Defender are switched [13.421].
e. If the Dogfight continues, both sides roll on the Manoeuvre Table with the following modifiers: (Aggression/Manoeuvre Rating/Disengaged Attempt Result (if attempted)/Fatigue). Combat is then resolved normally. Fatigue is calculated with a –1 DRM every 3 game turns in a Dogfight with a max (–3 DRM) at 10 game turns. Dogfight Fatigue is –1 (Turns 4-6), –2 (Turns 7-9) and –3 (Turn 10). See Dogfight Manoeuvre Table.
Special Dogfight rules: Dogfights have no speed but can be affected by wind during the Wind Drift Sub-Phase and will drift as applicable [7.53]. Dogfights lose one Altitude band after every five game turns until the fight is at Deck altitude at which time no further altitude loss occurs. When dropping a band the Dogfight will drop to Band+0. Any Dogfight that drops into an Altitude Band with Clouds in that band (not Broken Clouds) or Fog will end. All flights in the Dogfight will then follow the Post Combat procedure [15.0].
13.42 Disengagement
Disengaging flights do not roll for Manoeuvre and take no shots whether their attempt to Disengage was successful or not (see [13.321] for special shot exceptions for flights with rear firing guns). Flights attacking a successful disengaging flight apply the disengagement success (–4) modifier to their Manoeuvre roll. Flights attacking an unsuccessful disengaging flight apply the disengaging failure (–2) modifier to their Manoeuvre roll. A successful disengaging flight does not scatter but is marked with a Manoeuvre marker after combat [15.2]. However, if both or all flights disengage then they all are scattered and marked with Manoeuvre markers. Disengaging flights also apply a modifier to their Wind Up Table roll. Any disengaging flight that does not scatter may be placed on the map at a TtC value equal or lower within the band that the combat or dogfight took place that is a legal value for the aeroplane.
13.421 Dogfight Role Reversal
If the attacker in a Dogfight attempts to disengage, then the defender (if they did not declare disengagement) can allow the attacker to disengage. If so, the defender would no longer be threatened and both flights will scatter and have a Manoeuvre marker placed on them. Otherwise the attacker would have to check [if faster, it may not need to roll] for disengagement and if they failed that roll, the attacker and defender positions on the Dogfight play aid are swapped and a new round of combat is conducted normally.
13.422 Schusta Special Disengagement Rule (Advanced Rule)
Design Note: The Schusta aeroplanes were tasked with protecting the recon and artillery tasked aeroplanes from enemy attack and would do everything possible to tie up the enemy and allow the more valuable aeroplane to get away.
German FA or FA(A) units that have a Schusta aeroplane assigned to the flight may disengage if the Schusta aeroplane is undamaged and a D10 roll of five (5) or higher is made.
The Schusta aeroplane may not attempt to Disengage on the same game turn that this special disengagement is attempted. If successful the flight splits and FA/FA(A) aeroplane is scattered and a Manoeuvre marker placed on it, otherwise a normal round of combat is conducted but no modifier is applied for the unsuccessful disengagement.
13.423 Disengagement Spin Out (Optional Rule)
Design Note: Aeroplanes attempting to disengage from a Dogfight after suffering damage or being in an unfavourable situation would enter spinning flight to both expedite an escape or cause the attacker to assume they were shot down and not continue to pursue. The Manoeuvre does have inherent risks in that the spinning aeroplane may not be able to recover or may shed its wings.
If the disengaging flight consists of only a single aeroplane it may disengage by Spinning Flight unless unable to spin (i.e., BE2 aeroplanes). Declare this during Step a. of the Dogfight sequence and disengagement is automatic. The aeroplane must follow the rules for Spinning Flight [10.31]. Aeroplanes that disengage by Spin Out do not allow the attacking aeroplane a roll on the Manoeuvre Table. Disengagement Spin Out cannot be attempted if the flight is at Deck altitude.
13.43 Bouncing a Dogfight (Optional Rule)
Design Note: Dogfights tended to be lengthy affairs and allowed time for another friendly flight to potentially come to the rescue of the defending flight.
If a Dogfight has not been activated for the current game turn, it is possible for another flight to pile into the Dogfight as a Bouncing flight. The Bouncing flight must be on the same side (German or British) as the Defending flight. Dogfights are considered to be Detected for the duration of the Dogfight but a flight may still attempt to get a Tally on a Dogfight during the Detection Phase which would increase its chances to bounce the attacker. If a legal flight enters a hex with a Dogfight marker it must attempt to engage. Follow these steps:
a. The Defender in the Dogfight must declare whether to Disengage or stay and fight.
b. If the Defender states Disengage then the Attacker must declare whether he will stay and fight with the Defender or let him automatically disengage. If the Attacker lets the Defender auto-disengage, then the Attacker does not get a shot on the disengaging Defender whether the Bouncer successfully engages or not.
c. The Bouncer then rolls for Engagement using either the Tally or Detected column. If successful and the Defender did not disengage, continue on to Step e. Otherwise, if the Attacker allowed the Defender to disengage, then the Attacker must attempt to engage the Bouncer on the Detected column. If successful they spot the bounce and are not surprised otherwise they are surprised. In either case slide the Bouncer to the Attacker slot on the Dogfight play aid and the previous Attacker to the Defender slot. The previous Defender is moved back to the map and conducts a Wind Up check [15.1].
d. If the Bouncer failed to engage continue the Dogfight normally with the Attacker/Defender conducting Dogfight activation [13.41]. The bouncing flight has failed to engage and is not in the Dogfight. If the Attacker let the Defender disengage, the Dogfight is over.
e. If the Bouncer engaged and the Defender did not Disengage, the Attacker rolls to engage the Bouncer on the Undetected column. If the Attacker is successful they spot the bounce and are not surprised otherwise they are surprised. A round of Combat [13.3] is then conducted between the Bouncer and Attacker.
f. If the Attacker survives the round of Combat with the Bouncer then the Attacker may now conduct a round of Combat with the Defender (if the Defender did not disengage earlier). Ammo depletion is not checked until both combat rounds have been completed.
g. Subsequent Dogfight activations will require the Defender, Attacker and Bouncer to each declare whether they Disengage or not. If the Defender and Attacker do not attempt to Disengage then the Bouncer and Attacker conduct a round of Combat followed by Attacker/Defender Combat. If the Attacker declared to Disengage then the Defender is automatically disengaged whether they declared it or not. Disengagement by the Attacker is then rolled for if the Bouncer did not Disengage.
NOTE: The bouncing flight in a Dogfight will use a different Dogfight turn counter for tracking Dogfight Fatigue [13.41e]. This may allow a Dogfight to continue past 10 game turns but only for the Bouncer and Attacker. The Defender will disengage at 10 game turns and the Bouncer is limited to 10 game turns in a Dogfight but the original Attacker may be in longer than 10 game turns but less than 20. The easy way to remember is the first in will be the first out and the last in will be the last out. The maximum fatigue value is –3 DRM.
13.44 Defensive Wheels and Combat
Design Note: The Defensive Wheel is not an offensive formation, allowing no more than one aeroplane a shot at any passing enemy. It is difficult to catch at a disadvantage and is a way for less Manoeuvrable planes to survive.
Defensive Wheels [10.5] engage and fight as if they were a single aeroplane. If engaged, they automatically engage back and roll on the Manoeuvre Table, using the 1 column [13.31]. Attackers may not claim surprise against Defensive Wheels [13.24]. Units in a Defensive Wheel do not suffer disadvantage penalties and do not scatter [15.2].
A flight in a Defensive Wheel cannot be drawn into a Dogfight. Attacking flights must attempt to engage again on subsequent game turns.
14. Air Unit Damage
14.1 Damage Allocation
Randomly allocate damaged/crippled/shot down results among the aeroplanes in a flight by rolling a die on the Damage Allocation Table, cross-referencing against the total number of aeroplanes in the flight.
The result is the number of aeroplanes affected. If the result is C# and a crippled aeroplane is present, allocate the damage to any crippled aeroplane (attacking player's choice). Otherwise allocate damage to the damage # indicated. Note the damage on the flight log [5.21].
If a combat generates multiple damage results, roll to allocate each one separately. Results can be allocated in any order selected by the attacker. If a damaged/crippled aeroplane is damaged or crippled again, its damage is increased by one level, from damaged to crippled and crippled to shot down. Apply the effects of damage before allocating the next result.
Example: A flight with two aeroplanes receives a shot down, crippled and damaged result against it. The attacking player decides to allocate the shot down result first and rolls a result on the #1 aeroplane, which is shot down. This leaves the #2 aeroplane to which the crippled result is applied first, then the damaged result. The aeroplane is shot down too.
14.11 Special Damage Effects
For each damaged or crippled aeroplane roll a D10 on the Special Damage Effects chart to see if any additional effects occur as a result of the combat. Damaged/crippled aeroplanes may be forced into Spinning Flight or suffer a Dud Engine.
14.2 Damage Effects
14.21 Damaged Aeroplane
Damaged aeroplanes are not counted toward the total aeroplanes available to make air-to-air or air-to-ground attacks but may continue other taskings such as Artillery Cooperation or Recon.
Example: A four-aeroplane flight with one damaged aeroplane rolls on the 3 column of the Manoeuvre Table in air-to-air combat.
14.22 Crippled Aeroplane
Crippled aeroplanes must split off into their own flights [5.14] during the Admin Phase only if they are not locked into a Dogfight. If they did not automatically disengage from a Dogfight due to the result of a special damage effect, they are considered locked in the Dogfight. All damaged aeroplane effects also apply to crippled aeroplanes [14.21].
14.23 Spinning Flight
Damaged/crippled aeroplanes with the Spinning Flight damage effect must immediately become separated from their flight and are automatically disengaged from combat and follow the Spinning Flight [10.31] rules on the next game turn.
Exception: BE2 aircraft as noted on their ADC treat this as no effect.
14.24 Dud Engine
Crippled or damaged aeroplanes with the Dud Engine damage effect must become separated from their flight. They are automatically disengaged from combat, scattered and get marked with a Dud Engine marker as well as a Manoeuvre marker. They must use Gliding Flight [10.31] on the next game turn and all subsequent game turns. Aeroplanes with a Dud Engine and in Gliding Flight have their Manoeuvre rating reduced to one (1).
14.25 Shot Down Aeroplanes
Aeroplanes that are shot down are removed from the flight. If all the aeroplanes in a flight are shot down the air unit is eliminated. There is an optional table that provides chrome results for a shot down aeroplane.
15. Post-Combat Procedure
Following air-to-air combat, flights must perform the following actions in order:
(1) Check for Dogfight status (advanced rule [13.41]). If so then mark them with a Dogfight marker and follow these steps:
- Place the Dogfight marker in the hex where the Dogfight started, Active side up;
- Place the Defender on the Dogfight play aid in the Defender box;
- Place the Defender's Time to Climb marker on the Dogfight play aid in the Alt box;
- Place the Attacker on the Dogfight play aid in the Attacker box;
- Place a 1 time marker on the Dogfight play aid in the Time box;
- The Attacker and Defender remove any Tallies they have on other flights;
- Any Tallies on the Attacker and Defender from flights not in the Dogfight remain on the map and are placed on top of the Dogfight marker.
(2) If no Dogfight occurs or at the conclusion of a Dogfight, follow these steps.
- Scatter [15.2];
- Place Manoeuvre markers [15.2];
- Check for Wind Up [15.1];
- Become undetected [15.3]. Any Tally markers on the flight are removed.
These procedures take place immediately, before any other movement or combat action is performed.
15.1 Wind Up Check
Design Note: Wind Up (slang term) affected just about every pilot in the war as battle fatigue and constant combat sapped their morale and will to continue fighting. Most regained their composure after a period of rest or it was just a temporary loss of nerve.
All flights in air-to-air combat roll a Wind Up check after combat has been resolved or a Dogfight has ended even if no shots occurred by either side. Flights that roll on the Archie Damage Table [16.31] also roll a Wind Up check even if the result is NE. Some effects such as Spinning Flight also require a Wind Up check. Unless the Wind Up check is due to AA or ground fire the Wind Up check will be resolved under the Air-to-Air Combat column.
To make a Wind Up check, roll two dice and consult the Wind Up Table. Modify the roll as indicated. Apply damage/loss modifiers only for aeroplanes that were damaged or lost in the just resolved combat or Dogfight.
Apply the results. Abort the flight or Abort the flight and decrease their Aggression Value by 1 (but never below –3).
15.2 Scatter and Manoeuvre Markers
Design Note: Flights spit out of a combat in all sorts of directions and usually at a lower altitude. The scatter roll represents this.
After air-to-air combat is concluded or due to damage effects, flights or individual aeroplanes scatter from their hex. For flights that were in a Dogfight, they are placed in the current Dogfight marker location in the following order; Defender placed first, then the Attacker and then the Bouncing flight (if present). Player choice on heading within the hex.
Roll a die for each flight in the combat or aeroplane due to damage effect and follow the instructions in the scatter diagrams.
Note: A successful disengaging flight does not scatter unless all flights disengaged. If instructed to descend an Altitude band and the flight is on the Deck, do not descend any further. If scatter requires the drop of an Altitude band, the flight is marked with an Altitude Band +0 marker for the new Altitude band. Otherwise place them at Band+0 for the altitude band the Dogfight or Combat ended.
Mark all flights/aeroplanes with Manoeuvre markers [10.33]. If forced to scatter off map, keep rolling until a legal movement result occurs.
15.21 Defensive Wheels
Flights in Defensive Wheels [10.5] do not roll for scatter.
15.3 Post-Combat Detection
Design Note: It would seem that aeroplanes exiting air-to-air combat would be able to keep track of the other side but more times than not they would find the sky clear around them as the flights have scattered in different directions and altitudes.
Following an air-to-air combat, all participating flights immediately become undetected. Replace the counters with a Generic counter on its Undetected side.
16. Anti-Aircraft Artillery
Design Note: Anti-Aircraft Artillery (AA) concentrations represent areas of flak barrage called "Archie" by British WW1 pilots. Flak is a latter day term but is used interchangeably with AA and Archie in the rules.
16.1 AA (Archie) Concentrations
Design Note: Concentrations of AA reflect the density of overall firepower projected rather than the calibre of weapons used.
AA concentrations are ground units and come in three densities: Light, Medium and Heavy.
AA concentrations are available in scenarios and are represented on the map by counters. There can be no more than one concentration in a hex [4.41].
Observation Balloons have an inherent Medium AA capability and do not have to be marked with an AA counter unless their capability is upgraded to Heavy. Players may do so by removing one Medium density concentration and placing a Heavy concentration below the Balloon marker.
Artillery units have an inherent Light AA capability that is not upgradable.
NOTE: Every active trench location on the map also has a small arms value against flights at Deck altitude. This small arms attack does not create a Barrage Marker and is only effective in its actual trench location and not the surrounding hexes (i.e., only one hex).
16.11 AA Points
In the Planning Phase each player will receive a number of AA concentrations listed by type.
AA concentrations may be altered by exchanging them for the following cost in AA points:
- Light = 1
- Medium/Flaming Onion = 2
- Heavy = 4
Example: A player can exchange two Light AA for one Medium or a player with one Heavy AA can exchange it for two Light AA and one Medium AA.
Each player plots the locations of AA concentrations in the Planning Phase [4.2]. Some of these AA concentrations are set up on-map in the Ground Deployment Phase [3.1] on their active or inactive side. The remaining AA concentrations are hidden (i.e., not placed on the map) and are inactive.
16.12 AA as Targets
AA concentrations are target profile C [18.13].
16.2 AA Activation
Design Note: AA active state represents the AA being cleared to shoot at anything that enters their barrage zone. Inactive AA is lying in wait, ready to spring a 'flak trap'.
AA concentrations are either active or inactive. The player chooses when to activate AA. Once active, AA cannot become inactive. Inactive AA concentrations can be activated only at the following times:
a. The Admin Phase. b. When a flight moves adjacent to the concentration. c. When a flight expends a MP while adjacent. d. When a flight is scattered adjacent to a concentration. e. When a flight drifts adjacent to the concentration during Weather Phase.
When an AA concentration is activated, flip the AA counter to its active side. Hidden AA is revealed and placed on the map. Once revealed, AA cannot become hidden again.
AA flipped to Active due to cases b. to e. above do not fire. Further activity from the flight within the AA's barrage zone [16.3] is required.
16.3 Flak Barrage
Design Note: The AA barrage fills an area of sky with shrapnel and blast in the hope of hitting an aeroplane flying past.
An active AA concentration projects a flak barrage zone into its hex and all adjacent hexes. Roll a barrage attack on a flight immediately each time the following applies to it:
a. It enters a hex in a flak barrage zone via movement, drift or scatter. (Exception: Flight/AA Deconfliction [16.33].) b. It expends a MP turning in a barrage zone. c. It attacks an enemy flight in a barrage zone. (Use the defending flight's hex and altitude to resolve combat). d. It declares that it is pressing the attack [18.33]
Flak barrage rolls are made regardless of whether the target is detected or undetected but the AA unit must have a LOS to the target [7.3].
Exceptions: AA units will not fire into a Dogfight hex and Heavy AA may not fire at Deck+0 flights.
16.31 Resolving Flak Barrages
Roll two dice on the AA Table using the column for the density of AA being projected into that hex, cross-referenced with the flight's altitude. If the flak barrage roll is as a result of a change in altitude, the player may choose to attack either the altitude where the flight started or where it ended.
Example: An RFC flight at Low altitude climbs to Medium. The DLS player may select either the Low or Medium bands as the flight's altitude for the barrage attack.
If more than one AA concentration projects its barrage into the hex, the player chooses one concentration (only) to roll the barrage attack.
Example: A flight moves into the barrage zone of a Light and Medium concentration. One barrage attack is rolled, using the Medium column. The Light concentration does not attack.
If the roll is equal to or greater than the AA number listed, the target flight is hit. If the target is hit, roll for damage on the Barrage column of the Flak Damage Table. Roll two dice and apply the barrage flak modifiers to obtain the damage result. Note: No modifiers to this die roll are applied if it was the result of wind drift or post combat scatter.
A 'D' result means one aeroplane is damaged; 'C' that an aeroplane is crippled, and 'K' that an aeroplane is shot down [14.2]. If more than one result is listed, all are applied to the flight.
Once a barrage occurs, mark each hex attacked with a German or British Barrage marker which makes visual detection on that flight easier. Barrage markers are removed at the end of the Detection Phase.
16.311 Flak and Weather (Optional Rule)
Apply the Rain and Snow DRMs for any AA barrage into altitude band affected by those weather conditions.
16.32 Air-to-Ground Modifiers
Design Note: One of the chief effects of flak is to disrupt bombing, or strafing attacks by interrupting the pilots' aim.
Flak barrage also applies as a modifier, listed on the AA Table (in parentheses), to those bombing air-to-ground attacks where the bomb run passed through a flak barrage zone [16.3]. Apply the modifier even if flak fails to hit the flight. Where more than one barrage zone affects the attack, apply the greatest negative modifier.
16.33 Flight/AA Deconfliction
Friendly flights that enter a hex at Deck/Low altitude are not attacked by a friendly flak barrage. Friendly flights that fly within barrage range of friendly flak at Medium altitude or higher can be attacked by those AA units unless they are inactive if flying towards friendly territory (west for British / east for Germans) and their movement started in enemy territory (i.e. across the active trench line). Roll 1D10 (1-5 safe)(6-10 AA fires).
Design Note: This simulates the use of flares to help identify friend from foe but sometimes mistakes happened.
16.4 Flaming Onion
Flaming Onion is a special German 37mm incendiary weapon. If the German player has any Medium AA units they can be designated as a Flaming Onion unit as long as the AA is co-located with an Observation Balloon or at least three hexes away from the active trench line. The German player marks this secretly on his log sheet but reveals that the unit is a Flaming Onion unit when the AA unit makes an attack. Flaming Onion units that score damage have it resolved on a separate column on the AA Table. If shot down by Flaming Onion, Shot Down Chrome [14.25] table has a –2 DRM and Wind Up Check [15.1] has a –4 DRM.
17. Air-to-Ground
Certain flights carry ordnance to attack ground targets or can use their guns to strafe ground targets.
17.1 Ordnance
Flights tasked with Bombing will carry bombs.
17.11 Ordnance Type
- Bombs – This is the default ordnance type.
17.12 Bomb Ammunition
Design Note: Bombs in WW1 are hardly worth the name considering the advances made in WW2 and beyond but a successful attack could still do damage.
Bomb ordnance loads are expressed as an attack strength, which is listed on the ADC. When making an attack, the flight must expend all of its attack strength.
Example: A flight of four FE2ds has total bomb strength of 4, one point per undamaged aeroplane. During a bomb run, it must expend 4 pts of bombs.
17.13 Strafing Ammunition
Flights that are strafing roll for depletion as if the flight had just been in air-to-air combat (do not modify the roll). Flights with rear guns can use them while strafing but must total rear guns as a separate attack and depletion roll.
18. Air-to-Ground Attacks
18.1 Attacks
Flights can attack ground targets during the Movement Phase. A flight can attack once per game turn and may not attack more than one target.
18.11 Tasking Restrictions
A flight tasked with Bombing can attack any targets in the target hex. It can also attack AA situated in or adjacent to the target hex. It cannot attack any other targets. Flights with bombs have their Manoeuvre Rating reduced to one while laden with them. If forced to abort [10.6] or enter a Dogfight [13.41], the flight will automatically jettison any remaining bombs in its current hex with no damage result.
18.12 Ordnance Restrictions
Flights must have ordnance of the correct type to launch an air-to-ground attack. Bombs can be used against any target. Flights with guns but no ordnance may conduct strafing attacks against any target with a profile of B, C or D.
18.13 Target Profiles
Ground targets are rated by their target profile, as described in the scenario. Target profiles are a measure of the target's vulnerability to attack and range from D (most vulnerable) to A (least vulnerable). Target profiles modify attack rolls.
18.2 Bomb Runs
To attack, the flight must first complete a bomb run. The flight starts its bomb run at an Initial Point (or IP). Announce the bomb run is starting then move directly from the IP toward the target hex without turning. When the flight reaches the target hex, and after all AA attacks have been resolved, the attack takes place. Once the attack has been executed the flight finishes its remaining movement. Free turns are not permitted directly after an attack (i.e., before another MP is expended).
18.3 Attack Profiles
There are only two attack profiles used by flights. The attack profile specifies the conditions to be met to make the attack. If any of these conditions aren't met no attack is allowed.
18.31 Level Bombing Profile
Use bomb ordnance for a visual bombing attack with an IP that is one hex from the target. Climbing or Diving Flight is not permitted during the attack. Apply the Level Bombing modifier.
18.32 Strafing Profile
Design Note: If all else fails aeroplanes can simply shoot at targets with their machine guns.
No ordnance is required, but the flight must have a gun type weapon and carry out a bombing attack. The IP is one hex from the target and must be attacked from Deck+0 altitude. Only targets with profile B, C or D can be attacked.
18.33 Press the Attack
A flight on a bombing or strafing profile may declare that they are pressing the attack to gain a +1 DRM on the Air-to-Ground Attack Table but will be subject to an additional AA or small arms attack prior to resolving the attack if within barrage range.
18.4 Resolving Attacks
Resolve attacks as follows.
18.41 Calculate Attack Column
First find the column the flight uses on the Air-To-Ground Attack Table. Flights with Bomb ordnance take the declared bomb strength expended and multiply it by the number of undamaged aeroplanes in the flight to find the attack value. Use the highest numbered column that is equal to or less than the attack value.
Example: A flight of four FE2ds has a single aeroplane damaged. The flight attacks a ground target. The attack value is 1 (bomb strength) multiplied by 3 (number of undamaged aeroplanes) for a result of 3. The attack uses the 3 column of the attack table.
Strafing flights calculate the column as for flights with Bomb ordnance. However, the bomb strength for a strafing attack is 0.5 per aeroplane either forward or rear guns unless the aeroplane has dual firing MGs in which case the bomb strength is 1.0 per aeroplane.
18.42 Attack Roll
Roll two dice and modify the roll as indicated. Look up the result on the attack column of the Air-to-Ground Attack Table. The AA modifier [16.32] applied to the attack is the largest one applied in any hex or Altitude band flown through on the bomb run. The result is an attack success value from 0 to 4. If the success is 1 or more, place a marker equal to the attack success on the target hex. If more than one attack is made on the target, place a separate marker for each attack.
Roll for damage resolution.
Design Note: Success numbers represent the pilots' perception of how well the attack has gone. A low success means no effects are seen after the attack. A high success means secondary explosions or debris are seen.
19. Ground Target Damage
Resolve damage against ground targets as follows:
19.1 Resolving Damage
To resolve damage roll two dice for each success marker and cross-reference with the column of the Damage Table corresponding to the attack's success value. The result is listed as follows:
- NE: No effect = No effect to target.
- S: Slight Damage = Target is slightly damaged. AA concentrations are unaffected.
- H: Heavy Damage = Target is heavily damaged. Ground units in the hex are damaged. AA concentrations are flipped to their inactive side and cannot become active until next game turn.
- T: Total Destruction = Target is destroyed. All ground units in the hex are destroyed.
Damage is not cumulative. The target is affected only by the highest damage level applied.
20. Track Phase
Design Note: A detected target can be lost as a result of flying into cloud, post combat or flying out of range of ground observer posts and Tallys must be maintained.
In the Track Phase, all visually identified or detected flights that do not meet the criteria for detection become undetected and are replaced by a Generic Undetected counter.
Example: A flight at Deck+0 that is five hexes away from an enemy trench line or aerodrome would become undetected.
A flight that has a Tally marker on-map must roll to maintain this Tally using all applicable DRMs to include a +3 Tally DRM. Failure of this roll results in removal of the Tally marker. A flight that is no longer visually tallied by an airborne flight is flipped to their Detected Previously Visually Sighted (Scope) side unless they are outside of Ground Observer detection range in which case they would become Undetected.
Flights that have ended air-to-air combat or exited a Dogfight are flipped from their Visually Identified side and replaced by a Generic Undetected counter.
Any flight that no longer has LOS to the enemy flight they have a Tally on will result in the enemy flight being flipped to its Detected Previously Visually Sighted side or Generic Undetected counter if no ground observation possible. Flights may voluntarily drop a Tally to allow them to attempt to Tally another flight on the next game turn.
21. Night
Design Note: Surprisingly night flying did occur during WW1 with some success for the units trained in that environment. Only one squadron (100 Sqn RFC) was night qualified for the time frame and area of operations modelled in the game.
Night conditions apply where specified by the scenario. Night limits the ability of units to fly and fight.
21.1 Night Taskings
21.11 Moon Phase
The scenario should specify the moon phase: Full or No Moon. Players should choose an option for DYO or alternate scenario setups.
21.12 Visual Sighting and Ground Detection
Visual sighting [8.31] cannot take place at night. Ground Detection applies a –3 DRM if No Moon and DRM is cumulative with other Weather effects.
21.13 Visual Identification
Flights may not be visually identified at night [8.3]. Do not reveal visual ID information [8.33] to an opponent until an engagement or successful AA attack.
21.2 Night Navigation
21.21 Night Flying
Only squadrons trained on night navigation may fly at night unless noted by SSR. Regardless of speed, the maximum turn value [10.32] of flights at night is 60 degrees.
Units not trained for night flying may attempt to fly at night but are limited to 30 degrees maximum turn value and suffer an adverse modifier for recovery.
21.3 Night Combat
21.31 Air-to-Air Combat
Night combat modifiers apply at night. No Manoeuvre differential modifiers are applied to air-to-air combats.
21.32 AA Attack Restrictions
AA barrages must still have a valid "LOS" unblocked by weather but apply the "–4" DRM at night.
22. Ground Units
Design Note: Ground units depict the poor bloody infantry on the ground that have to slog through the muck and endure endless barrages of artillery, gas attacks, MG fire and strafing aeroplanes.
22.1 Ground Unit Types
Infantry (Inf), Cavalry (Cav) and Machine gun (MG) counters represent units that are in fixed positions and will not move during the scenario unless noted by SSR. Infantry and Cavalry units fire as small arms against enemy aeroplanes once the unit has been identified. MG units fire as Light AA against enemy aeroplanes but do not place a Barrage marker.
Scenarios set with Contact Patrols will have mixed ground units (i.e., German and British ground units) that are randomly placed face down on the map. These units will not be identified or fire at enemy aeroplanes until a flight has flown over them at Deck altitude and spent 1MP to identify them.
22.2 Ground Units as Targets
Ground units are target profile D unless noted otherwise by SSR. Railway and Bridge targets are profile B or as noted in SSR. Cavalry units are considered moving ground units (–2 DRM). Ground units in woods/urban terrain are considered to be profile B and profile C if in a trench hex due to the cover afforded by those terrain types.
23. Campaign Day Scenario
Design Note: Campaign Day Scenarios provide a more long term look at the effect of sustained operations of an entire day.
The campaign day is a series of consecutive time blocks, simulating a day's worth of taskings. Campaign days can be combined with other non-Campaign day scenarios to form an even larger campaign if so desired. Most scenarios can be played as a campaign by flying through all blocks in sequence.
23.1 Campaign Game Concepts
Day. A campaign is divided into a number of time blocks within a scenario day. To complete a game day the players must play through the number of time blocks as noted on the campaign scenario.
Weather. Weather will be rolled for each time block within a campaign day scenario.
Roster. Players should use the roster of pilots and allocate them to flights throughout the campaign day.
23.2 Campaign Rules
23.21 Air Units
The campaign scenario will state which units can be used for the campaign day and which time blocks those units may fly in.
23.22 Ground Units
The players plot and set up ground units as determined by the scenario information and those units will stay in place unless listed otherwise by SSR.
23.23 Persistence of Damage and Destruction
At the end of a time block, all damage to or destruction of ground units will carry over throughout the campaign day. Targets are never repaired within a single day of a campaign. Any aerodrome with Total Destruction (T) cannot be used for the next time block in a campaign.
23.3 Campaign Victory
After all the campaign days have been played out, the campaign ends. Then players total the Campaign Victory Points (CVP) they scored over all the time blocks played through.
23.31 Victory Levels
The victory total is determined by which player has the highest total number of CVPs.
24. Solitaire Rules
Design Note: Bloody April has been designed primarily as a two player experience but can be played solitaire from the British side.
24.1 Solitaire Scout Matrix
German flight actions are governed by the Solitaire Scout Matrix. When using the Solitaire Scout Matrix, the solo player will not utilize any of the German 2-seater aeroplanes.
24.2 Changes to Baseline Scenarios
The scenarios can basically be played out as written for solitaire play but realistically only from the British side. All planning for the German side should be completed prior to any planning for the British side.
24.3 Combat
German aircraft will stay in combat until out of ammo or only one plane is left and if only one plane left and aggression level is 0 or less they will disengage by spin out if allowed or if at Deck will attempt to disengage normally.
25. Designing Bloody April
Commentary by the designer with additional background information provided by the lead graphic designer.
25.1 Why WWI?
The design grew out of research for an earlier solitaire air combat project when the designer came across a history of the air battles fought over Arras in the spring of 1917. That history described in fascinating detail the air combat of the era — brave recon pilots and crews facing impossible odds, dashing defenders, and the same asymmetric-warfare dynamic found in the designer's earlier games. The British in 1917 flew a dizzying array of aeroplane types in different stages of their combat life cycle; aeroplanes such as the BE2 were totally obsolete by 1917 but soldiered on performing invaluable Artillery Cooperation and Recon missions, the main tasking Higher Headquarters put on the RFC. The Germans, meanwhile, had just transitioned to their Jasta organization for scout aeroplanes, and their pilots faced a target-rich environment. The British scout pilots had the unenviable job of stopping the Germans from doing just that. The larger-than-life personalities of the Aces of the time rounded out the appeal of the subject.
25.2 Scale
The game system foundation that Bloody April is built upon was designed to model post-WW2 jet aircraft with limited BVR (Beyond Visual Range) capability. While the main foundation of the game flow was maintained, switching from fast jets to relatively slow WW1 aeroplanes required a major overhaul of a few but major game system components. Most particularly, the map scale was reduced from 2.5nm per hex down to 1nm. The time increment for each turn was changed from 1 minute to 2 minutes of real-time and finally each Movement Point (MP) is 30mph vs. 150mph. Players will note that the aeroplanes move almost as fast along the map as their jet-era descendants but it is an optical illusion. As a point of comparison, take an F-4 flying at 450mph and a Sopwith Pup flying at 90mph. The F-4 moving at the scale of Bloody April would have 15MPs to the Pup's lowly 3MPs!
25.3 Aeroplanes
Ask anyone to name two aeroplanes from WW1 and they probably will tell you the Fokker Triplane and Sopwith Camel — two very famous aeroplanes made famous by the Red Baron and Snoopy in popular cartoons — however these aeroplanes came to the front later in 1917 than the period depicted in Bloody April. Players will become intimately familiar with their predecessors, aeroplanes such as the Sopwith Pup and Triplane, the SE5 and SPAD VII and workhorses like the BE2s, DH4s and RE8s. The Germans hunt the skies with Albatros and Halberstadt Scouts and their own recon aeroplanes such as the Rumpler, Albatros and Roland. With the plethora of aeroplanes in the game, it required a level of detail in performance that is a big step above the designer's earlier air combat games but still allows players to quickly resolve manoeuvres and combats. Players won't be yanking and banking their aeroplanes as in a tactical game but get the same feel that air commanders had of the sweeping panorama of the burgeoning air combat that occurred in this sector of the Western Front during the War to end all Wars.
There are advanced variants of some aircraft such as SE5a and Bristol F2b that players can use for what-if or continue on with scenarios set in June 1917 or later.
25.4 Air Combat
Air battles of this era could and normally would be protracted turning combats. The short range of the weapons and the lack of any sophisticated gun aiming aids all lead to very limited opportunities to put lead on a target in a decisive manner. This is the primary reason to add the Dogfight rules to the game which portrays the lengthy process that some combats evolved into lasting 15-20 minutes.
The Manoeuvre differential is an assessment of relative aeroplane performance. Manoeuvre ratings account for wing loading, top speed and excess power and are an overall rating.
Historically, training, tactics and pilot quality were often decisive in securing kills. Adopting the term 'Aggression value' for this reflects the extent to which the willingness to close and fight is a key aspect of these 'human factors'. The Wind Up mechanism is a way to determine whether a pilot or flight is still willing to continue in "harm's way" or head for home.
25.5 Orders of Battle
For Bloody April, there is a lot of data available on the individual squadrons of the Royal Flying Corps and German Jagdstaffeln. This data included names of individual pilots and observers which allowed the designer to develop a database with a fairly representative listing of these crew members. The one area where there is not a lot of available information is on the German Recon units as that data was destroyed during WW2. That is the one weak area in the Orders of Battle but a book on the Schusta units provided much of the missing data and helped close the gap in this area.
25.6 Scenarios and Campaigns
The scenarios are representative of activity for the three months in 1917 that the game models. In most cases they depict actual missions as closely as the data provided. A lot of data on missions was available and individual combats were detailed especially where losses occurred that can be cross referenced to locations on the game map. Numerous sources were looked at to cross check information but not everything was available especially for some of the less glamorous missions such as bombing and recon. The game is designed as best as possible within the boardgame medium, to give the players a snapshot feel for the challenges and mission taskings that WW1 air commanders faced for a block of time within a typical day of battle. On another level the game is also a 'tool kit' for players to create their own scenarios and experiment with alternatives.
25.7 Scenario Weather
The weather during the three months modelled in the game is quite variable. There was a lot of historical data available that gives a general feel for what weather occurred on a particular date (as noted in the Historical Outcome section of each scenario) but not the data needed for the actual wind speed and cloud cover. A lot of research went into modelling the weather effects and a ten year period of historical weather was used to determine primary wind direction and speed as well as the ratio of how many days during a month a certain weather condition occurred. All of this has been distilled into the Scenario Weather Table to allow the player to face the same variability that had such a key role in how missions played out. It also adds a significant amount of replayability to scenarios, as a scenario flown in Clear Weather is much different than one with Rain, Snow or Fog.
25.8 Map and Aeroplane Art
The map style was a key early decision. The counters are important, but it's the map that first grabs attention when a game is laid out. As one of the main functions of air forces in WWI was to photograph the ground for the creation of maps, the obvious inspiration to draw on was the trench maps of the period. Not only would these provide all the detail required, they also give a look appropriate for the period. Obviously a lot had to be removed to avoid clutter, so only major roads are shown (and not all of them), but the bulk of the rail network is present, and a proportion of the villages sufficient to represent the building density of an area and to provide the players with appropriate reconnaissance targets.
Where possible within the confines of a hex grid the aerodromes are accurately positioned to within a few hundred yards of their historical locations. In some cases this has proved impossible to track down, and a best guess has been arrived at based on proximity to railways and how level the ground is.
The various aeroplanes on the counters are all to the same scale, with the exception of the FE2 which would be too large to fit, so players can easily see the difference between the scout machines and the two-seaters. Colour schemes for aeroplanes were drawn from a variety of sources. Some of the individual German aeroplanes are conjecture, as artistic licence was used in cases where a scheme is known to have been used several months later in 1917 and so might have applied it to machines flown during the Battle of Arras. And no, it isn't a mistake—the evidence found shows the Red Baron was not flying an all red machine at this time! However, an alternative version of his machine has been provided for those that prefer him in red.
By contrast, British machines were simple. These were either clear doped linen, or doped in a colour coded PC10 for RFC machines and PC12 for the RNAS. Squadron and Flight markings are also well documented, and these are reflected in various symbols and coloured engine cowlings. Not as individual as the German machines, but not as drab as is often supposed.
26. Tactical Hints
26.1 Tactics
Tactics were evolving constantly during WW1 and players will quickly discern on their own the tactics that work best for them. One of the things that players will find that is much different from tactical-level air combat games is the need to stalk your targets carefully in regards to altitude. It takes time for a WW1 aeroplane to get up to proper altitude and altitude advantage is very much a key to success not only in defence but attack. Having altitude advantage as a defender means that any attacker is forced to climb to try and attack and they must be at your altitude or higher to do so. As an attacker having that altitude advantage allows you to decide when and where a combat takes place as you can avoid it or initiate it at will. Much time in the game will be spent tackling that issue. For the British player, the key tactic will be protecting and positioning his recon and artillery cooperation missions to ensure they are able to successfully complete those taskings. Easier said than done as the Germans' first order of business should always be to strike hard and fast any flights they perceive as being recon or artillery cooperation missions. This asymmetric warfare battle rhythm will dictate many of the campaign days and larger scenarios.
"Time to Climb" Conversion Tables
DECK (0 to 3.99k)
| Time to Climb | TtC 2D | TtC 3D | TtC 4D | TtC 5D | TtC 6D | TtC 7D |
|---|---|---|---|---|---|---|
| DECK+1 | 2000ft | 1333ft | 1000ft | 800ft | 666ft | 575ft |
| DECK+2 | 2666ft | 2000ft | 1600ft | 1330ft | 1050ft | |
| DECK+3 | 3000ft | 2400ft | 2000ft | 1625ft | ||
| DECK+4 | 3200ft | 2666ft | 2300ft | |||
| DECK+5 | 3330ft | 2875ft | ||||
| DECK+6 | 3550ft |
LOW (4.00 to 9.99k)
| Time to Climb | TtC 3L | TtC 4L | TtC 5L | TtC 6L | TtC 7L | TtC 8L | TtC 9L |
|---|---|---|---|---|---|---|---|
| LOW+1 | 6000ft | 5500ft | 5200ft | 5000ft | 4850ft | 4750ft | 4666ft |
| LOW+2 | 8000ft | 7000ft | 6400ft | 6000ft | 5700ft | 5500ft | 5330ft |
| LOW+3 | 8500ft | 7600ft | 7000ft | 6550ft | 6250ft | 6000ft | |
| LOW+4 | 8800ft | 8000ft | 7400ft | 7000ft | 6666ft | ||
| LOW+5 | 9000ft | 8250ft | 7750ft | 7330ft | |||
| LOW+6 | 9100ft | 8500ft | 8000ft | ||||
| LOW+7 | 9250ft | 8666ft | |||||
| LOW+8 | 9333ft |
| Time to Climb | TtC 11L | TtC 12L | TtC 17L | TtC 21L | TtC 24L |
|---|---|---|---|---|---|
| LOW+1 | 4545ft | 4500ft | 4350ft | 4285ft | 4250ft |
| LOW+2 | 5090ft | 5000ft | 4700ft | 4570ft | 4500ft |
| LOW+3 | 5635ft | 5500ft | 5050ft | 4855ft | 4750ft |
| LOW+4 | 6180ft | 6000ft | 5400ft | 5140ft | 5000ft |
| LOW+5 | 6725ft | 6500ft | 5750ft | 5425ft | 5250ft |
| LOW+6 | 7270ft | 7000ft | 6100ft | 5710ft | 5500ft |
| LOW+7 | 7815ft | 7500ft | 6450ft | 5995ft | 5750ft |
| LOW+8 | 8360ft | 8000ft | 6800ft | 6280ft | 6000ft |
| LOW+9 | 8905ft | 8500ft | 7150ft | 6565ft | 6250ft |
| LOW+10 | 9450ft | 9000ft | 7400ft | 6850ft | 6500ft |
| LOW+11 | 9500ft | 7750ft | 7135ft | 6750ft | |
| LOW+12 | 8100ft | 7420ft | 7000ft | ||
| LOW+13 | 8450ft | 7705ft | 7250ft | ||
| LOW+14 | 8800ft | 7990ft | 7500ft | ||
| LOW+15 | 9150ft | 8275ft | 7750ft | ||
| LOW+16 | 9500ft | 8560ft | 8000ft | ||
| LOW+17 | 8845ft | 8250ft | |||
| LOW+18 | 9130ft | 8500ft | |||
| LOW+19 | 9415ft | 8750ft | |||
MED (10.00 to 15.99k)
| Time to Climb | TtC 4M | TtC 6M | TtC 7M | TtC 8M | TtC 9M | TtC 10M | TtC 13M |
|---|---|---|---|---|---|---|---|
| MED+1 | 11500ft | 11000ft | 10850ft | 10750ft | 10666ft | 10600ft | 10460ft |
| MED+2 | 13000ft | 12000ft | 11700ft | 11500ft | 11230ft | 11200ft | 10920ft |
| MED+3 | 14500ft | 13000ft | 12550ft | 12250ft | 12000ft | 11800ft | 11380ft |
| MED+4 | 14000ft | 13400ft | 13000ft | 12666ft | 12400ft | 11840ft | |
| MED+5 | 15000ft | 14250ft | 13750ft | 13230ft | 13000ft | 12300ft | |
| MED+6 | 15100ft | 14500ft | 14000ft | 13600ft | 12760ft | ||
| MED+7 | 15250ft | 14666ft | 14200ft | 13220ft | |||
| MED+8 | 15230ft | 14800ft | 13680ft | ||||
| MED+9 | 15400ft | 14140ft | |||||
| MED+10 | 14600ft | ||||||
| MED+11 | 15060ft | ||||||
| MED+12 | 15520ft |
| Time to Climb | TtC 15M | TtC 16M | TtC 18M | TtC 20M | TtC 30M |
|---|---|---|---|---|---|
| MED+1 | 10400ft | 10375ft | 10333ft | 10300ft | 10200ft |
| MED+2 | 10800ft | 10750ft | 10666ft | 10600ft | 10400ft |
| MED+3 | 11200ft | 11125ft | 11000ft | 10900ft | 10600ft |
| MED+4 | 11600ft | 11500ft | 11333ft | 11200ft | 10800ft |
| MED+5 | 12000ft | 11875ft | 11666ft | 11500ft | 11000ft |
| MED+6 | 12400ft | 12250ft | 12000ft | 11800ft | 11200ft |
| MED+7 | 12800ft | 12625ft | 12333ft | 12100ft | 11400ft |
| MED+8 | 13200ft | 13000ft | 12666ft | 12400ft | 11600ft |
| MED+9 | 13600ft | 13375ft | 13000ft | 12700ft | 11800ft |
| MED+10 | 14000ft | 13750ft | 13333ft | 13000ft | 12000ft |
| MED+11 | 14400ft | 14125ft | 13666ft | 13300ft | 12200ft |
| MED+12 | 14800ft | 14500ft | 14000ft | 13600ft | 12400ft |
| MED+13 | 15200ft | 14875ft | 14333ft | 13900ft | 12600ft |
| MED+14 | 15600ft | 15250ft | 14666ft | 14200ft | 12800ft |
| MED+15 | 15625ft | 15000ft | 14500ft | 13000ft | |
| MED+16 | 15333ft | 14800ft | 13200ft | ||
| MED+17 | 15666ft | 15100ft | 13400ft | ||
| MED+18 |
HIGH (16.00 to 18.99k)
| Time to Climb | TtC 4H | TtC 5H | TtC 6H | TtC 10H | TtC 15H | TtC 20H |
|---|---|---|---|---|---|---|
| HIGH+1 | 16750ft | 16600ft | 16500ft | 16300ft | 16200ft | 16150ft |
| HIGH+2 | 17500ft | 17200ft | 17000ft | 16600ft | 16400ft | 16300ft |
| HIGH+3 | 18250ft | 17800ft | 17500ft | 16900ft | 16600ft | 16450ft |
| HIGH+4 | 18400ft | 18000ft | 17200ft | 16800ft | 16600ft | |
| HIGH+5 | 18500ft | 17500ft | 17000ft | 16750ft | ||
| HIGH+6 | 17800ft | 17200ft | 16900ft | |||
| HIGH+7 | 18100ft | 17400ft | 17050ft | |||
| HIGH+8 | 18400ft | 17600ft | 17200ft | |||
| HIGH+9 | 18700ft | 17800ft | 17350ft | |||
| HIGH+10 | 18000ft | 17500ft | ||||
| HIGH+11 | 18200ft | 17650ft | ||||
| HIGH+12 | 18400ft | 17800ft | ||||
| HIGH+13 | 18600ft | 17950ft | ||||
| HIGH+14 | 18800ft | 18100ft | ||||
| HIGH+15 | 18250ft | |||||
| HIGH+16 | 18400ft | |||||
| HIGH+17 | 18550ft | |||||
| HIGH+18 | 18700ft | |||||
| HIGH+19 | 18850ft |
VH (19.00 to 22.0k)
| Time to Climb | TtC 4VH | TtC 5VH | TtC 15VH | TtC 20VH |
|---|---|---|---|---|
| VH+1 | 19250ft | 19200ft | 19200ft | 19100ft |
| VH+2 | 19500ft | 19400ft | 19400ft | 19200ft |
| VH+3 | 19750ft | 19600ft | 19600ft | 19300ft |
| VH+4 | 19800ft | 19800ft | 19400ft | |
| VH+5 | 20000ft | 19500ft | ||
| VH+6 | 20200ft | 19600ft | ||
| VH+7 | 20400ft | 19700ft | ||
| VH+8 | 20600ft | 19800ft | ||
| VH+9 | 20800ft | 19900ft | ||
| VH+10 | 21000ft | 20000ft | ||
| VH+11 | 21200ft | 20100ft | ||
| VH+12 | 21400ft | 20200ft | ||
| VH+13 | 21600ft | 20300ft | ||
| VH+14 | 21800ft | 20400ft | ||
| VH+15 | 20500ft | |||
| VH+16 | 20600ft | |||
| VH+17 | 20700ft | |||
| VH+18 | 20800ft | |||
| VH+19 | 20900ft |
German Scout Aircraft Availability Matrix
| Jasta | Month | Halb D.II | Alb D.II | Alb D.III | Alb D.V |
|---|---|---|---|---|---|
| 1, 3, 4, 5, 12 | March | 1-2 | 3-7 | 8-10 | – |
| B | March | – | 1-6 | 7-10 | – |
| 11, 30 | March | 1-7 | 8-10 | – | – |
| B, 33 | April | – | 1-5 | 7-10 | – |
| All other Jasta | April | 1 | 2-5 | 6-10 | – |
| All Jasta | May | – | 1-2 | 3-8 | 9-10 |
Roll 1D10 for flight type.
Jasta Flight Size
| D10 Result | 1 | 2-3 | 4-5 | 6-7 | 8-9 | 10 |
|---|---|---|---|---|---|---|
| # of Aircraft | 1* | 2 | 3 | 4 | 5 | 6 |
* Single aircraft will use individual ace pilot from unit (Rating 0 to +5).