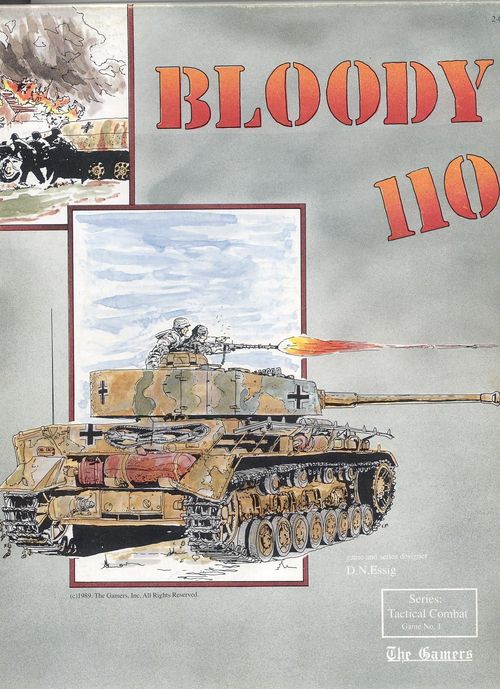
Bloody 110
Bloody 110 Rulebook
Table of Contents
Table of Contents
- Introduction
- Counter Error
- Terrain and Map Notes
- American Special Rules
- German Special Rules
- General Special Rules
- Command and Control
- General Victory Conditions
- Set Up Notes
- Teaching Scenarios
- Historical Scenarios
- 1. The Two Day Battle for the Bastogne Highway
- 2. The Absolutely Historical Two Day Version
- 3. The Battle of 16 December
- 4. The First Attack on Marnach
- 5. First Attempt to Relieve Marnach
- 6. The Final Attack on Marnach
- 7. The Second Day: Fuller's Counterattack
- 8. The Charge of the Light Tanks
- 9. The Attacks on Munshausen
- 10. The Final Attack on Heinerscheid
- Battle Notes
- Designer's Notes
- American Player's Notes
- German Player's Notes
- American Set Up Table
- For Further Reading
Introduction
These rules only contain the specific rules pertaining to the game Bloody 110th itself. The Tactical Combat Series rules must be available and used in order to play this game.
Counter Error
In the course of production, one error is known to exist on the counters. All US trucks are printed with "- B 13" on the back. Those few US trucks that are armed with MG's (1(8)0 on the front) should be "A B 13" on the back.
Terrain and Map Notes
-
Woods hexes are those with even a small amount of light green within the hex itself. The natural "spread" of hexside hedges that drift into a hex is not counted for this purpose. Forest hexes are those with even a small amount of dark green. The small dark green border around all green areas is ignored for all purposes.
-
Building hexes are those with one or more black building symbols. Red building symbols indicate village or city hexes.
-
Map edge hexes that are roughly half or more of a hex are playable. Tiny slivers of a hex are not. Units forced off the map edge are destroyed. Off map movement, etc. is not allowed.
-
The Clerf River is impassable at all points except bridges. Units forced to move into or through it at other points are destroyed.
-
Cliff hexsides are marked with a red cliff symbol. These hexsides are completely impassible to every unit in the game and any unit forced to move across them is destroyed.
-
The Turn Record is provided to keep track of the current game turn and game day. One marker is placed in each track to record the present turn. The turn marker is advanced one space at the end of each Clean-Up Phase. The day marker is advanced to the next box at the end of the 2400 turn. Night turns are those with a dark blue border and in those turns all night rules are in effect. All other turns are considered to be day turns.
-
Entry hexes and Areas are marked on the map for the arrival of reinforcements. Arriving units are free to enter the first map hex or half-hex at the map edge within the width of the entry area or in the exact hex marked in the case of the entry hex. Should the proscribed entry hex/area be blocked by enemy units, reinforcements arrive in the next available unblocked map edge hex.
-
The hex numbering system is used to identify individual hexes on either game map. The two maps are designated A and B, with A being the north map and B being the south map. The digit(s) before the decimal indicate the number of the hexrow running from south to north, counting from west to east. For instance, 1.xx is the very first hexrow on the left edge of the map. The digits after the decimal indicate the number of the hex itself counting from south to north from the bottom of the map. xx.01, therefore, is the first complete hex on the bottom of each hexrow. Not every hex is numbered. Each fifth hex in each row is numbered (xx.05, xx.10, xx.15, etc.) creating gridlines to follow. For instance, to find hex A29.17, follow the gridline for xx.15 until you find 29.15 on map A, then count northward two hexes. Other examples on the game map are: hilltop 531 is A31.12, hilltop 496 is B12.33.
American Special Rules
1. At Start Restrictions
The following restrictions are placed on the American player at the start of the game to simulate the surprise of the German assault and American unpreparedness for offensive activities.
A. All US units can only be included on defensive op sheet(s) and may be dug in. B/630 TD and D/1/110 may be placed in reserve status as these units had predetermined deployment areas to go to on an alert. No other units may be in reserve. No US troops may be included on any offensive op sheet or in an offensive role (counterattack etc.) on any op sheet at start.
B. No Minefields may be placed at or within 5 hexes of the main road CR 343 and N 18 from the east to west map edges at start. These mines had just been removed to allow for coming maneuvers.
C. D/1/110 is the 1/110 battalion weapons company. It may assign its troops to any line company of the battalion or to be on their own. Its mortars may be used to support any battalion unit and any battalion unit may observe their fires. Regardless of assignment, D/1/110 keeps track of its own company morale and uses it only, to the exclusion of any other company morales of units with which it might be associated.
D. A/1/110 must maintain at least one infantry platoon and its mortar platoon at or within 5 hexes of a city/village hex of Heinerscheid. If at any time this presence is not maintained, when the given units are available, the 116 Pz Recon Bn enters the map immediately through entry area 1 if not already on the map. If entering because of this reason, the 116 Pz Recon Bn must still follow its special rules. If the above minimum occupation is not maintained because the required units no longer exist the recon bn does not enter automatically. As much of the minimum requirement as is physically possible must always be maintained. If at any point the American player fails to maintain as much of the requirement as he is capable of, the 116 Pz Recon Bn enters as above.
2. US Variable Set Up
Before the game, in secret, the American player rolls one die. This die roll measures the effectiveness of the German Intelligence effort in locating his units. Compare this roll with the American Set Up Table to determine the constraints on US set up. This table and its roll are only used in game versions beginning on the 0800 16 December turn.
3. US Command Prep Rating
The US Command Prep Rating changes slowly over the course of the game as the American command structure awakens for active combat operations and recognizes the scope of the German counteroffensive. These are given on the Command Prep Rating Table on the game map. They are effective on the turns of the times given.
4. On Map Artillery Batteries
The three on-map artillery batteries represent all the available artillery support to the US player. These batteries may displace to a new location once during the game. If forced to displace again, they must displace off the game map and will no longer be available to give fire support. There is no requirement to displace together or as to where they may go. Each battery displaces as a unit, separately from the others.
5. Variable Reinforcements
In the Command Planning Phase of the 1000 16 December turn and thereafter, the US player rolls two dice for variable reinforcements. Check this roll against the American Reinforcement Table to determine if another roll is required on either the class A or B table. Make this one die roll if allowed to determine what, if any, US reinforcements arrive that turn. Bring on any reinforcements that turn in the entry hex called for by the table. If all or part of a given reinforcement is not available, bring on that part of it which is still available, if any. Ignore any reinforcements called for which are already on the map and not available.
6. Provisional Units
In the Command Planning Phase of every hour turn on or after 1000 16 December, roll one die. If a six is rolled, the 110 HQ Provisional Company may be placed in any empty or friendly occupied city/village hex of Clervaux and used by the US player. Continue to make this roll each hour thereafter until another six is rolled at which time the 28 R&R Provisional Company may be placed in accordance to the above restrictions for US use. These rolls are made independently of the variable reinforcement roll and the two rolls have no effect on each other.
7. The M10 Platoon
Historically, this unit was incredibly ineffective as it was very green and stolen from its company to participate in the battle. When it enters the map through the Variable Reinforcement Table, it is subject to the following special rules. Every time any vehicle of this platoon is attacked by any table roll (point fires, artillery, AT rolls etc.) unsuccessfully, roll one die. If this roll is 4 or more, the entire platoon must exit the map as quickly as possible using road movement via any road hex of the north, west or south map edges. If an M10 is destroyed in any way, including slow go terrain, the platoon must automatically exit the map in accordance with the above. Historically, they received some artillery fires and, in their haste to leave the map, one M10 overturned. This was their only loss.
8. US Trucks
The US player is provided with two types of trucks. The only difference between the two is the presence of a 50 cal ring-mount giving one truck a firepower and the other none. In every game set-up, where a truck placement is called for, either type may be set-up as the US player desires and the counter mix allows.
9. US Artillery
All available US guns are on the game map. They are all of 105mm caliber and the current number of rounds in a battery fire can be determined by the number of tubes still in operation. At start each battery has 6 guns.
German Special Rules
1. At Start Restrictions
The following are meant to simulate the confused, battering-ram like nature of the German assault.
A. No German unit may begin the game with a prepared defense op sheet.
B. All units must be placed into their bridge crossing or ferry order before the game is set up and may not change that order afterward. Ferry and bridging sites must be selected at that same time.
C. Units may only be assigned op sheets (into new or existing ones) after they enter the map. Map entry movement may be an op sheet preliminary instruction on an op sheet drawn up the turn they enter or as an add-on to an existing one.
2. Command Prep Ratings
The German forces showed an unusual clumsiness throughout the Battle of the Bulge which was probably due to the quality and experience of the troops involved. Throughout the game, German command speed gradually increased because of the crossing of higher and more experienced commanders and staffs.
Two options are given for the German Command Prep Rating. One is the historical rating for what really occurred. The other represents the German army of 1941 or so at the peak of its efficiency as one of the top quality armies in history. These two versions are given on the German Command Prep Rating Table on the game map. Players are encouraged to experiment with the optional rating but are to be forewarned of its major effect in tilting the game's balance.
3. Ferry Operations
By use of rubber boats and rafts, the Germans crossed the Our River to enter the battle before the bridge at Dasburg was finished. The player may bring on infantry units and supporting weapons in this manner in accordance with the below.
A. Only infantry type units (defined in 3.1, Series Rules), AT guns and Mortars may be ferried. No vehicles, carriers, or Tow Only weapons may ever be ferried.
B. The German player must draw up a listing of the order and place of entry of all ferried units before the beginning of the game. This order may not be changed in any way after its creation. Only the entry areas along the east map edge (1, 2, or 3) may be used for the entry of ferry units. If committed to being ferried, a unit may not be changed later to cross the bridge.
C. Each hour turn, including 0800 16 December, the German player rolls one die during the Command Planning Phase. If the result is a 5 or 6, he may bring on the next infantry battalion or battalion heavy weapons in accordance with his established ferry order. That is to say, the maximum allowed onto the map in a given ferry turn is an infantry battalion less its heavy weapons, or the heavy weapons of an infantry battalion. Regimental heavy weapons enter as if they were a battalion's heavy weapons.
D. Heavy weapons may only be brought onto the map if their battalion/regiment is already on the map.
E. Ferry operations continue until no units remain in the ferry order to cross onto the map. A ferry die roll of 1 to 4 is no effect.
4. German Bridge Operations
Most of the first day of battle was consumed with the bulk of the 2nd Panzer Division sitting on the wrong side of the Our River awaiting the construction of two 60 ton bridges. When finally finished, a Pz IV drove off the edge of the bridge into the river causing a further three hour delay as repairs were made to the bridge. The following rules simulate the effort and frustrations had by the Germans in attempting to build their bridges in order to get their heavy vehicles into the battle.
A. Before the game, as with ferry operations, The German player must determine his bridging site and with which units in what order will cross the bridge. The site and crossing order determined before the game cannot be changed in any way after being created. Obviously, the heavy bridging equipment cannot easily be shifted along the river's edge and all units are in a massive traffic jam awaiting their turn to cross the bridge and no room exists to change their queue.
B. Bridging sites available and the entry areas that may be used by each are given on the German Bridge Table on the game map.
C. Every hour turn during the Command Planning Phase after and including the turn listed on the German Bridge Table, roll one die. If this die roll is equal to or less than the number of hours since the turn listed on the German Bridge Table +1, the bridge is finished. Therefore, a bridge that begins rolling on the 1200 turn must roll a 1 to be finished on that turn, a 1 or 2 at 1300, and a 1-3 at 1400 and so on. On any other die roll, the bridge remains unfinished and is of no effect.
D. Certain bridge sites allow for entry along areas 4 and 5. To use these areas the town of Hosingen (off map) must be reduced. To reduce Hosingen, roll two dice each turn after the bridge is up. If the result is 10 or more, Hosingen is reduced and areas 4 and 5 may be used, otherwise no effect.
E. After the bridge is up (and Hosingen reduced if required,) German units may enter the map in the predetermined crossing order. Each unit is listed on the German Crossing Chart on the game map with a given number of crossing turns required for entry. A crossing turn represents the amount of time needed by the unit to cross the bridge, reform and enter the map. From the turn the last unit enters the map (or the bridge is up, if the first unit,) until the given number of crossing turns has passed, a unit is considered to be crossing the bridge. When the given crossing turns have passed, the unit may then enter the game map in one of the bridge site's entry areas and another unit may begin crossing on the next turn. Only one unit may cross the bridge at one time and units may not be subdivided further than as they are listed on the chart. As an example, if the bridge is up at 1200 and Hosingen need not be reduced, the 2nd Pz Recon could enter on the 1240 turn and the 2/3 Pz at 1540.
5. 116th Panzer Recon Battalion
After unsuccessfully trying to advance to the right of the 2nd Panzer Division, the 116th Panzer was ordered to fall in behind 2nd Panzer and use its bridges, Its recon battalion crossed in the morning of the 17th and took Heinerscheid around 1300. The balance of the division crossed later that day and regrouped at Heinerscheid during the night of the 17th.
The 116 Pz Recon Battalion is a variable reinforcement for the German player and its arrival is dependent on the luck or rather the lack of it by the 116 Pz along its line of march. In the Command Planning Phase of the 2400 turn 16 December, the German player rolls two dice. If this roll is 8 or more, the 116 Pz Recon Bn must be inserted into the bridge crossing order to arrive between 0700 and 1200 17 December. It requires three crossing turns. If this dice roll fails, this unit will not appear (with the possible exception of the below.) If for any reason, the 116 Recon Bn is on the map before the 2400 16 Dec turn, no roll is made.
If the US player has the capability to but fails to keep one infantry platoon and the mortar platoon from A/1/110 at or within 5 hexes of Heinerscheid, the German player may automatically bring the 116 Pz Recon Bn in Area 1. The Recon Bn enters if the US player fails to maintain any part of the minimum of which he is capable if he cannot meet the entire requirement. If the US player cannot meet this requirement because of losses or German capture of the town, the Recon Bn does not enter.
In all cases, the 116 Pz Recon Bn may only be used to attack and seize Heinerscheid. It may conduct no other operations and must stay at or within 5 hexes of the town after its capture.
6. The Clervaux Forward Observer
In the early morning hours of December 16, an observer team with a radio infiltrated into Clervaux to call artillery fires in on the town. The German player designates the hex location of this team before the game. They may be in any city/village hex of Clervaux or any such hex west of the Clerf River. They may never move and their location may be kept secret from the US player. Once positioned, this team may call artillery fires on any target in their LOS and the German player need not identify their location when they do so (as long as both players trust each other's version of the LOS rules.) The team is never subject to losses or capture.
7. Infrared Equipped Panthers
A small number of Mark V Panthers were equipped with crude infrared sights for this battle. This sight was one of Hitler's secret weapons and represented a major advance in tank weapons systems. The German player secretly records one of his Mk V platoons to carry the night sights. IR equipped tanks may fire out to 6 hexes, inclusive, as if in daylight during night turns. IR sights have no effect on range restrictions caused by LOS, fog or smoke. All night fire modifiers are ignored when conducting the fires of these tanks out to their 6 hex range.
8. Called Fire Delay
The German player has a called fire delay of one in effect for all artillery fires in any historical scenario. The American player has no called fire delay.
9. German Battery Composition
The German player has a relatively large number of artillery batteries to contend with and these are of a number of calibers. Artillery ammunition is given in terms of caliber and type. If none is given, none is available. Since these batteries are of differing numbers of tubes a given battery fire may be a different number of rounds depending on the battery which fires it. A battery fire is a battery fire and it does not have any particular amount of rounds associated with it. For real sticklers, multiply the number of battery fires available by 5 to get a number of rounds to keep track of.
| Battery | Number and Caliber |
|---|---|
| 1/1/74 | 5x75mm |
| 2/1/74 | 5x75mm |
| 3/1/74 | 5x150mm |
| 1/2/74 | 6x75mm |
| 2/2/74 | 6x75mm |
| 1/3/74 | 4x150mm |
| 2/3/74 | 4x105mm |
| 3/3/74 | 4x150mm |
10. German Artillery Notes
The rounds of 150mm are considered to have the same game firepower as 155mm rounds. They do have the same amount of explosive power, just a slightly thicker casing, etc. In some scenarios, one or more 36 round Nebelwerfer fires are available. These fires are conducted according to the Rocket Artillery rules 10.15. Each 36 round "volley" is resolved as one battery fire and only one "volley" may be conducted before passing to the other player for one of his fires (normally done after four battery fires.)
General Special Rules
1. Company/Battalion Assigned Vehicles
Certain vehicles on both sides are assigned directly to company, battalion or higher commands. These vehicles may be assigned as desired just as any other unit. Such vehicles are counted as AT guns, etc. when calculating command size modifiers (see 6.6d in the Series rules.) Trucks never count for size modifiers.
2. Weather
Each hour turn during the Command Planning Phase, one player rolls one die and compares the result with the Weather Table on the game map. The effects of weather are given below.
| Type | Max Visibility |
|---|---|
| Heavy Fog | 3 Hexes |
| Light Fog | 7 Hexes |
| Snow | 3 Hexes |
| Rain | 5 Hexes |
| Mist | 12 Hexes |
In mist, Allied air sorties are available in daylight turns.
3. Trafficability
Throughout any historical scenario, trafficability remains a constant heavy mud and is rated poor. A given scenario may give good conditions for itself, but generally all scenarios rate it as poor. The Teaching Scenarios, for simplicity, have good trafficability.
4. AA Ratings
On both sides ratings are given as below, given particular unit types:
- Infantry, MG and Pioneers: 11 range up to their normal range
- Quad 50's, Bofors, Wirblewinds: 10 range up to their normal range
- 88 AT guns: 11 range up to x3 nominal range
- All others (must have a weapon): 12 range up to 4 hexes
5. Air Sorties
Given Mist weather and a daytime turn, the US player is given two P-47 sorties per turn. Their weapons information is as follows:
Each P-47 may:
- ... strafe 4 targets with a firepower of 6
- ... bomb one target with a firepower of 16 or a hit roll of 6 or more and automatic kill if hit on point or both targets.
or (as an alternative to the above at the owning player's choice)
Each P-47 may:
- ... fire three volleys of rockets with a firepower of 10 each or a hit roll of 8 or more and automatic kill if hit for point or both type targets.
- ... strafe as above.
The US player must identify the type of armament of the P-47's at the time their target zone is recorded. Each capacity may be used the number of times given, which may be used against that number of separate targets or more than once (or in combination) against a single target.
Air sorties may not be applied against targets that are in fire mode in forest hexes. Only move mode units in forest hexes may be targeted. Should any area targets in fire mode be stacked with a move mode unit in a forest hex they are all attacked as normally.
6. The Historical Order of Arrival
The Historical Order of Arrival printed on the game map may be used in the place of German Bridging Operations and American Variable Reinforcements for certain scenarios if desired. It does not, however, replace the Ferry Operations or Provisional Company rule sections. Note that the entries listed on this table are for the vehicle and carriers of a given unit only (in terms of Germans, that is) and does not require the delay of units that could be ferried earlier to await the turn of entry given on the table.
7. Tow Only Mortar Units
Certain mortars, in this game German 120mm ones, are considered tow only. This designation means they cannot move under their own power and must use a carrier to move. It should not be taken literally in that a tow only mortar does not use up the towing capability of a carrier (the mortars are passengers, not towed items) nor should one think that the tow only status will allow them to be towed by vehicles in an exception to the usual provision against mortars being carried by vehicles (12.4b).
Command and Control
Like any game in this series, this game may be played without the main command rules if desired. It is recommended that only the shorter scenarios be played in this manner as the effect of the C&C rules' absence grows geometrically with the length of the game.
1. General American Higher Commander's Intent
The US higher commander's intent historically was simply to hold all the villages on the map and give no ground. Given this "hold everything, line of death" order, the US player's victory will be determined by his ability to hold onto the villages on the map.
2. General German Higher Commander's Intent
Hitler's overall intent is for the units in the Ardennes Offensive to burst through the US line, cross the Meuse and take Antwerp. This is a very tall order. At the 2nd Panzer Division's level during to time portrayed in the game, this translated into as quickly as possible clear the CR 343/N 18 highway from the east to west map edges and remove any US threat from the road. The 2nd Panzer was to be crossing the Clerf by 1200 historically. The effectiveness of the German player will be measured in the speed by which he clears the road for German use and damages the US forces such that they do not count as a threat to the road. This is done by physically clearing the road itself and causing a certain amount of damage to each US formation.
3. American Op Sheet Limitations
Due to the lack of preparation for mobile operations and the small number of US headquarters present, the US player is limited to no more than 4 implemented op sheets at any one time in the game.
4. Initial Op Sheets for Scenario
Every scenario allows the players to begin with implemented op sheets of any desired type, except where specifically noted otherwise.
General Victory Conditions
These victory conditions are primarily made for the two day full battle game. Smaller scenarios will generally give their own victory conditions. As is the series' intent, players are measured against their higher commander's expectations and not necessarily against each other directly. If this method of victory does not appeal to you, as you simply want to know who beat who, feel free to discuss this with your opponent and come up with a yardstick more suitable for yourself. After a long game, both players usually come away knowing how well they did against each other and the determination of victory by points or what not is a mute point. It would be much better to relax with a beer and talk the matter over with your opponent using such phrases as "do you remember when I..." and such to come up with a good feeling of who won.
German Victory
German victory is measured by two events: the opening of the road for German use, and the removal of US threat to that road. Note the turn that the following two conditions are both met:
A. No US unit remains adjacent to or on the main road CR 343/ N 18 from the east to west map edge and no more than 5 units (of any type) remain at or within five hexes of the road anywhere along it.
B. Each US Infantry company has no more than 7 steps of infantry remaining (exclude mortars in this count), no US tank company has more than 8 tanks remaining, and no more than one artillery battery remains on the game map.
On the first turn these conditions are met the game formally ends (although play may continue to the bitter end, if desired.)
Regardless of the loss of these conditions at some point later in the game, the German player's victory is based on the turn when he first reaches the conditions. Both conditions must be met simultaneously to record the game turn. Actual level of victory is given on the table below for each time period within which the turn falls:
| Turn Time | Level of Victory |
|---|---|
| 16 Dec 0800-1600 | Massive German Victory |
| 1700-0800 17 Dec | Major German Victory |
| 0820-1200 | Minor German Victory |
| 1220-1500 | Minor German Defeat |
| 1520-1800 | Major German Defeat |
| Not at all | Massive German Defeat |
American Victory
American victory is hinged completely on holding the villages on the map. At the time, the US commanders realized the importance of Marnach and Clervaux as major avenues of advance, although such an event was considered quite unlikely.
American victory is measured twice in the game and these two measurements are added together and compared with the table below to determine victory. The US player receives a number of victory points for each village he "holds" as given below. "holding" is defined as having at least one unit of any type within any of the contiguous city/village hexes of a given village regardless of enemy units which also exist within that village. Unoccupied villages in which the US player was the last to enter, etc., are not considered held.
The points for held villages are added twice in the game and these two totals are added together to determine the final victory. A total is made on the 2400 16 December turn and the 1800 17 December turn just after the Action Phase. If the game ends earlier because of the German victory conditions, the measurements remaining (one or both) are made at the time the German makes his conditions.
| Village | Points |
|---|---|
| Heinerscheid | 1 |
| Grindhausen | 1 |
| Fischbach | 1 |
| Urspelt | 1 |
| Hupperdange | 1 |
| Munshausen | 1 |
| Roder | 2 |
| Marnach | 5 |
| Reuler | 2 |
| Clervaux | 5 |
| Total Points (for both measurements) | Victory Level |
|---|---|
| 21 or more | Massive US Victory |
| 18 to 20 | Major US Victory |
| 12 to 17 | Minor US Victory |
| 10 to 11 | Minor US Defeat |
| 7 to 9 | Major US Defeat |
| 6 or less | Massive US Defeat |
Set Up Notes
For set up purposes, "w/i X of" means set up a given unit within X hexes of the given hex, inclusive.
All units may set up in either mode and may be mounted or dismounted at the player's wish. All units of a given organization are set up with that organization unless specifically mentioned otherwise.
American units generally set up first and German units may then set up no closer, generally, than 5 hexes to an American unit.
Minefields, when given, may be set up according to the usual mine placement rules (15.1) and, for scenarios beginning at 0800 16 December, American Special Rule 1.b. If no minefields are specifically listed, none are available for use. If both players agree, a certain number of optional minefields may be used to spice up a scenario as an optional variant.
When set ups refer to X number of hexes to a given town, this distance may be counted to any village/city hex of the given village. When a doubt arises as to the ownership by a village of a given hex, both players should come to an agreement regarding a given village's extent. Village hexes of a given village need not be contiguous.
When a given scenario gives losses for a particular unit, these are given in terms of steps. These step loses may be distributed or concentrated among or onto one or more of the sub units of the unit in question as is the owning player's desire.
Reinforcements are generally given. If none are given and the scenario does not specifically mention the use of the American Variable Reinforcement Table, Provisional Unit rolls, Ferry or Bridging Operations, no reinforcements are allowed in the scenario. When a scenario gives reinforcements, only those reinforcements are allowed. Where applicable, scenarios give the historical instructions for each given reinforcement. The player is free to use these instructions in order to make the use of reinforcements truer to that which was historically done. Players are encouraged to use these instructions but are in no way required to use them.
Unless specifically stated otherwise either in the scenario itself or above, all game special rules are in effect for each scenario.
Teaching Scenarios
The following scenarios are not historical battles but represent simple actions which can be played in an hour or two using a small number of units and limited map area in order to help in the learning of the rules. Each scenario lists the required sections that scenario was made to illustrate. If a given section is mentioned as, say, 12.0 - this means all of section 12 is in use, not just the introductory paragraph 12.0.
All teaching scenarios require the following sections: 1.0 to 1.3h, 3.0 to 3.6b, 4.0 to 4.2, 5.0 to 5.1d, 8.0 to 8.8e, and 12.0 to 12.1f. None of them require the Command rules (6.0) and it is recommended that these rules not be used at first, but that players concentrate on the game's mechanical aspects.
1. An Armor Fight
Map Area: Map A (all)
Start: 0800 End: 1000 (7 turns)
Artillery: None
Set Up:
- US: A/707 w/i 3 of Heinerscheid
- German: 2/1/3 Pz Rgt w/i 3 of Urspelt
Reinforcements: None
Rules Illustrated: 8.9, 14.0 (if desired)
Victory
- German: Exit 6 Mk V's or more via A47.35
- US: Avoid above and lose no more than 7 Shermans.
- Draw: Other than above
2. An Infantry Fight
Map Area: Map A (all)
Start: 0800 End: 1000 (7 turns)
Artillery: None
Set Up:
- US: A/1/110 w/i 3 of Fischbach
- German: 1/2PG (No Vehicles) w/i 5 of A33.01
Reinforcements: None
Rules Illustrated: 9.0, 13.0 (if desired)
Victory
- German: Occupy physically both village hexes of Fischbach.
- US: Avoid the German occupation of either Fischbach hex.
- Draw: Other than above
3. Armor Overrun Assault
Map Area: Map A (all)
Start: 0800 End: 0900 (4 turns)
Artillery: None
Set Up:
- US: 1x Prov/110 HQ Platoon A29.12
- German: 1/2/1/3 Pz Rgt w/i 3 of A29.08
Reinforcements: None
Rules Illustrated: 8.9, 8.10, 9.0, 14.0
Victory
- German: Destroy the US unit.
- US: Destroy 3 Mk V's and avoid above
- Draw: Other than above
4. Forward Observer
Map Area: Map A (all)
Start: 0800 End: 0900 (4 turns)
Artillery:
- German: 105 - HE 10, Smoke 2 (one six-gun battery)
- US: None
Set Up:
- US: A/1/110 w/i 3 of Fischbach
- German: None (An FO (forward observer), not on the map, is considered to be at A35.05. He cannot be eliminated in any way and is free to call in fires.)
Reinforcements: None
Rules Illustrated: 9.0, 10.0, 11.0
Victory
- German: Destroy 6 or more US steps and/or make the US company morale exceed 10.
- US: Avoid the above.
5. Minefield Assault
Map Area: Map A (all)
Start: 0800 End: 1200 (13 turns)
Artillery: None (as an option assign the German player 10x 105 HE and 3x 10⁵ Smoke battery fires. One, six-gun battery.)
Set Up:
- US: A/1/110 w/i 3 of Fischbach; 5x Minefields (real): in line along xx.08
- German: 1/2 PG (no vehicles) w/i 3 of A33.01
Reinforcements: None
Rules Illustrated: 9.0, 13.0, 15.0
Victory
- German: Create at least one mine breach and assault at least two US units.
- US: Avoid the above
6. Jabos!!
Map Area: Map A (all)
Start: 0800 End: 0900 (4 turns)
Artillery: None
Set Up:
- US: None
- German: 2/3 Pz Rgt anywhere on map
US gets 2x P47's each turn, armed as desired. Weather is good.
Reinforcements: None
Rules Illustrated: 17.0
Victory
- German: Avoid US conditions
- US: Destroy 50% or more of German Tanks
Historical Scenarios
The following scenarios are taken from the real two day battle. Each represents part or all of that battle. It is suggested that the smaller of these scenarios be played using all the rules sections, including the Command Rules, before playing the two day battle scenarios.
Each scenario is given a 1-5 rating of length and complexity (5 is highest) and a balance rating of +5 to -5 with +5 being highly US biased, 0 being balanced, and -5 being highly German biased.
1. The Two Day Battle for the Bastogne Highway
Complexity: 5 Balance: 0: First Day, -3: Second Day, -2: Overall
This scenario represents the entire two day battle in the Clervaux area and as such its commentary exists more in the Battle Notes than here. The US player will be in a position to do much offensive work before the German bridge is in position. After that point, German units will begin entering the map at a high rate and the odds will shift quickly against the US.
Map Area: Maps A & B (all)
Start: 0800 16 December End: 1800 17 December (67 turns)
Artillery:
| US | HE | Smoke | Illum |
|---|---|---|---|
| 150 | 15 | 7 |
| German | HE | Smoke | Illum |
|---|---|---|---|
| 75 | 150 | 10 | 5 |
| 105 | 35 | 5 | 2 |
| 150 | 100 | 5 | 5 |
& 2x 36 round Nebelwerfer fires (150mm)
Minefields:
- US: 30 real or dummy
- German: 15 real or dummy
Set Up:
- US: Set up according to American Set Up Table Roll
- German: German units are free to set up anywhere on either map, as long as the basic set up restrictions given in the Set Up Notes are followed.
- 2/304 PG (all, without any mortars, AT Guns, or Trucks, -3 steps)
- 38 Pioneer (same as above, no lost steps)
(Instructions: German forces are to attack and sieze Marnach and conduct infiltrations to the north and south of the town in order to isolate the highway N.18.)
Reinforcements: All special rules in use.
2. The Absolutely Historical Two Day Version
Complexity: 5 Balance: Same as the standard two day battle except that first day will tend to be more favorable to the US player.
This scenario is for those who want to see the historical battle. As such, much of the variability in scenario 1 has been removed. I recommend that players try this one just to see the historical fight, but use number 1 for serious competitive playings against each other.
Map Area: Maps A & B (all)
Start: 0800 16 December End: 1800 17 December (67 turns)
Artillery: Same as scenario 1
Minefields: Same as scenario 1
Set Up:
- US: Set up according to the American Set Up Table with a die roll of 1.
- German:
- 2/304 PG (same note as scenario 1) w/i 5 of B33.18
- 38 Pioneer (same note as scenario 1) w/i 5 of B41.27
(Instructions: Same as scenario 1.)
Reinforcements: All reinforcements via the Historical Order of Arrival. German may use Ferry Operations as in any normal game. German bridge is at Dasburg South #1, but no die roll is used for its completion. No crossing order need be created. Bridge site selection, etc. is not used. American Provisional units are handled normally.
3. The Battle of 16 December
Complexity: 3 Balance: -1 to +1 depending on US Reinforcement rolls.
This scenario highlights the confused action of the first day of the battle. In this day, strangely enough, the Americans have armor superiority. The fight is between the infantry elements of the 2nd Panzer and the at start US troops and their reinforcements. On the whole, depending on the players, this scenario is relatively balanced and should be a good aggressive fight on both sides.
Map Area: Maps A & B (all)
Start: 0800 16 December End: 1800 16 December (27 turns)
Artillery:
| US | HE | Smoke | Illum |
|---|---|---|---|
| 110 | 10 | 5 |
| German | HE | Smoke | Illum |
|---|---|---|---|
| 75 | 90 | 6 | 3 |
| 105 | 20 | 3 | 1 |
| 150 | 60 | 3 | 3 |
& 2x 36 round Nebelwerfer fires (150 mm)
Minefields:
- US: 30 real or dummy
- German: 15 real or dummy
Set Up: Set up according to scenarios 1 or 2 depending on the preference of the players. Use scenario 1 for a regular game and scenario 2 for a strictly historical one.
Reinforcements: Follow the reinforcements as used by the scenario used for set up.
Follow any special rules given in the set up scenario used.
Victory
- German: General Victory Conditions are in effect. If German victory conditions are not met by the end of the game, the Germans have a Minor Victory.
- US: Measure victory points at end of game and multiply by 1.5 to determine victory.
4. The First Attack on Marnach
Complexity: 2 Balance: +1 to -1
On the morning of the 16th, the lead German forces made a hasty first attempt to seize Marnach. Historically, this attack lacked "vigor" and quickly fizzled out. Much to their surprise, had they known the odds, the Marnach garrison held out till the night of the 16th. This scenario shows this first assault and can be used as a good short historical scenario after playing the teaching scenarios, before attempting the really big versions.
Map Area: Map B only (bounded by hexrows 18.xx and 40.xx, and hexes xx.13 and xx.33, per the map diagram)
Start: 0800 16 December End: 1040 16 December (9 turns)
Artillery:
| US (B/109 FA only) | HE 50 | Smoke 5 |
|---|
| German | HE | Smoke |
|---|---|---|
| 75 | 30 | 2 |
| 105 | 7 | 1 |
| 150 | 20 | 1 |
& 2x 36 rnd Nebelwerfer Fires (150mm)
Set Up:
- US: w/i 3 of Marnach: B/1/110, 3x 1/110 AT, 2x 110 AT, 1x B/630 TD Recon Plt
- German: Same as Scenario 1
Reinforcements:
- US: 0900 at B20.13: 2x B/630 TD AT, 1x B/630 TD Recon Plt, 1x B/630 TD Halftrack (Instructions: Link up with B Company and enter into pre-planned alert deployments.)
- German: 0940 at B40.24: 1/38 Pioneer Mortar, 1/2, 2/2, 3/2 304 PG Mortars (Instructions: Link up with parent units in order to assist with their operations.)
Victory
- German: Physically occupy 5 or more village hexes of Marnach
- US: Avoid German occupation of more than 3 hexes of Marnach
- Draw: German holds 4 Marnach hexes.
5. First Attempt to Relieve Marnach
Complexity: 2 Balance: -1
As soon as Col. Fuller determined that Marnach was under heavy pressure, he ordered C Company to attempt to fight its way through to relieve it. C Company attempted just that but became embroiled in a firefight along the road from Munshausen to Marnach and had to maneuver into the woods. Meanwhile, Fuller received two tank platoons as reinforcements and he sent both to Munshausen with orders to link up with C Company and to fight on to Marnach. The tank platoons then drove down C.R. 326 to Marnach without seeing C Company. One platoon was held there by B Company and the other drove back down the road looking for C Company (it finally found it around 1600.) B Company's tank platoon eventually was ordered off the map to Hosingen, leaving Marnach without armor for the Coup de Grace later that night.
Map Area: Map B only (bounded by hexrows 15.xx and 27.xx, and hexes xx.08 and xx.20, per the map diagram)
Start: 1100 16 December End: 1400 16 December (10 turns)
Artillery:
| US (Cannon Co/110 only) | HE 25 | Smoke 5 |
|---|---|---|
| German | HE | Smoke |
|---|---|---|
| 75 | 15 | 1 |
| 105 | 3 | 1 |
| 150 | 10 | 1 |
Set Up:
- US (set up second): C/1/110 w/i 2 of B17.10 (Instructions: C Company is to attack down C.R.326 in order to relieve Marnach.)
- German (set up first): 1/2/304 PG (-2 steps) w/i 3 hexes of B24.18
Reinforcements:
- German: 1200 at B27.20: 2x 2/304 PG AT Guns (Instructions: Link up with 1/2/304 PG and assist their operations.)
- US: 1320 at B15.09: 1/A/707, 2/A/707 (Instructions: 1st Platoon is to link up with C Company and assist their attack. 2nd Platoon exit the map via B27.20 and link up with B Company (off map) to assist in the defense of Marnach.)
Victory
- US: Exit no less than 7 steps of infantry off map area between B24.20 and B27.20
- German: Allow no US steps of infantry to exit in the above hexes.
- Draw: Between 1 and 6 US infantry steps exit in the above hexes.
6. The Final Attack on Marnach
Complexity: 3 Balance: -2
In this scenario, the final (and overwhelming) attack is made on Marnach. This attack finally cleared Marnach and the road to Clervaux for German use. After the attack, Marnach was used as a German staging area for the rest of the night. The actual fate of the Marnach garrision is unknown as are the details of their last hours. This scenario does well at giving game life to that end, as well as being a juicy night action to exercise the system.
Map Area: Map B (only) (bounded by hexrows 18.xx and 40.xx, and hexes xx.13 and xx.33, per the map diagram)
Start: 1800 16 December End: 2300 16 December (6 turns)
Artillery:
- US: None
| German | HE | Smoke | Illum |
|---|---|---|---|
| 75 | 30 | 2 | 1 |
| 105 | 7 | 1 | 1 |
| 150 | 20 | 1 | 2 |
Set Up:
- US: w/i 3 of Marnach
- B/1/110 (-6 steps, co morale 6), 2x 1/110 AT, 1x 110 AT
- 1x B/630 TD Recon Plt, and
- 2x minefields (either type)
- German (none w/i 3 of an US unit):
- w/i 3 of B35.30: 38 Pioneer (-3 steps, co morale 5, all wpn units, no vehicles)
- w/i 5 of B24.18: 2/304 PG (-9 steps, co morale 8, all wpn units, no vehicles)
(Instructions: All German forces are to attack and sieze Marnach.)
Reinforcements:
- US: None
- German:
- 1900 at B40.24: 2 Pz Recon (all)
- 2100 at B40.24: 2/3 Pz Rgt (all)
(Instructions: Both reinforcements are to assist in the attack and take the town of Marnach.)
German units may enter with implemented attack orders.
Victory
- German: Hold and physically occupy all Marnach hexes
- US: Hold and physically occupy 3 Marnach Hexes
- Draw: Other than above
7. The Second Day: Fuller's Counterattack
Complexity: 4 Balance: -2 to -3
This scenario shows the entire second day of the battle, beginning at 0700. I had wished to isolate some parts of the battle, those in and around Clervaux, but soon found that this was impossible given the closeness of so many German troops and the interrelationship between a number of actions going on simultaneously in the same area. As the scenario opens, 2/110 is poised to begin its ill-fated attack on the, supposed, US garrisoned town of Marnach. C Company and its nearby tank platoon are to launch a supporting attack from Munshausen. Lastly, the 707 Tank Battalion's Stuart company is to attack south from Heinerscheid. All these attacks are doomed to failure. More intelligent, coordinated use of these attacks may salvage more from this decidedly German day.
Map Area: Maps A & B (all)
Start: 0700 17 December End: 1800 17 December (28 turns)
Artillery:
| US (Cannon Co/110 only) | HE 30 | Smoke 4 | Illum 1 |
|---|
| German | HE | Smoke | Illum |
|---|---|---|---|
| 75 | 20 | 1 | 1 |
| 105 | 15 | 1 | 1 |
| 150 | 25 | 2 | 1 |
Set Up:
US (+15 Minefields)
- w/i 4 of Reuler:
- D/1/110 (-5 steps, Co Morale 6)
- 5x 110 Trucks
- 2x 110 AT Guns
- Recon, Ammo, Mine Plts 1/110 (-3 steps, Co Morale 8)
- 2x B/630 TD AT Guns
- 1x B/630 TD Halftrack
- w/i 3 of B10.24:
- Prov/28 ID R&R (-4 steps, Co Morale 8)
- 3x 2/110 AT Guns
- Any Village hex west of the Clerf River:
- 1x B/630 TD AT Gun
- Prov/110 HQ (-3 steps, Co Morale 5)
- 2/A/707 (-1 tank)
- 3x 110 Trucks
- w/i 3 of B6.30: E/2
- w/i 3 of A6.01:
- F/2
- 3x 110 Trucks
- w/i 5 of B4.30: All remaining 2/110 units
(Instructions: 2/110 is to attack and sieze Marnach.)
- w/i 3 of Urspelt:
- 4x B/630 TD AT Guns
- 2x B/630 TD Halftracks
- 3x 110 Trucks
- w/i 5 of Heinerscheid:
- A/1/110
- 1x 1/110 AT Gun
- 2x B/630 TD AT Guns
- 1x B/630 TD Halftrack
- 2x 110 Trucks
- w/i 5 of Munshausen:
- C/1/110 (-4 steps, Co Morale 6)
- Cannon/110
- 3x 110 Trucks
- 1x B/630 TD Recon Plt (-2 steps)
- 2x B/630 TD AT Guns
- 2x B/630 TD Halftracks
- 1/A/707 (-1 tank)
(Instructions: One Platoon, C Company and 1/A/707 is to attack Marnach in support of 2/110's attack.)
German (10 Minefields Available)
- w/i 10 of B19.13:
- 2/304 PG (-10 steps, Co Morale 8)
- 3x 304 PG AT Guns
- 1x 304 PG Truck
- w/i 3 of Marnach:
- 38 Pioneer (-5 steps, Co Morale 10)
- 2/2/3 Pz Rgt
- 3/2/3 Pz Rgt
- 4/2/3 Pz Rgt
- 2/3 Pz Rgt Wirblewind
(Instructions: Assist attack on Clervaux by sending a company of taks with 2 PG and provide fire support to 1/304 PG from ridge outside Marnach.)
- w/i 10 of B20.21: 1/2 PG; All 2 PG Regimental Troops
(Instructions: 2 PG is to advance down N. 18 to attack Clervaux.)
- w/i 5 of B8.18: 1/2/3 Pz Rgt
(Instructions: Attack northward to assist attack on Clervaux.)
- w/i 10 of B22.33: 1/304 PG; 2x 304 PG Trucks; 3x 304 PG AT Guns
(Instructions: Support 2 Recon's attack with at least one compnay. Remaining units to attack with 2 PG on Clervaux.)
- w/i 10 of A30.13: 2 Pz Recon Bn
(Instructions: Attack Urspelt and then advance on Clervaux from the north along the railway.)
- w/i 10 of Fischbach: 38 PzJg Bn
Reinforcements:
- Option 1: Use Historical Order of Arrival only.
- Option 2: Use Variable reinforcement rules. German Bridge at Dasburg South #1, remaining German units crossing in desired order. Start counting crossing turns on the first game turn (none are "saved up".) The 116 Pz Recon must enter according to its rules (the die roll was passed.) Both US Provisional units have been received and no rolls need be made for them.
Victory
- German: General Victory Conditions.
- US: General Victory Conditions. The first measurement (2400, 16 Dec) resulted in 11 points. Add these to the measurement made at the end of this game to determine the victory point total.
8. The Charge of the Light Tanks
Complexity: 1 Balance: -4 (easy, if not worse.)
This scenario depicts the quick (35 minute) extermination of the D/707 Tank Company at the teeth of the 38 PanzerJager Battalion. While unbalanced as anything, it is included as a possible solitaire scenario and as a quick one for tank enthusiasts and for people who have a deep-seated hatred of the Stuart tank.
D Company attacked down N. 16 early on the 17th to support all the other efforts to take Marnach by the 110 Infantry. Shortly after cresting the ridge north of Fischbach, it came under intense fires from 75mm AT guns and StuG III's. Eleven Stuarts were quickly destroyed and the remaining few escaped to Heinerscheid and Urspelt. These last few were to share the fate of the towns they retreated to and be destroyed later in the day - one by "scuttling", the others at the hands of the Germans.
Map Area: Map A (only) (bounded by hexrow 28.xx and the map edge, and hexes xx.05 and xx.25, per the map diagram) Start: 0700 17 December End: 0900 17 December (5 turns)
Artillery: None
Set Up:
- US: None
- German: 38 PzJg (all) w/i 10 of A36.10
Reinforcements:
- US: 0700 at A44.25: D/707 (Instructions: Support other relief attempts on Marnach by attacking south on N.16.)
- German: None
Victory
- US: Exit 6 or more M3's via the south map edge at xx.05
- German: Destroy 11 or more Stuarts
- Draw: Other than above.
9. The Attacks on Munshausen
Complexity: 3 Balance: -1 before German Tanks, -2 afterwards
Throughout the day of the 17th, attacks were made repeatedly and in increasing intensity against the garrison of Munshausen. Of special importance to the Germans was Cannon Company of the 110th - the last US artillery support in the battle. Munshausen was eventually overrun during the day by intense attacks supported by tanks.
Map Area: Map B (only) (bounded by the map edge and hexrow 25.xx, and the map edge and hex xx.18, per the map diagram) Start: 1200 17 December End: 1800 17 December (15 turns)
Artillery:
| US (Cannon Co/110 only) | HE 20 | Smoke 2 |
|---|---|---|
| German | HE | Smoke |
|---|---|---|
| 75 | 15 | 0 |
| 105 | 10 | 1 |
| 150 | 20 | 2 |
Minefields:
- US: 5 (either type)
- German: None
Set Up:
- US: w/i 5 of Munshausen
- C/1/110 (-4 steps, Co Morale 3)
- Cannon/110
- 3x 110 Trucks
- 1x B/630 TD Recon Plt (-2 steps)
- 2x B/630 TD AT Guns
- 2x B/630 TD Halftracks
- 1/A/707 (-1 tank)
- German: w/i 10 of B19.13
- 2/304 PG (-10 steps, Co Morale 3)
- 3x 304 PG AT Guns
- 1x 304 PG Truck
(Instructions: Attack and sieze Munshausen and put the US artillery out of action.)
Reinforcements:
- US: None
- German: 1240 at B24.18: 3/2/2/3 Pz Rgt, 2/3 Pz Rgt Wirblewind (Instructions: Assist attack of 2/304 PG.)
Victory
- German: Clear all US units from any Munshausen hex and destroy Cannon Company.
- US: Maintain at least one unit in Munshausen and all of Cannon Company on the map.
- Draw: Other than the above.
10. The Final Attack on Heinerscheid
Complexity: 2 Balance: -1 to -2
Having escaped most direct combat up to this point, Heinerscheid's garrision is now KO'd by a backhand blow from the 116 Pz Recon and elements of 2nd Panzer. After the 116th's poor progress to the north, it has been shifted south to use the 2nd's bridges and attempt to advance. After eliminating the garrision at Heinerscheid, the entire 116 Panzer Division will use the town as an assembly area that night.
Map Area: Map A (only) (bounded by hexrow 39.xx and the map edge, and hex xx.20 and the map edge, per the map diagram) Start: 1300 17 December End: 1540 17 December (9 turns)
Artillery:
| German | HE | Smoke |
|---|---|---|
| 75 | 10 | 1 |
| 105 | 5 | 1 |
| 150 | 5 | 1 |
- US: None
Set Up:
- US (+2 Minefields, either type): w/i 5 of Heinerscheid
- A/1/110
- 1x 110 AT Gun
- 2x B/630 TD AT Guns
- 1x B/630 TD Halftrack
- 2x M3 from D/707
- German: w/i 3 of A41.23: 116 Pz Recon Bn
(Instructions: Attack and sieze Heinerscheid to provide an assembly area for the remainder of 116 Panzer.)
Reinforcements:
- US: None
- German: 1340 at A40.20 1/3/38 PzJg (Instructions: Assist the attack by 116 Recon.)
Victory
- German: Clear all US units from all Heinerscheid hexes
- US: Maintain at least one unit in a Heinerscheid hex.
Battle Notes
In August of 1944, the stubborn German defense in Normandy completely collapsed, unleashing the furious exploitation by the Allied forces that became known as the “dash across France.” In the face of disaster, Adolph Hitler revealed to selected members of the German high command a daring plan to recoup Axis fortunes by launching a counterattack in the West. The German generals were skeptical of the possibilities in this desperation offensive, but Hitler remained adamant. For their part, the Allies were unprepared to support such a rapid success and the advance ground to a halt in September at the frontiers of the Reich itself. With this respite, Hitler chose the locale and objective for his scheme. It was to attack through the Ardennes forest to seize Antwerp and isolate more than half of the Anglo-Allied armies in northern France and the Low Countries. The German general staff was amazed when Hitler was able to reconstitute his shattered forces and provide a mobile reserve for the attack. The start date for the big offensive was set for November, but delays moved it back to December 16th.
That morning the Ardennes erupted in a massive artillery bombardment except in the front occupied by the 2nd Panzer and 26 Volksgrenadier Divisions. Along the front to be attacked by the 2nd Panzer, the only defenders were the refitting remnants of the 28th Infantry Division. This US division had been very badly mauled in the fighting for the town of Schmidt in early November and was now being rebuilt in this, a quiet sector. It was holding a very large portion of the front, so large in fact, that its companies were divided into islands of defense based on the locations of the local villages. In this game, the 1st Battalion, 110th Infantry Regiment holds the towns of Heinerscheid, Grindhausen, Urspelt, Marnach, Munshausen and the small city of Clervaux. It occupies the center of the 28th Infantry Division’s line along the critical main road to the city of Bastogne. The existence of that road is the reason for the 2nd Panzer’s drive against this area.
The 2nd Panzer Division was one of the original panzer divisions of the German army and had participated in combat since the invasion of Poland and at one time its division commander was one Heinz Guderian. For this attack, it has been refitted nearly to full strength with new equipment and the better manpower the bottom of the barrel had to offer. Its commander, corps commander, and army commander were all highly experienced panzer commanders of exceptional talent.
For the attack, expecting to rapidly overrun the few Americans in their way, the Germans planned to brush aside the defenders and quickly move along the road toward Bastogne and the Meuse. The 2nd Panzer’s first day objective was to take Clervaux and have the east-west road cleared. One battalion of the 304th Panzergrenidiers and the 38th Pioneer Battalion crossed the Our River in the early morning darkness to initiate the battle. This was done without an artillery preparation to maintain surprise. The 304th’s battalion immediately stumbled into a minefield which slowed its advance and caused some confusion and casualties. These two battalions set about attacking Marnach at around 0800 but their attack failed to start really rolling until 1000.
During the morning, additional German infantry units and heavy weapons were ferried across the river to join the battle. These forces conducted two pincer movements, one to the north and one to the south of Marnach to seize the road to Clervaux. Throughout the first day, German operations disintegrated into local fights and lacked organization and drive. The US infantry company in Marnach held out until after dark against everything the 2nd Panzer could muster against it.
On the American side, the 110th’s regimental commander, Colonel Hurley Fuller, spent much of this first day attempting to discern the scale of the attack and in shipping what help he could to the beleaguered village garrisons. From the reports he received no coherent German plan could be discovered, only intermitted contacts with roving bands of Germans. Fuller ordered attacks southward from Heinerscheid and northward from Munshausen to relieve Marnach, which was under the most immediate threat. A Company’s movement south from Heinerscheid failed quickly and withdrew. C Company’s movement northward from Munshausen became bogged down in forest fighting south of Marnach. A tank platoon sent to aid this attack failed to find C company but drove into Marnach bringing much needed ammunition on their decks. These tanks, without orders to stay in Marnach, retraced their steps to Munshausen in the hopes of picking up C Company. Eventually, they did find C Company and withdrew with them to Munshausen leaving the road to Marnach completely cut off. Another tank platoon entered Marnach with the other mentioned above. This platoon remained in the town until mistaken orders were given for it to attack southward to Hosingen - thus leaving Marnach without tank support.
After the failure of their patrol south to Marnach, the Heinerscheid garrison remained in place firing at the occasional German patrol and observing their section of the Our River. Much activity was reported there and A Company’s attention was held in that direction. In the forests near Heinerscheid the handpicked elite recon battalion of the 560th Volksgrenadier Division spent the first two days of the battle completely out of touch and lost in the woods.
Early in the morning, German engineers intended to begin work on the critically important Our River bridges needed by the 2nd Panzer Division and its corps to cross their heavy equipment and tanks. However, they could not approach the river until a massive concrete gate had been opened, the key to which had been lost. The engineers prepared the gate for demolition but could not blow it in place until the opening of the barrage to preserve surprise. Once blown the engineers quickly went to work on a pair of 60 ton ribbon bridges in the icy water. Work proceeded slowly as conditions were poor.
German infantry attacks proceeded in a relatively disorganized fashion during the day with Munshausen and Hupperdange coming under pressure. In both places, the German infantry eventually overran the defending forces but only at heavy loss and with a large expense of time. The artillery battery at each place spent at least some time firing direct fires in support of their own defense before displacing out of the battle.
The vital German bridge was finished at 1300, but one of the first ten vehicles across, a Pz IV tank, drove off the edge of the bridge and fell into the river killing its driver. This accident damaged the bridge and the engineers fell back to work into the water to fix it. The bridge reopened at nightfall, 1600. Meanwhile, awaiting repair of the bridge, a massive traffic jam involving the 2nd Panzer, Corps support elements, and some units of 116th Panzer further ensnarled the plan. Valuable time was wasted in unraveling this mess, with even the corps commander acting as a traffic cop at one point. This tie up further slowed battle reinforcements.
By 1600, when the bridge finally reopened, the German infantry had at last launched a concentrated attack on the Marnach garrision and took the town. During the night, one German unit after another crossed the bridge to enter assembly areas on the west bank of the river for a continuation of the advance on the 17th. The Pz IV battalion crossed and was regrouping in Marnach at around midnight. German plans for the next day included a mechanized flank movement through Urspelt to Reuler and Clervaux.
During the night, Col. Fuller, who did not know Marnach had fallen, finally had his 2nd Battalion released from Divisional reserve to counterattack from Clervaux through Reuler to Marnach. In conjunction with this attack, the division’s light tank company was to attack south from Heinerscheid in support. Col. Fuller also received permission to use his excess troops at headquarters and the 28th Infantry Division’s Rest Camp to form two provisional companies. These were posted just east of Clervaux on the road to Marnach with a couple of AT guns.
By morning on the 17th, the German flank attack had moved quickly to take Reuler and the heights above Clervaux and several Pz IV’s were advancing southward along the railroad on the west bank of the Clerf into Clervaux itself. The provisional units south of Reuler collapsed and drifted back to Clervaux in small groups. A few available Shermans fought it out with the Pz IV’s south of Clervaux causing the German tanks to fall back.
Regardless of changing circumstances, Fuller’s counterattack began just as planned. Companies E and F 2/110 advanced north of Reuler to attack toward Marnach. This movement immediately ran into trouble and stalled as they hit the German flanking forces. Their advance stopped and they spent the next few hours trying to extricate themselves from their situation. By the end of that time, 2nd Battalion 110th Infantry was crippled as a fighting force and the road to Clervaux was open.
D Company, 707 Tank Battalion, composed of Stuarts, attacked south from Heinerscheid at the same time as 2nd Battalion’s attack. They proceeded southward along the Skyline Drive to Fischbach. The attack lasted only 15 minutes and they were devastated by AT gun and StuG III fires. Seven tanks remained after the turkey shoot. Two entered Heinerscheid to help with its defense, the others withdrew to Urspelt where they were overrun later that day.
In the later part of the morning, the 116th Panzer Division’s Recon Battalion was pushed into the 2nd Panzer’s crossing queue as that division had failed to make any progress to the 2nd Panzer’s north. The recon battalion crossed and attacked to take Heinerscheid. It took that town around 1300.
By nightfall on the 17th, German tanks and infantry were finishing the last defenders in Clervaux, except for a few that held out for a couple of days in Clervaux’s castle. The road to Bastogne was open but the 110th Infantry had placed the Germans one vital day behind their timetable and gave US commanders the time they needed to hurry the 101st Airborne and 9th Armored Divisions to the critical area. The entire 28th Infantry Division held its ground at all costs and was a vital factor in the course of the rest of the battle. For the Germans, aside from lost time, 2nd Panzer Division losses were very heavy. The 304th PG was badly mauled on the first day and lost its regimental commander. Losses in the 2nd PG and 3rd Pz Rgt were not much lighter and any such loss heavily damaged the offensive capability of this, the panzer division that was to make the furthest advance in the Battle of the Bulge. If not for the delay of the 110th Infantry and her sister units who can tell how far this elite panzer division would have gotten.
Designer's Notes
Bloody 110th was a tough design. German information was sketchy as well as weak. American information tended to fill pages with interesting personal incidents but failed to draw a clear picture of who was doing what when. One comes away with an image of groups of 300 Germans scuttling from bush to bush who come to grief when Private Joe Whats-his-name from New York does this that and the other thing and ends up lost, somewhere near Paris. Entertaining reading but useless for game design.
Research, ably conducted by Carl Gibeault, obtained a copy of the 2nd Panzer’s strength report for the offensive, which was very useful and remaining German information needed was only to find out who crossed the river when to enter the battle. Danny Parker came through with some vital information as well as confirming other sources using his contacts in the 2nd Panzer Division Veteran’s Association. These sources were pieced together to correctly identify the German crossing methods and times.
American information was much easier to come up with and was put together much more quickly than the German data. All of the parts of the puzzle fell together much more easily than it first seemed they would.
The map data came from two beautiful Luxembourg maps obtained from the University of Illinois map library. These maps were accurate down to wire fences and individual lone trees. They were also old enough and close enough to the end of the war to avoid any changes through time. Of interest is that the ruins of a Roman fortified camp exist on the Our River just east of the map edge near Roder.
The victory conditions took care to create as they must be more subtle than in the usual game. The problem is that if geographical objectives were all that mattered, the German player could bypass the command system by outlining those objectives in his initial orders. While the highway is of prime importance to the German offensive, its ownership alone will not determine the issue. The German must also deal enough damage to the US forces to keep them away from the road and too weak to be a threat. This makes the US forces also objectives and, as they may move, no initial plan will take care of everything.
The available teaching scenarios should help in learning the basic game rules. If a particular facet of the game’s system needed a teaching scenario devoted to it that didn’t have one, let me know what it was so I can include teaching scenarios on that aspect in later games.
As you will see, this game is fairly easy in terms of what any given unit can and will do in a turn but is very complex in the judgements needed to determine where and when to attack or defend and what to make your battalions and companies do using op sheets. You have a lot of freedom in the form of your operations, but deciding on what to do when is the art involved and that is what I have tried to show.
American Player's Notes
As the US player, you have a tough job ahead of you. Your weak forces must hold the Germans at bay while inflicting heavy losses on them. You must realize that, by the end of the second day, your forces will be crushed by him. It is your job to keep him from getting that done early and winning the game.
A close look at your forces is in order. The line rifle companies are good as long as they are not caught in the open by enemy fires. Their mortar platoons are weak and difficult to keep in the fight because of their range. D Company, the weapons company, is best used after being distributed out to the line companies. It is very weak on its own. B/630 TD is also best when parceled out. Your reinforcing tank units can be very valuable if not squandered piecemeal. The Stuarts and M10’s are all but useless. Use them carefully. The artillery batteries are your lifeblood. They must be carefully protected to avoid their being overrun or displaced off the map.
Take care of your artillery ammo supply to avoid wastage. It will get you to the end of the game but is in no way ample and should only be used for important targets. Use it carefully to build his losses where it counts and never expend it on useless fireworks displays.
Use minefields to block his way and slow him. Let him work around your minefields into your kill zones and always cover mines with fires. Don’t let him walk up to them and breach then without earning it.
Hoard your reinforcements until you can do some real good with them. A major counterattack later, that he will feel, is much better than a pinprick now he won’t. Of course, if a good opportunity presents itself, one quick sharp strike may disrupt the German’s timetable and attack plans all out of proportion to the US forces committed. Never waste your armor by using it recklessly. You will wish you hadn’t by the second day when his armor makes itself felt.
The initial dug in placement of your units is critical. Think about where everyone can fire and make sure you can see and hit with force his movements to your front. Make him pay for each attack.
If someone must pull out in front of him without orders (mission failure) try to fall back masked by some other unit that does have orders. He can do a lot of damage on a unit trying to fall back without orders if he can pursue. Attempt to always cover units that are unassigned awaiting an op sheet’s implementation so that they do not receive direct fires and can get their orders as soon as possible. Again, no one is as exposed as someone without orders.
German Player's Notes
The German player’s initial decisions are of prime importance - where to put the bridge, what order to line the units up behind it, who to ferry and in what order. Take care and time to think these out and make sure they fit into your overall attack plan. The infantry battalions are fairly weak in the attack without their heavy weapons so it is best to get the mortars across by ferry early. Also, do not forget to get some AT guns into your mix before he gets armor reinforcements.
It is best to set up some initial op sheet orders to start the game with and get things going but not the tie yourself down too much to a long term op sheet. Move reinforcements onto the map with preliminary instructions and then keep them safe while they await implementation. You must keep sizable reserves and keep ahead of changing mobile operations and situations. You will have many troops, but few to spare. Every unit must be used wisely in order to achieve the rapid success you will need to win.
Unlike your opponent you have lots of artillery ammunition, relatively, and should use it hard and liberally when attacking. You can expend rounds to save unit steps. Take care to use smoke to cover open advances. Do not be too quick to close with him, especially if he is dug in. Use plenty of artillery, carefully fired, to soften him up before moving in for the kill.
By the morning of the second day, you will have a lot of power at your command. You must resist the temptation to make human wave assaults. With your tanks and halftracks you can conduct some fine mobile operations to mop him up but do not stop being careful. Remember Gudarian’s favorite comment: “Clobber them, don’t jab at them!” The moral the general is trying to get across is a good one. He wants us to remember that the force needed to accomplish the job is always unknown and it is too easy to allocate too little to the effort so it is best to hit them as hard as you can without worry about the efficiency of the attack.
At any rate, do not lull yourself into thinking your job is easy. Even after a few smaller battles on the map seem to have him on the run you still have much to do to win. He needs little to give you a run for it and if he can find an opening he will shift over to the attack on your unprepared units. Throughout the game do not forget your victory conditions. Merely holding the road is good but not nearly enough. You must cripple his units so they cannot attempt harassment of that road. His artillery batteries may cause you much loss so it is best to attack them as soon as you can to destroy, suppress or cause them to displace.
By the end of the game as you look over your losses, reflect on the handful of American companies that did this and the determination they showed.
American Set Up Table
According to the constraints of the table below, determined by its die roll, the following units are set up on the 0800 turn of 16 December.
- Hupperdange: A/109 FA; 3x 10⁹ FA Trucks; Section 2, 447th AAA
- Heinerscheid: A/1/110; 1x 1/110 AT Gun
- Grindhausen: D/1/110; 4x 110 Trucks
- Urspelt: Recon/Ammo/Mine Plts 1/110; 2x 110 Trucks
- Reuler: B/109 FA; 3x 10⁹ FA Trucks; Section 1, 447th AAA
- Marnach: B/1/110; 3x 1/110 AT Guns; 1x B/630 TD Recon Plt
- Munshausen: C/1/110; Remainder of B/630 TD; Cannon Co/110; 3x 110 Trucks
- At any of the above villages: 4x 110 AT Guns; 12x 110 Trucks
Positioning Table
Place the above units at or within the given number of hexes of the given town above.
| Die | ...Hexes of the given town above |
|---|---|
| 1 | 5 |
| 2 | 8 |
| 3 | 10 |
| 4 | 15 |
| 5 | 20 |
| 6 | 25 |
For Further Reading
The following works are both useful and interesting. They cover this battle, the Ardennes Campaign, and the art of warfare.
- Elstob, Peter. Hitler's Last Offensive. New York, NY. Ballantine. 1971.
- Lind, William S. Maneuver Warfare Handbook. Boulder, CO. Westview. 1985. This rare book should be read by all gamers to gain a better grasp of how combat operations work. While a bit heavy in its "dogma," this work is highly recommended. It is, however, hard to find.
- MacDonald, Charles B. Company Commander. New York, NY. Bantam. 1978. This book has been out of print for years has been reprinted as a paperback is highly recommended as the author was a rifle company commander in the northern shoulder of the Bulge. It also will help give the gamer a better feel for the realities of combat after too many cardboard counters make it look too easy or nice.
- MacDonald, Charles B. A Time for Trumpets. New York, NY. Bantam. 1984. By the same author, who also worked on the US Army Official history of the war, the book covers the entire campaign. It offers a unique insight as it was written by one who commanded their.
- Phillips, Robert F. To Save Bastogne. Briarcliff Manor, NY. Stein and Day. 1983. This work, also hard to find, deals strictly with the Bloody 110th battle and the few after it before Bastogne. Again the author was there in the 110th itself. Highly recommended.