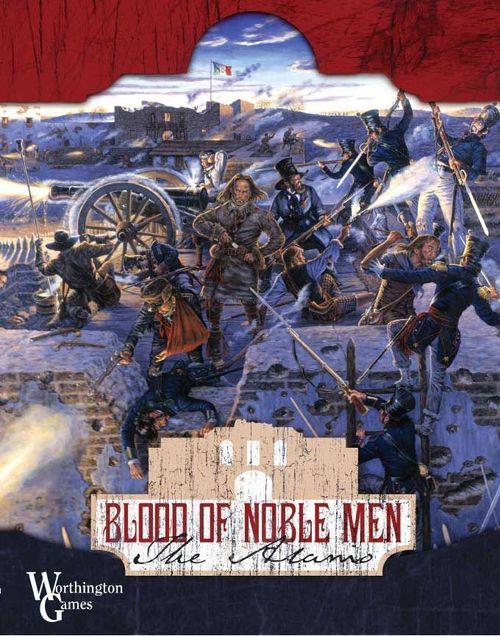
Blood of Noble Men: The Alamo
Blood of Noble Men: The Alamo Rulebook
Table of Contents
Table of Contents
2. Game Board
2.1. The game board is a graphic representation of the Alamo compound and surrounding area, drawn for this game. Also located on the map are the Turn Track, the Victory Point Track, and a track for Mexican and Texian losses.
2.2. The game board is set up into zones that control movement and combat. Lettered zones outlined in white represent the Alamo compound. The zones outside the Alamo compound are numbered and outlined in brown.
2.21. No Texian unit may move outside of the compound (the lettered zones).
2.3. There are two outer zones on the board, zones 8 and 9 that are rough terrain that limit movement into the zone.
2.4. The Alamo compound consists of wall zones, and court yard zones that regulate movement and combat. Zones J, K, L, and M are court yard zones. Zones A (Chapel), B, C, D, E, F, G, H, and I are wall zones. Certain wall zones have buildings within them; zones A (Chapel), B, D, E, F, G, and H have buildings within them. Any wall zone with an arrow pointing to it has a building in it. Entry into or out of the buildings is from or to the zone with the red arrows. Wall zones that have buildings have a unique feature in that game units may either be on the wall zone or inside the buildings of the wall zones. (KEY CONCEPT: Picture your own house; you can be on the roof or inside the house.) In the graphic example below a game unit in court yard zone K could enter into the buildings of wall zones H or G, or move on the wall of wall zones H or G.
2.41. The Alamo Chapel Zone (A). This is a unique wall zone with a building that units treat as a "combined" wall and building. Units in zone A are both on and inside the zone at the same time. Only 8 SP and one artillery unit can be in zone A. It can not be scaled by the Mexican player or fired on by infantry, but may by artillery. Movement through, into or out of zone A must be through the entry arrow in zone J. Melee into zone A can only be through zone J. Units in zone A may conduct artillery and infantry fire as though they are on a wall zone.
3. Game Units
3.1. The game uses wooden blocks with labels to represent the men and artillery that did the fighting during the battle. The brown and grey labels (Texian) are applied one per block to the grey blocks. The blue labels with flags (Mexican) are applied one label per block to the blue blocks. Also included are a Victory Point label and a Turn Track label both to be placed on grey blocks. There are some extra grey blocks used to track losses. To apply the label, remove one label at a time and position it in the middle of a block. Once centered press the label firmly down to assure proper adhesion.
3.2. On each label are numbers, 1-10. These represent the unit's current strength in a combination of manpower, firepower, and morale. Throughout the rules a unit's strength will be abbreviated as SP (strength point). The unit's current SP is always the number showing at the top of the unit. During setup and play, the side of the unit without the label on it faces your opponent to keep the unit's current SP hidden. The exception to this is loaded artillery units which are always face up.
3.3. TEXIAN UNITS - The Texian player controls all blocks with the brown and grey labels on the grey blocks. The Texian player controls 4 types of units; infantry, artillery, cannon crews, and leaders. Each type of unit can perform different functions as follows:
3.31. TEXIAN INFANTRY: Movement rate is one zone per turn. Infantry units may conduct fire and melee combat.
3.32. ARTILLERY: Artillery can only be fired, reloaded or moved by cannon crew units or Mexican infantry with a leader. Artillery has no SP. Only one artillery unit may be located within a zone with the exception of zone H (lunette zone), where two artillery units are allowed. Artillery units may not be inside buildings with the exception of Zone A (the Chapel). Artillery alone may not defend any zone or stop Mexican movement or scaling attempts.
3.33. CANNON CREWS: These are the only Texian units who may reload, move, and fire the artillery. Cannon crews may perform as infantry units when they are not performing a function with an artillery unit (movement, fire, etc.). All cannon crews have 1 SP. Movement rate is 1 zone per turn.
3.34. LEADERS: Texian leaders are William Travis and David Crockett. Leaders move 2 zones per turn. Leader units can provide leader bonus movement for units. Leaders may rally units. Each Texian leader unit is 1 SP and performs as infantry for combat purposes.
3.4. MEXICAN UNITS - The Mexican player controls the blue label units with the blue blocks. The Mexican player controls 2 types of units; infantry, and leaders. Each type of unit can perform different functions as follows:
3.41. MEXICAN INFANTRY: Movement rate is one zone per turn. Infantry units may conduct fire and melee combat and scale walls. Any Mexican infantry unit with a leader may perform as a cannon crew. The Mexican Army was divided into 5 columns for the assault. Each column is identified by a specific color in their center square. The individual units are further identified by a unit name.
3.42. LEADERS: These represent the commanders of the Mexican assault columns. Leaders move 2 zones per turn. Leader units can provide leader bonus movement for units. Each Mexican leader may rally 1 SP per turn for units in his column. No more than two Mexican leaders may be in one zone at a time. Any Mexican leader with an infantry unit may perform as a cannon crew. Mexican leaders have no SP.
4. Game Set-Up
4.1. Place the Turn marker on turn 1. Start the VP marker on 0 on the Victory Point Track. Place the extra grey blocks on the loss track for each side on the 0 column. These will be moved during the game as losses occur, victory points are gained and to mark turns.
4.2. The game starts with no units on the board. During set-up and game play units should have the label side of their block facing the owning player with the blank side of the block facing the opposing player.
4.3. The Mexican player starts by writing down the column commander name for each of his five columns. Next to each name write down what zone on the outer edge of the board each column will enter. No more than two columns can enter into one zone. The reserve column under Amat is also listed to move onto the board through any of the outer zones because it enters later in the game.
4.4. The Texian player places each of his artillery units on the board in their correct starting location. Each artillery unit has its starting zone listed on the unit and starts the game loaded. The Texian player then sets up the remainder of his units in any of the Alamo lettered zones that he desires.
4.5. The Mexican player places the units belonging to the columns of Morales, Romero, Cos, and Duque on the board in the zone they wrote down before the Texian player placed his units. The column of Amat is held off board in reserve and is not brought on board until he meets the requirements listed in the reserve release rules. The Mexican player placing his units on the board counts as his first move for the turn. No Mexican double movement with leaders is allowed on turn 1.
5. Sequence of Play
5.1. The sequence of play listed below is conducted in exact order each turn.
- Starting with turn 3 of the game the Mexican player rolls one die to determine if his reserve column appears on board that turn. Once the reserve appears there are no further rolls.
- Artillery units captured by the Mexican player are reloaded.
- The Mexican player may move any and all eligible units.
- Texian artillery units are reloaded.
- The Texian player may move any and all eligible units.
- The Texian player conducts fire combat, first with artillery and then infantry. Mark the Mexican losses on the Mexican Losses Track.
- The Mexican player may attempt to scale wall zones he is adjacent to.
- The Mexican player may conduct fire combat, first with any captured artillery, then with any units that are not scaling a wall zone. Mark the Texian losses on the Texian Losses Track.
- Melee occurs and is simultaneous for both sides. Mark the Mexican and Texian losses on the Losses Tracks.
- For turns 1-7 leaders for both sides may rally 1 SP for each leader.
- Adjust the VP marker on the VP track based on VP locations taken by the Mexican player.
- If all of the Texian units have been eliminated or it is the end of game turn 15 the game is over, and players determine victory. Otherwise, advance the game turn marker one space.
6. Mexican Reserve Column - Amat
6.1. The Mexican column colored red with leader Amat is a reserve column. It is held off board until certain conditions are met.
6.2. Starting on turn 3 the Mexican player rolls one die to determine if the reserve column enters the game. The following are the die rolls needed for the reserve column to enter the game.
| Turn | Die roll needed |
|---|---|
| Turn 3 | 6 or greater |
| Turn 4 | 5 or greater |
| Turn 5 | 4 or greater |
| Turn 6 | 3 or greater |
| Turn 7 | Automatic entry |
6.21. The die roll is affected by Mexican losses. For every 20 Mexican losses (check the Mexican Losses Track) add +1 to the die roll to determine if the reserve column enters the game.
For example: It is game turn 3 and the Mexican player has taken 14 losses. The Mexican player at the start of turn 3 will roll one die with no modifier because losses are below 20. If the result is a 5 then Amat and his units are not placed on the board. If the Mexican player had taken 25 losses he would roll one die and add 1 to whatever number is rolled because he has taken over 20 losses. If the result of the die roll was 5 plus 1 modifier (5 + 1 = 6) then the Amat and his units are placed on the board in whatever zone the Mexican player listed prior to the start of the game.
6.3. When the reserve column comes in the Mexican player places the column on the board in the zone the Mexican player listed prior to the start of the game during set-up. This is done during the movement portion of the Mexican turn and counts as the move for the column.
7. Artillery Reload Phase
7.1. Unloaded artillery units should be played face down. They may be reloaded by cannon crew units or Mexican infantry units accompanied by a leader. The loading unit (this includes the Mexican leader) has to start the turn in the same zone as the unloaded artillery unit. To show that the artillery unit is being loaded place the unit (Mexican infantry and leader, or Texian cannon crew) loading the artillery on top of the artillery unit. The loading unit and the artillery unit may not move or fire this turn. During the artillery reload phase of the following turn, flip the artillery unit face side up as described in 7.2.
7.2. During this phase also flip artillery units to their loaded side (face up) if an artillery unit was being loaded during the previous turn. They are loaded and may be fired this turn by cannon crews or Mexican infantry with a leader. Any units on top of artillery units (that have either loaded the artillery or moved it the previous turn) and artillery units are eligible to move this turn.
8. Movement
8.1. Each infantry or cannon crew unit is allowed to move one zone per turn. Leaders and units that are using the leader bonus move may move two zones per turn. Infantry units, cannon crews, and Texian leaders may move, fire, and melee during a game turn. Mexican units may also scale walls.
8.2. Movement is from zone to adjacent, connected zone. Diagonal movement is not allowed. Zones may not be skipped or passed over. Movement may not be saved for another turn or transferred to another unit. For example: A unit in zone J could move into zones A, B, I, H, and K, because they are adjacent. They could not move to zones C or L because they are diagonal.
8.3. Mexican units may not move into a zone containing Texian infantry, artillery crew or Texian leader units. Texian units may not move into any zone containing Mexican infantry units. If the Texian player enters a zone containing only a Mexican leader unit, the leader unit is moved to the nearest friendly occupied zone.
8.4. Mexican units may enter zones containing only Texian artillery units in which case the Mexican player is then in control of the artillery unit.
8.5. Mexican units may move from any numbered zone onto any wall zone that starts the turn with a Mexican unit occupying the wall zone.
8.6. Zones 8 and 9 restrict Mexican movement. The Mexican player may not use double movement through these zones. Only 20 SP per turn may enter these zones. The restrictions do not apply to the number of units or SP allowed to be in the zone or to exit the zone.
8.7. Leader movement bonus - Each Texian leader can move themselves and up to 5 SP two zones during the movement phase. Cannon crew units moving artillery units may not use this bonus but cannon crews without artillery can. Each Mexican leader may move themselves and up to 10 SP two zones during movement in a turn. Mexican infantry with leaders moving artillery units may not use this bonus. Mexican units may not use this bonus to move through the rough terrain in zones 8 and 9.
8.8. Texian units may not move outside of the Alamo compound lettered zones.
8.9. Any wall zone with an arrow pointing to it has a building in it. Movement into or out of the buildings is from or to the zone with the red arrows. Wall zones that have buildings have a unique feature in that game units may either be on the wall zone or inside the buildings of the wall zones. Once inside of a building a unit is only allowed to exit the building to a zone with a red entry arrow. (KEY CONCEPT: Think of the arrows as the doors of your house. Entry or exit would be at this point.) To show the difference between units on a wall zone and inside the buildings of a wall zone, units should be left upright when on the wall, and units inside a building in a wall zone should be placed face down. Units on a wall zone may move on to adjacent wall zones. Movement is not allowed from inside of a building to the inside of a different adjacent zone with buildings.
8.91. Only 8 SP may be located inside a building. Only 8 SP may melee into a building.
8.10. Artillery units may never move or fire by themselves. Artillery units may only be moved or fired by Texian cannon crew units or Mexican infantry units accompanied by a leader unit. Artillery may only be moved during the movement portion of the owning players turn.
8.11. Artillery units may not fire the same turn they move. To indicate the artillery unit has moved, place the unit that moves the artillery on top of the artillery unit. The unit moving the artillery unit and the artillery unit itself may not fire that turn.
Movement example (from the printed rules): In the example diagram, the Texian units in Zone K could move into the buildings in Zones H or G, or on zone G or J. They may not move on zone H because it is occupied by a Mexican unit. Note there is already a Texian unit inside the building in Zone H, shown face down to reflect being inside the building. Although a Mexican unit is on zone H, Texian units could move inside the buildings of zone H. The Texian unit inside the building of zone H can not move on zone H, nor move to zones G or I. The unit could only move out to zone K by following the entry arrow from zone K. The Mexican unit on wall zone H could move to zones G, I, or J. He could not move to K as it is occupied by Texian units. The Mexican unit on zone H could not move into the buildings of zone G or H as the Texian units in zone K block the building entry arrows into zones G and H. The Mexican unit outside of the compound in zone 20 could move on zone H without scaling because the Mexican player has a unit starting the turn in zone H. The Texian unit in the building of zone H could not fire at or melee with Mexican units on the wall of zone H, and vice versa.
9. Fire Combat
During fire combat units may fire and unit losses are taken. Units that take losses are shown by reducing SP. This is done by rotating the block(s) to account for the losses. For example, a 7-5-3-1 at full strength takes a 2 SP loss during Fire Combat. The unit would be rotated counter clockwise from a 7 to a 5.
9.1. At times, the Mexican player may have to incur losses higher than actual losses due to the values associated with the Mexican units. For example, if a Mexican 7-5-3-1 SP unit was in a zone by itself at full strength (7 SP) and that zone took 1 SP in losses, the unit would have take 2 SP in losses in order to rotate the unit (from 7 SP to 5 SP).
9.2. Fire combat consists of three parts. Line of sight determination, artillery fire combat, and infantry fire combat. Use the charts on page 12 (reproduced at the end of this rulebook).
9.3. LINE OF SIGHT
9.31. Line of sight is determined at the moment the firing units declares his targets.
9.32. Line of sight is determined by firing in a straight line of zones from the firing zone to the targeted zone. No diagonal fire is allowed. Consult the Line of Sight chart to resolve any questions. Line of sight is affected by the following:
- Units (friendly or enemy) block line of sight. Units may not fire through enemy units into a zone behind them.
- Walls zones block line of sight. Units may not fire into a zone behind the wall or building zone.
- Units may fire at enemy units on a wall zone.
- Units inside a building of a wall zone may not be fired on by infantry but may be fired on by artillery units. Units inside a building of a wall zone may only fire into adjacent zones with entry arrows into the building. For example, units inside of buildings in zone B could only fire at zones C, J and L.
- Units inside a building of a wall zone may not fire or melee with units on the wall of the same zone, and vice versa. A unit in the building of zone H could not fire or melee at units on the wall of zone H, and vice versa.
- Line of sight when firing within (from lettered zone to lettered zone) the Alamo compound is limited to an adjacent zone.
Line of Sight example: Zones that zone I has a line of sight to are represented by solid lines. Zones that zone I does not have line of sight to are represented by dashed line. Zone I does have line of sight to zones A, 18, 19, 11, 4, H, and J. Zone I does not have line of sight to zones 10, 20, or 12 as no diagonal fire is allowed. Line of sight to zones B, C and K are not allowed because line of sight in lettered zones is limited to adjacent zones. See Line of Sight Chart.
9.4. ARTILLERY FIRE COMBAT
9.41. Artillery has a range of three zones and may fire if it has line of sight. Each turn artillery may only fire once per turn if it is loaded and a cannon crew is present. For artillery units firing, pick the loaded artillery unit to fire (it must have either a Texian cannon crew unit or Mexican infantry unit with a leader). Consult the Artillery Fire Chart. Count the number of zones from the artillery unit to the target zone (count the zone the target unit is in but not the zone the firing unit is in). Locate the correct range shown on the Artillery Fire Chart. Roll one die. Cross reference the die roll with the range. The number shown at the cross referenced box is the total number of SP eliminated by that artillery fire. The eliminated SP are immediately removed. (NOTE: This is the total number of SP's eliminated, not the number of rotation of enemy units.) Flip the artillery unit to its unloaded facedown side.
9.42. Cannon crews can fire loaded artillery in a zone they just moved into. The artillery could not be fired if the artillery unit itself was just moved into the zone that turn. Mexican infantry moving into a zone with a leader could also fire a loaded artillery unit provided that the artillery unit did not move that turn.
9.43. Artillery units firing into wall zones add one additional zone as a penalty for firing at walls.
For example: A Mexican infantry unit and a leader unit fire a cannon located in zone J at Zone A which is one zone away. However because Zone A is a wall zone the artillery fire die roll would be compared to the "2 Zones Away" row on the Artillery Fire Chart to determine the number of SP hit.
9.5. INFANTRY FIRE COMBAT
9.51. Infantry fire combat is allowed once per turn. Texian infantry, cannon crew units, and leaders may fire up to two zones. Mexican infantry may fire one zone. Every Mexican and Texian infantry and Texian leader is eligible to fire during the fire combat portion of their turn provided they have line of sight to an enemy unit in range. Mexican infantry units that have successfully scaled wall zones may not conduct infantry fire combat. Cannon crew units that are not firing, loading or moving artillery units may act as infantry units during infantry fire combat. In the case of captured artillery units for the Mexicans, an infantry and leader unit may fire the artillery unit instead of firing as infantry.
9.52. Infantry fire is resolved using the Infantry Fire Charts. Note: There are different charts based on whether it is the Mexican or Texian player firing.
9.53. To fire during infantry fire combat, select all of your infantry, Texian leader, and/or cannon crew units (that have not fired an artillery unit this turn and are acting as infantry) in a zone that desire to fire. Select the target zone. Total the numbers of SP's firing into the target zone and locate that number of SP on the Infantry Fire Chart. Roll one die and cross reference the die total thrown with the number of SP firing. The number shown at the cross referenced box on the Infantry Fire Chart is the number of SP immediately eliminated from the targeted zone. (NOTE: This is the total number of SP's eliminated, not the number of rotation of enemy units.)
9.54. An individual unit may never split it's fire between different zones. Units in a zone may split their fire between different zones. For example: Two units in a zone could fire into two different zones. One unit could only fire into one zone, it could not divide it's SP between two different zones.
9.55. Texian and Mexican Loss Tracks are located on the game board. Whenever the Mexican or Texian player takes any losses, the marker on track should be adjusted to reflect those losses. SP brought back as the result of rally should be subtracted from the loss track. These tracks are to show cumulative losses for the game.
10. Scaling Wall Zones
10.1. The outer Alamo compound wall zones are the lettered zones immediately adjacent to numbered zones. These zones are walls that form a continuous barrier that must be initially scaled by the Mexican player until he controls the wall zone. The Mexican player in order to melee with defending Texian units that are located on a wall zone must scale the zone (from a numbered zone to a lettered zone). Scaling is the initiation of melee on a defended wall zone. The Mexican player does not have to scale a wall zone when attempting to melee a wall from the interior zones of the compound (a lettered zone to a lettered zone). Also, units may not scale the Chapel (Zone A).
10.2. The Mexican player designates which units in a zone will attempt to scale a wall zone. The maximum number of units that can attempt to scale from a zone is 7 infantry units. Any units attempting to scale must have their column leader present but he does not count in the calculation for units attempting to scale.
For example: There are 12 Mexican units in zone 15 attempting to scale zone E. The Mexican player picks 7 units that have their column leader present. These units do a scaling attempt.
10.3. The Mexican player may attempt to scale a wall zone any time he is adjacent to one whether it is defended or undefended (no Texian infantry, leader, or cannon crew units present. Artillery units by themselves do not defend any zone). The Mexican player determines how many infantry units he has in a zone and locates the corresponding number on the Mexican Scaling Chart up to a maximum of 7 infantry units. If the wall zone being scaled is undefended, then the Mexican player rolls two dice. If the wall zone is defended, the Mexican player rolls one die. Compare each die roll to the Scaling Chart. Each number cross referenced on the Scaling Chart equals the number of Mexican infantry units that have successfully scaled the zone. For undefended wall zones the Mexican player picks the units and moves them into the wall zone they were attempting to scale. For defended wall zones the Texian player blindly (Mexican player does not reveal the SP) picks which infantry units successfully scale from the units that attempted to scale. The leader present in the zone may move up onto the wall any time a unit successfully scales the wall and is not counted in the total picked by the Mexican or Texian player.
For example: The Mexican player has 7 units with which he wants to scale a wall zone. The wall zone is undefended so he rolls two dice, the results of which are a 2 and a 5. For the 2 he gets to scale with 2 units, and for the 5 he gets to scale with 3 units for a total of 5 units successfully scaling. He picks 5 units from the 7 units that attempted to scale. If the wall was defended then he would only roll one die, the result of which was a 5. For the 5 he gets to scale with 3 units. The Texian player would blindly pick the 3 units that successfully scaled.
10.4. Mexican infantry that are not successful in scaling a wall zone may conduct fire combat.
In the example above, Texian leader Crockett and the 3rd Mobile Greys occupy wall zone D. Mexican leader Morales and all of the units from his column occupy zone 16. It is now the scaling phase of the game turn. The Mexican player rolls one die (because the wall section is defended) and the die result is 5. Cross reference the Scaling Chart to the number of Mexican infantry units scaling (which is four) with a die roll of 5. The result is 2 units that successfully scale. Continuing below with the example from above, the Texian player (since he is defending the wall section) picks blindly 2 units from the 4 Mexican infantry units that were attempting to scale. The Texian player picks a Jimenez Cazadore 4 SP unit, and the Matamoros Cazadore 8 SP unit. These units have successfully scaled the wall and are placed in zone D. The two remaining Mexican infantry units in zone 16 may now conduct infantry fire combat against the Texian units in zone D.
11. Melee
11.1. Melee may only be conducted into defended adjacent zones. Melee may not be initiated against an undefended zone. No diagonal melee is allowed. Units are only allowed to melee once per turn. Melee is considered simultaneous so SP losses are not applied until both players have had their opportunity to conduct melee combat. Scaling is the initiation of melee on a defended wall zone.
11.2. While melee is simultaneous, the Mexican player is the only player who may initiate melee. The Texian player may not initiate melee but does get to melee whenever the Mexican player initiates melee. The Mexican player does not have to initiate melee, it is his choice when and where. The Mexican player initiates melee by moving the units wishing to conduct melee into an adjacent zone that has Texian infantry, leader, and cannon crew units. (Artillery units by themselves do not defend any zone). This is the only time you may enter another zone as an enemy unit. If Mexican units start the melee portion of the turn in a zone with Texian defenders due to scaling then that is the zone where the melee occurs. Mexican units that successfully scale an undefended wall zone are not allowed to melee that turn.
11.3. Both players reveal their units that are involved in the melee.
11.4. Melee combat is resolved by each side totaling how many SP's they have in a zone where melee is occurring. Each player then consults the Melee Chart. Each player compares the number to the total number of SP meleeing. Each player rolls one die. The die number thrown is cross referenced on the chart with the total number of SP involved in the melee for his side. The number in the cross referenced block is the total number of enemy SP eliminated. The owning player selects the losses for his side from any SP located in that zone. Both players get to roll for their melee before applying the losses. If the cannon crew conducts an action with an artillery unit his SP are not used in any melee that occurs in a zone where the unit is located. However, the Texian player may take losses from cannon crew units that did not participate in the melee.
(Note: Mexican units may scale a wall zone that is undefended. Mexican units may not initiate melee against an undefended zone.)
11.5. If the Mexican player eliminates all of the defending units in the zone where the melee occurs, the Mexican players units remain in that zone.
11.6. If any of the Texian defending units survive the melee then all Mexican units involved are moved back into the zone from which they initiated the melee. This includes units that have scaled wall zones. Units that have been forced to retreat from a melee may scale in future turns, but they do have to re-roll for the scale attempt.
Melee example (from the printed rules): Following Mexican infantry fire, during which no hits were inflicted, both sides conduct simultaneous melee combat. The Mexican player consults the Mexican Melee Chart under 7-12 SP, he rolls one die and the result of the die is a 5. Cross reference the 7-12 SP with a result of 5 yields two hits on the Texian defenders. The hits are not applied until after the Texian roll on the Melee Chart as melee is simultaneous. The Texian player then consults the Texian Melee Chart under 4-6 SP, (he has 4 SP for the 3rd N. O. Greys plus 1 SP for Crockett). He rolls one die and the result is a 1. Cross reference the 4-6 SP with a result of 1 yields no hits on the Mexican units on the wall. The Texian player now marks his two hits on the 3rd N. O. Greys and rotates the unit from 4 SP to 2 SP. The Mexican units on wall zone D are retreated back to zone 16 since they did not eliminate the Texian units. The Texian player moves the Texian Losses Track up 2 points to reflect his losses.
11.7. Only 8 SP may be in a wall zone building. Only 8 SP may melee into a wall zone building. The only zones that may melee into a wall zone building are ones with entry arrows. For example, Texian units in wall zone H buildings may only be meleed by Mexican units in zone K. Only 8 Mexican SP could melee into the buildings of wall zone H even if the Mexican SP in zone K exceeded 8.
12. Rally
12.1. Only leaders may rally units. Leaders must be in the same zone as the unit rallied. For the Mexican player, the units they rally must belong to their column. Rally occurs at the end of each turn as listed in the sequence of play from turns 1-7. After turn 7 there is no rally for either player.
12.2. Only 1 SP may be rallied per leader (not one rotation, but 1 SP, so a 10 SP unit that is now at 8 SP may not be rallied, etc.). The Texians may rally up to 2 SP per turn, 1 for Travis and 1 for Crockett. The Mexican may rally up to 4 SP per turn, one for each column leader that starts the game. Note: Amat will not be able to rally units due to the breakdown of the SP within his units.
12.3. If there are no units eligible for rally then the SP are not saved or transferred to another turn or leader, they are lost.
12.4. Adjust the Mexican and Texian Losses Charts to reflect SP gained by rally.
13. Victory
13.1. Victory for the Mexican in the Alamo was to eliminate the Texian defenders as quickly as possible while minimizing losses. Victory for the Alamo defenders during the battle was to sell their lives at such a cost to the Mexican army that it would disrupt their future campaign. For these reasons victory is determined by losses and the speed at which the Mexican can take the Alamo compound.
Victory points are counted at the end of the game. During the course of the game progress is tracked on the Victory Point Track for Victory Point locations taken by the Mexican player. Victory points for losses are not tallied until the end of the game and are based on cumulative losses for each side at that time.
13.2. The Mexican player receives location victory points based on the following:
- Capturing the first wall zone: 2 VP for capturing a wall zone by the end of turn 6; or 1 VP if by the end of turn 7 or 8. Otherwise zero.
- Capturing the Alamo Chapel (zone A): 3 VP by the end of turn 8; or 2 VP by the end of turn 9 or 10; or 1 VP if by the end of turn 11. Otherwise zero.
- Capturing El Quartel (zone B): 1 VP by the end of turn 9. Otherwise zero. Capturing means the Mexican controls the zone by having units inside El Quartel.
The points for the capture of wall zones, the Alamo Chapel, and El Quartel are only awarded once.
The Mexican player receives 1 VP for every 8 Texian SP eliminated rounded down at the end of the game. There are a total of 40 Texian SP so if all the Texian SP are eliminated the Mexican player would receive 5 VPs (40/8 = 5). If he eliminated 39 SP by game end he would receive 4 VPs.
13.3. The Texian player receives 1 victory point for every 10 Mexican losses, rounded down at the end of the game. For example: 71 Mexican losses equals 7 Texian VP. 69 Mexican losses equals 6 Texian VP.
13.4. The game ends at the end of game turn 15 or when all Texian units have been eliminated. At that point victory is determined as follows:
- The Victory Point Track should already have been marked by the VP counter for the VPs gained by the Mexican player for VP locations.
- Check the Mexican Losses Track to determine Texian VPs. Move the VP counter from its current location one space to the left for each Texian VP earned.
- Check the Texian Losses Track to determine Mexican VPs earned. Move the VP counter from its current location one space to the right for each Mexican VP earned.
- Victory is determined by checking the location of the VP counter.
Victory Conditions are:
| VP counter result | Victory |
|---|---|
| +3 or greater | Mexican Decisive Victory |
| +1 or +2 | Mexican Marginal Victory |
| 0 | Draw |
| -1 or -2 | Texian Marginal Victory |
| -3 or less | Texian Decisive Victory |
14. Optional Rules
14.1. Players may choose which optional rules to use at their discretion. They may also be used for play balance purposes for players of different skill levels.
Advantage Texian Player
- The Mexicans take a 1 sp hit in the zone firing to reflect friendly fire any time a 1 is rolled on the Mexican Infantry Fire Chart.
- Travis and Crockett can double melee (roll 2 dice) with up to 5 SP. This reflects Texian ferocity.
- Use up to 4 extra blank grey blocks as decoys. They move like infantry, but do not fire or melee or take losses. Once revealed they are removed from the game.
Advantage Mexican Player
- Travis is killed in any zone where he is present and Mexican infantry fire causes 2 or more losses. Travis's loss is in addition to the 2 losses.
- The Mexican player can give up 1 VP to add +1 to the reserve die roll or 2 VP to add +2. Mark on the VP track. This may only be done once in the game.
- Mexican commanders may move up to 20 sp at double movement.
- The Texian player receives 1 VP for every 12 Mexican losses instead of every 10.
Charts
The following charts appear on page 12 of the rulebook. Layouts are reconstructed as tables; values are as printed.
Line of Sight Chart
| Zone letter | Zone type | 1 zone range | 2 zone range | 3 zone range |
|---|---|---|---|---|
| *A | Wall with buildings | 18, 19, I, J, C, 17, 9 | 10, 11, 16, 8, 3 | 4 |
| B | Wall with buildings | C, J, L, D | ||
| C | Wall | 17, B, **A | 16, 9 | 3 |
| D | Wall with buildings | 16, B, M, E | 8 | 3 |
| E | Wall with buildings | 15, D, M, F | 7 | 2 |
*Zone A may not be scaled. **May only fire with artillery.
Artillery Fire Chart
| Range / Die roll | 1 | 2 | 3 | 4 | 5 | 6 |
|---|---|---|---|---|---|---|
| 1 | 1 | 2 | 2 | 3 | 3 | 4 |
| 2 | 1 | 1 | 2 | 2 | 2 | 3 |
| 3 | 1 | 1 | 1 | 1 | 2 | 3 |
Texian Infantry Fire Chart (1 or 2 zones)
| SP Melee / Die Roll | 1 | 2 | 3 | 4 | 5 | 6 |
|---|---|---|---|---|---|---|
| 1-3 | 0 | 0 | 0 | 1 | 1 | 1 |
| 4-6 | 0 | 0 | 1 | 1 | 1 | 2 |
| 7-12 | 0 | 1 | 1 | 1 | 2 | 3 |
| 13-18 | 0 | 1 | 2 |
Mexican Infantry Fire Chart (only into adjacent zones)
| Mexican SP Firing/Die Roll | 1 | 2 | 3 | 4 | 5 | 6 |
|---|---|---|---|---|---|---|
| 7-18 | 0 | 0 | 0 | 0 | 1 | 1 |
| 19-35 | 0 | 0 | 1 | 1 | 1 | 2 |
| 36-53 | 0 | 1 | 1 | 1 | 1 | 2 |
| 54+ | 1 | 1 | 1 |
Less than 7 SP may not fire. Inside the Alamo compound range for all types of fire is 1 zone (lettered zone to lettered zone firing).
Mexican Scaling Chart (maximum 7 units per wall zone)
| Mexican units scaling | 1 | 2 | 3 | 4 | 5 | 6 |
|---|---|---|---|---|---|---|
| 1 | 0 | 0 | 0 | 0 | 1 | 1 |
| 2 | 0 | 0 | 1 | 1 | 1 | 2 |
| 3 | 0 | 1 | 1 | 1 | 1 | 2 |
| 4 | 1 | 1 | 1 |
Column leader must be present to scale. Roll one die for defended wall zones, two dice for undefended wall zones.
Texian Melee / Mexican Melee Chart
| SP Firing or Melee / Die Roll | 1 | 2 | 3 | 4 | 5 | 6 |
|---|---|---|---|---|---|---|
| 1-3 | 0 | 0 | 0 | 1 | 1 | 1 |
| 4-6 | 0 | 0 | 1 | 1 | 1 | 2 |
| 7-12 | 0 | 1 | 1 | 1 | 2 | 3 |
| 13-18 | 0 | 1 | 2 |