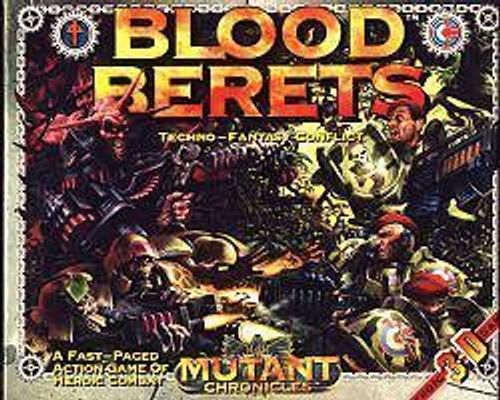
Blood Berets
Blood Berets Rulebook
Table of Contents
Table of Contents
I. How to Play This Game
Figures and Character Cards
The figures are the heart of the game. Each figure is represented by a character card giving all vital information. The Imperial Corporation side has two close combat specialists, Sgt. McBride and Medic Hawkes, and four regular troopers. The Legion side consists of two Nepharite Overlords and eight nameless undead Legionnaires.
The Game Environment
The game board has two environments, the jungle and the caves. In the first mission, Into the Caves, the Blood Berets have entered an unknown cave system, searching for a group of captives. In mission 2: Stalking the Enemy, the team is on a search mission in the jungles of Venus to find the entrances to an underground fortress. Mission 3: Lightning Strike combines these aspects for a game involving deployment, search, and infiltration of the fortress. Meanwhile, the Legionnaires under the command of the Nepharite Overlords try to stop the intruders and destroy them.
The player who fulfills his goals first is the winner.
Actions
Each figure has a number of actions to spend during each game turn.
- One attack at an enemy is one action.
- Moving three squares on the game board is also one action.
A figure with three actions per game turn may choose to shoot three times, or move a total of nine squares, or perform any combination of fighting and moving.
Skills and Die Rolls
The skills and the skill roll govern the outcome of most of the actions. Each skill usually has a specific skill value. The player rolls a 20-sided die and compares the result with the skill value. If the roll is equal to or lower than the skill value the action is successful. If the roll is higher the action has failed.
A Blood Beret with a missile weapons skill of 14 spends all three of his available actions shooting at three Legionnaires. He rolls "8", "14", and "19", which results in two hits and one miss.
All figures are equipped with battlesuits and weapons of different strength. To determine if a figure is wounded by a hit the defending player makes an armor roll against the armor value of the figure. Find the damage points of the weapon and subtract that number from the armor value, and roll the die. If the roll is higher than the armor value, the figure is wounded.
- The two Legionnaires that were hit have an armor value of 22.
- The Blood Beret used his standard weapon, an Imperial assault rifle with 12 damage points.
- Armor value of 22 minus 12 is 10.
- The Legion player rolls once for each hit, gets "8" and "15", and saves the first Legionnaire, while the second is wounded.
When figures are wounded the player flips the figure's card over.
The Playing Pieces
The plastic figures need to be assembled. At the end of the rules you will find a set of numbered squares with arrows you can photocopy and glue to the stands. Make a cut for the runner under the feet of the figure that goes into the stand, then press the figure in place. The number should be to the rear, and the arrow should point forwards. You may need to add a drop of glue if the fit is too loose.
The numbers identify each figure. There are two styles of Blood Berets—the close combat specialists should have numbers 1 and 2, and the four troopers are numbered 3–6. The Nepharite Overlords should also have numbers 1 and 2. Give numbers 3–10 to the Legionnaires.
The Game Board Sections
Each of the nine pieces of the game board has jungle printed on one side and a cave system on the other. There are three different layouts on the cave sides—in the mission descriptions they are sometimes referred to as "corridor", "labyrinth", and "hall" sections.
The Cards
There are cards of the following types: Characters for the Blood Berets and the Dark Legion, Imperial Corporation Equipment, Dark Legion Equipment, and Dark Symmetry. In addition, there is a set of six cards for a Bauhaus Corporation squad to be used with Heartbreaker figures which can be bought separately.
The Counters
Counters are used for record keeping purposes. The Initiative counters determine when a player may move his figures, and also show which figures have acted. The Legion Troop counters are used by the Legion player to keep his movement secret. Stunned-markers are used when a figure is temporarily out of action, and so on. Each type of counter is described fully in the appropriate rules.
The Die
The game uses a 20-sided die for all die rolls. If you are unfamiliar with this kind of die, we suggest you test roll it a few times. You need to roll the die on a flat surface, as it rolls quite easily. You read the result by noting the number on the top surface.
The Display
The Legion player uses the display to deploy his troops and also to place mines and tunnel entrances. The 9 boxes of the display each represent the 9 game board sections. Counters seen on the display represent the objects and figures to be found on the board. The blue halves show troops in the caves, and the tan halves show objects on the surface.
The Character Cards
There is a lot of concentrated information on the character cards. In order to fully understand how each bit works, you should read the appropriate sections of the rules.
The Initiative Score
Each figure has an initiative score. It is a reflection on the ability to react quickly and efficiently in a variety of situations. The initiative score is used under the following circumstances:
- When the Blood Berets are checking on objects.
- When the Blood Berets are attacked by Nepharites using dark powers.
- When Blood Berets are entering sections containing Legion troop counters.
- When Legion troop counters are entering sections containing Blood Berets.
Actions
This number tells how much a figure is able to do during each game turn.
Armor Points & Damage Points
When a figure is hit, the damage points of the used weapon are deducted from the armor points of the defending figure, after which a die roll is made. If the roll is higher than this value, the figure has been wounded.
The Skills
Not every figure has knowledge of all skills. The appropriate skills for each character are to be found on the card.
Missile Weapons. All the shooting weapons—pistols, rifles, flamethrowers, and grenade launchers are governed by the missile weapon skill. You also use the skill when clearing jammed weapons.
Field Surgery. Field surgery is used by the medic when he gives first aid.
Scanning. The skill is used with the scanner to reveal hidden activity, objects, mines and tunnel entrances. The skill value is found on the scanner card.
Close Combat. The close combat weapons are identified by an asterisk, and are used when the figures attack each other in close combat.
Dark Symmetry. This skill can only be used by the Nepharite Overlords. Dark symmetry is used for psychic attacks against enemies and their equipment.
II. The Game Turn
1. Order of Initiative
Players draw initiative counters to determine order of play. Take a look at the counters—there are ten with the symbol of Algeroth and seven with the military identification of Imperial. (You will also find seven initiative counters for a complete Bauhaus Venusian Rangers squad.) Put the counters, one for each figure in play, in a cup and draw them one at the time. A player gets to act if the counter drawn shows the symbol of his chosen troops. When a player is done with a figure the counter is placed next to it. Any player may draw the counters.
When figures are lost the corresponding number of counters are removed. If a figure has already acted when it is removed the initiative counter is removed with the figure. If the figure has not yet acted a corresponding counter is removed immediately from the cup.
When all figures have acted the game turn is over. Collect the initiative counters of all figures which are still alive (and any reinforcements) and put them back in the cup.
Extra Actions
As long as the Blood Beret sergeant is alive that player has an additional counter to give one of his troopers an extra round of three actions. This extra counter represents the sergeant's ability to inspire his men to redouble their efforts. It is immediately removed if the sergeant dies.
2. Movement
All moves are made to adjacent unoccupied squares. Figures may not move through or stay in squares occupied by other figures.
A figure can pass between occupied squares as long as the move takes it directly to an unoccupied adjacent square.
Always place the figure so the base stays entirely within the square.
All the shaded squares are adjacent.
3. Actions
All actions, except movement, are governed by skills. To determine if you are successful or not, you roll the die and compare the result with the appropriate skill value. If the roll is equal to or lower than the value, the action is successful. If the roll is higher the action has failed.
The Close Combat skill of a Legionnaire is 14. In order to succeed the player must roll 14 or lower to hit the opponent.
| Action | Skill |
|---|---|
| Close combat attack | Close combat skill |
| Missile weapon attack | Missile weapons skill |
Action Checklist
Missile weapons: Decide which weapon, check the skill value, roll the die.
- Successful: Defender makes an armor roll.
- Failed: The shot missed.
Close combat: Determine weapon type, check the skill value, roll the die.
- Successful: Defender makes an armor roll.
- Failed: The attack missed.
4. Use of Weapons
Missile Weapons
Decide which weapon you are going to use (if you have a choice), choose a target, and roll the die.
- If the result is higher than the skill value, the shot has missed.
- If the result is equal to or lower than the skill value, the target is hit. Make an armor roll.
In order to shoot, a figure must have a clear line of sight to the target. If the line of sight isn't obvious, use a ruler and draw a straight line from the center of the square of the shooting figure to the center of the target square. If the line cuts through walls or squares containing any other figures, the line of sight is blocked.
Close Combat
Decide which weapon you are going to use (if you have a choice), choose a target, and roll the die.
- If the result is higher than the skill value, the close combat attack has missed.
- If the result is equal to or lower than the skill value, the target is hit. Make an armor roll.
Close combat can occur when two opposing figures are in adjacent squares. Close combat does not happen automatically, it is an action that must be initiated by the active figure. Figures in close combat positions can only use close combat weapons against each other. The alternatives are shooting at other figures, or moving the figure out of the close combat situation.
Close combat weapons are identified by an asterisk before their names.
*Necrolance; *Chainripper
The Armor Roll
When a figure is hit by a weapon an armor roll is made to find out if the battle suit, luck, or thick-headedness will prevent the attack from inflicting a wound.
- Find the armor value of the target.
- Deduct the damage points of the weapon to get the modified armor value.
The defending player rolls the die, once for each hit.
-
If the roll is higher than the modified armor value, the figure has been wounded.
-
If the roll is equal to or lower than the modified armor value, the figure is unhurt.
-
A Legionnaire with a weapon skill of 11 fires at a Blood Beret.
-
The armor value of the target is 24.
-
The heavy attack rifle of the Legionnaire has 10 damage points, which are deducted from the armor value: 24-10=14.
-
In order to take out the Blood Beret the Legionnaire must first roll 11 or less to hit, and then the Blood Beret must roll 15 or higher for any damage to register.
Wounds
Legionnaires and Blood Berets die after their second wounding hit, the Nepharite Overlords die after the fourth. The first time a Blood Beret or a Legionnaire is wounded the character card is turned over. The Nepharite cards are turned after the second hit—after the first and third you need to place some sort of marker on the card. On the reverse are lower values for armor and skills.
When a character dies, both the card and the figure are removed from play. If the figure has not yet acted, one of that player's initiative counters is immediately removed from the cup.
Certain weapons are more dangerous than others—this is noted in each description as "double damage" and by double asterisks next to the damage points. Legionnaires and Blood Berets are killed directly if they fail their armor rolls against double damage weapons, while Nepharites receive two hits.
Damage points **13
Range
All weapons fall into one of three categories when it comes to range—refer to the Weapons and equipment chapter for full details on each weapon.
Unlimited: You may shoot straight across the game board if you wish.
Limited: The weapon has a maximum range given in number of squares.
Close combat: Weapons marked with an asterisk are close combat weapons, and may only be used for that purpose. There are two exceptions—the Aggressor PSA and the Necrolance.
III. Into the Caves
The first mission takes place entirely below ground. There are a few more things you need to know before you enter this forbidding environment.
The game board consists of nine sections with jungle on one side and a system of caves on the other. There are three different layouts for both jungle and caves. The Blood Beret player is not supposed to know beforehand what type of cave he will find under a certain type of jungle, as each variety of jungle contains one each of the cave pieces on its back.
Preparations for Play
For a mission in the caves the Legion player lays out the game board sections in any way he thinks will give the Blood Berets as much problems as possible. The Legion player then turns the sections over when he is done so the Blood Beret player cannot see the layout of the caves. It is a good idea to remember where the corridor sections are placed, as these limit where you can go as soon as they have been turned. Laying out the game board is something the Legion player does in secret.
When turning sections always grab them by the short sides and sort of roll them between your fingers as if there is an axle along the length of the section. This way you preserve the layout throughout the game.
It is important to remember that board sections showing jungle when the Blood Berets are exploring the caves, are not really jungle but still unknown sections of the cave system. The same is true when the Imperial Corporation troops are pushing through the vegetation topside. Areas which look exactly like caves are nothing but unexplored sections of jungle (as seen by the Blood Berets). When a Blood Beret moves into a new section, it is turned to show more of the immediate environment. These sections are referred to as "turned", regardless if they show the caves or the jungle.
Sections that are not yet turned can be used by the Legion player for swift and partly secret moves. Secret, meaning that his troops are represented by face down troop counters. Swift, meaning that the troop counters can move across greater areas, than the figures they represent, and the fact that they can attack suddenly and unexpectedly.
The Cave Forces
Using the display the Legion player deploys his available forces (according to the mission instructions). Each numbered figure is represented by a numbered Legion troop counter. In addition, the Legion player has a number of dummy counters to confuse the enemy with (numbered 11-14). All troop counters should be placed with the number face down. The Legion player may look at his troop counters at any time.
Each box on the display is split down the middle. Store all Legion troop counters in the blue halves.
Before a Legion figure may be used, it must be activated, that is, moved from the display to the board. Whenever the Legion player draws an initiative counter he may place one of his Legion counters on the corresponding section of the game board. If he wants to he can also move the counter to an adjacent section on the board, or attack a Blood Beret. Finally, place the initiative counter next to the Legion troop counter (or figure if it has been converted).
- The exact location of a troop counter in a section is not important. To the Blood Berets, it is simply "enemy activity..."
- Counters are moved from one section directly to adjacent sections (although not diagonally).
- Counters are converted to figures if they enter sections of the cave system with Blood Berets in it (but not if they enter the opposite side of a "corridor" section, see diagram).
- You may place any number of counters in any one section.
- Legionnaire counters may move from one section to another. Nepharite and dummy counters may move across 1 or 2 sections.
- As soon as a dummy counter is spotted by a Blood Beret it is removed and may not be used again—"interference in the scanner..."
Surprise Party
When a Blood Beret enters a new section, the game board jungle is turned over to reveal more of the cave system. If there are troop markers in the section you need to decide which player is going to deploy the Legion figures. Both players roll the die once and add the appropriate initiative scores—the Blood Beret player uses the initiative score of the figure entering the section, and the Legion player uses the initiative of his best available figure in the section.
The winning player places the Legion figures wherever he wants them in the section, although the Legion player always places any primary or secondary targets.
When a Legion troop counter moves into a section containing Blood Berets the players roll for initiative in the same way (this time the Blood Beret players use the best available score). If the Blood Beret player wins the Legion counter is converted to a figure and placed on hold immediately outside the section it wants to enter. The figure must begin its turn by moving into the section (thereby using 1 action). If the Legion player wins, he may place the figure anywhere in the section at no cost in actions.
Any counters still on the display when a Blood Beret enters the corresponding section are immediately converted and placed by the Blood Beret player anywhere in the section.
Legion troops are reconverted to counters when and if they return to unturned cave sections.
If a troop counter moves into a turned section with no opponents it is not converted.
Note: The Legion troops do move quicker as counters than as figures.
Mission 1: Into the Caves
A team of Blood Berets under the command of Sgt. McBride have found an entrance to one of the underground Legion fortresses. Their mission is to rescue a group of high-ranking Imperial Corporation officials. Use the "Primary target" counter to represent the prisoners.
Preparations for Play
- The Legion player arranges the game board.
- The Legion player places his troop counters on the display.
- The Blood Beret player decides where he wants to enter.
- The Legion player moves his counters away from the corresponding section on the display.
- The Blood Beret player places his figures in the chosen section.
- Put all initiative counters in a cup and draw the first counter.
- Start playing.
The Game Board. The Legion player arranges the board in any way he wants (in a rectangle with the sections 3 by 3).
The Prisoners. The primary target counters is used to represent the prisoners. The group of officials may be placed in any section on the display, but when they are placed on the board they may never be placed in inaccessible parts in corridor sections (these appear when corridor sections are placed at the corners of the game board). The prisoners can be moved like any Legionnaire counter or figure by using an initiative counter for this purpose. When the primary target has been revealed it can only be moved if the Nepharite is present in the section it moves from. The primary target is immediately stopped if it must pass through squares adjacent to any Blood Berets.
The primary target blocks the line of sight.
The Forces.
- The Blood Beret player uses all of his figures, but no extra equipment cards.
- The Legion player uses all of his Legionnaires but only one Nepharite. If the game is played using the basic rules only, the Nepharite may only use two necrotech cards in this mission: the Belitshe gun and the Azogar close combat weapon.
The Legion player places all of his troop counters (including all dummies and the primary target) on the display. The Imperial player then chooses any one section as his deployment point. Any Legion troop counters in that section are first moved to adjacent sections on the display (even diagonally), then the Blood Beret player deploys his squad anywhere in the section, although he is not allowed to split the group if they are starting in one of the "corridor" sections.
You are now ready to begin play.
Victory Conditions. The Blood Berets must find the primary target, and then remain with it for three full game turns in order to guide a full-scale rescue party to the spot. If the primary target is moved at this time, at least one of the Blood Berets must be able to follow in the same game turn. Otherwise, you start counting game turns again.
IV. In the Jungle
This section deals with the jungles of Venus. The aim of the second mission is to locate the entrances to a secret legion fortress along some godforsaken section of the front.
Preparations
The Legion player prepares for the mission by placing troop counters and counters for tunnels and mines on the display, and then setting up the game board sections showing the caves. The opponent is not supposed to know how the jungle is arranged. The Blood Beret player decides which section he wants to enter (any one except for the central section). Turn the chosen entry point to show jungle.
The First Game Turn
During the first game turn the Legion player has only one initiative counter, but will receive an additional counter each game turn.
The Blood Beret player moves his figures onto the game board, one at a time for each initiative counter. The Legion player can act with one of his troop counters when his initiative counter is drawn.
The Game Board
The sections showing caves are in actuality unexplored jungle. Here the Legion troops can move about unhindered and in secrecy—as troop counters, that is. Except for this the troop counters and the figures behave in exactly the same way as in the caves. The troop counters may also move diagonally between the sections.
Looking Around
The first part of the section below deals with the mines and the entrances. These operate on two levels (not to be confused with the physical levels of the game board). At the beginning the counters are placed on the display. As long as they stay there, eager Blood Berets run the risk of triggering them while they move about in the jungle. The scanner rules tell how the Blood Berets can find them without stepping on them. When both counters have been moved from the display to the corresponding section of the game board, any explosives can only be set off if a Blood Beret approaches the counter on the game board (by stepping into an adjacent square). This is something he must do in order to find the tunnel entrances.
If the skill roll for the scanner is successful, the Blood Beret has found one of the hidden objects of the section—the Legion player moves one counter from the corresponding square on the display to the game board.
In order to find out what a counter really is, a Blood Beret must step up to the counter and examine it. If the figure rolls successfully against the initiative score the player can turn the counter. If the roll fails the object explodes.
1. Hiding Things...
One of the steps when preparing for a surface mission is to place counters for tunnel entrances and mines on the display. The Legion player has 18 counters—two for each section of the board. Not more than one tunnel entrance may be placed per section. Until they are placed on the board, the counters are stored in the tan halves of the display. The troop counters are stored in the blue halves as before.
Available Markers
- 3 tunnel entrances
- 3 troop mines
- 12 small mines
About the Mines. There are two types of mines in the game. Small and large. The small mines may destroy a figure in a single square, the larger troop mines also affect the surrounding squares.
Small Mines
- Damage points: Impact square 11
Troop Mines
- Damage points: Impact square 13
- Adjacent squares 11
Triggering Mines. While the Blood Berets are walking through the terrain they may set off mines, depending on how careful they are. Roll the die once for each Blood Beret after it has finished its move.
This die roll is never made for Legion troops.
| Number of actions spent on movement | Mine explodes on a die roll of |
|---|---|
| 1 | 20 |
| 2 | 19-20 |
| 3 | 18-20 |
| 4 | 17-20 |
When is There a Risk of Triggering Mines? A die roll must be made whenever the move carries the Blood Beret over any section where there are still objects on the display.
If a mine is triggered it is normally taken from the section the triggering Blood Beret ends his move in, but if the move ends in a section with no undiscovered objects, any triggered mines are taken from sections the figure has passed through.
If you trigger a mine and the only available counter is an as yet undiscovered tunnel entrance, the booby trap in the tunnel blows up, effectively destroying the tunnel.
Determine Impact Square. The small mines only affect the figure triggering it. The larger mines also affect all the adjacent squares. When the Legion player detonates the larger mines he can freely choose the impact square, although the triggering figure must be included in the blast area (large mines also affect Legion troops on the surface if they are standing on top of or next to the impact square).
... and Finding Them
The Blood Berets, except the sergeant and the medic, are equipped with scanners, instruments which let them search an area for hidden objects and enemies (take the Scanner cards from the Equipment stack and place one card next to each trooper). While scanning the figure is standing still.
A scanning Blood Beret is looking for enemy activity and hidden traps, in order to eliminate the first and avoid the second. Scanning on the surface in order to find hidden objects takes one action. When searching for enemy activity the procedure is more or less automatic—simply add 6 to the initiative score of all scanner equipped troopers when both players are rolling for initiative.
Using the Scanner. The scanning Blood Beret announces his intentions, spends one action and rolls the die—you find the scanning skill on the scanner card. If the roll is successful an object has been found. The Legion player removes an object from the corresponding box on the display, and places it in the section with the scanning Blood Beret, but not closer than two squares from any figure.
When the Legion player places the first object on the board (out of the two available), he can choose which one to place.
When both markers in a section are on the board, the section is considered scanned, even though the true nature of the objects may still be unknown.
Revealing Objects. To find out what an object is the Blood Berets must get adjacent to it. Roll the die against the initiative score. If the roll is successful, the object may be turned (note that rolling for initiative is not an action). If the roll fails the object explodes.
You need to make further rolls for initiative every time a move takes a Blood Beret into a square adjacent to a revealed mine.
Initiative Roll
| Counter | Unknown | Revealed |
|---|---|---|
| Successful | ||
| Tunnel | Turn | * |
| Small mine | Turn | Remove |
| Troop mine | Turn | Remove |
| Failed | ||
| Tunnel | Explodes** | * |
| Small mine | Explodes*** | Explodes*** |
| Troop mine | Explodes | Explodes |
- Unknown = the identity of the counter is still unknown
- Revealed = the counter has been turned to reveal its secret
- Turn = turn the counter, nothing else happens
- Remove = remove the counter, the mine is disarmed
- * No roll is needed for revealed tunnel entrances.
- ** The tunnel entrance was booby trapped! Treat the explosion as if it was a small mine.
- *** Note that small mines always explode in the same square as the triggering Blood Beret, regardless if the figure was standing on top of the marker or next to it.
2. Terrain
The thickness of the vegetation varies. The game boards show this as tan, and medium and dark green. Movement through open terrain (tan) is the normal three squares per action. While moving through thicket (medium green) or jungle (dark green) movement drops drastically—the cost of entering a square of this terrain is 2 steps per square (thicket and jungle is also called difficult terrain).
There is a red dot in the middle of each square on the game board. The type of terrain covering this dot defines the entire square for movement and other purposes.
If you spend 1 action on movement and step into a square of difficult terrain, you can't get any further unless you can move onto a square of open terrain. If you use 2 actions on movement you can move a total of 3 squares of difficult terrain (3+3 steps used like this: 2+2+2). Using 3 actions you can move through 4 squares, and 4 actions are enough for 6 squares of difficult terrain.
In Cover—Jungle
Any figure may hide in the jungle. If there are two or more squares of jungle between opposing figures, they may not shoot at each other, as the dense vegetation is in the way.
Sometimes it is not so obvious whether a jungle square is covering a figure or not. Draw a line from the center of the squares the figures are standing in (use a ruler or other straight object). If the line crosses any part of two or more squares of jungle, the figures are covered.
In Cover—Unturned Sections
Figures may not shoot into, across or through unexplored sections.
Mission 2: Stalking the Enemy
The Blood Berets have been sent into a section of the Venusian jungle in order to locate the entrances to a Legion fortress as a preparation towards a major offensive. It is vitally important that the entrances are located in order to let the main force into the fortress.
Game Board
Place the entire game board showing the cave sections.
Forces
- The Blood Beret player uses the full squad. Equip all troopers (except the Sergeant and the Medic) with scanners. The Nepharite may only use the Belitshe and Azogar necrotech cards, if you are using the basic rules.
- The Legion player may use all the Legionnaires and one of the Nepharites. During each game turn he can add one Legion initiative counter until all of his figures are in play. As long as the Nepharite is alive killed Legionnaires will be replaced at the start of the next game turn at the rate of one per turn. New arrivals may pop up in any unturned board sections. When all board sections have been turned to reveal the surface, additional legion troops can only be placed in jungle terrain in sections containing undiscovered tunnel entrances. At the start of each game turn the correct number of Legion initiative counters is put in the cup.
- Game turn 1: 1 counter
- Game turn 2: 2 counters
- Game turn 3: 3 counters, etc.
- If the Nepharite dies killed legionnaires do not return.
- Advanced scenario rules: The Blood Berets may choose five equipment cards in addition to the scanners. The Nepharite Overlord may also take five cards. Decide how many Dark Symmetry cards you will use (if any), and draw them at random, then add Necrotech cards of your choice until you have your five cards.
Victory Conditions
The goal of this mission is to locate all of the tunnel entrances. The Blood Beret player wins when he has found all three (at least one must be intact). The Legion player wins as soon as he kills all the scanner equipped troopers, or all three tunnel entrances blow up.
V. Advanced Rules
In the following section you will find additional rules covering a variety of subjects. If you wish you may learn all of the rules before playing the first scenario, but we recommend playing the first two before turning your attention to this section. Some of the rules refer to other rules in this section, but most are designed to be used independently of each other. Some of you will not like all of the advanced rules. If you feel that any of the rules slow down the game you need not use them. The only important consideration is that both players agree on which rules to use.
Modifications
A number of the advanced rules result in situations where the skill values are modified, making it either easier or more difficult to succeed with an action, for example, a figure in cover is more difficult to hit, which affects the weapon skill value.
If your skill value is 15 and it suffers a –2 modification, you must roll 13 or lower in order to succeed.
Or, if your skill value is 14 and it receives a +2 modification, you need only to roll 16 or lower in order to succeed.
Occasionally the modifications pile up in such a way as to make success or failure almost inevitable.
Your Close Combat skill value is 16, you are equipped with sonar (+2 on close combat attacks), and you manage to attack an enemy from behind, which adds 2 to your skill for that attack. You must then roll 20 or lower in order to succeed... Congratulations! But you will still fumble if you roll 20.
1. Choosing Not to Move
The Blood Beret player may choose to save his counters for a while when they are drawn—the Blood Berets are not a mindless horde, and therefore are able to wait for opportunities. The player keeps the counter in front of him, and a new counter is drawn. When he wants to he may use any or all of his saved counters, although he must wait until the Legion player has finished his current move.
2. Split Movement
If you spend some but not all of a figure's actions on movement the remaining actions may be performed at any time in between steps.
A Blood Beret wants to spend one action on movement, and two on shooting. His three squares of movement could be used like this: moving forward two squares to get into position around a corner, shooting twice, and finally returning one square to hide behind the corner.
3. Perfect Results and Fumbling
A roll of 1 is called a perfect roll. A roll of 20 is considered a fumble. Perfect results add an extra feature to the general success—fumbling means doing something really disastrous.
Complete Action Checklist
Aiming. The figure spends one action taking aim. Add 4 to the weapon skill as long as the figure is shooting at the same target. Increase the damage points of the weapon by 4.
Close combat. Determine weapon type, check the skill value, check if any modifications apply, roll the die.
- Perfect: Automatic damage.
- Successful: Make an armor roll.
- Failed: The attack missed.
- Fumble: The attacker hits himself—stunned for 1 game turn.
Dark Symmetry Checklist
The figure spends 1 action, subtracts the dark power level from the skill level, rolls the die, getting one of these results:
- Perfect: Automatically successful—attacked Blood Berets may not make saving rolls.
- Successful: Attacked Blood Berets may make saving rolls against the initiative score.
- Failed: No effect.
- Fumble: No effect, in addition the Nepharite is stunned for 1 game turn.
| Action | Perfect | Fumbled |
|---|---|---|
| Shooting | Automatic damage | Weapon is jammed or explodes |
| Close combat | Automatic damage | Attacker stunned for 1 game turn |
A perfect result while shooting or attacking in close combat results in automatic damage—no armor roll is made.
If a Blood Beret fumbles while shooting the weapon will jam. Place a jammed weapon counter next to the figure. Each attempt at fixing the jam costs one action. Make a roll against the shooting skill. If the roll is successful the jam has been fixed, and the counter is removed. If the roll fails new attempts may be made by spending more actions.
When a Legionnaire fumbles while shooting, the weapon explodes in his hands. Make an armor roll, using the damage points of the exploding weapon. If the figure is still alive a counter indicating destroyed weapon is placed next to it. Until the figure is removed from play it may only make close combat attacks using its combat blade.
The Nepharite Overlords may miss from time to time when they shoot, but they never fumble—they are entirely too cool for such antics.
If a figure fumbles a close combat attack he cuts his own foot, falls on his face, or performs some other feat of acrobatics—anyway, the attacker is stunned for 1 game turn (remaining actions during the present game turn are also lost).
Stunned Figures
Whenever a figure is stunned, that is, momentarily taken out of action for some reason, a *stunned-*marker is placed next to it. The consequence for the figure is that it misses its turn.
How do you keep track of when your figure may act again? Simply replace the stunned-marker with an initiative counter at any time one of your counters are drawn, to indicate that the figure has "finished its actions" for that game turn.
If the figure already has acted the stunned-marker is placed beneath the initiative counter, to be removed in like manner during the next game turn.
4. Medics
Hawkes, one of the two close combat specialists, is also the team medic. Pick the Medikit card from the Equipment deck, and place it next to Hawkes' character card. The medic can administer first aid to all of the Blood Berets, including himself. The medic must spend two actions in a square adjacent to the damaged figure, he then rolls the die.
- If the roll is successful: The character card of the damaged figure is turned back to its undamaged side.
- If the roll fails: New attempts can be made, but they still cost two actions.
- If the roll is fumbled: The patient dies. Remove the figure from the board.
- If the roll is perfect: The charactercard of the wounded figure is turned back to its undamaged side, at a cost of only 1 action.
Field Surgery Checklist
The medic spends 2 actions in a square adjacent to the recipient of his care. Roll the die. If the medic treats himself he just stays where he is for 2 actions, and rolls the die.
- Perfect: Turn the character card, takes only 1 action.
- Successful: Turn the character card.
- Failed: No effect, but the medic may try again.
- Fumbled: Patient dies.
Missile Weapons Checklist
The figure fires its weapon. Decide which weapon, check the skill value, check if any modifications apply, roll the die.
- Perfect: Automatic damage.
- Successful: Make an armor roll.
- Failed: The shot missed.
- Fumble: Weapon jammed/blown up.
5. Facing
Each figure has a facing, that is, it is always pointed in a certain direction. Facing is important when a figure wants to shoot, or is attacked in close combat. The arrows you have glued to the bases always point forward.
Study the diagram above, it shows which squares are in front of and behind the figure. The fields in between are the left and right sides. Everything in front of the figure may be shot at. An opponent has an advantage if it can attack in close combat from the rear.
You may change the facing twice for each movement action, and you may change facing once for all other actions, either before or after the figure has performed the action.
Regardless if you turn the figure 90 or 180 degrees at the same time, it is still counted as one change. If you turn the figure 90 or 180 degrees, perform an action, and then turn it another 90 or 180 degrees, it counts as two changes.
A figure may only move into the squares in front of it. If you wish to move a figure in a direction which is behind, or to the sides of it, the figure must change its facing before it is moved.
If a figure is turning its back against a close combat attacker the chance of success is increased: add 2 to the skill value, and 2 damage points for each close combat attack from behind.
Perimeter Control
The Blood Berets are said to be controlling the perimeter when figures are facing towards the entrances to other sections. This means that the Legion player may not move troop counters into a section containing the controlling Blood Beret in order to surprise him. Instead all Legion figures must begin their moves in the controlled section in the same way as if they had lost an initiative roll.
6. Aiming
A figure can spend actions taking aim before shooting. An aiming figure gets a +4 modification on its to hit roll, and another +4 modification on the damage points. The aiming bonus applies to all successive shots at the same target. The figure may not move, change facing or perform any other actions in between aiming and actually shooting.
Figures in close combat positions may not spend actions taking aim.
Weapons without the aiming modification
- Close combat weapons
- Flame throwers: the Gehenna Puker and the Nefasti
- The Nafai Necrotech weapon
7. In Cover
A figure behind a corner but still visible (see below), is more difficult to hit. Modify the to hit roll by –4, if the target is in cover behind a corner. A figure shooting from the same position is not penalized by this, but only if he stands right next to the corner.
You can tell if a figure is visible if half or more of the square the figure stands in projects beyond the corner—draw a straight line from the center of the square of the shooting figure to the point of the corner and beyond.
Friendly figures. If friendly figures entirely or partially cover an enemy figure, the enemy may not be fired at! This does not apply to the Nepharites, who would rather destroy a Legionnaire sitting in the field of fire than let an enemy get away. A Nepharite may at any time take a shot at Blood Berets in sight—the shot has a –4 modification. If the skill roll fails the Legionnaire has been hit.
Difficult terrain. All weapon skill rolls are modified if the figure that is shooting or is shot at is sitting in thicket or jungle. If the figure is standing at the edge of thicket or jungle he may take advantage of the cover provided, but is not hindered while he is shooting. A figure is entirely out of sight if there is more than one square of jungle between it and the opponent, a condition which makes standard weapons fire impossible (but check Weapons and equipment for interesting exceptions).
The most difficult terrain determines the modification, it is either -2 if the line passes through any number of thicket-squares, or -4 if it passes through not more than one square of jungle.
Scanning Checklist
Spend 1 action standing still, and roll the die. If the scanner is jammed, 1 action is spent to correct this.
- Perfect: 2 objects located.
- Successful: 1 object located.
- Failed: No result.
- Fumbled: Jammed.
Shoot While Moving Checklist
This action combines movement and a shot from the hip. The figure moves one square less than normal, and fires once. Determine weapon type, check the skill value, modify by -4 because the figure is moving, check if any other modifications apply, and roll the die.
- Perfect: Automatic damage.
- Successful: Make an armor roll.
- Failed: The shot missed.
- Fumble: Weapon jammed/blown up.
8. Going Through Walls
If the Blood Berets are equipped with the Shellshocker they can blast their way through walls up to 2 squares thick. If the attack is successful the Blood Beret player places a blasted wall-marker on that section of wall. The blasted section is 1 square wide. See more under Shellshocker in the equipment chapter.
9. Dark Symmetry
The Nepharite Overlords have access to a number of dark powers. Each power is represented by a card describing how each dark power functions, and what effects it has. Each use of a dark power costs one action, whether it is successful or not.
When a Nepharite is using a dark power it rolls against the dark power skill, and subtracts the level of the specific power from his skill value.
Each Nepharite may use dark powers only once per game turn. In order to succeed the Nepharite must roll equal to or lower than the modified value. The higher the level of a dark power, the more difficult it is to use successfully.
One of the Nepharites has a dark power skill value of 16. If it wants to create a malfunction—a level 3 dark power—it must roll 13 or less to succeed (skill value 16-level 3=13).
If the dark power is some form of psychic attack against a Blood Beret, the trooper can make a saving roll against his initiative score (this is comparable to the armor roll made when attacked physically). The roll is not made if the dark power used is imprison dead, as the Blood Beret in question must be dead at the time the power can be used. The scanner can not be used to raise the initiative score, but the psychic helmet and the hyperactivator may be used.
If the Nepharite fails the skill roll, nothing happens. If the roll is fumbled the Nepharite is stunned for 1 game turn. A perfect result is automatically effective—attacked Blood Berets may not make saving rolls (if possible).
Lance of Pain 1. The Nepharite creates feelings of sudden pain in the mind of its victim. The victim is stunned for 1 game turn. The victim may make a saving roll.
Blindness 1. The victim suffers temporary blindness for 2 game turns, and is limited to moving 1 square per action spent on movement. No other actions may be performed. If the victim is equipped with sonar it can move as normal, but may not do anything else. A Blood Beret equipped with cybernetic eyes are not affected at all. The victim may make a saving roll.
Dark Aura 2. The Nepharite surrounds itself with a dark and threatening aura if it succeeds with its skill roll. During the remainder of the game turn every activated Blood Beret within sight (or moving within sight), must make a roll against initiative as soon as it can see the Nepharite, with the following results (if the Nepharite gets a perfect result, each result below is moved down one step):
- Perfect: no effect, the Blood Beret laughs in the face of danger.
- Successful: the Blood Beret may attack the Nepharite and surrounding Legionnaires using missile weapons, but may not move any closer to the Nepharite.
- Failed: the Blood Beret will not attack at all.
- Fumble: the Blood Beret flees, remaining actions this game turn only must be spent on moving him as far away as possible from the Nepharite.
Malfunction 3. If the Nepharite concentrates on a small electronic device, for example a computer, a guidance system, or an energy weapon, it may destroy it—the effect is permanent. Purely mechanical objects are not affected. Equipment which can be destroyed have a note saying so on the cards and in the equipment section of the rules.
Compression 4. By compressing reality the Nepharite can move from one place directly to another, up to its Dark Symmetry skill value per number of squares in any direction, but it must adhere to normal movement rules (it may not move through walls or through squares containing other figures, etc).
Imprison Dead 4. The Nepharite may imprison the soul of a dead Blood Beret if it kills him in close combat—the body becoming a mindless slave. The Nepharite may not spend actions on movement inbetween killing the enemy and imprisoning it.
The Nepharite takes over the card and figure of the dead Blood Beret. The imprisoned trooper has skills and characteristics as wounded. The body is destroyed if it receives one more damaging hit. Add one Legion initiative counter to the cup for each imprisoned enemy. If no counters are available the Legion player must let a figure stay inactive during each round.
Stream of Acid 5. A stream of acid erupts from the floor covering an area of 4 squares. Place the acid marker on the board. Roll for damage on each figure hit by the acid. The acid keeps pumping from the floor as long as the Nepharite can see any part of the stream, and spends 1 action to keep it flowing each game turn. Each figure entering any square of acid must roll for damage, as well as any figure staying in the acid.
Damage points 14
Dimension Warp 5. The target figure is teleported into a dimension of pure evil. Remove the figure from the board for 1 game turn. A previously unhurt figure returns wounded to the same spot. Already wounded figures are completely removed.
Distort Space 6. The Nepharite can distort the space-time continuum. The section the Nepharite is in can be turned 180 degrees, thereby changing the layout of the cave system. Any figures present are rotated along with the section.
Time Death 6. The Nepharite may stop time for a short moment, and can then move freely through the resulting hole in time. This means that the Nepharite immediately receives another full round of actions. The power can only be used once during a mission (if the roll fails the power is still used up).
VI. Missions
Play one of the three missions or create your own. In the beginning we recommend playing the ready-made missions while you learn the rules. Each mission has its own set-up and different goals for the two sides. Read the instructions and note what the mission may has to say about equipment, reinforcements, and so on.
The Game Board. Lay out the game board according to the instructions. The Legion player places the display in sight of both players. When creating your own missions you are not restricted to the 3 by 3 layout of the gameboard. You may want to make a customized version of the display if you change it.
The Game Board Counters. The Legion player decides where to deploy his forces, and other objects at his disposal. Remember there are two types of counters to be used: troop counters and object counters.
Initiative Counters. Put the starting number of initiative counters in a cup and mix them. Any of the players may draw the counters. Add or subtract initiative counters when figures are killed or you gain reinforcements.
Cards. Each Blood Beret or Bauhaus squad may be equipped with five equipment cards in addition to scanners. Each Nepharite Overlord has a choice of five cards also. The Legion player first decides how many Dark Symmetry cards he wants to use—these are to be drawn randomly. Next he draws necrotech cards until he has a total of five cards for each Nepharite.
Troops. Pick out the troops specified by the mission, or assemble your own force using this simple points system: each action is worth 3 points, a skill level of 10 is free, but each higher step costs 1 point. A figure with 2 actions doesn't lose any when wounded, a figure with 3 or 4 loses 1, a figure with 5 or 6 loses 2. Each skill level drops 3 points when the figure is wounded. Each armor value above 17 costs 1 point per point (armor value may not be higher than 27). The lowest initiative is 9, and each 2 points above this costs 1 point.
Imperial vs. Bauhaus. It happens quite often that the five large corporations of the world of the Blood Berets clash with each other. Why not try a mission using the Blood Berets and the Venusian Rangers pitted against each other?
Mission 3: Lightning Strike
The task is to locate the enemy stronghold, penetrate it, map as much as possible, and then escape with the information.
The Blood Berets start with a full squad and the equipment of their choice (scanners and 5 extra cards). The orders are to locate one of the entrances, get in, and then spend one round in at least 6 of the game board sections with scanner equipped troopers. The scanners will automatically map each entered section. The information gathered is then automatically transmitted to each of the other scanners—which means that even though several of the Blood Berets may die, the effort is not wasted.
The Legion player has the same number of troops on the surface as in Mission 2. When the action moves below, any remaining surface troops are ignored.
When the surface objects are placed, the Legion player also deploys his troops below exactly as in Mission 1. These troops may be moved onto the board as soon as the Blood Berets start entering the tunnels. Legion troops in the entry section are first moved to adjacent sections as usual.
The Legion player has a choice in the tunnels. He may either use the same number of figures below as in mission 1, or he may trade four of his Legionnaires for the second Nepharite (if it survived on the surface). In that case troop counters 7–10 are also used as dummies. The Legion player may use all of his initiative counters, regardless of the number of minitures in play. Counters are removed when actual figures are lost.
Both Nepharites may be equipped with five Dark Symmetry/Necrotech cards each.
Lightning Strike Using the Bauhaus Rangers
If you use the character cards depicting a squad of Bauhaus Venusian Rangers in addition to the Blood Berets, the Legion player may use the full set of figures both above and below, and receives initiative counters at the rate of two per game turn; and killed Legionnaires are replaced two per game turn (one for each living Nepharite).
How to Enter the Tunnels
When a tunnel entrance is located each trooper must get to the entrance square. As each trooper disappears into the hole, the figure is removed from the board. When everyone has entered, you turn the first section of the game board to reveal the caves, that is, the one with the entrance.
But before the Blood Berets move ahead the Legion player rearranges the remaining game board sections.
Make a note on the order of entry as this affects the starting order below. All figures entering the tunnel during the same gameturn are all part of the same entry group. If the entire squad (of those alive, of course) enters during the same gameturn, there will be only one entry group. If only part of the squad entered during the first round, then figures entering during the next round will be part of the second entry group, and so on, until all of the troopers have entered.
When you turn the entry section to reveal the cave system, you begin the second half of the mission with the first entry group during the first gameturn. If there is a second (or a third) entry group, it will not come into play until the second gameturn starts (and so on, with the third group coming into play during the third gameturn).
Figures entering the caves are placed anywhere in the entry section at the beginning of the gameturn.
Victory Conditions
The Blood Berets win if they can find an entrance, map 6 sections, and return to the surface with the information. Otherwise they lose, and the Legion has added yet another victory to its dark list.
VII. Weapons and Equipment
There are two main types of weapons and equipment: standard equipment for all figures of a certain type, and equipment represented by special equipment cards. The descriptions in this chapter provide all the important information—the card information is necessarily abbreviated. An asterisk before the name of a weapon indicates close combat weapons. Double asterisks next to the damage points indicate double damage for wounding hits (immediately kills Blood Berets and Legionnaires).
Certain weapons carry plus or minus modifications to the close combat and missile weapon skills. Add or subtract these from the appropriate skill value when the figure is using any of these weapons.
*Chainripper. This officer's weapon combines a large gyro-stabilized weight and a chain saw device, which effectively stuns the victim and rips it open at the same time. Because of this it causes double damage.
- Damage **14
- Range Close combat
Hellblazer SMG. The Hellblazer is the standard sidearm of Blood Berets equipped with close combat weapons. It can be fired one-handed, and is an excellent weapon for confined spaces.
- Damage 10
- Range 10 squares
*Aggressor PSA. The standard sidearm of Blood Berets not equipped with close combat weapons. The Aggressor fires 10 mm bullets. The pistol is ideal for short distances. This is the only weapon which may be used both as a ranged and as a close combat weapon, that is, it may be used to fire at enemies in adjacent squares. Use the close combat skill.
- Damage 8
- Range 6 squares
Imperial Intruder. The Imperial Intruder fires high-speed explosive bullets, and is an excellent and reliable weapon.
- Damage 12
- Range Unlimited
Shellshocker. The shellshocker is a long range armor-piercing grenade. It takes 2 actions to fire the weapon. The shellshocker can be used to smash down walls or block passages—each shot will open or block a hole one square wide, which happens automatically if the skill roll is successful*. If you shoot against a wall facing an unturned game board section, the board is turned when one of the Blood Berets steps through the hole. The Legion player tells when the shot have broken through. As this is a very indiscreet method of entry the Blood Beret player loses his chance of surprising the Legionnaires—the Legion player is automatically allowed to position his figures. The shellshocker may not be used on a target if it is adjacent to any Blood Berets.
* If the Blood Beret wants to shoot through a wall which is more than two squares thick he will not succeed. The Legion player checks after the shot has been fired, and then informs the Blood Beret player of his failure or success.
- Missile weapons –2
- Damage **17
- Range Unlimited
Deathlokdrum. The next two miniatures are equipped with the Deathlokdrum heavy support weapon. The gun is equipped with double mechanisms. The rear set fires 8.6 mm armor piercing ammunition, and the front fires 33 mm grenades. The size of the weapon makes it difficult to use in confined spaces, which means that a deathlokdrum equipped soldier has no close combat capability, and also that the miniature may not turn more than 90 degrees per action. Turning in a corridor only one square wide costs a full action. If used against bunched up enemies the grenades may do damage to more than one figure. Use the rules for troop mines—same area of effect and same damage points; if fired at a single miniature the card value is used.
The Bauhaus standard weapon is the AG-17 assault rifle.
*Ironfist. The Blood Beret trooper has had his hands and lower arms replaced by cybernetics. The implants allow him to make close combat attacks bare-handed.
- Close combat +2
- Damage points 11
- Range Close combat
Gehenna Puker. Instead of an Intruder the Blood Beret is equipped with a Gehenna Puker, a flame thrower sending out a stream of burning syntoplasma. The Puker burns right through thicket and jungle, removing the modification against difficult terrain. It causes double damage to Legionnaires, but Nepharites are only stunned for 1 round. Roll for each figure in a straight line from the shooting figure.
- Missile weapons +2
- Damage **10
- Range 5 squares
Medikit. The Blood Beret medic is the only one carrying a medikit. Using it he can perform emergency field surgery on each member of the team, including himself. This activity takes 2 actions, which the medic must spend in a square adjacent to his patient.
Scanner. The scanner is used when searching for hidden objects in the vicinity. May be destroyed by system malfunction. Increases initiative by 6.
- Scanner skill 12
- Perfect: two objects located
- Successful: one object located
- Failed: no effect
- Fumbled: jammed
Hyperactivator. The figure can control his production of adrenaline among other things, giving him better reactions and movement. Decide each round if the feature will be used or not. Roll against initiative when the move is finished. Stunned for 1 round if the roll fails.
- +1 action per round
- +4 to initiative
- Initiative roll after each use (against modified score)
Sonar. An synthetic organ in the skull transmits sound waves, giving the user an improved sense of where objects are.
- +2 on close combat rolls
Armor. The body has been strengthened to give additional protection, but it also slows it down. Movement is always 2 squares per action regardless of terrain. Armor can't be combined with the hyperactivator.
- Always 2 squares of movement per action
- +2 armor points
Cybernetic Eye. The Blood Beret is equipped with a cybernetic eye. The eye makes him immune to blindness, and also improves his missile weapon skill. The cybernetic eye may be destroyed by malfunction.
- +2 on missile weapon rolls
- Immunity to blindness
Psychic Helmet. The Blood Beret is surrounded by a psychic awareness giving him added protection against the dark powers of the Nepharites. The helmet increases the initiative score when attacked psychically.
- +4 initiative points
Whirlwind Blaster/*Combat Blade. The whirlwind is one of the standard weapons of the Legionnaires. The gun is originally of human design, but has been transformed by the dark technology of the Legion. The weapon is improved in many strange ways, but it is also highly unreliable, prone to exploding in the face of the user. An added feature of the gun is the combat blade, a serrated, vibrating bayonet affixed below the barrel, used in fierce close combat attacks.
Whirlwind Blaster
- Damage 10
- Range Unlimited
*Combat Blade
- Damage 12
- Range Close combat
*Azogar. The azogar is a close combat weapon consisting of a staff with a rotating saw at one end, and is used as a short lance or an extremely long sword. The saw rotates at a very high speed. During use the azogar needs blood, which it takes from the user—the Nepharite must spend 1 action per round to keep it happy and awake, but it may then be used to the limit of available actions. When not needed the weapon can be put into hibernation, using no energy. It takes 1 full game turn to arouse a sleeping azogar.
Flip the card to indicate a dormant weapon. At the beginning of the game the weapon is asleep.
If the Nepharite is represented by a troop counter, the initiative counter is placed on the azogar card when the weapon is aroused.
(Note: double damage asterisks have disappeared from the card.)
- Damage **12
- Range Close combat
Alimahn. Roll once before each game turn to determine the present attack strength of the alimahn. Each successful attack stuns a Blood Beret for 1 game turn. Skill value is the same as the attack strength.
Nefasti. The nefasti is a flame thrower that hurls burning plasma. Surviving figures hit by the flames can perform no actions during the next game turn until the clinging plasma has burned away, although they can move as normal.
The nefasti produces its own ammunition, but it takes a while—the weapon may only be fired once every other game turn.
- Damage **10
- Range 8 squares
Nafai. The nafai can only be used once. The projectile is approximately the size of a football, and terribly violent. It can move around corners to attack all enemy figures it can reach. The nafai moves a total of 8 squares during the attack, and can move right through each target (actually flying above its victims).
- Damage 10
- Range 8 squares
Gretchjakth. The gretchjakth hurls rotating, sharp disks causing severe damage. During use the gretchjakth needs blood, which is taken from the user—the Nepharite must spend 1 action per round to keep it happy and awake, but it may then be used to the limit of available actions. When not needed the weapon can be put into hibernation, using no energy. It takes 1 full game turn to arouse a sleeping gretchjakth.
Flip the card to indicate dormant weapon. At the beginning of the game the weapon is asleep. If the Nepharite is represented by a troop counter, the initiative counter is placed on the gretchjakth card when the weapon is aroused.
- Damage **13
- Range Unlimited
*Necrolance. The necrolance is an extremely long two-handed sword made of black cartilage. The length of the necrolance lets the user attack in close combat from one square away (does not need to be in an adjacent square). For the same reason the weapon may not be used in confined spaces (if the attacking figure or the target is in a corridor only 1 square wide).
- Damage 12
- Range Close combat
Claws of Bohnar. This is a chainsaw-looking device using black claws where you would normally find a chain. A normal chainsaw may have its chain snapped, something which never could happen to the claws, as they are part of the living paws of the weapon.
- Damage **8
- Range Close combat
Belitshe. This black gun, also known as The Gift of Algeroth, is a heavy automatic using large caliber bullets. It has two handles and is studded with sharp points and nasty edges. Belitshes are commonly used by the extremely strong Razides. The version used by the Nepharites differs in one respect as it doesn't have the two angled blades sticking out below the muzzle.
- Damage 12
- Range Unlimited
Standard equipment. A small scanner is also part of the standard equipment. The scanner is used for searching out enemy activity, traps and other hidden objects. The privates are equipped with the standard gun of the Corporation, the Imperial Intruder. The close combat specialists carry a smaller automatic, and the fearsome Chainripper.
Modifications to Skill Rolls
| Situations | Modification |
|---|---|
| Target or attacker in thicket | –2 to hit* |
| Target or attacker in jungle | –4 to hit* |
| Close combat attack from behind | +2 to succeed/+2 damage points |
| Attacker is aiming | +4 to hit/+4 damage points |
| Shoot while moving | –4 to hit |
| Target behind a corner | –4 to hit |
*Does not apply when the attacker is at the edge of thicket or jungle.
Equipment Effects
| Equipment | Modification |
|---|---|
| Gehenna Puker | +2 missile weapons |
| Shellshocker | –2 missile weapons |
| Ironfist | +2 close combat |
| Cybernetic Eye | +2 close combat |
| Sonar | +2 close combat |
| Armor | +2 armor points |
| Hyperactivator | +4 initiative |
| Psychic Helmet | +4 initiative |