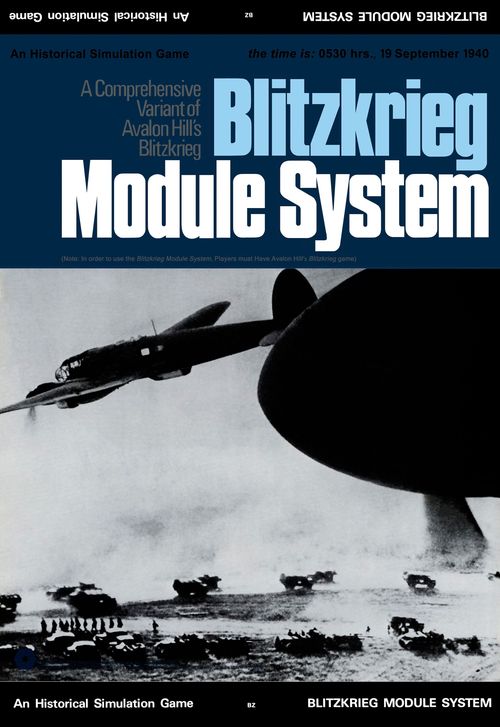
Blitzkrieg Module System
Official rulebook: SPI (Simulations Publications, Inc.) · PDF
Blitzkrieg Module System Rulebook
Table of Contents
Table of Contents
- 1. Fluid Impulse
- 2. Rigid Impulse
- 3. Modified ZOC
- 4. Combat Results
- 5. Class Stacking
- 6. Phase Class Sequencing
- 7. Railroads
- 8. Initial Orders of Battle
- 9. Production
- 10. Supply
- 11. Naval Forces
- 12. Air Forces
- 13. Flak
- 14. Weather
- 15. Guerillas
- 16. Artillery
- 17. Variable War Scenarios & Victory Conditions
- 18. Minor Country Armies
- Charts and Tables
- Minor Country Armies (chart)
- Production and Initial Orders of Battle
- Fleet Engagement Table (FET)
- Ground Combat Results Table (GCRT)
- Strategic Bombardment Table (SBT)
- Rail Interdiction Table (RIT)
- Fighter Combat Results Table (FCRT)
- Flak-Defense Table (FDT)
- General Notes on Supply and Isolation Effects
- Artillery Missions and Modes
- MST/LST Actions Permitted
- Port Facility Chart
- Task Force Mission Capability
- Air Mission Targetting
- Weather Indication
- Phase-Class Sequencing
- Class Stacking and Unit Characteristics
1. Fluid Impulse
FLUID IMPULSE REFERS ONLY TO THE MOVEMENT AND COMBAT OF CLASS 4 GROUND UNITS.
Each move consists of two "IMPULSES" or movement turns. Combat takes place between the two impulses. Procedure: First impulse move all Class 4 ground units, roll combat results, remove losses, retreat any defenders according to CRT. SECOND IMPULSE move all Class 4 ground units again, using full BTA. Units may move into enemy ZOC (zone of control) on both First and Second impulse. No combat, however, takes place at the end at the Second Impulse. On both the First and Second impulse units may move THROUGH enemy zones of control at 1/2 BTA. Overruns may take place in either impulse.
2. Rigid Impulse
Similar to FLUID IMPULSE except that units may not move through enemy ZOC. Units ending their first impulse in enemy ZOC (after combat is rolled) may not move in the second impulse. Units moving in the second impulse may not enter enemy ZOC. Overruns may take place in either impulse.
3. Modified ZOC
ARMOR, INFANTRY, MARINES, AIRBORNE AND RNGR UNITS have a zone of control (ZOC) which extends to all adjacent land squares. This zone of control affects movement of enemy units. Except when using the FLUID IMPULSE MOVEMENT SYSTEM (Module No. 1) units must stop in the first square of enemy ZOC that they enter. Units do not have to have combat with enemy units whose ZOC they are in. If they do choose to attack they may attack only one square of enemy units or as many as they choose. All units in attacked squares must be treated as one defense factor. Units may move from the ZOC of one enemy stack directly to the ZOC of another enemy stack as long as those ZOC's do not overlap.
Class 1, 2, 3, 5 and 6 units do not have ZOC's. They only block the movement of enemy units through the squares they occupy.
(NOTE: SEE AREA INTERDICTION MISSION in AIR TARGETTING CHART, MODULE NO. 12.) Class 4 Artillery Units have no ZOC. Class 4 units being transported in Class 2 or 3 have no ZOC.
Class 3 units on port squares or assault squares have no ZOC in relation to ground units on land.
Class 4 units which become unsupplied lose their ZOC. SEE ISOLATION EFFECT TABLE.
4. Combat Results
(SEE THE COMBAT RESULTS TABLE ENCLOSED AS A SEPARATE SHEET)
The following is an explanation of what the various table results mean:
R = indicates the number of squares the defending units must move back (away) from the attacking units. R 2 means that the defending units must move back 2 squares. The defender MAY elect to lost two factors for each square he is supposed to move back and remain where he is. Or the defender may combine the two, losing some factors and then moving back also. For example; in a R 3 the defender may decide to lose two factors and then move back 2 squares or else lose four factors and move back one square or lose six factors and stay where he his or move back three squares and lose no factors at all. When moving back the retreat must be as straight as possible, directly away from the battle lines in the general direction of the friendly rear area.
AD = Attacker loses the number of his own factors indicated. AD1 would mean one factor lost, AD3 means the attacking units lose 3 factors.
DD = defender loses factors in the same fashion as AD.
EX = an "exchange" with both attacker and defender losing the number of factors indicated. An EX3 would mean that both sides lose three factors.
Whenever a unit is forced to retreat the attacker may occupy the vacated square. If impulse movement is not used, any defending unit forced to retreat more than one square is immobilized for one turn (flip counter over).
OVERRUN - If a stack of attacking units have 10-1 or better odds on defending units they do not have to attack them to destroy them but may simply move into the enemy square (losing 4 movement factors in the process) and simply remove the enemy unit from play. This is not considered an attack and is done during the movement portion of either impulse.
If players wish to increase their sense of loss or gain accompanying defeat or victory they may wish to use one of the following systems.
-
Cost Effectiveness (COLD-BLOODED). For every factor you lose, pay your opponent the production cost for that factor in cents. For example: for each armor factor you lose, pay your opponent 2 cents.
-
Humanistic (warm-hearted). Pay your opponent in cents the following prices per factor lost of the following types: AIR UNITS = 1 cent; RANGER = 3 cents; RR, FLAK, AIRBASE = 5 cents; ARMOR, ARTILLERY, AIRBORNE = 10 cents; MARINES, MST, 2 BTA INF = 15 cents; 4 BTA INF GUERILLAS, LST = 20 cents; TF = 40 cents.
Keep a running total of both sides losses. Subtract the smaller figure from the larger and pay the difference to the player with the lower losses. System One is meant to reflect the economic "pain" of losing expensive equipment and highly trained personnel. System Two reflects in a small way, the moral "pain" felt at losing great numbers of men. If you desire more decision points use System No. 3 (MIXED EMOTIONS) which is a combination of both systems. Pay for each factor twice: once at the Cost Effectiveness Rate and once at the Humanistic Rate.
For maximum accuracy each player should physically destroy the money lost for each unit rather than have his opponent profit from the "death" of his forces.
5. Class Stacking
Units are divided into "classes" based upon their fundamental environment, physical characteristics and relative mobility. Units stack by class (i.e. units of one class do not count against the stacking of units of another class when stacked in the same square). For example: 3 infantry units, one flak unit, one airbase, 12 factors of aircraft, one railroad unit carrying eight factors of ground units could all conceivably be stacked on one square. Note that when ground units are "entrained" in a railroad unit they do not count against the stacking of other ground units in the same square. All stacking limitations must be met by the end of the Movement Phase of a player's turn. Refer to the Unit Characteristics Chart. A unit's class also reflects the order in which the units are moved; see Phase Class Sequencing.
6. Phase Class Sequencing
PHASE/CLASS SEQUENCING is simply a method of making movement more logical and orderly. It also implies many rules merely by stating what you must do before you can do something else. You must move in phase, by class; according to sequence. Any action which is made possible only by moving out of order is an illegal move. Even if you decide not to use this module, examine it very carefully to understand the rules implicit in the system. For even if you do not use the PCS you MUST obey the rules inherent in it.
For example; SEE PHASE I CLASS 3. Implicit in the order of movement is the rule that units may not go to sea and conduct an invasion in the same turn since Invasions (E) comes before Embarkations (F).
Consistant use of this system will become automatic by about the 6th turn of employment. You will find it ends many of the arguments about what was moved and not moved in a game as complex as BLITZKRIEG. It also speeds up the game considerably once players become accustomed to its use.
7. Railroads
USE OF RR UNITS: The red transportation lines are considered to be RAILROAD MAINLINES not roads. Ground units only increase their movement rate on these lines when traveling in RR units. Each RR unit represents the number of trains necessary to transport 8 factors of Class 4 or 5 units. Units traveling in RR units are placed UNDER the RR counter.
Procedure: Ground unit begins turn on railine or in city square. RR unit is moved to waiting ground unit and picks up (ENTRAINS) unit at a cost of 10 RR movement factors. It may then transport the ground factors along the railine to the limit of its RR movement factor. It may drop off units at a cost of 5 RR M.F. and continue on in the same turn ENTRAINING and DETRAINING units to the limit of its RR M.F. Ground units detrain at a cost (to them) of 2 movement factors, and may not use other forms of transport in the same turn. RR units may not move into enemy ZOC. They may, however, begin their turns in enemy ZOC. RR units themselves do not have any ZOC and neither do any ground units traveling in them. RR units unloaded or loaded have a total defense factor of 1. If attacked and the results call for either a retreat or a loss of factors, the RR unit and any passenger units are destroyed. RR units may be captured by "Overrun Attack".
Railines are subject to being "cut" by either air or artillery bombardment or by ground units. See RR and Railine Interdiction on the Air Mission Chart. Ground units may cut railines automatically by simply placing a Class 4 unit on the rail square to be cut and announcing the fact to your opponent. The "cutting unit" may not be in enemy ZOC or engage in any other form of offensive combat in that turn. When the line is cut place a "cut marker" on that square. Place two markers on a Bridge cut (the point at which a railine or city straddles a river). Cuts last for one turn (see PHASE/CLASS SEQUENCING CHART) and may be traversed at a cost of 10 RR M.F. per cut marker.
Railines are also used for Supply (see Supply Module). See Unit Characteristics Chart.
Component note (RAIL TRANSPORT counter): the counter shows a Def factor of 1, a capacity of RR-8 (factor capacity), a RR MF of 60, and the cost to traverse a cut (RR CUT marker) of 10 RR MF.
8. Initial Orders of Battle
Before each game begins each player chooses an order-of-battle for his side. Both may use the same OB, but to insure an interesting game try to agree on different OB's. If agreement can not be reached between two players here are two ways of deciding which will increase the variation and fairness in OB choice METHOD NO. 1. One player selects any two different OB's and the second player decides who will use which OB of the two selected. METHOD NO. 2. Both players roll die. The player with the lowest die roll uses that number OB and the second player uses any OB with a higher number. For example, BLUE rolls low with a 2 and therefore uses a "Strategic Combined Arms Army". Red may choose anything from a Mixed Combined Arms Army to a Horde Army but may not choose a BLITZ ARMY OB or a Strategic Combined Arms Army OB. The side with the lower numbered OB moves first, the higher numbered OB sets up first.
The combined arms army is a balanced force of all arms, ground and air as well as adequate naval support. Obviously, even this "balanced" force can vary in its proportions according to the philosophy of the user. Thus we have mixed, strategic and tactical CAA's (Combined Arms Armies). Most modern nations strive to create CAA's. But if their resources are not up to it they produce Infantry Armies (IA's). This type was in wide use until World War I and is still found in many parts of the world. Even today the Russian army is, in actuality although not in theory, an Improved Infantry army. This was what her army was at the end of WW II. At the beginning it was just an IA. The Horde Army is none other than the "human wave" type force. Color it chinese and run. The Blitz army is what the Germans had at the beginning of WW II. Sort of a "super" tactical CAA.
You will notice that all things considered there are actually FEWER units involved in the game on an active level than in the old Avalon Hill OB. This lower troop level is a more accurate reflection of the size of the armies which could be raised by countries of the order of magnitude represented in the game.
It is recommended that the larger Navy always belong to BLUE.
9. Production
Each order-of-battle calls for a given number and type of production centers. In each production cycle (which takes place at the end of every second turn starting on turn 21) a player produces new units at the cost per factor in Production Points indicated on the Production Chart. Each Production Center produces independently and may not combine its points with other centers to produce especially "expensive" units. For example a 10 point Production Center could produce, in one cycle, 5 factors of armor or 2 Factors of Artillery and one factor of FTR or any combination of types whose total production cost per factor does not exceed 10. Of course, this means that certain units may not be produced by some types of PC's. Production points may not be accumulated nor may the newly produced units delay their appearance on the board. Newly produced ground units (class 2, 4, 5) appear in the same square as the PC within stacking limitations. Newly produced sea units appear in the port square of the city in which the PC is located. Sea Units may ONLY BE PRODUCED BY PC's IN PORT CITIES. Newly produced air units (Class 1) appear in the nearest HOME COUNTRY airbase. Newly produced airbases appear in any supplied area, behind friendly lines and out of enemy ZOC. Airbases may not be used in the turn of production. Friendly unit counters lost during the production cycle turn may not be re-used for that cycle.
If newly produced ground units would exceed stacking limitations the excess may appear in any Home Country city directly connected to the PC city by a railine.
NO NEWLY PRODUCED UNITS MAY APPEAR IN A SQUARE COMPLETELY SURROUNDED BY ENEMY ZOC. If a production center is completely surrounded by enemy ZOC during the production cycle phase, it may not produce. Production Centers may be captured by an Overrun attack only. Captured PC's may be used as a source of supply only and may not be used to produce new units. They may be recaptured by eliminating all enemy forces holding them. Captured PC's have no defense factor.
NOTE: IN THE CASE OF MAC, RR, TF, MST, LST, and AIRBASE COUNTERS THE ENTIRE UNIT IS CONSIDERED AS ONE FACTOR FOR PRODUCTION PURPOSES.
Players may wish to increase the realism of production center employment by limiting production cycles to one cycle every THREE turns and/or secretly writing production plans two cycles in advance. Write out the first two cycles of the game before the first turn.
Component note (PRODUCTION CENTER counter): Production points 10; Def. factor 1.
"Production" actually represents not only newly produced units but also units which have been refitted, received replacements or called-up from reserve components. P.C.'s should be heavily defended from air attack by flak units and interceptor groups and should generally be located in the heartland of the country with sufficient RR units close at hand to deliver new production to the front. Guard them carefully for once a P.C. is lost it may NEVER BE REPLACED.
10. Supply
Units are considered "supplied" when they are within five squares of a friendly rail line running back to:
A. A home country city
B. A friendly port (which can also trace a supply line through sea zones of naval parity or friendly superiority back to a home country port).
C. A friendly airbase to which MAC supply airlift missions have been flown that same turn.
Lines of supply must be free of enemy ZOC.
Units may also be supplied by airdrop using MAC units flying from a supplied airfield (see air mission/targetting chart).
Units may not deliberately move into an unsupplied square and must attempt to avoid them when forced to retreat.
A unit is "out of supply" on the turn AFTER its supply line has been cut. For example: if due to enemy action a unit's supply line is cut the isolated unit does not suffer any of the penalties of being "isolated" until its next turn to move comes.
When a unit is "unsupplied" (or "isolated") it may relieve this condition by either moving back into supply or by over running one of the surrounding enemy units and again opening a supply line (this is a normal "overrun" and requires the same 10-1 odds). Supply may also be restored by other, non isolated, friendly units which do this by also obtaining a 10-1 superiority over one of the isolating enemy units. This action allows the "isolated" unit to immediately (in that turn) operate as a supplied unit. During any of the above operations the regular supply conditions must still be achieved after a blockading enemy unit is destroyed. In other words, you don't just overrun ANY of the blockading enemy units but only those whose absence will open an actual supply line.
UNSUPPLIED UNITS HAVE NO ZONE OF CONTROL other than the square they occupy. Their combat factor is cut in half and, in addition, ARMORED units have their movement factor cut in half. Unsupplied air units may only fly ferry missions to a supplied airbase in their first turn of isolation.
INVASION SUPPLY: A total of 18 factors may be supplied through a given beachead. 36 factors may be supplied through a captured port city. An overall total of 60 factors may be supplied by sea. Invading units are considered to be supplied on the turn of their invasion. They may be supplied if they are within five squares of a beachead. Invasion units may not use enemy rail lines for supply purposes until they capture an enemy city or open a rail line back to a home country city.
NOTE: Minor Country Armies trace their supply routes to a Supply Counter. Once these counters are lost they may not be replaced.
Railines running through captured hostile cities may not be used for supply or movement purposes unless the cities are garrisoned.
Component note (SUPPLY counter): Defense factor 1-0.
11. Naval Forces
USE OF NAVAL UNITS: Units may be placed at sea in initial set up of game in a Home Country Sea Zone (BLUE Zone A & B; RED ZONE D & E) or in a Home Country Port. Units "at sea" form "Fleets" by stacking together or arraying themselves together on the "AT SEA BOX". These stacks are considered as separate and distinct groups. There is no limit to the number of naval units which may stack in Fleet formation while on the open sea. Units in Port or on Assault Squares (any sea-square adjacent to the coast) stack 3 per square. See Unit Characteristics Chart.
Each Task Force (TF) unit may carry one factor of Rangers and three factors of either TAC or FTR. Aircraft are assigned to ships by flying ferry missions to the TF's from Naval Airbases (bases within one square of the coast) or by flying ferry missions from any base to a port facility or assault square containing the TF's. Rangers embark like any other land unit.
Land units embark into MST's by starting their turn in a port city square. The MST is moved to the matching Port Facility square and the land unit is placed UNDER the MST counter.
Each coastal city square has a matching adjacent sea square in which sea units may dock. See Port Facility Chart. In a couple of instances, however, only one docking square is physically available for two city squares. In that case double the stacking limitation in those squares (dock 6 units). There are three Inland Ports on the board. Sea units "dock" in the designated city square itself (3 per square). Enemy TF's adjacent to the mouth of the river approach to an Inland Port prevent friendly units from leaving or entering that port. Sea Units in ports which are captured by enemy ground action must sail in the very next turn or be considered eliminated. Enemy ground units stacked on river approaches to Inland Ports also seal-off those ports. TF's may not fight their way out of such sealed-off ports.
INVASIONS: Move MST, LST and any escorting TF's to an assault square adjacent to a CLEAR TERRAIN beach square. The presence of the LST unit permits 6 factors of the possible 8 carried by the MST to assault the beach square. Only one specific beach square may be assaulted from each assault square. On the next and subsequent turns up to 12 factors may be transferred ashore by an LST unit if that previously assaulted beach square has been cleared of enemy units by the "first wave." As long as that beach square remains CONTINUOUSLY free of enemy units, LST's may land units on it. First wave assaults which do not force the defender back, take the losses called for by the GCRT. If the assault force is eliminated as a result, so is the LST unit. In any case, if the beachead is not gained the invasion is aborted and all units involved must return to port. Friendly units already on beach squares may be withdrawn at the rate of 6 factors per turn. See Unit Characteristics Chart, Weather Charts, and MST/LST Actions Chart. TF's may land one factor of Rangers without using LST's. Ranger landings are not considered to be beacheads.
TF units fight Fleet Engagements using the Fleet Engagement Table. See also TF Mission Capability Chart. The following is an explanation of the FET:
AW = Attacker Withdraws: All attack units in that stack withdraw.
AD = Attacker Destroyed: One TF unit destroyed, remainder (if any) in that stack withdraws.
EX = Exchange: Each side loses one TF.
- = Nothing Happens.
DW = Defender Withdraws: Defending TF's plus any MST/LST under their escort withdraw.
DD = Defender Destroyed: One TF unit destroyed. Remainder plus any MST/LST under their escort withdraws.
Units withdraw to same zone port or adjacent "at sea" box. If, after withdrawals resulting from combat, one side has gained Naval Superiority in that sea zone, withdraw any MST/LST units of the inferior force IMMEDIATELY. Units forced to withdraw do not count towards Naval Superiority in the sea zone to which they withdraw for that turn-half. They may not withdraw to a zone of enemy superiority or S-3 Weather. If no alternative is available they remain where they are and lose one more unit. Aborted landings must return to port as soon as possible and dock and disembark land units.
Component notes: MILITARY SEA TRANSPORT (MST) counter: factor capacity 8. LANDING SHIP/TROOP (LST) counter: first assault and withdrawal capacity 6; follow-up landing capacity 12. TASK FORCE (TF) counter: flak factor and RNGR capacity 1; shore bombardment factor and FTR-TAC capacity 3.
12. Air Forces
AIRBASE COUNTERS: EACH AIRBASE holds 3 air unit counters or 12 factors of air units whichever is greater. Air bases may only be built behind a players lines and not in enemy zones of control.* If an airbase is attacked by ground units, it and all the air units in it are destroyed if forced to retreat.* An Airbase may only be captured by building up an "Overrun" (10-1 odds) situation against it, in which case the planes are destroyed but the field may be utilized by the capturing player next turn.
-
Air units based in an airfield are placed UNDER the counter when not flying (with the exception of FTR assigned to INTERCEPT missions which are placed upside down on top of the airbase).
-
Land-based MDM and FTR may only fly missions against or to SHIPS AT SEA from "NAVAL AIRBASES". A Naval Airbase is one which is located no more than one sqr. from the coast of the sea zone to which the mission is flown. Naval Airbases affect only one sea zone even if they are built at the juncture of two sea zones.
-
AIRBASES may be voluntarily destroyed and the counter reused during the NEXT Production Cycle. If voluntarily destroyed during a production cycle turn they may not be used or "rebuilt" that turn. Combat Missions may not be flown during the turn of voluntary destruction.
Component note (AIRBASE counter): Defense factor 1.
-
USE OF AIR UNITS: Most of the rules and mission capabilities of Aircraft are contained in the AIR MISSION TARGETTING CHART.
-
Notice that TAC which is based on T.F. units at sea (FLEET TAC) has a much wider mission capability than land based TAC. More information on FLEET AIR missions will be found in the TASK FORCE MISSION CAPABILITY chart.
-
Virtually all combat air missions are compatable, that is to say they may be flown against targets in the same square. Airborne units however may not be dropped into a square which is being attacked by bombers (they may however drop into squares in which friendly FTR missions are being flown.)
Air units may always refuse combat (while flying) by aborting their stated mission and returning to base. If, for example, a target were too heavily defended by flak or interceptors the attacking player simply informs the defender of his decision to abort and returns to base without suffering any losses. Similarly if intercepting fighters find that an enemy bomber group is too heavily escorted they may also refuse combat and return to base.
Air units flying from the same base to the same square must fly together.
Optional: Interceptors may attack enemy planes at any point along their flight path either on the way to, or returning, from their mission.
Component note (MILITARY AIRLIFT CAP counter): airborne factors droppable and supply airdrop capability 2; ground factor transport or supply capacity 3; the counter also shows 1-10.
13. Flak
FLAK units are employed against enemy aircraft. Each FLAK unit has a ZOE (zone of effect) which includes the square it occupies and the six adjacent squares. FLAK units have no ZOC and no defense factor against ground attack. If attacked alone FLAK is destroyed automatically and the attacker may move on as if no unit was present.
Enemy aircraft suffer FLAK effects whenever they fly through or to a square within a FLAK unit's ZOE. Each FLAK unit may fire only once per turn. FLAK units on different squares may combine their fire against targets flying through or to a common ZOE. FLAK effect upon aircraft is determined by using the FLAK Defense Table (FDT). If upon entering a FLAK unit's ZOE the player running the air mission decides that the concentration is too heavy he may ABORT the air mission without suffering any losses. The player with the FLAK must, however state prior to this decision which (if any) FLAK unit will be used against the air units. Every ABORT caused by FLAK constitutes a use of those FLAK units, and they may not be used again in that turn. When a FLAK unit has been "fired" a player may wish to turn the FLAK counter 90 to record that event. FLAK may not fire into a square containing friendly FTR's flying INTERCEPT MISSIONS. Air units which elect to suffer FLAK fire remove losses before they execute their mission. Air units bombing a square containing 2 or more FLAK FACTORS which are directed against them, add one to their bombing-effect-die-roll number. Air units with different missions occupying the same square at the same time are treated as one group of planes with respect to FLAK effect. A group of aircraft returning from a mission may not escape the effect of any previously unused FLAK unit whose ZOE they fly through. When a player aborts an air mission he must return immediately to the same base or bases from which the mission started. FLAK units may not be used while they are entrained or embarked.
FLAK units may not be attacked from the air although they may suffer ground support air attacks (SEE AIR MISSIONS). FLAK units may suffer Naval or Ground Artillery fire.
- When there are different types of aircraft undergoing FLAK fire in the same square BOMBERS are always the first to suffer any losses.
Component note (FLAK counter): FLAK factor 1-2.
14. Weather
The board is divided into three Weather Zones which correspond to the North to South folds in the board. The weather in each of these zones is determined by the use of Weather Indicators. At the beginning of each complete turn, BLUE rolls the die. The die roll determines which of the numbered Indicators is to be placed in the LEFT-HAND Weather Zone. The next two Zones have their weather indicated by placing the next two Weather Indicators in them in numerical order reading left-to-right. For example: DIE ROLL = 5. No. 5 Weather Indicator is placed in Left Hand Zone; No. 6 in Middle Zone; No. 1 in Right Hand Zone. Each "season" is 9 turns long.
Blitz board weather zones:
- LEFT zone includes Sea Zones A & B.
- MIDDLE zone includes Sea Zone C.
- RIGHT zone includes Sea Zones D & E.
SPECIAL NOTE: DURING "WINTER" ALL RIVER SQUARES SOUTH OF THE EAST-TO-WEST FOLD ARE FROZEN AND EQUAL CLEAR TERRAIN SQUARES. LAKE FREDERICK IS ALSO FROZEN.
Component note (WEATHER INDICATOR counter): the example indicator shows the season (FALL), a sequence number (2), and three weather codes (V 2, G 1, S 2). See "Weather Indication Table".
15. Guerillas
After half of the cities in a minor country have fallen guerilla units may be raised in the countryside. Guerilla units are produced every production cycle turn. One 1-4 Guerilla unit is produced for each fallen minor country city. The units come on the board no further than 3 squares away from the city of production and not in enemy zones of control. Their appearance may be delayed by the player friendly to the conquered country. Guerilla units are moved by the opponent of the "oppressor" nation. Guerilla units need no supplies until they combine to form a unit of 4 combat factors or greater. Guerilla units need not combine into larger units. Once they do, however, their supply line is traced according to normal supply rules with the exception that it may be traced to a friendly city outside their home country. Guerilla units of less than 4 factor size, may refuse combat by retreating one square when attacked (before the die is rolled). Guerilla units operate as infantry and stack 3 units per square maximum. Guerilla units MUST fight if attacked when surrounded by enemy ZOC.
Artillery & Air units add 3 to their die-roll number when bombing guerilla units of less than 4 factor size. Guerillas of less than 4 factor size may move through 1 square of enemy ZOC. Guerillas may not operate offensively outside their home country until the country is liberated. Guerilla units may be absorbed by friendly regular infantry in which case they lose their guerilla characteristics. Guerilla units may not participate in invasions. Guerilla units may take sanctuary outside their home country in any uninvaded minor country or in the "Neutral Country" squares in the North East corner of the board. When in "sanctuary" they are considered to be supplied. They may not be attacked while in "Neutral Country" and any attack on Guerillas in an uninvaded minor country constitutes an invasion of that minor country.
Guerilla units have normal ZOC. They may cut supply lines. One factor of guerillas may "cut" a railine (place cut marker) by moving to the rail square to be cut and not engaging in any other attacks. The rail square to be cut may not be in enemy ZOC.
Minor countries may be "pacified" (i.e. rendered incapable of further guerilla production) if, at anytime after the first guerillas have been produced and made their appearance, all guerillas, i.e. that country are either destroyed, pushed out or in sanctuary outside that country. Guerilla units coming back from sanctuary allow Guerilla units to be produced again.
Component note (GUERILLA counter): 1-4.
16. Artillery
ARTILLERY UNITS - Disregard the first combat factor printed on artillery units. The second combat factor is the only one to be used (therefore an 8-4-4 becomes a 4-4). Artillery units have no native defense factor and if attacked while they are stacked alone they are automatically eliminated by any attacking ground unit (other than enemy artillery). Artillery units also have no ZOC.
They do, however, have a zone of Effect (ZOE) which extends to every adjacent square. ARTILLERY UNITS may be employed as indicated in the ARTILLERY MISSION CHART.
17. Variable War Scenarios & Victory Conditions
A. Total War (Standard Game) - Blue moves first. Use regular orders-of-battle (OB) for Red and Blue. Use minor country armies if desired. The player who controls the most cities wins. Game may be any agreed upon number of turns in duration but not shorter than 12 turns. Game may also be "open-ended" (i.e. goes on until one player concedes). Game starts 6 turns before Summer (See weather module).
B. National Expansion - Same as above except that the side which controls the most minor countries by turn 12 wins. You are considered to be in control when you occupy the majority of cities in a given country and you have a 2-1 combat factor superiority over enemy regular units and guerillas operations in that country.
C. Neutrality Violation - The neutrality of Calaedia is guaranteed by the 4 other minor countries. North and South Walkure are passive allies of Blue; New Endor and San Estados are passive allies of Red. (Passive allies allow the major power to deploy starting units in their country and to initiate combat operations from within their borders). Minor country armies are deployed by their respective allies but may only be used within their own nation until Calaedian neutrality is violated by one of the major powers. When Calaedian neutrality is violated ALL the minor countries become active enemies of the violating power. Guerilla units are produced in any country under control by the violator. Lines of supply for the "allies" may then be traced to any friendly city. The player who controls the most minor countries by the end of the game wins. Game may be any length but no shorter than 12 turns.
D. Grand Alliance Vs- Quadruple Entente. - Same as total war except that Blue has North and South Walkure as ACTIVE allies (Grand Alliance) and Red has Calaedia, New Endor and San Estados as Active allies (Quadruple Entente). A major power may deploy starting units in any allied country and the allied armies may engage in offensive operations outside their own borders.
E. Brush Fire War (Short Game) - North and South Walkure are ACTIVE allies against the active alliance of the other three minor countries. Use minor country armies only. The Walkurian Alliance moves first. The side which controls the most cities by the end of the game, wins. Start game on the first turn of Summer. Game ends on last turn of Summer. Each country has a replacement rate of 2 ground factors per turn as long as it does not lose control. Replacements appear in any friendly home country city at the end of the turn. Units may not violate the borders of either of the major powers.
F. THIRD POWER - The minor countries are all ACTIVE allies of each other. Blue takes any regular OB except BLITZ ARMY. Minor Country Allies move first (starting from their respective countries). Red is passive ally of Minor Country Alliance. Red sets up units in Red Homeland but may not move them across borders unless Blue violates Red territory or if at the beginning of any turn Red rolls a 6 on the die (The die is rolled every turn to determine whether Red becomes an ACTIVE ALLY of minor countries. When a 6 is rolled, Red units may cross border in the following turn.) Minor Country Units may escape into Red territory and use rail system for supply and movement purposes (utilizing minor country RR units). The side which controls the most minor country cities at the end of the game, wins. NOTE: RED MAY TAKE ANY INFANTRY ARMY OB. USE GUERILLA RULES IN MINOR COUNTRIES. For variation switch Major power roles and make BLUE passive ally of Minor Countries. Minor Country Alliance has a total of 4 Five point Production Centers. Game begins in the 5th turn of Summer and lasts through the first turn of Winter (15 turns).
G. NATIONAL LIBERATION - One side (RED or BLUE) takes a regular OB and occupies the entire board. The other player has Guerilla forces only. Starting with 18 Guerilla factors which are placed no more than 3 squares from a city not in occupiers home country, the Guerilla player must try to gain control of at least 5 cities for a Marginal Victory, 10 cities for a Tactical Victory 20 cities for a Strategic Victory. Up to 18 new guerilla factors may be produced every production cycle as per guerilla rules. Any city not in occupiers home country which is un-garrisoned becomes a guerilla controlled city whether or not there are actually any guerilla units in it. As soon as Guerilla's gain control of 5 cities for one complete turn they may declare the game over or elect to continue and try for a greater victory. At each level of victory they may end game or go on. Oppressor Army only wins when ALL Guerilla units have been eliminated. If at the end of one complete year (36 turns) neither side has achieved a victory condition the war is declared stalemated (which is actually a Moral Victory for the Guerilla's). For variation consider the entire board to be occupied territory and the Oppressor nation to be across the sea. All newly produced Oppressor forces enter through ports in sea zone C or D. Game starts in the 1st FALL turn.
H. CIVIL WAR - The entire board is one country. Distribute one OB throughout the cities and ports on the board, with no more than one unit per square. Air units are distributed one per base. Roll die for each unit. Assuming the counters initially distributed to be BLUE, a roll of 1, 2 or 3 means they remain loyal (BLUE). A 4, 5 or 6 means they turn RED and rebel. The side with the fewest ground units moves first. The side which controls the most cities at the end of 12 turns, wins. Do not use Guerilla Rules. Production Centers become the property of whoever can seize them first. They may be captured and used by the opposing side by driving off any combat units occupying them. Game starts on the first turn of Summer.
18. Minor Country Armies
The abbreviations of the names of the minor countries refer to their physical location on the mapboard. For example, Nord Walkurie comes out NW on the counters referring to North West while Calaedia is abbreviated C (for Central) on the counters.
Also keep in mind that zones of control do not extend over national boundaries which have not been violated yet (the two nations are not yet at war with one another).
When setting up the game, unless otherwise noted, the following procedure is followed for setting up the minor country armies. Each player sets up the armies of minor countries bordering his opponents nation. Both players roll the die to determine who will set up Calaedia's army. Refer to the WAR SCENARIOS for further information on this subject as well as variations on it.
Charts and Tables
Minor Country Armies (chart)
Glyphs as printed: boxed X = infantry; oval in a box = armor; diagonal arm with "1" = airbase (defense factor 1); "S" box = supply counter; "RR-8" box = railroad; infinity-symbol counters labelled "tac" or "ftr" = TAC or FTR. Factors are shown as printed. Underlined combat factors are substitute units, per the chart's note: "Substitute Units have underlined combat factor. In Standard Game, M.C. units may not move until their border is violated." Entries are listed by printed row, left to right, with repeats shown as "x" counts.
Nord Walküre (NW, Chrome Orange)
- Row 1: Infantry 4-4 x7; Armor 3-6 x3; FTR 4-12 x2.
- Row 2: TAC 4-8; Supply 1-0 x3; Railroad 1-60 x2; Airbase (1) x2.
- Row 3: Infantry 2-4 x7 (substitute); Infantry 1-4 x5 (substitute).
- Row 4: Armor 2-6 x3 (substitute); Armor 1-6 x3 (substitute); TAC 2-8 (substitute); TAC 1-8 (substitute); FTR 2-12 x2 (substitute); FTR 1-12 x2 (substitute).
Sud Walküre (SW, Cadmium Yellow)
- Row 1: Infantry 4-4 x4; Armor 3-6; FTR 4-12; Supply 1-0 x2; Airbase (1); Railroad 1-60 x2.
- Row 2: Infantry 2-4 x3 (substitute); Infantry 1-4 x4 (substitute); Armor 2-6 (substitute); Armor 1-6 (substitute); FTR 2-12 (substitute); FTR 1-12 (substitute).
San Estados (SE, Pale Olive)
- Row 1: Infantry 4-4 x5; Armor 3-6 x2; FTR 4-12; TAC 4-8; Supply 1-0 x2; Railroad 1-60.
- Row 2: Airbase (1) x2; (blank); Infantry 2-4 x5 (substitute); Infantry 1-4 x4 (substitute).
- Row 3: Armor 2-6 x2 (substitute); Armor 1-6 x2 (substitute); FTR 2-12 (substitute); FTR 1-12 x2 (substitute); TAC 2-8 (substitute); TAC 1-8 x2 (substitute).
New Endor (NE, Pale Sepia)
- Row 1: Infantry 4-4 x3; Armor 2-6 x2; FTR 4-12; Supply 1-0; Railroad 1-60; Airbase (1).
- Row 2: Infantry 2-4 x3 (substitute); Infantry 1-4 x3 (substitute); Armor 1-6 x2 (substitute); FTR 2-12 (substitute); FTR 1-12 (substitute).
Calaedia (C, Lt. Grey #2)
- Row 1: Infantry 2-4 x6; Armor 2-6; Railroad 1-60; Supply 1-0.
- Row 2: Infantry 1-4 x6 (substitute); Armor 1-6 (substitute).
Note: the chart shows unit-type glyphs only; the small tick-marks above the unit symbols are not reproduced.
Production and Initial Orders of Battle
Production chart. Columns: CLASS; COST (in Production Points per factor); UNIT TYPE; then the Blitz Army (#1), the Combined Arms Armies (#2 Strategic, #3 Mixed, #4 Tactical) and the Infantry Armies (#5 Improved, #6 Standard, #7 Horde). A dot (•) indicates types not producible within the given OB. Values are listed as Cost, then #1 / #2 / #3 / #4 / #5 / #6 / #7.
| Class | Cost | Unit type | #1 Blitz | #2 Strategic | #3 Mixed | #4 Tactical | #5 Improved | #6 Standard | #7 Horde |
|---|---|---|---|---|---|---|---|---|---|
| 1 | 6 | SAC | 0 | 16 | 16 | 0 | 0 • | 0 • | 0 • |
| 1 | 5 | MDM | 12 | 12 | 6 | 12 | 0 | 0 • | 0 • |
| 1 | 3 | TAC | 8 | 0 | 4 | 8 | 8 | 2 | 0 • |
| 1 | 4 | FTR | 12 | 16 | 4 | 16 | 12 | 2 | 0 • |
| 1 | 4 | MAC | 2 | 4 | 2 | 2 | 0 | 0 | 0 • |
| 2 | 3 | Rail Transport | 6 | 6 | 4 | 8 | 4 | 2 | 2 • |
| 3 | 6 | TF | 0 | 6 | 2 | 2 | 1 • | 0 • | 0 • |
| 3 | 6 | MST | 3 | 4 | 3 | 2 | 2 • | 1 • | 1 • |
| 3 | 6 | LST | 0 | 1 | 0 | 0 | 0 • | 0 • | 0 • |
| 4 | 1/2 | Inf. (2 BTA) | 0 | 0 | 0 | 0 | 80 | 100 | 120 |
| 4 | 1 | Inf. (4 BTA) | 80 | 24 | 32 | 24 | 0 | 0 | 0 |
| 4 | 2 | Armor | 60 | 12 | 18 | 24 | 22 | 10 | 0 |
| 4 | 3 | Artillery | 16 | 16 | 8 | 0 | 0 | 0 | 0 • |
| 4 | 2 | Marines | 0 | 18 | 6 | 12 | 0 | 0 | 0 |
| 4 | 5 | Rangers | 0 | 4 | 0 | 0 | 0 • | 0 • | 0 • |
| 4 | 3 | Airborne | 8 | 12 | 4 | 8 | 0 | 0 | 0 • |
| 5 | 2 | Flak | 12 | 16 | 12 | 14 | 0 | 0 | 0 |
| 6 | 2 | Airbase | 5 | 8 | 5 | 6 | 3 | 2 | 0 • |
| - | - | # of Production Centers | 2 | 3 | 3 | 3 | 6 | 5 | 5 |
| - | - | Production Points per center | 12 | 10 | 10 | 10 | 5 | 4 | 2 |
Note on the printed chart: the Production column header reads "COST-in Product Points per factor"; the Production Points per center row is printed in circles, shown here as plain numbers.
Initial Orders of Battle comparison (OB Comparison chart). Columns: TOTAL; CLASS ONE RAW STRENGTH (excluding MAC); CLASS FOUR RAW STRENGTH; CLASS ONE RANGE FACTOR (average); CLASS FOUR MOBILITY FACTOR (average).
| Order of battle | Total | Class one raw strength | Class four raw strength | Class one range factor (avg.) | Class four mobility factor (avg.) |
|---|---|---|---|---|---|
| #1 Blitz Army | 196 | 32 | 164 | 10.3 | 4.7 |
| #2 Strategic Combined Arms Army | 130 | 44 | 86 | 14.4 | 4.3 |
| #3 Mixed Combined Arms Army | 98 | 30 | 68 | 15.2 | 4.5 |
| #4 Tactical Combined Arms Army | 104 | 36 | 68 | 11.1 | 4.7 |
| #5 Improved Infantry Army | 122 | 20 | 102 | 10.4 | 2.9 |
| #6 Standard Infantry Army | 114 | 4 | 110 | 10.0 | 2.6 |
| #7 Horde Army | 120 | 0 | 120 | 0.0 | 2.0 |
Fleet Engagement Table (FET)
Rows are die rolls 1-6; columns are the naval odds 1-3, 1-2, 1-1, 2-1, 3-1, 4-1. Results are explained under Module 11.
| Die | 1-3 | 1-2 | 1-1 | 2-1 | 3-1 | 4-1 |
|---|---|---|---|---|---|---|
| 1 | Ex | DW | DW | DD | DD | DD |
| 2 | AW | Ex | Ex | DW | DD | DD |
| 3 | AW | • | Ex | Ex | DW | DD |
| 4 | AD | AW | • | • | DW | DW |
| 5 | AD | AW | AW | AW | Ex | DW |
| 6 | AD | AD | AD | AW | Ex | Ex |
Note printed under the FET: "If possible, Withdrawals take place towards Home country sea zone."
Ground Combat Results Table (GCRT)
Standard Attack (columns are odds; the Overrun column applies at 10-1):
| Die | 1-2 | 1-1 | 2-1 | 3-1 | 4-1 | 5-1 | 6-1 |
|---|---|---|---|---|---|---|---|
| 1 | R 1 | R 2 | R 2 | R 2 | R 3 | R 4 | R 4 |
| 2 | R 1 | R 1 | R 1 | R 2 | R 3 | R 4 | R 4 |
| 3 | AD 1 | R 1 | R 1 | R 2 | R 3 | R 3 | R 3 |
| 4 | AD 2 | AD 2 | R 1 | R 2 | R 2 | R 3 | R 3 |
| 5 | AD 2 | AD 2 | AD 2 | DD 1 | DD 2 | DD 3 | R 3 |
| 6 | AD 2 | AD 2 | AD 3 | Ex 3 | Ex 3 | Ex 2 | Ex 1 |
Blitz Attack. Must involve at least 1 Armored Unit. Armor takes losses first.
| Die | 1-2 | 1-1 | 2-1 | 3-1 | 4-1 | 5-1 | 6-1 |
|---|---|---|---|---|---|---|---|
| 1 | R 2 | R 2 | R 2 | R 3 | R 4 | R 5 | R 5 |
| 2 | R 1 | R 2 | R 2 | R 3 | R 4 | R 5 | R 5 |
| 3 | AD 2 | AD 1 | R 2 | R 3 | R 4 | R 4 | R 5 |
| 4 | AD 3 | AD 1 | R 1 | R 2 | DD 4 | R 4 | R 5 |
| 5 | AD 3 | AD 2 | AD 3 | DD 2 | DD 5 | DD 7 | R 5 |
| 6 | AD 3 | AD 2 | AD 4 | Ex 4 | Ex 4 | Ex 3 | Ex 1 |
Overrun (10-1 column of the Standard Attack table): a stack with 10-1 or better odds may move into the enemy square without attacking (see Module 4).
Strategic Bombardment Table (SBT)
Columns are the bombardment factors. Results: H = half of total factors destroyed (as defined in the Air Mission Targetting chart); D = all units destroyed. The chart leaves a blank dot (•) unexplained; it is read here as no effect.
| Die | 3 | 6 | 12 | 18 | 24 |
|---|---|---|---|---|---|
| 1 | H | D | D | D | D |
| 2 | H | H | D | D | D |
| 3 | • | H | H | H | D |
| 4 | • | • | H | H | H |
| 5 | • | • | • | H | H |
| 6 | • | • | • | • | H |
Rail Interdiction Table (RIT)
Columns are the bombardment factors. Results: X = rail line cut (see Air Missions 11 and 12); • = no effect.
| Die | 1 | 2 | 3 | 4 | 5 |
|---|---|---|---|---|---|
| 1 | X | X | X | X | X |
| 2 | • | X | X | X | X |
| 3 | • | • | X | X | X |
| 4 | • | • | • | X | X |
| 5 | • | • | • | • | X |
| 6 | • | • | • | • | • |
Fighter Combat Results Table (FCRT)
The interceptor is the ATTACKER (a). Each cell gives factors lost by the attacker (a) / by the defender (d). A dot (•) means none.
| Die | 1-4 | 1-3 | 1-2 | 1-1 | 2-1 | 3-1 | 4-1 |
|---|---|---|---|---|---|---|---|
| 1 | 3 / 1 | 1 / 1 | • / 1 | 1 / 2 | 1 / 3 | 1 / 3 | 1 / 4 |
| 2 | 2 / 1 | 1 / 1 | 1 / 1 | 1 / 1 | 1 / 2 | 1 / 3 | 1 / 4 |
| 3 | 1 / • | 1 / 1 | 1 / 1 | • / 1 | • / 2 | • / 3 | • / 3 |
| 4 | 1 / • | 1 / 1 | 1 / 1 | • / 1 | • / 1 | • / 2 | • / 3 |
| 5 | 1 / • | 1 / • | 1 / 1 | • / 1 | • / 1 | • / 2 | • / 3 |
| 6 | 1 / • | 1 / • | 1 / • | 1 / • | 1 / 1 | • / 1 | • / 3 |
Flak-Defense Table (FDT)
Columns are the number of Flak factors; cells are the number of air factors lost (as used under Module 13).
| Die | 1 | 2 | 3 | 4 | 5 | 6 | 7 | 9 | 12 | 18 |
|---|---|---|---|---|---|---|---|---|---|---|
| 1 | • | 1 | 1 | 2 | 3 | 3 | 4 | 5 | 5 | 6 |
| 2 | • | 1 | 2 | 3 | 4 | 4 | 5 | 5 | 6 | 7 |
| 3 | 1 | 1 | 2 | 4 | 5 | 5 | 6 | 6 | 6 | 8 |
| 4 | 1 | 1 | 3 | 4 | 5 | 5 | 6 | 7 | 7 | 8 |
| 5 | 1 | 2 | 3 | 4 | 5 | 6 | 7 | 7 | 8 | 8 |
| 6 | 1 | 2 | 3 | 4 | 5 | 6 | 7 | 8 | 8 | 8 |
General Notes on Supply and Isolation Effects
General notes on supply:
- Supply lines must be entirely free of enemy ZOC.
- RR "cuts" do not affect supply lines.
- Any number of factors may be supplied by a given home country city.
Isolation Effects (unit, movement, combat factor):
| Unit | Movement | Combat factor |
|---|---|---|
| Air units | May ONLY fly ferry missions OUT of unsupplied airbase in first turn of isolation. | Fighters halved while ferrying out of isolation. NO ATTACKING. |
| Airbase | • | Normal |
| Railroad | Halved | Normal |
| Sea units | Normal | Normal |
| Armor | Halved | Halved |
| Infantry, Marines, Artillery, Airborne, Flak | Halved. NOTE: Airborne units do not suffer isolation in the turn they are dropped. | Halved. Units breaking out attack at half factor. If an over run is built up from the outside of an encirclement the units inside may be considered resupplied in that turn. |
| Rangers | RANGERS never need supplies and may move into unsupplied areas. | Normal |
Note on the table: in the printed chart the combat-factor entry for Armor and the infantry-type units is a single merged cell; it is reproduced in both rows.
Artillery Missions and Modes
| Mode | Mission | Conditions |
|---|---|---|
| Attacking | Offensive Support. Add artillery factors to ground attack if defender is within the Zone of Effect. | Use regular CRT's. Artillery is the last type to suffer losses unless the enemy has defensive artillery within the zone of attacking artillery units. |
| Attacking | Barrage. Use artillery factors as if they were MDM bombers. Refer to SBT and Air Targetting Chart. | Artillery may not conduct Barrage and Offensive Support with the same units in the same turn. Units suffering barrage may also undergo ground attack in the same turn. All targets within the Zone of Effect may be Barraged by artillery. Artillery in the same square may split and be applied to different targets. All barrages concentrated on one target must be added together as one barrage. |
| Defending | Defensive Support. Add artillery to ground defense if attacker is within Zone of Effect (even if attack develops from more than one square). | Use regular CRT. If not forced to retreat, artillery is always last unit to suffer losses. Artillery is only forced to retreat when stacked with other units forced to retreat. |
Not transcribed: the printed Time Record track (a turn-record grid with season and scenario start/end markers) is a playing aid rather than a rule.
MST/LST Actions Permitted
| Sea zone status | Land or withdraw troops | Sail from same zone port | Sail into port from adjacent zone | Remain in zone "at sea": escorted | Remain in zone "at sea": unescorted | Sail to adjacent zone | Sail into same zone port |
|---|---|---|---|---|---|---|---|
| Enemy superiority | NO | NO | NO | NO | NO | YES | YES |
| Parity | YES | YES | YES | YES | NO | YES | YES |
| Friendly superiority | YES | YES | YES | YES | YES | YES | YES |
Definitions printed under the table:
- NAVAL SUPERIORITY exists in a sea zone when friendly TF's at sea outnumber enemy TF's at sea and in port by a ratio of 3 to 1 (or better) within that zone.
- PARITY exists when neither navy has superiority.
Port Facility Chart
Coastal city square and its matching port facility square. Squares marked with a dot (•) are island ports, as the printed key reads "• Island Port."
| Coastal city square | Matching port facility square | Coastal city square | Matching port facility square |
|---|---|---|---|
| CC-15 | CC-14 | X-27 | X-28 |
| U-11 | U-10 | BB-31 | CC-31 |
| G-4 | F-3 | AA-42 | Z-42 |
| D-7 | C-6 | JJ-46 | JJ-47 |
| D-8 | C-7 | NN-48 | MM-48 |
| M-14 | M-15 | NN-49 | MM-49 |
| P-15 | O-15 | AAA-54 | ZZ-54 |
| P-16 | O-15 | BBB-55 | AAA-55 |
| L-19 | L-19 • | JJJ-56 | JJJ-56 • |
| C-20 | B-20 | RRR-55 | SSS-56 |
| D-31 | D-31 • | RRR-54 | SSS-55 |
| H-32 | H-33 | RRR-40 | SSS-41 |
| I-33 | H-33 | SSS-40 | TTT-41 |
| V-33 | W-34 |
Task Force Mission Capability
Note printed above the chart: defending TF's (except escorts) may refuse combat by voluntarily withdrawing to port or adjacent zones; attacking TF's may then be re-employed in the same zone.
| Mission | Objective | Placement | Resolution | Notes and conditions |
|---|---|---|---|---|
| Fleet Engagement | Destroy enemy offensive units. | At Sea Box or assault square | Fleet Engagement Table (FET) | May only be executed if all friendly shipping in zone is either escorted or in port (if no friendly naval superiority exists). May conduct air missions in conjunction with surface combat. Units involved in offensive fleet engagement may not conduct fire missions. |
| Raid | Destroy enemy shipping. | At Sea Box or assault square | One enemy MST or LST lost for each attacking TF. | Same as above plus: at least 1-1 fleet engagement must be fought with any escort. Attacking TF's in excess of 1-1 then may raid shipping. |
| Fire mission | Bombard enemy units/installations on coastal squares and enemy ships in port. | Assault square or adjacent to port square | SBT. Each TF = 3 bomber factors. | Gun Range = 1 square. May be employed against any target open to SAC type aircraft. Bombardment results must be rolled separately from any air attack on same target. Fire mission precludes using same TF in raid or fleet engagement in that turn. Prohibited in zones of enemy superiority. |
| Escort | Protect friendly ships. | With MST/LST | • | Escort "at sea" must be stacked with shipping. Escorts with invading units may be stacked one square away. Escorts may not engage enemy TF's in fleet combat or raids. |
| RNGR Assault | Land Ranger Force | Assault Square | GCRT | May conduct Air and Fire missions in conjunction with landing. May not conduct Escort, Raid or Fleet Engagement. LST not needed. Naval Parity not required. |
| Inshore Air mission | Attack enemy targets within air range of assault squares | Assault square | Normal aircraft rules | Count range from assault square. Mission may be flown in conjunction with any of above. Inshore fighter intercept may only be flown when TF has been left on assault square during opponents turn. |
| Sea Zone Air mission | Enemy shipping or targets on coast squares. | At Sea Box or assault square | Normal aircraft rules | Fleet TAC may be used against ships at sea or in port as if it were MDM bombers. Mission may be flown in conjunction with any of the above. Carrier TF must be in the same Sea Zone as target. |
Air Mission Targetting
Chart note: Air units may perform only one mission per complete turn. Missions against a target square containing several targets affect only the target system being attacked. Ground units subjected to ANY bombing may also be subjected to ground attack in the same turn.
| # | Mission | Aircraft | Mode of effect | Results |
|---|---|---|---|---|
| 1 | Strategic Bombing of Class 4 Units | SAC, MDM | Refer to SBT (Strategic Bombing Table) | Result "D" = All units destroyed. Result "H" = Half of total factors destroyed. When only one factor is targetted, a SBT result of "H" has no effect. When target is in a city square, add 1 to die roll number. (A die roll of 6 in that case would have no effect.) |
| 2 | Strategic Bombing of Railroad Units | SAC, MDM | SBT | Result "D" = All RR units destroyed plus half of any factors being transported. Result "H" = RR units immobilized for one turn (flip counters over). Unlike class 4 units, RR units are NOT less vulnerable when in cities. |
| 3 | Strategic Bombing of Production Centers | SAC, MDM | SBT | Result "D" = No production for that center in the next production cycle. (Flip counter over.) Result "H" = Production rate halved for the next production cycle (turn counter sideways to show this). |
| 4 | Strategic Bombing of Supply Centers | SAC, MDM | SBT | Result "D" = Center destroyed. Result "H" = No supply for one turn. |
| 5 | Strategic Bombing of Ships in Port | SAC, MDM, Fleet TAC | SBT | Result "D" = One sea unit destroyed for every three bomber factors attacking. Also, no ships may leave or enter that port square for one turn (place any upsidedown counter there to show this). Result "H" = One sea unit destroyed for every six factors of attacking bombers. The attacker chooses the ships lost. Range to target is counted to the CITY SQUARE adjacent to the port square. |
| 6 | Strategic Bombing of Port Facility | SAC, MDM | SBT | Result "D" = No docking or sailing from that port square for one complete turn as well as no use of port for supply purposes for one turn (use a rail cut counter to show this). Result "H" = NO EFFECT. |
| 7 | Strategic Bombing of Ships "At Sea" | Fleet TAC, MDM | SBT. MDM based at Naval Air Base adjacent to same sea zone as ships | Result "D" = One sea unit sunk for every six bomber factors attacking. Result "H" = One sea unit turned back to port for every three factors of attacking bombers. Defender decides which units turn back and which are destroyed. Ground units on MST/LST are lost as well as Rangers or aircraft on sunk TF's. Units turned back do so IMMEDIATELY, to the nearest friendly port. |
| 8 | Strategic Bombing of Ships on Assault Squares | Fleet TAC, MDM | SBT | Same as SHIPS AT SEA. Land based aircraft count range to assault squares. |
| 9 | Strategic Bombing of Airbases | SAC, MDM | SBT | Result "D" = Airbase destroyed and all planes on the ground destroyed. Result "H" = One half of all planes on ground destroyed and no takeoffs or landings for one complete turn (flip airbase counter over). |
| 10 | Strafe or Bomb Aircraft on the Ground | MDM, FTR, Fleet TAC | One factor on the ground destroyed for every attacking factor | Defender chooses aircraft lost. Attacking fighters may assume escort role if challenged, in which case they do not take part in strafing mission. |
| 11 | Railline Interdiction | SAC, MDM, Fleet TAC | RIT (Rail Interdiction Table) | Result "X" = Rail line cut. Place "cut counter". RR units traverse cut at cost of 10 movement factors. Result "•" = NO EFFECT. Place 2 cut counters for each bridge rail line cut. Remove one a turn for two turns. For 2 it takes 20 movement factors to cross. |
| 12 | Railroad Unit Interdiction | FTR | RIT | Result "X" = One RR unit immobilized for one turn for each 2 factors of attacking fighters (flip RR counter over). |
| 13 | Area Interdiction of Ground Units | FTR | At least 2 factors of FTR's fly to specific square and remain for one complete turn. FTR's have zone of control into adjacent squares. NOTE THAT THIS IS THE ONLY MISSION WHICH STAYS ALOFT FOR A COMPLETE TURN. | ENEMY ground units move through affected squares at one half their normal movement rate OR at their normal movement rate suffering 1 combat factor loss per square for every 2 factors of interdicting fighters. Enemy units may not retreat through zones of interdiction, if forced to do so they lose one half their combat factors for each interdicted square moved into. 1-1 interception nullifies interdiction for that half of the turn. If intercepted fighter to fighter combat results. If after fighter to fighter combat only 1 factor of interdicting fighters remain they only affect the square they occupy in the ensuing opponents turn. Ground units would still be subject to one factor losses per square per unit. |
| 14 | Counter-Interdiction (hunt mission) | FTR | FTR to FTR CRT (The counter Interdictors are the attackers) | COUNTER INTERDICTORS must have at least 1-1 odds. Regardless of fighter to fighter results, interdiction is nullified for that half-turn. Counter-Interdictors are also subject to interception. |
| 15 | Escort All Missions | FTR | FTR to FTR CRT if intercepted (The interceptors are the attackers) | Escort may fly with any air mission and may rendezvous at any point along the path of the mission within and to the limits of their range. |
| 16 | Intercept All Enemy Missions | FTR | FTR to FTR CRT if mission is escorted; otherwise 1 factor of bombers or MAC is lost for every FTR factor intercepting. | Interceptors must be assigned to that role at the beginning of the players turn and may not participate in any other mission for that complete turn of assignment. Interceptors have a TOTAL range of 12 squares (radius of action of 6 squares if landing at airbase of takeoff). Interceptors must fight escort at at least 1-1 odds. Interceptor factors above that may strip off and attack bombers or MAC. Interceptors are the ONLY air units which INITIATE their flights during the enemy turn-half. They intercept ONE enemy mission per turn. |
| 17 | Ground Support | MDM, TAC | Add air combat factors to ground attack factors. | Air support can only suffer losses as a result of interception or enemy flak concentrations. They may not absorb losses indicated on ground combat CRT. |
| 18 | Combat Airlift | MAC | Emplane Infantry, Ranger, Marine or Airborne units. | MAC unit flies to and deplanes units at friendly airbase (3 ground factors per MAC unit). |
| 19 | Combat Airdrop | MAC | Emplane airborne infantry, fly to drop zone square. | Each MAC unit can carry 2 factors of airborne troops for airborne mission. Airborne units must start turn in airbase with MAC unit and may not move after dropping (rotate unit to show this). |
| 20 | Supply Airdrop | MAC | Fly from supplied airbase to unsupplied unit. | Each MAC unit airdrops enough supplies for 2 factors of ground units. Unit to be supplied may be in enemy zones of control. |
| 21 | Supply Airlift | MAC | Fly MAC unit from supplied airbase to airbase in unsupplied area. | Up to 3 factors may be supplied by one MAC unit. Units needing supplies trace supply routes to airbase as if it were a home city. |
| 22 | Ferry Flights | ALL | Transfer air units from one airbase to another at up to double their range. | Subject to interception as are all other air missions (with the exception of the interception mission itself). |
Note on the printed chart: the "•" entries in the Railline Interdiction result are printed as a filled dot, which the chart labels "NO EFFECT."
Weather Indication
Each weather indicator gives a value for Visibility (V), Ground (G) and Sea (S). The three values are looked up on the Weather Indication table below.
| Result | Visibility | Ground | Sea |
|---|---|---|---|
| 1 (Normal) | Normal | Normal | Normal |
| 2 | Aircraft combat factor and supply airdrop: HALVED | -5 RR MF, -1 class 4 & 5 MF | Air to ship and TF bombardment factor: HALVED. Delay landings and assaults. |
| 3 | NO AIR OPERATIONS | Class 2, 4 and 5: MF HALVED. ARMOR combat factor: HALVED. | WITHDRAW to port or calmer zone; do not leave port; no combat; abort landings. |
Weather Indicators (season, sequence number, then V, G and S values):
| Season | #1 | #2 | #3 | #4 | #5 | #6 |
|---|---|---|---|---|---|---|
| Spring | V1 G1 S1 | V1 G1 S1 | V1 G1 S1 | V1 G2 S2 | V1 G1 S2 | V2 G3 S2 |
| Summer | V1 G1 S1 | V1 G1 S1 | V1 G2 S1 | V2 G1 S1 | V1 G2 S2 | V1 G1 S1 |
| Fall | V1 G1 S1 | V2 G1 S2 | V1 G2 S3 | V3 G3 S2 | V2 G2 S1 | V2 G1 S2 |
| Winter | V1 G1 S3 | V2 G2 S1 | V1 G2 S2 | V3 G3 S3 | V2 G2 S2 | V3 G3 S2 |
Phase-Class Sequencing
Each phase lists the attacker's sequence by class, with the defender's notes alongside. All stacking conditions must be met by the end of Phase I.
Phase I - Movement
- Class all: • Break up larger units into smaller ones as desired.
- Class 1 (Defense notes: Check weather. Fire. Flak. Fly interceptors. Extract losses.)
- A. Land all previous turn area interdiction missions.
- B. Assign Fighter units to INTERCEPT missions.
- C. Allocate (fly to target) all area interdiction missions.
- D. Allocate SAC and MDM bombing missions plus escort.
- E. Allocate TAC plus escort and independant fighter missions.
- F. Allocate all MAC missions: Emplane class 4 units, fly and land or conduct paradrops. Fly air supply missions.
- G. Allocate and land all FERRY missions (double range).
- Class 2 (Defense notes: Check weather. Area interdiction effect.)
- A. Move RR units ENTRAINING and DETRAINING ground units as desired. Detrained units may not re-entrain in the same turn. Rotate detrained units 90 degrees to indicate that they lose 2 BTA when they move.
- B. Remove all cut-markers placed by same player in the previous turn (except when 2 are at bridge, leave 1). Bridge cuts are removed at rate of 1 per turn.
- Class 3 (Defense notes: Check weather. Note zones of naval superiority.)
- A. Sail TF, MST, LST units from SEA ZONE to adjacent sea zones or from assault squares to same sea zone or adjacent sea zone.
- B. Sail MST units to friendly ports, disembark land units, rotate land units 90 degrees in port city to indicate loss of 2 BTA.
- C. Sail TF units from ports to same zone "at sea" box.
- D. Allocate TF missions (in same sea zone).
- E. Allocate MST/LST invasion missions (in same sea zone).
- F. Embark land units into MST units in ports. Sail units to zone "at sea" box.
- Class 4 & 5 (Defense notes: Check weather. Check area interdiction effect.)
- A. Land and move all unopposed invasion forces at a cost of 2 BTA (including Rangers).
- B. Move all detrained units at a cost of 2 BTA.
- C. Move all debarked units at a cost of 2 BTA.
- D. Move all deplaned units at a cost of 1 BTA.
- E. Move all remaining supplied ground units.
- F. Move all unsupplied ground units. Embark units conducting beach withdrawal into LST's.
- Class all: • Combine smaller units into larger single units. (May not be in enemy zones of control.)
Phase II - Combat
- Class 1 (Defense notes: Check weather.)
- A. Execute air attack missions against air and land targets - extract losses - place cut markers.
- B. Execute air missions against Naval targets - extract losses.
- Class 3 (Defense notes: Perform mandatory withdrawals.)
- A. Execute fleet engagements - extract losses.
- B. Execute raid missions - extract losses.
- C. Execute fire missions - extract land losses.
- D. Perform mandatory withdrawals.
- Class 4 (Defense notes: Perform retreats. Defensive Artillery Support.)
- A. Fire all artillery barrages - extract losses.
- B. Conduct beach assaults and Ranger assaults.
- C. Conduct ground combat (including artillery and ground air support missions). Extract losses, and advance survivors into vacated squares as desired.
Phase III - Post-Combat
- Class 1 (Defense notes: Check weather.)
- A. Land all air missions.
- Class 4 - SPECIAL: Move second impulse (if impulse system being used).
Phase IV - Production (every other full turn)
- Class 6
- A. Produce guerillas.
- B. Produce and place class 1 through 5 units.
- C. Produce new airbases.
- D. Destroy unwanted airbases.
Class Stacking and Unit Characteristics
Legend printed on the chart: shaded cell = prohibited or inapplicable; D = doubled; N = no change in factor.
| Class | Maximum units per square per class | Prohibited squares | Unit types | Notes |
|---|---|---|---|---|
| 1 Air | In airbase: 3 units or 12 factors, whichever is greater. No limit when flying. | ALL except airbase (AB) when not flying. NONE when flying. | SAC, MDM, TAC, FTR, MAC | 3 factors of TAC or FTR may be based on each TF unit. |
| 2 RR (Rail) | 3 per city; 1 on railine | All except city and railine | Rail Transport | Defense on squares behind river line, forest and city/mountain: N. |
| 3 Naval | 3 on port and assault square. No limit "At Sea." | LAND, except inland ports | TF, MST, LST | Units in port do not contribute to ground defense of city. |
| 4 Ground | 3 | SEA | Inf. (2 BTA), Inf. (4 BTA), Airborne, Marines, Rangers, Armor, Artillery, Guerilla | See the notes on Class 4 below. |
| 5 AA (Flak) | 1 | SEA | Flak | |
| 6 Installation | 1 | Airbase: city, sea and mountain. Production: all except city. | Airbase, Production | The printed note beside the Supply symbol is illegible in the scan and is not reproduced. |
Class 4 unit characteristics (as legible on the printed chart):
| Unit | Transportable by RR and MST | Transportable by MAC | Invasion: first assault | Invasion: same-square follow-up | Movement cost per square on mountains and forests |
|---|---|---|---|---|---|
| Inf. (2 BTA) | yes | yes | no | no | 2 |
| Inf. (4 BTA) | yes | yes | yes | yes | 2 |
| Airborne | yes | yes | yes | yes | 2 |
| Marines | yes | yes | yes | yes | 2 |
| Rangers | yes | yes | yes | yes | 1 |
| Armor | yes | no | no | yes | 3 |
| Artillery | yes | no | no | no | 3 |
| Guerilla | yes | yes | no | no | 1 |
Class 4 effects that are legible on the chart:
- Airborne may not drop into forests or move in drop-turn. May drop into enemy ZOC and fight (considered as supplied in turn of drop).
- Units defending behind rivers or on mountains do not double when attacked exclusively by Rangers.
- Add 1 to set die-roll if class 4 target is in city, mountain or forest.
- Add 3 to SBT die-roll regardless of terrain if sole target is guerilla units(s) of less than 4 factor size.
- Attacking from an assault square: Marines and Rangers are doubled (D). Armor attacking from forest or mountain: HALVED.
- Defending on the terrain columns: Guerilla units are doubled (D) behind rivers, in forest and in city/mountain. Artillery is unchanged (N) on those terrain columns.
Class 4 note: the shaded cells of the printed grid (the attack and defense effect columns for the other unit rows) do not resolve cleanly in the scan, so those cells are not reproduced here. They should be checked against the printed chart before use.
Class 5 and 6 notes: Flak (Class 5) is transportable by RR and MST, has a movement cost of 2 on mountains and forests and is unchanged (N) on attack from forest or mountain. Airbase and Production are Class 6 installations; the supply note on the chart is partly illegible.