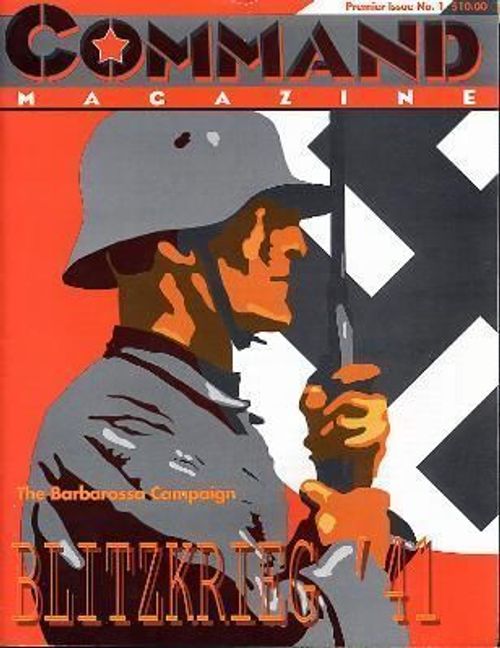
Blitzkrieg '41
Blitzkrieg '41 Rulebook
Table of Contents
Table of Contents
- 1.0 Introduction
- 2.0 Counters
- 3.0 Setup and Hex Control
- 4.0 The Turn
- 5.0 Supply
- 5.1 In General
- 5.2 When to Check Supply
- 5.3 Soviet Special Supply
- 5.4 Intervening Hexes
- 5.5 Process
- 5.6 Tracing Supply Over Water
- 5.7 Other Terrain Considerations
- 5.8 Mobile Assaults
- 5.9 Supply During Prepared Assaults
- 5.10 Applying Reduction to Combat Factors
- 5.11 Limits on OOS Reductions
- 5.12 Mobile Supply Unit
- 6.0 Replacements, Reinforcements, and Special Units
- 7.0 The RVGK Box
- 8.0 Stacking
- 9.0 Weather and Terrain Effects
- 10.0 Sea Movement
- 11.0 Romanian, Italian, and Hungarian Units
- 12.0 Regular Movement and Mobile Assaults
- 13.0 The Fog of War
- 14.0 Prepared Assaults and Combat Results
- 15.0 Winning the Game
1.0 Introduction
Blitz'41 is actually the second part of a tetralogy of games, all sharing much the same system and all concerned with World War II's eastern front. The first installment, a mini-game entitled The Tigers Are Burning, was published earlier by 3W, Inc. The third and fourth parts, titled Sunrise of Victory: 1942-43 on the Eastern Front and Forgotten Soldiers: The Last Year of the Russo-German War, will both appear in later issues of this magazine.
1.1 Scale
A. Each hexagon on the map equals 45 miles/73 kilometers from side to opposite side.
B. For most of the game, each turn equals one month of real time; however, during the faster paced summer months, turns equal periods of two to three weeks.
1.2 The Map
Natural terrain and manmade constructions have had to be altered slightly from their real world configurations to make them correspond to the hex grid of the map. Players will find, though, the relationships among the various terrain types are, from hex to hex, accurate to the degree necessary to present them with the same space-time dilemmas faced by their historic counterparts.
1.3 Learning the Game
This is a game of "low to medium" complexity. If you're new to the hobby, you can learn to play it on your own, especially if you use the beginners' rules for your first run-through. Over the years, most have found by far the easiest way to learn wargaming is to have an older hand teach it to you – and we highly recommend that approach if anyone like that is available to you.
1.4 Components
In addition to the unit counters in 2.0, the other components to a complete game of Blitz '41 are the rules and play aids (which you're now reading), and the map. Provide a six-sided die for resolving combat.
1.5 Abbreviations
| Abbr | Meaning | Abbr | Meaning |
|---|---|---|---|
| AP | Air Point | RIH | Romanian, Italian, and Hungarian |
| CRT | Combat Results Table | SOP | Sequence of Play |
| MA | Mobile Assault | TEC | Terrain Effects Chart |
| MF | Movement Factor | TRC | Turn Record Chart |
| MSU | Mobile Supply Unit | VP | Victory Point |
| OOS | Out of Supply | ZOMO | Zone of Military Operations |
2.0 Counters
2.1 In General
Carefully punch out the 200 die-cut counters included with the game and sort them by side and type after you have read through the rules the first time.
2.2 A Sample Unit
A. This is a German unit, the 56th Panzer Corps. The fact that it has a blank upper left corner means it starts the game already on the board. (Units with a number or symbol in their upper left come into play only after the game has started.)
B. The 56th, in common with many other units in the game, has four levels of strength (each level is called a step), represented by two units, printed on both sides. Only one piece for any one unit is ever in play at any one time. The 56th starts the game at its full, four-step, strength (10-8-9), and is reduced in strength (first by flipping it over to its 8-6-8 size, then by substituting the second counter with its 6-4-7 side up, then, last, by flipping it over to its 3-3-6 side) step by step until its final destruction occurs after losing four steps. (Losses suffered due to adverse combat results are explained later.)
2.3 Unit Sizes
A. A unit's historical organizational size is denoted by the symbol along its top edge.
| Symbol | Size |
|---|---|
| XXXX | Army |
| XXX | Corps |
B. A bracket atop a unit's size symbol means it was an ad hoc unit put together outside the bounds of that side's normal organization tables, probably just to meet some sudden or emergency purpose.
C. Typically, a German corps-sized unit in this campaign had between 40,000 and 70,000 men (if infantry) and between 200 and 400 tanks (if panzer).
D. Soviet armies averaged between 150,000 and 200,000 men (along with a completely variable number of tanks), while their mechanized corps had about 10,000 men and 240 tanks.
2.4 Movement Type
A. All units in the game that have Movement Factors (MFs) printed on them are considered to belong to one of two basic categories: mechanized or leg (also called non-mechanized).
B. Mechanized units are those formations whose primary means of locomotion is provided by wheeled or tracked motor-driven vehicles. Leg outfits are those that depend on the legs of men or beasts to move around the battlefield.
2.4.1 Mechanized Units
Panzer, Motorized Infantry, Hungarian Fast Corps (Axis)
BT-7, KV-1, T-34 (Soviet)
2.4.2 Leg Units
Infantry, Mountain Infantry, Shock Infantry, Naval Infantry (Axis)
Paratroop, Militia, Partisans, Fortress Infantry (Soviet)
2.5 Unit Abbreviations
| Abbr | Meaning | Abbr | Meaning |
|---|---|---|---|
| C | Coastal Army | LPMA | Lenningrad People's Militia Army |
| CSIR | Special Italian Corps, Russia | OBG | Oranienbaum Bridgehead Group |
| FMG | Front Mobile Group | OKRH | High Command of the Army Reserve |
| H | Hungarian | R | Romanian |
| I | Italian | Sch. | Schnell (Fast) |
2.6 Nationality
A. The counters are printed in different colors to make sorting them into their various national groups easier.
B. In a normal two-player game, one player commands all the German, Romanian, Hungarian and Italian units, while the other commands all the Soviet units. None of the units in this game can ever switch sides.
2.6.1 Axis
| Color | Nationality | Color | Nationality |
|---|---|---|---|
| Black on Gray | German Leg | Black on Green | Romanian |
| White on Black | German Mechanized | Black on Lt Blue | Hungarian |
| Black on Yellow | Italian |
2.6.2 Allied
| Color | Nationality | Color | Nationality |
|---|---|---|---|
| White on Red | Soviet Leg | Red on White | Soviet Mechanized |
2.7 Initial Location
Some units have a small number printed in their upper-left corners. That means rather than start the game in play, these units only become available for use at the start of the turn corresponding to that small number in their upper left corner.
2.8 Initial Strength
A. All German units have potentially four steps available to them. But look at the German Units Holding Boxes printed beside the map. Several units have a 2 or 3 printed in the upper-right corner of their holding box on that chart (not on the counter itself, just on its chart box). That means, if a number 2 is in the upper right (as it is in the 13th Corps' box) the unit starts play at its two-step level, with the factors 2-3-5 showing in the case of the 13th. A 3 appearing there (as it does for the 47th Panzer Corps) means it starts at its three-step level. (That would be 8-6-8 for the 47th Panzer or 3-4-5 for a regular infantry outfit.)
B. Germany simply did not have all the divisions necessary to fill out all their corps units to full strength. Just because a unit starts at less than full strength, however, does not mean it cannot be built up beyond that level later in the game (6.0).
C. Most Soviet units have only one or two steps available to them, meaning there is only one unit representing them in the counter mix. Soviet mechanized corps, the LPMA, and the OBG all have only one step, and so reverse sides are blank. Twelve Soviet Armies (8, 9, 10, 11, 12, 19, 20, 21, 22, 1 Shock, 2 Shock, 3 Shock, 4 Shock) have three or four steps available to them. Those 13 units have holding boxes printed on the map in the Soviet Units' Holding Boxes area.
D. All Soviet units that start the game in play do so at their full (highest) values.
E. Use the holding boxes to store the second counter of three and four step units. This allows for easier retrieval when combat losses or replacements call for making the substitution.
2.9 Combat Strength
A. A unit's Attack Factor is a measure of its relative ability to conduct offensive combat against enemy units.
B. A unit's Defense Factor is a measure of its relative ability to stand on the defensive against the attacks of the enemy.
2.10 Movement Capability
A unit's MF is a measure of the relative speed (expressed in terms of clear terrain hexes enterable in dry weather) it can use to cross the map.
2.11 Markers
A few other counters in the game represent hedgehogs (German all-around defensive posture in towns), being in the cut off supply state, Soviet cavalry raids, and air-dropped supply.
2.12 Errata
Ignore the 2 printed on the upper-left corner of the German 42nd Infantry Corps. The setup chart on the map is correct as to its at-start strength and location.
3.0 Setup and Hex Control
A. Players should first decide, by whatever method suits them, who will play which side.
B. Set up both sides' at start units per the instructions in the Holding Boxes. Units with numbers or symbols printed in their upper left corners appear later, if at all, and should be set off in a convenient side location until needed.
C. There are no zones of control in Blitz'41 as there are in most other wargames. Therefore control of a hex exists only when that side actually has units positioned in it or through which that side's units were the last to pass. All land hexes on the map are always controlled by one side or the other.
D. The control of an empty hex switches instantly from one side to the other as soon as a unit from the other side enters the hex. At the start of the game, German controls only those hexes west of the Soviet border, and the Soviets control all to the east.
E. The concept of control is important for purposes of supply, and judging victory, and will be explained more fully in later sections of the rules.
F. If a unit(s) of either side is removed from play due to lack of supply, and the hex(es) the unit(s) died in is (are) completely surrounded by hexes controlled by the other side, then the opponent automatically gains control without passing any units through those vacated hexes. Control of such hexes switches automatically to the other side when the cut off units are removed.
4.0 The Turn
4.1 Turn Structure
All actions take place within the framework of two player-turns, both of which are subdivided into smaller segments called phases. It is illegal to perform actions outside their proper sequence, and once a player completes a given phase and has gone on to the next, s/he may not go back to perform some forgotten action unless his opponent graciously permits it.
4.2 Outline
A. The complete Sequence of Play (SOP) is below in outline form. The rest of the rules are organized so as to explain things in the order they are encountered in the SOP.
B. After the outlined Turn Sequence, it is presented again in expanded form. Experienced players will find by merely referring to this expanded outline, they can pretty well keep up with the game without having to dig up specific rules.
4.3 Sequence of Play
A. Soviet player-turn
- Soviet Supply Phase
- Soviet New Units Phase
- Soviet Movement and Mobile Assault Phase
- Soviet Prepared Assault Phase
- Victory Check Phase (Starting with Turn 3)
B. German Player Turn
- German Supply Phase
- German New Units Phase
- German Movement and Mobile Assault Phase
- German Prepared Assault Phase
4.4 Special Cases
A. There is no Victory Check Phase at the end of the German player-turns.
B. Though the Soviets usually go first in each turn, on Turn 1, play is not considered to have begun until the German Prepared Assault Phase. (So you just start in, forgoing all the preceding phases.)
C. Also on Turn 1, German and Romanian units in Romania may not attack at all.
D. During the Soviet player-turn of Turn 2, German and Romanian units in Romania have their defense factors doubled in strength.
E. During Turn 11, play ends at the conclusion of the Soviet player-turn.
4.5 Expanded Turn Sequence
4.5.1 Soviet Player-Turn
4.5.1.1 Soviet Supply Phase
A. The Soviets may first place or remove the 0-0-1 Mobile Supply Unit if it is available, but may not both place and remove the supply unit in the same turn. Then check the supply status of all Soviet units (only).
B. All units with no complete supply line or one that is over four hexes long are judged Out of Supply (OOS). All Soviet units marked OOS during the previous turn's Soviet Supply Phase, and which are OOS again during this check, are removed from play at this time due to lack of supply.
C. After removing the old OOS units, mark the newly discovered OOS units as such with the markers provided.
4.5.1.2 Soviet New Units Phase
A. Check the Turn Record Chart (TRC) to see if new units become available (either appearing automatically or first needing to be filled out with replacement steps.).
B. Units may enter and/or exit the RVGK Box at this time, but the same unit may not both enter and exit of the RVGK Box during the same Soviet New Units Phase.
4.5.1.3 Soviet Movement and Mobile Assault Phase
A. Coastal Army sea movement, paratrooper airdrop and partisan placement are possible at this time.
B. Only mechanized units can mobile assault (MA). For a stack of such units to be able to mobile assault together, they must have started this phase already stacked together in the same hex. Air factors can support MAs. No MAs are allowed during Mud Weather or into mountain hexes in any weather.
C. Soviet mechanized units must absorb all combat results from MAs they launch as step losses. Other than that, there are no automatic combat penalties for MAs; only pay triple normal movement costs to enter the defender's hex where the assault it to be launched and take note of normal terrain defensive benefits when calculating odds.
D. Soviet units starting this phase in or next to an operating supply source have their full movement factor available. If one hex intervenes between them and their supply source, they suffer a -1 reduction to their movement allowance; two hexes intervening means they suffer a -2 reduction; three hexes a -3, and four hexes a -4. No movement allowance reduction takes place beyond the -4 penalty, no matter how far away the nearest supply source.
E. No Soviet unit may voluntarily move into a hex more than four intervening hexes away from the nearest operating supply source. Soviet units finding themselves in such hexes due to enemy actions may only move if each hex of the move brings them closer to an operating supply source.
F. Units are always guaranteed the ability to move from a land hex to one adjacent land hex, through a land (partial or full) hexside, regardless of the actual cost in points, by expending all the movement points they do have available.
4.5.1.4 Soviet Prepared Assault Phase
A. Combat is always voluntary. There are no Zones of Control in this game.
B. Check Soviet units' Combat Supply status just before they launch their Prepared Assault (PA). Soviet units trace supply to friendly controlled towns, cities or their Mobile Supply Unit (MSU).
C. To use a Supply Sources the Soviets must be able to trace a line of land hexes, empty of enemy units, off the east or south map edges. Soviet units in hexes with or next to their supply source have their full printed attack factor available for their assault. If there is one hex intervening between unit and source, the unit loses 10% of its attack factors. (Round remainders up on penalties to be subtracted.) If there are two hexes intervening between the Soviet attacking units and their supply source, the units lose 20%; three hexes means minus 30%; four means 40%. No reductions beyond 40% are made to attack factors, regardless of the intervening distances. No unit may have its attack factor reduced to less than one due to supply.
D. Check the Combat Supply of German/Axis defenders before calculating odds. (But Germany can declare air supply at any time during the turn.)
E. Soviet units making PAs must always absorb at least the first increment of their combat result as a step loss; the rest may be taken as a retreat.
F. The maximum advance-after-combat for the Soviets is 2 MPs for mechanized and 1 MP for non-mechanized. (The attacker may always occupy the defender's just-vacated hex, regardless of point cost.)
G. Probing Attacks, into empty enemy-controlled hexes are allowed with no odds calculation needed.
4.5.1.5 Soviet Victory (or Defeat) Check
Make the check at this point each turn, but only starting on Turn 3.
4.5.2 The Axis Player-Turn
4.5.2.1 Axis Supply Phase
A. Check only Axis units' supply status.
B. Announce if consolidating supply or using sea supply.
4.5.2.2 Axis New Units Phase
Same procedures as the Soviet.
4.5.2.3 Axis Movement and Mobile Assault Phase
A. Same procedures as the Soviets, except the Axis has no RVGK Box or MSU, and its mechanized assaulters need not take all their combat results as step losses.
B. There is no Axis sea movement.
C. Romanian, Italian, and Hungarian (RIH) units never make mobile assaults (MAs).
4.5.2.4 Axis Prepared Assault Phase
A. Same procedures as with the Soviet.
B. RIH units may not attack unless stacked with at least one German unit that is also attacking.
5.0 Supply
5.1 In General
A. The units of both sides require supply to operate at their full potential for movement and combat. There are no actual counters to represent the quantities of materiel consumed. (The Soviet MSU represents another source of supply, not consumable supplies themselves.)
B. Supply states are determined abstractly, at the start of the player-turn, again before movement, and then before combat, by tracing supply.
C. There is no limit to the number of units that can trace supply to a given supply source.
5.2 When to Check Supply
A. The supply status of friendly units is checked during the friendly Supply Check Phase. Supply must be checked for each individual unit or stack of units on the board. Supply is checked by tracing (generally, just in your mind's eye) a path of hexes – which may be enemy-controlled but must be empty of actual enemy units – from the unit to a hex containing a supply source.
B. Axis supply sources units are any hex west of the Soviet border. These hexes are called the Zone of Military Operations (ZOMO).
C. If Leningrad (B9) is Axis-controlled, Axis units in it are fully supplied while in that hex.
D. Soviet supply sources are any Soviet-controlled city or town on the map which can itself trace a path of hexes, empty of German/Axis units, to the east edge of the map.
E. Once it becomes available, the Soviets may also use their MSU as a source of supply (in effect, it operates as a semi-mobile town or city for supply purposes) when it's not in the RVGK Box. It, too, must have an unblocked line of hexes to the east edge to function.
F. Soviet units may not trace their supply lines directly off the east edge of the map; they must always go through an on-board supply source, which in turn does the tracing off map.
G. There is an important distinction between supply lines and supply sources. A supply line may go through enemy-controlled hexes empty of actual enemy units at the instant of tracing. To be operable, a supply source must in a friendly-controlled hex by your side, not just empty of enemy units, at the instant of the tracing to it.
Historical Note: Unlike many other games which forbid the tracing of supply through hexes controlled by the other player, even if they are empty hexes, that's not the case here. At this scale such a rule would be historically inappropriate for this campaign. During these opening months of what eventually became a long war, the situation was universally more fluid and disorganized, for both sides, than it would ever be again during the fighting. Particularly during the summer, there were incidents of enemy supply columns crossing each others' paths in what both presumed to be their own rear areas.
5.3 Soviet Special Supply
A. During the Soviet Supply Check Phase, Soviet units that are found to have no complete supply line at all or a line that contains more than four intervening hexes between the tracing unit and its supply source are said to be OOS.
B. Immediately mark such units with one of the OOS markers provided. If that same unit(s), regardless of myriad adventures it goes through during the coming turn, is again found to be OOS during the next Soviet Supply Check Phase, it is considered completely destroyed and removed from play due to lack of supply.
C. The Soviets may not move units into a hex where they would clearly enter an OOS position. Further, Soviet units found to be OOS may only move if each hex entered brings them closer to an operating supply source.
D. Soviet units in the RVGK Box are always in full supply.
Design Note: The iron laws of economics forbid us from including games in the magazine with more than 200 counters. That didn't leave us, in the case of this game, with room to provide you many OOS markers. In future issues, when we present games with smaller counter mixes, we'll use the extras to provide you with generic marker units. Until then, you can either cannibalize markers from your other games or use pennies as substitutes.
5.4 Intervening Hexes
When the term intervening hexes is used in these rules, its meaning is just that. Do not count the hex the tracing unit is in or the hex the supply source is in; only count the actual hexes between them.
Example: A Soviet unit in hex G19 and tracing its supply to Riga (E16) has three hexes intervening between it and its supply source. If that same outfit were tracing to the closer town of Kaunas (H17), there would only be one hex intervening.
Play Note: Exactly which supply sources your various units trace to is entirely up to you. Generally speaking, of course, the closer they are the better; however, that simple approach may be altered by enemy occupation or blocking units. And just because the first unit you trace uses a given supply source for its supply does not mean all or any of your other units must also use that same source – all your operable supply sources are available for your simultaneous use at all times.
5.5 Process
A. During the Soviet Supply Check Phase, the Soviets should only be concerned with identifying new and repeat OOS units. During the Movement and Mobile Assault Phase, the Soviets should again note the supply line condition of each unit and stack at the instant they starts to move them.
B. If a unit starts its movement in an OOS state its MF is reduced by 4 MPs.
Example: A unit with a printed MF of 7 would have only 3 MPs available to it for that turn if it began its move OOS.
C. Reduce a unit's MF per the table below.
| Intervening Hexes | MPs Lost |
|---|---|
| 1 | 1 |
| 2 | 2 |
| 3 | 3 |
| 4 or OOS | 4 |
Play Note: It is possible you'll find some of your units to be in a different supply tracing situation when you begin to move them than they were in during your Supply Check Phase. That's OK. During the Supply Check Phase, you are only checking the supply situation for purposes of determining a unit's overall survivability due to being adjudged OOS in two consecutive Supply Check Phases. During the Movement Phase it is possible a unit beginning that phase in an OOS or attenuated (less than full) supply position might have a better supply situation created for it by the actions of other units you move first (to blast open new supply routes).
Further, in a situation where an OOS unit had supply opened to it during the Movement Phase, operated accordingly during the turn following, and yet found itself again OOS during its own side's next Supply Check Phase, that unit would still be removed from play due to the overall effects of its supply disruption. So don't remove OOS markers except during Supply Check Phases!
Design Note: When playing the game, you'll quickly notice that, given the structure of the SOP, OOS Soviet units are removed at such a point it allows the German units holding the perimeter of their pocket to move away from them and back toward the front shortly before the Reds actually die. This is really not an artificial construct, but to understand it you must view the turn as a whole and judge its accuracy by the aggregate of activities that take place throughout it. Given the physical mechanics of actual game play, it's impossible to craft a smoothly workable set of rules that has both players doing things on the board simultaneously. So what's actually happening as those German pocket-perimeter guard units move away is that the cut off Soviet units are already losing their cohesion and coming apart. It's just that the SOP keeps the Soviets from getting their hands on the board to give that process certification, by removing their dying units, until slightly later on. Of course, I suppose could have reconfigured the SOP to give this process a more logically sequential appearance, but I wanted it the way it is to better serve other rules in the game.
5.6 Tracing Supply Over Water
A. Unless the tracing side specifically announces it is making use Sea Supply (5.13, 5.18), supply lines may not be traced across all-sea hex hexsides.
Example: A Soviet unit in hex C17 could not trace its supply line into or through the all-sea hex between it and land hex C15.
Exception: The Kerch Strait in hexside CC11/ CC12. Both sides may trace supply lines across it when otherwise appropriate.
B. Partial land hexsides are OK to trace through.
C. There are three seas on the board: the Baltic in the northwest, and the Black Sea and Sea of Azov in the southeast.
D. Supply lines may be traced into and through all-lake (and reservoir) hexsides and hexes. (That's a critical consideration at Leningrad.)
5.7 Other Terrain Considerations
A. Aside from the all-sea prohibitions discussed above, no other natural terrain on the board blocks supply line tracing in any way.
B. Germany may not trace supply through hexes containing intact Soviet fortifications.
C. The Soviets may not trace supply through a ZOMO hex unless they control that hex. This is the one exception to the tracing procedures in 5.2.
5.8 Mobile Assaults
A. Determine supply for mechanized units in MAs have the combat at the start of their movement, no matter at what point during their move they actually launch their MA.
B. At the moment of launching the MA, also check the supply status of the defending enemy units defending against the assault. Depending on their traceable distance from supply, they, too, may suffer a strength decrease.
5.9 Supply During Prepared Assaults
During the Prepared Assault Phase, at the start of the odds calculation process, again check the supply status of the units about to launch that particular PA. If assaulting Soviet units are in or immediately adjacent to their supply source, they have their full attack strength available for the battle.
| Intervening Hexes | Loss in Attack Strength |
|---|---|
| 1 | 10% |
| 2 | 20% |
| 3 | 30% |
| 4 or OOS | 40% |
5.10 Applying Reduction to Combat Factors
A. When more than one unit is located in a single hex, total the strength of all units in that hex participating in the battle and make just one subtraction.
Example: If three attacking Soviet units were together in one hex with printed attack factors of 3, 4, and 6, they total 13. Any supply penalties are then figured as a percentage of that combined strength of 13.
B. In multi-hex attacks, combine the strengths of all units from all hexes sharing the same penalty amount. If different hexes are suffering different penalty amounts, calculate those penalties separately, then add the results to determine the overall attack strength.
C. In cases where penalty deductions do not result in whole numbers, always round up the penalty amount to be subtracted.
Example: 40% of 6 is actually 2.4, but for game purposes round that to 3.0, so the unit would have an attack factor of 3 (6 - 3).
E. Defending unit (in a MA or PA) may also suffer strength reductions due to their supply state. Check the defender's supply status in every battle immediately after checking the attacker's status.
F. The penalties suffered by Soviet defenders are calculated the same way as they are for Soviet attackers, except the subtractions are made from their printed defense factor, rather than from their printed attack factors. (German procedures and penalties are described in 5.14 and following.)
5.11 Limits on OOS Reductions
A. No unit may ever have its defense or attack factor reduced below one due to supply considerations.
B. No unit may ever have its MF reduced below one due to supply considerations.
5.12 Mobile Supply Unit
A. During Turn 5's Soviet New Unit Phase, the Soviets automatically receive their MSU. The MSU functions as a supply source when placed on the map. As with town and city supply sources, the MSU must be able to trace a line of hexes off the east edge to be able to function). There are no qualitative or quantitative differences between supply provided by the MSU and town/city sources.
B. The Soviet MSU is the only unit with a printed movement factor that is considered neither mechanized nor non-mechanized. In reality, it represents not so much an independent unit as it does the ability of the Soviet Command to organize an ad hoc supply pipeline outside of the pre-war transportation net represented by the town/city infrastructure.
C. The MSU does not count for stacking. It has no attack or defense value of its own, and if any Axis combat unit enters a hex containing only the supply unit, simply pick the supply unit up and move it eastward far enough to where it is located in a hex empty of enemy units. In cases where the supply unit becomes cut off in a pocket (that is, is unable to trace its line off the east edge), again pick it up and move it as far beyond the eastward rim of the pocket as necessary to get it back to where it can trace its line of hexes off the east edge.
D. The MSU can never be destroyed. If forced to move off the map edge, it simply returns to the RVGK Box.
E. The MSU may enter and exit the RVGK Box just like regular combat units, though, also just like them, it cannot do both during the same turn. It counts as one unit for RVGK transit purposes.
F. When it first arrives, the MSU need not go through the RVGK Box before entering into play; it may be directly placed onto the map in any legal land hex (that is, one from which it can instantly trace its hex path off the east edge and is already Soviet-controlled at the instant of placement).
G. The MSU cannot enter Axis-controlled hexes unless accompanied by at least one Soviet combat unit. Thus, the MSU cannot by itself cause a hex to become Soviet-controlled.
H. The MSU may be adjacent to enemy units, but cannot attack or defend in any way, and it has no step-loss value in combat.
I. When stacked with Soviet combat units (any unit with a printed attack or defense strength), the MSU shares the fate of those units in terms of retreating after combat. The MSU, no matter which units it is stacked with, may never advance after-combat in the case of PAs, nor may it accompany combat units in MAs.
J. The MSU's printed MF of 1 is always one hex, regardless of the kind of weather or terrain. It cannot enter all-sea or non-frozen all-lake hexes, though it may cross the Kerch Straits.
K. The MSU can function as a supply source and as an entry point for new units starting the very instant it is placed on the board as the first act of a Soviet Supply Check Phase.
L. The MSU can use its MF the turn it is placed; however, the Soviets must move it last during the Movement Phase.
5.13 Soviet Sea Supply
A. Only the Soviet Coastal Army has the capacity to receive sea supply. This unit is considered fully supplied as long as it is on a coastal hex of the Black Sea or the Sea of Azov and the Soviets control at least one port city tracing supply to the Coastal Army. Supply line length has no bearing in the tracing of this sea supply; it is always provided to the Coastal Army at full strength, and the supply line may go through all sea hexes and hexsides.
B. The three port cities are: Odessa (Y17), Sevastopol (CC15), and Novorossisk (DD10). They can provide other Soviet units with regular supply (provided they can trace their line off the east edge) while simultaneously providing sea supply to the Coastal Army. They do not need to be able to trace off the east edge to provide sea supply; that ability is automatic as long as they remain Soviet-controlled. Once a port city becomes Axis-controlled, it loses its sea supply capacity for the remainder of the game. If all port cities are under simultaneous Axis control, permanently remove the Coastal Army from play. Thereafter, all aspects of sea supply are denied to the Soviets.
C. To trace supply from a port to a Sea of Azov coastal hex, the Soviets must control the Kerch Straits at the instant of tracing.
D. The Coastal Army must always remain in coastal hexes; it may never move inland for any reason, nor can it draw any other kind of supply than sea supply. (For more on the movement and combat capabilities of the Coastal Army, see 10.0.)
5.14 Axis Supply
A. Axis supply originates in the row of hexes just west of the Turn 1 Nazi/Soviet borderline. This strip (and it does include the extra protruding hexes at H19 and O21) is called The Zone of Military Operations (ZOMO). Each hex of the ZOMO is a source of supply for all Axis unit.
B. The two protruding ZOMO hexes can only be used as supply sources if at least one of the other ZOMO hexes immediately adjacent to it is also Axis-controlled at the instant of tracing.
C. Each hex of the ZOMO, just like Soviet supply sources, has infinite supply capacity in terms of the number of units it can service each turn.
5.15 Axis Supply Lines
A. At the start of the game, Axis units that can trace a supply line (same restrictions as when Soviet combat units trace to their sources) to a ZOMO hex inside Germany (any hex north of hex Q23) no longer than nine hexes are in full supply.
B. Units tracing to a ZOMO hex in Hungary or Romania are in full supply only if the line is no longer than seven hexes.
C. For each hex beyond 9 or 7, the tracing unit's attack and defense factors are reduced by 10%, and one movement factor is lost (up to a maximum penalty of 40% and/or 4 MPs).
D. The Axis does not count intervening hexes like the Soviets. The Axis counts from the ZOMO to its units, beginning with the ZOMO hex itself as zero, and counting out toward the unit(s) being supplied. Do count the hex where the unit being supplied is located.
Example: A German unit in hex H9, tracing from hex H19 is ten hexes away, and would suffer 10%/-1 penalties to its combat and movement factors.
E. In cases where an Axis unit could trace to a German, Hungarian, or Romanian ZOMO hex, the Axis is free to choose the hex to use. Axis units are not forced to trace to particular ZOMO hexes in their own country; all ZOMO hexes are pan-Axis in their supply capacity.
Design Note: It is only that the transportation infrastructures of Romania and Hungary were less well developed than those of Germany, and therefore they could not project supply as far.
5.16 Germany Supply Beyond Nine Hexes
A. German units (not RIH) may move out beyond where the maximum 40%/-4 supply reduction take place. That is, their supply lines to the ZOMO can in reality be of any length, but they will continue to suffer the maximum strength and movement reductions.
B. German units may even move to hexes where they would be completely unable to trace any supply line (again, suffering the -40%/-4 reductions).
C. At the beginning of Turn 5 (September), the Axis supply line length increases by two hexes, then and every turn thereafter. Thus on Turn 5, the primary full-supply length from the German ZOMO area becomes 11 hexes and that from Hungary and Romania becomes nine hexes. (On Turn 6, they both increase to 13 and 11, respectively.)
D. Axis supply is checked at the times in that player's turn corresponding to the same movement and combat checks as for the Soviets.
5.17 Axis Air Supply
A. The German air force has a limited ability to provide otherwise cut-off Axis units with supply-by-air. This kind of supply is called air supply.
B. The Axis can air supply up to four corps every turn. (Each Romanian unit counts as two units for air supply purposes.) To be eligible for air supply, the unit must be located within six hexes of a German-controlled hex that is itself in full overland supply to the ZOMO or is within six hexes of a north-board-edge hex west of Leningrad.
C. Air supply may be declared by the Axis on a hex-by-hex basis, at any time during the turn, and its effects last for the unit(s) so supplied until the start of the next turn, all Axis air supply capacity become available for reuse again.
D. Units provided with air supply should be so marked with one of the four AS markers provided. Units on air supply have their full movement and combat capabilities available to them.
E. There is no Soviet air supply capacity in this game.
5.18 Axis Sea Supply
A. Each turn, the Axis may supply up to one stack along the Black Sea coast and a second stack along the Baltic Sea coast. No supply line tracing or attenuation takes place; simply indicate the stack to be supplied and it is fully supplied. Sea-supplied units must all be in the same hex to receive the supply for that sea when the operation is declared during the German Supply Check Phase. They do not have to remain together once the declaration is made, but sea-supplied units must remain in coastal hexes throughout the remainder of the turn on which they received such supplies.
B. To provide sea-supply to units along the coast of the Sea of Azov (which for purposes of this rule is considered part of the Black Sea), the Axis must control both hexes of the Kerch Straits.
C. Non-mechanized units receiving sea supply have their full movement and combat capabilities available to them. Mechanized units receiving sea-supply have their full combat strengths available to them, but they may not make MAs and their MF is reduced to 5 MPs.
5.19 Consolidating Axis Supply
A. At the very start of any of any Axis player-turn after Turn 1, the Axis may declare it is consolidating supply. This declaration applies throughout the next two player-turns (Axis and Soviet), until the very start of the following Axis player-turn when it can announce consolidation again or rescind it.
B. When German supply is consolidated, the Axis selects five panzer corps to receive it. Those units can then operate in full supply, regardless of the length of their supply line to the ZOMO. (They still need to trace normal, hex-by-hex, lines; it's just that now they may be of any length without incurring attenuation effects.)
C. No air, sea, or Leningrad supply is available when supply consolidation is in effect. Further, no Hedgehogs (14.39.8) may be on the map during consolidation. (If any are on the map at the instant of declaration simply remove them.)
D. During consolidation, all Axis units other than the five selected panzer corps lose their ability to attack in any way and may move only one hex (with the same restrictions as the Soviet MSU). These units still do require regular supply when it comes to checking for survivability each German Supply Check Phase, and they still suffer normal attenuation effects to their defense factors.
E. Consolidation is made on a turn-by-turn declaration basis, and the same five corps need not be provided with the special supply each turn it is declared.
F. The Axis may not enter any reinforcements or replacements on turns it has consolidated supply.
Design Note: This rule is based on Van Creveld's well-calculated notion the Germans, by stripping their entire army of all available transport and every non-essential scrap of combat supplies, could have sent between 16-18 mechanized divisions careening full-bore and fully supplied, toward Moscow. It is, of course, a risky undertaking, and should only be contemplated if you see a near-sure shot at a Moscow Sudden Death victory.
5.20 Captured Supply Sources
As the frontline moves back and forth, both sides capture or recapture hexes containing towns and cities that can legally function as supply sources for them. The capacity of a captured (or recaptured) supply source does not become effective until the start of the capturing side's next Supply Check Phase.
5.21 German Leningrad Supply
German units in Leningrad – provided the hex was already German-controlled at the start of last Axis Supply Check Phase – are always considered to be in full supply. Leningrad supply (via Finland and the German Baltic Fleet) is never projectable out the city; it exists only for German units in the hex. This Leningrad supply cancels out German Baltic Sea sea-supply on turns it is used.
6.0 Replacements, Reinforcements, and Special Units
Most units entering the game as reinforcements can do so only after having been fleshed out with replacement steps. That is, in most cases, replacements are used to buy reinforcements.
6.1 Reinforcements
Reinforcements are new units that enter after play has already begun. There are two broad categories of reinforcements: automatic reinforcements and cadre reinforcements.
6.2 Automatic Reinforcements
A. Automatic reinforcements are units which, when listed the TRC, are placed on the map without any intermediate steps being necessary in their creation. They automatically appear with their full strength available for use, and there are no costs of any kind involved in their entry into play.
B. Reinforcements have their first turn of availability printed in their upper left corner.
C. Soviet automatic reinforcements are the LPMA, Partisan, MSU and Cavalry Raid marker.
D. Axis automatic reinforcements are the Italian CSIR corps and Hungarian Schnell corps.
6.3 Cadre Reinforcements
A. All the other units in the game are Cadre Reinforcements. That is, when the TRC lists several Soviet Armies Available for Turn 2, that does not mean those units enter play at full strength. Rather, what has become available are actually no more than counters representing these potential armies – just cadres of headquarters and administrative personnel. To turn them from potential armies into fighting armies requires the use of replacement steps (given on the chart in the column next to both sides' Units Available listings) to flesh them out.
B. Going further with this example, if the Soviets immediately wanted to get a new army into play at full strength, they could do so because the TRC also shows 30 Replacement Steps. By using one available replacement step, the 24th can enter at its one-step strength (1-2-4), or for two steps, it can enter it at its full, two-step (3-4-4), strength.
6.4 Saving Steps
Both sides need record replacement steps spent and saved on paper or electronically. It is permissible to save steps indefinitely; and they have no presence on the board that can be reached and destroyed by the enemy; they simply exist on paper until brought into play via the fleshing-out process just described.
6.5 German Cadres
The German Units Holding Boxes list corps with the acronym OKHR. These are reinforcement cadres available sometime after play begins.
6.6 Replacements in Reduced Units
In addition to being used to flesh out and enter new cadre reinforcements, replacements may also be used to strengthen units already in play but operating their at less than their full-step value. Each replacement step spent increases a unit's strength by one step.
6.7 German Replacements
German replacement steps arrive in two types: mechanized and nonmechanized. Non-mechanized steps can only be used to flesh out non-mechanized units. Mechanized steps can be used to flesh out both categories of combat units; however, if a mechanized step is used to flesh out a non-mechanized unit, that unit does not gain mechanized characteristics. In essence, the Axis permanently sacrifices the mechanized quality of any mechanized replacement step spent in so inefficient a way.
6.8 Soviet Replacements
Soviet replacement steps arrive in completely undifferentiated form, and any Soviet steps may be used to flesh out any eligible Soviet units.
Design Note: You'll quickly notice an almost complete lack of German mechanized replacement steps throughout the game. Not my fault. Rather, it is yet another example of Hitler's convoluted thinking. That is, first he launched this, his most critical campaign, with a plan predicated on success being achieved in one season. Then he simultaneously withheld all but the barest minimum of armor replacements from his active units in the field, so he could use that new production to organize entirely new units inside Germany. One wonders, if Russia were to have been conquered in that one season, who were these new units destined to fight? Well, no doubt he would have found someone.
6.9 Entry of Soviet Cadre Reinforcements
On any given turn, all newly available Soviet cadre reinforcements must be at least partially fleshed out and brought into play (either directly on the map or stored as a strategic reserve in the RVGK Box) before they can spend any replacement steps for any other purposes. This restriction does not apply to the Axis.
6.10 Soviet Units Ineligible for Replacements
A. The following Soviet units may never receive replacement steps: the LPMA, the 4th Airborne Corps, the Partisans, the OBG, and all mechanized corps. (The FMG is not a corps; it may receive replacements.) All these units, once weakened or destroyed, may never be recreated or fleshed out.
B. Other than those above, any Soviet units, even ones completely destroyed and in the dead pile, may always be recreated and fleshed out, regardless of the circumstances of their destruction or weakening.
6.11 Axis Replacements
A. There are no Italian or Hungarian replacements available in the game; those units may never be fleshed out or rebuilt during play.
B. The Axis has two Romanian replacement steps available for use throughout the entire game to be used only for fleshing out Romanian armies if they take losses.
6.12 Eliminated Axis Units
No German or Romanian unit, once eliminated, can ever reenter the game at any strength level. A unit is eliminated when it takes such combat losses (or suffers the OOS fate), that its last step is eliminated and thus removed from the game.
6.13 Entry of Soviet Reinforcements
Newly entering (or reentering) Soviet units appear either in the RVGK Box (7.0) or directly onto the map via any Soviet-controlled city hex anywhere that is in supply, or atop the deployed MSU, or in any fully supplied Soviet-controlled town hex more than three hexes of the initial German/Soviet borderline.
6.14 Entry of Axis Reinforcements
Newly arriving Axis units appear in any German-controlled hex of the ZOMO (including H19 and O21), provided at least one of the neighboring ZOMO hexes is German-controlled) or in any German-controlled city in full overland supply to the ZOMO.
6.15 Abilities of Reinforcements
A. Newly arriving units and units receiving replacements in the field instantly and immediately have their full combat and movement abilities available, as per all the other rules governing such matters. (That is, the replacement/reinforcement process in no way inhibits the normal use of the receiving units during the same player-turn.)
B. Stacking limits must be considered when placing new units. The initial placing of new units costs no MPs.
6.16 Restoring Steps to Reduced Units
For a weakened unit to be fleshed out in the field (that is, receive replacements once already in play) it must be in full overland supply (not air or sea supplied) to the ZOMO if Axis, or to a town/city/MSU/port if Soviet. Such units may move and operate fully on the turn of fleshing out.
6.17 Limits on Replacements
No unit in the game can ever be made stronger than the strength steps provided for it in the counter mix. Neither side is forced to try to keep its units at their maximum strengths simply because higher step-values are available to them.
6.18 Soviet Shock Armies
A. These four units may only appear by converting already existing Soviet armies. The armies to be converted must be in full overland supply on board or in the RVGK Box for the conversion to take place.
B. The conversion is made step-for-step, and a newly placed Shock Army may instantly flesh out with replacement steps in the field.
C. Soviet armies used in the conversion are instantly and permanently removed from play for the rest of the game.
Example: At the start of the Soviet New Units Phase on Turn Seven (November). That turn both 1st and 2nd Shock Armies become available. The Soviets takes the 40th Army, located in full supply on hex K7, at its reduced 1-2-4 strength, and remove it from the map. They then take the counter for the 1st Shock Army, at its one-step strength of 3-2-3, placing it in K7. They then spend three replacement steps to immediately build the 1st up to its full, four-step, 11-8-3 level.
D. The Soviets are never forced to make the conversions (though they will find it's certainly within their interests to do so), and holding off the Shock Armies does not activate the replacement-spending restrictions in 6.9.
6.19 The Leningrad People's Militia Army
This unit is one of the Soviet automatic reinforcements, never counts for stacking, and may not be replaced once destroyed. It must always enter play via Leningrad, and may never move more than three hexes from that city. (If Leningrad is lost to German control before the LPMA arrives, then the unit never enters.)
6.20 The Oranienbaum Bridgehead Group
A. This Soviet unit may enter into play, exclusive of the entire reinforcement and replacement process given above, during the course of any Soviet Movement and Mobile Assault Phase.
B. The Soviets may create the OBG by passing any Soviet army unit containing more than one step through or past any hexside of hex B10. step and place the OBG in hex B10. The OBG may not move on the player-turn of its creation. If Oranienbaum (B10) loses its supply line, the OBG, as long as it is in B10 and Leningrad is Soviet controlled, remains in full supply.
C. The OBG counts as one unit for stacking, and it may never move more than one hex from B10. Outside of B10, the OBG uses its printed attack factor as its defense factor, too. If attacking from B10, the OBG uses its printed defense factor as its attack factor.
D. If destroyed, the OBG is permanently eliminated.
E. There is no special movement possible between Oranienbaum and Leningrad.
6.21 Soviet Partisan Unit
A. Once available, the Soviet Partisan unit may be placed in any German-controlled but empty hex within four hexes of Moscow or Leningrad. It may not be placed in Moscow or Leningrad or in any town hex.
B. Once placed, it never moves or retreats. It never attacks; it only defends. It is an automatic reinforcement and may be withheld off board (not in the RVGK Box) until a Soviet New Units Phase arrives during which the Soviets want to commit it. The Partisan is always in full supply and needs not trace any kind of supply line.
C. The Partisan serves to make their hex Soviet-controlled and to block Axis retreats into or through their hex.
D. Normal terrain considerations do apply when figuring its defensive strength for combat.
E. When any Soviet combat unit other than the 4th Airborne Corps enters the Partisan unit's hex, link up is considered to have occurred. At that point remove the Partisan permanently from play and award the Soviets the number of replacement steps (1 or 2) equal to its step value at that moment.
F. Deploying a temporarily withheld Partisan does not use Soviet RVGK capacity.
6.22 The Front Mobile Group
A. This unit is a cadre reinforcement and it may take replacements. It may not appear before Turn 5 nor until a Soviet player-turn begins when the Soviets have no mechanized corps in play.
B. The Soviets may voluntarily remove any remaining mechanized corps to allow for the FMG's entry, crediting themselves with one replacement step per three printed attack factors worth of mechanized corps so removed. The corps must all be removed on one turn, and any that come off in a less than fully supplied state do so without adding to the replacement credits.
6.23 The Cavalry Raid Marker
This unit is an automatic Soviet reinforcement, but is really only an attack strength enhancer rather than a real unit. It has no step value of its own in combat, and is merely held off board (not in the RVGK Box) unless the Soviets commit it to aid a PA. See 14.39.6 for a description of its combat effects.
Design Note: The Soviets did not really devise and apply a broadly successful strategic role for their cavalry arm in 1941 – that had to await later stages of the war. Accordingly, the Soviet Army's cavalry establishment is mostly factored into the existing army sized units in the game.
7.0 The RVGK Box
7.1 In General
The Soviets may strategically redeploy (that is, move over far greater distances than normal) units each turn by using the RVGK Box. (RVGK is the transliterated Russian acronym for the term Reserve of the Supreme High Command.)
7.2 Eligibility
A. To be eligible to enter the RVGK Box, a Soviet unit must be in full overland supply on the map, or it may enter there directly if entering or reentering via the replacement and reinforcement process.
B. On Turn 2, the Soviets may transit up to (a total of) two units into or out of the RVGK Box. The limit increases each turn until Turn 5 when it reaches five and remains there for the rest of the game.
C. Soviet units with printed attack factors of six or more count as two units for RVGK transit maximum purposes.
D. The transit limits do not put a ceiling on the number of units that may actually be in the box, just the number moving in and out on a given turn.
7.3 Limits
A unit enters or exits the RVGK Box at the very start of the Soviet New Units Phase. The same unit enter and exit during the same Soviet player-turn. Over the course of a game, though, the same unit may make any number of properly sequenced transits.
7.4 Entry
To enter a legally available unit into the RVGK Box, simply pick it up and place in the box.
7.5 Exit
Units may leave the RVGK Box and reenter play on the map via any fully supplied, Soviet-controlled town or city or via the MSU. (It is permitted to use the MSU for this purpose on the very same turn it was also just deployed from the RVGK Box.)
7.6 Unit Capabilities
Units may move and attack regularly on the very same turn they deploy from the RVGK Box.
7.7 Ineligible Units
Mechanized corps, the Coastal Army, the 4th Airborne Corps, the Partisan, the Cavalry Raid marker, the OBG, and the LPMA may never enter the RVGK Box.
Design Note: There is no Axis equivalent to this kind of movement during the game. During this period, all of the Germans' transport capacity was fully tied up just moving the needed supply and replacements forward, so none was available for strategic redeployments.
8.0 Stacking
8.1 In General
Placing more than one unit into the same hex is called stacking. The Axis may stack up to five units in one hex. The Soviets may stack up to four units.
8.2 Soviet Mechanized Corps
Each Soviet mechanized corps (not the FMG) counts as one-half unit for stacking, but no more than two may ever be stacked in a hex.
8.3 Soviet Restrictions
Any Soviet unit with a printed attack factor of 6 or more counts as two units each for stacking purposes. This must be taken into account when fleshing out units already in stacks.
8.4 Axis Restrictions
A. Each of the two Romanian armies counts as two units for stacking purposes.
B. The Romanian armies may never both be in the same hex.
C. Romanian and Hungarian units may never stack or move together.
8.5 Free-Stacking Soviet Units
A. The Soviet LPMA, MSU, and Cavalry Raid marker do not count at all for stacking.
B. The 4th Airborne Corps, while in Moscow before making any airdrop, does not count for stacking. Once airdropped, it counts as one unit for stacking thereafter.
8.6 Markers
OOS, air supply, and hedgehog markers never count for stacking.
8.7 When Stacking Limit Is Enforced
During the course of a turn, any number of units may move through a given hex. Stacking limits are in effect during the placement of new or reentering units, at the end of both sides' Movement and Mobile Assault and Prepared Assault Phases, at the completion of every retreat and advance after combat (but just for the involved units), and at the instant a Mobile Assault is launched against a given hex.
8.8 Mobile Assaults and Stacking
A. When launching an MA, the phasing side must ensure that the hex the assault originates from has no more than the legal stacking limit at the instant the MA begins.
B. In the defenders' hex where the MA actually takes place, the stacking limits of the two sides are mutually exclusive.
9.0 Weather and Terrain Effects
9.1 In General
A. At the strategic level simulated here, the power of the terrible east European climate primarily makes itself felt through its effects on ground conditions. Weather for a given turn is said to be either Dry, Mud or Frost. Further, there are two weather zones on the board, northern and southern.
B. The weather of the southern zone is milder, but because of the severity of the 1941-42 winter, that warmer area was even more restricted than usual that year. The Southern zone consists only of the nine Crimean hexes lying within the weather line boundary shown on the map.
C. In Frost and Clear weather, Soviet non-mechanized units pay only 1 MP per hex to enter any hex. Costs and restrictions for crossing hexside terrain are still figured normally.
9.2 Determining Weather
The weather for each zone is given in the weather column on the TRC. During turns in which the weather is the same for both zones, only one type is shown. During turns when the weather in both zones is different, the type on top pertains to the northern zone and the bottom to the southern zone.
Example: On Turn 6, the weather is Mud in the northern zone and Dry in the southern zone.
9.3 Mud Restrictions
No Mobile assaults are allowed in a zone experiencing mud weather.
9.4 Movement Effects
Weather's effects on movement costs are given on the Terrain Effects Chart (TEC).
Example: Entering a clear terrain hex in dry weather costs both mechanized non-mechanized units 1 MP. In Mud weather, mechanized units pay 3 MPs per hex entered, while non-mechanized pay 2 MPs.
9.5 Combat Effects
Weather's effects on combat strength calculations are also given on the TEC. It is always the terrain in the defender's hex that determines the terrain column used.
Example: When attacking into a clear hex in Mud weather, the attacker must deduct 10% from its units' attack strength before calculating odds.
9.6 Advance After Combat Effects
Weather also affects the maximum advance-after-combat after PAs (14.25-14.27).
9.7 Advancing Across the Weather Line
If an advance after combat carries a victorious attacker across the weather line, and thus through two different kinds of weather, conduct the entire advance as if it were made under the conditions most advantageous to the attacker.
9.8 One Hex Minimum Movement
A. All units in this game are guaranteed the ability to move at least one hex each player-turn. That is, even if, according to the TEC, a unit just starting its move lacked the required MPs to make a desired one hex move, it could still move one hex by expending all its available MPs.
B. This one-hex guarantee does not give units the ability to do otherwise illegal things, such as all-sea hexside without using sea movement.
9.9 Rivers
The major and minor river hexside crossing costs given on the TEC are assessed against the moving unit's MF in addition to the cost assessed for entering the hex crossed into.
9.10 Artificial Terrain Movement Effects
Artificial terrain (towns, cities, and fortifications) carry no intrinsic movement costs of their own. The cost for entering such hexes is dependent on the natural terrain located there.
9.11 Natural Terrain
Natural terrain is clear, broken (hills), forest, or marsh. Only one kind of natural terrain ever exists in any one hex.
9.12 Kerch Straits
A. The Kerch Straits lie in the hexside between hexes CC11 and CC12. Its movement costs and combat penalties are the same as those for a major river hexside. Further, though, no advances or retreats after combat are allowed across it in Dry or Mud weather unless the actual crossing takes place during the first hex of that movement. This restriction is lifted during Frost weather.
B. No MAs are allowed across the Straits.
9.13 Sivash
A. The Sivash, a low coastal area of shallow tidal basins and marshes, lies along the hexsides shared by hexes Z13 and AA14, and between AA13 and AA14. These hexsides are always treated for all purposes as major river hexsides in a Mud weather state, regardless of the actual weather at the time.
B. For purposes of sea movement and supply, hex Z13 is not considered to be a usable coastal hex.
C. No MAs are allowed through the two Sivash hexsides.
9.14 All-Sea Hexsides
Except as given in the rules for sea supply and sea movement, no actions at all may take place across all-sea hex sides.
9.15 Artificial Terrain Combat Effects
Artificial terrain carries combat effects of its own, which effect combat strength calculations in addition to the effects generated by the natural terrain in the defender's hex.
Example: When defending in a town, after the die is rolled to resolve the battle and a result obtained, the defender's combat result is reduced by one.
9.16 Defending in a City or Town
A. Defenders in city hexes (all cities in the game are located on clear natural terrain) have their available defense strengths doubled.
B. The defender's combat result is reduced by one for being in a city or town.
C. The attacker's combat result is increased by one when attacking a city.
D. All mechanized units use their defense factor as their attack factor when assaulting into cities in any way. (Tanks are much less useful to an attack, and far more vulnerable to ambush in rubble-filled streets than they are in the countryside.)
Clarification: The only combat effect of towns is simply to decrease the defender's numeric result by one. The combat effect of cities is threefold: The defender's combat strength is doubled before calculating combat odds. The defender's combat result is decreased by one. The attacker's combat result is increased by one.
9.17 The Stalin Line
Soviet units defending in an intact Stalin Line hex have their defensive factors increased by 10%. (Round the bonus up, such that 10% of a defense factor of 11 is 1.1, yielding a +2 here.)
Design Note: The Stalin Line, running along the 1939 border, had been planned as a formidable strategic block. With the annexations of 1939-40, however, the Red Army moved forward, and with it went all the heavy weaponry originally emplaced in the line. During this campaign, then, the Stalin Line was reduced to a hollow shell, only its empty emplacements providing its defenders with some protection against German artillery.
9.18 Other Fortifications
The other fortifications on the map exist in their hexes in addition to the natural terrain located there and in addition to any other artificial terrain located there, too.
Example: In a hex with both a town and a fortification, the effects of both are felt in combat. The attacker's combat result would be raised by one because of the fortification, and the defender's result would be decreased by two, due to both a town and the fort being in the same hex.
9.19 Existing Fortifications
At the start of the game, there are independent fortifications already existing in Odessa (Y17), Sevastopol (CC15), AA14 (Perekop), Kiev (R15), B10 (Oranienbaum), and Leningrad (B9). These fortifications give Soviet defenders in their hexes a -1 to their combat result. They are intact and operable from the very start of the game. They are considered permanently destroyed if they become Axis-controlled.
9.20 Fortified Lines
In addition to those independently existing fortifications listed above, there are four fortified lines printed on the map. These are:
A. The Luga Line (B11, C11, D10, E10);
B. The Vyazma Line (I9, J8, K9, L8, M9);
C. The Mozhaisk Line (J7, K7, L7, M7, N6); and
D. The Moscow Line (J5, K6, L5).
9.21 Effective Turns of Fortified Lines
A. These fortifications, though printed on the map for convenience, do not actually come into existence, and thereby have effects on play, until the very start of Turn 3 for the Luga Line, and the very start of Turn 5 for the other three.
B. If any hex of a given fortification line switches toGerman control before that line comes into existence, then that line is considered to have been abandoned by the Soviets and never activates for the remainder of the game. (Once a line has come into existence, the mere seizure of one of its hexes is no longer enough to undo the whole line for the Axis; from that point on it must take each one hex-by-hex.)
9.22 Destruction of Fortifications
A. Soviet fortifications (no matter if they are part of the Stalin Line, independent, or one of the four later-built lines) are all considered intact until such time as their hex switches to Axis control. At that point they are wrecked, and no longer provide defensive benefits for the remainder of the game – ignore them completely from then on.
B. Once wrecked, fortifications cannot be rebuilt.
C. The Soviet fortifications in this game have no intrinsic defensive powers of their own. If unoccupied by defending Soviet units, Axis units may enter and traverse them freely.
D. An intact (even if empty) Soviet fortification does block German/Axis supply line tracing through its hex.
9.23 River and Lake Effects
A. The combat and movement penalties for hexside water barriers (minor and major rivers, lakes, Sivash, Kerch) are assessed in addition to any costs and penalties incurred for moving/attacking into the hex on the other side of them.
Example: A unit assaulting across a minor river hexside into a clear terrain hex, during mud weather, suffers a 20% reduction of its attack factor for the cross-river operation, plus another 10% reduction for attacking into the clear terrain.
B. In such multi-penalty cases, combine the penalty percentages into one figure, then make just one grand reduction to attack strength, rounding penalties up.
9.24 Lakes
A. Lakes are shown on the map in two broad size categories: those so small they only occupy hexsides (as rivers do), and Lake Ladoga in hex B8 and those surrounding, which covers an entire hex and more.
B. Lake hexsides (and this category includes the Rybinsk Reservoir) cannot be crossed or assaulted through except during Frost turns, and even then a +1 MP penalty and 20% attacker reduction is incurred for doing so. Supply lines, however, can be traced across lakes in all weather.
C. Units can only enter the main hex of Lake Ladoga (B8) during Frost turns, but they cannot end their move there. No assaults can ever be launched into or out of that hex. The hex has clear terrain characteristics for movement during Frost (2/2). Supply lines can always be traced into and through this hex by both sides.
9.25 Combat and Movement Penalties Cumulative
All combat reductions and movement costs are cumulative in this game. When subtracting combat strength or movement factors from a unit, all the applicable penalties should first be added together, and then one grand deduction made.
10.0 Sea Movement
10.1 Soviet Coastal Army Sea Movement
The Soviets may move only their Coastal Army by sea movement. In making such a move (no more than once every Soviet player-turn, during the Movement and Mobile Assault Phase, and performed before any regular land movement takes place), the Coastal Army may travel through all-sea hexes and hexsides from its start hex to any other Black Sea or Sea of Azov coastal hexes within six hexes. The landing hex must be one empty of all Axis units; there are no amphibious invasions in this game.
10.2 Soviet Coastal Army Land Movement and Combat
A. After landing, the Coastal Army may use its printed movement factor to move along the coast and may launch a PA (alone or in conjunction with other Soviet units) that same player-turn.
B. The Coastal Army may enter only coastal hexes and launch PAs only into coastal hexes. If it retreats-after-combat, it must do so only along coastal hexes (in any direction). It can also retreat out to sea and back to any Soviet-controlled port city within six hexes. (Such a retreat only negates one increment of a combat result, so any extra would need to be absorbed as step losses.)
10.3 Soviet Coastal Army Replacements
A. As long as the Soviets control at least one of the port cities (5.13.B) the Coastal Army can receive replacements and even be rebuilt if totally destroyed.
B. If at any time, though, all of the port cities come under Axis control at once, the Coastal Army is immediately removed from play and may never return, and the Soviets permanently lose all aspects of sea-supply and sea movement.
10.4 Sea of Azov
In order to move into or through any Sea of Azov hexes, the Soviets must control both Kerch Straits hexes (CC11 and CC12). Both hexes are considered to lie within the Black Sea and the Sea of Azov, and on a case-by-case basis, the Soviets may consider them to be in either sea at any moment.
10.5 Axis Sea Movement
A. The Axis has a limited sea evacuation capacity available in both the Baltic and the Black Sea/Sea of Azov areas.
B. At the start of any friendly Movement and Mobile Assault Phase, the Axis may declare an evacuation to be taking place in either or both of those two water body areas. The Axis can evacuate up to one full stack (and that stack's worth of units must indeed all be in the same hex within the given water body) from the Baltic and one full stack from the Black/Azov areas each turn.
C. Evacuees must start the phase already stacked in the coastal hex to serve as the evacuation point. Then, simply lift them off the map and permanently remove them from play for the remainder of the game. Such evacuated units, though the Axis loses their combat power, are considered to be alive and reorganizing in Germany, and their evacuation therefore does not cause a deduction from the Axis VP total (15.5).
D. No kind of supply line need be traced or range limit calculated for German/Axis units to be eligible for sea evacuation. This is the only kind of sea movement available to the Axis in this game. Axis units cannot retreat out to sea.
E. Sea evacuation movement is not available on turns supply is consolidated.
11.0 Romanian, Italian, and Hungarian Units
11.1 Movement Restrictions
A. Romanian units may never move north of the S hex row, though they may enter it.
B. Hungarian and Italian units may never move north of the O hex row, though they may enter it.
11.2 Combat Restrictions
RIH units may not attack unless stacked with at least one German unit involved in the same assault.
11.3 Mandatory Retreat
A. RIH units alone in a hex or there only with other RIH must always absorb as much of their combat results as possible by retreating.
B. In combat situations where there is German unit participation, the presence of RIH does not force the retreat of the entire Axis force. The Axis must use German steps to absorb the combat losses if choosing not to retreat in such situations, though, and once any German units are eliminated, any remaining combat result would have to be absorbed by retreating the RIH survivors.
11.4 Stacking Restrictions
Hungarian and Romanian units may never move or stack together.
11.5 Special Italian and Hungarian Restrictions
The Italian and Hungarian units are both mechanized-class units. Due to all kinds of social, doctrinal and training deficiencies, though, these units cannot perform MAs. Nor may they in accompany German stacks that are performing MAs. They do pay mechanized terrain costs. These two units are illustrated with NATO-style symbols, rather than silhouettes, to serve as a reminder of these restrictions.
12.0 Regular Movement and Mobile Assaults
12.1 Movement Factors
A. Every regular unit in the game has a MF printed as the right-most numeral along its bottom edge. This represents the maximum number of hexes the unit can move into in a single Movement and Mobile Assault Phase.
B. MFs cannot be saved or accumulated from turn to turn, nor can they ever be transferred or loaned from one unit to another. If units with different MFs are moving together as a stack (12.5), when the movement allowance of the slower unit(s) is exhausted it must drop off from the stack and cease movement in that last reachable hex.
12.2 Movement in General
A. Each side move only its own units during a friendly Movement and Mobile Assault Phase.
B. When moving, the phasing side player may move some, all or none of its units within the restrictions given in the rules. No player is ever forced to move any units.
12.3 Moving Through Friendly Units
Units on the same side may enter and pass through each others' hexes freely, as long as stacking limitations are observed (8.7, 8.8). There is no limit on the number of units that may enter and pass through any given hex on any given turn.
12.4 Enemy-Occupied Hexes
Moving units may never enter hexes occupied by enemy units, unless the moving units are mechanized units about to launch an MA. During MAs, the mere entry into the defender's hex is not enough to trigger a switch in which side controls that place. Control is decided by which side remains in the hex as a result of the MA.
12.5 Stack Movement
In order to move together during a given player-turn, units must start the Movement Phase together in the same hex. Such piles are called stacks.
12.6 Sequencing Movement
All regular movement is performed stack-by-stack and hex-by-hex. The movement of one stack (or individual unit starting alone in a hex) must be completed before that of any other may be started. A player may only go back and readjust the movement of his already moved units if the opponent agrees to allow it.
12.7 Splitting Off Units From a Stack
Sometimes, when moving a large stack, the phasing side may wish to split off some of the units in the stack and have them move by themselves. The units left in the original parent stack may then resume their own movement, even splitting off more stacks if so desired.
12.8 Movement Restrictions
Once the phasing side has begun moving an entirely different parent stack, it may then no longer go back and move earlier units without first obtaining the opponent's permission to do so. (And given the historically mean-spirited nature of the war being simulated here, players should certainly not feel themselves to be under any compunction to automatically grant such requests.)
12.9 Mobile Assaults
A. MAs are attacks conducted by mechanized German and Soviet units while moving. The attacking units enter a hex containing enemy units (of either class), by paying triple the normal MP cost for the terrain in the hex.
B. MAs are the only situations in which units of opposing sides may even temporarily occupy the same hex simultaneously.
12.10 The Stacking Limit During MAs
The attacker must observe stacking limits in the hex from which it is launching the MA.
Example: If the Soviets have four units in a hex next to enemy units they wish to MA with other moving Soviet mechanized units, it would be illegal to launch the moving force into an MA from the hex already containing the other four Soviet units.
12.11 MP Requirement
The guaranteed ability of units to move one hex given (9.8) does not guarantee mechanized units the ability to launch an MA. Units launching MAs must have all the required MPs to pay for the assault or they cannot carry it out.
12.12 Multiple Units Conducting an MA
To participate in the same MA, mechanized units must start the Movement Phase stacked together in the same hex.
12.13 Air Support
Air support points may be used to assist with and defend against MAs. (14.39.2)
12.14 Successive MAs in the Same Phase
A. German mechanized units launching MAs are free to continue launching as many MAs as desired into the same or as many different hexes, as long as the units have sufficient MPs remaining and absorb any combat results as step losses.
B. Soviet mechanized units are limited to making no more than one MA per Movement Phase.
12.15 Effect of Retreats
If mobile assaulting units absorb even just one increment of their combat result from the MA as a retreat, their move for the turn ends in the final hex of their retreat path.
12.16 Terrain Effects
A. No MAs are allowed across the Kerch Straits or the Sivash, nor may they ever be conducted in Mud weather.
B. Units making MAs into city hexes must use their defense factor as their attack strength.
12.17 Place of MA
An MA is considered to be taking place in the hex in which the defending enemy units are located. The stacking limits of the two sides and do not affect each other in any way.
12.18 Supply and Other Effects
The immediate combat supply state of both sides, plus the defensive value of the hexside assaulted through and the hex assaulted into, must all be considered when calculating combat strengths and odds.
12.19 Retreat by Assaulting Units
If units making an MA retreat to absorb any of their combat result, first place them back in the hex from which they just launched the failed assault, and then carry out their retreat from that launch hex (14.30).
12.20 Advance After Combat
A. There is no automatically available advance after combat for victorious mobile assaulters as there is for victorious prepared assaulters.
B. All post-MA advances are dependent on the MFs still available to the assaulters (provided they have not retreated).
12.21 Mulit-Hex MAs
A. As MAs are always conducted by only one moving stack against one defended hex at a time, they cannot use the Concentric Attack bonus.
B. Because only one stack of moving attackers may conduct an MA at any one time, multi-hex MAs are impossible.
C. It is possible, however, for the same stack of defenders to be mobile assaulted more than once, in the same or different hexes, during the same player-turn.
12.22 MA Where Defender Does Not Retreat
In cases where an MA yields combat results which are completely absorbed as step losses by both sides, yet both sides remain in the MA hex, choices are:
A. Soviet attackers must return to their launch hex. If they have MPs remaining, they may use them to move in any legal directions, otherwise, they remain in the launch hex.
B. German attackers may remain, provided they have sufficient MPs, and immediately relaunch (no kind of reinforcement is possible) another MA (recalculating odds), or they could return to their launch hex (at no MPs cost) and move in whatever direction and launching whatever new MAs they had MPs remaining to allow for.
12.24 Prepared Assault by Unit That Launched MA
The fact that a mechanized unit launched an MA in the Movement Phase does not preclude it from launching a Prepared Assault later that same player-turn.
13.0 The Fog of War
13.1 Turn 1 Special Rule
During Turn 1's Axis Prepared Assault Phase, the Axis may freely examine Soviet stacks located in hexes adjacent to ZOMO hexes.
13.2 General Rule
In all other cases at any other times, it is forbidden to examine an opponent's stacks unless the phasing side first commits to making a PA or MA against the particular hex to be examined. Such examination can be made only the instant the attack itself is launched.
13.3 Holding Boxes
Players are also allowed and encouraged to cover the various holding boxes on the map sheet to prevent easy viewing by their opponent.
13.4 Beginner's Rules
When playing with beginners' rules, it is always permitted to examine what lies beneath the top unit in your opponent's stacks, and the various holding boxes on the map must be kept uncovered.
14.0 Prepared Assaults and Combat Results
14.1 In General
During each side's Prepared Assault Phase, combat is possible between adjacent opposing units. Units are never forced to attack simply because they are next to enemy units; launching an attack is always voluntary.
14.2 Attacker and Defender Defined
In any Prepared Assault Phase, the phasing side is the attacker, and the other is the defender, regardless of the overall strategic situation.
14.3 Calculating Combat Odds
A. To resolve a battle (MA or PA), total the attack factors of all units making the assault (considering the various strength penalties), then total the defense factors of all enemy units receiving the assault (considering possible strength reductions due to supply state). Divide the defender's available total strength into the attacker's available total strength to obtain an odds ratio. Always round down the remainder (in favor of the defender).
Example: 26 attack factors versus 8 defense factors yields an odds ratio of 3-1.
B. If odds higher than 8-1 are obtained, use the 8-1 column to resolve that battle.
C. If odds lower than 1-3 are obtained, that assault is considered ineffectual and is simply called off after the defeated attacking forces suffers a mandatory one step loss. (In the case of MAs, the ineffectual assaulter would return to the launch hex and its movement for the turn would end.)
14.4 Determining Combat Result
Next, look at the Combat Results Table (CRT) and find the column heading corresponding to the odds obtained in the previous step. Roll one six sided die, and check that result under the column heading.
Example: Continuing the previous example at 3-1 odds, if a 3 were rolled, that would yield a result of 0/3.
14.5 Interpreting Combat Results
Those CRT numbers are read as step losses or hexes to be retreated or some combination thereof.
Results to the left of the slash apply to the attacking force, and those on the right to the defender.
14.6 No Effect
When a 0 result appears on either side of the slash, that means all units of that side are not affected in any way (i.e., no effect). There might still be an advance after combat in such a case, if the battle was a PA and the defender suffered a result leading it to vacate its hex (14.9, 14.22-14.28).
14.7 Numerical Results
A. A result of 1-4 means the affected units must either lose that number of steps (in total) or all be retreated that number of hexes or some combination of those two results.
Example: A 3 result allows the owner to lose one step from one unit and retreat all involved units (including the one that just took the step loss) two hexes; or lose two steps (total) from one or more units, and then retreat all involved units one hex; or lose three steps (total) and keep all the survivors in place.
B. When apportioning out multi-step losses, the owner has complete freedom to allocate losses. That is, one unit can suffer all the losses or several units could take one or more losses.
C. Whenever the Soviets take step losses in battle, on attack or defense, and mechanized corps were involved, the mechanized corps must absorb all losses before any step losses are taken from any other Soviet units. This is true even if there was no use of Massed Combined Arms Tactics (14.39.3).
14.8 Split Result
A. When both the attacker and defender receive a non-zero result on the CRT, the situation is called a split result. In split results, the defender's result is always fully applied before the attacker's.
B. If attacking PA units did not retreat and the defender vacated its hex, the attacker may advance after combat.
C. In PAs where the attackers have been destroyed or pushed out of their assault hex(es), and the defender obtained a final CRT result of 0, the victorious defenders may move forward and occupy the abandoned assault hex(es). Defenders may never advance-after-combat in cases of split results.
14.9 Advances and Retreats in General
A. Advancing and retreating after combat is not considered part of regular movement do not expend MPs.
B. Retreats occur as the result of an MA or PA.
C. Advancing after combat only takes place after PAs.
14.10 Conducting Retreats
Both sides retreat only their own units. Axis units must retreat in as straight a line as possible westward. (Use the hex rows running laterally across the board as map east and map west.)
14.11 Retreat Restrictions
A. Generally, units may not retreat off the map.
B. There are two exceptions for Axis units:
-
German units defending in Leningrad or retreating through it from a defeat elsewhere may retreat off the map into Finland. The fate of such units is precisely the same as German sea evacuees; they are out of play but no total destruction VPs are deducted from the Axis.
-
German and RIH units may retreat off the map through any ZOMO hex. Such a retreat completely absorbs all combat results increments, and those units are again available for map reentry on the next Axis New Units Phase. They must reenter through a German-controlled ZOMO hex lying within the same country from which they retreated off map. If no such hex is immediately available, they must wait until one is opened up for them.
14.12 Soviet Retreat Restrictions
Soviet units may never retreat into or through a ZOMO hex unless the ZOMO hex was Soviet-controlled before the retreat began.
14.13 Soviet Retreat Requirements
A. Soviet units must retreat in as straight a line as possible eastward.
B. The Coastal Army, though, always has the option of retreating out to sea and from there back to a friendly port within six hexes. (10.2). No other unit on either side has the ability to retreat out to sea.
14.14 Retreat Considerations
A. If a direct route is blocked by enemy units or impassable hexsides, units may then veer off as necessary (but keep that veering to the absolute minimum necessary).
B. Other than the Soviet restrictions on ZOMO retreats given in 14.12, units may freely retreat into and through enemy-controlled hexes that are empty of actual enemy combat units.
C. By themselves, intact Soviet fortifications and/or the MSU do not block Axis retreat routes. And the retreat of an Axis unit into an empty intact fort does serve to wreck that fortification.
14.15 Conduct of Retreats
A. Retreats are figured in hexes, not in MP costs, regardless of the kind of passable terrain the retreating units enter or cross.
B. Retreating does not give units superhuman capabilities such as crossing unfrozen lake hexsides.
14.16 Retreating Stacks
A. Units stacked together must retreat together, splitting up only if stacking restrictions would be violated in the last hex of their retreat. Again, keep the split up distance to the minimum necessary to allow for legal stacking, and all split up stacks must still have all their component units retreat the same number of hexes.
B. Retreats must be performed in as straight a line as possible, and no hex of the retreat path may be entered more than once.
14.17 Maximum Retreat
No defending unit may retreat more than four hexes. If a combat result is raised by modifiers to greater than four, the affected units must absorb that surplus as step losses.
14.18 Sequencing of Losses
In battles wherein units are to absorb their combat result as a combination of step loss(es) and retreat, the step loss is always absorbed first, then the retreat is made.
14.19 Order of PAs
A. A given phase's PAs may be fought out in any order the attacker desires. The attacker need not declare all attacks before commencing any.
B. A given PA must be completely resolved before beginning the resolution of the next.
14.20 Effect of Prohibited Terrain on Retreats
Any time a unit is prohibited from retreating (by impassable terrain, board edges, etc.), it must absorb the remainder of its combat result as step losses.
14.21 Attacks Upon Retreated Units
A. If some defending units retreat from a PA, ending up stacked with other friendly units, and the new stack then comes under attack that same phase, the just-retreated units contribute nothing to the defense of their new hex.
B. If the new stack suffers a final combat result above zero, the new arrivals are all automatically destroyed, and their destruction does not satisfy any of the new hex's combat result.
C. This rule applies only to PAs. In an MA situation (carried out during the Movement Phase), previously retreated defenders do contribute fully and behave normally in any subsequent combat in their new hex.
14.22 Advance After Combat
A. In a PA, if the attacker clears the defender's hex(es) of all units, it may advance the victorious units into the vacated hex.
B. Like retreats, advances do not expend MPs. Unlike retreats, advances are figured in MPs, not in hexes.
C. The victorious attackers are awarded as many advance MPs as hexes the defeated defender just retreated. But just because attackers have been awarded a certain number of MPs does not mean they can use them all in their advance; there are limitations.
14.23 Limits on Soviet Advances
A. Non-mechanized Soviet attackers may only occupy the defender's hex.
B. Mechanized Soviet attackers, provided they were in full supply for their PA, may advance up to 2 MPs, otherwise, they, too, may only go one hex, regardless of weather.
14.24 RIH Advances
RIH units may only occupy the defender's hex.
14.25 German Advances in Dry Weather
A. In Dry weather, fully supplied German mechanized attackers may advance up to 4 MPs. Fully supplied non-mechanized attackers may go up to 2 MPs.
B. Full supply can be achieved by overland tracing, or by air supply. If the attacker's offensive strength was not diminished by supply considerations, it is in full supply. (Remember, available German air supply can be committed at any point in the turn sequence.)
C. Less than fully supplied mechanized German units are limited to 2 MPs in Dry weather.
D. Less than fully supplied non-mechanized German units may only occupy the defender's hex.
14.26 German Advances in Mud
In Mud weather, the maximum German advance is always only into the defender's hex, regardless of supply state or unit type.
14.27 German Advances in Frost
A. In Frost, fully supplied German mechanized attackers can go up to 4 MPs.
B. Partially supplied German mechanized attackers may only occupy the defender's hex.
C. German non-mechanized units may only occupy the defender's hex.
14.28 Minimum Advance After Combat
A. Though advancing is figured in MPs rather than hexes, there is a minimum guarantee of one hex here similar to the one set out for regular movement in 9.8. That is. whenever a defender's hex is vacated in a PA, regardless of weather or supply situations, the attackers may always at least occupy the defender's hex.
B. For multi-hex advances, it is necessary to count MPs from the very start, and the first hex entered into must always be the defender's vacated hex.
14.29 Automatic Victory
A. Anytime the attacker (in a PA or MA) achieves odds of 8-1 or higher, the defender automatically suffers a DX result. There is no option of retreat open to the defender; it is destroyed. PA cases, attackers are awarded the maximum number of MPs allowable for their unit category in the prevailing weather and supply situation.
B. In multi-unit attack forces, the presence of non-mechanized or RIH units does not restrict the others from advancing to their fullest.
C. Advancing stacks may split up in any hex after the first.
14.30 Limit on Attacker Retreats
A. Attacking units in MAs and PAs may never retreat more than one hex. Any result surplus must be absorbed by them as step losses.
B. Further, attacking Soviet units must always absorb at least one increment of their combat result of their step loss. (So a Soviet combat result of 1 must always be taken as a step loss.)
14.31 PA Limits
A. There is no artificial limit to the number of PAs the phasing side may make in any of its Prepared Assault Phases. A defending unit may be simultaneously attacked in a PA by units in any or all of the six surrounding hexes.
B. No unit may launch a PA more than once in any given Prepared Assault Phase.
C. No enemy unit may be attacked more than once per Prepared Assault Phase.
14.32 Multi-Hex Attack
A. Units in two or more hexes may combine their attack factors and all PA together into a single hex.
B. Defending units stacked in a single hex may not be attacked separately; they may only be assaulted as if they were one large unit. (That last is true of both MAs and PAs.)
14.33 Adjacency Requirement
A. PAs may involve any number of attacking and defending units.
B. For multi-hex PAs to be resolved as a single battle, though, all the assaulting units must be adjacent to all the defending units.
14.34 No Requirement for All Units to Attack
In cases where the attacking player has more than one unit in a hex, not all those units must make a PA into the same hex. Some could PA into different hexes or simply not assault at all.
14.35 Indivisibility of Unit Strength
Each unit's attack and defense strengths are always indivisible, and may not be divided among different battles, either on attack or defense.
14.36 Terrain Considerations
Only the terrain in the defending unit's hex and any water barriers around its perimeter effect combat. Terrain in the attacking unit's hex has no effect on combat. (Though no attacks are allowed to come out of Lake Ladoga at all, 9.24.C.)
14.37 Multi-Hex Defenders
Defending units in a multi-hex battle always benefit from the most advantageous terrain in those hexes. Example: If two adjacent defenders are being PAed in a single battle, one in clear terrain and the other in broken terrain, the attack penalties are calculated as if the broken terrain were in both hexes.
14.38 Probing Attacks
Both sides may PA into empty enemy-controlled hexes. These are called Probing Attacks, and are resolved without odds computation or die roll. The attackers are automatically victorious and simply advance to the maximum allowable limits as governed by their type, supply situation, and weather. The first hex of the advance must be into the one just probed.
Design Notes: Though brief, the Probing Attack rule is undoubtedly one of the most important in the game. If you don't master it you will never come close to achieving your side's potential in play.
Many players – particularly German commanders – have complained that with the front as fluid and irregular as it tends to be, particularly in the all-important opening turns, it's a real chore to keep track of exactly which hexes are Soviet-controlled. That is true, but I wouldn't change it because I believe it reflects a crucial aspect of this campaign in particular and mobile war in general.
In any well-prosecuted mechanized war the pace will inevitably become so blistering some opportunities will be lost simply because they're not noticed in time to exploit them. Such is the case here. If keeping track of hex control – and marking them with coins or your own control markers from other games – is allowable – is too much trouble, fine, don't do it. Guaranteed, though, you won't do as well as someone who does spend the mental energy units to do so.
By setting out this rule I do not mean to seem to throw my sympathies over to the kind of gamer whose play is so meticulous and boringly slow they often win by putting their opponent to sleep. On the contrary, that goes directly against the spirit I try to achieve in my designs. If you are faced with such an opponent, I recommend adopting a rule beforehand limiting each player-turn to no more than 20 minutes duration. At that time all activity stops and the other guy's player-turn begins.
In such matches, the time spent in the Victory Check Phase should not be counted against either player, and if a player manages to roll for his/her first PA within his 20 minutes, the clock is then turned off and s/he is allowed to finish rolling for them all.
14.39 Other Combat Modifiers
In addition to artificial and natural terrain, supply, and weather, combat results may be affected by eight other variables (or modifiers), listed below.
14.39.1 Concentric Prepared Assault
A. If a single hex of defenders is attacked from two opposite sides or from three hexes with empty hexes between each or from more than three hexes, that PA is said to be Concentric. This raises the defender's combat result off the CRT by one.
B. The presence of a friendly unit(s) adjacent to the defender being concentrically assaulted in no way serves to negate the attacker's achieved concentricity.
14.39.2 Air Power
A. Both sides receive Air Points (APs) on the TRC. (Soviets APs first arrive on Turn 5.) APs are not represented by actual units in the game, and should be recorded on paper or in electronic format, if memory is insufficient.
B. APs are available to aid in both sides' MAs and PAs. They may not be accumulated from turn to turn; those not used during either of their awarding game-turn's player-turns are lost. Each AP may participate in one combat support operation, at which time it is considered expended.
C. Germany may never commit more than 2 APs to a single battle. RIH units may have airpower committed to them by Germany.
D. The attacker allocates APs first, then the defender. (If the attacker has no available APs or chooses not to use any in a given battle, the defender must be given a chance to commit APs before the attacker rolls the die.)
E. No unit may have APs committed to its battle unless at the instant of combat there is at least one friendly-controlled and fully supplied (via overland supply) hex within three hexes of it. Attackers may figure range to any hex from which the PA is originating or to the hex in which the MA is taking place. Defenders figure range to any hex of the battle in which they have defending units.
F. Additionally, German units within three hexes of the north board edge in or west of Leningrad may have 1 AP assigned to them (if available from the normal pool of factors, that is), even if there is no on-board friendly controlled and fully supplied hex within range.
Design Note: We assume here the Luftwaffe planes are staging from Finland.
G. When both sides commit APs to the same battle, the side with excess APs applies the excess amount to the battle.
H. The effect of each excess offensive AP is to raise the defender's combat result by one.
I. The effect of each excess defensive AP is to lower the defender's combat result by one.
14.39.3 Soviet Massed Combined Arms Tactics
A. This modifier is only available for Soviet PAs when every hex of a Soviet PA contains at least one attacking army and at least one attacking mechanized corps.
B. The Axis defender's combat result is therefore increased by one.
14.39.4 Shock Armies and the Front Mobile Group
In any Soviet PA in which 50% or more of the available attack factors are provided by Shock Armies and/or the FMG, increase the combat result of the defending Axis units by one.
14.39.5 German All-Out Panzer Assault
A. Any PA or MA in which the Axis has at least one full-strength panzer corps participating may be declared to be an All-Out Panzer Assault. After the normal odds computation process, the Axis selects a full-strength panzer corps to be reduced by one step. This loss increases the defender's combat result by one.
B. No more than one step may be sacrificed this way per MA or PA, and it may only come from a full-strength panzer corps.
C. This technique may not be used when attacking into Marsh terrain or in Mud weather.
D. This loss does not satisfy any of the combat results obtained by rolling the die; it is extra.
14.39.6 Soviet Cavalry Raids
A. At this stage of the war, the primary effect Soviet cavalry had at the strategic level was to occasionally stage supply-disrupting raids into German rear areas during conventional attacks launched by other Red units. Accordingly, the Soviet Cavalry Raid marker may be placed atop any stack of Axis defenders about to receive a Soviet PA. The marker is available for use once per Soviet PA Phase upon its entry into the game.
B. For a cavalry raid to be launched, at least one of the Soviet units involved in the PA must be in full overland supply. Further, a cavalry raid may not be launched against defenders in a city or hedgehog.
C. The raid marker's effect is to add three strength points to the Soviets' total offensive strength in the PA.
14.39.7 4th Airborne Corps
In 1941 the Soviets already had a huge airborne establishment within their army. But due to doctrinal and logistical limitations, only one of the corps, the 4th, was involved in an airdrop of strategic significance during the time period of this game.
A. The Soviet 4th Airborne Corps must remain in Moscow until such time (if ever) the Soviets decide to use it in an airdrop. (These super-elite troops were billeted at airfields within a 40-mile radius of Red Square. And had no drop been made, those valuable fighters would certainly have been committed to the city's defense.) While in Moscow prior to dropping, the 4th does require normal supply like any other ground unit, but it does not count for stacking.
B. A drop (made during a Soviet Movement Phase before any regular ground movement takes place) may occur on any turn starting with Turn 5 (September). Pick up the unit, placing it in any empty or Soviet-occupied hex within four hexes of Moscow.
C. Place the unit with its weaker side up. If, at the start of the next Soviet New Units Phase, the 4th is still on the map, flip it over to its stronger side again. (When in Moscow before the drop, the unit starts at full strength.)
D. Other than this operation, the 4th may never receive replacements. And the one-time step increase does not count against the normal Soviet replacement pool total.
E. After the drop, as long as the 4th remains within four hexes of Moscow, and that city is itself in supply and Soviet-controlled, the paratroopers are considered to be automatically fully supplied. Beyond that range, it must join the regular supply net.
14.39.8 Hedgehogs
A. At the very beginning of Turn 7, the Axis may create up to four hedgehogs in any Axis-controlled town hexes that are eligible for air supply. (No more than one hedgehog per town hex.)
B. They are created just as air supply, by simple declaration at any point during the turn.
Play Note: German players must realize this ability to declare at any time for hedgehogs and air supply does not mean they can do so as a combat die roll is flying through the air.
C. For combat purposes, the Axis must have the chance to declare before doing odds calculations for each individual battle, but if that opportunity is passed, it is sacrificed for that battle on that turn.
D. Each hedgehog created reduces the German air supply capacity by one corps. (Even though the hedgehogged hex may not be surrounded at the strategic level visible in play here, going to an all-around defense implies a willingness to – and provides a near certainty for – being cut off down at the tactical level.)
E. The effect of forming a hedgehog in a town hex is to turn that place into a city hex for all combat calculation purposes. Additionally, German units defending in hedgehogs must absorb all combat results as step losses. And last, there can be no more than six steps of German units in any hedgehog hex. (That is, no other Axis units other than those actually hedgehogged may be present in the hex.)
F. Once created, hedgehogs may be removed by the Axis at the start of any of its player-turns. Once removed, they may be created again in the same or different town hexes.
G. Hedgehogs may only be created in Frost weather. If the Soviets capture a hedgehog hex it is considered destroyed, but the counter is given back to the Axis and is available for reuse.
15.0 Winning the Game
Design Note: Most players will be frustrated with this game's victory conditions, because of the many drawn games they will produce. That's to be expected and is historically acceptable in this situation. That is, in the real campaign, both the Germans when they invaded and later the Soviets when they counterattacked, wanted this fight to be decisive. But given the sheer size of the theater of operations and the magnitude of the forces committed to it, barring some amazing blunder or stroke of genius by one side or the other, a final strategic decision was probably not reachable within a one-year time.
Players concerned with competitive standings relative to one another should therefore agree, before starting their first match, to determine ultimate superiority by playing an even-numbered series of games (2, 4, 6, etc.), switching sides for each new play. Each player should keep track of the total number of points s/he earned each time as the Axis, add these game totals up at the end of the series, and declare the player with the largest tally the Maximum Winner.
Of course, this will be frustrating for people with the time or inclination to play only one match. There's nothing to be done for it -– Hitler and Stalin were frustrated, too, when all they got for their troubles in 1941-42 was a draw.
15.1 Sudden-Death Moscow Victory
A. This kind of victory, the highest kind, is only available up through the end of Turn 6 (October).
B. If, at any time before the end of that turn, the Axis succeeds in gaining control of the Moscow hex (supply state of the gaining units does not matter), the game ends instantly and the Axis is declared the winner. For series-play purposes, award 88 points.
15.2 Winning on Victory Points
A. If the Axis fails to achieve a Sudden-Death Moscow Victory, the game is decided on victory points (VPs). Only the Axis earns VPs, awarded for the capture of strategically important towns, cities, and oilfields. (Stalino, the only point-yielding town, represents the capture of the economically important Donbas region.)
B. Keep track of the VPs using the VP Track. Award VPs the instant the hex in question comes under Axis control, and deduct the same immediately upon the loss of control of a given VP hex. There are 83 available VPs.
| VPs | City | VPs | City |
|---|---|---|---|
| 3 | Dnepro Petrovsk | 3 | Minsk |
| 4 | Sevastopol | 4 | Gorki |
| 18 | Moscow | 4 | Smolensk |
| 3 | Odessa | 4 | Kharkhov |
| 5 | Kiev | 6 | Stalingrad |
| 3 | Riga | ||
| 2 | Stalino |
15.3 Victory Check
A. Starting with Turn 3, make a victory check at the end of every Soviet player-turn. If the Axis has advanced far enough (as measured by VPs) and fast enough, the political shock is considered to have brought down the Communist regime.
B. If during the Victory Check Phase, the Axis has at least the VP level on the TRC for that turn, it is considered to have won the game and play stops. For series play purposes, award 87 VPs if the victory occurs at the end of Turn 3, 86 at the end of Turn 4, 85 at the end of Turn 5, 84 at the end of Turn 6, and 83 after Turn 6.
15.4 Automatic Soviet Victory
A. Most games between players of relatively equal skill levels will probably end with a VP total somewhat less than the ultimate 43 needed by the Axis to win. In that case, for series-play purposes, record the exact final total earned at the end of the game.
B. If the German point total is below 27 after Turn 7, play stops immediately and the Soviets are declared the winner. Again, for series play purposes, the Axis would record 27 VPs if defeat occurred on Turn 8, 28 on Turn 9, 29 on Turn 10, and 30 on Turn 11.
15.5 Deductions for Step Losses
The Axis may lose VPs by being too wasteful with its forces. Deduct the points below from the total when any of these events occur. These subtracted points can never be regained.
| VP Loss | Event |
|---|---|
| -1 | per Romanian step eliminated beyond two |
| -2 | Italian CSIR unit eliminated |
| -1 | Hungarian Schnell corps eliminated |
| -1 | per supplied* German non-mechanized corps eliminated |
| -2 | per supplied German panzer corps eliminated |
| -3 | per unsupplied** German non-mechanized corps eliminated |
| -4 | per unsupplied** German panzer corps eliminated |
* attenuated or full
** Units totally destroyed in hedgehogs count as unsupplied for this purpose.
15.6 Supply State Irrelevant for City Capture
As they advance and seize VP hexes, the supply state of Axis units is irrelevant. The VPs are awarded regardless of the units' supply status at the time.
15.7 Alternate Leningrad VPs
As victory conditions now stand, an early German capture of Leningrad, coupled with only adequate performance elsewhere along the front, will pretty much assure that side a win. I did that intentionally because the conversations I've had with many Soviets who were alive and in Russia when Barbarossa was launched convinced me an early seizure of that birthplace of the revolution might well have provided the needed shock to bring about a political collapse.
Also, in purely competitive terms, an Axis player who manages an early capture of Leningrad has so over-matched her/his game opponent and historical counterparts that, again, I feel a victory award is proper.
And I say that even though many of the playtesters pointed out the original German plan didn't call for the capture of the city, only its siege. That's true, but the siege called for was not the one the Germans actually set up. Look at the Leningrad-area map elsewhere in this issue. Note that the originally mandated siege perimeter was well within the city limits. Hitler's idea was to avoid costly house-to house fighting in built up areas by starving them out of the downtown locales.
Further, my guess is had the Germans succeeded in getting that deeply into the city, the siege idea would have been scrapped as Hitler pushed for ultimate capture. After all, that's what happened the next year when the same siege/masking procedure was to be used against Stalingrad. The first German units to approach were carried inside the city, virtually by their earlier cross-country momentum, and from then on the idea of a siege was no longer enough to satisfy the Fuhrer.
A. However, if you're uncomfortable with the standard Leningrad VP award, try this method instead. During the first four turns, the VP value of Leningrad is not automatically what is printed on the map. Instead, at the instant of German capture of that city, roll a die. Leningrad's victory point award is twice the value rolled, with the important exception that it is never less than 6 VPs. (So a 1-3 yields 6 VPs.)
B. If the game is still in progress after Turn 4, the normal 12 VPs is awarded for its capture. And if the Axis captures Leningrad before Turn 4, but still has not managed to turn out a victory, on Turn 5, award the difference in VPs between what was rolled and 12.