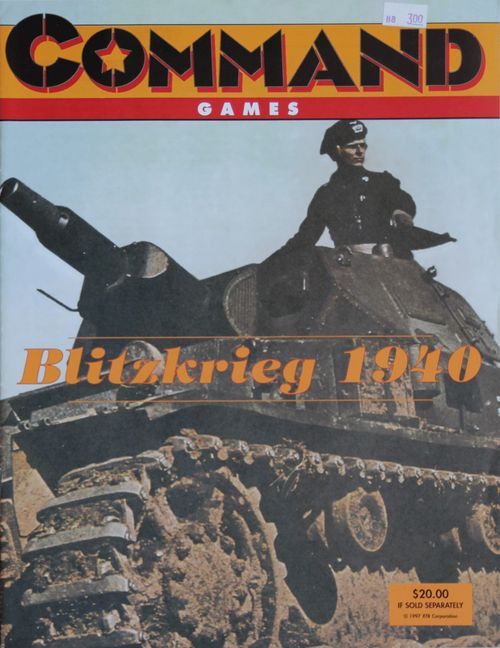
Blitzkrieg 1940
Blitzkrieg 1940 Rulebook
Table of Contents
Table of Contents
- 1.0 Introduction
- 2.0 Game Components
- 3.0 Setup and Hex Control
- 4.0 How to Win
- 5.0 The Turn Sequence
- 6.0 Operation Sickle Cut and Dummy Units
- 7.0 Airborne Coups de Main
- 8.0 Neutrals and Capitulation
- 9.0 Zones of Control
- 10.0 Supply
- 11.0 Stacking
- 12.0 Strategic Reserves and Reinforcements
- 13.0 Movement
- 14.0 Combat
- 14.1 In General
- 14.2 Multi-Hex Attacks
- 14.3 Indivisibility of Units
- 14.4 Attack Sequencing
- 14.5 Basic Combat Procedure
- 14.6 Poor Odds Attacks
- 14.7 Odds Limits
- 14.8 Volatile Combat Factors
- 14.9 Combat Resolution Die Roll
- 14.10 Numeric Combat Results
- 14.11 Zero Combat Results
- 14.12 Terrain Effects on Combat
1.0 Introduction
1.1 In General
A. Blitzkrieg 1940 is a two-player simulation of the decisive first three weeks of the campaign fought across the Low Countries and northeastern France during May of that year. The Allied player, primarily on the defensive, controls French, British, Belgian and Dutch forces, and is opposed by the invading German player, who commands units of that nation's army, air force and SS.
B. There is also an alternative history 1939 scenario covering the possibility of a French offensive toward the Ruhr a few days after the war began. The rules for the 1939 scenario, in so far as they differ from those of the 1940 scenario, are detailed in a separate section.
1.2 Game Scale
A. Each hex on the map represents seven miles from side to opposite side.
B. Each complete game turn represents two days.
C. The majority of units in the game represent divisions, brigades and regiments of 2,000 to 15,000 men and/or 100 to about 350 armored fighting vehicles.
1.3 Basic Game
To play the Basic Game, omit rules 3.2, 5.5, 7.0, 8.0, 9.4, 11.3, and 14.5.
1.4 Abbreviations
| Abbr | Meaning | Abbr | Meaning |
|---|---|---|---|
| DRM | Die Roll Modification | OOS | Out of Supply |
| EZOC | Enemy ZOC | SR | Strategic Reserve |
| LOC | Line of Communications | TEC | Terrain Effects Chart |
| MF | Movement Factor | VP | Victory Point |
| MP | Movement Point | ZOC | Zone of Control |
2.0 Game Components
2.1 In General
The components to a complete game include these rules, two mapsheets, and 560 die-cut, half-inch counters (units or unit counters). Players must provide one standard (six-sided) die to resolve combat and other probabilistic events throughout the game.
2.2 Assembling the Maps
The two maps fit together along the long axis, with hex row 60xx of the western (smaller) map overlapping hex row 10xx of the eastern map. Western map hex 6000 overlaps eastern map hex 1013.
2.3 The Assembled Maps
A. The assembled game map depicts the militarily significant terrain in northeastern France, Western Germany and the Low Countries in May 1940. A hexagonal ("hex") grid is printed over the map to regulate the placement and movement of units.
B. A unit is considered to be in only one hex at any one time. Each hex contains natural and/or artificial terrain features that affect movement and combat.
C. Each hex has a unique, four-digit identification number printed in it. Example: St. Quentin is in hex 5411 of the west map.
D. The numbers are provided to help you find places more quickly and to allow you to record unit positions if a game has to be interrupted before it can be finished.
Errata: Hex E1035/W6022 is Châlons-en-Champagne.
2.4 Counters
A. There are 560 counters included in the game, most of which represent combat-maneuver divisions, brigades and regiments; others serve as informational markers and memory aids.
B. After reading the rules, carefully punch out the counters.
C. Each combat unit counter displays several pieces of information: nationality (and therefore its side), step and combat strengths (which may be volatile), type, movement factor (MF), and setup hex or strategic reserve (SR) designation.
2.5 A Sample Combat Unit
A. This is the German 10th Strategic Reserve Infantry Division. It has two steps (shown by having its combat factor and MF printed on both sides), an attack factor of eight, a defense factor of 10, and a MF of 6. It starts the game off the map in the German SR.
B. One-step units have their set up or strategic reserve status on their reverse sides; two-step units have that information on their front, upper-left corners.
2.6 Nationality
A unit's nationality is shown by its color scheme.
2.6.1 1940 Allies
| Nationality | Colors | Nationality | Colors |
|---|---|---|---|
| Belgian | black on yellow | French | white on blue |
| Dutch | white on red | British | black on tan |
2.6.2 1940 Germany
| Unit Type | Colors |
|---|---|
| Non-Mechanized | black on gray-green |
| Mechanized | white on black |
2.6.3 1939 Scenario
| Nationality | Colors |
|---|---|
| French | red on white |
| German | black on gray |
2.7 Unit Abbreviations
The following abbreviations appear on various units of both sides as all or part of their historic identification:
| Abbr | Meaning | Abbr | Meaning |
|---|---|---|---|
| A | African | M | Moroccan |
| AS | Assen | MF | Mac Force |
| BE | Betuwe | MNT | Montmedy |
| BEF | British Expeditionary Force | MW | Maas-Waal |
| BMN | Bauman | N | North African |
| BOU | Boulay | P | Peel |
| C | Colonial |
Historical Note: The four Dutch infantry brigades identified A, B, C, and D are simply that: Infantry Brigades A, B, C, and D.
2.8 Unit Types
All ground units in the game belong to one of these two categories (mechanized or non-mechanized) and 14 types:
2.8.1 Mechanized
- Tank or Panzer
- Lt Mechanized Cavalry
- Motorcycle Cavalry
- Mechanized Infantry
- Motorized Infantry
2.8.2 Non-Mechanized
- Infantry
- Fortress Infantry
- Bicycle Infantry
- British Emergency Delay Force
- Static Infantry
- German Airborne Coup de Main Force
- Light Infantry
- Large Fort Complex
- Mountain Infantry
- Small Fort Complex
Editor's note: the source states "14 types" but its unit-type panel shows fifteen unit-type symbols across the two categories above; the list is transcribed as printed.
2.9 Unit Sizes
A. The unit-size-symbols printed atop the unit-type boxes on most of the ground combat counters mean:
| Symbol | Size | Symbol | Size |
|---|---|---|---|
| XX | Division | III | Regiment |
| X | Brigade | II | Battalion |
B. A unit with its size symbol in a bracket is an ad hoc formation. That is, one not normally a part of its nation's regular army, put together solely for this campaign.
2.10 Attack and Defense Factors
A. If a unit has three numbers printed across the bottom, the first is its attack factor and the second its defense factor.
B. Attack factor is a quantification of its ability to perform in offensive combat, defense factor in defensive combat.
C. If a unit has only two numbers printed across the bottom, the first number is its combined combat factor, used for both attack and defense.
2.11 Volatile Units
A. A unit is considered volatile if its printed combat factors are zero or integers with a plus or minus sign in front of them. A volatile unit's actual strength in battle is determined by die roll each time it fights (14.8).
B. In the 1940 scenario all Allied units are volatile; in the 1939 scenario no Allied units are volatile.
C. In the 1940 scenario only six German units (the SS Totenkopf Division and the five airborne coup de main units) are volatile; in the 1939 scenario all German units are volatile except the two infantry divisions arriving on Turn 4. As reminder of their unique status, those three German divisions have their combat factors printed inside white boxes. (The airborne units are iconic and therefore already stand out.-See 7.0 for details on them.)
2.12 Movement Factor
This number is the measure of a unit's ability to move across the over the map. Units pay different costs to enter different hexes, with the cost determined by the terrain in each hex and along the exact hexsides move across.
2.13 Steps
A. Step is an term used to describe one increment of a unit's ability to absorb combat losses.
B. Most of the ground units in the game have two steps. The second step comes into play after the unit has lost a step in combat, by flipping the unit over so its reverse side (with lower combat factors) shows.
C. When units of this size are eliminated in game play, it does not mean all the men in it have been killed. It means sufficient casualties and equipment losses have taken place to render it useless for further operations during the game (which may, in some cases, mean less than 10% casualties have actually been suffered).
2.14 Four-Step Panzer Divisions
In the 1940 scenario, all German panzer divisions have four steps. (There are no panzer divisions in the 1939 scenario; they were all in Poland.) Each is represented by two counters, only one of which may be in play at any one time.
For clarity, each panzer division counter has its step strength shown, printed circled to the left of its type box. When a panzer division takes its first step loss, flip over the four-step counter to show its three step side. When the next step loss is suffered, remove the four/three-step counter from the map and replace it there with the two/one step substitute counter.
2.15 Markers
The use of these markers is explained at appropriate points throughout the rules.
Markers in the game: German Control; Allied Control; German Step Loss; BEF Step Loss; Terror Bombing; RAF Maximum Effort; Dummy Counter; Roer River Flood; Game Turn.
3.0 Setup and Hex Control
3.1 Setting Up
A. After choosing who will control which side, both players should sort their units into two piles: one for the units that will start the game in play, and the other for those that will enter play after the game has started.
B. Look at the upper left corners of two-step units or reverse sides of one-steppers. Units with the letters SR or a single-digit number (along with, for some, an asterisk), make up their side's strategic reserve and reinforcement units. They enter play after the game starts.
C. Place the reinforcement units in the appropriately numbered boxes on the Turn Record Track (TRT) on the mapsheet. Example: In the 1940 scenario, all British units with a 3 on their reverse sides should be placed in the 3 block on the TRT.
D. The SR units of both sides should be placed in separate piles off to the side.
E. In the 1940 scenario, all starting Allied units have a four-digit set up hex number. Place each on the map in the exact hexes indicated on their counters.
F. The 1940 German starting units have no starting hex numbers. After the Allies have placed their starting units, Germany may place all its starting units anywhere inside Germany (but see 6.0 for an important option).
3.2 Dummy Units
The dummy units included in the German 1940 counter mix are deployed according to the rules provided for Operation Sickle Cut (6.0).
3.3 1939 Set Up
In the 1939 scenario, all units have specific set up hexes. Only use the units designated on the countersheet as 1939 French and 1939 Germans. Do not set up any British, Belgian, Dutch, or Maginot Line units.
3.4 Starting Step Strengths
In the 1940 scenario, all two-step and four-step units are set up at their full step strength.
In the 1939 scenario only the two German reinforcement infantry divisions have two steps; all other units have only one step each.
3.5 Hex Control
A. Hex control describes which side is in control of particular hex at each instant during play. Hex control is important for river crossings (13.9), strategic movement (13.16), sea movement (13.11), strategic reserve and reinforcement entry (12.0), and determining victory (4.0).
B. At the start of the game the Allies control all town and city hexes inside France; Germany controls all hexes inside Germany. Neutral countries (see section 8.0) become Allied territory as soon as the first German unit enters or attacks there.
C. The control status of a hex changes the instant a unit from the other side enters and/or moves through it.
D. Control status of a hex can change back and forth any number of times during a game.
Design Note: The control markers have been provided for the convenience of showing on the map the control status of hexes when the delineation of the front line itself isn't sufficient to do that.
4.0 How to Win
4.1 The 1940 Scenario in General
In this scenario, Germany attempts to win by launching an offensive that will gain at least three victory points (VPs) by the end of the first player-turn couplet (5.0) of Turn 10. The Allies win by holding Germany to two or fewer VPs. There are no draws.
4.2 Winning the 1939 Scenario
A. In this scenario, we assume the French fulfilled their pledge to Poland to launch an offensive into Germany soon after hostilities were declared. The French goal is to gain control of territory inside Germany within heavy artillery range of the Reich's vital Ruhr industrial area. That accomplished, it is assumed some quickly formed cabal of German industrialists and generals would move to overthrow Hitler and his Nazi regime to end the war and "save the Fatherland from destruction."
B. Play of the 1939 scenario stops and the French (Allies) are declared the winner if, at any time prior to the end of Turn 7, one or more French units enter any hex of the "Ruhr Endangered Area" delineated on the map. Germany wins by preventing that. There are no draws.
4.3 Concession
In both scenarios either player is free to concede defeat at any time prior to the game's official end if convinced that her/his position is hopeless and beyond recouping.
4.4 1940 Victory Points
Only Germany scores VPs. At the end of the first player-turn couplet of Turn 10, award/deduct VPs per the following schedule, then award victory per 4.1.
| VPs | Event/Condition |
|---|---|
| +1 | Holland capitulated |
| +1 | Belgium capitulated |
| +3 | France capitulated |
| +1 | Maginot Line breached |
| +1 | Severe RAF pilot losses |
| +1 | BEF destroyed |
| -2 | German losses severe |
| -1 | The Allies control any non-Ruhr German city (or cities) in supply at the end of the game. |
Historical Note: In 1940, Germany scored 2 VPs for causing Holland and Belgium to capitulate. By 28 May, the French had not capitulated; the Maginot Line had not been breached; the BEF had not been destroyed; the RAF had not suffered severe losses, and German losses were not severe.
Design Note: The idea behind these victory conditions is, though German forces performed brilliantly in May 1940, Germany still went on to lose World War II in May 1945. Thus, taking the long-run perspective, the historical outcome of the May 1940 campaign did Germany no decisive good. Therefore, in our game, each point Germany scores above two is considered to extend the life of the Third Reich beyond its historical May 1945 termination. Thus the Germany is considered to "win" in 1940 only by achieving an extension of Hitler's life expectancy. In general, figure each point the German scores above two extends the life of the Reich for three or four months; each point below two decreases it by the same amount of time.
4.5 1940 Allied Strategic Victory
It is possible, though highly unlikely, for the Allies in the 1940 scenario to win an all-out (strategic or monstrous-fine) victory by having a British or French ground unit enter any Ruhr City hex. If they accomplish that at any time prior to the end of the scenario, play stops and the Allies immediately win.
4.6 Capitulations
For details on the capitulations of Belgium, Holland, and France in the 1940 scenario, see 8.0. In the 1940 scenario, Britain never capitulates. In the 1939 scenario, only Germany may capitulate (4.2).
4.7 Breaching the Maginot Line
A. The Maginot Line is breached if at any time prior to the end of the 1940 scenario, Germany succeeds in completely clearing any three (or more) contiguous Maginot Line border hexes of all fort complexes.
B. In counting the three cleared hexes, skip over the two gap areas in the line.
Example: If the Germany cleared hexes 2840 and 2940, it would not yet be considered to have breached the Maginot Line. To do that it would have to also clear 2539 or 3143.
C. For purposes of this rule (only), the behind-the-border fort complexes in hexes 1735, 2135, 2137, 2236, and 2336 are not considered part of the Maginot Line. Germany gains no VP advantage from clearing those hexes of their fort complexes.
D. The Maginot Line is also breached if at the end of the scenario it is impossible for the Allies to trace a line of communications (LOC) from any friendly-controlled Paris hex to any one or more of the Line's border fortification hexes, with the entire LOC running only through hexes in France. The LOC is otherwise traced under the same strictures as Allied supply lines (10.6).
Play Note: If France capitulates, Germany does not receive the VP award for breaching the Maginot Line; the Maginot Line VP is considered part of the three granted for achieving overall victory over France.
Design Note: Given the earlier explained rationale of victory conditions crafted to measure the "long run," some of you will no doubt wonder what long run advantage breaching the Maginot Line has for Germany. Well, this VP award takes into account what you might call the short run of the long run. That is, barring French capitulation in May, at the end of that month, Germany will have at least one more campaign to run in this theater of operations in 1940. In that case, breaching the Maginot Line would serve as a good set up (both strategically and psychologically) for the knockout blow of June.
4.8 Severe RAF Pilot Losses
A. At the end of Turn 5, if the Allies decide to commit the Royal Air Force to an all-out effort (14.8), then at the end of the 1940 scenario, determine if commitment has resulted in serious pilot attrition, diminishing chances for British victory in any upcoming aerial campaign over their home islands.
B. Roll the die. A 4-6 means severe pilot attrition has occurred and Germany is awarded 1 VP. A 1-3 means dangerous attrition levels were not reached and no VP award is made.
C. If the Allies decide not to commit the RAF, no die roll is made and no VP award is possible.
Design Note: Some of you will bridle at awarding or withholding a VP based on such an arbitrary procedure. I feel this approach is more than justified, however, because the historic British commander who made the decision on this (Winston Churchill) had to do so with no more than this same general perception of the dangerous possibility inherent in it.
4.9 Destroying the BEF
A. The destruction of the BEF is based on the total number of British steps eliminated by the end of the game. British steps OOS at the end of the game are considered eliminated for purposes of this rule.
B. The three BEF Emergency Delay Force units (Frank Force, Mac Force and Usher Force) do not count toward BEF losses when determining this VP award. (Two counters have been provided to enable you to keep a running count of the BEF steps eliminated on the TRT as play proceeds.)
C. To determine if the BEF has been destroyed, total the number of steps eliminated according to the strictures given above, roll a die and consult the table below.
| BEF Steps Lost | Die Roll to Destroy BEF |
|---|---|
| ≤ 14 | Automatically not destroyed |
| 15 | 1 |
| 16 | 1-2 |
| 17 | 1-3 |
| 18 | 1-4 |
| 19 | 1-5 |
| ≥ 20 | Automatically destroyed |
Design Note: Again, some of you will object to this kind of procedure. The reason no set limit can be established to determine BEF destruction or severe German losses is that in both cases we're not so much concerned with equipment and overall manpower losses as we are with casualties among the hard to replace NCO and junior officer ranks. Given both players in the game are cast in the roles of strategic commanders, unable to affect the tactics of their side through the vehicle of this loftily scaled game, we can only put in place this kind of uncertain determination procedure. Of course, overall casualties still matter in that the higher they go the more likely it becomes the crucial figure will be reached in the two important personnel categories.
4.10 Severe German Losses
A. The procedure for determining if German losses have been severe are similar to those for determining the destruction of the BEF. Unsupplied German units still on the map at the end of play are not considered eliminated. Count each eliminated airborne coup de main unit (7.0) as two steps.
B. To determine if German losses have been severe, total the number of steps eliminated according to the strictures given above, roll a die and consult the table below. (Two counters have been provided to enable you to keep a running count of the German steps eliminated on the TRT as play proceeds.)
| Steps Lost | Die Roll for Severe Losses |
|---|---|
| ≤ 49 | Automatically Not Severe |
| 50-53 | 1 |
| 54-57 | 1-2 |
| 58-61 | 1-3 |
| 62-65 | 1-4 |
| 66-69 | 1-5 |
| ≥ 70 | Automatically Severe |
5.0 The Turn Sequence
5.1 In General
A. Each game turn of Blitzkrieg 1940 is divided into two player-turn couplets of strictly sequenced steps (phases). Every action taken by a player must be carried out in the appropriate phase.
B. Once a player has finished a particular phase s/he may not go back to perform some forgotten action or redo a poorly executed one unless her/his opponent graciously permits it.
5.2 1940 Turn Sequence Outline
A. First Player Turn Couplet
- German Operations Segment a. German Movement or Combat Phase b. German Combat or Movement Phase
- Allied Operations Segment a. Allied Capitulation Check Phase b. Allied Movement or Combat Phase c. Allied Combat or Movement Phase
B. Second Player Turn Couplet
- German Operations Segment a. German Movement or Combat Phase b. German Combat or Movement Phase
- Allied Operations Segment a. Allied Capitulation Check Phase b. Allied Movement or Combat Phase c. Allied Combat or Movement Phase
5.3 1939 Turn Sequence Outline
A. First Player Turn Couplet
- French Operations Segment a. French Movement or Combat Phase b. French Combat or Movement Phase
- German Operations Segment a. German Movement or Combat Phase b. German Combat or Movement Phase
B. Second Player Turn Couplet
- French Operations Segment a. French Movement or Combat Phase b. French Combat or Movement Phase
- German Operations Segment a. German Movement or Combat Phase b. German Combat or Movement Phase
5.4 Move or Fight
A. At the start of each Operations Segment in both player-turn couplets; the phasing side must declare the order in which it will carry out the Movement and Combat Phases that couplet. Units may move first and fight second, or fight first and move second. The decision is always up to the phasing side.
B. No matter what order is chosen for a segment, each unit gets to participate to the limit of its normal capabilities in both phases. Moving or fighting does not preclude a unit from performing both tasks during each couplet; only the order of execution is variable.
C. Each side only makes one phase order declaration per couplet, at the start of its Operations Segment, and which is then applied to all its units throughout that couplet. A player may never choose one phase order for some units and the other phase order for others. Neither player may have two of the same kind of phases during the same Operations Segment. Only their order of execution may be varied.
5.5 First Turn Special Supply Rule
A. All units of both sides are automatically in supply throughout the first player-turn couplet of Turn 1 in both the 1939 and 1940 scenarios.
B. In the 1940 scenario, all German mechanized units are in supply throughout both player-turn couplets of Turn 1, whether or not Operation Sickle Cut is in effect.
5.6 Maximum Scenario Lengths
The 1940 scenario ends with the completion of the first player-turn couplet of Turn 10; the 1939 scenario ends with the completion of the second player-turn couplet of Turn 7.
6.0 Operation Sickle Cut and Dummy Units
6.1 In General
A. This rule may be used by Germany during Turn 1 of the 1940 scenario. Its use reflects the strategically superior appreciation of the Ardennes Forest achieved by the German high command over that of their opponents.
B. If Germany intends to launch Operation Sickle Cut, it must make the announcement as soon as the Allies have finished deploying their starting units. (It is a decision that cannot be delayed or revoked.)
C. If Germany decides not to launch Operation Sickle Cut, no changes are made to the setup and game start procedures described in 3.0 and 5.0. If Germany does launch it, alter Turn 1 procedures as follows.
Design Note: Launching Operation Sickle Cut automatically violates Belgian neutrality (8.0).
6.2 Procedure
A. Upon the German declaration that Operation Sickle Cut is in effect, the Allied player should immediately turn away from the board. Germany then takes an opaque container, such as a coffee mug, and places up to 11 mechanized units and up to 22 non-mechanized units in it. Those two figures may include any mix of real and/or dummy units of each category, but they may not include any airborne coup de main units (7.0).
B. Place the container aside, covering it so the Allied player cannot see into it during Turn 1.
C. With the Allied player still turned away, set up the rest of the German starting units, including any dummy units not just placed into the mug, inside Germany.
6.3 Dummy Units
A. Dummy units may be placed in any hexes containing one or more real German units. They may be placed anywhere in such stacks, including the top position, but there must always be at least one real German unit in any stack containing one or more dummies. Dummy units have no stacking value.
B. During the course of play, dummy units will be revealed during combat resolution as factors are counted. As those revelations take place, Germany may immediately move such dummies to any other of its stacks, or leave them in place, depending on the appreciation of his opponent's short term memory. During such redeployments the Allied player should turn aside.
C. When moving with a stack, dummy units are considered to have the same MF as the fastest unit in that stack.
Design Note: Naturally, the use of dummy units makes for opportunities to cheat. If no impartial, third-party observer is available, players who don't feel they can trust each other to this degree should omit using the dummy rules.
6.4 During Turn 1
With Operation Sickle Cut in effect, Turn 1 procedures and potentialities are altered:
A. No German on-board units may move or attack into any Ardennes Forest hex during either couplet.
B. The three Belgian units that begin play set up in Ardennes hexes are frozen in place in those hexes, unable to move or attack for the entire turn.
C. No other Allied units may move or attack into any Ardennes hexes during the entire game turn.
6.5 Ending Turn 1
A. At the end of Turn 1, the Allies pick up the three Belgian units in the Ardennes and move them to any hex(es) in Belgium bordering on the forest.
B. Then Germany takes all the units placed in the cup and sets them up in any Ardennes hexes. Non-mechanized units must be placed only in interior forest hexes; mechanized units may be placed in any forest hexes.
Example: A German infantry division taken from the cup could be set up in 1928, but not in 1828, 1829 or 1728.
C. Normal stacking rules must be maintained, remembering that dummy units have no stacking value.
6.6 Turn 2
A. Sickle Cut or no Sickle Cut, no further changes are made to normal procedures after the placement of the cup-held units within the Ardennes at the end of Turn 1.
B. From the start of Turn 2 onward, both sides are free to operate in and around the Ardennes according to normal neutrality, movement, and combat rules.
6.7 No Sickle Cut
If Germany declines to launch Sickle Cut, both sides may operate in and around the Ardennes according to the normal terrain, combat and neutrality rules through Turn 1 and all subsequent turns.
7.0 Airborne Coups de Main
7.1 In General
A. In the 1940 scenario, Germany has five airborne coup de main units available for commitment during Turn 1. These units represent airborne/airlanding battlegroups of battalion to regimental sizes. Each has a stacking value of one-third of a division, a step-strength of one and a volatile combat factor of zero (14.8).
B. They never exert zones of control (ZOCs), nor do they move or attack after being placed according to the procedures described below.
C. They do control the hex into which they drop, provided they survive their landing. Each one eliminated counts as two steps toward overall German step losses.
Design Note: German units that do exert ZOCs are not inhibited from continuing to do so because they enter a hex containing an airborne coup unit.
7.2 Landing Procedures
A. At the start of Turn 1, Germany takes however many of the five units it wishes to commit (some, all or none, depending only on the plan of action), set those not to be used aside (They are out of play for the rest of the game.), and place the selected units, no more than one per hex, in any hexes on the board other than marsh, mountain or Ardennes.
B. Within that stricture, they may land in hexes containing Allied units and/or fortifications, including Eben Emael and the Maginot Line.
C. Germany then rolls one die per coup unit, in any desired order.
D. The first unit rolled for survives its landing on a 1-5; the second on a 1-4, the third on a 1-3, the fourth on a 1-2, and the fifth on a 1.
E. Immediately place into the dead pile all coup units that fail to survive their landing die roll, and record two German steps lost per unit so eliminated.
7.3 Landing in an Empty Hex
A. If an airborne unit survives its landing in an empty hex (other than Even Emael or the Maginot Line), place the German unit in the hex.
B. Landing in a hex containing only an EZOC counts as landing in an empty hex.
C. Landing in a hex containing only an Allied fortification (the field works printed on the mapsheet, as opposed to Eben Emael and the Maginot Line) counts as landing in an empty hex.
D. If any Allied mobile units are located in such a fieldworks hex, resolve the situation per 7.4.
7.4 Landing Atop Mobile Units
If an airborne unit survives its landing in a hex containing any Allied mobile units (mobile here meaning any unit with a printed MF greater than zero), Germany moves those units into any one (or more) neighboring hex(es), then places the coup unit in their just-vacated hex.
7.5 Landing Atop Eben Emael
If an airborne unit survives its landing atop Belgian fort Eben Emael (in hex 2423), remove the fort and place the German unit in that hex.
7.6 Landing Atop the Maginot Line
If an airborne unit survives its landing atop a Maginot Line hex (regardless of any Allied mobile units in the hex), eliminate the airborne unit along with any one (German's choice) of the fort complexes in the landing hex.
Design Note: The airborne unit is eliminated along with the fort even though it survived its landing; in cases where the airborne unit did not survive, the Maginot forts are left unscathed.
Historical Note: Eben Emael, though it was called the "best fort in Europe," had a garrison largely untrained in infantry fighting. Once the German paratroopers gained control of the surface of the fort, the defenders felt their position was hopeless, suffered a morale collapse and literally allowed themselves to be sealed inside. That would most likely not have been the case in any similar assault on a Maginot Line complex.
7.7 Paris
A. If any airborne coup units are dropped into Paris hexes and survive their insertion there, Germany immediately rolls one die and consults the table below to check for their effect on French national morale.
B. Roll only one die once, no matter how may coup units survive landing in Paris.
C. Do not roll at all if all coup units dropped in Paris hexes failed to survive their insertion.
| Roll | Effect of Paris Landings on French National Morale |
|---|---|
| 1-2 | The "Spirit of 1914" once more infuses all France and the nation rallies. Throughout the game all French attacks gain a 1R odds shift, and all attacks against French units suffer a 1L shift. |
| 3-4 | No Effect |
| 5-6 | French national morale plummets and defeatism reigns. Throughout the game all French attacks suffer a 1L odds shift, and all attacks against French units gain a 1R shift. |
7.8 No Dummies
No dummy unit may be deployed into a hex containing only an airborne coup unit.
7.9 After Insertion
Once successfully on the ground, German airborne coup unit remains in place until eliminated in combat by Allied attacks or a supplied German unit moves into its hex. In the latter case, Germany may choose to leave the airborne unit in place or immediately and permanently remove it from play, thus denying the Allies the chance to eliminate it.
8.0 Neutrals and Capitulation
8.1 In General
At the start of both scenarios, only France and Germany are already actively involved in the war, Belgium, Holland, and Luxembourg are neutral. In the 1940 scenario, German actions control which neutrals will be brought into the war. In the 1939 scenario, only the French may violate neutrality.
8.2 1940 Neutrals
A. In the 1940 scenarios Germany may bring any or all of the neutrals into play – pushing them into the Allied camp – by moving or attacking into their national territory during any turn.
B. This is not a one-time, nor an all or nothing, decision for Germany. It may decide to violate a particular neutral during any turn.
C. Once a neutral nation has been violated, it becomes instantly and permanently part of the Allied side; a neutrality violation is irrevocable.
Play Note: It is possible for Germany to violate Belgian neutrality without violating Dutch neutrality, but the reverse of that situation is not allowed. That is, the instant Dutch neutrality is violated, Belgian neutrality is also automatically considered to have been violated.
Design Note: Germany should decide which neutrals to violate based on its own planning. If Belgium and Holland do not enter the war, Germany cannot possibly gain the VPs for making them capitulate.
8.3 ZOCs and Neutrality
A. From the start of the game, even before their neutrality is violated, neutral nations' units project ZOCs normally (8.0), but not across national borders.
B. No other nations' units' ZOCs extend inside the territory of a neutral until the instant of violation occurs.
8.4 Neutrals' Movement
A. Though Germany may decide not to violate their neutrality on Turn 1 (or, for that matter, on any other turn thereafter), the Allies may, from Turn 1 on, move the units of Belgium and Holland within their own national territories (respectively).
B. Prior to a neutrality violation by the German, though, no Anglo-French units may move or attack into either Belgium, Luxembourg, or Holland.
Historical Note: Yes, I'm aware that before and after this campaign, France and Britain were willing to make first violations of various other neutrals. Within the context of their planning for this campaign, however, I can find no indication they were prepared to move into Belgium, Luxembourg or Holland until after the Germans had first done so.
8.5 Belgian and Dutch Army Restrictions
Prior to a German violation of their nation's neutrality, Dutch units may only move inside Holland, and Belgian units may only move inside Belgium. Once their neutrality has been violated, Dutch and Belgian units are free to move and attack inside their own country and Germany.
Design Note: Luxembourg had no armed forces significant enough to be represented by a unit at this scale. Otherwise all the other neutrality rules given above do apply to Luxembourg in the 1940 scenario.
8.6 Dutch Capitulation
A. Dutch capitulation may never be checked for prior to two turns after its neutrality was first violated (during the Allied Capitulation Check Phase of each player-turn couplet).
Example: If Holland's neutrality was first violated on Turn 1, the first capitulation check would be made for during Turn 3.
B. Once the two turn grace period has been passed, make one capitulation check every player-turn couplet according to the turn sequence (5.0).
C. Dutch capitulation is based on the number of that nation's cities (counted as named cities, not individual city hexes) controlled by Germany at the instant of each couplet's capitulation check.
D. There is a possibility Holland will capitulate if Germany controls six or more Dutch cities. If that is the case, Germany rolls a die. A 4-6 means Holland has capitulated; a 1-3 means it will fight on for at least another couplet.
8.7 Belgian Capitulation
Belgian capitulation is resolved under the same time conditions and on the same basis as that of Holland, counting Belgian cities under German control rather than Dutch. It is possible to make checks for both during the same couplet, but make a separate die roll for each.
Design Note: For Germany to control a city for capitulation check purposes means to control all its hexes. Thus, it does no good for Germany to control only two hexes of Antwerp (a three-hex city); to count toward the six cities, Germany must control all three hexes of it.
8.8 French Capitulation
French capitulation is never checked for prior to Turn 5's Allied Capitulation Check Phase. It is based on German control of Paris hexes. If Germany controls any Paris hexes, roll a die.
| # Hexes* | France Capitulates on |
|---|---|
| 1 | 1 |
| 2 | 1-2 |
| 3 | 1-3 |
| 4 | 1-4 |
| 5 | 1-5 |
| 6+ | Automatic |
*# hexes of Paris under German control
Historical Note: Some of you may be surprised at my making a fight for Paris part of reckoning French survival, when in the real war they declared it an open city. Remember, though, that concession came in June, the month after (what was from the French point of view) the fiasco at Dunkirk, when their national morale had been severely and irretrievably depressed.
8.9 Automatic Capitulation
A. Holland, Belgium and/or France instantly capitulate the instant either of these conditions applies:
- All its steps have been eliminated from the map; or
- All its cities are under German control.
B. For any capitulation determination (8.6-8.9), the supply state of the German units controlling the cities in question has no bearing on the roll.
8.10 Capitulation Effects
A. If an eligible nation capitulates per 8.6-8.8, immediately remove all its units (including Eben Emael and the Maginot Line in the cases of Belgium or France) from the map.
B. Allied units of non-capitulated nations are not required to withdraw from the territory of a capitulated nation, though it may be prudent to do so.
C. Allied-controlled cities within a capitulated nation may still be used as strategic movement transit termini (13.16).
8.11 Terror Bombing
A. In the 1940 scenario Germany may launch a terror bombing attack (one per game) to try to bring on the capitulation of one eligible nation.
B. Just before the Allies make a capitulation die roll check for an eligible nation, Germany may announce a terror bombing attack against one city hex of that nation still under Allied control at the time of the bombing.
C. The terror bombing marker is placed in the selected hex and the Allies roll the die, applying a +1 die roll modification (DRM) to the roll. No matter the result, the marker is left in the bombed hex for rest of that couplet; that entire city may not serve as a strategic movement transit point during that couplet.
8.12 1939 Neutrality
A. In the 1939 scenario, German units are restricted to being able to move and attack only into hexes of their own nation.
B. French units are free to move and/or attack into hexes of France, Germany, Luxembourg, Belgium, and the Maastricht salient of Holland (hexes 2522, 2622, 2623, 2721 and 2722).
Historical Notes: Germany is restricted to staying inside Germany in 1939 because their planning and (sparse) logistical preparation in the west in 1939 only allowed for limited operations - everything was concentrated in the east for a quick victory over Poland.
The Belgian armed forces are kept out of the equation of the 1939 on the basis of an incident that took place historically in January 1940. During one of the many German-invasion scares during the phony war period, some French units actually began moving into Belgium to preempt the German attack they expected to be coming within hours. The Belgian government immediately began howling about its neutrality. Significantly, though, the Belgian army units in the field in front of the advancing French forces simply got out of their way. In a few hours, of course, things were straightened out and the French units were all turned around and moved back into their own territory.
The crucial point I draw from the incident is that Belgian commanders were not prepared to lead their units into action against the French in 1939 - a stance we can only consider reasonable given the two forces' relationship in 1914-18. So my feeling is the Belgian army, had the French been able to muster the political will to make such a move in September 1939, would simply have stood-to in their garrisons, leaving their politicians to launch proforma protests in Geneva.
The Dutch, I figure, having missed the experience of German invasion and occupation in World War I, could have been counted on to be more stiff-necked about upholding their neutrality against any and all comers. Upon closely studying their actual deployments, though, we can see they probably weren't resolved to be totally uncompromising. Across the entire Maastricht salient they made no fortifications and deployed (poorly) only five lightly armed home guard battalions. That, it seems to me, was a tacit abandonment of that little bit of national sovereignty.
9.0 Zones of Control
Design Note: Rules 9.1-9.5 generally pertain to all units except German mechanized (white on black) units in the 1940 scenario. Rather than say, "Exception... " each time, please just keep in mind as you're reading this section for the first time, that German mechanized units enjoy broad exceptions to these rules (9.6).
9.1 In General
A. Almost all ground units, excluding the five German coup de main units, exert ZOCs into the six hexes surrounding their location hex at all times.
B. There is no qualitative difference between a hex containing a ZOC exerted by one unit and hex containing ZOC exerted by several units.
C. The ZOCs of both sides can be exerted simultaneously into the same hexes.
Design Note: Yes, Eben Emael and Maginot Line fort complexes exert ZOCs, even when there are no mobile units stacked in those hexes.
9.2 ZOC Limits
A. ZOCs do not extend across all-sea, blocked, or the causeway hexsides.
Example: A unit in 2013 only exerts ZOCs into 2014 and 2113, because the other hexes around it are separated from it by all-sea hexsides.
B. No other kinds of terrain, artificial or natural, have any inhibiting effects on ZOCs.
Design Note: Mechanized units, though prohibited from actually moving into Marsh hexes, still project ZOCs into them.
C. ZOCs do not extend into or out of neutral countries until they are brought into play.
D. OOS units exert ZOCs normally. Editor's note: the source prints "00S" here, transcribed as OOS.
9.3 Enemy ZOCs and Movement
A. Moving units and stacks must stop their movement in a given Movement Phase in the first hex they enter containing an enemy ZOC (EZOC), and may move no farther that phase.
B. A unit beginning its Movement Phase in an EZOC may leave that hex provided the first hex it enters contains no EZOC. The presence of a friendly unit and/or ZOC in a hex into which an EZOC is being projected in no way negates that EZOC for movement purposes.
C. Victorious attacking units of both sides and of all types are able to make a one-hex EZOC to EZOC move during their Combat Phases (14.22).
D. There is one-hex minimum movement in this game (13.3).
9.4 EZOCs and Supply
A. Only mechanized units in the 1940 scenario may trace supply lines through hexes containing EZOCs; no other units of either side may do so in either scenario.
B. A friendly unit in a hex containing an EZOC does negate that EZOC for the purposes of tracing supply lines into and through the hex.
Design Note: Some of you are probably wondering how it is, for instance, that a small Dutch cyclist regiment exerts ZOC of the same quality as a panzer division. Well, this approach provides a quick and workable way to get at fog of war in general, and the tactical conditions of this campaign in particular. In general, with couplets equal to only a day, down at tactical levels you can't count on your forward elements being able to rapidly identify newly contacted enemy elements. Hence the general reaction to stop, clarify and develop each new contact. Don't forget, in these campaigns everyone is still pretty green; this is 1939-40, not 1941-42. (Besides, in the 1940 scenario at least, things will be a lot more fluid than you're probably thinking they will be – you haven't read rule 9.6 yet.)
9.5 Allied 1940 Engagement/Disengagement
A. During the 1940 scenario, all Allied units must pay an additional movement point (MP) to enter a hex containing an EZOC (movement to engage). They must also pay +1 MP to move out of an EZOC hex (movement to disengage). German units do not pay these costs.
B. Paying engagement and disengagement costs still does not allow Allied units the ability to move directly from EZOC to EZOC during the Movement Phase.
Historical Note: This rule simulates the more cumbersome Allied doctrine and command structure, along with the effects of refugees and German air force interdiction on their deployments.
9.6 German 1940 Mechanized Units
A. German mechanized units in the 1940 scenario project ZOCs as described in 9.1-9.5. However, they may completely and freely ignore the EZOC projected by all Allied units, no matter if they start a German Movement Phase already in such hexes or enter them during the course of their movement.
B. The ZOCs projected by moving German mechanized units does not inhibit such movement. That is, the ZOCs projected by German mechanized units do not reverse-pin them as they move past Allied units during German Movement Phases.
Design Note: The paragraph directly above is brought to you on behalf of the Rules Lawyers who exist in every wargamer group.
Historical Note: The single German mechanized infantry division in the 1939 scenario does not have any of the special properties described in 9.6. In that earlier campaign, the 76th was merely a regular leg infantry division temporarily given trucks to be able to serve as the western front's mobile reserve while all the Blitzkrieg-trained divisions were off in Poland.
10.0 Supply
10.1 In General
Units require supply to operate with their full (printed) factors. Units are always either supplied or out of supply (OOS or unsupplied). No unit is ever reduced in step strength or eliminated simply for being OOS.
10.2 When to Check Supply
A. Check the supply state of each unit at the instant it begins moving in each of its Movement Phases.
B. Check the supply states of all involved units of the attacking side at the start of every combat resolution process in every Combat Phase throughout the game.
Exception: First Turn Special Supply Rule (5.5).
10.3 OOS Effects
A. Units OOS at the start of their movement have their MF reduced to 4 MPs for that phase.
B. OOS attacking units have their attack factor halved for those computations. In such situations. Round down all remainders, but no unit or stack ever has its attack factor reduced to less than one for any reason. When halving more than one unit in the same battle, total the attack factors of all units to be halved in that battle then make just one grand division.
10.4 Defense Unaffected by OOS
OOS defenders are unaffected by their OOS status: defense factors remain full.
10.5 How Units Are Supplied
Units are supplied when they are able to trace a supply line (a path of contiguous hexes) of any length from a friendly supply source to their location hex. There are no counters in the game representing the actual materiel being consumed; this is all done just in the mind's eye of the player.
10.6 Tracing Supply Lines
A. A supply line (or path) consists of an uninterrupted line of contiguous hexes traced (in the mind's eye) from the unit or stack in question back to a valid supply source. Such paths may be of any length, and may enter and cross all kinds of playable terrain.
B. Supply lines may not enter or cross hexes occupied by enemy units. Neither may they be traced into and through hexes containing an EZOC unless there is a friendly unit in the hex to nullify the EZOC for supply tracing purposes.
Exception: In the 1940 scenario, German mechanized units may always trace their supply lines into and through hexes containing EZOCs, even if there are no friendly units in those hexes to nullify those EZOCs.
C. No portion of a supply line may enter or pass through enemy-controlled city hexes, even if no enemy units or EZOC are actually in such hexes at the time of tracing.
D. Supply lines may not be traced across all-sea hexsides, except over the causeway hexside at 2213/2214, nor may they run into or through the territory of unviolated neutral nations or cross blocked hexsides.
Design Note: 1940 German mechanized units can trace supply through unnegated EZOCs because: 1) their supply units did operate more boldly than those of the leg infantry during the campaign; and 2) the army put together an ad hoc aerial supply operation to supplement overland supply by using the small planes, such as Storches, at its disposal.
10.7 French Supply Sources
A. French supply sources are all the hexes in France along the assembled maps' south and west edges, from 4404 to 4428 and east from there to 3244.
B. A French board edge supply source hex temporarily loses its supply capacity while occupied by a German unit. That capacity is regained as soon as the German unit leaves or is eliminated.
10.8 BEF Supply
A. BEF units may trace supply to any (some or all) of the three channel ports: Boulogne (4901), Calais (5200), and Dunkirk (5600). Once a port is occupied by a German unit, it never regains its supply source capacity even if retaken by Allied forces.
B. The Bauman and 51st Infantry Divisions are an exception in that they may trace supply as BEF units or as French units (to French sources), decided at the couplet by-couplet convenience of the Allies.
10.9 German Supply Sources
A. German supply sources are all the hexes along the assembled maps' east edge inside Germany from 4210 to 4244, along with all the Ruhr City hexes printed on the map in the area around 3719.
B. A German board edge supply source hex temporarily loses its supply capacity while occupied by an Allied ground unit. That capacity is regained, however, as soon as the Allied unit leaves or is eliminated.
C. If a Ruhr City hex is occupied by an Allied ground unit, the game is over (4.5.)
10.10 Dutch/Belgian Supply
Dutch and Belgian units are always automatically in supply inside their own countries. (Remember that they are never allowed to leave their own countries, 8.5.)
10.11 Franco-German City Supply
A. French units located in city hexes inside France are always in supply while in those hexes, but French units outside them may not achieve supplied status by tracing into them.
B. German units located in city hexes inside Germany are always in supply while in those hexes, but German units outside them may not achieve supplied status by tracing into them.
C. A French or German city hex permanently loses this in-hex supply capacity once occupied by an enemy unit.
10.12 Supply Line Capacity
There are no limits to the number of units that may trace supply through any given supply path. Nor are there any limits on the number of units that may trace supply to any single, friendly, map edge supply source.
10.13 Willful OOS
It is permitted to move any unit into a hex where it will, or likely will, become OOS.
11.0 Stacking
11.1 In General
A. Stacking is having more than one unit into the same hex at the same time. The general rule is that either side may stack up to four of its divisions in any hex at any one time.
B. Brigades, regiments, battalions, British emergency reinforcement units, and German airborne coup units each counts as one-third of a division for stacking purposes.
11.2 Stacking and Movement
A. The stacking rule is in effect at all times throughout the turn. That means players must pay attention to the sequence in which they move their units or they risk having carelessly made early moves block units moved near the end of their Movement Phases. But within the limits of the rules of this section, there is no limit to the number of units that may enter and pass through a given hex over the course of any given Movement Phase.
B. Units that begin a Movement Phase stacked together need not remain together.
C. Each side checks its own stacks at the end of each phase in the turn sequence. If any of units are found to be over stacked at any of those times, eliminate the excess unit(s).
11.3 Fog of War
Neither player is ever free to examine the units that lie beneath the top unit of the opponent's stacks until the combat resolution process begins for a force involved in combat. Both players may, of course, freely examine their own stacks at all times.
11.4 Inter-Allied Stacking
Allied units of all nationalities are free to pass through one others' hexes throughout each Allied Movement Phase. However, at the end of every Allied Movement Phase all the units of that side may only be stacked according to nationality.
Exception: The British 51st and Bauman Divisions may always stack with French units.
11.5 Free Stackers
German dummy units and both sides' informational markers have no stacking value and may be added to any stack according to the rules governing their uses.
11.6 Stack Movement
To move together as a stack, units belonging to the same army must begin their side's Movement Phase already stacked together. Units are not required to move together simply because they started the Movement Phase in the same hex; such units might be moved together, individually, or in smaller sub-stacks.
11.7 Splitting Stacks
A. When moving a stack, you may halt it temporarily to allow a unit or sub-stack to split off and move away on a separate course. The units left behind in the original (parent) stack may then resume their own movement, even splitting off other units again, if desired.
B. Once you begin moving an entirely different parent stack (or individual unit that began in a different hex), you may no longer resume the movement of the earlier-moved stack without your opponent's permission.
C. If units with differing MFs are traveling together in a stack, the stack must use the MF of the slowest units. As the slower units in a stack exhaust their MFs, you may leave them behind and continue on with the faster ones.
12.0 Strategic Reserves and Reinforcements
12.1 In General
A. Reinforcements are units that do not start the game on the map at the beginning of play, instead entering play after the game has begun. In both scenarios, most reinforcements are German and French units that enter play from their respective strategic reserves, those units of both armies labeled SR on their fronts or backs that do not begin play already on the map (3.1).
B. Units with a single digit on their reverse sides or in their front, upper-left corners (for example, in the 1939 scenario the German 17th and 18th Infantry Divisions have a 4 printed in their upper-left corners) are reinforcements that go into their army's SR at the very start of the turn indicated by that number. From there they enter play when selected from the SR pool of units by their owner.
C. In the 1940 scenario there are also some British reinforcements that enter play without going into any strategic reserve. There are never any Dutch or Belgian reinforcements or SRs.
12.2 French Reinforcement/SR Entry
A. In both scenarios, starting with the second player-turn couplet of Turn 1, the Allies may select any two French divisions to enter play from the French SR. When selecting smaller-than division-sized units, go by the stacking rule of one-third division per such unit.
B. The selected units may enter play any time during the current couplet's Allied Movement Phase. They may use regular movement to enter the map via any French board edge supply source hex not then occupied by a German unit, or they may use strategic movement (13.16) to enter via any eligible Allied-controlled city in France, Belgium, or Luxembourg.
C. In the 1939 scenario they may only enter hex E1035/W6022 in France.
12.3 German Reinforcement/SR Entry
A. In both scenarios, starting with the second player-turn couplet of Turn 1, Germany may select any two German divisions to enter play from the German SR. When selecting smaller than-division-sized units, go by the stacking rule of one-third division per such unit.
B. The selected units may enter play any time during the current couplet's German Movement Phase. They may use regular movement to enter the map via any German board edge supply source hex not then occupied by an Allied unit, or they may use strategic movement (13.16) to enter via any eligible German-controlled city in Germany.
12.4 British Normal Reinforcement Entry
A. In the 1940 scenario, several British ground units become available as reinforcements on Turn 3. They may enter by landing at any three of the French Channel ports shown on the map that are Allied-controlled at the instant of landing. Such units are placed in the port and may not move farther or attack that couplet.
B. The Allies may also choose to delay their entry one couplet and move them onto the map via any French board edge supply source hex not then occupied by a German unit; or such delayed units might likewise use strategic movement (13.16) to enter via any eligible Allied-controlled city in France, Belgium or Luxembourg.
Editor's note: the source prints two sections numbered 12.4 (this one and the British Emergency Reinforcement Units section below); both are transcribed under their printed numbers.
12.4 British Emergency Reinforcement Units
A. The three iconic British infantry units scheduled to arrive on Turn 8 are emergency reinforcement units (ERU). An emergency is considered to exist if by the start of Turn 8 one or more Allied nations have capitulated or the BEF has already lost enough steps that it is certain the Allies will have to check for its destruction at the end of the scenario (4.9).
B. If either or both those conditions pertain, the Allies may immediately place the ERU units, no more than one per hex, in any hexes then containing one or more British units, regardless of their supply state irrelevant.
C. ERU units do exert a ZOC, have a step strength of one and a volatile defense factor of zero (14.8). They never attack, and their elimination does not count toward BEF destruction. (The number 8 printed on the backs of the ERU counters is asterisked as a reminder of this special status.)
D. If no emergency exists at the start of Turn 8, the ERUs are held off the map until a turn begins when one does.
Design Note: Reinforcement units' potential use of their side's strategic movement capacity to enter the map is not additive to it. Such units may only use strategic movement capacity as part of their side's normal, per-couplet allotment of for it.
12.5 The Bauman Division
A. The Turn 8 Bauman motorized infantry division is another British reinforcement that only becomes available, no sooner than the start of Turn 8, if an emergency (per 12.4) has begun.
B. This unit enters by being placed, at any time during an Allied Movement Phase, in any hex on the western map at that moment in supply and free of German units and EZOCs.
C. After placement, the Bauman division exhibits no further special characteristics; its elimination does count toward BEF destruction.
Historical Note: The division was an ad hoc formation of rear-area service and support units put together in the south after the formation of the Dunkirk pocket.
12.6 RAF Maximum Effort
At the start of Turn 5 in the 1940 scenario, the Allies decide whether the Royal Air Force will be committed to an all-out ground combat support effort during the remainder of the campaign. This is a one-time, irrevocable decision with potentially large effects on combat (14.14) and victory determination (4.8). If the RAF is committed, those planes become immediately available for use (14.14).
12.7 Reinforcement Arrival
A. Reinforcements always enter play supplied and at their full step strength, and they have all their normal movement and combat capabilities available for immediate use according to the regular rules governing them.
B. It is not necessary for the owner to immediately bring reinforcements onto the map simply because they have become available. Their entry may be delayed from couplet to couplet and turn to turn. Delayed French and German units are considered to simply stay in their respective SRs.
C. Delayed Turn 3 British reinforcements in 1940 are considered to be in Britain (just keep them off to the side of the map). Holding ERUs and the Bauman division may similarly be delayed, but when they are finally entered, they may only do so using the procedures described for them in the rules above.
12.8 Return to the SR
No unit of either side may be moved from the map back into the SR.
13.0 Movement
13.1 In General
A. The MFs printed in the lower-right corners of the units represent the number of MPs available to them to use in moving across the map during its side's Movement Phase each couplet. Units move from hex to adjacent hex (no skipping of hexes is allowed), paying varied costs to do so depending on the terrain in and around the hex being entered.
B. The movement of each side's units takes place only during friendly Movement Phases; no enemy movement takes place during a friendly player-turn.
13.2 Movement Limits
A. MPs may not be accumulated from phase to phase or turn to turn, nor may they be loaned or given from one unit to another. Within the limits described in this section and in the turn sequence, the phasing side may move all, some, or none of its units in each of its Movement Phases throughout the game.
B. Units that move are not required to expend all their MPs. The movement of each unit or stack (11.6, 11.7) must be completed before that of another is begun.
C. A player may only adjust the position of an already moved unit if the opponent allows it.
13.3 Minimum Movement Ability
A. All units are generally guaranteed the ability to move at least one hex during each of their side's Movement Phases by expending all their available MPs at the very start of their move. This guarantee does not allow units to enter hexes or cross hexsides otherwise impassable to them, nor does it guarantee units, other than German mechanized in the 1940 scenario, the ability to move directly from EZOC to EZOC.
13.4 Enemy Units
Friendly units may not enter hexes occupied by any enemy unit (other than German coup de main units).
13.5 No Off Map Moves
Moving off the map by any unit once in play is prohibited, except as described in 13.17.
13.6 Terrain
A. There are two general categories of terrain on the map: natural and artificial. Each category is divided into different types.
B. No hex is ever considered to contain more than one natural terrain type.
C. For a hex to be considered clear, it must contain only clear natural terrain; any forest or mountain or marsh, etc., printing existing in such a hex would change its status to that of whatever terrain type was printed there atop the clear terrain.
13.7 Natural Terrain
There are nine kinds of natural terrain on the map: clear, rough, mountain, Ardennes, watergangs, blocked hexsides, river/canal hexsides, and all-sea hexsides. The effects of these features on movement are described below and/or on the Terrain Effects Chart (TEC).
Example: Each rough hex costs all units 2 MPs to enter.
Design Note: Strictly speaking, watergangs (the local term for water way) hexes are at least as much artificial as they are natural terrain, but in the game they function as natural, so we leave it as that. They are low-lying areas cut by streams and ponds as well as canals.
13.8 Blocked Hexsides
No units may ever move or attack across any blocked hexside, neither do ZOCs extend across them.
13.9 River/Canal Hexsides
A. Fresh water, in the form of rivers and canals, exists along hexsides, rather than in-hex like the features described above.
B. Crossing a river/canal hexside into a hex already controlled by the moving unit's or stack's side costs that moving force no additional MPs.
C. When entering an enemy-controlled hex, the moving side should pause in the movement to roll a die. Divide that result by two and round down any remainder. That result will thus be a whole number from 0-3, and represents the extra MP the moving unit or stack must pay in order to get across the river. (Extra means in addition to the cost for moving into the hex being crossed into.)
D. If the moving unit or stack does not have sufficient MPs remaining at that moment to pay the entire cost of crossing the river and moving into the hex there, it must stop its movement for the phase in the hex from which the failed crossing was just attempted. No other units may cross that hexside during that phase in any way. This even supersedes 13.3.
Design Note: In situations where riverbank hex control a status is not obvious, use some of the control markers provided to clarify the situation on a hex-by-hex, as-needed basis.
13.10 All-Sea Hexes and Hexsides
A. Generally, no units may cross all-sea hexsides or enter all-sea hexes.
Exceptions: The Moerdijk Causeway and Allied sea movement (13.11).
B. ZOCs never extend across all-sea hexsides or into all-sea hexes.
13.11 Allied Sea Movement
A. In the 1940 scenario, the Allies may move up to one British or French division by sea movement in each friendly Movement Phase throughout the game.
B. To eligible for sea movement, the selected unit must begin the Movement Phase either already in a French Channel port or in the SR (or, in Britain for a British non-ERU reinforcement).
C. The selected division may be moved, at any time during an Allied Movement Phase, from an eligible starting location either off the map, and hence back to Britain or the French SR, or to any other French port.
D. Units to be moved by sea may not move in any other way during the same phase.
E. ERUs may never use sea movement.
Design Note: This rule does not take into account the historic Allied evacuation by sea from Dunkirk. The scenario ends the day before that effort got seriously underway, and my research indicates they really could not have got it underway any time sooner than they did historically.
13.12 Artificial Terrain
Artificial terrain exists in seven types: the Moerdijk Causeway, cities, allied field fortifications, the Maginot Line/Eben Emael, the Siegfried Line, the Sarreguemines Gap, and the Roer River dams. Except for the Sarreguemines Gap, no artificial terrain has movement effects of its own. Rather, the cost for entering such hexes is determined by the natural terrain type involved.
13.13 The Moerdijk Causeway
A. The Moerdijk Causeway completely nullifies, for all units of both sides, the movement prohibition against moving across the all-sea hexside it spans.
B. ZOCs do not extend across it, but units may attack over it as if through a river hexside.
Historical Note: There is no provision for demolishing the causeway because the Dutch believed it was essential to their own internal communications, and were therefore loathe to plan for its destruction.
13.14 The Sarreguemines Gap
A. To enter the Sarreguemines Gap (hexes 2639 and 2739) a unit or stack of either side must begin the friendly Movement Phase in a hex adjacent to the gap hex to be moved into. That one-hex move uses all of its MPs for that phase.
B. Units beginning a friendly Movement Phase in a gap hex may move out without special penalty, paying only normal movement costs according to the terrain in the hexes being entered.
Historical Note: The Sarreguemines Gap was a deliberately prepared area within the Maginot Line filled with roadblocks, barriers, etc., and prepared for easy flooding, making an artificial marsh within an artificial maze.
13.15 Roer River Floods
A. In both scenarios, Germany may open the Roer River dams, declaring it at the start of any player-turn couplet in which it still controls one or more of the three dam complex hexes (2925, 2926, 3026).
B. The effect is to immediately turn the Roer River hexsides (from 2925/3026 to 2821/2920, inclusive) into impassable water hexsides for all purposes: regular movement, strategic movement, combat, and supply.
C. The decision is irrevocable once the dams are opened.
D. The effect lasts throughout the couplet of the declaration. At the start of every subsequent new couplet, Germany rolls one die.
- On a 3-6 the waters recede, returning the Roer to normal river status.
- On a 1-2, the flood remains in effect at least until the start of the next couplet, when another die roll check is made (repeating the process each couplet until the flooding recedes).
Design Note: Naturally, the German side is likely to make much better use of this rule in the 1939 scenario than in the 1940 scenario.
13.16 Strategic Movement
A. In both scenarios, both sides may move up to two divisions by strategic movement in each of its Movement Phases throughout the game.
Exceptions: There is never any strategic movement by either side during the first player-turn couplet of Turn 1, and Belgian and Dutch units never use strategic movement.
B. This applies to two total British or French divisions for the Allies.
C. To eligible for strategic movement in 1940, the selected Allied units must begin their Movement Phase already in a French, Luxembourgeois, or Belgian city hex, or in the SR.
D. In the 1939 scenarios, French strategic movement only takes places within France.
E. If units start in a city hex, that place must be able to trace a path of contiguous non-marsh hexes, free of blocked hexsides, from there to another city in France, Belgium or Luxembourg. German ZOCs may project into the starting and ending city hexes, but no hex along the route between the two terminus hexes may contain a German ZOC, and friendly units do not negate EZOCs for this purpose.
F. Nor may units using strategic movement enter or pass through any enemy-controlled cities, even if those cities are empty of actual enemy units or EZOC.
G. When multiple units use strategic movement in a given phase, they do not have to start and/or end their movement from or in the same hex.
H. Within the limits given above, Anglo-French units using strategic movement may exit from any western or southern map edge hex in France and return that same phase through any other such hex. German units may do the same through any eastern edge hexes of their own nation.
I. German strategic movement is similar to Allied except it takes place only between German cities and/or the German SR, in both scenarios.
J. Within the limits above, strategic movement length is infinite.
K. No unit may use strategic movement and any other kind of movement during the same phase.
13.17 BEF Movement Restriction
Due to inter-Allied political constraints, no BEF unit may ever end its Movement Phase in Paris.
14.0 Combat
14.1 In General
A. During a friendly Combat Phase, the phasing side can attack all adjacent enemy units across playable hexsides. The phasing side is the attacker and the other is the defender, regardless of the overall situation.
B. Attacking is always voluntary; the mere presence of opposing units in each other's ZOC does not necessitate combat between them.
14.2 Multi-Hex Attacks
A. An enemy-occupied hex may be attacked in one battle by as many eligible units as can be brought to bear from the surrounding hexes.
B. No single attack may have as its objective more than one hex (i.e., only one defending hex may be attacked in a single battle).
C. Inter-allied attacks are permitted within the limits of 11.4.
14.3 Indivisibility of Units
A. No attacking unit may have its combat factor divided and applied to more than one battle.
B. Likewise, no defending unit or stack may have part of its defense strength attacked by one or a few attackers while another part is attacked by others.
C. Defending units stacked together may only be attacked as if they are one combined unit.
D. No attacking unit may attack more than once per Combat Phase.
E. No defending unit may be attacked more than once per Combat Phase.
14.4 Attack Sequencing
A. Aside from the restrictions described above, there is no artificial limit on the number of attacks each side may conduct in a friendly Combat Phase.
B. The attacker need not declare all attacks beforehand, and may resolve them in any desired order, as long as the resolution of one is completed before that of the next is begun.
14.5 Basic Combat Procedure
A. Normally the attacker should strive to have more attack factors involved in a given battle than the defender has defense factors. Such attacks are called high odds attacks.
B. To resolve them, the attacker must first calculate the odds. Do that by summing the combat factors of all attacking units involved in a battle; then determine the combat factors of the defending units in the battle. Divide the attacker total by the defender, rounding down any remainder.
Example: 26 attack factors versus 7 defense factors yields an odds ratio of 3:1. That is: 26 ÷ 7 = 3.71, which rounds down to 3.
14.6 Poor Odds Attacks
Battles in which the attacking force has fewer combat factors than the defender are poor odds attacks. Procedures are modified to divide the defender's total by the attacker's; rounding remainders up.
Example: A force with 5 attack factors attacks a force with 11 defense factors. Divide 11 by 5 (11+5=2.2), and round up (2.2 becomes 3) to yield odds of 1:3.
14.7 Odds Limits
The column headings on the CRT range from 1:3 to 6:1. If the combat ratio obtained for a given battle is 1:4 or lower, that battle is resolved as if it were a 1:3. If the combat ratio obtained for a given battle is 7:1 or more, that battle has an automatic combat result of 0/3.
14.8 Volatile Combat Factors
A. Many units in both scenarios are considered volatile (2.11). A volatile unit's combat factors are always variable from battle to battle. To determine a volatile unit's combat factor, roll one die for each such unit during the odds computation process. Then add or subtract the number shown after the plus or minus sign on its counter.
Examples: A volatile unit with a +3 for an attack factor receives a die roll volatility result of 5. That unit then has an attack factor of 8 for that battle. A unit with a -2 for an attack factor (assuming again a die roll volatility result of 5) would go into battle with an attack factor of 3.
B. Make a separate die roll volatility check for every involved volatile unit every time it goes into battle.
C. No volatile unit ever has either of its combat factors reduced to less than one, no matter what the actual result of adding or subtracting its volatility factor from its die roll result.
D. If a unit's printed volatility factor is zero on the counter, simply use the unmodified die roll result as its combat factor.
E. When halving OOS volatile attackers, do not halve the volatility factors. Calculate their attack factors as described above, then simply halve the finally determined number.
Design Note: Yes, the volatility rule does add a certain amount of "wristage" to play of the game. But given that one of my main hypotheses for this design is this kind of unit-by-unit undependability was one of the key tactical factors in the historic campaign, it's a design feature I felt shouldn't be passed up.
14.9 Combat Resolution Die Roll
To resolve a battle, find the odds column of the CRT corresponding to its odds ratio and roll a die. Cross-index with the number just rolled to determine the combat result for that battle.
Example: A roll of a 4 at 3:1 odds yields a result of 1/2.
14.10 Numeric Combat Results
A. Numeric results to the left of the slash apply to the attacker; those to the right apply to the defender. All results are given in terms of step losses to the forces involved in that battle. That is, each whole-number increment of the combat result means one step of the affected side must be eliminated.
B. Combat results are applied by each side among its own involved units as desired, with the single exception that no unit of one side may be completely eliminated until all of its units have first been reduced to one step.
14.11 Zero Combat Results
A zero combat result means the involved forces of the side receiving that result are entirely unaffected; there is no step loss for that side.
14.12 Terrain Effects on Combat
A. Both natural and artificial terrain have effects on combat, shown on the TEC either by generating column shifts favorable to one side or the other, or by halving the combat factors of attacking or defending units.
B. Odds shifts to the left favor the defender; those to the right the attacker.
Example: A unit or stack defending in a mountain hex receives a two-column-leftward (2L) odds shift. Thus a 3:1 attack against units in a mountain hex would become 1:1 (unless those odds were further shifted by other factors described below).
C. It is always the terrain in the defender's hex and along its hexsides that determine those effects; the terrain in the attacker's hex(es) has no bearing.
Exception: The Sarreguemines Gap (14.17).
D. All applicable terrain effects and other odds shifters are cumulative.
14.13 River/Canal and Causeway Hexsides
A unit attacking across river/canal and/or causeway hexsides has its final attack factor halved for doing so. When halving the combat factors of multiple units attacking through such hexsides, total the factors of all the affected units involved in the battle and then make just one grand division. Round all remainders down.
14.14 RAF Combat Air Support
A. If the RAF has been committed to make a maximum effort (4.8, 12.6), the Allies may use those aircraft to provide combat ground support to any of their battles, offensive or defensive, during each turn.
B. Any number of available planes may be committed per battle.
C. The effect of each aircraft unit so committed is to shift the odds one column in the Allies' favor in the battle(s) being supported.
D. To determine the exact number of RAF support counters available for each player-turn couplet, the Allies roll one die at the start of each couplet once all-out RAF commitment has been declared. Apply a -1 DRM. The result (0-5) is the number of support counters available for use throughout that couplet.
E. Each counter may fly one support mission (defensive or offensive) in each player-turn couplet.
F. There are no range limits; the planes may intervene in combat anywhere across the map and may support ground units of any Allied nationalities.
Design Note: The five RAF Spitfire counters represent the only aircraft units for either side in both scenarios. The air superiority achieved by the Luftwaffe in the 1940 campaign is built into the mechanics. It is part of the Allied engagement and disengagement movement costs, and helps account for the relative robustness of German units, reflected, particularly in the panzer divisions, in strength-steps and turn sequence flexibility.
14.15 Concentric Assaults
A. Whenever a single hex is attacked by units in opposite hexes, or by units in three hexes with one hex between each one and the next, or by units in more than three hexes, a concentric assault has been created, which works to generate a 1R odds shift.
Exceptions: This bonus can never be gained when attacking into Maginot Line, Eben Emael, or active Siegfried Line hexes.
B. The presence of other units of the same side as those being concentrically assaulted in hexes next to the assaulted hex in no way serves to negate this shift. In the diagrams below, the defending (center) unit is being concentrically assaulted.
[Diagrams omitted: three hex-grid illustrations of concentric assaults on a defending unit in the center hex.]
14.16 The Maginot Line and Eben Emael
A. Eben Emael and Large Maginot Line fort complexes have a volatility defense factor of +6; small Maginot Line fort complexes have a volatility defense factor of zero.
B. Once placed, such units never move from that hex except as a result of elimination in defensive combat.
C. These three kinds of units do not count for stacking; each has a step strength of one, and they do project their own ZOCs.
D. Forts by themselves never attack, nor can they participate in their side's mobile units' attacks in any way, but mobile units stacked with them may attack from such hexes.
E. Whenever panzer divisions attack a Maginot Line or Eben Emael hex, use their defense factor as the basis for calculating their offensive contribution to that battle.
14.17 The Sarreguemines Gap
Halve the appropriate combat factor of any unit defending in or attacking from a gap hex.
14.18 The Siegfried Line
A. The general rule here is German units defending in Siegfried Line hexes receive a 2L shift.
B. In the 1939 scenario, only those hexes marked as 1939 Siegfried Line Hexes provide this bonus.
C. In the 1940 scenario, all Siegfried Line hexes provide the bonus.
D. Active Siegfried Line hexes are never destroyed, nor are they susceptible to the concentric attack odds bonus.
E. Allied units never benefit from defending in such hexes.
14.19 Allied Field Fortifications
A. Allied units of any nationality defending in any of the Allied Field Fortification hexes printed on the map gain a 1L shift for doing so.
B. Field fortifications are never destroyed, but are susceptible to the concentric attack odds bonus.
C. German units never benefit from defending in such hexes.
14.2 Phase-Sequence Odds Shifts
Editor's note: the source numbers this section "14.2", after 14.19; it is transcribed under its printed number.
A. In every player-turn couplet of the 1940 scenario in which Germany chooses the Fight/Move sequence instead of the Move/Fight sequence, all German attacks gain a 1R odds shift. This does not apply to the 1939 scenario.
B. In every player-turn couplet of both scenarios in which the Allies chooses the Move/Fight sequence instead of the Fight/Move sequence, all Allied attacks suffer a 1L odds shift.
Design Note: The above penalty structure for phase sequencing simulates the fact the Allies were wedded to a tactical and operational doctrine stressing preplanning and prepositioning. But the Germans, even among their non-mechanized units, had gone over to a system that allowed them to be more effective in mobile situations. Thus, if Germany does choose the fight/move sequence, indicating the luxury of preplanning/ prepositioning for that day's operations, it gains a bonus above what are for it now normal (mobile) operating efficiency levels. The more cumbersome Allies, however, suffer a noticeable drop off in combat efficiency if they do not choose fight/move, illustrating their inability to operate as well in more mobile situations.
14.21 Watergangs and Marsh
Halve the attack factor of any mechanized unit (regardless of type or side) attacking into a marsh or watergangs hex, its attack factor is halved. (Though mechanized units are prohibited from moving into marsh hexes, they may still attack into them.)
14.22 Advance After Combat
Whenever all the defenders in a battle are eliminated, one, some or all of the involved attacking units may occupy the vacated hex. This is true even if the advance is made from an EZOC hex directly into another EZOC hex. Normal stacking limits apply, but this kind of movement doesn't require the expenditure of MPs. Advances are not mandatory, but the decision to do so must be made immediately, before the next battle's resolution process is begun. Victorious defenders never advance after combat; they simply hold their position. Important stricture: victorious attackers are prohibited from advancing after combat into hexes containing terrain they could not move into during normal movement.