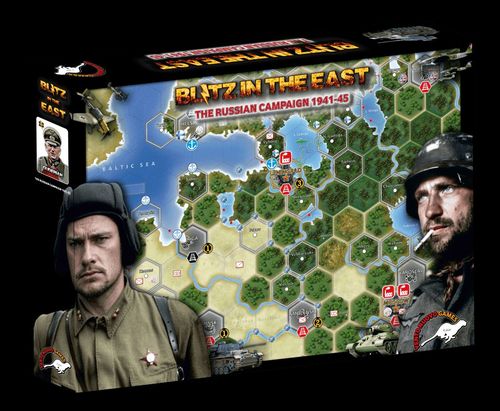
Blitz in the East
Blitz in the East Rulebook
Table of Contents
Table of Contents
- Introduction
- Sequence of Play
- 1.0 Administrative Phase
- 2.0 Ground Movement Phase
- 3.0 Attrition Phase
- 4.0 Attack Phase
- 4.1 Air Battle Resolution
- 4.2 Ground Battle Resolution
- 4.3 Ground Combat Bonuses
- 4.4 Defender Retreat
- 4.5 Advance After Combat
- 4.6 Air Unit Rebasing
- 4.7 Housekeeping
- 5.0 Blitz Phase
- 6.0 Final Phase
- Soviet Turn
- Tutorials
- Rules Addenda
- Scenarios
- Optional Rules
Introduction
Gaming Map
The Map: The hexagonal grid superimposed over terrain features regulates movement and the position of playing pieces. The distance across each hex represents approximately 100 kilometers.
Land hex terrain is either Open, Rough (Forest and Hills), Heavy (Swamp and Mountains), or Urban (Major City and Fortress).
Play Note: For playing purposes, there is no difference between Forest and Hills nor between Swamps and Mountains. These types are present only to represent terrain accuracy.
Minor cities and ports provide no terrain effects.
Partial land hexes with darkened backgrounds along the map edge are not playable. Ground units may not move across full lake and sea hexsides.
Cities: Minor, Major, and Fortress cities act as airbases for Air Units and arrival locations for reinforcements and resurrected units.
Ports: Have an anchor symbol and are used for tracing supply by sea.
National Capitals and Colors
Nations have the following Capitals and colors in parentheses for their units:
- Soviet Union: Moscow (Pink/Red)
- Germany: Berlin (Grey/Black)
- Romania: Bucharest (Blue)
- Hungary: Budapest (Green)
- Finland: Helsinki (White)
- Italy: Bucharest (Yellow)
- Bulgaria: Sofia (N/A)
- Slovakia: Bratislava (N/A)
- Iran: Tabriz (N/A)
Unit Types and Classes
There are two types of units: Ground (squared counter with rounded corners) and Air (round counter).
Within the Ground Unit category, there are three Classes: Armor, Cavalry, and Infantry.
Axis Alpine are Infantry with some specific bonuses during Snowy Weather.
Designer Note: Axis and Soviet Air Units represent air fleets of roughly 300-2000 aircraft. Axis Ground Units represent Army (XXXX) or Corps (XXX) sized formations of roughly 30,000-50,000 men, 300-500 tanks and various support units. Soviet Ground Units represent Army (XXXX) or Front (XXXXX) sized formations of roughly 50,000-200,000 men, 500-2,000 tanks, and various support units. Unit Names appear within the Ground Unit Symbol and above the Air Unit Symbol (abbreviated to a single letter). Several Ground and Air Units changed their names during the Campaign and some of those name changes appear on the reverse side of the Unit counters. In order to foster simplicity and minimize the game's total number of counters, Axis and Soviet Unit names are based solely on what they were identified as when first participating in the campaign.
Ground Units have two numbers at the bottom: the first representing Strength and the second available movement points (MP).
Four Armor Units are blitz capable and marked with either a single or a double bolt icon.
Air Units have two numbers, the first representing the number of dice to roll during air-to-air combat and the second representing maximum MP. They also have a die symbol representing the minimum die roll to inflict a hit during air-to-air combat.
Each Unit has a circle to assist setup or a flag that correlates its arrival with specific Cards.
Unit Status
Units have three status categories that can change and have varying impacts throughout game play: Strength, Supply, and Organization.
The Strength category represents how strong and capable a unit is with respect to manpower and equipment: Full Strength (colored numbers) or Cadre (white numbers).
The Supply category represents how well maintained and sustained a unit's manpower and equipment are: Supplied or Out of Supply (OOS).
The Organization category represents how well a Ground unit can perform basic military functions on a routine basis: Organized or Disorganized. Air Units are always in Organized status.
A unit, either Full Strength or Cadre, that has no additional marker is considered Organized and Supplied.
Unit Surrendering
Surrendered units are Units Destroyed while Out of Supply.
Place Surrendered Axis units into the map's Siberia Box. Those units can never return to action.
Place Surrendered Soviet units into the map's HIWIS Box. See 1.4 and 6.1 for details.
Stacking
A single hex may contain up to 2 Axis or 1 Soviet Ground Units. Playing the Vasilevsky Card increases the Soviet stacking limit to 2.
An airbase hex may have 1 Air Unit in addition to the allowable Ground Units.
Units move one at a time and ignore stacking limits while moving. Units may not exceed stacking limits at the end of every Sub-Phase.
For advances or retreats, units may not move into a maximum stacked hex.
Rounding
When certain rules require a reduction to one half or one quarter of a unit's Strength or MP, round down the result to the nearest whole number (the minimum value is one).
If a Unit's Strength requires factors to be multiplied and divided, first multiply and then divide as discussed above.
Cards
There are 28 (11 Axis and 17 Soviet) cards in the game.
Some are Strategic (vertically oriented) and some are Tactical (horizontally oriented).
Each Side starts the game with specific cards employed and/or in his hand. New Cards become available on specific turns during the Card Draw Sub-Phase to abstractly simulate important historical effects on the War in the East.
Cards in a hand remain concealed until employed. Place employed cards on the table with the front side visible.
There is no limit to the number of cards held by a player. The phasing player may employ one Strategic and one Tactical card per turn.
During the Strategic Card Employment Sub-Phase, the Phasing Player may employ any one of his in hand Strategic cards. Once played, a Strategic card remains in play for the remainder of the game unless cancelled by another Strategic Card or event.
During the Attack or the Blitz Phase, the Phasing Player may employ any one of his in hand Tactical cards. Once employed, a Tactical card provides its effect for one Battle, and then returns in hand at the end of the Phasing Player's Turn.
Review the Card Summary Addendum for details.
Weather & Terrain Impacts
In the game, there are four types of weather (Clear, Rainy, Snowy, and Blizzard), four types of playable hex terrain (Open, Rough, Heavy, and Urban), and Rivers that run in between hexes.
Depending on the terrain and weather at any given time, there are varying movement, attrition, and combat effects.
Rivers (except the Lower Volga) freeze during snowy weather.
Permanently Prohibited Terrain:
Kazakhstan (the seven hexes on the eastern side of the Lower Volga): no Axis Movement, Attack, or ZOC;
Kerch Strait crossing and Heavy terrain: no Armor movement.
See the details in the Weather Addendum.
Sequence of Play
Each year contains six Two-Month periods and each Two-Month period contains an Axis Turn followed by a Soviet Turn. The player executing his Turn is the Phasing Player, while the other player is the Non-Phasing Player.
SEQUENCE of PLAY
AXIS TURN
- 1.0 Administrative Phase
- Card Draw
- Strategic Card Employment
- Initial Supply Check
- Production Points (PP) Collection
- Reinforcement Entry & PP Expenditure
- Strategic Rail Movement
- Air & Operational Movement
- 2.0 Ground Movement Phase
- 3.0 Attrition Phase
- Superiority Check
- Attrition Resolution
- [4.0 Attack Phase]
- [5.0 Blitz Phase]
- 2nd Ground Movement Phase
- 2nd Attack Phase
- 6.0 Final Phase
- Final Supply Check
- Victory Check
SOVIET TURN (Repeat Phase 1.0 - 6.0)
1.0 Administrative Phase
1.1 Card Draw
The Phasing Player draws the Card scheduled to arrive this Turn (if any) and adds it to his hand.
1.2 Strategic Card Employment
The Phasing Player may employ one Strategic Card from his hand.
1.3 Initial Supply Check
The Phasing Player checks supply for each of his Units, controlled Production Centers and Railyards.
A Unit, Production Center, and Railyard is in supply if it can trace a line of friendly controlled hexes to its supply source, either directly or through a supply link.
Axis Supply Sources are any Axis Minor Capital, Berlin (G1), and Vienna (G2).
The Soviet Supply Source is Siberia (off the map) via supply links with Kirov (S1) and Saratov (S2).
The Phasing Player will place an Out of Supply (OOS) marker on any unit unable to trace a supply path to a Supply Source.
Units that are OOS suffer several penalties throughout the turn:
- Cannot Reorganize, Replenish, or Upgrade;
- Cannot conduct Strategic Movement;
- Cannot conduct Operational Movement (Air Units can, but MP allowance is normal vice doubled);
- MP reduced by half during the Ground Movement Phase;
- OOS Air Units and OOS Armor Units are NOT Valid for determining Air Superiority and Armor Superiority. This is true for both the Phasing Player and the Non-Phasing Player.
- OOS units belonging to the Phasing Player are NOT Valid for determining the Attrition Strength of the Phasing Player.
- OOS units belonging to the Non-Phasing Player are Valid for determining the Attrition Strength of the Non-Phasing Player.
- Cannot advance during the Attrition Phase;
- Cannot attack during the Attack Phase;
- Cannot move or attack during the Blitz Phase;
- Suffer 2 hits if still OOS during the Final Supply Check;
- If Destroyed they surrender (6.1).
1.3.1 Sea Supply
Depending on a Side's sea control, Air and Ground Units (not Production Centers or Railyards) may also trace a line of friendly controlled hexes via friendly controlled ports to a supply source.
Ports: There are major ports (anchor with blue background) and minor ports (anchor with white background).
Sea Control: Sea control is determined by the number of friendly controlled major ports in a sea. Each playable sea has three major ports.
- Baltic Sea: Danzig; Helsinki; Leningrad
- Black Sea: Constanta; Sevastopol; Batumi
Control occurs when one Side controls at least two major ports. Control guarantees Sea Supply for the controlling Side.
Example: At the beginning of the game, the Axis controls the Baltic Sea (Helsinki and Danzig) while the Soviets control the Black Sea (Batumi and Sevastopol).
Place an OOS marker on any Production Center or Railyard unable to trace supply exclusively via land hexes. OOS Production Centers are unable to provide Production Points (PP). OOS Railyards are unable to support Strategic Movement, unit replenishment, and unit upgrading.
Air and Ground Units on sea supply are unable to Replenish or Upgrade. Resurrected or reinforcing Air and Ground Units are also unable to deploy to friendly controlled home country cities on sea supply.
Play Note: Supply for the Non-Phasing Player's units, controlled Production Centers, and controlled Railyards is never checked during the Phasing Player's Turn. Its status remains unchanged from the Non-Phasing Player's previous Turn or per the Scenario start instructions.
1.3.2 Zone of Control (ZOC)
ZOC represents the ability of a Ground Unit (Air Units project no ZOC) to apply a certain level of control to each playable hex adjacent to its location. ZOC affects both Hex Control and enemy Ground Movement.
ZOC does not extend:
- Across the Kerch Strait or an unfrozen River;
- Across a full lake or sea hexside (hexsides marked with a red dot are impassable for Ground Units and prevent ZOC);
- Into an enemy controlled Urban terrain hex.
[Figure 1 diagram]
Example (Figure 1): The Weather is Clear and Moscow's last occupant was a Soviet Ground Unit. Due to the unfrozen river and enemy controlled Urban terrain hexes surrounding its location, the German 1st Panzer can only project a ZOC into the two hexes to the left and lower left. The Soviet 4th Tank can project a ZOC into all surrounding hexes except the upper left hex across the unfrozen river.
ZOC affects Ground Unit Movement as follows:
- Leaving an enemy ZOC during Ground Movement costs +1MP;
- Leaving an enemy ZOC and simultaneously entering an enemy ZOC during Ground Movement (whether from the same or a different enemy unit) costs +2MP;
- Entering an enemy ZOC does not cost any extra MPs.
Exception: For Operational Movement, hex control only changes at the end of the Administrative Phase.
1.3.3 Hex Control
A hex may be friendly controlled, disputed, or enemy controlled. Any changes in control status take effect immediately.
A hex is friendly controlled if:
- The Scenario setup instructions designate the hex as friendly controlled;
- A friendly Ground Unit occupies the hex;
- It is empty, its last occupant was a friendly Ground Unit, and it does not lay in the ZOC of an enemy Ground Unit;
- It is empty, it lays in a friendly ZOC, and it does not lay in an enemy ZOC;
- It is empty, not Urban terrain, and surrounded by friendly controlled hexes.
Disputed hexes are empty of Ground Units and lay in both a friendly and enemy ZOC.
[Figure 2 diagram]
Example (Figure 2): Each hex that is either occupied by an Axis Ground Unit or solely within its ZOC is Axis controlled. There are four disputed hexes that lie within the ZOC of both Axis and Soviet Ground Units. All other hexes are Soviet controlled due to previous Soviet control. Note that the hexes right of the Prut River are Soviet controlled, as the Soviets were the last occupant and Axis ZOC does not extend across an unfrozen river.
1.4 Production Points (PP) Collection
Production Centers abstractly represent the production of resources required to set the conditions for major attack operations, Reorganize, Replenish, Upgrade, and Resurrect units, and pay any Upfront Penalty costs. There are three types of Production Centers in the game: Factories, Mining Centers, and Oilfields. Factories and Mining Centers produce Goods while Oilfields produce Oil.
The Phasing Player updates the Production Tracker on the playboard and collects one Production Point (PP) for each friendly controlled Production Center in Land Supply.
Designer Note: Factories and Mining Centers are depicted with different icons on the map, but have no functional difference in the game. They only gain different capabilities when playing the Scorched Earth Expansion. The color of all Production Centers (black for the Axis and red for the Soviets) is solely based on ownership as of June 1941 when the Barbarossa campaign began and can change ownership throughout the game.
HIWIS Bonus. For each Surrendered Soviet unit in the HIWIS Box, the Axis immediately receives a one-time allotment of Goods and/or Oil as follows:
- Infantry: 1 Goods;
- Armor/Cavalry: 1 Oil;
- Air: 1 Goods & 1 Oil.
1.5 Reinforcement Entry & PP Expenditure
The Phasing player can spend or accumulate Production Points and uses the markers displayed below to update the total PP remaining for use.
The Phasing Player expends PP to:
a. Purchase an Attack Chit (2 Goods + 2 Oil)
Purchasing the Attack Chit is the 1st PP Expenditure decision, as it allows the Phasing Player to not only conduct the Attack and Blitz Phases, but to also Reorganize two non-Upfront Ground Units or one Upfront Ground Unit at no additional cost.
b. Reorganize
Unit reorganization allows Ground Units to shift from Disorganized to Organized.
Requirements: The Ground Unit must be In Supply
Cost:
- Armor/Cavalry: 1 Oil
- Infantry: 1 Goods
- Air: NA
Designer Note: Cavalry require Oil instead of Goods expenditures due to the significant integration of mechanized vehicles during the war.
c. Replenish
Unit replenishment allows Air and Ground Units to shift from Cadre to Full Strength.
Requirements: Units must be In Land Supply and within three friendly controlled hexes from a friendly railyard.
Cost:
- Armor/Cavalry: 1 Goods & 1 Oil
- Infantry: 2 Goods
- Air: 2 Goods & 2 Oil
[Konev, Zhukov and YAK-3 card images]
Note, the Soviets are unable to Replenish their units until later in the game with the Konev (Infantry Units), Zhukov (Armor Units), and the YAK-3 (Air Units) cards.
d. Upgrade
Unit upgrading allows six specific Ground Units to shift type and transition from Cadre to Full Strength.
Requirements: The Ground Units must be in Land Supply and within three friendly controlled hexes from a friendly railyard.
Cost:
- The four Cadre Soviet Cavalry Units may be upgraded to Full Strength Armor Units when the Rokossovsky Card is employed. Each Upgrade costs 1 Oil & 1 Goods.
- The Cadre Italian Infantry Unit may be upgraded to a Full Strength Alpine Infantry Unit at a cost of 2 Goods.
- The Cadre Hungarian Cavalry Unit may be upgraded to a Full Strength Infantry Unit at a cost of 2 Goods.
Designer Note: Upgrading the four Soviet Cavalry Units required an extensive infusion of equipment, lengthy training, and a buildup of experience. This is abstractly represented by linking the Upgrades to the arrival of Marshal Rokossovsky in 1944. The Italian CSIR received substantial reinforcements in 1942, including three Alpine divisions, four Infantry divisions, and several other minor combat formations, to become the 8th Army and support upcoming Caucasus operations. Employed in 1941, the Hungarian Rapid Corps initially consisted of one Cavalry and two Motorized divisions. Pressured by German demands for greater commitment in the East, Hungary withdrew the three mobile units and replaced them with nine light Infantry divisions in 1942. The new formation became the 2nd Army. While more powerful from a manpower standpoint, the 2nd Army was significantly under motorized. During the game, both Sides will need to do a cost-benefit analysis to determine if and when they should commit to any Upgrades.
e. Resurrect
Unit resurrection allows Units to return from the Destroyed Pool as Cadres (and Organized if a Ground Unit).
Requirements: Newly resurrected Air and Ground Units returning from the Destroyed Box and scheduled Ground Unit reinforcements must deploy in friendly controlled home country cities in Land Supply and without violating the stacking limitations.
Armor Units may not deploy in Minor cities located in Heavy terrain, and Italian Ground Units use Bucharest as their home country city.
Cost:
- Armor/Cav: 1 Goods & 1 Oil
- Infantry: 2 Goods
- Air: 2 Goods & 2 Oil
Note, the Soviets are unable to Resurrect their Air Units until the Sturmovik Card is employed.
Upfront Penalty Extra Cost
A location or unit is Upfront if it is adjacent to an enemy Ground Unit via a playable hexside. Upfront status becomes applicable during Production Point expenditure, Operational and Strategic Rail Movement, Attrition determination, rebasing, and retreating.
Reorganizing, replenishing, and upgrading (not resurrecting) Upfront Ground Units requires paying an additional Upfront Penalty cost for each unit:
- Armor/Cavalry: +1 Oil
- Infantry: +1 Goods
Upfront Air Units may not Replenish.
Designer Note: The Upfront Penalty represents the extra cost and effort to deliver logistics, material, and replacements to the frontline.
Final Notes
Disorganized Cadre Ground Units can restore to Organized and Full Strength during the same Player Turn if the Phasing Player expends the cost to both Reorganize and Replenish (or Upgrade). If Upfront, the Ground Units must also pay the Upfront Penalty for each action.
Destroyed Air and Ground Units can also restore to Full Strength (and Organized at no additional cost if a Ground Unit) during the same Player Turn if the Phasing Player expends the cost to both Resurrect and Replenish.
The Upfront Penalty only applies when replenishing the newly resurrected Ground Unit in an Upfront location. Resurrected Air Units deployed to an Upfront city can't Replenish.
Requiring no PP expenditure, reinforcements arrive per their associated event Card Organized, either at Cadre or at Full Strength. Cadre reinforcements may also Replenish in conjunction with their Turn arrival. The Upfront Penalty only applies when replenishing the newly arriving Ground Unit in an Upfront location.
Similar to resurrected units, reinforcements must deploy in friendly controlled home country cities in Land Supply without violating stacking limitations.
Example (Figure 2): The Axis Player is the Phasing Player and he has 10 Goods and 6 Oil accumulated.
He first decides to purchase the Offensive Chit (2 Goods & 2 Oil) to conduct operations during the upcoming Attack and Blitz Phases. This also allows him to freely Reorganize a Disorganized/Cadre Finnish Alpine Infantry (off screen shot) and the Disorganized/Cadre Hungarian Cavalry as both are not Upfront.
He then decides to Upgrade the Organized/Cadre Hungarian Cavalry (2 Goods), Replenish the Organized/Cadre German 11th Infantry (2 Goods), Replenish the Organized/Cadre German 1st Panzer (1 Good & 1 Oil +1 Oil for being Upfront), and the Organized/Cadre Romanian Alpine Infantry (2 Goods +1 Good for being Upfront).
After spending 10 Goods and 4 Oil, he adjusts his Goods and Oil markers on the Production Tracker to 2 and 0, as a reminder that 2 Oil PP remain for later turns.
Transcriber's note: the printed example says "Offensive Chit" where Section 1.5a names the same purchase the "Attack Chit". The printed marker sentence reads "2 and 0" for Goods and Oil, but its reminder says 2 Oil remains, and the arithmetic (10 Goods and 6 Oil less 10 Goods and 4 Oil spent) leaves 0 Goods and 2 Oil. Both are reproduced as printed here.
Designer Note: Both Sides (more so for the Axis) will frequently be unable to resolve all of their reorganization, replenishment, upgrade, and resurrection needs in a single Turn. This problem is further magnified when also including any Offensive Chit purchases and Upfront Penalty costs. Conducting sustained combats in a limited PP environment requires a lot of forethought and is one of the more challenging aspects of the game to master.
1.6 Strategic Rail Movement
The Phasing Player may move ONE of his Organized and Supplied Ground Units between friendly controlled and in Supply Railyards if the following conditions apply:
- Unit movement does not start in, move through, or end in an Upfront location;
- All hexes entered are friendly controlled at the beginning of the Administrative Phase;
- No stacking violations occur at the final destination.
This unit may move again during Operational Movement or Ground Movement (not both).
Designer Note: Strategic Movement represents the redeployment of large ground formations via rail across vast distances. Given the map scale, all playable hexes have rail capacity. In order to reduce map clutter though, only railyards are visually displayed in the game. In 1941 the Soviet rail gauge was different from the one used in the rest of Europe (and recently annexed Baltic States). In the basic game, differences in rail gauge are ignored. Different rail gauges only play a role in the Scorched Earth Expansion.
Example (Figure 2): The Axis Player is the Phasing Player. Only the German 6th Infantry in Lvov satisfies all of the conditions to conduct Strategic Rail Movement. However, given his offensive focus, the Axis declines to strategically rail move this unit at this point in the game.
1.7 Operational Movement
Air Operational Movement. The Phasing Player may move any number of his Air Units up to double their full movement allowance (normal movement allowance when OOS) if movement ends in a friendly controlled and supplied airbase without exceeding stacking limits.
Air Unit movement is unaffected by enemy ZOC, terrain, and weather.
Ground Operational Movement. Ignoring both normal terrain and weather impacts (each hex traversed costs 1 MP), the Phasing Player may move any number of his Organized and Supplied Ground Units up to their full movement allowance provided:
- Ground Unit movement does not start in, move through, or end in an Upfront location;
- All hexes entered by Ground Units were friendly controlled at the beginning of the Administrative Phase;
- Stacking limits are not exceeded at the final destination;
- Armor cannot enter Heavy terrain hexes;
- Only Infantry and Cavalry Units in Clear or Snowy weather can cross the Kerch Strait.
Ground Units that have used Operational Movement cannot move again during the Ground Movement Phase, but they can potentially move again during the Blitz Phase. The Phasing Player should rotate any moved Ground Unit by 90° as a reminder.
Designer Note: Unmolested by large-scale enemy activity, Operational Movement represents more rapid rear area movement of large ground formations via roads. Given the map scale, all playable hexes have road capacity. Roads are not displayed to reduce map clutter.
Example (Figure 2): Only the Hungarian Cavalry (if reorganized in the earlier production example above), the German 6th, RHS, and 11th Infantry satisfy all of the conditions to conduct Operational Movement. However, given his offensive focus and the need to bring as many Ground Units Upfront as possible, the Axis declines to operationally move any of these units.
2.0 Ground Movement Phase
The Phasing Player may move any Organized and Supplied Ground Units that have not performed Operational Movement up to their full movement allowance, paying full cost for enemy ZOC departure, terrain, and weather impacts.
Axis Units cannot cross the Lower Volga.
Armor Units cannot enter Heavy Terrain hexes.
Kerch Strait: Only Infantry and Cavalry Units in Clear or Snowy weather can cross the Kerch Strait.
Organized units that are OOS can move, but they have their movement allowance halved.
Disorganized Ground Units and all Air Units may not move during this phase.
There is no minimum hex movement. If a Ground Unit does not have enough MP to enter a hex due to enemy ZOC departure, terrain, and/or weather impacts, it cannot move at all.
Each Ground Unit moves individually and may exceed stacking limits while moving but may not exceed stacking limits at the end of its movement. Players may not move stacks of units together.
Ground Units may not move into a hex occupied by an enemy Ground Unit.
However, a Ground Unit may move into a hex occupied solely by an enemy Air Unit and Overrun it. During an Overrun, the Ground Unit destroys the enemy Air Unit and the overrunning friendly Ground Unit can continue moving up to its max MP limit.
Once a Ground Unit has moved, the Phasing Player should rotate it by 45° to mark its status and then proceed with moving another unit.
After completing all desired movement during the Ground Movement Phase, the Phasing Player can then restore all of his rotated Ground Units to normal position.
[Figure 3 diagram]
Example (Figure 3): The Axis Player is the Phasing Player. Desiring to take advantage of Clear Weather, he advances three units across the Romanian frontier into the Soviet Union. The Soviet 12th Infantry and 2nd Cavalry project a ZOC into the hexes with a Z circle label.
Although Upfront, the Romanian 3rd Alpine Infantry does not start its movement in the Soviet 12th Infantry's ZOC and only spends 1 MP to cross the Prut River into Kishinev. Continuing movement to the right of the Soviet 12th Infantry requires 3 MP (1 MP for Clear terrain plus 2 MP for simultaneously exiting and entering an enemy ZOC). At this point the Romanian 3rd Alpine Infantry has expended its max 4 MP limit and must stop.
The German 11th Infantry moves rightward across the Prut River for 1 MP and then across the Dniester River for another 1MP. Now, being inside the Soviet 2nd Cavalry's ZOC and only having a max of 4 MP, it could only continue moving another hex into Vinnitsa for 2 MP or across the Bug River for 2 MP.
The Romanian 4th Infantry moves across the Danube River for 1 MP and then across the Dniester River for another 1MP. Now, being inside the Soviet 2nd Cavalry's ZOC and only having a max of 3 MP, it must stop.
3.0 Attrition Phase
Players first verify if either has Air/Armor Superiority, then compare the strength of their Upfront Ground Units, and finally cross-index the result on the Attrition Table to determine the number of Hits, Claimed Attrition Hexes, Battles and Air Reactions.
The Attrition Phase is mandatory, but the Battle and Air Reaction Markers - representing the maximum number of Battles and Air Reactions that the Phasing Player and Non-Phasing Player can employ during each of the Attack and Blitz Phases – are applicable only if the Phasing Player purchased the Offensive Chit (4.0).
3.1 Superiority Check
Supply, Organization, Strength, and Weather affect Superiority.
3.1.1 Air Superiority
Valid Unit: Any Supplied Air Unit within range of a friendly Upfront Ground Unit.
Conduct the following procedure:
- Each Player counts the number of his Valid Air Units. Count each Cadre Air Unit as one and each Full Strength Air Unit as two. However, if the Weather is Rainy, then all Units count as one each. If the Weather is Snowy or Blizzard, then all Axis Units count as one each.
- Compare the two numbers: If a Player has at least a 2:1 advantage, he achieves Air Superiority for this Phase and deploys his Air Superiority Marker on the gameboard.
Effect: The Player gains a favorable one column shift on the Attrition Table. Any ratios < 2:1 have no effect.
[Figure 4 diagram]
Example (Figure 4): The Romanian Air Unit and 3 of 5 available Soviet Air Units were Destroyed during Turn 1.
For the Axis Player's Attrition Phase on Turn 2, the Axis has 3 Valid Air Units and the Soviets have 2 Valid Air Units to determine Air Superiority. Note, while the Axis has 4 Supplied Air Units in play, the Finnish Air Unit is not within range (3 hexes) of a friendly Upfront Ground Unit and is invalid.
Of their Valid Air Units, the Axis has 1 Cadre and 2 Full Strength Units and the Soviets have 2 Cadre Units.
The Axis has a 5:2 advantage, resulting in Air Superiority (≥2:1) for the phase and deploys the Air Superiority Marker on the board.
3.1.2 Armor Superiority
Valid Unit: Any Organized and Supplied Armor either Upfront or adjacent to a friendly Upfront Ground Unit.
Conduct the following procedure:
- Each Player counts the number of his Valid Armor Units. Count each Cadre Armor Unit as one and each Full Strength Armor Unit as two. However, if the Weather is Rainy, then all Armor Units count as one each. If the Weather is Snowy or Blizzard, then all Axis Armor Units count as one each.
- Compare the two numbers: If a Player has at least a 2:1 advantage, he achieves Armor Superiority for this Phase and deploys his Armor Superiority Marker on the playboard.
Effect: The player gains a favorable one column shift on the Attrition Table. Any ratios < 2:1 have no effect.
Example (Figure 4): The Axis Player has 4 Armor Units in play, but only 3 of them are valid for Armor Superiority determination (Organized, Supplied, and Upfront or Organized, Supplied, and adjacent to a friendly Upfront Ground Unit). All valid Armor Units are at Full Strength.
The Soviet Player has 3 valid Armor Units for Armor Superiority (Organized, Supplied, and Upfront or Organized, Supplied, and adjacent to a friendly Upfront Ground Unit). All Armor Units are at Cadre level.
The Axis has a 6:3 advantage, granting Armor Superiority for the phase and deploys the Armor Superiority Marker on the board.
3.2 Attrition Resolution
For Attrition Strength determination, a Ground Unit is Valid if:
- Upfront for the Non-Phasing Player;
- Upfront, Organized and Supplied for the Phasing Player.
Conduct the following procedure:
- Each player applies any Fortress and Weather impacts (see Player Aid Card) and then calculates the total Strength of all his valid Upfront Ground Units;
- Cross index the two values on the Attrition Table;
- Apply the cumulative number of all applicable Surprise and Superiority shifts per the Attrition Table (rightward for the Phasing Player and downward for the Non-Phasing);
- Determine the # of Non-Phasing Player Hits, # of Phasing Player Hits, and # of Phasing Player Attrition Hex Markers;
- If the Phasing Player purchased the Offensive Chit, then also determine the # of Phasing Player Battle Markers and # of Non-Phasing Player Air Reaction Markers.
3.2.1 Hit Application
Both Players, Non-Phasing Player first, apply all hits to their Upfront Ground Units as follows:
- No more than one hit per an Upfront Ground Unit until all Upfront Ground Units have suffered a hit;
- Any Upfront Ground Unit, regardless if it was valid and contributed its Strength for Attrition Resolution, may take hits;
- Apply no hits to Air Units or to Ground Units that are not Upfront.
[HITS diagram: hit progression for a Ground Unit is Organized Full Strength, then Disorganized Full Strength, then Organized Cadre, then Disorganized Cadre, then Destroyed; each step down is one hit.]
Transcriber's note: the Attrition Phase sub-sections below are printed as "2.2.x" (not "3.2.x") and the page carrying the "2.2.1" heading is not present in the source; the numbering is reproduced as printed.
2.2.1.1 Free Advance
If the Non-Phasing Player vacates an Upfront hex, the Phasing Player may then immediately advance a maximum of two adjacent, Organized, and Supplied Ground Units into the hex regardless of weather impacts (Armor Heavy terrain and Kerch Strait/Lower Volga restrictions still apply). Ground Units may only advance once per phase. Rotate them by 45° after movement to ensure compliance.
Designer Note: Since these advances do not consume any Claimed Attrition Hex Markers, they are just a free opportunity to capture enemy territory (especially those hexes that are typically unclaimable). The Non-Phasing Player should avoid losing these natural strongholds.
2.2.2 Claimed Attrition Hexes
With each available Claimed Attrition Hex Marker, the Phasing Player may claim an enemy occupied Upfront hex.
Resolve each Claimed hex resolution one at a time per the following procedure:
- The Phasing Player places a marker onto a claimable hex;
- The Non-Phasing Player retreats Ground Units and/or rebases Air Units from the hex;
- The Phasing Player advances at least one valid Ground Unit into the hex.
The following hexes are not claimable:
- Hexes divided by the Kerch Strait;
- Hexes accessible only via River hexsides (Bridgehead Effect: Even if the hex is claimable, a Ground Unit across a River hexside can only advance if another Ground Unit that is not crossing a river hexside advances first);
- Heavy and Urban terrain;
- Rough terrain in Rainy, Snowy, or Blizzard weather;
- Hexes where no Ground Units are available to advance.
2.2.3 Retreat
The Non-Phasing Player must first retreat all Organized Ground Units in the Claimed Attrition Hex to any adjacent friendly controlled hex allowed per terrain and weather restrictions and within stacking limits. Retreating does not cost any MP.
Each retreating Ground Unit that ends up in an Upfront location suffers a hit per the hit procedure described above. Ground Units that are Disorganized or unable to retreat as described above are Destroyed.
2.2.4 Air Unit Rebasing
If a Non-Phasing Air Unit resides in the Claimed Attrition Hex, the Non-Phasing Player must rebase it to a friendly controlled airbase within range and within stacking limits. An Air Unit required to rebase and unable to do so is Destroyed.
2.2.5 Claimed Attrition Hex Advance
After the Non-Phasing Player has completed his required retreat and/or rebasing from the Claimed Attrition Hex, the Phasing Player may advance at least one adjacent, Organized, and Supplied Ground Unit. Advancing does not cost any MP.
Ground Units may only advance once per phase: After completing the advance into the claimed hex, the Phasing Player rotates his advancing units by 45° and deploys the Attrition Marker on top as a reminder that these Units cannot advance any longer in the Phase.
2.2.6 Housekeeping
After resolving the last Claimed Attrition Hex, the Phasing Player can then remove all of his employed Attrition Hex Markers from the playboard and restore all advancing Ground Units to the normal position.
Designer Note: The Attrition Phase abstractly represents the day-to-day attrition and transfer of territory that occurs along the front's entirety during the Turn, both inside and outside major offensive periods. This is a unique technique to better simulate the scale of the war in the East and its tremendous cumulative cost.
Attrition Table (3.0)
The table is printed with the Phasing (Attacker) strength brackets across the top, each keyed to a count of Phasing Claimed Attrition Hexes / Battle Markers (0 to 6), and the Non-Phasing (Defender) strength brackets down the side, each keyed to a count of Defender Air Reaction Markers (0 to 6). Each cell gives the Non-Phasing Hits and Phasing Hits, in that order (for example, 1-1 means one hit to each side).
| Defender Air Reaction Markers (row) | Non-Phasing (Defender) Ground Strength ↓ \ Phasing (Attacker) Ground Strength → | 0-26 (Claimed Attrition Hexes / Battle Markers: 0) | 27-53 (1) | 54-80 (2) | 81-107 (3) | 108-134 (4) | 135-161 (5) | OVER (6) |
|---|---|---|---|---|---|---|---|---|
| 0 | 0 - 26 | 1-1 | 1-0 | 2-0 | 3-0 | 4-0 | 5-0 | 6-0 |
| 1 | 27 - 53 | 0-1 | 1-1 | 2-1 | 3-1 | 4-1 | 5-1 | 6-1 |
| 2 | 54 - 80 | 0-2 |
Table notes (as printed on the table):
- Air Strength = 0.
- Non-Upfront Ground Strength = 0.
- Phasing Disorganized/OOS Ground Strength = 0.
- Rainy: Total Ground Strength = Halved.
- Snowy: [except Alpine] Total Phasing Axis Ground Strength = Halved.
- Blizzard: [except Alpine] Total Axis Ground Strength = Quartered (Phasing) / Halved (Non-Phasing).
- Ground Strength in Fortress = x3.
- Shifts: Axis Surprise: 1 Shift Rightward. Air Superiority: 1 Shift*. Armor Superiority: 1 Shift*.
- * Phasing shifts Rightward; Non-Phasing shifts Downward.
- 1-1 = Non-Phasing Hits - Phasing Hits.
- Ineligible Claimed Attrition Hexes: Across a River, Across Kerch Strait, Heavy/Urban terrain, and Rough terrain in non-Clear weather.
[Fig. 4 example map omitted: an example board of Axis and Soviet units and claimed attrition hexes, illustrating the Attrition Table. The circled cells on the printed table are example highlights only.]
Example (Figure 4), continued: [The opening sentence of this example does not appear in the source booklet; the text resumes below.] Axis Turn, the Axis has a total strength of 70 from 16 valid Upfront Ground Units and the Soviets have a total strength of 30 from 9 Upfront Ground Units (Note 23rd Infantry has triple Strength for Leningrad is a Fortress.)
The two total Strength numbers are cross indexed on the Attrition Table to give an initial "2-1" result and then shifted two columns rightward (Axis Air and Armor Superiority) from "2-1" to a final "4-1" result.
The Soviet Player suffers 4 hits, while the Axis Player suffers 1 hit and earns 4 Claimed Attrition Hex Markers. With a purchased Offensive Chit, the Axis Player also receives 4 Battle Markers and the Soviet Player receives 1 Air Reaction Marker for use in each of the upcoming Attack and Blitz Phases.
The Soviet Player applies his 4 hits first (each indicated by a blue arrow pointing to an upside down Disorganized marker). Cadre 7th Infantry (shifts to Disorganized), Cadre 23rd Infantry (shifts to Disorganized), Cadre 20th Infantry (shifts to Disorganized), and Disorganized/Cadre 5th Infantry (shifts to Destroyed).
Then, the Axis applies his 1 hit next (red arrow toward an upside down Disorganized marker) to the Cadre Finnish Kr Alpine Infantry (shifts to Disorganized).
The Axis will then immediately free advance the German RS Infantry into the hex vacated by the Soviet 5th Infantry (marked with a green box).
The Axis Player now claims and advances into the following three hexes (marked with green hexagons) one at a time: hex occupied by the Soviet 21st Infantry (Soviet 21st Infantry must retreat to any of the two top adjacent hexes to avoid taking a hit and becoming Disorganized/German 9th Infantry and 18th Infantry will advance); hex occupied by the Soviet 19th Infantry (Soviet 19th Infantry must retreat downward, taking a hit (UpFront) and becoming Disorganized/German 2nd Panzer and 16th Infantry will advance); hex occupied by the Soviet 6th Infantry (Soviet 6th Infantry is unable to retreat and is Destroyed/Italian CSIR Infantry will advance).
The Axis still has one of his four Claimed Attrition Hex Markers and desired to claim and advance into some other hexes (outlined with yellow and red), but the lack of an advancing Ground Unit (yellow hex) or prohibitive terrain (red hexes) made this impossible.
4.0 Attack Phase
The Attack Phase occurs only if the Phasing Player purchased the Offensive Chit during the Administrative Phase.
With each available Battle Marker (3.0), the Phasing Player (now the "Attacker") may battle a hex occupied by the Non-Phasing Player (Defender) with Air and/or Ground Units. There are two types of battles.
Air Battle. Using one in range and Supplied Air Unit, the Attacker battles a hex occupied by an enemy Air Unit. Only air-to-air combat occurs with this type of battle.
Ground Battle. Using at least one adjacent, Organized, and Supplied Ground Unit via a playable hexside, the Attacker battles a hex occupied by at least one enemy Ground Unit. Air Units from both Sides may participate, conducting air-to-air battle and potentially providing Close Air Support for ground battle.
Resolve each battle, from Battle Marker employment to advance after combat, one at a time.
The Attacker does not need to initiate any battle, but the maximum number of battles he can initiate is limited by the number of Battle Markers gained during the Attrition Phase (never exceeds six). In addition, the Attacker may never battle a hex more than once during the same phase.
Air Units can move up to their maximum range and ignore enemy ZOCs, terrain, and weather while moving to battle, reacting, or rebasing. However, weather could affect their effectiveness in combat per the Weather & Terrain Impacts Addendum.
In the Attack Phase, Ground Units cannot move prior to battle, but can move post combat in order to retreat or advance.
Air and Ground Units may only participate in one battle during the phase. Rotate each applicable unit 45° at the end of combat to ensure compliance.
The phase concludes after the Attacker resolves all battles.
4.1 Air Battle Resolution
Conduct each Air Battle per the following procedure:
- The Attacker employs a Battle Marker onto a valid battle hex and then moves one in range and Supplied Air Unit to that hex. The Defender can not employ an Air Reaction Marker in response.
- Conduct one round of simultaneous air-to-air combat. Full Strength Air Units roll two dice and Cadre Air Units roll one die. Depending on the Air Unit and Scenario instructions, firepower may vary from Quadruple Fire (hits at 3+) to Double Fire (hits at 5+). Hits only apply to Air Units within the battle hex and any excess hits are disregarded. Unlike Ground Units, Full Strength Air Units are Destroyed after two hits and Cadre Air Units are Destroyed after one hit.
- Surviving Air Units remain in place until Air Unit Rebasing occurs after resolving the phase's last battle.
Example (Figure 5): The Axis Player is the Attacker during the Attack Phase and the weather is Clear.
The Axis Player employs one of his four Battle Markers onto Krivoy Rog and moves the Full Strength German S Air five hexes from Lvov (off screen shot) into the hex for an Air Battle against the Cadre Soviet W Air (Battle #1). The Soviet Player cannot employ an Air Reaction Marker for this situation.
Simultaneously, the Axis Player rolls two dice ("4" and "5") and the Soviet Player rolls one die ("4"), resulting in two hits scored for the Axis and none for the Soviets. The Soviet W Air is Destroyed and immediately moves to the Destroyed Units Box for future resurrection. The German S Air remains in Krivoy Rog until Air Unit Rebasing occurs after resolving the phase's last battle.
4.2 Ground Battle Resolution
Conduct each Ground Battle per the following steps:
- The Attacker employs a Battle Marker onto a valid battle hex and declares which of his adjacent Ground Units is attacking by rotating them by 45°.
- Both Players – Attacker first - may move one in range and Supplied Air Unit to the battle hex for Close Air Support with the following exceptions for the Defender: a. If a defending Air Unit is not present in the battle hex, the Defender may employ an Air Reaction Marker onto the battle hex in order to react with an Air Unit not currently present in the battle hex (or choose not to react); b. If a defending Air Unit is already present in the battle hex, the Defender must use that unit (whether the Attacker battles with an Air Unit or not) without using an Air Reaction Marker.
- Conduct Step 2 in Section 4.1. Surviving Air Units remain in place for Close Air Support Bonus determination and Air Unit Rebasing.
- Each Player applies any terrain and weather modifiers to participating Ground Units per the Weather & Terrain Impacts Addendum and then calculates the total Strength.
- Compare the two values, calculate a ratio column on the Ground Combat Results Table (GCRT), and round down to the next ratio column as appropriate. If the calculated ratio column is <1:1, immediately stop the combat. The employed Battle Marker is forfeit and all involved units may not participate in any other battles.
- The Attacker may employ an available Tactical card from his hand for the Battle (only one per Attack or Blitz Phase).
- Apply the cumulative number of all applicable Ground Combat Bonus column shifts on the GCRT (rightward for the Attacker and leftward for the Defender) per Section 4.3.
- The Attacker rolls a die on the modified ratio column and determines the following result from the GCRT: a. # of Defender Hits/# of Attacker Hits. b. An "!" next to the result or a blue bracket (around the modified ratio columns) requires a mandatory Defender Retreat unless the battle hex is Urban.
- Both Players, Defender first, apply their hits as desired amongst their Units, resolve any retreats and advances per the sections discussed below.
4.3 Ground Combat Bonuses
The Close Air Support Bonus (1 or 2 column shift) occurs when a player has the strongest participating Air Unit or the only participating Air Unit. Unless there is a weather impact listed in the Weather & Terrain Impacts addendum, a Full Strength Air Unit in Clear weather provides a 2 column shift, any other Air Unit provides a 1 column shift. When both players have participating Air Units, their column shifts simply cancel each other out.
The Armor Bonus (1 column shift) occurs for the Attacker if the weather is Clear, the battle hex is Open terrain, and only his Side has a participating Armor Unit. Regardless of terrain and weather, the bonus occurs for the Defender if only his Side has a participating Armor.
The Pincer Bonus (1 column shift) occurs when combat occurs across two hexsides not adjacent to each other (1 shift). This bonus increases to 2 column shifts if combat occurs across three hexsides not adjacent to each other (Concentric Combat). Additional attacking Units in other adjacent hexes do not affect nor negate the Pincer or Concentric Combat Bonuses.
4.4 Defender Retreat
Defender retreats can occur after combat either voluntarily or via a mandatory combat result.
For a voluntary retreat, the Defender can retreat some or all participating Organized Ground Units. For a mandatory retreat, the Defender must retreat all participating Organized Ground Units.
In both cases, all retreating Ground Units must move into any adjacent friendly hex without exceeding stacking limits.
Retreating does not require any MP expenditure, but Units cannot retreat into prohibited terrain.
Each retreating Ground Unit that ends up in an Upfront location suffers a hit per the hit sequence graphic in section 3.2.1.
Disorganized Ground Units or Organized Ground Units unable to retreat as described above are Destroyed.
4.5 Advance After Combat
After the Defender retreats, the Attacker must advance into the vacated hex with one of his participating Organized Ground Units if possible. Advancing does not require any MP expenditure, but Ground Units cannot exceed stacking limits nor enter prohibited terrain.
[Fig. 5 example map omitted.]
Example (Figure 5): The Axis Player now employs a Battle Marker (Battle #2) onto Kiev to launch a Ground Battle with the following Full Strength German Units: 1st Panzer, 6th Infantry, and C Air from Vilnius (off screen shot five hexes away). Although the Soviet Player has one Air Reaction Marker to expend, he does not have any Air Units in range due to the Axis Player's previous successful Air Battle (Battle #1).
Both Players calculate and compare their total Ground Strength: 14 for the Axis and 6 for the Soviets (the Cadre Soviet 4th Tank is Organized and enjoys double Strength defending in Urban terrain).
The initial Ground Combat Ratio is 2:1 and is revised to 4:1 due to the Axis Player's Close Air Support Bonus (Full Strength C Air = rightward 2 column shift). The Axis Player rolls a "2", resulting in two hits for each Player.
The Soviet 4th Tank (Organized Cadre) is Destroyed and moves to the Destroyed Box for future resurrection. The Axis Player has three options to consider: apply one hit to each Ground Unit or apply both hits to either Ground Unit. In order to capture Kiev (friendly ZOC into an empty enemy controlled Urban hex is insufficient to change control) and safeguard the German 1st Panzer's later blitzing capability (must be Organized and Full Strength), the Axis Player decides to apply both hits to the German 6th Infantry (now an Organized Cadre) and then advance the German 1st Panzer and 6th Infantry into Kiev. The German C Air remains in Kiev until Air Unit Rebasing after resolving the phase's last battle.
Note, the Axis Player was unable to launch a desired Ground Battle into Odessa due to the initial Ground Combat Ratio being <1:1. Total Ground Strength for the Axis was 5 (Full Strength German 11th Infantry suffers half Strength attacking across an unfrozen river) and 6 for the Soviets (Cadre Soviet Od Infantry is Organized and enjoys double Strength defending in Urban terrain).
The Axis Player now conducts his last two remaining battles in the northern part of the playboard.
4.6 Air Unit Rebasing
After resolving the phase's last battle, all participating Air Units, Defender first, must rebase to friendly controlled airbases within range and without exceeding stacking limits. Any Air Units required to rebase and unable to do so are Destroyed.
4.7 Housekeeping
After rebasing all Air Units, Players take the following action to end the phase:
- Phasing Player: Removes all employed Battle Markers from the playboard and restores all units to normal position. A used Tactical card will remain on the playboard until completion of the Blitz Phase.
- Non-Phasing Player: Removes all employed Air Reaction Markers from the playboard.
5.0 Blitz Phase
The Blitz Phase occurs if the Phasing Player meets all the following conditions:
- He has purchased the Offensive Chit;
- At least one Blitz-capable, Organized, Supplied, and Full Strength Armor Unit is available;
- The appropriate Strategic Card is employed.
Participating Units. The following units are able to participate in the phase:
- Blitzing Armor Units;
- Supplied Air Units adjacent to a Blitzing Armor Unit;
- Organized and Supplied Ground Units adjacent to a Blitzing Armor Unit.
Starting in 1942, the range for participating Units to a Blitzing Armor Unit increases from adjacent to within two friendly controlled hexes.
Rotate all non-participating units 90° at the beginning of the phase to ensure that they do not participate.
Participating units conduct another Ground Movement Phase and Attack Phase, even if they had participated in earlier movement or combat during the Turn. Players can employ the same number of Battle Markers and Air Reaction Markers gained during the Attrition Phase, no matter how many were employed in the Attack phase.
Example (Figure 6): Continuing on from the preceding example, the Axis Player has resolved all of his Battles, rebased the German C Air from Kiev five hexes back to Vilnius (off screen shot), rebased the German S Air from Krivoy Rog two hexes to Kiev, restored his Ground Units to normal position, and concluded the Attack Phase.
During the Blitz Phase, the Axis determines that only the 1st Panzer meets all of the requirements for designation as Blitzing Armor (Blitz-capable, Organized, Supplied, and Full Strength). The supporting Kleist card was employed at the beginning of the game. Since it is 1941, only the Organized and Supplied 6th Infantry and Supplied S Air located in Kiev may join the 1st Panzer and participate in the Blitz Phase.
[Fig. 6 example map omitted.]
The Axis now ponders his options with the three units at his disposal for the phase. They can move and then attack again employing the four Battle Markers gained in the Attrition Phase. Other Axis Units cannot move or attack. The Soviets can react with the one Air Reaction Marker gained in the Attrition Phase.
Note that it is impossible to battle the 2-5 Organized Cavalry in Perekop (Swamp, Organized Defender Doubled to 4), as the Axis do not meet the Initial Ground Combat Ratio requirement ≥1:1 because Armor cannot attack in swamp, and the 4-3 Infantry would be halved to 2 for river crossing.
Instead, noticing that the Soviet Air Units are out of reach, the Axis could employ these three units to battle Odessa: the 6th Infantry from the hex occupied by the Romanian Infantry while the Armor (halved) across the Bug from the empty hex along the coast for 8:6 plus Pincer Bonus and Air Support for an inviting 4:1 (83% chance to seize the city.)
6.0 Final Phase
6.1 Final Supply Check
The Phasing Player verifies the status of all of his OOS units, controlled Production Centers, and controlled Railyards. Remove the OOS Marker from any of the above entities now able to trace supply to a supply source per Section 1.3.
Production Center and Railyards that remain OOS maintain the OOS markers.
Units that remain OOS immediately suffer 2 hits and maintain the OOS markers unless Destroyed. If Destroyed they Surrender.
[Siberia Box and HIWIS Box icons]
Surrendered Axis Units are moved to the Siberia Box and permanently removed from the game.
Surrendered Soviet Units are temporarily moved to the HIWIS Box, provide a HIWIS Bonus to the Axis, and then are moved to the Destroyed Box for future resurrection.
6.2 Victory Check
Use the Scenario instructions to check for Blitz or Decisive Victory Conditions. If the Axis player has not met any Victory Condition, then flip the Turn Tracker Marker to the Soviet Side and begin the Soviet Turn.
Soviet Turn
Conduct the Soviet Turn similar to the Axis Turn, except the Phasing/Non-Phasing Player roles swap.
After the Soviet Turn, both Players check the Scenario instructions to check for Operational or Strategic Victory Conditions. If no one has won yet and more Turns remain in the game, move the Turn Tracker forward by one space and flip it for a new Axis Turn.
Tutorials
S.0 Beyond the Dnieper
The scenario starts on the Attrition Phase of Axis Turn 2 and ends with the Soviet Victory Check of Turn 2. Setup with the Units portrayed in figure 4. German RC and Soviet 5th Infantry are Disorganized. Romanian Air and all "circled" Soviet Units not shown (8 Infantry, 1 Armor, and 3 Air) are in the Destroyed Units Boxes.
The Axis has the Offensive Chit available.
Axis Cards: Kleist, Guderian and Iran are in play.
Soviet Cards: Great Patriotic War is in play, Sturmovik is in hand, and Katyusha is in the deck.
The Axis must seize and hold the three cities marked with a "2" to win the scenario. The Soviets must hold at least two of the three cities to win the scenario. Any other result is a draw.
S.1 Blitz in the East
The Axis must practice with the opening move to seize all three objectives and inflict heavy losses to the Soviets to both shock the Red Army and limit its counterattack capability. A good goal is to seize 14 Soviet hexes and eliminate 14 Units before they can attack you.
As the Soviets, once your turn comes there is nothing to lose: repel the invaders from the Motherland!
Start: Turn 1 – Axis Ground Movement Phase
Finish: Turn 1 – Strategic Victory Check
Victory Cities: Riga, Minsk, and Lvov
- Axis Victory: The Axis capture and hold all three victory cities;
- Draw: The Axis capture and hold two of the three victory cities;
- Soviet Victory: The Axis capture and hold one or none of the victory cities.
Axis Surprise Bonus: During the 1st Axis Turn, the Axis Player has a Surprise Bonus. The bonus applies for the Attrition, Attack, and Blitz Phases and provides the following benefits:
- The Axis gains 1 shift rightward on the Attrition Table during the Attrition Phase;
- Axis Full Strength Air Units hit at 3+ (Cadre at 4+) in air-to-air combat;
- The Axis gains 1 shift rightward on the GCRT for all battles during the Attack and Blitz Phases.
Historical Setup: As portrayed on the gameboard, dark unit symbols correlate with Full Strength (most of the Axis Units), white unit symbols correlate with Cadre Strength (all of the Soviet Units and some of the Axis), the Hungarian 1st Inf in Cluj is frozen and the Finnish Kr Alpine Infantry is Disorganized.
All Units are in Supply. All playable hexes outside of the Soviet Union and Iran are Axis controlled unless negated by Soviet ZOC (e.g. Joensuu).
Cards. Only three Cards available (note that the German 1st Panzer is at Cadre and cannot Blitz).
Axis Cards Employed: Guderian & Kleist
Soviet Card in Hand: Great Patriotic War
The Axis has the Offensive Chit available.
Rules Addenda
RA.1 Axis Minors Capitulation
Axis Minors capitulate immediately and exit the game per the conditions listed below. Once met, remove all applicable units (unless in the Siberia Box).
- Romania: Soviet capture of Bucharest
- Hungary: Soviet capture of Budapest
- Finland: Soviet capture of Helsinki OR D-Day conditions met. May affect Baltic Sea control.
- Italy: Mussolini Dismissed Card conditions met OR Romania capitulates.
- Bulgaria: Soviet capture of Sofia OR Romania capitulates.
- Iran: Soviet capture of Tabriz
- Slovakia: Soviet capture of Bratislava
RA.2 Weather and Terrain
Clear Weather
- Movement Impacts: All terrain types with the exception of Clear and Urban cost 2 MP.
- Attrition Impacts: Phasing and Non-Phasing Player Ground Strength in Fortresses → Tripled.
- Combat Impacts: Organized Defending Ground Units in non-Open terrain → Strength Doubled (Tripled in Fortress); Attacking Ground Units across a River → Strength Halved.
Rainy Weather
- Movement Impacts: All terrain types with the exception of Urban cost 2 MP.
- Attrition Impacts: Each player totals his Ground Strength, tripling the value for units in Fortresses first, and then halving the total value. Treat Phasing and Non-Phasing Player Full Strength Air Units as Cadres for Air Superiority.
- Combat Impacts: Attacking Ground Units → Strength Halved; Organized Defending Ground Units in non-Open terrain → Strength Doubled (Tripled in Fortress); Attacking Ground Units across a River → Strength Halved.
Treat Attacking and Defending Full Strength Air Units as Cadres for air-to-air combat and Close Air Support Bonus purposes.
Snowy Weather
- Movement Impacts: All terrain types with the exception of Urban cost 2 MP.
- Attrition Impacts: Soviet Phasing/Non-Phasing Player and Axis Non-Phasing Player calculate total Ground Strength as if Clear Weather; Axis Phasing Player totals his Ground Strength, tripling the value for units in Fortresses first, and then halving the total value. Treat Axis Phasing and Non-Phasing Player Full Strength Air Units as Cadres for Air Superiority.
- Combat Impacts: Axis Attacking Ground Units → Strength Halved; Organized Defending Ground Units in non-Open terrain → Strength Doubled (Tripled if in a Fortress); Rivers are frozen (no impact); Treat Axis Attacking and Defending Full Strength Air Units as Cadres for air-to-air combat and Close Air Support Bonus purposes.
River
- Additional Movement Costs: None.
- Attrition Impacts: Hexes accessible only via River hexsides are not selectable as Claimed Attrition Hexes.
- Combat Impacts: Attacking Ground Units during Clear and Rainy weather → Strength Halved.
Lower Volga: Axis Units cannot cross the Lower Volga (south of Saratov, depicted in dark blue color).
Kerch Strait
- Movement Costs: At no additional MP cost. Only Infantry and Cavalry in Clear and Snowy weather can cross the strait.
- Attrition Impacts: Only Infantry and Cavalry Units during Clear and Snowy weather can battle, retreat, and advance across the strait; Attacking Infantry and Cavalry Units → Strength Halved.
- Combat Impacts: Only Infantry and Cavalry Units (Strength Halved) in Clear and Snowy weather can battle and advance across the strait during the Attack and the Blitz Phase; Only Infantry and Cavalry Units in Clear and Snowy weather can retreat across the strait during the retreat after combat.
Exceptions:
- Armor Units cannot enter Heavy terrain hexes;
- Movement Costs: Air Units only expend 1 MP per hex entered;
- Attrition Impacts: Axis Alpine Infantry Units suffer no penalty during Snowy weather;
- Combat Impacts: Armor Units cannot battle Heavy terrain hexes; Axis Alpine Infantry Units suffer no penalty during Snowy weather.
Play Note: If this is your first historical war game, do not become overwhelmed with all of these terrain and weather effects. A separate player aid graphically portrays the different terrain and weather impacts for easy reference. Besides, the 1941 scenario starts off with several Turns of Clear weather and minimal impacts as you become comfortable with the game at large.
Designer Note: The Volga River only had a limited number of low capacity bridges south of Saratov. The Soviets relied heavily on river barges to transport materials along and across the river in this particular area. Any Axis operations across the river would have encountered significant logistical difficulties.
RA.3 Event Cards Summary
Year in parentheses refers to OR.3: Random Card Entry.
Remember: When a Card is cancelled, remove it from the game.
AXIS Cards - #11
Guderian (Strategic)
- Entry: In play.
- Impact: Allows the German 2nd Panzer to blitz.
- Cancellation: if Moscow has not been captured yet and the Soviets play the OKH Intervenes Card.
Kleist (Strategic)
- Entry: In play.
- Impact: Allows the German 1st Panzer to blitz.
- Cancellation: If Rostov has not been captured yet and the Soviets play the OKH Intervenes Card.
Iran Joins the Axis (Strategic)
- Entry: Turn 2 (1941)
- Impact: Iranian hexes immediately become playable - AND - The Soviets, starting with their next PP Collection Sub-Phase, immediately lose 1 Oil per Turn.
- Cancellation: The Soviets control Tabriz. In addition, the 53rd Infantry (Cadre) arrives as a reinforcement during the next Turn.
Paulus (Strategic)
- Entry: Turn 3 (1941)
- Impact: Soviets cannot play the OKH Intervenes Card AND Axis cannot purchase the Offensive Chit during Turns 3 through 6.
- Cancellation: Turn 3, if not employed.
Gustav (Tactical)
- Entry: Turn 7 (1942)
- Requirements: Axis Air Superiority
- Impact: The Axis receives a two column shift on the GCRT for 1 battle against an Urban hex only during the Attack Phase (not during the Blitz Phase due to Gustav being a heavy rail gun).
Fall Blau (Strategic)
- Entry: Turn 8 (1942)
- Requirements: Axis controls Kharkov and Sevastopol
- Impact: The Axis receives a free Offensive Chit and the RHB Infantry arrives in Kharkov (Organized/Cadre)
- Cancellation: After completing the entry Turn's PP Expenditure & Reinforcement Entry Sub-Phase or at the end of Turn 9 if not employed.
Pioneers (Tactical)
- Entry: Turn 9 (1942)
- Impact: Axis receive a one column shift on the GCRT for 1 battle against an Urban hex during the Attack or Blitz Phase.
Manstein (Strategic)
- Entry: Turn 11 (1943)
- Impact: The Axis receives the SS Panzer and the 8th Infantry (both Organized Cadre) as reinforcements - AND - Can select any one Full Strength, Organized, and Supplied Panzer Unit to Blitz per Turn.
Heavy Panzer Battalion (Tactical)
- Entry: Turn 13 (1943)
- Requirements: Clear Weather
- Impact: The Axis receive a one column shift on the GCRT for 1 battle against an Open terrain hex during the Attack or Blitz Phase.
Zitadelle (Strategic)
- Entry: Turn 14 (1943)
- Requirements: The Axis controls Kharkov and Sevastopol
- Impact: The Axis gets a free Offensive Chit
- Cancellation: After completing the entry Turn's PP Expenditure & Reinforcement Entry Sub-Phase or at the end of Turn 15 if not employed.
Festung (Strategic)
- Entry: Turn 22 (1944)
- Impact: Berlin and Breslau immediately become Fortresses.
SOVIET Cards - #17
Great Patriotic War (Strategic)
- Entry: In Hand
On Soviet turn 1, the Soviet player can employ the card and forgo any collection and expenditure of PP on Turn 1 - OR - The Soviet player can discard the card and begin collecting and expending PP on Turn 1.
- Great Patriotic War Impact. The Soviets:
- Collect and expend PP starting on Turn 2;
- Expend 1 less Goods for each Ground Unit Resurrection;
- Reorganize non-Upfront, Disorganized, and in Supply Ground Units at no PP cost;
- If the Offensive Chit is purchased, Reorganize 2 Upfront, Disorganized, and Supplied Ground Unit at no PP cost;
- Can conduct battles on the 1:2 ratio column;
- Purchase the Offensive Chit at double cost for the remainder of the game.
- Cancellation: Turn 1 if the Soviets decline to use it; or if employed and Axis captures Moscow, the end is determined by a die roll.
Example: Axis captures Moscow on Turn 4 → Axis immediately rolls a "3" → Great Patriotic War ends at the end of Turn 7 (4+3).
Otherwise cancel the card at the end of Turn 10.
Deploy the GPW Marker on the ending Turn as reminder.
Sturmovik (Strategic)
- Entry: Turn 1 (1941)
- Impact: Resurrect Air Units.
Katyusha (Tactical)
- Entry: Turn 2 (1941)
- Impact: The Soviets receive a one column shift on the GCRT for 1 battle during the Attack or Blitz Phase.
Lend Lease (Strategic)
- Entry: Turn 3 (1941)
- Impact: The Soviets receive extra Goods during each Turn's PP Collection Sub-Phase as follows:
- 1941 +1 Goods
- 1942 +2 Goods
- 1943 +3 Goods
- 1944 +4 Goods
- 1945 +5 Goods
Reduce by a maximum of 1 Goods per Turn if the Axis controls any of the three Lend Lease hexes OR any of these three hexes are unable to trace a supply route to Siberia.
Pearl Harbor (Strategic)
- Entry: Turn 4 (1941)
- Impact: The Soviets receive the "Kal" Infantry (this turn) - AND - the "Sta" Infantry (next Turn) as Full Strength reinforcements.
OKH Intervenes (Strategic)
- Entry: Turn 5 (1942)
- Impact: Immediately remove Guderian Card if the Axis never captured Moscow at any point.
- Impact: Immediately remove Kleist Card if the Axis never captured Rostov at any point.
- Cancellation: Removed from the game when: the Axis plays the Paulus Card or the Axis captures both Moscow and Rostov.
Red Guard (Tactical)
- Entry: Turn 7 (1942)
- Impact: The Soviets get a one column shift on the GCRT for 1 Battle during the Attack or Blitz Phase.
Konev (Strategic)
- Entry: Turn 8 (1942)
- Impact: The Soviets can Replenish Infantry Units.
Zhukov (Strategic)
- Entry: Turn 9 (1942)
- Impact: The Soviets receive the 1st Guard Tank (Blitz-capable) as a Full Strength reinforcement - AND - Can Replenish Armor Units.
Uranus (Strategic)
- Entry: Turn 10 (1942)
- Impact: The Soviets receive a free Attack Chit.
- Cancellation: After completing the entry Turn's PP expenditure and Reinforcement Entry Sub-Phase - OR - At the end of Turn 11 if not employed.
Airborne Assault (Tactical)
- Entry: Turn 13 (1943)
- Impact: The Soviets ignore any River penalties for 1 Battle during the Attack or Blitz Phase.
Mussolini Dismissed (Strategic)
- Entry: Turn 14 (1943)
- Impact: During each Soviet Victory Check Phase the Soviets roll one die until both of the following actions occur:
- Die roll ≥ 3: Unless in Siberia or OOS, remove SS Panzer. If OOS, remove SS Panzer once in Supply;
- Die roll ≥ 4: Italy surrenders.
Rokossovsky (Strategic)
- Entry: Turn 16 (1943)
- Impact: The Soviets receive the 2nd Guard Tank (Blitz-capable) as a Full Strength reinforcement - AND - Can Upgrade Cadre Cavalry Units to Full Strength Armor Units.
Vasilevsky (Strategic)
- Entry: Turn 17 (1944)
- Impact: The Soviets can stack 2 Ground Units in a hex.
YAK-3 (Strategic)
- Entry: Turn 18 (1944)
- Impact: The Soviets can Replenish Air Units.
D-Day (Strategic)
- Entry: Turn 19 (1944)
- Requirements: Soviets control Leningrad.
- Impact: During each Soviet Victory Check, the Soviets roll one die until the following action occurs:
- Die roll ≥ 4: Finland surrenders.
Bagration (Strategic)
- Entry: Turn 20 (1944)
- Impact: The Soviets receive a free Offensive Chit.
- Cancellation: After completing the entry Turn's PP Expenditure & Reinforcement Entry Sub-Phase - OR - At the end of Turn 21 if not employed.
Scenarios
S.2 Operation Barbarossa
Once you have played the two Tutorials and you are familiar with the game engine, time has come to embark in the largest land warfare operation in history. Do not use any Optional Rules yet.
As the Axis, try to maintain the Offensive going. You have two ways to win the game, either on speed, controlling the Turn Triplette Cities (see Axis Blitz Victory Conditions, below) and scoring a successful die roll, or on final operational dominance, achieving 21 points during the last Soviet turn Victory Check. Whatever is your intention, keep on inflicting losses to the Soviets and grabbing territories.
As the Soviets, take a deep breath and know that the Axis needs both luck and spectacular success to win the game. Efficiently trade space for time by avoiding direct attacks and maintaining your flanks in order. Once the snow falls, look for opportunities to land a decisive blow on a weakened Axis line.
Start: Turn 1 – Axis Ground Movement Phase. The Axis has 3 saved Goods and 2 saved Oil.
Finish: Turn 4 – Soviet Victory Check
Victory Conditions: The Axis can win with a Blitz Victory in 1941. Either player can win with an Operational Victory.
As soon as the Axis controls one of the 12 cities mentioned below, deploy the Axis marker on the city as a reminder. Remove the Axis marker if the Soviets liberate the city.
Axis Blitz Victory: Victory depends upon the Axis capturing the Triplette/Spoils of War Cities:
- Turn 1: The Axis controls Riga, Minsk, and Lvov and rolls a 1 with one die.
- Turn 2: The Axis controls Smolensk, Kiev, and Odessa, and rolls a ≤2 with one die.
- Turn 3: The Axis controls Leningrad, Tula, and Kharkov, and rolls a ≤3 with one die.
- Turn 4: The Axis controls Moscow, Rostov, and Sevastopol, and rolls a ≤4 with one die.
Example: during the Axis Victory Check of the 1st Turn, the Axis controls Riga, Minsk and Lvov but rolls a 2. During the 2nd Turn's Axis Victory Check, the Axis controls Smolensk, Kiev and Odessa but rolls a 6. During the 3rd Turn's Axis Victory Check, the Axis controls Leningrad, Tula and Kharkov and rolls a 1.
Operational Victory: The number equals the total value of all Axis controlled cities having a Spoils of War/Blitz Victory symbol on the playboard during the Turn 4 Soviet Victory Phase Check.
- Axis Operational Victory: ≥ 21
- Draw: 12 – 20
- Soviet Operational Victory: ≤ 11
Example: during the Soviet Victory Check of the 4th Turn, the Axis controls Riga (1), Minsk (1), Lvov (1), Smolensk (2), Kiev (2), Odessa (2), Kharkov (3) and Rostov (4) for total 16. The game ends in a Draw.
Axis Spoils of War Bonus: After capturing a Spoils of War City (marked 1, 2, 3, or 4), the Axis gains +1/+2/+3/+4 Goods at the beginning of the next Axis PP Collection Sub-Phase under the following conditions:
- Only applies for first time captures in 1941;
- Spoils of War City must be friendly controlled and in Land Supply at the moment of PP collection.
Axis Surprise Bonus: As described for S.1 Scenario.
Historical Setup: As described for S.1 Scenario.
Axis Cards Employed: Guderian & Kleist
Soviet Card in Hand: Great Patriotic War
Event Card Arrival: Draw the following six on the indicated turn:
- Turn 1: Sturmovik
- Turn 2: Iran Joins Axis; Katyusha
- Turn 3: Paulus; Lend Lease
- Turn 4: Pearl Harbor
The Axis has the Offensive Chit available.
S.3 The Russian Campaign
Once you have played the first three Scenarios and you are comfortable with the game engine, time has come to embark in the largest land warfare operation in history. You can play the Campaign with or without Optional Rules.
As the Axis, try to maintain the Offensive pressure on the Soviets. You can win the game via two means: decisive knockout blow by controlling the Turn Triplette Cities and scoring a successful die roll or sustained operational dominance by earning > 21 points during the last Soviet Victory Check. Both options require inflicting significant casualties on the Soviet Army while capturing wide swaths of enemy territory.
As the Soviets, take a deep breath and know that the Axis needs both luck and spectacular success to win the game. Efficiently trade space for time by avoiding direct attacks and maintaining your flanks in order. Once the snow falls, look for opportunities to land a decisive blow on a weakened Axis line.
Start: Turn 1 – Axis Ground Movement Phase. The Axis has 3 saved Goods and 2 saved Oil.
Finish: Turn 28 – Soviet Victory Check
Victory Conditions: The Axis can win with a Blitz Victory in 1941 and either player can win with an Operational Victory at the end of 1941 (see S.2).
If none of the above are met, then the game continues until a Decisive or a Strategic Victory is achieved by either side.
-
Axis Victory: The Axis controls three of the following cities: Sevastopol, Moscow, Leningrad, Baku, and Stalingrad during the Soviet Victory Check for Turns 10, 16, 22, or 28 OR the Axis control four of the above cities during any Victory Check of any Turn.
-
Soviet Victory: The Soviets win if they capture Berlin OR obtain >9 Victory Points. The Soviets earn a Victory Point for each Surrendered Axis unit and the following Soviet controlled cities (nine points maximum): Kirov, Saratov, Tabriz, Bucharest, Sofia, Helsinki, Bratislava, and Vienna.
-
Stalemate: Soviet Turn 28 ends and no one has won yet.
Axis Surprise Bonus: Axis Turn 1 Attrition and attack Phase (not the Blitz Phase).
Operation München: During Axis Turn 1, German 11th Army and Romanian Units cannot battle.
Axis Historical Setup: As described in S.1 Scenario
Soviet Alternative Setup: As described in S.1 Scenario, but the Soviet player may deploy his four Armor Units in any empty hex adjacent to the original starting hex.
Axis Cards Employed: Guderian & Kleist
Soviet Card in Hand: Great Patriotic War
Event Card Arrival: Number indicated on the Card.
Axis Spoils of War Bonus: After capturing a Spoils of War City (marked 1, 2, 3, or 4), the Axis gains +1/+2/+3/+4 Goods at the beginning of the next Axis PP Collection Sub-Phase under the following conditions:
- Only applies for first time captures in 1941;
- Spoils of War City must be friendly controlled and Supplied exclusively via friendly controlled land hexes to a supply source at the moment of PP collection.
The Axis has the Offensive Chit available.
Optional Rules
OR.1 Axis Minors Cooperation
Designer Note: Although allied with Germany and supportive of the War in the East, the Axis Minors were generally less capable, sometimes had ongoing rivalries amongst each other, and frequently prioritized their own national objectives above all others. The restrictions listed below help bring this reality to the game.
Supply. Axis Minor Units are in supply if they can trace a line of friendly controlled hexes to their National Capitals (Bucharest for Italy).
Production. The Axis can only Reorganize, Replenish, Resurrect, or Upgrade 1 Axis Minor unit per Turn (total not per an Axis Minor) until turn 5. This restriction increases to 2 from turn 6 onward.
Attrition. Upfront Axis Minors' Units suffer no more than 1 hit during the Attrition Phase until all other Upfront German Ground Units have suffered a hit.
Air Unit Participation
- Attrition Phase: For Air Superiority determination, an Axis Air Unit must be in range of an Upfront Ground Unit from the same nationality.
- Attack & Blitz Phases: Axis Air Units can only provide ground support to battles with Ground Units of the same nationality.
ROMANIA
Romanian units:
- Can only move and battle within Romania and the Soviet Union (south of the Axis Minor Limit Line).
- May never stack with a Hungarian unit at the end of movement. Any unit forced to retreat or rebase into a hex occupied by a Hungarian unit is Destroyed.
- May never participate in the same battle with a Hungarian unit during the Attack and Blitz Phases.
HUNGARY
The Hungarian Rp Cavalry can Upgrade to the Hungarian 2nd Infantry no earlier than Turn 6.
The Hungarian 1st Infantry unfreezes if the Soviets enter Hungary or in 1943 if the Soviets control Kiev.
Hungarian units:
- Can only move and battle within Hungary, Yugoslavia, and the Soviet Union (south of the Axis Minor Limit Line).
- May never stack with a Romanian unit at the end of movement. Any unit forced to retreat into a hex occupied by a Romanian unit is Destroyed.
- May never participate in the same battle with a Romanian unit during the Attack and Blitz Phases.
FINLAND
Until Leningrad is Axis controlled:
- German units cannot enter Finland.
- Finnish units can only battle within the Finnish Attack Zone (FAZ). The FAZ consists of Finland, Vyborg, and Soviet Karelia north of the Svir River and west of the Lend Lease Route (Finnish Hexagonal Icons on the map represent the edge of the FAZ).
Note, regardless of Leningrad's control status, Finnish units may move anywhere within Finland and the Soviet Union north of the Axis Minor Limit Line.
Once Leningrad is under Axis control, the FAZ expands to the area within the Soviet Union north of the Axis Minor Limit Line on the map.
ITALY
The Italian CSIR Infantry can Upgrade to the Italian 8th Alpine Infantry no earlier than Turn 6.
The Italian unit can only move and battle within Romania, Hungary, Albania, Greece, Yugoslavia, and the Soviet Union (south of the Axis Minor Limit Line).
OR.2 First Axis Winter
Designer Note: Confident Operation Barbarossa would last no more than a few months and not fully understanding the harshness of the Russian winter, Oberkommando des Heeres (OKH) was not prepared for the transition to extreme winter operations in November 1941. To make matters worse for the Axis, the Russian winter of '41 – '42 was also the coldest in 100 years. The restrictions listed below help bring this reality to the game.
Additional Blizzard Penalties. For Turns 4 and 5 only, Axis units eastward of the Blizzard Line suffer the effects of Snowy weather and the following additional penalties:
- Attrition Impacts: Axis Phasing Player totals his Ground Strength, tripling the value for units in Fortresses first, and then quartering the total value; Axis Non-Phasing Player totals his Ground Strength, tripling the value for units in Fortresses first, and then halving the total value.
- Combat Impacts: Axis Attacking Ground Units → Strength Quartered; Axis Defending Ground Units → Strength Halved.
Axis Alpine Infantry Units and all Soviet units treat Blizzard weather as Snowy weather.
OR.3 Random Event Card Entry
Instead of arriving on a specific Turn, Event Cards now become available in a specific year for random draw. The Event Card Summary (RA.3 above) includes the year of availability in parentheses and the card has a color-coded turn indicator. All rules in RA.3 still apply with the following exceptions:
- Both Players will maintain a card deck with available cards.
- When beginning a new year, the Phasing Player will add the new year's cards to his deck and reshuffle.
- The Phasing Player, unless specified differently in the Event Card Summary, returns the employed Tactical Card to his deck (not to his Hand) and reshuffles.
OR.4 Road of Life
Designer Note: Leningrad was surrounded by Army Group North by the beginning of September 1941 and it appeared that the city would slowly starve itself into surrender. However, the city amazingly held out and survived for 900 days due to a special supply route opened via Lake Ladoga.
Soviet Units besieged in Leningrad may trace supply via Lake Ladoga per the guidance listed below.
Lake Ladoga Supply Route. If Leningrad is besieged (surrounded by Axis units so as to prevent the tracing of supply via land), only Soviet Air and Ground Units located in the city may trace supply across Lake Ladoga to Novaya Ladoga and then via a line of friendly controlled hexes to Siberia.
Other Impacts. During the Leningrad siege, its Factory provides no Goods and the Soviets may not Replenish or Upgrade any Unit in Leningrad, nor deploy Reinforcements or Resurrected Units (as for Sea Supply).
OR.5 Fog of War
Designer Note: Planning and operations in warfare rarely lead to perfect outcomes. No one controls the enemy's decision making or the environment at large. The potential for surprise and miscalculation always exists. The restrictions listed below help bring this reality to the game.
Fog of War Effect. Conduct the following procedure after determining Superiority in the Attrition Phase:
- Each Player rolls one die.
- Compare the two die rolls. The Side with the higher die roll gains a favorable 1 column shift on the Attrition Table (rightward for the Phasing Player and downward for the Non-Phasing Player). A tie has no effect.