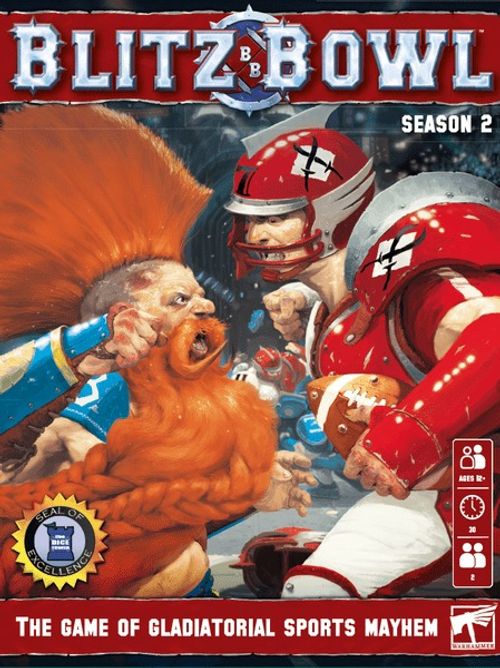
Blitz Bowl: Season 2
Blitz Bowl: Season 2 Rulebook
Table of Contents
Table of Contents
Components
Human Team
The Human Team, known as the Marauders, and their Team Balls, Coin and Score Marker.
Dwarf Team
The Dwarf Team, known as the Dwarf Giants, and their Team Balls, Coin and Score Marker.
Cards
- 45 Player Cards
- 40 Challenge Cards
- 7 Drill Cards
- 27 Ball Cards
Dice
- Eight-sided Dice
- Six-sided Dice: this dice has a Blitz Bowl logo on one face – this is treated as a 6.
- Block Dice
Coach Roster Pad
Used to track each coach's Traits and Roster.
Game Board
The game board contains the playing area, known as the pitch. It is divided into squares. The game board is double-sided with a different pitch on each side. Each side of the game board also contains some special features:
- End zones where the teams start, and where touchdowns are scored.
- One or two trapdoors where the ball comes into play.
- Blocked squares, delineated by a red border.
- Score track.
- Bounce chart.
- Challenge card tableau – one space for the Challenge deck (marked with a card-back icon), one space for discarded Challenge cards (marked with a discard icon) and three for active Challenge cards (marked 1, 2, 3).
Also included are a Throw Ruler (marked Short Range and Long Range) and 2 double-sided Dugouts.
Getting Started
To get started, first put all of the miniatures together. There is a construction guide on pages 18 and 19 that shows you how to do this. One coach uses the Human team miniatures, called the Marauders, and the other coach uses the Dwarf team miniatures, called the Dwarf Giants. You will also need your teams' player cards. There are four player cards for each team.
Each of the player types in a team has its own player card. For example, the Human team has four player cards: one each for the Blitzer, Thrower and Catcher, and a shared card for the three Linemen. A player card shows:
- The player's team.
- The player's position.
- A photograph of the player's miniature.
- How many players of that type are in the team.
- The player's Move, Throw and Armour values.
- The player's ability, if it has one.
Bob Bifford's Boot Camp: The Training Ground — Before you go any further, it's recommended that you play through each of the 7 Drill cards so you have an understanding of the core principles of the game. Once you've mastered those, the rest of the rules will make a lot more sense! It's also a good idea to read through this rulebook at least once before playing your first full game.
Setting Up a Game
To set up a game of Blitz Bowl ready to be played, follow the steps outlined below:
- First, flip one of the team coins to determine which coach wins the toss. The winning coach chooses the pitch they want to use and places the game board in the centre of the table with that side face up. If this is your first game, we recommend using the pitch with a single trapdoor.
- A Dugout is placed at each end of the board.
- Next, the coaches decide who will control each team. Each coach takes their six players, then places their team's four player cards face-up in front of them where they can easily be seen and referenced.
- Now shuffle the deck of 24 standard Challenge cards with Challenge-side face down and place it in the space next to the board that is marked with the card-back icon. Then deal out the top three cards, Challenge-side up, into the active Challenge card spaces – the top card of the deck is dealt into the '1' space, the next into the '2' space and the next into the '3' space.
- Next, the coach that won the toss sets up their team in their end zone, then the other coach does the same. When setting up their team, the coach can choose each of their players is placed. Each square can only have one player in it.
- Each coach puts their Score Marker on the 0 space of the Score Track and puts their Team Coin near the board.
- Finally place a ball on the trapdoor – note that the colour and shape of the ball does not matter, the ball does not belong to either team and all balls follow the same rules. If the coaches are using the side of the board that has two trapdoors, the coach who won the toss rolls a six-sided dice. On a result of 1, 2 or 3 the ball is placed on the trapdoor to their left; on a 4, 5 or 6 it is placed on the trapdoor to their right.
Commentary with Jim Johnson: Understanding Your Team
Each team consists of six players – three Linemen, who are decent all-round players but do not have any abilities, and three unique players. Both teams have a Blitzer, who is good at blocking opposing players. In addition, the Human team have a Thrower who is good at picking up and throwing the ball, and a Catcher, who is more fragile but gets a free move if they catch a thrown ball. The Dwarfs on the other hand have a Runner who ensures that the ball stays with your team even if they are knocked down, and a Troll Slayer who excels at knocking opposition players down. Understanding how best to use your players' abilities is key to victory.
How to Play
A game of Blitz Bowl is played across a variable number of rounds. In each round both coaches take a single turn with their team, beginning with the coach who set up their team first (coach A), followed by the other coach (coach B). When it is a coach's turn, they make three Actions with the players in their team. After completing a round, start a new one, and keep on taking rounds like this until the game ends (see Winning the Game, page 11).
Game Sequence
A single round of Blitz Bowl proceeds in the following way:
Coach A's Turn
- No Ball in Play check¹
- Emergency Reserves²
- Action 1
- Make an action
- Claim Challenge card step³
- Action 2
- Make an action
- Claim Challenge card step³
- Action 3
- Make an action
- Claim Challenge card step³
- Refresh Challenge cards³
Coach B's Turn
- No Ball in Play check¹
- Emergency Reserves²
- Action 1
- Make an action
- Claim Challenge card step³
- Action 2
- Make an action
- Claim Challenge card step³
- Action 3
- Make an action
- Claim Challenge card step³
- Refresh Challenge cards³
¹ No Ball in Play (see page 10) ² Emergency Reserves (see page 9) ³ Challenge cards (see page 11). Note that each Claim Challenge Card and Refresh Challenge Card step is skipped by both players in the first round.
Important Game Terms
Coach: When the rules refer to a coach, they are referring to the real-life people who are playing this game.
Players: A player is one of the plastic player models that makes up a coach's team.
Team-mate: A team-mate is a player from the same team.
Opponent: An opponent is a player from the opposite team.
Challenge cards: The front of each Challenge card shows the following information:
- The name of the Challenge.
- The conditions that must be met for a coach to claim the Challenge card.
- The points scored for claiming the card.
The back of each Challenge card is a Bonus Play and shows the following information:
- The name of the Bonus Play.
- How the card can be played.
A Coach's Hand: When Challenge cards are claimed (see page 11) these cards are put to one side, or held by the coach that claimed them. These cards are referred to in these rules as a coach's 'hand'. The Bonus Play side of the cards in a coach's hand should be kept secret from their opponent.
Throw Checks and Armour Checks: If a coach is called upon to make an Armour or Throw check, roll one six-sided dice and compare the result to the Throw or Armour value from the relevant player card. If the result is lower than the given value, the check fails; otherwise, the check passes. Some rules will modify the result of a check – this is done before comparing the result to the Throw or Armour value, and multiple modifiers can apply to the same roll. However, in all cases, an unmodified roll of 1 always fails and an unmodified roll of 6 always succeeds.
Re-rolling Dice: Some rules allow a coach to 're-roll'. This lets the coach pick up the dice they just rolled and roll it again. If they rolled multiple dice, they must re-roll all of them.
Player Status: During a game of Blitz Bowl, players can either be Open, Marked, Prone or in the Dugout. Each of these is explained below:
Open Players: A player who is standing and who is not adjacent to any opponent is Open. Each of the eight squares around a given square are said to be adjacent to it.
Marked Players: A player who is standing adjacent to an opponent who is not Prone, is Marked. A player can mark, and be marked by, multiple opponents at once.
Prone Players: A player who is laying on the ground is Prone. A Prone player cannot mark other players.
Dugout Players: A player will sometimes be placed in their team's Dugout – this represents the player waiting to return to the pitch.
Example: This Dwarf Lineman is Open. Both of these players are Marked. As the Dwarf player is Prone, the Human is Open.
Actions
In their turn a coach can make three Actions with the players from their team, dividing them between their players however they wish, but cannot make the same action more than once. For example, the Human coach uses their first action to Run with their Blitzer. They could not make another Run action with their Blitzer this turn, but the Blitzer could make another action – for example, they could Mark an opponent. Note that the coach could still make Run actions with other players on their team, as long as no player makes the same action more than once.
The actions a player can make are dependent on their current status (page 7), as shown below:
| Open Players | Marked Players | Prone Players | Dugout Players |
|---|---|---|---|
| Run | Block | Stand up | Reserves |
| Mark | Sidestep | ||
| Throw |
Run Action
When a player makes a Run action, their coach moves them a number of squares up to their Move value. A move can be made in any direction, including diagonally, but a player cannot move through a square that contains another player (either standing or Prone) or blocked (see page 3), and players cannot move off the pitch. In addition, when a player makes a Run action, their move cannot take them adjacent to an Open or Marked opponent. Trapdoors do not block movement; players can move onto them freely, but they can be quite hazardous as they fly open whenever a Touchdown is scored and a new ball can enter play!
Example: In this diagram, the Dwarf Lineman is making a dash across the pitch, running a total of 4 squares while not moving adjacent to any of the Human Linemen.
Free Actions
Some player abilities and Bonus Play cards allow a player to make a free action. This is done in the same way as a regular action, but does not count towards the total number of actions that a team can make during their turn. In addition, a player's free action can be an action they have already made this turn, and making a free action does not prevent a player from making an action of that type later in the turn.
Did You Know... Any player who manages to successfully tackle a priest of Nuffle during the Crush is guaranteed to receive several lucrative sponsorship offers. Such occurrences are rare, however, as priests of Nuffle are notoriously slippery individuals well known for their vicious right hooks.
Picking Up the Ball
A player that makes a Run action and moves into a square that contains the ball, picks it up. If a player moves onto the ball in any other way – for example, when making a Mark or Sidestep action, or when pushed by an opponent – the ball bounces (see page 10). When a player picks up the ball, the ball is moved onto that player's base to show that they are holding it (some of the balls have a small peg that fits into the hole on the player's base for just this purpose). When a player with the ball moves, the ball moves with them.
Mark Action
A Mark action is a move of up to 2 squares (as described under the Run Action), but when a player makes this action they must finish their move adjacent to an opponent, and can move adjacent to opponents as they move.
Block Action
When a player makes a Block action, their coach picks an adjacent standing opponent (the target) and rolls a Block dice. The result is then resolved, depending on which symbol was rolled:
When the target is Knocked Down, they are placed Prone in the square they are in. If they are carrying the ball, it bounces (see page 10). Then, their coach must make an Armour check (see page 7) for them. If it succeeds there is no further effect, but if it fails the player is injured. When a player is injured they are no longer Prone – they are removed from the game board and placed in their team's Dugout.
Kerrunch!: The target is Knocked Down (see above). In addition, when the Armour check is made, subtract 1 from the result.
Miss: The target is unaffected. In addition, the blocking player cannot make any more actions this turn.
Tackle: The target is Knocked Down (see above). In addition, the blocking player cannot make any more actions this turn.
Shove: If possible, the target is pushed one square directly away from the player making the Block action, who can choose to move into the square they left. If this would move the target into an occupied or blocked square, or off the board, the target is Knocked Down instead (see above).
Assisting a Block
If the target of a block is also being marked by one or more of the blocking player's team-mates, the block is Assisted. This means that the coach rolls two Block dice instead of one, and chooses which result to use. A block cannot benefit from more than one Assist – a maximum of two Block dice can be rolled.
Sidestep Action
A Sidestep action is a move of 1 square (see Run action, opposite), but when a player makes this action they must finish the move Open. If a player moves on to the ball when making a Sidestep action the ball bounces (see page 10).
Stand Up Action
A Prone player can only make a Stand Up action. If a player takes this action, stand them up in the square they are occupying.
Example: Here, the Human coach has rolled a Shove result on the Block dice. This causes the Dwarf player to be moved back one square.
Reserves Action
A player who is in their team's Dugout can make a Reserves action. Set the player up in their team's end zone. They cannot be set up adjacent to an opponent unless there is no other option, and cannot be set up in a square containing the ball.
Emergency Reserves
If a team has fewer than three players on the board at the start of their turn, their coach immediately makes one free Reserves action.
Throw Action
A player holding the ball can throw it to another player on their team. To see whether a player is in range, place the throw ruler so that the curved end is in line with the edge of the throwing player's base (as shown below); a player is in range if any part of the throw ruler can reach the centre of the square that player is standing in.
Example: The throw ruler is placed in line with the player's base. The grey shaded area is in short range, whilst the red shaded area is in long range.
If the target square is occupied by an Open team-mate who is adjacent to the thrower, they automatically take possession of the ball (this is called a hand-off). Otherwise, make a Throw check (page 7) for the throwing player, subtracting 1 from the result for each of the following modifiers (to a minimum of 1):
- It is a long throw (the centre of the target square is in the half of the ruler marked 'long throw')
- It is an obstructed throw (any part of the throw ruler between the thrower and the target player is touching a blocked square, or a square occupied by an Open opponent)
- The target player is Marked
If the check succeeds, the target player takes possession of the ball. If the check fails, the ball bounces from the target player's square.
Fumble: If the result of the Throw check is a 1 (before or after modifiers), the throw fails and the ball bounces from the thrower's square instead of the target player's square.
Bouncing Ball
When the ball bounces, it moves to an adjacent square. Roll an eight-sided dice and look at the bounce chart on the game board to see which square it moves into.
- If the ball bounces into a square that is occupied by an Open player, they take possession of the ball.
- If the ball bounces into a square occupied by a Marked or Prone player, it bounces again from the occupied square.
- If the ball bounces into an empty square, it stops.
- If the ball would bounce into a blocked square, or off the board, the ball does not bounce in that direction. Instead, work clockwise around the bounce chart until you reach a result which means the ball would not bounce into a blocked square or off the board. Use that result instead.
Scoring Touchdowns
To score a touchdown, at the end of one of your actions, a player from your team must meet the following three criteria.
- They must be in the other team's end zone
- They must be holding the ball
- They must be Open
If a player scores a touchdown, the ball is removed from play and that player's team scores 3 points. In addition, the scoring player is hauled out of the arena (no doubt to be congratulated by their fellow aspirants) and is placed in their team's Dugout. The team complete their turn as normal, even though there may be no ball on the pitch – this is a great chance to reposition and maybe make a block or two!
No Ball in Play
If there is no ball on the pitch at the start of any turn, a new one enters play. First, the trapdoor opens and if there is a player standing on it they are immediately injured and placed in their team's Dugout! Then the ball is placed in that square, and bounces (see above). If the coaches are using the side of the board that has two trapdoors, the coach whose turn it is rolls a six-sided dice at the start of the turn. On a result of 1, 2 or 3 the ball will emerge from the trapdoor to their left; on a 4, 5 or 6 is will emerge from the trapdoor to their right.
Multiple Balls in Play
In some special situations, there might be more than one ball in play at once. Only one ball can occupy a square, and each player can only carry one ball. If a player carrying a ball moves into a square containing another ball, that ball bounces (see above). If a ball bounces into a square containing another ball, or a player carrying another ball, it bounces again.
Scoring Points
Teams score points by scoring touchdowns and claiming Challenge cards. Each team's score is recorded by the position of their Score marker on the Score track. Once a team's score reaches 10 points, their team coin is placed on the +10 space and their Score marker is returned to 0. The same happens when their score reaches 20 or 30. So, for example, a team with a score of 17 would have their Score marker on the 7 space and their coin on the +10 space.
Challenge Cards
Active Challenge Cards
The three Challenge cards in the spaces marked 1-3 are active, and can be claimed during a team's turn. The card on top of the Challenge deck is not active, although it is visible to both coaches – this way they can see at least one card that will become active next turn. Note that coaches are not allowed to look at the backs of any Challenge cards until they take them into their hand.
The Claim Challenge Card Step
In the first round of the game (each coach's first turn), the Claim Challenge Card step is skipped. From the second round onwards, during the Claim Challenge Card step, the coach whose turn it is can claim one active Challenge card each time they make an action with a player from their team, provided the conditions listed on the card have been met. If more than one Challenge card's conditions are met, the coach whose turn it is can only choose one to claim.
If a Challenge card's condition has been met as described above, and the coach whose turn it is does not claim that Challenge card, it cannot be claimed later in the game unless the condition is met again after a different action.
Discarding Challenge Cards
When a Challenge card is discarded, place it onto the designated space along the edge of the game board (marked with the discard icon), with its Bonus Play side showing.
Example: In this diagram, the card on space 2 has been claimed this turn, therefore the card on space 1 is not removed. The card on space 3 is moved to the now vacant space 2, and the top card of the Challenge deck is placed onto space 3.
Refreshing Challenge Cards
At the end of each coach's turn, the active Challenge cards are refreshed. If all three cards are still present, the card on space 1 is discarded. Then, any remaining cards are moved along the board to the lowest free number to fill any gaps, and new cards are drawn from the top of the Challenge deck to fill any remaining spaces, starting with the lowest-numbered space.
Get On With It!
If a team starts a turn in possession of every ball on the pitch, and by the end of their turn they still have possession of every ball on the pitch and have not claimed any challenge cards, a new ball enters play, following the rules for 'No Ball in Play' (see above).
When a Challenge card is claimed by a coach, its points value is added to their team's score and the coach takes the card, adding it to their hand. If a coach has more than three Challenge cards in their hand at the end of their turn (not counting any cards that they have played in front of them), they must discard cards from their hand until they are left with three.
Clean Sweep: If a coach claims all three active Challenge cards in a single turn, this is a Clean Sweep, and their team scores 2 bonus points as the crowd goes wild!
Bonus Plays
The reverse of each Challenge card shows a Bonus Play – a special one-off boost that the coach can use to gain an advantage. Some cards state that they must be played immediately – otherwise, each Bonus Play card states when a coach can choose to play it. The only restriction is that a coach cannot play duplicate cards in the same turn; for example, a coach could not play two Inspiration Bonus Plays in their turn.
Winning the Game
If one team's score exceeds the other team's score by 10 points or more, the game immediately ends and the team with the higher score wins. This is a Sudden Death victory. Otherwise, once the last Challenge card is dealt out and becomes active, each team has one more turn. The game then ends and the team with the highest score wins. If both teams have the same score, the game ends in a draw!
Extra Time Rules
Once both coaches are familiar with the rules of Blitz Bowl, you can introduce any or all of the Extra Time rules presented here. These rules add extra teams and challenges to your games, as well as a small level of unpredictability and a lot of fun. If both players agree to use these rules, simply pick which Extra Time rules the game will feature, and then following the instructions presented here.
The Endgame
These rules introduce special Endgame Challenge cards, which make sure the game ends in a suitably impressive way!
During set-up, take the 16 Endgame Challenge cards and shuffle them Challenge-side up. Then deal out 6 at random, Challenge-side up, onto the Challenge deck space next to the board. The 10 remaining Endgame Challenge cards are returned to the box, and are not used. The 24 standard Challenge cards are then shuffled Challenge-side up and placed on top of the 6 Endgame Challenge cards with all cards Challenge-side up. This creates a Challenge deck of 30 cards in total, the bottom 6 of which are Endgame Challenge cards.
As soon as an Endgame Challenge card becomes active, the Endgame has begun. From this point on, a Sudden Death victory cannot be won – the game will not end until the entire Challenge deck has been dealt out. As soon as the last card from the deck becomes active, each team has one more turn, then the game ends and the team with the highest score wins. If both teams have the same score, the game ends in a draw.
Special Ball Rules
Many coaches bring non-regulation balls unique to their team along to the Crush. These custom balls are a huge favourite with the crowds in the big leagues, and seeing what a raw recruit can do with one of them is a key part of the selection process.
In order to use these special balls, you will need to build a ball deck before the game begins. To do this, each player picks two ball cards from their team's special balls – each ball card shows which team that ball belongs to. Take these four ball cards, shuffle them and place them face down beside the game board to form the ball deck. Before a ball is put into play, draw the top card of the deck and place it face up beside the board. The ball on that card is put into play and its special rule comes into effect. Most of these are designed to entertain the crowd, not help the players! When that ball is removed from play, shuffle that ball's card back into the ball deck. If, for any reason, a fifth or subsequent ball comes into play, the coach whose turn it is can choose one of the special ball types in play to use for that ball, provided the model for that ball is available.
A ball card shows:
- The name of the ball.
- An image of the ball's miniature.
- The ball's unique rule.
- The team this ball belongs to.
Extra Teams
The game box includes player cards for additional teams – Chaos, Dark Elf, Elf, Goblins, Halflings, Lizardmen, Nurgle, Orc, Skaven, Undead and Wood Elf. These teams are available separately and using them is a simple case of switching out one or both of the teams included in the Blitz Bowl box with the appropriate type and number of miniatures, as shown on that team's player cards.
Did You Know... Despite its name, the Crush involves very little actual crushing. Instead, prospects are formed into makeshift teams and given drills to perform to test their abilities before they face any serious opponents. Many suggest the term 'Crush' comes from all the dreams that are crushed that day.
League Rules
Though rare, it is not unheard of for an overwhelming number of players to impress the head coaches of bigger teams after the pre-season Crush. To sort the wheat from the chaff, coaches in attendance will throw together an ad hoc league and play a series of games to put the players through their paces. These leagues are short but intense and usually played over a few days at most – after all, the head coaches need to get their players drafted and ready for the real deal in the big leagues!
How to Run a League
In a Blitz Bowl league, coaches play a series of matches, aiming to score as many league points as they can. The coaches that score the most league points during the league will earn their way to the end of season finals which will determine the winner of the league.
You Will Need
You will need at least three coaches to play a Blitz Bowl league. Each coach will need their own Blitz Bowl team and coach roster – a pad of rosters is included in this game.
Playing Matches
In a Blitz Bowl league, each coach plays 10 matches. A match is a game of Blitz Bowl between two coaches taking part in the league. Each time two coaches play a match, they must play at least one match against each coach in the league before they can play each other again. The results of a coach's match are recorded on their coach roster.
The Coach Roster
The coach roster is a record of a coach's league match results and who they have played against so far. The following information is recorded on the coach roster for each match.
The Opposing Coach: Before each match, record the name of the opposing coach on your roster.
Result: After each match, the coaches score a number of league points based on the result of the match.
- Win = 3
- Draw = 1
- Lose = 0
Challenge Cards Claimed: Each time you claim a Challenge card, mark this in the 'Challenge Cards Claimed' box on your coach roster.
Injuries Caused: Each time an opposing player is injured, mark this in the 'Opposing Players Injured' box on your coach roster.
The Finals
Once each coach has played 10 matches, the total league points scored by each coach in the league are compared – count up the league points in the 'Result' column on the coaches' coach rosters. The two coaches with the highest league points totals play a final match, and whoever wins that match is declared the winner of the league. The final match does not score any league points.
Quarter- and Semi-Finals
Quarter- and semi-finals are a great option for larger leagues. After comparing the total league points, instead of playing one final match with the top two coaches, the top eight coaches will play in a series of quarter-final matches. Once those matches are finished, the winners progress to the semi-finals, where they play another match. Once the semi-finals conclude, there will be two coaches left and these two play in a final match to determine the overall winner of the league.
Drawing a Match
If any quarter- or semi-final match results in a draw as described under 'Winning the Game' on page 11, remove all the remaining Challenge cards from the Active Challenge Card area. Take all 24 Challenge cards and shuffle them into a deck. Do not use the Endgame Challenge cards. Now draw three cards from the top of the deck and place them Challenge-side up in the Active Challenge card area in the same manner as during set-up. Play then carries on as if the match had not ended. The Challenge cards are claimed and refreshed following the rules on page 11. If, at the end of a round (page 6), a coach has more points, that coach is declared the winner of the match.
To allocate the coaches their opponents in the quarter- and semi-finals, the coach with the highest total league points will play the coach with the lowest, the coach with the second-highest will play the coach with the second-lowest, and so on.
League Awards
Blitz Bowl has a dedicated following of coaches, officials and of course, fans. This means that sponsors are heavily invested in making sure Blitz Bowl is thrilling, glamorous and as violent as possible. To this end, the various sponsors give out a series of awards to coaches to recognise the entertainment their teams have brought to the game.
Each of these awards is presented at the end of the league to the coaches who meet the requirements laid out below:
The Cabalvision Master of the Crush Award: This award goes to the coach who scored the most league points.
Legbreaker's King of Carnage Award: This award goes to the coach whose players have caused the most injuries in the league.
The Bugman's XXXXXX Challenger Award: This award goes to the coach that claimed the most Challenge cards during the league.
The Spike! Magazine Lead Laurels: This award goes to the coach who scored the fewest league points.
Coach Traits
Even a grizzled coach can learn new tricks. Between bribing the right official to ensure that your team's balls are put into play first, to spiking the opposing team's drinking water with Blarf Spewbrewer's Rotgut Ale, there are many tricks a canny coach can pull in order to improve their chances of success.
Gaining Coach Traits
After a playing a league game (not a finals, semi-finals or quarter-finals match), both coaches will gain one Coach Trait. Each coach rolls 2 eight-sided dice, and compares the total score on both the dice to the Coach Traits table to see what Coach Trait they have gained. If the coach already has that Coach Trait, they can choose one trait they do not have. That Coach Trait is then available to that coach until the end of the league, and should be recorded on their coach roster. Each Coach Trait a coach gains gives them a special ability that can be used once per game.
Did You Know... Boney and Glidera were an undead husband and wife duo that, after being rejected during the Crush of 2426, haunted the temple of Nuffle for two decades before being successfully exorcised.
Coach Traits Table
Roll two eight-sided dice and add the results together to find the Coach Trait gained.
| Result | Coach Trait |
|---|---|
| 2 | Magical 'Training': Before a player on your team that is on the pitch makes a Run, Block or Throw action, you can choose another player from your team that is on the pitch or in the Dugout. Until the end of that action, those players swap any abilities that are on their cards (for example, Safe Hands or Hulking Brute). |
| 3 | Sponsored Kit: After making an Armour check, you can re-roll the dice. |
| 4 | Threatening Looks: Before an opponent makes a Block action, roll an eight-sided dice; on a 6 or better, that opponent must make a Sidestep action instead. If they cannot make a Sidestep action, that opponent cannot make any more actions this turn. |
| 5 | Bribe the Ref: Start the game with 1 point, instead of 0. |
| 6 | Last Blast: During your last turn, if your team has fewer points than the other team, you can shuffle the Endgame Challenges that were not used to make this match's Challenge deck, draw one and place it face up in front of you. This challenge can be claimed by your team in this turn. If it is not claimed it is discarded. |
| 7 | Incentiviser: When your team takes a free action, roll an eight-sided dice; on an 8, take a free action with another player. |
Start your Coach Roster at the start of the league, and then bring it along to each of your games – remember to make a note each time you score a challenge or cause an injury, as shown in this example.
Mark when you use a coach trait during a game in pencil – then you can rub this out before your next game starts.
Assembling Your Miniatures
This box contains two teams of finely detailed Citadel Miniatures representing the Human and Dwarf teams. The players come unassembled and unpainted – the Humans are red and the Dwarfs are blue, meaning that even if you don't paint them, you'll easily be able to tell the teams apart at a glance! A construction guide showing how each player type (Blitzer, Thrower, Catcher, Lineman for the Humans; equivalent Dwarf positions) fits together from its component parts is provided.