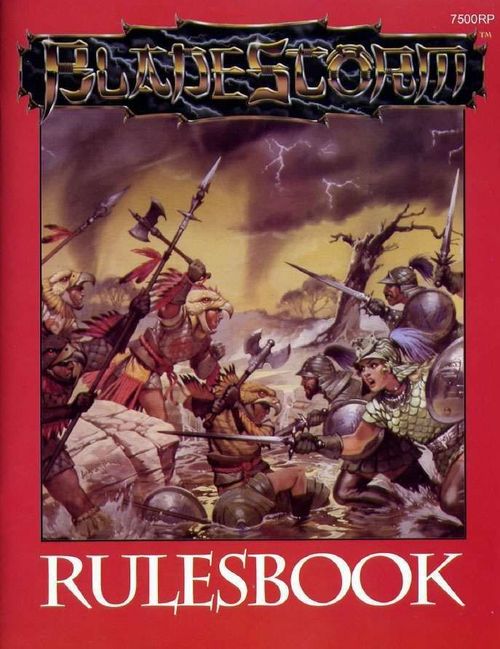
Bladestorm
Bladestorm Rulebook
Table of Contents
Table of Contents
Introduction
Mounting Miniatures on Bases
When fighting a miniatures battle, it is very useful to have each individual miniature mounted on a "base." A base can be made of thick card stock or cardboard or even thin plastic sheets. Each miniature should be pasted or glued onto its base. Typically, miniatures come with a slot that slides into a base or they already include some ground to give them safe footing.
A base gives a miniature stability, and it also gives a representation of the minimum space required for the miniature to move and fight. Bladestorm rules assume that each miniature is mounted on a base. We suggest a 1"x1" base [or 25mm x 25mm] for miniatures representing human sized combatants (i.e., 5'-7' [2m] tall). Other sized combatants can use proportionally smaller or larger bases, e.g., 5/8"x5/8" [15x15mm] for Halflings, 1.25"x1.25" [40x40mm] for 7'-9' [2.5m] Trolls, 1"x1.5" [25x40mm] for cavalry, etc.
Note: These rules assume the use of "25mm" or "28mm" miniatures. If a different scale is to be used, the figures used in this product must be adjusted accordingly.
Note: A base is used to abstractly represent the 6' [1m] area influenced by a combatant during combat. Certain abnormal situations arise due to the use of a square base. For example, the diagonal of a 1"x1" [25x25mm] square is ≈1.4" [≈36mm], so a miniature on such a base could not turn around in a 1" [25mm] wide corridor. Use common sense in such cases (e.g., a combatant can turn-around in a 1" [25mm] wide corridor).
Numbering Miniatures
In a miniatures battle, figures of the same type and painting scheme are often used (i.e., members of the same military unit). During play it is necessary to be able to distinguish between miniatures of the same type. So, for each type of miniature, you should place a unique number on each figure's base (start with '1' each time). This can be accomplished with a marking pen or scotch tape and small bits of paper.
Measuring Distances
In a miniatures battle it is necessary to measure distances. Regular tape measures can be acquired from any hardware store. However, players may find it also useful to use real rulers and/or tape measures specifically made for gaming purposes.
String is also often useful for measuring distances that do not occur in straight lines. Just lay the string along a route whose length needs to be determined; then straighten the string and measure the route's length.
Note: Normally, a player may measure a distance (e.g., for the purposes of movement, missile fire, etc.) only after committing to perform the action being measured.
A popular alternative to free movement across terrain are map sheets that feature a square tile background. The Bladestorm Basic Game can easily be played on these maps by using 1" [25mm] square tiles to determine distances for the purpose of movement. Creatures that occupy fractions of floor tiles because of their base size are considered to be occupying the entire tile.
[Diagram: a grid of 1" [25mm] square tiles, labelled 1, 2, 3 along one edge, with the scale marked "1" [25mm]" on both axes.]
Terms
- Attack Roll — The dice roll that determines the success or failure of an attack.
- Attack — An attempt by one combatant/unit to damage another.
- Chance — Sometimes an event has a "chance" or a "percentage chance" of occurring, and this chance is given in the form of "#%." To determine if the action occurs, roll 2D10 — one die is the tens, the other is the ones, for a result between 1 and 100 (treat 00 as 100). If the result is less than or equal to the "#%", the event occurs.
- Combatant — Each individual participant in a skirmish battle is called a combatant and is represented by a miniature.
- Endurance — A statistic indicating how much damage a combatant or unit can absorb before being removed from play.
- Facing — After each combatant is moved, it must be "faced" in a specific direction. Facing determines a combatant's front, flank and rear.
- Impassable Terrain — Terrain that totally prohibits ground movement (e.g., a wall, a sheer cliff, a ravine, etc.).
- Melee Attack — An attack against a target adjacent to the attacker (e.g., hand-to-hand attacks with swords, axes, pole arms, etc.).
- Miniature — A small figurine or statue used to represent an individual participant in a skirmish battle.
- Movement Rate — The distance that a combatant or unit may move in a given turn.
- Playing Surface — A playing surface can be any regular surface on which the miniatures can be set up and moved (e.g., a table top, the floor, etc.).
2.0 The Basic Game
The Bladestorm Basic Game is designed to introduce players to some of the key elements of resolving a battle in the skirmish system. First a few basic conventions concerning die rolling and other factors are presented; then the measurement scale and playing surface are discussed.
Game mechanics presented in the Basic Game are:
- Environment ............ Section 4.0
- Combatants .............. Section 5.0
- Turn Sequence ........ Section 6.0
- Movement ................ Section 7.0
- Melee Combat ......... Section 8.0
- Damage .................... Section 9.0
3.0 Conventions
3.1 Dice Rolls
In most games, it is necessary to generate a random number in order to determine the result of an action (e.g., an attack).
A Bladestorm player generates such random numbers by rolling dice.
There are two types of dice used in Bladestorm: 6-sided dice and 10-sided dice. A 6-sided die gives a result between 1 and 6, inclusive. Such a die is referred to as "D6". A 10-sided die actually gives the results: 0, 1, 2, 3, 4, 5, 6, 7, 8, and 9 — but the 0 is treated as a 10. Thus, a 10-sided die gives a result between 1 and 10. Such a die is referred to as "D10".
Multiple Dice — If more than one die is to be rolled, the number of dice precedes the "D".
Example: "3D6" indicates that three 6-sided dice are to be rolled. 2D10 indicates that two 10-sided dice are to be rolled.
An Addition — A fixed number may be added to a given die roll.
Example: "1D10+4" means: the result of a 10-sided die plus four. If the 10-sided result is a 7, then the result of the roll is 11 = 7 + 4.
A Dice "Roll" — The result of a dice roll is the total of all dice rolled — after modification by additions and multipliers.
Example: "2D6+1D10+4" means: two 6-sided dice plus the result of a 10-sided die plus four. If the two 6-sided results are 2, 5 and the 10-sided result is a 7, then the result of the roll is 18 = 2 + 5 + 7 + 4.
3.2 Time Scale
In Bladestorm, combatants fight and move in terms of a fixed period of battle time called a turn (see 6.0). Each turn represents 10-30 seconds of battle time, but a given turn may take much more time for the players to actually resolve. During a given turn each combatant may only move once (see 6.0).
3.3 Size/Distance Scale
To fight skirmish battles it is impossible to use the real sizes/distances for the combatants and the area in which they fight. Instead we will use "scaled down" sizes: every one inch of size/distance in a Bladestorm skirmish battle represents six feet in the "real world." In metric terms, 25 millimeters represents two meters.
6 feet = 1 inch ≈ 25 millimeters = 2 meters
Example: A 1" [25mm] high miniature can represent a 6' [2m] tall man, while a 1.5" [40mm] high Troll miniature can represent a 9' [3m] tall Troll. If a Troll can move 42' [14m] in 10 seconds, the miniature representing the Troll can move 7" [18cm] in a turn.
Note: These rules use English measurement (i.e., inches and feet). An equivalent Metric measurement is provided in brackets after each occurrence of an English measurement. The Metric measurements have been rounded to the nearest millimeter, centimeter, or meter and thus are not exactly equal to the English measurements.
Note: Normally, a player may measure a distance (e.g., for the purposes of movement, missile fire, etc.) only after committing to perform the action being measured.
3.4 Bases
The Bladestorm rules assume that each miniature is mounted on a base that is proportional to its size. A base gives a miniature stability, and it also gives a representation of the minimum space required for the miniature to move and fight. See page 4 for guidelines for base sizes and for mounting miniatures on bases (see Introduction above).
4.0 Environment
The combatants in a skirmish battle fight in an environment which consists of a playing surface and any special terrain. The playing surface can be any regular surface on which the miniatures can be set up and moved (e.g., a table, the floor, etc.).
Terrain consists of objects placed on the playing surface to represent various features of the battlefield (e.g., trees, bushes, buildings, roads, walls, etc.).
These terrain features can be purchased commercially or they can be created from common every day objects. For example, you can use a box to represent a house, a couple of pieces of stacked cardboard to represent hill contours, balls of cotton to represent bushes.
If using map sheets with 1" [25mm] square tiles, it is also possible to obtain maps that include environment as part of the printed map sheet.
For the Basic Game the only terrain used totally prohibits movement. Such terrain is called impassable terrain. For example, movement through a wall is prohibited.
Example: The following terrain is used in the first Basic Game Scenario: the impassable walls of a cavern and four impassable pillars (see below).
EXAMPLE Scenario "WARRIORS OF ASH"
- Scenario Type: Skirmish
- The Tale: Beneath the Folenn Spikes lie labyrinthine caverns known as the Ash Lairs. Within these dark passages, foul creatures incessantly battle one another.
- Terrain: The impassable walls of a cavern and four impassable pillars. Note that the gaps marked as 1" [25mm] cannot be traversed by the Troll — his base is 1.25" [40mm] wide.
- Victory Conditions: To win, a player must eliminate all of his opponent's combatants.
[Map: the cavern walls, the four pillars, and the starting positions "M", "A", "C" (Goblins) and "T" (Troll) are shown on the printed map.]
- Player #1 — Controls three Goblins: Monto, Argh and Cro. Monto and Cro are lesser Goblins and Cro, the greater Goblin, is the strongest of the group. They get to move first and take position as indicated by the squares "M", "A" and "C" on the map.
- Player #2 — Controls the Sea-Troll; a very large and powerful fellow. The Troll moves second and takes position as indicated by the capital "T" on the map.
5.0 Combatants
Each combatant in a skirmish battle is represented by a miniature and a set of statistics called its stats. These stats will be explained in the following sections on movement and combat. For the basic game, only the following stats are used:
- Movement Rate
- Melee Attack
- Melee Damage
- Defense
- Endurance
Example: The following combatants are used in the first Basic Game Scenario: a Sea-troll versus three Goblins (Orc-like creatures). The Goblins should be mounted on 1"x1" bases and the Troll on a 1.25"x1.25" base.
SEA-TROLL (Large Claws)
- Movement Rate 7" [18cm]
- Melee Attack ............ 3D6+4
- Melee Damage ......... High+2
- Defense ............................. 10
- Endurance (51)
CRO, Greater Goblin (2H-sword)
- Movement Rate 6" [15cm]
- Melee Attack ... 2D6+D10+3
- Melee Damage ... High+Low+2
- Defense ............................... 9
- Endurance (18)
ARGH, Lesser Goblin (Scimitar)
- Movement Rate 5" [13cm]
- Melee Attack ............. 3D6-2
- Melee Damage ........ High+2
- Defense ............................... 7
- Endurance (10)
MONTU, Lesser Goblin (Scimitar)
- Movement Rate 5" [13cm]
- Melee Attack ............. 3D6-1
- Melee Damage ........ High+2
- Defense ............................... 7
- Endurance (10)
6.0 Turn Sequence
In the Basic Game, one player may move all of his combatants, and then combat occurs between combatants in base-to-base contact. Then the other player may move all of his combatants and combat occurs again. This comprises one turn and represents 10-30 seconds of activity in the battle. The players repeat this process until one player wins.
Individual scenarios can indicate which player moves first and when a win occurs.
Example: In the first Basic Game Scenario, the Goblins move first, and the Troll moves second.
[Diagram: Turn Sequence chart, with the turn round number (1, 2, 3) shown above. Steps in order: Initiative; Player 1 Moves; Player 1 Attacks; Player 2 Defends; Player 2 Moves; Player 2 Attacks; Player 1 Defends; Remove Defeated. The chart is captioned "Only once!"]
Restrictions on movement (see 7.0):
- A combatant may not move through another miniature. That is, a combatant's base may not pass through the area occupied by another miniature's base.
- A combatant may not move through impassable terrain (see 4.0). That is, a combatant's base may not pass through impassable terrain.
7.0 Movement
During his part of the turn, a player may move some, all, or none of his combatants. Each combatant may move (in any direction) a distance up to its Movement Rate.
Distance is measured from the center of one of a miniature's edges.
Example: The diagram shows each of the combatants in the first scenario. The shaded area around Montu shows the allowable position to which he can move during his part of the first turn. The Troll, Argh, and Cro have similar limitations.
Example: In the first scenario the Goblins move first. Since they can't get all the way to the Troll, they all move about 3" [7.5cm] towards the Troll. They end up in the positions shown below.
Example: In the first scenario after the Goblins move, the Troll moves up to the closest Goblin, Montu, as shown below.
Example: After combat takes place between Montu and the Troll (see 8.0), it is the Goblins' turn to move. Montu chooses not to move, while Argh and Cro move to attack the Troll as shown in the diagram below.
8.0 Melee Combat
When the turn sequence (see 6.0) calls for combat to occur, each combatant may make one attack against one other combatant (called the target of the attack). The following restrictions apply:
- One edge of the target's base must be in contact with one edge of the attacker's base (i.e., they may not just touch at a corner). The area of contact must be at least 1/4" (6mm).
- All combatants get to make their attacks before any combatants are removed from play. Though combat is simultaneous, the player that just moved his combatants may resolve his attacks first. Attacks are announced and resolved one at a time.
- In the Basic Game, combatants need not face each other in order to attack; only base-to-base contact is required.
Example: In the first scenario after the Goblins move, combat cannot occur because none of the combatants are in contact. After the Troll moves (see above), the Troll and Montu are in contact and may attack each other (see above).
To determine the result of an attack, roll the dice (see 3.1) indicated by the attacker's Melee Attack stat. This is called an "attack roll". If the attack roll exceeds the target's Defense stat, the attack damages the target. Otherwise, the target takes no damage (i.e., the attack misses).
9.0 Damage
An attack roll determines whether or not an attack damages a target (see 8.0).
9.1 Hits Taken
If a target is damaged, its Endurance stat is decreased by an amount indicated by the attacker's Melee Damage stat (e.g., High, Low, Highx2, etc.). See the section below on "Damage Results" for a discussion of how High and Low results are obtained. This damage is based upon the attack roll, so don't move the attack roll dice until after the damage has been applied.
To record damage, check off boxes next to the target's Endurance stat. Each box checked off is called a "hit"; so damage is often referred to as "hits taken."
After all attacks have been resolved, any combatant whose Endurance stat is zero or less (i.e., all of its boxes have been checked) is removed from the game. Such a combatant is assumed to be incapacitated, killed, or unconscious for the rest of this battle.
Note: This removal process takes place after all attacks have been resolved, thus all combatants get to make their attacks before any combatants are removed from play. Therefore, combat is simultaneous.
9.2 Damage Taken
The Melee Damage stat will indicate a damage result based upon "High Damage" or "Low Damage."
High Damage — The target takes a number of hits equal to the highest die already rolled. If more than one die are highest, the damage taken is equal to the sum of the highest dice.
Example: An attack roll of "3D6+7" results in die results of 3, 5, and 1. "High" damage from such an attack would be 5 hits. If the rolls were 2, 4, and 4, the "High" damage would be 8 = 4 + 4 because both 4's are high. If the rolls were 2, 2, and 2, "High" damage would be 6 = 2 + 2 + 2.
Low Damage — The target takes a number of hits equal to the lowest die already rolled. If more than one die are lowest, the damage taken is equal to the sum of the lowest dice.
Example: An attack roll of "3D6" results in die results of 6, 4, and 1. "Low" damage from such an attack would be 1 hit. If the rolls were 3, 4, and 3, the "Low" damage would be 6 = 3 + 3 because both 3's are low. If the rolls were 4, 4, and 4, "Low" damage would be 12 = 4 + 4 + 4.
High+Low Damage — The target takes a number of hits equal to the sum of the highest die and the lowest die already rolled. If more than one die are lowest or highest, the damage taken is equal to the sum of all three of the dice.
Example: An attack roll of "3D6" results in die results of 6, 4, and 1. "High+Low" damage from such an attack would be 7 = 6 + 1. If the rolls were 3, 4, and 3, the "High+Low" damage would be 10 = 4 + 3 + 3 because both 3's are low.
9.3 Damage Modifiers
As with normal dice rolls (see 3.1) damage results can be modified by additions and multipliers.
Example: An attack roll of 3D6 results in die results of 6, 4, and 1. "Low+2" damage from such an attack would be 3 = 1 + 2. If the rolls were 3, 4, and 3, the "Low+2" damage would be 8 = 3 + 3 + 2.
Example: An attack roll of 3D6 results in die results of 6, 4, and 2. "Lowx3" damage from such an attack would be 6 = 2 x 3. If the rolls were 3, 4, and 3, the "Lowx3" damage would be 18 = (3 + 3) x 3.
9.4 Combat Example
In the first scenario, after the Troll and the Goblins have moved (see the example in Section 8.0), the Troll and Montu stand in base-to-base contact and may attack one another. The Troll's Melee Attack is "3D6+4" and his attack roll is a 1, a 5, and a 3, for a total attack roll of 13 = 1+5+3+4. Since Montu's Defense is only "7", the Troll's attack damages Montu. Since the Troll's Melee Damage is "High+2" and his dice results were 1, 5, 3, Montu's Endurance is decreased by 7 = 5 + 2 (i.e., check off 7 boxes next to Montu's Endurance, he takes 7 hits).
Montu's Melee Attack is "3D6-1" and his attack roll is a 2, a 3, and a 6, for a total attack roll of 10 = 2+3+6-1. Since the Troll's Defense is "10", Montu's attack just misses and doesn't damage the Troll.
Next, the remaining Goblins move, and all decide to move into base-to-base contact with the Troll (see the diagram below). Montu chooses not to move and keeps his position in front of the Troll.
After their movement has concluded, it is their turn to attack the Troll and melee combat between the two groups commences again.
Argh's attack roll is 8 = 1+5+4-2, he misses. Cro's attack roll is 15 = 6+2+4+3 (his Melee Attack is 2D6+D10+3), so he damages the Troll. Cro's Melee Damage stat is High+Low+2, so the Troll takes 10 hits (i.e., 10 = 6+2+2).
Montu attacks and rolls 11 = 4+2+6-1 — which is more than the Troll's Defense of 10, he damages the Troll! Since Montu's Melee Damage stat is High+2, the Troll's Endurance is decreased by 8 = 6+2.
The Troll decides to attack Montu again, this time with an attack roll of 12 = 2+3+3+4. This is more than Montu's Defense of 7, so the Troll damages Montu again — Montu's Endurance stat is decreased by 8 = 6 + 2, since the High result of a 2,3,3 roll is 6 = 3+3.
After those attacks the Troll has taken 18 hits (i.e., its Endurance is reduced by 18), Montu has taken 15 hits, and the other Goblins are undamaged. Since Montu only has an Endurance of 10 (i.e., 10 boxes), he is removed from play.
[Status at end of example: Sea-Troll Endurance (51) with 18 hits taken; Cro Endurance (18) undamaged; Argh Endurance (10) undamaged; Montu Endurance (10) with 15 hits taken, removed from play.]
10.0 Scenarios
After having read through the examples given in the previous chapters, you are now ready to fight your way through the attached Basic Game scenarios. Both scenarios are set on the backdrop of Folenn, a wild continent that is part of the Shadow World RPG setting by Terry K. Amthor.
The example match is included together with a larger map to help you set up your playing surface in a similar way. The three Goblins and the Sea-Troll are included with full featured Combatant Cards. On them, you will see a range of stats and values that are not covered under the Basic Game rules. Simply ignore them for now. The cards are set up so you can reuse them when playing a game under Standard Game and Optional Rules.
The second scenario "A Test of Arms" stages a face off between three equally capable combatants on both sides of a wall. While the first scenario is very generic in terms of the chosen combatants, the second scenario takes you to the Bladelands of Folenn and drops you into the middle of a fight between two Warring Holds. If you like a setting of warrior clans fighting for supremacy on an unpredictable continent, you might enjoy discovering more in the classic Bladestorm Box Set and its included scenarios.
All combatants come with full featured Combatant Cards for your convenience. You can either print them out or fill them out directly in the Quick-Start Rules booklet.
10.1 Game Balance
On the subject of game balance and equal chances you may ask yourself how to tell if a match between two groups on the gaming table can be called a fair fight. This is achieved by appointing an abstract value to each combatant, called TPC.
TPC is short for Total Point Cost and it symbolizes a combatant's fighting skills and the choice of equipped weapons. When pitting two combatants or two groups of combatants against each other, the combined TPC values should be very close to even if you want to create a balanced encounter.
You can also use TPC values to create a threshold to introduce levels of difficulty into your skirmish matches.
Example: In the first Scenario, the Goblins' TPC outnumbers the TPC of the Troll (636 vs. 480) in order to offer an easy introduction to the game.
Example: In the second scenario, the group from Rukon and the group from Cavan each have a net worth of 475 TPC on the battlefield, which makes them an even match.
10.1 Combatant Cards
The combatant card is your single point of reference to keep track of your combatant's health and abilities.
Use them to give game related stats to any kind of tabletop or role playing character you can imagine.
You can obtain blank templates by downloading them at www.metal-express.net or print out the templates at the back of this Rulesbook.
(See chapter 11.0 "Create Your Own" to learn more about the possibilities of combatant creation for your own individual games.)
[Diagram: Combatant Card setup. Callouts: the most important stats (loosely resemble the miniature; enter stats freely, calculate with the Bladestorm Calculator, or convert from other game systems); one circle of health for each point of endurance; spell users can cast any type of spell (Standard Game rules, not covered by Quick-Start); weapons and their attack and damage stats (no set limit; each additional weapon increases the combatant's TPC; if the three slots are not enough, add another and make the endurance points box smaller); leaders (Standard Game rules, not covered by Quick-Start); special powers and other game related information, race and base size; TPC values symbolize the level of strength that a combatant or unit brings into the game.]
There are two types of cards: Combatant Cards and Unit Cards. Units are part of the Standard Game rules and are not covered in the Quick-Start Rules.
10.2 Warriors of Ash
[Map: printed scenario map.]
Basic Game Scenario: A large Sea-Troll fights three tough Mountain Goblins.
- The Tale: Beneath a vast mountain range lie labyrinthine caverns where only the most brave adventurers dare to go. These lairs run beneath both land and sea. Within these dark passages, foul creatures incessantly battle one another unless they can prey on a poor intruder who has somehow found his way in. In this scenario, a Sea-Troll from under the ocean is hunting in drier caverns. It comes upon three tasty Goblins.
- Terrain: The impassable walls of a cavern and four impassable pillars. Note that the gaps marked as 1" [25mm] can not be traversed by the Troll — his base is 1.25" [40mm] wide.
- Victory Conditions: To win, a player must eliminate all of his opponent's combatants.
- Player #1 — The Goblins; move first and set up as indicated on the map.
- Player #2 — The Sea-Troll; move second and set up as indicated on the map.
10.3 A Test of Arms
[Map: printed scenario map.]
Basic Game Scenario: Three Footmen of Cavan vs. three Footmen of Rukon.
- The Tale: In a daring and unprecedented move, Brool Highrunners of Rukon raid a Cavan outpost in the Folenn Spikes. Cavan footmen rush out into the level valley to do battle with the Highrunners.
- Terrain: Clear terrain. 15" x 15" playing surface. A wall runs northwest to southeast through the skirmish site, but an opening allows for the flow of combatants.
- Victory Conditions: To win, a player must eliminate all of his opponent's combatants.
- Player #1 — Rukon Highrunners Skirmishers; set up first within 1" [3cm] of the south edge; move first.
- Player #2 — Cavan Garrison Skirmishers; set up last within 1" [3cm] of the north edge; move last.
Setting: Rukon
Rukon, a Warring Hold in the south of Folenn, constantly sends Hunts into neighboring lands to seek out valuables and plunder. Threatened by harsh winds and saddled with poor soil and harsh topography, the Rukonu eke out a subsistence economy that supports its powerful warrior class. Slaves and horses comprises their chief exports.
The current ruling class, the Brool, exemplify a rich warrior elite. Both men and women fight, and anyone who is ruthless and tough enough can become a warlord.
Setting: Cavan
Cavan, another Warring Hold in the far north of Folenn looks the exact opposite. Well-watered and fertile, it is an inviting land, traditionally divided into three "Walks". The Coast Walk to the west, the Green Walk straight through the middle and the Iron Walk east along the mountain range. Cavan's soldiers fall into two categories. A small warrior class and an auxiliary class that numbers in the hundreds. They protect the realm against any who seek its treasures by force.
11.0 Create Your Own
The following two chapters describe a random, and a guided method to create combatants for the game.
The previous chapters provided an insight on the basic mechanics that make up the Bladestorm tabletop game. The introduction however talked about a set of rules that empowers you to realize any kind of skirmish fight, independent of a setting and purely powered by your creativity and imagination.
"One set of rules to fight hideous monsters and historic figures alike!"
The easiest way to create your own combatants is by simply filling out an empty Combatant Card as can be found at the end of this booklet. By selecting stats for your miniature you can try out its effects on the game for the sake of fun and experience. Using this method will make it hard however to get a firm grasp on balance, as the adventurers and monsters you create do carry their strengths and weaknesses without comparison. Judgement is relative as it depends on you and your gaming group to determine what is fair and balanced and what is not.
For this purpose the Bladestorm tabletop game brings with it a more detailed method to create individual combatants and units. The driving factor in this process is the weighted combatant assembly for the game, that results in a definite TPC-value.
The process is best imagined by looking at a given tabletop miniature and visualizing its most important characteristics, then selecting the matching equivalent from a range of choices. During this step-by-step creation process, you can literally watch your miniature come alive.
The random method can also be used to look up the maximum possible values that can be assigned to a combatant's stat while freely appointing stats. It is recommended to adhere to the minimum and maximum values as Bladestorm — unlike most other tabletop games — opens up its gearbox for you to get your hands dirty. You can tune any of the values given in the following tables but keep in mind that like with any tuned engine, it may blow up if too much pressure is applied to its components.
11.1 Random Creation
The random method for combatant creation leaves the good and the bad up to a number of dice rolls. Use 2D6 or D6+D10 and follow these steps to create a combatant for the Basic Game.
Note: rolling up two combatants for an instant duel game may prove a lot of fun and prove drastically unfair at the same time!
Let's start by determining the race of our random combatant by rolling 2D6.
Determine Race
| Dice Roll | Race | Base Size |
|---|---|---|
| 2-4 | Orc | Medium (1"x 1") |
| 5-10 | Human | Medium (1"x 1") |
| 11-12 | Troll | Large (1.25" x 1.25") |
The race you just rolled for your combatant does have immediate effects on its stats. Note these values down on a piece of paper and add them to the respective total later.
Race Modifiers
| Race | Attack | Defense | Endurance |
|---|---|---|---|
| Orc | +1 | - | +1 |
| Human | - | - | - |
| Troll | +5 | +4 | +12 |
Next, we want to know how fast our combatant can run. Roll D6+D10 to find out:
Determine Movement
| Dice Roll | Medium Size | Large Size |
|---|---|---|
| 2 | 5" | 7" |
| 3 | 6" | 8" |
| 4 | 7" | 9" |
| 5 | 8" | 10" |
| 6 | 9" | 11" |
| 7 | 10" | 12" |
| 8 | 11" | 13" |
| 9 | 12" | 14" |
| 10 | 13" |
Congratulations, you now know how fast your combatant can move on the gaming surface. Note the stat value down on the combatant card and proceed to the next step.
Now we want to see how easy or hard it is to defend against attacks. Roll 2D6 to find out:
Determine Defense
| Dice Roll | Medium Size | Large Size |
|---|---|---|
| 2-3 | 7 | 5 |
| 4-5 | 8 | 6 |
| 6-7 | 9 | 7 |
| 8-9 | 10 | 8 |
| 10 | 11 | 9 |
| 11 | 12 | 10 |
| 12 | 13 | 11 |
This time we might have to consider a modifier to the stat we just rolled. If creating a Troll, apply the modifier from the Race Modifiers table on the left. Tough luck for everybody else.
We move on to the endurance stat. This is going to be important, so warm up D6+D10!
Determine Endurance
| Dice Roll | Medium Size | Large Size |
|---|---|---|
| 2 | 5 | 10 |
| 3 | 7 | 15 |
| 4 | 9 | 20 |
| 5 | 11 | 25 |
| 6 | 13 | 30 |
| 7 | 14 | 32 |
| 8 | 15 | 34 |
| 9 | 16 | 35 |
| 10 | 17 | 36 |
Again, we might have to consider a modifier to the stat we just rolled. If creating a Troll or an Orc, apply the modifier from the Race Modifiers table. The player for the human combatant will just have to get used to it.
Time to find out what kind of weapon our combatant will receive. Note, that the table below does consist only of a selection of melee weapons as ranged combat is not part of the Basic Rules. You are 2D6 away from your armament:
Determine Melee Weapon
| Dice Roll | Weapon | Damage | Attack |
|---|---|---|---|
| 2-3 | Club | High | 2D6-2 |
| 4-5 | Mace | High+1 | 2D6 |
| 6-7 | Short Sword | High | 3D6-1 |
| 8-9 | Broadsword | High+2 | 3D6-2 |
| 10 | Warhammer | High+1 | 3D6-3 |
| 11 | Battleaxe | High+Low+1 | 2D6+D10-4 |
| 12 | Two Handed Sword |
Consult the Race Modifiers table one last time. If creating a Troll or an Orc, apply the modifier from the Attack column to the Attack Roll as stated in the weapons chart.
Example: The dice roll that determines the weapon shows a 10, resulting in a Warhammer for the Orc. Since he receives a bonus of +1 to his Attack Roll, his attack is 3D6-3+1 = 3D6-2 on the Combatant Card.
This concludes the creation of a random combatant. Repeat this process again to create an adversary. You then have everything you need to engage in a quick skirmish battle following the Bladestorm Basic Game Rules.
11.3 The Calculator
Creating a combatant for the game at random is a quick way to get started and it does reveal a good deal of the inner workings behind the Bladestorm combatant creation system. However, it misses out greatly on game balance as there is no way to influence the TPC value. It also lacks a number of stat improvements that are available during a calculated approach to the process.
The main concept behind a planned combatant creation remains the same. It is a step-by-step process which starts with the general aspects of the combatant, then moves on to stats and finally adds weapons that are available in combat.
As this process can involve much more information than is available in the Basic Game, it is recommended to make use of the Bladestorm Calculator. This calculator comes in form of a MS Excel Spreadsheet that allows each stat to be determined separately.
Every aspect of a combatant can be customized. Changes show in real time on a stylized combatant sheet next to the available options. The software basically takes all information into account that is presented in the Bladestorm Rulesbook and adds a great deal of convenience. Creating combatants for your tabletop game becomes a point-and-click adventure.
Once all the details of the new combatant have been fleshed out, simply copy its stats over to a combatant card for easy print out.
Just like the Bladestorm rules, the Bladestorm Calculator comes in two versions.
- The free version supports all material found in the Quick-Start Rules and resembles the Basic Game.
- The full version supports the Bladestorm rules in their entirety, including the Intermediate Game, the Standard Game and the Optional Rules.
Step by Step
After double clicking the Bladestorm Calculator.xlsx file, the application opens in the "Combatant Calculator" spreadsheet.
The window is separated into two areas: all options for combatant creation are shown on the left whereas the right is dominated by a stylized combatant card.
By default, the calculator is set to show a human, medium-sized combatant with no selected features. The TPC of 50 is based on the default selection for a medium sized combatant. It is recommended to always return the calculator to this state in order to start clean.
Combatant creation is guided through the following steps:
- Let's start with size and background. The combatant size determines the minimum and maximum stats and sets the initial base size. Humans, Goblins and Orcs for example are medium sized combatants, while Trolls are considered large. Numerous fantasy races are available that feature specific bonuses or penalties. Note that the races of the free version are limited to Human, Orc and Troll.
- Determine stats. The Movement, Defense and Endurance stats can be set in this area. Note, that depending on your choice of base-size, you will have different values available in the drop-down menus. Advancing the stats will inevitably increase the TPC value associated with it.
- Hand out some weapons. The Bladestorm Calculator supports three weapon slots for either melee or ranged weapons. All applicable bonuses and penalties are applied accordingly. The free version offers a variety of melee weapons to choose from. Weapon slots may also stay empty.
- Boost fighting skills. Whereas the random combatant creation process did only appoint a weapon to a combatant, the Bladestorm Calculator lets you give your combatant improved fighting skills. The Melee Attack Bonus is the basic representation of a combatant's fighting skill. The bonus is added to the Attack Roll and makes wielding cumbersome weapons, such as two handed swords, a lot easier. Keep in mind though that training is expensive and will raise the TPC of your combatant. Extra attack dice are available only to large and huge creatures. The Melee Damage Bonus is added to the weapon's damage value.
- Create a leader. Not applicable for Basic Game.
- Create a spell user. Not applicable for Basic Game.
After all selections have been made, the Bladestorm Calculator will have filled out the Combatant Card on the right side and offer a usable TPC value to ensure balance in your skirmish encounters.
Congratulations! That concludes the Bladestorm Quick-Start Rules. You are now ready to embark on your first quest!
If you like the mechanics of this game and would like to dive head long into the action, feel free to buy the full Bladestorm Rulesbook.
12.0 Resources and Partners
Resources
As Bladestorm has moved into the 21st century we are happy to provide support for our game at multiple locations on the world wide web.
- Metal Express Homepage — http://www.metal-express.net
- The MX Forums — http://www.metal-express.net/forum
- Facebook — http://facebook.com/BladestormTabletop
- RPGNow — http://www.rpgnow.com
Partners
Miniatures are our passion and we are happy to display figures throughout our publications from the 25mm ranges of the following miniature companies:
- Brigade Models — http://www.brigademodels.co.uk
- Excalibur Miniatures — http://www.excalibur-miniatures.com
- Mirliton High Quality Miniatures — http://www.mirliton.it
- RAFM Miniatures & Games — http://www.rafm.com