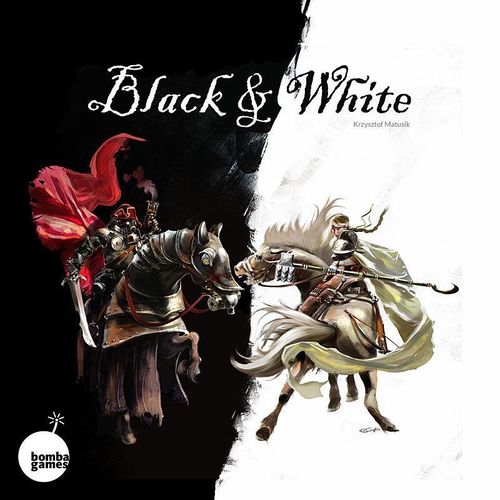
Black & White
Black & White Rulebook
Table of Contents
Table of Contents
- Box Contents
- Goal of the Game
- Before You Begin the Game
- Preparing the Game
- Units
- Building the Army
- Example Armies
- Terrain Objects: Trenches, Abatis, Fire, Smoke
- Setup Overview
- Playing the Game
- Important
- Moving the Units
- Terrain
- Area of Influence
- Line of Sight
- Attack
- Ranged Attack
- Artillery Fire
- Destruction of Units
- Critical Success and Critical Failure
- Additional Fight Rules
Box Contents
- board
- 24 black wooden blocks
- 24 white wooden blocks
- 94 stickers
- 2 cube dice (d6)
- 24 terrain tiles
- 12 terrain tokens
- 9 round special tokens
- 3 round faction counters
- 18 unit cards
- 6 commander cards
- 22 scenario cards
- 8 aid cards
- 1 curtain
Goal of the Game
Black&White is a war game for two players. Each player commands one of two available armies. Players can use 22 included scenarios. Victory conditions are designated by scenario.
Before You Begin the Game
Before first battle you have to prepare the game. There is a sheet with stickers in the box (48 for each army). These stickers have to be stuck on the wooden blocks in a way shown in the picture. When all stickers are in place, you can begin the game.
Preparing the Game
Put the board on a flat surface between players. The next step is choosing one of available scenarios, either by two players consenting to play one of them, or determining it in a random way. It is advised to play the first game with scenario number 21 or 22. They are tutorial scenarios, designed to teach players the basics of the game. After choosing the scenario, you need to decide which player will lead black army of Thargaton and which the white army of Vesania. Then, each player takes appropriate cards (black or white) and corresponding wooden blocks. In addition to them, there are also so called aid cards in the box. Players should refer to them during first games to learn the rules faster.
Every game of Black&White consists of two stages. First stage is preparing scenario and building your army, and second – the gameplay.
Preparing the Scenario
On the scenario card there is a schematic map showing the location of strife. Using terrain tiles, players have to prepare the board for the game. Furthermore, there are victory conditions shown for each side. The game offers 4 types of scenarios.
Scenario card labels: scenario number; first row of board for black player; victory condition for black player; first row of board for white player; victory condition for white player.
Scenario Types
Skirmish (scenarios 01–05)
They are the simplest scenarios. Each player tries to eliminate as many enemy units as possible. The goal of each side is to obtain 10 victory points. Points are granted for elimination of enemy units. The amount of points a player gets for each unit is equal to its cost. Players mark victory points on the score track located on the board. Faction counters are used for tracking obtained points. Both players get 3 special tokens.
Defense (scenarios 06–10)
During these scenarios one side is defending the fort. The opponent has to capture it within 10 or 12 turns. The attacking player marks the passing time on his or hers score track. The defending player gets victory points just like in the skirmish scenario. If defending player gets 15 victory points before the end of turn 12 – he or she wins.
The defending player gets 3 special tokens, the attacking player gets 4 special tokens.
Domination (scenarios 11–15)
During these scenarios players try to capture forts marked on the board. The player, who controls adequate number of forts at the beginning of his or her turn wins. Fort is considered captured if a player has at least one unit in it.
Both players get 3 special tokens.
Behind enemy lines (scenarios 16–20)
In these scenarios one player tries to lead his or her units to the opposite end of the board. Second player tries to hinder other player's plans. The advancing player has to move 3 of his or her units to hexes marked with arrows. The defending player must get required amount of victory points. If he or she gets 15 before enemy gets to their positions, the defending player wins. During placing the units, the defending player cannot place his or her units on the hexes with arrows.
The advancing player gets 4 special tokens and the defending player gets 3 special tokens.
Tutorial (scenarios 21–22)
These scenarios are designed to teach players the basics of the game. They are played just like skirmish scenarios.
Victory Conditions
Victory condition examples on the scenario cards: obtain 10 victory points; capture fort during 12 turns; capture 2 of 3 forts; lead 3 units.
Units
During the game players are taking control of their units. The unit is represented by a single wooden block. There are stickers on the blocks, which identify the unit. The type of a unit (infantry, cavalry, artillery) is visible to the enemy. The class of a unit (ex. engineers, heavy cavalry, the Brotherhood of the Sword etc.) is visible only to the player who controls the unit. Furthermore, there are dots on the sticker that show size of unit. At the beginning of the game, all units have maximum size available to them. Players mark this by placing the block in such position, that the highest available size is on the top. If as a result of the attack or other events unit has to reduce its size, the block must be turned 90 degrees to the left. If unit's size is equal to 1 and must be reduced, then such unit is destroyed.
Unit Limit Rules
Units of only one player may station on a hex. Additionally, on one hex can be a maximum of: 3 infantry units; 2 cavalry units or 1 artillery unit. Furthermore, units of different type can stand on the same hex: 1 cavalry unit and 1 infantry unit or 1 infantry unit and one cavalry unit.
Squads
The squad consists of more than one units of the same type (infantry or cavalry) standing on the same tile. The squad can consist of 3 infantry units (regardless of class) or 2 cavalry units (regardless of class). Have in mind that different types of units do not make a squad.
Special Tokens
Each scenario defines an amount of special tokens each player gets. The tokens have two sides. Each player puts specified amount in front of them and turns them to their faction's side. The tokens show how many activations a player can make during a turn. After activation, player flips one token to the other side. He or she marks taken action in this manner.
Building the Army
When the board is prepared, players have to place curtain between them. From this moment, players are secretly building their armies. Players have 20 points to distribute. For these points they can buy units, which are represented by wooden blocks (their costs are printed on the unit cards).
Each unit card that takes part in the game should be placed face-down in a way that prevents the other player from knowing what he or she will face. Blocks representing the army should be placed on the first row of hexes facing the opponent with the icon representing type of unit (infantry, cavalry or artillery).
Unit card labels: unit class; discipline; melee attack; ranged attack; defense; cost; unit type; special ability. Unit type icons: infantry, cavalry, artillery.
The army needs a leader. Players have 3 commanders per side at their disposal. Each of them determines a way that the army will fight. So, choosing the right commander is vital. During the first games we suggest that players play without the commanders.
When players have finished building armies, choosing commanders and placing units, the curtain has to be removed from the board and placed in a box.
Players have to put a faction card beside the board. This is used for the players to know exactly whose turn this is. At the end of the turn the card must be flipped to the other side.
Example Armies
Thargaton Army
Infantry
The defense attribute of infantry (regardless of class) during melee fight is raised by 1 for each allied infantry unit located on the same hex. Furthermore, unit's discipline (regardless of class) is raised by 1 for each allied infantry unit located on the same hex.
- Regular infantry – A player can move all his regular infantry units 1 hex by sacrificing one activation. These units cannot attack.
- Line infantry – These units can perform ranged attack even when they are standing in the area of hostile influence. During melee fight, they can add its Ranged attack attribute to its Melee attack attribute.
- Marksmen – If during an activation this unit did not move, it can perform ranged attack at a unit located 3 hexes away.
- Engineers – If during an activation this unit did not move, it can build trenches or abatis.
Cavalry
- Regular cavalry – No special abilities.
- Light cavalry – This unit can move through swamp.
- Heavy cavalry – This unit can perform charge with +2 modifier.
Artillery
- Regular artillery – No special abilities.
- Special artillery – During firing, player has three types of ammo at his or her disposal: regular, incendiary and smoke bomb. The type of ammunition is determined before aiming roll. If player uses special ammunition (incendiary, smoke bomb) he or she does only the aiming roll. You can aim at hexes without enemy units.
Vesania Protectorate Army
Infantry
"Melee attack" of infantry unit (regardless of class) is raised by 1 for each allied infantry unit on the same hex.
- Order of the Aquarius – This unit can perform melee attack after making full move.
- Brotherhood of the Sword – This unit can perform charge with +1 modifier. The defense of this unit is lowered by 1 when it is the target of a ranged attack.
- Order of the Virgo – If this unit did not move during activation, it can fire at enemy unit twice. If the attacked unit retreats after the first attack and leaves the range of the Order of the Virgo, second attack does not happen.
- Lions of Vesania – During fight with the cavalry, the defense of this unit is raised by 1.
- Sirens of Vesania – No special abilities.
- Guardians of the Surculus – If this unit did not move during activation, it can fire at enemy unit twice. If the attacked unit retreats after the first attack and leaves the range of the Guardians of the Surculus, second attack does not happen.
- The Iron Order – This unit can perform charge with +1 modifier.
- Order of the Capricorn – No special abilities.
- Order of the Scorpio – This unit can move through swamp, can attack after move and skips aiming during firing. It has range of 1-3 hexes. Target of shooting must be in line of sight.
Terrain Objects: Trenches, Abatis, Fire, Smoke
Trenches – The engineer unit can make a trench on the hex it is located on by sacrificing its whole activation. It has to be marked with trench token. Only infantry units can enter hex with a trench.
Units in trench have defense raised by 1. Furthermore, units in trench can be forced to retreat only during a critical success. Trench does not block line of sight.
Abatis – The engineer unit can make an abatis on the hex it is located on by sacrificing its whole activation. It has to be marked with abatis token. Only infantry units can enter hex with abatis, but they cannot attack after this move. Unit entering this tile have to stop. Infantry located on hex with the abatis can sacrifice its whole activation to remove it.
Fire – If a player manages to aim with incendiary ammo, he or she puts fire token on the target hex. If enemy units are located on this hex, they must pass the command check. If they pass, they can retreat. Otherwise they remain on this hex and must reduce their size by one. If at the end of turn there are any units standing on burning hexes, they must reduce their size by one. Fire does not block line of sight. Units can move through the fire, but they must reduce their size by one for each passing through the burning tile.
Smoke – If a player manages to aim with smoke bomb, he or she puts smoke token on the target hex. Smoke blocks line of sight. Units located on the tile with smoke cannot perform attacks and use special abilities, also they cannot be attacked. However, smoke can be fired on by artillery.
Setup Overview
Everything is set up: 1. scenario card, 2. faction card, 3. commander card, 4. unit cards, 5. special tokens, 6. point track, 7. first row of hexes for placing white units, 8. first row of hexes for placing black units.
Playing the Game
Each player rolls a die. Player who gets the highest result begins. The game is played in turns. In each turn, player can take a maximum of activations equal to the amount of special counter he or she possess. Taken activations should be marked using round special tokens. The game continues until either player accomplishes the goal printed on scenario card.
Description of Activation
Activation means activating a unit or squad. Activated unit can move through the board, attack the enemy or perform special actions. The squad can only move through the board, however one unit in this squad can attack, if this squad did not use all of its movement points. If a unit or squad moves, player does not reveal the class of units to his or her opponent. Only during the attack or special action player reveals the unit, and also flips the corresponding card face-up on the table. If a unit moved through a maximum amount of hexes available, it cannot attack.
Commanders
Each player has a commander card with 4 orders that can be given to units at his or her disposal. One has to have in mind that each player can give only one order per turn. Unit receiving the order has to pass the command check. If it passes, the order is entering into force. The order with number one is a special order, and as such does not require passing of the command check and does not count against the limit of orders that can be given in a turn. Additionally, it can be issued any number of times.
Unit action options (from the commander card's action table):
- Infantry during its activation can: A. perform special action; B. move up to 1 hex and perform melee attack; C. move up to 1 hex and perform ranged attack; D. move 2 hexes.
- Cavalry during its activation can: A. perform special action; B. move up to 2 hexes and perform melee attack; C. move up to 2 hexes and perform ranged attack; D. move 3 hexes.
- Artillery during its activation can: A. perform special action; B. move 1 hex; C. open fire at the enemy.
Commander Orders
Baron Maximilian
- Special order: unit's Discipline is raised by 1.
- Motivation: during melee fight, the unit's attack is raised by 1.
- Finish them: if during a fight player rolls a critical success, the enemy unit is dealt twice the damage (it must drop its size by two).
- Dodge: during an enemy counterattack, cavalry units do not take damage.
Lord Alexandrus
- Special order: a player can reroll the dice during aiming, but only once.
- Strenuous march: infantry and cavalry units can move one additional tile. After this order this unit cannot attack.
- Defense: during an enemy counterattack, the unit's defense is raised by 1.
- Empty move: a unit before its activation can move one hex back or sideways.
Vlad Kristofferson
- Special order: in the event of critical failure, you can reroll the dice once.
- For the Queen!: unit in melee fight can sacrifice itself (it must be taken off board) to successfully attack the enemy unit (its size must be reduced by 1).
- Recon: if a unit has an enemy unit in line of sight in range of 2-3 hexes, it can check class of this unit.
- Power surge: unit can attack after making a full move.
Inquisitor Dominic
- Special order: during a turn, player can activate one unit twice. However, player can use special abilities of activated unit only once. This order does not work on artillery.
- Restoring strength: unit performing this order must sacrifice an activation to raise its size by one (block must be spun 90 degrees to the right).
- Pursuit: if during a melee attack an enemy unit retreats, player can move his or hers unit on the hex that was left and perform an additional attack on retreating unit.
- Tactical retreat: Unit can retreat after performing a melee attack.
Cardinal Rafael
- Special order: you can check enemy unit class in your area of influence.
- Berserk: an infantry unit can perform two melee attacks during this activation. It can attack two different targets or one target twice.
- Dodge: during an enemy counterattack, cavalry units do not take damage.
- Crippling: unit in your area of influence can not be activated during the next turn. This unit must perform a command check. If it passes, ignore this effect.
Sister Anastasia
- Special order: player can reroll the dice during ranged attack once.
- Till death: if a unit is going to be destroyed as a result of counterattack, it can perform one additional melee attack.
- Steady aim: during ranged attack, raise the "ranged attack" attribute by 1.
- Fear: if a unit has an enemy unit in its area of influence it can force the opposing unit to retreat. This unit must perform a command check. If it passes, ignore this effect.
Important
Each turn, a unit can be activated only once. During a turn only one artillery unit can be activated. Furthermore, player can give only one commander order a turn.
Moving the Units
There are 3 types of units: infantry, cavalry and artillery. Each of them has shared attributes regarding moving and attacking. So, for the enemy there is no distinction between you making a move with engineers or marksmen. Both units are infantry units and move the same way. Units can pass through hexes occupied by allied units, but only if they do not violate unit limit rules. A manner of moving and possibilities of attack are presented on attached aid cards. During first games it is advised that players look at them to avoid making mistakes.
Charge
Certain units possess the ability to charge. To perform a charge, unit must sacrifice the whole activation. Charge is a move through exactly 3 hexes in a straight line. This move cannot be made through forest, smoke or terrains unavailable to the unit. After this move, unit performs melee attack on enemy unit with positive modifiers to the attack.
Charge diagram: 1. Unit doesn't move, but opens fire at the enemy. 2. Unit makes a move through 1 hex and melee attacks enemy unit. 3. Unit makes a move through 2 hexes and ends its activation. 4. Charge.
Terrain
The move of units is restricted by terrain they are moving through. Furthermore, terrain is significant in resolving attacks and determining line of sight.
- Forest: only cavalry and infantry can enter this tile. After entering the forest, unit must stop. Forest blocks line of sight. Units located in forest have +1 defense bonus. This bonus does not work if both units are located on adjacent tiles of forest.
- Hill: this terrain is available to all types of units. It blocks line of sight. If unit on the hill is being melee attacked, the attacking unit gets -1 attack penalty.
- Swamp: this terrain is available only for infantry. It does not block line of sight.
- Mountains: this terrain is unavailable to all units. It blocks line of sight.
- Stream: infantry and artillery entering this tile must stop. Stream does not block line of sight.
- River: this terrain is unavailable to all units. It does not block line of sight.
- Fort: object available only for infantry. Defense attribute of unit inside is raised by 2. During the defense of the fort, the stationing unit is forced to retreat only on critical success. Fort blocks line of sight.
- Bunker: object available only for infantry. Defense and Ranged attack attributes of unit inside are raised by 1. During the defense of the bunker, the stationing unit is forced to retreat only on critical success. Bunker does not block line of sight.
- Bridge: object that makes passing through river or stream possible. Bridge does not block line of sight.
Area of Influence
Every unit has its own area of influence. All adjacent hexes are incorporated into it. If a unit is located in hostile area of influence and wants to leave it, it has to pass command check.
Command Check
Player rolls two dice. If sum of rolled values is equal or less than value of its discipline attribute, the unit passes the command check. Otherwise, it fails command check.
If the check is failed, unit cannot move during this activation. However, it can attack the enemy unit.
Line of Sight
During the game, players will have to frequently check, if their units see the enemy units. To do this, it's advised to imagine a line which begins at the centre of hex occupied by the unit, and ends on a hex with the enemy unit. If this line does not cross tiles that block line of sight, then both units see each other. Enemy and allied units also block the line of sight.
Diagram: unit is in the line of sight / unit isn't in the line of sight.
Attack
If the unit begins or ends its move and is located next to the hex with enemy unit, it can perform melee attack at it. If a unit, after the move or before it, has enemy in the line of sight and in range, a player controlling this unit can decide to open fire at the enemy. One has to remember that attacking ends the activation of unit.
Melee Attack
Enemy units standing on neighboring hexes are incorporated into each other's areas of influence. Such units can fight each other.
To perform an attack, a player rolls two dice. Player subtracts lower value from higher value. Then, he or she adds obtained result to the Melee attack attribute of attacking unit. To successfully attack, it must exceed the Defense attribute of defending unit. If attack succeeds, the defending player must reduce size of his or her unit by one. After reducing the unit size, the defending player can retreat his or her unit. If player does not want to retreat his or her unit, he or she must take command check with this unit. If it passes the command check, it can perform counterattack, otherwise it has to retreat.
Example: Unit performs melee attack and rolls two dice. The dice results are 5 and 4, so player will add 1 to his or her attack value. The defense of defending player is equal to 3. The attacker wins the fight. The defending player reduces size of his or hers unit. Then, he or she performs a command check. The defender can perform a counterattack. The results are 5 and 3. Final value of the counterattack is 3.
Counterattack
Counterattack can only be performed if units are in melee range and the defending unit was not forced to retreat. It is performed similarly to attack, with the distinction that the active player is now the defending player. No matter if the counterattack succeeds or not, active player does not have to retreat and pass command check.
Retreating
If a unit is forced to retreat, it has to leave area of influence of the enemy. However, it cannot retreat into another enemy unit's area of influence. Unit can retreat into the tile with another friendly unit, having in mind limit of units on each hex. If unit cannot retreat, it remains on the hex, but its size must be lower by one.
Ranged Attack
If a unit has Ranged attack attribute, it can perform ranged attack. The range of this attack is exactly 2 hexes. It can be performed only if nothing blocks line of sight, the enemy unit is in range, and attacking unit is not in an area of hostile influence. Performing ranged attack is similar to the melee attack. The distinction is that the attacking unit uses Ranged attack attribute instead of Melee attack. If ranged attack succeeds, the defending player can retreat. If he or she does not want to, the defending unit must pass the command check. If it fails, the unit must retreat. During ranged attack, the enemy cannot perform counterattack.
Example: Range of a unit with Ranged attack attribute. Unit performs ranged attack and rolls two dice. The dice results are 5 and 3, so player will add 2 to his or hers attack value. Defender has increased by 1 Defense because his unit is located in the forest. The defense of defending player is equal to 4. The attacker wins the fight. The defending player reduces size of his or hers unit. Then, he or she passes a command check and he or she don't have to retreat.
Artillery Fire
Artillery fire is a special kind of attack, which can be performed only by artillery units. Units or hexes under artillery fire do not have to be in performing unit's line of sight. Artillery fire consists of two stages: aiming and damage dealing. If aiming fails, the second stage is ignored. Artillery can fire 2-4 hexes away. The further player wants to shoot, the more difficult aiming is.
Aiming
To aim at chosen hex, player has to determine the range and roll adequate result on the die.
If aiming failed, player puts one of the additional special tokens on that hex. This way player marks the spot he or she was aiming at. If in the next turn player will aim at the exact same place, he or she adds 1 to the die roll for every token lying on this hex. If he or she manages to hit, they remove all tokens from it. If aiming succeeded, the player goes to the damage dealing stage.
Damage Dealing
Damage dealing looks exactly as ranged attack described above. Additionally, if artillery is firing at hex with more than one enemy units, the size reduction and possible retreat is resolved individually for every unit, with the distinction that the attacking player rolls the dice only once.
Destruction of Units
If unit's size drops to zero, it is destroyed. A block representing it must be removed from the board. Then, enemy gets victory points equal to the cost of destroyed unit.
Critical Success and Critical Failure
During melee or ranged attack, there is a chance that both dice roll the same number. Such roll is considered a critical failure and means that attack failed, regardless of how high the attack attribute of attacking unit is in relation to defender's defense attribute. If sum of rolled dice is 7 (1+6, 2+5, 3+4), then such roll is considered critical success. It means that the attack succeeded regardless of how high was your attack attribute in relation to defender's defense attribute.
The dice always have to be rolled, no matter how high or low the odds are.
Additional Fight Rules
- If player performs melee attack at hex that is occupied by more than one enemy units, he or she decides which will be the target of attack. However, the opponent does not show what unit it is exactly (the attacker knows only the type of unit). After the roll, opponent shows what unit was attacked.
- If player wants to attack hex with both infantry and artillery, he or she has to attack infantry first. The artillery can be attacked only after infantry is destroyed or forced to retreat.
- If ranged attack is performed from hex with more than one unit, the attacking player does not show which unit is shooting. He or she just shows the hex from which attack is performed, and then reveals appropriate unit card.