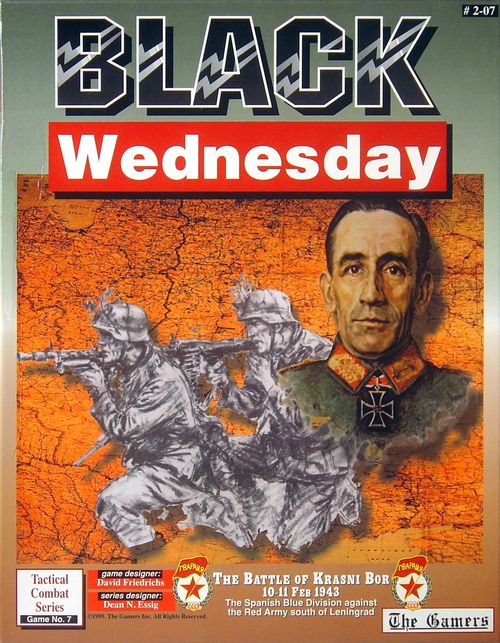
Black Wednesday: The Battle of Krasni Bor, 10-11 Feb 1943
Black Wednesday: The Battle of Krasni Bor, 10-11 Feb 1943 Rulebook
Table of Contents
Table of Contents
- 1.0 General Special Rules
- 2.0 Soviet Special Rules
- 3.0 Axis Special Rules
- 4.0 Minor Variants
- 5.0 Victory Conditions
- Scenario 1—Turning the Left
- Scenario 2—Assault of the Guards
- Scenario 3—Assault the Line
- Scenario 4—Melee in Krasni Bor
- Scenario 5—Assaulting the Mill
- Scenario 6—The Assault Continues
- Scenario 7—Breakout
- Scenario 8—Counter-attack at Krasni Bor
- Soviet Preparatory Barrage Program Log
- Order of Battle and Counter Manifest
- Player's Notes
- Designer's Notes
- Historical Notes
- Annotated Bibliography
1.0 General Special Rules
1.1 Terrain Notes
1.1a "Partial" Features. All terrain features are whole-hex items (as per series rule 9.3a)—e.g. a hex containing part of a Trench or Weapons Pit is a Trench hex (do not count the "dirt spread" as part of the Trench feature). A hex with at least one full tree in it (with or without leaves) is a Forest Hex. As usual, LOS blockages only exist where the symbols are actually printed.
1.1b Craters, Background Tones, and Rubble. Craters and the Background Tones (the coloring in back of City and Building hexes) have no effect on play. Rubble is part of the City hex symbol. Rubble has no effect on Movement.
Design Note: Some might ask why rubble has no effect on movement. Remember the areas with rubble were fought over months before and the Spanish (and Germans before them) had occupied this position for some time. During that period, the smooth functioning of the defending units would require that the most obstructive rubble be pushed aside so military vehicles could traverse the area easily.
1.1c City vs. Building Hexes. City and Building hexes have different types, shapes, and colors of building symbols in them. Building hexes have tin and thatched roof buildings, whereas City hexes have flat-roofed industrial buildings. Furthermore, many City hexes (and no Building hexes) have rubble in them.
1.1d The FW-190 Crash Site. Hex A46.20 has one of the oddest terrain features you are likely to find—a downed FW-190. While the crash hex has no effect on movement or combat, it was used by both sides as a point of reference for orders and movement. Use it in your Op Sheet planning as a positional reference. It can also be used by the Axis player as a "Faux TRP," see 3.2d.
1.1e The Hospital. The structure in hex B53.12 is a very large city building. No vehicle movement is allowed into this hex. Tow Only units can enter this hex by using the following special rule: Move the unit in question to any hex adjacent to B53.12 and have it change to Fire Mode. In the next friendly Action Phase, announce that the unit is being "Man-Handled" into B53.12 and move the unit into that hex while still in Fire Mode. Man-Handling does not draw Overwatch fires, and any number of units can execute this maneuver in a single turn. Units which are Man-Handled cannot fire SFAs in the same phase. These units can leave B53.12 by applying the inverse procedure.
The Hospital is a large, low, building—so it cannot act as a better vantage point for observation.
1.1f The Mill. The City building in hex A25.23 is surrounded by a thick 10-foot high wall. Vehicles can only enter this hex by using the road which enters A25.23 from A26.23. With the exception of fires in Assault Combat, no direct fires into (or out of) this hex are allowed (Overwatch or regular). Indirect fire weapons (Mortars, Artillery, and Air Sorties) can fire into (or out of) this hex. Units can see out of the hex for spotting purposes—likewise units outside the hex can see into it for the same purpose.
1.1g The Peat Bog. This large feature on map B is a peat moss cutting field (essentially a swamp) which is not frozen over due to the warm chemical reactions occurring inside it. The Peat Bog is not an LOS obstacle—even though it is Partly Protective terrain for combat purposes, it affects Spotting Ranges as Open Terrain would.
1.2 RR Embankment
A unit in a RR Embankment hex is automatically atop the RR Embankment and the following apply—even if it is in Fire Mode.
1.2a The hex containing a raised railroad symbol is at elevation 80 meters and blocks LOS accordingly.
1.2b Vehicle targets on embankments are always using road movement (even if not in Move Mode).
1.2c Tanks (never Trucks) can expend their entire movement allowance to enter or leave a RR Embankment hex to or from a hex which does not follow the railroad. Tanks and Trucks can freely enter and exit RR Embankment hexes when following the path of the railroad at no additional cost.
1.2d There is a maximum stacking of 2 vehicle units in such a hex. Non-vehicle units are not further restricted.
1.3 Trench Hexes
The Spanish were protected by an extensive series of trenches. Trenches affect both players identically when their units occupy such hexes. Trench hexes do not affect the roads which in some locations run through them.
1.3a Non-vehicle units in Trench hexes are in Protective terrain. Such units receive an additional -2 modifier on the Area & Point Fire Table. In Assault combats, this additional modifier ONLY applies to the defender. These benefits are in addition to those from being Dug In as per TCS rule 6.16.
1.3b Vehicle units in Trench hexes are considered to be in Open terrain for regular fire purposes, but in Protective terrain for AT Rolls.
1.3c Non-vehicle units moving from one Trench hex to another only trigger Overwatch fires from enemy units they move adjacent to—in other words, non-vehicle units moving between Trench hexes have a spotting range of "Adjacent Only."
Design Note: Movement between Trench hexes does not require "following the trench's grain" or the like—the two trenches on the map are connected with multiple connecting trenches which allow protected movement between them.
1.3d Units in Trench hexes can convert any SYR Morale result inflicted upon them into a Paralyzed result if the owning player desires.
1.4 Wire Hexes
The Wire hexes represent the extensive concertina wire entanglements, abatis, tank traps and other obstacles in front of the Spanish lines. These hexes are treated as other terrain in the hex except for the special rules below.
1.4a Units (of both sides) can ONLY enter Fully Breached Wire Hexes, except when fulfilling the breaching steps in 1.4b. Fully Breached Wire Hexes are regular open terrain. Breaches (Full or Partial) are not directional and can be used from any adjoining hex.
1.4b Breaching a Wire Hex. Only Infantry and Cavalry units can breach Wire Hexes. These units do so using the following procedure:
A) The unit attempting to make a breach must begin the Soviet Action Phase adjacent to a Wire Hex. This unit can be in either Mode.
B) During the Action Phase, the Soviet player must announce the attempt to breach the hex. Move the unit into the Wire Hex using all of its MA (or remaining MA after a Mode change) and execute any Overwatch fires triggered by this movement.
C) If the unit is still in the hex and in Move Mode, place a "Partially Breached" Marker in the hex and retreat the unit into the hex from which it came. If desired, the Soviet player can then flip the unit into Fire Mode after the retreat, but the retreat itself is required (and does not trigger Overwatch fires).
D) In the next turn or later, the same or different units can attempt to convert the Partial Breach into a Full Breach by repeating steps A) through C) and flip the Partially Breached Marker into a Fully Breached Marker. When the hex becomes Fully Breached, the unit remains in the hex (instead of retreating back out) and other units can move through the hex in the same phase. Treat the Fully Breached hex as completely open terrain.
1.4c Fully or Partially Breached Wire hexes can never become "un-breached" or "rewired" or whatever.
1.4d Roads do not negate the Wire effects.
1.4e Artillery fires never breach Wire hexes.
1.5 The Anti-Tank (AT) Ditch
The AT Ditch was a remnant of the 1941 defense of Leningrad. It was in considerable disrepair and not much of an impediment to vehicle movement. The AT Ditch is a hexside feature and is considered to run along the hexsides of the hex it is closest to—generally, those on the same side of the hex's center dot as the AT Ditch symbol.
1.6 El Bastion
Hexes B32.06 and B33.07 are a series of interconnected bunkers and redoubts. This was a very formidable position. The Bastion hexes are Trench hexes except that non-vehicle units in these hexes (in either Mode) receive an additional -4 modifier shift instead of the -2 called for in 1.3a above (as above this modifier—in addition to the terrain type of the Trench hex, and in Assault combats, ONLY applies to the defender).
1.7 Minefields
There are no minefields available to either player during this game. If the variant (4.5) is used, only the Wire hexes are mined and no additional minefields can be placed.
1.8 Weather
During the Command Phase of each hour turn, the Axis player rolls two dice on the Map A's Weather Table. Weather has three effects: A) Snow modifies the next hour's Weather Table roll, B) air sorties can only occur during Clear turns, and C) the current Weather limits visibility. The Weather Record Track on Map A lists these effects. Use the lesser of the Weather Track's or Turn Record Track's visibility limits as the turn's visibility limit.
All scenarios begin with Clear Weather before the first Weather Table check of the game.
1.9 Air Power
Each Day turn (not Night or Twilight) that the weather is Clear, the Soviet player rolls two dice (as an 11..66 roll) on the Air Sortie Table (Map A). Do this at the beginning of the Aircraft Fire Phase. Place the number of air sorties specified by the roll into the appropriate Sortie Holding Box. Sorties must be used immediately and cannot be saved.
1.10 Set Up & Handling Notes
In addition to TCS set up notes on pg. 2, use the following:
1.10a All units of a given organization are set up when that organization is called for, unless specifically excluded.
1.10b The Soviet player sets up first and must fill out his Preparatory Barrage Log (Scenarios 1, 2, and 3 only) before the Axis player sets up.
1.10c Losses are specified in number of steps for the affected units. Players can select the units in a formation to take losses freely. Losses listed with a Battalion or Regimental set up are in addition to those given to the subordinate units and can be taken out of any subordinate unit.
1.10d Initial Battalion Morale level (if any) is given in the set up; otherwise the unit's Battalion Morale is 0.
1.10e In each scenario, the Set Up gives the Soviet player Battalion and Regimental set up areas. All non-mortar units from a Battalion must set up in their Battalion area. Mortars and Regimental guns can set up in their Regimental and/or any of their associated Battalion Set Up areas. Divisional units can set up in any area belonging to a subordinate unit of that division.
1.10f In each scenario, the Set Up gives the Axis player Company and Battalion Set Up Areas (using the word "company" loosely to also include the artillery Battery units). Companies can set up in either their Company Area or their Battalion Area; Battalion Weapons units can set up in the Battalion Area or any Company Area affiliated with their battalion. Each unit can be freely placed into any of the set up areas available to it—units can be split up or grouped as desired. When the center of a Set Up area is in a trench hex, all trench hexes adjacent to the wire in the Set Up area must be either occupied or adjacent to a Spanish unit. No Axis unit may set up north of the wire line or the Peat Bog.
1.10g All Soviet reinforcements enter from the north map edge, east of the Leningrad-Moscow Highway.
1.10h All Spanish reinforcements enter from areas A through D. All non-Spanish Axis reinforcements enter from areas E through H. If the Soviets exit an "intact" (meaning 80% or more of original steps remaining) Battalion off any of these areas, that particular area cannot be used by the Axis player for reinforcements.
1.10i The following abbreviations are used in Set Ups:
- MG—Machine Gun
- AT (#)—Anti-tank Gun (size)
- Inf Gun (#)—Infantry Gun (size)
- Wgt Turns—Weighted turns (for op sheets)
1.10j The historical orders given in the scenarios are for reference only—the player can substitute the implemented Op Sheets of his choice for them as he desires. If a unit is listed as having "No Orders," that unit is unassigned, must follow the "No Orders" provisions of TCS 6.3, and cannot be included on any at-start implemented Op Sheet. If the unit has any accumulated Weighted turns, these will be listed in the Set Up.
1.10k Either player can draw up any non-implemented Op Sheets he wants before play begins (in addition to the implemented ones with which he starts the game), AND these sheets have 15 accumulated Weighted turns (unless the scenario specifies a different number of weighted turns).
1.11 Transportation
1.11a Gun Transportation. The AT guns, infantry guns, on-map artillery and heavy mortars of both sides are all transported by combinations of trucks and wagons while in Move Mode. These units move with 8 MPs which are Foot MPs for terrain purposes.
1.11b Tanks as Carriers. The Soviets cannot use tanks as carriers (TCS Rule 25.1e). Axis units are free to do so.
1.11c Commander's Tanks. Both sides have tanks as part of their armored units which are the company and battalion commander's vehicles. These have no specialized functions, but players should not be confused by their lack of platoon number.
1.12 Assault Benefits
Certain units are better equipped and trained to handle assault-style combats. These are all Engineer, SMG, Ski, Cavalry, and MR (the Spanish Mobile Reserve Battalion) units.
When these units participate in Assault-style combat (as attacker or defender), their fires receive a +1 shift on the Area Fire Table and (if they are the unit checking morale for their side in the combat) do not double their morale value for the Morale Table—use the regular value.
2.0 Soviet Special Rules
2.1 Command and Control
Designer's Note: Soviet command and control methods were exceptionally rigid due to a severe lack of well-trained NCOs and officers. The rigid system, although denying the opportunity to take advantage of battlefield situations, did allow them to control the mass of men and material with minimal effort.
2.1a Soviet Commander's Intent. The Soviet intent is to destroy the defensive positions in front of Krasni Bor, drive down the Leningrad-Moscow Highway to Sablino (south of the game map) and then to capture Mga. This operation is intended to encircle and destroy the German forces on the Sinyavino Heights.
2.1b OP Sheet Limits—Divisions. All units of a Soviet Division must be on only one implemented Op Sheet. The player can put more than one division on a single Op Sheet, but he cannot split up a division among multiple Op Sheets. Furthermore, TCS 6.7b would then limit the Soviet player to a maximum of 6 divisional Op Sheets at any one time (3 implemented and 3 non-implemented OR 6 non-implemented)—if the player uses separate Op Sheets for each Division. (See also the extra Op Sheets available for Soviet Armor, 2.1c.)
2.1c OP Sheet Limits—Soviet Armor. The two Soviet Armored units (1 Independent Tank Battalion and 1 Red Banner Tank Brigade) can be included on any of the divisional Op Sheets OR on their own Op Sheet (bringing the Soviet Op Sheet total up to 8—the six divisional sheets PLUS one implemented and one non-implemented Armor sheet).
2.1d Command Prep Rating. The Command Prep Rating for the 63 Guard Division is 5; for all other divisions (or a mixed sheet which also includes 63 Guard as well as other units) it is 7. Ignore the "Size" and "Staff" Modifiers for Soviet Op Sheets (they are integrated into the Command Prep Ratings and the limited number of Op Sheets available), but see 2.1e.
2.1e Uncoordinated Implementation. To all Soviet Op Sheets that attempt to implement during the course of play (this rule has no effect on Op Sheets that begin the game implemented), apply the following: Check for Implementation on the Command Prep Table normally. If the result from the table is implementation, then ONE BATTALION from the Op Sheet must begin the Op Sheet's instructions (ignore series rule 6.10b—this battalion must attack, it cannot drag its feet). In other words, it implements the order by itself. The Soviet player can freely choose the battalion from among those on the Op Sheet. Continue to accrue Weighted Turns and make a Command Prep Table roll each turn for the Op Sheet. Each time the Op Sheet implements, the Soviet Player again releases one battalion to begin its job from the Op Sheet. Continue this process until all battalions from the Op Sheet have begun the operation (at that time the Op Sheet is finally, fully implemented).
All Regimental and Divisional units of the Op Sheet's division are committed with the first Battalion of the Op Sheet to implement.
Designer's Note: The Soviets are prepared for exactly one major operation at this battle: the initial one to break through the trenches. When that bogs down due to looting (2.1f), the Red Army shows its "form" by clumsily attempting further operations. When these actions do go forward, they do so in a completely piecemeal and uncoordinated manner. The Axis player will be able to run command circles around the Red horde hung up on the trenches—he will need to, in order to survive!
2.1f Looting. No Op Sheet implemented before play begins in Scenarios 1, 2 or 3, can have any movement or attack objectives further than 5 hexes south of the second line of Trench hexes. This Op Sheet limitation also applies to any Reserves which might be on these initial Op Sheets. At the beginning of Scenarios 4, 5 or 6, some units begin the game under these looting restrictions. These units cannot have op sheet objectives beyond the restriction noted above nor can they set up beyond those limits. Non-Implemented Op Sheets the units might have as the game begins are not restricted by looting and can have objectives deeper into the Spanish lines.
Designer's Note: Although the encirclement of Leningrad had been broken, the front line soldiers were still severely limited in the amount and quality of food they received. When they entered the Spanish positions they found what to them was a fortune in luxuries (chocolate, coffee, wines, and cheeses were abundant). Even the best trained soldiers could not resist these temptations, and these were not the best trained soldiers. It took the Soviet commanders several hours to regain control of their troops.
2.2 Specialized Soviet "Techniques"
2.2a The Encouragement of Commisars. The Soviet player can ignore any Suppression Morale result (even in Assault Combats) against a hex by inflicting one additional step loss on a unit in the hex (the Soviet player picks the unit in the hex to absorb the "example" losses). Paralyzed, SYR, and Surrender results cannot be "downgraded" in this way. This rule cannot be invoked to speed the recovery of Paralyzed units. The Soviet player is free to accept the Suppressed result if he wants (and avoid the extra step loss)—the choice is his.
Important: A given unit can only "benefit" from one application of this rule in a single phase.
2.2b Bunching. All units of each Soviet company must move during their Action Phase so as to attempt to keep bunched up (all units at or within a 3 hex radius). Move the leading platoon of the company without reference to the locations of the rest of the company; then attempt to move the rest of the company to fulfill this rule. Ignore units which fall out of the company "area" due to morale results (have them catch up when they can...).
Designer's Note: Bunching is meant to be a guideline, not a hard and fast "do this or suffer" rule. It reflects the follow-the-leader tactics of the Russian infantry. If you find that you are already looking for ways to circumvent it—save yourself the trouble and play without it.
2.2c Consolidation. During any Clean Up Phase, the Soviet player can consolidate the losses of any of his platoons that are stacked with or adjacent to each other. These platoons must be the "same" (same type of unit, same strength, same morale) and not be Suppressed or Paralyzed. The units must be from the same battalion. Consolidation does not generate Overwatch fires. The Soviet player is never required to consolidate. For example, the Soviet player sees two identical adjacent Infantry platoons each of which has lost 3 steps during the Clean Up Phase. He chooses to consolidate them and ends up with one platoon with only one step destroyed—the other platoon is consigned to the dead pile.
Designer's Note: Consolidation serves three functions. First, it reflects the grouping characteristics of Soviet infantry (more men is good, fewer men is bad...) by forming full-strength units (which have a tougher morale due to fewer losses) from shattered ones. Second, it allows players to police their map to cut down on stacking and counter density. Players are to forewarned that having one unit with intact morale is generally much better than two shot up ones—even though the one unit will generate less firepower. Third, it cuts down on the number of counters in play, their density, and the number of markers needed to reflect losses on the map.
2.2d Mortars. Soviet 82mm Mortars must self-spot—no unit, not even FOs, can spot for them. See 2.3d for the ability of some FOs to spot for Soviet 120mm Mortars.
2.3 Soviet Artillery: General Rules
The Soviet artillery is grouped into 12-gun battalions. Individual batteries cannot fire separately. Scenario ammunition allotments are in BATTALION (not Battery) Fires (see 2.3f). The table below lists the number of battalions available.
| Battalion | Gun Size |
|---|---|
| 1-289 AT Rgt. | 76mm |
| 2-289 AT Rgt. | 76mm |
| 3-289 AT Rgt. | 76mm |
| 1-162-43 Art. | 76mm |
| 2-162-43 Art. | 76mm (No longer in play as of 0500 Feb 11) |
| 3-162-43 Art. | 122mm (No longer in play as of 0500 Feb 11) |
| 1-343-63 Gd Art. | 76mm |
| 2-343-63 Gd Art. | 76mm |
| 3-343-63 Gd Art. | 122mm |
| 1-9-72 Art. | 76mm |
| 2-9-72 Art. | 76mm |
| 3-9-72 Art. | 122mm |
The Battalions involved in the Preparatory Barrage Program (as per the Prep Log) are only available for that Program and its fires. Once the Program is finished, these units depart the battle area and can no longer be used.
2.3a Restrictions. Fires from the Divisional Artillery Battalions can be spotted for only by Forward Observers of their own division. The 289 AT Regiment can be used by only one division and it must have its division assigned before the game begins—assignment cannot be changed after play begins.
2.3b Unit Availability and Ammunition. Each scenario specifies the Artillery Battalions available at start and the starting ammunition pool. All Soviet artillery units are off-map guns.
2.3c Ammunition Reinforcements. At 0500 Feb 11, increase the Soviet artillery ammunition pool as follows:
- 76mm: 50 HE, 20 Smoke, 0 Illum
- 122mm: 20 HE, 5 Smoke, 0 Illum
2.3d Spotters. Spotters for Soviet Divisional Artillery fires must be one of that division's Forward Observer (FO) units. Each regiment has two FO units. One (marked with the Mortar symbol) can spot only for that regiment's 120mm Mortar company's fires. The other (not marked with the Mortar symbol) can be used to spot for its divisional artillery (plus the 289 AT Regiment if assigned to their division). Ignore FO units for stacking purposes.
Soviet FOs are exempt from the Mode restrictions listed in TCS rule 17.2b.
Designer's Note: The Mode exemption for Soviet FOs is more important than it looks. This little rule allows the Soviet player to advance his FOs to avoid the effects of enemy smoke—so the FOs cannot be blinded by surgically placed smoke.
2.3e Death to ALL FOs. FOs can never actually be killed as a result of the Area Fire Table. If no other units exist in the FO's hex which can take an Area Fire Table result step loss, ignore the step loss. Inflict Morale results (including Surrender and disintegration during SYRs) normally. Furthermore (since the Soviet player is now thinking of devious ways to use his indestructible FO units...), FOs can never attack in any sort of Assault-style combat.
Designer's Note: The Soviet Army was very short of radios and depended almost exclusively on phone lines and messengers for battlefield communications. The Mortar spotter assigned to each regiment literally represents the regiment's Mortar Company commander calling the fires of his own company. The other spotter with each regiment (the artillery guy) represents one of the divisional artillery regiment's battalion commanders. Purists (and those who want to see the Russians more hamstrung!) can insist that each FO only be able to direct the fires of one battalion from the divisional guns. I feel that would be too restrictive, but feel free to apply the restriction if your tastes, reading, and the whining Spanish player agree!
2.3f Smoke Missions. Even though Soviet artillery fires as battalions, each smoke mission still only generates one Level 2 Smoke marker.
2.4 Soviet Artillery: Preparatory Barrage Program—The 'Prep'
Before the Axis player sets up in Scenarios 1, 2, or 3, the Soviet player must fill out his Preparatory Barrage Program (Prep) Log sheet. Fill out each Prep Log box in the columns applicable to the desired scenario with each mission's target hex. The hex numbers already printed on the Prep Log are for the historical barrage—use them if you like. The Katyusha entries can only be for the turns given; each Gun Battalion fires every turn of the Prep. Once prepared, the Prep Log cannot be changed in any way. No mission may be canceled. The Prep Log must be followed as the rigid artillery plan it represents.
2.4a Any hex can be targeted for a Prep Log fire mission. Non-Katyusha Prep Log missions always fire with DOUBLE the firepower given to them as per the Artillery Barrage Fire Values Chart. (Effectively, each battalion fire represents a two firing battalion group.) Katyusha fires are fired at the strength given in 2.4g.
2.4b Ammo is not a concern for the Prep Fires as it has been allocated to it already and cannot be saved for other purposes. All Prep fire missions are HE.
2.4c Once the Preparatory Barrage Program is finished, the Soviet player can no longer fire the Battalions from the Howitzer Brigades or the Katyusha Regiment (i.e. all the units listed on the Log).
2.4d Prep fire missions need no spotter, cannot be Fast Fire missions (they fire with double strength as per 2.4a—no x4 is allowed!), and do not use the regular Adjustment Table. Instead, roll one die per fire mission. On a 1-3, it is a Bad Shoot, on a 4-6 it is a Good Shoot. Regardless of the die roll, the mission lands on the plotted hex.
2.4e Execute Prep Log fire missions (if any) for the turn in individual succession as the first activity in each Soviet Action Phase after removing any Barrage Markers from the previous turn. Place the Barrage Markers for these missions normally.
2.4f Divisional Artillery units can conduct regular fire missions during the Prep Program period.
2.4g Katyushas. The Soviet player has a Katyusha (rocket artillery) Regiment available. The Attack Zone has a radius of 5 hexes (11 hex diameter) with a fire strength of 6 (yes, these are the small Katyusha rockets...). The Katyushas can only fire as recorded on the Prep Log and cannot be fired at any other time. The firing turns available are only those specified on the Prep Log. Unlike regular prep artillery fires (which can never scatter), Katyusha fires scatter normally. See TCS rule 17.7a for the handling of Rocket Artillery.
2.5 Company-Sized Units
There are several company counters in the Soviet OB. These are Infantry and MG units marked with "Co" instead of "Plt" on the counter, and ALL Soviet Mortar units. These units have several special characteristics.
2.5a Company-sized units function as regular 5-step platoons. Importantly, Mortar Companies are not affected by TCS 10.0b until they have lost their third step.
2.5b Company unit activities are not controlled directly by Op Sheet graphics. If a division is constrained by 2.1f, so are the division's companies.
2.6 Cavalry
The 63 Gd and 72 Rifle Divisions each have one Cavalry unit. Whenever these units are in Move Mode, they are using Mounted Movement (use the Foot Movement terrain costs). Any enemy Area fires against a hex containing one or more Mounted Cavalry units are modified by an additional +1 column. Units using Mounted Movement can only assault using Overrun (never Assault or Combined Assault).
2.7 Soviet Variable Reinforcements
During each Command Phase after the entire Spanish I-263 Battalion has entered play, the Soviet player checks for the release of the 14 Rifle Regiment (72 Rifle Division). Roll two dice. If the result of the die roll is 11 or 12, release the 14 Rifle Regiment. Draw on the 72 Rifle Division's Op Sheet a mission for the 14 Rifle. The regiment enters as reinforcements that same turn and can immediately begin to follow the Op Sheet instructions (no additional delays) assuming the 72 Rifle had an implemented Op Sheet. Otherwise, the regiment must move to be with the rest of the 72 Division and await implementation.
2.8 Soviet Smoke Limitations
Soviet Mortar units cannot fire smoke.
3.0 Axis Special Rules
3.1 Axis Command and Control
Designer's Note: The Spanish military tradition was heavily dependent on the quality of its line officers (much in the same vein as the German's heavy dependence on their NCOs). Because of this, the operational command tended to exercise little control over the battle once it was started and allowed line commanders a great deal of latitude in the conduct of the battle.
3.1a Axis Commander's Intents. The Spanish intent is to survive and maintain their reputation as quality soldiers. The German commander's intent is unclear. It appears to have been simply to contain and throw back the Soviet attack. The German Army and Corp commands reacted quickly to the threat at Krasni Bor. However, Oberst Heckel (regimental CO of the nearest German reserves) proved to be less than eager to send his troops into the carnage of this battle.
3.1b Cooperation. Spanish and German units cannot be on the same Op Sheets. The 2 SS Brigade AT unit can be on either German or Spanish Op Sheets.
3.1c Command Prep Rating. The Spanish Command Prep rating is 3. The German Command Prep Rating is 2. Apply the "Size" (TCS 6.9c) or "Staff" (TCS 6.9d) modifiers to Axis Op Sheets and implement them normally.
3.1d Dug In Reserves. All units in Scenarios 1, 2, or 3 indicated as Reserves can (in an exception to TCS 6.14b) be Dug In while in Reserve even though they are unassigned.
3.2 Axis Artillery
Much of the Spanish artillery was pressed into anti-tank roles during this battle. However, it is still available for artillery support (see TCS 25.5). Unlike the Soviets, Axis artillery can fire as Batteries as well as Battalions—though not, of course, on the same turn. The artillery units available to the Axis are listed on the table below (all are off-map except as indicated).
Spanish Artillery:
| Battalion | Gun Size | Available Batteries |
|---|---|---|
| I-250 | 105mm | 1, 2, 3 (all on map) |
| III-250 | 105mm | 7, 8, 9 (7 & 8 on map) |
| IV-250 | 150mm | 10, 11, 12 |
German Artillery:
| Battalion | Gun Size | Available Batteries |
|---|---|---|
| I-215 Bn | 105mm | 1, 2, 3 |
| III-215 Bn | 150mm | 9 |
| 850 Bn | 150mm | 1, 2, 3 |
Artillery Available in each scenario is listed in that scenario.
Designer's Note: Much of the German artillery was engaged in counter-battery and harassing fire on Leningrad. However, had the Germans been willing, a large number of guns would have been available for battle.
3.2a Adjustment. Both the Spanish and the Germans use the German line on the Adjustment Table.
3.2b Unit Availability and Ammunition. Each scenario specifies the Batteries available at start and starting ammunition pool. Spanish ammunition must be segregated from the German pool—Spanish units can only fire Spanish ammunition and vice versa.
3.2c Ammunition Reinforcements. At 0500 Feb. 11, the Axis artillery ammunition pool is increased as follows:
Spanish:
- 105mm: 20 HE, 20 Smoke, 0 Illum
- 150mm: 50 HE, 20 Smoke, 0 Illum
German:
- 105mm: 100 HE, 20 Smoke, 0 Illum
- 150mm: 120 HE, 15 Smoke, 0 Illum
3.2d Faux Target Reference Points. The Axis player can substitute any one of the following for the spotting unit when determining the distance between the spotter and the target hex for the Adjustment Table. Missions using this technique still need a regular spotter with a Unblocked LOS to both the target hex and the Faux TRP being used. Pre registration merely makes the mission more likely to be a Good Shoot.
Possible Spotter Substitution Hexes (for distance calculation):
- Building Hexes
- City Hexes
- Road Junctions (two or more roads connect in the hex)
- Trench Hexes (includes El Bastion)
- Wire Barrier Hexes
- The FW-190 Crash Hex
3.3 Spanish Variable Reinforcements
Designer's Note: The 250 Infantry division was stretched to its limits. At the beginning of February it held a front of over 30 km. In addition to this burden, one of its battalions was detached in late January to stop the first part of the Second Lake Logoda offensive. Despite this, the division was able to mass a good number of troops to support the 262 Regiment.
3.3a The divisional reserve consists of the entire I-263 battalion and two companies (5, 8) of the II-269 battalion. Divisional reserves arrive through Entry Areas A, B, C, and/or D when released. After the first Soviet unit enters a Trench hex, make a check for the release of these units each Command Phase using the Spanish Variable Reinforcement Table on Map A.
3.3b When released, draw the proposed use of these units onto an Op Sheet. These units automatically implement it and begin to function according to that Op Sheet in the next Axis Action Phase. This "instant order" cannot assign these units a Prepared Defense.
3.4 The Return Battalion
At 2200 February 10, the Spanish player can replace 15 steps of infantry (not MG, mortar, or gun) for units that have taken losses. If the Spanish have lost fewer than 15 steps, the excess is wasted.
Designer's Note: If the Spanish have lost fewer than 15 steps of infantry by 2200 Feb 10, the Soviet player should resign.
3.5 German Variable Reinforcements
Designer's Note: Some of the German troops available for this battle were in Sablino (10 km to the south). Historically, these units arrived at a painfully slow rate.
After the first Soviet unit enters a Trench hex, roll at the beginning of each Command Phase to determine if reinforcements arrive using the German Variable Reinforcement Table on Map A. All German units not set up at the beginning of the scenario enter via the results of this table. The results give the following reinforcements:
- Type A, Release either one company of infantry OR one battery of artillery.
- Type B, Release one of the following: one company of armor, KG III Flak, two companies of infantry OR two batteries of artillery.
NOTE: All batteries of I-215 must be committed before the 9-III-215 or any 850 Bn batteries are committed.
3.5a Whenever an artillery battery is released, 20 HE, 4 Smoke, and 1 Illum (of the appropriate caliber) are also added to the German Artillery Ammunition Pool.
3.5b When non-artillery units are released, they enter the map via Entry Areas E, F, G and/or H. Released artillery is added to the available Axis artillery units.
3.5c When released, draw the proposed use of these units onto an Op Sheet. These units automatically implement it and begin to function according to that Op Sheet in the next Axis Action Phase. This "instant order" cannot assign these units a Prepared Defense.
4.0 Minor Variants
All of these can be used in two-map scenarios, only those without victory cost can be applied to one-map scenarios. There is no victory adjustment to these (a shift would be too great of a cost). Use any or all you desire to add spice or adjust the game to compensate for players with differing experience levels—or use them like we do to explore historical what-ifs. Enjoy!
4.1 German Cooperation
4.1a Modify the Command restrictions in sections 3.1 as follows: German and Spanish units can be on the same op sheets.
4.1b The German variable reinforcement roll is modified by +2 (in addition to the modifier already on the table for rolls made on or after 0100 Feb 11).
4.1c The number of German sorties rolled on the Air Sortie Table is doubled (2x Stuka would become 4x Stuka). The number of Soviet sorties rolled is halved.
4.1d The German and Spanish artillery pools are not segregated.
Designer's Note: The German performance at Krasni Bor was dismal. Oberst Heckel's advance to Krasni Bor from his assembly point at Sablino took most of 10 Feb even though the distance covered was fewer than 10 kilometers. Once on the field, the advance continued to be painfully cautious. Had the local German commander made even the slightest effort to assist the Spanish, the battle for Krasni Bor would have had a much different ending.
4.2 Spanish Panic
4.2a Each time a Spanish unit is overrun by armor, roll one die the instant the attack is announced (before it actually begins) for each unit in the overrun target hex. If that unit has a morale rating greater than or equal to the roll, then it is reduced by one step and becomes Paralyzed. Do not apply any modifications to the unit's morale rating (such as Bn Morale, or step losses)—use the unit's printed morale.
Designer's Note: In the week preceding the battle, many new recruits were incorporated into the Blue Division. Although this brought the division up to full strength (a true oddity for a division on the East Front), it did put doubt into many minds (at least the German command) as to whether the new recruits would hold up under fire. During the battle, there were few indications of panic under fire. However, the danger was present.
4.3 Purely Historical Option
In Scenarios 1, 2 or 3, this option can be used to make events conform to the actual battle more closely. Use the Historical Soviet Preparatory Barrage Log hex entries. Assign boundaries between the Soviet Divisions before play begins. These boundaries cannot be changed after play begins. No Soviet unit can ever cross its divisional boundary—destroy units forced to do so. Soviet units cannot fire across its divisional boundary into another division's sector. Units can enter the hexes containing their divisional boundary.
Use the normal Variable Spanish Reinforcements (3.3), but do not use the German Variable Reinforcements (3.5)—use the following schedule instead:
| Time & Day | Unit |
|---|---|
| 1500 Feb 10 | 635 Ost Battalion |
| 1700 Feb 10 | 9-III-215 Artillery Battery |
| 2100 Feb 10 | I-390 Infantry Battalion |
| 2300 Feb 10 | 1-I-215 Artillery Battery |
| 0100 Feb 11 | II-390 Infantry Battalion |
| 0300 Feb 11 | 2-I-215 Artillery Battery |
| 0500 Feb 11 | III-390 Infantry Battalion |
| 0700 Feb 11 | 3-I-215 Artillery Battery |
| 0720 Feb 11 | KG III Flak |
No other German units are available in this scenario.
Set up the Spanish normally, except that the Engineer and Recon Companies must set up at or within 5 hexes of the hospital.
4.4 Axis Free Set Up Option
In Scenarios 1, 2, or 3, allow the Axis player to set up his forces as desired provided they are within the area in play and south of the Trench line (inclusive). However, every Trench hex must either contain an Axis unit or be adjacent to one.
4.5 Improved Spanish Defenses
Allow the Spanish Wire Barrier hexes to also be laced with mines. When a Soviet unit attempts to breach a Wire hex, they are also making a Breaching attempt (with the resulting attack resolution as per the series rules). The unit must successfully breach the Wire Barrier hex (as per 1.4b); if so the mines are also cleared.
Designer's Note: Both sides, but particularly the Spanish, were woefully short of mines for their defenses. The week before the battle, the German corps commander, after visiting the front at Krasni Bor, ordered the immediate delivery of 15,000 mines. Few arrived before the battle, and those that did arrive had no detonators.
4.6 Grandes in Command
Change the Spanish Command Prep Rating to 2.
Designer's Note: Shortly before the battle of Krasni Bor, the original division CO, Muñoz Grandes—see painting of him on the box—was recalled to Spain. His personal ability and leadership were sorely missed by the division as a whole. Had Grandes not been recalled, the division's performance at Krasni Bor would have been even better.
4.7 Gustav the Great—"Dora"
When this option is used, apply the following: Dora can only fire on hour turns starting with 0700 Feb 10. Each of Dora's fires must have its target hex plotted on the hour turn before it is to fire (0600 for 0700, etc.). Once plotted, the mission cannot be canceled or changed in any way. Do not apply the regular artillery fire procedure when firing Dora. Instead, scatter the target hex automatically (one die minus one for distance of scatter) and attack whatever hex the mission lands on with one 151 Firepower attack. After the attack, place a single regular Smoke Marker in the hex. There are no "adjacent to the Attack Zone" attacks here.
Designer's Note: Around Leningrad is every giant piece of German artillery in existence—huge mortars, railway guns and the like. The largest railroad gun ever built, the 800mm Gustav Gun (affectionately called Dora) was sent to Germany for refitting after shelling Sevastepol. While we are assuming things, why not go all the way. Not only is the gun assumed to have come to shell Leningrad, but it also comes to the aid of the Spanish—in a manner of speaking anyway. The chances of convincing the German High Command (to include Hitler himself) to use "The Gun" and its 4,000 man (!) crew in a tactical role are pretty slim (obviously, the gun would contribute so much more to the German war effort lobbing shells at the stolid citizens of Leningrad—that was sarcasm for those who didn't recognize it...). Here we give the gun a chance to show up in a tactical setting—just for the fun of it! This is chrome plated chrome, just for those who always wanted a chance to fire this gun in a tactical game...
5.0 Victory Conditions
Determine victory using a combination of key terrain features, exiting units off the south map edge and killing enemy troops.
Terms.
"Occupy" means the last player to occupy, or pass through, all of the contiguous hexes of the feature.
"Exiting" means units have physically left the game map by moving into the map edge hexrow and have then paid one MP to leave play.
"Intact" means a unit has 80% or more of its original strength (in steps) remaining.
"Lost Units" include any units which enter the dead pile during the game. Pre-game losses and units lost due to consolidation do count.
Hexes belonging to a city or village for Victory purposes include all contiguous Building or City hexes of the named feature. For instance, Krasni Bor includes all the City and Building hexes in its area of Map B, but does not include The Hospital (not connected) and the various small forest areas (not City or Building).
5.1 Campaign Scenario Victory
The following victory conditions apply to all of the "Campaign Scenarios." Scenarios 3, 6, 7 and 8 are also different starting points for campaign games as well as stand-alone scenarios. The victory conditions listed with the scenario are for the short version of the scenario. Use the following when playing through the campaign versions.
Soviet Massive Victory—Occupy all of Krasni Bor, Staraia Myza, Potrolovo, Mondolovo and Samsonovka. Clear the Axis from the Moscow-Leningrad highway (i.e. no Axis units at or within 5 hexes of any highway hex). Exit an intact Regiment or Brigade off the map through at least one Entry Area from among E, F, G, and/or H.
Soviet Major Victory—Occupy all of Krasni Bor. Occupy two of the following villages: Potrolovo, Mondolovo, Samsonovka, and Staraia Myza. Exit an intact battalion off the map through at least one Entry Area from among E, F, G, and/or H.
Soviet Minor Victory—Occupy all of Krasni Bor. (Historical result.)
Draw—Any result other than those listed.
Axis Minor Victory—Occupy at least 20 hexes of Krasni Bor and hold all City hexes south of the trench line, west of the Izhora River.
Axis Major Victory—Occupy at least 40 hexes of Krasni Bor, and all City & Building hexes on the west map. Prevent the Soviets from exiting more than an intact company off any Entry Area E, F, G, or H.
Axis Massive Victory—Occupy all City & Building hexes south of the trench line. Prevent the Soviets from exiting any intact formations (platoon or higher) off any Entry Area E, F, G, or H.
Shifts:
- The level of victory is adjusted one in the Soviet player's favor for every 40 Axis units lost.
- The level of victory is adjusted one in the Axis player's favor for every 80 Soviet units lost.
Scenario 1—Turning the Left
This little scenario constitutes an excellent little training scenario. Suffice it to say, while it works players through the system, it lacks the wide scope of other scenarios. Use this one to learn the system and special rules, then go on to scenario 2 to get a better workout.
At 0600 Feb 10, the Soviets launched their attack on the Spanish Blue Division. The 43 Rifle Division was responsible for crushing I-262 and pushing into the rear of the 2 SS Brigade (to the east off the map). The artillery bombardment wiped out 1 Company. When the Soviet troops hit the trenches the 2nd company withdrew to link up with the SS. The Ski Company made an attempt to move to the trenches, but was destroyed in an air attack while moving forward. The remaining elements of the defense withdrew or were overrun as the Soviets began looting the Spanish position.
Map Area: Map B (only), east of the railroad (inclusive) First Turn: 0600 Feb 10 Last Turn: 0940 Feb 10 (12 turns) First Turn's First Player (Do not Roll for the first turn's Action Phase sequence): Soviet
Soviet Information: Set Up: None Artillery Available: Battalions 1, 2, and 3 of the 162 Artillery Rgt, 43 Rifle Division Artillery Prep Log needed? Yes. Artillery Ammo: 76mm: 48 HE, 8 Smoke; 122mm: 12 HE Reinforcements: 708 Rifle Rgt (43 Rifle Div) and 1 Independent Tank Battalion, enter turn 0600 or later. Historical Orders: Attack to capture the trenches east of the October Railroad. Units without Orders: None
Axis Information: Set Up: Company Set Up areas: 1-I-262: w/i 2 B16.29; 2-I-262: w/i 2 B16.33 Battalion Set Up areas: I-262: w/i 4 B21.32 Reserves (Set up in any of the above): 4-I-262; 13-262 (2x Inf Gun (75)); 14-262 (2x AT (75), 4x AT (37mm)); Ski Co. Artillery Available: Batteries 1, and 2 of the 250 Artillery Rgt Artillery Ammo: 105mm: 70 HE, 20 Smoke, 2 Illum Reinforcements: 3 Company (Recon Bn) Enters at The Train Station at 0900 (Ignore this when playing the campaign or Scenario 3. When playing those versions, roll for Variable Reinforcements as per rules 3.3 and 3.5) Historical Orders: Hold the trenches. Implemented Prepared Defense Op Sheets are allowed at start. Units without Orders: None
Victory: Soviet Minor—Clear all the Trench Hexes in the play area. Axis Minor—The Soviets fail to fulfill their victory conditions.
Scenario 2—Assault of the Guards
This one is more involved and needs a bit more skill to play than scenario 1. Use this one as a dress rehearsal before moving on to scenario 3. It also makes a better stand-alone game than does scenario 1—since there is more going on and the trench assault isn't the freebie it is in scenario 1.
At 0600 on Feb 10, the 63 Guards launched its attack on trench lines of the II-262 Battalion. With massive artillery support, the Guards were able to penetrate the lines and move into Krasni Bor. The initial attack ended as the guardsmen pillaged the Spanish dugouts and stores.
Map Area: Map B (only), area west of the RR and east of xx.06 (inclusive) First Turn: 0600 Feb 10 Last Turn: 0940 Feb 10 (12 turns) First Turn's First Player (Do not Roll for the first turn's Action Phase sequence): Soviet
Soviet Information: Set Up: None Artillery Available: Battalions 1, 2 and 3 of the 343 Artillery Rgt, 63 Gd Division Artillery Prep Log needed? Yes. Artillery Ammo: 76mm: 48 HE, 8 Smoke; 122mm: 12 HE Reinforcements: 63 Gd Div. (all), enters 0600 or later. Historical Orders: Attack to capture Krasni Bor from the north. Units without Orders: None
Axis Information: Set Up: Company Set Up Areas: 3-I-262: w/i 2 B19.26 and/or B24.25; 5-II-262: w/i 2 B29.25 and/or B33.23; 6-II-262: w/i 2 B34.15 and/or B34.19; 7-II-262: w/i 2 B33.12 and/or B31.09; 3 Battery-250: w/i 5 B41.21 Battalion Set Up Areas: II-262: w/i 4 B38.16; Others: w/i 6 B53.12, w/i 5 B37.06 Reserves (Set up in any of the above): 13-262 (2x Inf Gun (75), 2x Inf Gun (150mm)); 1-AT; AT-2 SS; Engineer Bn.; Recon Bn; 8-II-262 Artillery Available: Batteries 3, 9, and 12 of the 250 Artillery Rgt Artillery Ammo: 105mm: 70 HE, 20 Smoke, 2 Illum; 150mm: 25 HE, 6 Smoke Reinforcements: Roll for Variable Reinforcements as per rules 3.5 Historical Orders: Hold trenches and Krasni Bor. Implemented Prepared Defense Op Sheets are allowed at start. Units without Orders: None
Victory: Soviet Minor—The Soviet player either occupies 5 or more hexes of Krasni Bor AND/OR he captures El Bastion. Axis Minor—The Soviet player occupies fewer than 5 hexes of Krasni Bor.
Note: Each Axis Reserve Company released during play credits the Soviet Player with one additional hex of Krasni Bor occupied.
Scenario 3—Assault the Line
At 0600 Feb 10, the Soviets launched an attack to take the important supply head at Mga. In addition to the attacks of the 43 Rifle and the 63 Guards Divisions in Scenarios 1 and 2, here the 72 Rifle Division is added and attacks through Iam Izhora, into the Spanish trenches. This attack was followed by attacks on the Mill and Staraia Myza. Looting of the Spanish positions prevented any immediate follow-up to their success.
This scenario combines Scenarios 1 and 2 and adds the assault of the 72 Rifle Division and can be used as a starting point for the campaign.
Map Area: Both First Turn: 0600 Feb 10 Last Turn: 0940 Feb 10 for Scenario 3 (12 turns) OR 1700 Feb 11 for the campaign (82 turns) First Turn's First Player (Do not Roll for the first turn's Action Phase sequence): Soviet
Soviet Information: Set Up: None Artillery Available: All. Artillery Prep Log needed? Yes. Artillery Ammo (As per Scenario 1 & 2, plus): 76mm: 72 HE, 12 Smoke; 122mm: 12 HE Reinforcements: As per Scenarios 1 and 2 plus 133-72 and 187-72 Regiments and 1 Red Banner Tank Brigade enter turn 0600 or later. Historical Orders: As per Scenarios 1 and 2, plus 72nd Rifle to take Staraia Myza and secure a position over the Izhora River. Units without Orders: None
Axis Information: Set Up: As per Scenario 1 and 2 plus the following: Company Set Up areas: 3-MR: w/i 2 B29.03 and/or B30.05; 2-MR: w/i 2 A30.33 and/or A27.30; 1-MR: w/i 2 A25.23; 9-III-262: w/i 2 A21.31 and/or A22.30; 10-III-262: w/i 2 A15.32 and/or A17.33; 11-III-262: w/i 2 A12.29 and/or A10.27; 1 Battery-250: w/i 5 B49.19; 2 Battery-250: w/i 5 B45.18; 7 Battery-250: w/i 5 A27.14; 8 Battery-250: w/i 5 A27.14 Battalion Set Up areas: MR: w/i 5 A25.24; III-262: w/i 5 A17.25 Reserves (Set up in any of the above OR any of the Axis areas listed in Scenarios 1 and 2—likewise, the Reserves listed in those scenarios can make use of any Scenario 3 area): 4-MR; 12-III-262; 13-262 (2x Inf Gun (75)); 14-262 (6x AT (37mm)) Artillery Available: As per Scenarios 1 and 2 plus 7, 8, 10, 11 Batteries of the 250 Artillery Rgt Artillery Ammo (As per Scenario 1 & 2, plus): 105mm: 70 HE, 20 Smoke, 2 Illum; 150mm: 50 HE, 12 Smoke Reinforcements: Roll for Variable Reinforcements as per rules 3.3 and 3.5 Historical Orders: Hold the trench line and Krasni Bor. Units without Orders: None
Victory for Scenario 3 (for the campaign see 5.1): Soviet—Three or more of the following conditions exist: 1) Soviets occupy all trench hexes East of the October Railroad, 2) Soviets occupy El Bastion, 3) Soviets occupy 5 or more hexes of Krasni Bor, and 4) Soviets occupy 25 or more Trench hexes west of the October Railroad. Draw—Two of the conditions for a Soviet victory are met Axis—One or less of the conditions for a Soviet victory is met
Note: Each Axis Reserve Company released during play credits the Soviet Player with one additional hex of Krasni Bor occupied.
Scenario 4—Melee in Krasni Bor
After looting the Spanish bunkers and billets, the Guards regained their composure and pushed forward into Krasni Bor. There they met vicious fire from batteries and strong counter-attacks. The battle degenerated into a series of see-saw skirmishes with both sides intermingled in the streets. By mid-afternoon, the Spanish batteries had been isolated and the remainder of the town captured.
Map Area: Map B east of xx.06 and west of the railroad (inclusive) First Turn: 1000 Feb 10 Last Turn: 1540 Feb 10 (18 turns) First Turn's First Player (Do not Roll for the first turn's Action Phase sequence): Soviet
Soviet Information: Set Up: Battalion Set Up areas: 1-269-63 Gd: w/i 3 B34.16 (Less 18 Step Losses, Bn Morale is 1); 2-269-63 Gd: w/i 3 B33.13 (Less 17 Step Losses, Bn Morale is 1); 3-269-63 Gd: w/i 3 B31.10 (Less 18 Step Losses, Bn Morale is 2); 1-270-63 Gd: w/i 3 B34.16 (Less 7 Step Losses); 2-270-63 Gd: w/i 3 B32.22 (Less 6 Step Losses); 3-270-63 Gd: w/i 3 B29.23 (Less 5 Step Losses); 1-342-63 Gd: w/i 3 B15.23 (Less 13 Step Losses, Bn Morale is 1); 2-342-63 Gd: w/i 3 B21.20 (Less 7 Step Losses, Bn Morale is 1); 3-342-63 Gd: w/i 3 B26.22 (Less 5 Step Losses) Regimental Set Up area: 269-63 Gd: w/i 4 B29.15 (Regimental units less 11 Step Losses and 3x Inf Gun (76mm)); 270-63 Gd: w/i 4 B29.19 (Regimental units less 4 Step Losses and 4x Inf Gun (76mm)); 342-63 Gd: w/i 4 B07.17 (Regimental units less 5 Step Losses and 4x Inf Gun (76mm)); 63 Gd Divisional Units: in any 63 Guard area (Divisional units less 6 Step Losses and 6x AT (45mm)) Deploy 8 full Wire Breaches in any Soviet Set Up Area. Artillery Available: Battalions 1, 2 and 3 of the 343 Artillery Rgt, 63 Gd Division Artillery Ammo: 76mm: 32 HE; 122mm: 16 HE Reinforcements: None Historical Orders: Attack to capture Krasni Bor Units without Orders: Except for 1-270-63 Gd and 2-270-63 Gd (which have already successfully implemented the division's follow-on Op Sheet as per rule 2.1e), all are awaiting their turn at implementation of the division's follow-on Op Sheet (it has 27 Wgt Turns accrued when the scenario begins). Remaining units have completed their initial Op Sheets and are under the Looting restrictions (2.1f). 1-270-63 Gd and 2-270-63 Gd have implemented the 63 Gd Division's Follow-on Op Sheet.
Axis Information: Set Up: Company Set Up areas: 3-I-262: w/i 1 B21.26 (Less 10 Step Losses, Battalion Morale is 1); 4-I-262: w/i 4 B44.26 (Less 8 Step Losses); 5-II-262: w/i 2 B41.21 (Less 9 Step Losses); 7-II-262: w/i 2 B33.07 (Less 12 Step Losses); 1-Recon: w/i 2 B45.18; 2-Recon: w/i 2 B45.18; 3-Recon: w/i 2 B44.26; 1-Engineer: w/i 2 B48.14; 2-Engineer: w/i 2 B43.14; 3-Engineer: w/i 2 B40.10; 1 Battery-250: w/i 5 B49.19; 2 Battery-250: w/i 5 B45.18; 3 Battery-250: w/i 5 B41.21 Battalion Set Up areas: II-262: w/i 4 B38.11; Others: w/i 5 B37.05 and/or w/i 4 53.12 Reserves (Set up in any of the above): AT-2 SS; 1-AT (Less 6x AT (37mm)); 8-II-262 (Less 2 Step Losses) Artillery Available: Batteries 1, 2, 3, 9 and 12 of the 250 Artillery Rgt Artillery Ammo: 105mm: 50 HE, 12 Smoke, 2 Illum; 150mm: 18 HE, 6 Smoke Reinforcements: Roll for Variable Reinforcements as per rules 3.5 Historical Orders: 1, 2-Rec, 1, 2, 3-Eng are to attack to recapture Krasni Bor. 3-Rec to attack to relieve 3-I-262. All others defending in place. (7-II-262 & 4-I-262 hasty defense, all others prepared defense.) Units without Orders: None
Victory: Soviet—Both of the following conditions are met: 1) Axis units occupy fewer than 50 City & Building hexes of Krasni Bor, and 2) there are no Spanish units in El Bastion. Draw—One condition for a Soviet victory is met. Axis—None of the conditions for a Soviet victory are met.
Scenario 5—Assaulting the Mill
After unsuccessfully attacking the Spanish line west of the Izhora River, the 72 Rifle Division and the Red Banner Tank Brigade pushed through the available gaps and assaulted two difficult positions—El Bastion and the Mill. Both withstood several assaults. While these two positions were being attacked, additional forces moved to Staraia Myza. The Spanish beat back several attacks, but by afternoon, El Bastion was surrounded and the Mill was in desperate need of reinforcements. The Spanish I-263 Battalion attacked the Soviets driving south out of Staraia Myza, forcing them back into the town.
Map Area: Both, west of Bxx.07 (inclusive) First Turn: 1000 Feb 10 Last Turn: 1540 Feb 10 (18 turns) First Turn's First Player (Do not Roll for the first turn's Action Phase sequence): Soviet
Soviet Information: Set Up: Battalion Set Up Areas: 1-133-72: w/i 2 B25.02 (Less 13 Step losses, Bn Morale is 1); 2-133-72: w/i 2 A25.34 (Less 12 Step losses, Bn Morale is 1); 3-133-72: w/i 2 A22.35 (Less 9 Step losses, Bn Morale is 1); 1-187-72: w/i 2 B29.01 (Less 5 Step losses); 2-187-72: w/i 2 A29.33 (Less 5 Step losses); 3-187-72: w/i 2 A27.31 (Less 5 Step losses); 1-RB: w/i 4 B20.04 (20x KV-I); 2-RB: w/i 4 B20.04 (18x T-26) Regimental Set Up Areas: 133-72: w/i 4 B14.09 (Less 5 Step losses, 4x Inf Gun (76mm)); 187-72: w/i 4 B20.04 (Less 3 Step losses, 4x Inf Gun (76mm)); 72 Divisional Units: in any 72 Rifle Division area (Less 4 Step losses, 4x AT (45mm)) Deploy 4 full Wire Breaches in any Soviet Set Up Area. Artillery Available: Battalions 1, 2, and 3 of the 9 Artillery Rgt, 72 Rifle Division, and Battalions 1, 2, and 3 of the 289 AT Rgt. Artillery Ammo: 76mm: 48 HE; 122mm: 16 HE Reinforcements: As per rule 2.7 Historical Orders: 72 Rifle to attack and capture Staraia Myza and secure a position over the Izhora River. Units without Orders: All are awaiting their turn at implementation of the division's follow-on Op Sheet (it has 27 Wgt Turns accrued when the scenario begins). All 72 Rifle Division units have completed their initial Op Sheets and are under the Looting restrictions (2.1f). The RB Tank Brigade can begin the scenario with an implemented follow-on Op Sheet of the player's choice.
Axis Information: Set Up: Company Set Up Areas: 1-MR: w/i 2 A25.23; 3-MR: w/i 3 B30.05 (Less 7 Step losses); 9-III-262: w/i 2 A21.31 and/or A22.30 (Less 4 Step losses); 10-III-262: w/i 2 A15.32 and/or A17.33; 11-III-262: w/i 2 A12.29 and/or A10.27; 7 Battery-250: w/i 5 A27.14; 8 Battery-250: w/i 5 A27.14; 1-I-263: w/i 2 A53.14; 2-I-263: w/i 2 A53.14 Battalion Set Up Areas: MR: w/i 4 A25.24; III-262: w/i 4 A17.25 Reserves (Set up with any of the above): 4-MR; 12-III-262; 14-262 (only set up 4x AT (37mm)) Artillery Available: Batteries 7, 8, 10, 11 of the 250 Artillery Rgt Artillery Ammo: 105mm: 36 HE, 12 Smoke, 2 Illum; 150mm: 20 HE, 5 Smoke Reinforcements: Roll for Variable Reinforecments as per 3.3 (1 and 2-I-263 are already committed) Historical Orders: All but I-263 battalion defend in place (Prepared Defense). I-263 can have any order except Prepared Defense. Units without Orders: None
Victory: Soviet—Two or more of the following conditions are met: 1) Soviets occupy the Mill, 2) Soviets occupy El Bastion, 3) Soviets occupy Staraia Myza. Draw—One condition for a Soviet victory is met. Axis—None of the conditions for a Soviet victory are met.
Scenario 6—The Assault Continues
After looting the Spanish trenches and billets, the men of the 43 Rifle moved forward. The 65 Regiment was committed and moved to the east to threaten the now open left flank of the 2 SS Brigade. The 708 Regiment took up position below the ridge to secure the 63 Guard's left flank.
This scenario combines Scenario 4 and 5 and adds the efforts of 43 Rifle Division to exit the map.
Map Area: Both First Turn: 1000 Feb 10 Last Turn: 1540 Feb 10 for Scenario (18 turns) OR 1700 Feb 10 for campaign (70 turns) First Turn's First Player (Do not Roll for the first turn's Action Phase sequence): Soviet
Soviet Information: Set Up: As per Scenario 4 and 5 plus the following: Battalion Set Up Areas: 1-708-43: w/i 2 B15.32 (Less 6 Step Losses); 2-708-43: w/i 2 B15.31 (Less 6 Step Losses); 3-708-43: w/i 2 B15.33 (Less 6 Step Losses); Ind Tank: w/i 4 B12.32 north of AT ditch Regimental Set Up Areas: 708-43: w/i 4 B12.32 (Less 3 steps and 4x Inf Gun (76mm)) Deploy 15 full Wire Breaches in any Soviet Set Up Area. Artillery Available: As per Scenario 4 and 5 plus Battalions 1, 2, and 3 of the 162 Artillery Rgt. 43 Rifle Division Artillery Ammo (As per Scenario 4 & 5, plus): 76mm: 32 HE; 122mm: 16 HE Reinforcements: As per Scenario 4 and 5 Historical Orders: As per Scenario 4 and 5 plus 43 Rifle is to drive off the southeast edge of the map and attack the 2 SS Brigade (off the east map edge) Units without Orders: As per Scenario 4 and 5 for 72 Rifle and 63 Gd. The 43 Rifle has completed its initial Op Sheet and is under the Looting rules awaiting its follow-on Op Sheet (Wgt Turns: 27).
Axis Information: All information: As per Scenario 4 and 5
Victory for Scenario 6 (for the campaign see 5.1): Soviet—Three or more of the following conditions are met: 1) Soviets occupy the Mill, 2) Soviets occupy El Bastion, 3) Soviets occupy Staraia Myza, 4) Axis units occupy fewer than 50 City & Building hexes in Krasni Bor. Draw—Two of the conditions for Soviet victory are met Axis—One or less conditions for Soviet victory is met
Scenario 7—Breakout
As night approached, the Spanish commanders in the isolated pockets began to realize that their situation was hopeless. One by one, the survivors of the afternoon carnage slipped out of their positions, moved through the Soviet lines and regained the safety of new defenses along the Izhora or south of Krasni Bor.
Map Area: Both First Turn: 1600 Feb 10 Last Turn: 0200 Feb 11 for Scenario (15 turns) OR 1700 Feb 11 for campaign (52 turns) First Turn's First Player (Do not Roll for the first turn's Action Phase sequence): Axis
Soviet Information: Set Up: Battalion Set Up Areas: All 708-43 and 1 Ind Tank Bn units set up north of xx.37 and east of the railroad (Each Battalion of the 708 has lost 13 steps and has a Battalion Morale of 2, the Ind Tank Bn has lost 8x T-34); 1-269-63 Gd: w/i 4 B33.21 (Less 25 Step losses, Bn Morale is 1); 2-269-63 Gd: w/i 4 B38.14 (Less 29 Step losses, Bn Morale is 1); 3-269-63 Gd: w/i 4 B29.12 (Less 33 Step losses, Bn Morale is 1); 1-270-63 Gd: w/i 2 B50.06 (Less 31 Step losses, Bn Morale is 2); 2-270-63 Gd: w/i 2 B47.10 (Less 26 Step losses, Bn Morale is 2); 3-270-63 Gd: w/i 2 B52.10 (Less 27 Step losses, Bn Morale is 2); 1-342-63 Gd: w/i 2 B45.17 (Less 26 Step losses, Bn Morale is 1); 2-342-63 Gd: w/i 2 B43.12 (Less 23 Step losses, Bn Morale is 1); 3-342-63 Gd: w/i 2 B49.14 (Less 17 Step losses, Bn Morale is 1); 1-14-72: w/i 2 B15.06 (Less 4 Step losses); 2-14-72: w/i 2 B10.06 (Less 2 Step losses); 3-14-72: w/i 2 B05.07; 1-133-72: w/i 3 A28.27 (Less 19 Step losses); 2-133-72: w/i 3 A35.23 (Less 20 Step losses); 3-133-72: w/i 3 A39.24 (Less 19 Step losses); 1-187-72: w/i 3 B22.01 (Less 27 Step losses); 2-187-72: w/i 3 B29.01 (Less 26 Step losses); 3-187-72: w/i 2 A27.31 (Less 28 Step losses); 1-RB: w/i 4 A36.31 (Less 6x KV-I); 2-RB: w/i 4 A36.31 (Less 11x T-26) Regimental Set Up Areas: 708-43: see above (Less 6 Step losses and 4x Inf Gun (76mm)); 269-63Gd: w/i 4 B29.15 (Less 17 Step losses and 2x Inf Gun (76mm)); 270-63Gd: w/i 4 B29.19 (Less 18 Step losses and 2x Inf Gun (76mm)); 342-63Gd: w/i 4 B29.25 (Less 19 Step losses and 2x Inf Gun (76mm)); 63 Gd Divisional Units: in any 63 Guard area (Less 15 Step losses and 5x AT (45mm)); 14-72: w/i 4 B02.13 (set up only 4x Inf Gun (76mm)); 133-72: w/i 4 A26.35 (Less 10 Step losses and 2x Inf Gun (76mm)); 187-72: w/i 4 B20.04 (Less 12 Step losses and 2x Inf Gun (76mm)); 72 Divisional Units: in any 72 Rifle area (Less 12 Step losses and 4x AT (45mm)) Deploy 15 full Wire Breaches in any Soviet Set Up Area. Artillery Available: Battalions 1, 2, and 3 of the 162 Artillery Rgt, 43 Rifle Div; Battalions 1, 2, and 3 of the 343 Artillery Rgt, 63 Guard Div; Battalions 1, 2, and 3 of the 9 Artillery Rgt, 72 Rifle Div; Battalions 1, 2, and 3 of the 289 AT Rgt Artillery Ammo: 76mm: 20 HE; 122mm: 4 HE Reinforcements: None Historical Orders: 708-43, 269-63 Gd, 187-72 defend in place (Hasty Defense). 14-72, 270-63 Gd, 342-63 Gd attack Krasni Bor. In all these cases, all battalions have implemented the orders. Units without Orders: 133-72 only. No weighted turns accumulated.
Axis Information: Set Up: Company Set Up Areas: 4-I-262: w/i 4 B44.26 (Less 8 Step losses); 5-II-262: w/i 2 B41.21 (Less 13 Step losses); 7-II-262: B32.06 and/or B33.07 (Less 12 Step losses); 9-III-262: w/i 2 A21.31 and/or A22.30 (Less 4 Step losses); 10-III-262: w/i 2 A15.32 and/or A17.33; 11-III-262: w/i 2 A12.30 and/or A10.28; 1-MR: w/i 2 A25.23 (Less 8 Step losses); 3-MR: w/i 2 B30.05 (Less 13 Step losses); 1-I-263: w/i 3 A38.17 (Less 4 Step losses); 2-I-263: w/i 3 A38.17 (Less 4 Step losses); 3-I-263: w/i 3 A38.17 (Less 4 Step losses); 5-II-269: w/i 2 A48.15; 8-II-269: w/i 3 A54.14; 1-Engineer: w/i 2 B49.19 (Less 5 Step losses); 2-Engineer: w/i 3 B57.02 (Less 5 Step losses); 3-Engineer: w/i 2 B44.05 (Less 5 Step losses); 1-Recon: w/i 3 B59.08 (Less 5 Step losses); 2-Recon: w/i 3 B59.12 (Less 5 Step losses); 3-Recon: w/i 2 B44.26 (Less 5 Step losses); 1-635 Ost Bn: w/i 3 B60.16; 2-635 Ost Bn: w/i 3 B60.16; 1 Battery-250: w/i 3 B49.19; 3 Battery-250: w/i 3 B41.21; 7 Battery-250: w/i 4 A27.14; 8 Battery-250: w/i 4 A27.14 Battalion Set Up Areas: II-262: w/i 4 A51.31 (Less 8 Step losses); III-262: w/i 4 A17.25; MR: w/i 2 A25.23 (Less 6 Step losses, Bn Morale is 1) All 708-43 and 1 Ind Tank Bn units set up north of xx.37 and east of the railroad (mirrored on the Axis side per the Soviet set up note above) Artillery Available: Battalion 1 of the 162 Artillery Rgt, 43 Rifle Div; Battalions 1, 2, and 3 of the 343 Artillery Rgt, 63 Guard Div; Battalions 1, 2, and 3 of the 9 Artillery Rgt, 72 Rifle Div; Battalions 1, 2, and 3 of the 289 AT Rgt Artillery Ammo: 76mm: 200 HE, 20 Smoke; 122mm: 50 HE Reinforcements: None Historical Orders: Hold current positions, clear the Leningrad-Moscow highway and secure a position over the Izhora River. All are in Hasty Defense except 133-72 which has an implemented Attack Op Sheet (all battalions have implemented). All units have 18 Weighted Turns accumulated (except 133-72) toward a Prepared Defense. Units without Orders: None
Victory: Soviet—Three or more of the following conditions are met, 1) There are no Axis units in Krasni Bor, 2) Soviets occupy El Bastion, 3) Soviets occupy The Mill, 4) Soviets occupy Samsonovka, Mondolovo or Raikolovo. Draw—Two of the conditions for a Soviet victory are met Axis Minor—One or less conditions for a Soviet victory is met
Scenario 8—Counter-attack at Krasni Bor
Historically, the Germans were content to hold the line south of Krasni Bor and lob shells into the town. A more aggressive approach would have rushed greater reinforcements to the front and launched an immediate attack. This scenario depicts such an action.
Map Area: Both First Turn: 0600 Feb 11 Last Turn: 1700 Feb 11 (34 turns) First Turn's First Player (Do not Roll for the first turn's Action Phase sequence): Axis
Soviet Information: Set Up: Battalion Set Up Areas: All 708-43 and 1 Ind Tank Bn units set up north of xx.37 and east of the railroad (Each Battalion of the 708th has lost 13 steps, the Ind Tank Bn has lost 12x T-34); 1-133-72: w/i 3 A29.27 (Less 19 Step losses); 2-133-72: w/i 3 A33.25 (Less 20 Step losses); 3-133-72: w/i 3 A37.24 (Less 19 Step losses); 1-187-72: w/i 3 A28.34 (Less 30 Step losses); 2-187-72: w/i 3 B29.05 (Less 19 Step losses); 3-187-72: w/i 3 A28.31 (Less 35 Step losses); 1-14-72: w/i 3 B22.01 (Less 8 Step losses); 2-14-72: w/i 3 B17.07 (Less 6 Step losses); 3-14-72: w/i 3 B12.07 (Less 4 Step losses); 1-269-63 Gd: w/i 3 B43.12 (Less 25 Step losses); 2-269-63 Gd: w/i 3 B36.13 (Less 29 Step losses); 3-269-63 Gd: w/i 3 B30.09 (Less 33 Step losses); 1-270-63 Gd: w/i 3 B52.07 (Less 37 Step losses); 2-270-63 Gd: w/i 3 B46.07 (Less 29 Step losses); 3-270-63 Gd: w/i 3 B50.11 (Less 37 Step losses); 1-342-63 Gd: w/i 3 B41.19 (Less 26 Step losses); 2-342-63 Gd: w/i 3 B37.24 (Less 26 Step losses); 3-342-63 Gd: w/i 3 B48.18 (Less 22 Step losses); 1-RB: w/i 4 B07.17 (Less 7x KV-I); 2-RB: w/i 4 B07.17 (Less 13x T-26) Deploy 15 full Wire Breaches in any Soviet Set Up Area. Artillery Available: Battalion 1 of the 162 Artillery Rgt, 43 Rifle Div; Battalions 1, 2, and 3 of the 343 Artillery Rgt, 63 Guard Div; Battalions 1, 2, and 3 of the 9 Artillery Rgt, 72 Rifle Div; Battalions 1, 2, and 3 of the 289 AT Rgt Artillery Ammo: 76mm: 200 HE, 20 Smoke; 122mm: 50 HE Reinforcements: None Historical Orders: Hold current positions, clear the Leningrad-Moscow highway and secure a position over the Izhora River. All are in Hasty Defense except 133-72 which has an implemented Attack Op Sheet (all battalions have implemented). All units have 18 Weighted Turns accumulated (except 133-72) toward a Prepared Defense. Units without Orders: None
Axis Information: Set Up: Company Set Up Areas: 9-III-262: w/i 2 A21.31 and/or A22.30 (Less 4 Step losses); 10-III-262: w/i 2 A15.32 and/or A17.33; 11-III-262: w/i 2 A12.30 and/or A10.28; 1-MR: w/i 2 A25.23 (Less 9 Step losses); 1-I-263: w/i 3 A38.17 (Less 5 Step losses); 2-I-263: w/i 3 A38.17 (Less 5 Step losses); 3-I-263: w/i 3 A38.17 (Less 5 Step losses); 5-II-269: w/i 3 A49.13 (Less 11 Step losses); 2-MR: w/i 3 A54.19 (Less 2 Step losses—this unit has been reinforced by the Return Bn, see 3.4); 3-MR: w/i 3 A51.24 (Less 14 Step losses); 7-II-262: w/i 3 A47.35 (Less 12 Step losses); 1-Engineer: w/i 3 B61.21 (Less 6 Step losses); 2-Engineer: w/i 3 B58.02 (Less 6 Step losses); 3-Engineer: w/i 3 B51.02 (Less 6 Step losses); 1-Recon: w/i 3 B59.09 (Less 6 Step losses); 2-Recon: w/i 3 B59.09 (Less 6 Step losses); 3-Recon: w/i 3 B62.30 (Less 6 Step losses); 5-II-262: w/i 3 B62.26 (Less 13 Step losses); 1-635 Ost Bn: w/i 3 B59.13; 2-635 Ost Bn: w/i 3 B60.17; 7 Battery-250: w/i 4 A27.24; 8 Battery-250: w/i 4 A27.24; All KG Heckel Units (less 635 Ost): w/i 4 A62.30 Battalion Set Up Areas: II-262: w/i 4 A51.31 (Less 8 Step losses); III-262: w/i 4 A17.25; I-263: w/i 4 A30.17 (Less 3 Step losses); II-269: w/i 4 A54.14; MR: w/i 2 A25.23 (Less 6 Step losses) Spanish Artillery Available: Batteries 7, 8, 9, 10, 11, 12 of the 250 Artillery Rgt Spanish Artillery Ammo: 105mm: 40 HE, 5 Smoke; 150mm: 20 HE, 5 Smoke German Artillery Available: Batteries 1, 2, 3, and 9 of the 215 Artillery Rgt, and 1, 2, and 3 of the 850 Artillery Bn German Artillery Ammo: 105mm: 110 HE, 20 Smoke; 150mm: 100 HE, 30 Smoke Reinforcements: None Historical Orders: Hold current positions and counterattack the Soviet spearheads. The Spanish and 635 Ost units have implemented Prepared Defense Op Sheets. The German (except 635 Ost) units have implemented Attack Op Sheets. Units without Orders: None
Victory: Use 5.1 for this scenario.
Soviet Preparatory Barrage Program Log
The hex numbers below are the historical target hexes for the Prep Log (see 2.4), used in Scenarios 1 and 2 (a subset of positions) or all positions for Scenario 3. Other scenarios do not use this Log.
| Turn | Katyusha 1 Bn | Katyusha 2 Bn | Katyusha 3 Bn | 122mm 1 Bn | 122mm 2 Bn | 122mm 3 Bn | 122mm 4 Bn | 122mm 5 Bn | 122mm 6 Bn | 152mm 7 Bn | 152mm 8 Bn | 152mm 9 Bn |
|---|---|---|---|---|---|---|---|---|---|---|---|---|
| 0600 | B29.30 | B46.12 | B32.06 | B15.32 | B15.30 | B34.17 | B34.15 | A29.31 | A27.30 | B15.31 | B34.16 | A28.30 |
| 0620 | B36.30 | B50.07 | A38.21 | B15.32 | B15.30 | B34.17 | B34.15 | A29.31 | A27.30 | B15.31 | B34.16 | A28.30 |
| 0640 | — | — | — | B15.32 | B15.30 | B34.17 | B34.15 | A29.31 | A27.30 | B15.31 | B34.16 | A28.30 |
| 0700 | — | — | — | B15.32 | B15.30 | B34.17 | B34.15 | A29.31 | A27.30 | B15.31 | B34.16 | A28.30 |
| 0720 | — | — | — | B16.33 | B16.28 | B34.19 | B34.12 | A30.32 | A25.29 | B16.30 | B34.14 | A23.30 |
| 0740 | — | — | — | B15.34 | B18.30 | B34.21 | B32.11 | A30.34 | A25.23 | B17.28 | B34.12 | A21.30 |
| 0800 | — | — | — | B19.32 | B19.29 | B38.16 | B38.13 | B29.02 | A25.23 | B16.34 | B33.11 | A20.31 |
| 0820 | B45.30 | B53.12 | A47.32 | B21.32 | B21.29 | B40.19 | B40.15 | A18.24 | A25.23 | B18.34 | B31.10 | B32.06 |
Order of Battle and Counter Manifest
Soviet Organization of Forces
63 Guard Rifle Division
- Division Troops (1x Cav, 3x Engineer, 6x AT (45mm))
- 269 Regiment
- Rgt Troops (1x Recon, 6x SMG, 2x FO, 4x Inf Gun (76mm), 1x Mortar Company (120mm))
- 1-269 Bn (9x Inf, 1x MG Company, 1x Mortar Company (82mm))
- 2-269 Bn (9x Inf, 1x MG Company, 1x Mortar Company (82mm))
- 3-269 Bn (9x Inf, 1x MG Company, 1x Mortar Company (82mm))
- 270 Regiment
- Rgt Troops (1x Recon, 6x SMG, 2x FO, 4x Inf Gun (76mm), 1x Mortar Company (120mm))
- 1-270 Bn (9x Inf, 1x MG Company, 1x Mortar Company (82mm))
- 2-270 Bn (9x Inf, 1x MG Company, 1x Mortar Company (82mm))
- 3-270 Bn (9x Inf, 1x MG Company, 1x Mortar Company (82mm))
- 342 Regiment
- Rgt Troops (1x Recon, 6x SMG, 2x FO, 4x Inf Gun (76mm), 1x Mortar Company (120mm))
- 1-342 Bn (9x Inf, 1x MG Company, 1x Mortar Company (82mm))
- 2-342 Bn (9x Inf, 1x MG Company, 1x Mortar Company (82mm))
- 3-342 Bn (9x Inf, 1x MG Company, 1x Mortar Company (82mm))
43 Rifle Division (part)
- 708 Regiment
- Rgt Troops (1x Recon, 3x SMG, 2x FO, 4x Inf Gun (76mm), 1x Mortar Company (120mm))
- 1-708 Bn (9x Inf, 1x MG Company, 1x Mortar Company (82mm))
- 2-708 Bn (9x Inf, 1x MG Company, 1x Mortar Company (82mm))
- 3-708 Bn (9x Inf, 1x MG Company, 1x Mortar Company (82mm))
72 Rifle Division
- Division Troops (1x Cav, 3x Engineer, 3x MG Company, 6x AT (45mm))
- 14 Regiment
- Rgt Troops (1x Recon, 3x SMG, 2x FO, 4x Inf Gun (76mm), 1x Mortar Company (120mm))
- 1-14 Bn (9x Inf, 1x MG Company, 1x Mortar Company (82mm))
- 2-14 Bn (9x Inf, 1x MG Company, 1x Mortar Company (82mm))
- 3-14 Bn (9x Inf, 1x MG Company, 1x Mortar Company (82mm))
- 133 Regiment
- Rgt Troops (1x Recon, 3x SMG, 2x FO, 4x Inf Gun (76mm), 1x Mortar Company (120mm))
- 1-133 Bn (9x Inf, 1x MG Company, 1x Mortar Company (82mm))
- 2-133 Bn (9x Inf, 1x MG Company, 1x Mortar Company (82mm))
- 3-133 Bn (9x Inf, 1x MG Company, 1x Mortar Company (82mm))
- 187 Regiment
- Rgt Troops (1x Recon, 3x SMG, 2x FO, 4x Inf Gun (76mm), 1x Mortar Company (120mm))
- 1-187 Bn (9x Inf, 1x MG Company, 1x Mortar Company (82mm))
- 2-187 Bn (9x Inf, 1x MG Company, 1x Mortar Company (82mm))
- 3-187 Bn (9x Inf, 1x MG Company, 1x Mortar Company (82mm))
1 Independent Tank Battalion (21x T-34/76)
1 Red Banner Tank Brigade
- 1 Bn (21x KV-I)
- 2 Bn (21x T-26)
Spanish Organization of Forces
250 Infantry Division—The Blue Division
- Recon Bn (9x Inf, 3x MG)
- Mobile Reserve Bn (9x Inf, 6x MG, 3x Mortar (81mm))
- Engineer Bn (9x Inf, 3x MG)
- Ski Co (3x Inf)
- 1-AT Bn (12x AT (37mm))
- 262 Regiment
- I-262 Bn (9x Inf, 6x MG, 3x Mortar (81mm))
- II-262 Bn (9x Inf, 6x MG, 3x Mortar (81mm))
- III-262 Bn (9x Inf, 6x MG, 3x Mortar (81mm))
- 13 Co (6x Inf Gun (75), 2x Inf Gun (150mm))
- 14 Co (10x AT (37mm), 2x AT (75))
- 263 Regiment (part)
- I-263 Bn (9x Inf, 6x MG, 3x Mortar (81mm))
- 269 Regiment (part)
- II-269 Bn (3x Inf, 4x MG, 3x Mortar (81mm))
- 250 Artillery Regiment (part)
- Battery 1 (4x 105mm How), Battery 2 (4x 105mm How), Battery 3 (4x 105mm How), Battery 7 (4x 105mm How), Battery 8 (4x 105mm How)
Attached to the Blue Division: AT-2 SS (5x AT (75mm))
German Organization of Forces
Kampfgruppe Heckel (elements of 215 Infantry)
- 635 Ost Bn (partial) (Estonians) (6x Inf, 2x MG)
- 1-226 Assault Gun Co (9x Stug III F)
- 1-563 PanzerJäger Co (7x Marder II)
- 102 Heavy Tank Bn (partial) (4x Pz VI E)
- 390 Regiment (part)
- I-390 Bn (9x Inf, 6x MG, 3x Mortar (81mm))
- II-390 Bn (9x Inf, 6x MG, 3x Mortar (81mm))
Kampfgruppe III Flak (6x AT (88mm))
Player's Notes
Soviet
The Soviets have one basic strength in this situation—mass. They have overwhelming numbers in men, artillery, tanks, and weapons. As a general rule, the Soviets should always use any of these assets en-mass.
The initial assault is the most critical phase in the battle for the Soviet player. The goal is to demolish sections of the trench line in each of the divisional areas. Limited Spanish forces in the breakthrough area of the trenches will generate heavy losses in the assault troops.
The Soviets have a tool for the job—the Barrage Prep Program. A tactic that should be considered is concentrating three battalions of artillery for each division, and making the initial target hexes a line of six hexes (one plotted barrage hex in every other hex) in the area for the breakthrough zone. After two or three consecutive turns of fire, the barrage should be moved back and to the sides of the breakthrough. This should be sufficient to eliminate the entrenched defenders in the breakthrough zone and suppress those units near or supporting those areas.
A consideration for the initial breakthrough is selection of the point of breakthrough. Historically, each division had its own independent zone (1-I-262 for 43 Rifle, 6-II-262 for 63 Guard and 2-MR for 72 Rifle). This approach has merit, as it allows 63 Guard and 72 Rifle a covered approach through the central woods and Iam Izhora.
The breakthrough portion of the battle is the most frustrating for the Soviets. The looting rule will in all likelihood prevent an immediate exploitation of the havoc created by the artillery preparation.
Krasni Bor is the key, and the bulk of the attack should be centered on that objective. The Spanish do not have the strength to cover all approaches to the town and the Soviets must use numbers to seek out the weakness in the defense. Clearing the city hexes is a difficult task, but the mortars, engineers, and SMG companies are well suited for this operation.
The objectives across the Izhora River and on the west edge of Krasni Bor are exceptionally difficult to take because of the on-board artillery. Frontal assaults on the open plains leading to these guns is suicidal. If this is the only option available, heavy use of the divisional 122mm gun batteries is critical.
One other factor that the Soviet player must consider is the requirement to exit units off the Axis entry areas. This task is best left to the 43 Rifle Division. The 43 has the easiest approach to the exit area (particularly area 'H') and the least critical mission. The size of this exited group is an important consideration as the Soviets will need to secure this flank for the assault on Krasni Bor.
One final point the Soviet player must keep in mind at all times is a comment made by Napoleon. He said that a general who cannot look dry-eyed on his dead soldiers will likely doom many more than is necessary to the same fate. The same holds true for this battle; it is not for the timid. Casualties will be immense. Companies and battalions will disappear under the hail of machine gun bullets, mortar shells and howitzer fire. The Soviets have vast resources: use them.
Axis
The Spanish have some important strengths in this situation. The most important is terrain. They are established in a very strong position (Krasni Bor more than the defensive works). They also have much more flexibility in command and control. Exploiting the advantages in terrain and command and control will be the key to their success.
The initial set up for the Spanish units is critical for success. There are several options available to the player—players can distribute units between the trench positions and the battalion areas, stacking is a concern, placement of key weapons is a vital consideration. The principles of defense in depth are the key to success in this stage of the battle.
The use of the divisional units (Recon, Engineer battalions and Ski company) is a major consideration in the set up. These are very good units and can be deployed forward in the line battalion setup areas or in Krasni Bor. Although it is very tempting to place these units forward to bolster the thin trench line, the Soviet preliminary bombardment will probably destroy these units before they get a chance to fire. Placing them in the secondary line would be better, but this provides very little to defend Krasni Bor. Rushing these units into the trench right in front of the on-coming Soviet steamroller will cause them to be destroyed—it is better to use them to fight the individual Soviet battalions released when the Russian's follow-on orders begin to kick in. The player who relies on the German reinforcements to defend the town will in all likelihood be disappointed. Because of this, a tactic that should be considered is using this force to defend a hedgehog in the city. These units dug in a city hex will be difficult to dislodge.
The placement of the 75mm AT guns is critical. There are only seven of these pieces. Placing them in the trench line is a potential waste. Concentrating them around the railroad and the highway in the second line is a recommended option.
The most potent weapon in the Spanish arsenal in the opening stage of the battle is its artillery and mortars. The artillery should be concentrated and liberally used (use fast fire often) while the Soviets are making their initial advance to the trenches. Once the enemy is in the trenches and Krasni Bor, the usefulness of the artillery will be severely limited. The area between the trenches and the north map edge is a superb killing ground and the Soviets will be packed in close groups.
The second stage of the battle, the breakthrough, provides some interesting options for the Spanish player. The looting rule provides time for the Spanish to reset their defenses. The axis of the Soviet attack should be obvious by this time and new defense lines can be created in time to receive the attack.
One other possibility, especially if the Soviet player is not careful, is to launch a small, sharp counter-attack to throw off the Soviet juggernaut. However, finding even a company for a counter-attack may be a difficult task. Even stiffening the shoulders by reoccupying trenches abandoned during the bombardment can prove to be a serious thorn in the Soviets' side.
A major counter-attack should wait until the largest possible force is available and the Spanish have extracted the greatest toll on the Soviets. At best, this force will be a regiment of infantry supported by some armor. The real striking force is in the German artillery. Any attack by this fragile force should use the abundant artillery rather than the scarce men.
During the first day, the Axis player should be content with establishing a German unit on the map to secure the jump-off point for an attack.
Hopefully, the Soviets should be in a pretty sorry state on the second day. Their forces will be severely depleted and they may not have time to prepare defensive lines. A strong German attack at a point unexpected by the Soviets will create severe difficulties. The Soviets, although large in force, are very inflexible. The success of the German attack will be in direct proportion to how well the Axis player exploits his forces' flexibility.
Designer's Notes
Research on any aspect of the Russian front in World War II is at best difficult. Original source material is only available to those who read German or Russian. Source documents are difficult to get and are often marred by rhetoric. Recently, many good secondary sources have become available.
The Map: The map was developed from a combination of the excellent discussion in Hitler's Spanish Legion, a 1950's vintage 1:500,000 scale map and original source material from the Army Group North situation maps. Without the text, this task would have been impossible, as the game map area on the map source was less than 1 square inch. However, it did confirm the general location of features and confirmed built up, marsh and wooded areas.
Order of Battle: The unit designations down to the company level for the Spanish and German units and to the regimental level for the Soviets came from the source Hitler's Spanish Legion. Specific composition at the counter level was made using The Handbook on German Military Forces for the Spanish and German units and The Handbook on USSR Military Forces for the Soviets. Confirmation of the orders of battle were made using Hitler's Legions, Verbande und Truppen der Deutschen Wermacht und Waffen SS, and Red Army Order of Battle.
Units: The Soviet heavy weapons have been organized into five step units rather than sections. Functionally, these units did not operate as sections but were massed together in larger groups. The reason centers around the lack of trained NCOs and junior officers in the Soviet army. Without the necessary skills to place, operate and support these weapons, the Soviets were forced to accept a lack of flexibility in their use.
Morale: The Spanish small units were reputed to be at least as good as any German unit, with the exception of the weapons units. The Spanish did not regard MG and mortar crews with the same esteem as line platoons. It was considered more "heroic" to stand in the face of the enemy with bayonet and grenade than to stand off and destroy the enemy at range. The worse morale value for the weapons reflects this.
The Soviets have morale values that were worse than what would be expected for a number of reasons. The 63 Guard Division was known as the 136 Rifle Division a month before the battle and would be equivalent to a line division of the day. The 72nd Rifle division was a penal unit made up of Ukrainian "volunteers" led by Russian officers. Their morale is slightly worse than a normal Soviet unit. The 43 Rifle had been in the line at Leningrad for some time and was probably made up of many new recruits and is therefore slightly worse than a normal Soviet division.
The morale on the German units was taken to be equivalent to the Spanish. Normally, the morale of the German weapons units would be better than the line platoons, however, the 215 Infantry had just come off the line and weapons units were always heavily attritted and had new replacements. The German Ost battalion (Estonians, actually) were assumed to be equivalent to normal Soviet units.
Historical Notes
History of the Spanish Blue Division
Spanish volunteers! ... you have sworn to die before allowing barbarous Bolshevism to continue its work of hatred and destruction which has bloodied our motherland and which today ... attempts to impose itself on all of Europe. Before this ... brutal system which the heroic might of the German Army is destroying in the greatest battle yet known to history, you Spanish volunteers have gallantly risen ... You only wish to destroy this monster—this lash of humanity—in its own lair. There on the Siberian steppes, at the side of the Germans, some modest Spanish tombs sprinkled with young blood ... will proclaim to the ... entire world the brotherhood of our peoples ... —Gen. Muñoz Grandes, July 31, 1941
Genesis
On June 22, 1941, Germany invaded Russia. When news of the invasion reached Madrid, many desired to join in the conflict against the Bolsheviks. Not more than three years before, the bloody civil war had ended with the defeat of the Socialists, backed by the Soviets. War against the Bolsheviks was an attractive proposition.
Many in the Spanish government, Franco being the most important, did not desire involvement in this struggle. The threat of reprisal from England, the uncertainty of absolute victory and an appreciation of the ravages of war prevented Spain from entering the war as an active participant. However, the obvious support from the populace and from the Falangist fanatics in the government required some support for Germany's "anti-Bolshevik crusade." So, the idea of the volunteer division was born.
The day the 56th Panzer Corps marched through Ostrov halfway to Leningrad, and 18th Panzer Division was in a life-and-death battle with 1st Moscow Motorized Rifle Division in the Borisov bridgehead, the Spanish volunteers mustered for the first time as a unit. The blue uniforms of the Falangist volunteers dominated the spectacle—observers quickly dubbed the unit the "Blue Division."
When the Germans first heard the Spanish wanted to send a division to Russia, they immediately seized the opportunity. Not only would the division add to the strength of the attacking army, but the propaganda value of a volunteer legion, crusading against the Communists, was invaluable. However, once serious discussion of the specifics of incorporating the division began, both sides seriously reconsidered their positions. The difficulties ranged from the OKH demand that the Spanish bring their own transports to the differences between the Spanish diet of meats and fresh vegetables and the German diet of sausage and sauerkraut.
The differences were resolved and by July 13, the division was on its way to Germany. The journey was not without incident. Upon entering France, many exiled Republicans met the trains with angry shouts and empty wine bottles. At one point, German garrisons were brought out to subdue the angry crowds. When the trains rolled into Germany, the Spaniards were once again among friends and each new stop brought cheers from the natives.
Within a week, the division was assembled for training at Grafenwohr. Grandes, eager to get into combat with his division, demanded that the training be completed within a month. At this point, the cultural differences between the Spanish and Germans began to tell. The Spanish volunteers had little desire to conform to the arrogant, fixated Prussian view of soldierly conduct. This led many Germans to the false assumption that the Spanish would not prove good fighters. Despite numerous incidents, training was completed within a month and the Blue Division received the designation 250th Infantry Division.
Into Russia
On August 21, the day Hitler ordered the diversion of 2nd Panzer Group south to Kiev, the 250th Infantry began its march east. German high command had decided that a long march would allow time for more training and bring greater cohesion and discipline to the unit. Their destination was von Kluge's 4th Army, which was advancing toward Moscow.
The first stop for the division was Grodno, in eastern Poland. The restless Iberians added to their tarnished reputation by harassing civilians, committing minor theft and as always, flagrant fraternization with the local women. To increase discipline, the Germans required several parades. At one of these events, an entire company donned condoms on their rifles as they marched in review.
The division then proceeded to Minsk via Ozmiana (near Vilna). On the road to Minsk, an incident occurred when a member of von Kluge's staff was stopped at an intersection while the Spaniards marched by (in broken ranks), refusing to yield the road. The next day, 4th Army refused to accept the division into their operational area.
The division was next directed to 9th Army, to the north. The division reached the Dnieper at Gusino in the last week of September and was told that 9th Army also did not want them. The Spaniards were beginning to wonder if there was to be a place for them.
At the Front
By the end of September, the division was again marching north, this time to 16th Army. In early October, the 1000 km march ended at Novgorod, at the north end of Lake Ilmen. The division was attached to 39th Corps and began relieving the 126th Infantry and 18th Motorized Divisions. The division saw its first major action on the 19th when it established a bridgehead over the Volkhov River. Over the course of the next week, they were able to beat back repeated counter-attacks and link up with the 126th Infantry operating to the north. During the next two weeks, the division continued to expand their bridgehead and fight off ever increasing Soviet attacks. By the beginning of November, the division had eliminated two Soviet regiments (1002nd and 848th). However, the offensive was canceled by the 39th Corps command.
After this attack, the division's first major crisis developed. In after-action reports, von Chappuis (39th Corps CO), gave a very unfavorable report on the conduct of the division. He complained of the laxity in logistics and equipment care; he gave no comment on their excellent battle record. He wanted them out of the line. Busch (16th Army CO) had met Muñoz Grandes (250 Infantry CO) and had observed him and his men in action. He was very favorably impressed by their conduct. In the end, von Chappuis was relieved (he later committed suicide).
On January 13, 1942, the Soviets launched a massive attack on the 126th Infantry front. In two days, the unit on the Blue Division's left was shattered. The Spanish lines at Novgorod held but formed the solid shoulder against the enemy breakthrough. For the next two months, the division was constantly assailed. By the end of that first Russian winter, while much of the rest of the German army was in headlong retreat, the 250th Infantry held out in their hedgehog at Novgorod.
After the spring thaw, the Soviet 2nd Shock Army under Gen. Vlasov had gouged a huge pocket along the Volkhov north of Novgorod. On March 14, the 1st Corps (spearheaded by SS Police) and 39th Corps (58th, 126th, and 250th Infantry) counter-attacked. The pocket was quickly cut off. The Soviets, attempting to escape the trap, counter-attacked until the end of June. A few were able to escape, but Vlasov's once-proud force finally capitulated.
During the spring of 1942, the Blue Division received its first major replacements. While most of the German forces were converting to a six infantry battalion division OB, the Blue Division remained with ten battalions. The new recruits had a lower percentage of the highly motivated Falangist volunteers, but did have a greater number of professional military men. The integrity of the division was maintained.
To Leningrad
In August, the Blue Division was pulled out of the line (replaced by 20th Motorized). The division was earmarked to join von Manstein's 11th Army for the final assault on Leningrad. The division was scheduled for additional training and upgraded to an assault division.
By the end of the month, the Soviets, knowing that the attack on Leningrad was imminent, launched the first Lake Ladoga offensive. The attack was a simple pincer movement, executed by an attack from Leningrad by 67th Army and from the east by the Volkov Front. The objective was Mga, the important railhead necessary for the German defense of the Leningrad cordon.
During the attack, 250th Infantry was ordered into the line. By September 4, they were back on the front opposite Kolpino. In their typical fashion, the Soviets launched attacks into the new formation. On the night of 13 September, two large attacks by 72nd Rifle hit the Spanish lines; both were bloodily repulsed. Sporadic probes continued.
In December, the division was dealt a hard blow. Muñoz Grandes (see insert) was recalled to Spain. His replacement, Esteban Infantes, lacked the zeal and skill for combat his predecessor possessed. This led to another crisis for the division, as the Germans felt that the personality of the division would be analogous to that of its commander, and most felt Infantes less than desirable.
The qualms about the division were partly put to rest a few weeks later. Infantes requested and received permission to execute a limited attack. The Soviets were attempting to establish forward positions at Iam Izhora. He wanted this threat eliminated. On December 29, 1942, the attack was launched and succeeded.
The new year brought further disasters for the German Army. The 6th Army was hopelessly cut off at Stalingrad, Soviet forces were pouring toward Rostov, 1st Panzer Army was desperately trying to avoid being surrounded, and there was a yawning 200 km wide gap in the line in front of Kharkov.
The front at Leningrad was not quiet either. On January 13, 1943, the Soviets launched the second Lake Ladoga offensive. The attack was basically a repeat of the earlier offensive except the axis of attack was just south of the lake. The German 227th Infantry at Schusselburg was cut off after the initial attack. However, the shoulders of the Soviet breakthrough were very narrow. The Germans threw in reinforcements (including II-269 Battalion) to hold the line. In an attack against the new Soviet corridor, the Germans were able to extract their surrounded troops defending the pocket on the south shore of the lake.
By the end of the month, the Soviets had secured a five-mile-wide corridor linking Leningrad to the rest of Russia. On February 7, 1943, the first train in 526 days left for Leningrad. However, the corridor was woefully narrow.
The Battle of Krasni Bor
Believing the Germans could attack and close their land link to Leningrad at any time, the Soviets developed a plan to enlarge the gap. The German held Sinyavino Heights which were the key to the area, but the position was held despite tremendous and bloody frontal attacks. The offensive continued with this phase directed at the capture of Mga, the critical supply head for supporting the heights. The attack would be a repeat of the previous battle but on a wider axis. The western arm of the attack centered at Krasni Bor.
The Spanish defensive works at Krasni Bor were inherited from the 121st Infantry. The positions were much to the disliking of the Spanish. In typical pre-1943 practice, the Germans had erected a thin continuous line of works, well protected by wire entanglements. However, the position lacked depth and mines. From their experience in the Spanish Civil War, most of the members of division preferred a series of strong points with interlocking support fire. However, little could be done to improve the line.
On the morning of February 10, 1943, 400 guns opened up on the right wing of the Blue Division. Three Soviet divisions (72nd and 43rd Rifle and 63rd Guard), supported by 60 tanks, moved out of their trenches and advanced on 262 Regiment.
The artillery hit along the line and in Krasni Bor; the concentrations on 1-I-262, 6-II-262 and 2-Mobile Reserve were particularly heavy. By 0800, the artillery began shifting into Krasni Bor and behind the Spanish positions. The Soviet infantry hit the lines on the heels of the artillery.
The 43rd Rifle hit I-262 Battalion's 1 and 3 Company. The division Ski Company was dispatched to assist the beleaguered companies but was wiped out by an air attack. The initial attacks were repulsed but by 0845, 1-I-262 was wiped out along with the battalion HQ, 2-I-262 was taking shelter in the woods to the east and 3-I-262 was hanging on to their trenches in the swamp, repulsing two more attacks.
On the Spanish left, the 2-MR was reeling from the heavy artillery pounding when elements of 72nd Rifle poured out of Iam Izhora, and into their lines. They were overrun by 0845.
In the center, elements of 63rd Guard were advancing across the peat bog into the woods in front of Krasni Bor. The artillery bombardment had shattered 6-II-262. After the first assault into the line at 0900, the company was destroyed and 5-II-262 on the right was down to 30 men. The guardsmen poured through the hole into Krasni Bor.
By 0900, the last of the artillery lifted and the Spanish began to react. On the right, I-262 (except for 3 Company) was out of the battle. 3-Recon was ordered to move up the east side of the railroad to stop the Soviet tide.
In the center, 7-II-262 withdrew to El Bastion in the center, bolstering the defense of the left shoulder of the 63rd Guard breakthrough. The remnants of 5-II-262 withdraw to help in holding the right shoulder of the breakthrough. The point of the guard's attack was blunted as it reaches the positions of II-262 HQ. 2-Recon company was dispatched to shore up the battalion HQ's defense.
On the Spanish left, Soviet armor, supported by artillery, advanced through the hole left by the destruction of 2-MR company and engaged the MR HQ. This left 3-MR cut-off but still holding its positions opposite Iam Izhora.
By 1000 hours, the battle had degenerated into assaults on isolated pockets by disorganized attackers. The Spanish were beginning to recover from their initial shock and the Soviets' initial assault was waning. Pockets of resistance still holding out included 3-I-262, El Bastion, and 3-MR. Meanwhile, a second line was forming up in Krasni Bor centered on II-262 HQ, now bolstered by 2-Recon.
By 1030 hours, the defense in Krasni Bor was weakening, II-262 HQ was overrun. The Engineer Battalion was ordered to counter-attack. This move hit the pursuing guardsmen with such force that they retreated almost immediately. For the next two hours, the attack see-sawed back and forth through the streets of the town.
By noon, there was still no sign of German support, despite the fact that at 0720, KG Heckel (215th Infantry) had been ordered to the battle. Heckel's troops were stationed at Sablino, less than 10 kilometers from Krasni Bor. Meanwhile, the Soviets, at least those not immediately endangered by Spanish fire, took to looting their enemy's bunkers. Control of the battle was lost from both sides.
The Spanish regained their balance first. By 1330 hours, a line began to form as divisional reserves arrived. I-263 began moving up either side of the Izhora to counter Soviet advances toward Staraia Myza. 5-II-263 arrived to prepare to defend Raikolovo.
The Soviets also regained their composure and lunged forward. By 1430 hours, the positions held by 3-I-262 were overrun. The mill was heavily engaged and but for the defensive fire from Battery 7, would have fallen. 72nd Rifle also drove south toward Staraia Myza and hit I-263 coming from Raikolovo. After an hour long firefight, the Spanish withdrew to Samsonovka and the Soviets to Staraia Myza.
As the afternoon turned to night, the Soviet attacks on the pockets waned. One by one, the isolated pockets of Spanish defenders slipped away into the night. 3-MR, still holding its line in the trenches, was the first to withdraw. The men of Battery 3 in Krasni Bor used their last rounds of ammunition to destroy their guns. By 2300 hours, 3-Engineer and 7-II-262 had also abandoned their perimeters and formed up with the remnants of the regiment along the woods south of Krasni Bor.
At midnight, German artillery began its harassing fire on Krasni Bor. Amid the exploding shells, the last of the Spanish defenders (1 Battery), destroyed their guns and withdrew. German troops were finally moving into the area to bolster the defense but the town was now in Soviet hands.
The next morning the combatants facing each other were shells of what they had been at the beginning of the previous day. The Soviets made a feeble attempt to attack Samsonovka but were bloodily repulsed when the Spanish counter-attacked. The counter-attack briefly retook Staraia Myza, but this too was reversed by day's end. The Germans were content with lobbing a few shells into Krasni Bor and waiting for reinforcements.
The battle ended. The Soviets had lost between 7,000 and 11,000 men (depending on the source), the Spanish approximately 2,200. Losses such as these, in a one day battle, in such a confined area, are nearly unheard of in World War II.
The Soviets had gained the burnt-out shell of a town and a few kilometers of trenches. On the eastern side of the cordon, the Soviet attack was met by 96th Infantry, supported by 61th and 132nd Infantry. Although the fighting was savage, the Soviets were repulsed. A final attempt to take Mga was made a month later, with the attacks coming further north. This too was savagely defeated. The second Lake Ladoga offensive had ended.
Eclipse of the Blue Division
After the battle at Krasni Bor, confidence in the division and its mission waned. Franco's anxiety over Anglo-US intentions toward Spain, the decimation of the division's line officers, and ever-increasing lack of confidence from the Germans in Esteban Infantes all conspired to bring about the decline of the Blue Division.
The end came slowly. The front for the division's right flank settled in along the Izhora River. The fighting was limited to minor skirmishes and shelling took the lives of a handful of soldiers each day. The slow attrition took its toll in men and morale. The division suffered.
On March 19, the Soviets launched a major attack out of Iam Izhora in an attempt to gain the Spanish works along the Moscow-Leningrad highway. The fighting was savage, but in the end, the Spanish held their line.
By May, the division was back to full strength. However, the replacements were no longer either the zealot Falangist militia or professional soldiers, but very low quality fighters. Many of the new "volunteers" were actually former socialists, wanting to obtain passage to Russia so they could desert and fight for the Soviets. The rate of desertion and self inflicted wounds soared with these new recruits.
The war of attrition continued without letup, as the morale of the division fell. On June 17, the Soviets launched another attack. It too was fiercely repelled.
The political fight for Spanish neutrality came to a climax in July. The defeat of Operation Citadel and the subsequent Soviet attack, coupled with the downfall of Mussolini at the end of the month, forced Franco to pursue formal neutrality. During August, a parade of ambassadors converged on Spain, by the end of the month, Franco was convinced that the Blue Division should come home.
At the front, the slaughter continued. By the end of September, Franco announced to his military cabinet that the division was to be reduced. On October 1, he announced Spanish neutrality and told Germany the division was to be withdrawn from Russia.
The Spanish Legion
Repatriation began almost immediately. The men with the longest years of service returned first. No regard for unit integrity was made and the discipline and morale of the men left behind deteriorated rapidly. It became difficult even to fend off partisan attacks.
Franco still desired a presence in Russia. The concept of a "Spanish Legion" came about. The composition and size of the unit were not known but he planned to reform the unit.
Recruiting volunteers among the current veterans was a failure. The initial word from Madrid called for a legion of 4,500 men to continue the fight. However, this was whittled down to 1,500 men by November.
By the end of the month, the unit had been organized and began training. In the first two weeks, a dozen men had deserted or inflicted wounds on themselves. Another 75 were declared unfit for service and sent home.
By mid-December, the unit was back in the line. They were attached to the 121st Infantry Division and placed in a quiet sector along the Mga-Lyuban road. The front remained quiet for a month. On January 14, 1944, the Soviets launched their massive attack at Leningrad. Five German division (9th and 10th Luftwaffe and 126th, 170th and 215th Infantry) were routed in the initial attack. 28th Light Division was surrounded at Vzvad.
The Spanish Legion was caught in the attack. They were ordered to withdraw to Lyuban. The unit participated in the defense of that town. By January 27, 1944, the day the Soviets declared to be the official end of the 900-day siege of Leningrad, the unit was moving south to defend Luga. By the time the unit completed its 140 kilometer march through partisan-controlled country, to reach Luga, they were exhausted and ordered to continue their withdrawal.
Once again, political pressure was brought to bear on Franco. Anglo-US forces demanded the withdrawal of the legion. Franco was being boxed in by the Allies. Finally, on February 20, 1944, Hitler, fearing the presence of the Spanish Legion would provide a provocation for an Anglo-US invasion of Spain, made the decision to withdraw the unit from Russia. By the end of May, the unit was home and disbanded.
Even after this, a few die-hard anti-communists still wanted to continue the fight. These volunteers were incorporated into the Waffen-SS and fought until the end of the war. The last of the volunteers, the Spanish SS Battalion, defended Berlin in 1945.
In total, 47,000 Spanish soldiers fought against Russia. A total of 4,500 men were killed, 8,000 wounded, 7,800 sick, 1,600 frostbitten, and 300 captured. During their two years of campaigning, estimated enemy losses were over 49,000. In the attack, they were relentless; in defense, they were tenacious. Their only defeat was in the politics of their cause.
Annotated Bibliography
Hitler's Spanish Legion: A History of the Blue Division in Russia, G.R. Kleinfeld and L.A. Tambs. This is an excellent divisional history, with a minimum of glorification (unlike many such books). It was the primary source for the game and is strongly recommended reading and has been recently reprinted.
The Road to Berlin, John Erickson. This book (and its companion volume The Road to Stalingrad) are excellent and complete works on the strategic and operational levels of the Russian front (presented primarily from the Soviet viewpoint) and are recommended reading.
Verbande und Truppen der Deutschen Wermacht und Waffen SS im Zweiten Weltkrieg 1939-1945, Georg Tessin. Simply stated, this is THE source for German OB information; there are none better or more complete.
Hitler's Legions, Samuel W. Mitcham, Jr. An excellent source document with brief histories of German divisions.
Red Army Order of Battle in the Great Patriotic War, Robert G Poirier and Albert Z. Conner. Incomplete, but one of the only sources of Soviet divisional OB information generally available.
The Handbook on German Military Forces, TM E30-451, U.S. Army
The Handbook on USSR Military Forces, TM 30-430, U.S. Army
The Forgotten Soldier, Guy Sajer. The true story of a common soldier's experience in Russia. This book is to WWII what All Quiet on the Western Front was for WWI. This is a must read for any student of military history.
Panzer Commander, Col. Hans von Luck. Extremely well written autobiography of a fascinating man and an amazing soldier.
Panzer Battles, Maj. Gen. F.W. von Mellenthin. The classic work on the use of panzer forces in World War II.
Small Unit Actions During the German Campaign in Russia, Army Pamphlet 20-269, U.S. Army. This is an incredible book put together by German officers after the war discussing actions at the TCS level. A truly invaluable resource.
Russian Combat Methods in World War II, Army Pamphlet 20-230, U.S. Army. An excellent book outlining tactics and techniques used by the Soviet army.