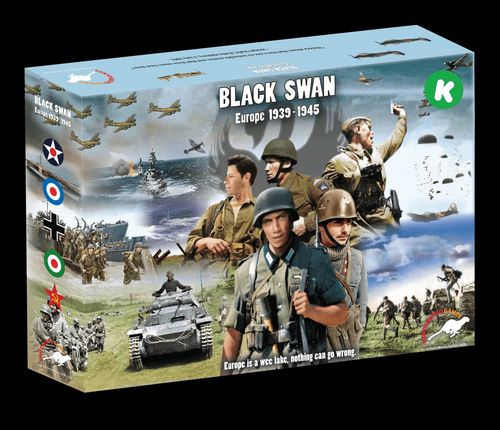
Black Swan
Black Swan Rulebook
Table of Contents
Table of Contents
- Preface
- Introduction
- Sequence of Play
- 1.0 Production Phase
- 2.0 Naval Phase
- 3.0 Land Phase
- 4.0 Blitz Phase
- 5.0 Final Phase
- 6.0 Special Rules
- 7.0 Glossary
- 8.0 Scenarios
- 9.0 Campaigns
- Campaign Setups
Preface
When in 1939 Hitler ordered the invasion of Poland, few in Germany − and probably in the rest of Europe − believed that France and Great Britain would have declared war.
In the previous months Hitler had broken the Treaty of Versailles, by which the harsh conditions imposed had humiliated and starved the German population for years and led to a political reunification of the original German Reich: restored the Rhineland, annexed Austria and invaded Czechoslovakia, with the tacit consent of the other nations, Great Britain and France above all.
So his assumption that he could have done the same with Poland had a logical basis. Instead this time events went another way.
Most European countries had been so devastated by WWI that few wanted another war. Ignoring the German preparations for a renewed war of revenge based on the new Blitzkrieg tactics, France developed an old fashioned concept of static border fortifications − the Maginot Line − and Chamberlain's Great Britain focused entirely on diplomacy in an attempt to deal in a gentlemen fashion with the rapacious and very ungentlemanly Nazi regime. Even after the fall of France, which surrendered in a few weeks after a blitz attack across the Ardennes − almost the same move adopted at the beginning of WWI − Great Britain still tried to reach an agreement with Hitler.
This did not happen and Great Britain remained alone, with no American help, and was on the edge of the defeat, having to choose between an unfair peace and the threat of an invasion. It was only one man, the freshly appointed Prime Minister Winston Churchill − going against any logic and even against his own political peers and the Crown − that wanted to resist, and the outcome of the Battle of Britain later proved him right.
However many months would have to pass before the Soviet Union first and the US later would join the Allied cause to restore peace in Europe, at the cost of millions of deaths....
As the Axis Powers you have to swiftly win the war, either by a Mediterranean strategy to break the British Empire, or an all out effort to demolish the Red Army. If a Decisive Victory is unobtainable, you can still go for a Strategic or at least an Economic Victory.
As the Allies, you must survive the initial onslaught and prepare for a long war of attrition before dealing a deathly blow to the Reich's body.
I hope you will enjoy BLACK SWAN, and that it will answer some of your questions as well. I look forward to the conversations that will follow its release.
Introduction
BLACK SWAN is a block wargame covering WWII in Europe from 1939 to 1945.
Note: "¤" indicates an island not used in the game.
Each Major Nation has its own Units (in a specific color, except the US which has the same color as France), Force Pool, Economic and Strategic Power. Note that Germany, the Soviet Union, France and Great Britain have Forts, in a slightly different color (e.g. German Units use black blocks, while German Forts use grey blocks), so once deployed on the mapboard the other Side's Players − even if they cannot see the enemy Units' Strength because of the Fog War − can at least know if any Unit is a Fort or not.
The Force Pool of a Nation is made up of all Units of that Nation that are not deployed on the mapboard (allowable builds), either because not built yet or because eliminated in a previous Turn.
The Units in the Force Pool may be purchased during the Production Phase. Note that some Units have a colored circled number (1, 2, 3, or 4) indicating the year when the Unit is added to the respective Force Pool. Thus in 1939 it is not possible to build a Unit marked with a "circled 1", as it will be added to the proper Nation's Force Pool in Winter 1941.
As in all other block games, both the Fog of War and Unit strength reduction/increase by rotation, drive the gameplay in BLACK SWAN, as a player cannot know the identity or the strength of an enemy block until it is revealed in combat. Most used game terms are reported in the Glossary.
BLACK SWAN is a historical game with some fixed starting points, but the outcome is completely unpredictable and, despite the historical result, the Axis Side (Germany and Italy) can defeat the Allied Side (France, Great Britain, US and the Soviet Union).
The Allied Side is made up of two Factions: the Western Allies and the Soviets. Beside being formally allied, the two Factions of the Allied Side cannot cooperate in any way, thus they cannot stack together, or trace supply across either a Sea Zone or a Land Area controlled by the other Faction.
Germany, Italy, France, Great Britain, USA and the Soviet Union are Major Nations. All the others are Minor Nations.
No Side can enter Land Areas belonging to one of the six Absolute Neutrals, identified with a white border: Eire, Portugal (including Azores ¤), Spain (including Spanish Morocco, Canary ¤ and Balearic Is. ¤), Sweden, Switzerland and Turkey.
The three Soviet Elite Artillery marked with a "squared 1" cannot move until Summer 1941.
Non-Neutral Nations of the same Faction maintain their own Supply Source (the National Capital), but they can trace supply using any Faction's Naval Units/controlled Land Areas/Sea Zones. They can freely enter any Land Area of the Faction, and be transported by the Naval Units of the Faction. They can stack together, but each Nation keeps its own Force Pool, Economic and Strategic Power.
French and British Units can never stack together, either in the same Sea Zone or in the same Land Area.
US and Great Britain have a unique Strategic Power (to be used cumulatively) and both Washington and London can supply both American and British Units.
Each Minor Nation has its own Units and uses either white blocks (Axis Minors) or brown blocks (Western Allied Minors), but have neither an Economic/Strategic Power, nor a dedicated Force Pool. They are controlled by the Major Power they are allied to (Germany or Great Britain) which treats them as if they were German or British respectively for all effects, except that Minors are restricted to their home Nations. Additionally:
- The Finns can enter the Soviet Union, but no Axis Unit can engage the enemy across the Finnish No-Engage Line;
- The Hungarians and the Romanians can enter Poland, Yugoslavia and the Soviet Union, but can never stack with each other;
- The Bulgarians can enter Yugoslavia and Greece.
Sequence of Play
At the beginning of each colored year, the Units marked with the corresponding colored circles are added to the respective Force Pools: the Germans receive new additions in 1941, 1942 and 1943, the Soviets in 1943 and 1944, while the Western Allies in 1943 only.
Each year is divided into four seasons: Winter, Spring, Summer and Fall. Spring and Summer always have good Weather. During Fall and Winter, the Mediterranean Front always has good weather, while the West and the East Front have Snow in Winter and Rain in Fall.
The game offers several Scenarios (from one to three Seasons long) and two Campaigns (1939 and 1941).
Each Season is made up of two Turns: first the Axis Turn, then the Allied Turn. Each Turn follows the sequence of play which is divided into five different Phases and it is played by all Side's Major Nations (either if they are at war or Neutral) and at war Minor Nations.
The Side playing its Turn is the Phasing Side, while the other one is the Non-Phasing Side.
While Italy and the Soviet Union are neutrals, each Sea Zone in the Mediterranean and in the East Front respectively is considered as if it were controlled by the Phasing Side and no Opposition/Sea Control Disc is deployed in any Mediterranean and/or East Front Sea Zone respectively until Italy and/or the Soviet Union are at war.
As soon as Italy and/or the Soviet Union cease to be Neutral, the Mediterranean and/or the East Front respectively become active:
All Italian/British and/or German/Soviet Opposition Discs are deployed in each Mediterranean and East Front Sea Zone respectively, to reflect Island and Strategic Land Areas controlled by that Side. Opposition Discs are piled one on top of the others on the white disc printed in the center of each Sea Zone. Sea Zone control will be checked in the next sub-phase.
The phases of a Turn are:
-
Production Phase
- DoW and Bodies of Water's Activation
- Supply Check
- Collect PPs
- Garrison Check
- Strategic Air Warfare
- Strategic Naval Warfare
- Spend PPs
-
Naval Phase
- Naval Movement
- Naval Engagement Die roll
- Naval Combat
- Update Sea Control
-
Land Phase
- Special Operations
- Land Movement
- Armistice (France/Italy)
- Strategic Land Movement
- Land Combat
- Retreat after Combat
- Update Sea Control, Economic & Strategic Power
-
Blitz Phase
1.0 Production Phase
1.1 Declaration of War (DoW)
A Nation is neutral unless specified in the Campaign/Scenario instructions and remains neutral until the Phasing Side declares war on that Nation.
During the next Land Combat after a Nation has been declared at war, all attacking Units of the Phasing Side gain a temporarily Hit Bonus (e.g. instead of hitting at 5+, they hit at 4+) against that Nation.
Each National Capital is the Supply Source for all of that Nation's Units. Additionally, if Soviet controlled, each of the three Rough Land Areas east of the Arkhangelsk-Astrakhan Line (these three represent Siberia) is a Soviet Supply Source.
1.2 Supply Check
For each active Sea Zone, sum the number of Naval Units and Opposition Discs of each Side. A Sea Zone is controlled by the Side which has at least double the amount of the other Side, otherwise if no Side has double the number then the Sea Zone is contested (with the printed white disc visible, or partially at least if any Opposition Disc has been deployed on it).
If one Side has at least double the amount, deploy the large Sea Zone Control Disc of the appropriate color on the white disc printed on the Sea Zone.
Example: The Axis has just declared war on the Soviet Union, thus activating the four Bodies of Water in the East Front. Two black Opposition Discs are deployed in the Southern Baltic (as the Germans control Berlin and Warsaw) and one red Opposition Disc is deployed in the Northern Baltic as the Soviets control Leningrad. The Northern Baltic contains one red Opposition Disc and three Soviet Naval Units (four) versus one German Naval Unit (one) for a total ratio of four to one in favor of the Soviet player, thus a large red Control Disc is deployed on the white circle printed on the Northern Baltic Sea Zone to mark that it is Soviet controlled. In the Southern Baltic there are two black Opposition Discs and two German Naval Units (four) versus one Soviet Unit (one) for total four to one ratio in favor of the German player, thus a large black Sea Control Disc is deployed in the Southern Baltic to mark that it is German controlled.
No Sea Zone Control Check is done for the White Sea, the Azov Sea and the Caspian Sea as only the Soviets are allowed to deploy Naval Units in these three Bodies of Water.
A Unit is in Supply if it can trace a line of unlimited length to its Supply Source.
The Soviets only may use the so called "Road of Life" to trace supply across Lake Ladoga, as if it was a controlled Land Area.
The supply line must cross controlled Land Areas and/or controlled/contested Sea Zones that contain at least one friendly Naval Unit.
Supplied Units may act normally during the remaining part of the Turn, while Out of supply units are marked with a white cube and can neither perform any action, nor be reinforced during this turn. If still unsupplied during the Final Phase, they will be either eliminated or reduced.
Exception: Out of supply Naval Units must attack as a result of a successful engagement die roll.
Example (Fig. 1): During the Supply Check of the Axis Turn, the three Axis Units in Libya (one Italian and two Germans) are unable to trace supply to Rome and Berlin respectively, as the Central Med is British controlled, and Vichy France is a neutral Nation. Thus each of the three is marked Out Of Supply with a white cube. For the remainder of the Axis Turn they cannot move, either normally or strategically, or be reinforced.
If the Axis does not improve the 3 to 6 ratio to contest or take full control of the Central Med (either by moving other Italian Navy Units in the Central Med or by conquering Malta or Crete in that order) before the Unit Surrender subphase, the three Units will be eliminated, granting the British a total of 6 PPs.
1.3 Collect Production Points
Only the six major Nations collect PPs: France, Great Britain and USA (Western Allies), Italy and Germany (Axis) and the Soviet Union.
Each Nation has a number of available Production Points (PPs) equal to its Economic Power. Players may use the Economic Power Tracker printed on the mapboard (where 1939 values are shown) to keep each Nation's Economic Power updated.
Each time a Land Production/Strategic Area switches control/supply status, update the other five Nation's Economic Power accordingly.
A controlled Land Area is an Area which is either occupied by a friendly Unit or a Land Area where the last occupant was a friendly Unit.
Five Production Points (PPs) for each controlled and in supply Strategic Land Area (19, each marked with a golden star icon) and 5/10/20 PPs for each controlled and in supply Land Production Area (indicated by a black triangle icon) from the appropriate Front:
| Nation | West (Production) | West (Strategic) | Med (Production) | Med (Strategic) | East (Production) | East (Strategic) |
|---|---|---|---|---|---|---|
| Italy (I) | - | - | Yes | Rome | - | - |
| Germany (G) | Yes | Yes | - | Yes | Yes | Yes |
| France (F) | - | Paris | Casablanca, Marseille | - | - | - |
| Great Britain (GB) | Yes |
Any Axis controlled Land Strategic and Production Area's income from the West and the East Front and any Land Strategic Area's income from the Med Front except Rome is collected by Germany, even if it is an Italian Unit that has conquered it; and any Axis controlled Production Area's income from the Mediterranean Front is collected by Italy, even if another Axis Unit has conquered it.
Any Allied controlled Production Area's income from the West and the Med Front is collected by Great Britain even if a Soviet Unit has conquered it; and any Production Area's income from the East Front is collected by the Soviet Union even if a Western Allied Unit has conquered it.
This does not apply to Strategic Area's income, that is granted instead to Germany, Great Britain or the Soviet Union only and never to Italy (except Rome), or France (except Paris), or the US.
Once France surrenders, Great Britain extends its collectible income to Paris, Marseille and Morocco if controlled.
Finally, add any PPs from any previously surrendered enemy Unit.
As a reminder, once the final amount of PPs collected by a Major Nation has been calculated, players may use colored cubes, for example white cubes to count as 10 PPs each, and colored cubes of the National color to count as 1 PP each.
1.4 Garrison Check
Some Land Areas need a garrison. A garrison is a friendly Ground or Air Unit occupying the Area. Subtract 1 PP for each controlled (even if out of supply) ungarrisoned Land Area. There are four different kinds of Land Areas that need to be garrisoned:
- Conquered enemy Strategic Areas (marked with a golden star);
- Conquered enemy Production Areas (marked with a black triangle);
- Conquered enemy Capitals (name in red);
- Colonies, Mandates, Belfast and the three Trans-Caucasus Areas.
In the Med Front, garrison requirements end for the British after Italian surrender.
1.5 Strategic Warfare
Strategic Warfare is mandatory for both Sides.
Bad weather halves the Strength (Steps) of the attacking Air Units (sum first, then halve).
Elite Air Unit Steps are doubled.
The Strategic Air Warfare against Germany is played if the Western Allied player has at least 8 − before halving for bad weather − Air Unit Steps (Raiders) inside the Blue Strategic Air Warfare Umbrella. Both Sides reveal their Units in the Blue Umbrella and attacking Allied Air Unit Steps (Raiders) and the Axis Air Units Steps (Interceptors) inside the Blue Umbrella are indexed on the Combat Results Table (CRT). Apply the results and conceal any surviving Unit.
The Axis must play a Strategic Warfare against Great Britain using Air and Naval Units. The Strategic Air Warfare for the Axis is resolved similarly as the Allies, but the smaller, Black Umbrella is used in this case. Apply the results and conceal any surviving Unit.
Note that a Land Area belongs to any of the two Umbrellas, if its city name is inside the Umbrella.
Example: Belfast is inside the Blue Umbrella (thus Aircraft in Belfast may participate in the Strategic Warfare against Germany, either attacking or defending), but it is out of the Black Umbrella (Aircraft in Belfast cannot participate in the Strategic Warfare against Great Britain, either attacking or defending).
Note that Italian Air Units participate in the Strategic Warfare Phase (both) if they are inside the appropriate (black or blue) umbrella.
If either numbers (Raiders or Interceptors) is greater than 16, both numbers are halved and the result is applied twice.
Note: For any purpose, when halving or quartering, any fraction is rounded down, but never below one.
Results are indicated by a triplet: the first number indicates Raiders' Losses, the second number indicates Production Losses, the third number indicates Interceptors' Losses. Losses are always applied to the strongest Unit first.
Example: During the Spring 1943 Allied Turn, the Axis plays the Strategic Warfare against the Western Allies. In the Black Umbrella there are 7 German and 2 Italian Air Unit Steps (9 Raiders), and 8 (of which 4 are Elite and do count as double) British and 6 American Air Unit Steps (18 Interceptors). A cross reference of 9 to 18 is not possible (18 is greater than 16), so both numbers are first halved to 4 and 9, and then the result (3-0-0) is applied twice (6-0-0), resulting in 6 Axis Raiders losses on Axis Air Unit Steps (thus one Air Unit is eliminated at the Axis player choice, and the other three are reduced to minimum strength), 0 losses to British Production, and 0 Western Allies Interceptors losses on Western Allies Air Unit Steps.
To resolve the Strategic Naval Warfare against Great Britain, both Sides reveal their Units in each of the three (North, Central and South) Atlantic Ocean Sea Zone. Calculate the number of steps of all German Naval Units vs Allied escorts (Light Surface and Aircraft Carrier Units steps only) per each Sea Zone and apply the results indicated by the CRT one by one starting from the North Atlantic Sea Zone. Then conceal any surviving Unit.
Example: During the Spring 1943 Allied Turn, the Axis must conduct the Strategic Warfare against the Western Allies. In the North Atlantic there are 6 Axis Submarine steps, and 2 Western Allied Submarine steps (which do not count), thus the result is applied indexing the 6 to 0, for a 0-3-0 result: 0 losses for German subs, 3 PP lost for Great Britain, 0 Western Allied Naval steps losses.
In the Central Atlantic there are 2 German Heavy Surface (HS) steps versus 7 British Light Surface (LS), 4 American HS and 2 American Aircraft Carriers (CV), resulting in a 2 to 9 (HS do count for Axis raiders, not for Allied escorts), counting for a 2-0-0 result, causing both German HS steps to be eliminated, while inflicting 0 losses to either the Western Allies Naval Units and British Production.
Finally in the Southern Atlantic there are no German Naval Unit, so nothing happens there.
1.6 Spend Production Points
Collected PP could be spent to buy the following assets in the following order:
a. Purchase a Blitz Disc: there are three available Blitz Discs in the game, one for each Front (Blue for the West, Red for the East, and Yellow for the Med). The Axis can purchase a maximum of three Blitz Discs (one for each Front). The cost is 20 PPs per Disc. Italy can help Germany in buying the Mediterranean Blitz Disc.
The Soviets can only buy the East Front Blitz Disc. The Western Allies can only buy two Blitz Discs, in the West and in the Mediterranean Fronts.
b. Purchase new Units: The number of new units that can be bought is limited by the Nation's Strategic Power. The Strategic Power is determined by the number of Strategic Land Areas (Stars) in supply and controlled by the Nation.
Example: The Strategic Power of Italy is 1 (Rome), so each Season it can buy one new unit, either one Naval or one Ground/Air Unit.
Units are chosen randomly from the two Allowable Build Pools of the Nation: small blocks (ground and air units) or large blocks (naval units) and deployed at minimum strength.
Great Britain and US share their Strategic Power.
Example: in 1943, as the British Strategic Power is five, the British and the Americans can in total buy up to five Units per Season, e.g. three American and two British Units, either Naval or Ground/Air Unit.
Ground and Air units are deployed in their home Nation's Land Areas, but not in islands, Mandates, Colonies and overseas territories like Morocco, Sardinia, Crete, Malta, Gibraltar, Belfast etc.
Exception: Italy can deploy a new unit in Sicily, and the British in Belfast.
Forts can be deployed in any controlled and supplied Land Area (each Land Area may contain maximum 1 Fort).
Additionally, in the Mediterranean front, Forts may be only deployed by Italy, France and Great Britain in a supplied and controlled area which either is able to trace supply by ground, or by ground and sea and contains a port. After Italy surrenders, Germany may deploy Forts in the Mediterranean Front. The Soviets can only deploy Forts in the East Front.
Naval units are deployed in controlled or contested Sea Zones adjacent to the Home Nation (those with the colored Navy Icon) with a maximum of one unit per Sea Zone and without over-stacking.
New Units are randomly drawn from the Allowable Builds Pool of the Nation, but the player may choose the Sea Zone/Land Area where he deploys it.
Example: Great Britain can deploy maximum 3 Naval Units per Season (one per adjacent sea) but only if there are not 4 naval units already in that Sea Zone, and only if the Sea Zone is British controlled or contested.
The US is exempted from deployment and stacking limits in the US and in the US Coastal Waters.
The Soviets are exempted from deployment and stacking limits in the three Areas on the east side of the Astrakhan-Archangelsk line.
Each new Unit costs 2 PPs to deploy.
Exception: once at war, Soviet units cost 1 PP.
c. Reinforce Units: out of supply units cannot be reinforced. The following costs, per step, do apply:
- Infantry and Subs: 1 PP;
- Tanks and Light Surface: 2 PPs;
- Artillery and Heavy Surface: 3 PPs;
- Aircraft Carriers and Air Units: 4 PPs;
- Forts and Paratroopers: 5 PPs.
Production Limits:
- Each Minor Nation's Unit, Fort and Naval Unit can be reinforced max one step per season;
- The total number of elite steps that can be reinforced during the production phase cannot exceed its Nation Strategic Power;
- During the first Axis Winter, each Axis Unit in the Soviet Union may be reinforced a maximum of one step;
- Deploying a new unit counts as one step;
- Ground and Air Units in the Mediterranean Front unable to trace supply by ground only, but able to trace supply by ground and sea, may be reinforced only if they are in a Port (Orange or Red). Reinforcing such a unit before either Italian surrender or "Mare Nostrum" costs:
- Double in an Orange Port;
- Triple in a Red Port. Only the Western Allies may use Red Ports.
Example: In Spring 1943 Italy has a production of 15 PPs and a Strategic Power of 1 (Rome), while Germany has a production of 55 PPs and a Strategic Power of 7 (Berlin, Warsaw, Paris, Narvik, Ploesti, Athens and Kiev). Copenhagen is not garrisoned (-1 PP) and 8 PPs are lost during the Strategic Air Warfare reducing the German available PPs from 55 to 46. Also Belgrade is not garrisoned, reducing by 1 PP the Italian production to 14 PPs, as Italy is responsible for garrisoning Med Front conquered capitals.
First, Germany buys a Blitz Disc for the East Front (20 PPs). The Mediterranean Blitz (20PPs) is also purchased: Italy spends 12 of her 14 PPs, and Germany 8 of her remaining 26 PPs.
Then Italy buys one Naval Unit (randomly drawn) and deploys it at minimum strength (cadre level) in any controlled Sea Zone adjacent to the home nation (one of the three with a Yellow Navy Icon) without over-stacking, while Germany buys one Naval Unit and six Air/Ground Units (7 Units, up to its maximum Strategic Power), all randomly drawn for 14 PPs. The Naval Unit is deployed in one of the two black Navy Icon Sea Zones, only if controlled/contested and without over-stacking, while the six other Air/Ground Units are deployed at cadre level, without over-stacking, one per each controlled black (Germans) or corresponding Axis Minor's gray Land Area (Bulgarians in Sofia; Hungarians in Budapest or Transylvania; Romanians in Bucharest, Ploesti or Bessarabia; Finns in Helsinki, Tampere, Oulu, Petsamo or Western Karelia).
If a Fort would have been drawn, then it must be deployed in any controlled Land Area in the West or the East Front, without over-stacking and without being reinforced before the next Season because of the one step/Season limit. With the remaining 4 PPs Germany may either reinforce four Infantry steps, or one Air step, or two Tank steps or any other valid combination.
2.0 Naval Phase
2.0.1 Bodies of Water
Naval Units play a role in the water part of the map, which is made of eight Bodies of Water:
- US Coastal Waters and Indian Ocean (only Western Allies Naval Units are allowed to enter);
- Atlantic Ocean (only German and Western Allies Naval Units may enter);
- Baltic Sea (only German and Soviet Naval Units may enter);
- White Sea, Black Sea and Caspian Sea (only Soviet Naval Units are allowed to enter);
- Mediterranean Sea (only Western Allies and Italian Naval Units may enter, except the Adriatic Sea where only Italian Naval Units are allowed).
Nations may not apply Opposition Discs in Bodies of Water/Sea Zones they cannot enter.
Each Body of Water is divided in several Sea Zones, except the US Coastal Waters, the White Sea, the Caspian Sea and the Indian Ocean that are made by a unique Sea Zone.
The "Persian Gulf" and the "Red Sea" are a unique Sea Zone that belongs to the "Indian Ocean".
The "Azov Sea" is named only for geographical accuracy and it is part of the "Eastern Black Sea Zone".
2.0.2 Lakes
The Soviets only may use the so called "Road of Life" to trace supply across Lake Ladoga, as if it were a controlled Land Area.
Other Lakes are marked just for geographical purpose and have no impact on game play except that Air (and Airborne assaulting) Units may move over any Lake at the cost of 1 MP.
2.0.3 Opposition Discs
Each controlled Island and Strategic Area adjacent to a Sea Zone in an active Front allows the controlling player to deploy one Opposition Disc (i.e. in the Central Mediterranean Sea, there are four of these available locations − Crete, Sicily, Malta and Athens − in two colors: yellow for the Italians, blue for the British). Neutral Nations don't deploy any Opposition Disc until they are declared at war.
Azores, Canary and Balearic Islands belongs to Absolute Neutrals Nations, thus no Opposition Disc is deployed (¤). To determine who controls a Sea Zone, each Opposition Disc counts as a Naval Unit.
2.1 Naval Movement
Naval Units have unlimited movement points but must stop as soon as they enter a sea zone containing an enemy Naval Unit. An out of supply Naval Unit cannot move at all.
The stacking limit is four Naval Units/Sea Zone/Side. Units are moved one by one and must respect stacking limits at the end of their movement.
The following limitations apply on naval movement, as some Naval Units are restricted to operate in certain Bodies of Water:
- Italians to the Mediterranean Sea;
- Germans to the Atlantic Ocean and the Baltic Sea;
- Soviets to the Baltic Sea, the Black Sea, the White Sea and the Caspian Sea;
- Western Allies to the Indian Ocean, the US Coastal Waters, the Atlantic Ocean and the Mediterranean Sea.
Canals (2) and Straits (3) have further limitations:
- If Western Allies control Gibraltar (Gibraltar Strait) they (only) can move Naval Units and trace supply across the Atlantic Ocean and the Mediterranean Sea;
- If Western Allies control both Cairo and Sinai (Suez Canal) they (only) can move Naval Units and trace supply across the Mediterranean Sea and the Indian Ocean;
- If the Germans control both Denmark and Bergen (Skagerrak Strait) OR both Hamburg and Berlin (Kiel Canal) they (only) can move Naval Units and trace supply across the Atlantic Ocean and the Baltic Sea;
- Nobody can cross the Turkish Straits since Turkey is an Absolute Neutral.
2.2 Naval Engagement Die Roll
For each Sea Zone that contains Naval Units of enemy Factions, roll a die and add the number of Naval Units and the Opposition Discs in that Sea Zone to the die roll. If the result is 11 or more, then a Naval Combat occurs and all Naval Units are revealed.
2.3 Naval Combat
After all the die rolls have been done in each Sea Zone containing Naval Units of enemy sides, the Phasing Side starts resolving Naval Combats in each Sea Zone, in the order he chooses.
Example: in Spring 1943, there are three Sea Zones containing Naval Units of both sides: the Northern Baltic (two Soviet Naval Units and one German Naval Unit plus one Soviet Opposition Disc), the Central Mediterranean Sea (three Italian Naval Units and three British Naval Units, plus four Opposition Discs) and the Central Atlantic (three German Naval Units and four Western Allies Naval Units, plus one Opposition Disc). Source note: the Glossary (Naval Battle entry) gives the threshold as a modified die roll "greater than 10"; section 2.2 and the Glossary (Successful Naval Engagement entry) give 11 or more. Both are transcribed as printed.
As a modified die roll of 11 is needed to cause a Naval Battle, no die roll is done for the Northern Baltic (as even a "6" would not be enough to trigger a naval battle to occur), nor in the Central Mediterranean (as even a die roll of "1" would necessarily become a modified die roll of "11") while in the Central Atlantic a die roll is needed: with a modifier of +8 there is a 66% chance (on a die roll of 3, 4, 5 or 6) that a naval battle would occur.
A naval battle is fought by, at most, five simultaneous-fire sub-phases:
- Opposition Discs;
- Aircraft Carrier (CV);
- Heavy Surface (HS);
- Light Surface (LS);
- Submarine (Sub).
Hits are scored on a result of 5 or more (die roll plus modifiers, see below) simultaneously at the end of each sub-phase.
Hits are applied to the enemy naval units starting from the strongest one (controlling player's choice).
Opposition Fire: both Sides simultaneously roll a die for each Opposition Disc they have in the Sea Zone. Hits are scored on a die roll of 5+, and the results are applied immediately by the owning player to the strongest (in number of steps) Naval Unit in the Sea Zone.
Navy Class Fire: each navy class fires at the enemy rolling one die per step. The following modifiers apply to the dice roll:
- Unsupplied (marked with a white cube) Naval Units are halved (rounding down);
- Capital Ships (CV and HS) unopposed by the same navy class get a Hit Bonus.
There are also special rules regarding target designation:
- Unopposed CV choose their target;
- Sub always choose their target (even if opposed) but can't hit enemy sub;
- To hit enemy Subs, a Side must have CV or LS.
There is no retreat at the end of a Sea battle and Sea Control is updated accordingly (see next paragraph). After each naval battle is resolved, surviving Navy Units are concealed.
Once all sea battles have been resolved, Sea Control is updated for each Sea Zone.
Example (continued): in the Central Med, both players simultaneously roll for their Opposition Discs: 3 dice are rolled by the Italians (as the Axis controls Crete, Sicily and Athens) and one die by the British as they control Malta. Hits are scored on a die roll of 5+, and the results are applied immediately by the owning player to the strongest (in number of steps) Naval Unit in the Sea Zone. The Italians have a 4-step HS, a 3-step LS and a 3-step Sub, while the British have a 3-step CV, a 3-step HS and a 3-step LS. Out of three die rolls the Italians score a hit, and the British score a hit as well. The Italians must reduce their HS from 4 to 3, while the British may choose to reduce what they prefer, as all three Units have the same strength. They choose to reduce the LS from 3 to 2, as it is the cheapest and also the last to fire of the three.
Then the British CV rolls three dice, hitting at 4+ (as it is unopposed by an enemy CV) and rolls two 4's and one 5. The CV always chooses the target, thus the British choose to inflict all the three hits to the enemy HS, eliminating it. Now it is time for the HS, which the Italians have just lost, so the British 3 step HS rolls 3 dice unopposed (*) at 4+ scoring two "1" and one "5", which is a hit. The Italians reduce the Sub from three to two. Now both sides simultaneously roll for their LS, scoring one hit each which is applied to the enemy LS, which are both reduced, the Italians to 2-step, the British to cadre level. Finally the Italian submarines roll two dice, rolling a 5 and 6 and score two hits. The Italian player chooses to apply the two hits to enemy CV, which is reduced to cadre level.
At the end of the battle the Italians have two Naval Units (one LS and one SS) plus three Opposition Discs (5) while the British have three Naval Units and one Opposition Disc (4). The Sea Zone remains contested.
2.4 Sea Zone Control Update
To determine Sea Zone control, add the number of Naval Units and Opposition Discs per Side in each Sea Zone.
If a Side has double or more the amount of the other Side, deploy its Sea Control Disc. If a Side no longer has double or more, remove its Sea Control disc as the Sea Zone is now contested.
Example: in the previous example the Central Mediterranean Sea was contested at the beginning of the sea battle (three Italian Naval Units and three Opposition Discs versus three British Naval Units and one Opposition Disc) and remains contested even after the sea battle has been fought, because even if the Italians lead 5 to 4, no side is able to double the other side.
Across a controlled Sea Zone a Side can:
- trace Supply;
- sea transport Ground and Air Units at a lower risk of being hit by enemy Naval Units (at 6+ instead of at 5+).
3.0 Land Phase
3.0.1 Movement Priorities
If the Soviets and the Western Allies want to move in the same Land Area, the Faction that is native in that Front (the Soviets in the East Front, otherwise the Allies) is allowed to move in.
3.1 Special Operations
There are three kinds of Special Operations: Airborne, Seaborne or Combined Operation.
Special Operations may only be performed if a Side has purchased the Blitz Disc for the Front that contains the target Land Area of the operation, but the units can start their movement in another Front.
Example: The Western Allies have purchased the Mediterranean Front Blitz Disc, so during the Land Movement they can launch a Seaborne assault from the US to Morocco, but not against Nantes.
Special Operations must be conducted against a Land Area with Good Weather.
Exception: The Soviets and the Finns can conduct Special Operations in Snowy Weather (not in Rainy).
3.1.1 Airborne Operation
Airborne units can conduct an airborne assault only from a Land Area against an enemy controlled Island in the adjacent Sea Zone.
If the Island is occupied by an enemy Unit, the Airborne Unit must be accompanied by at least one (maximum two) Air Unit. If the Island is not occupied by an enemy Unit, the Airborne Unit may assault it without being accompanied by an Air Unit.
Example: In Fig. 1, the German Airborne Unit in Athens may launch an Airborne assault against Crete or against Malta, but not against Cyprus as it is not in a Sea Zone adjacent to Athens.
All Airborne Units are Elite, thus they automatically have a Hit Bonus. During an Airborne Operation the assaulting Airborne Unit:
- fires before any other Unit, except when the Defender has a Fort;
- cannot claim any Unopposed Bonus.
For all other purposes (e.g. Defender Unopposed Bonus), assaulting Airborne Units are considered as Infantry.
When attacking without conducting an Airborne/Combined Operation or when defending, Airborne Units maintain the Elite Bonus, but are treated as other Infantry: they are halved if attacking across a River/Canal/Black Double Arrows, roll last during the Infantry Fire segment and do count as Infantry for the Unopposed Bonus.
3.1.2 Seaborne Operations
A Seaborne Operation must be conducted by full strength Ground Units, a maximum two Units per Class, from a Land Area containing a Port against an enemy controlled Land Area with a Port.
The assaulted Area may be occupied by enemy Units or not, at any sea Zone distance, even in a different Body of Water, provided that there is a friendly Naval Unit for each assaulting Ground Unit − acting as a transport − in each Sea Zone crossed and that each Sea Zone crossed is either controlled or contested.
It is not possible to launch a Seaborne Operation against an Area that either does not have a Port, or that does not have a Port in the last Sea Zone crossed.
Example: a Seaborne Operation is not allowed against the Sinai Peninsula, as it does not have a Port, while it is allowed against Denmark, but only across the Baltic, as Denmark has no Port at the Norwegian Sea coast.
Each Ground Unit making a Seaborne Operation will be hit by enemy Opposition Discs/Naval Units exactly as if it was strategically moving.
If the assaulted Land Area is occupied by enemy Units, then TWO Classes of attacking Units are needed.
Full Strength Air Units in range of two (either two Land Areas or a Sea Zone and a Land Area) may accompany the Ground Units without the need of a Naval Unit.
Up to four full strength Heavy Surface Naval Units from the adjacent Sea Zone may provide gunfire to the Seaborne assaulted Land Area. Gunfire is applied before any other Units fire in Combat, each HS rolling ONE die and hitting at 5+ in any weather condition.
Example: Fig. 1, the Axis has purchased both the Med and the West Front Blitz Discs, so it may conduct Seaborne Operations against Crete and Gibraltar.
As Gibraltar is occupied by a British Fort, at least two Units of two different Classes must be used. The Italians have two Navy Units in the Alborean Sea, two Navy Units in the Western Med and two in Tyrrenean Sea. The Central Med is British controlled, so no Axis Seaborne Operations may be conducted across it. There is no Air Unit in range and the Artillery in Naples is not at full strength. Thus the only two full strength Units in a Port available are the Italian Infantry in Sardinia and the Italian Tank in Rome.
The Infantry will be carried by one of the two Italian Navy Units in the Western Med (and fired on by the British Navy Unit there, hitting at 6+ as the Sea Zone is Axis controlled) and then by one of the two Italian Navy Units in the Alborean Sea (and fired on by the British Navy Unit and Opposition Disc there, each hitting at 5+ as the Sea Zone is contested).
The Tank will be carried by one of the two Italian Navy Units in the Tyrrenean Sea (and fired on by the British Navy Unit there, hitting at 6 as the Sea Zone is Axis controlled), by the last Italian Navy Unit in the Western Med (and fired on by the British Navy Unit there, hitting at 6 as the Sea Zone is Axis controlled) and then by the last Italian Navy Units in the Alborean Sea (and fired on by the British Navy Unit and Opposition Disc there, each hitting at 5&6 as the Sea Zone is contested).
3.1.3 Combined Operations
A Combined Operation is a special assault which involves at least two of the following three:
- a normal land attack;
- an Airborne Operation;
- a Seaborne Operation.
A Combined (either with a Seaborne or a normal attack) Airborne Operation is needed for attacking an enemy occupied Land Area which is not an island.
A Combined Airborne Operation:
- cancels the "halved" effect for Ground Units attacking across a river/Black Double Arrows;
- reduces from "quartered" effect to "halved" for any Seaborne Ground Unit.
3.2 Land Movement
Units that have not performed a Special Operation can now be moved.
Each unit has a different amount of available MP:
- Infantry and Artillery units have 1 MP;
- Tank, Air and Airborne units have 2 MPs;
- Forts cannot move at all.
Each Unit spends 1 MP to enter any Land Area.
Exceptions: The El Qattara Depression cannot be entered. To enter a Rough Terrain, or to move across Double-Black-Arrows, a Tank Unit spends 2MPs. The Qattara Depression cannot be entered.
A Ground Unit may freely move into enemy controlled Land Areas unoccupied by enemy Units, immediately switching control of the entered Area from enemy to friendly. Use control cubes for recalling the control of those empty Areas.
Air Units cannot move alone into an enemy controlled Land Area even if unoccupied by enemy units, unless a Ground Unit has just move into it. Air and Airborne Units can fly over an enemy controlled Land Area, occupied by enemy Units or not, at the cost of 1 MP. Air and Airborne Units can fly over ONE Sea Zone (it costs one MP), but they must start and end their movement in a Land Area.
Moving into a Land Area occupied by enemy Units is called engaging. At least TWO different Classes of Units are needed to engage, but it's not possible to engage with more than TWO Units per Class. It is therefore not possible to attack a Land Area with three or four Units of the same Class, but it is possible to stack any number of Units of the same Class up to the Land Area's stacking limit.
The stacking limit (per Side) is:
- 2 Units in any Small Land Area (Tobruk, Alexandria, Malta, Gibraltar, Sevastopol, Murmansk, Petsamo, Leningrad and Narvik);
- 4 Units in any other Land Area.
Units are moved one by one and must respect stacking limits at the end of their movement.
A Land Area cannot remain engaged by both Sides at the end of the combat: one Side must retreat at the end of land combat.
Engaging across Black Double Arrows is only possible during good weather.
Axis Units cannot engage any of the three Soviet Land Areas east of the Arkhangelsk Astrakhan Line, but they can enter them if they are unoccupied by Soviet Units, and Air/Airborne Units can fly over any of them.
Axis Units northwest of the "Finnish No Engage Line" cannot engage any Soviet occupied Land Area southeast of the line until Leningrad is Axis controlled, but they can engage the other way round, or move in or through without engaging, and Air/Airborne Units can fly over any of them.
3.3 Armistice
France may ask for an Armistice during any Armistice sub-phase before Paris is enemy controlled.
The Axis player must immediately accept the Armistice, or reject it.
If the Armistice is accepted, then all French Units are permanently removed from the game without granting the Axis any PP for the surrendering French Units.
Any other Unit in newly formed Vichy France is removed and returned to its Force Pool.
The two Vichy Metropolitan Land Areas, Corsica, Morocco, Algeria, Tunisia, Syria and Lebanon become part of the newly formed Vichy France.
The capital is Vichy. Vichy France has only two Forts, that are immediately deployed at cadre level, one each in Marseille and Tunis, and that can be reinforced by the German player as if they were German Forts (5 and 10 PPs per step respectively, as Tunis is an Orange Port), even while Vichy France is neutral. If destroyed, these two Forts are permanently eliminated.
Vichy France is a neutral Axis Minor, with two Production Land Areas (Marseilles and Casablanca) that are not collectible until Vichy France is declared to be at war. Only the Americans can declare war on Vichy France. Until then, no one can enter or move through Vichy France.
Any other French controlled Land Area that does not contain a British Unit is now controlled by the Italians or by the Germans if it is in the Med or in the West Front respectively.
If instead the French Armistice is rejected, the Anglo-French Union is created. The Anglo-French Union is a brand new joint Nation made of Great Britain and France, with two National Capitals (London and Paris), both acting as national supply sources for any British and French Unit, which now can fully cooperate summing up their Force Pools, and their Economic and Strategic Power. Both must be Axis controlled by the end of 1941, otherwise it is an Allied Victory. The only limitation is that randomly drawn new Air and Ground Units built must be deployed in Great Britain and France respectively as usual, and Naval Units in respective Sea Zones.
Italy may ask for an Armistice during any Armistice sub-phase before Rome is enemy controlled.
The Western Allied player must immediately accept the Armistice, or reject it.
If the Armistice is accepted, then all Italian Units are permanently removed from the game without granting the Allies any PP for the surrendering Italian Units.
Any Italian controlled Land Area becomes Western Allied controlled, unless it contains a German Unit.
If instead the Italian Armistice is rejected, the German-Italian Union is created. The German-Italian Union is a brand new joint Nation made of Germany and Italy, with two National Capitals (Berlin and Rome), both acting as national supply sources for any German and Italian Unit, which now can fully cooperate summing up their Force Pools, and their Economic and Strategic Power. The only limitation is that randomly drawn new Air and Ground Units built must be deployed in Germany and Italy respectively as usual, and Naval Units in respective Sea Zones.
3.4 Strategic Land Movement
Each Major Nation has a number of available Strategic Movement Points (SMPs) equal to its Strategic Power.
A Ground or an Air Unit (but not a Fort) may be strategically moved along an unlimited path made up of controlled and supplied Land Areas and/or Bodies of Water at the cost of one SMP per each Unit moved.
One additional SMP per unit must be (cumulatively) spent for:
- Crossing multiple Bodies of Water (one extra SMP each extra Body of Water crossed after the first);
- Performing a Strategic Movement around the Cape of Good Hope (one extra SMP).
No Engagement can be made during a Strategic Move.
There must be at least one friendly Naval Unit in each Sea Zone crossed and each Sea Zone crossed must be either friendly controlled or contested. Enemy controlled Sea Zones cannot be crossed.
The moving unit will be fired at by each enemy Naval Unit and each Opposition Disc in each Sea Zone crossed.
Hits are applied at 5+ if the Sea Zone is contested, 6+ if the Sea Zone is friendly controlled.
Example: In Fig. 1, if an Axis Ground/Air is strategically moved across the Aegean Sea, the British will roll one die and on a die roll of 6 the Axis Unit will suffer one hit.
The following Strategic Movement limitations apply:
- Italian Units can only Strategically Move across the Mediterranean Sea;
- German Units can only Strategically Move across the Mediterranean Sea, the Atlantic Ocean and the Baltic Sea;
- Soviet Units can only Strategically Move across the Baltic Sea, the Black Sea, the White Sea and the Caspian Sea;
- Western Allies Units can only Strategically Move across US Coastal Waters, the Mediterranean Sea, the Atlantic Ocean and the Indian Ocean;
- Only one Unit per Side and per Season may Strategically Move using the Arctic Route;
- An American Air Unit in the US can only exit the US by a Strategic Movement, while American Ground Units can exit the US either by a Strategic Move or by a Seaborne Operation.
Example: the American player wants to move an Air Unit from the US to Cyprus. The only way he can do it is strategically, by firstly crossing the US Coastal Waters (1 SMP), then the Atlantic Ocean (+1 SMP) then either the Mediterranean Sea (+1 SMP) or the Indian Ocean (+1 SMP) around the Cape (+1 SMP) and then finally the Mediterranean (+1 SMP). The first way costs 3 SMPs (one per each Body of Water crossed) and requires seven Naval Units, one per Sea Zone crossed, while the second way would cost 5 SMPs but "only" 6 Naval Units, one per each Sea Zone crossed.
Note that each Sea Zone crossed must not be enemy controlled, must contain at least one friendly Naval Unit per each Unit Strategically Moved across that Sea Zone, and that the Unit Strategically Moved will be fired by each enemy Naval Unit/Opposition Disc in each Sea Zone crossed (being hit on each 6 rolled in a friendly controlled Sea Zone and on each 5 and 6 rolled in any contested Sea Zone cumulatively, and eventually even eliminated while moving!). Controlling as many Sea Zones as possible and depriving the enemy of its (expensive and long to build) Naval Unit as soon as possible can really turn the tide in your favor.
3.5 Land Combat
Land combat happens after Land Movement has been completed, in each Land Area containing units of both Sides. If there are multiple engagements in multiple Land Areas, the Phasing Player chooses the order to fight them.
Each land combat must be fully resolved before another one can start.
A land combat is fought per Unit Class, at most, 4 simultaneous fire sub-phases:
- Air Units Fire
- Artillery Units fire
- Tank Units fire
- Infantry Units fire
Exception: If the defender has a Fort, the defender fires first with all his Units. Then the attacker can fire back with all his surviving units, and all hits must be suffered by the Fort, until it is eliminated.
Each unit rolls one die per step and hits are scored immediately and simultaneously. Hits are applied to enemy units of the same unit Class or to the strongest enemy unit if unopposed. If one side outnumbers the other in a sub-phase, their additional units fire after the first round(s).
When a Unit suffers damage, it is reduced (step-reduction) once per each Hit suffered.
The following modifiers apply to the dice roll:
- Each Unit Unopposed by the same unit Class gets a Hit Bonus (hitting at 4+);
- Each Elite Unit (darker background) gets a Hit Bonus (hitting at 4+), and each Elite Unopposed Unit gets TWO Hit Bonuses (hitting at 3+);
- The two Finnish Infantry get a Hit Bonus (hitting at 4+) in the nine Land Areas marked with the sniping icon;
- Fort units have a Hit Bonus (hitting at 4+), since they are always unopposed;
- Ground Units attacking across a River, a Canal, or Black Double Arrows are marked with a light blue cube and are halved (rounding down), unless a Combined Operation takes place;
- Seaborne Ground Units are marked with a light blue cube and are quartered (halved in case of a Combined Operation).
There are also the following special conditions:
- Attacking Units do not receive any Unopposed Bonus in Rough Terrain, or until the defending Fort − if any − is eliminated;
- Seaborne Ground Units or Ground Units attacking across a River/Black Double Arrows do not receive any Unopposed Bonus;
- Moscow (for the Soviets), Berlin (for the Germans), London (for the British), Fort, Rough Terrain (or Mud) each provides an Absorb Bonus to the defender: the first hit is ignored by the Defender if one of the two conditions is met, the first TWO hits are ignored if two are met, the first THREE hits are ignored if either the Soviets in Moscow, the Germans in Berlin, or the British in London are defending in Mud with a Fort.
Example: an attacking 4-step Infantry rolls four dice and hits at 5+. If in in clear terrain and unopposed by an enemy Infantry, it rolls four dice, but hits at 4+ because of the Unopposed Bonus (unless marked with a little blue cube, or if the defender has a Fort).
Example: During the Axis Land Movement Phase, two German Air Units and one Italian Artillery move to Moscow, which is Soviet controlled and occupied by one pink block (a Fort) and three other red blocks.
After all Land Movements have been completed, the Axis must resolve the land battles in the order he chooses.
The Axis player decides to start with the battle for Moscow. Both Sides simultaneously reveal their Units (four each) by flipping their blocks face up. See Fig. 4a.
The Soviets have a 1-step Fort and three 3-step Infantry. As this is Moscow and the Soviets are defending, the defender has two Absorb Bonuses (Fort + Moscow). Also, because of the Fort, the Soviets roll first. As the Axis has no Infantry, all defenders hit at 4, and hits are applied by the owning player to its actual strongest Unit.
Out of 10 die rolls, 5 hits are scored and the Axis player must assign the first two hits (one each) to his two 4-step Air Units, and then the other three hits one each to each of his three Units.
Now the Axis starts rolling. First four dice with his two 2-step Air Units (hitting at 5+) and three hits are scored: the first two are absorbed by Moscow and the Fort, while the third hit must be taken by the Fort, eliminating it.
Finally, as the Fort has been eliminated, the two 2-step Italian Artillery may benefit from the Unopposed Bonus (*), thus rolling two dice and hitting at 4+. Only one hit is scored, thus it taken by one of the three 3-step Soviet Infantry. The battle is over. See Fig. 4b.
3.6 Retreat after Combat
If a Side has been completely eliminated, the other Side now controls the Land Area. If this is not the case, then one of the two Sides must retreat, leaving the Land Area to the other Side.
3.6.1 Retreat Priorities
- The defender may retreat (in this case any Fort is destroyed);
- If the defender does not retreat, the attacker has the option to do so;
- If neither chooses to voluntary retreat, the attacker must retreat if the Area is either:
- Rough Terrain,
- experiencing Mud,
- has a Fort;
- In any other case, the player with the fewest Unit Classes must retreat. In case of a tie, the following priorities determine the side that remains in the Land Area:
- The highest Unit Class: Air > Artillery > Tanks > Infantry;
- The highest number of steps of the highest Unit Class (Units of the same Class sum their steps up);
- The attacker must retreat.
Example: following up with the previous example of the battle for Moscow, as the Axis has two Unit Classes (Air and Artillery) versus only one Soviet Unit Class (Infantry), the Soviets must retreat his three Infantry into any adjacent controlled and uncontested Land Area.
Retreat is performed into any adjacent friendly controlled and supplied Land Area, without over-stacking. If this is not possible, the Unit is eliminated unless it can alternatively:
a. Temporarily retreat into an adjacent friendly controlled and uncontested Land Area in over-stacking, and then continue to retreat receiving 1 automatic hit for each additional adjacent friendly controlled and fully stacked Land Area entered while retreating, until it enters an adjacent friendly controlled Land Area where it does not over-stack.
b. Retreat by sea across ONE adjacent friendly controlled Sea Zone which contains at least one friendly Naval Unit for each retreating Ground/Air Unit. Each Unit retreating by sea suffers one automatic retreating hit, and receives enemy Naval Unit and Opposition Disc Fire (hits at 6, as a retreat through a contested Sea Zone is not possible). If the Land Area entered after retreating by Sea is fully stacked, then the Unit must continue to retreat as specified on the previous option "a", suffering one hit for each over-stacked friendly controlled Land Area to which it temporarily retreats.
Example: In Spring 1944 the Western Allies make a Seaborne attack across The Channel against German occupied Nantes which is defended by Fort. The attack is conducted by two Infantry (transported by two of the four HS) and two Air Units, and it is supported by the Naval gunfire of 3 full strength HS (each rolling one die).
The full strength "C" HS in the Central Atlantic cannot provide gunfire, as it is not in the Sea Zone from where the Seaborne Operation has been conducted.
Both sides disclose their Units, the combat starts.
First the three HS gunfire roll three dice (5+) and score a hit (absorbed by the Fort).
The Fort rolls four dice (4+) and scores four hits. The Allied must take one hit per Unit. Then, the two Air Units roll six dice (5+ as there is no Unopposed Bonus against a Fort) and score one hit reducing the Fort to three. Finally the two Infantry roll two dice (quartered) and score one hit, reducing the Fort to two steps, without eliminating it.
The German Fort has not been eliminated, thus the Allies must then retreat across Sea.
Both the Infantry and the Air Units automatically suffer one hit each because they are forced to retreat by Sea (each reduced to two steps). There is no Axis Naval Unit/Opposition Disc in The Channel, so no extra hit is taken. However the only two friendly controlled Land Areas adjacent to The Channel are Plymouth and London. Both are fully stacked, so the four Units suffer one additional hit each (and are now at cadre level), and must retreat to either Manchester or Liverpool. These two are fully stacked, so the four Units must suffer an extra hit and are eliminated.
3.7 Update Sea Zone Control, Economic and Strategic Power
If a Side loses or gains control on an island and/or on a Strategic Area adjacent to a Sea Zone, remove/add/update the Opposition Discs and the Sea Control Marker accordingly.
If a Side loses or gains control on a Production or on a Strategic Area, update the Economic/Strategic Power Track Marker accordingly.
4.0 Blitz Phase
This phase is identical to the Land Phase so it includes: Land Movement, Strategic Land Movement, Land Combat and Special Operations.
During the Blitz Phase, the Phasing Side may only move Units in Land Areas that belong to the Front for which the Blitz Disc has been purchased for. These Units may move (but not Strategically) into a Front, for which the Blitz Disc has not been purchased, and can only attack Units in Land Areas belonging to the Front for which a Blitz Disc has been purchased.
During the Blitz Phase, Special Operations must start from and target a Land Area inside a Front for which the Blitz Disc has been purchased. Purchased Blitz Discs are returned to the counter mix at the end of the Blitz Phase.
Example: Fig. 1. The Axis has purchased TWO Blitz Discs: one for the West and one for the Med Front. In the Blitz Phase, the Bulgarian Infantry cannot move, as it is in the East Front. The German Infantry in Thessaloniki may move normally in any adjacent Land Area (Including Bulgaria) or may be moved strategically to any Land Area in the Med or in the West Front (not to Bulgaria, or in any other Land Area in the East) or may be Sea transported, or even participate in a Seaborne or in a Combined Operation, as it starts the Blitz Phase in a Port.
The Axis may conduct an Airborne Operation with the German Airborne in Athens against Crete or Malta. If the latter, it must be accompanied by an Air Unit as Malta is enemy occupied. Either the Italian Air Unit from Sicily or the German Elite Air Unit may accompany it, but not both because of the stacking limit (Malta is a Small Area).
The Axis may conduct a Seaborne Operation against Crete with either the German Infantry in Thessaloniki or the German Airborne in Athens or even both as there are two Italian Naval Units in the Aegean Sea; however, the British Navy Unit in the Aegean Sea will roll one die against each Axis Unit, hitting at 6 only, as the Aegean Sea is Axis controlled. Mind that, as Crete is empty, any Special Operation may be conducted with just one Unit, but the Axis player may decide to accompany one or both them with the Elite Air Unit in Athens.
The Axis may conduct a Combined Operation against Crete with the German Infantry seaborne from Thessaloniki (the British Navy Unit in the Aegean Sea will roll one die hitting at 6 only, as the Aegean Sea is Axis controlled) and the German Airborne "flying" from Athens. The Elite Air Unit in Athens may accompany them.
5.0 Final Phase
5.1 Nations Surrender Check
During any Surrender Check:
- A Major Nation other than the US and the SU surrenders if either its Capital is enemy controlled or if it has not any Naval Units left in play;
- Alternatively, Italy surrenders if TWO of Sicily, Sardinia, Milan and Naples are Allied controlled;
- Alternatively, France surrenders if TWO of Lille, Strasbourg, Nantes, Bordeaux, Marseille and Toulouse are Axis controlled;
- A Minor Nation surrenders if its Capital is enemy controlled.
US never surrender.
The Soviet Union surrenders only if every Land Area west of the Arkhangelsk-Astrakhan Line is Axis controlled.
Alternatively, France and Italy may surrender if during the Armistice sub-phase an Armistice is asked by the controlling player, and the other Side accepts it.
If Italy, Great Britain or the Soviet Union surrenders, permanently remove all the yellow, blue or red Opposition and Control Discs.
If Italy surrenders, British Med Front garrison requirements end.
5.2 Units Surrender Check
Each Unit either of a Surrendering Nation or marked with an Out of Supply white cube (other than those of a Nation surrendering because of an Armistice) that is still unable to trace a valid Supply Line to its Supply Source now surrenders to the enemy.
Exception: Each 2/3/4-step Fort of a non Surrendering Nation still marked with an Out of Supply marker is instead reduced by one step (per Season).
All surrendering Units are removed from play granting a certain amount of PP to the enemy. These PPs can be spent in the next Production Phase.
The amount is different for each Unit Class:
- 1 PP for each Infantry and Submarine Unit;
- 2 PPs for each Tank and LS Unit;
- 3 PPs for each Artillery and HS Unit;
- 4 PPs for each Air and CV Unit;
- 5 PPs for each Airborne and Fort.
If an Allied Unit surrenders to the Axis, then the corresponding amount of PPs is given to Italy if it surrendered in the Mediterranean Front, or to Germany if it surrendered in the West or in the East Front.
If an Axis Unit surrenders in the West or in the Mediterranean Front, then the corresponding amount of PPs is given to Great Britain, while if an Axis Unit surrenders in the East Front, the corresponding amount of PPs is given to the Soviets.
Example: two Out of Supply Italian Air Units − one in Belgrade and one in Kursk surrender. They are removed from play and returned to the Italian Force Pool and can be later rebuilt. Four PPs (blue colored cubes may be used) are immediately given to the British player (Belgrade is in the Mediterranean Front) and four PPs (red colored cubes may be used) to the Soviet player (Kursk is in the East Front) to be spent in the next Production Phase.
5.3 Victory Check
During any Victory Check (two per each Season, one at the end of the Axis Turn and one at the end of the Allied Turn), the game immediately ends with a Total Victory if either the following conditions are met:
a. Berlin is enemy controlled;
b. a Faction controls 11 Strategic Land Areas.
Additionally, a special Victory Check is made at the end of the each year of the Campaign game, or at the end of a Scenario.
Players calculate the Strategic Power of each Faction. If a Faction has a Strategic Power equal or greater than 10, then the Faction has won a Strategic Victory.
If this is not the case, players calculate the Economic Power of each Faction. If a Faction has an Economic Power equal or greater than 100, then the Faction has won an Economic Victory.
If the same Faction has a Strategic Power equal or greater than 10, and an Economic Power equal or greater than 100, then that Faction has won a Decisive Victory.
While playing a Campaign, if no Faction meets these criteria, then another year of war begins.
While playing a Scenario (other the "1939") if no Faction meets these criteria, at the end of the Scenario the Faction with the highest Strategic Power is the winner. If two Factions have the same Strategic Power, then the one with the highest Economic Power is the winner. If none of the above, then it is a Tie.
Note: A Strategic or Production Area only counts when it is in supply.
Source note: the manual states the Strategic Power threshold for a Strategic Victory as 10 in this section and as 11 in the Glossary (Strategic Power entry); both are transcribed as printed.
6.0 Special Rules
6.1 1941 Milchkuhe
Starting from Winter 1941, German subs are automatically considered in supply.
6.2 1942 Snorkeling
Starting from Winter 1942, German subs must no longer stop due to enemy Naval Units when moving through Sea Zones.
6.3 1943 Z-Plan Cancelled
Starting from Winter 1943, German subs may be reinforced without any limit, but any other German Naval Unit may only receive one step per season totally. Moreover eliminated German Naval Units other than submarines cannot be rebuilt.
6.4 Mare Nostrum
The Axis controls Gibraltar, Cairo, and all seven Sea Zones in the Body of Water of the Mediterranean Sea. The Axis ignores "Orange Port" extra cost while the three above conditions are met.
6.5 The Weather
The East and West Front have Bad Weather during Fall (Mud) and Winter (Snow) Turns, while the weather is always good in the Mediterranean Front. During Bad Weather Turns there are some limitations:
- no Special Operations can be launched (except for the Finns and the Soviets in Winter);
- attacking Ground and Air units are halved (except for the Finns and the Soviets in Winter);
- Black Double Arrows cannot be engaged across;
- in Winter, Rivers (except the Danube) and the Kiel Canal are frozen;
- in Fall, any Terrain turns into Rough Terrain.
6.5.1 Axis First Winter in the East
During the first Winter after the Axis and the Soviet Union are at war (usually it is Winter 1942, but it may vary in the 1939 Campaign) any Axis Ground and Air unit − besides Forts and Finns − in the Soviet Union:
- are quartered when attacking, and halved when defending;
- may only be reinforced maximum by one step;
- and the Axis Strategic Movements are limited to one inside the Soviet Union.
7.0 Glossary
-
Absolute Neutrals: Eire, Portugal, Spain, Sweden, Switzerland and Turkey.
-
Absorb Bonus: The ability of the Defender to absorb the first Hit suffered in Combat. Up to three Absorb Bonuses are available in a Land Area (Rough Terrain or Mud; Fort; Soviets in Moscow, Germans in Berlin, British in London).
-
Armistice: The possibility for France and Italy to negotiate better surrender terms.
-
Axis First Winter: The first Winter Season after the Axis and the Soviet Union are at war.
-
Blitz Disc: In three colors, one for each Front. Costs 20 PPs, allows Special Operations and Blitz Phase.
-
Body of Water: One of the eight water basins on the mapboard: US Coastal Waters, Atlantic Ocean, Indian Ocean, Mediterranean Sea, Azov Sea, Caspian Sea, Baltic Sea, White Sea. Each made of one to seven Sea Zones.
-
Cadre Level: Once purchased, a Unit is deployed as a Cadre at the Minimum Strength.
-
Canals and Straits: A narrow water corridor between two or more Land Areas. There are two Canals (Kiel and Suez) and three Straits (Gibraltar, Skagerrak, and the Turkish Strait). Besides the Turkish Straits, movement across is always forbidden. Naval Movement across a Canal or a Strait is only allowed if the Phasing Side controls it.
8.0 Scenarios
BLACK SWAN offers you the chance to play several Scenarios and two Campaigns. However, before you start playing any of the two Campaigns, it is better to practice with the Scenarios.
The 1939 Scenario is the ideal start to get into the mood. After, try the 1941 or the 1942 Scenarios, and then the 1943 and 1944 Scenarios. Once you are familiar with the game's basic concepts, it is time to venture into one of the two long Campaigns!
1939: Fall Weiss
See 1939 Campaign for Setup instructions.
The 1939 Scenario lasts only two Seasons and ends in the Final Phase of Fall 1939 with a Tie, unless at anytime a Side controls both Berlin and Warsaw and then it is declared the winner.
1941: Barbarossa
See 1941 Campaign for Setup Instructions.
1941 Scenario ends in the Final Phase of Fall 1941.
1942: The Giant's Awake
Starts: Spring 1942, Axis Land Phase. Ends: Fall 1942, Allied Final Phase. Supply: All Units are in Supply. Bodies of Water: All Active. War Status: All the following Nations are deployed and at war excepting Vichy France. Force Pool Additions: none.
− ALLIES −
Poland, Denmark, Norway, the Netherlands, Belgium, Yugoslavia and Greece surrendered. France asked for Armistice and Vichy France (Neutral Axis Minor) was created.
Controlled Territories: USA, all Blue Land Areas plus Gazala, Tobruk and Benghazi.
USA (At War) Economic Power: 20. Strategic Power: shares British Strategic Power. Allowable Builds: 2 Infantry, 2 Tanks, 2 Artillery, 2 Air. Unless otherwise specified, American Units are at 4-step.
- USA: 1 Infantry, 1 Air;
- US Coastal Water: 1 HS (at 1), 2 LS (at 1);
- Northern Atlantic: 1 CV, 1 HS, 1 LS, 1 Sub.
GREAT BRITAIN (At war) Economic Power: 35. Strategic Power: 5 (London, Gibraltar, Cairo, Mosul, Abadan). Allowable Builds: None.
- Northern Atlantic: 1 Control Disc;
- Norwegian Sea: 1 Sub (3);
- North Sea: 1 LS (4), 1 Opposition and 1 Control Discs;
- The Channel: 1 CV (2), 1 HS (4), 1 Opposition and 1 Control Discs;
- Central Atlantic: 3 LS (4), 1 Opposition and 1 Control Discs;
- Southern Atlantic: 3 LS (4), 1 Control Disc;
- Indian Ocean: 1 LS (4);
- Eastern Med: 1 HS (4), 2 Opposition and 1 Control Discs;
- Central Med: 1 CV (4), 1 LS (4), 1 Sub (4), 1 Opposition Disc;
- Western Med: 1 HS (4);
- Alboran Sea: 1 HS (3), 1 Opposition and 1 Control Discs;
- Mosul: 1 Infantry (2);
- Abadan: 1 Infantry (2);
- Jerusalem: 1 Artillery (1);
- Alexandria: 1 Artillery (2);
- Tobruk: 1 Infantry (2);
- Bengazhi: 1 Infantry (3), 1 Tank (3);
- Malta: 3-step Fort (2), 1 Air (4);
- Gibraltar: 3-step Fort (2);
- London: 4-step Fort (3), 1 Artillery (4);
- Plymouth: 1 Infantry (4), 1 Tank (4), 1 Air (4);
- Belfast: 1 Air (1).
SOVIET UNION (At war) Economic Power: 60. Strategic Power: 6 (Moscow, Murmansk, Leningrad, Gorki, Stalingrad and Baku). Controlled Territories: all Red Land Areas except Kostomuksha, Petrozavodsk, Novgorod, Minsk, Smolensk, Pinsk, Gomel, Kursk, Kiev, Kharkov, Odessa, Dnipropetrovsk, Stalino and Simferopol. Allowable Builds: 1 Sub.
- White Sea: 1 LS (1);
- Northern Baltic: 1 HS (1), 1 LS (2), 1 Sub (2), 1 Opposition Disc, 1 Control Disc;
- Eastern Black sea: 1 HS (1);
- Murmansk: 3-step Fort (3), 1 Infantry (4);
- Kandalaksha: 3-step Fort (2), 1 Infantry (3);
- Tikhvin: 3-step Fort (3), 1 Infantry (4), 1 Artillery (3);
- Leningrad: 4-step Fort (3), 1 Artillery (3);
- Kalinin: 1 Infantry (4), 1 Tank (1), 1 Artillery (4), 1 Air (1);
- Moscow: 4-step Fort (3), 1 Infantry (4), 1 Tank (3), 1 Elite Artillery (4);
- Tula: 1 Infantry (4), 1 Tank (2), 1 Elite Artillery (3), 1 Air (3);
- Voronezh: 1 Infantry (4), 1 Tank (1), 1 Elite Artillery (3), 1 Air (1);
- Rostov: 3-step Fort (1), 1 Infantry (1), 1 Tank (1), 1 Artillery (1);
- Stalingrad: 1 Infantry (2);
- Gorki: 1 Artillery (3);
- Krasnodar: 1 Infantry (2);
- Sevastopol: 4-step Fort (2);
- Batumi: 3-step Fort (1);
- Yerevan: 3-step Fort (1);
- Baku: 3-step Fort (1).
VICHY FRANCE (Neutral Axis Minor) Capital is Vichy. Controls Metropolitan Vichy France, Corsica, Morocco, Algeria, Tunisia, Lebanon and Syria. Axis cannot enter Vichy France untill USA declares war to Vichy France.
- Marseille: 1 Fort (1);
- Tunis: 1 Fort (1).
OTHER AXIS MINORS (All at war) Bulgaria, Finland, Hungary and Romania.
− AXIS −
East and Med Front Blitz Discs available.
Controlled Territories: all Black, Grey and Yellow Land Areas except Gazala, Benghazi and Tobruk, but plus Poland, Denmark, Norway, the Netherlands, Belgium, Yugoslavia, Greece, non-Vichy France (Paris, Nantes, Bordeaux, Lille and Strasbourg), the Baltic States and the following Red Areas: Kostomuksha, Petrozavodsk, Novgorod, Minsk, Smolensk, Pinsk, Gomel, Kursk, Kiev, Kharkov, Odessa, Dnipropetrovsk, Stalino, Simferopol.
GERMANY (At war) Economic Power: 70 (includes Poland, Norway, the Netherlands, Belgium, Greece, Paris, Romania, Kiev, Dnipropetrovsk and Stalino). Strategic Power: 7 (Berlin, Warsaw, Narvik, Paris, Ploesti, Athens and Kiev). Allowable Builds: None.
- Northern Atlantic: 1 Sub (4);
- Central Atlantic: 1 Sub (4);
- Southern Atlantic: 1 Sub (4);
- Norwegian Sea: 1 HS (4), 1 LS (4), 1 Sub (4), 1 Opposition and 1 Control Discs;
- Southern Baltic: 1 HS (3), 1 LS (3), 2 Opposition and 1 Control Discs;
- Petsamo: 4-step Infantry (4);
- Western Karelia: 1 Finnish Infantry (4), 1 Finnish Artillery (3), 1 Finnish Air (2);
- Petrozavodsk: 1 Finnish Infantry (4);
- Kostomuksha: 1 Artillery (2);
- Bordeaux: 3-step Infantry (3);
- Paris: 1 Elite Tank (3), 1 Air (1);
- Bergen: 3-step Infantry (3);
- Oslo: 3-step Infantry (3);
- Trondheim: 3-step Fort (1);
- Narvik: 3-step Fort (1), 4-step Infantry (1);
- Copenhagen: 3-step Infantry (1);
- Nantes: 4-step Fort (1);
- Lille: 4-step Fort (1), 3-step Infantry (3);
- Brussels: 4-step Fort (2), 1 Air (4);
- The Hague: 3-step Fort (1), 3-step Infantry (3);
- Hamburg: 4-step Fort (2), 3-step Infantry (3);
- Essen: 4-step Fort (1), 1 Artillery (1);
- Berlin: 4-step Fort (2);
- Königsberg: 4-step Fort (1);
- Bucharest: 3-step Fort (1), 1 3-step Romanian Infantry (3);
ITALY (At war) Economic Power: 15 (includes Yugoslavia). Strategic Power: 1 (Rome) − cannot increase. Allowable Builds: None.
- Western Med Sea: 1 Sub (3), 1 Opposition Disc;
- Tyrrhenean Sea: 1 HS (3), 2 LS (3), 1 Sub (3), 3 Opposition Discs and 1 Control Discs;
- Central Med Sea: 1 HS (3), 1 LS (3), 1 Sub (3), 3 Opposition Discs;
- Aegean Sea: 1 HS (3), 1 LS (3), 2 Opposition and 1 Control Discs;
- Eastern Med: 1 Opposition Disc;
- Adriatic Sea: 1 CV (1);
- Zagreb: 1 Infantry (2);
- Albania: 1 Infantry (2);
- Milan: 1 Infantry (3), 1 Air (2);
- Rome: 1 Artillery (2);
- Naples: 1 Infantry (2);
- Sicily: 1 Air (2);
- Sardinia: 1 Infantry (2);
- Sirte: 1 Infantry (3);
- Tripoli: 1 Infantry (1), 1 Tank (3), 1 Artillery (2).
1943: Totaler Krieg
Starts: Spring 1943, Axis Land Phase. Ends: Fall 1943, Allied Final Phase. Supply: All Units are in Supply. Bodies of Water: All Active. War Status: following Nations are deployed and at war. Force Pool Additions: none.
− ALLIES −
Poland, Denmark, Norway, the Netherlands, Belgium, Yugoslvia and Greece surrendered. France asked for Armistice and Vichy France (Axis Minor) was created.
Controlled Territories: USA, all Blue Land Areas plus Morocco, Algeria, Lebanon, Syria, Tripoli, Sirte, Gazala, Tobruk and Benghazi.
USA (At War) Economic Power: 30. Strategic Power: shares British Strategic Power. Allowable Builds: 1 Elite Infantry, 1 Tank, 1 Elite Artillery, 1 Elite Air.
- USA: 1 Airborne (1), 1 Elite Tank (1), 1 Tank (1), 1 Artillery (1);
- US Coastal Water: 1 CV (2), 1 HS (2), 1 LS (1);
- Central Med: 1 HS (4), 2 LS (4), 1 Sub (3), 1 blue Opposition Disc;
- Plymouth: 1 Infantry (4), 1 Air (4), 1 Air (1);
- Casablanca: 1 Infantry (1);
- Bone: 1 Infantry (3), 1 Artillery (4), 1 Air (3).
GREAT BRITAIN (At war) Economic Power: 40 (includes Casablanca). Strategic Power: 5 (London, Gibraltar, Cairo, Mosul, Abadan). Allowable Builds: None.
- Northern Atlantic: 2 LS (3), 1 Control Disc;
- Norwegian Sea: 1 HS (4), 1 Sub (3);
- North Sea: 1 Opposition and 1 Control Discs;
- The Channel: 1 CV (4), 1 HS (4), 1 HS (4), 1 Opposition and 1 Control Discs;
- Central Atlantic: 1 CV (4), 2 LS (4), 1 Opposition and 1 Control Discs;
- Southern Atlantic: 3 LS (4), 1 Control Disc;
- Indian Ocean: 1 LS (4);
- Eastern Med: 1 HS (4), 2 Opposition and 1 Control Discs;
- Western Med: 1 HS (4), 1 Sub (4);
- Alboran Sea: 1 LS (3), 1 Opposition and 1 Control Discs;
- Mosul: 1 Infantry (2);
- Abadan: 1 Infantry (2);
- Damascus: 1 Artillery (1);
- Tobruk: 1 Air (3);
- Bengazhi: 1 Infantry (4);
- Tripoli: 1 Infantry (4), 1 Tank (4), 1 Artillery (4), 1 Air (2);
- London: 1 Fort (4), 1 Infantry (4), 1 Tank (4), 1 Artillery (4);
- Malta: 1 Fort (2);
- Gibraltar: 1 Fort (2);
- Belfast: 1 Airborne (1);
- Liverpool: 1 Elite Air (1), 1 Air (4).
SOVIET UNION (At war) Economic Power: 60. Strategic Power: 6 (Moscow, Murmansk, Leningrad, Gorki, Stalingrad and Baku). Controlled Territories: all Red Land Areas except Kostomuksha, Petrozavodsk, Novgorod, Minsk, Smolensk, Pinsk, Gomel, Kiev, Kharkov, Odessa, Dnipropetrovsk, Stalino, Krasnodar, Simferopol and Sevastopol. Allowable Builds: 1 Infantry, 1 Tank, 1 Artillery, 1 LS, 1 Sub.
- White Sea: 1 LS (1);
- Northern Baltic: 1 HS (1), 1 Sub (1), 1 Opposition and 1 Control Discs;
- Eastern Black sea: 1 HS (1);
- Murmansk: 3-step Fort (3), 1 Infantry (2);
- Kandalaksha: 3-step Fort (3), 1 Infantry (2);
- Tikhvin: 3-step Fort (3), 1 Infantry (2);
- Velikie Luki: 1 Infantry (2), 1 Artillery (2);
- Leningrad: 4-step Fort (4), 1 Artillery (2);
- Kalinin: 1 Infantry (2);
- Moscow: 4-step Fort (4), 2 Elite Artillery (3), 1 Air (3);
- Tula: 4-step Fort (4), 1 Infantry (2), 1 Artillery (2), 1 Tank (2);
- Kursk: 3-step Fort (3), 1 Elite Infantry (3), 1 Elite Tank (3), 1 Elite Artillery (3);
- Voronezh: 1 Infantry (2), 1 Artillery (2), 1 Tank (2), 1 Air (2);
- Rostov: 1 Infantry (2), 1 Tank (2), 1 Air (2);
- Stavropol: 1 Tank (2);
- Sukhumi: 1 Infantry (2);
- Batumi: 3-step Fort (3);
- Yerevan: 3-step Fort (3);
- Baku: 3-step Fort (3).
− AXIS −
East Front Blitz Disc available.
Controlled Territories: all Black, Grey and Yellow Land Areas except Tripoli, Sirte, Gazala, Benghazi and Tobruk, but plus Tunis, Corsica, Metropolitan Vichy France, Poland, Denmark, Norway, the Netherlands, Belgium, Yugoslavia, Greece, non-Vichy France (Paris, Nantes, Bordeaux, Lille and Strasbourg), the Baltic States and the following Red Areas: Kostomuksha, Petrozavodsk, Novgorod, Minsk, Smolensk, Pinsk, Gomel, Kiev, Kharkov, Odessa, Dnipropetrovsk, Stalino, Krasnodar, Simferopol and Sevastopol.
Axis units by location:
- Paris: 1 Elite Tank (3), 1 Artillery (2), 1 Air (3);
- Nantes: 3-step Fort (1);
- Bordeaux: 1 3-step Infantry (1);
- Lille: 4-step Fort (2), 1 3-step Infantry (1);
- Brussels: 4-step Fort (2), 1 Air (4);
- The Hague: 3-step Fort (1), 1 Elite Infantry (4);
- Hamburg: 4-step Fort (2), 1 3-step Infantry (1);
- Essen: 4-step Fort (1);
- Berlin: 4-step Fort (2);
- Königsberg: 4-step Fort (2);
- Novgorod: two 4-step Infantry (4), 1 Airborne (3);
- Minsk: 4-step Infantry (4), 1 Tank (3), 1 Artillery (3), 1 Air (3);
- Smolensk: 4-step Fort (2), 4-step Infantry (4), 1 Artillery (4);
- Gomel: 4-step Infantry (4), 1 Tank (4), 1 Artillery (3), 1 Air (3);
- Kharkov: 4-step Infantry (4), 1 Elite Tank (4), 1 Artillery (4), 1 Elite Air (4);
- Stalino: 4-step Infantry (4), 1 Tank (4), 1 Artillery (4), 1 Air (3);
- Krasnodar: 4-step Infantry (4);
- Sevastopol: 1 3-step Infantry (1);
- Athens: 1 3-step Infantry (3);
- Warsaw: 1 Tank (2);
- Riga: 1 Tank (2).
VICHY FRANCE (At war)
- Marseille: 1 Fort (1);
- Tunis: 1 Fort (1).
OTHER AXIS MINORS (All at war) Bulgaria, Finland, Hungary and Romania.
GERMANY (At war) Economic Power: 70 (includes Poland, Norway, Paris, Romania, Greece, Kiev, Dnipropetrovsk and Stalino). Strategic Power: 7 (Berlin, Warsaw, Narvik, Paris, Ploesti, Athens and Kiev). Allowable Builds: 3 Subs, 1 Hungarian Infantry, 1 4-step Romanian Infantry.
- Central Atlantic: 2 Subs (3);
- Norwegian Sea: 1 LS (3), 1 Opposition Disc;
- Southern Baltic: 2 HS (3), 1 LS (3), 2 Opposition and 1 Control Discs;
- Tunis: 1 Elite Tank (2);
- Sofia: 1 Bulgarian Infantry (4);
- Thessaloniki: 1 Bulgarian Infantry (3);
- Bucharest: 3-step Fort (1), 1 Romanian Infantry (3), 1 Romanian Artillery (1), 1 Romanian Air (1);
- Odessa: 1 Romanian Infantry (3);
- Belgrad: 1 Hungarian Infantry (1);
- Budapest: 1 Hungarian Infantry (3);
- Helsinki: 3-step Fort (1), 1 Finnish Air (2);
- Western Karelia: 1 Finnish Infantry (4), 1 Finnish Artillery (3);
- Petrozavodsk: 1 Finnish Infantry (4);
- Petsamo: 1 4-step Infantry (4);
- Kostomuksha: 1 4-step Infantry (4);
- Narvik: 3-step Fort (2);
- Bergen: 3-step Fort (1);
- Oslo: 1 3-step Infantry (1);
- Trondheim: 3-step Fort (1);
- Copenhagen: 1 3-step Infantry (1).
ITALY (At war) Economic Power: 20 (includes Marseille and Yugoslavia). Strategic Power: 1 (Rome) − cannot increase. Allowable Builds: 1 CV, 2 HS, 2 LS, 1 Sub, 3 Infantry.
- Western Med Sea: 1 Sub (3), 2 Opposition Discs;
- Tyrrhenean Sea: 1 HS (3), 1 LS (3), 1 Sub (3), 4 Opposition and 1 Control Discs;
- Central Med Sea: 3 Opposition Discs;
- Aegean Sea: 1 LS (3), 2 Opposition and 1 Control Discs;
- Eastern Med: 1 Opposition Disc;
- Milan: 1 Air (2);
- Rome: 1 Artillery (2), 1 Air (2);
- Naples: 1 Artillery (1);
- Sicily: 1 Infantry (1);
- Sardinia: 1 Infantry (3);
- Albania: 1 Infantry (1);
- Crete: 1 Infantry (1);
- Tunis: 1 Tank (1).
1944: Gotterdammerung
Starts: Spring 1944, Allies Land Phase. Ends: Fall 1945, Allied Final Phase. Supply: All Units are in Supply. Bodies of Water: All Active. War Status: following Nations are deployed and at war. Force Pool Additions: none.
− ALLIES −
Poland, Denmark, Norway, the Netherlands, Belgium, Yugoslvia and Greece surrendered. France asked for Armistice and Vichy France (At War Axis Minor) was created.
Controlled Territories: USA, all Blue Land Areas plus Morocco, Algeria, Tunisia, Corsica, Lybia, Lebanon, Syria, Sicily, Sardinia and Naples.
In the Med Front, garrison requirements for the British are no more needed (Italy surrendered).
West and Med Front Blitz Disc Available.
USA (At War) Economic Power: 40. Strategic Power: shares British Strategic Power. Allowable Builds: none.
- USA: 1 Infantry (4);
- US Coastal Water: 1 CV (4), 1 LS (4), 1 Sub (4);
- Central Atlantic: 2 HS (4), 2 LS (4), 1 blue Opposition Disc and 1 blue Control Disc;
- Plymouth: 1 Airborne (3), 1 Elite Air (4), 2 Air (4);
- Liverpool: 1 Elite Infantry (4), 1 Elite Tank (4), 1 Tank (4), Elite Artillery (4);
- Naples: 1 Infantry (4), 1 Tank (4), 1 Artillery (4);
- Sardinia: 1 Infantry (4), 1 Artillery (4), 1 Air (4).
GREAT BRITAIN (At war) Economic Power: 40 (includes Casablanca). Strategic Power: 5 (London, Gibraltar, Cairo, Mosul, Abadan). Allowable Builds: None.
- Northern Atlantic: 3 LS (4), 1 Control Disc;
- Norwegian Sea: 1 CV (4), 1 HS (4), 1 LS (4);
- North Sea: 1 Opposition and 1 Control Discs;
- The Channel: 2 HS (4), 1 LS (4), 1 Opposition and 1 Control Discs;
- Southern Atlantic: 1 CV (4), 2 LS (4), 1 Control Disc;
- Indian Ocean: 1 LS (4);
- Eastern Med: 1 Sub (4), 2 Opposition and 1 Control Discs;
- Thyrrenian Sea: 1 HS (4), 3 Opposition and 1 Control Discs;
- Central Med: 2 Opposition and 1 Control Discs;
- Western Med: 1 Sub (4), 2 Opposition and 1 Control Discs;
- Alboran Sea: 1 LS (4), 1 Opposition and 1 Control Discs;
- Naples: 1 Infantry (4);
- Sardinia: 1 Air (4);
- Manchester: 2 Infantry (4), 2 Artillery (2);
- London: 1 Fort (4), 1 Airborne (3), 1 Elite Air (4), 1 Air (4);
- Malta: 1 Fort (2);
- Gibraltar: 1 Fort (2);
- Glasgow: 1 Infantry (4), 2 Tanks (4), 1 Artillery (4);
- Belfast: 1 Infantry (4), 1 Air (4).
SOVIET UNION (At war) East Front Blitz Disc Available. Economic Power: 75. Strategic Power: 7 (Moscow, Murmansk, Leningrad, Gorki, Stalingrad, Kiev and Baku). Controlled Territories: all Red Land Areas except Kostomuksha, Petrozavodsk, Minsk, Pinsk, Odessa, Simferopol and Sevastopol. Allowable Builds: none.
- White Sea: 1 LS (2);
- Northern Baltic: 1 HS (2), 1 LS (2), 1 Sub (2), 1 Opposition and 1 Control Discs;
- Eastern Black sea: 1 HS (2), 1 Sub (2);
- Murmansk: 3-step Fort (3), 1 Infantry (4);
- Kandalaksha: 3-step Fort (3), 1 Infantry (4);
- Tikhvin: 3-step Fort (3), 1 Infantry (4);
- Novgorod: 1 Infantry (4);
- Leningrad: 4-step Fort (4), 1 Artillery (4);
- Veliki Luki: 1 Infantry (4), 1 Elite Infantry (3), 1 Artillery (4);
- Smolensk: 1 Infantry (4), 1 Elite Artillery (3), 1 Elite Tank (3), 1 Air (3);
- Moscow: 4-step Fort (4), 1 Air (3), 1 Tank (3);
- Tula: 4-step Fort (4);
- Gomel: 1 Infantry (4), 1 Elite Infantry (3); 1 Elite Tank (3), 1 Tank (3);
- Kiev: 3-step Fort (1), 1 Infantry (4), 1 Tank (3), 1 Artillery (4);
- Dnipropetrovsk: 1 Infantry (4), 1 Tank (3), 1 Artillery (4), 1 Elite Artillery (3);
- Stalino: 1 Infantry (4), 1 Tank (3), 1 Artillery (4), 1 Elite Artillery (3);
- Krasnodar: 1 Air (3);
- Batumi: 3-step Fort (3);
- Yerevan: 3-step Fort (3);
- Baku: 3-step Fort (3).
− AXIS −
Controlled Territories: all Black and Grey plus Milan, Rome, Metropolitan Vichy France, Poland, Denmark, Norway, the Netherlands, Belgium, Yugoslavia, Greece, non-Vichy France (Paris, Nantes, Bordeaux, Lille and Strasbourg), the Baltic States and the following Red Areas: Kostomuksha, Petrozavodsk, Minsk, Pinsk, Odessa, Simferopol and Sevastopol.
AXIS MINORS (All at war) Bulgaria, Finland, Hungary, Romania and Vichy France.
GERMANY (At war) Economic Power: 75 (includes Poland, Norway, Paris, Romania, Greece, Marseille, Rome and Milan). Strategic Power: 7 (Berlin, Warsaw, Narvik, Paris, Ploesti, Athens and Rome). Allowable Builds: none.
- Central Atlantic: 2 Subs (3);
- Southern Atlantic: 1 Sub (3);
- Norwegian Sea: 1 HS (2), 1 LS (2), 1 Sub (2), 1 Opposition Disc;
- Southern Baltic: 1 HS (2), 1 LS (2), 1 Sub (2), 2 Opposition and 1 Control Discs;
- Rome: 4-step Infantry (3), 1 Artillery (3);
- Milan: 4-step Infantry (3), 1 Air (3);
- Sofia: 1 Bulgarian Infantry (4);
- Thessaloniki: 1 Bulgarian Infantry (3);
- Bucharest: 3-step Fort (1), 1 Romanian Infantry (3), 1 Romanian Artillery (1), 1 Romanian Air (1);
- Zagreb: 1 Hungarian Infantry (1);
- Belgrad: 1 Hungarian Infantry (1);
- Albania: 3-step Infantry (1);
- Budapest: 1 Hungarian Infantry (3);
- Helsinki: 3-step Fort (1), 1 Finnish Air (2);
- Western Karelia: 1 Finnish Infantry (3), 1 Finnish Artillery (3);
- Petrozavodsk: 1 Finnish Infantry (3);
- Petsamo: 1 4-step Infantry (4);
- Kostomuksha: 3-step Infantry (3);
- Narvik: 3-step Fort (3);
- Bergen: 3-step Fort (2);
- Oslo: 1 3-step Infantry (1);
- Trondheim: 3-step Fort (2);
- Copenhagen: 1 3-step Infantry (1);
- Paris: 4-step Infantry (4), 1 Elite Tank (3), 1 Artillery (3), 1 Air (3);
9.0 Campaigns
When playing any of the two Campaigns, on top of the other conditions, a Unit − during the Production Phase − may be reinforced overseas only if it is:
- A Ground or an Air Unit, and all the Sea Zones between the Unit and the main Supply Source are friendly controlled;
- A Naval Unit, and all the Sea Zones − except the Sea Zone it occupies − between the Unit and the main Supply Source are friendly controlled. The Sea Zone the Naval Unit occupies may be either friendly controlled, contested or enemy controlled.
Example: In Fig. 1, all the in supply Axis Units may also be reinforced, as they are in the above specified conditions.
In any later Allied Turn, the British Fort in Malta can be reinforced only if the British control all the Sea Zones in any of the two following paths: across the Gibraltar Strait (The Channel/North Atlantic, Central Atlantic, Alboran Sea, Western and Central Med) or around the Cape of Good Hope (The Channel/North Atlantic, Central and South Atlantic, Indian Ocean, Eastern and Central Med).
Campaign Setups
The two Campaigns are set up as follows (the 1941 setup is printed first, then the 1939 Campaign).
1941: Barbarossa to Berlin
Starts: Spring 1941, Axis Land Phase. Supply: All Units are in Supply. Bodies of Water: All Active. War Status: Except USA (Neutral and not deployed) and Vichy France (Deployed Neutral Axis Minor), all following Nations are deployed and at war. Surprise: The Axis has just declared war on Yugoslavia and the Soviet Union (both are Surprised). Force Pool Additions: as shown below (a graphic keyed to the 1942, 1943 and 1944 colored circles).
− ALLIES −
Poland, Denmark, Norway, the Netherlands and Belgium surrendered. France asked for Armistice and Vichy France (Neutral Axis Minor) was created.
USA (Neutral until Winter 1942) Economic Power: 0 (once at war: 20 − 30 − 40). Strategic Power: 0 (once at war: it shares British Strategic Power). Controlled Territories: USA.
WINTER 1942: Initial Deployment, all at full strength:
- USA: 1 Infantry;
- US Coastal Water: 1 CV, 1 HS, 1 LS, 1 Sub.
Allowable Builds: 1 HS, 2 LS, 2 Infantry, 2 Tanks, 2 Artillery, 3 Air.
GREAT BRITAIN (At war) Economic Power: 45 (includes Greece and Yugoslavia). Strategic Power: 6 (London, Gibraltar, Cairo, Mosul, Abadan and Athens). Controlled Territories: all Blue Land Areas plus Gazala, Tobruk, Benghazi, Greece and Yugoslavia. Allowable Builds: None.
- The Channel: 1 CV (3), 1 HS (3), 1 LS (3), 1 Sub (3), 1 Opposition Disc, 1 Control Disc;
- North Sea: 1 CV (3), 1 HS (3), 1 LS (3), 1 Opposition Disc, 1 Control Disc;
- Western Med: 1 Sub (3);
- Central Med: 1 LS (3), 3 Opposition Discs;
- Eastern Med: 1 HS (3), 1 LS (3), 3 Opposition Discs, 1 Control Disc;
- Aegean Sea: 2 Opposition Discs;
- Alboran Sea: 1 HS (3), 1 LS (3), 1 Opposition Disc, 1 Control Disc;
- Indian Ocean: 1 LS (3);
- North Atlantic: 1 LS (3);
- Central Atlantic: 1 LS (3), 1 Opposition Disc, 1 Control Disc;
- South Atlantic: 1 LS (3);
- Malta: 3-step Fort (2);
- Gibraltar: 3-step Fort (2);
- Glasgow: 1 Infantry (2);
- London: 4-step Fort (2), 1 Infantry (2), 1 Artillery (2), 1 Air (2);
- Plymouth: 1 Artillery (2), 1 Air (2);
- Benghazi: 1 Infantry (2);
- Crete: 1 Infantry (2);
- Thessaloniki: 1 Artillery (2);
- Alexandria: 1 Tank (2);
- Tobruk: 1 Infantry (2);
- Mosul: 1 Tank (2);
- Cairo: 1 Air (2).
GREECE (at war)
- Athens: 1 Greek Infantry (1);
- Trikala: 2 Greek Infantry (one at 3, one at 4).
YUGOSLAVIA (At war, Surprised)
- Belgrad: 1 Yugoslavian Infantry (2) and 1 Yugoslavian Artillery (2).
SOVIET UNION (At war, Surprised) Economic Power: 75. Strategic Power: 7 (Moscow, Murmansk, Leningrad, Gorki, Stalingrad, Kiev and Baku). Controlled Territories: all Red Land Areas plus Western Karelia, Baltic States, Eastern Poland and Bessarabia. Allowable Builds: 1 Sub.
The three Soviet Elite Artillery marked with a "squared 1" are deployed at 4-step, one each in Molotov, Kazan and Kuybyshev, and cannot move until Summer 1941.
- White Sea: 1 LS (2);
- Northern Baltic: 1 HS (2), 1 LS (2), 1 Sub (2), 1 Opposition Disc, 1 Control Disc;
- Western Black sea: 1 HS (2);
- Murmansk: 3-step Fort (1), 1 Infantry (3);
- Kostomuksha: 3-step Fort (1), 1 Infantry (3);
- Viipuri: 3-step Fort (at 1), 1 Infantry (3);
- Tallinn: 1 Infantry (3);
- Leningrad: 4-step Fort (2) and 1 Artillery (3);
- Riga: 1 Infantry (3), 1 Tank (3), 1 Artillery (3);
- Vilnius: 1 Infantry (3), 1 Tank (3), 1 Artillery (3), 1 Air (3);
- Lvov: 1 Infantry (3), 1 Tank (3), 1 Artillery (3), 1 Air (3);
- Bessarabia: 1 Infantry (3), 1 Artillery (3), 1 Air (3);
- Moscow: 4-step Fort (2) and 1 Tank (3);
- Kiev: 1 Tank (3);
- Minsk: 1 Infantry (3);
- Kharkov: 1 Infantry (3);
- Sevastopol: 4-step Fort (2);
- Odessa: 3-step Fort (1);
- Batumi: 3-step Fort (1);
- Yerevan: 3-step Fort (1);
- Baku: 3-step Fort (1).
− AXIS −
East and Med Front Blitz Discs available.
Controlled Territories: all Black, Grey and Yellow Land Areas except Western Karelia, Bessarabia, Gazala, Benghazi and Tobruk, but plus Western Poland, Denmark, Norway, the Netherlands, Belgium and non-Vichy France (Paris, Nantes, Bordeaux, Lille and Strasbourg).
VICHY FRANCE (Neutral Axis Minor) Capital is Vichy. Controls Metropolitan Vichy France, Corsica, Morocco, Algeria, Tunisia, Lebanon and Syria. Axis cannot enter Vichy France untill USA declares war to Vichy France.
- Marseille: 1 Fort (2);
- Tunis: 1 Fort (1).
OTHER AXIS MINORS (All at war) Finland, Bulgaria, Hungary and Romania.
GERMANY (at war) Economic Power: 50 (includes Poland, Norway, Paris and Romania). Strategic Power: 5 (Berlin, Warsaw, Narvik, Paris and Ploesti). Allowable Builds: one 3-step Bulgarian Infantry.
- Northern Atlantic: 1 Sub (3);
- Central Atlantic: 1 Sub (3);
- Southern Atlantic: 1 Sub (3);
- Norwegian Sea: 1 HS (3), 1 LS (3), 1 Sub (3), 1 Opposition Disc, 1 Control Disc;
- Southern Baltic: 1 HS (3), 1 LS (3), 2 Opposition Discs, 1 Control Disc;
- Helsinki: 3-step Fort (1), 1 Finnish Inf (4); 1 Finnish Artillery (3); 1 Finnish Air (2);
- Oulu: 1 Finnish Infantry (4);
- Bordeaux: 3-step Infantry (3);
- Paris: 4-step Infantry (4);
- Bergen: 3-step Infantry (3);
- Oslo: 3-step Infantry (3);
- Trondheim: 3-step Infantry (3);
- Copenhagen: 3-step Infantry (3);
- Nantes: 3-step Infantry (3);
- Lille: 4-step Fort (2) and 1 Artillery (4);
- Brussels: 4-step Fort (2) and 1 Air (4);
- The Hague: 3-step Fort (1);
- Hamburg: 4-step Fort (2), one 3-step Infantry (3);
- Berlin: 4-step Fort (2);
- Koenigsberg: 4-step Fort (2), two 4-step Infantry (4), 1 Artillery (4);
- Budapest: 1 Tank (4), 1 Air (4), 2 Hungarian Infantry (3);
- Cluj: 1 Hungarian Infantry (3);
- Sofia: 3-step Fort (1), 1 Airborne (3), 1 Artillery (4), one 4-step Bulgarian Infantry (4);
- Bucharest: 3-step Fort (1), 1 4-step Infantry (4), 1 Romanian 4-step Infantry (4), 1 Romanian Artillery (3);
ITALY (at war) Economic Power: 10. Strategic Power: 1 (Rome) − cannot increase. Allowable Builds: 1 CV.
- Western Med Sea: 1 Opposition Disc;
- Tyrrhenean Sea: 1 HS (3), 1 LS (3), 1 Sub (3), 3 Opposition Discs, 1 Control Disc;
- Central Med Sea: 1 HS (3), 1 LS (3), 1 Sub (3), 1 Opposition Disc;
- Aegean Sea: 1 HS (3), 1 LS (3), 1 Sub (3);
- Adriatic Sea: 1 LS (3);
- Milan: 1 Infantry (2);
- Rome: 1 Tank (2);
- Naples: 1 Infantry (2), 1 Air (2);
- Sicily: 1 Infantry (2), 1 Air (2);
- Sardinia: 1 Infantry (2);
- Albania: 1 Infantry (2), 1 Artillery (2);
- Sirte: 1 Infantry (2);
- Tripoli: 1 Infantry (2), 1 Artillery (2).
1939: Rise and Fall of the Black Swan
Starts: Summer 1939, Axis Land Phase. Supply: All Units are in Supply. Bodies of Water: All are inactives. War Status: Germany is at war with Poland. France, Great Britain, Italy and the Soviet Union are Neutrals and deployed. All other Nations are Neutral and not deployed. Surprise: Poland is Surprised. Force Pool Additions: as shown below (a graphic keyed to the 1941, 1942, 1943 and 1944 colored circles).
− ALLIES −
France and Great Britain must declare war on Germany in their next Production Phase. This activates the Atlantic Body of Water (Great Britain and Germany deploy Opposition and Control Discs accordingly).
POLAND (At war, Surprised)
- Warsaw: 2 Polish Inf (one at 3 and one at 4), 1 Polish Art (at 3), 1 Polish Air (at 2).
USA (Neutral until Winter 1942) Economic Power: 20 in 1942, 30 in 1943, 40 in 1944. Strategic Power: Shares British Strategic Power from 1942. Controlled Territories: USA.
WINTER 1942: Initial Deployment, all at full strength:
- USA: 1 Infantry;
- US Coastal Water: 1 CV, 1 HS, 1 LS, 1 Sub.
Allowable Builds: 1 HS, 2 LS, 2 Infantry, 2 Tanks, 2 Artillery, 3 Air.
FRANCE (Neutral) If France has not fallen by the end of Fall 1941, the Western Allies win the game. Economic Power: 15. Strategic Power: 1 (Paris) − cannot increase. Controlled Territories: all Green Land Areas. Maginot Line: the two French Forts are both deployed (at 1) in Strasbourg. Allowable Builds: 1 CV, 1 HS, 1 LS, 1 Sub, 1 Infantry, 1 Tank, 1 Artillery, 2 Air.
- Western Med: 1 HS (2), 1 LS (2);
- Central Atlantic: 1 LS (2);
- Strasbourg: 2 Maginot Forts (1);
- Paris: 1 Tank (1);
- Marseille: 1 Artillery (1);
- Algiers: 1 Infantry (1);
- Tunis: 1 Air (1);
- Damascus: 1 Infantry (1).
GREAT BRITAIN (Neutral) Economic Power: 35. Strategic Power: 5 (London, Gibraltar, Cairo, Mosul, and Abadan). Controlled Territories: all Blue Land Areas. Allowable Builds: 1 CV, 1 HS, 1 LS, 1 Sub, 3 Forts, 1 Infantry, 1 Tank, 1 Artillery, 1 Air).
- The Channel: 1 LS (2), 1 Sub (2);
- North Sea: 1 CV (2), 1 HS (2), 1 LS (2);
- Central Med: 1 LS (2);
- Eastern Med: 1 HS (2), 1 LS (2);
- Alboran Sea: 1 HS (2);
- Indian Ocean: 1 LS (2);
- North Atlantic: 2 LS (2);
- South Atlantic: 1 LS (2);
- Belfast: 1 Infantry (1);
- London: 1 Infantry (1), 1 Artillery (1) and 1 Air (1);
- Plymouth: 1 Infantry (1), 1 Tank (1);
- Alexandria: 1 Air (1);
- Mosul: 1 Infantry (1);
- Cairo: 1 Artillery (1).
WESTERN MINORS (Neutrals non deployed) An Axis DoW must be directed against any of the following three couples:
- Denmark and Norway;
- Belgium and the Netherlands;
- Yugoslavia and Greece*.
* The Axis can declare war to Yugoslavia and Greece only if Denmark, Norway, Belgium and the Netherlands have fallen in a previous Season, and Bulgaria has joined the Axis in this or in any previous Season.
DENMARK (Neutral non deployed)
- Copenhagen: 1 Danish Inf (at 1).
NORWAY (Neutral non deployed)
- Oslo: 1 Norwegian Inf (at 2).
NETHERLANDS (Neutral, non deployed)
- The Hague: 1 Dutch Infantry (at 3).
BELGIUM (Neutral, non deployed)
- Brussels: 1 Belgian Infantry (at 4), 1 Belgian Artillery (at 2), 1 Belgian Air (at 1).
GREECE (Neutral, non deployed)
- Athens, Trikala and Thessaloniki: 1 Greek Infantry (one at 1, one at 3, one at 4) randomly drawn.
YUGOSLAVIA (Neutral, non deployed)
- Belgrad: 1 Yugoslavian Infantry (2), 1 Yugoslavian Artillery (2).
SOVIET UNION (Neutral) Economic Power: Starts at 20. Raises at 40 once Soviet Limited Wars are completed and territories properly occupied. Raises at 75 once at war with the Axis. Strategic Power: 7 (Moscow, Murmansk, Leningrad, Gorki, Stalingrad, Kiev and Baku). Controlled Territories: all Red Land Areas.
Molotov-Ribbentrop Pact and Polish Partition: In the first Allied Production Phase that Warsaw is Axis controlled, Eastern Poland (Vilnius and Lvov) becomes Soviet controlled and both Land Areas must be occupied by four Soviet Units each. Additionally, each Season that Königsberg, Warsaw and Lublin are occupied by at least two Axis Units each, the Soviets must give 5 of their 20PPs to Germany. The 5PPs are first collected and then "sent" by the Soviets during their turn. The Germans will spend these 5 PPs in their next turn, even if they have just declared war to the Soviet Union.
Winter 1940: Western Karelia becomes Soviet controlled and must be occupied by at least two Soviet Units. Additionally, Petsamo − even if it remains part of Finland − no Unit may occupy/move through either normally or by the Arctic Trail until the Axis and the Soviet Union are at war.
Spring 1940: Baltic States (Riga and Tallinn) become Soviet controlled and must be occupied by at least four Units (at least three in Riga and one in Tallinn).
Summer 1940: Bessarabia become Soviet controlled and must be occupied by three Soviet Units.
From Fall 1940: Each Season that Eastern Poland, Western Karelia, Baltic States, and Bessarabia are properly occupied, Soviet Production raises from 20 to 40. Of these 40, 5PPs are given to Germany if Königsberg, Warsaw and Lublin are occupied by two Axis Units each.
Nazi-Soviet War: if Germany declares war to the Soviet Union or viceversa, Soviet Production raises to 75 and no more PP must be given to Germany.
Germany may declare war to the Soviet Union anytime. This may cause the Great Patriotic War.
Great Patriotic War: if Germany declares war to the Soviet Union (but not vice-versa) and all the six above mentioned Land Areas are properly occupied at the moment of the attack, then the Soviet Union will pay 1 PP instead of 2PPs for each new Unit built for the remainder of the game.
The Soviet Union can declare war to Germany (and as a consequence to Italy and to the four Axis Minors) if one of the two conditions is met:
A. All Soviet Air, Navy and Ground Units − other than the Elite Infantry and Tanks − have been deployed on the mapboard and are at full strength;
B. After the fall of Poland, any of Koenigsberg, Warsaw and Lublin does not contain an Axis Unit.
Allowable Builds: 1 LS, 1 Sub, 2 3-step Forts, 6 Infantry, 2 Tanks, 5 Artillery.
The three Soviet Elite Artillery marked with a "squared 1" are deployed at 4-step, one each in Molotov, Kazan and Kuybyshev, and cannot move until Summer 1941.
- White Sea: 1 LS (1);
- North Baltic: 1 HS (1), 1 Sub (1);
- Western Black Sea: 1 HS (1);
- Murmansk: 3-step Fort (1), 1 Infantry (1);
- Leningrad: 4-step Fort (1), 1 Tank (1);
- Moscow: 4-step Fort (1), 1 Tank (1), 2 Air (1);
- Kiev: 1 Infantry (1), 1 Tank (1), 1 Air (1);
- Minsk: 1 Infantry (1);
- Kharkov: 1 Infantry (1);
- Sevastopol: 4-step Fort (1);
- Odessa: 3-step Fort (1);
- Batumi: 3-step Fort (1);
- Yerevan: 3-step Fort (1);
- Baku: 3-step Fort (1).
− AXIS −
East Front Blitz Disc available.
Axis Units cannot enter Vilnius or Lvov before the Soviet Union is at war.
Controlled Territories: all Black Land Areas.
GERMANY (at war) Economic Power: 30. Strategic Power: 1 (Berlin). Allowable Builds: All five 3-step Infantry, two Tanks, two Artillery and two Air.
All deployed German Infantry are 4-step Infantry (3).
- Norwegian Sea: 1 HS (2), 1 LS (2), 2 Sub (2);
- Southern Baltic: 1 HS (2), 1 LS (2), 2 Sub (2);
- Hamburg: 4-step Fort (1), 1 Infantry (3);
- Essen: 4-step Fort (1), 2 Infantry (3);
- Berlin: 4-step Fort (1), 1 Airborne (3), 1 Infantry (3), 1 Air (3);
- Königsberg: 4-step Fort (1), 2 Infantry (3), 1 Artillery (3);
- Munich: 1 Infantry (3), 1 Artillery (3), 1 Air (3);
- Breslau: 1 Infantry (3), 1 Tank (3), 1 Artillery (3), 1 Elite Air (3).
ITALY (neutral) No one can declare war to Italy. Italy can declare war only if Belgium and the Netherlands have fallen. Economic Power: 10. Strategic Power: 1 (Rome) − cannot increase. Controlled Territories: all Yellow Land Areas. Allowable Builds: 1 CV, 1 HS, 1LS, 1 Sub, 1 Infantry, 1 Tank, 1 Artillery, 1 Air.
- Tyrrhenean Sea: 1 HS (2), 1 LS (2), 1 Sub (2);
- Central Med Sea: 1 HS (2), 1 LS (2), 1 Sub (2);
- Adriatic Sea: 1 LS (2);
- Milan: 1 Air (1);
- Rome: 1 Artillery (1);
- Naples: 1 Infantry (1);
- Sicily: 1 Infantry (1);
- Sardinia: 1 Infantry (1);
- Albania: 1 Infantry (1);
- Tobruk: 1 Infantry (1);
- Tripoli: 1 Infantry (1).
AXIS MINORS (Bulgaria, Finland, Hungary, Romania: All Neutrals)
There are two ways the four Axis Minors may enter the war:
A. If the Soviet Union declares war to Germany, then Italy, Bulgaria, Hungary, Romania and Finland immediately join Axis;
B. Alternatively, the Season following the fall of France, during the Axis DoW sub-phase, Romania cedes Transylvania to Hungary, and both Nations join Axis. Then, the following Season, Bulgaria and Finland join Axis.
When an Axis Minor joins Axis:
- His Economic and Strategic Power is added to the German ones and;
- Some of his Units are immediately deployed at full strength, while some others are added to the German Force Pool and become Allowable Builds:
- Hungary: two 3-step Infantry in Budapest;
- Romania: one 4-step Infantry and one Artillery in Bucharest, one 3-step Infantry and one Air in Ploesti;
- Bulgaria: One 4-step Infantry in Sofia;
- Finland: One 4-step Infantry, one Artillery and one Air in Helsinki, one 4-step Infantry in Oulu.
Added to German Force Pool: One 3-step Hungarian Infantry, One 3-step Romanian Infantry and one 3-step Bulgarian Infantry.