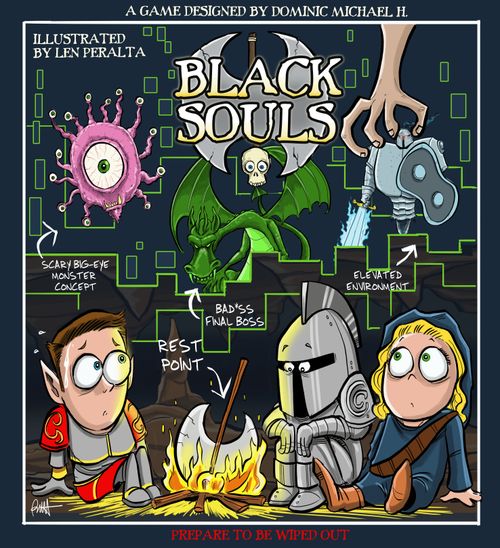
Black Souls
Black Souls Rulebook
Table of Contents
Table of Contents
Component List
- Meeples x 6
- Drawbag x 1
- Design Board x 6
- Cubes x 120 (30 x 4 colors)
- Cave Assets x 26
- Dungeon Assets x 26
- Outdoor Assets x 26
- Shrine Tokens x 20
- Tavern Tokens x 20
- Well of Illusions x 6
- Haunted House x 6
- Altar of Power x 6
- Turn Order Cards x 2
- Bid Cards x 54 (9 x 6 players)
- Hack Cards x 6
- Quirk Cards x 25
- Party Cards x 12
- Reference Cards x 6
- Glitch Tokens x 20
- Die (1D6)
- AI Difficulty Total Tracker x 1 (Rahdo Variant Pg.9)
- Colorblind Tokens x 2 (Replace meeple color in case of rarer colorblind)
- UAT Scoreboards x 6
Set Up
-
Give each designer a (A) Design Board, a Meeple matching the pen color of their Design Board, a Hack Card and a set of Bid Cards. Place a (B) Scoreboard and Hack Card in front of each designer on the table with the black side face-up. Bid Cards are kept in hand, from values 0 to 8. Value 7 is only used for 5+ designer games. Place the 2 (C) Turn Order Cards in the middle. Later when turn order has been established for the turns, update your meeples by placing them over the numbers on these Turn Order Cards so you won't forget the sequence. There are two such cards so that you can always track the previous turn sequence, then update the new turn one meeple at a time by migrating over the meeples from that card over to the new one, and then back again for the next turn and so on. Give each designer 1 Well of Illusions Token, 1 Haunted House Token and 1 Altar of Power Token. Place the Shrine and Tavern Tokens in the middle to form a supply. Place all the tiles (also known as Assets moving forward) into the drawbag. This will be where the Assets are randomly drawn from later.
-
Shuffle all the (D) Quirk Cards facedown and randomly assign 3 to every designer, who then choose to keep 2 and discard 1 each. These are secret goals that designers can each fulfil by the end of the game. Designers may look at their own hidden Quirk Cards at any time. Only the assigned designer of a Quirk Card can complete it. Thematically, the cards represent the unique gaming preference of the playtesters for the session, and each designer has done a little research on what they are. Afterall, everyone really wants this job! If designers can appeal to their taste in gaming, they gain bonus brownie points when the playtesters write their feedback later.
-
Randomly take another 3 (E) Quirk Cards and place them face up in the middle of the play area. These are the public goals that can be fulfilled by anyone. Thematically, these are the commonly known preferences of the playtesters that everyone is aware of.
-
Each designer then forms an initial party of 4 (F) Cubes (one of each of the 4 colors - Red, Blue, White, Black) Then shuffle all the Party Cards facedown to form the (G) Party Deck and reveal the top card, one at a time. Each time, add the amount of Cubes depicted on the revealed card into each designer's party. (yes, all designers start with the same exact party mix) Stop drawing as soon as the parties have at least 10 Cubes each. There is a chance that a game may start with party sizes of 11 or 12, depending on the last card drawn. There is a limit of 5 Cubes per type in every designer's party at all times. Excess Cubes of the same type are returned to the supply. Thematically, this represents the initial playtesting party trying out the levels for the current session.
Black Souls is a video game about souls in the Underworld trying to fight their way back for another chance at life. If they are destroyed in this form, they become Lost Souls. As is typical of great video games, there are also character classes in Black Souls too. Each Cube is a 'playtester' trying the game as a specific class, with Red being a Fighter soul, Blue being a Mage soul, and White being a Healer soul. There is also a 4th color Black (yes we know Black isn't technically a real color) representing the most powerful souls - The Black Souls. These act as wild colors during the game!
Playing The Game
Black Souls is played in two phases - the Design Phase, followed by the Gameplay Phase. During Design Phase, the designers build up their individual game levels across 12 turns, ultimately filling up each Design Board with 12 different game tiles (also known as Assets). Once all Design Boards have been filled with 12 Assets, the Gameplay Phase occurs.
Design Phase
-
Place all Assets not on a designer's Design Board into the Drawbag, then randomly draw out Assets equal to the number of designers (for 2-designer games, still draw 3 Assets) Place them in the middle, known as the Asset Pool.
-
Designers then secretly select one of their Bid Cards (valued 0 - 8) and reveal them simultaneously. The highest value card played allows its owner to go first in selecting an Asset from the Asset Pool, followed by the next highest and so on. Place each designer's Meeple onto the empty Turn Order Card according to the new turn sequence, in case anyone forgets the turn order at any point. On each Bid Card, there is also a secondary effect that will trigger. These effects take place as soon as they are played, and always occur before any Asset is chosen. Bid Cards played are always open information for everyone in the game. Designers should place their first Bid Cards played onto the right end of their player board, in alignment with the graphic on the board. The second card played should go to the second space directly below the first, but overlapping the first card. Repeat for cards played in later turns.
-
After a designer has chosen an Asset from the Asset Pool, the new Asset is to be placed onto his Design Board with the values side face-up. The designer must place the new Asset on either Level 1, 2 OR 3 of his Design Board. On Levels 1 (the bottom tier) and 3 (the top tier) the Asset must be placed in sequence from left to right, always filling the leftmost available space first. If the designer places the new Asset on level 2 instead (the middle tier), then the Asset must be placed in order from right to left, always filling the rightmost available space first. There are 3 types of Assets - Cave, Dungeon, and Outdoor. Points are given to designers who can connect Assets of similar types together by placing them together. See the bottom diagram of this page and Pg.8 Level Fluidity for more details.
-
Repeat from step 1 again until all Design Boards have 12 Assets. Then the Gameplay Phase occurs.
(Diagram: In Example 1, the RED spots are where a designer can place his first Asset. In Example 2, it is turn 4 of the Design Phase and the designer can place his next Asset on any of the RED spots.)
(Diagram: In Example 1, the designer has made a connection of 7 Outdoor Assets. In Example 2, the designer has made a connection of 6 Outdoor Assets, as well as a connection of 5 Dungeon Assets - But he still only scores for the longest made.)
Tavern & Shrine Tokens
During the Gameplay Phase, when a party arrives at an Asset with a Tavern Token, the designer of that party may choose to add 1 Cube of any color (except Black) from the supply to his party. If a party arrives at an Asset with a Shrine Token instead, the designer of that party may choose to return one Lost Soul of his choice (again, no Black) It is also up to the designer to decide the order of whether to resolve the Asset's Threat first or to resolve the Token on it first.
There is a limit of ONE Token per Asset, and Special Assets can never have Tokens on them - Special Assets are basically Assets with any of the icons: Boss/ Merchant/ Shrine/ Tavern/ Treasure (more on Special Asset Reference Pg. 9)
Ties During Bidding
Clashing of Bid Cards is likely to be common, and is part of the game!
On a tie (more than 1 designer playing the same value Bid Card), all involved designers go last! (Even if they played a high value) On top of that, their Bid Cards' secondary effects do not trigger too! This is when a designer may use the Hack ability (more on Hack Pg. 7), which allows him to avoid losing the effect of his secondary effect during a tie. Among the tied designers, the play order follows the previous turn. If designer A and B tied, and designer B had her turn before A in the previous turn, she will continue to have her turn before A in this new turn. If designers tie in the first turn of the game, the play order ascends from the youngest first. The Bid Card value 3's secondary effect will always trigger, even if tied. If there are multiple ties across different values, the higher value ties go first before the lower value ties.
Bid Card Values 3 & 8
If a designer plays the Bid Card value 3, he takes all previously played Bid Cards back into hand. This card CANNOT be used if your previous Bid Card was a value 2 or 3 unless it is the last card in your hand. If you do so, its effects do not trigger and the only way you can get your played Bid Cards back is to use up your entire hand! Also, when a designer plays the Bid Card value 3, all OTHER designers must place their Assets face-down this turn! Face-down Assets can only be flipped back up in the Gameplay Phase, when their parties arrive at them. Otherwise, they remain on their side with no game values shown. The Bid Card value 3's effects always trigger, even if tied.
When Bid Card 8 is played, a designer may place one of his 3 special tokens onto his Asset this turn. The type of token to place is determined by the Asset type he is placing. He can place a Well of Illusions if he places a Cave, an Altar of Power if it is a Dungeon and a Haunted House if it is Outdoor. Every designer only has 1 token of each type, and cannot add more of the same token if they have already used theirs. See last page for more detail on these tokens' effects.
Hack Ability
Each designer can activate their Hack ability up to TWO times per game, which is represented by a double-sided card. When a designer clashes during the Design Phase, he can ignore the clash penalty and still activate his Bid Card's secondary ability as well as retain his Bid Card's number for turn order sequence. At the end of the game, each unused Hack grants 1 Design Point!
Gameplay Phase
-
In this phase, the playtesting parties will run through the levels just designed by the designers. Each designer takes their meeple from the Turn Order Track and places it at the bottom left of their Design Boards, where the first Asset on the first row is. These meeples represent the current position of the parties in the level. They will resolve the level one Asset at a time. Designers may simultaneously resolve the Assets on their own, or it could be fun to do it together one by one instead - your choice! If a party reaches a face-down Asset, flip it face-up now.
-
All Assets in the game have 3 values - The first value in red (known as the Fighter Threat) shows how many fighters will die in that Asset, the second in blue (Mage Threat) shows how many mages will die, the third in White (Healer Threat) shows how many healers will die. Designers must choose to resolve just ONE of the three Threat values in order to move on to the next Asset - to kill off the fighters, the mages OR the healers in their parties. The challenge of the game is to make clever decisions by balancing as much deaths in a party as possible, but still keep at least one alive to the very end. There is also a fourth value at the top right corner that shows the Difficulty of that Asset. Remember that Black Souls can be used as wild colors!
-
After a designer has resolved the Asset on which his Meeple is placed, move it over to the next Asset, following the arrow direction in the diagram below. Repeat from Step 2 again until either the party is wiped out or has resolved the 12th Asset. When that happens, the game has ended! See Page 8 for scoring.
After resolving the last Asset on level 1, all designers then move their Meeples up to level 2, starting from the rightmost Asset this time and progressing to the left - still resolving one Asset at a time. Finally when the last Asset of level 2 is resolved, all Meeples are moved up to level 3. The Assets are resolved from left to right on this final level.
Wiping out a Party
If a designer cannot resolve ANY of the three Threat values on his Asset because he lacks the correct amount of Cubes in his party, he must resolve the Threat where he is most able to fulfil, and any leftover Cubes not fulfilled must be carried over and resolved by the remaining colors of the designer's choice. If a designer ends up with no Cubes remaining, then his party has been wiped out. It is common for parties to be WIPED - such is the spirit of the game!
The Value X
On some Assets, you will see the occasional X for a Threat value. This means that you will lose ALL of that type of party members if you choose to resolve that Threat. If you had 4 Fighters and you chose to resolve a Red X, you would lose all 4 Fighters. Similarly if you had just 1 Fighter, and you chose to resolve the Red X, you would only lose that 1 Fighter. However there is a condition when choosing to resolve an X. You MUST first have at least 1 member alive of that type in your party to resolve an X. Hint: If you had none of that type, a single Black Soul can clear it for you since it is a wild color.
Solo Mode
In this mode, you will play against an AI one-on-one! You will need the 6-sided die provided in the game for this.
Design Phase
Choosing of Bid Cards: Select your Bid Card and play it, then roll the die (1D6) and refer to the following chart to see what the AI plays:
- Bid Value 1: AI may place a Tavern Token on its Asset this turn.
- Bid Value 2: AI may add a member to its party based on the top party card.
- Bid Value 3: AI causes you to place your Asset face-down this turn.
- Bid Value 4: AI adds an extra Asset to the pool before deciding which to pick.
- Bid Value 5: AI may add a member to its party based on the top party card.
- Bid Value 6: AI may place a Shrine Token on its Asset this turn.
- The AI will never play Bid Cards 0 and 8.
- The AI has unlimited Hacks, and always uses Hack whenever there is a clash. All of its effects always trigger.
- The AI can play any card (even same value cards multiple times in a row - example: 3 times of Bid Value 6)
Choosing Of Assets: The AI will always pick an Asset with a Tavern first, followed by a Shrine. If none are available, it will pick based on difficulty rating of the Asset using the following chart: (You may more easily track its Difficulty Total using the AI Difficulty Total Card provided)
Each cell gives the first-choice Difficulty; ↓ means then going downwards, ↑ means then going upwards; — means not applicable.
| Current Difficulty Total | Turn 1-2 | 3-4 | 5-6 | 7-8 | 9-10 | 11-12 |
|---|---|---|---|---|---|---|
| 0-5 | 4↓ | 5↓ | 5↓ | — | — | — |
| 6-9 | 3↓ | 3↓ | 5↓ | 5↓ | — | — |
| 10-14 | — | 3↓ | 3↓ | 5↓ | 5↓ | — |
| 15-19 | — | 1↑ |
Example: On Turn 6, if the AI's total Difficulty thus far is 12, it will pick an Asset with Difficulty of 3 as first choice, then going downwards to 2 and then 1.
Lastly if there are same-difficulty Assets to pick from, it will select based on the type where it can increase the longest connection on its Design Board so far. If there is no type of Asset that can distinctly give it a longer connection than the other types for that turn, the AI will pick based on a die roll: (1-2) Cave (3-4) Dungeon (5-6) Outdoor. If the rolled type is not available, simply reroll. This is also true if it has other tied choices to make, such as multiple Tavern Assets to choose from - roll the die. If there are multiple same-difficulty Assets of the same type, it will pick the leftmost.
Placement of Assets: The AI always places an Asset type next to a similar type first, to form a longer connection. Otherwise, it will place based on difficulty of the Asset: (1-2) Row 1 (3) Row 2 (4-5) Row 3. If the row is full, it will place on the next lower row. Note that if it has to place on Row 1 but it is full, it will place it on Row 2 instead.
Gameplay Phase
During this phase, the AI will always choose to kill off the class type that has the least amount of threats on the Assets. If there is a tie to the threats on an Asset, it will choose based on which class it has more of in its party. If still tied, it will roll the die to determine: (1-2) Fighter (3-4) Mage (5-6) Healer. If the rolled class is not in the comparison, it will simply reroll.
Scoring: At the end of the game, scoring is the same for the AI except that for the Quirks, it always scores 6 DP regardless of its achievements. It also always scores 1 DP for its Hack usage remaining.
Difficulty Mode of AI: You can choose to make the AI stronger or weaker by tweaking its setup before a game:
- Easy Mode: No Change. You coward! This is just a fixed script, challenge yourself harder!!
- Normal Mode: Add 1 extra party card to the AI's party on top of the norm. It's final Quirk score is now 7 DP.
- Hard Mode: Add 2 extra party cards to the AI's party on top of the norm. It's final Quirk score is now 8 DP.
Ending The Game
At the end of a game, all designers will gain Design Points (DP) across multiple categories! The designer with the highest DP total wins and becomes the newest member of Designer Inc! If multiple designers tie for highest score, the designer with the most Champions alive wins. If it is still a tie, the designer with the highest Difficulty level wins. In the rare event it is still a tie, they all win together - Designer Inc is impressed with all of them and hires them altogether.
To count the total score, each designer takes 5 cubes from anywhere in the game (color does not matter at this point) and using the provided User Acceptance Test Score Boards, place the cubes to track how much DP they each score for the various categories as follows:
Playtester Reports
Each designer reveals his two Quirk Cards and checks for successful completion, each of which scores between 1 to 3 DP. Assigned Quirk Cards can only be completed by their own designers. The three face-up public Quirks are then checked for successful completion by each designer.
Level Fluidity
Designers score 1 DP if they manage to connect 5 Assets of the same type - Cave/ Dungeon/ Outdoor. They score 2 DP instead, if they manage to connect 6 or 7 Assets of the same type. If they connect at least 8 Assets of the same type, then the score is 4 DP instead. Note that each designer may only score this once - on their longest connection.
Level Challenge
DESIGNERS WHOSE PARTIES HAVE BEEN WIPED CANNOT GAIN DP FROM THIS CATEGORY!
It is RARE for parties to survive to the end. This bonus is a special reward for those who make it! All designers score 1 DP for every 3 dead members in their party.
Level Difficulty
DESIGNERS WHOSE PARTIES HAVE BEEN WIPED CANNOT GAIN DP FROM THIS CATEGORY!
ALL designers add the Difficulty total of their 12 Assets and rank themselves in descending order. Then they each gain an amount of DP based on both their ranking and the player count as per this chart below. It is important to include designers with wiped parties in the ranking, but they don't get any DP (even if they were ranked 1st in Difficulty total)
| Designers | 1st | 2nd | 3rd | 4th | 5th | 6th |
|---|---|---|---|---|---|---|
| 1 - 2 | 4 | 1 | X | X | X | X |
| 3 - 4 | 5 | 4 | 3 | 2 | X | X |
| 5 - 6 | 5 | 4 | 3 | 2 | 2 | 1 |
If tied, add the DPs and divide them equally, rounding down. If A & B tied for 3rd, both would get 2 DP because 3rd and 4th grant 3 DP, and 2 DP respectively. The total is divided among tied designers. Next in rank will be considered 5th.
Catch-Up Bonus
DESIGNERS WHOSE PARTIES SURVIVED TO THE END CANNOT GAIN DP FROM THIS CATEGORY!
The last party to be wiped will earn its designer 4 VP, followed by 2 VP for the second last to be wiped. Any other wiped parties do not gain any bonus in this category. Tied parties will all get the bonus DP in full.
Playing-Clean Bonus
If any designer has unused charges of Hack remaining, each Charge also gives 1 DP.
Game Index
Player Scaling
For 2-designer games, the secondary abilities of Bid Cards value 1 and 2 will not work if both designers play any of the 2 cards at the same time. Example: Designer A chose to play Bid Card value 1, and Designer B chose to play Bid Card value 2. Designer B gets to go first in selecting an Asset, but both designers' abilities do not trigger. Also, in 2 player games, still draw and reveal 3 Assets each turn during the Design Phase. Do not use Bid Card 8.
For 5 and 6-designer games, each designer gets an additional 7th Bid Card with the value 7. This card can only be used once per game. It will never return to one's hand, even if a designer plays the Bid Card value 3.
The Rahdo Glitch Variant
This variant was recommended by Rahdo to remove the element of memory from the game completely. In the normal game, when a designer plays the Bid Card 3, all other designers have to place their Assets face-down that turn. This variant changes that portion. Instead when a designer plays the Bid Card 3, all other designers must place a Glitch Token on their Assets that turn. These tokens will not block other tokens, so don't worry! You can still place your Tavern Token alongside a Glitch Token if you had played your Bid Card 1 that same turn. Later during the Gameplay Phase, when a party arrives at an Asset with a Glitch Token on it, the designer must draw the top card of the party deck (reshuffle the discard pile if the party cards run out). The Class type on that card can only be resolved as a last resort for that Asset!
Example: Player A arrives at an Asset with a Glitch Token, and that Asset kills 1 Fighter, 3 Mages and 2 Healers. Player A draws a party card and it shows Fighter type - Player A cannot choose to resolve the Fighter class for that Asset unless he does not have enough to resolve any of the other 2. So he must choose to resolve that Asset by killing 3 Mages or 2 Healers, even if he wanted to resolve the 1 Fighter.
Special Asset Reference
- Boss: This Asset has very high Threat values.
- Merchant: You may choose to change up to two Souls into any color(s) of your choice, except Black.
- Shrine: You may choose to guide a Lost Soul of your choice back into the party, except for Black.
- Tavern: You may choose to add 1 Soul of any color to your party now, except Black.
- Treasure: You may choose to change one Soul in your party into a Black. (One of the souls found a rare weapon and equips it, becoming a powerful Black Soul!)
The designer always decides the order of resolving an Asset - be it Threat first, or Special first.
Quirk Card References
Quirk Cards represent the individual preferences of the playtesters trying out your level design. The top left value of a Quirk Card shows how many DP you will get if you successfully meet its condition. The top right value is purely for easier reference for this rulebook to better understand the condition of your Quirk Card.
- Have the most Assets with Boss. You may tie for it.
- Complete at least 2 other Quirk Cards.
- Have the most Assets with Treasure. You may tie for it.
- Have the most Assets with Shrine. You may tie for it. (Tokens are not considered!)
- Have the most Assets with Tavern. You may tie for it. (Tokens are not considered!)
- Have the most difficult game level at end of game. You may tie for it.
- Have the most Tokens on your level at end of game. You may tie for it. (Glitch Tokens are not considered!)
- Have the least Bid Cards in hand at end of Design Phase. You may tie for it.
- Have the most Cave Assets of all. You may tie for it.
- Have the most Dungeon Asset of all. You may tie for it.
- Have the most Outdoor Assets of all. You may tie for it.
- Make a connection of at least 7 similar Asset types.
- Have the most Special Assets of all. You may tie for it.
- Have 2 full charges of Hack ability at end of game.
- Have at least 3 different types of members in your party at end of game.
- Have at least 3 Fighter Souls in your party at end of game.
- Have at least 3 Mage Souls in your party at end of game.
- Have at least 3 Healer Souls in your party at end of game.
- Have at least 2 Black Souls in your party at end of game.
- Have at least 12 Lost Souls at end of game.
- Played the highest value Bid Card during the last turn of the Design Phase. You may tie for it.
Bid Card References
- Value 0 - RECHARGE: Regain 1 Charge of Hack ability. May not exceed 2 Charges.
- Value 1 - ADD NETWORK OBJECT: Put a Tavern Token onto the Asset you place this turn. (More on Tavern Tokens Pg. 5)
- Value 2 - EXTRA BETA KEY: Draw a Party Card now and add 1 Cube of that type to your party immediately.
- Value 3 - SERVER REBOOT: Take back all your previously played Bid Cards including this. All other designers place their Assets face-down this turn. (See Pg. 5)
- Value 4 - SERVER UPDATE: Draw 1 random Asset from the Drawbag and add it to the Asset Pool. Important: This ONLY happens right when it is your turn to choose.
- Value 5 - SERVER TWEAK: You may swap the position of any two Assets on your Design Board with each other.
- Value 6 - EXTEND BETA OBJECT: Put a Shrine Token onto the Asset you place this turn. (More on Shrine Tokens Pg.5)
- Value 7 - WEEKEND FREE ACCESS (ONLY for 5-6 designer games): Draw a Party Card now and add all Cubes depicted on that card to your party immediately. This Bid Card can only ever be used once per game!
- Value 8 - EXPANSION CONTENT: Put one of your 3 special tokens on your Asset placed this turn. The Asset type you pick this turn determines the token to place. Cave places the Well of Illusions. Dungeon places the Altar of Power. Outdoor places the Haunted House. Each designer has only 1 of each token type:
- Well of Illusions - This Asset is a wild type for connection bonus purpose.